Style Guide
With a style guide, you can create, store, and manage all your project’s formatting and tone rules in one place. The main aim of a style guide is to ensure consistency in voice, style, and terminology usage across translations, helping translators understand exactly how your brand should sound in different languages.
Style guides function as a native resource at the same level as Translation Memory (TM) and Glossary. They provide human translators with a clear reference during the translation process and serve as foundational instructions for Crowdin AI features like AI Pre-translation, AI Assistant, and AI QA Checks.
You can create style guides and populate them with content by generating them with AI, writing them from scratch, or uploading existing files in MD, PDF, DOCX, or XLSX formats. These style guides can then be assigned to the relevant projects and specific target languages as needed.
To create a style guide, follow these steps:
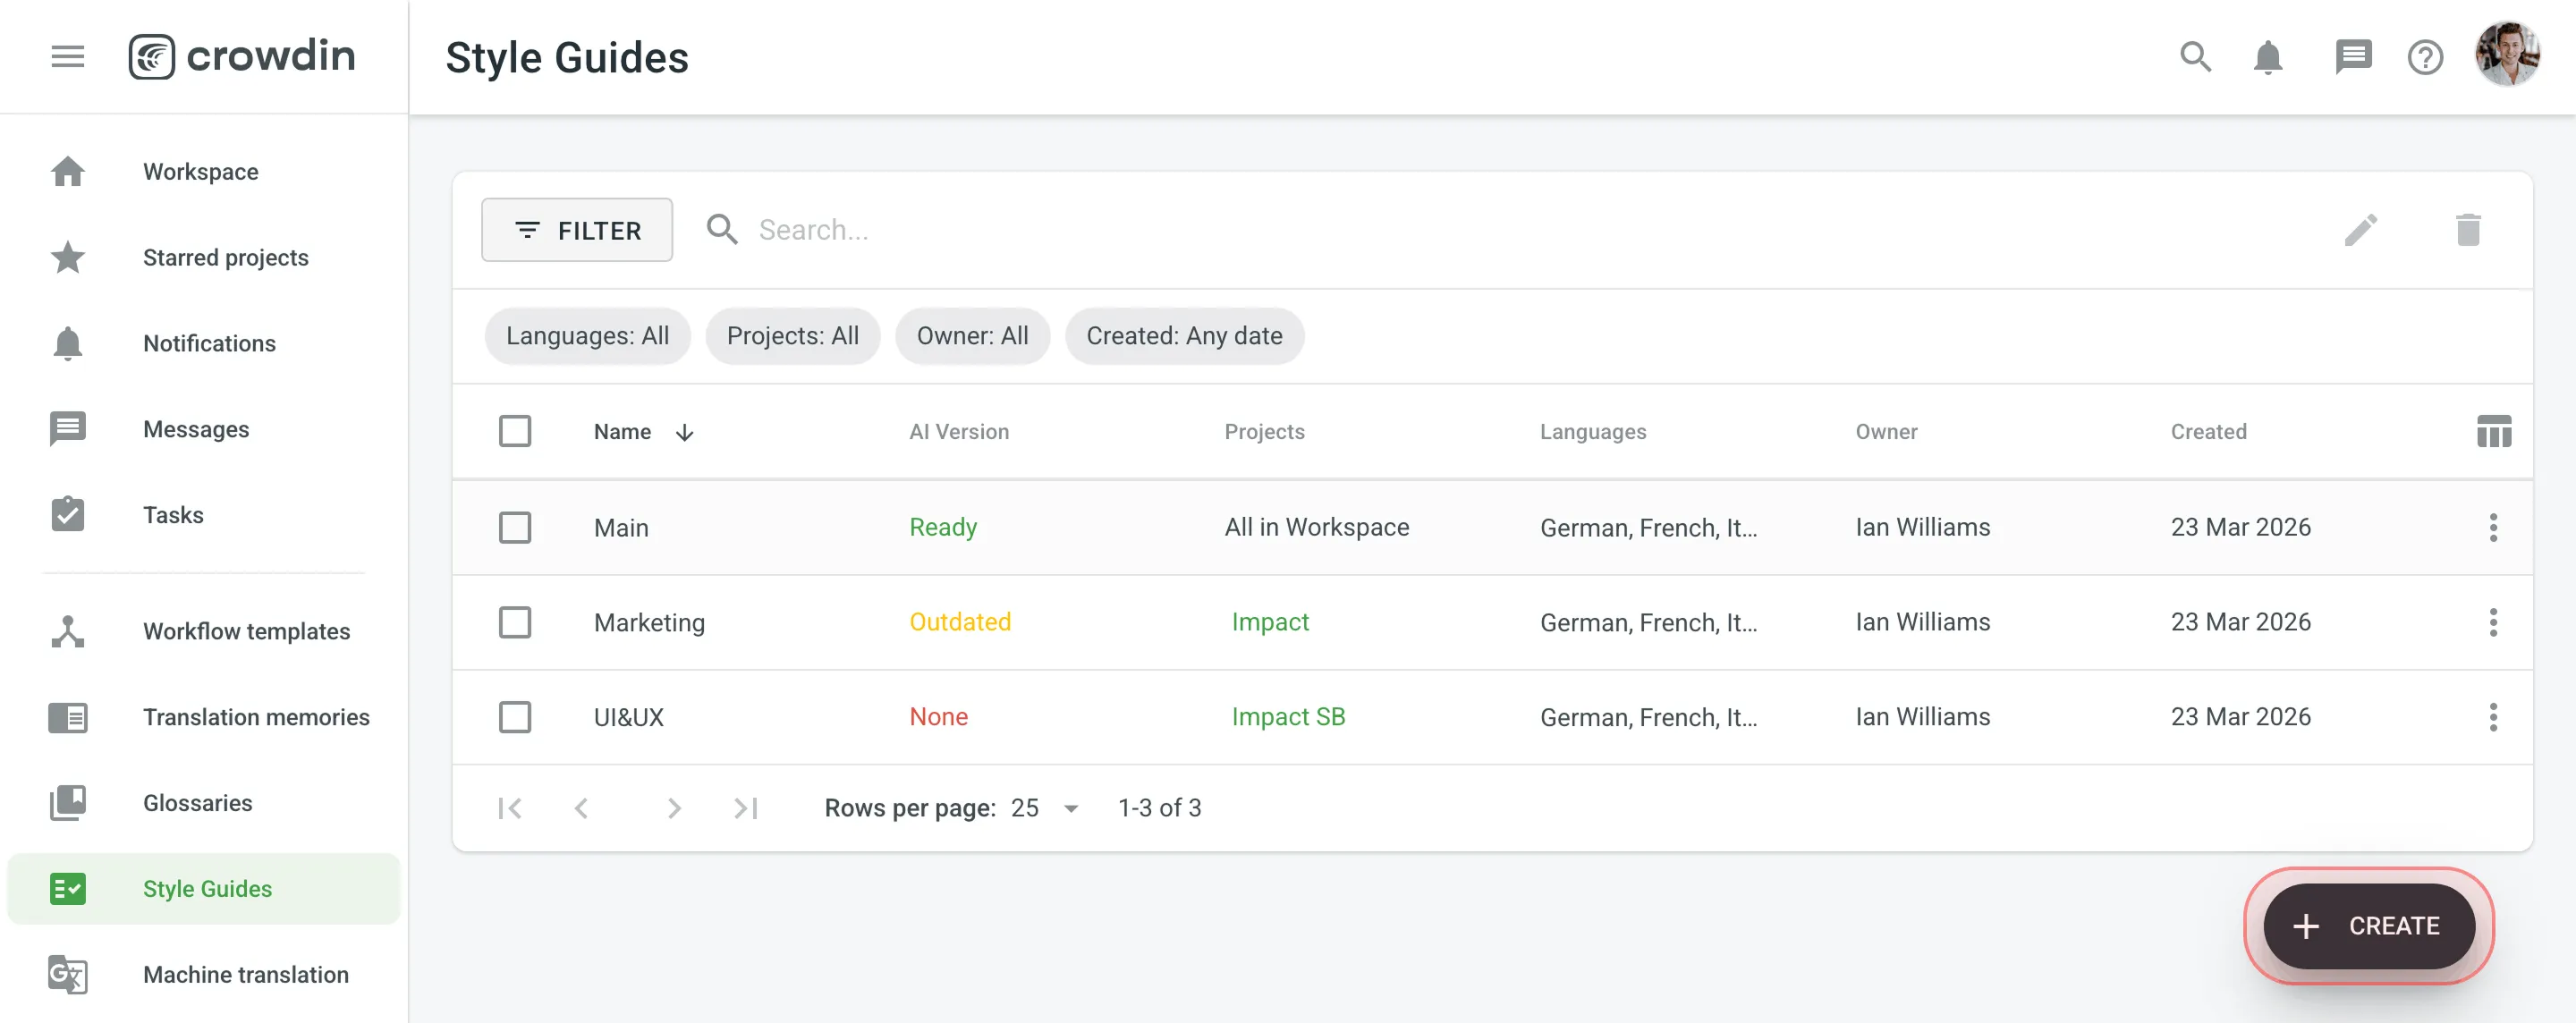
- Open your organization’s Workspace and select Style Guides on the left sidebar.
- At the bottom right, click Create.
- In the left panel of the appeared dialog, configure the following settings:
- Name – Name your style guide.
- Projects – Select All or Selected to assign the style guide to specific projects.
- Language – (Optional) Restrict the style guide to specific target languages. If left empty, it applies to all languages in the assigned projects.
- Move to the right side of the dialog and choose your preferred method for creating the content:
- Generate with AI – Describe your brand voice, target audience, and specific constraints in the Generate from Description field. Click Create Draft to let Crowdin Enterprise’s built-in AI generate a comprehensive Markdown file for you. You can then review and edit it if needed in the Markdown editor.
- Write in Crowdin Enterprise – Use the built-in Markdown editor to write your style guide from scratch.
- Upload file – Upload an existing
.md,.pdf,.docx, or.xlsxfile. If you upload a Markdown file, the system will automatically populate the built-in editor with its content.
- Click Create.
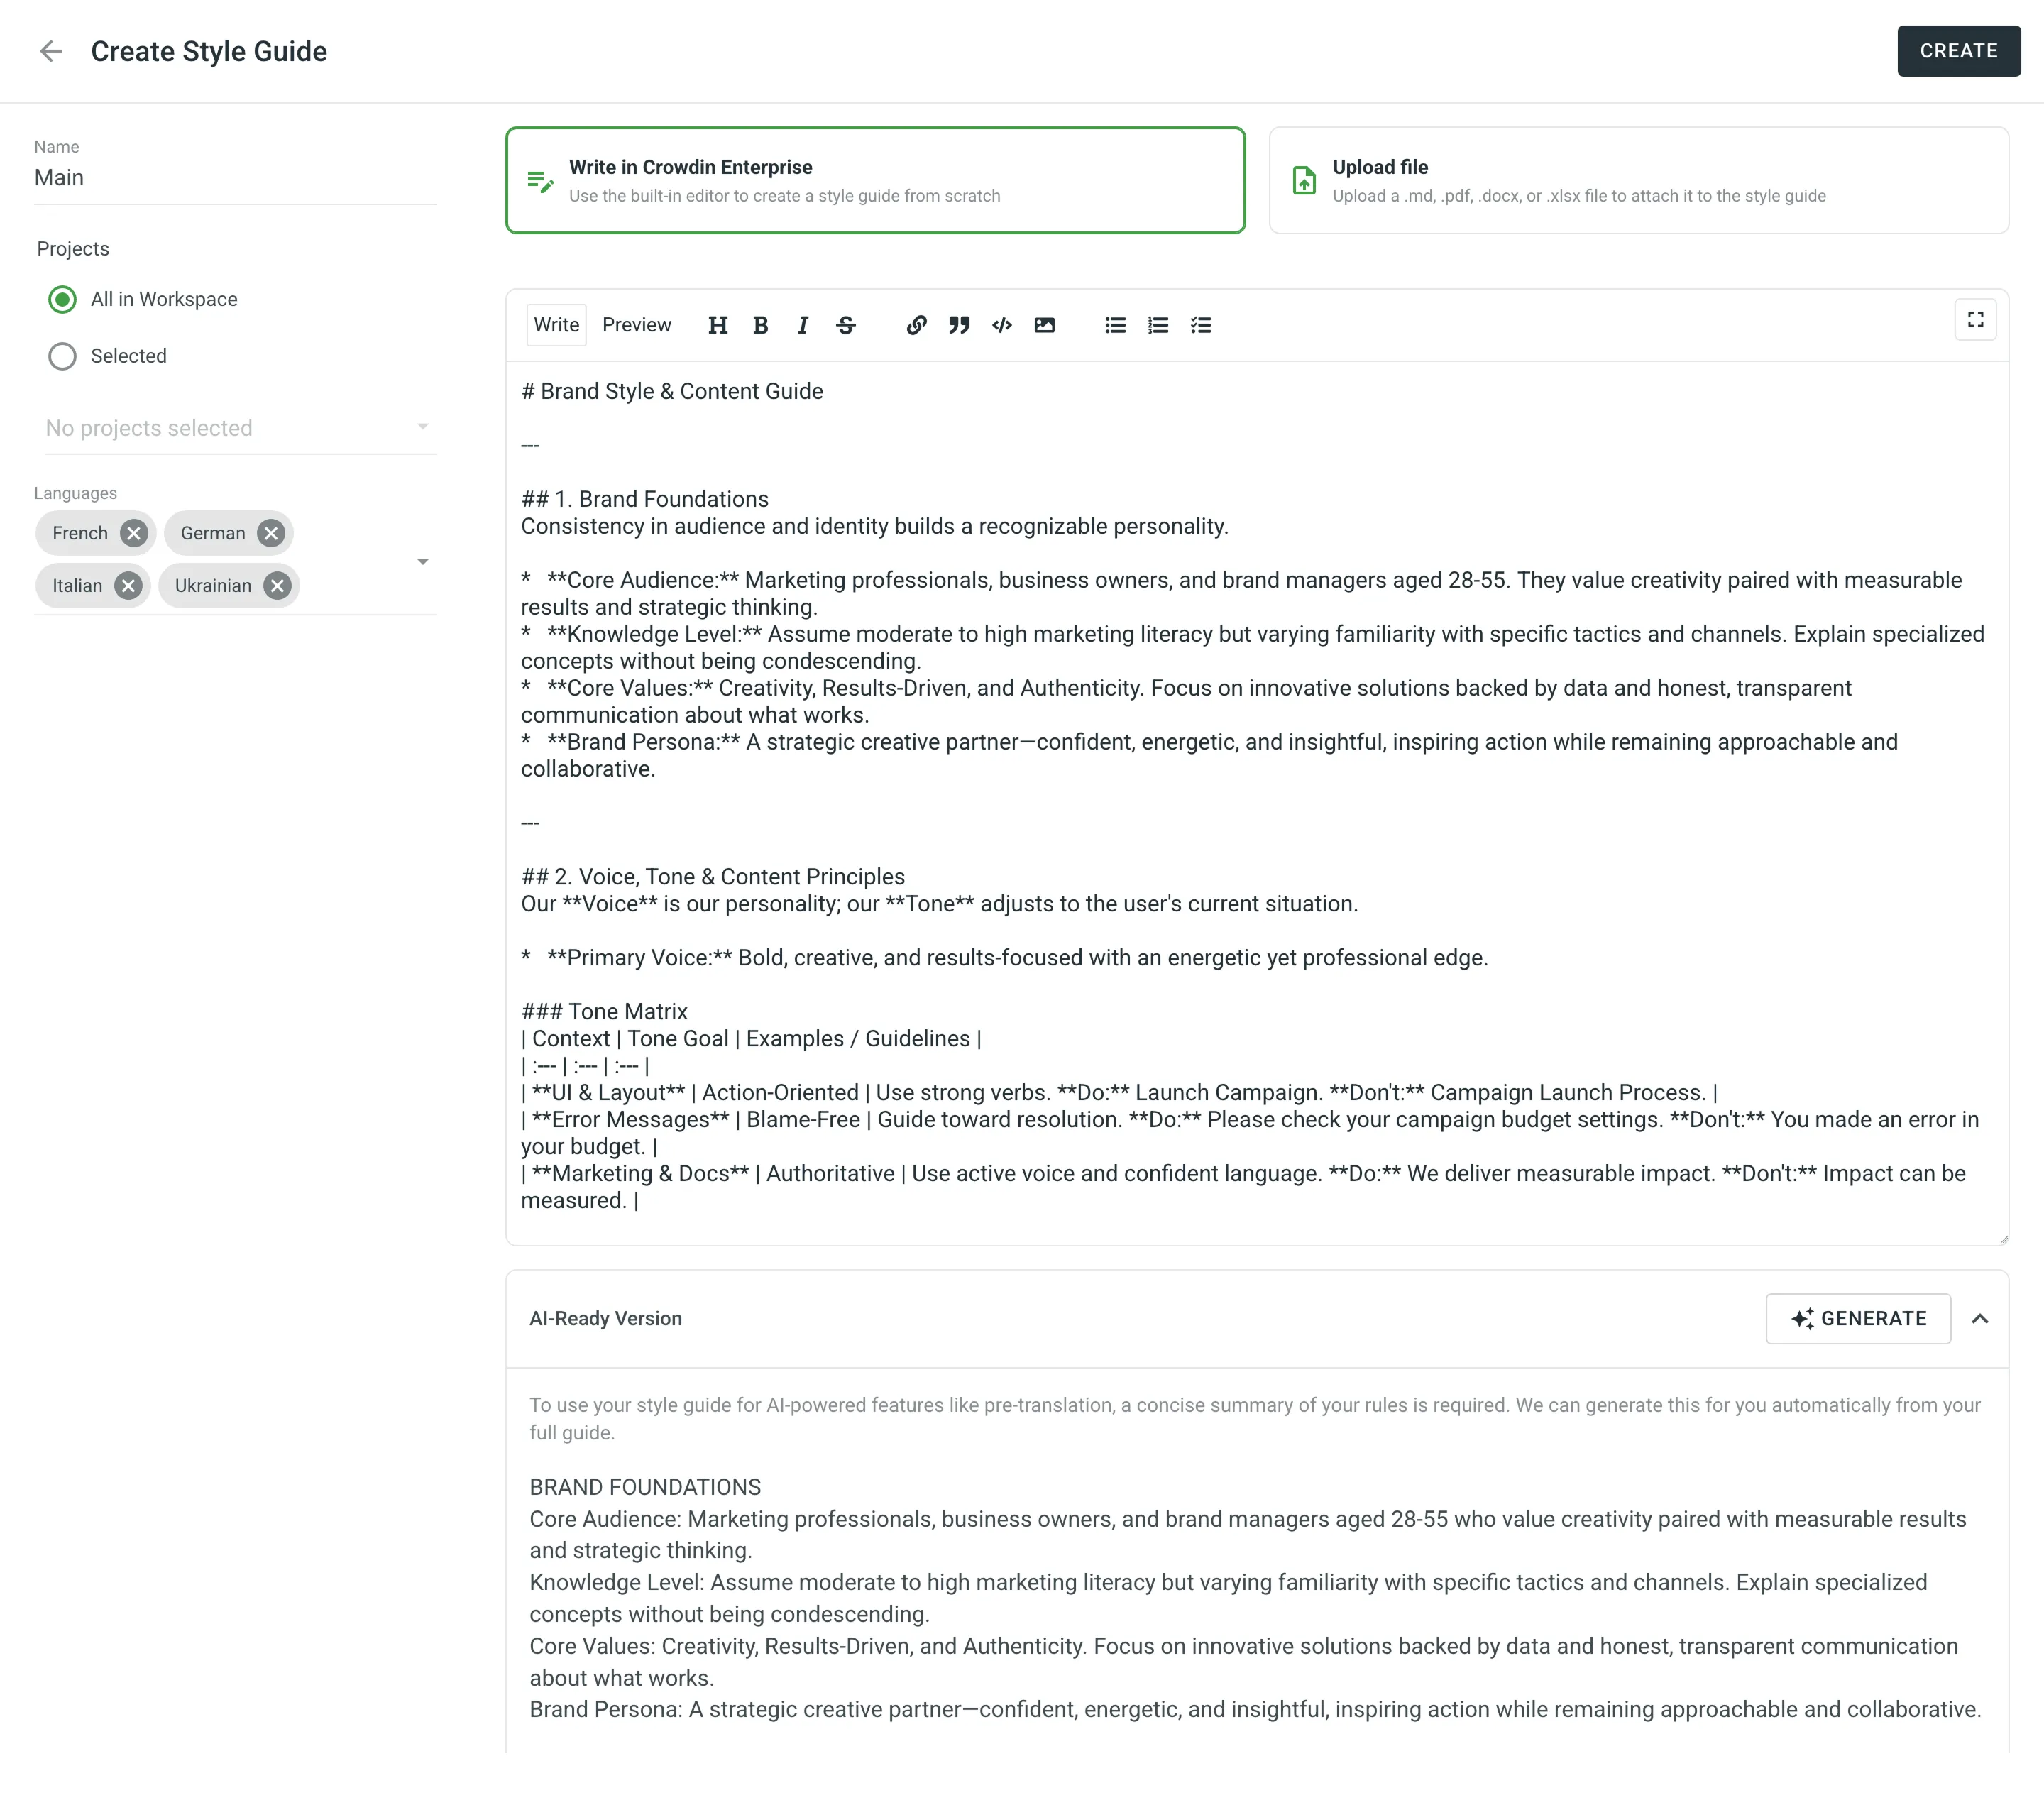
To use your style guide with AI-powered features (like pre-translation or the AI Assistant), the AI requires a concise summary of your rules to include in its prompts. This is managed in the AI-Ready Version section of your style guide.
If you create your style guide using the Generate from Description method, Crowdin Enterprise automatically generates the AI-Ready Version for you, and its status becomes Ready.
If you upload a file or write the guide from scratch, you can either write this summary manually or click Generate to have the AI summarize the full guide for you.
The system tracks whether your AI instructions are up-to-date with your current style guide content. You can view this status in the AI Version column on the Style Guides page:
- None – The style guide does not have an AI-Ready Version and will not be passed to the AI in prompts.
- Ready – The AI-Ready Version is fully up-to-date with the current style guide content.
- Outdated – The style guide content was modified, but the AI-Ready Version was not regenerated.
You can manage your style guides directly from the Style Guides page on your Workspace home page. This includes searching, filtering, editing, downloading, and deleting them.
Searching, Filtering, and Sorting Style Guides
Section titled “Searching, Filtering, and Sorting Style Guides”By default, all style guides are displayed on the Style Guides page. The table displays the style guide’s Name, AI Version, assigned Projects, Languages, Owner, and Created date.
To find a specific style guide, use the Search field. To filter the list of style guides, click Filter and use the available options:
- Projects – Filter by assigned projects (All or a specific project).
- Languages – Filter by assigned languages (All or a specific language).
- Owner – Filter by the user who created the style guide.
- Created – Filter by creation date (All or Custom Range).
To sort style guides, click the Name column header once to sort in ascending order and click again to sort in descending order.
To customize your viewing experience, click the column selector icon to choose which columns to display.
If you need to adjust your existing style guide, you can simply edit it.
To edit a style guide, follow these steps:
- Open your organization’s Workspace and select Style Guides on the left sidebar.
- Click next to the needed style guide and select Edit.
- Modify the style guide as needed and click Save to save changes.
When editing a style guide, you’ll find the Style guide metadata section on the left panel. This information provides a clear audit trail for collaboration and troubleshooting. By tracking creation and modification data, you can understand who created or last updated the rules and when. The section contains the following read-only details:
- Created by – The user who created the style guide.
- Created – The date and time the style guide was created.
- Modified by – The user who last modified the style guide.
- Last modified – The date and time the style guide was last modified.
Editing style guides allows you to update and improve them as needed to ensure they remain effective and aligned with your evolving project requirements.
You can download your style guides for offline reference and reuse them elsewhere.
To download a style guide, follow these steps:
- Open your organization’s Workspace and select Style Guides on the left sidebar.
- Click on the needed style guide and select Edit. Alternatively, just double-click on the needed style guide.
- Click Download in the editor toolbar.
To delete style guides, follow these steps:
- Open your organization’s Workspace and select Style Guides on the left sidebar.
- Delete the style guides using one of the following methods:
- Single style guide: Click next to the style guide and select Delete.
- Multiple style guides: Select the checkboxes next to the style guides you want to delete, or top checkbox to delete all, then click at the top of the list.
- Confirm the deletion in the confirmation dialog.
Once assigned to a project, style guides become visible to project members directly in the Editor, providing them with immediate context. This ensures that your team can easily preview or download formatting rules, tone, and brand guidelines without interrupting their workflow.
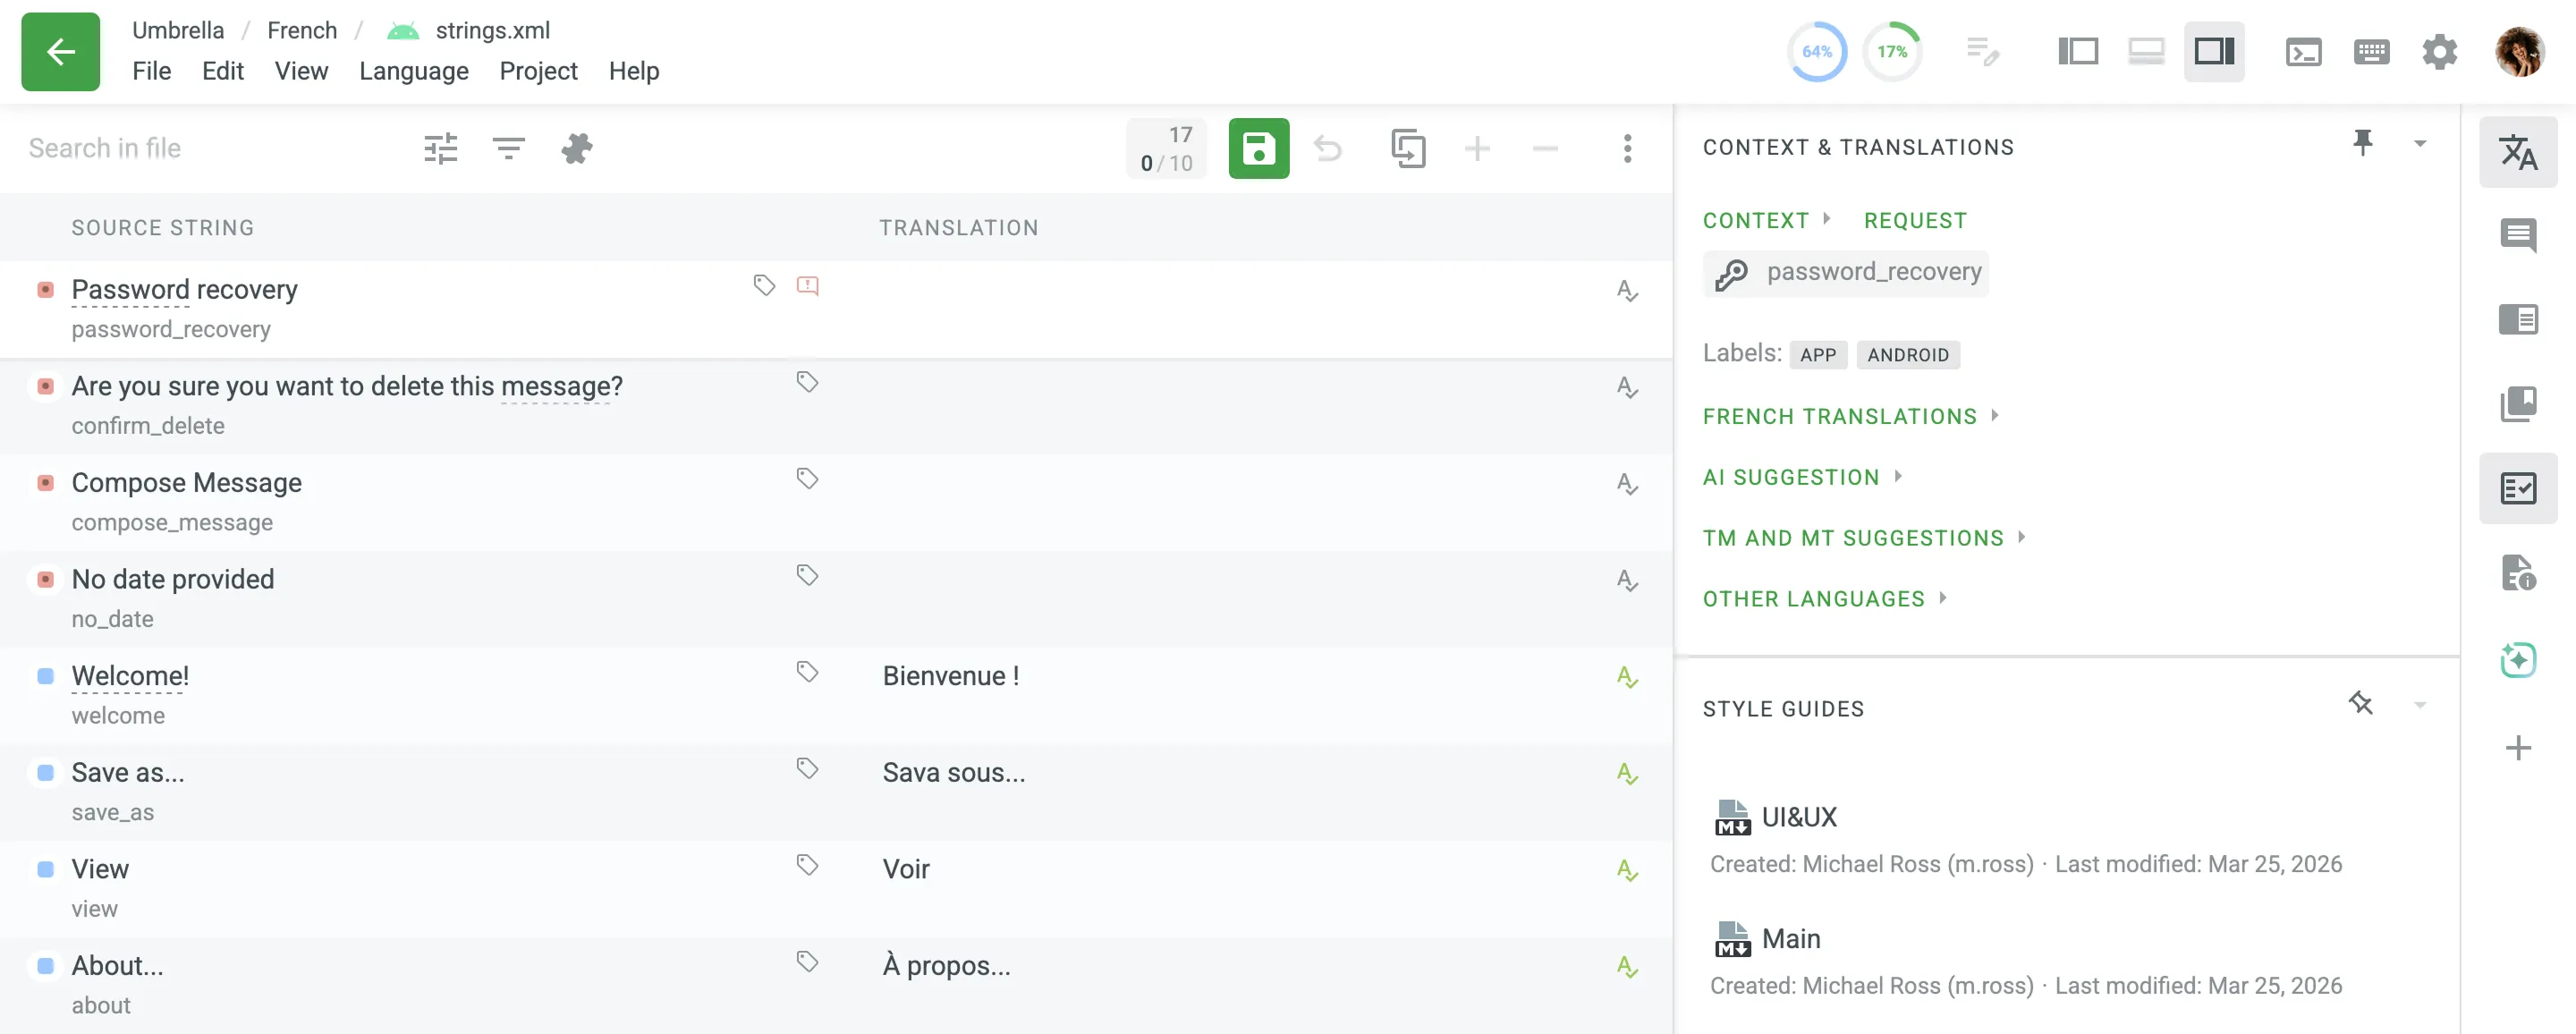
Read more about Style Guides in the Editor.
When the AI-powered QA check is enabled in your project, it automatically incorporates all assigned style guides into its evaluation prompt. The AI verifies that each submitted translation aligns with the tone, voice, and stylistic guidelines defined in your style guides.
You don’t need to manually select a style guide in your AI prompt settings. The system automatically evaluates translations against all the style guides assigned to the project.
Read more about Setting Up AI QA Check.
You can also create, manage, and delete style guides programmatically using the Crowdin Enterprise API.
Can I share style guides with vendors in Crowdin Enterprise?
Yes. When configuring your project workflow, you can enable the Share style guides with Vendor option in the Translation by Vendor or Proofreading by Vendor steps. This ensures that the vendor has access to your brand’s tone and style guidelines, helping maintain consistency across translations.
Read more about configuring vendor workflow steps.