Downloading Translations
You can download translations from your Crowdin Enterprise project using and combining various options like the Web UI, Console Client (CLI), API, and integrations.
To download translations for the whole project, follow these steps:
- Open your project and select Translations on the left sidebar.
- Click Download as ZIP to expand the respective section.
- Click Download.
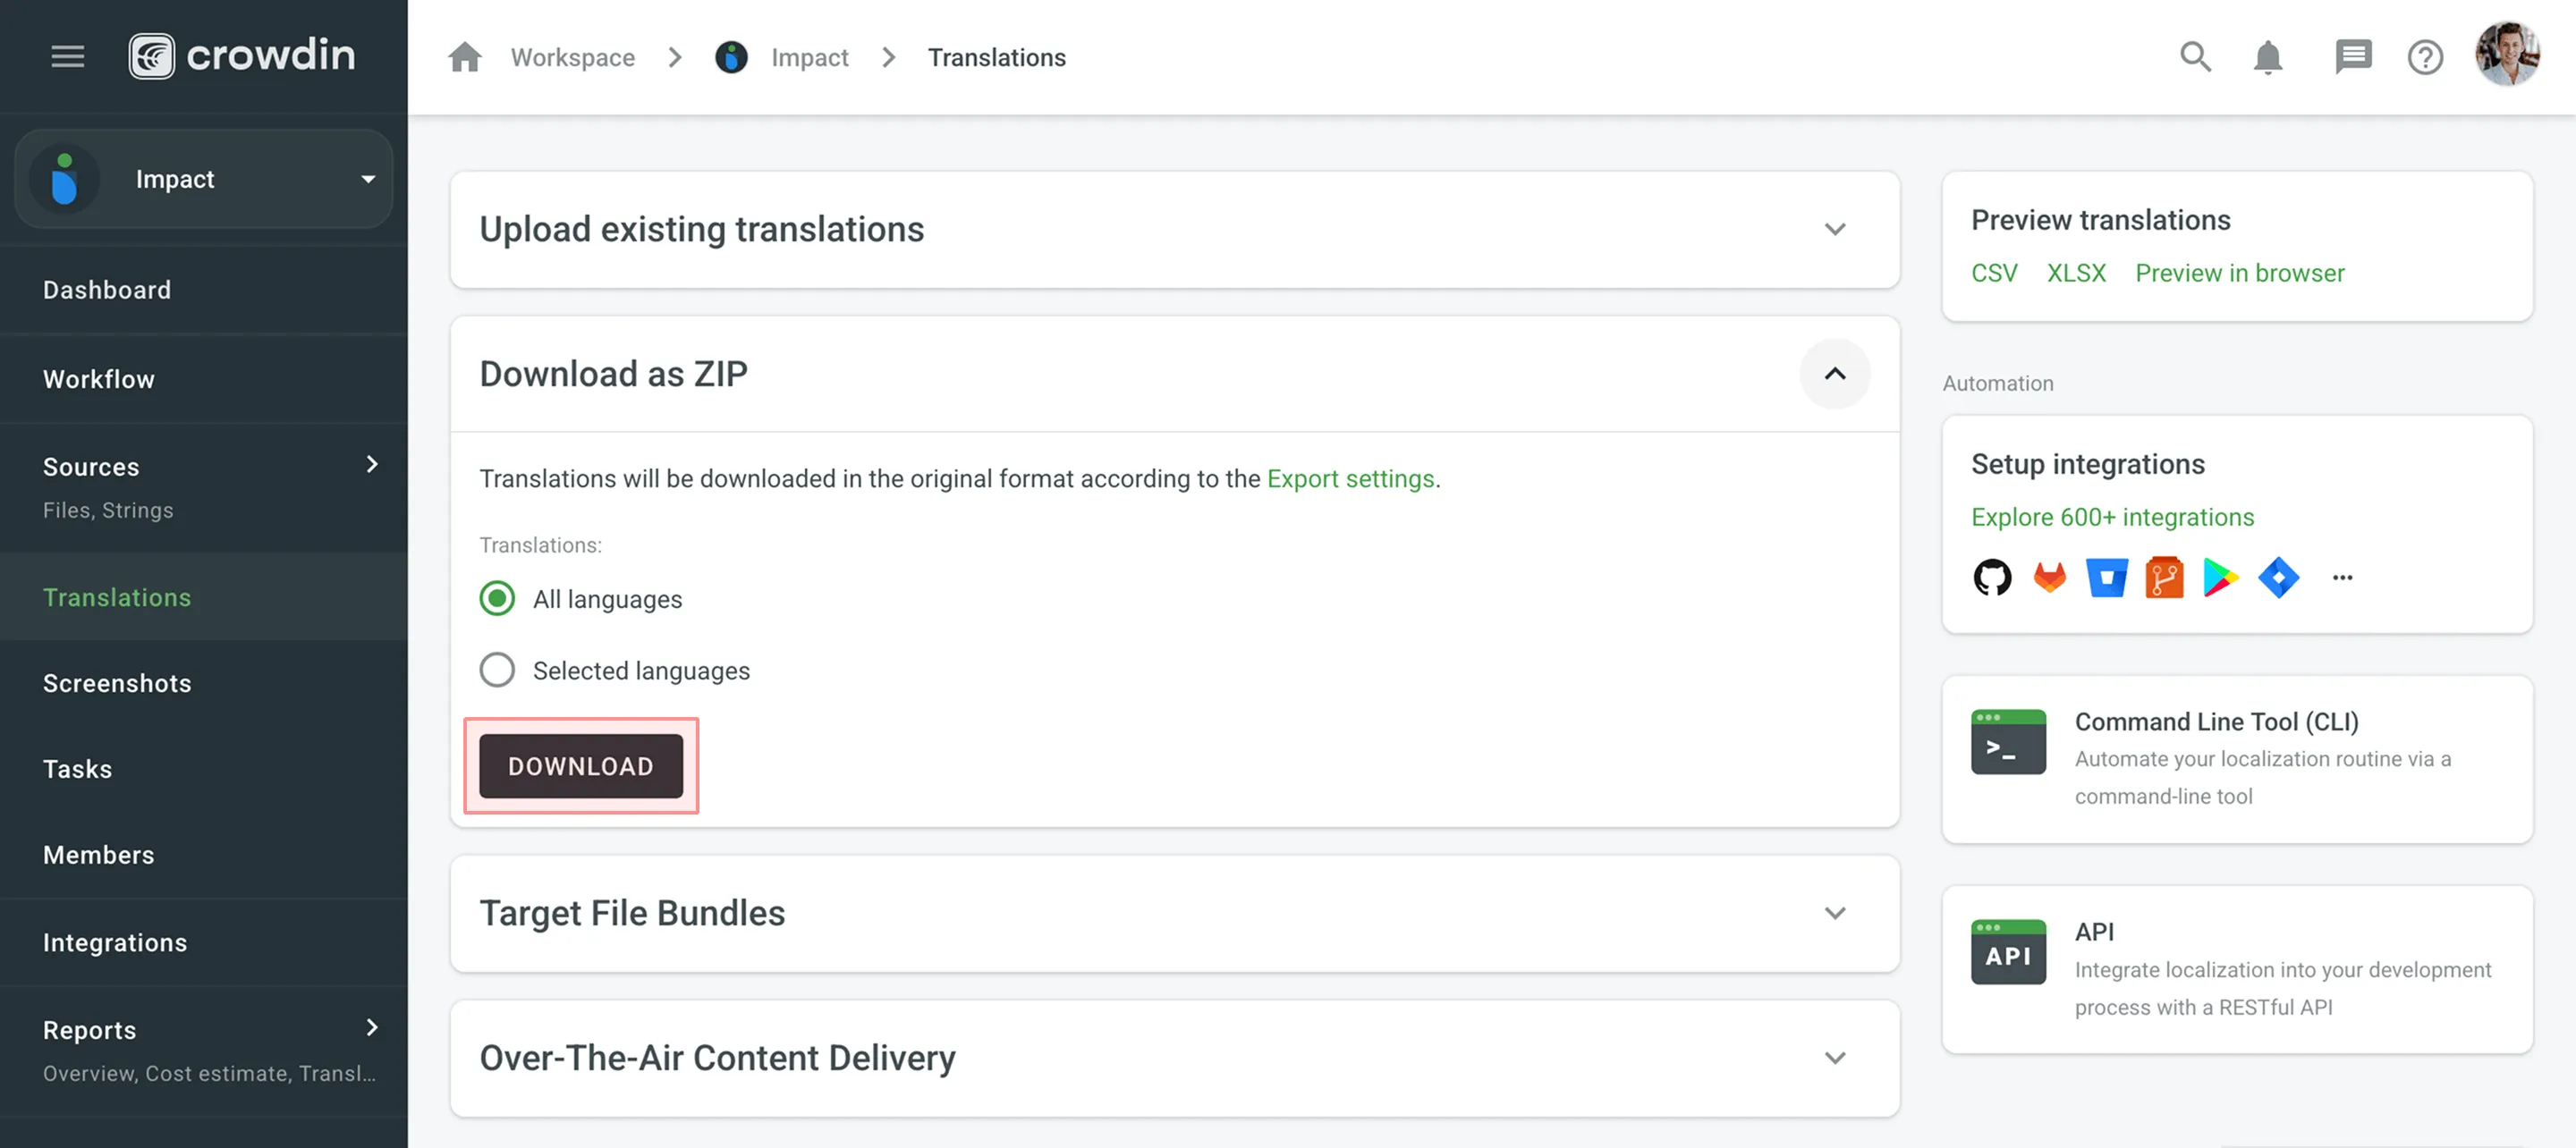
By default, the downloaded ZIP archive contains separate folders for each language. These folders are named with the corresponding Language Codes.
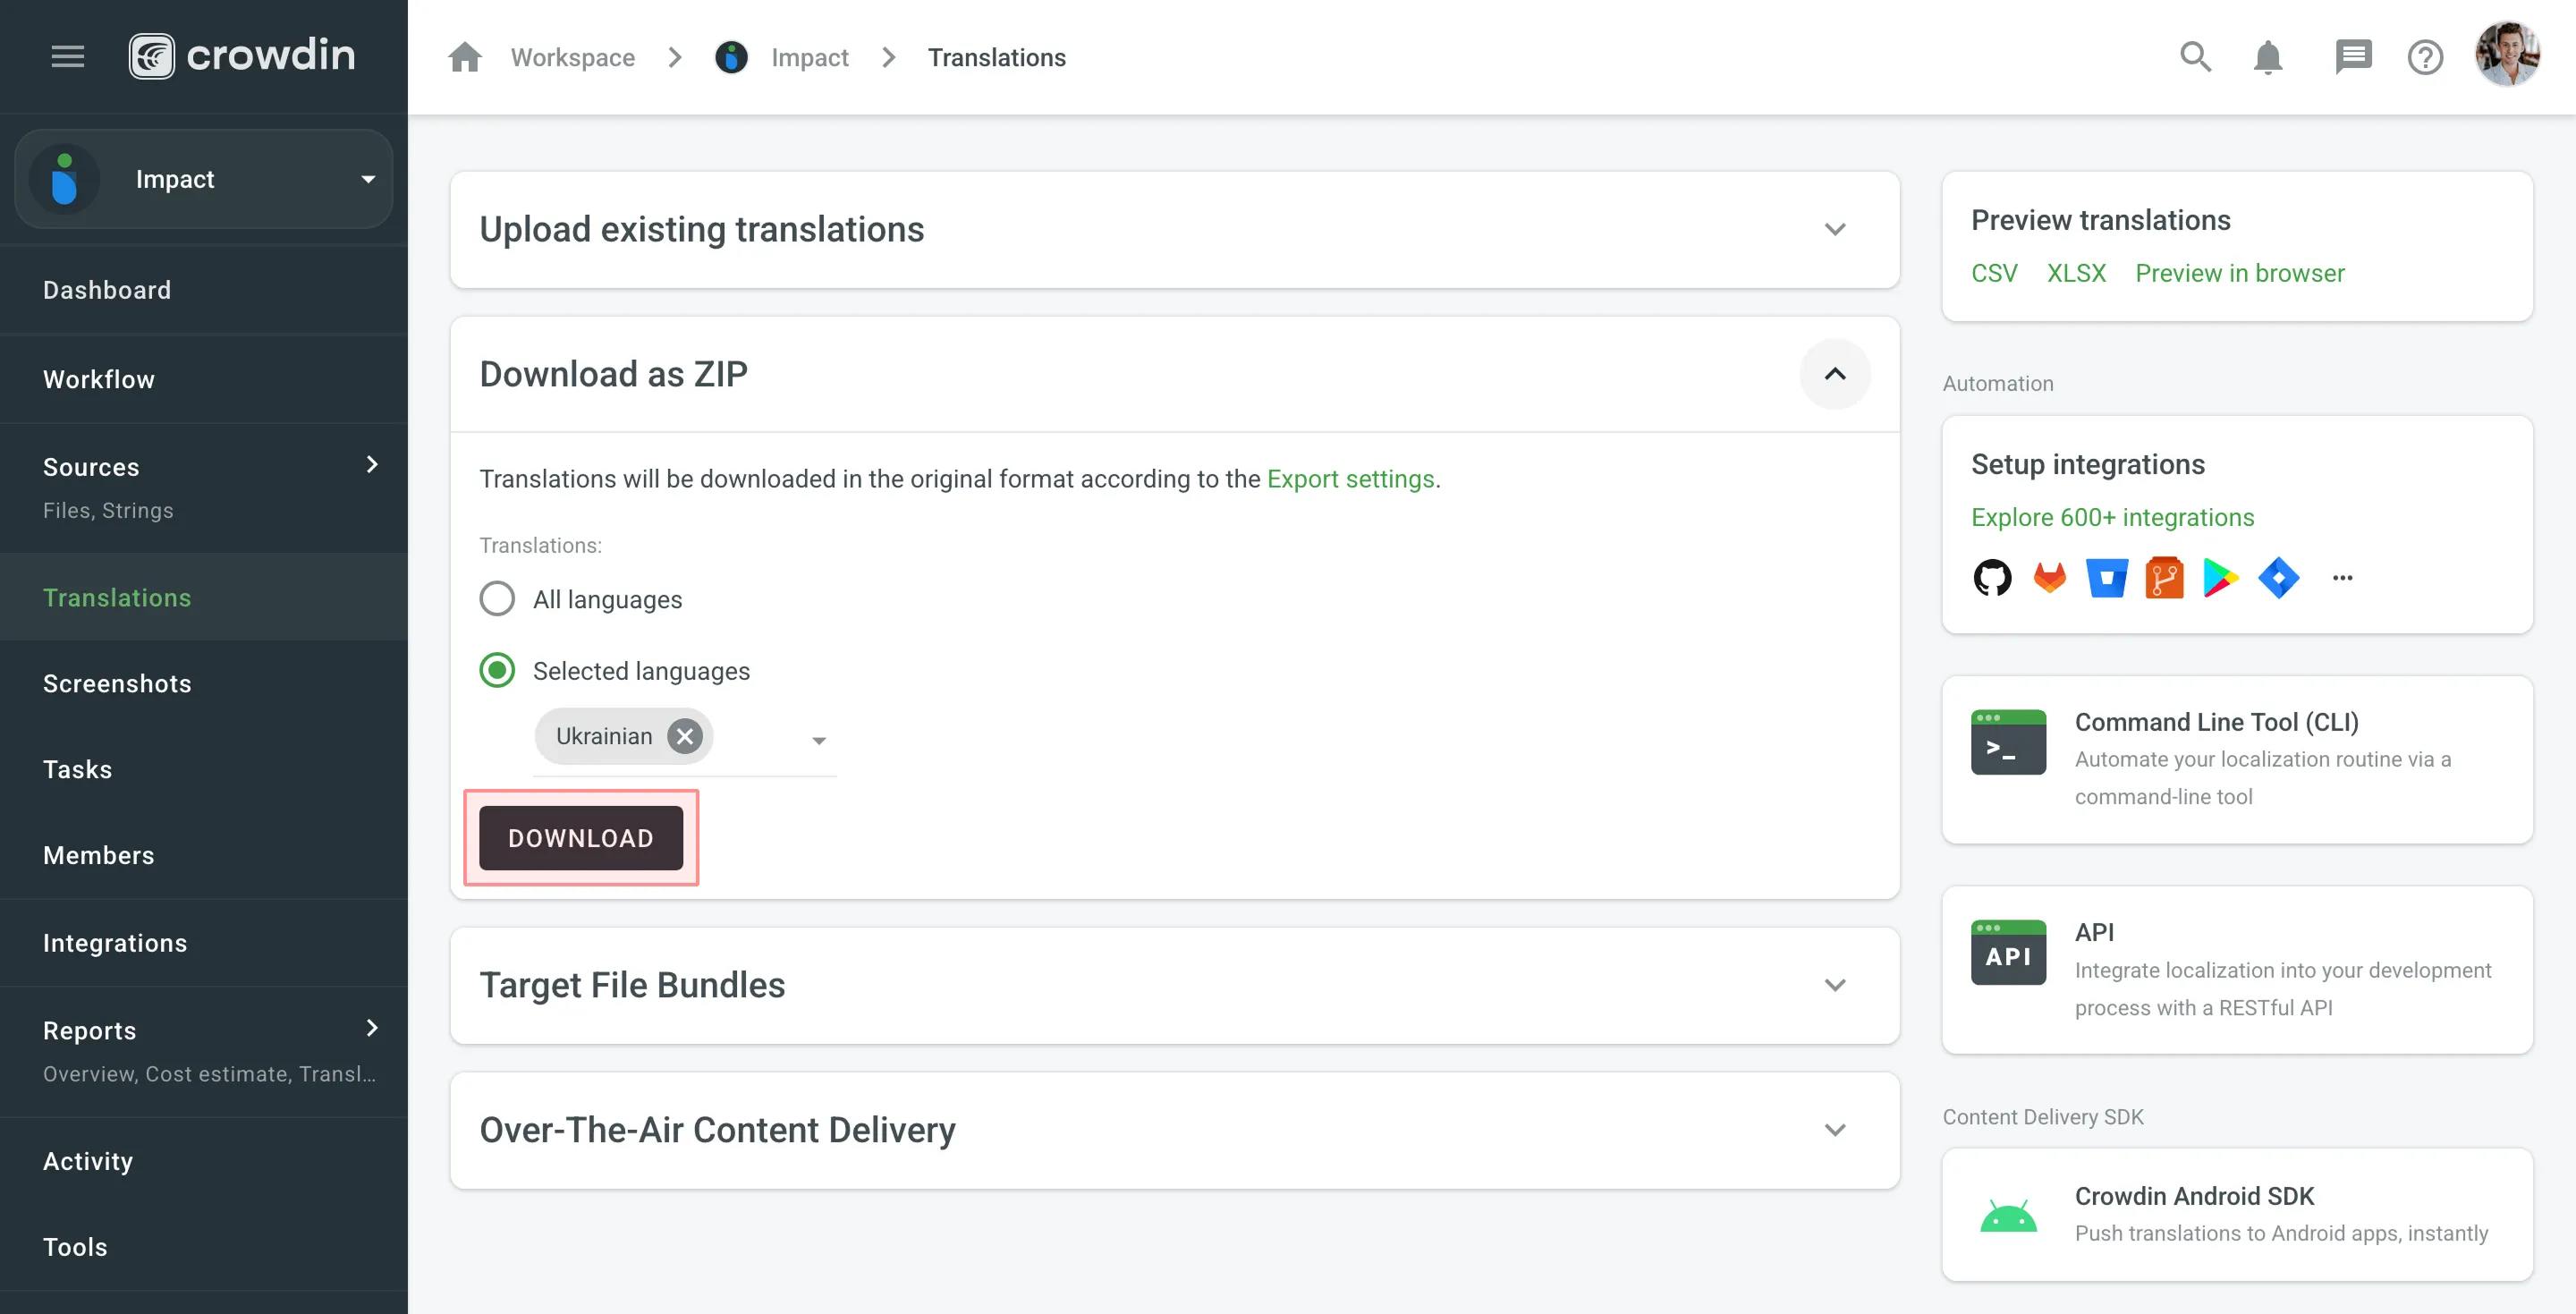
To download translations for a separate target language, follow these steps:
- Open your project and select Translations on the left sidebar.
- Click Download as ZIP to expand the respective section.
- Select Selected languages.
- Select the needed language from the drop-down menu.
- Click Download.
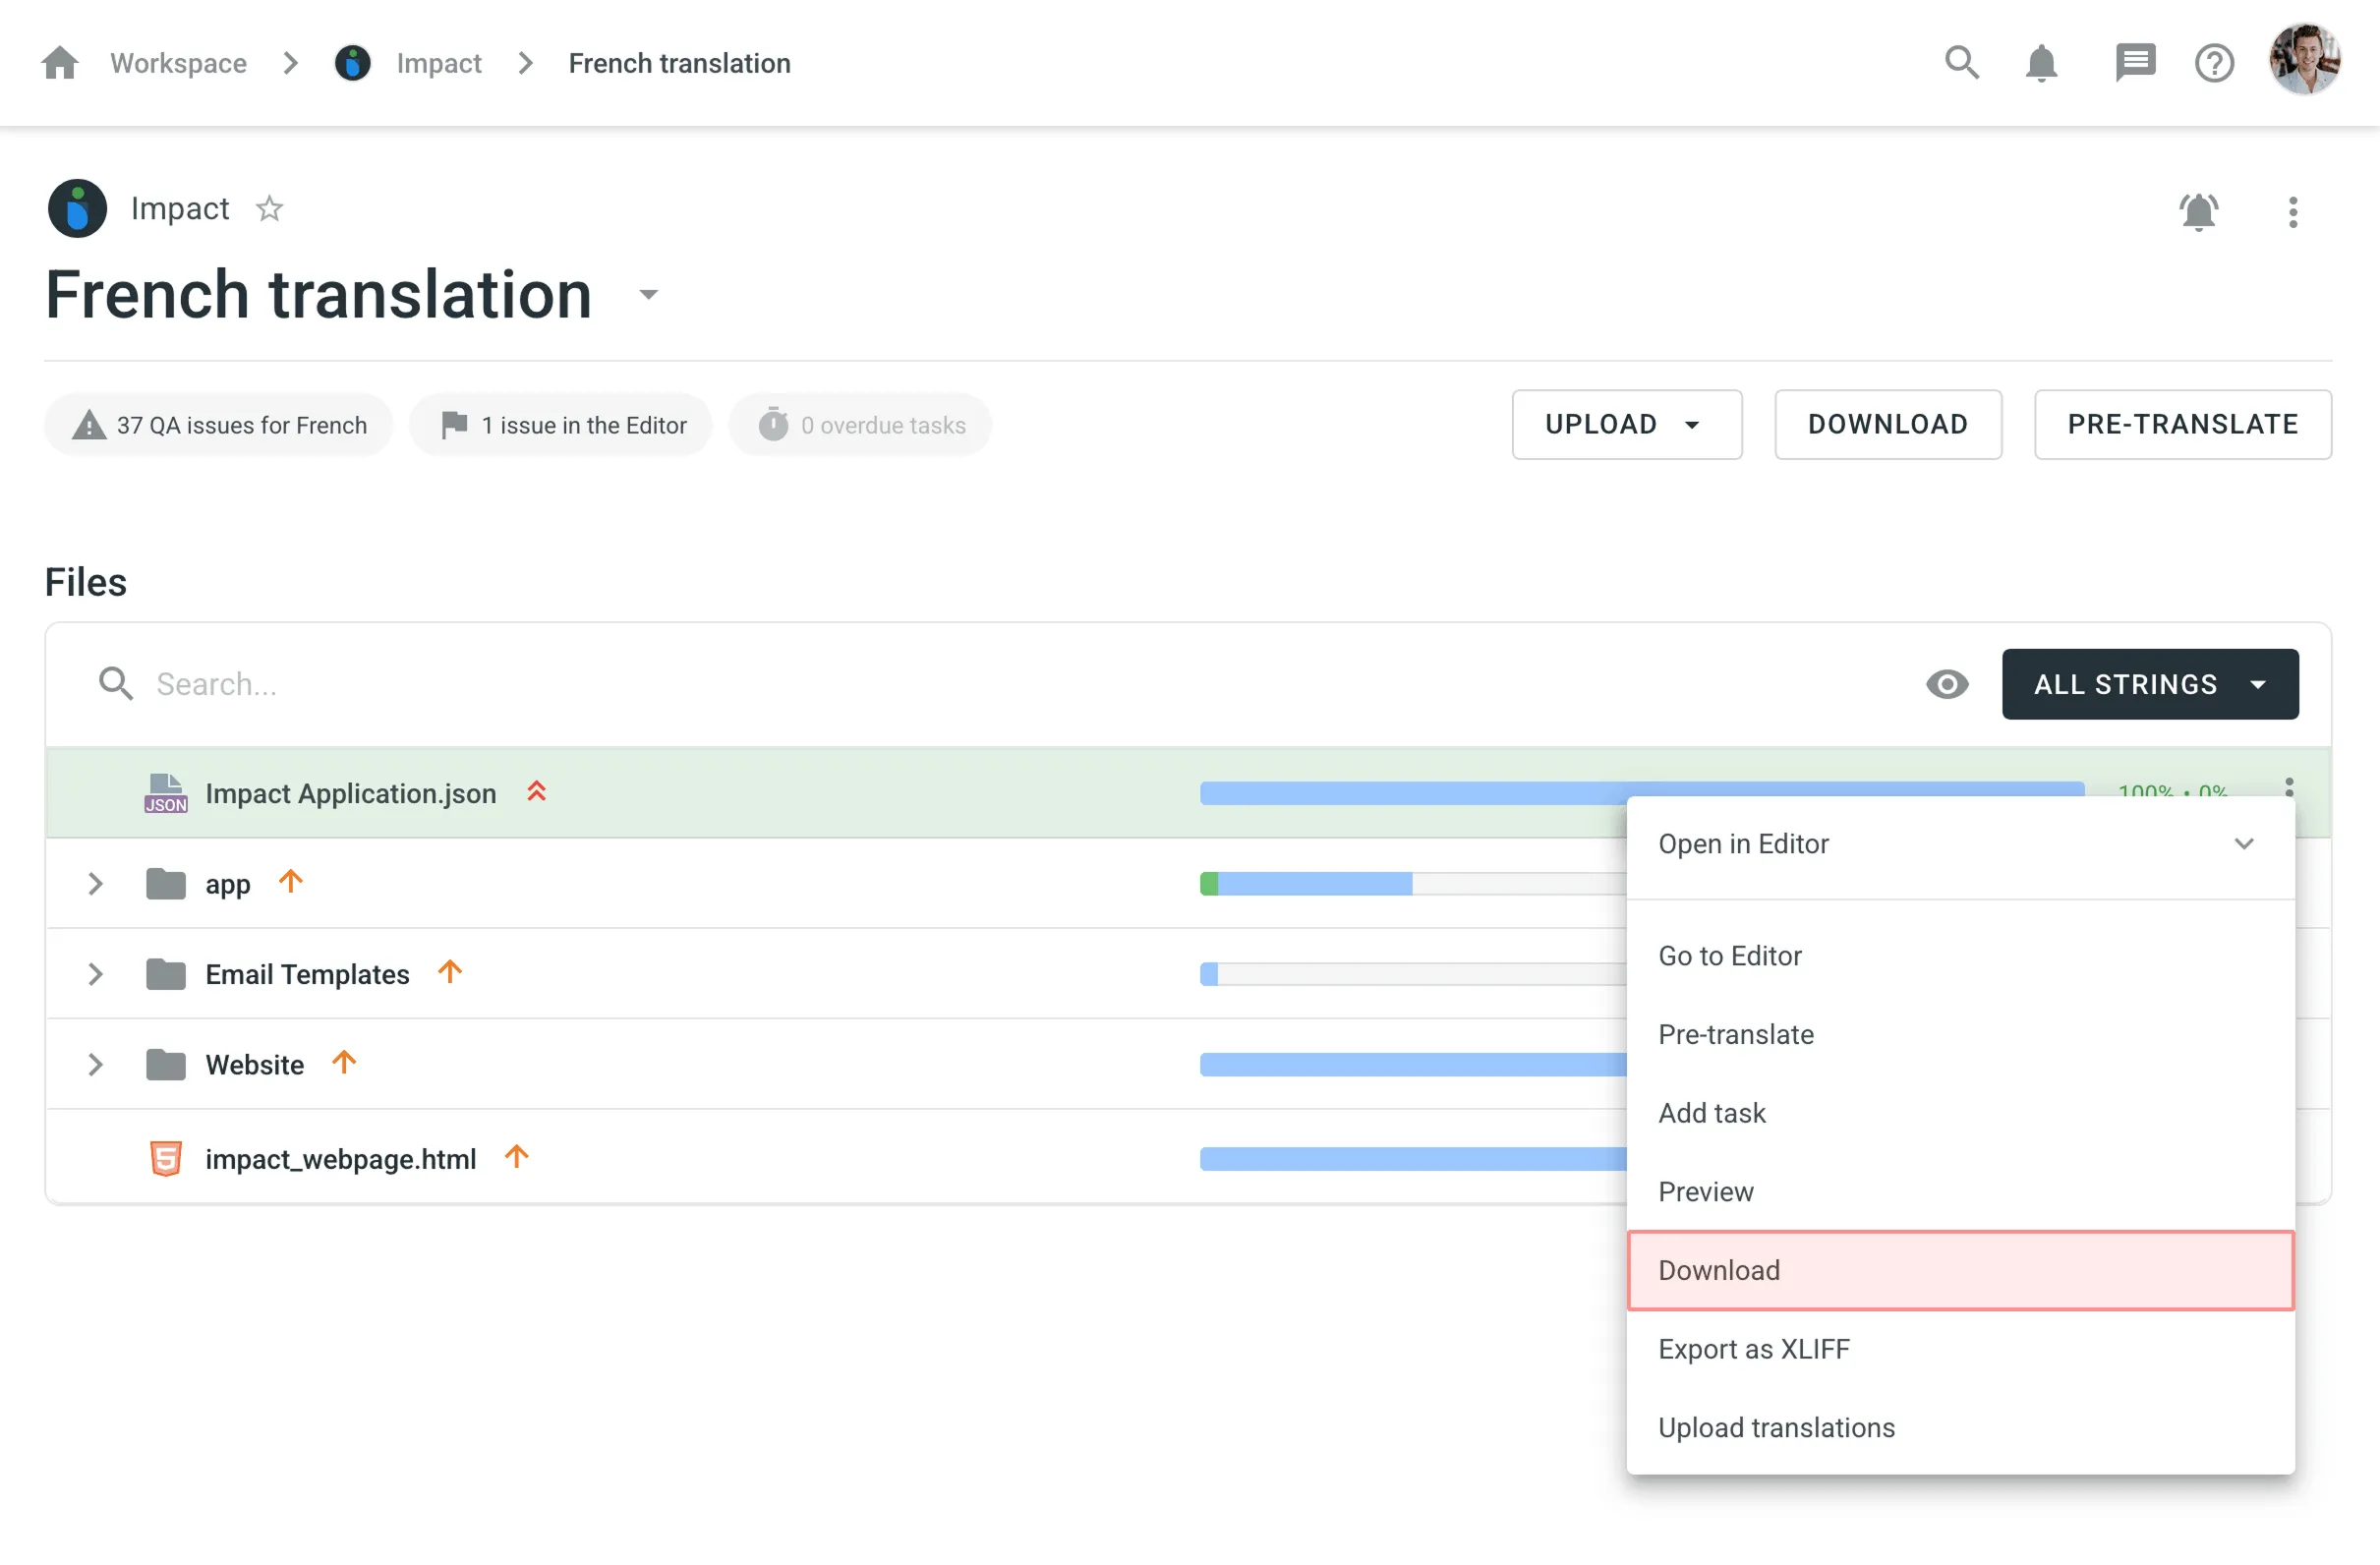
You can download translations for a separate file either on the language page or in the Editor. To download translations for a separate file on the language page, follow these steps:
- Open your project and select the target language.
- Click toward the needed file.
- Select Download.
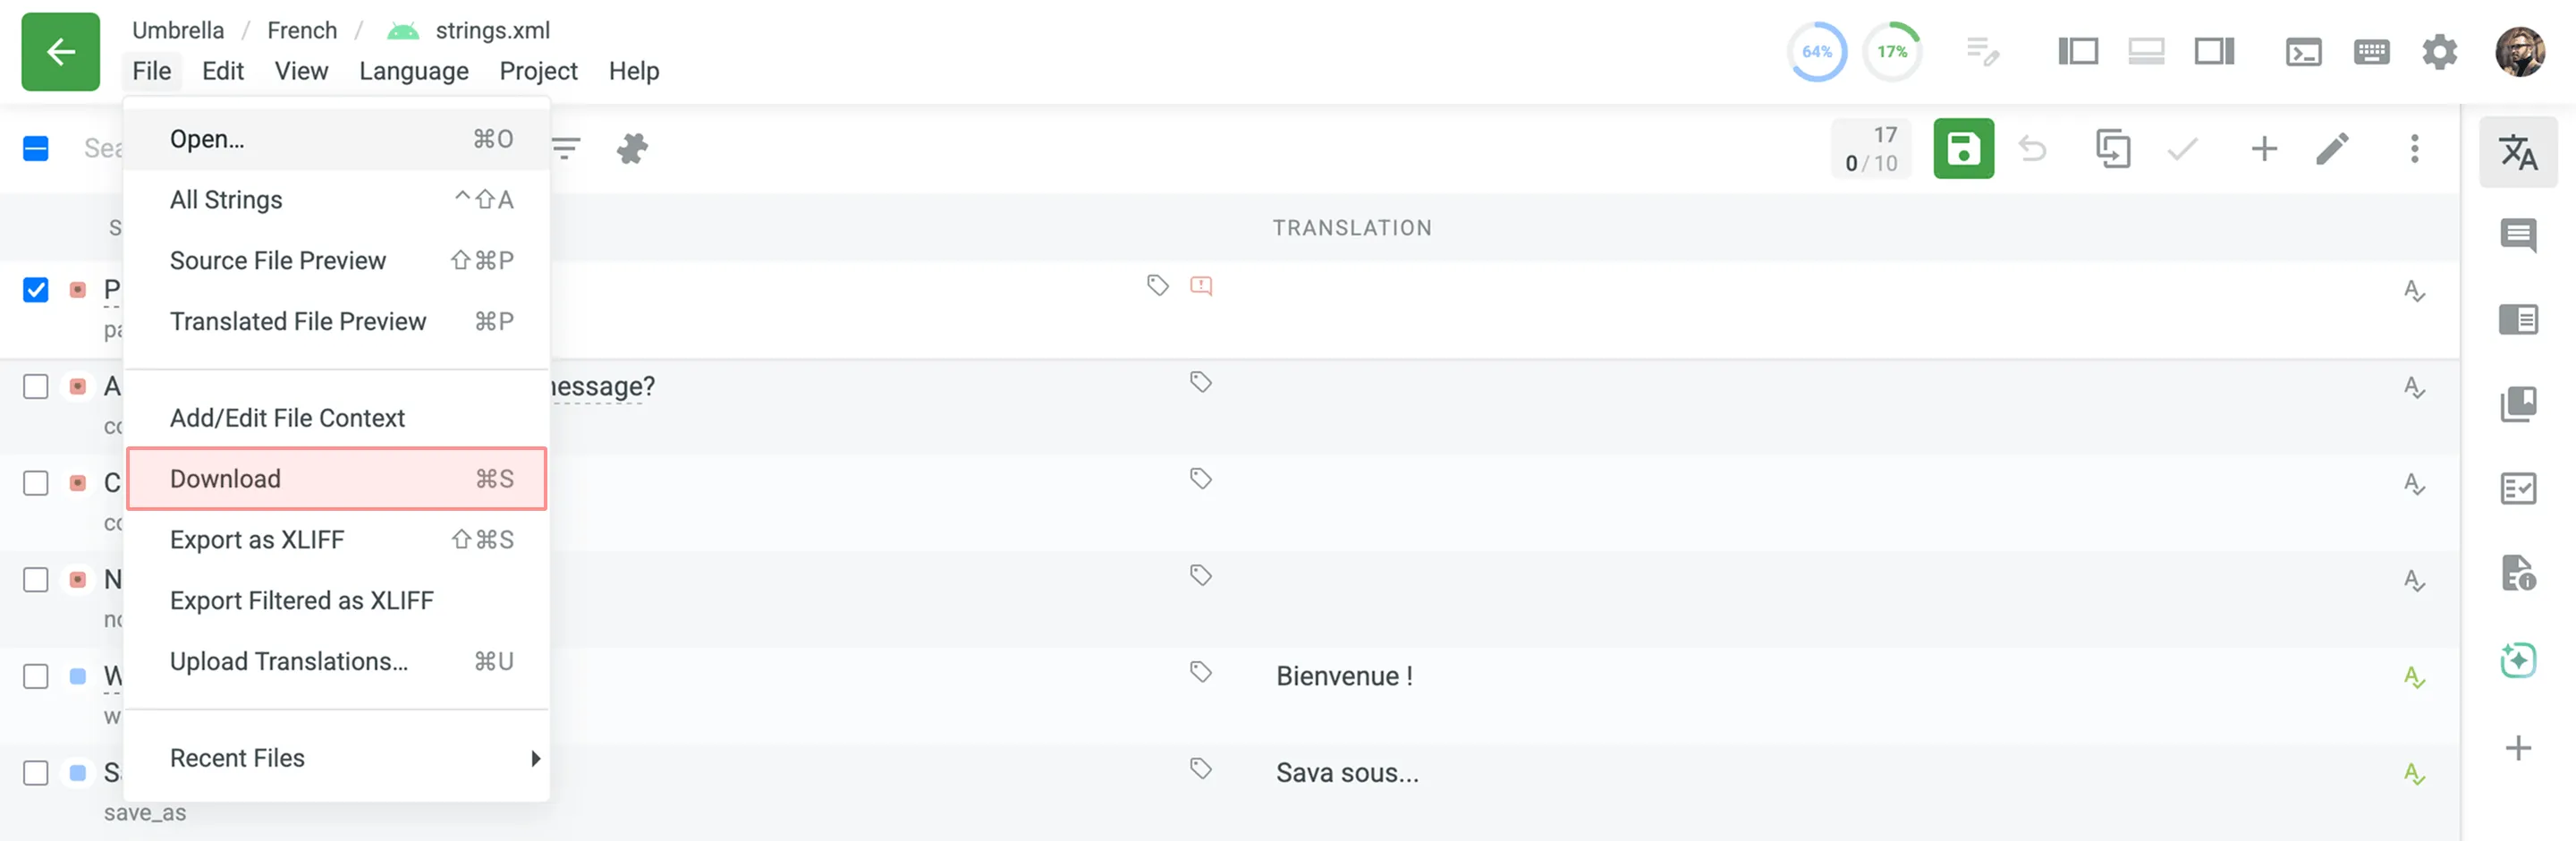
To download translations for a separate file in the Editor, follow these steps:
- Open your project and select the target language.
- Click on the needed file to open it in the Editor.
- Go to File in the main menu, and select Download.
The Downloads section allows you to manage bundles for exporting sets of strings in one of the selected formats.
Read more about configuring bundles.
The CDN Distributions section allows you to set up and manage instant translation delivery to your mobile (iOS, Android), server, web, or desktop apps via CDN.
Read more about CDN Distributions.
To preview translations for a whole project, follow these steps:
- Open your project and select Translations on the left sidebar.
- Choose one of the available options in the Preview translations section:
- CSV – download all project translations in a single CSV file.
- XLSX – download all project translations in a single XLSX file.
