Screens Translation
Screens Translation is a feature that changes your localization workflow from translating lists of text files to translating text directly from your app or website’s screenshots. By providing maximum visual context, this approach helps you produce higher-quality translations and can reduce the need for extensive localization quality assurance (QA).
This mode can be used with final screenshots or even with initial mockups and designs, allowing translation to begin before development is complete.
This view is enabled by a project manager in the project’s Settings > General > Project Language Page View section. When enabled, the screenshots will be displayed on the project’s language page instead of the traditional file list.
Once this feature is enabled for your project, your translation workflow shifts from navigating file lists to working directly with visual screens. You’ll open a screen in the Editor, interact with highlighted tags overlaid on the image to load the corresponding strings, and translate them with full visual context. You can also use preview options to check string statuses or see your translations directly on the screen design.
Here’s a step-by-step guide on how to translate using screens:
- Open the project and go to the Dashboard tab.
- Select the target language.
- On the language page, you will see a list of the project’s screenshots instead of usual source files. Click on the needed screenshot to open it in the Editor.
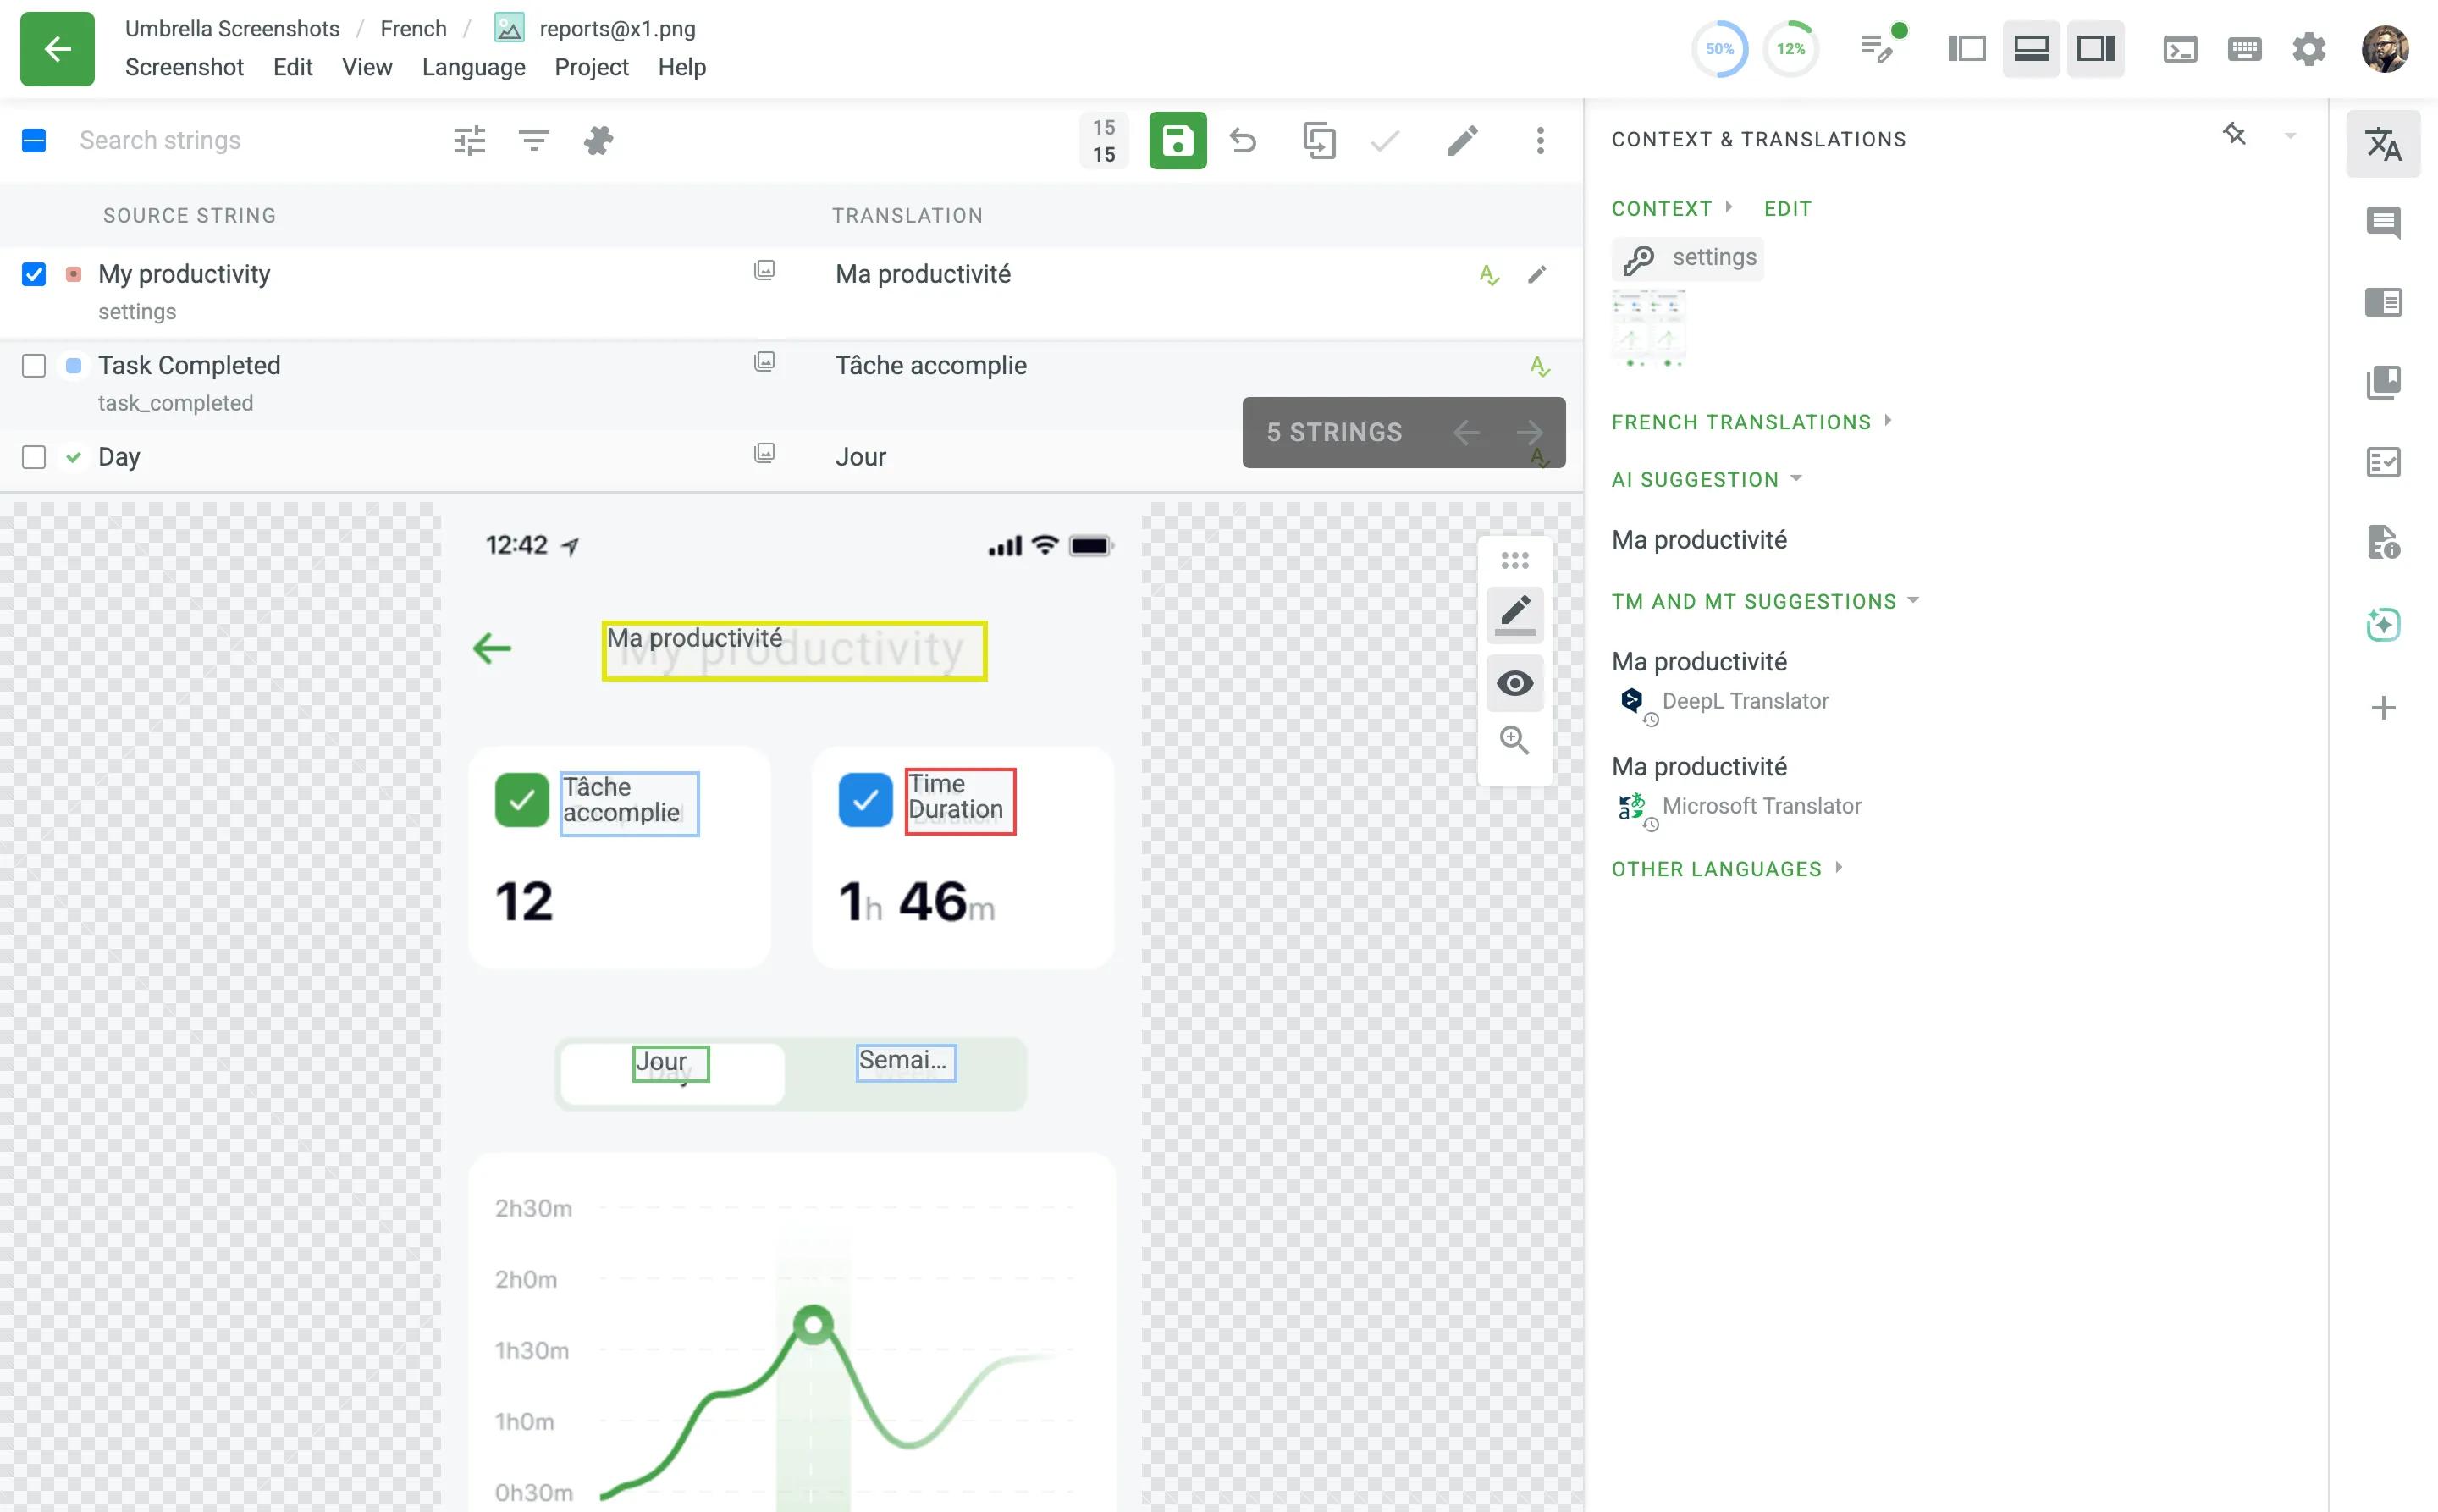
- You’ll see the full screenshot in the preview panel with text elements on the screenshot highlighted with colored tags.
- Click on any highlighted tag on the image. The tag will turn yellow, and the Editor will automatically load the corresponding source string.
- Enter your translation in the text area and click Save translation.
- You can continue clicking other tags on the screenshot to translate them in order.
When translating from a screenshot, the preview panel provides special display options to help you track your progress and visualize the final result.
You can toggle the following views using the preview control icons located in upper-right corner of the preview panel:
- Highlight Statuses: Click this icon to show the status of each string directly on the screenshot. The colored borders around the tagged text indicate the string’s state:
- Red: Untranslated
- Blue: Translated
- Green: Approved
- Yellow: Currently selected for translation
- Show Translation Preview: Click this icon to replace the source text on the screenshot with your saved translations. This allows you to instantly preview how your translations will look in the final UI.
- Scale Toggle: Click this icon to toggle between a zoomed-in and zoomed-out view of the screen, helping you focus on specific areas or see the overall layout.
While both features provide context, Screens Translation offers some unique advantages:
- No Setup Required: Unlike the In-Context tool, you don’t need to integrate your live application or learn how to navigate it.
- Works with Mockups: You can translate from static designs or mockups even before the application is built (e.g., using designs uploaded via the Crowdin plugins for Figma, Sketch, or Adobe XD), allowing localization to happen earlier in the development process.
- Consistent Performance: Translating screenshot by screenshot is often faster than navigating a live application, as you don’t need to search for the specific page or state where a string appears.