For Translators
Crowdin is a localization management platform that helps companies translate their software. In this article, you will find information on how you can contribute to localization projects as a translator.
You’ve been invited to join the Crowdin Enterprise project, but not sure where to start? Here’s everything you need to get started with translating and proofreading. This article, along with the quick video demo below, will walk you through the basics of the translation process in Crowdin Enterprise.
Each company in Crowdin Enterprise has a unique URL. A company that wants to invite you can either share the direct link to the project page or to the organization page with all the crowdsourcing projects they have. A project manager can also send an invitation directly to your email. Using this specific link, you need to create a new account in Crowdin Enterprise. To create an account (sign up), you can use your social media profiles (Google, Facebook, X), GitHub, or GitLab profiles.
Once you have created an account, you can use your username and password to access the needed organization page in Crowdin Enterprise. If you decide to contribute to more than one organization, you will need separate Crowdin Enterprise accounts for each organization.
The Workspace is the first page you’ll see after a successful registration. You’ll have the proofreader or translator (or both) access to the project you’ve been assigned to work on. You can access each project from here.
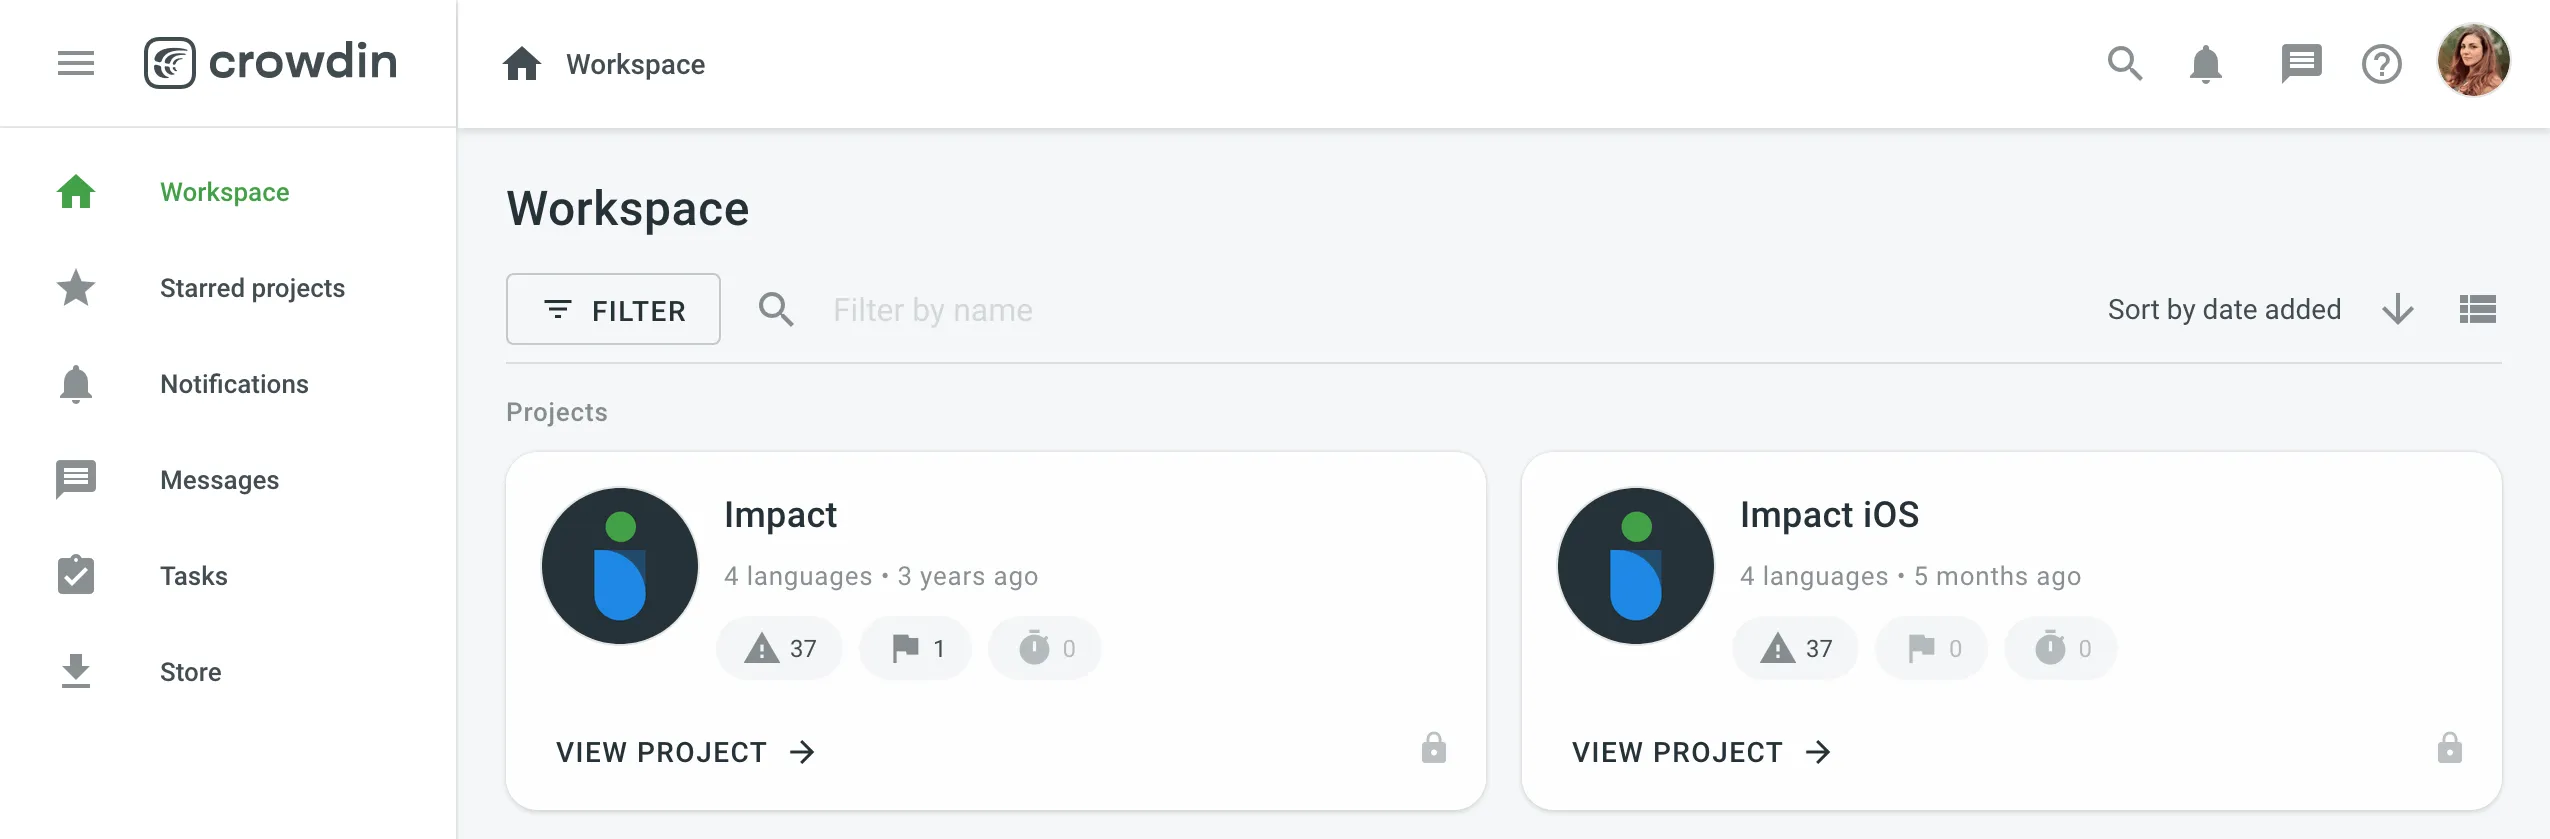
Using the left sidebar, you can access the following pages:
-
Starred projects – all your starred projects. Use it for quick access to the projects you open the most often.
-
Notifications – see all the key updates for the projects you are working on. For example, notifications about new strings added, new tasks created, etc. You can also choose to receive updates via email or Slack. Go to Account Settings > Notifications to change your notification preferences.
-
Messages – create one-to-one conversations or add as many project members to a conversation as needed. Any time you receive a message in one of the conversations, you can view it here.
-
Tasks – a list of tasks assigned to you. Use the filter for better navigation and archive the completed tasks.
-
Store – Crowdin Store offers 700+ apps you can install to extend Crowdin functionality. Explore Crowdin apps for Translator Productivity.
The Global Search feature helps you quickly find content and resources within the organization, such as source strings, groups and projects.
Read more about Global Search.
Each project has its own Dashboard page where you can see some basic information about the project, such as the number of target languages and source words, the last activity, and a list of the languages you’ve been assigned to work with.
For projects with workflow, you can click the expand icon next to the language to see the workflow steps assigned to you. You can select the workflow step and open all the strings you will be working with in that step in the Editor.
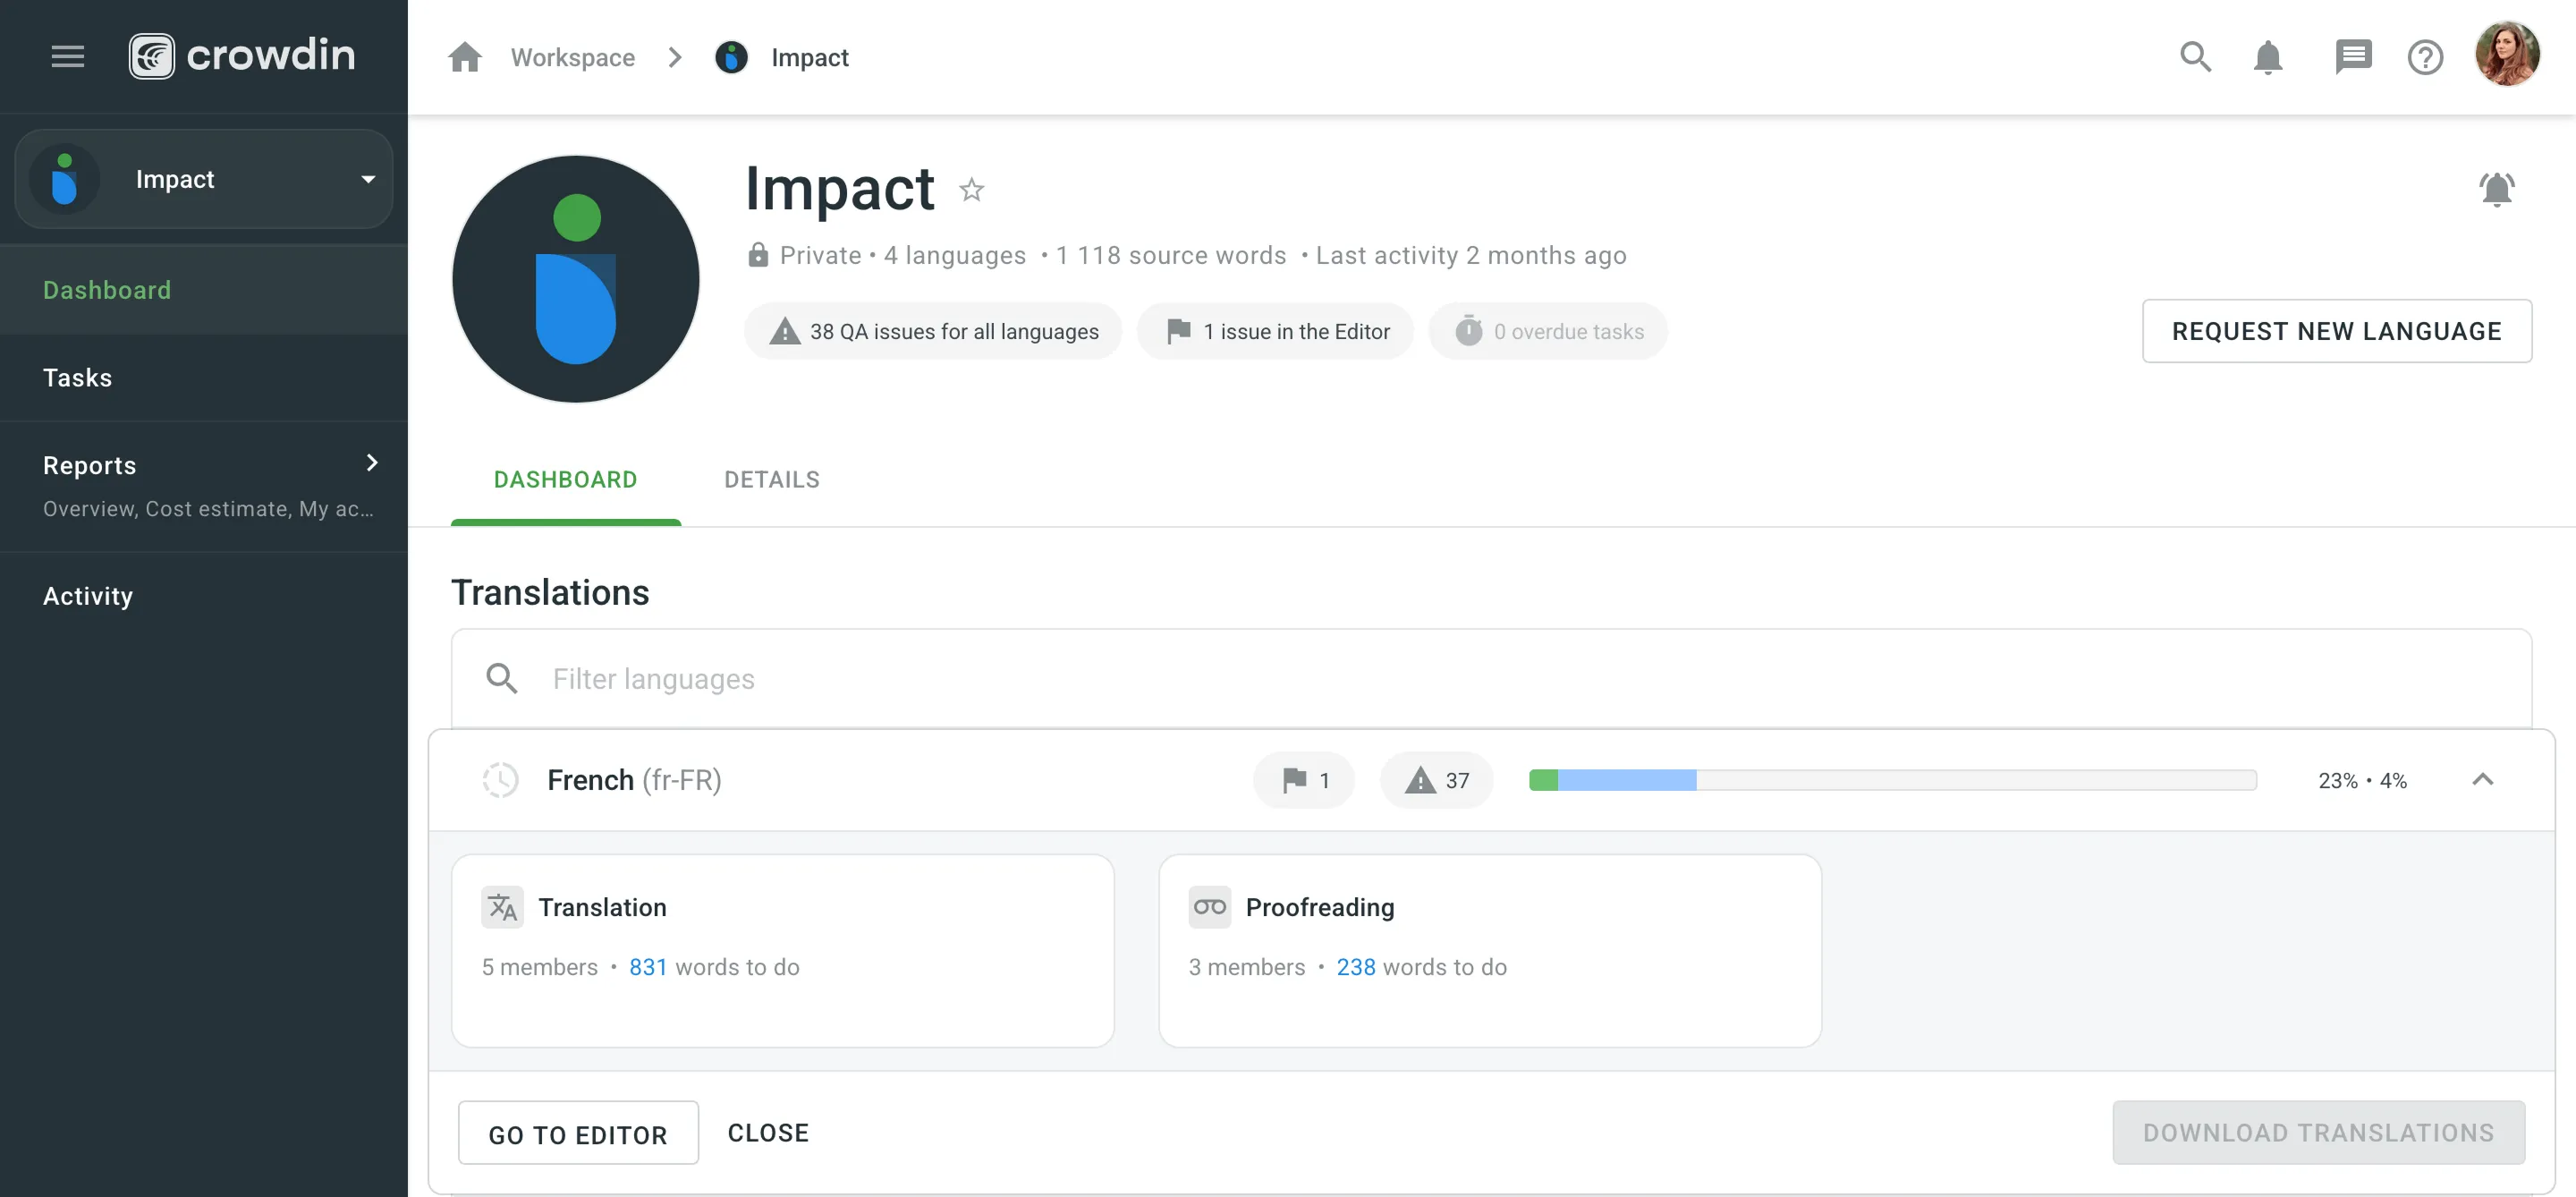
To access specific source files, click on the needed target language from the list and select the file.
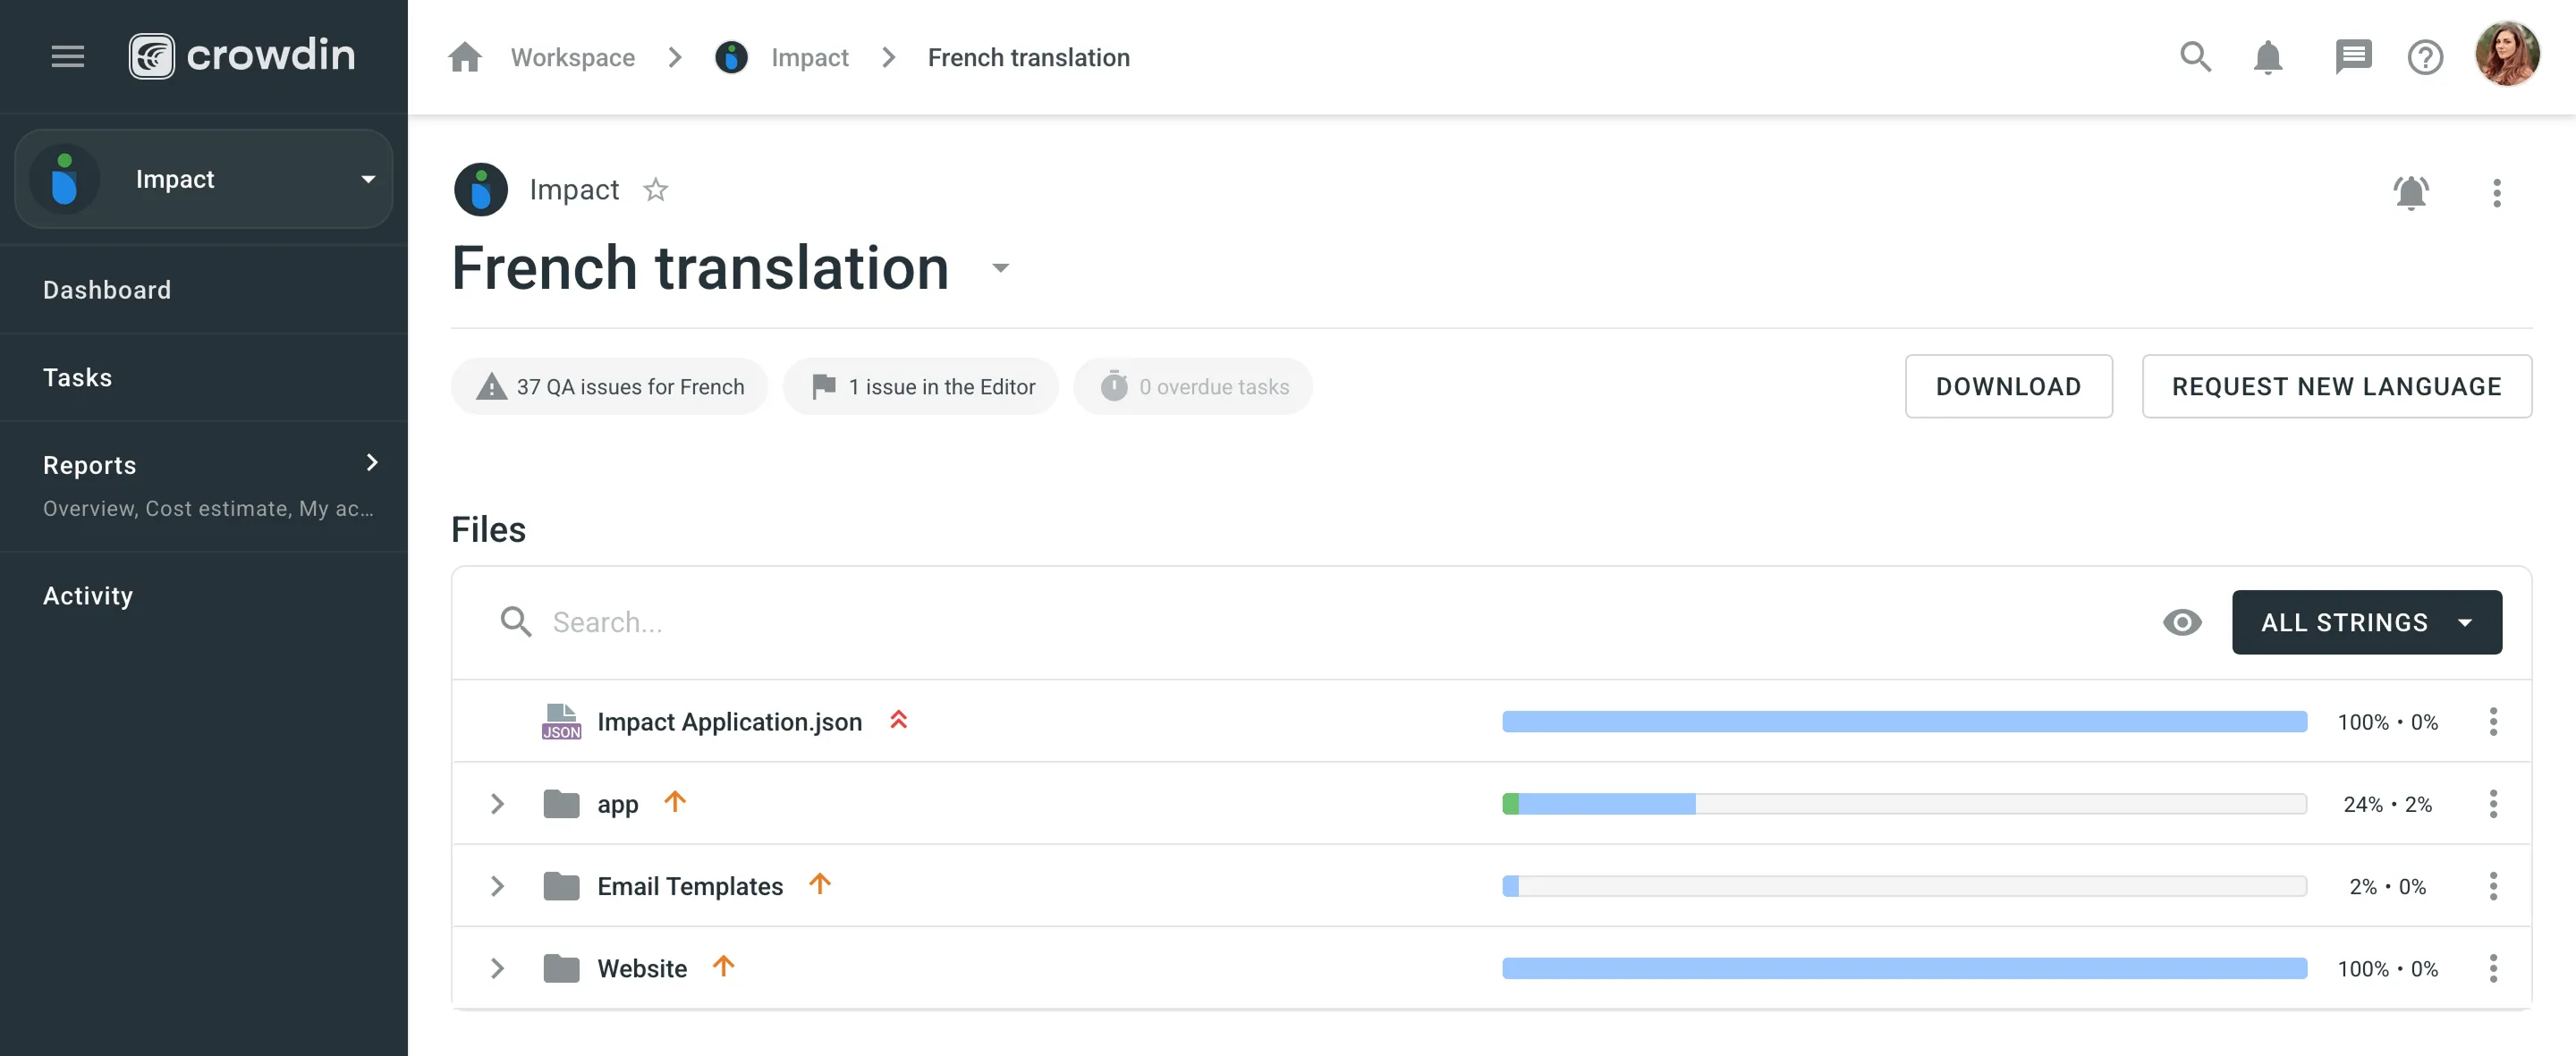
If a language you’d like to translate is not currently listed in the project, you can request its addition. This feature is available in all crowdsourced projects in Crowdin Enterprise.
To request a language, follow these steps:
- Open the project and go to the Overview tab.
- Click Request new language in the Details section.
- In the appeared modal, select the preferred language.
- (Optional) Add a message to the project managers to be included with your request.
- Click Send.
The project managers will review your request and determine whether the language can be added.
If another user has already submitted a request for the same language, you will receive a notification about the existing request. This notification will also appear if you submit multiple requests for the same language while the first request is still under review by the managers.
If you have questions about the project’s content, need clarification on a specific task, or would like to be promoted to a proofreader role, you can contact the project manager. You might also reach out if you need additional resources, have feedback on translations, want to discuss project timelines, etc.
To contact the project manager, open the project and click Contact next to their name in the Details section.
You will be redirected to the Messages page with the project manager pre-selected as the recipient. If needed, you can also add other users to the conversation. Enter and send your message, and the conversation will be created, allowing you to begin communicating. You will be notified when the manager replies, and the discussion will continue in the same thread.
Before contributing translations to a project, it’s important to understand the intellectual property terms. Projects may define how your translations will be used, shared, or licensed.
If you’re contributing to open-source or community-driven projects, check if the project provides additional legal or licensing terms. When in doubt, contact the project manager for clarification.
Read more about Intellectual Property Rights.
If you come across a project in Crowdin Enterprise that contains inappropriate or unsafe content, you can report it. Reports are reviewed to ensure the project complies with Crowdin’s Terms and Conditions.
The reporting option is available on the public pages of projects using Crowdsourcing.
To report a project, follow these steps:
- Open the public page of the project.
- In the Details section, click Report.
- In the appeared modal, select the type of issue you’re reporting.
- (Optional) If you selected Other, add additional details in the text field.
- Click Submit.
After submitting the report, you’ll see a confirmation message. The Crowdin team will review your report and take action if necessary.
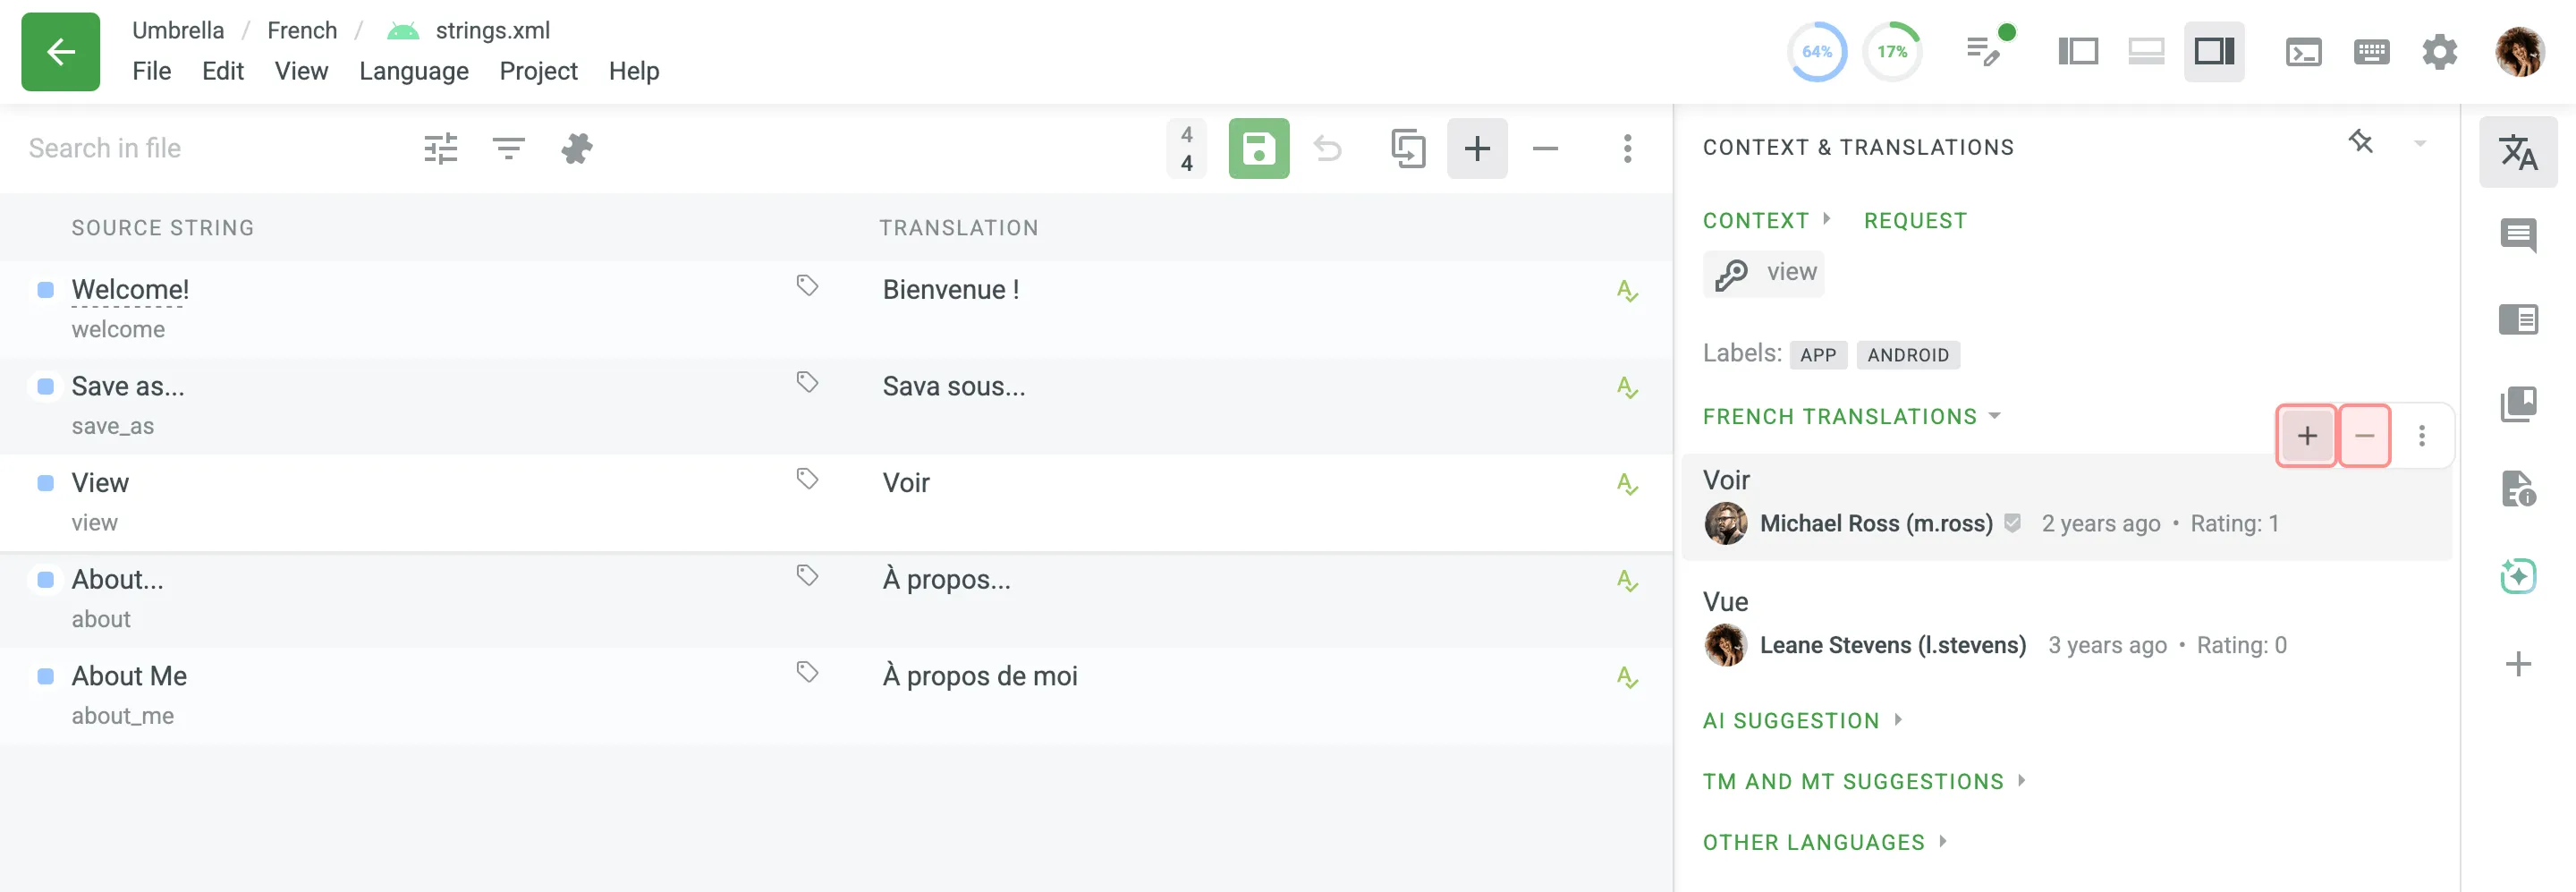
The Editor is where translators and proofreaders work on translations online. The String List section displays strings from the selected file or all strings available in the assigned workflow step, with the active string highlighted. String context and details for the selected string appear in the String Details section.
Collaborate with other project members, discuss any issues or questions in the Comments section, vote for the best translation variants, and take advantage of the project Glossary and Translation Memory. Use the machine translations as a basis for your own suggestions.

The String List is your primary workspace for managing translations.
- Source Text: On the left.
- Translations: On the right.
- Status icons indicate whether strings are untranslated, translated, or approved. Comments or issues are highlighted.
- Use the Search in file field to locate strings.
- Apply Simple or Advanced Filters to sort and filter strings.
Pop-up messages may appear to alert you to potential issues, such as inconsistent punctuation, mismatched spaces, or missing variables. These checks help maintain translation quality.
AI in the Editor helps you work faster and more accurately with context-aware translation suggestions.
To use AI suggestions, open the Context & Translations section in the right sidebar of the Editor.
For chat-based assistance, ask your organization admin to install and configure the Crowdin Copilot app from the Crowdin Store.
This section contains the resources that might be useful:
- Context, labels, screenshots, and additional information to guide the work.
- Translations by other project members
- Translation Memory (TM) suggestions
- Machine Translation (MT) suggestions
- Translations to other languages
In crowdsourcing projects, besides translating you can also participate by voting on suggestion submitted by other project members.
If you see that there is already a correct suggestion, vote for it by clicking the plus sign if you like the translation, or the minus sign if you don’t think the translation is correct. Translations that receive the most positive votes will have a higher rating and will appear at the top of all available translations for the string.
In the Comments section, you can discuss the meaning of the source string or other related questions with other project members. Use ”@” and a username to mention the specific person or create an issue related to the string.
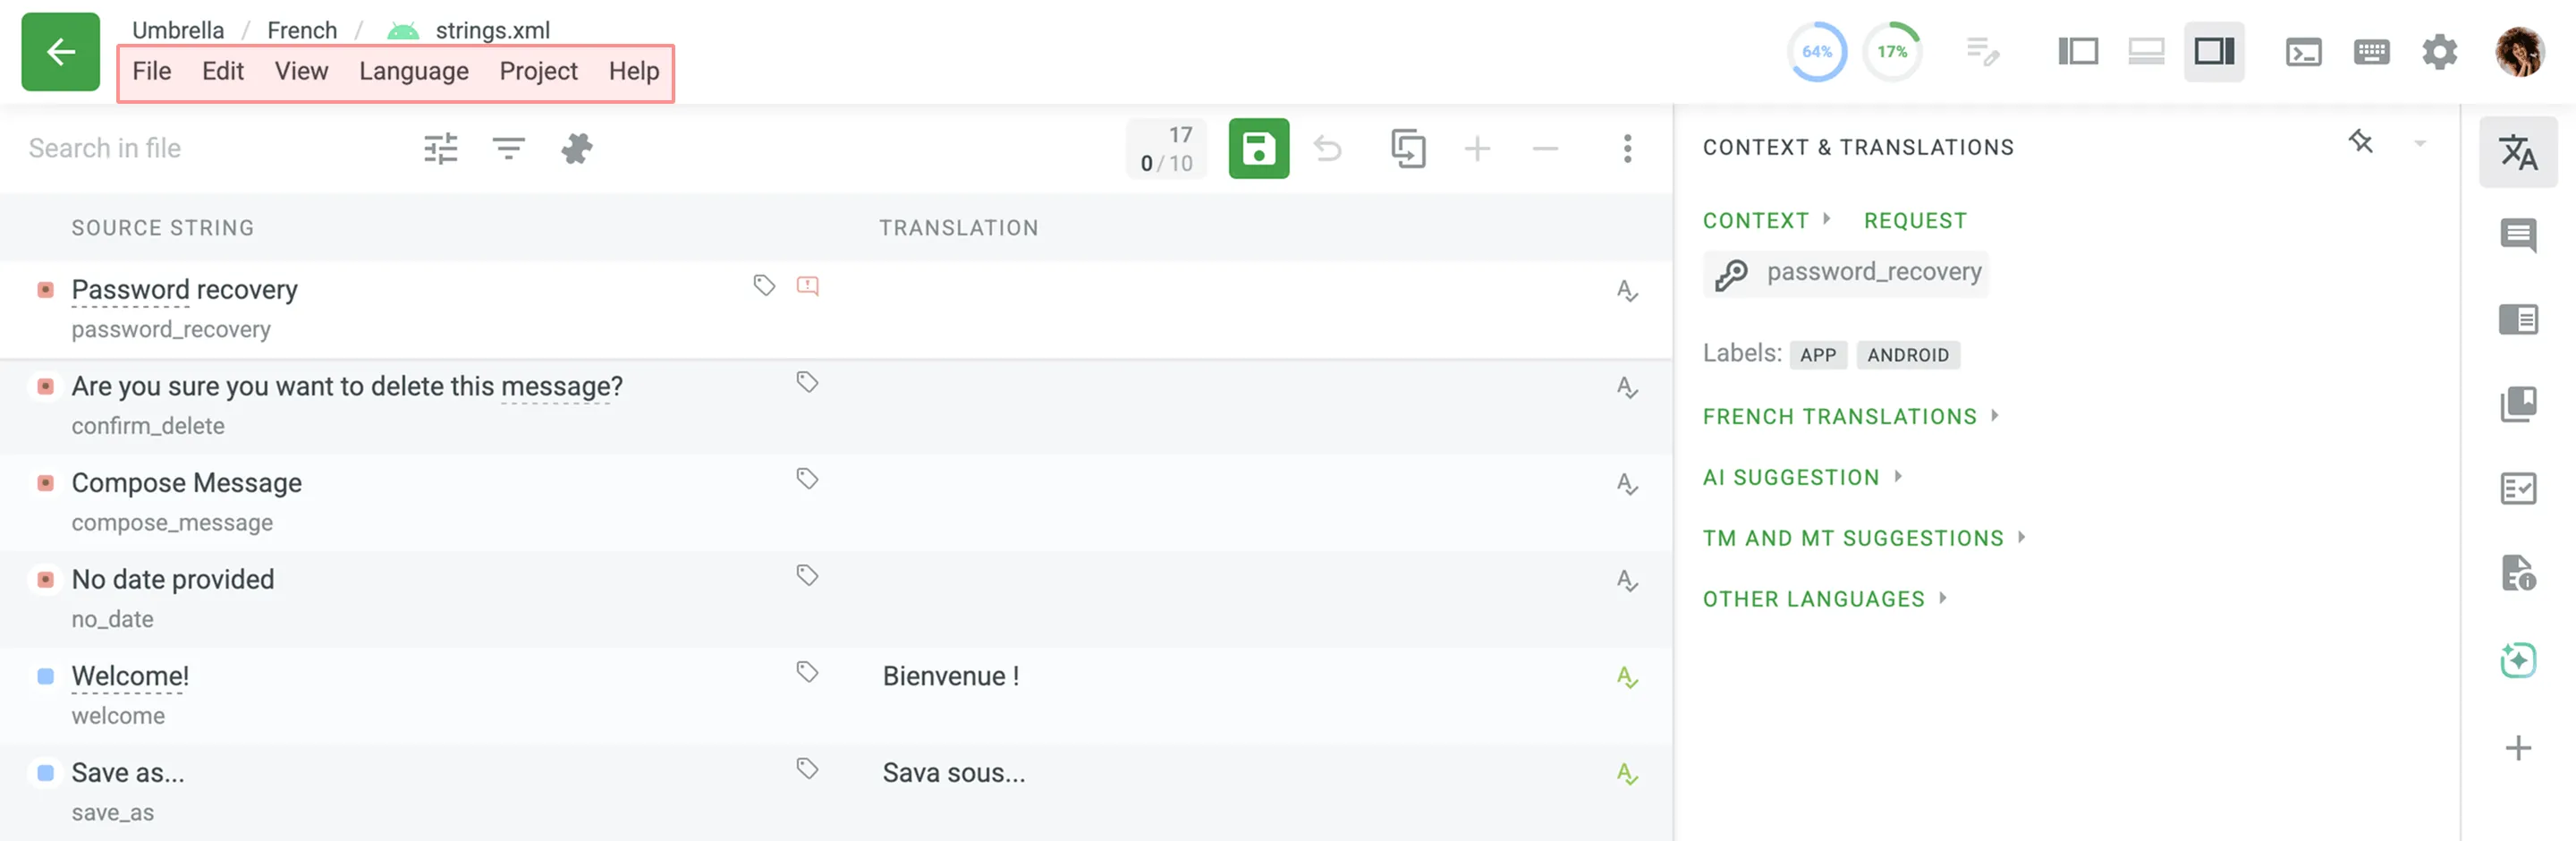
Using the main menu at the top of the Editor (File, Edit, View, Language, Project, Help), you can select content for translation, download or upload translations, perform various string actions, change the Editor’s layout, switch target languages, access project pages and switch projects, access help materials, and more.
Click in the upper-right corner to see the list of available keyboard shortcuts. They can make your work in the Editor more efficient and fast.
Most shortcuts can be customized. Click on the needed key combination and modify it using your keyboard.
If you are assigned to proofread the translations, you’ll see the list of source strings and their translations that you can review, correct where needed, and approve. The strings with the QA checks issues will be highlighted in this mode. You’ll also see the strings that were translated with the help of Translation Memory or Machine Translation engine.
In every project, strings move from one workflow step to the next. There are three statuses: ToDo, Pending, and Done. They are applied to each string depending on its status at the workflow step it’s currently at.
For example, if you’re assigned to translate the string, once you save the translation, the string is marked as Done and then moves to the next step.
The Pending status can be applied to the string in the following scenario:
The source string is translated at the Translation workflow step and marked as Done. It then moves to the next workflow step, e.g., Proofreading, where it’s marked as ToDo. If the translation of the string is deleted at the Translation workflow step, the string remains at the Proofreading workflow step and is marked as Pending until the translation is added again at the Translation workflow step.
Read more about Workflows in Crowdin Enterprise.
As an alternative to translating online in the Editor, you can download project files for offline translation if the project manager has enabled public downloads. Use the XLIFF file format for offline translation, which is supported by most desktop localization tools.