For Managers
Crowdin Enterprise is a cloud-based solution for streamlined localization management. Our technology solution allows you to localize your software, games, documentation, and other products.
You can upload your translatable content and automate its updates, collaborate with your in-house translators, outsource translations, keep track of translation progress in real-time, and seamlessly integrate completed translations into your products.
We’ve created this quick start guide to help you get the most out of your Crowdin Enterprise experience. This article will assist you in getting started with Crowdin Enterprise to grow your business, and we’ll provide some helpful resources you can use along the way. Ready to get started?
Open your organization’s Workspace, hover over the Create button at the bottom right, and select Project.
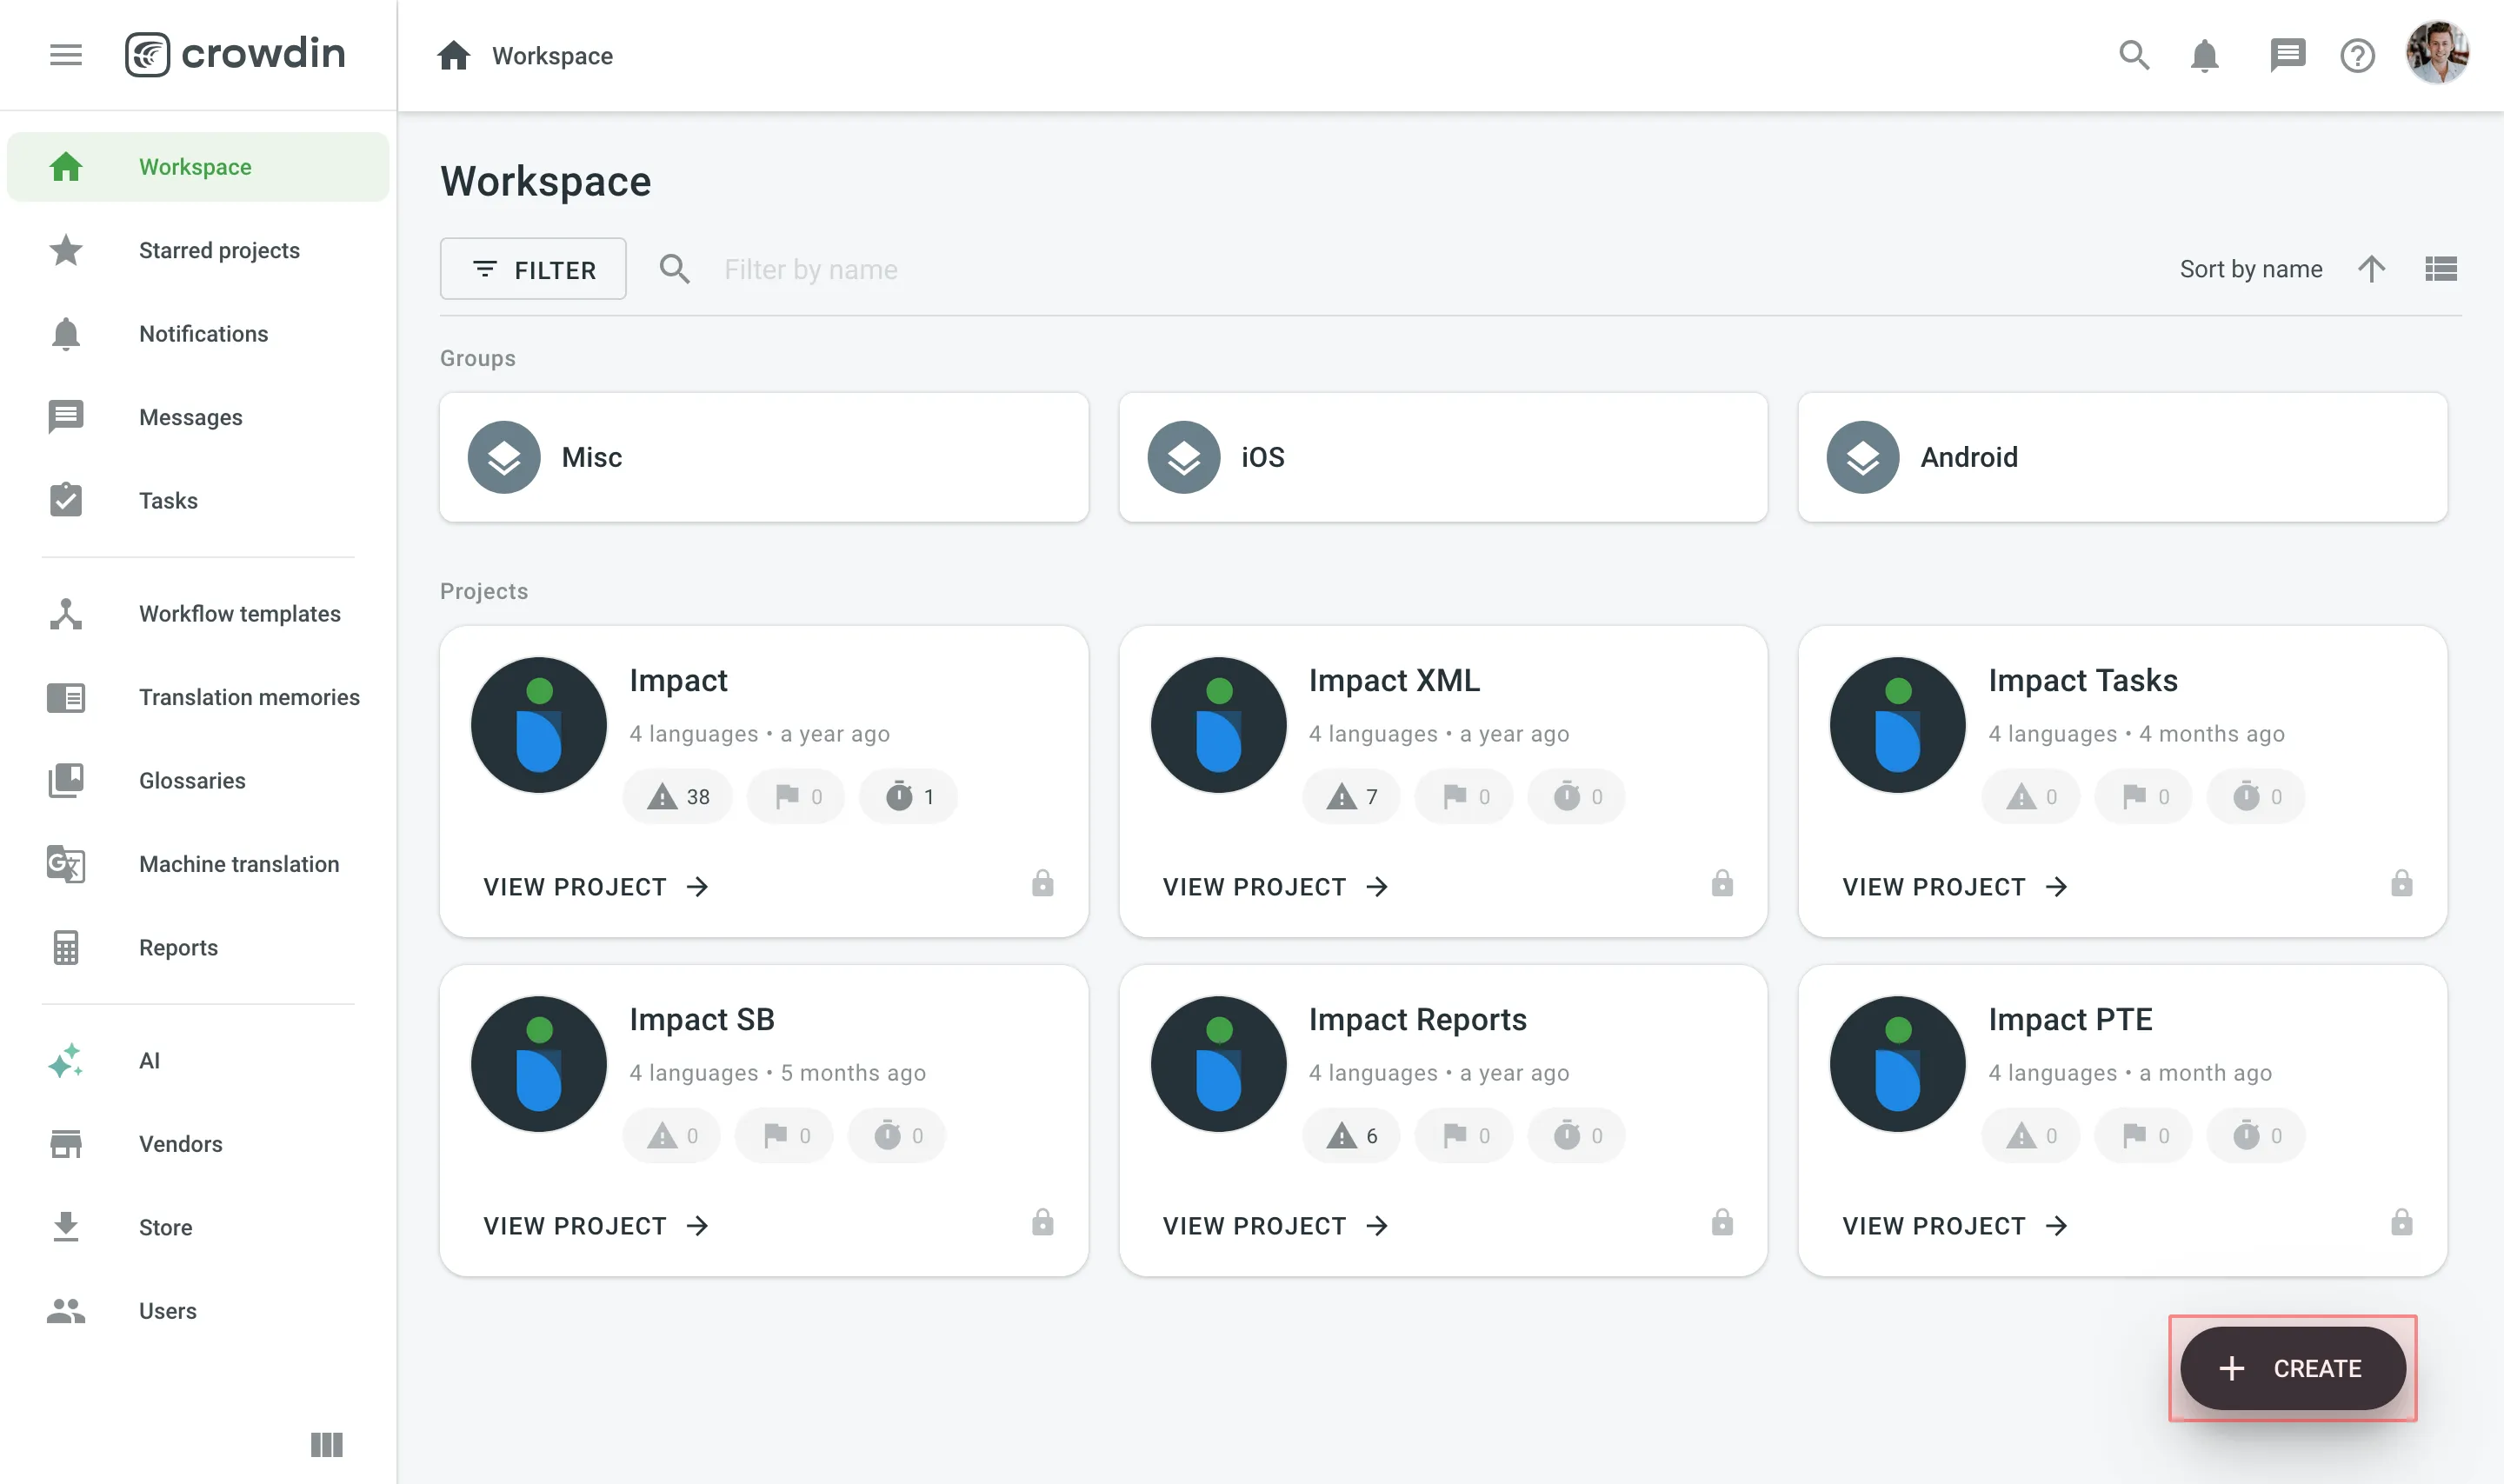
Read more about Creating a Project.
Once you’ve created a project, you can add content to be translated. Each project has its own source content, resources, target languages, integrations, members, etc.
In Crowdin Enterprise, most users create separate projects for different kinds of products or content. For example, you can create individual projects for your mobile application, website, desktop application, and documentation. This allows you to set up different workflows, as some projects can be translated by machine and post-edited by real people. Others may require multiple translation teams and additional proofreading steps.
All your projects are created and managed within an organization. They are only available to members of the organization or to a vendor organization if you invite one. The exception is projects with a Crowdsourcing workflow step, which you can publish to make them publicly visible. See Project Visibility for details.
Read more about Starting with an Organization.
Once you’ve created the project, upload localizable files and resources, such as screenshots, translation memory, and glossary.
You can upload localizable files in a way that works best for you:
- Manually via the web interface (UI).
- Integrate Crowdin Enterprise with the tools you already use:
- Repo (GitHub, GitLab, etc.)
- Marketing tools (Contentful, Webflow, WPML, Hubspot, Marketo, etc.)
- Help center (Help Scout, Zendesk, Intercom, etc.)
- Development tools (VS Code, Android Studio, Google Play, etc.)
- Email automation (MailChimp, SendPulse, ActiveCampaign, Mandrill, Moosend, etc.)
- Design tools (Figma, Sketch, Adobe XD).
- Use API or console client.
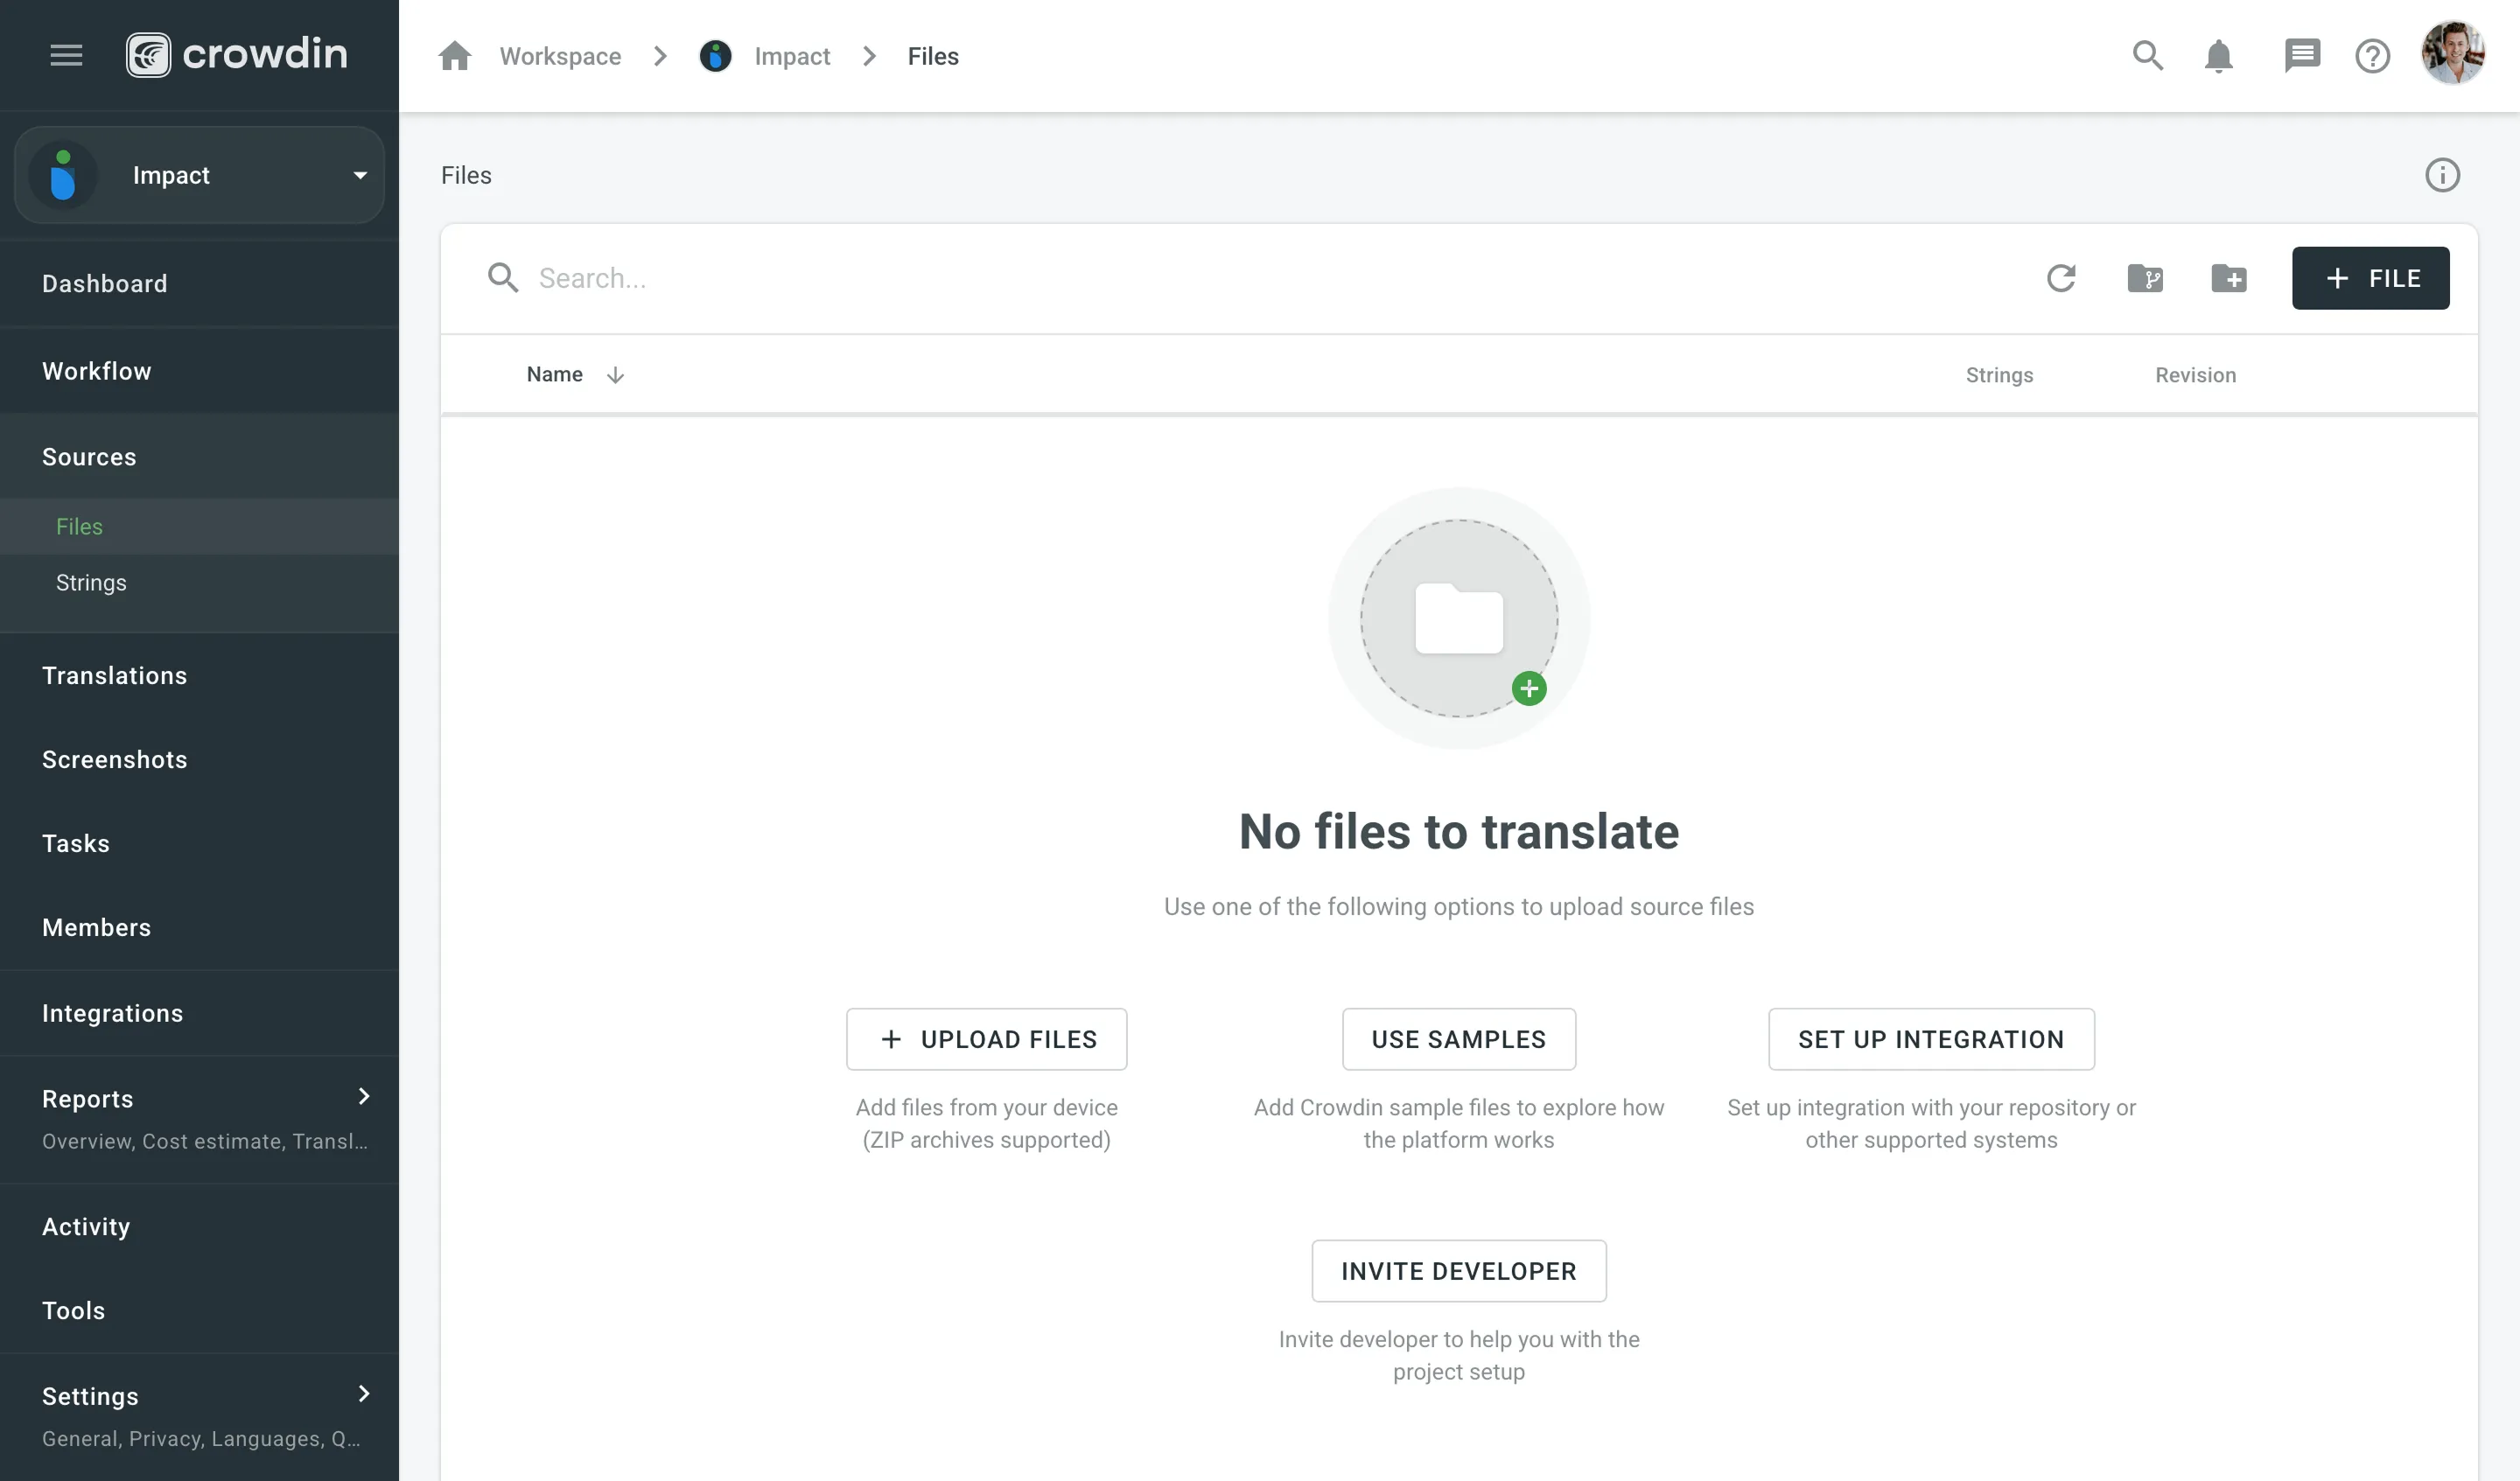
Read more about Uploading Source Files.
To automatically sync files between your Crowdin Enterprise project and the tools of your choice, add and set up the respective integration. Once you add the integration, you can proceed to the setup.
If you already have some translations done outside Crowdin Enterprise, you can upload them to your Crowdin Enterprise project to keep everything in one place and continue working on translations.
Read more about Uploading Existing Translations.
All resources, including TMs, Glossaries, Style Guides, and MT engines, can be added to your Workspace or directly to the project. Resources added to Workspace are available to all projects within your organization. Each project also has a default Translation Memory and Glossary that are created automatically.
You can also switch to Permission granularity mode, where you can add different resources to each group as well. Resources added to a group will be available only to the projects in this group.
Read more about Groups and Permission Granularity Mode.
With Translation Memory, you can leverage previous translations from your project. When the same or similar texts are used across your content, you can use the same translation and thus save your time. Auto-translate your project with a TM, and previous translations will be reused. Translators can also check how similar strings were translated earlier to keep translations consistent.
Project Translation Memory (TM) is created automatically for each project. You can also upload your existing TMs in TMX, XLSX, and CSV file formats.
Read more about Translation Memory.
Use a Glossary to make sure your product terminology is translated correctly and used consistently across all languages.
Project Glossary is created automatically for each project. You can also upload your existing Glossary TBX, XLSX, and CSV file formats.
Read more about Glossary.
Screenshots are another great way to provide additional context so translators can understand better how they should translate the source strings. To upload screenshots, open your project and go to the Screenshots section. Tag the source strings on the screenshots. This way, screenshots with tagged strings will appear under each string in the Editor’s Context and Translations section.
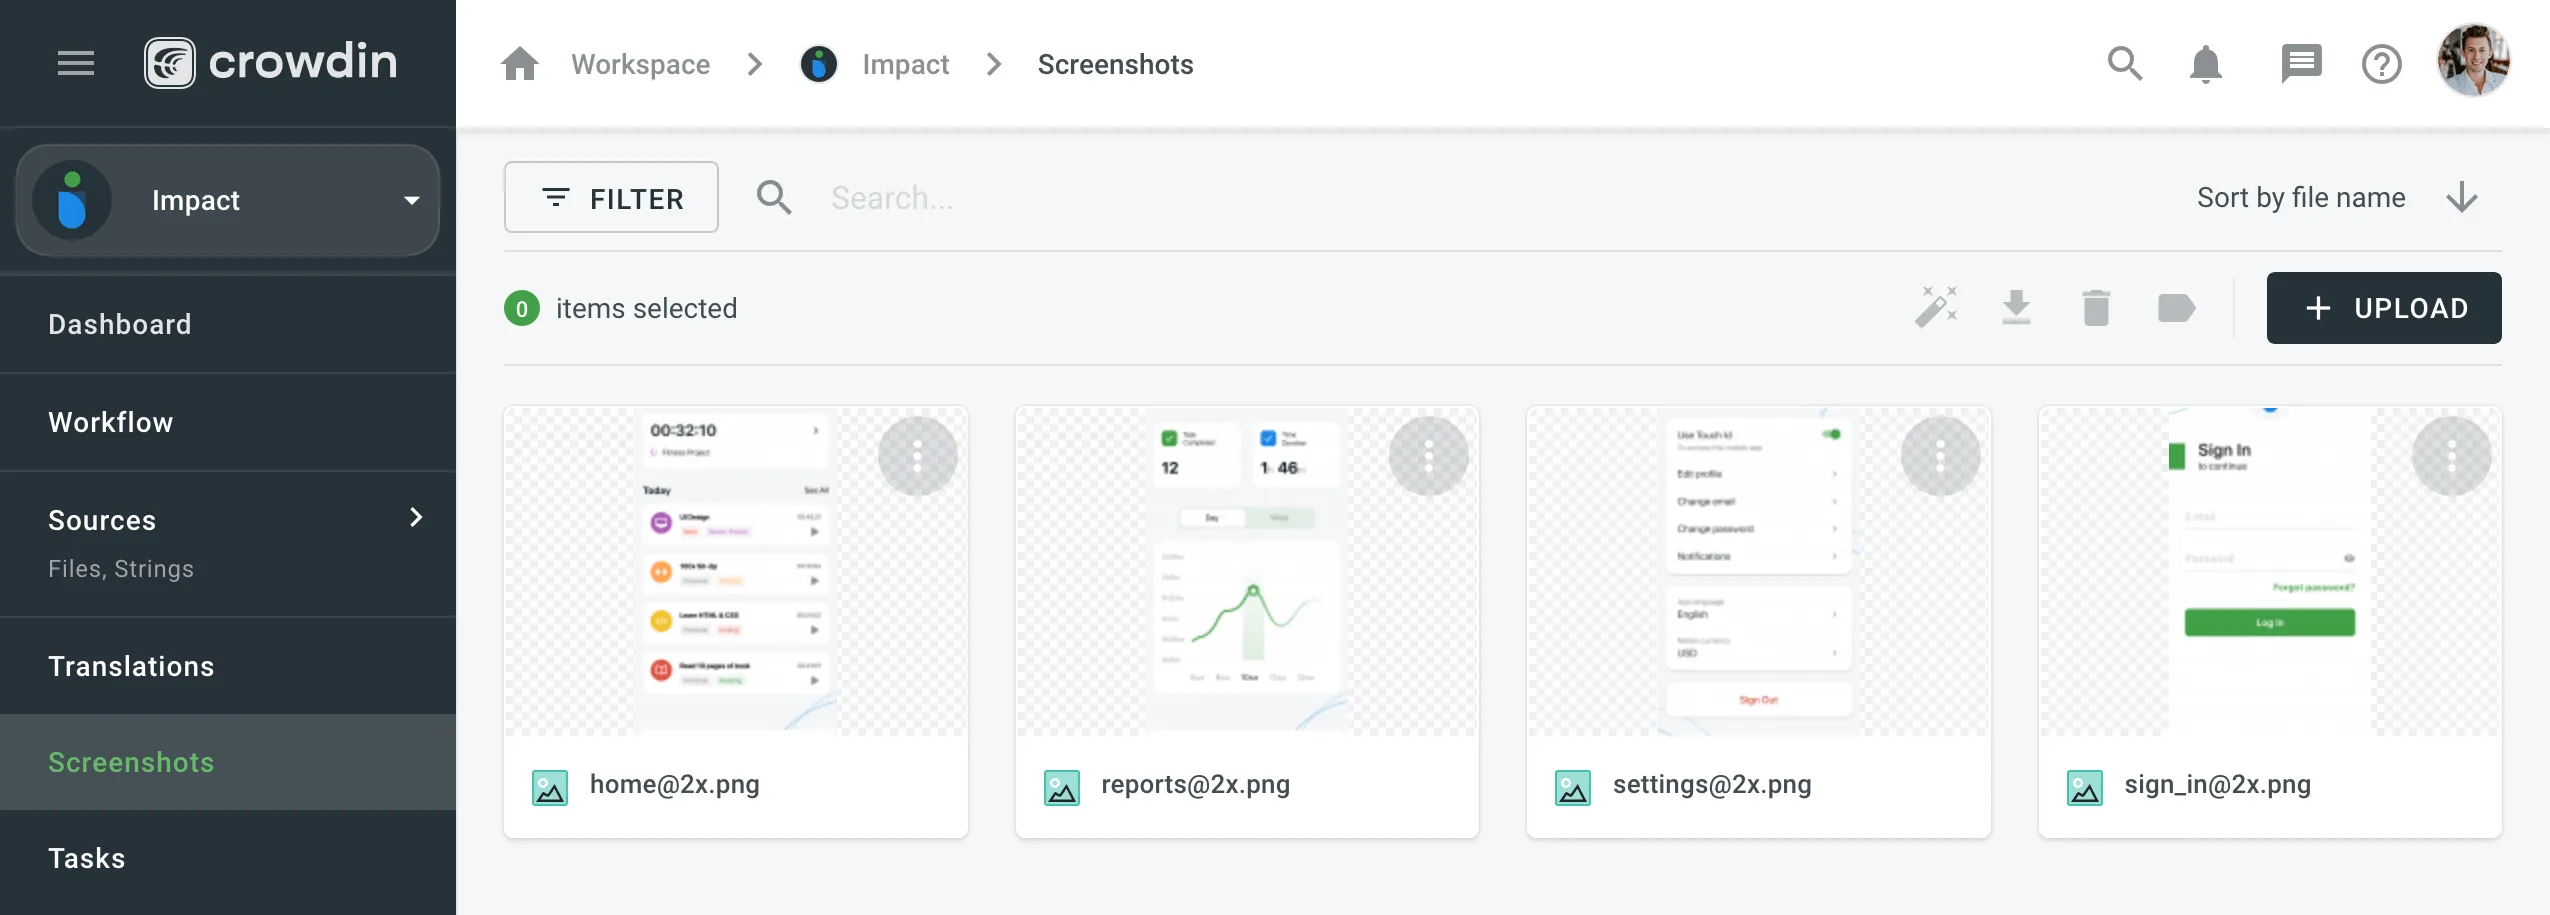
Read more about Screenshots.
To save time, you can auto-translate your Crowdin Enterprise project using AI, Translation Memory, or Machine Translation. Auto-translating your content means some strings will already be translated before translators begin their work.
You can apply auto-translation manually or set up automatic auto-translation through the project workflow. Projects without a workflow support manual auto-translation only.
Read more about Auto-translation.
Translate your projects with the right teams and technologies involved. You can invite your in-house translators, freelancers, translation agencies, and your community.
In Crowdin Enterprise, you can invite people to your organization or directly to a specific project. Project members can be assigned contributor or manager roles. Also, you can invite managers directly to groups on the organizational level.
Read more about Roles.
People invited into your organization will see an empty Workspace by default, except for Crowdsourcing projects, which are visible to all the organization members.
To invite people to your organization, open your organization’s Workspace and select Users on the left sidebar.
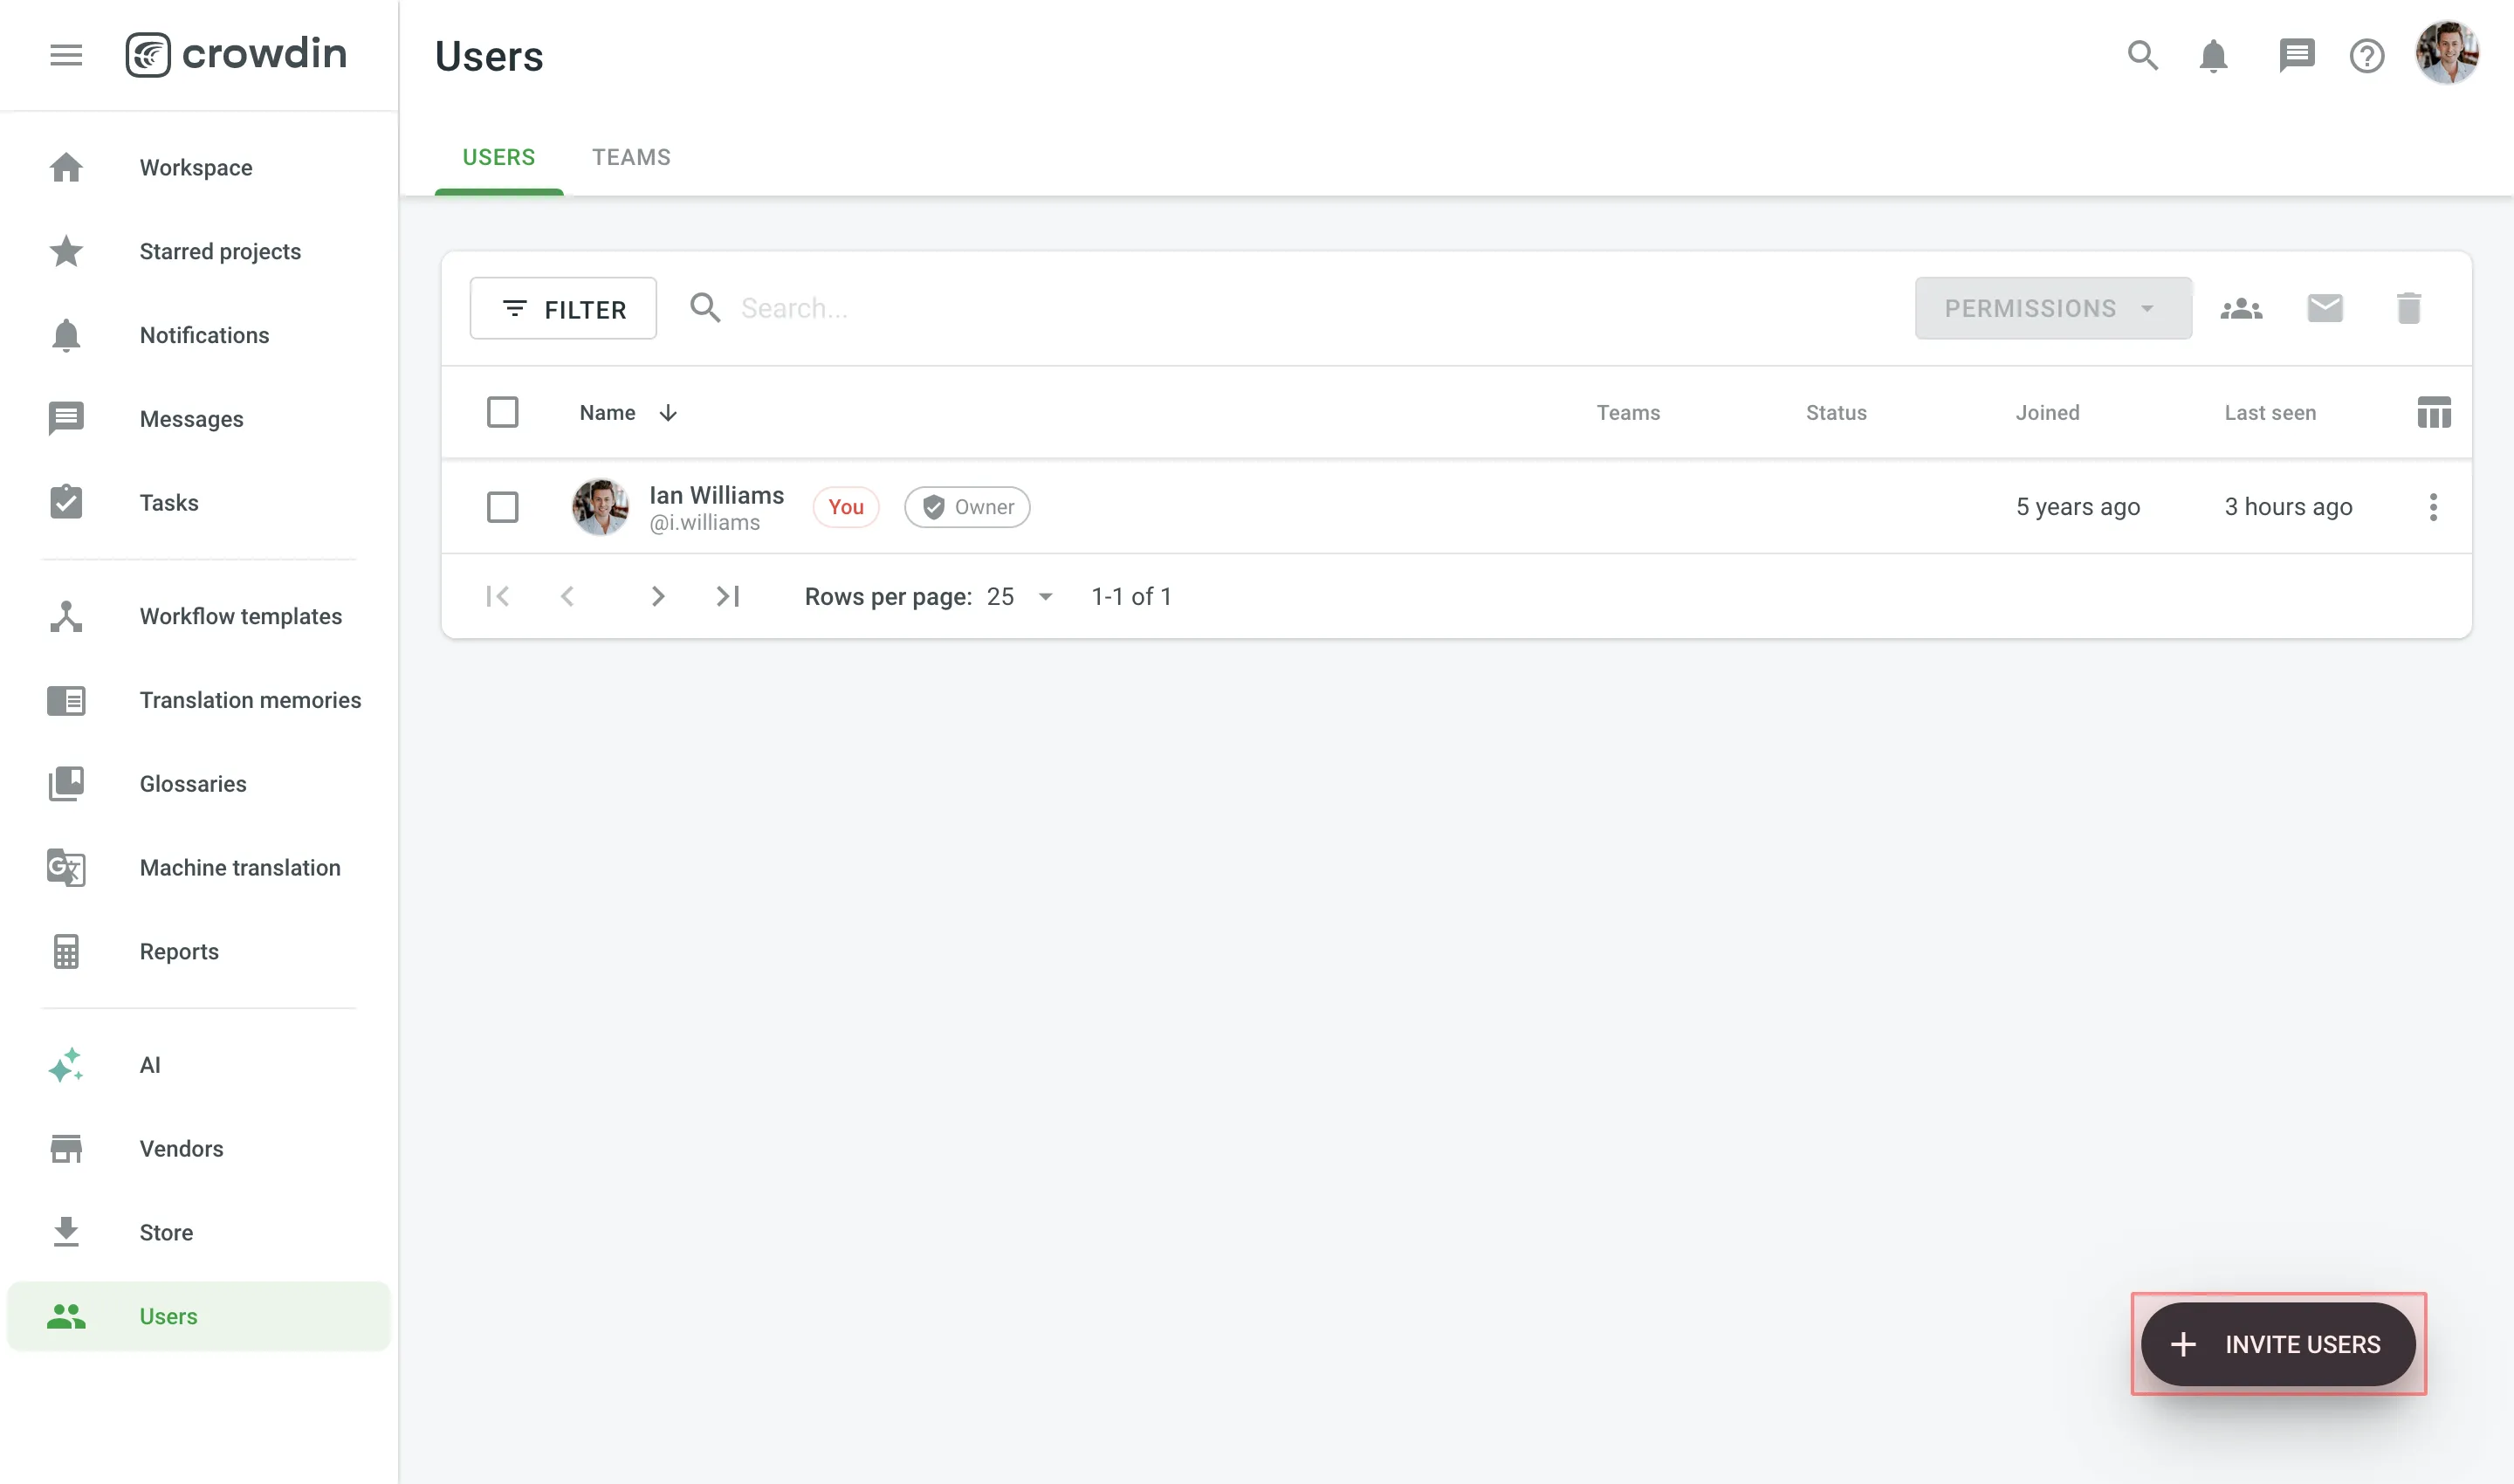
Read more about Inviting People.
Once you invite people to your organization, you’ll be able to assign them to workflow steps, add to projects, give them admin or manager access, and more.
To start cooperation with a Vendor organization, you first invite them to your organization and then assign to workflow steps. When you work with a vendor, you don’t see the specific people who did the translations. Instead, you see which vendor organization did them.
Translation agencies can have their own Vendor organizations in Crowdin Enterprise. If the agency you cooperate with already has an organization, you can invite them; if not - they can also create an organization and then contact our support, so we can convert their organization to a Vendor.
This way, you’ll be able to have more control over projects and resources you share, an ability to create complex workflows that would include translation and proofreading by vendor and more.
Vendor organization receives a copy of your project in the Incoming Projects section. This organization should accept the incoming project to receive the workflow step you invite them to and can independently set their own workflows and invite their own contributors.
To invite a Vendor to your organization, open your organization’s Workspace and select Vendors on the left sidebar.
Read more about Vendors.
Crowdsourcing is a localization practice that engages your community for a common goal – to translate your product on a volunteer basis into several languages. Cooperate with translators, proofreaders, and other enthusiasts on a volunteer basis and reward them for their efforts in a way that works for both of you.
Read more about Crowdsourcing.
Workflow is a combination of steps that content in your project goes through before it’s ready to be used in your product.
You can create a workflow template that works best for you and then assign it to your projects. You’ll be able to edit your workflow inside the project, and it will not change the workflow template. You can use unlimited workflow steps (both in parallel or subsequently).
To create a workflow template in your Workspace, open your organization’s Workspace and select Workflow templates on the left sidebar.

Read more about Workflows.
Project members can request new target languages for a project directly from project’s Dashboard page by clicking Request New Language. As a project manager, you will receive these requests as notifications, which you can then review and add a new language if needed.
To manage these requests effectively, you first need to ensure your notifications are correctly configured.
To receive alerts when a user requests a language, you must have the appropriate notifications enabled in your Account Settings.
- Go to Account Settings > Notifications.
- Select Language Requests for your preferred notification channels (e.g., In-app, Email, Slack).
Once a user requests a new language, you will be notified.
- Click the bell icon in the upper-right corner to see new notifications in a dropdown list.
- For a complete list of all notifications, click Show all. Alternatively, open your organization’s Workspace and select Notifications on the left sidebar.
- On the Notifications page, find the request. The notification will show the project, the requested language, the user who sent the request, and any comments they provided.
- Click Language Settings to go directly to the project’s Settings > Languages page to add the requested language to the project.
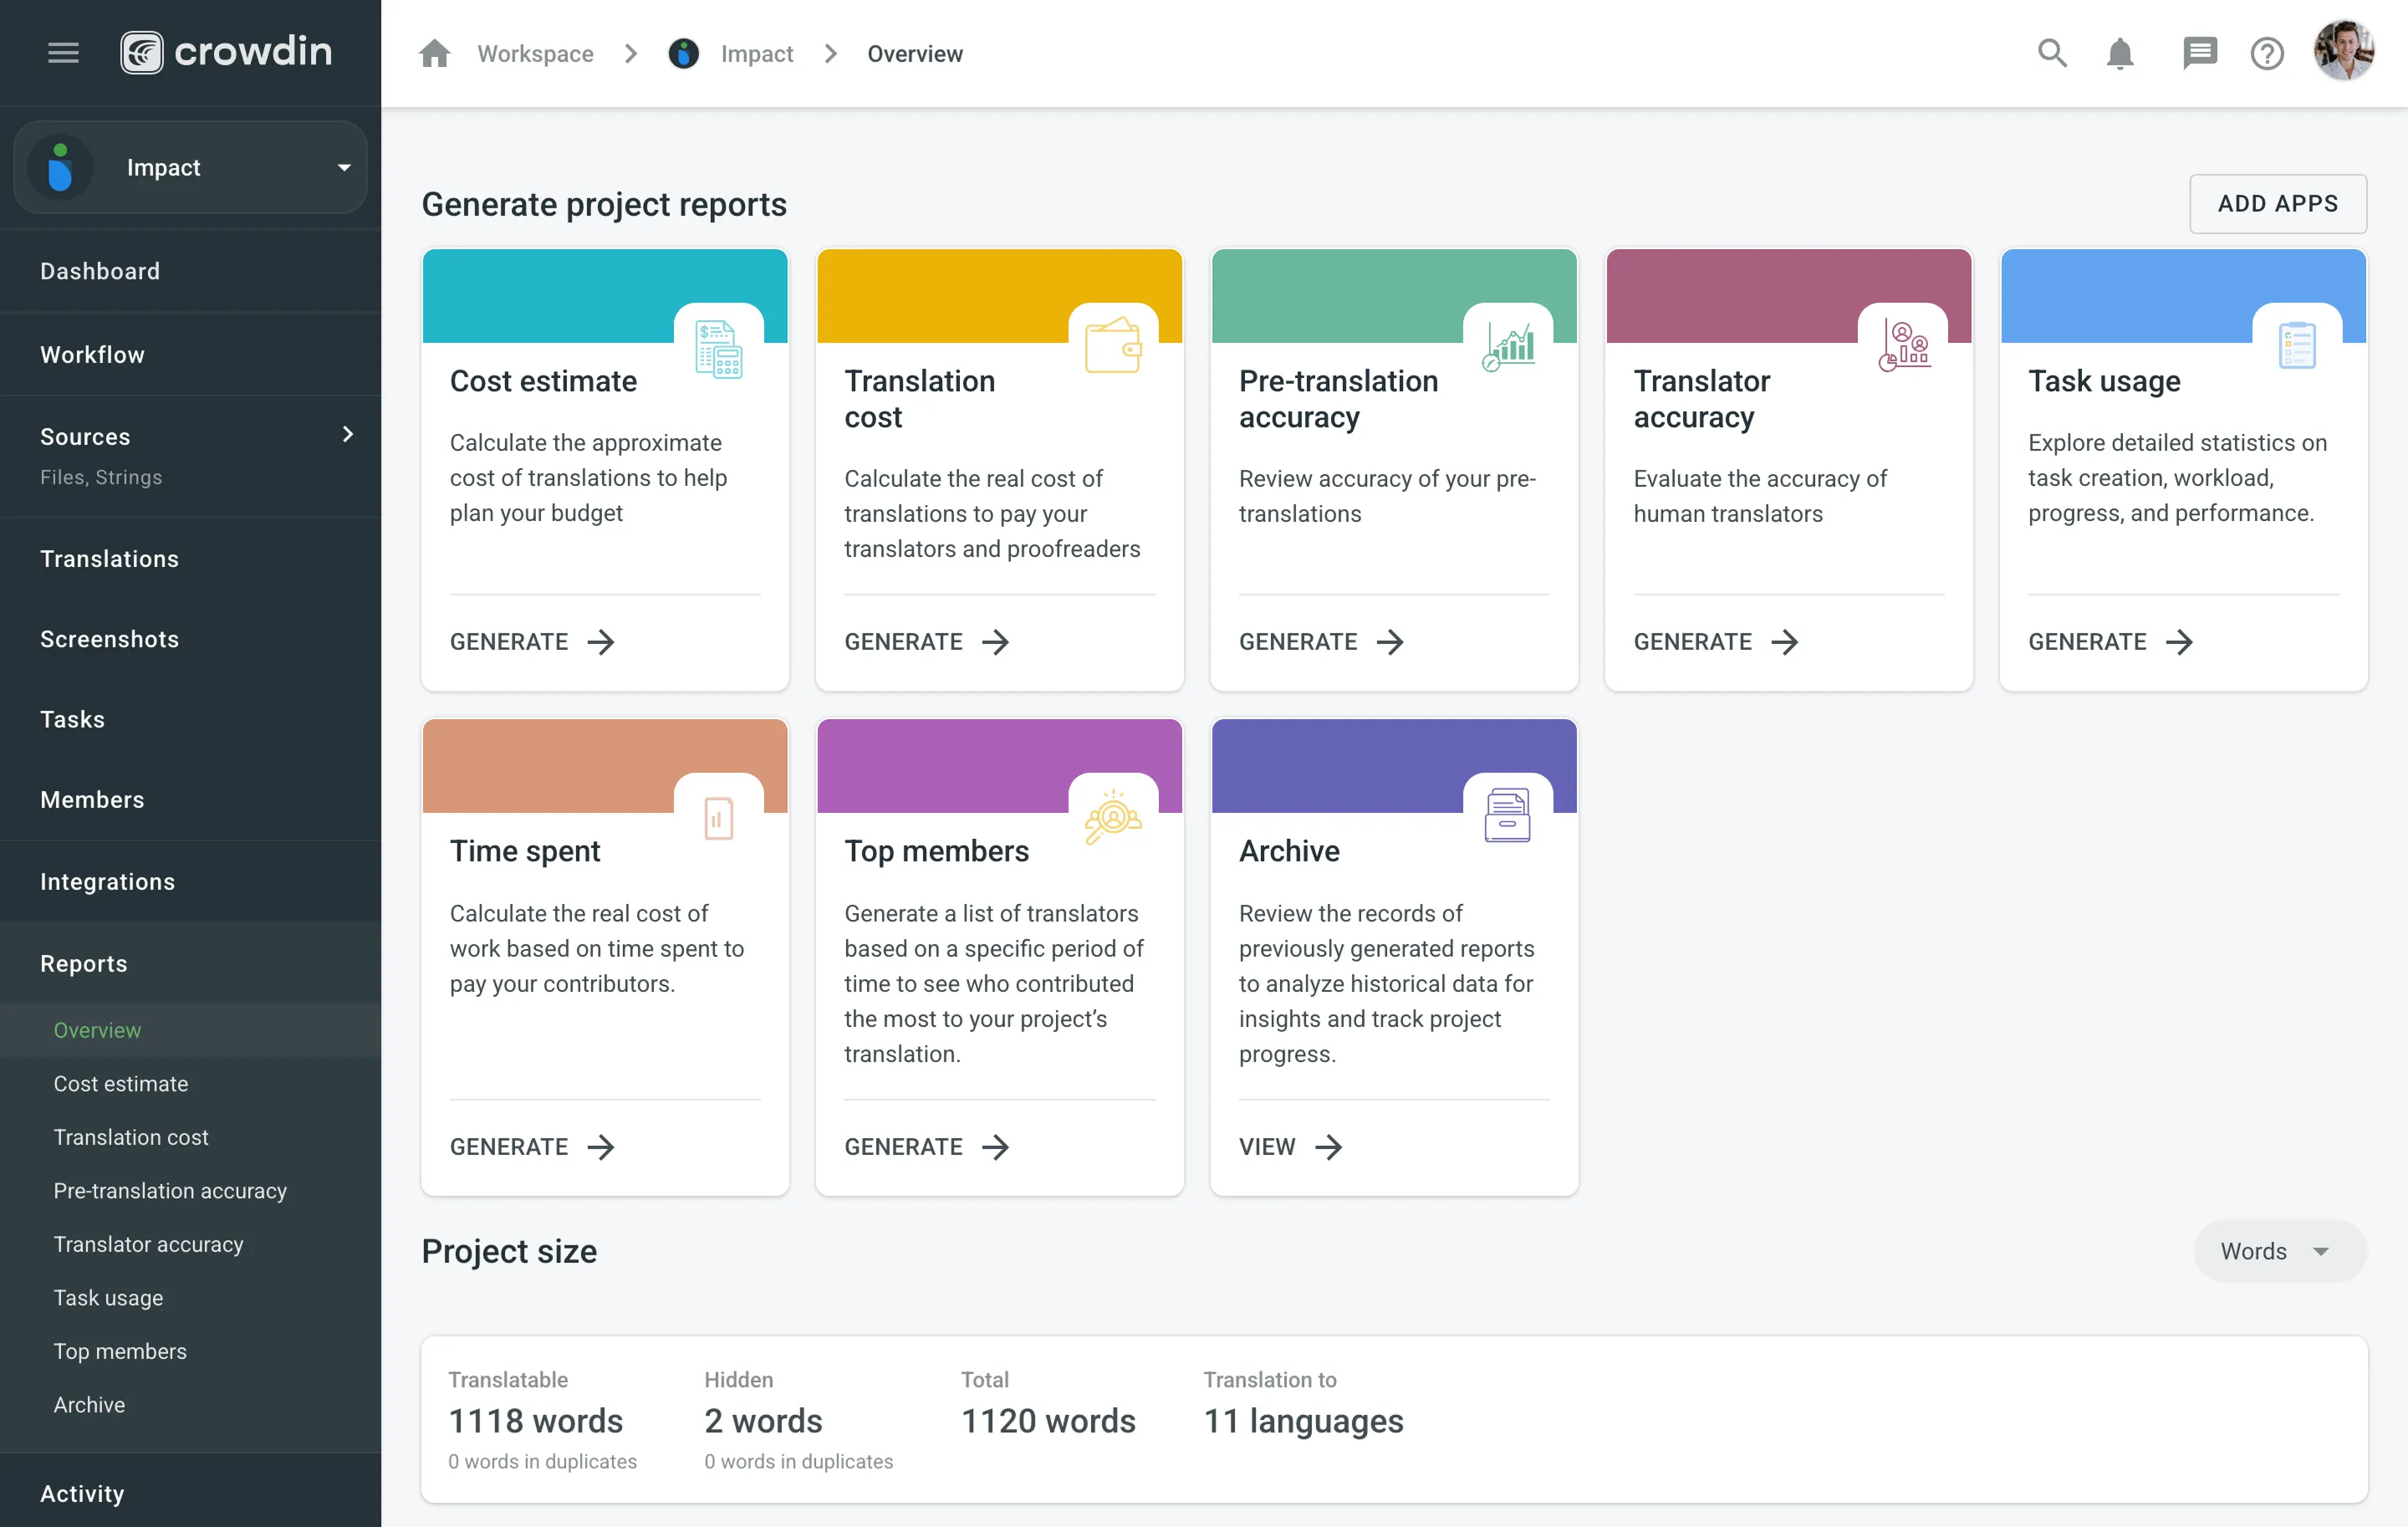
Crowdin Enterprise provides project-level, group-level and organization-level reports to help you track progress, evaluate translation accuracy, estimate and count costs, and measure contributor activity. To access them, open the Reports section from the project, group, or organization view.
The reports available to you depend on your manager role:
- Project Managers – can view reports for their assigned projects.
- Group Managers – can view reports for projects and groups they manage.
- Workspace Managers – can view reports across the organization, including project, group, and organization-level reports.
Available project-level reports include:
- Overview
- Cost Estimate
- Translation Cost
- Auto-Translation accuracy
- Translator Accuracy
- Top Members
- Archive
Available group-level and organization-level reports include:
- Overview
- Translation Cost
- Top Members
- Archive
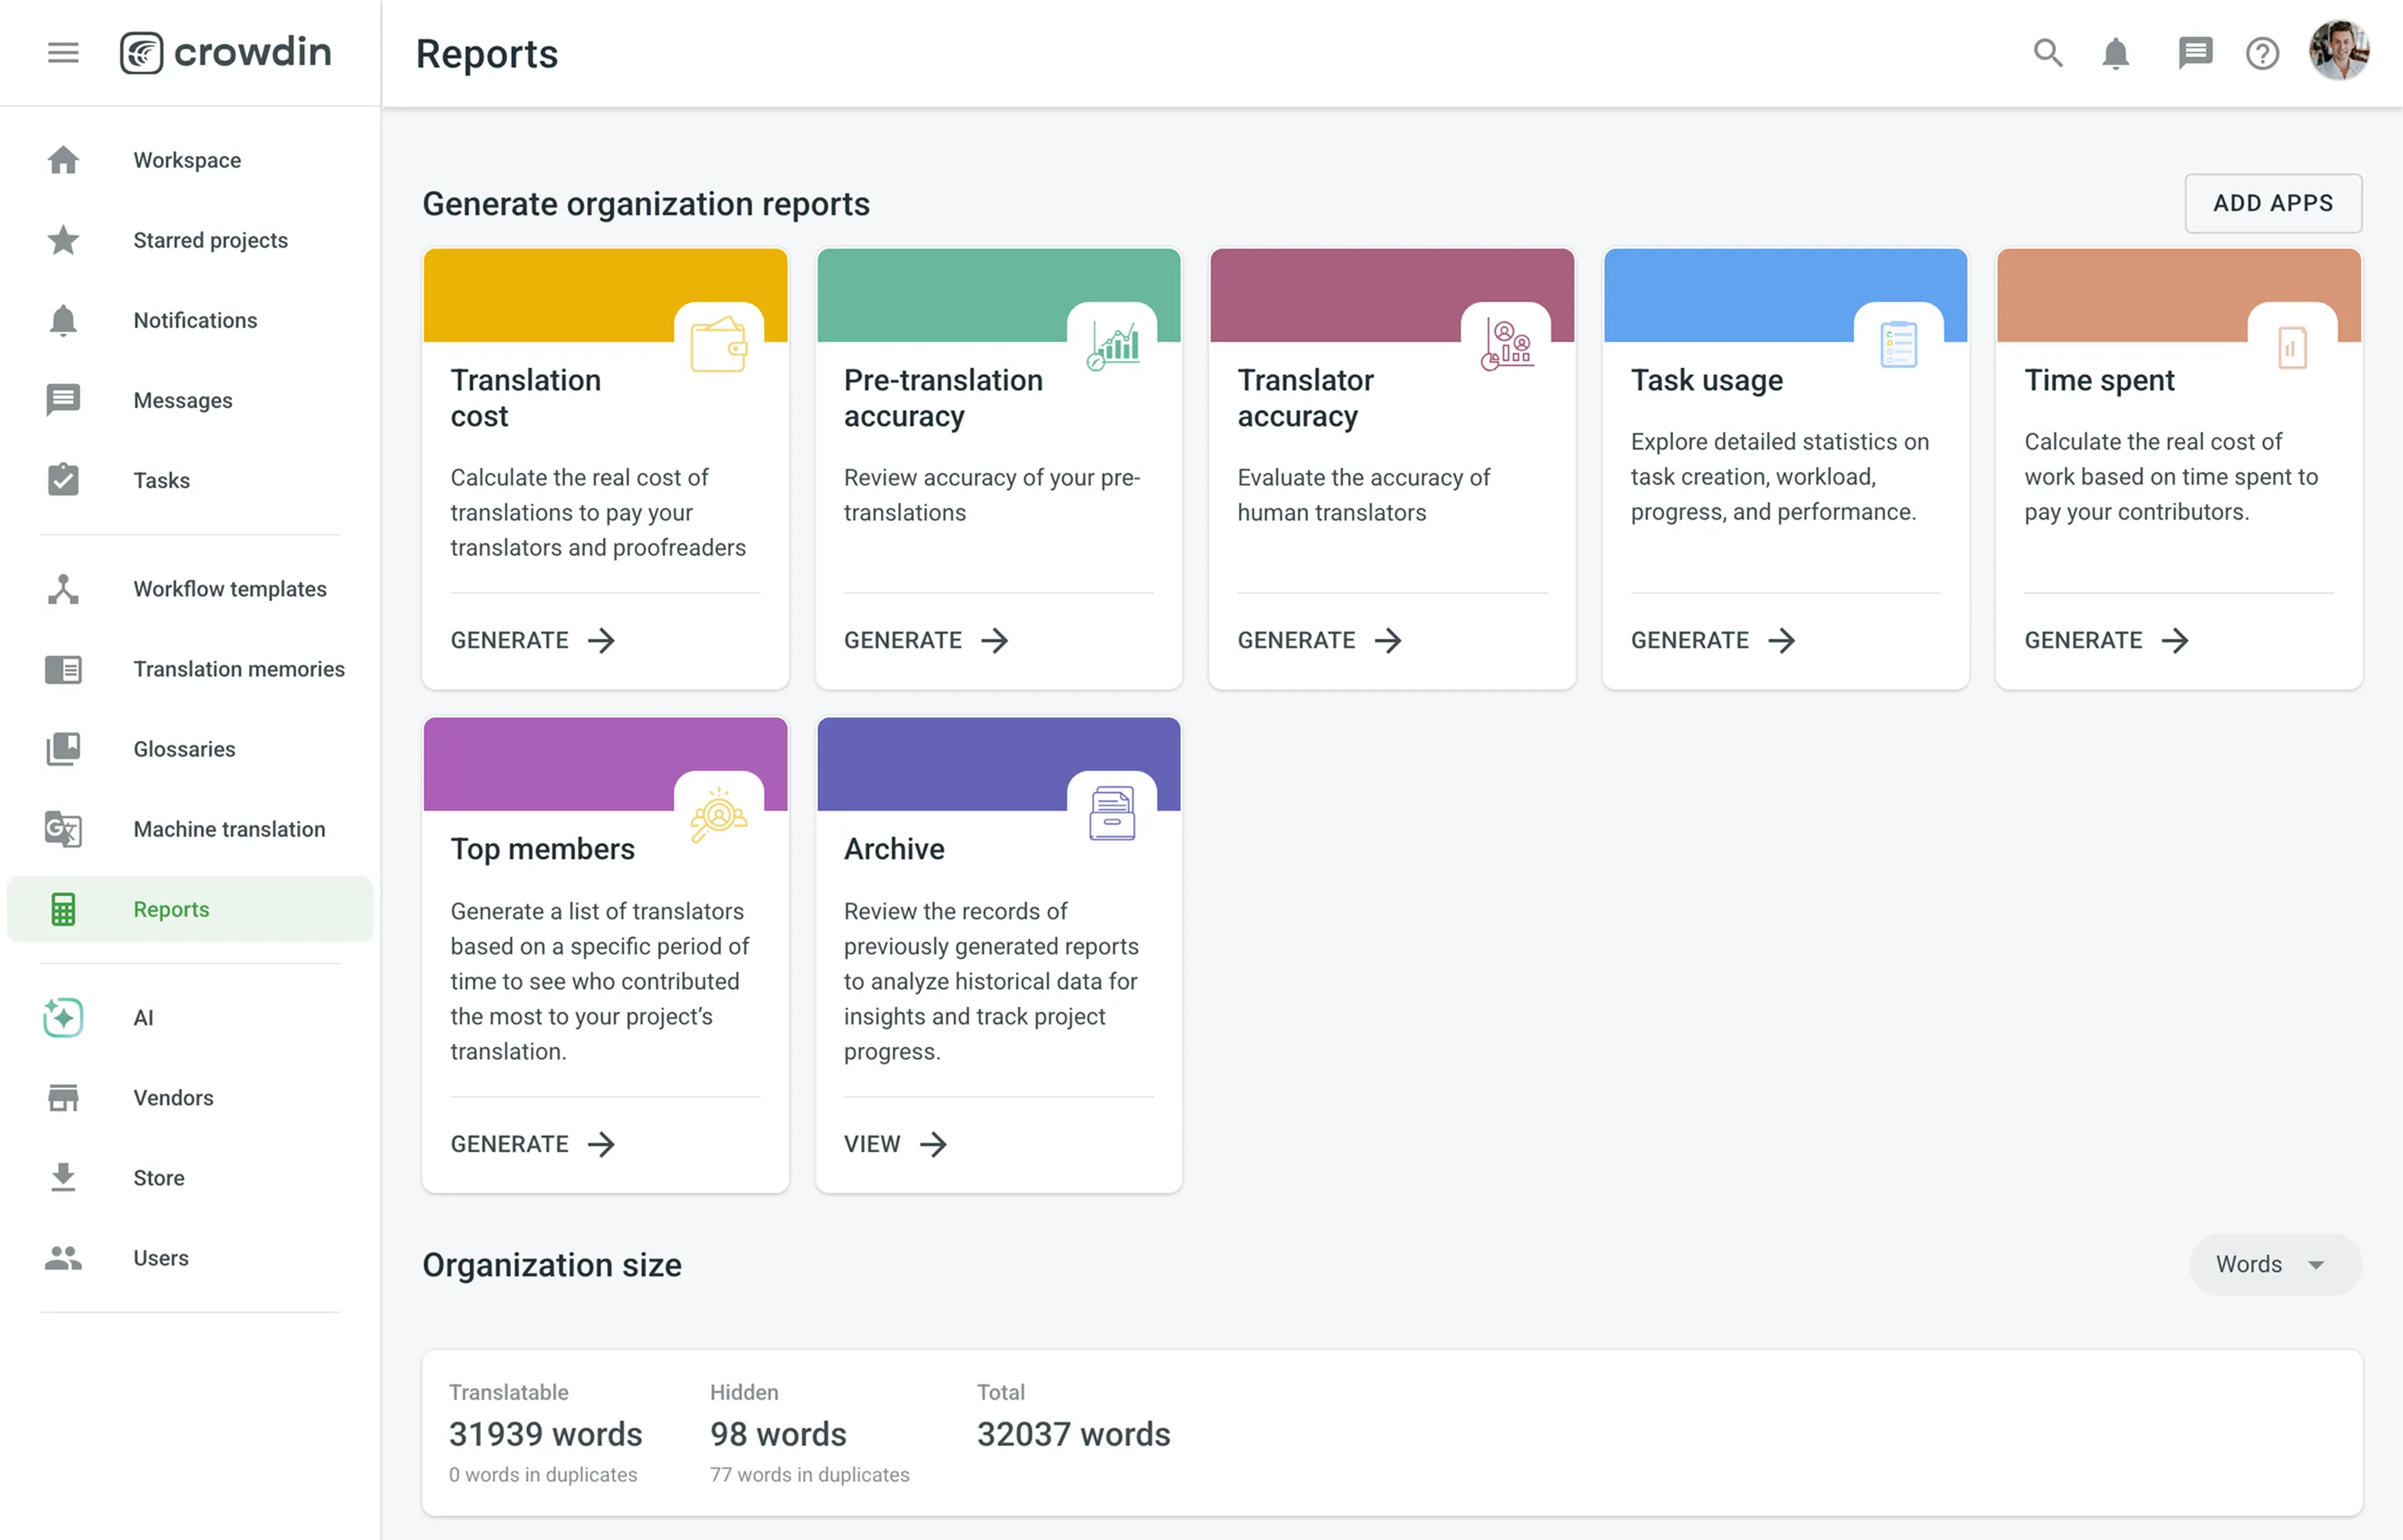
Read more about Project Reports and Organization Reports.
You can download translations manually using the web interface (UI) or set up automated delivery using integrations (e.g., GitHub or other connected tools), the Crowdin Enterprise API, the console client (CLI), or CDN Distributions.
Translations are downloaded according to the export settings configured in the project’s Settings section.
Read more about Downloading Translations.
The Global Search feature enables you to locate content and resources across your entire organization efficiently. You can access Global Search from most pages in your Workspace, within projects (excluding the Editor), and other sections.
Search results are displayed based on the role of the user performing the search. For example, a translator will only see resources assigned to them, while an organization admin can access all resources they have permissions for across the organization.
The Global Search opens in a dedicated page that allows for quick lookups and granular filtering.
To search for content and resources within your organization, follow these steps:
- Click in the upper-right corner of the Workspace or project page.
- You will be redirected to the Global Search page automatically.
- Enter your keywords or phrases in the search bar.
- Switch between the tabs on the left sidebar to view results categorized by different content types.
- (Optional) Customize your search scope using the available filters.
- Click to return to your Workspace.
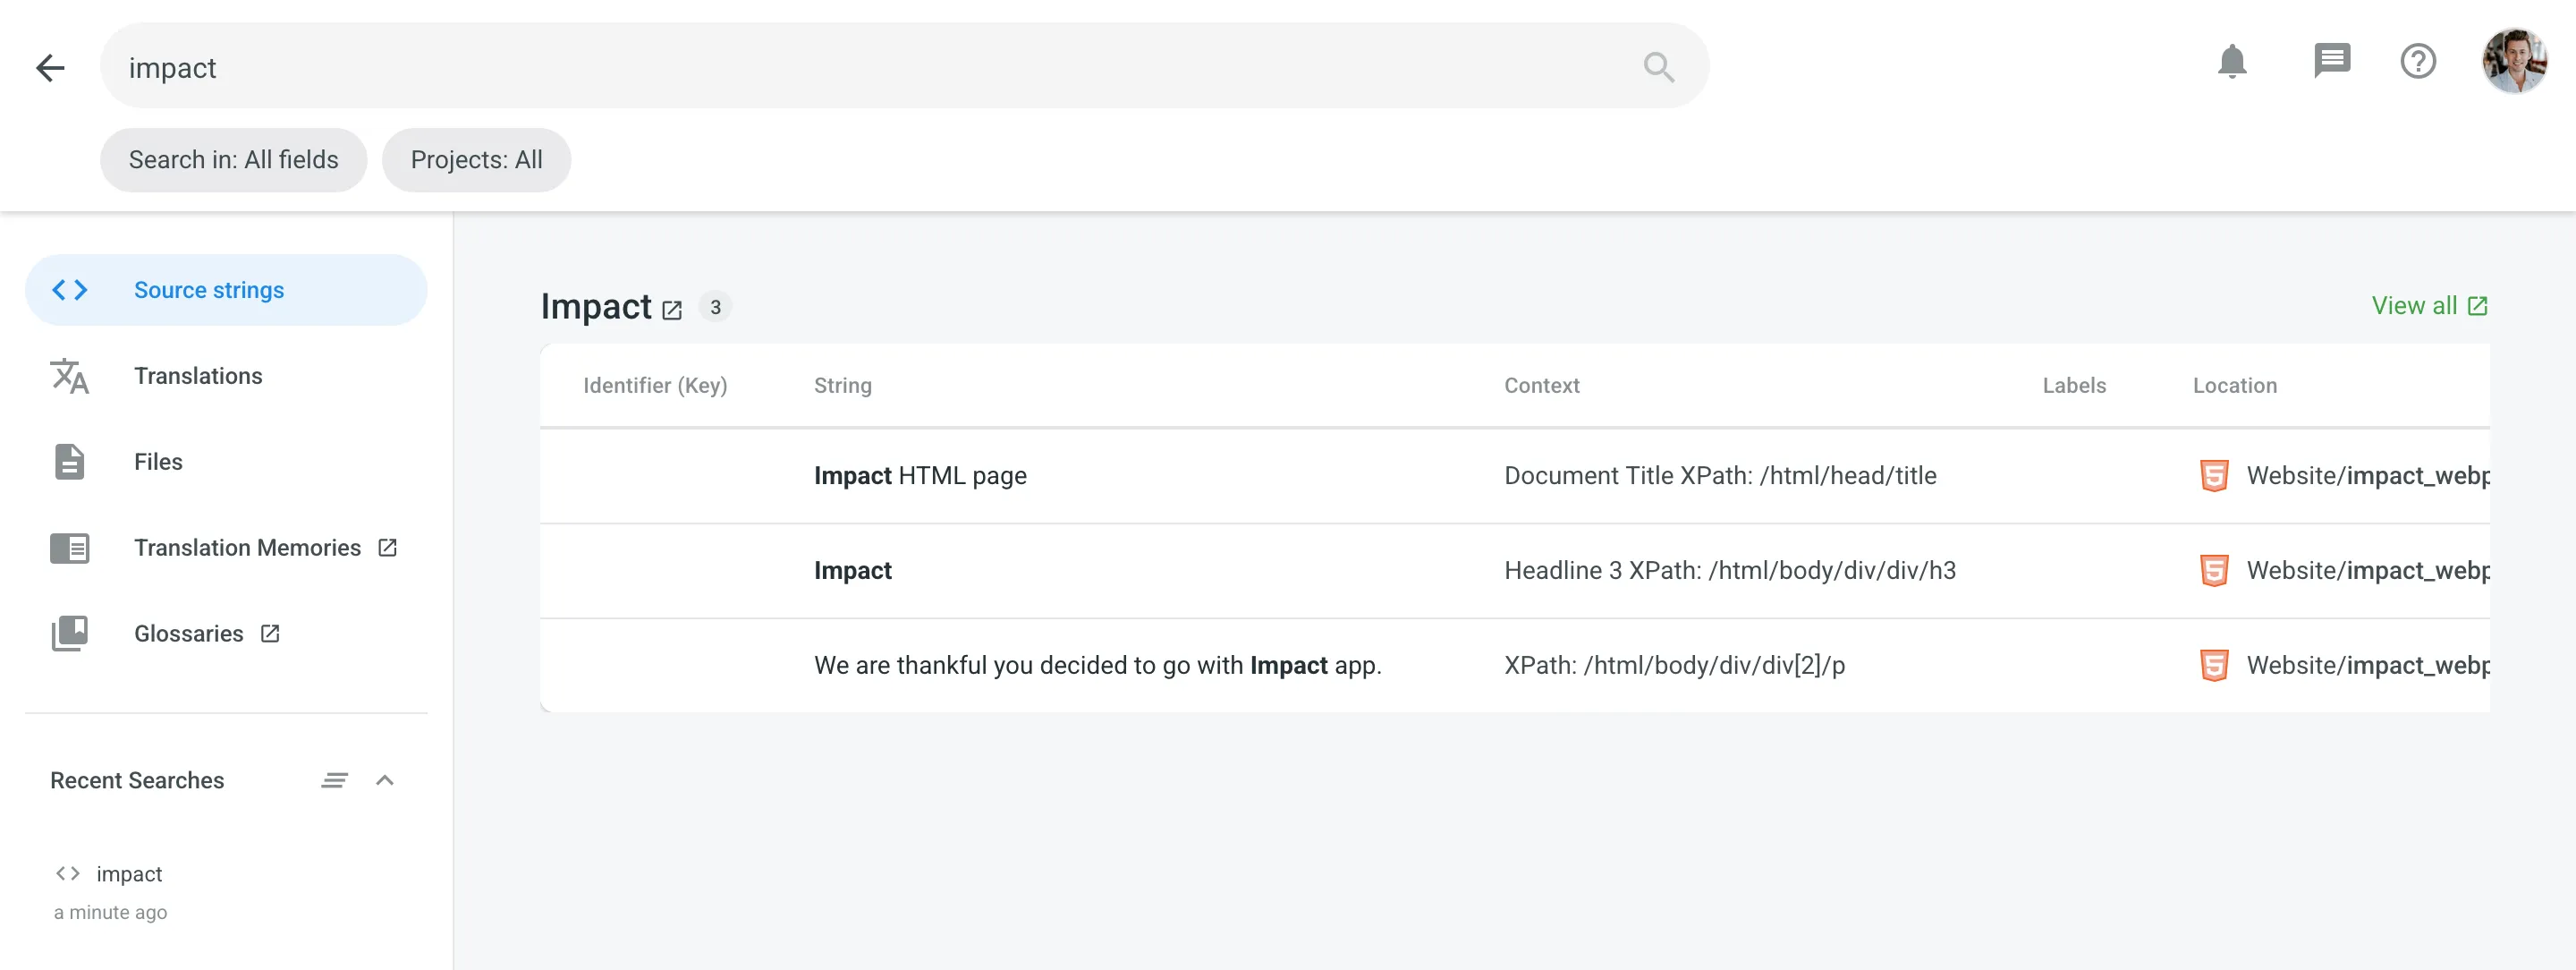
The search results are categorized to help you navigate different types of content. You can switch between these categories using the left sidebar on the results page. For easier navigation, matching terms in the results are highlighted in bold. For the Source strings, Translations, and Files categories, results are grouped by project. The project name header displays the total number of matches found within that specific project.
Search for source text, identifiers (keys), or context across projects. The results provide the following details:
- Identifier (Key): The unique string identifier assigned by developers.
- String: The source text containing the match.
- Context: Context information provided for the source string.
- Labels: Labels attached to the string for organization.
- Location: The file path or folder structure where the string is stored.
Search for target language translations to find specific terminology usage across different languages. The results provide the following details:
- Identifier (Key): The unique key of the string.
- Source string: The original source text.
- Context: Context information for the string.
- Translation: The translated text matching your query.
- Language: The target language of the translation.
- Labels: Labels attached to the string.
- Location: The file path where the string is stored.
Locate specific files by name within your projects. The results provide the following details:
- File: The name of the file.
- Title: The title of the file (if applicable).
- Location: The folder structure within the project.
- Words: The total word count of the file.
- Last modified: The date the file was last updated.
To search within your Translation Memories, click Translation Memories in the left sidebar. This action opens the All Records > Translation Units page in a new browser tab.
The search query you entered in Global Search is automatically carried over and applied to the Search field on the All Records page, displaying only the matching translation units.
Read more about Viewing and Filtering Translation Units and Segments.
To search for glossary terms, click Glossaries in the left sidebar. This action opens the All Records > Concepts page in a new browser tab.
Similar to Translation Memories, your search query is automatically applied to the Search field on the All Records page, allowing you to view matching concepts immediately.
Read more about Viewing, Searching, and Filtering Glossary Concepts and Terms.
To narrow down your search results, you can apply specific filters depending on the category you are viewing:
- Search in (Specific to Source strings): Choose the specific context for your search query.
- All fields: Search across all available data types.
- Source text: Search only within the source strings.
- Source key: Search for specific string identifiers (keys).
- Source context: Search within the context descriptions of strings.
- Projects: Limit your search to specific projects or search across All projects in your organization.
- Languages (Specific to Translations): Filter the results to show translations only for specific target languages.
Once you have located the desired content, you can interact with the results in the following ways:
- Open Project: Click the Project Name header to navigate directly to that project’s Dashboard.
- Open Editor (Specific String): Click on a Source String or Translation text to open the Editor focused specifically on that string.
- Open Editor (All Strings): In the Translations tab, click View all next to the project name to open the Editor filtered to show all strings with translation matches for your query.
- Open File: Click the File name to open the file in the Editor or click View all next to the project name to open the file manager filtered to show all files with file name matches for your query.
The Global Search panel stores your recent queries in the Recent Searches section at the bottom of the left sidebar, allowing you to quickly re-run previous searches.
Each entry displays the search query, the time elapsed, and a category icon (e.g., for Source strings) indicating the type of content searched. You can click any entry to immediately perform the search again. To manage your history, use the arrow icon () to collapse the list or click the Clear all icon () to remove all entries.
Have around 30 minutes and want one of our skilled Customer Success managers to walk you through your organization and help you implement best practices? Go ahead and Schedule a demo call to get a personalized tour and recommendations on how to best manage localization projects in your organization.