Uploading Source Files
Once you’ve created a project, the next step would be preparing source files for upload. Crowdin supports a wide range of file formats, including Android XML, iOS Strings, JSON, etc. When you have your files prepared, you can add them to your Crowdin project for translation.
Crowdin offers a few options for adding content to a project:
- Manually via the web interface (UI).
- Integrate your Crowdin project with the tools you already use. Explore available integrations on the Crowdin Store.
- Use the API or Developer Tool of your choice.
Usually, this task is accomplished by developers. You can invite your colleague developer to assist you with this step.
You can also use Crowdin sample files to test the translation workflows before starting your project with the actual source files.
To upload files via the web interface, follow these steps:
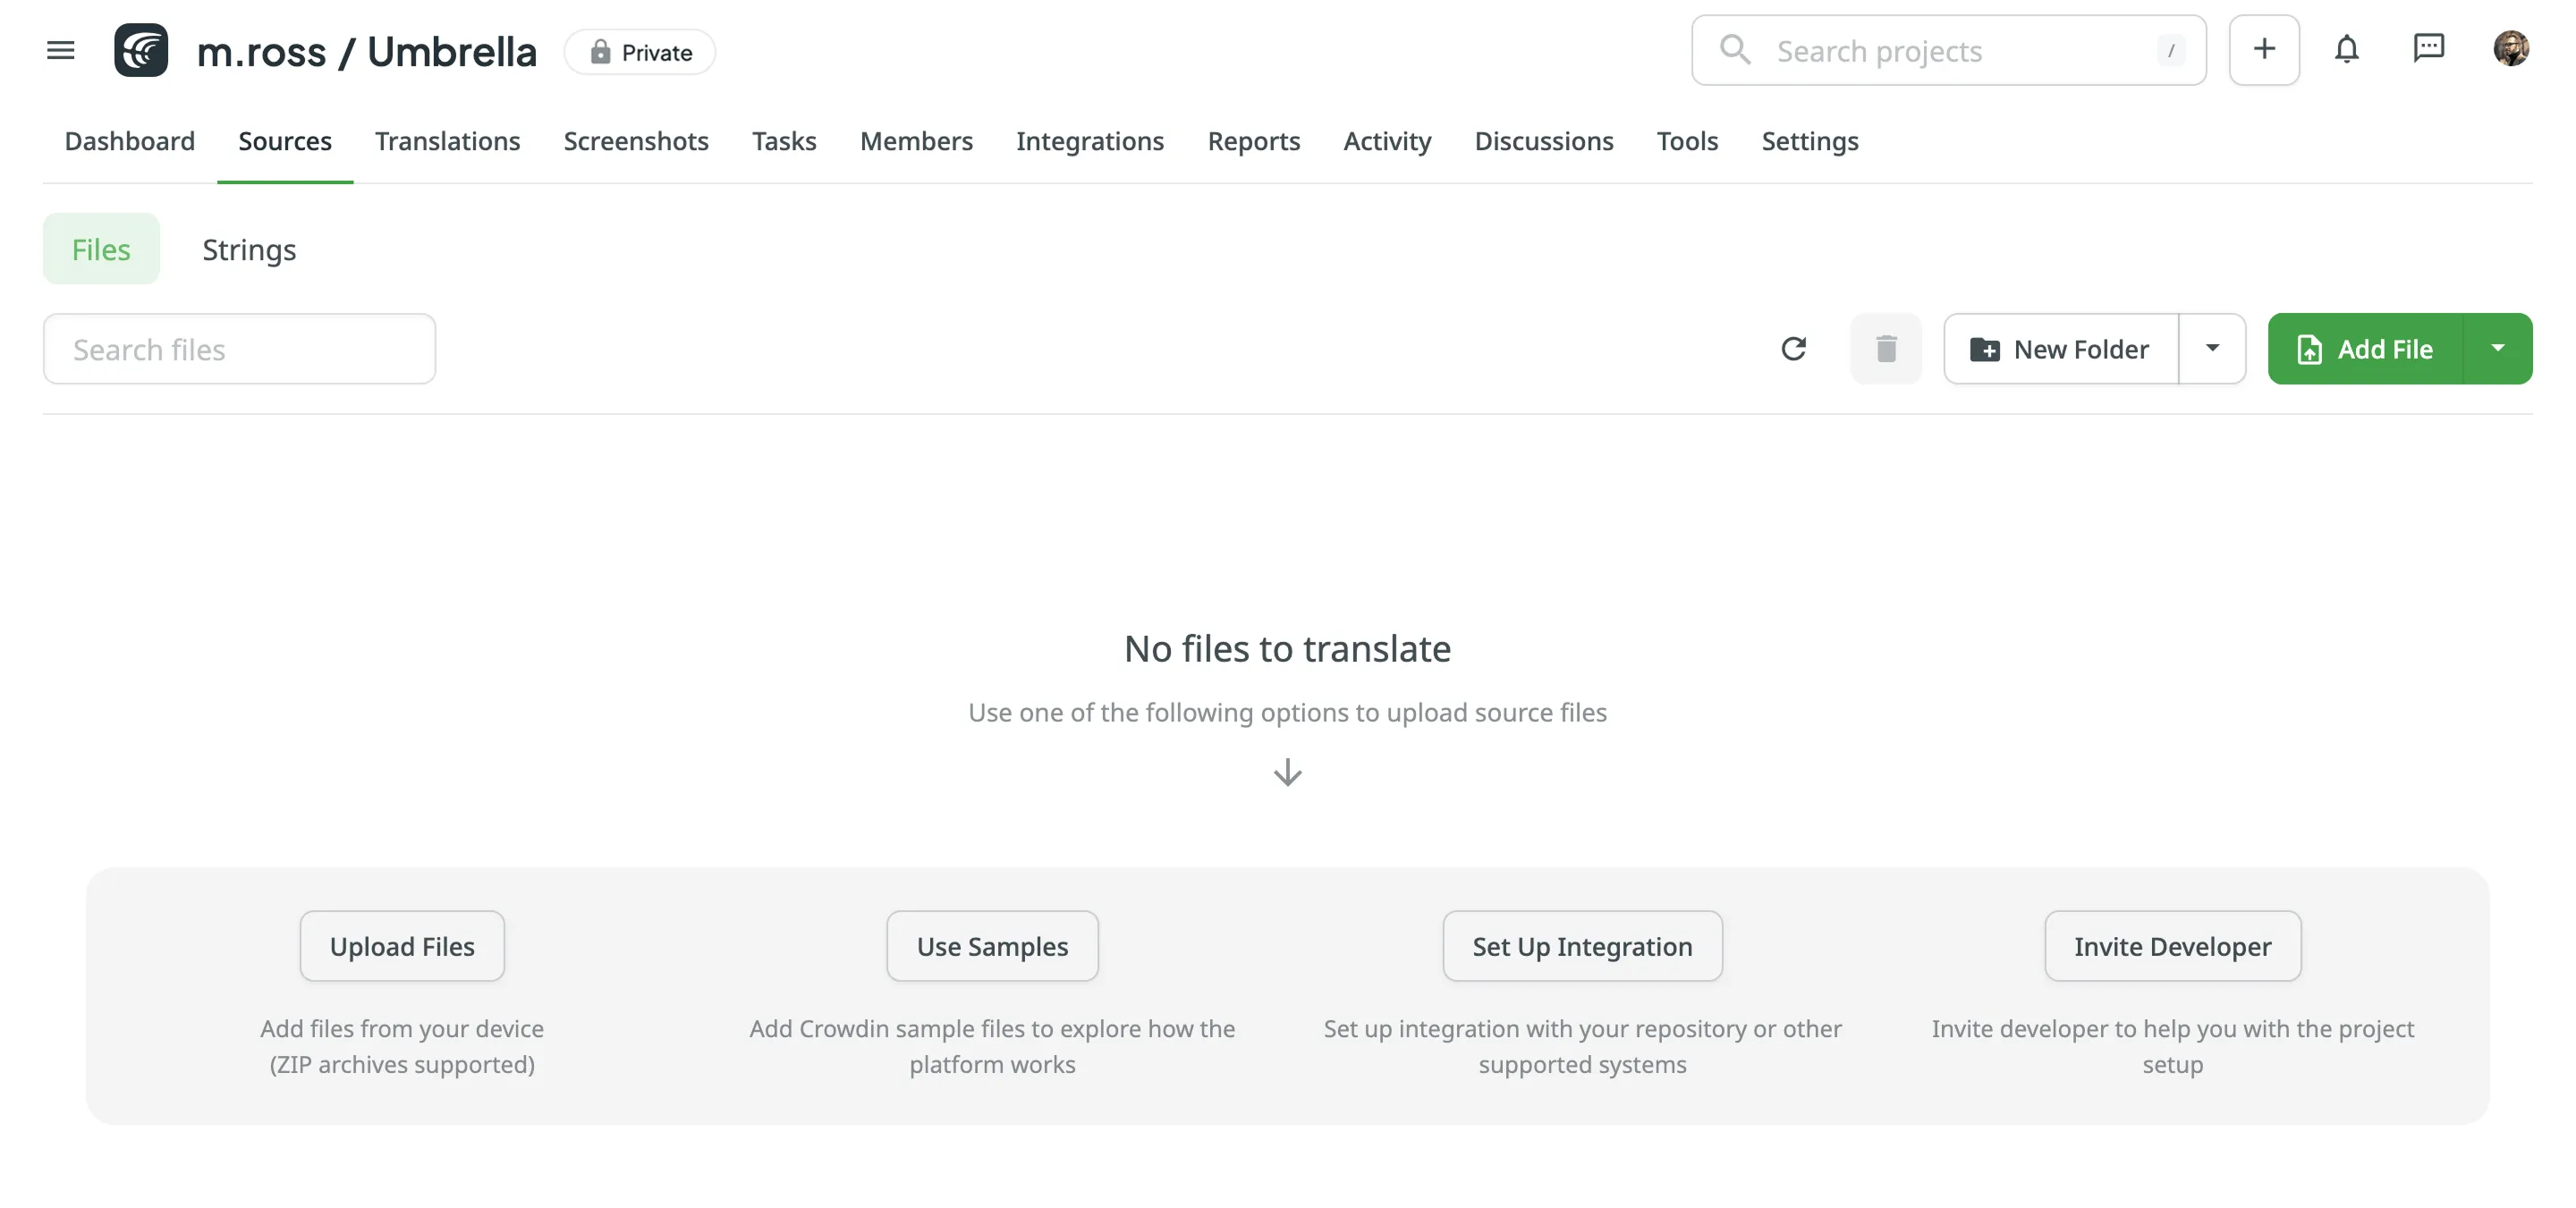
- Open your project and go to Sources > Files.
- Drag and drop files from your machine anywhere within the Files tab — to the root of the project or directly into an existing folder. You can upload ZIP archives if you want to add a structured set of folders and files.
- (Optional) Click Upload Files or Add File to add files, Use Samples to test translation workflows, Set Up Integration to synchronize content automatically, or Invite Developer / Translation Requestor if content uploads will be handled by your developer teammate. You can also click the drop-down arrow next to the Add File button to access additional options, such as Create String Vault (adds an empty CSV file) or another Set Up Integration shortcut.
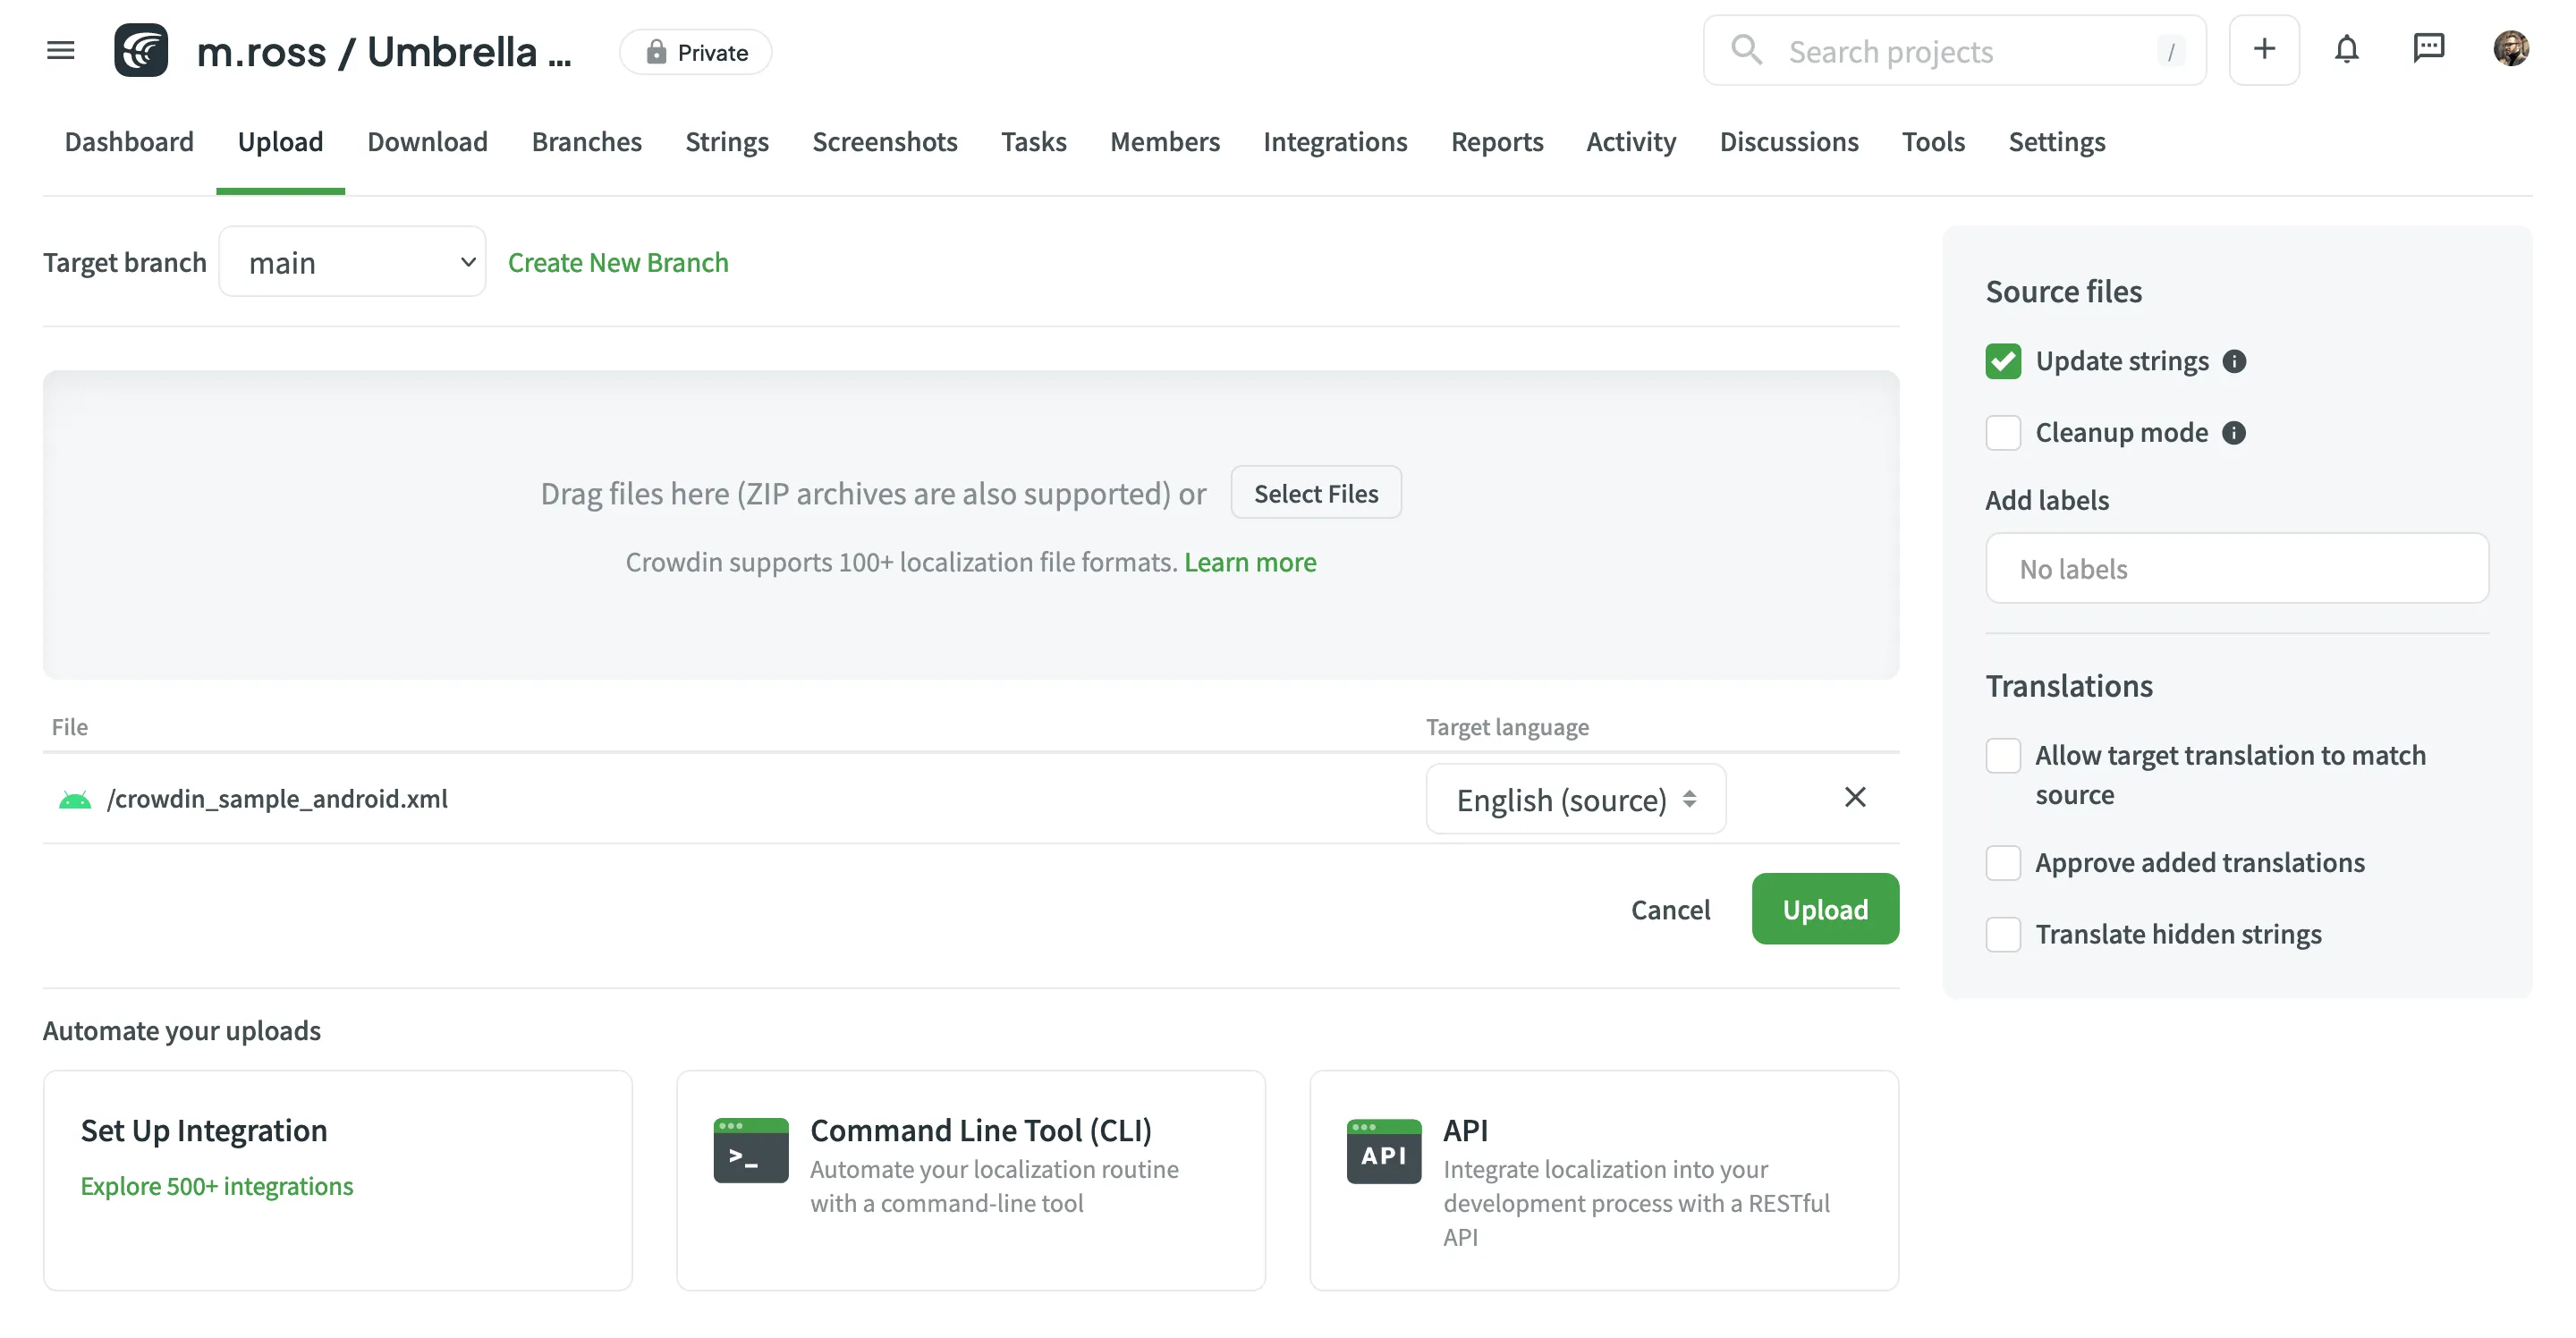
- Open your project and go to the Upload tab.
- Select the target branch to which you’re uploading source files. By default, the
mainbranch is selected. Create new branches if needed. - Drag and drop files from your machine, or click Select Files. You can also upload ZIP archives if you want a set of files to be added.
- Crowdin automatically tries to detect whether you’re uploading source content or translations. Verify the detection is correct and adjust the language settings if needed (e.g., English (source) should be selected for source files if the project’s source language is English).
- (Optional) In the Source files section, to the right of the uploaded file list, configure advanced source file import settings.
- Click Upload to finish uploading the source content.
Read more about project types.
Some file formats, such as XML, CSV, XLSX, and others, might require additional configuration.
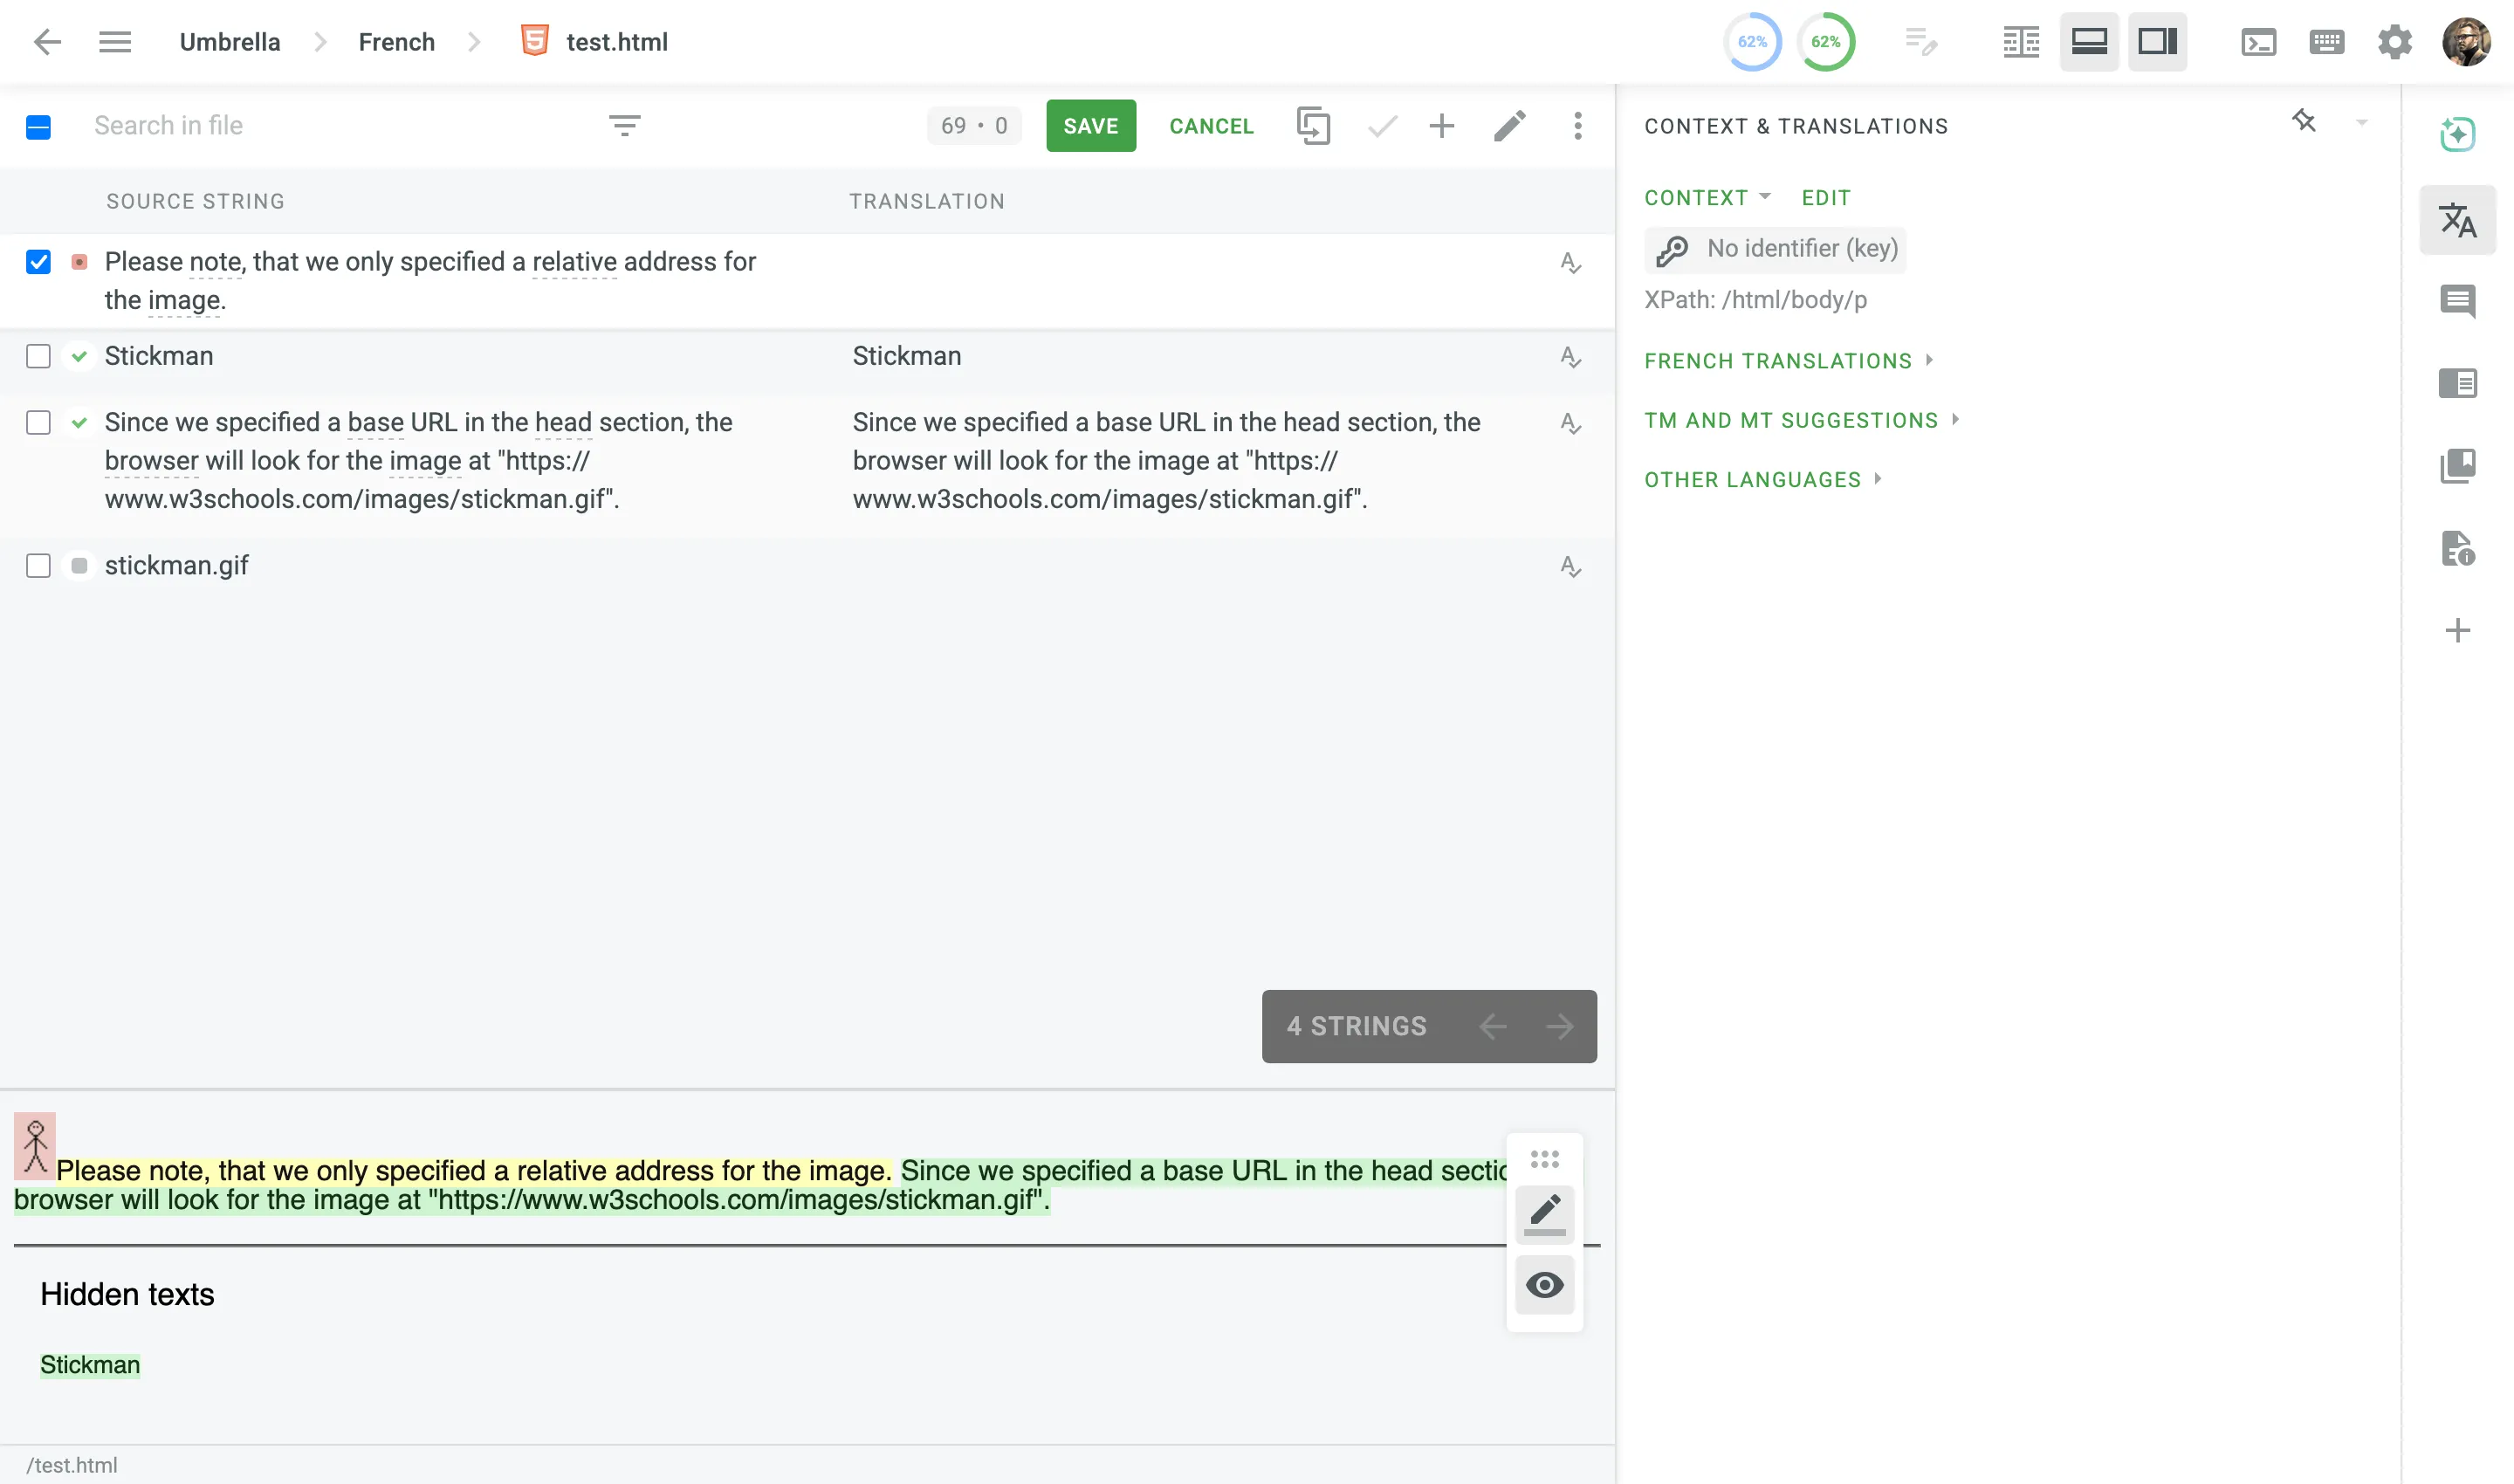
To display images and styles in the HTML file used outside of the website, where it belongs, add the <base> tag to specify the base URL/target for all relative URLs in a document.
<html> <head> <base href="https://www.w3schools.com/images/"> </head> <body> <p><img src="stickman.gif" width="24" height="39" alt="Stickman">Please note that we only specified a relative address for the image. Since we specified a base URL in the head section, the browser will look for the image at "https://www.w3schools.com/images/stickman.gif".</p> </body></html>Once you add the <base> tag, translators will see images in the HTML files when translating in the Editor.
You can configure the desired system behavior for uploaded source files in string-based projects using the available options:
- Update strings – update strings with the same identifiers. By default, this option is selected.
- Cleanup mode – remove previously uploaded strings not present in the newly uploaded file. By default, this option is cleared.
- Add labels – tag uploaded strings with the selected labels. When uploading source files, Crowdin also adds system labels that include the source file name.