Language Settings
In the Languages section, you can manage your project source and target languages and configure language mapping to use custom language codes.
The source language is the language you’re translating from. If you want to change the source language for your project, select a new language from the drop-down list and click Update.
Here are a few points you should be aware of when changing the project’s source language:
- Please note that there might be a plural form mismatch for imported strings depending on the new source language. For example, some plural forms might not be displayed in the Editor, or some plural form translations might be used in other ones on translation export. We recommend updating the source files if the new source language has different plural forms than the initial one.
- If you had an opened browser tab with the Editor during the source language update, you might need to refresh it for changes to take effect and continue translating from the new source language.
The Target Languages section allows you to add or remove target languages in your project, copy the target languages list from one project to another, and add custom languages.
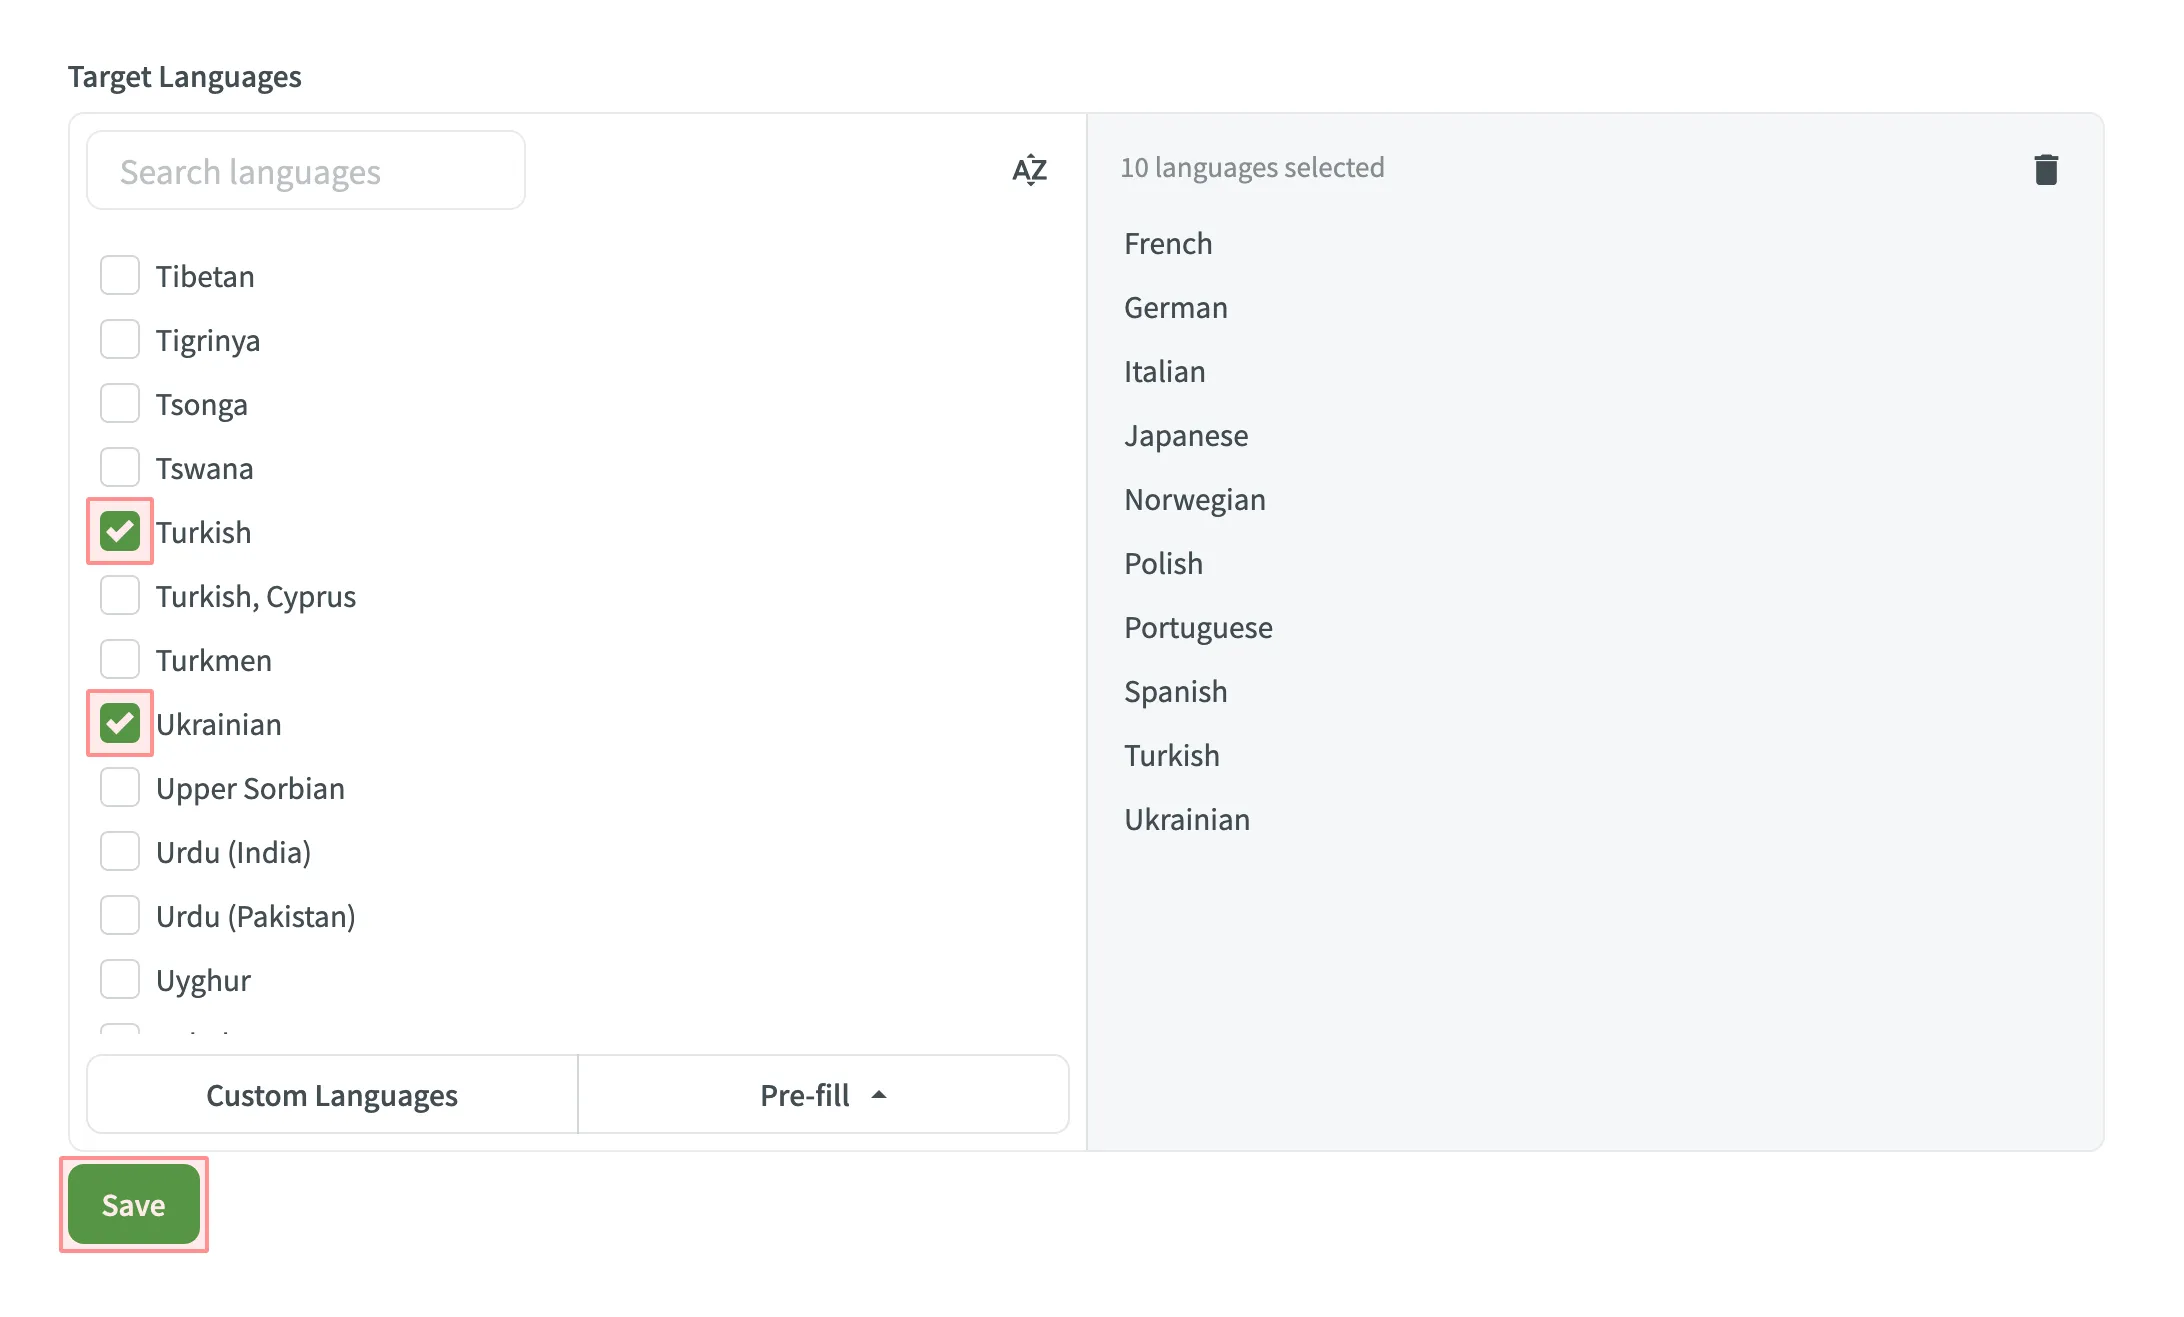
You can update your target languages anytime. To add or remove target languages in your project, follow these steps:
- Open your project and go to Settings > Languages.
- In the Target Languages section, you can make the following changes:
- Select the languages you want to add to the project in the left panel.
- Click on the languages you want to remove from the project in the right panel.
- Click Save.
If you translate multiple projects into the same target languages, you can copy the target languages list from one project to another in a few clicks:
- Open your project and go to Settings > Languages.
- In the Target Languages section, click Pre-fill and select Copy From Project….
- Select the project you’d like to copy target languages from and click Choose.
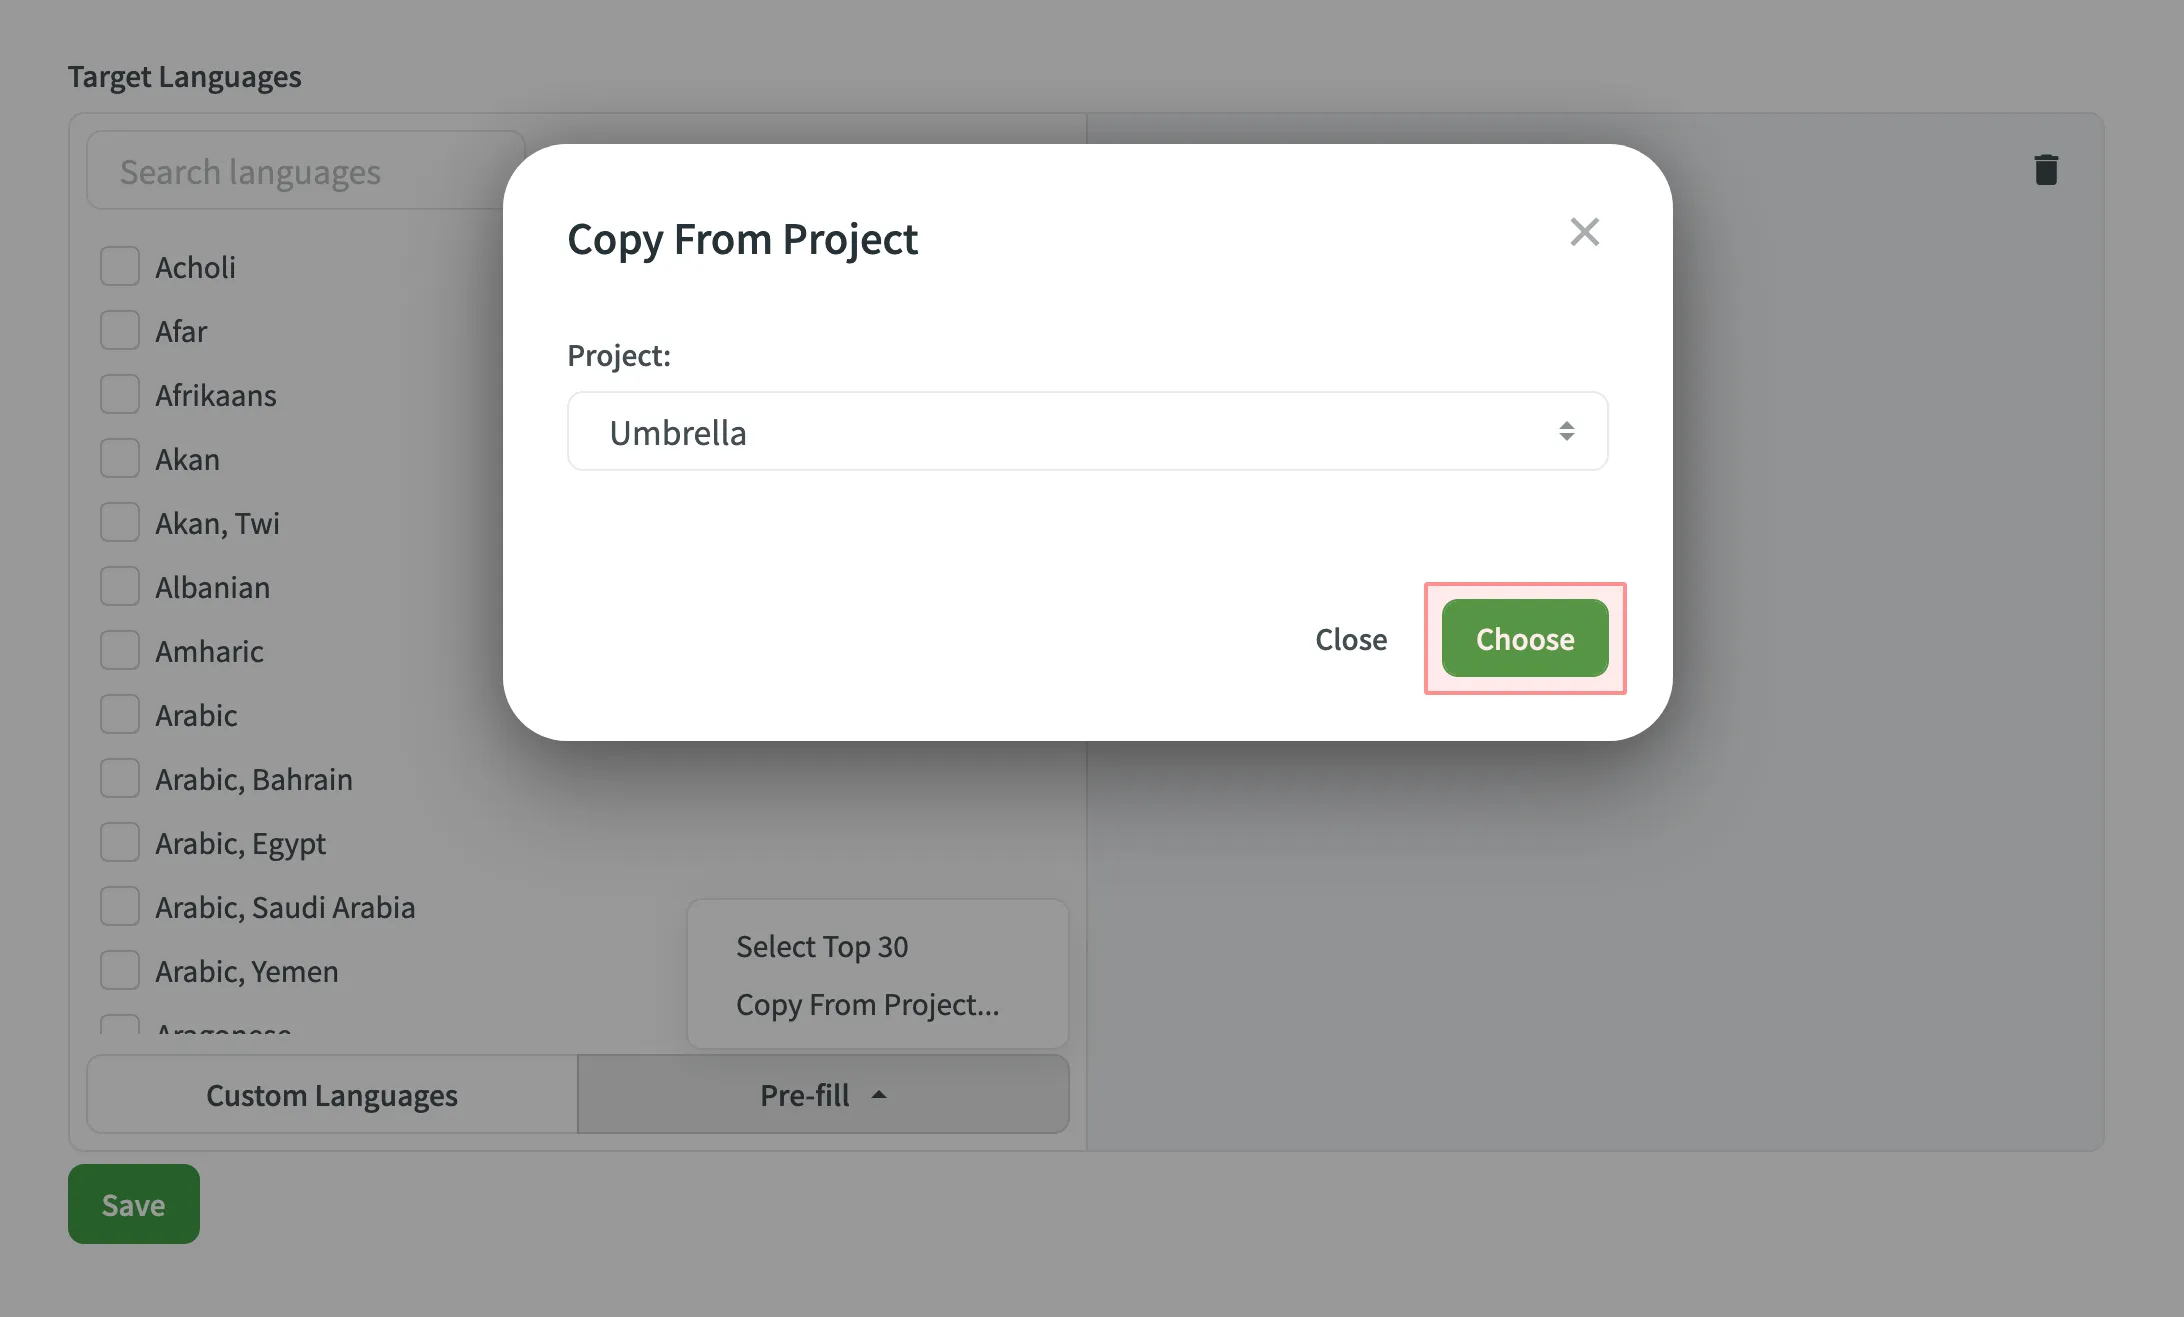
- Click Save.
If you’d like to translate your project into rare or less common target languages that are not officially supported at the moment, you can still add them as custom languages.
To add a custom language, follow these steps:
- Open your project and go to Settings > Languages.
- In the Target Languages section, click Custom Languages.
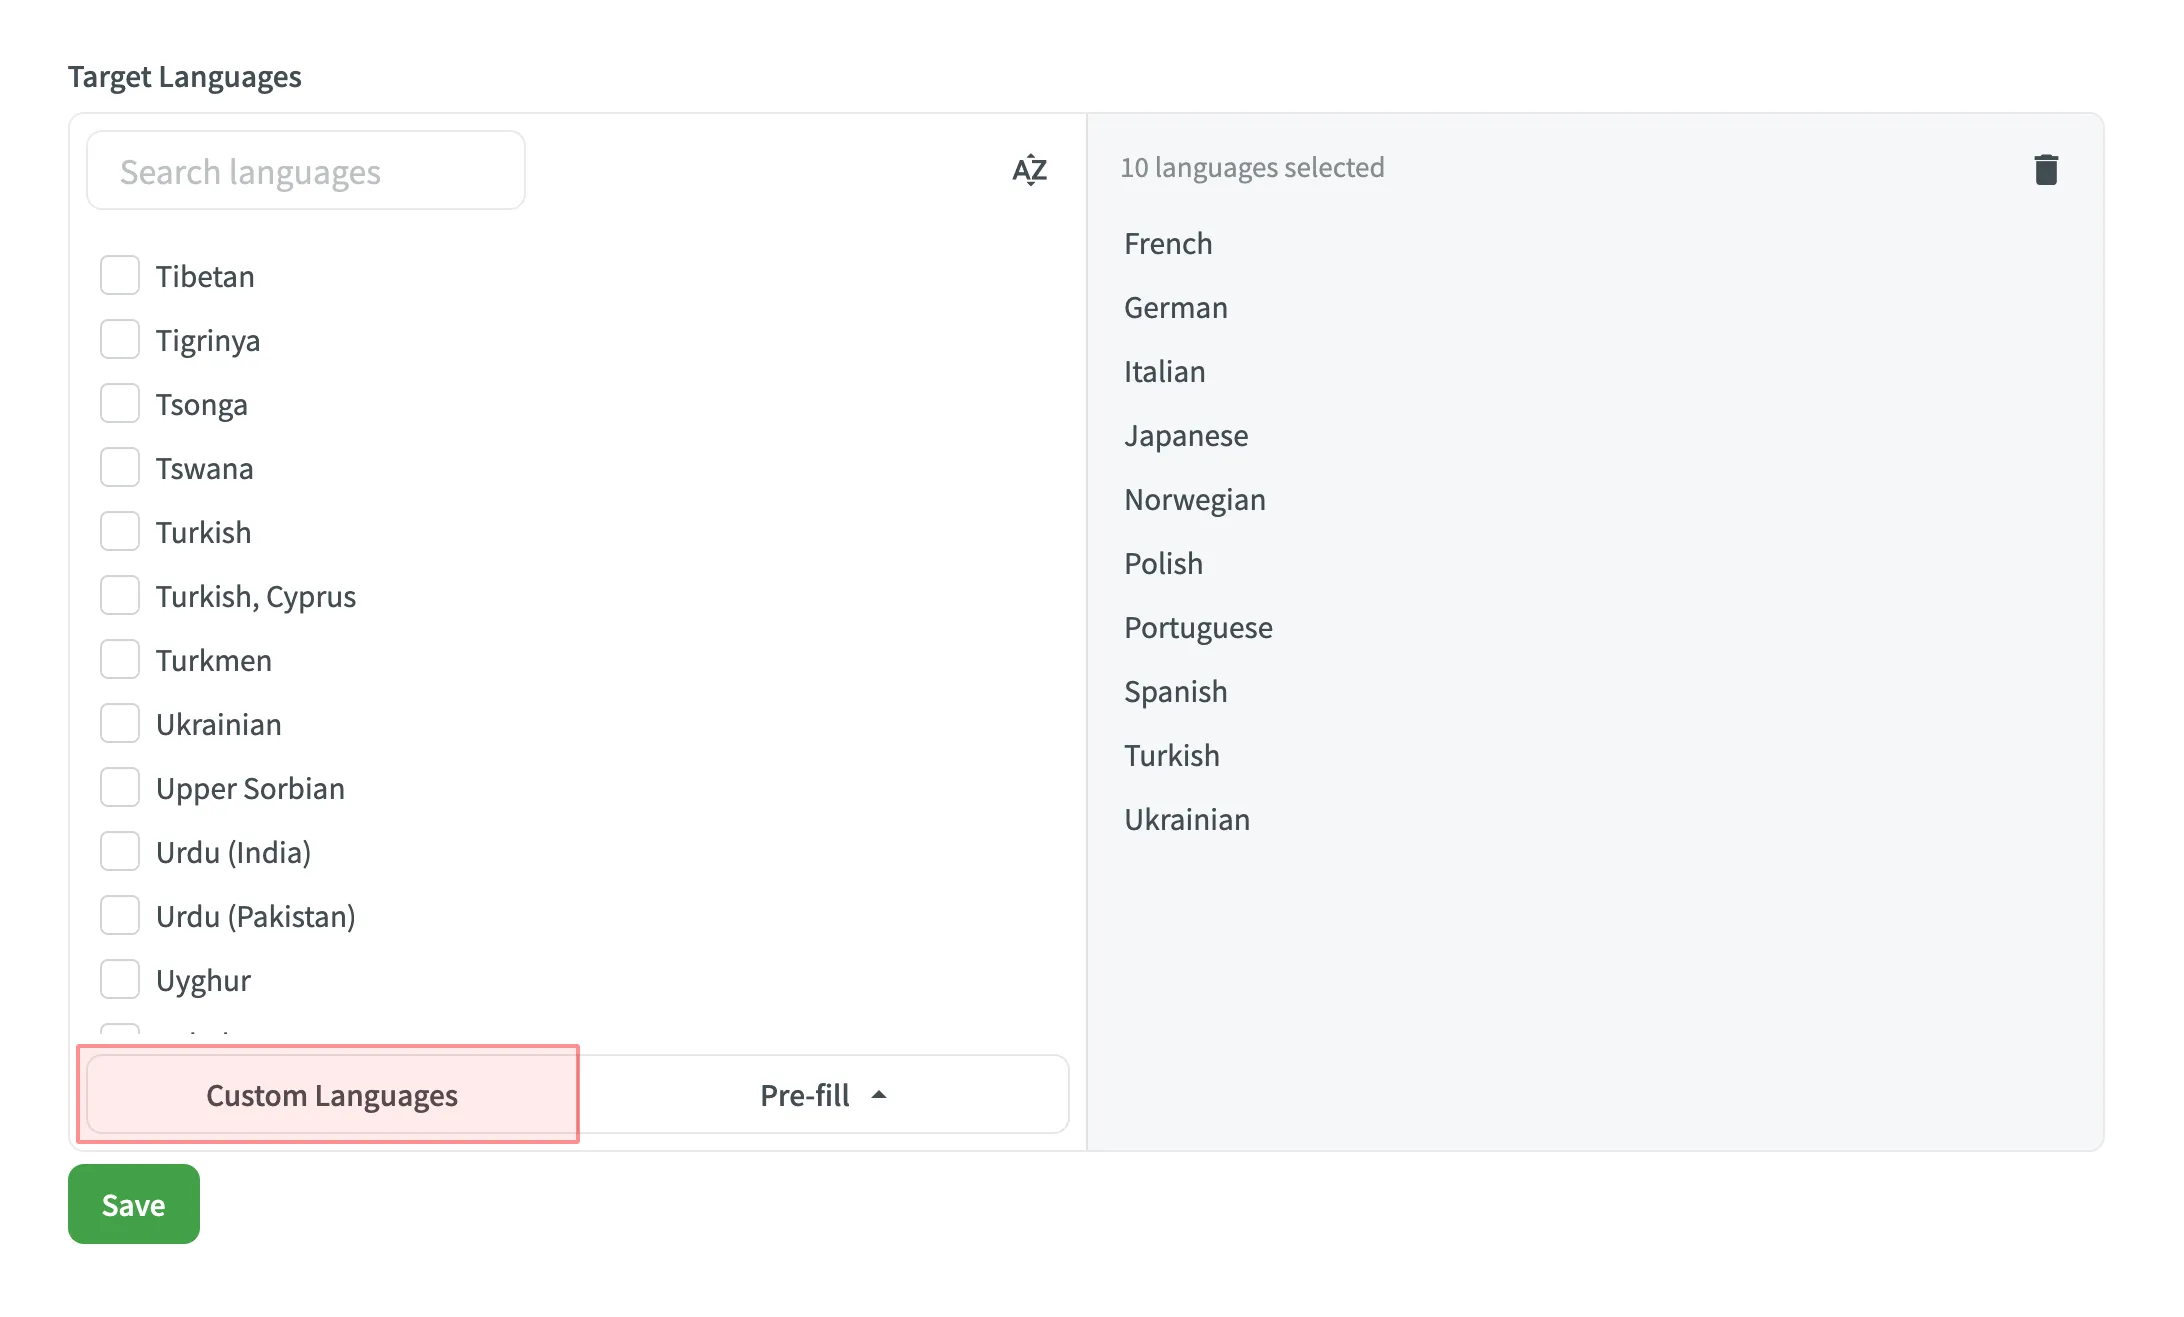
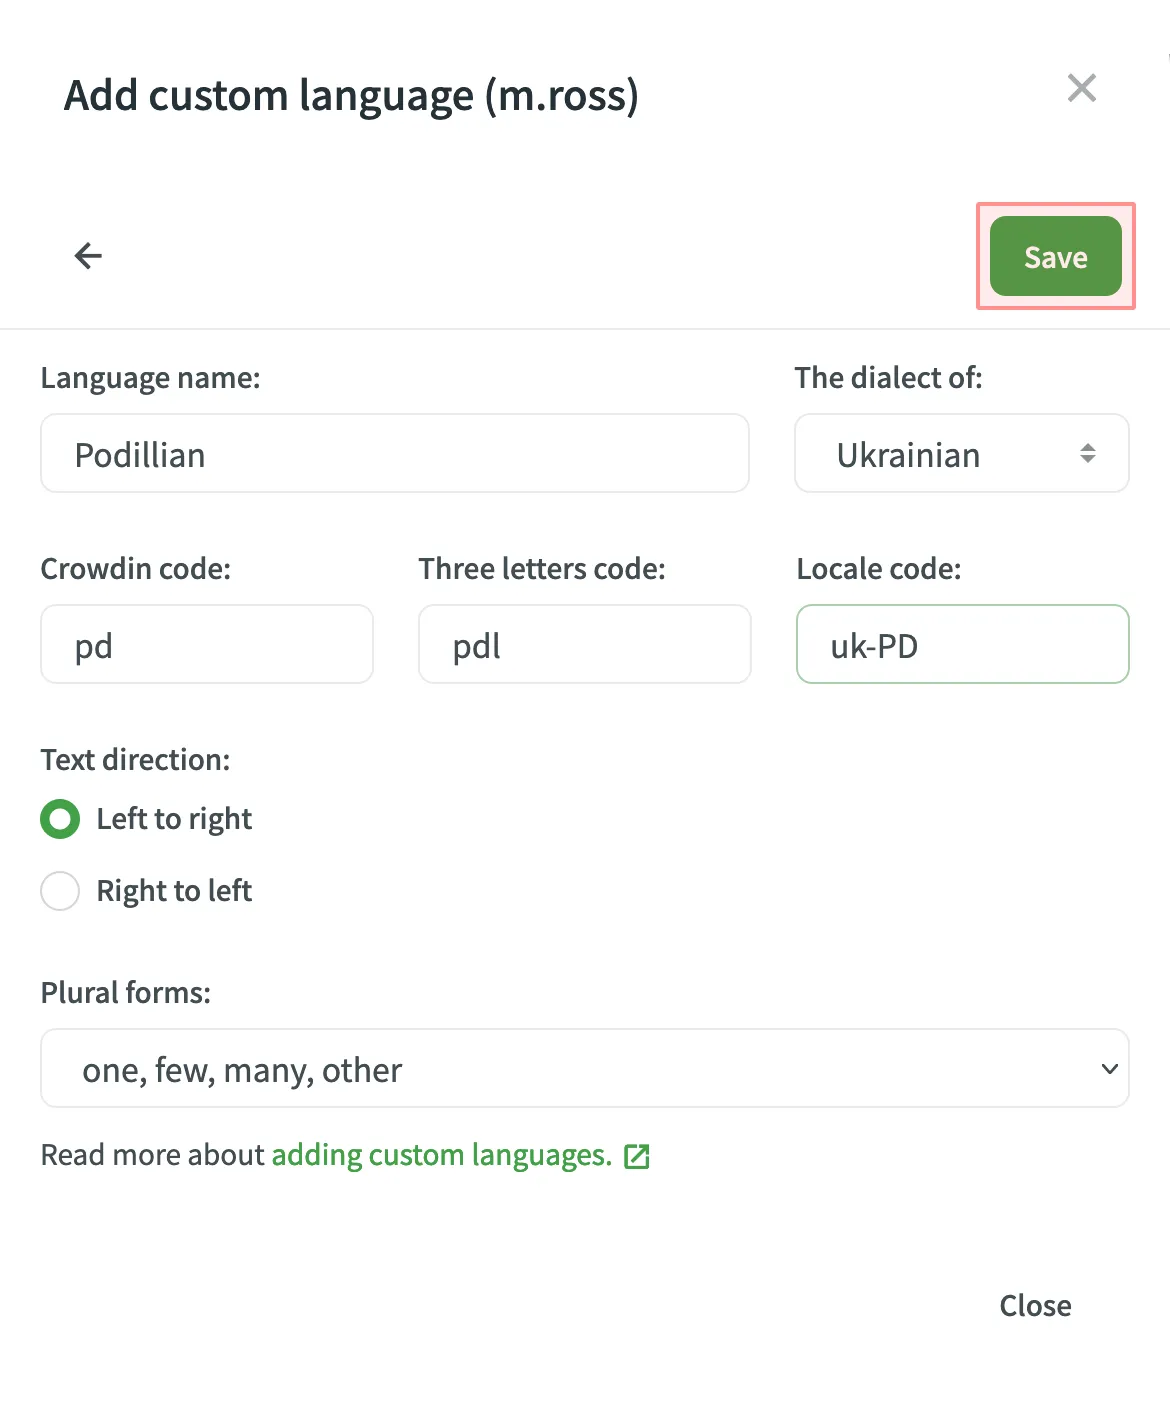
- Click Add.
- Specify a language name.
- If your custom language is a dialect of any of the supported languages, select it from The dialect of drop-down menu.
- Fill in language code fields.
- Set the preferred text direction and plural forms options.
- Click Save.
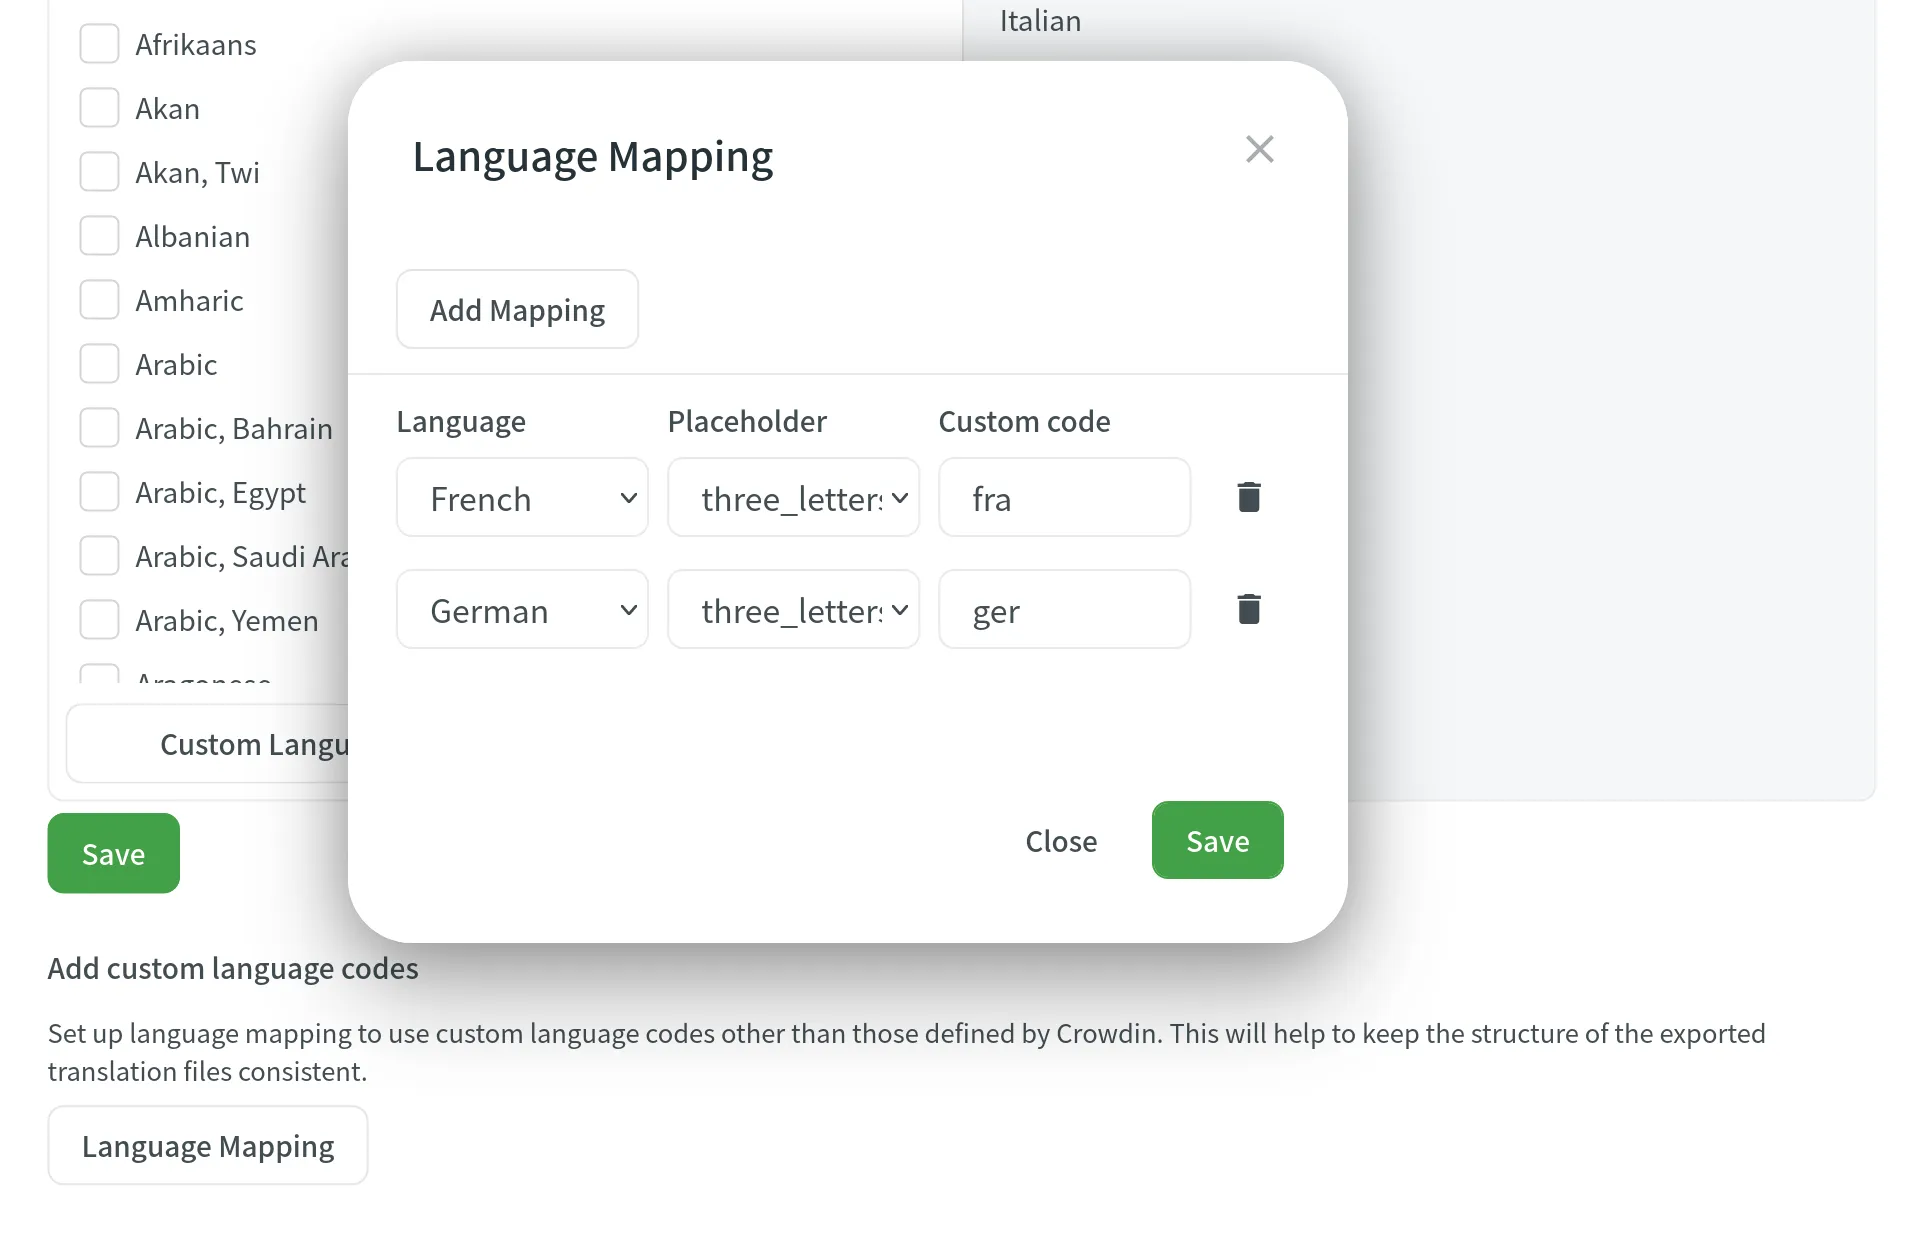
To add language mapping, follow these steps:
- Open your project and go to Settings > Languages.
- Scroll down to the Add custom language codes section.
- Click Language Mapping.
- Choose the necessary language and placeholder.
- Add custom code.
- You can map as many languages as you need. Click Add Mapping to add another custom code.
- Click Save.