Webhooks
Webhooks allow you to receive information about the key events that happen in your Crowdin project, like completed translations or proofreading. After you configure a webhook, Crowdin will start sending POST or GET requests with data to the webhook URL via HTTP.
You can add webhooks to build integrations with the services or with your backend. For example:
- Set up a webhook to send notifications to the system you use.
- Pass information to the third-party services with the specific request requirements (for example, HTTP method, content type).
- Create custom integrations with Crowdin.
You can configure webhooks for different events that occur in the project, e.g., when a file is translated, proofread, or when a string is added or updated.
Read more about Webhook Events on Crowdin Developer Portal.
To configure webhooks in Crowdin, follow these steps:
- Open your project and go to the Tools tab (for Account-level webhooks, open your Account Settings).
- Select Webhooks and click Add Webhook.

You will need to provide the following information to register a webhook:
- The webhook name (for example, “App Project Translated”).
- The events to post to the URL. You can select either one event or a specific set of events.
- The URL to which the webhook callbacks are sent as direct requests. Redirects are not supported and will result in a failed delivery. The endpoint must return a 2XX response within 30 seconds.
- The request method that indicates the desired action to be performed for a given resource (use either
GETorPOST). - The content type for the POST request method (
multipart/form-data,application/json, orapplication/x-www-form-urlencoded).- For the
application/jsoncontent type, you can select Batch webhooks to merge multiple events into a single request.
- For the
Optionally, you can add special headers to your webhook. They can be used for additional security, as an authorization method, and more. For example, if you add headers, your webhook endpoint can check them to ensure that information is coming from Crowdin.
Depending on your approach to webhook management, you might need to add dedicated Crowdin IP addresses to your firewall to allow Crowdin to open the pre-configured webhook URLs.
Read more about IP Addresses.
Each event type in Crowdin has a specific payload format with the relevant event information. You can customize the webhook payload to add and organize the elements the way your system requires.
To check the event’s possible variables, hover over the Info icon in the Payload section’s right upper corner.
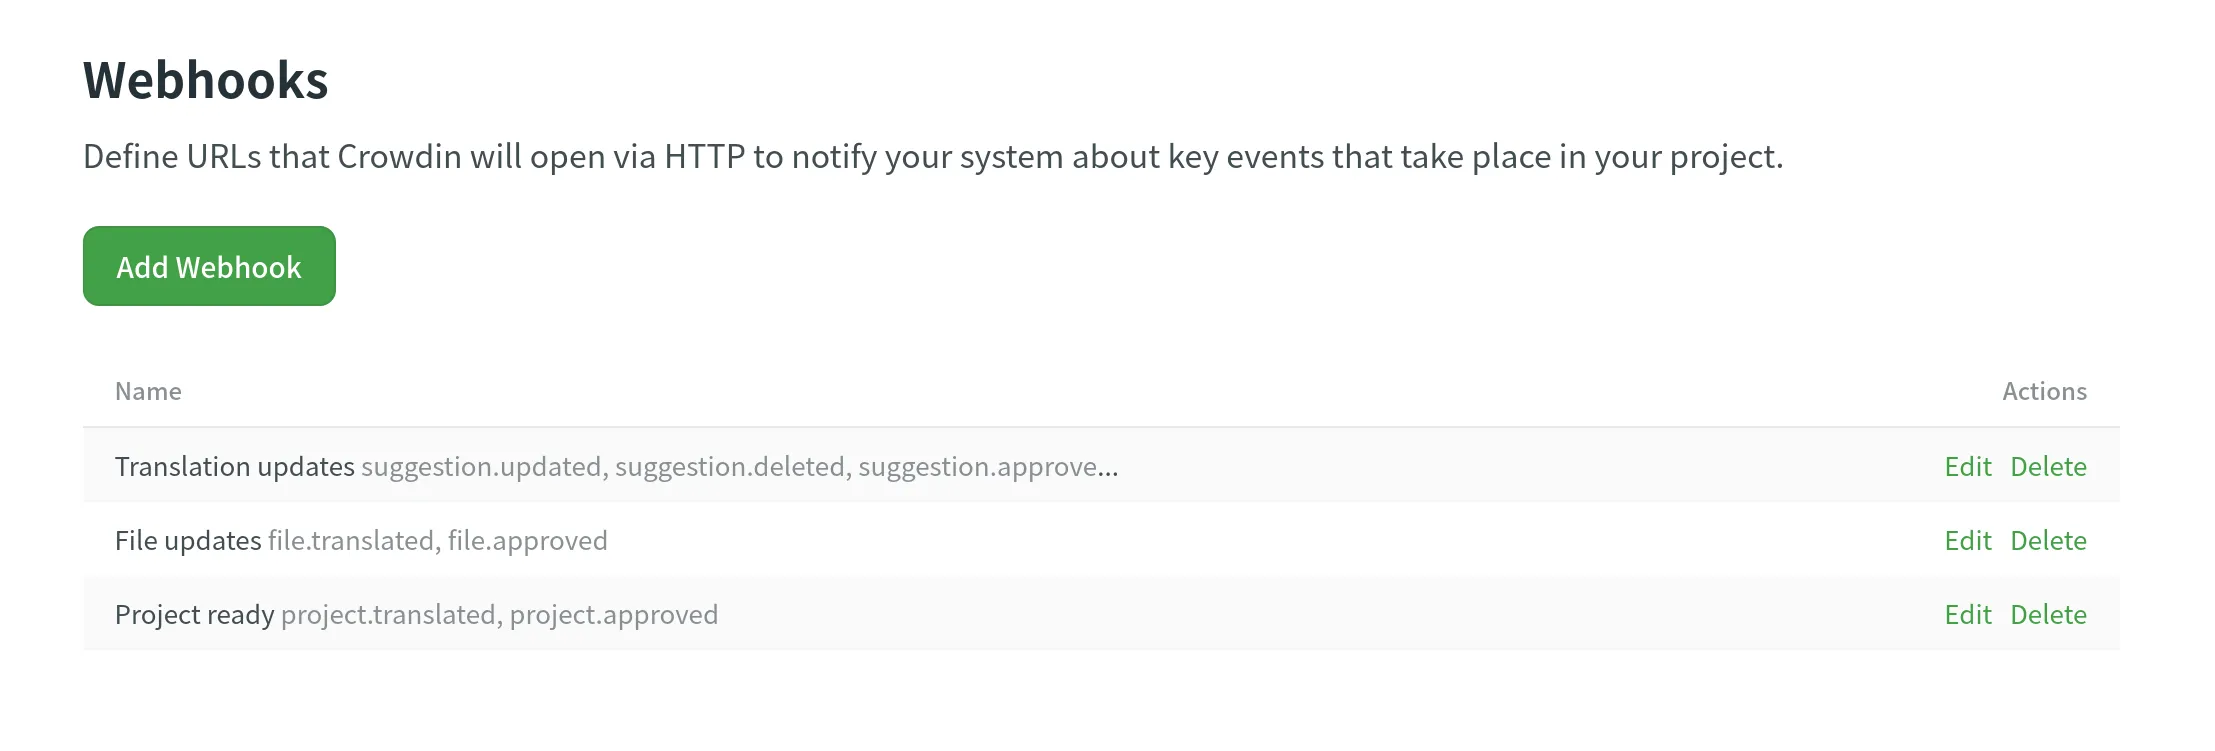
Within a specific project, you can access and manage configured webhooks by editing or deleting them directly from the displayed list.
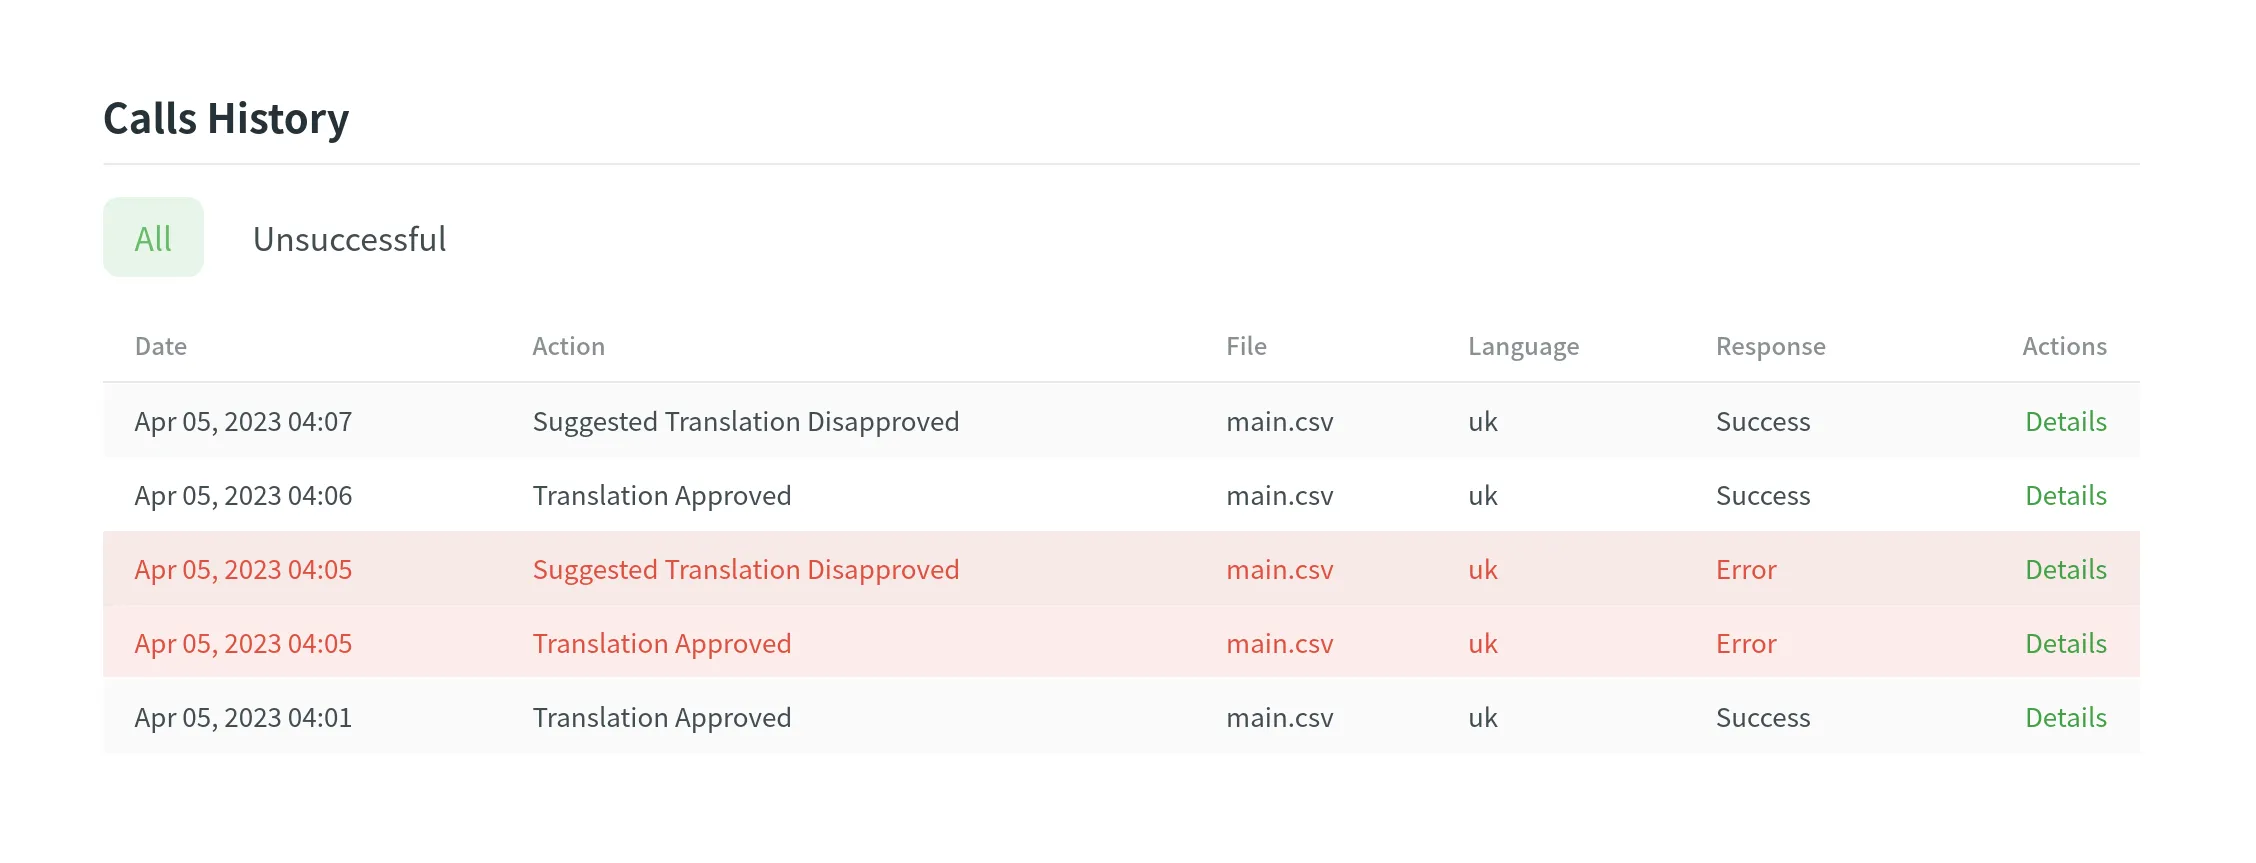
In the Calls History section, you can view the list of calls of all the configured webhooks. Use the filter to view all or only unsuccessful webhook notifications.
Webhooks that fail 100 or more times in the last 24 hours with response codes in the 4xx or 5xx ranges are automatically disabled.
Disabled webhooks are listed in the Webhooks section with a cleared check mark, indicating that they are currently inactive due to persistent failures. To discover more about failed webhooks, navigate to the Calls History > Unsuccessful section. Here you can explore detailed information about the issues encountered by each failed webhook.
Once you have identified and resolved the cause of the webhook failures, you can manually re-enable the webhooks to restore their functionality. In the Webhooks section, locate the disabled webhook and select it for re-enabling.
With the help of Crowdin webhooks, you can send notifications about pre-configured event types directly to a specific Slack channel.
To configure the webhooks’ sending to Slack, you’d need to create a simple Slack app.
Read more about Sending messages to Slack using Incoming Webhooks.
As soon as you create and configure your Slack app, you’ll have a Webhook URL that should be used for the Webhooks configuration in Crowdin.