Jira Integration
Integration with Atlassian Jira allows you to keep track of source string and translation issues reported by users working on the project translation in Crowdin.
With current integration, the following issue types reported in Crowdin are supported for the Jira dashboard:
- General issues
- Lack of context issues
- Translation issues
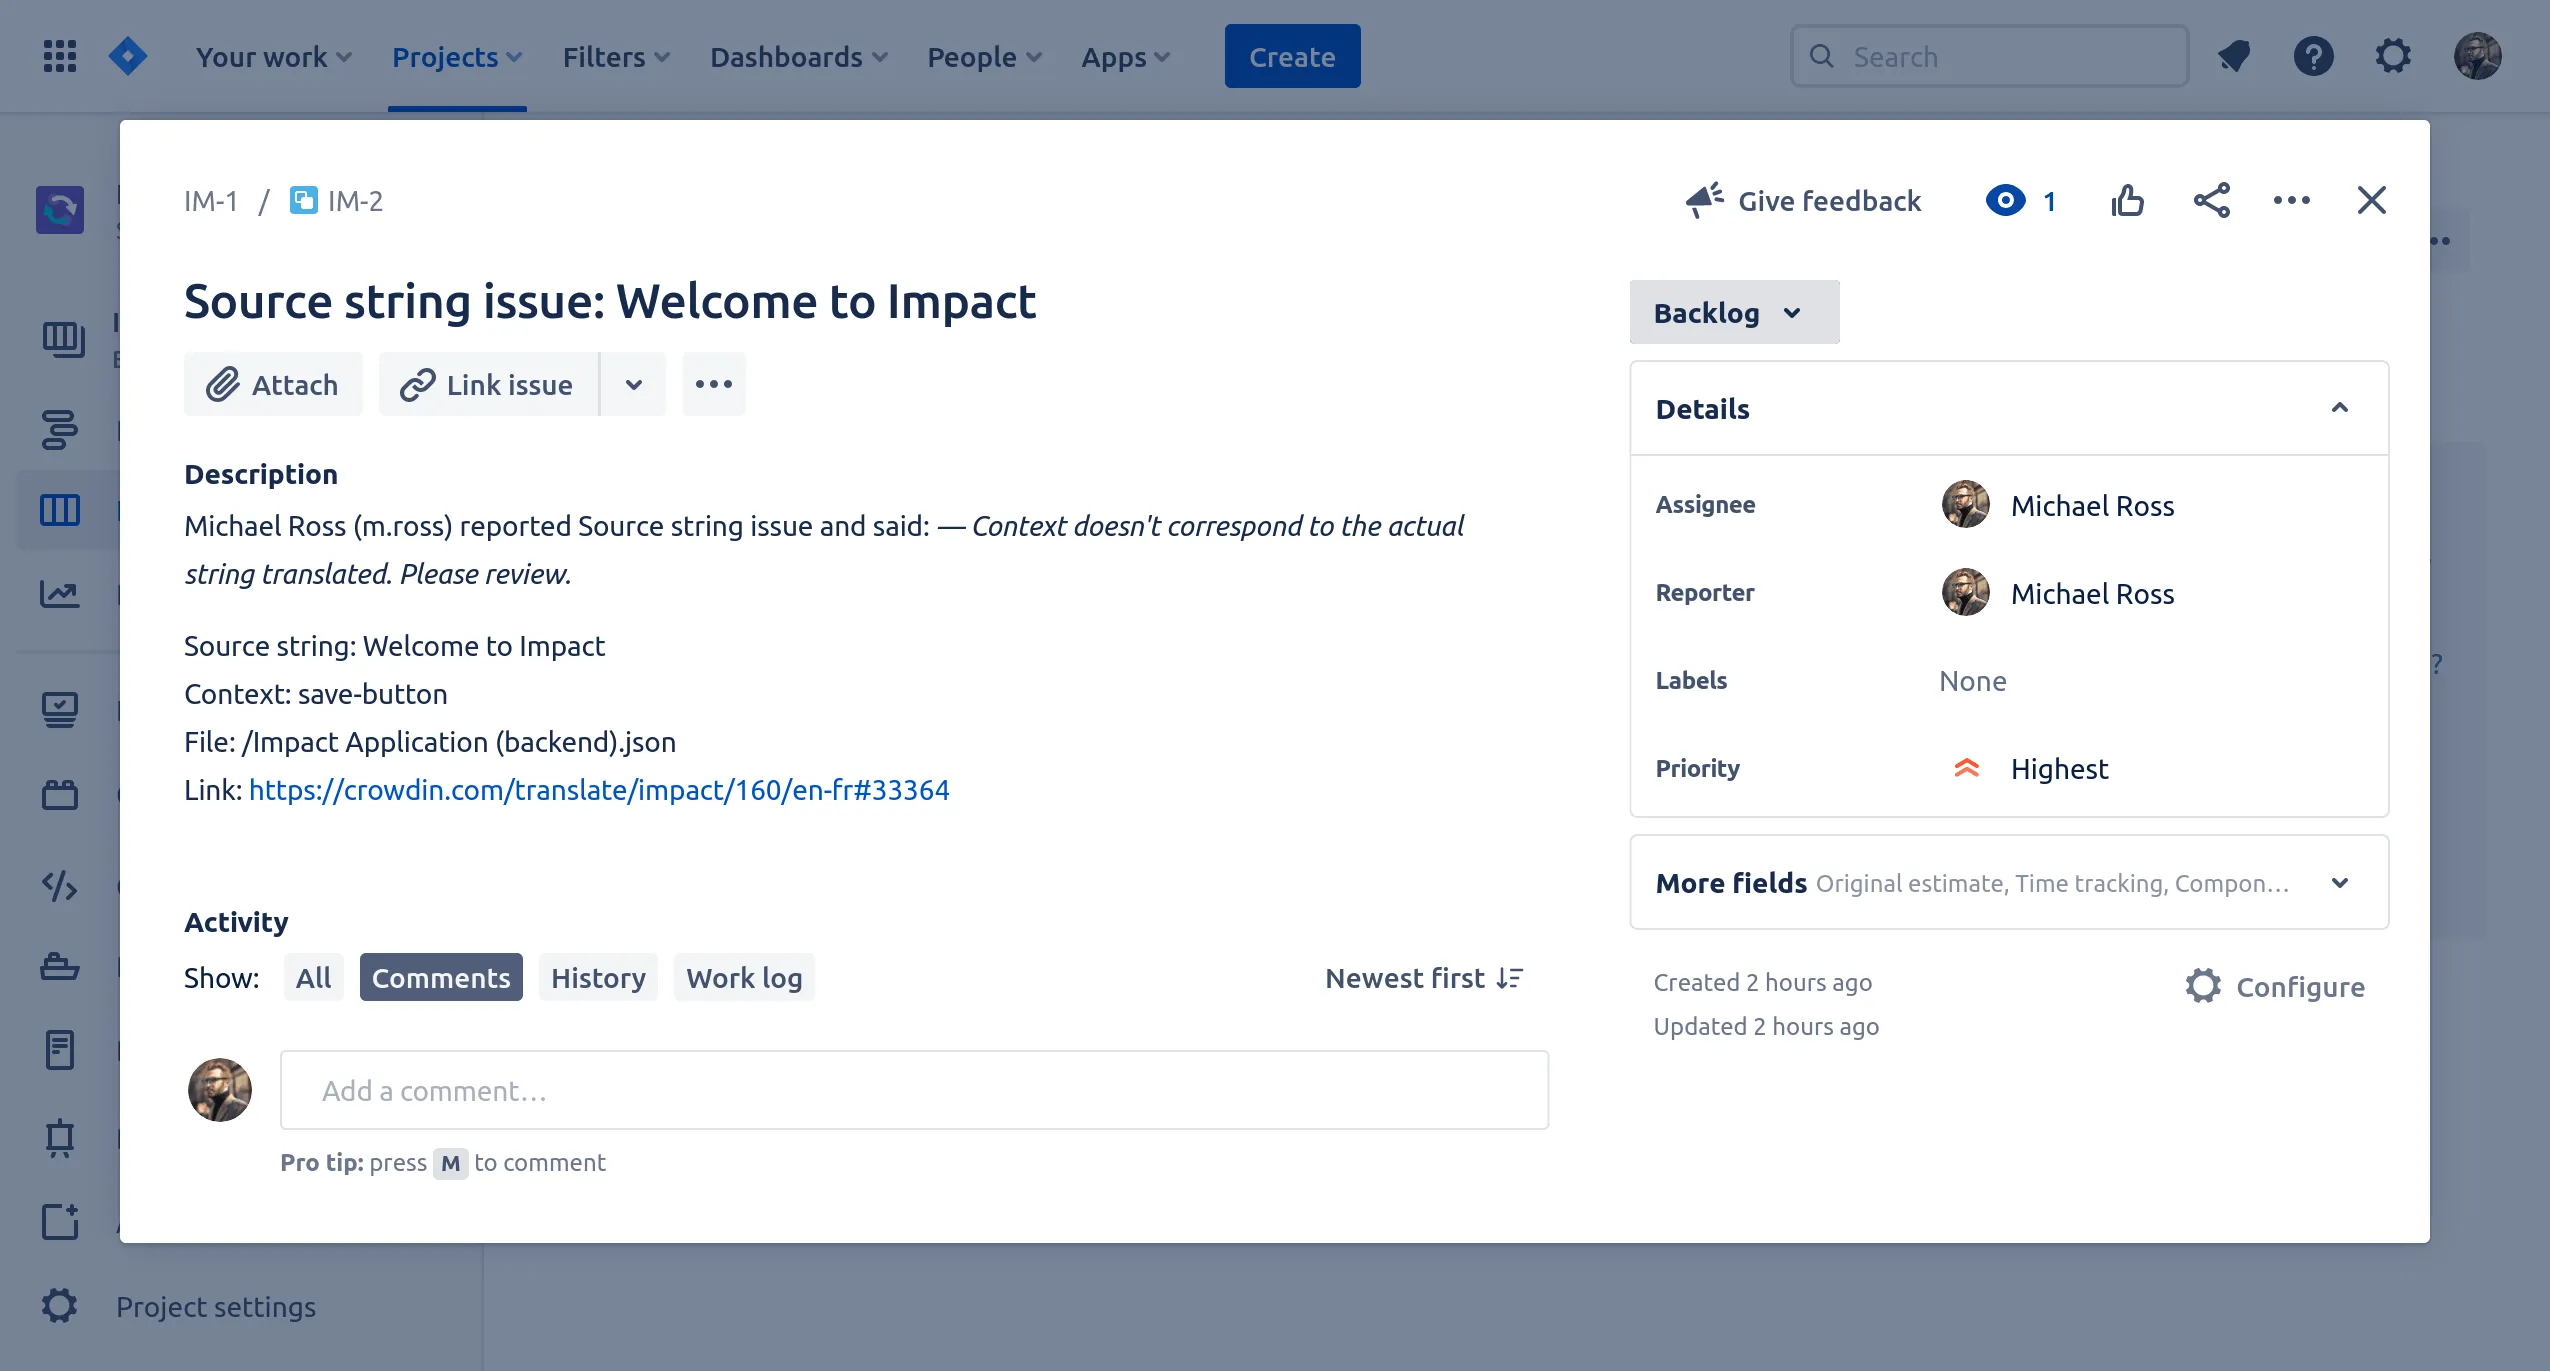
- Source string issues
Each synchronized issue type will have the parent task in Jira named after it. Each issue reported in Crowdin will create a sub-task in the corresponding parent task in Jira.
Once all reported issues have been resolved and their respective sub-tasks closed in Jira, you can also close their parent Jira task representing one of the Crowdin issue types.
As translators report new issues in the Crowdin project, the Jira integration will create new parent Jira task with its corresponding sub-tasks for each issue in the Crowdin project.
To connect Jira with your project in Crowdin, follow these steps:
-
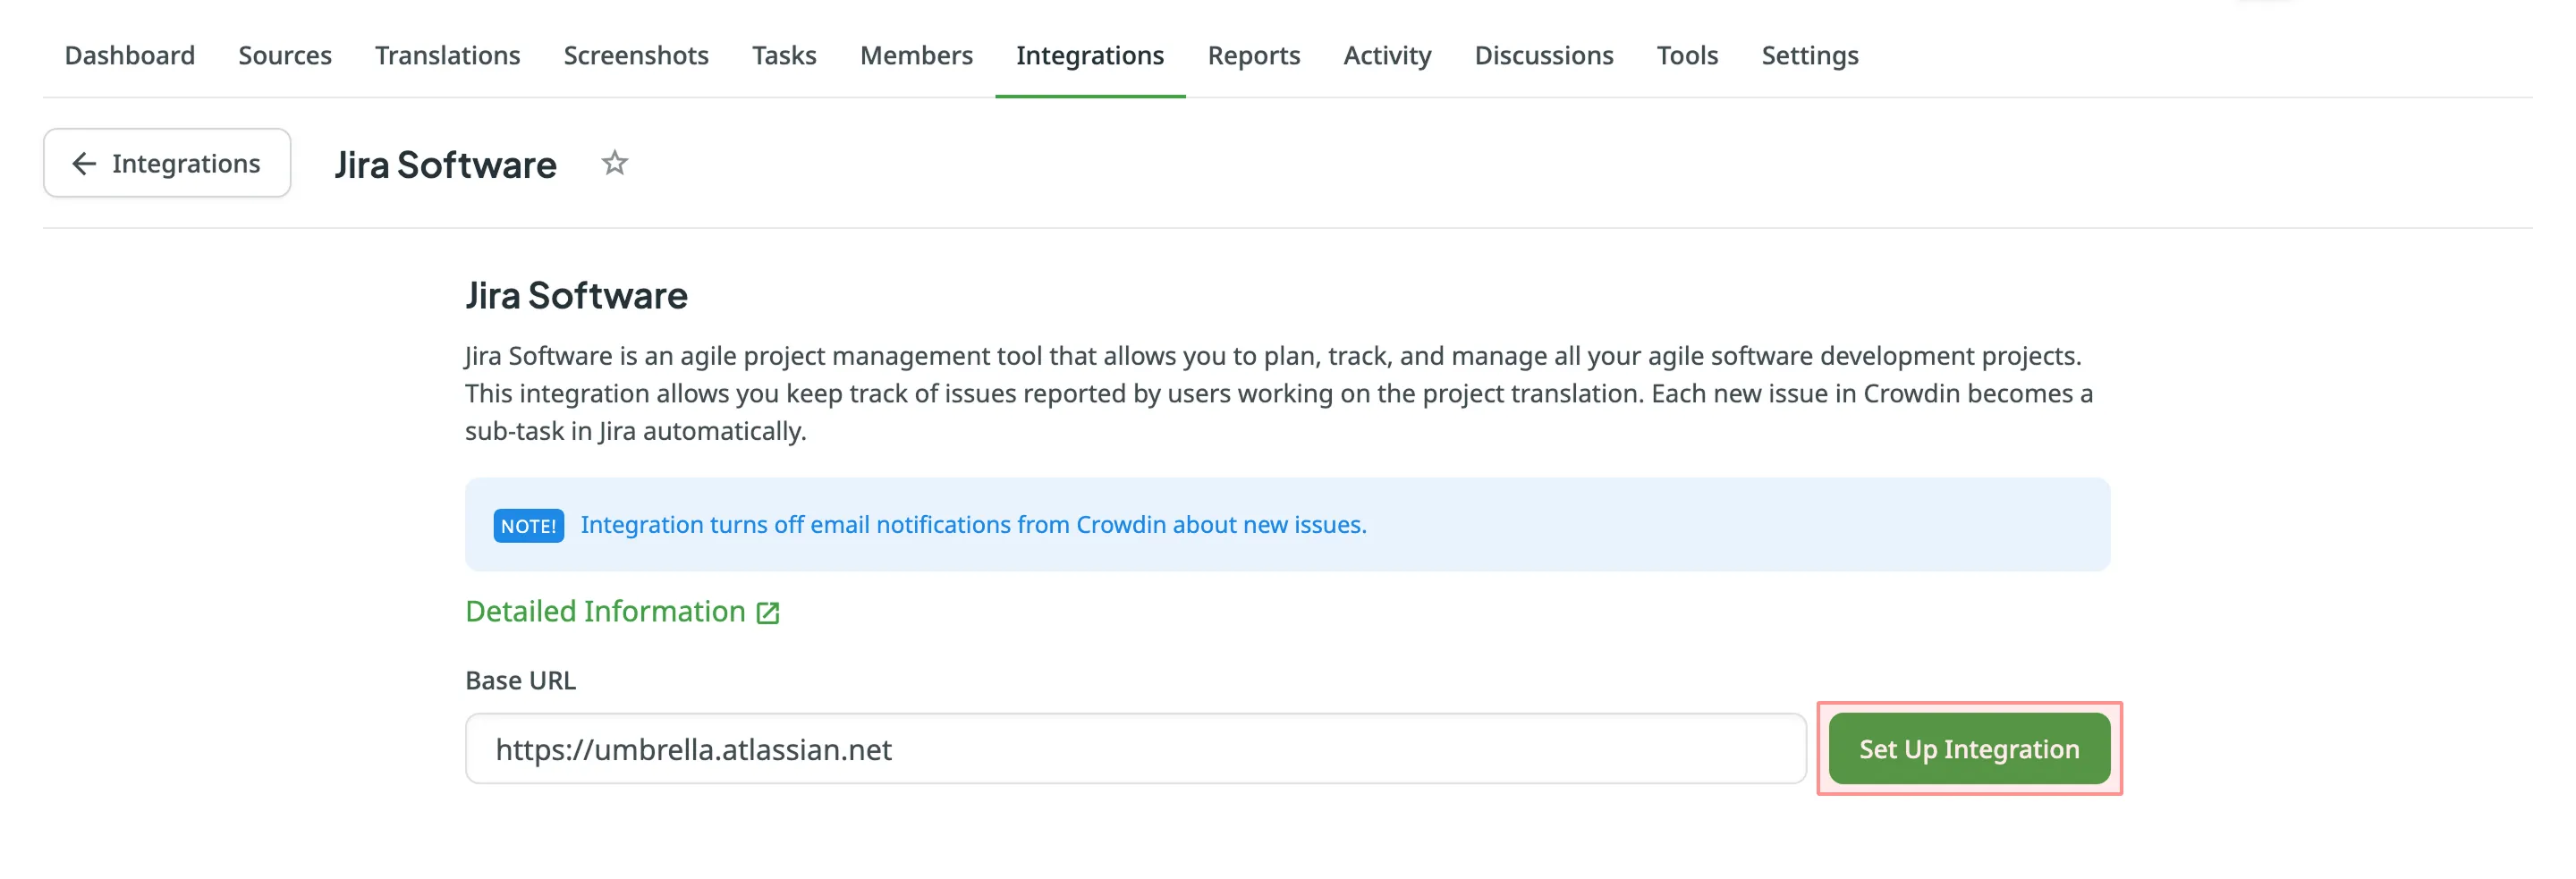
Open your project and go to the Integrations tab.
-
Click on Jira Software in the Integrations list.
-
Enter the Base URL of your Jira project and click Set Up Integration.
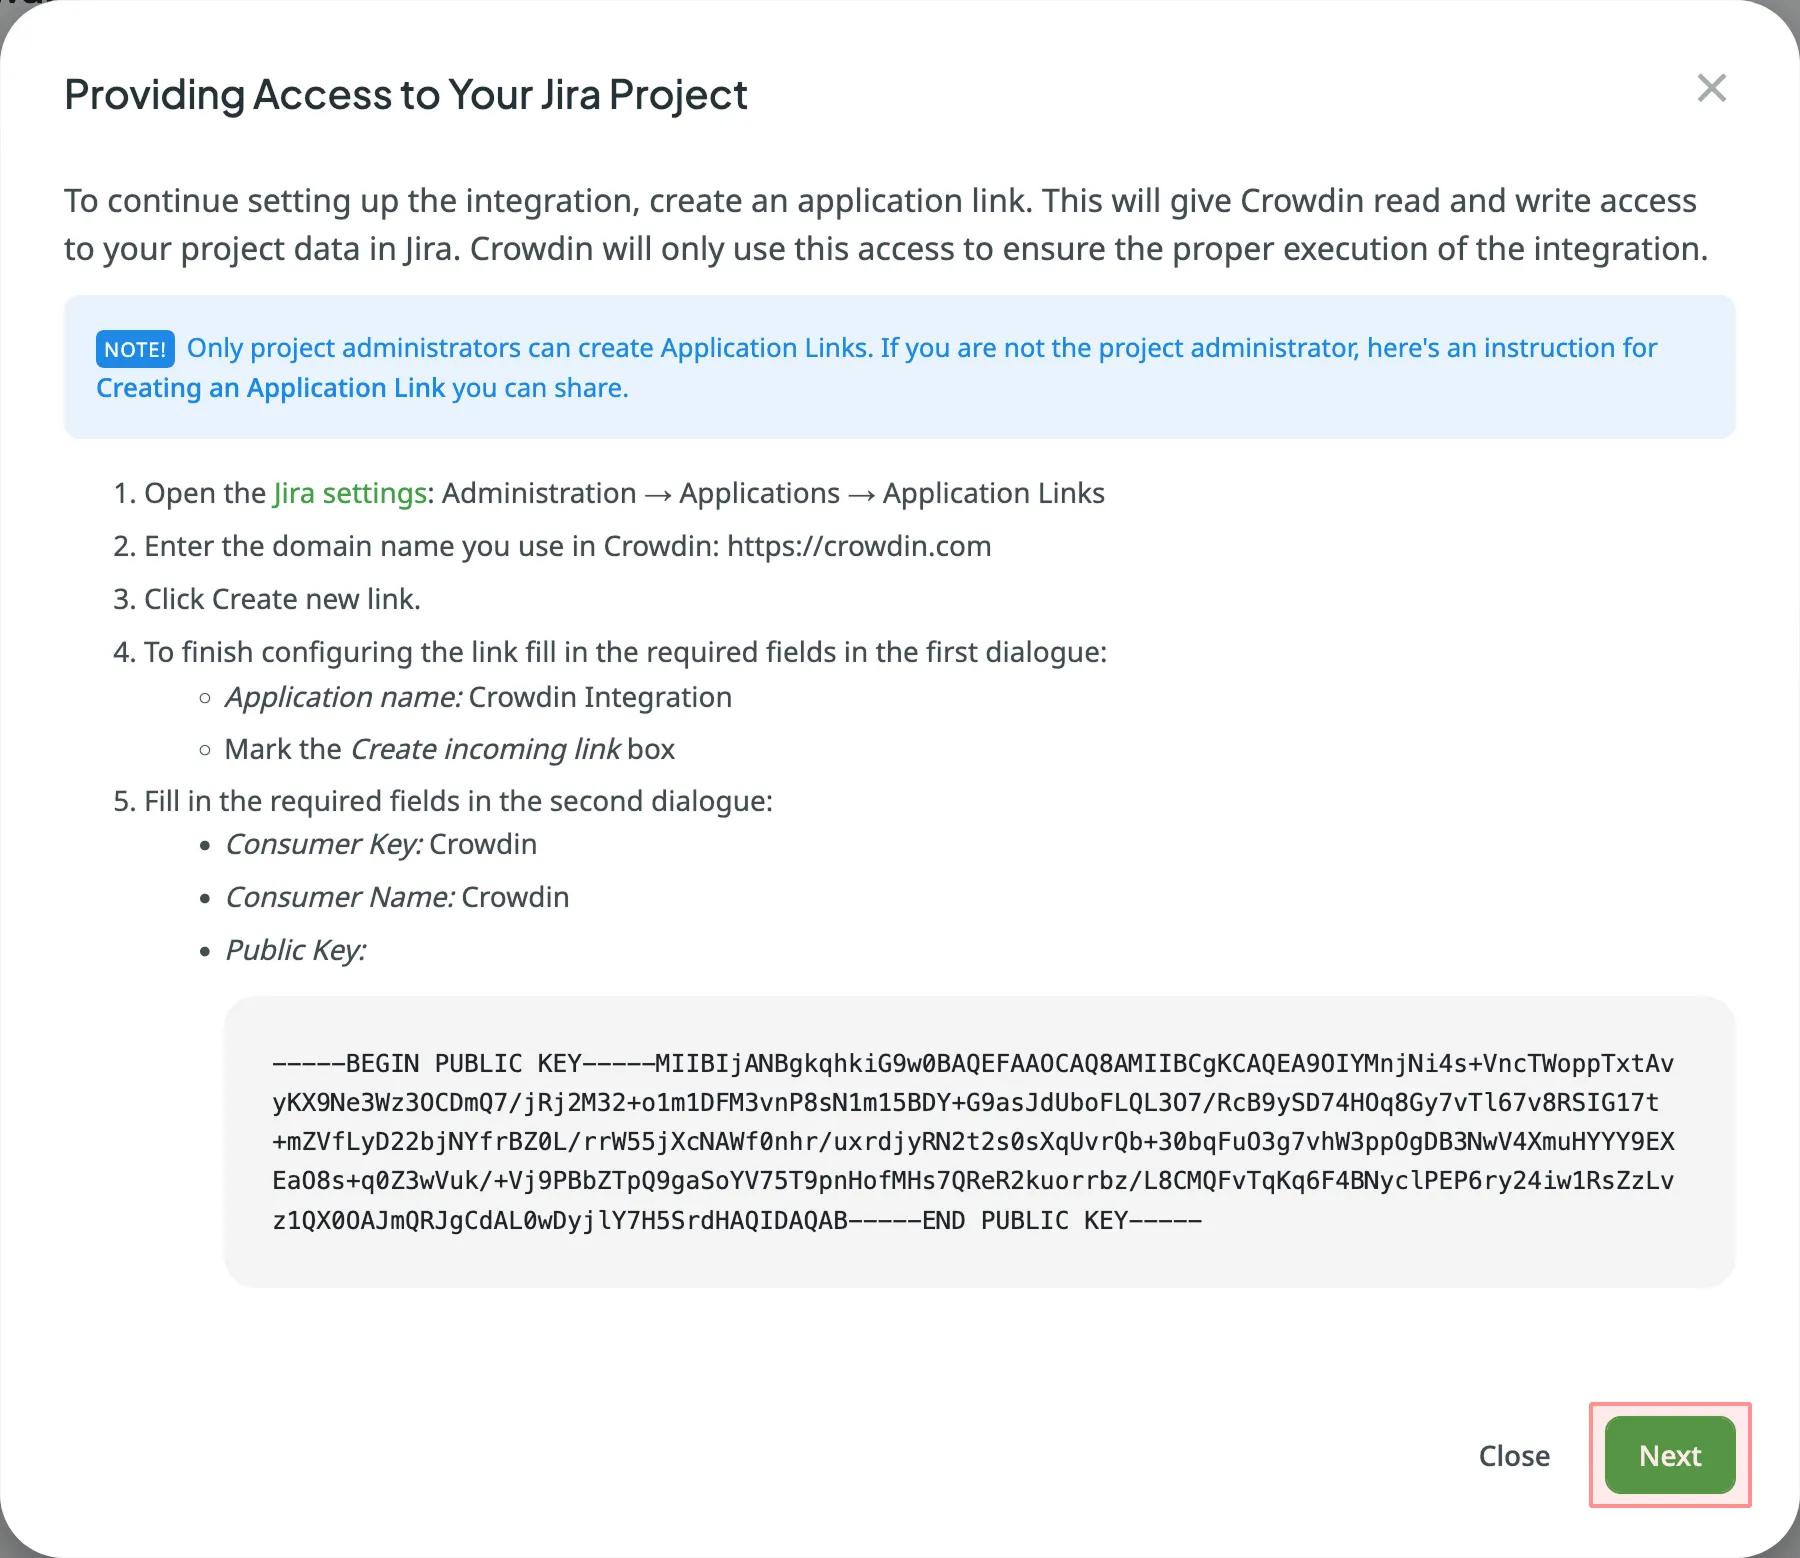
 You’ll then access the Providing Access to Your Jira Project dialog.
 -
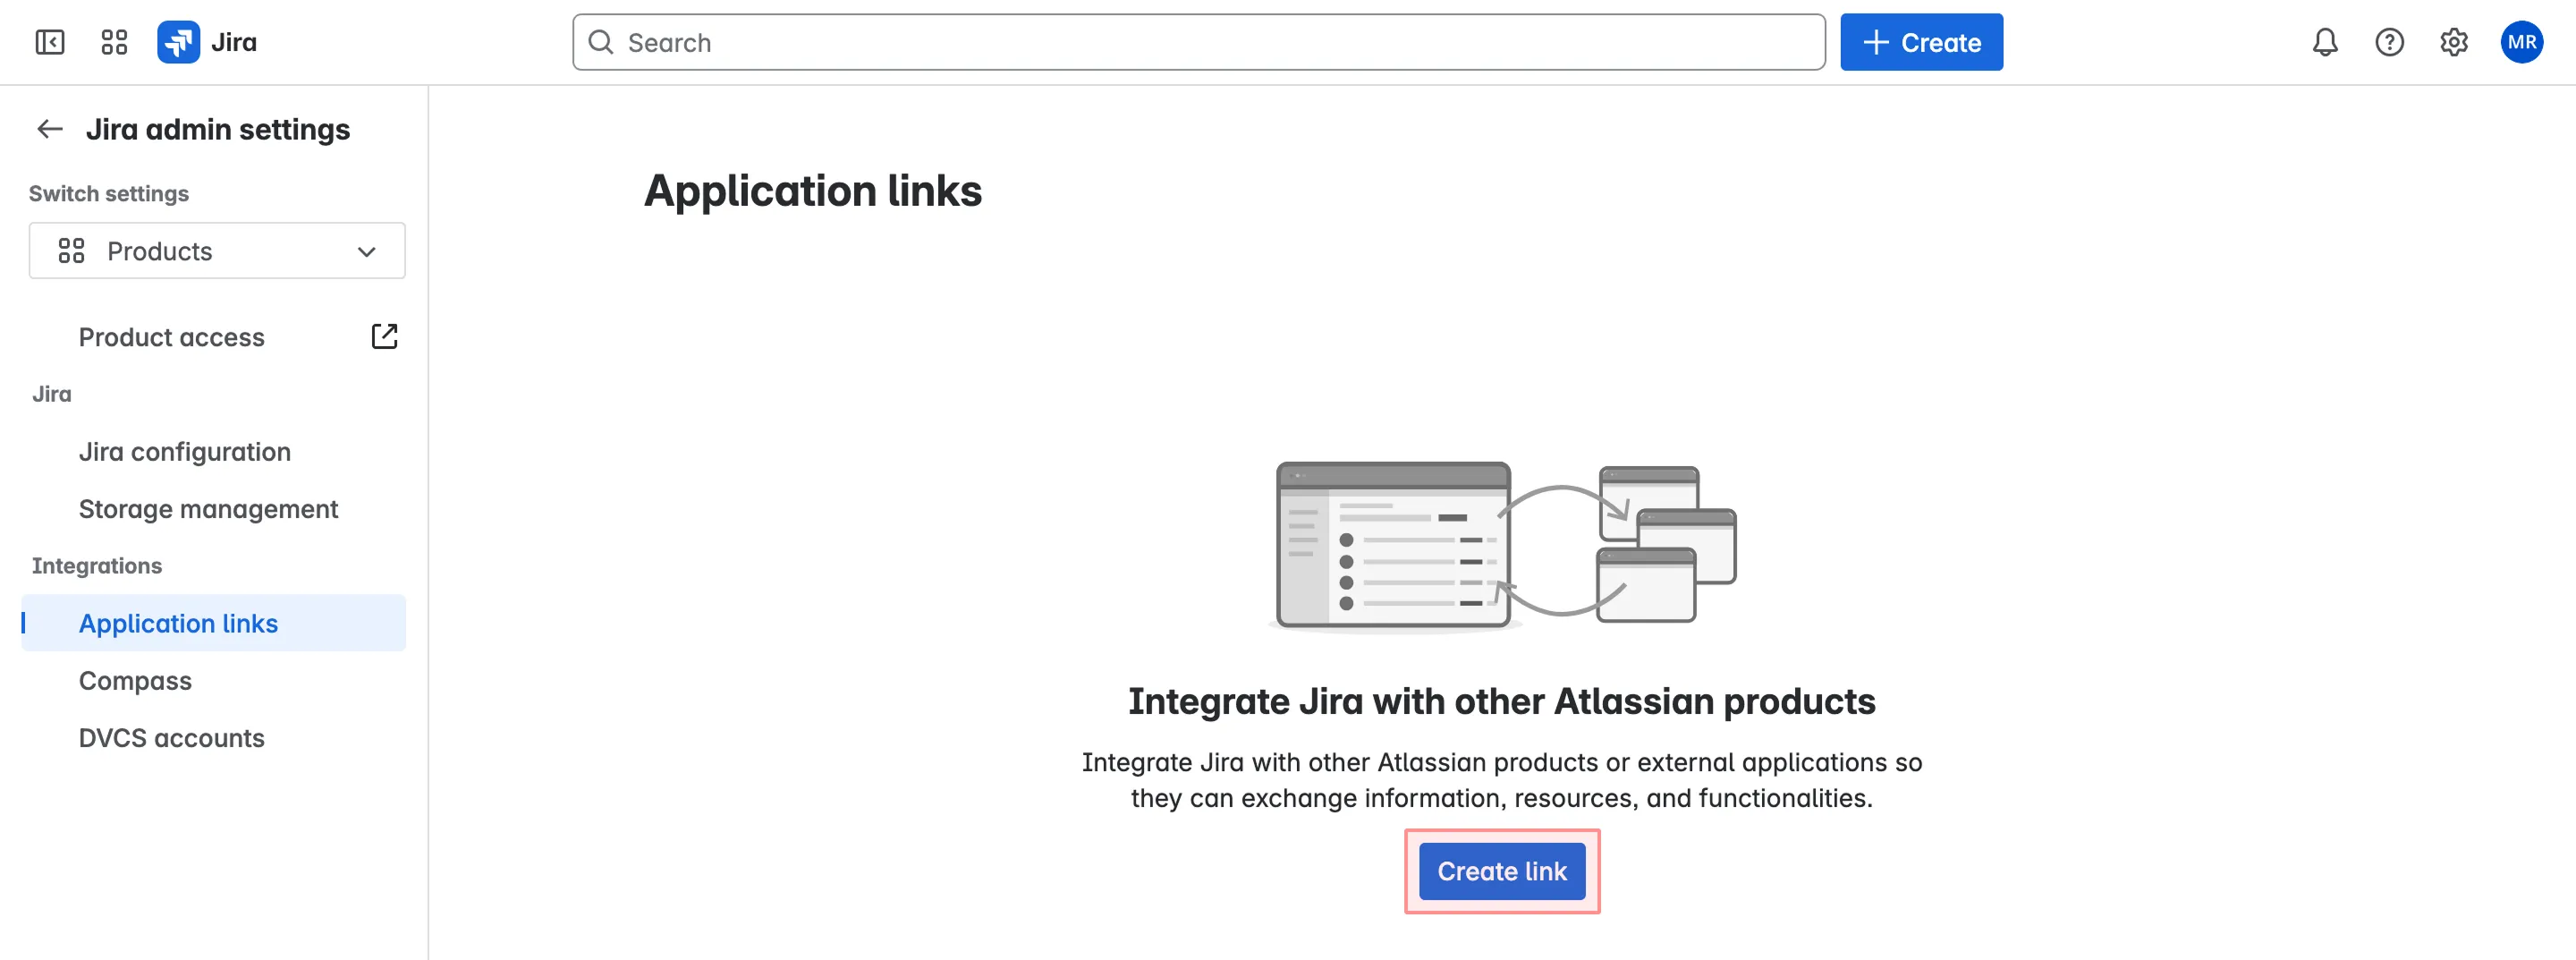
Configure an Application Link in Jira:
- Log in to Jira as a user with Jira Administrator permissions.
- Go to Jira settings > Products > Application links.
- Click Create link.
- Select Direct application link, enter your Crowdin URL, and click Next.
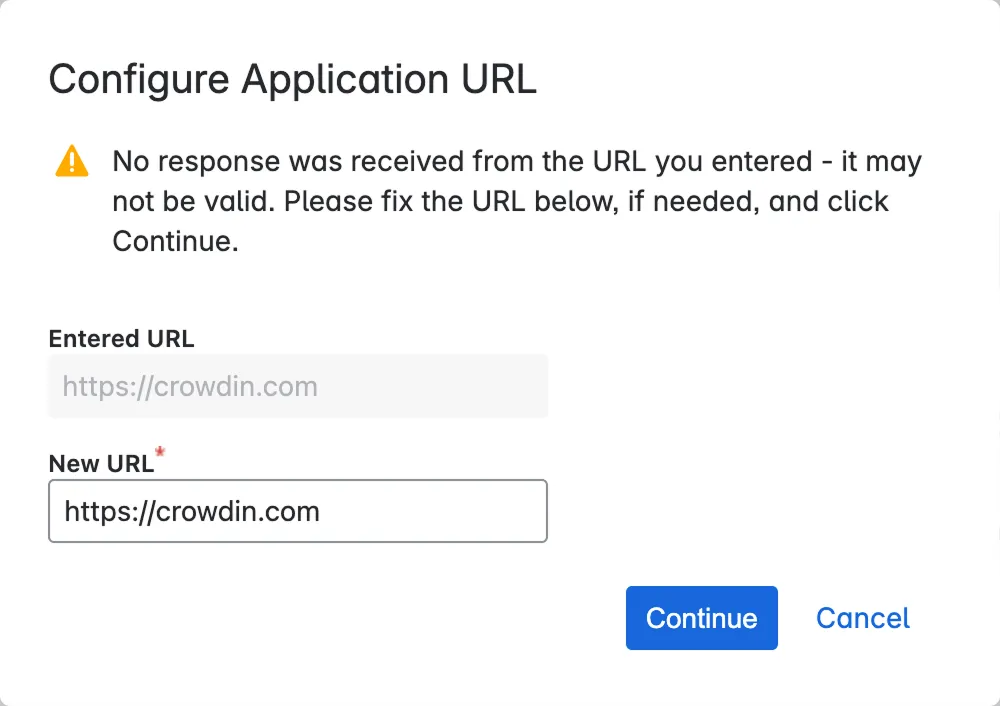
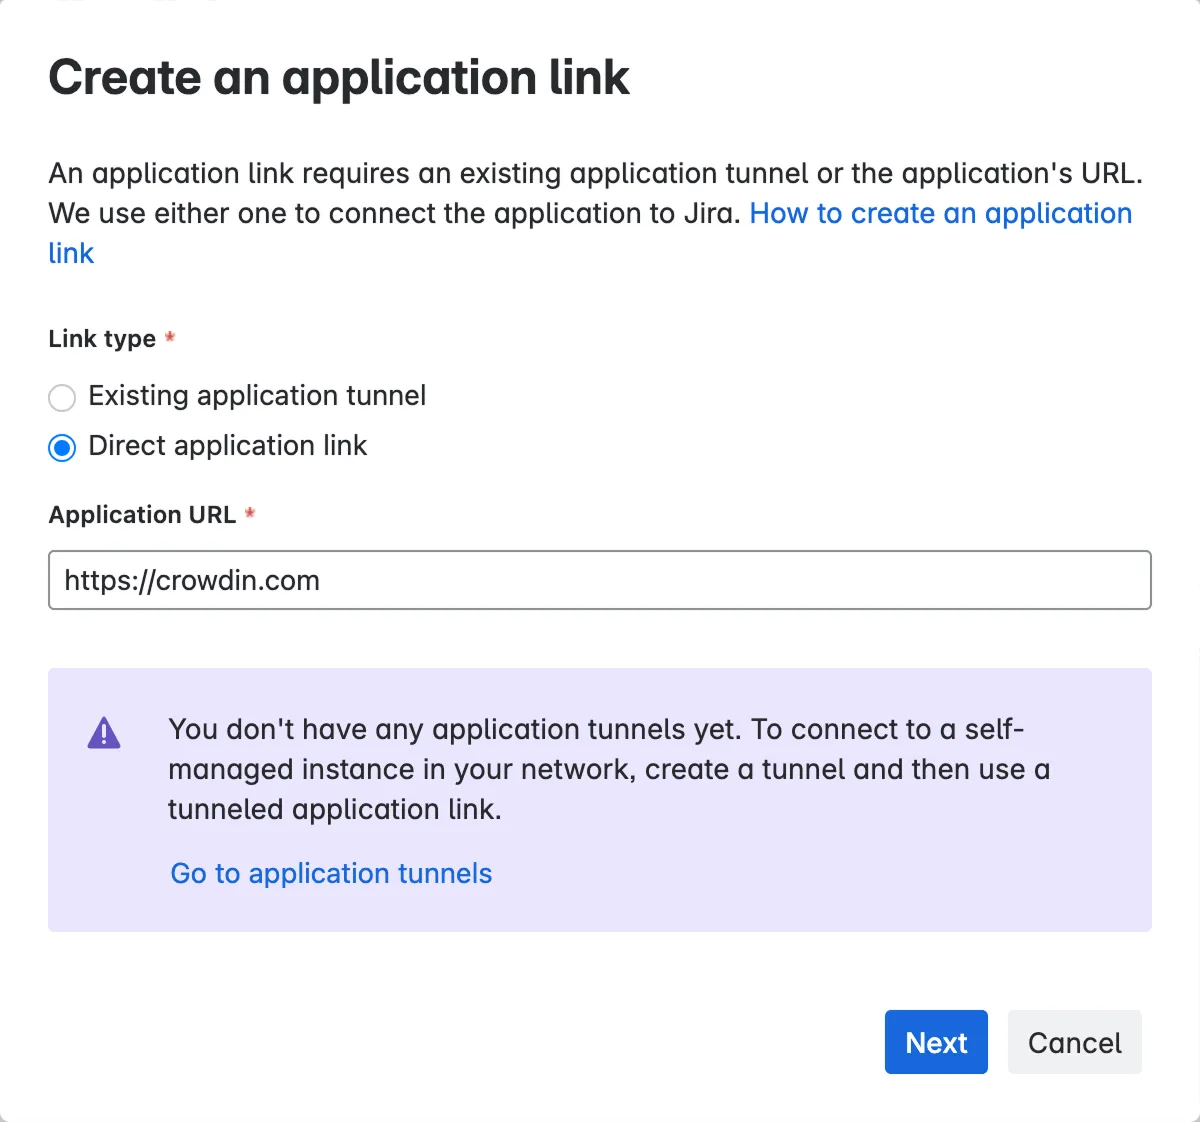 Due to Jira functionality, it sometimes does not receive the response from the entered URL. If you see the message below, check the provided URL to be correct and click Continue.
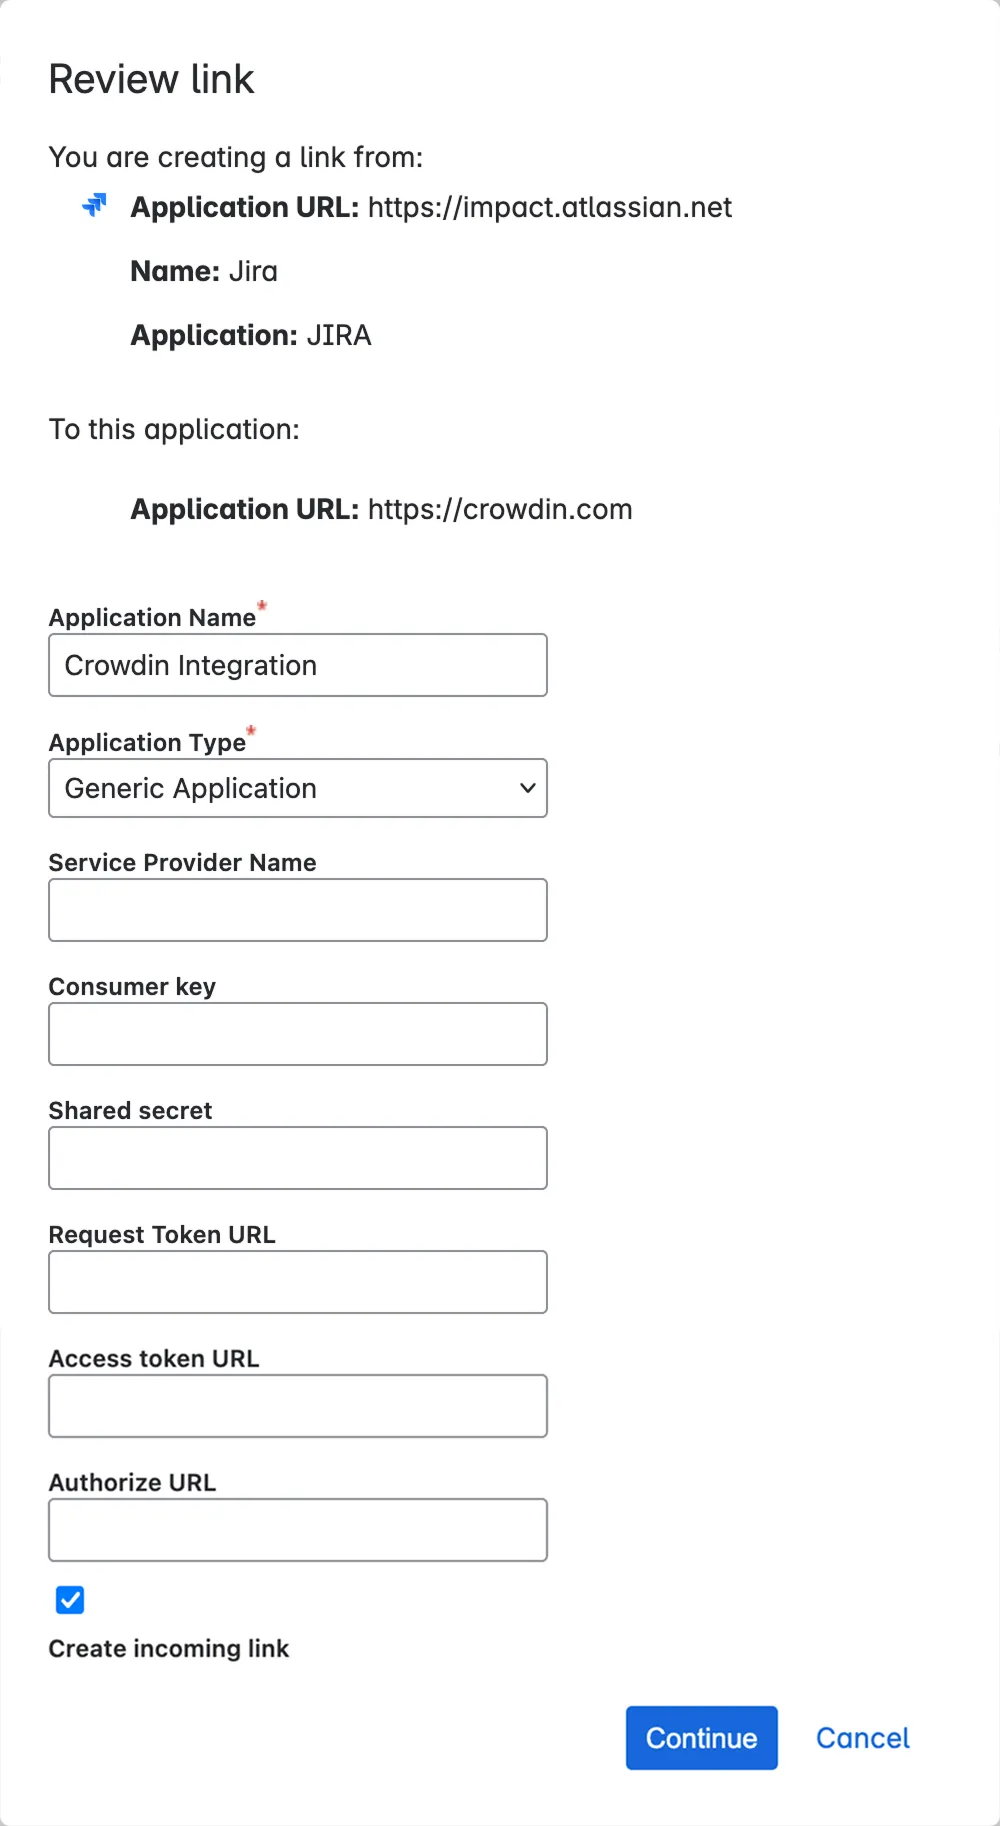
- Fill in all the required fields in dialog windows and click Continue to finish configuring the link:
- Application name: Crowdin Integration
- Application type: Generic Application
- Select Create incoming link and click Continue
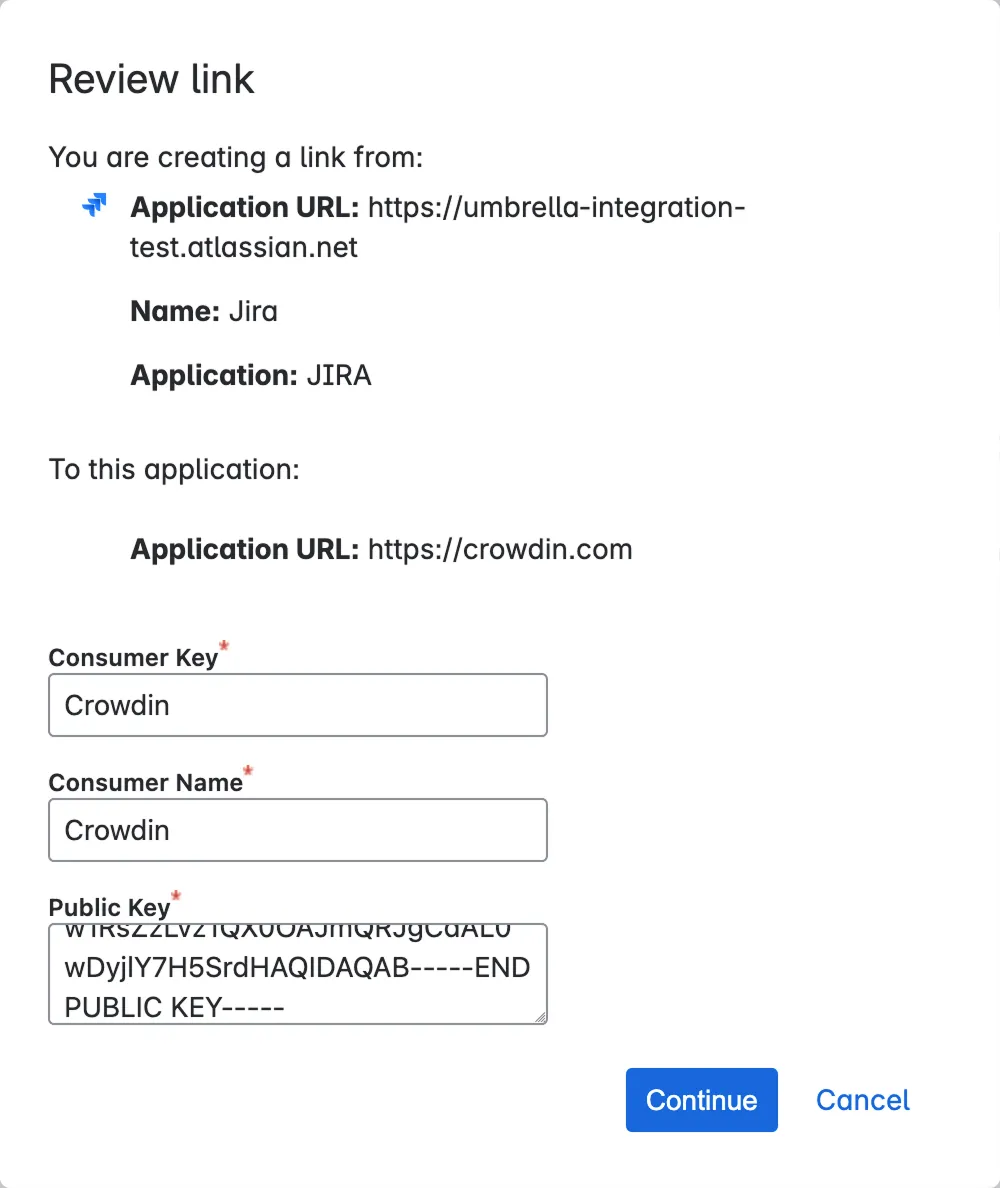
- Consumer Key: Crowdin
- Consumer Name: Crowdin
- Public Key: copy it from the Providing Access to Your Jira Project dialog in Crowdin
 Click Continue to finalize the Application Link setup.
-
Go back to Crowdin and click Next in the Providing Access to Your Jira Project dialog.
-
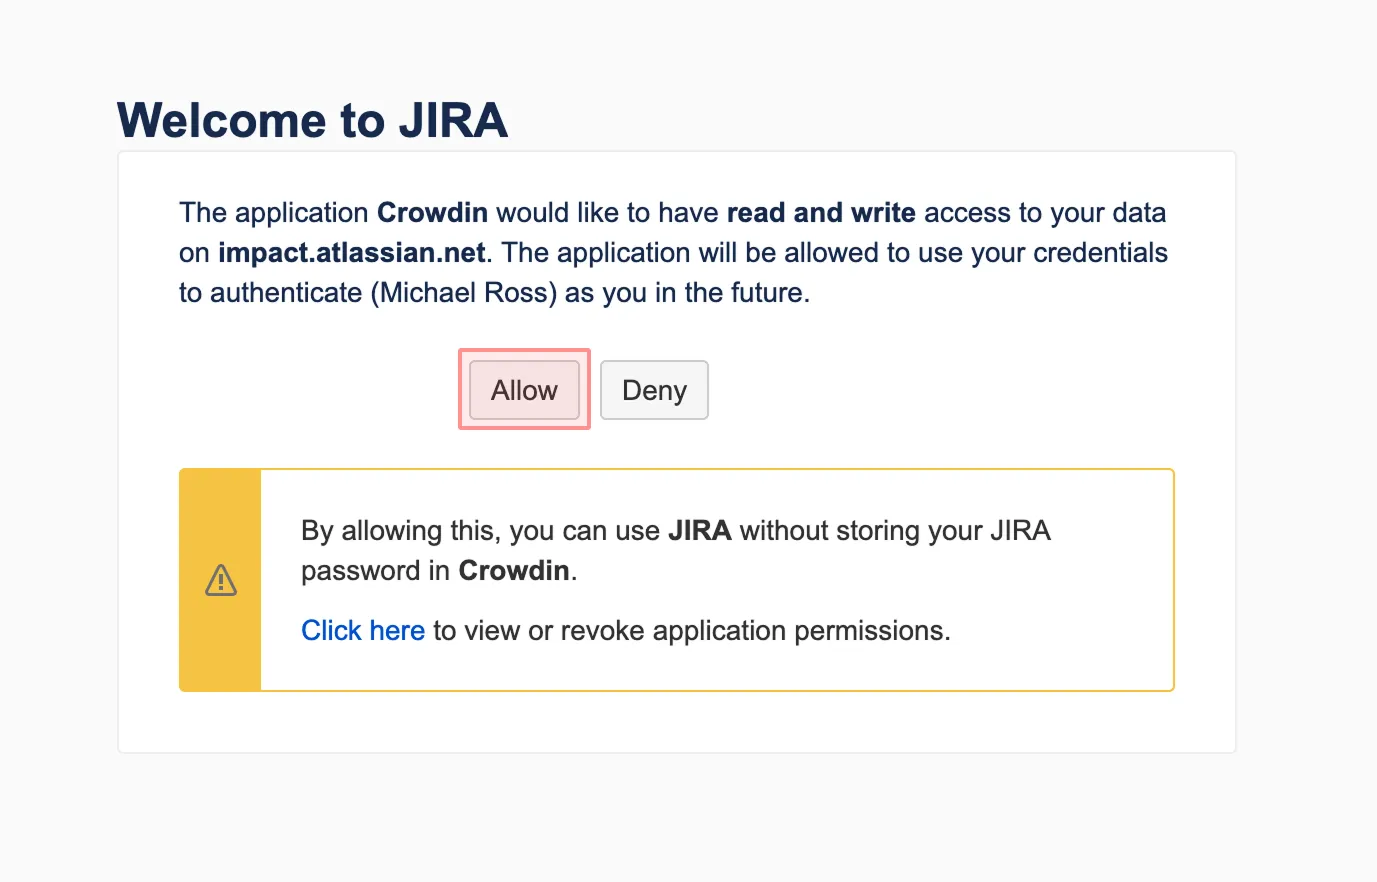
Allow read and write access to project data in Jira. Crowdin will use this access to help the integration run correctly.
-
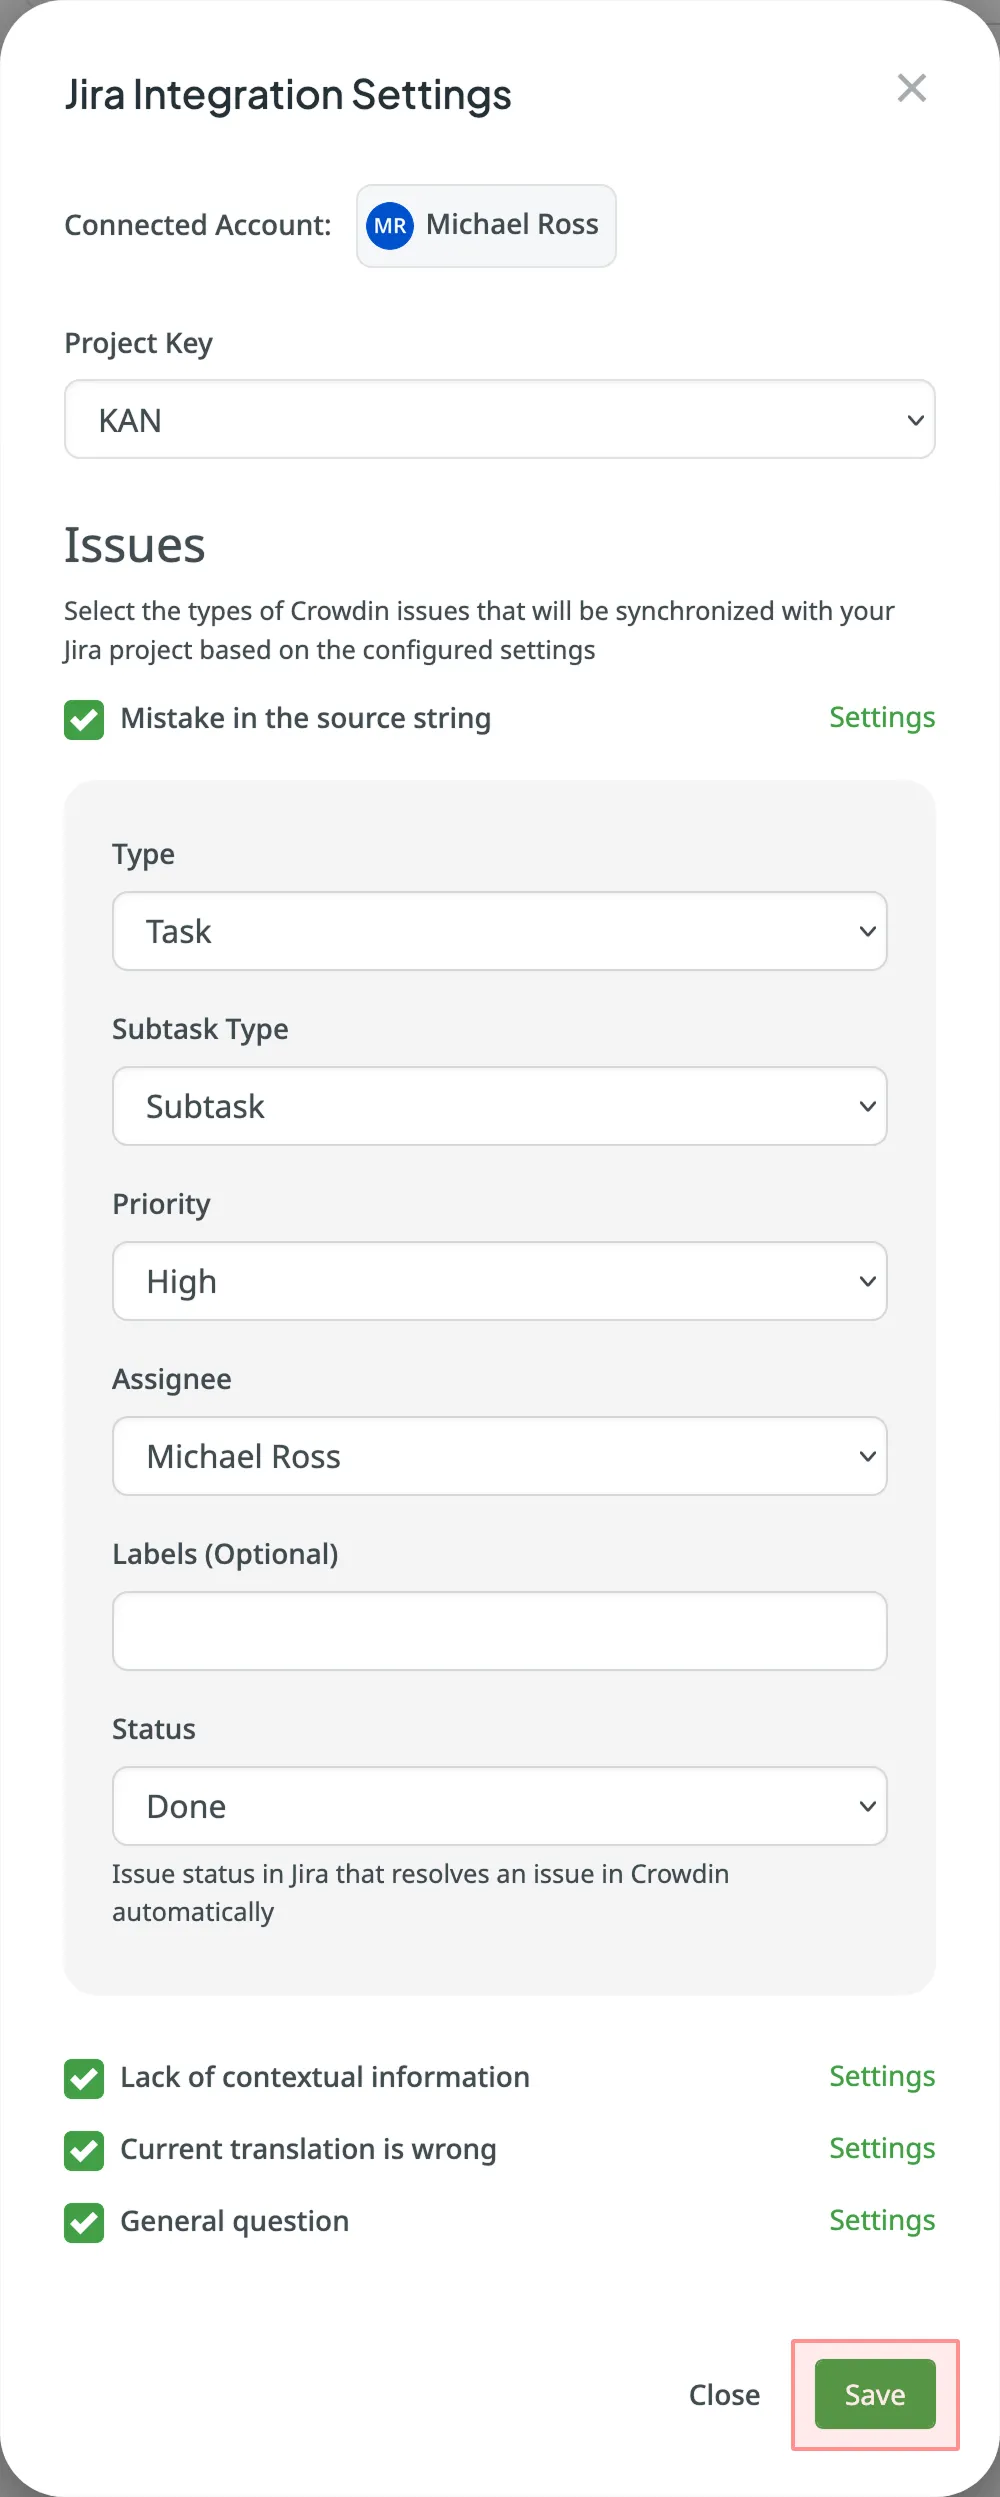
Choose the Jira project key, select types, and configure settings of Crowdin issues that you’d like to be synchronized with your Jira project. Jira issue settings available are:
- Type
- Subtask Type
- Priority
- Assignee
- Labels (Optional)
- Status – used to select the Jira status value that will trigger the closure of a related string issue in the Crowdin project.
-
Click Save.
Once you set up the integration, you can synchronize already existing issues in Crowdin (if any). A short message would tell you how many issues aren’t synchronized yet. To synchronize them, click Sync Issues.
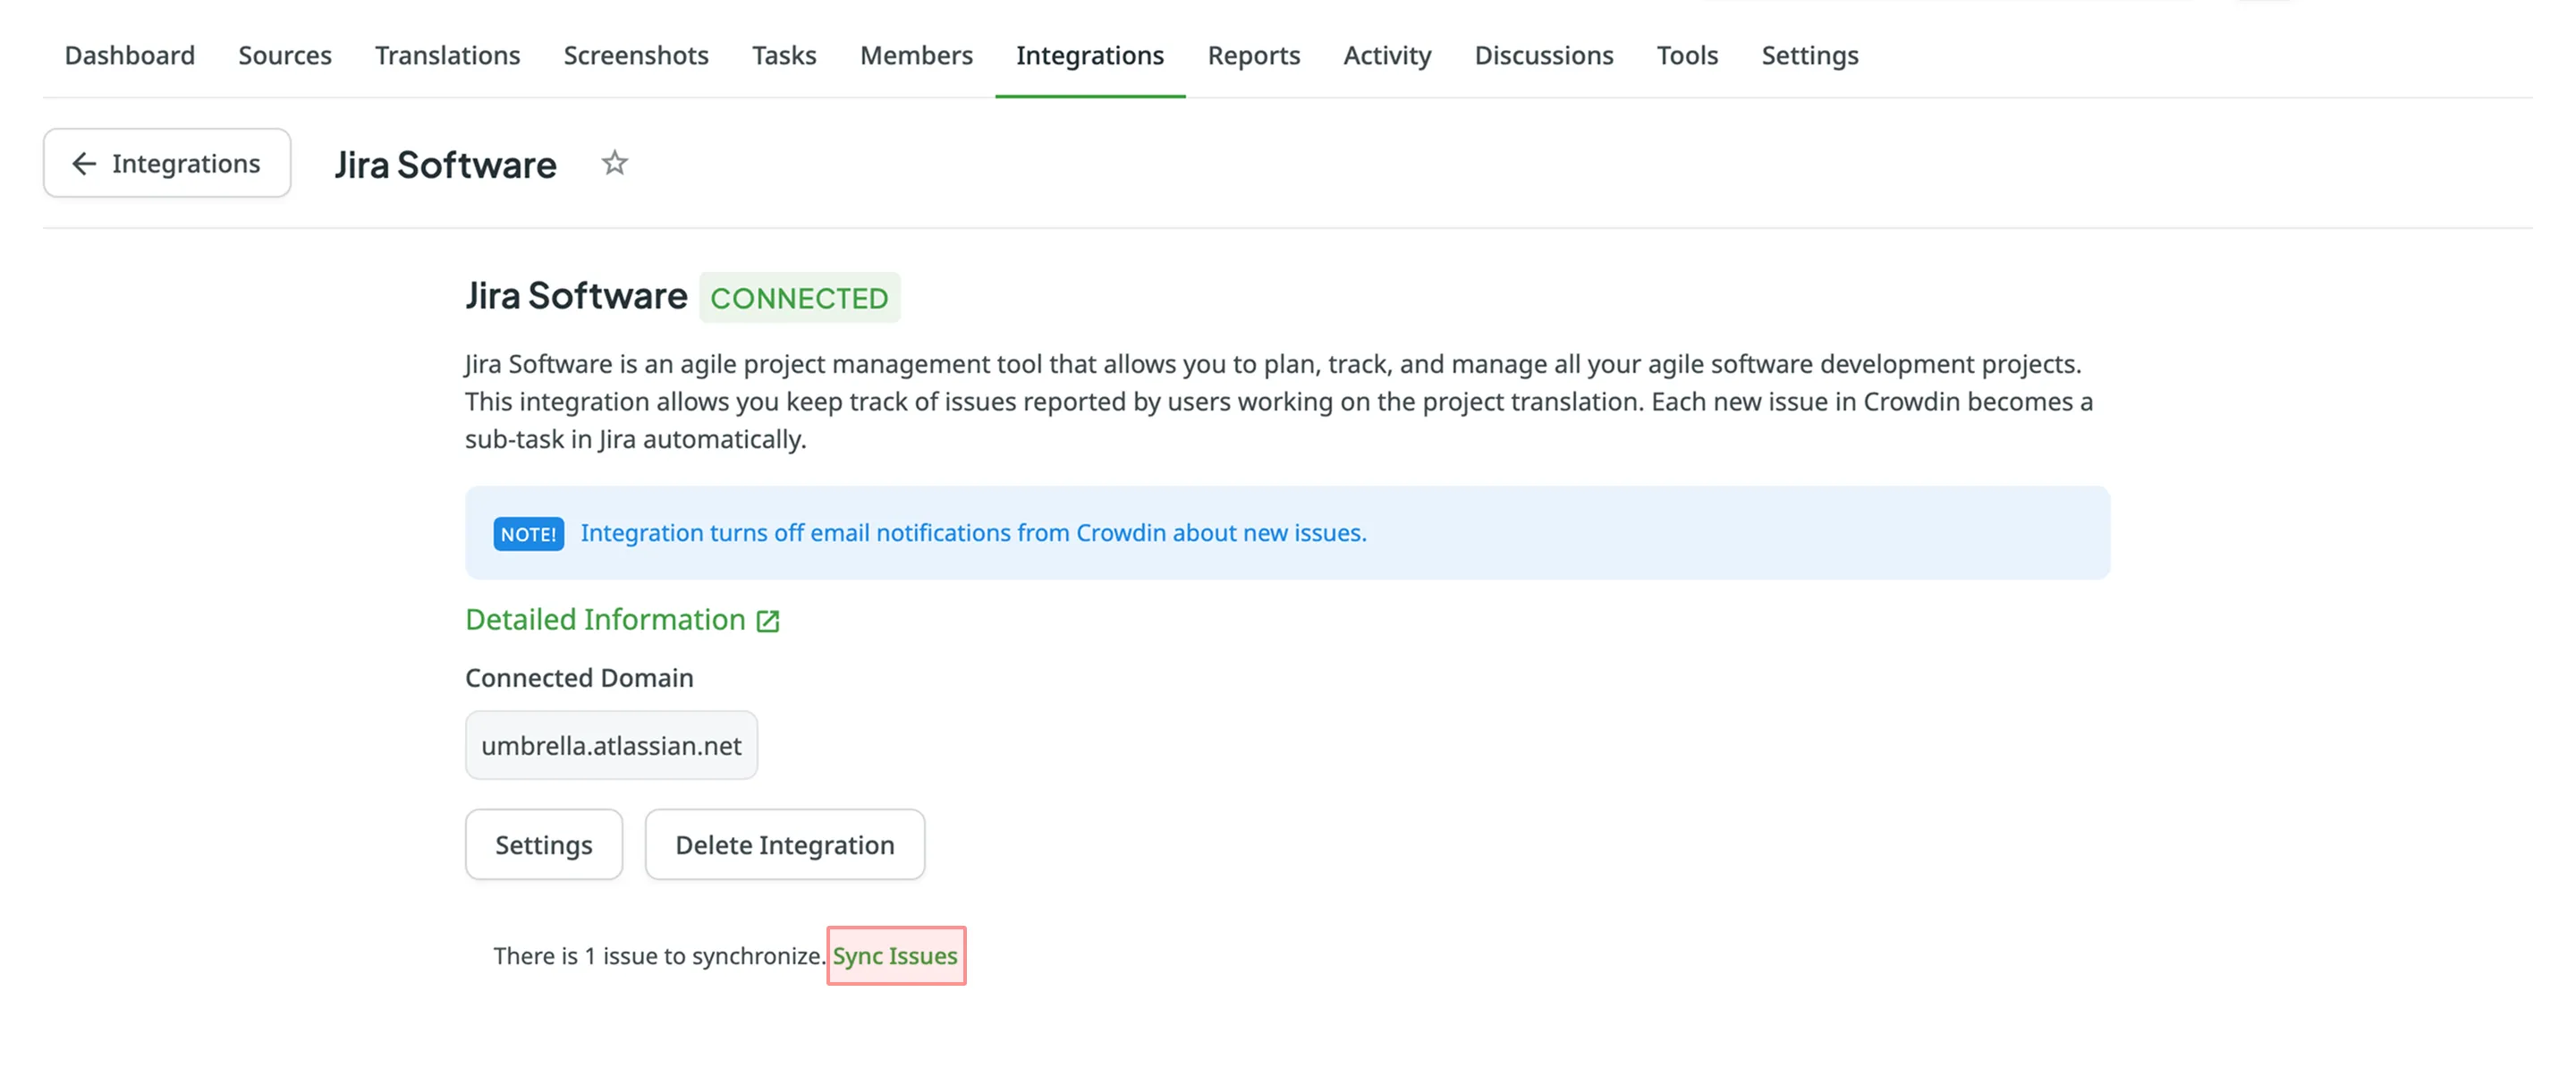
To change the integration settings, click Settings and apply the necessary changes. Updated settings will apply only to the newly synchronized issues. All the issues synchronized before will remain without any changes.
To delete the integration, click Delete Integration.