Adobe XD Plugin
With the Crowdin for Adobe XD plugin, you can use texts from Crowdin in your designs to save time for both designers and developers. These could include original or translated texts. If necessary, you can add new ones (e.g., dialog titles, button labels) and send them to translators in Crowdin.
- Quickly generate multilingual creative assets.
- Translate mockups and test them in different languages before the programming starts.
- Stop using ‘Lorem Ipsum’, add real texts from Crowdin to your prototypes instead.
- Create and upload source strings from your designs to your Crowdin project. This way, uploaded strings could be used by developers, which reduces time spent on development.
- Upload tagged screenshots to your Crowdin project.
- Sign in to Adobe XD.
- Navigate to Plugins > Browse plugins….
- Click Browse.
- Use the Search all plugins field to find Crowdin for Adobe XD plugin.
- Click Install.
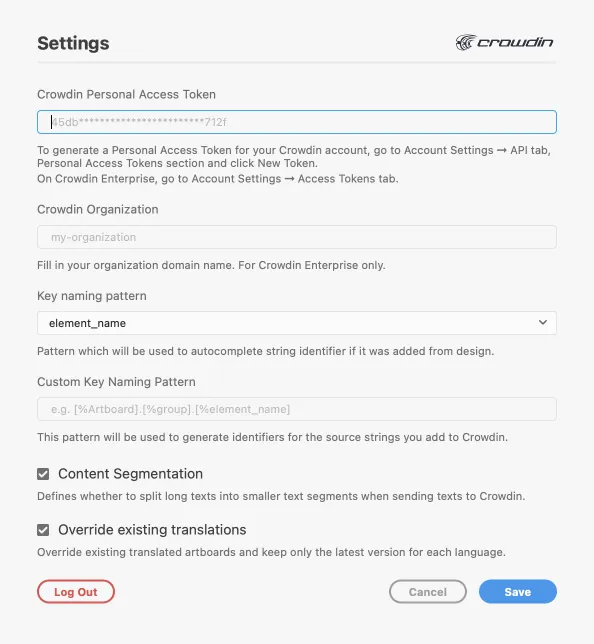
To specify your Crowdin credentials in Adobe XD, follow these steps:
- On the left panel, click Plugins > Crowdin for Adobe XD.
- Click .
- Provide your Personal Access Token.
- Click Save.
To generate a new token in Crowdin, follow these steps:
- Go to Account Settings > API, Personal Access Tokens section, and click New Token.
- Specify Token Name and click Create.
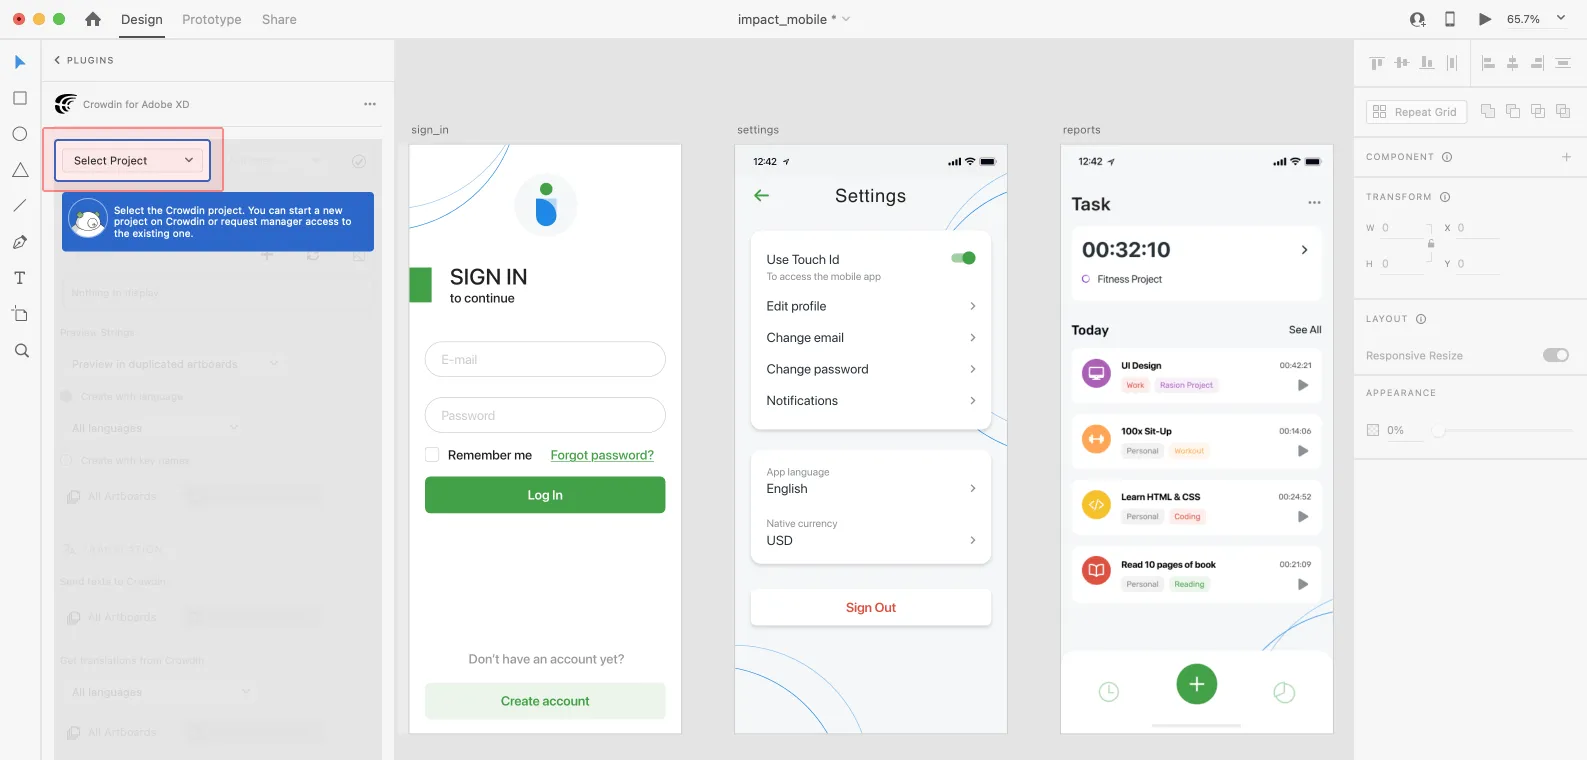
To select the Crowdin project you’d like to work with, click the drop-down menu, and select a project from the list. Later, you can use the same drop-down menu to switch to another project if needed.
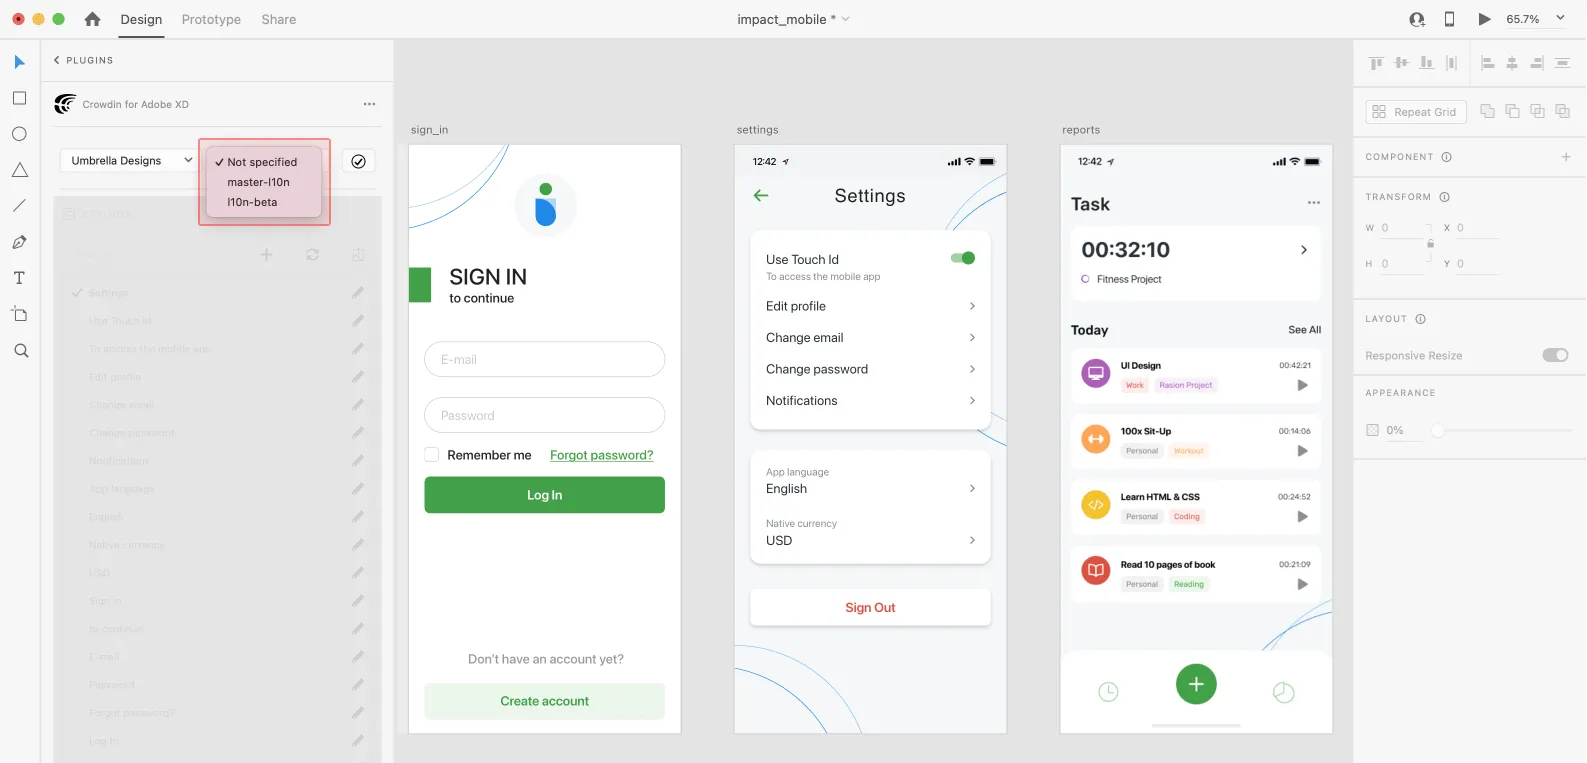
Select the specific branch your content will be uploaded to. If your Crowdin project doesn’t have branches, leave it empty.
Use the Strings section when localizing UI and working on dynamic pages with your development and marketing teams. In this section, you can add source strings from Crowdin to your designs in Adobe XD in a click. After the texts are used in the designs, you can automatically upload tagged screenshots for translators’ reference back to Crowdin.
Using Source Strings from Crowdin in Adobe XD
Section titled “Using Source Strings from Crowdin in Adobe XD”- Open the Crowdin plugin for Adobe XD.
- In the Strings section, use the Search field to find the specific copy. You can search strings by source text, string identifier, or context.
- Select the text layer to which you want to add text and click on the needed string.
After using the source strings from Crowdin in your designs, they become linked with the text fields, and you can preview translations for these strings in Adobe XD and upload screenshots for them to your Crowdin project.
You can link a single Crowdin string to one or multiple text fields in Adobe XD. However, one text field can be linked only to a single Crowdin string. If you link a text field with an existing connection to a new Crowdin string, the previous connection will be terminated, and a new connection will be established. If you’d like to unlink a Crowdin string from all text fields it was previously linked to, right-click on the link icon next to the needed string.
Adding Source Strings from Adobe XD to Crowdin
Section titled “Adding Source Strings from Adobe XD to Crowdin”You can add strings already used in the designs or create and add completely new strings.
- Open the Crowdin plugin for Adobe XD.
- To add the strings used in the designs, select the whole artboard, multiple artboards, or the needed strings on the artboards. Alternatively, skip this step if you want to add a new string.
- In the Strings section, click .
- In the appeared dialog, fill in the required fields.
- (Optional) To add labels to the strings, alternately select them from the Label drop-down menu and click Save.
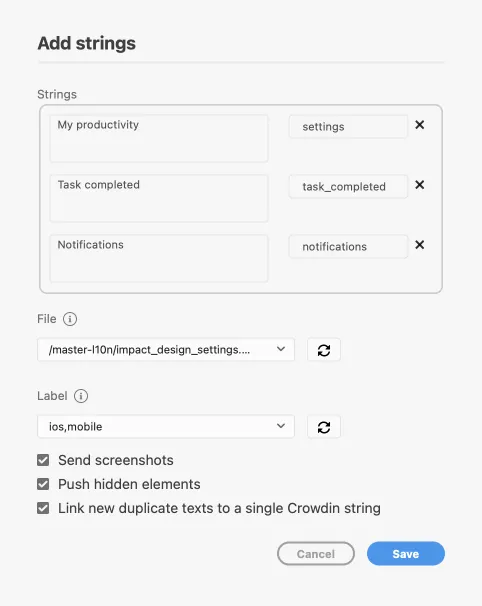
To add the same strings into multiple files in Crowdin, alternately select the needed files from the File drop-down menu.
Clear the Push hidden elements option if some artboards contain hidden elements that should not be added to Crowdin.
When adding multiple strings, you may want to select Link new duplicate texts to a single Crowdin string. It’s useful in the following cases:
- When adding multiple text fields with the same text, the plugin will add only one string to your Crowdin project and link all duplicate text fields to it.
- If your Crowdin project already contains a string with the same text you’re adding from designs, the plugin will only link the text fields to the existing string and won’t create a new one.
Added strings will be transferred to your Crowdin project and also displayed in the Strings section’s list. You can edit or delete the strings from the same list anytime. The respective changes will also be applied to the strings in your Crowdin project.
Configuring ICU Source String Placeholders
Section titled “Configuring ICU Source String Placeholders”When using ICU strings in your design, you can set the placeholders’ values, and after adding such strings to designs, they will be displayed in a formatted view with the preconfigured values.
Once you use the needed ICU string from Crowdin in your design, you can configure its placeholders’ values.
- Open the Crowdin plugin for Adobe XD.
- In the Strings tab, use the Search field to find the specific copy. You can search strings by source text, string identifier, or context.
- Click on the needed ICU string.
- Click Set placeholders.
- Type the needed values for ICU string placeholders.
- Click Submit to save the entered placeholders.
- Click Edit String to update the source string text in designs.
When previewing translations for ICU strings in Adobe XD, they will also be displayed in a formatted view if the values were preconfigured beforehand.
To simplify adding strings from Adobe XD to the Crowdin project, you can set up the desired key naming pattern for the source string identifiers in the plugin settings. The Crowdin plugin for Adobe XD will suggest the string identifiers for new strings based on the selected pattern. While adding new source strings, you can always edit the suggested identifier to the preferred look.
To select the key naming pattern, follow these steps:
- Open the Crowdin plugin for Adobe XD.
- Open the plugin Settings.
- In the Key naming pattern section, select the preferred option from the drop-down menu.
Besides the existing patterns, you can configure your own pattern. To use a custom pattern, select the Custom key naming pattern option from the drop-down list and specify your pattern in the Custom Key Naming Pattern field.
When adding source strings used in the designs, make sure to keep Send screenshots selected. As a result, the Crowdin plugin for Adobe XD will upload screenshots along with the source strings.
Also, you can update screenshots with an Update screenshots option while editing a Crowdin string that is linked to the text fields in designs.
Additionally, you can mass upload screenshots to Crowdin for strings linked with text fields in designs.
- Open the Crowdin plugin for Adobe XD.
- Select one or more artboards with the linked strings.
- In the Strings section, click to upload screenshots for selected artboards.
Read more about Screenshots.
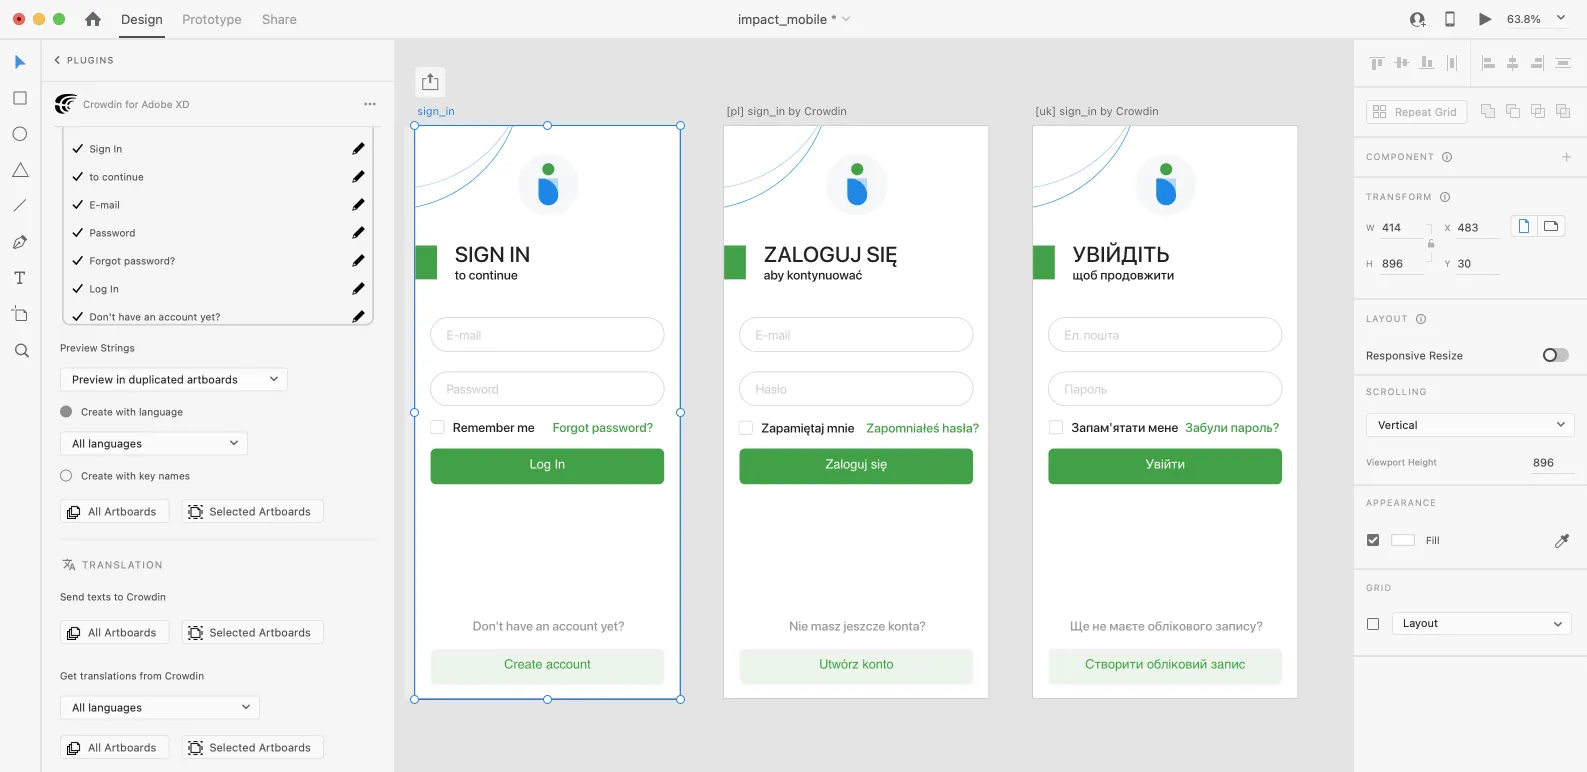
Preview translations from Crowdin for the strings used in the designs in Adobe XD. You can preview translations in the new artboards or the original ones. When previewing translations in the new artboards, you can populate them with the actual translations or with string keys for further use by developers.
To preview strings populated with translations, follow these steps:
- Open the Crowdin plugin for Adobe XD.
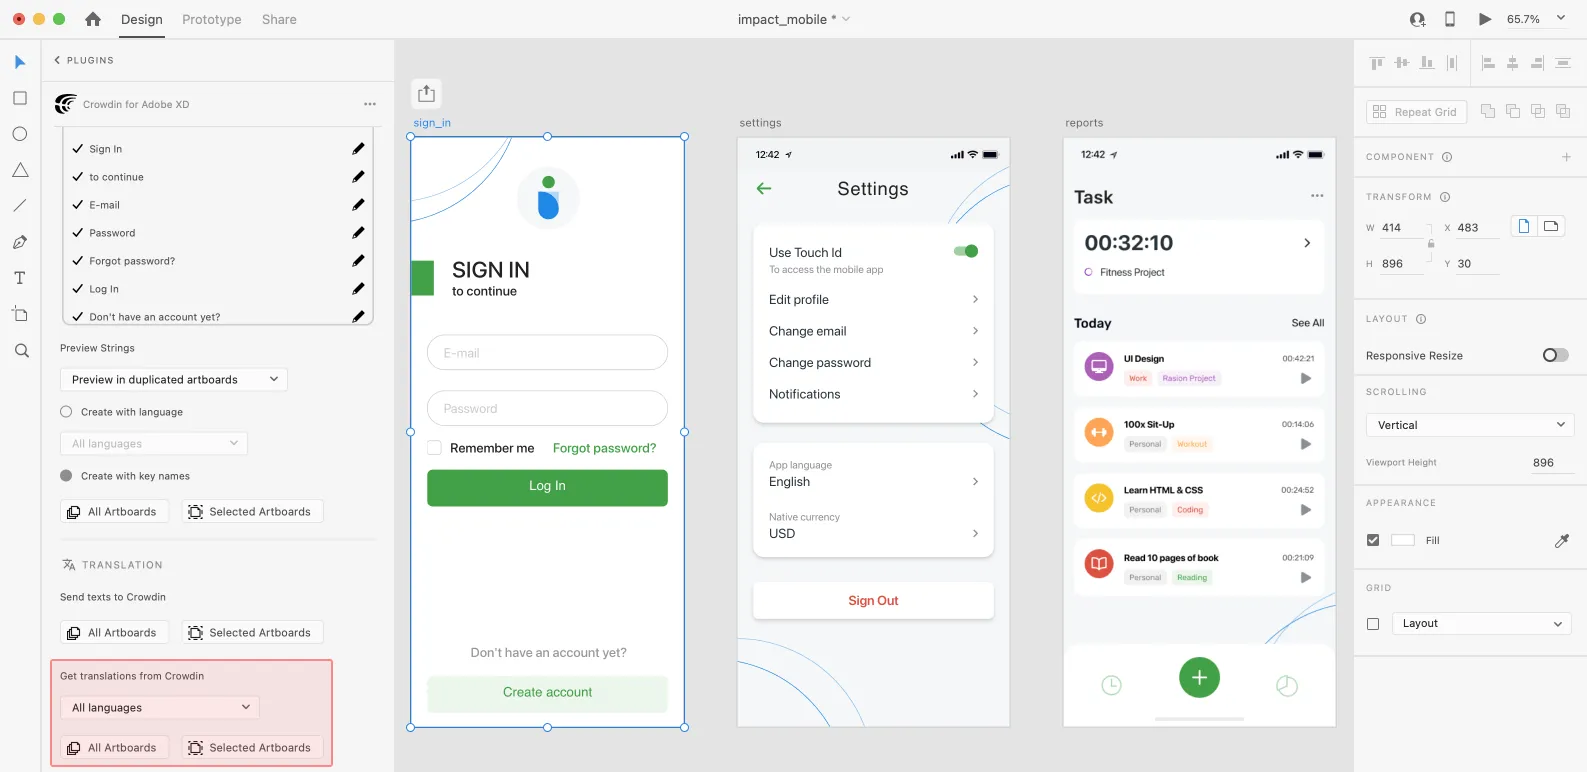
- In the Strings > Preview Strings section, select Preview in duplicated artboards or Preview in the current artboards.
- Select Create with language.
- Select the target language you want to preview translations for. You can also choose All languages.
- Choose the content you want to preview in Adobe XD. Select All Artboards or Selected Artboards.
To preview strings populated with key names, follow these steps:
- Open the Crowdin plugin for Adobe XD.
- In the Strings > Preview Strings section, select Preview in duplicated artboards.
- Select Create with key names.
- Choose the content you want to preview in Adobe XD. Select All Artboards or Selected Artboards.
Use the Translation section to localize static pages, like brochures and banners. In this section, you can send texts with context for translators to Crowdin and upload translated copies back to Adobe XD.
You can send text for translation either from selected or all artboards from an Adobe XD file. Translators will work with those texts in the list view and use designs as an additional context for even higher translation quality.
In Crowdin, a root folder Adobe XD plugin will be created. It will contain a subfolder named after your XD file with HTML files for each artboard inside. This folder can also contain a free-text.html file with texts not included in any of the artboards. If needed, you can disable content segmentation in the plugin Settings so long texts will not be split into sentences.
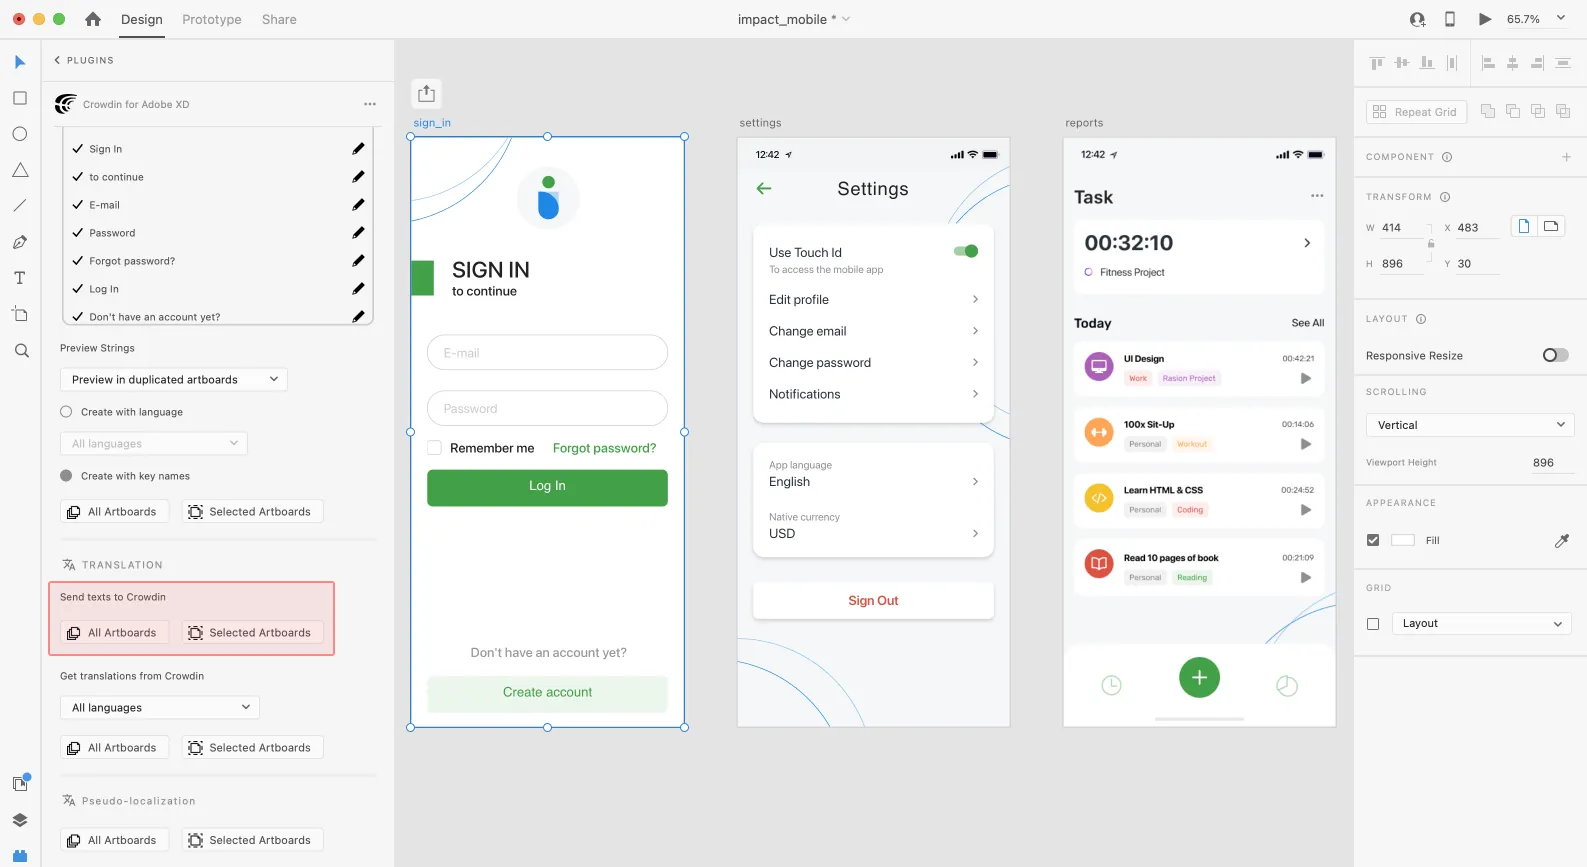
To send Adobe XD designs for translation, follow these steps:
- Open the necessary Adobe XD file.
- Go to Plugins > Crowdin for Adobe XD.
- In the Translation > Send texts to Crowdin section, select the content you’d like to translate. Select All Artboards or Selected Artboards.
When the source files are uploaded to your Crowdin project, you can invite contributors to translate and proofread them.
Read more about translation strategies.
Uploading Translations from Crowdin to Adobe XD
Section titled “Uploading Translations from Crowdin to Adobe XD”You can synchronize texts between Adobe XD and Crowdin projects whenever you want to test the translated copy inside Adobe XD or generate multilingual assets.
To upload translated copies to Adobe XD, follow these steps:
- Open the necessary Adobe XD file.
- Go to Plugins > Crowdin for Adobe XD.
- In the Translation > Get translations from Crowdin section, select the target language you want to upload translations for. You can also select All languages.
- Select the content you want to preview in Adobe XD. Select All Artboards or Selected Artboards.
After uploading translations to Adobe XD, the modified file will contain a separate artboard with translations for each target language. The newly uploaded translated versions won’t override the ones you uploaded previously. You can always delete the translated copies you no longer need.
If you’d like the newly uploaded translated versions to override the previously uploaded ones, open the plugin Settings and select Override existing translations.
Even before translations are completed, you can test whether your application is ready to be localized using pseudo-localization. This feature allows you to simulate how the application’s UI will look with different languages to check whether the source strings should be modified before the project localization starts.
Once you send your texts for translation, you can start pseudo-localization.
- Open the necessary Adobe XD file.
- Go to Plugins > Crowdin for Adobe XD.
- In the Pseudo-localization section, select the content you’d like to test with pseudo-localization. Select All Artboards or Selected Artboards.
- In the dialog box that appears, you can choose from predefined presets (French, Cyrillic, Chinese, Arabic) and configure the settings according to your preferences:
- Length Correction – allows you to make strings longer or shorter to see whether your product’s UI properly handles other languages. As translations in some languages can be longer or shorter than the source texts in your project.
- Prefix/Suffix – allows you to add special characters at the beginning and end of each string.
- Character Transformation – replaces English characters with easily identifiable accented versions, random Arabic symbols, or Chinese ideographs to make it obvious if there are some hard-coded strings in your application.
- Click Pseudo-localize.
Read more about Pseudo-localization.