File Management
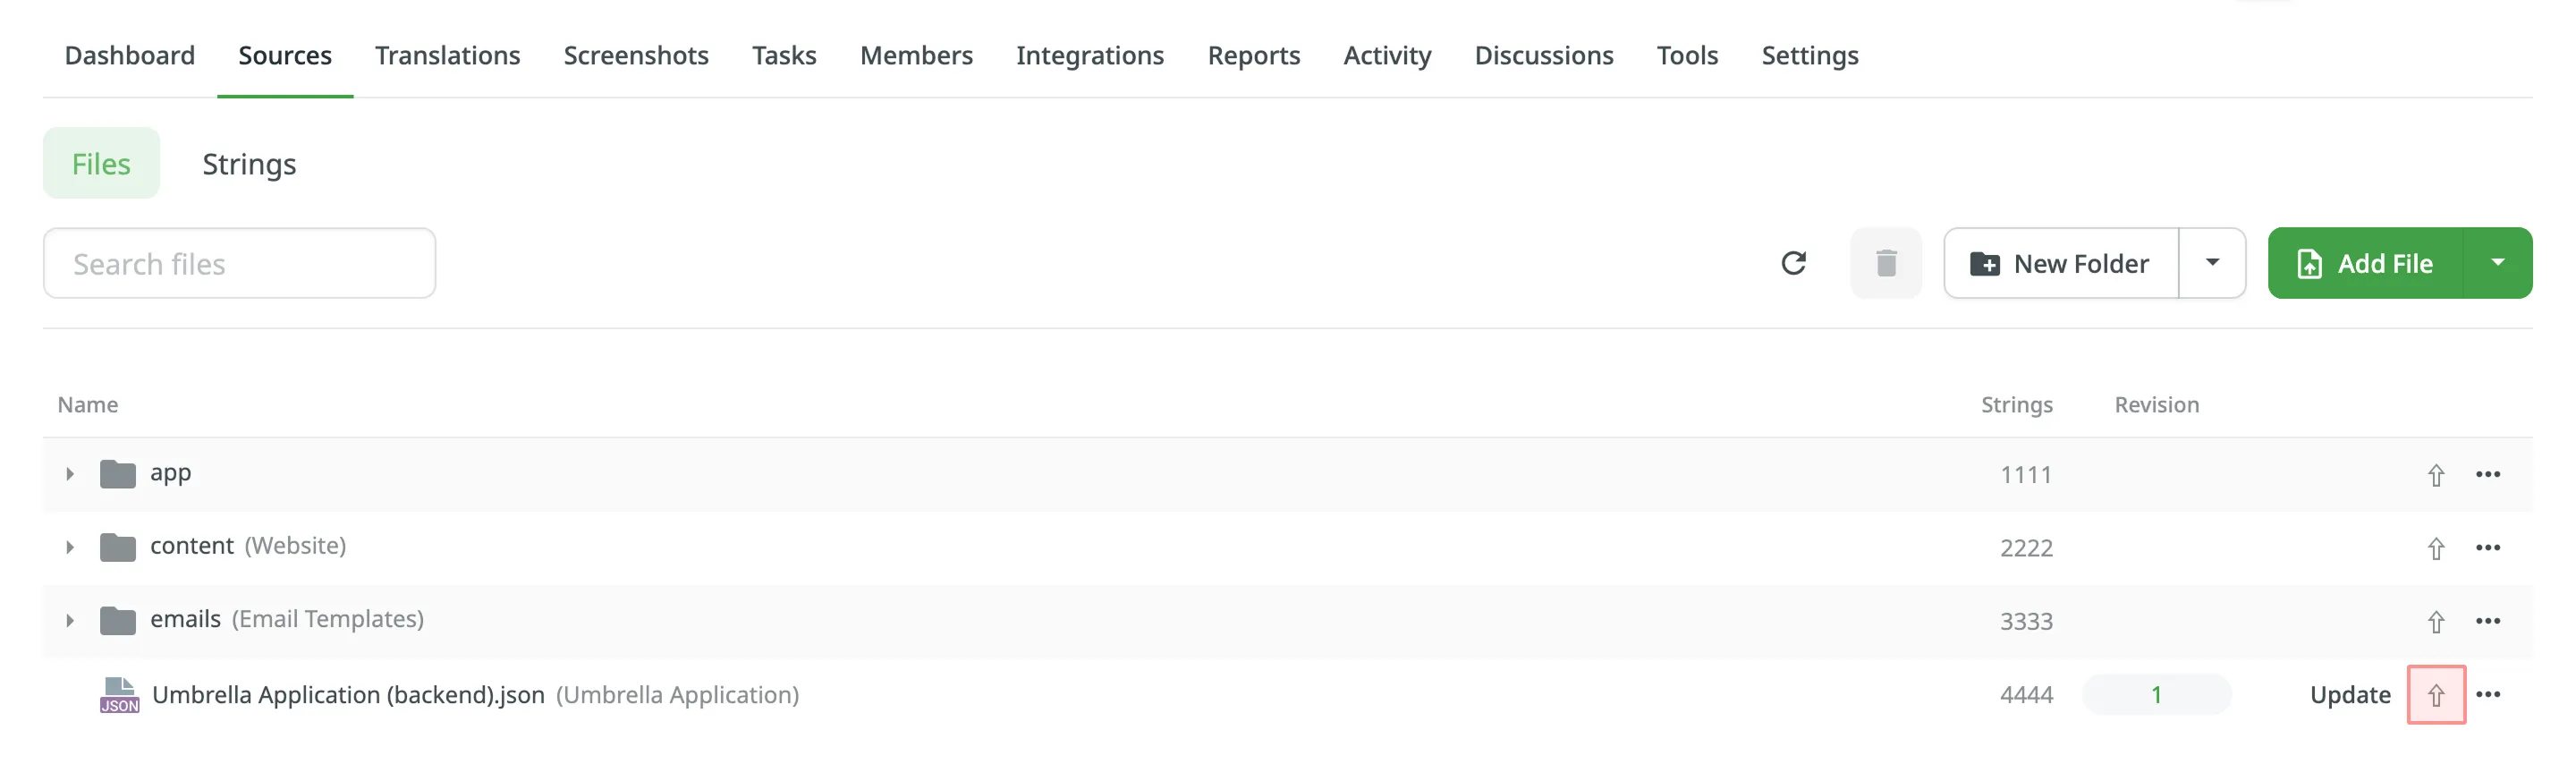
You can manage all the project’s files via Sources > Files. Here you can manually upload files for localization using various supported formats. When the files are uploaded, you’ll be able to take a glance at how many Strings your files include and how many Revisions (changes) were done to each of them.
If you want to configure an automatic files’ synchronization with your project, use the Integrations tab.
You can set a specific priority for each file by clicking an arrow icon next to the needed file. Then translators will be able to see files sorted according to their priority on the language page and in the Editor.
Files might have the following priorities:
- – low
- – normal
- – high
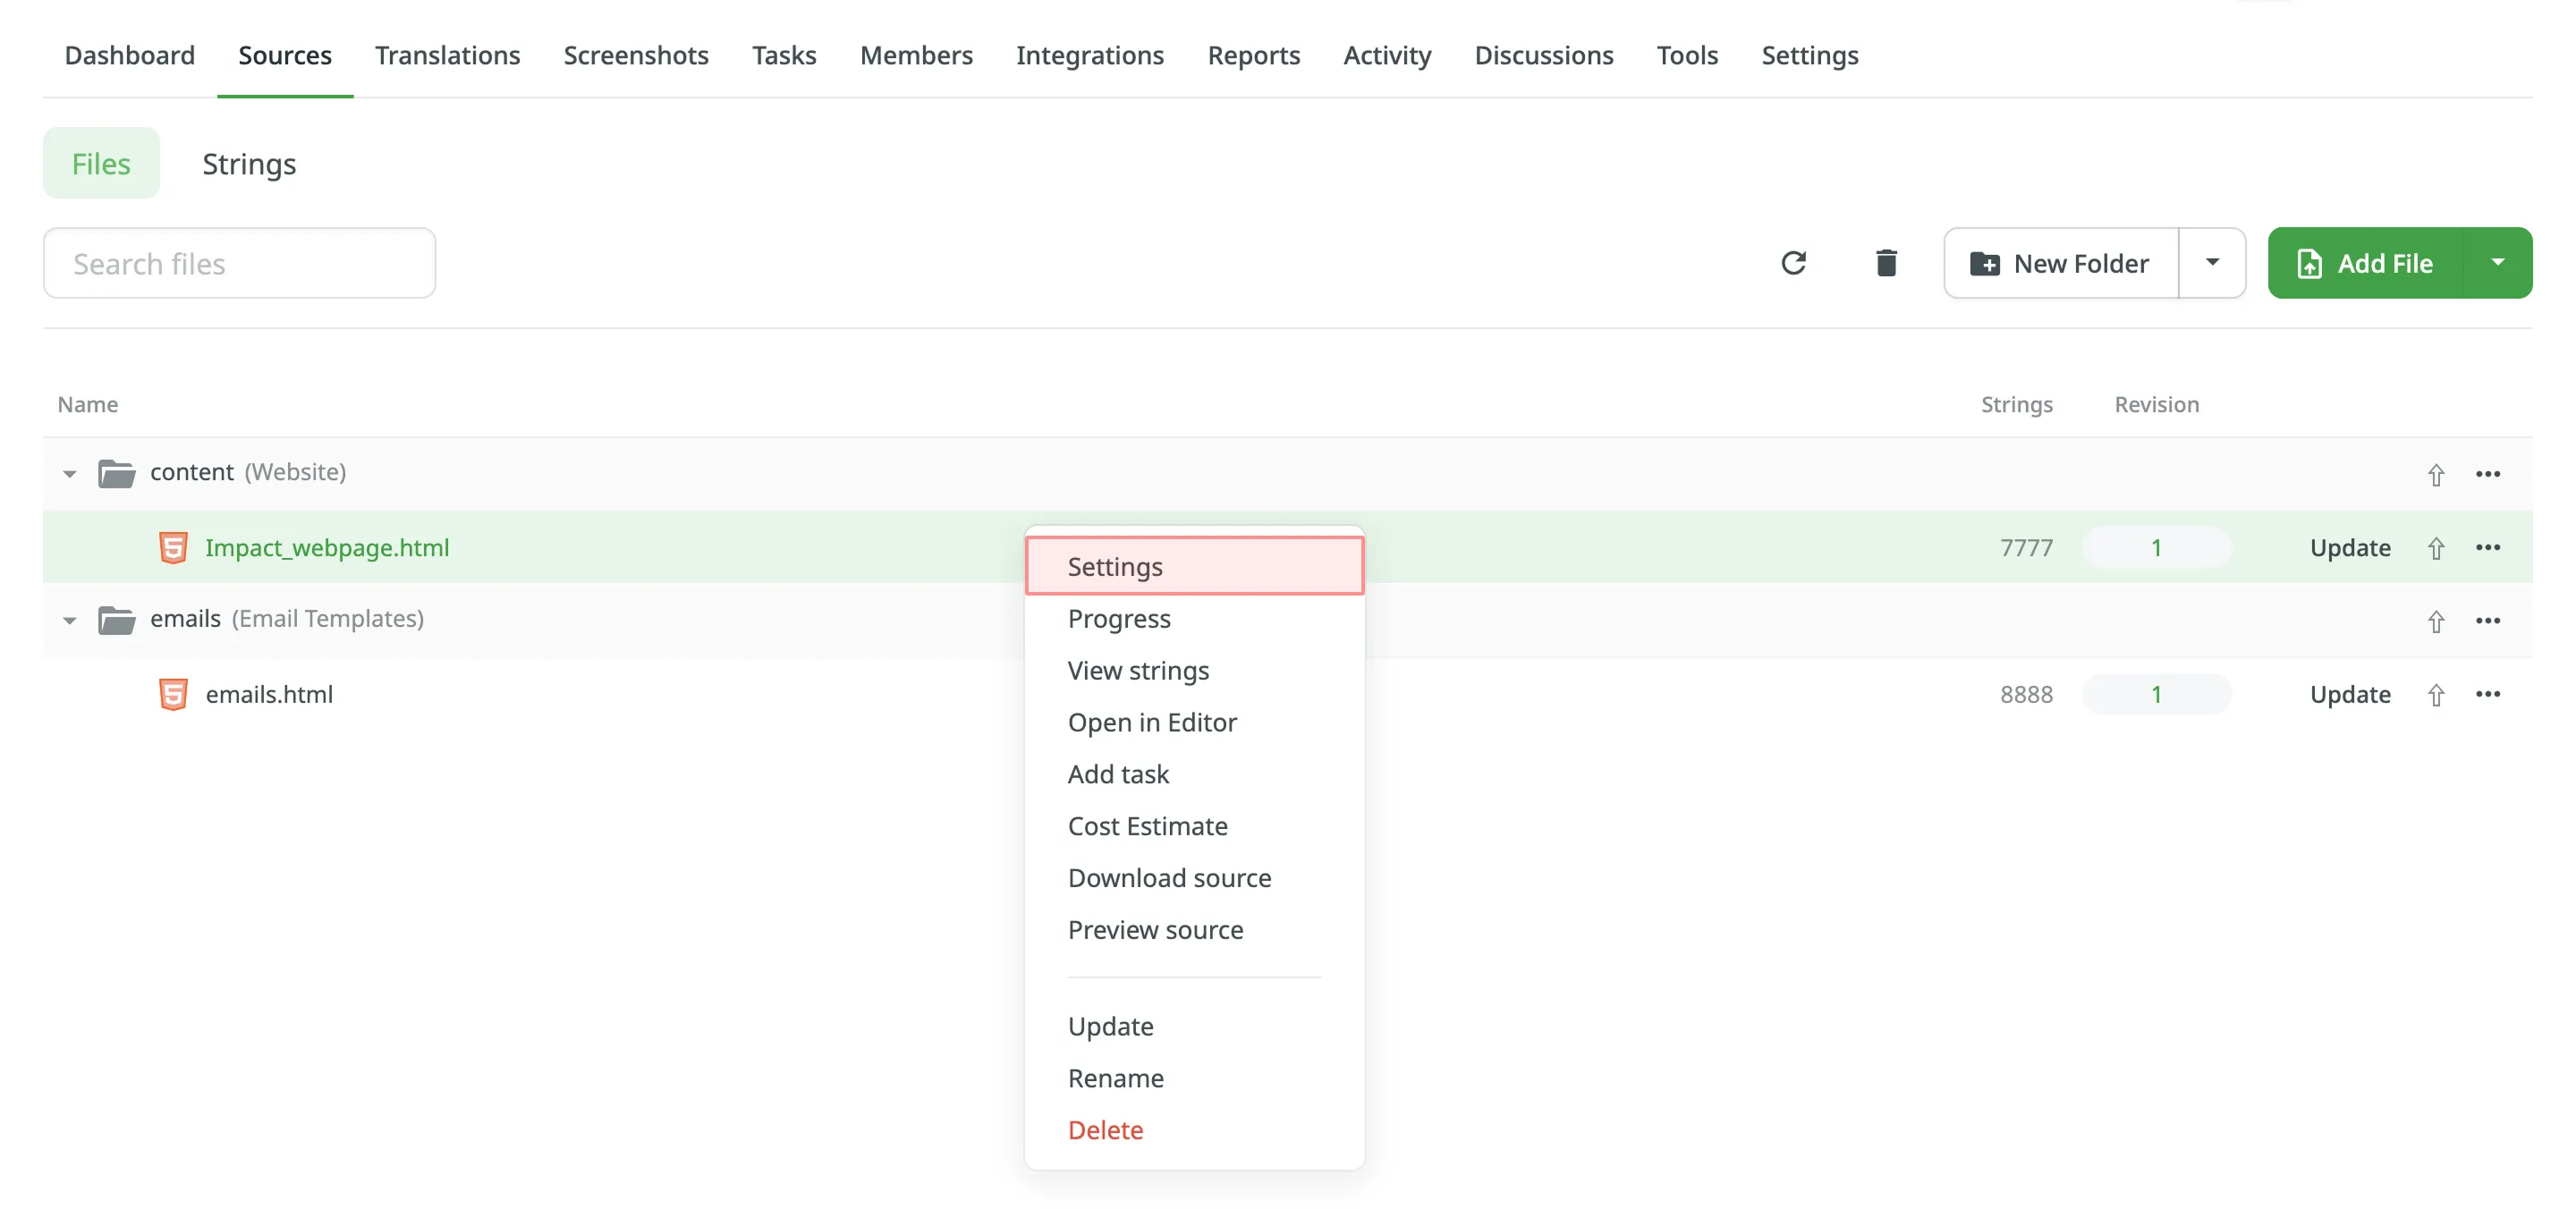
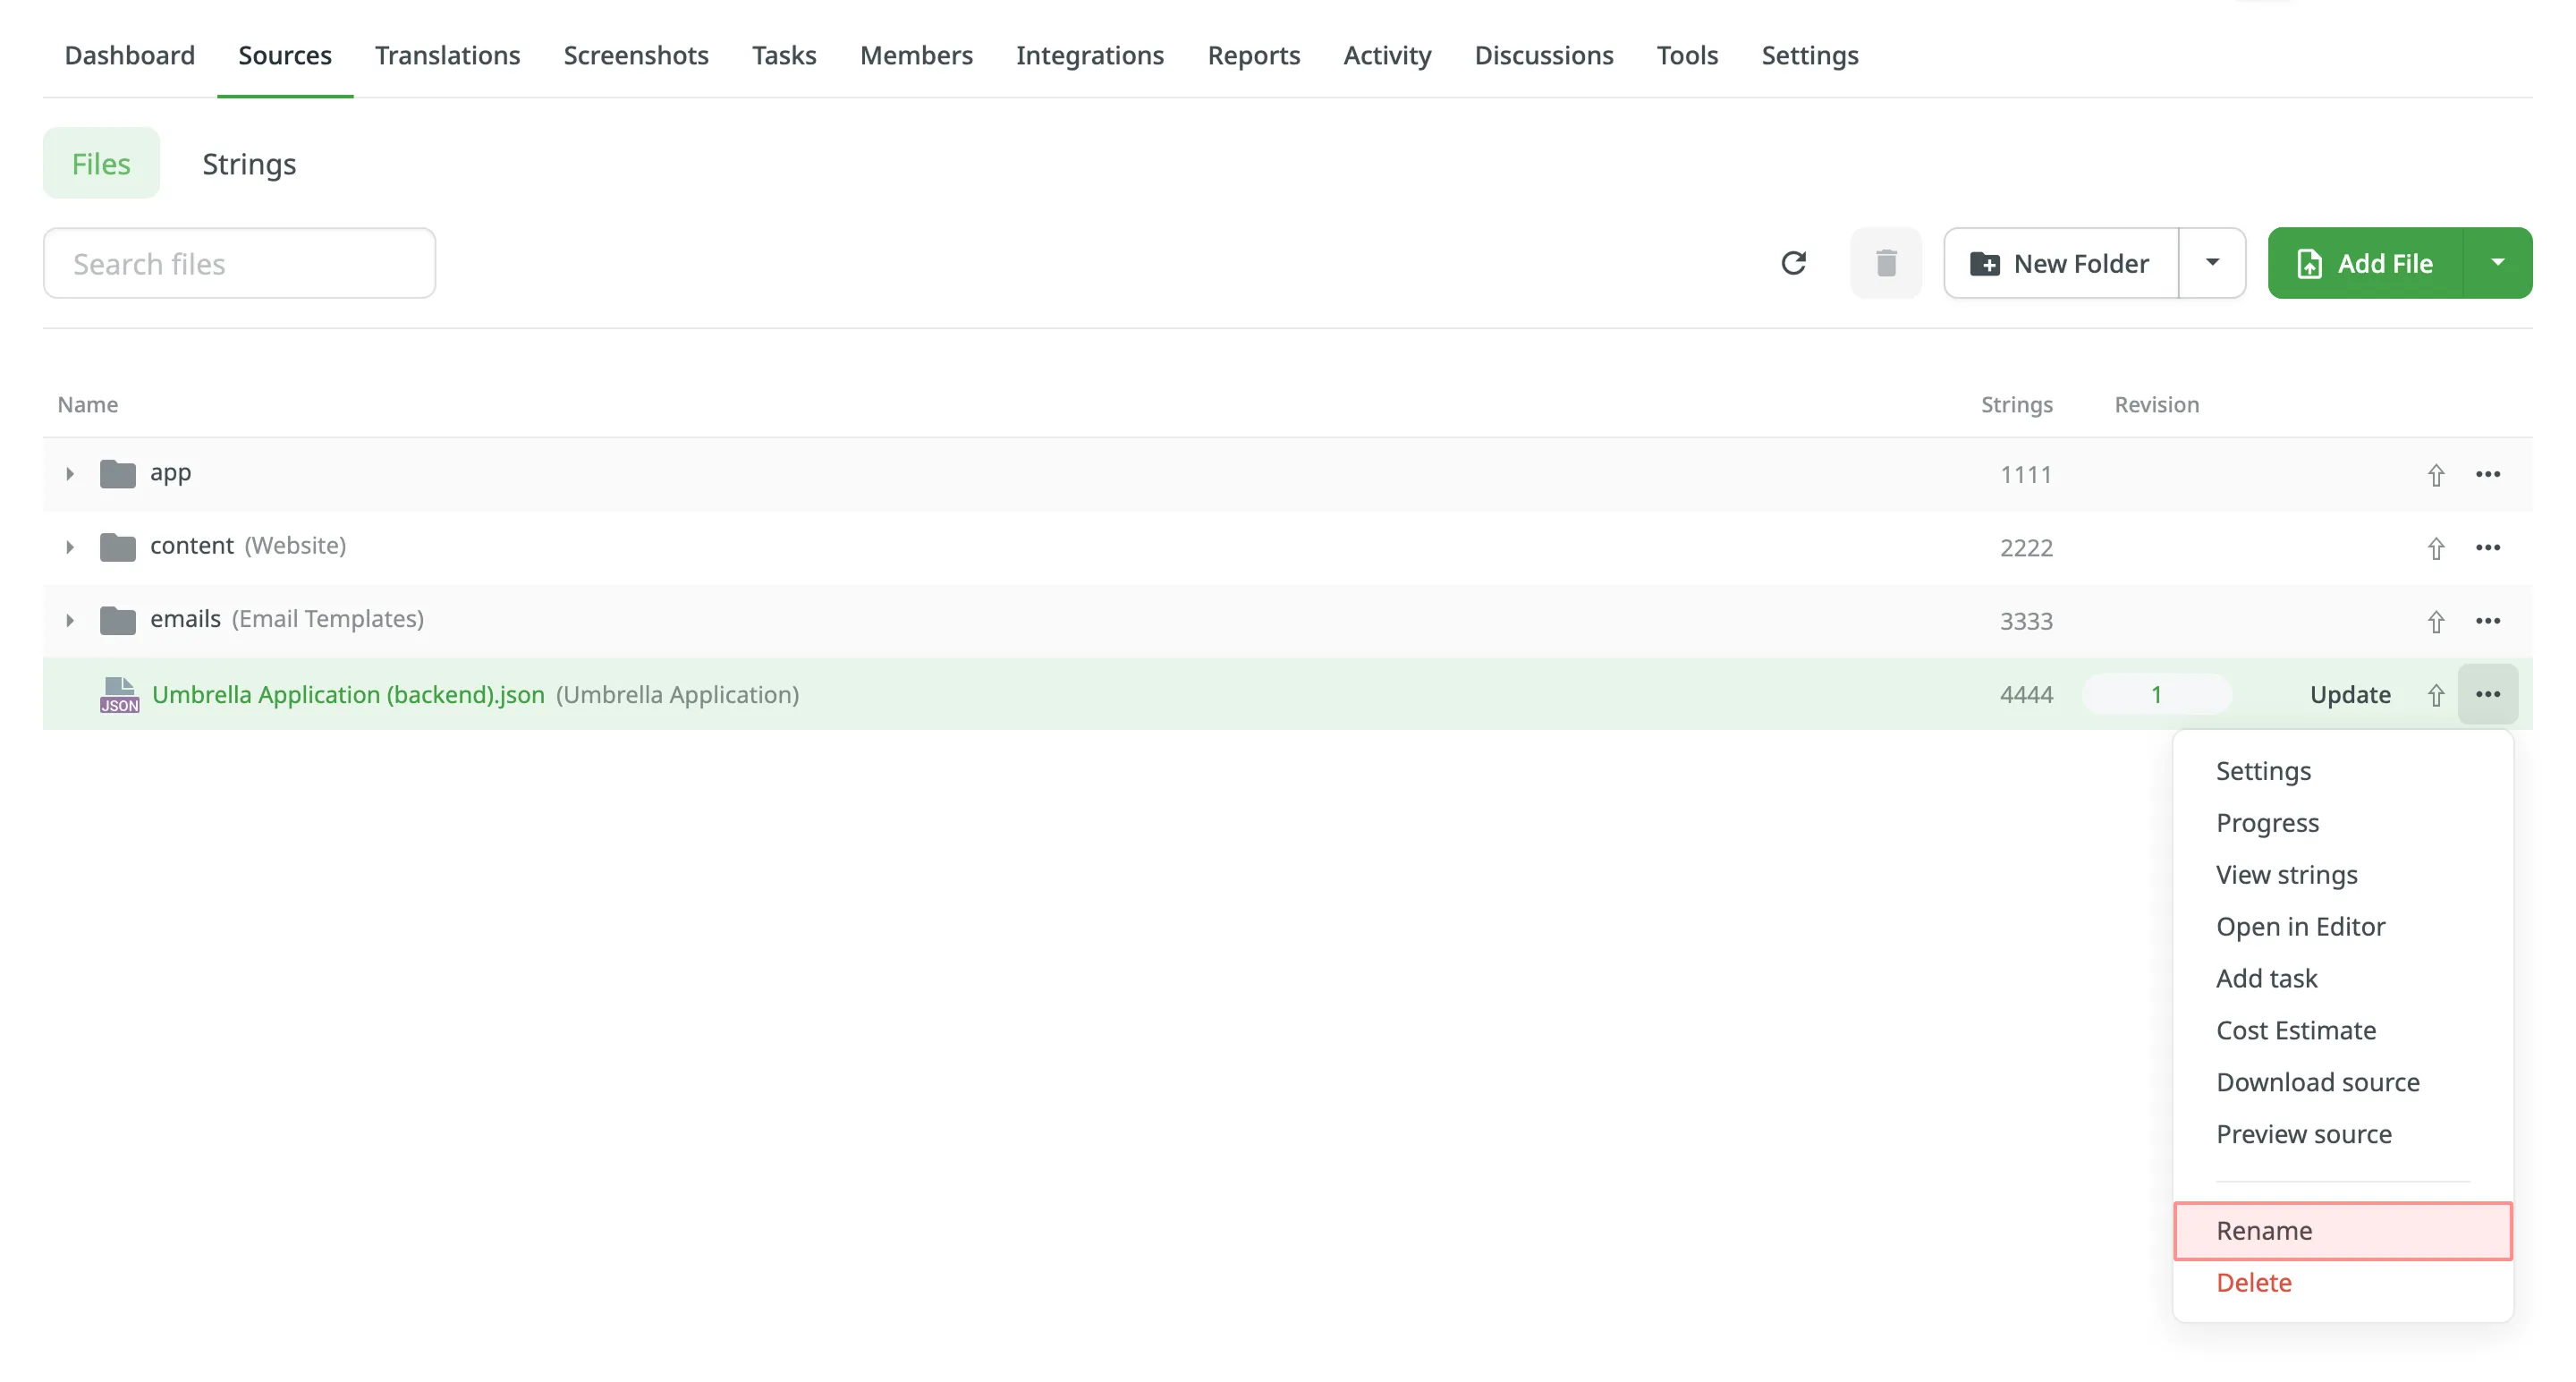
To access the configurations of specific files, right-click on the necessary file or click next to it and then select Settings. Alternatively, just double-click on the file.
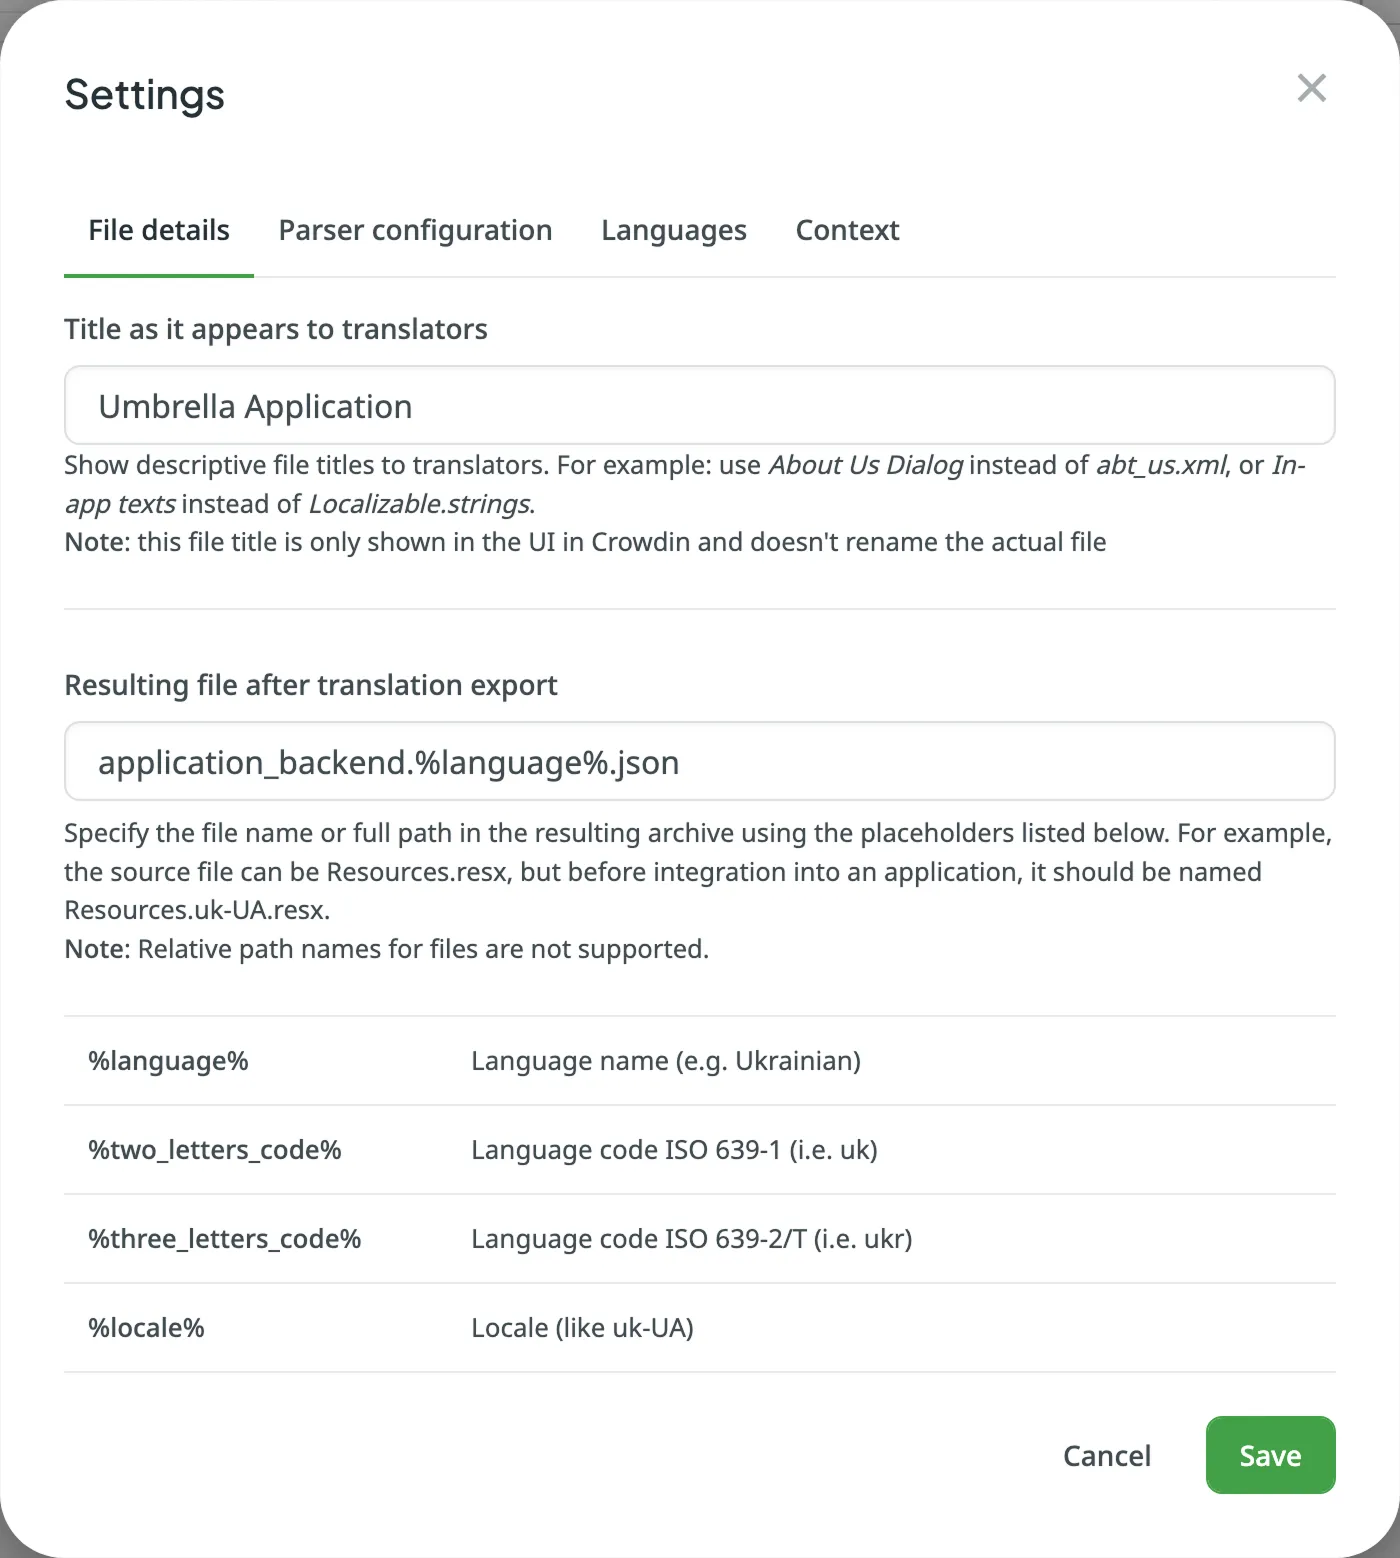
Show descriptive file titles to translators. For example: use About Us Dialog instead of abt_us.xml, or In-app texts instead of Localizable.strings.
Define a file name or full path in the resulting archive, use the available placeholders to indicate the structure of exported content.
For example, you want the source file Overview.csv with Ukrainian translation to be named Overview.ukrainian.csv before integrating it with the application. In this case, you’d need to set the Resulting file after translations export to the following: Overview.%language%.csv.
By default, Crowdin adds Crowdin language codes during the file export. To use custom ones for specific languages in the whole project, set up Language Mapping.
Some file formats allow you to configure import and export behavior. In this case, file’s Settings dialog will also contain the Parser configuration tab.
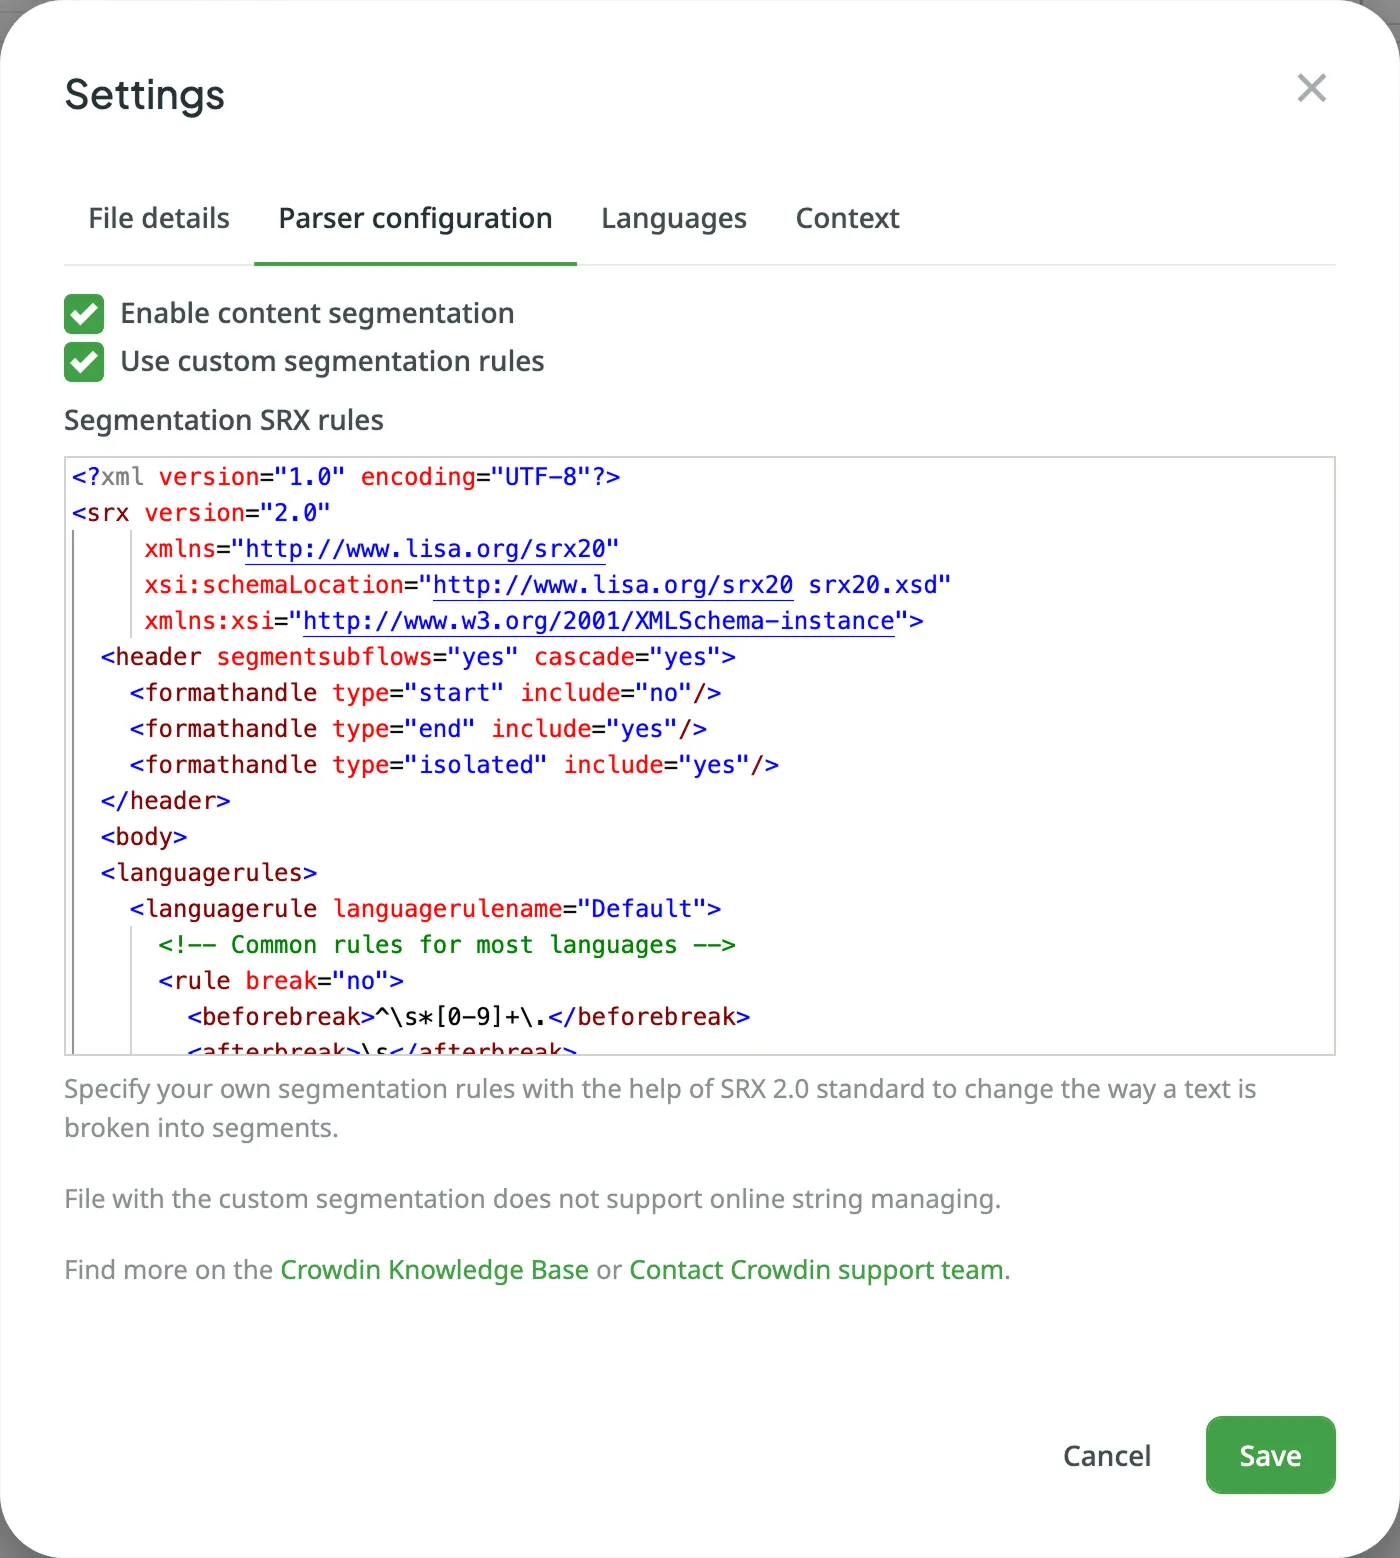
Read more about Parser configuration.
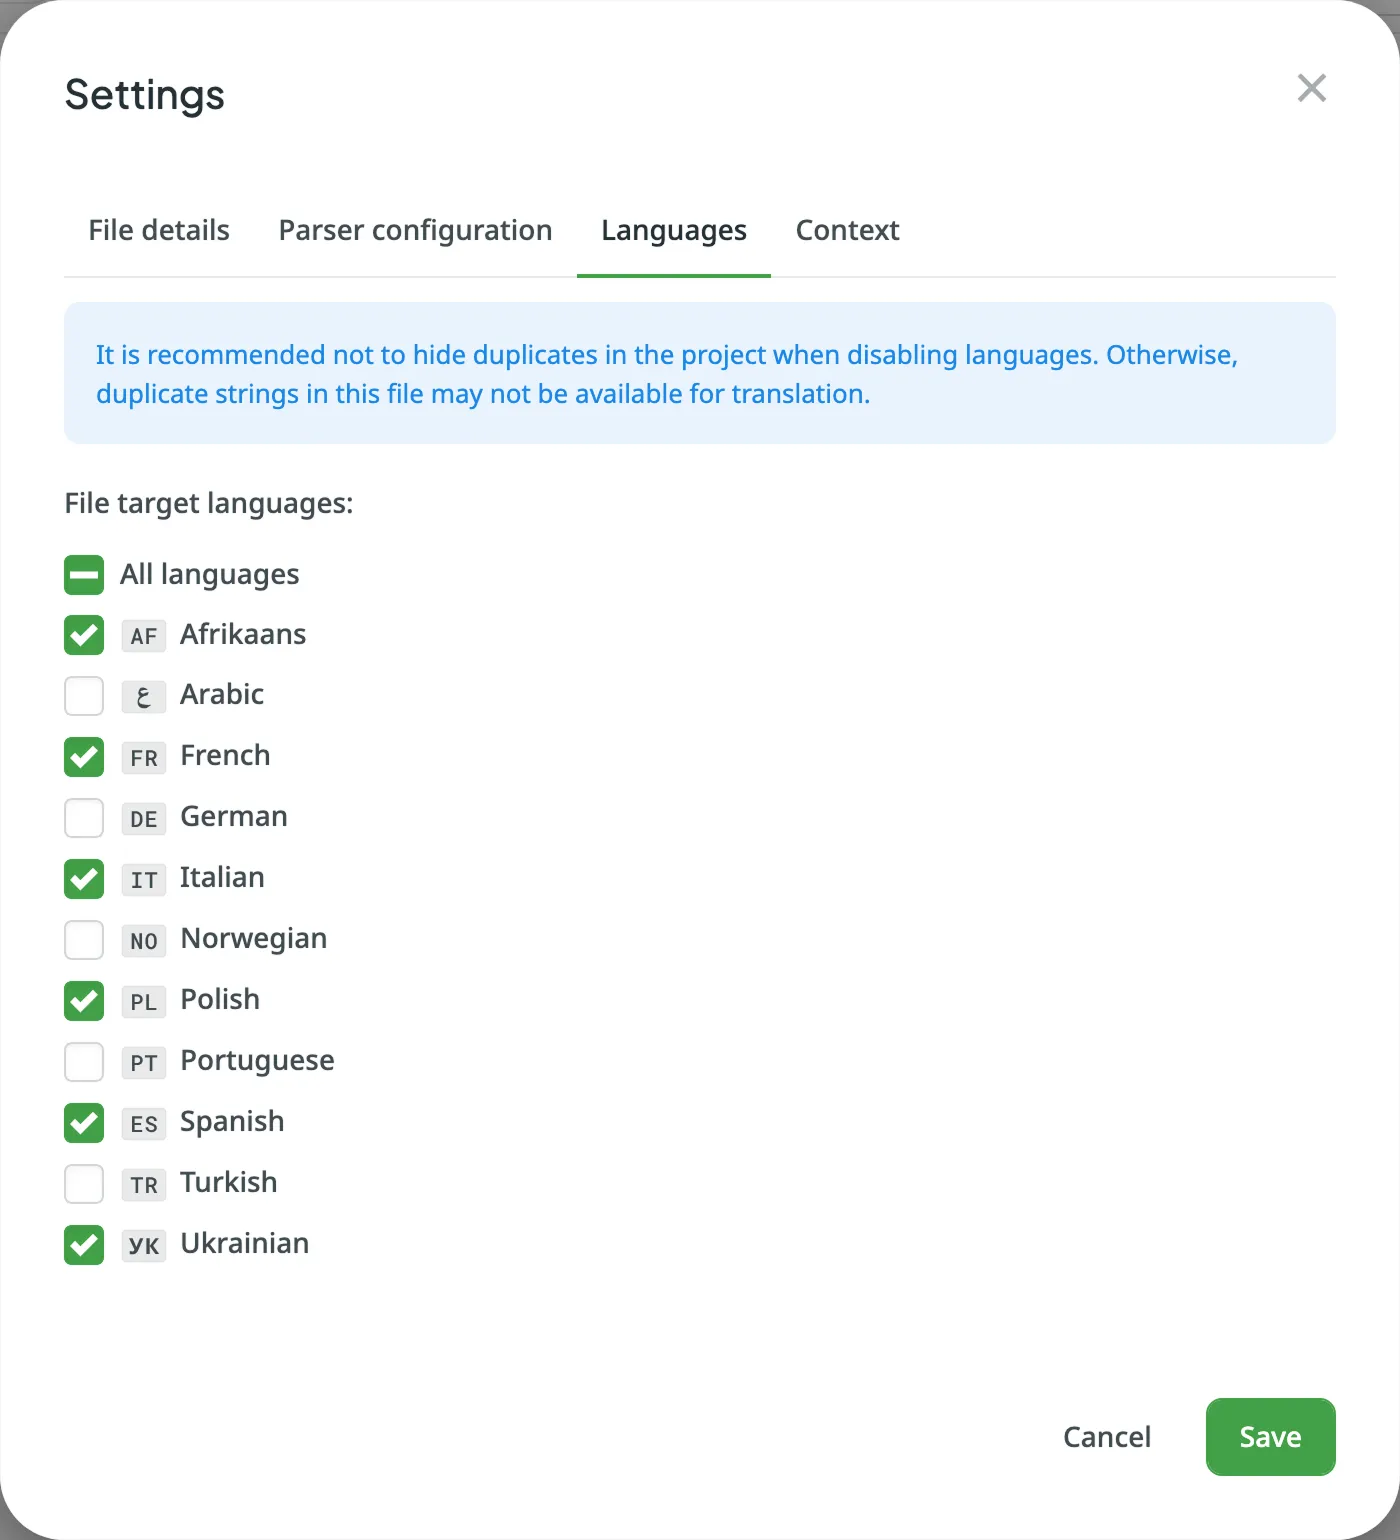
By default, the source files are available for translation into all target languages of the project. Clear the checkboxes in the File target languages list next to the languages your file shouldn’t be translated into, and click Save.
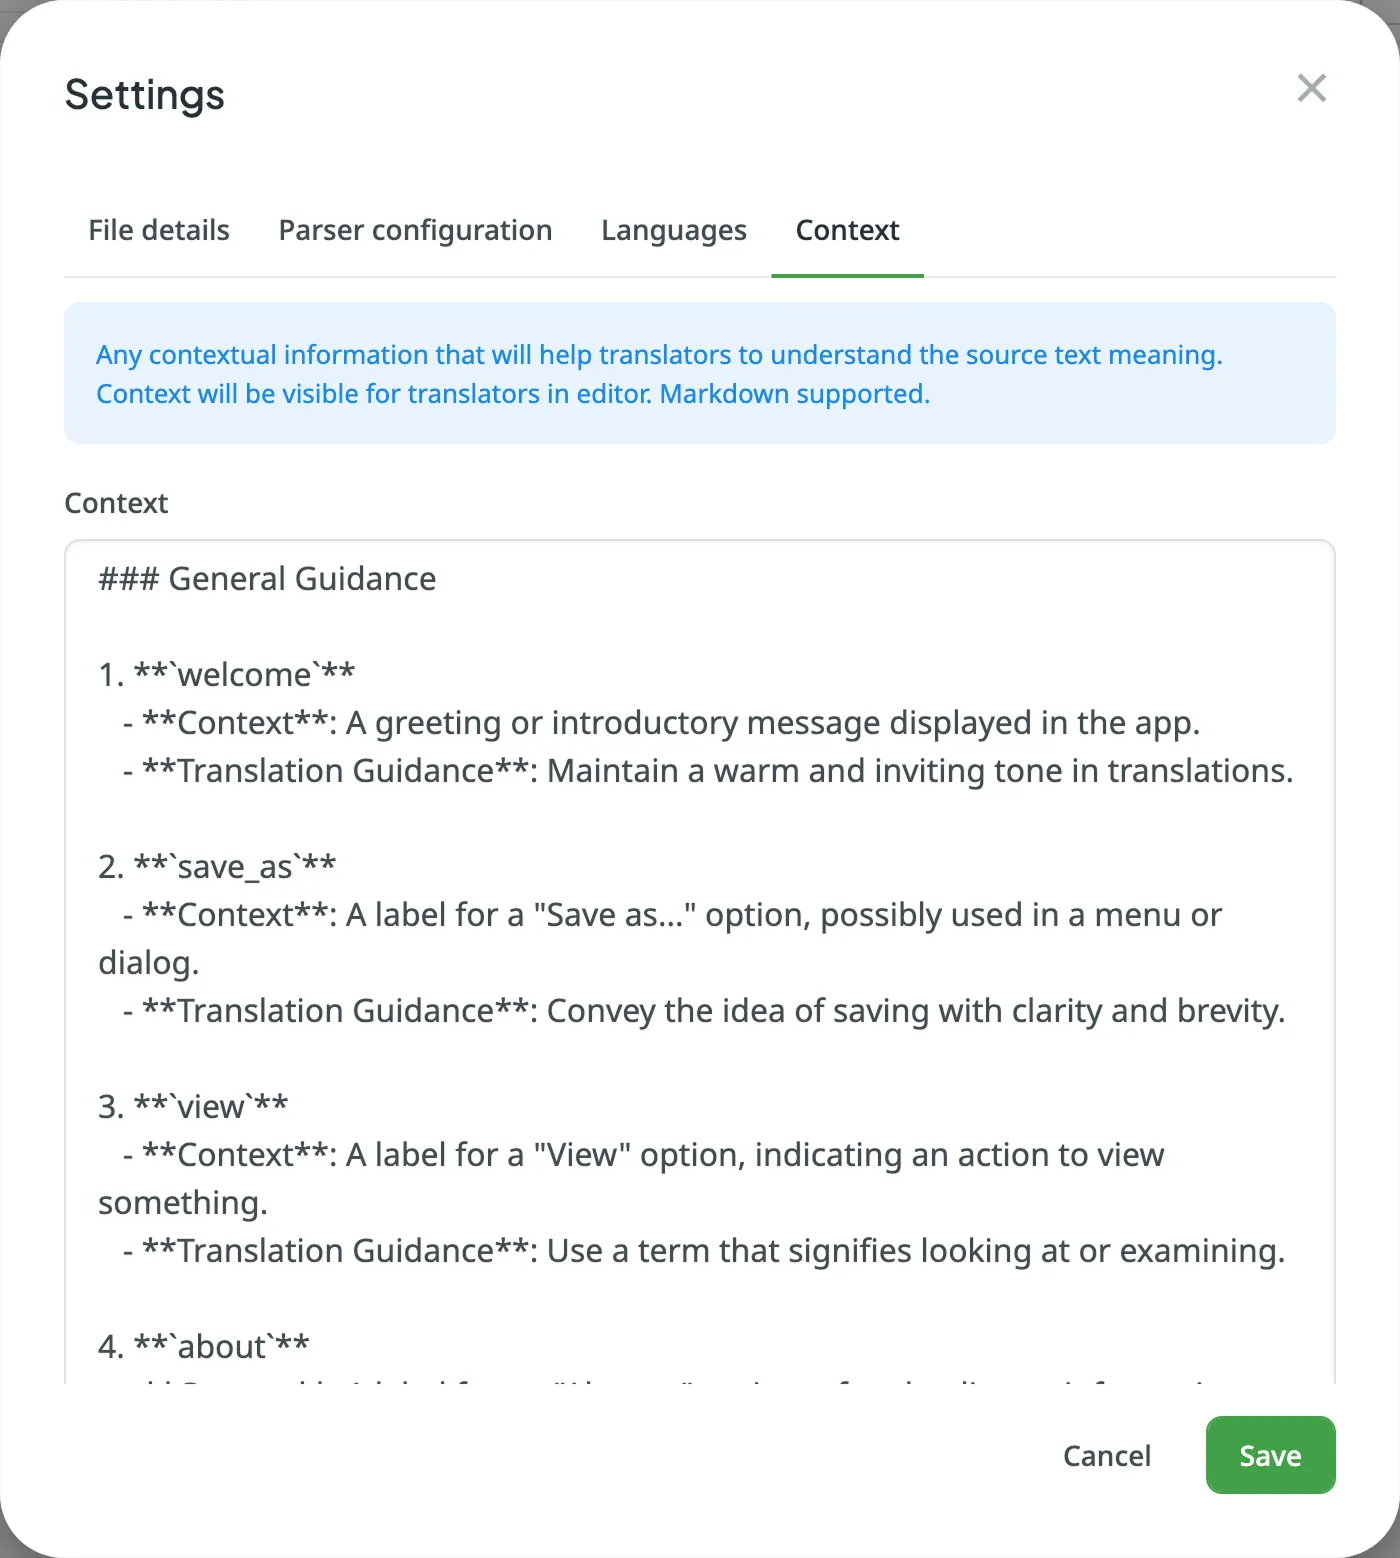
Add additional information or instructions to help translators better understand how to translate a file. File context can be added as plain text or Markdown in File Settings > Context or directly in the Editor. The provided context will be visible to translators in the Editor in the File Context tab. The icon appears next to files that have file context added, helping you quickly identify which files include helpful notes for translators.
To quickly run pre-translation for one or more files or folders, right-click on the necessary item or click next to it and select Pre-translate.
Read more about pre-translating selected files or folders.
To view all strings from a specific file, right-click on the file and select View strings. This opens the Strings tab with a pre-applied filter that displays only the strings from the selected file.
Read more about String Management.
To change the file’s name, right-click on the necessary file or click next to it and select Rename.
To estimate the cost of translation or proofreading for a specific file, right-click on the file and select Cost Estimate.
Read more about generating Cost Estimate report.
To create a task for a specific file, right-click on the file and select Add task. This allows you to assign translation or proofreading work for just that file to selected contributors or translation vendors.
Read more about Project Tasks.
To open a file directly in the Editor, right-click on the file and select Open in Editor. This allows you to review translations and approvals, answer string comments, and more.
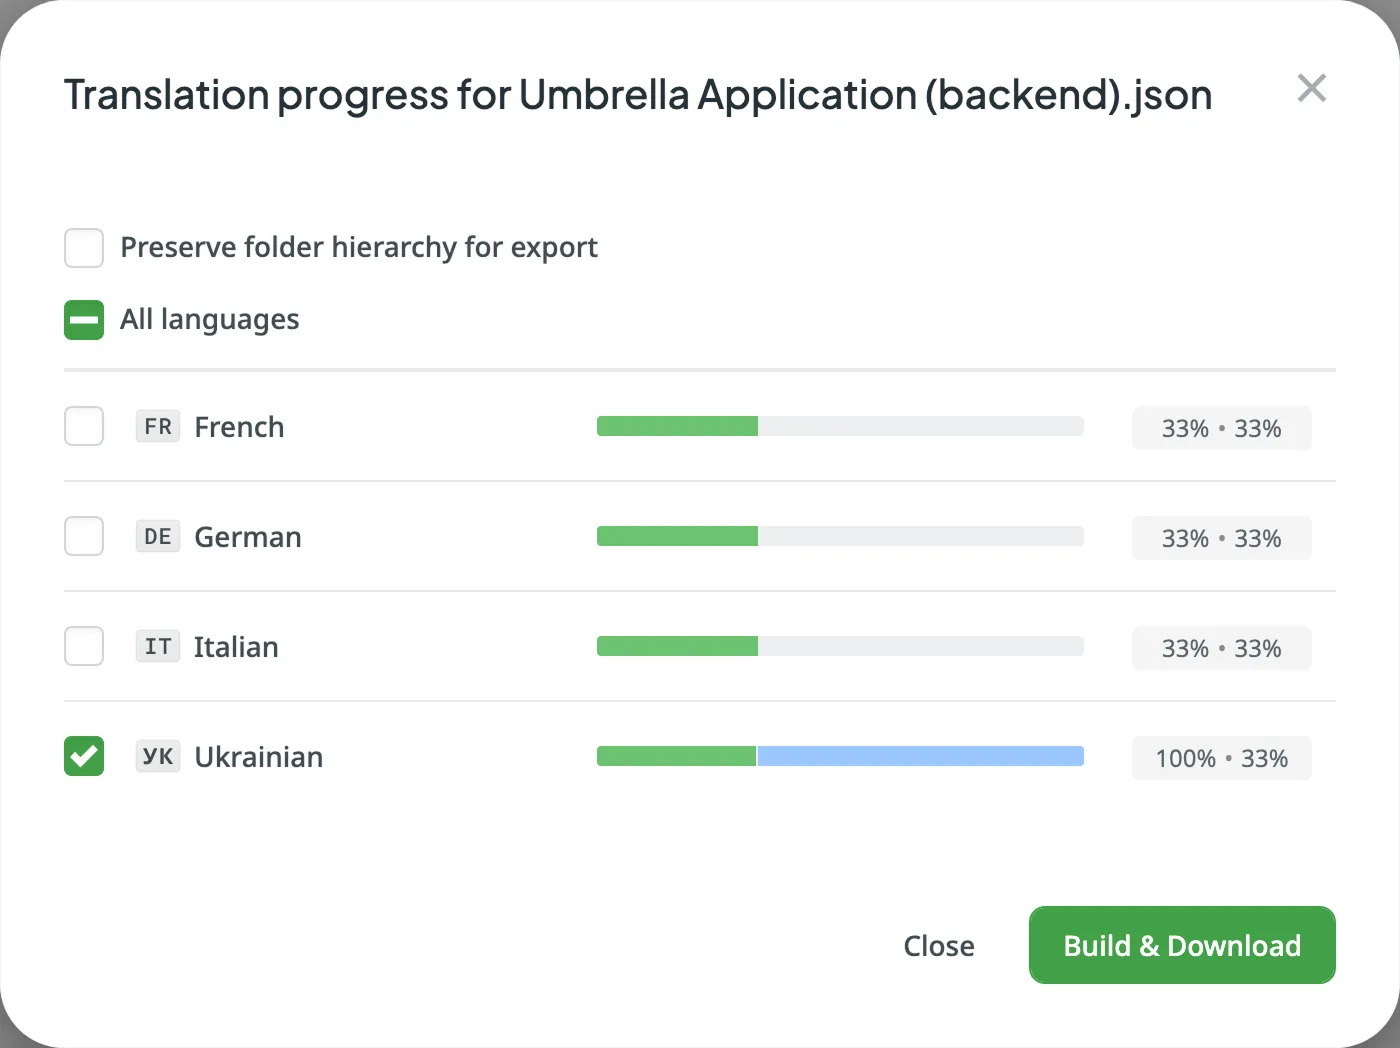
You can check the translation and approval progress for a branch, folder, or file you need. Right-click on the needed branch, folder or file, and select the Progress. To see how many words are translated and approved for each language, hover over the progress bar. To open the selected file in the Editor, click on the needed language.
To download translations for the chosen file, select the required languages, and click Build & Download. Optionally, you can select Preserve folder hierarchy for export to export translation files along with the folders they’re stored in Crowdin.
To preview the raw structure and content of a source file, right-click the file and select Preview source. This opens a read-only modal showing the file’s contents exactly as Crowdin received them.
To download a source file stored in your Crowdin project, right-click on the file and select Download source. This can be useful for reviewing the original content outside Crowdin, sharing it with teammates, or making offline edits before reuploading.
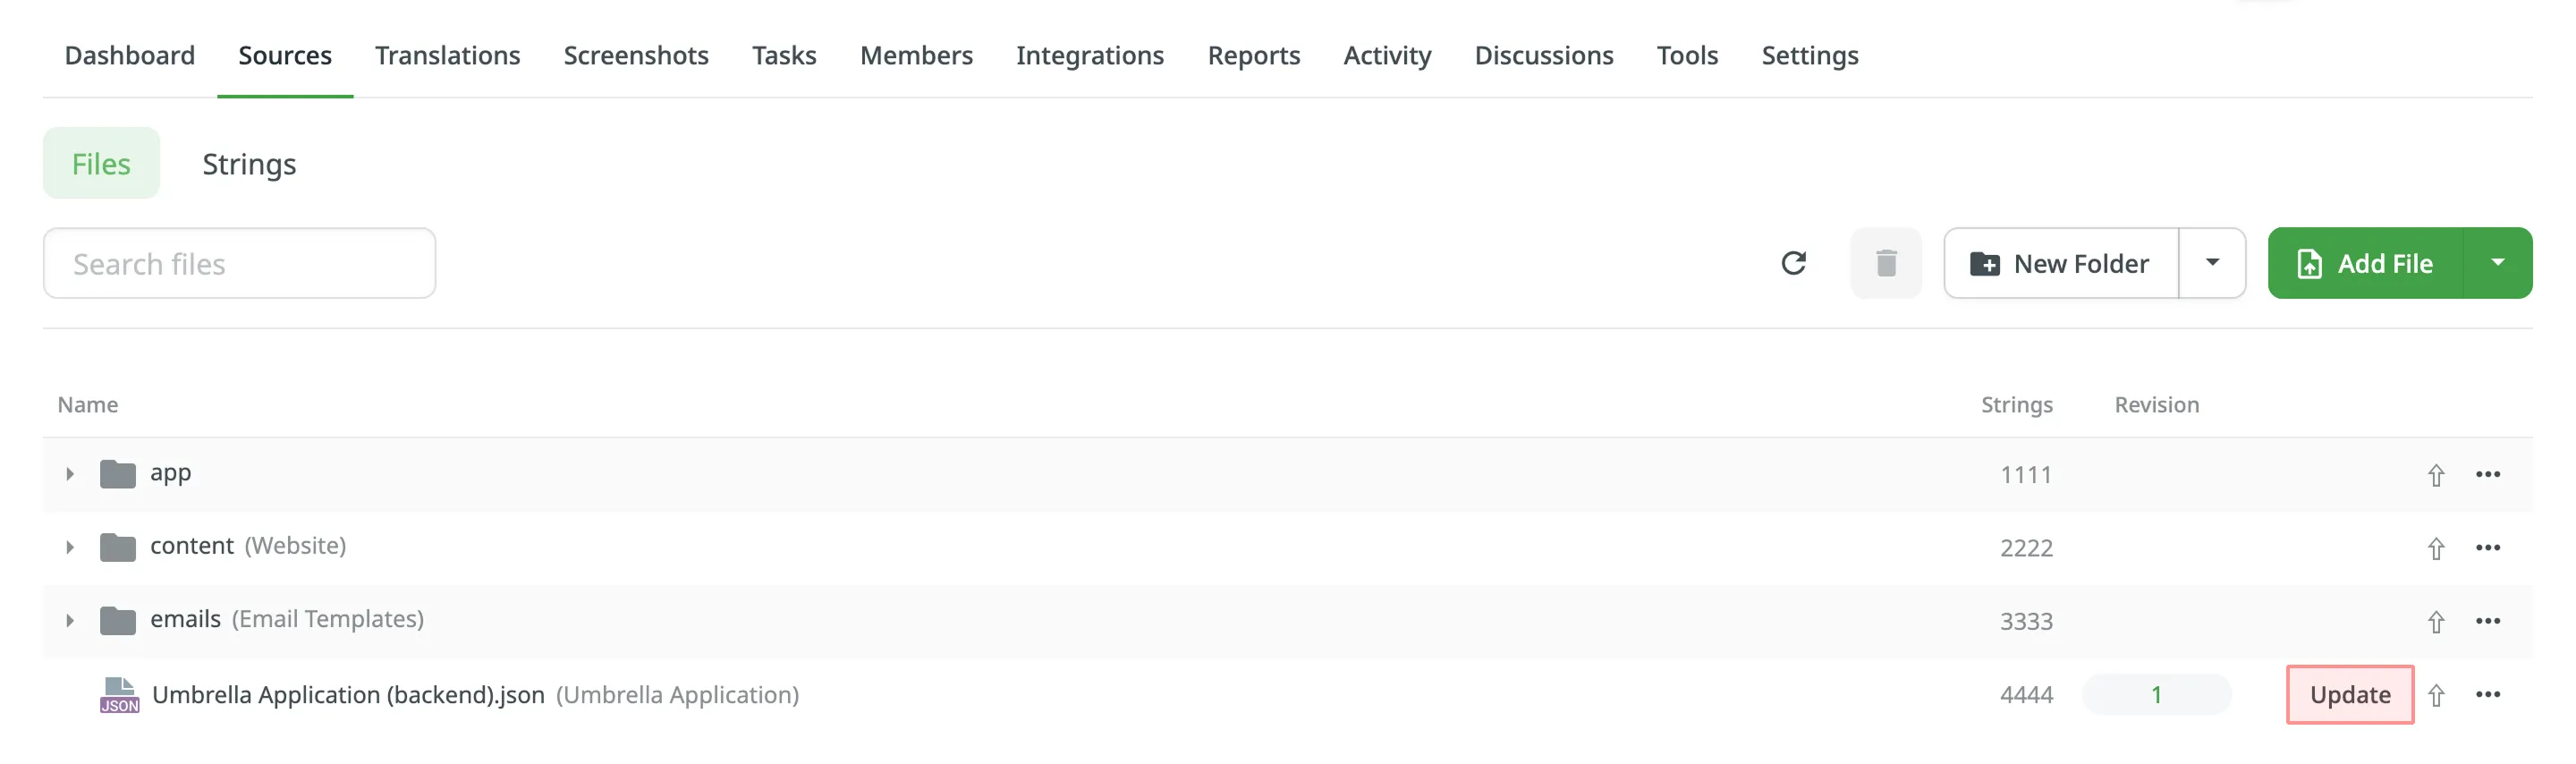
If you have added new strings to a source file, you’ll need to update the file in Crowdin to make the new content available to translators. To do this, click Update next to the needed file and select the new file from your machine.
If any source strings were modified in the updated file, Crowdin will display the Keep Translations for Updated Strings dialog. This dialog allows you to decide which existing translations to keep for the modified strings.
The dialog lists each modified string, displaying its Key (identifier) and allowing you to compare the Current Strings (original text) with the New Strings (updated text, with additions highlighted in green and deletions in red).
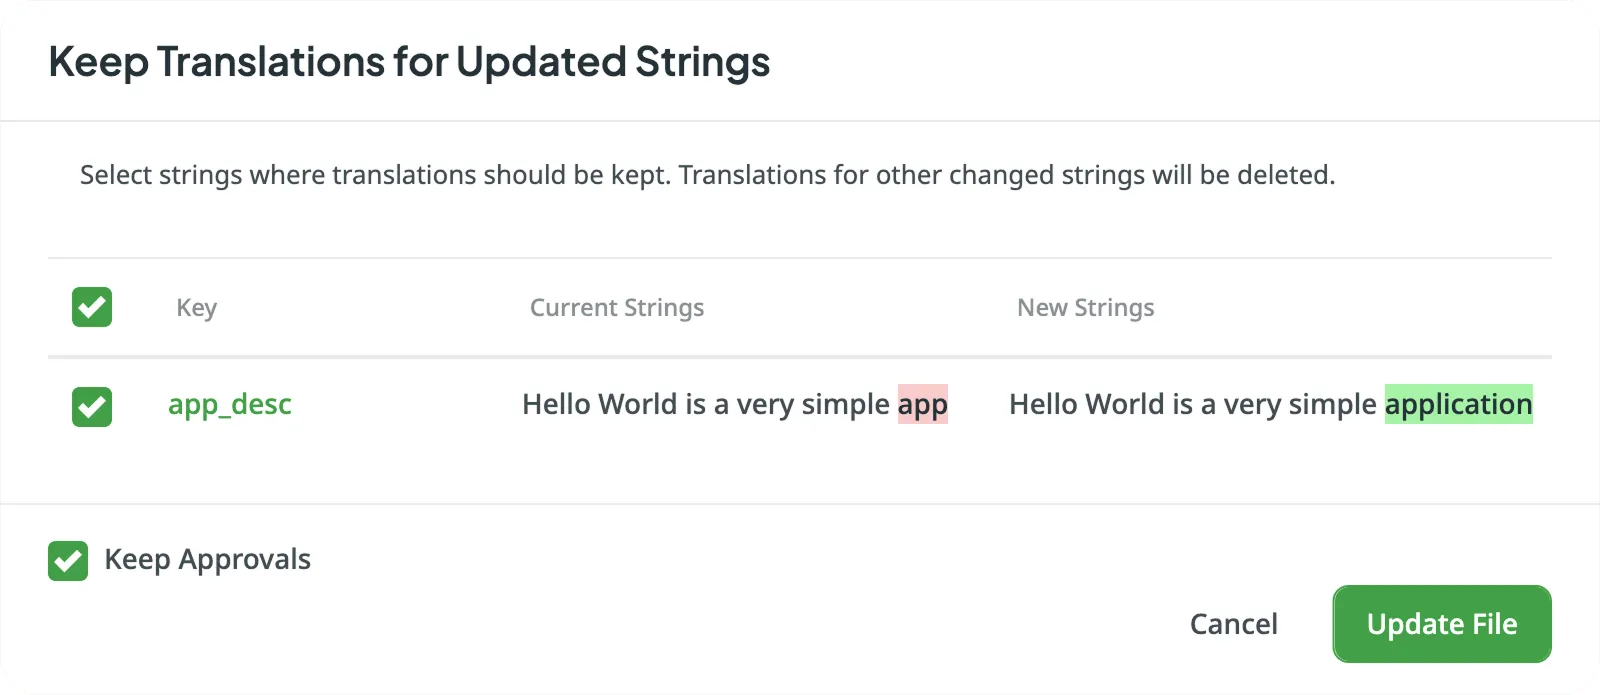
To keep the current translations for a modified string, select the checkbox next to it. For any string you don’t select, its existing translations will be deleted after the file update.
Additionally, select the Keep Approvals option at the bottom of the dialog to preserve approvals for the translations you choose to keep.
Once you’ve made your selections, click Update File.
After the update is complete, Crowdin may indicate changes by displaying a blue dot next to the Refresh button in the upper-right corner of the Files tab. Click this button to refresh the file list and display the most up-to-date information.
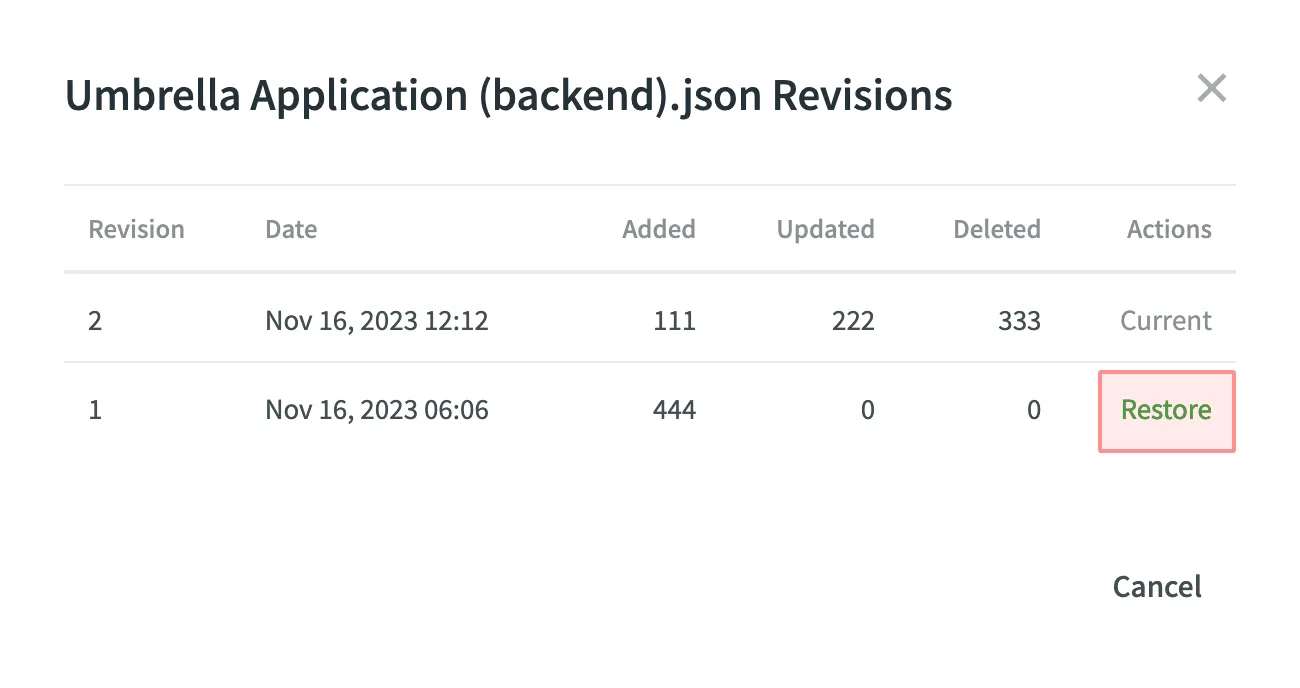
Each time you update the source file, a new revision is created. To restore your file to the previous revision, click the number on the needed file in the Revision column. In the appeared dialog, select the revision you want to restore your file to and click Restore next to it.
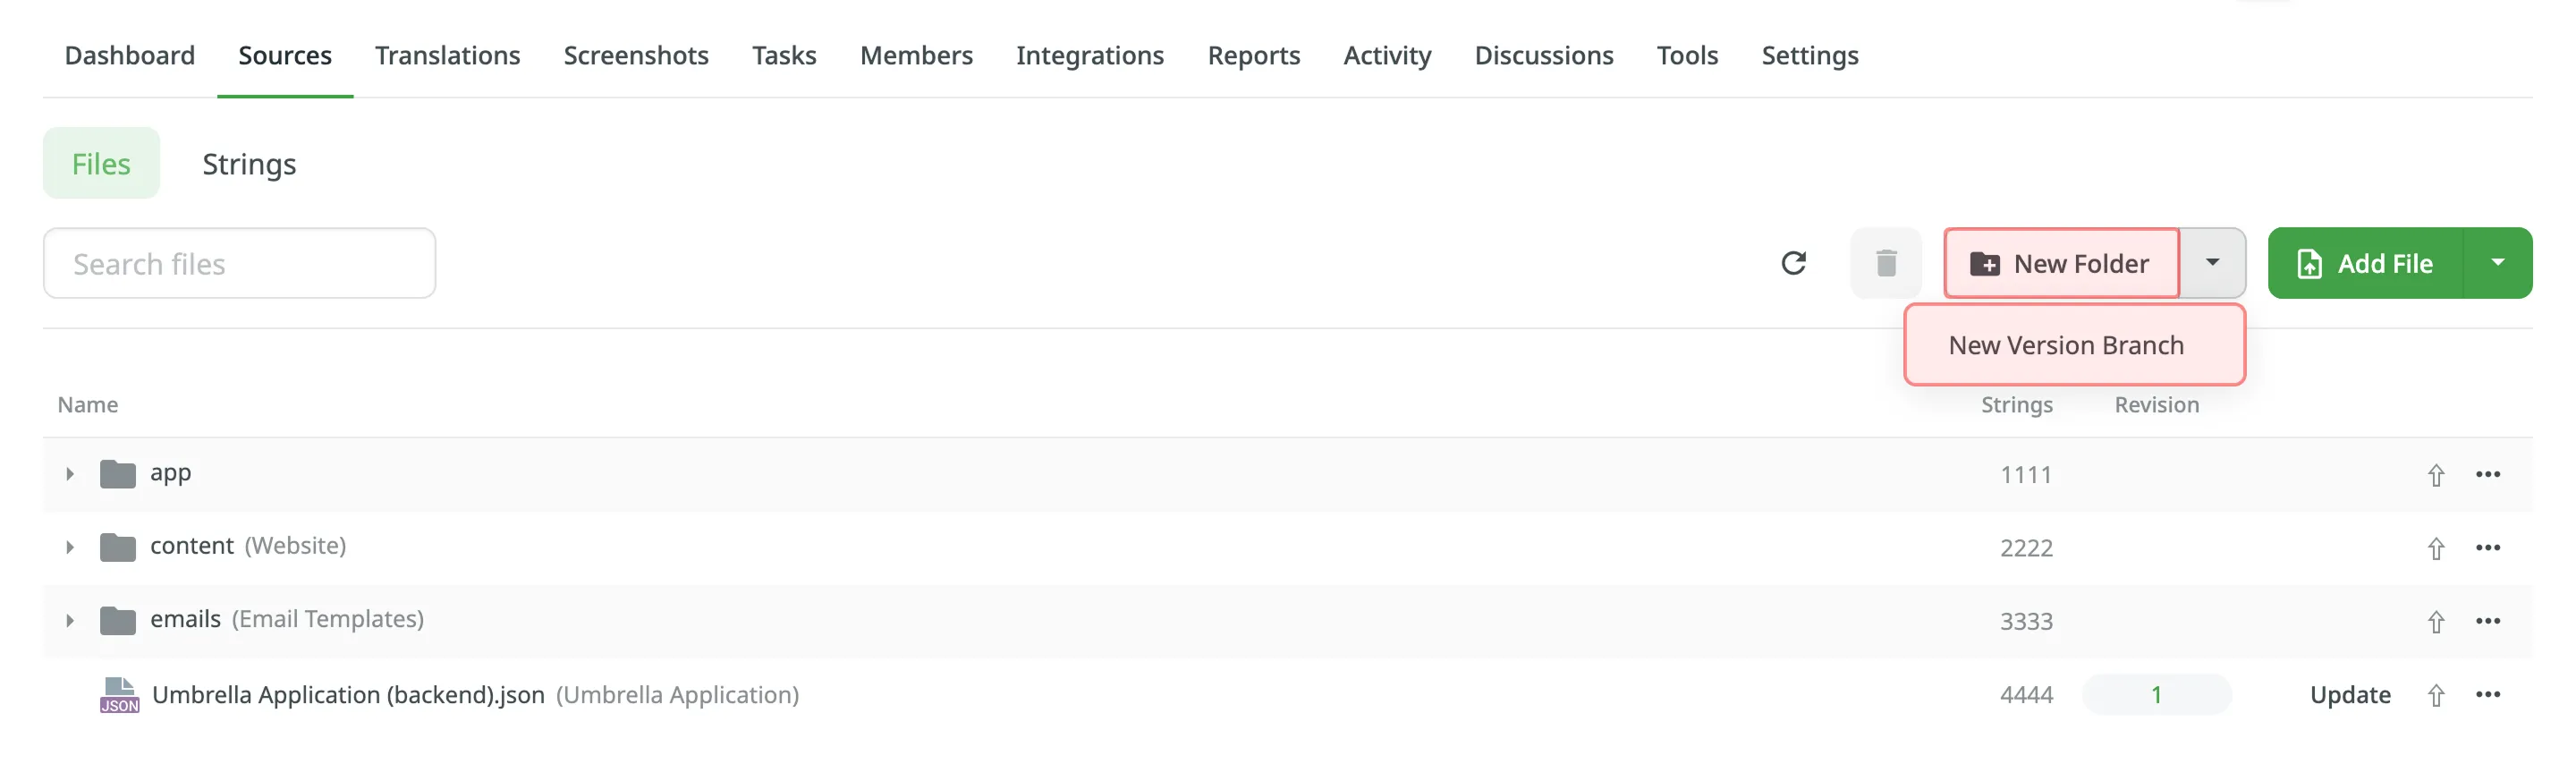
You can create folders and branches in Sources > Files with New Folder and New Version Branch buttons.
Folders represent your content structure, while branches help to manage different versions of the content.
Usually, branches in Crowdin are created automatically if you use GitHub, GitLab, or other VCS integration. Still, if you need to create branches manually, make sure to upload the master branch first, as all the others will be considered the feature branches.
Duplicates might be managed in Settings > Import > Source Strings by choosing the corresponding option for Duplicate Strings.
Read more about Version Management.
File formats like CSV and XLSX might require changing the initially configured scheme. Usually, it might be needed when you add a new target language to your Crowdin project.
Read more about changing the scheme for CSV and XLSX files.