Account Settings
Manage your Crowdin Enterprise account settings, including profile details, notification preferences, security settings, and more using the Account Settings page. To access it, click on your profile picture in the upper-right corner and select Account Settings.
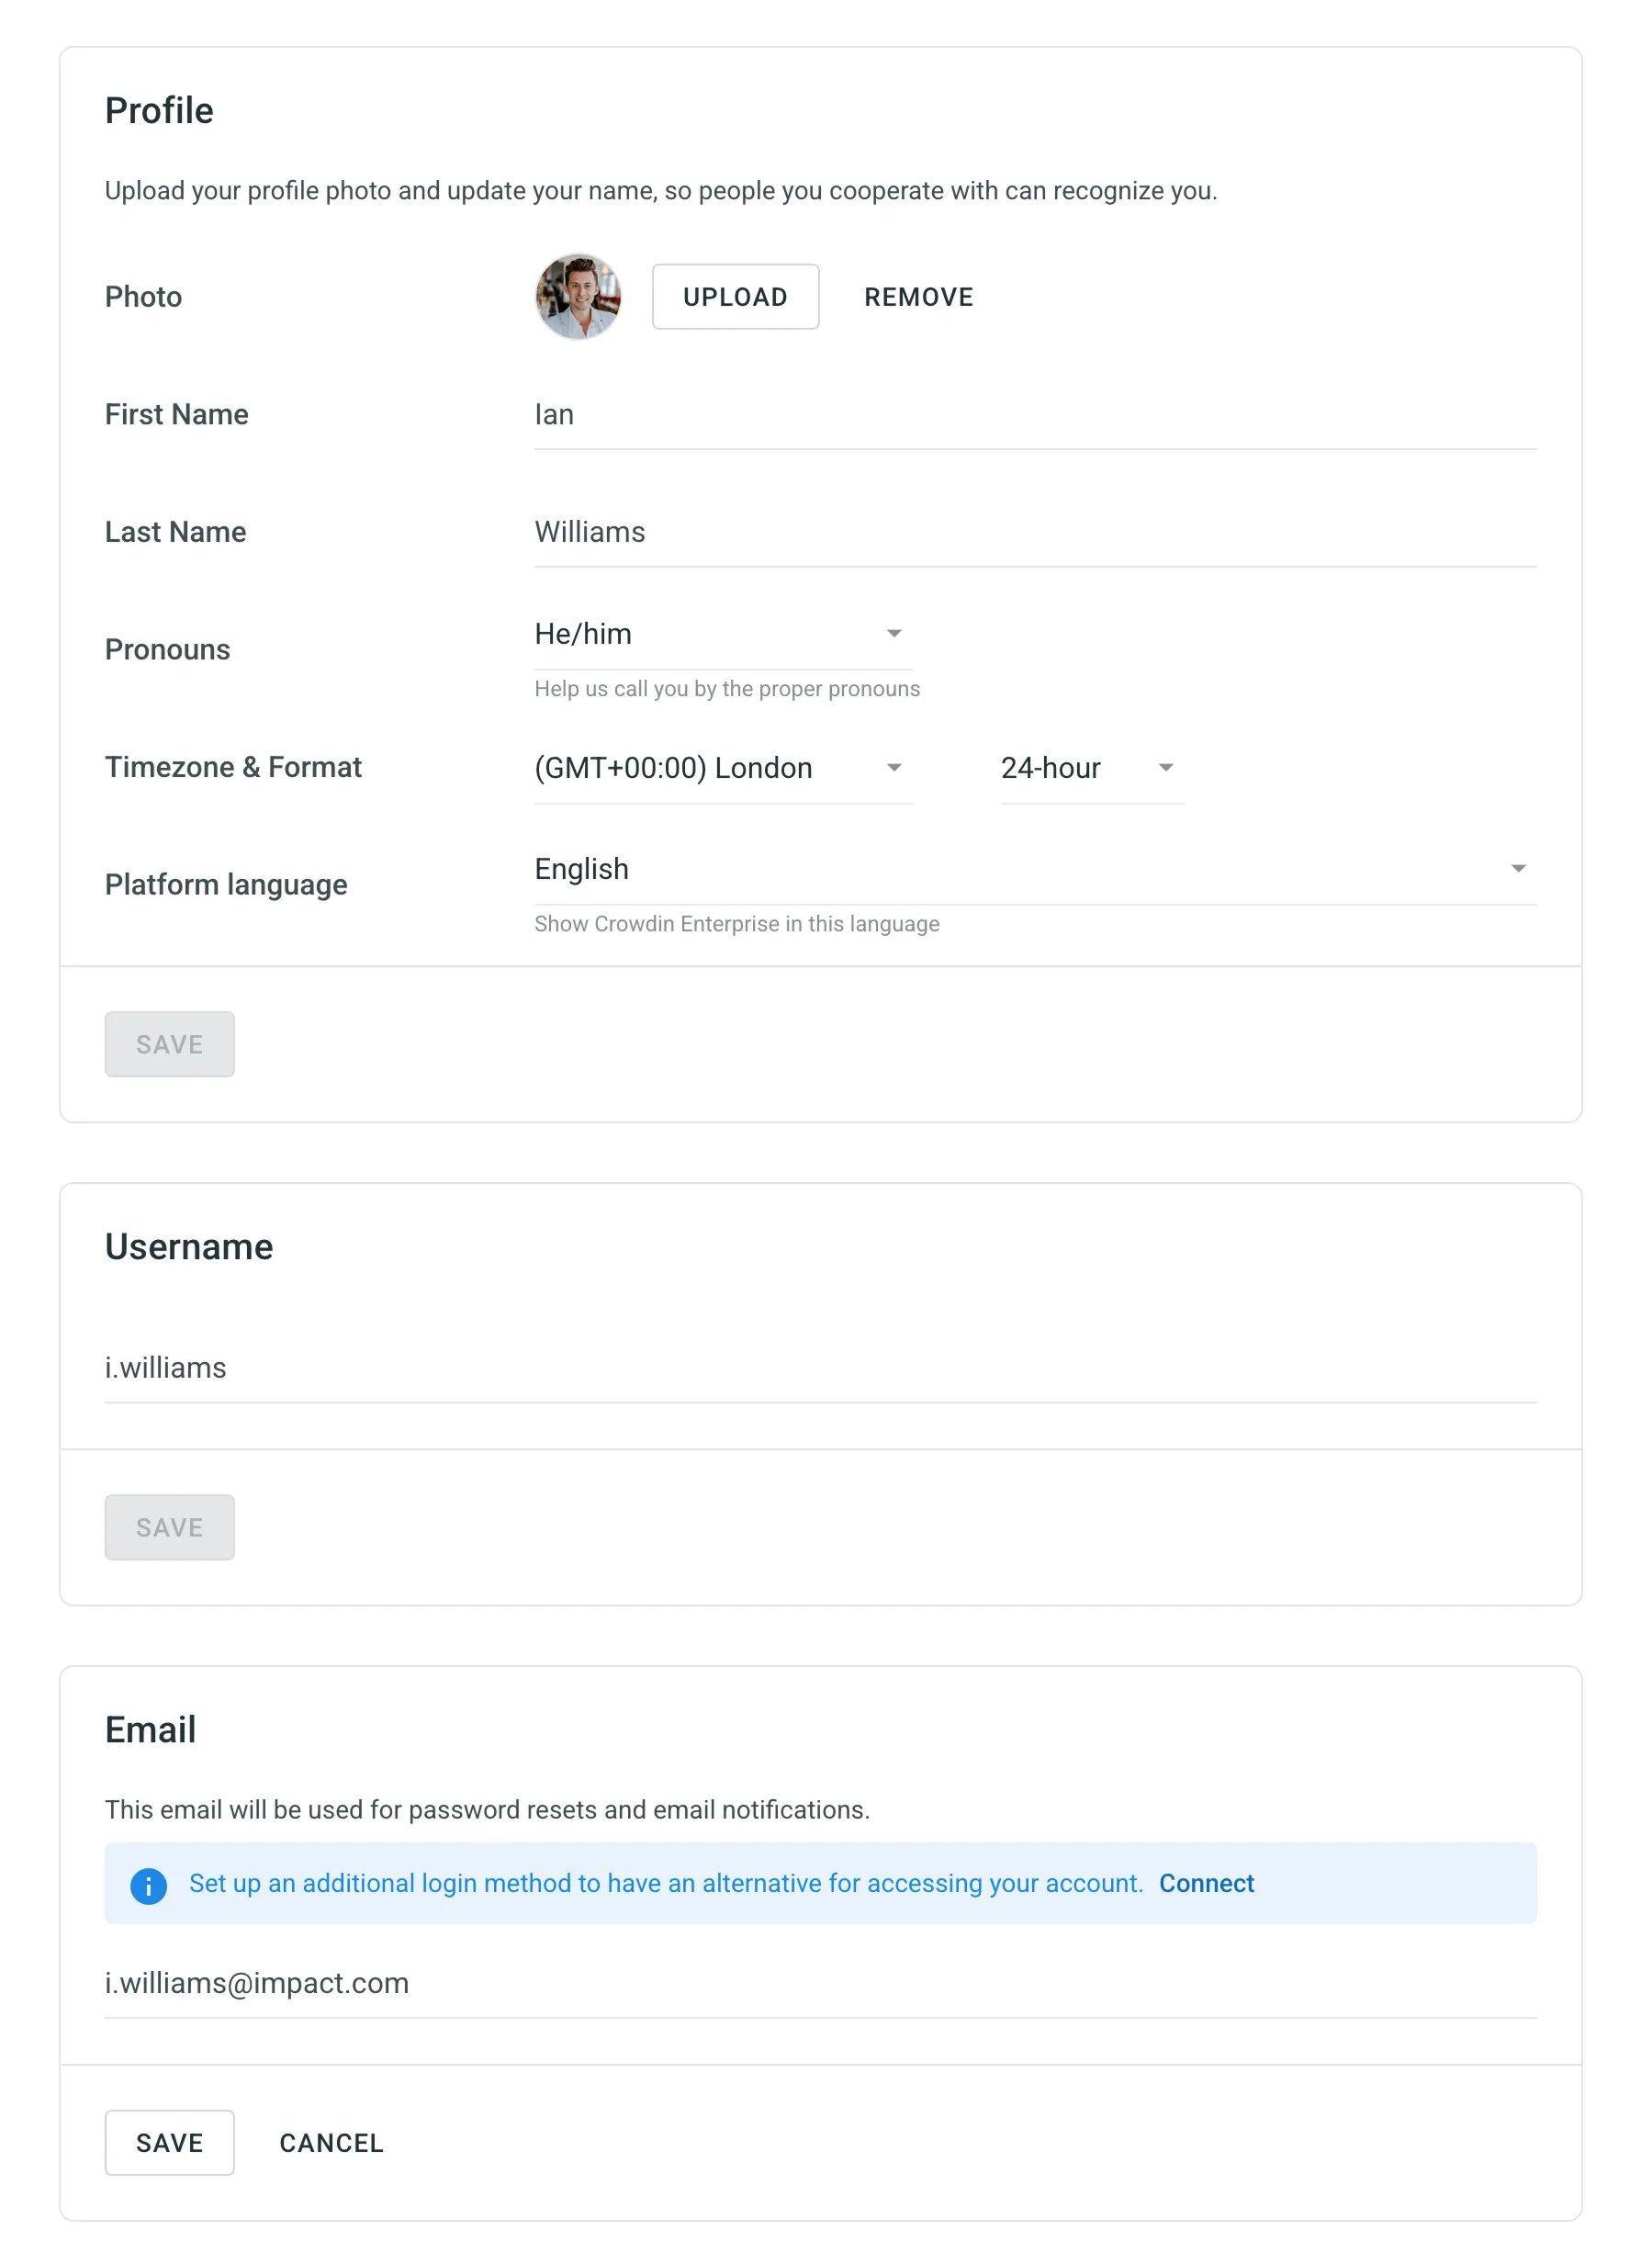
On the Personal Info page, you can update your personal information and account preferences to help colleagues recognize and connect with you.
The available settings include:
- Photo – Upload or remove a profile picture that helps others recognize you.
- First Name & Last Name – Displayed to teammates across the platform.
- Pronouns – Choose your preferred pronouns or select Prefer not to say.
- Timezone & Format – Set your local time zone and choose between 12-hour or 24-hour display.
- Platform Language – Select the language for the Crowdin Enterprise interface. New languages are added regularly.
- Username – This is your unique visible ID in your Crowdin Enterprise organization.
- Email – Used for login, password resets, and notifications. You can also link an additional login method.
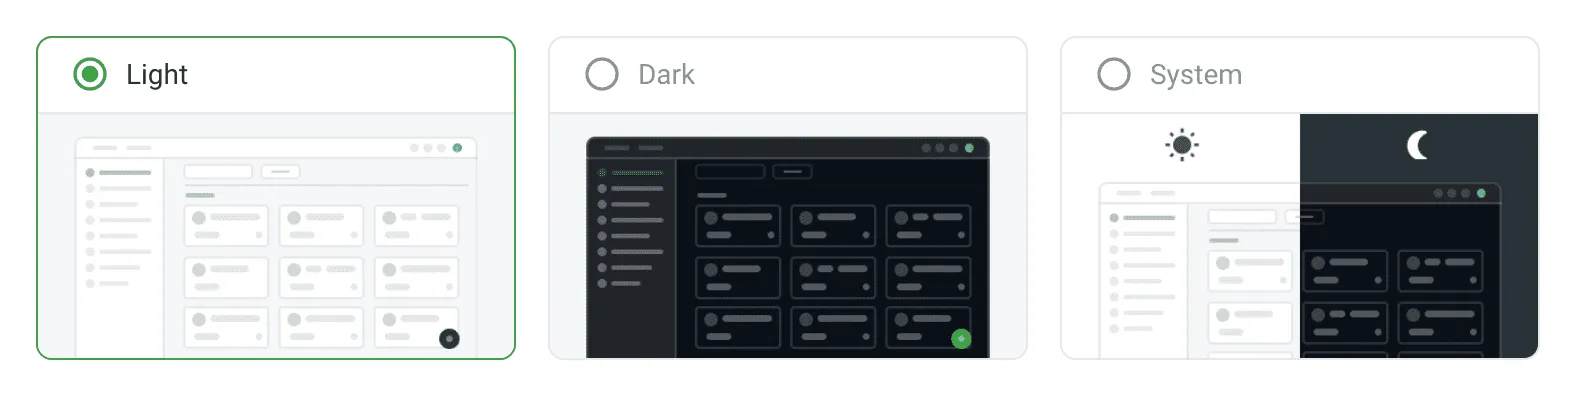
Choose how Crowdin Enterprise appears on your device. You can select a Light or Dark theme or sync it with your system settings to switch automatically between day and night modes.
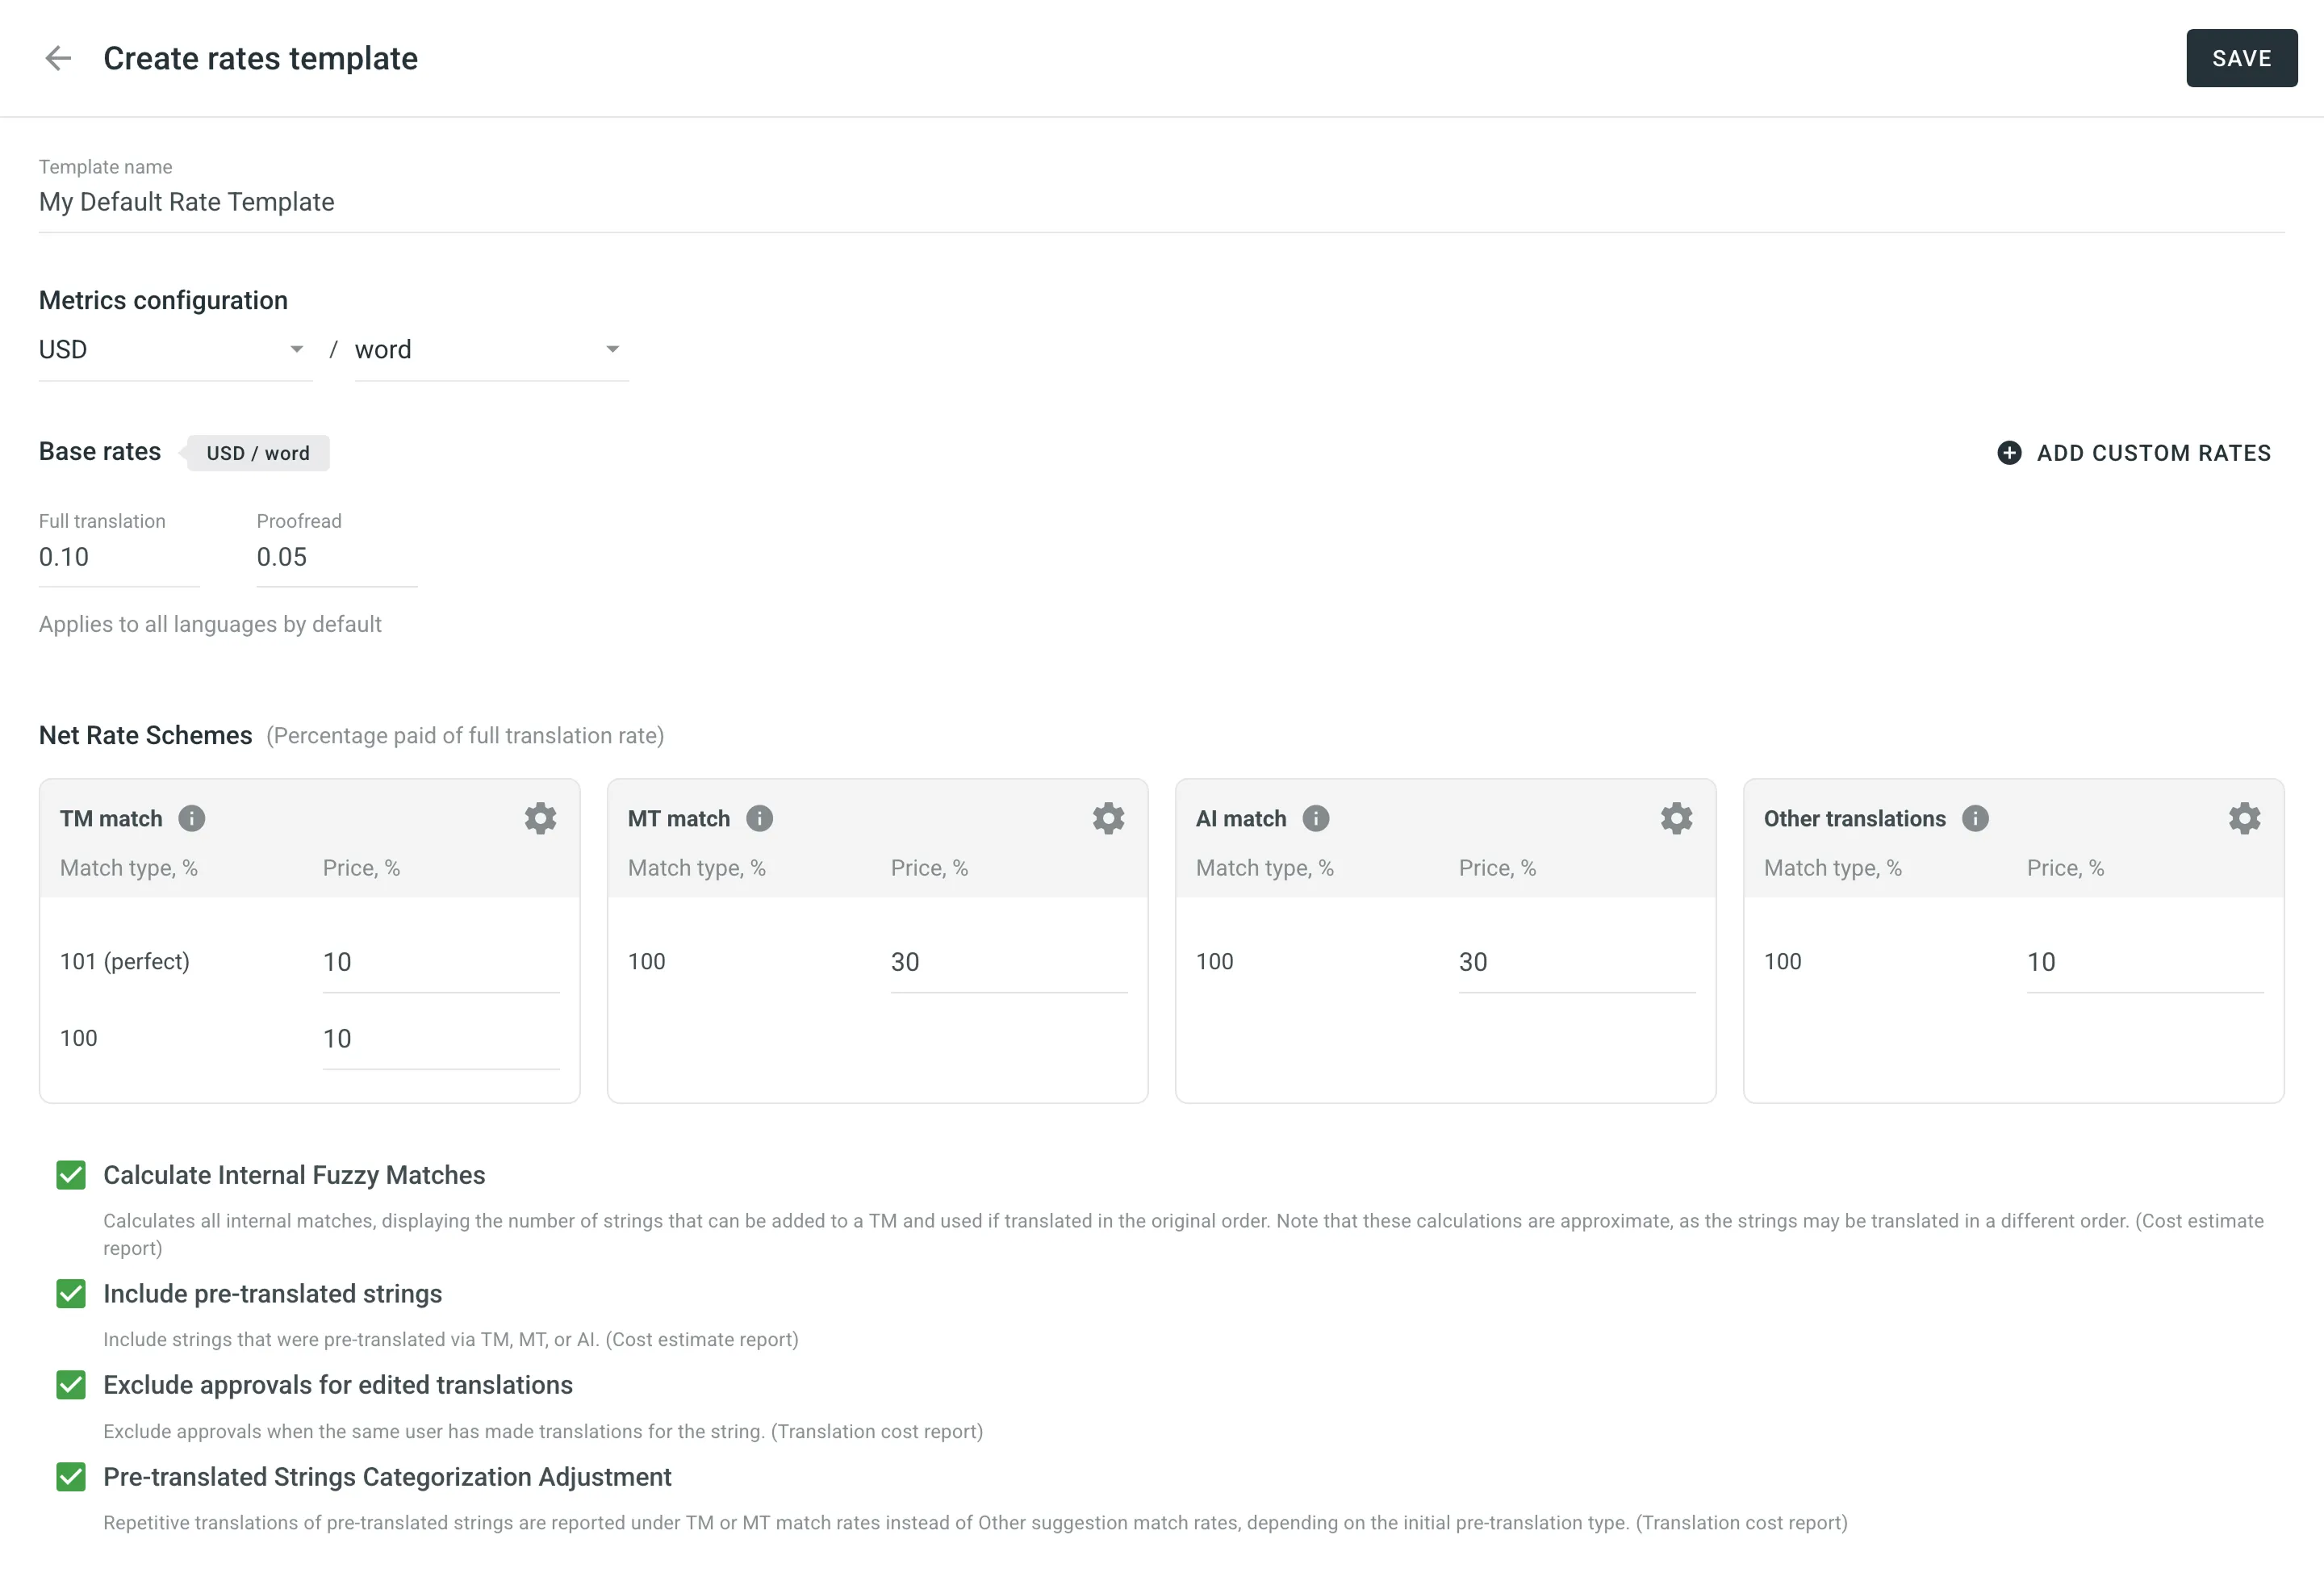
On the My rate templates page, you can create and manage personal templates for report settings. These templates are visible only in your profile and can be used when generating Cost Estimate and Translation Cost reports.
Each template can include:
- Base rates – Set rates for full translation and proofreading. Applied to all languages by default.
- Net Rate Schemes – Set percentage rates for TM, MT, AI, and other match types, based on the full translation rate.
- Custom rates – Add language-specific (and in some cases, user-specific) rate configurations.
- Additional options – Include or exclude pre-translated strings, adjust how repetitive translations are categorized, and calculate internal fuzzy matches.
Saved templates help standardize your rate setup and make it easy to reuse configurations across reports. To use a saved template, click Templates when configuring your report and select the one you’d like to apply.
To create a new rate template, follow these steps:
- Go to Account Settings > My rate templates.
- Click Add Rates Template.
- Enter a template name and define your base rates and net rate schemes.
- (Optional) Add custom rates for specific languages.
- Click Save.
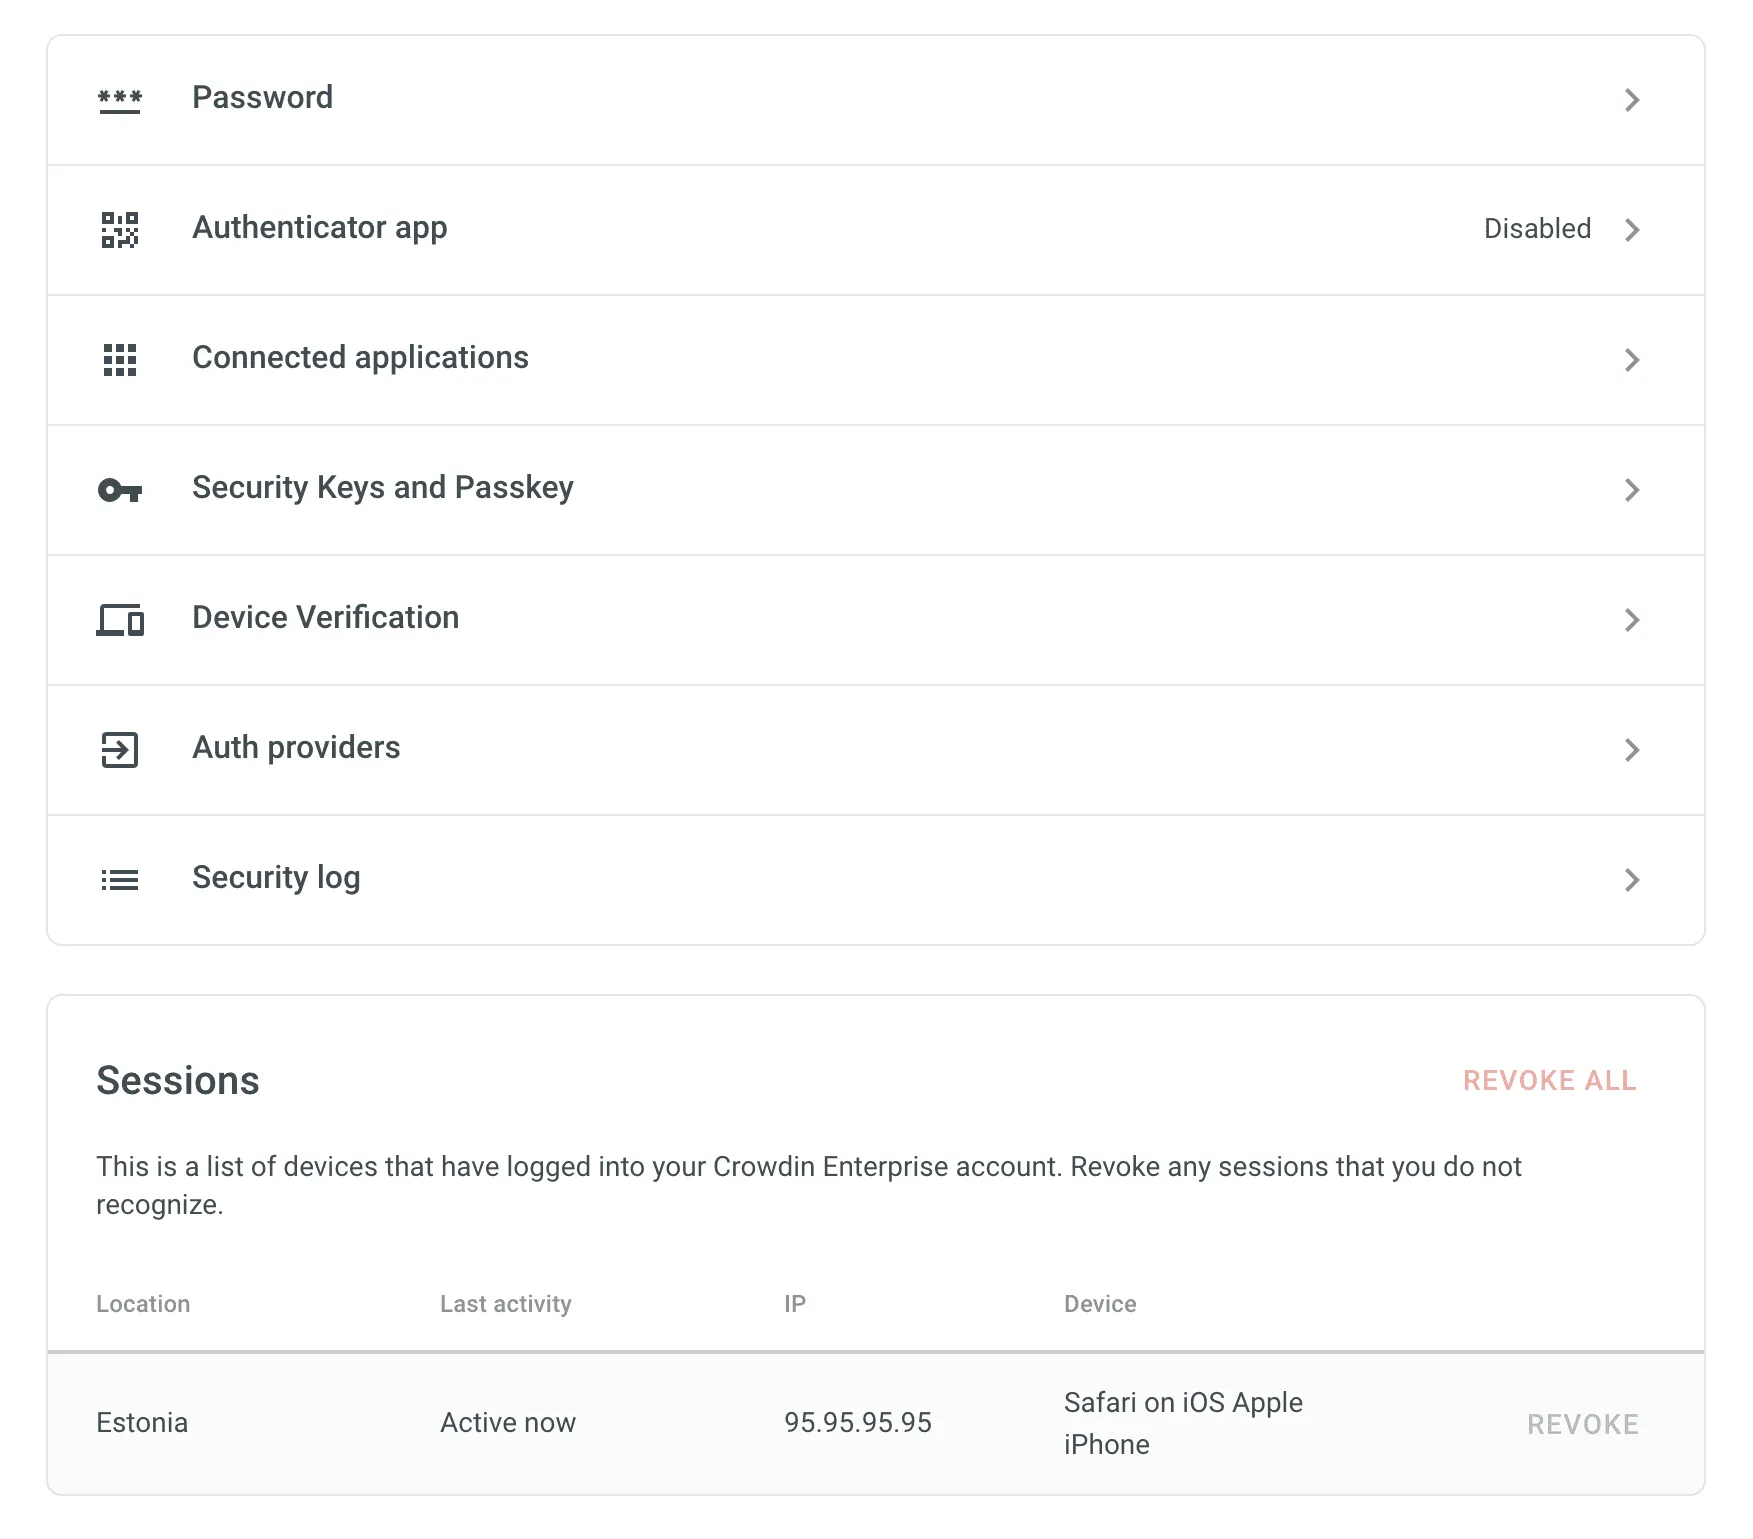
Change your current password, manage two-factor authentication for the Account, and check linked applications. You can also control authentication for external services and log out of all the devices.
To change your password, click Password, enter your current password, and set a new one. Click Save to apply the changes.
To ensure the highest level of account security, Crowdin Enterprise uses an entropy score to evaluate how difficult it would be for a computer to guess your password. We do not rely on simple rules like must contain one number. Instead, we calculate complexity based on length and character unpredictability.
As you type, a colored bar below the password field fills up and changes color to indicate the password’s strength.
Password Acceptance Policy:
Crowdin Enterprise prohibits the use of passwords categorized as Very weak and Weak.
If you attempt to save a password with one of these ratings, the system will automatically clear the password field and display the error message: Please choose a more secure password.
Refer to the table below to understand the security levels and visual indicators:
| Strength | Visual Indicator | Status | Description |
|---|---|---|---|
| Very weak | Red bar | Rejected | Risky. Typically a common dictionary word that can be guessed instantly. |
| Weak | Orange bar | Rejected | Vulnerable. Often a common word with a simple modification. Vulnerable to standard guessing attacks. |
| Medium | Yellow-Green bar | Accepted | Moderate. Provides basic protection against unthrottled online attacks. |
| Strong | Light Green bar | Accepted | High. Difficult to guess. Offers solid protection against most attacks and standard cracking attempts. |
| Secure | Green bar | Accepted | Highest. Mathematically complex and very unpredictable. Provides the best protection against sophisticated attacks. |
Activate two-factor authentication (2FA) to add an additional layer of security to your Crowdin Enterprise account. Use an authenticator app on your mobile device or computer to generate one-time verification codes.
To enable two-factor authentication, follow these steps:
- Open your Account Settings and select Security on the left sidebar.
- Click Authenticator app.
- Using the Google Authenticator app on your mobile device, scan the QR code on the screen.
- Enter the 6-digit verification code generated by your authenticator app, then click Submit.
- Download recovery codes, so you can use them if you can’t access your mobile device.
Manage third-party apps you’ve authorized to access your Crowdin Enterprise account. You can view a list of connected apps and revoke access as needed.
Register a physical security key or passkey to strengthen your account protection. These can be used alongside your password to verify your identity during login.
Enable Device Verification to require identity confirmation when logging in from a new device. A verification code will be sent to your registered email address, and the device will be added to your trusted list once verified.
You can manage trusted devices by removing individual entries or clicking Remove All to clear the list.
Manage external accounts linked to your Crowdin Enterprise account. You can connect services like Google, Facebook, GitHub, X, or GitLab to enable one-click login.
View a list of important account events, such as logins, password changes, authentication updates, and more. Each entry includes the event type, device, IP address, and timestamp.
View a list of devices that have accessed your Crowdin Enterprise account, along with details like location, last activity, IP address, and device type. You can revoke individual sessions or click Revoke All to end all sessions except the current one.
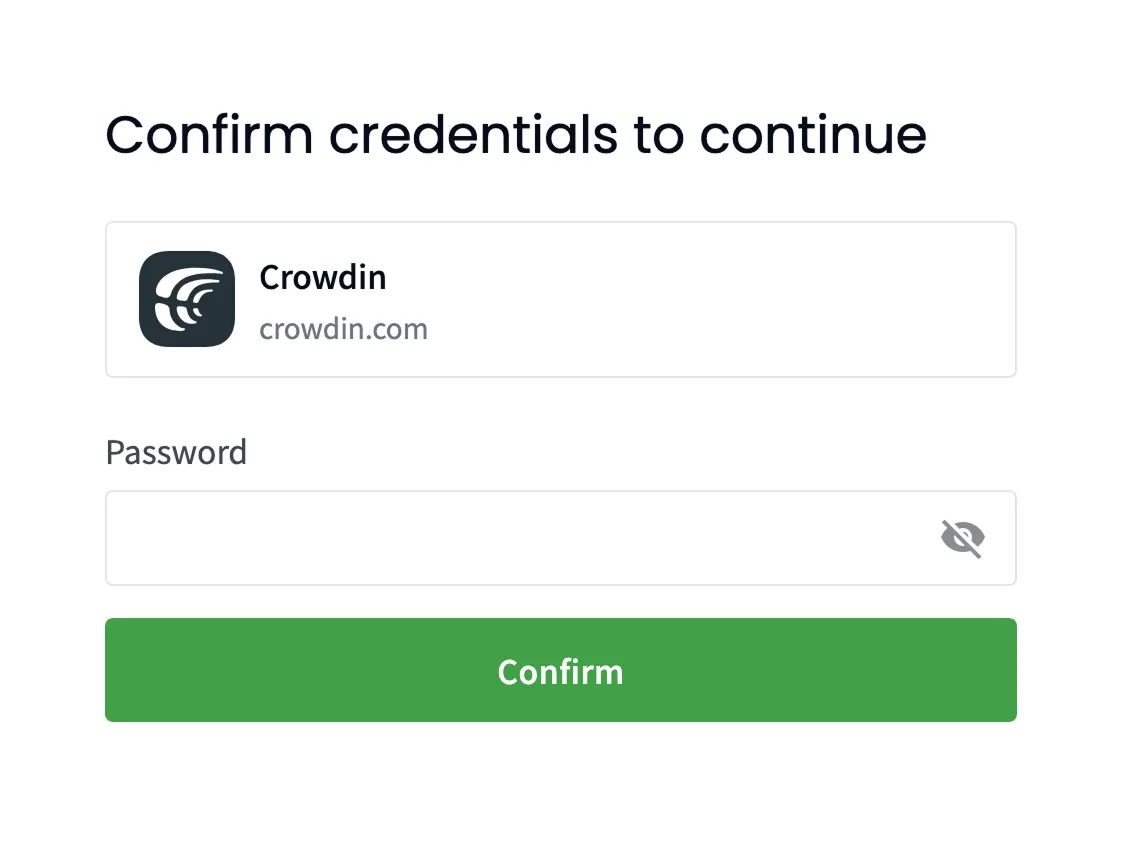
Crowdin Enterprise may ask you to confirm your password before performing sensitive actions, such as changing your password, email, or authentication settings. Once verified, you’ll stay in sudo mode for five minutes without needing to re-authenticate.
On the Notifications page, you can customize which notifications you receive and how they are delivered. You can choose delivery channels, select relevant events, and apply project-level preferences.
Crowdin Enterprise provides several channels for notifications:
- In-App (Crowdin Enterprise)
- Slack
- Custom Notifications
To customize notifications, click the arrow next to a channel name and select the events you want to be notified about.
Available notification events include:
| Event type | Description |
|---|---|
| Users & Roles | Join requests, project invitations, project role updates. |
| Collaboration | Updates on collaboration between translation vendors and clients. |
| Integrations | Updates on integrations you set up. |
| New Strings | New strings added. |
| Language Progress | Translation or proofreading for a particular language is completed. |
| API-Integrated Vendors | Updates on collaboration with API-Integrated translation vendors. |
| Content Issues | All issue types created or resolved in the Editor. |
| Mentions | Updates on you being mentioned in the Editor. |
| Tasks | Created, deleted, and updated tasks, status changes, mentions and comments. |
| Messages | Private messages within Crowdin. |
| API Notifications | Notifications sent by apps, API integrations, and users via API. |
To receive notifications in Slack, click Slack and authorize Crowdin Enterprise to integrate with your workspace. After setup, choose which events should be sent to Slack.
Read more about Slack Integration.
To send notifications to a custom service, click Set Up Notifications Custom Channel and follow the instructions. After setup, select which events should be sent to the custom channel.
Read more about Custom Notifications.
Subscribe to the Crowdin blog to get product news and localization best practices delivered to your inbox.
You can adjust notifications for each project:
- Global – Receive all selected notification types.
- Mentions only – Only receive notifications when @mentioned.
- Mute project – Turn off all notifications for the project.
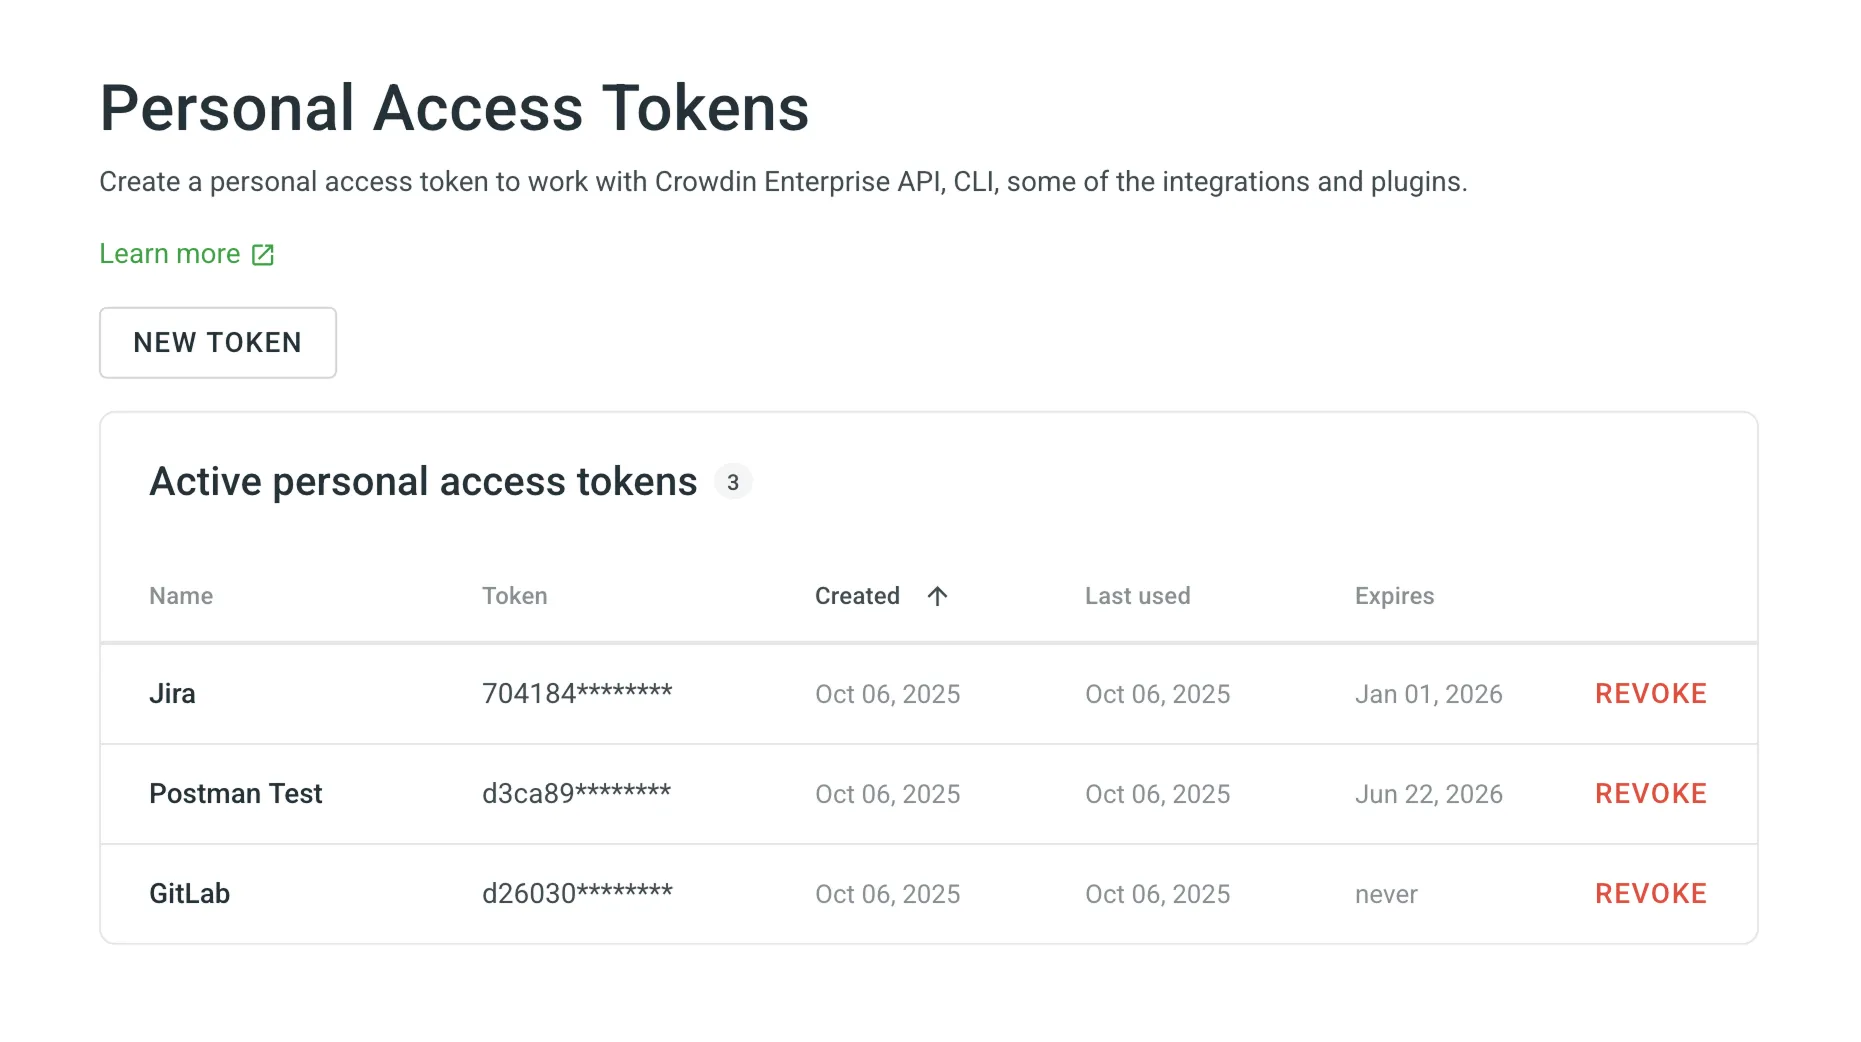
Personal access tokens serve as an alternative to passwords for authorizing third-party applications and scripts in Crowdin Enterprise. The token list displays each token’s Name, a partially masked Token, the Created date, the Last used date, and its Expires date. If a token has an expiration date, it becomes inactive once the date is reached, but remains in your list for reference.
You’ll need a personal access token for authorization in the following cases:
- Automating localization workflows via the Crowdin Enterprise API.
- Managing and syncing localization resources with the Crowdin CLI.
- Pushing design content for translation from design tools (i.e., Figma, Sketch, Adobe XD).
- Uploading and downloading content using IDE plugins (i.e., Visual Studio Code, Android Studio).
- And other integrations or tools that require secure access to your Crowdin Enterprise account.
When creating a new personal access token, you can give it a name as a reminder of what it’s used for, set an expiration date, select specific scopes, and, if needed, limit the visibility of resources for the selected scopes using the Granular access option. For example, you can create a token that should only interact with a specific project or group and have no access to others. As a result, only selected items will be returned when an API request is made to retrieve a list of all projects or groups.
To create a new personal access token, follow these steps:
- Open your Account Settings and select Access tokens on the left sidebar.
- Click New Token.
- In the appeared dialog, enter a name to help you identify the token later.
- Set an expiration date for the token. By default, Expires is set to Never.
- Select the required scopes.
- (Optional) To limit access to specific resources, click Granular access.
- Depending on the selected scopes, select Grant access to selected projects, Grant access to selected TMs, and Grant access to selected Glossaries.
- Click Select Groups, Select projects, Select glossaries, Select TMs, and respectively select the needed resources.
- Click Create.
After creating a new token, be sure to copy and save it immediately. For security reasons, it will not be shown again. You can create as many personal access tokens as needed.
Revoke a personal access token if it’s no longer needed or you suspect it was compromised.
To revoke a personal access token, follow these steps:
- Open your Account Settings and select Access tokens on the left sidebar.
- Find the token in the list and click Revoke next to it to remove its access.