Inviting People
This guide explains how to invite users either to your organization or directly to specific projects. You’ll learn how to assign appropriate roles and permissions depending on the invitation method and where to manage invited users.
When inviting people to your organization, you can either grant them admin or workspace manager access right away or add them without workspace permissions and define their access later. Once added, users can be invited to specific projects or assigned to workflow steps. Note that crowdsourcing projects are automatically visible to all organization members.
To invite users to your organization, follow these steps:
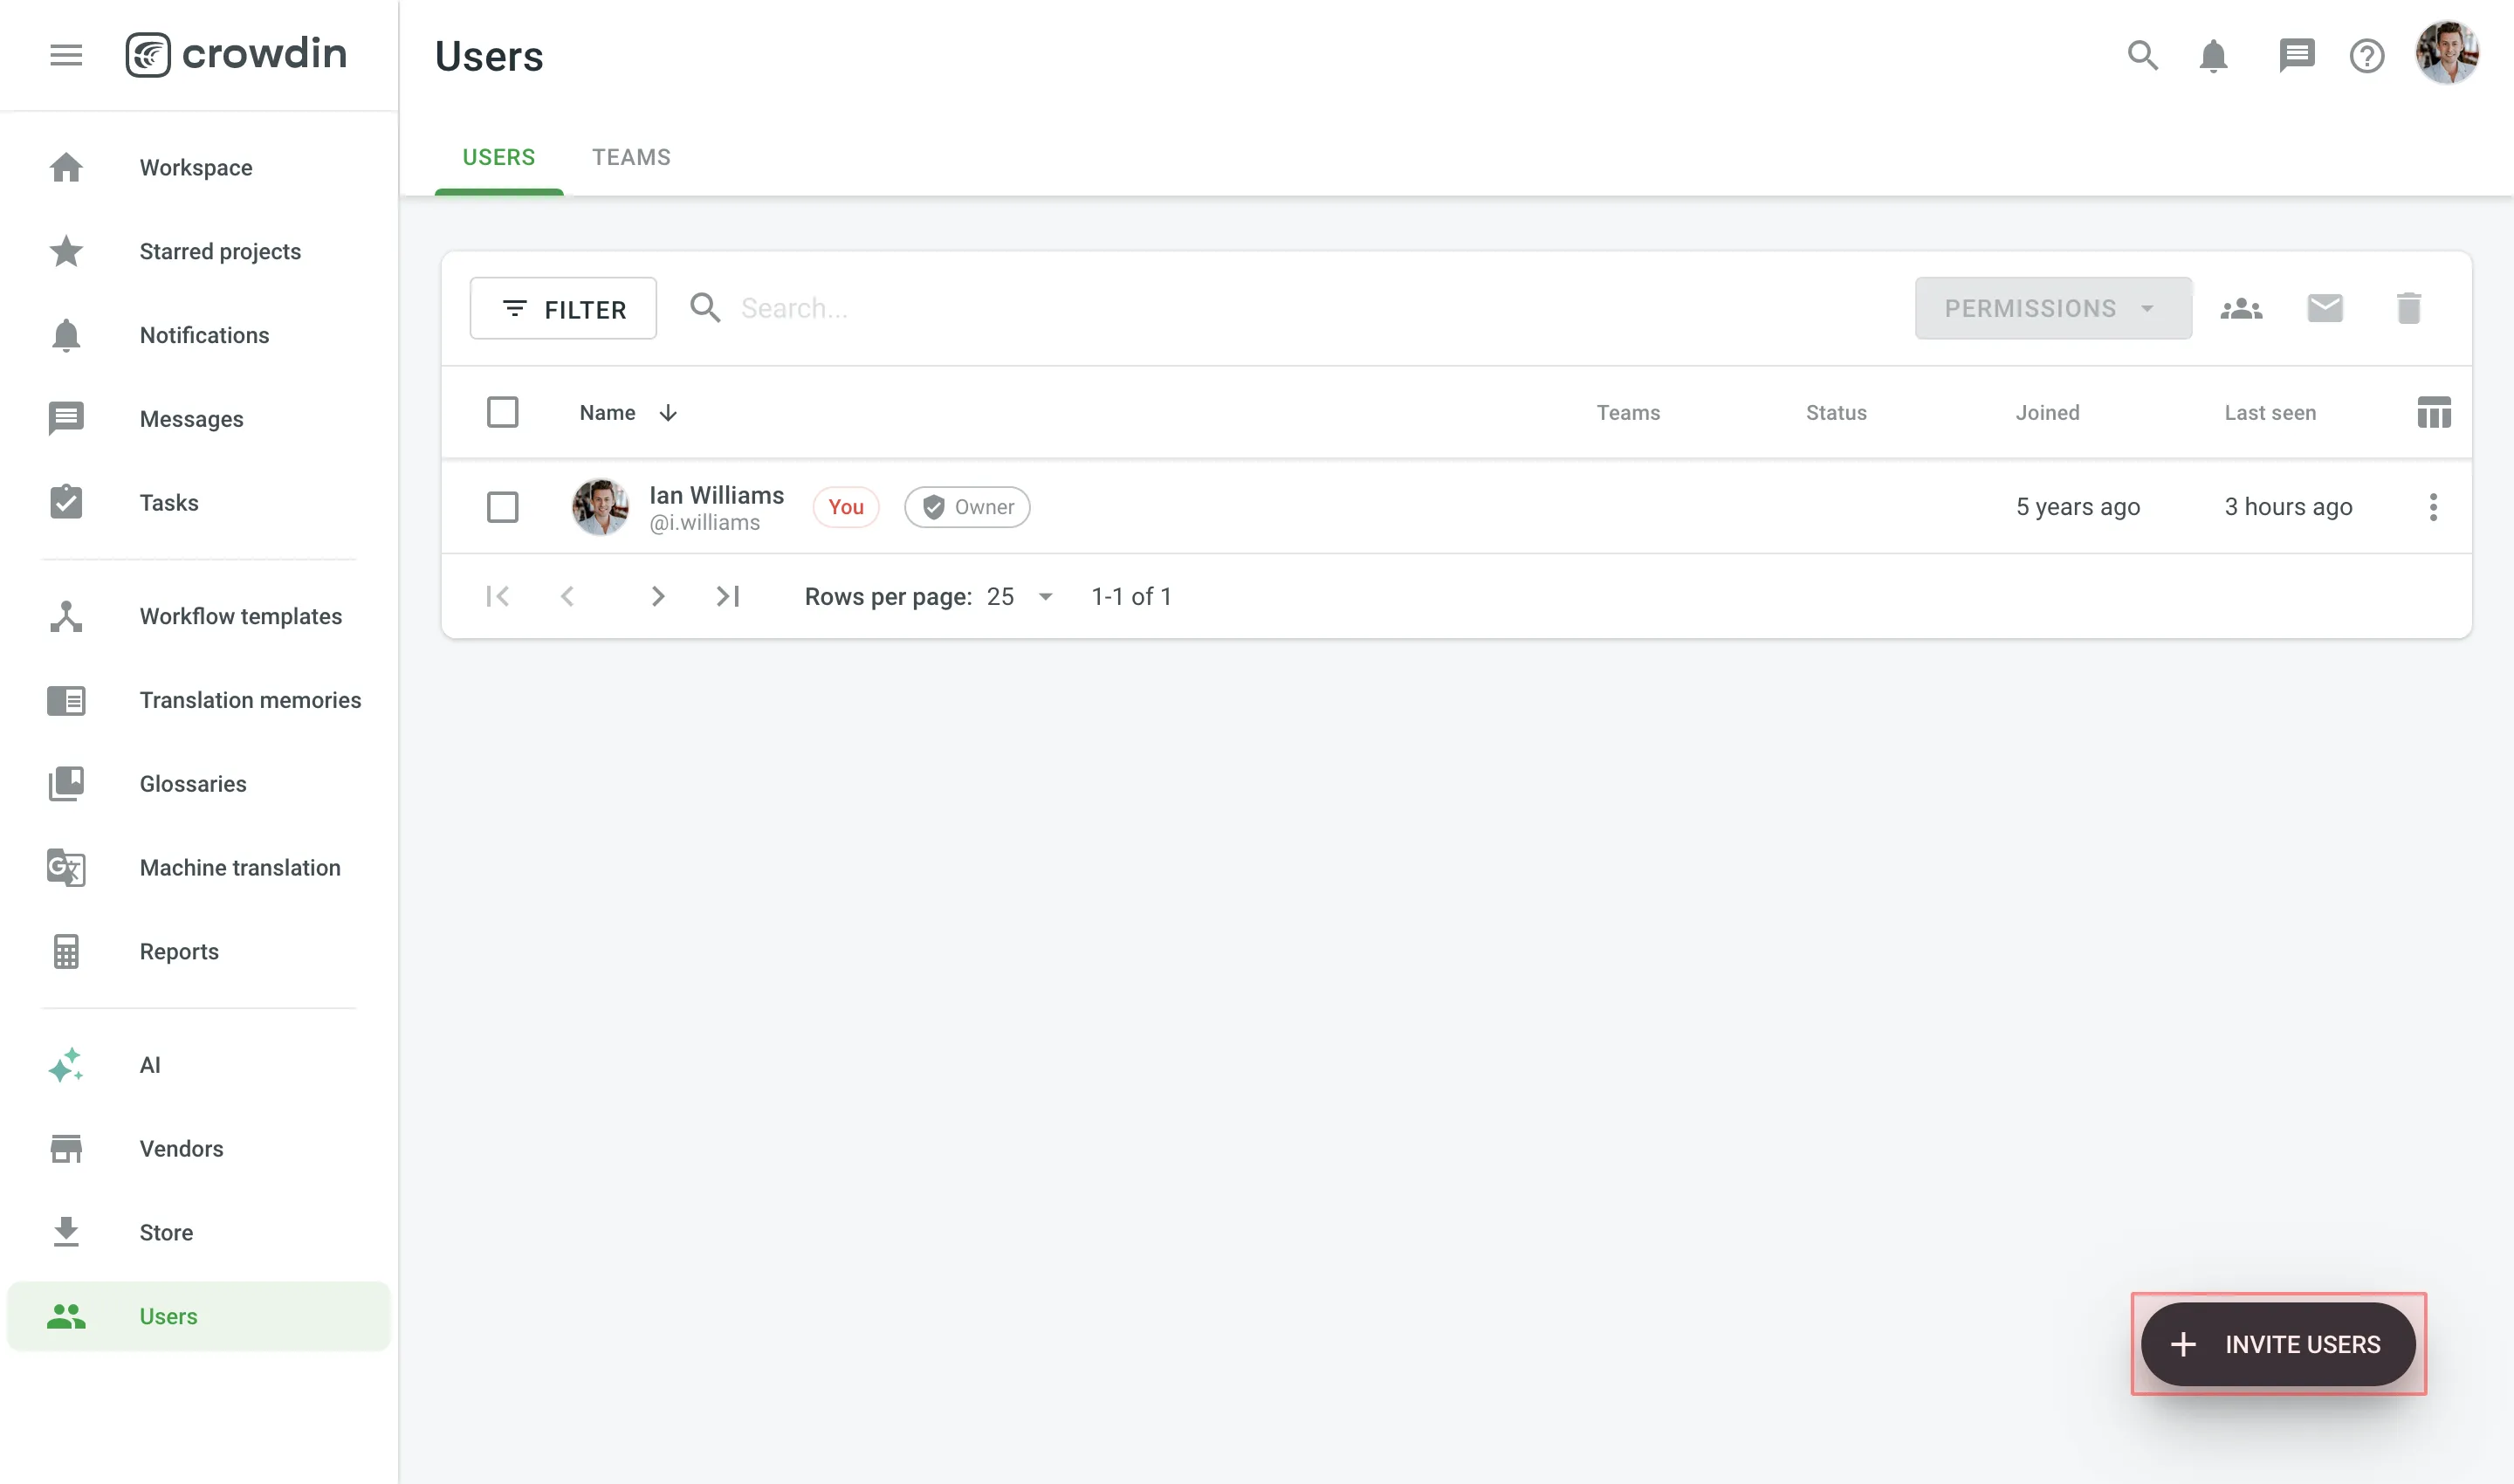
- Open your organization’s Workspace and select Users on the left sidebar.
- In the Users tab, click Invite users in the lower-right corner.
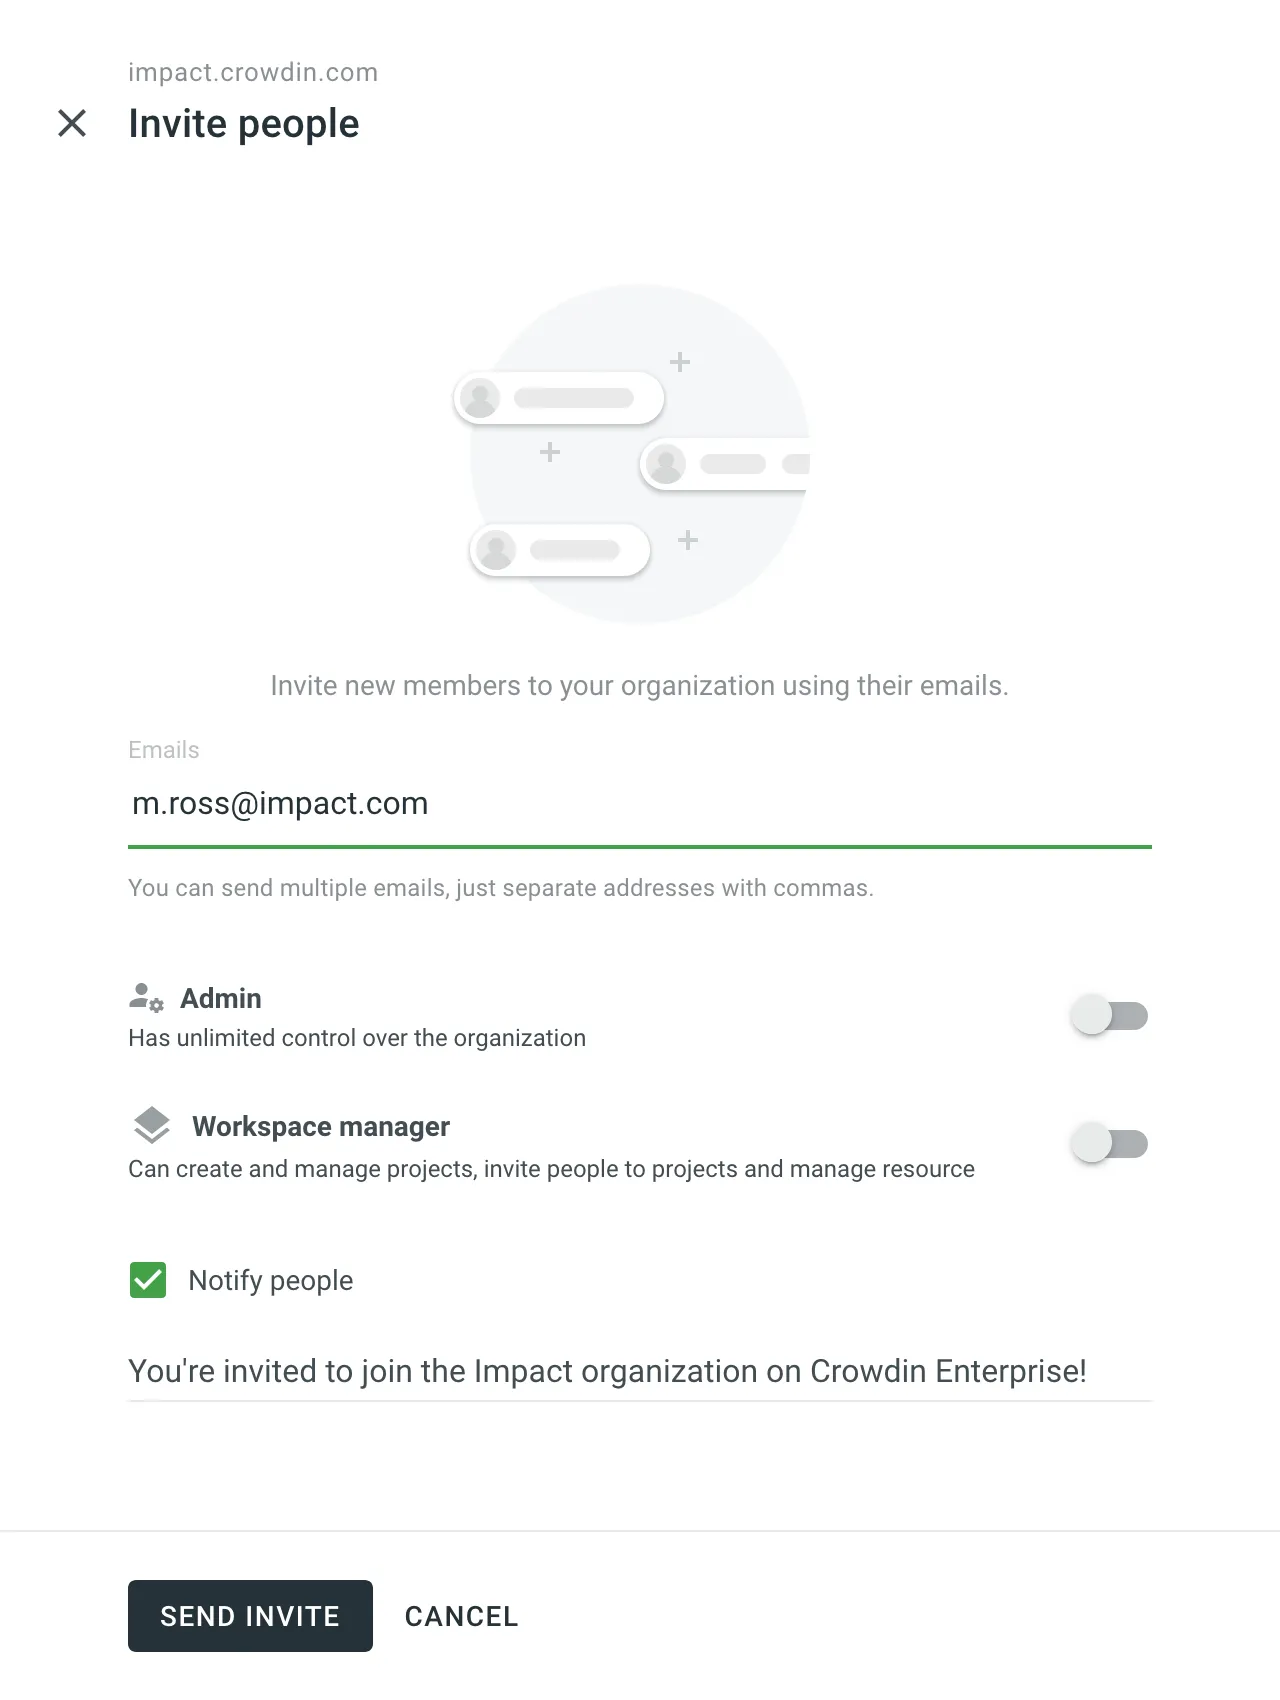
- Specify the email addresses of the people you want to invite.
- (Optional) Select Admin or Workspace manager to grant the invitees the required permissions.
- (Optional) Enter a message text if necessary.
- Click Send invite.
Once a user joins your organization, you can manage their permissions, track their contributions, update profile information, monitor their last activity, grant admin and workspace manager access, or block the user if necessary.
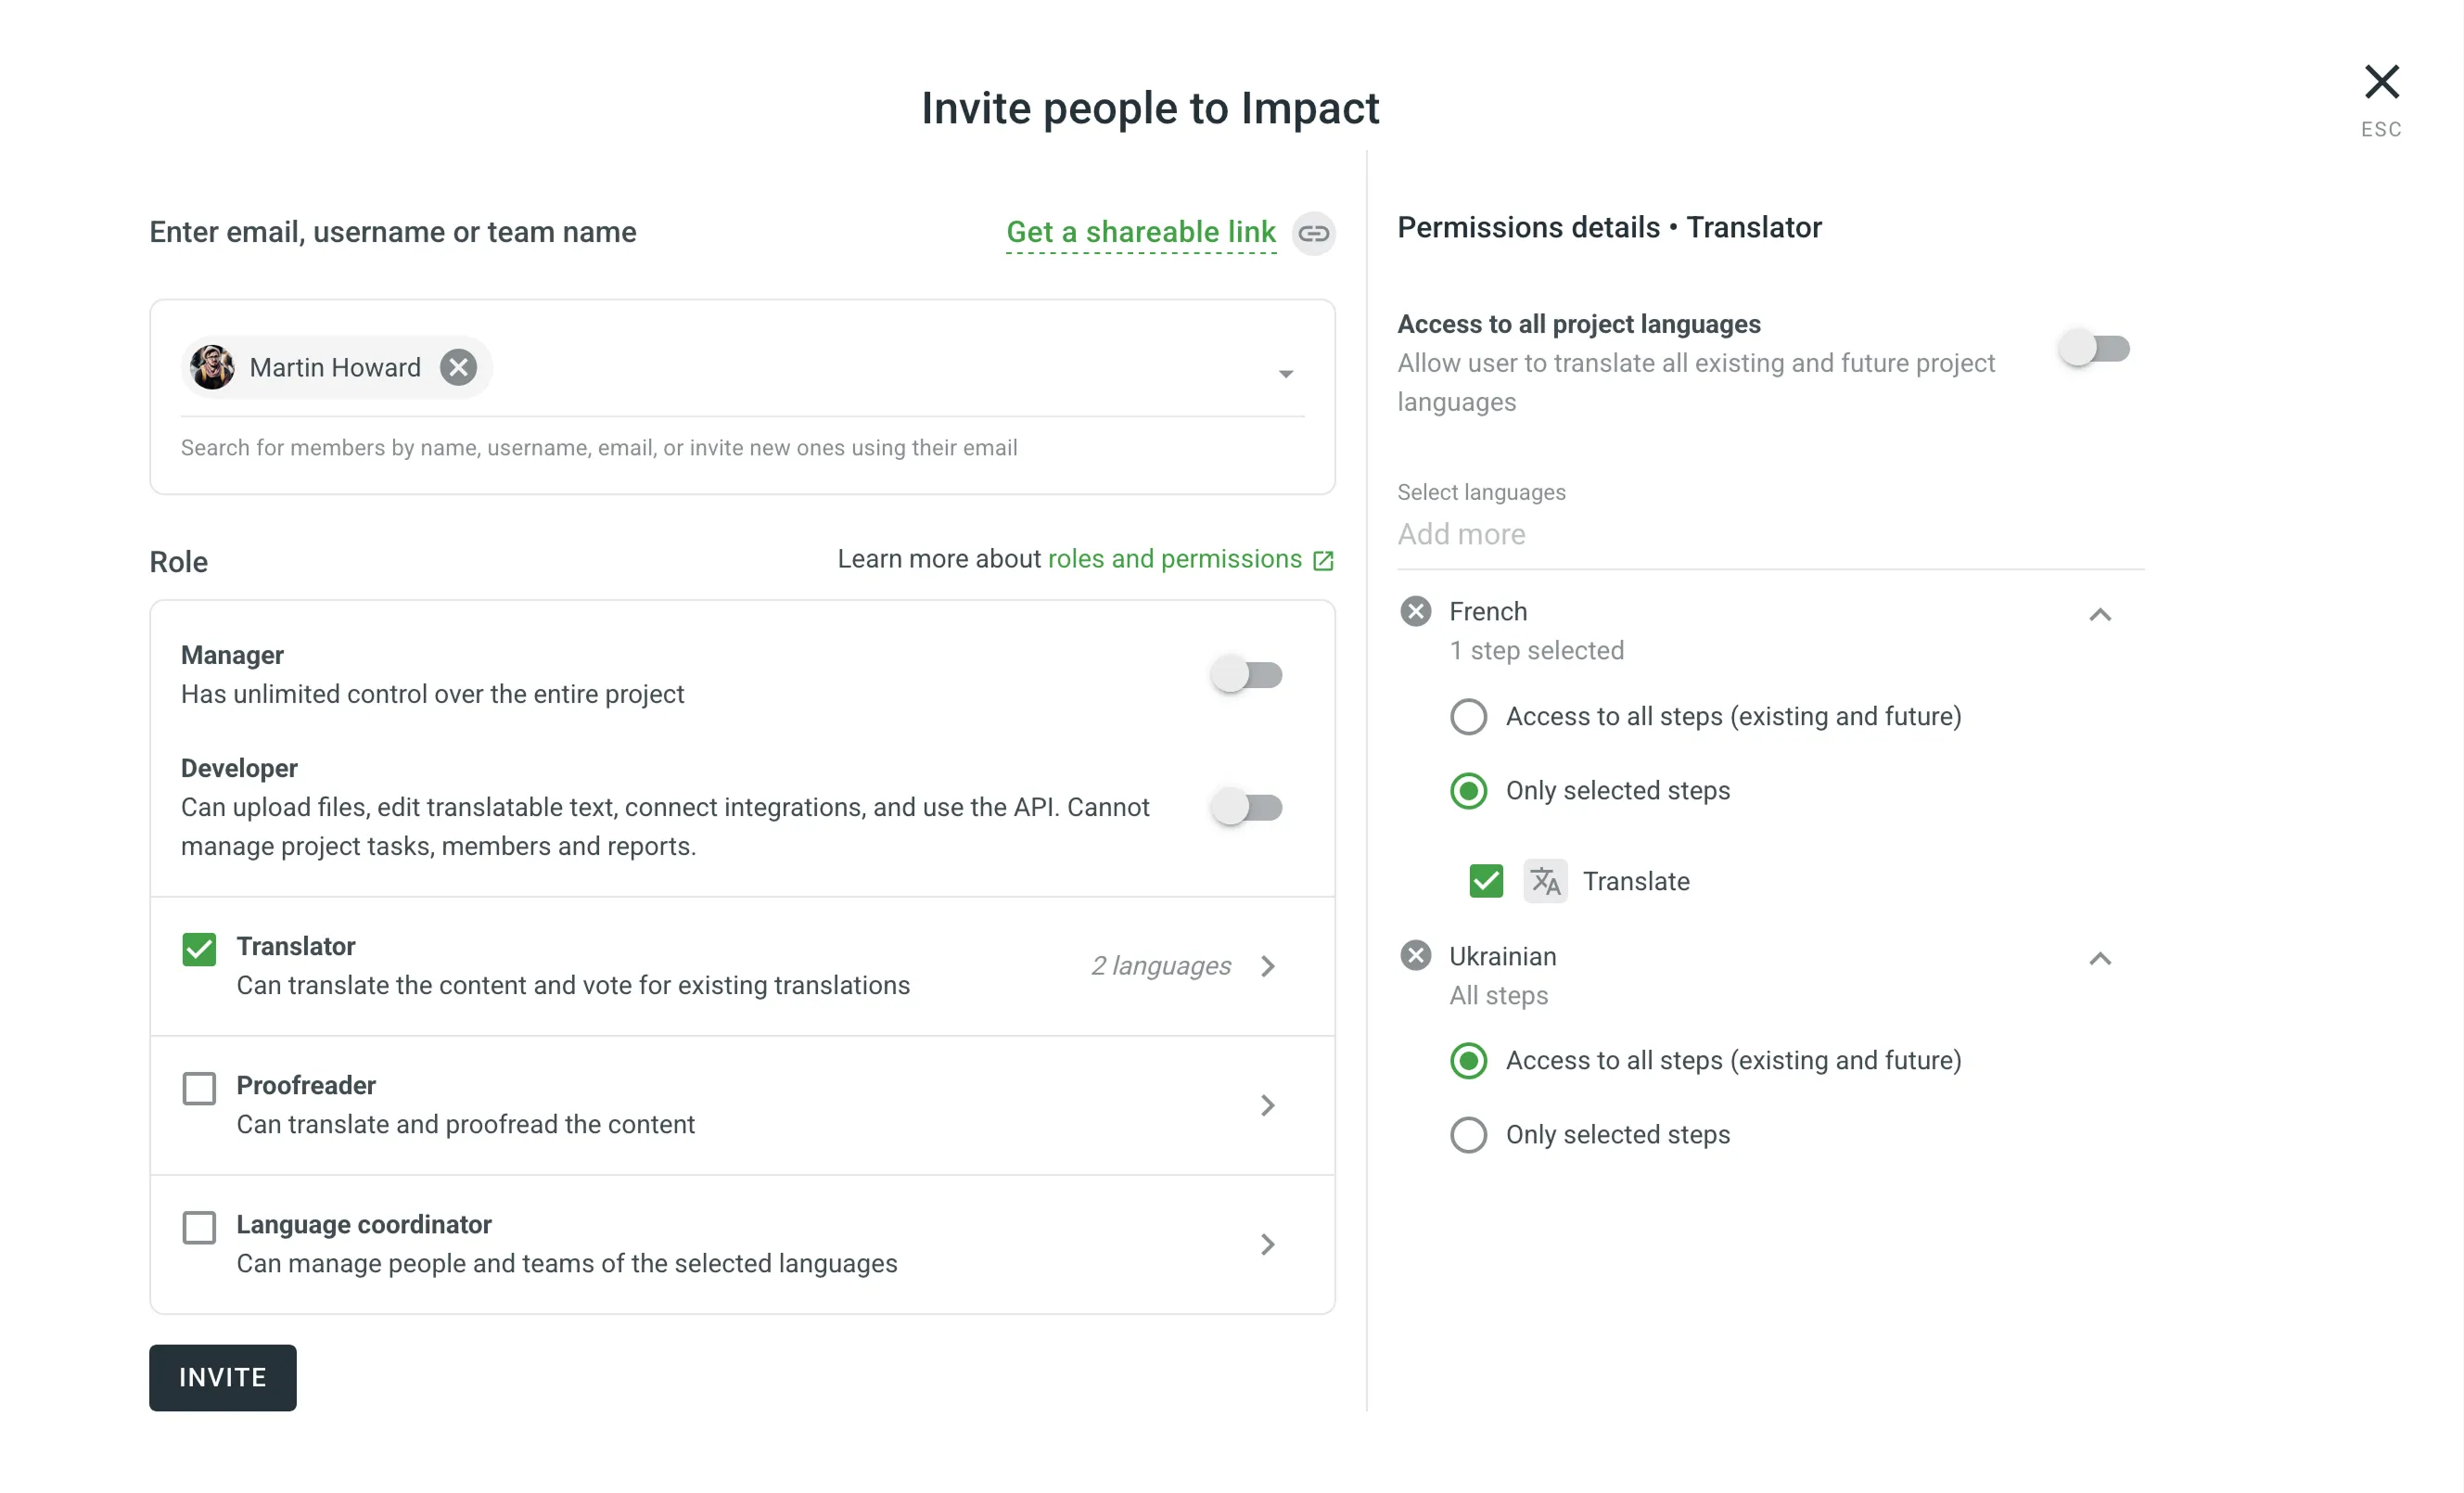
You can invite people directly to a project and grant them the required permissions by assigning roles. If the invited person is not yet an organization member, they will be added to the organization automatically.
To invite members to a specific project, follow these steps:
- Open your project and select Members on the left sidebar.
- Click Invite People in the upper-right corner.

- Select from current organization members or type the email address of the person you need to invite. You can also copy the shareable link and send it via email directly.
- Define the permissions for an invitee. By default, Access to all project languages is enabled. Disable it if you want to grant access to specific languages or workflow steps.
- Click Invite.