

Screenshots
Dette indhold er ikke tilgængeligt i dit sprog endnu.
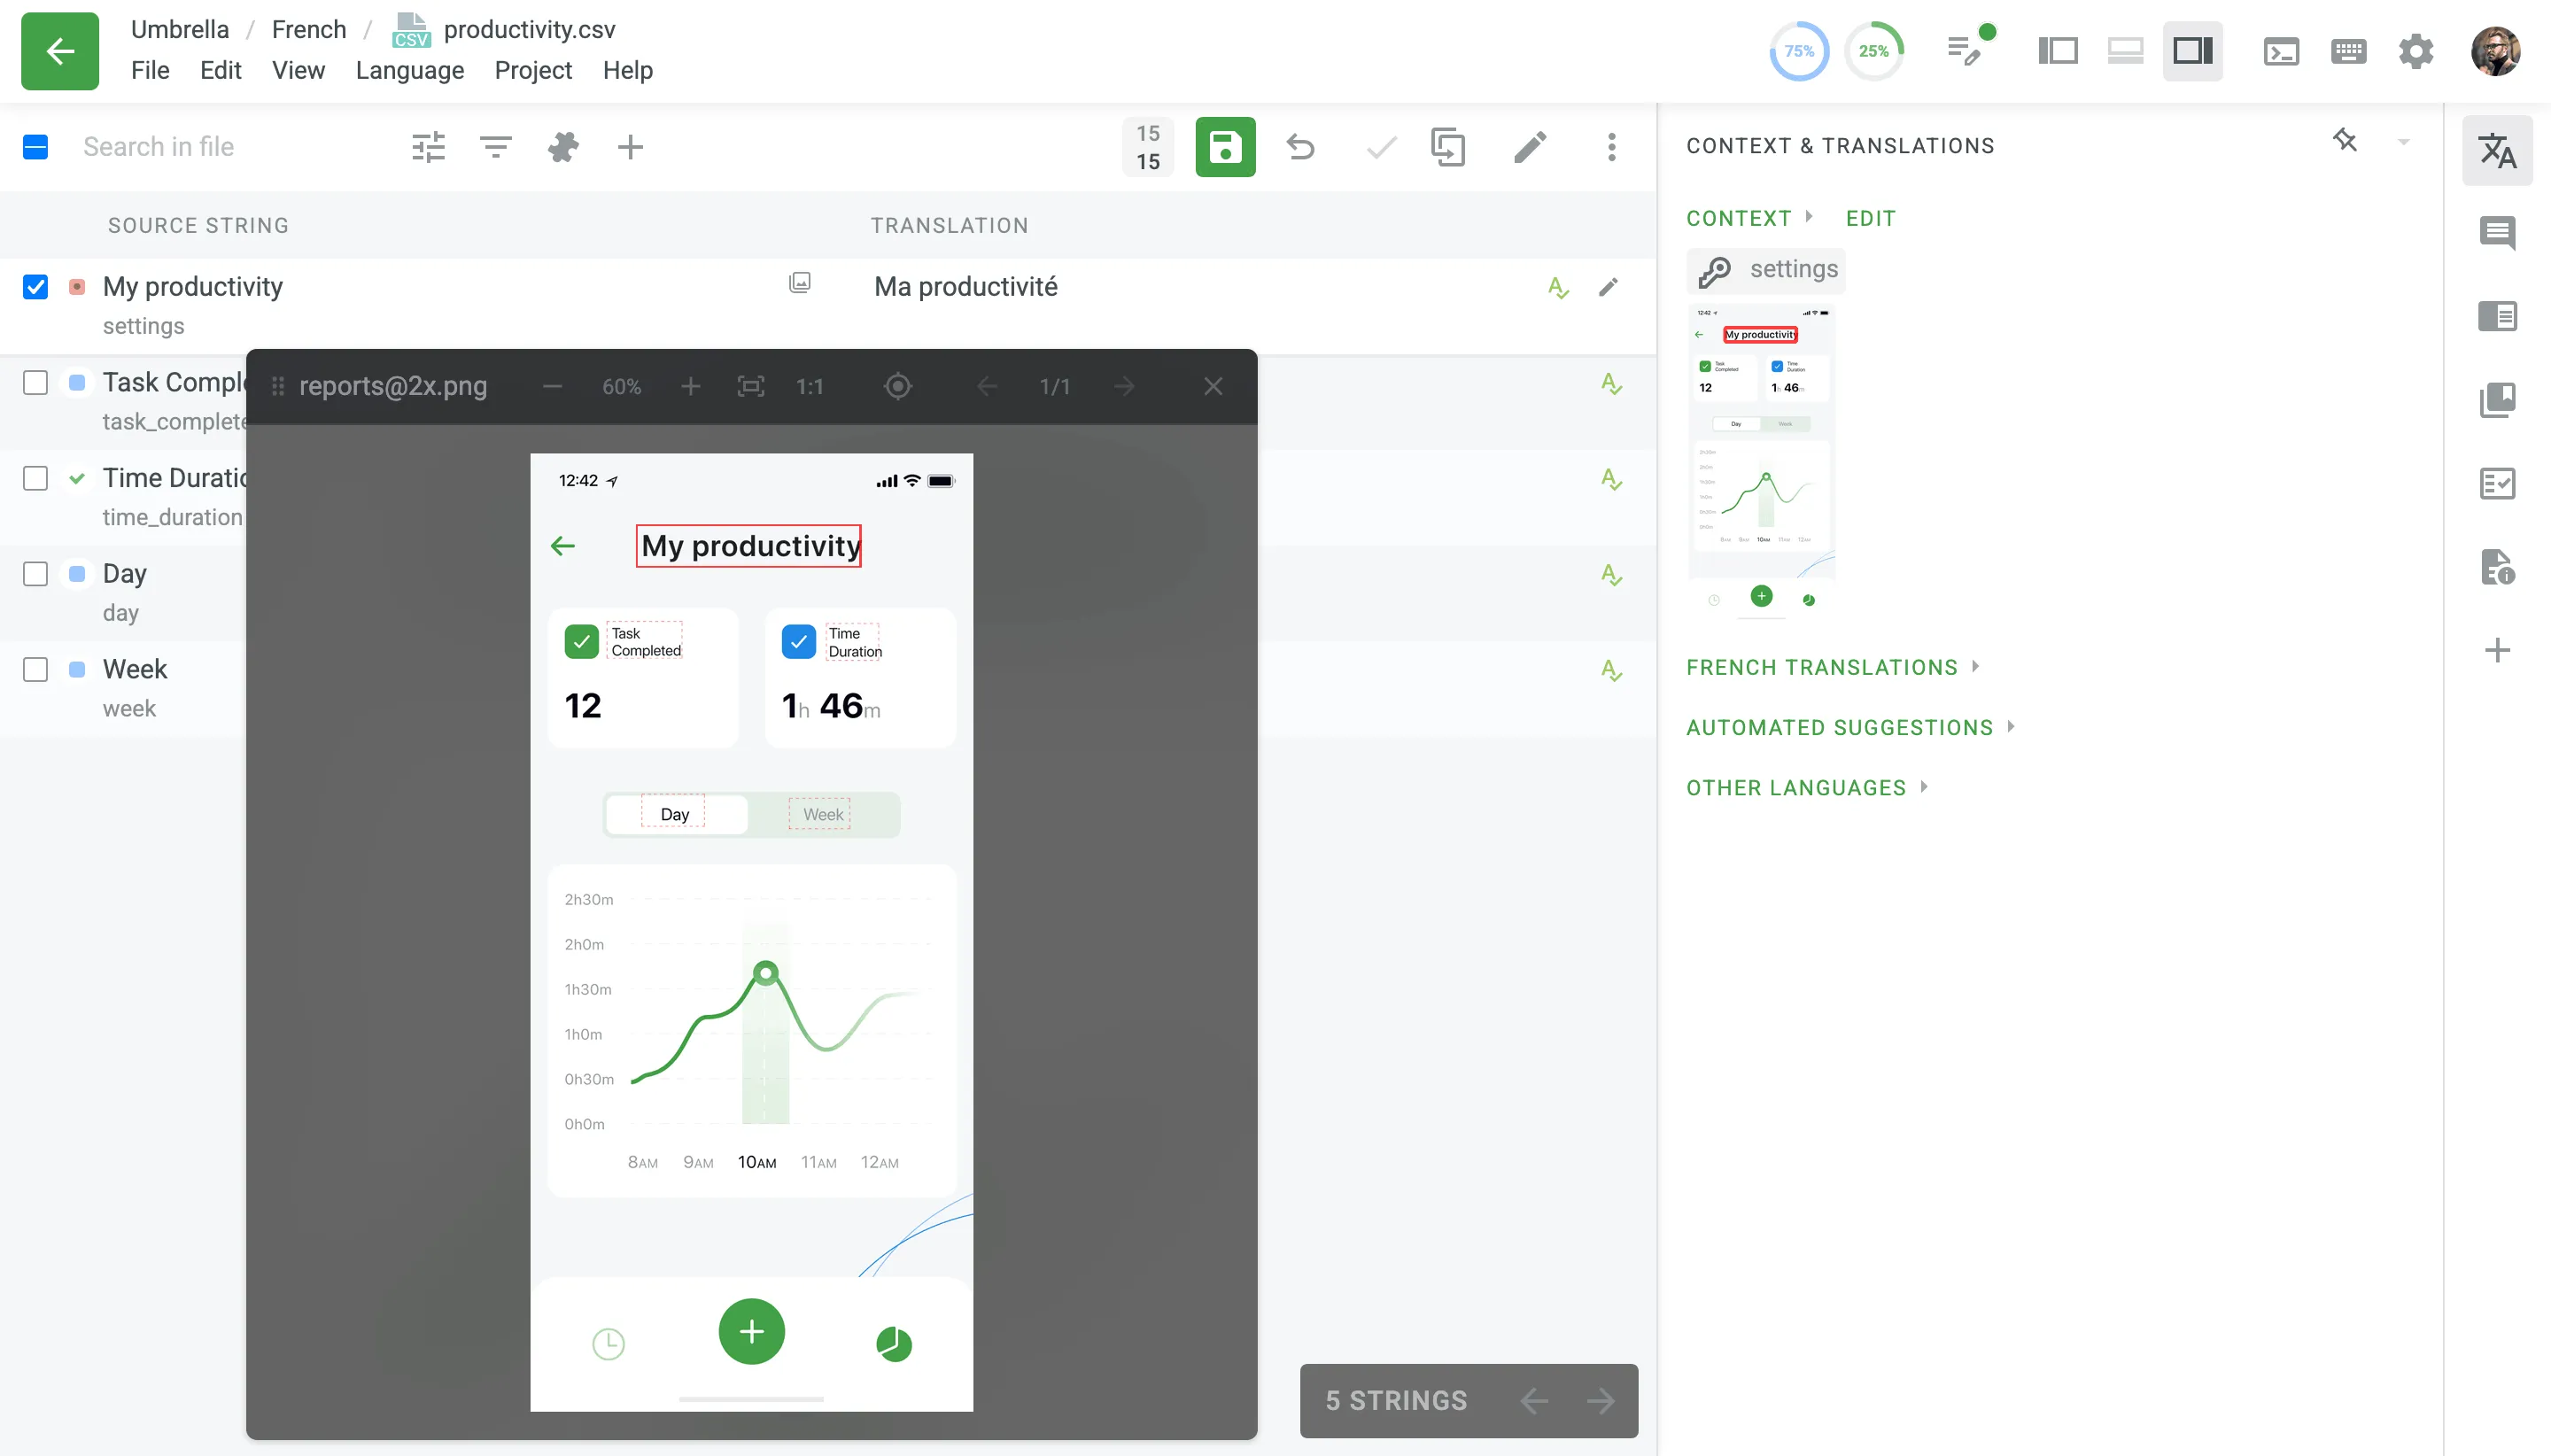
Translate in CrowdinScreenshots are a great way to provide translators with additional context for the source strings in your project and, as a result, get more relevant and consistent translations. With screenshots, your team can see which strings are used together on the same page, whether short texts stand for titles, buttons, etc.
Tag source strings to the screenshots to display them to translators in the Editor in the context section below the source string.
To upload screenshots into your project, follow these steps:
- Open your project and select Screenshots on the left sidebar.
- Drag images from your machine, or click Upload.
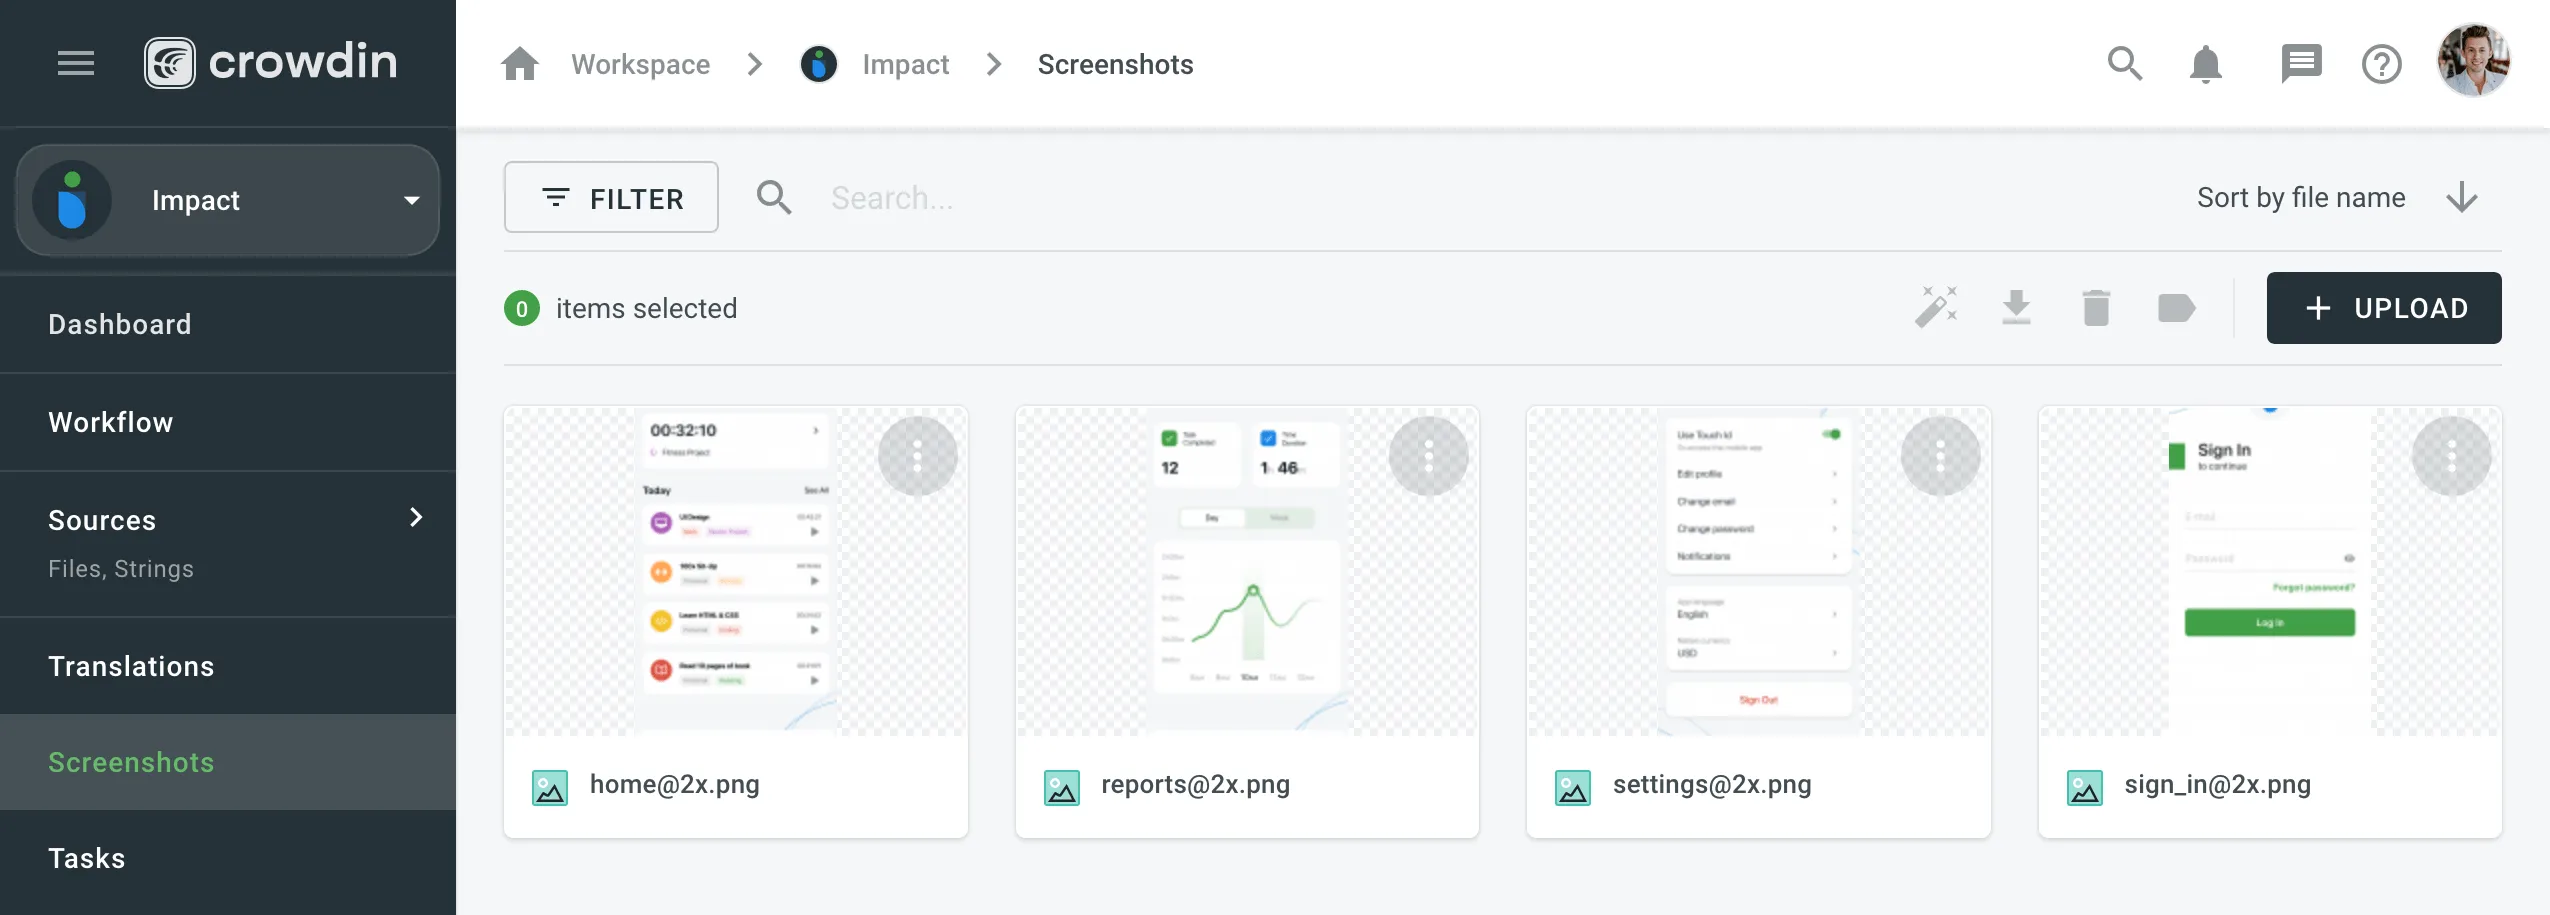
Next to each screenshot’s name, shows the number of strings tagged on it, and shows the number of its labels.
To show translators where certain strings are located in the UI, tag strings on the screenshots. In Crowdin Enterprise, you can tag strings using the following methods:
When you open a screenshot for tagging, the panel on the right has two tabs: Strings lists the project strings you can tag, and Labels holds the screenshot’s labels. The number next to each tab shows how many tags or labels the screenshot has.
To give the screenshot more room, click at the top right of the panel or press Ctrl+Shift+\ (or ⌘+Shift+\). To open the panel again, select Strings or Labels at the top right of the screenshot, or press the same keys.
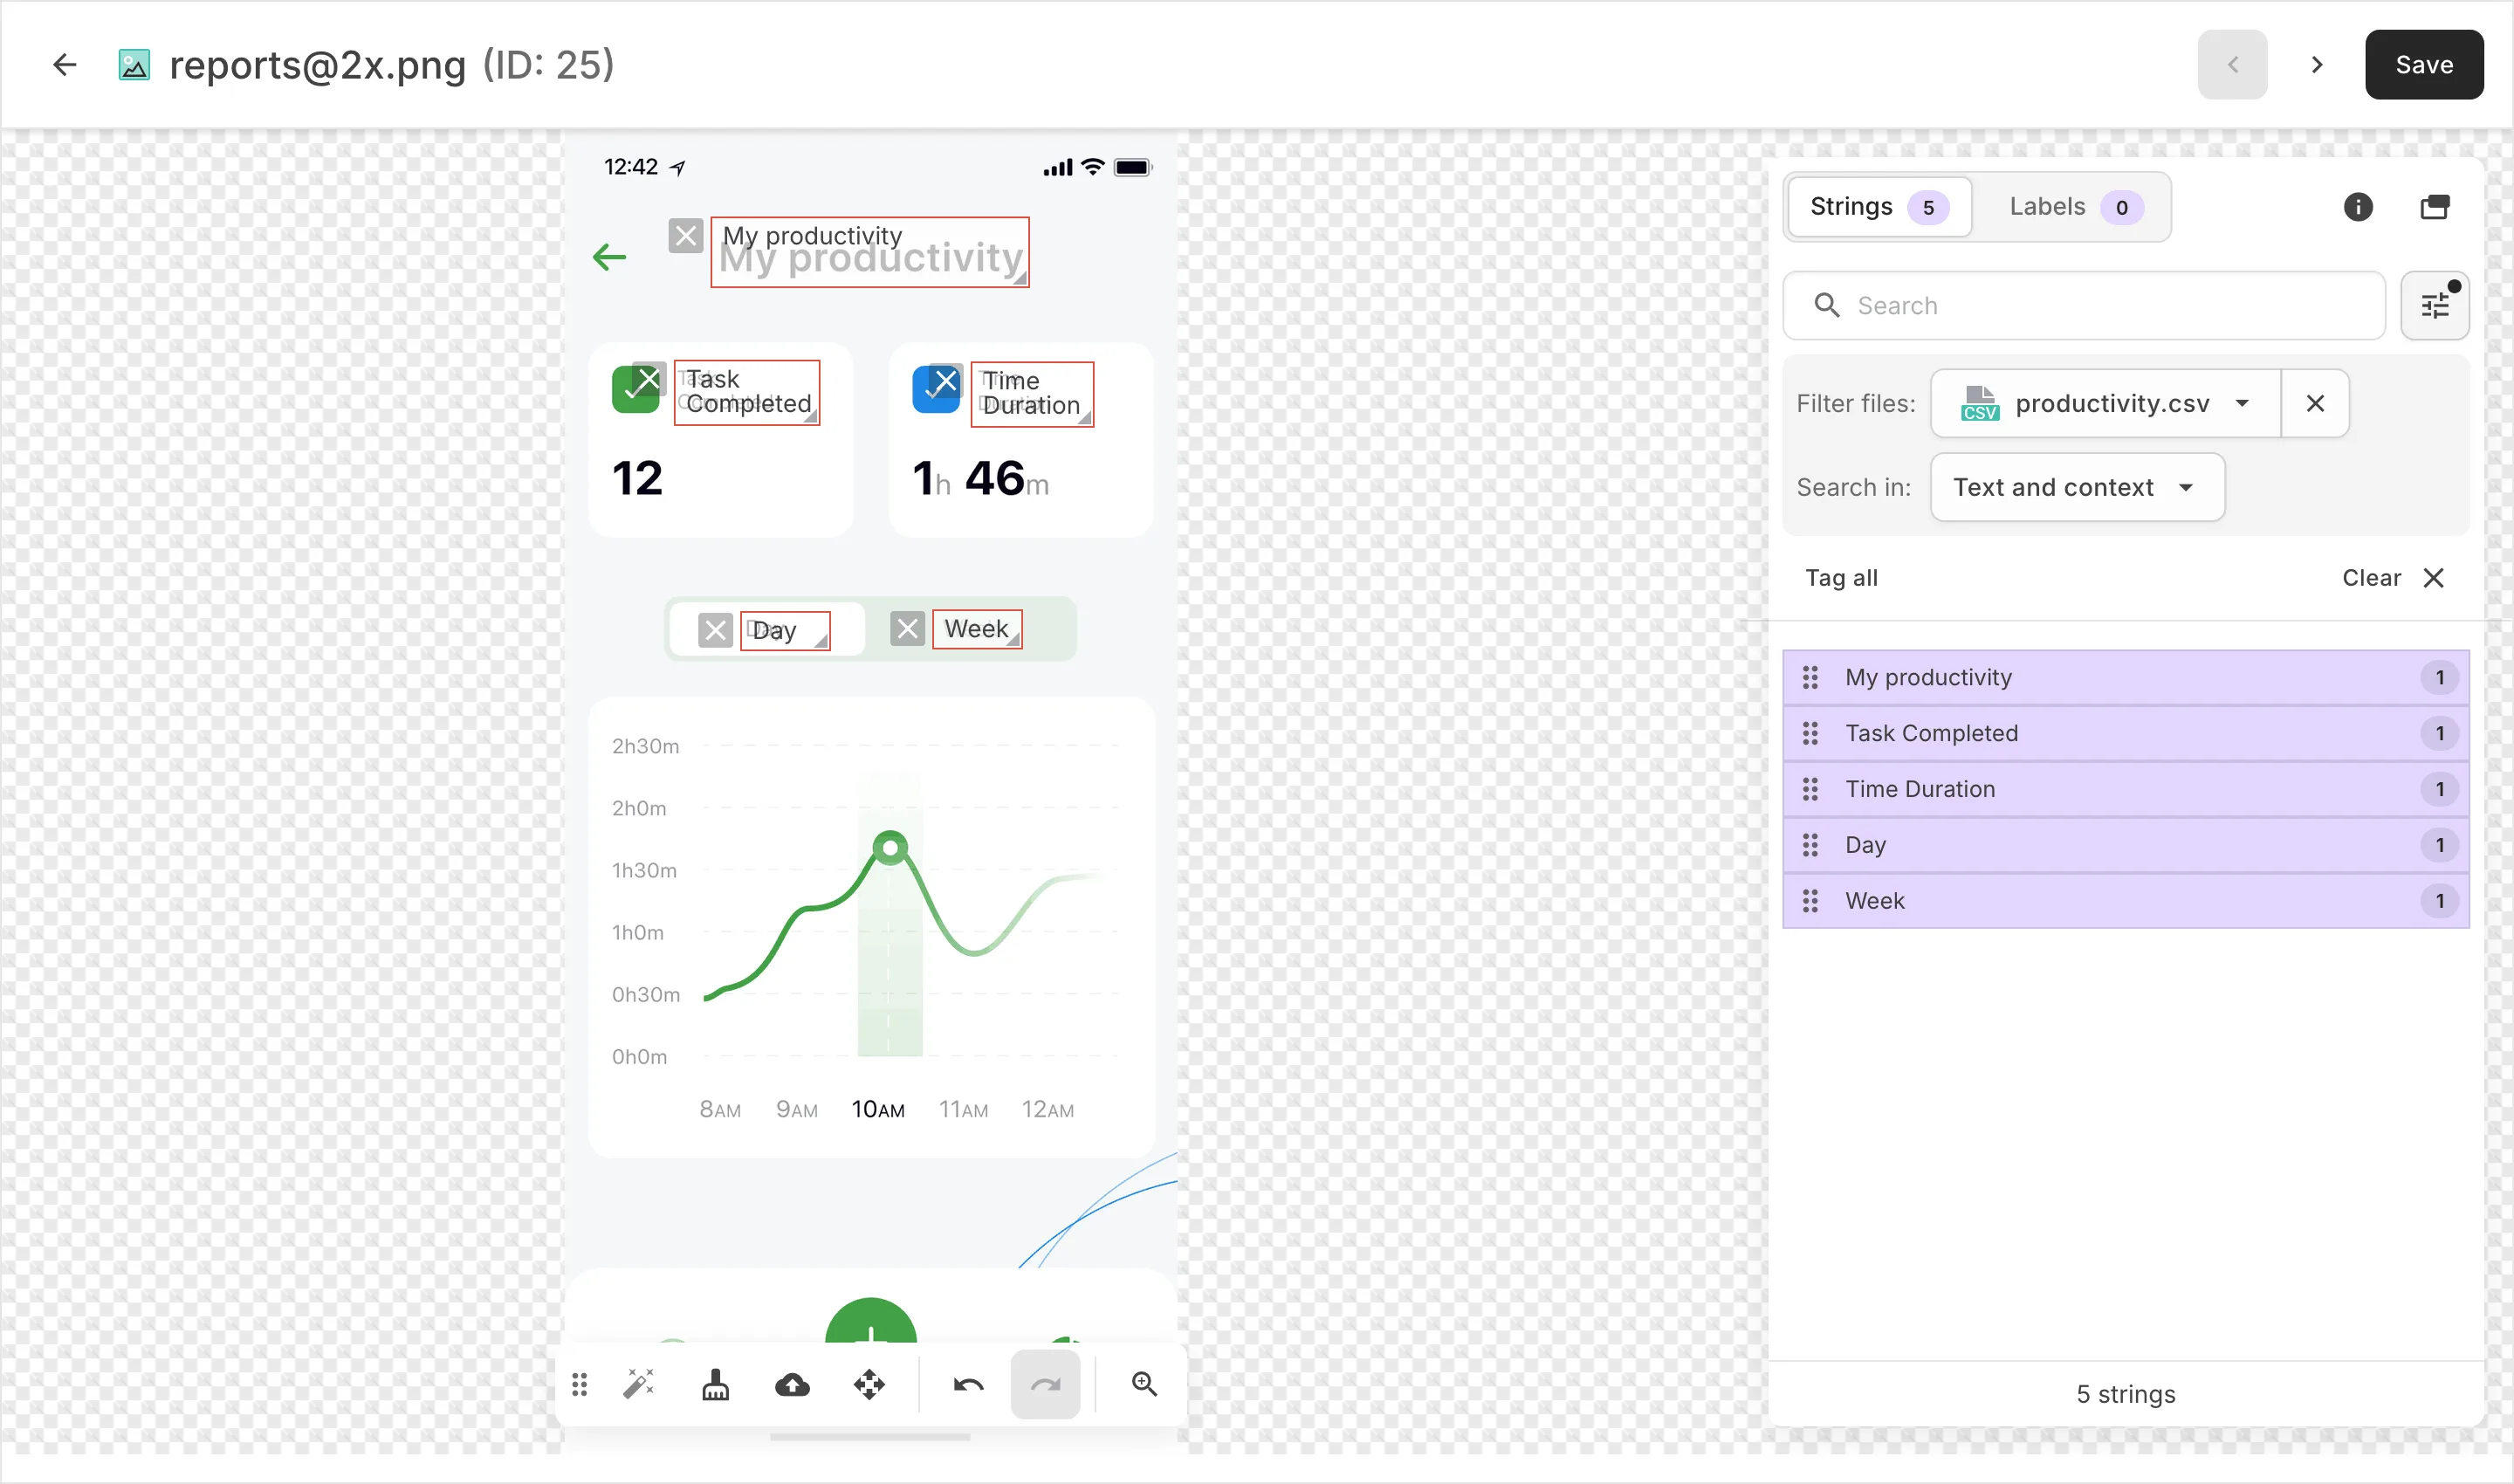
The toolbar at the bottom of the screenshot has the following options:
- Auto tag (A): Tag the strings found on the screenshot automatically.
- Clear (Shift+C): Remove all the tags from the screenshot.
- Update screenshot: Upload a new version of the image. This removes all the tags from the screenshot.
- Move the screenshot: Drag the screenshot to see the rest of a large image. You can also hold Ctrl (or ⌘) and drag.
- Undo (Ctrl+Z or ⌘+Z) and Redo (Ctrl+Shift+Z or ⌘+Shift+Z): Step back or forward through your changes.
- Zoom in and Zoom out: Switch between the actual size of the screenshot and the size that fits the view. These options appear when the screenshot is larger than the view.
To move the toolbar, drag it by . Double-click to put the toolbar back in place.
Press ← or → to open the previous or next screenshot, and Esc to cancel a text selection on the screenshot. The toolbar shortcuts and the arrow keys work when the cursor is outside text fields, such as the search field.
Crowdin Enterprise detects the text on the screenshot and tags the matching strings from the project, or only from the file or branch selected in the search settings.
To tag strings automatically, follow these steps:
- Double-click the screenshot, or click (or right-click) on it and select Edit.
- Click in the toolbar or press A. If the screenshot already has tags, click Clear tags to replace them.
- Once the strings are added, click Save.
To tag strings automatically on a single screenshot without opening it, follow these steps:
- Click (or right-click) on the needed screenshot.
- Select Auto tag.
To tag strings automatically on multiple screenshots at once, follow these steps:
- Select the screenshots you need. To select several in a row, click the first one, hold Shift, and click the last one.
- Click .
- Click Auto tag to confirm.
If you use In-Context, you can take screenshots of your website pages right from it, and Crowdin Enterprise tags the strings on them automatically.
Select an area with text on the screenshot, and Crowdin Enterprise recognizes the text and looks for matching strings in the project, or only in the file or branch selected in the search settings. A close match is tagged right away. Otherwise, you can select the best-matching string from the list.
To tag strings with text recognition, follow these steps:
- Double-click the screenshot, or click (or right-click) on it and select Edit.
- Drag over the text on the screenshot to select it.
- If the string isn’t tagged right away, select it from the list under the selection. To search for different text, edit the recognized text in the field above the list and press Enter.
- Once finished tagging all the strings, click Save.
To tag strings manually, follow these steps:
- Double-click the screenshot, or click (or right-click) on it and select Edit.
- Find the strings you need with the Search field above the list. To narrow the search, use the search settings below the field (click to show or hide them):
- Filter files (Filter branches in string-based projects): Show only the strings from the selected file or branch.
- Search in: Limit the search to Source text, Source context, or Source key, or widen it to All fields (text, context, and key). By default, the search covers Text and context. With Source key, the list shows the key under each string.
- Drag the needed string from the list in the right panel to the corresponding text on the screenshot. Alternatively, click on the strings to tag them in the screenshot without specifying the exact place where they should appear.
- (Optional) To view additional string details or edit them:
- Click at the top right of the panel to show more details (file, key, and context).
- Hover over a string and click to open the Edit String dialog. You can:
- Update the identifier.
- Update the source text.
- Add or update the context.
- Add or update the labels.
- Set the Max. length of the translated text.
- Click Save after making the changes.
- Click Save when you finish tagging.
Read more about String Editing.
To tag all the listed strings at once, follow these steps:
- Search or filter the list to show the strings you need.
- Click Tag all. The strings on the current page of the list are tagged without a specific place on the screenshot. If the list has more pages, go to the next one and click Tag all again.
- Click Save.
To remove a tag, click to the left of it on the screenshot. To remove all the tags of a string, hover over the string in the list and click . To remove all the tags from the screenshot, click Clear.
Click Save to keep the changes.
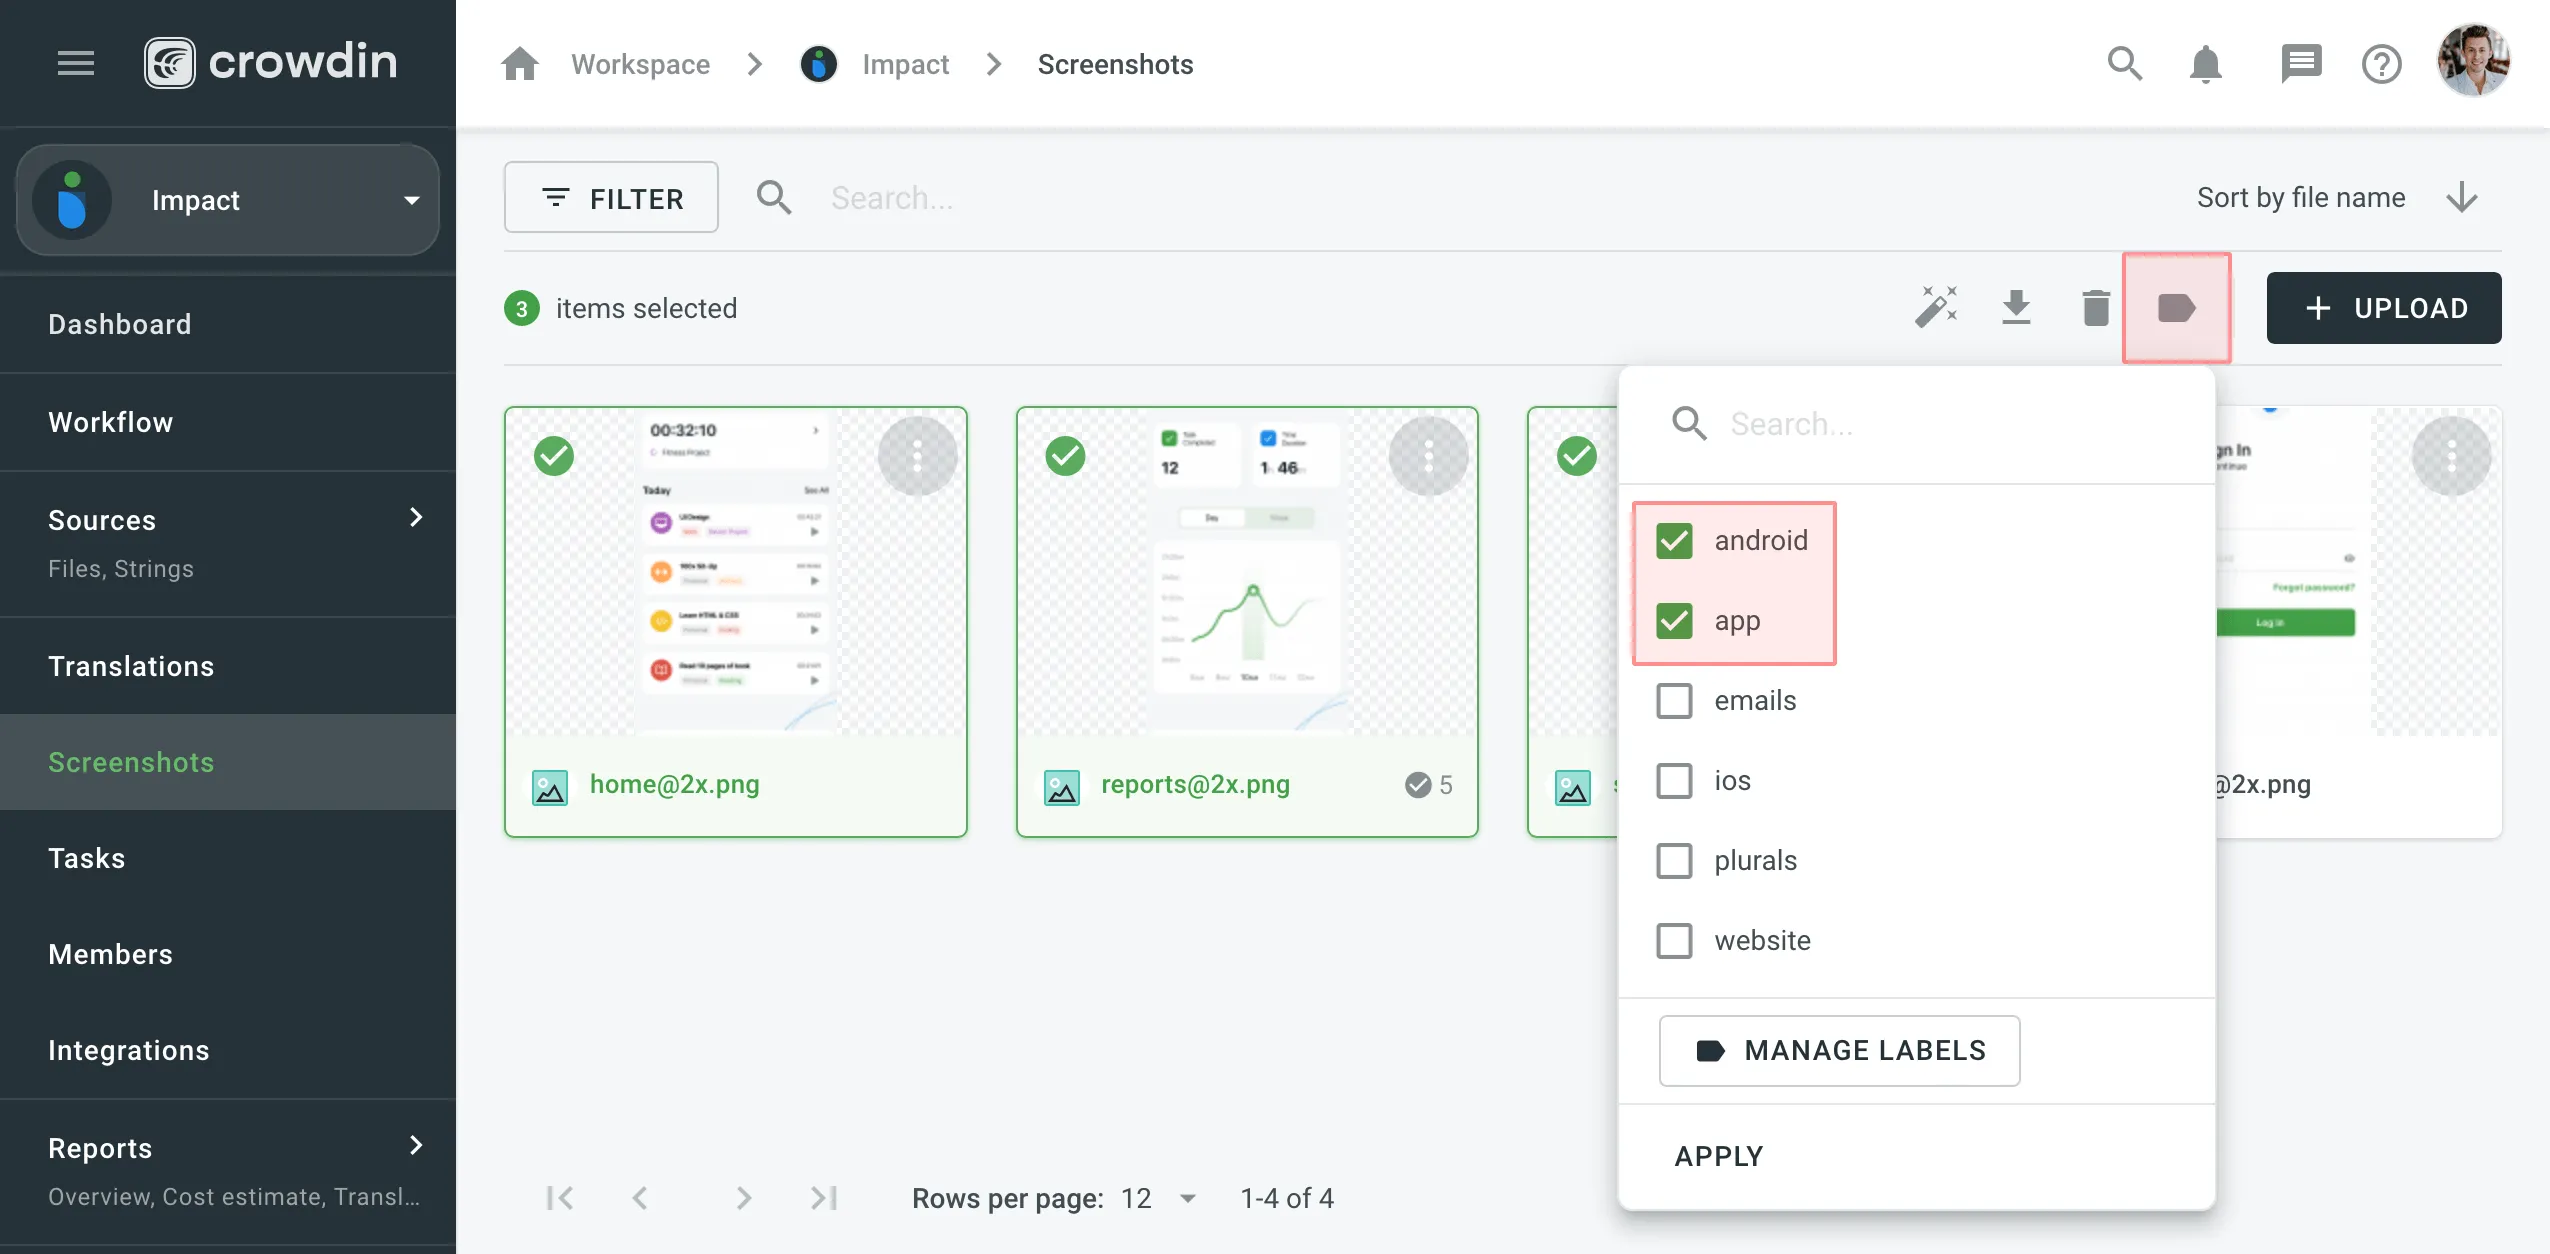
Use labels in your project for an easy way to organize screenshots by certain topics. Once you add labels to your screenshots, you can filter them by added labels. If you already use labels for your source strings, you can also use the same labels for screenshots.
You can add labels to one screenshot or to several screenshots at once.
To add labels to one screenshot, follow these steps:
- Double-click the screenshot, or click (or right-click) on it and select Edit.
- In the panel on the right, select Labels.
- Select the labels you need from the Labels drop-down menu. To create a new label, type its name, select Create new label, and click Save in the Create label dialog.
- Click Save.
To add labels to multiple screenshots at once, follow these steps:
- Select the screenshots you need. To select several in a row, click the first one, hold Shift, and click the last one.
- Click .
- Select the labels you need in the list. To create a new label, type its name in the search field, select Create new label, and click Save in the Create label dialog. Then select the new label in the list.
- Click Apply.
You can replace a screenshot with a new image, for example, after the UI changes. Updating the image removes all the tags from the screenshot, so tag the strings again before you save it.
To update a screenshot, follow these steps:
- Double-click the screenshot, or click (or right-click) on it and select Edit.
- Click in the toolbar and select a new image, or drag the image onto the screenshot.
- Tag the strings on the new image. For example, click to tag them automatically.
- Click Save.
To rename a screenshot, follow these steps:
- Click (or right-click) on the needed screenshot and select Rename.
- Specify a new name.
- Click Save.
You can download screenshots and reuse them in other projects or elsewhere.
To download screenshots, follow these steps:
- Select the screenshots you need. To select several in a row, click the first one, hold Shift, and click the last one.
- Click .
Alternatively, click (or right-click) on the needed screenshot and select Download.
To delete a screenshot, follow these steps:
- Select the screenshots you need. To select several in a row, click the first one, hold Shift, and click the last one.
- Click .
- Click Delete to confirm.
Alternatively, click (or right-click) on the needed screenshot, select Delete, and confirm.