CSV / XLSX File Configuration
Dette indhold er ikke tilgængeligt i dit sprog endnu.
Translate in CrowdinAfter CSV or XLSX files are uploaded to the project, they require configuration before the system can correctly parse and import their content.
To start the configuration, follow these steps:
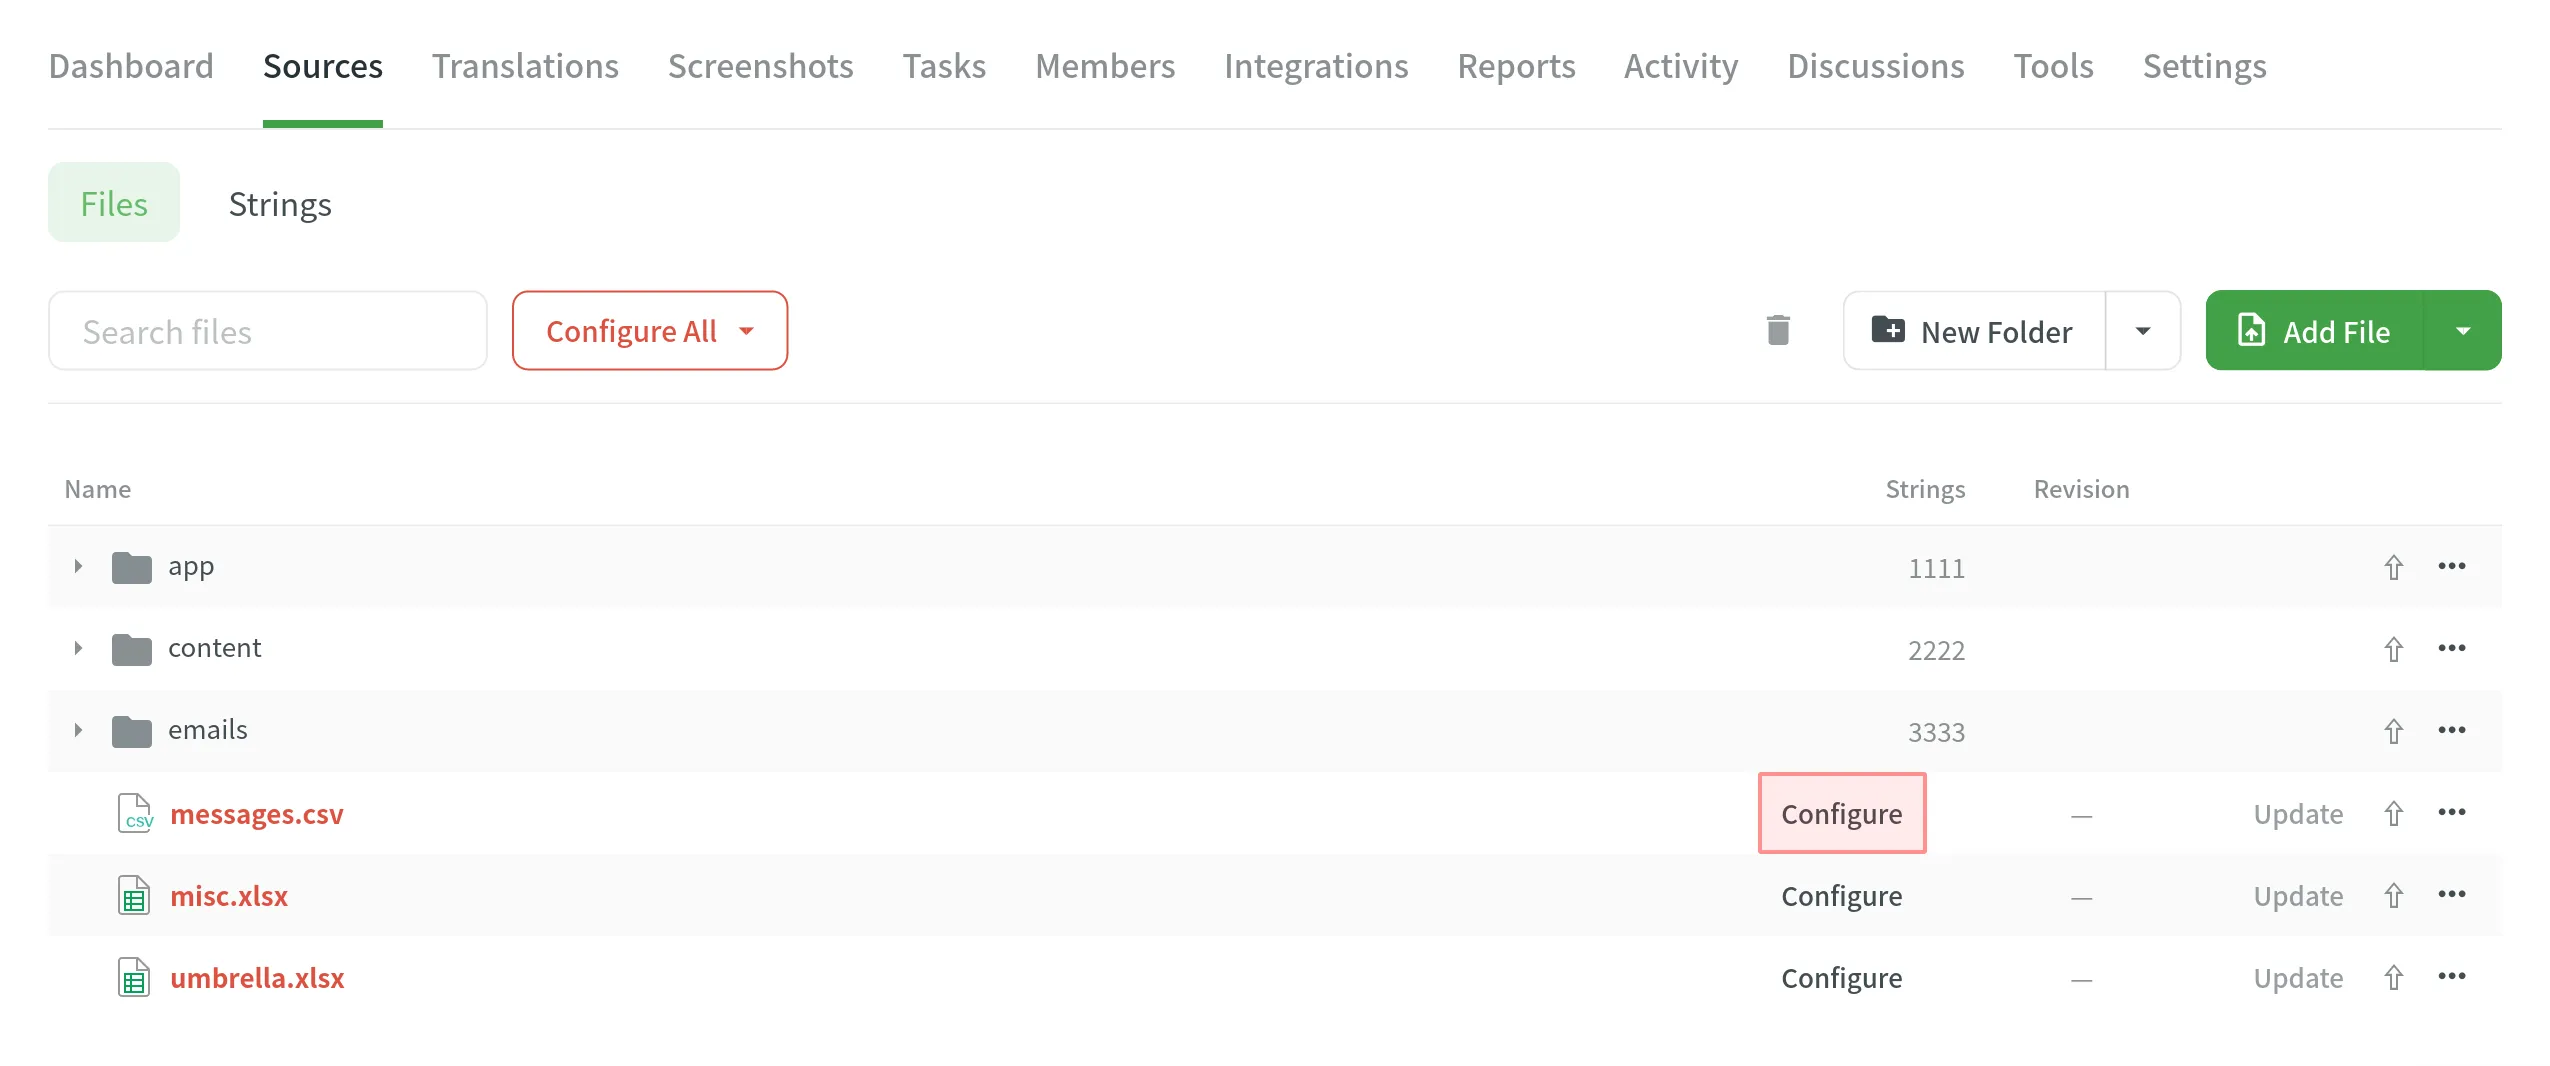
- Open your project and go to Sources > Files.
- Click Configure next to the file to open the configuration dialog.
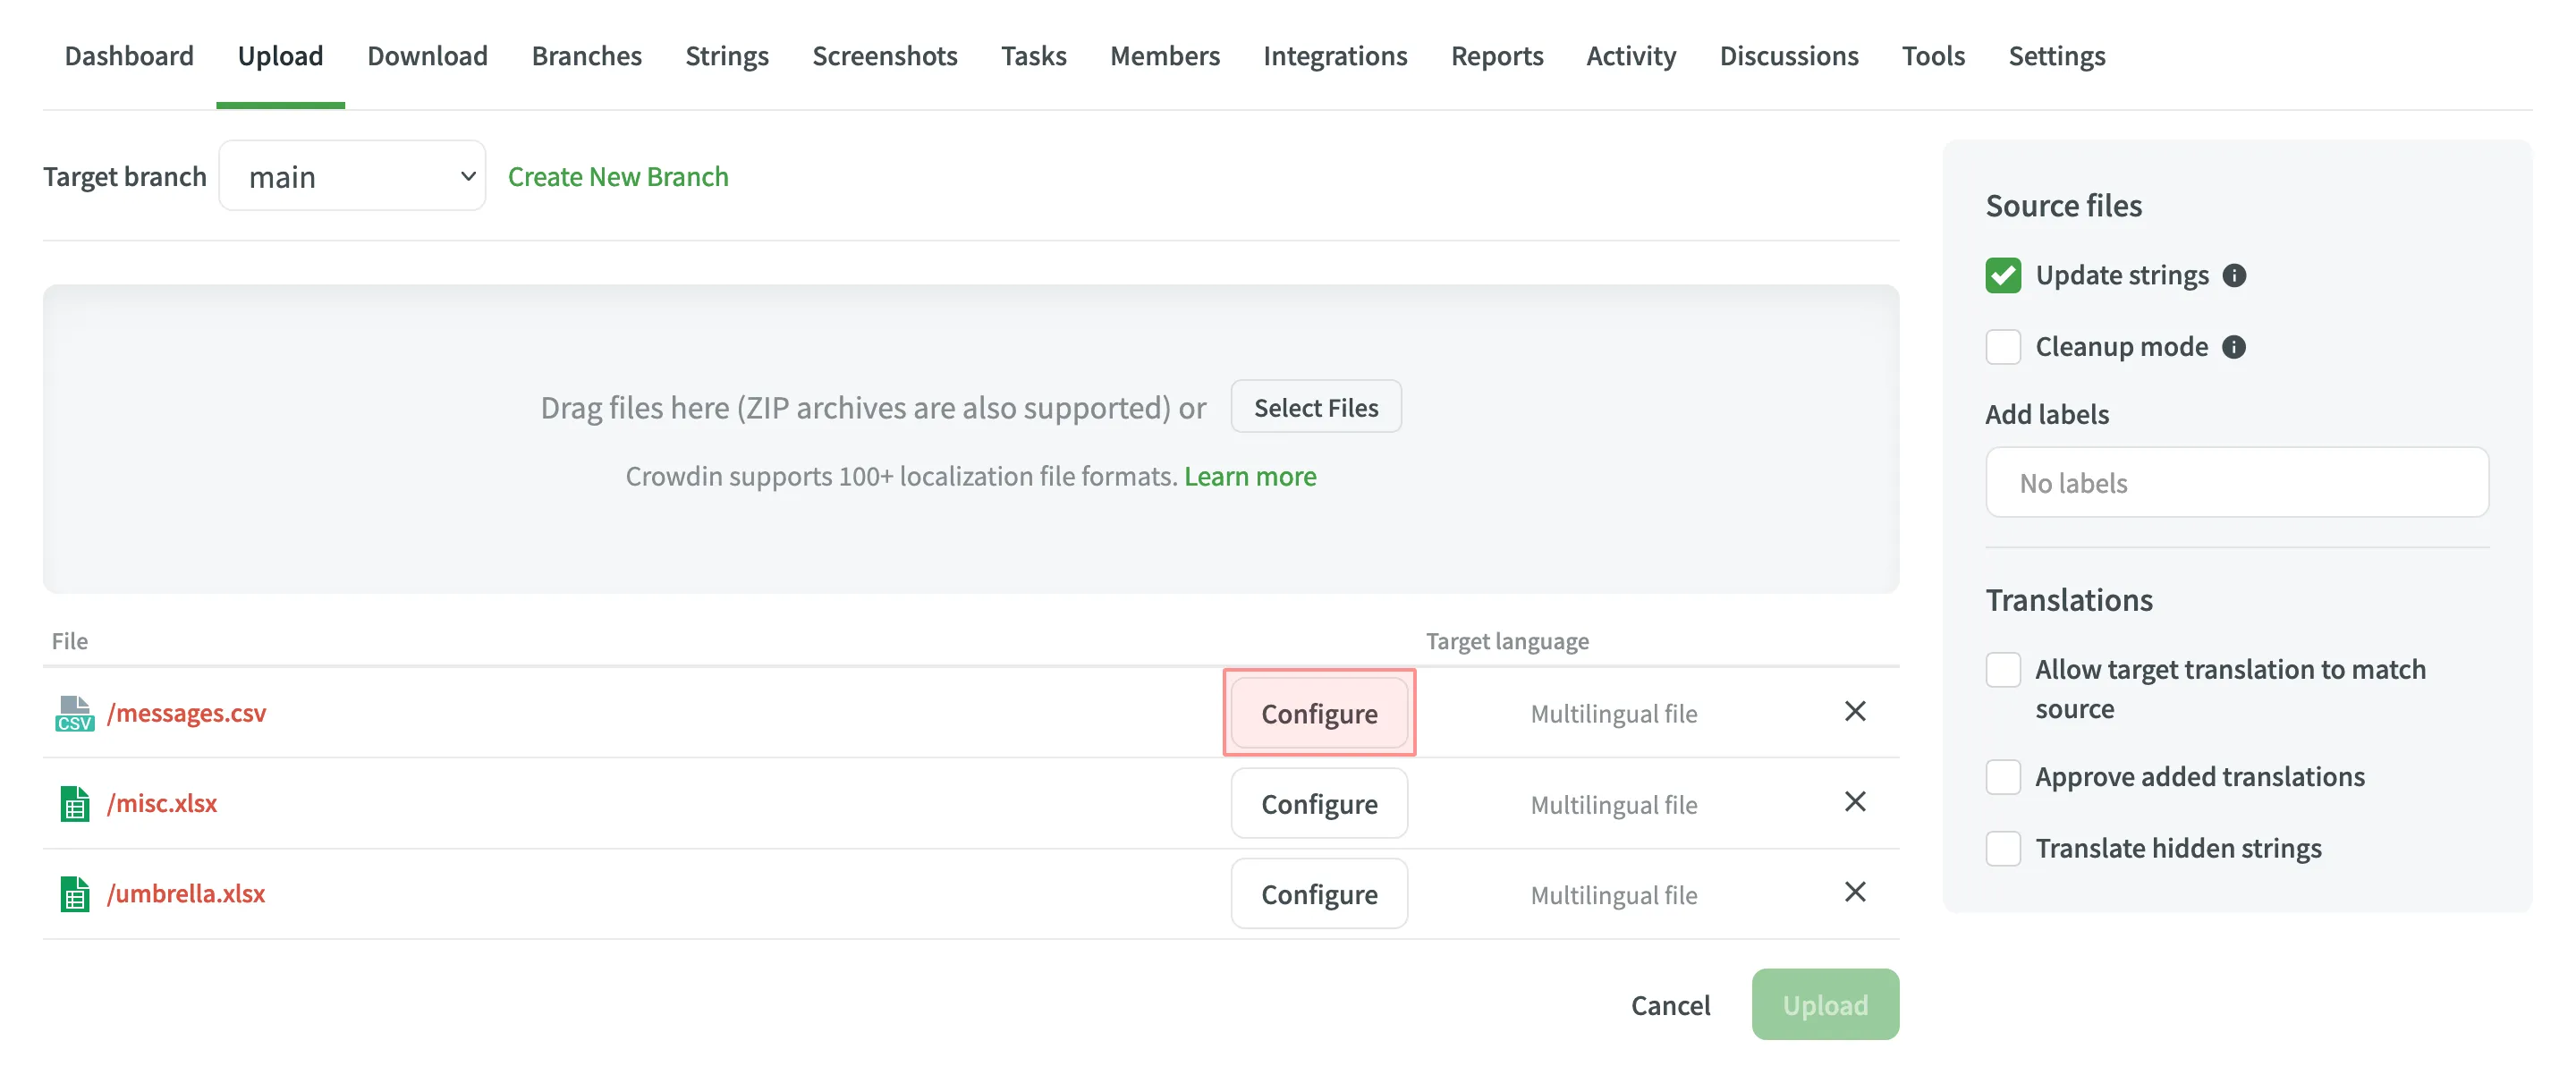
- Open your project and go to the Upload tab.
- Drag and drop your files or click Select Files.
- Click Configure next to the file you wish to set up.
The same configurations mentioned in this article are also applicable to the TSV file format. The main difference between CSV and TSV files is that they use different delimiters between columns (commas in CSV and tabs in TSV).
When configuring an XLSX file, you will first see a dialog with two primary options that determine how the file is processed:
- Import all cells - Imports the content of each cell as a separate source string. If you select this option, you can also enable Content segmentation to automatically split text into smaller translation units, such as sentences or short paragraphs. This is helpful when translating content units consisting of several sentences because it will be easier to translate smaller pieces of text. Segmentation Rules eXchange (SRX) are used for automatic content segmentation.
- Configure columns for import - This option opens the detailed configuration dialog, allowing you to manually map columns for sources, translations, context, and more.
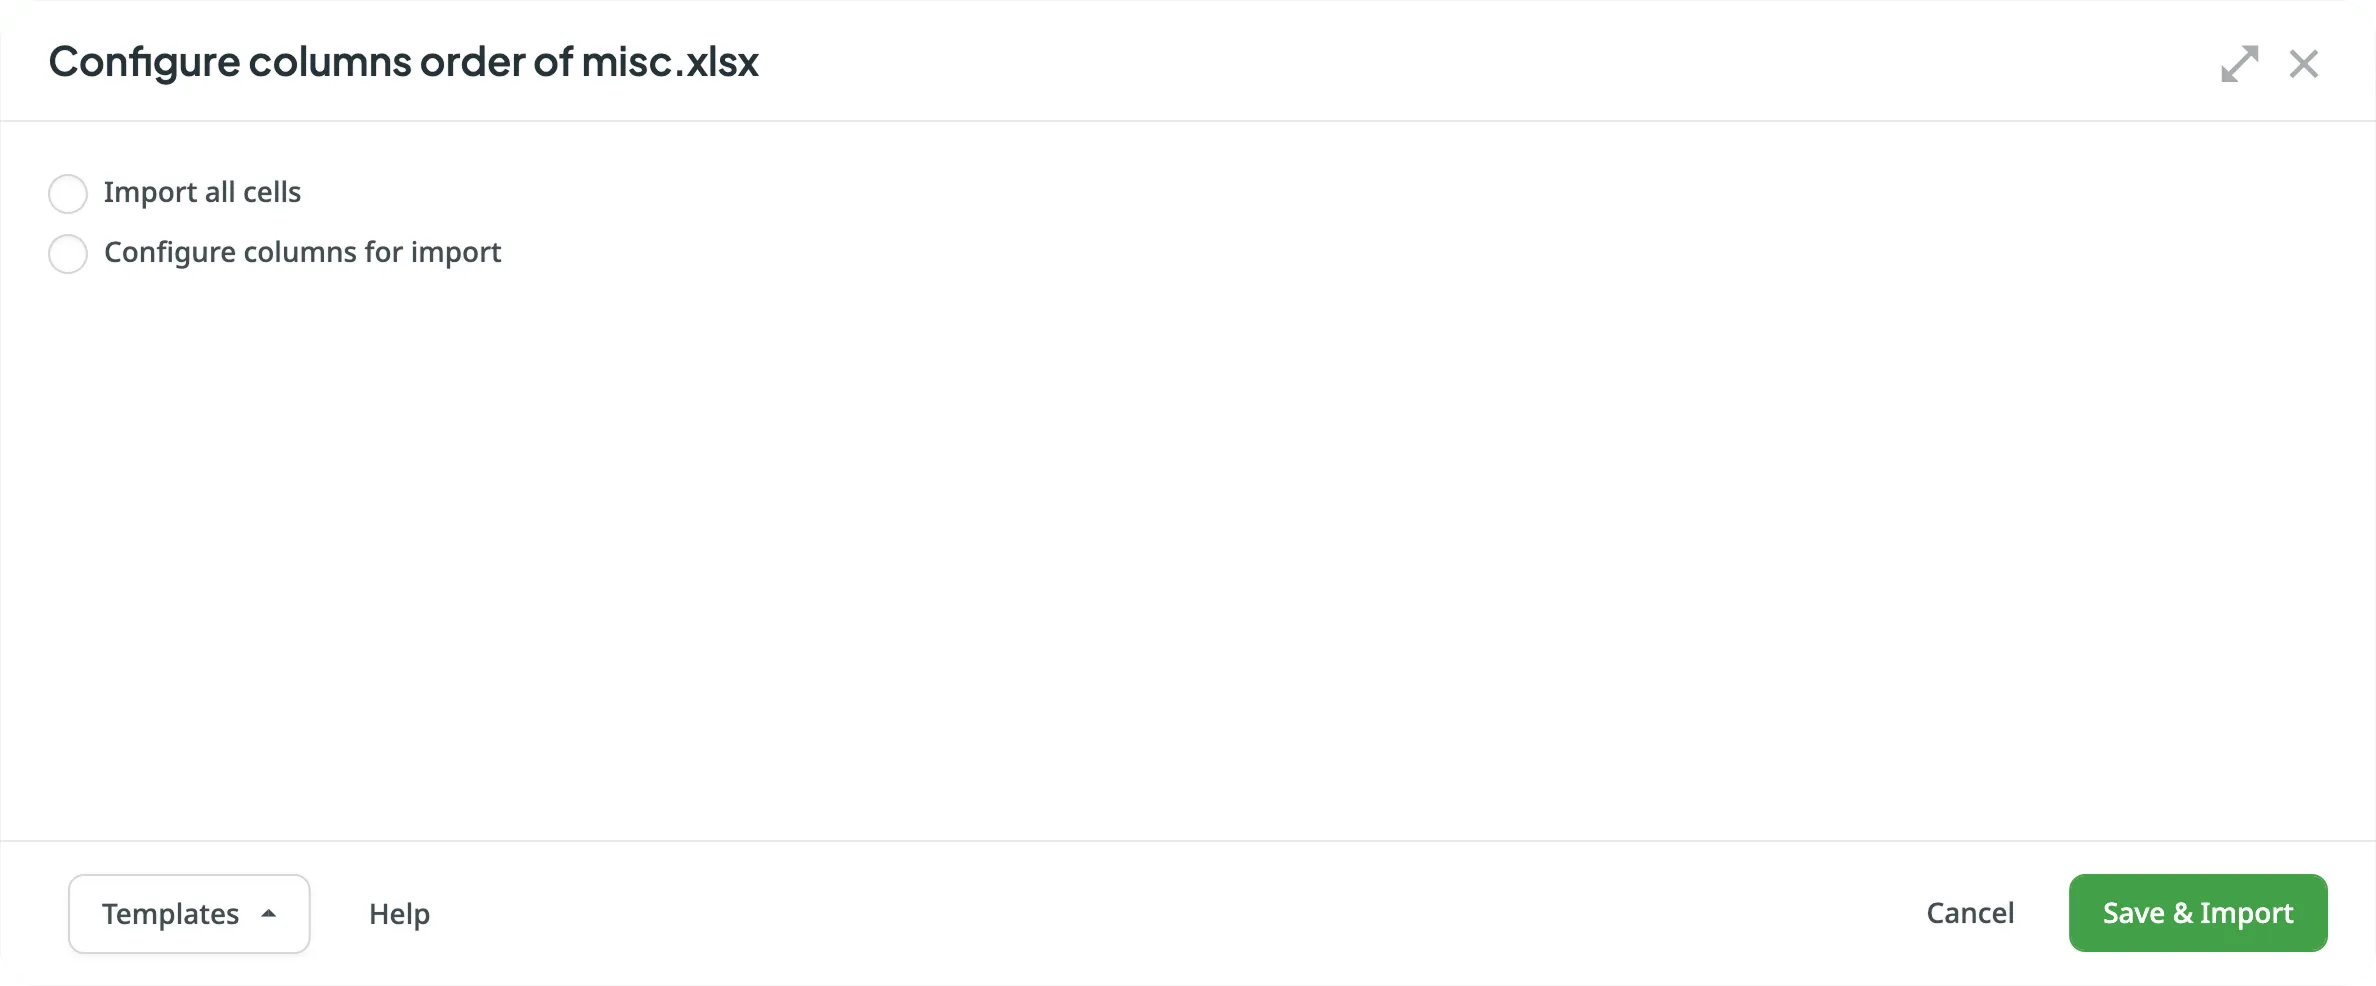
The detailed configuration dialog appears immediately for CSV files, or for XLSX files after you select Configure columns for import.
The main area of the dialog is for mapping the columns from your file to the appropriate data type in Crowdin. The interface includes the following controls directly above the column mapping:
- Detect - Re-runs the automatic detection of the column scheme based on the headers in the first row.
- Reset - Clears the current column configuration and resets all columns to Not selected.
- and - Use these buttons to add a new language column or remove a selected one. This is useful if your multilingual source file is missing columns for some of your project’s target languages. These buttons are active only when you select the Multilingual spreadsheet option in the Import Options section.
You can define the purpose of each column by assigning a type from the dropdown menu above it. The available column types are:
- Key – Column contains string identifiers. Typically, an alphanumeric value.
- Source string – Column contains source strings that should be translated.
- Source string/Translation – Column contains source strings, but the same column will be filled with translations when the file is exported. When uploading existing translations, the values from this column will be used as translations.
- Translation – Column for resulting translations added on export. On import and when uploading existing translations, the system will check this column for existing translations and upload them to the project.
- Context – Column contains comments or context information for the source strings.
- Labels – Column contains labels for the source strings. You can add multiple labels to each string, separating them with commas.
- Max. Length – Column contains max.length limit values for the translations of the strings.
- Not selected – Column will be skipped on import.
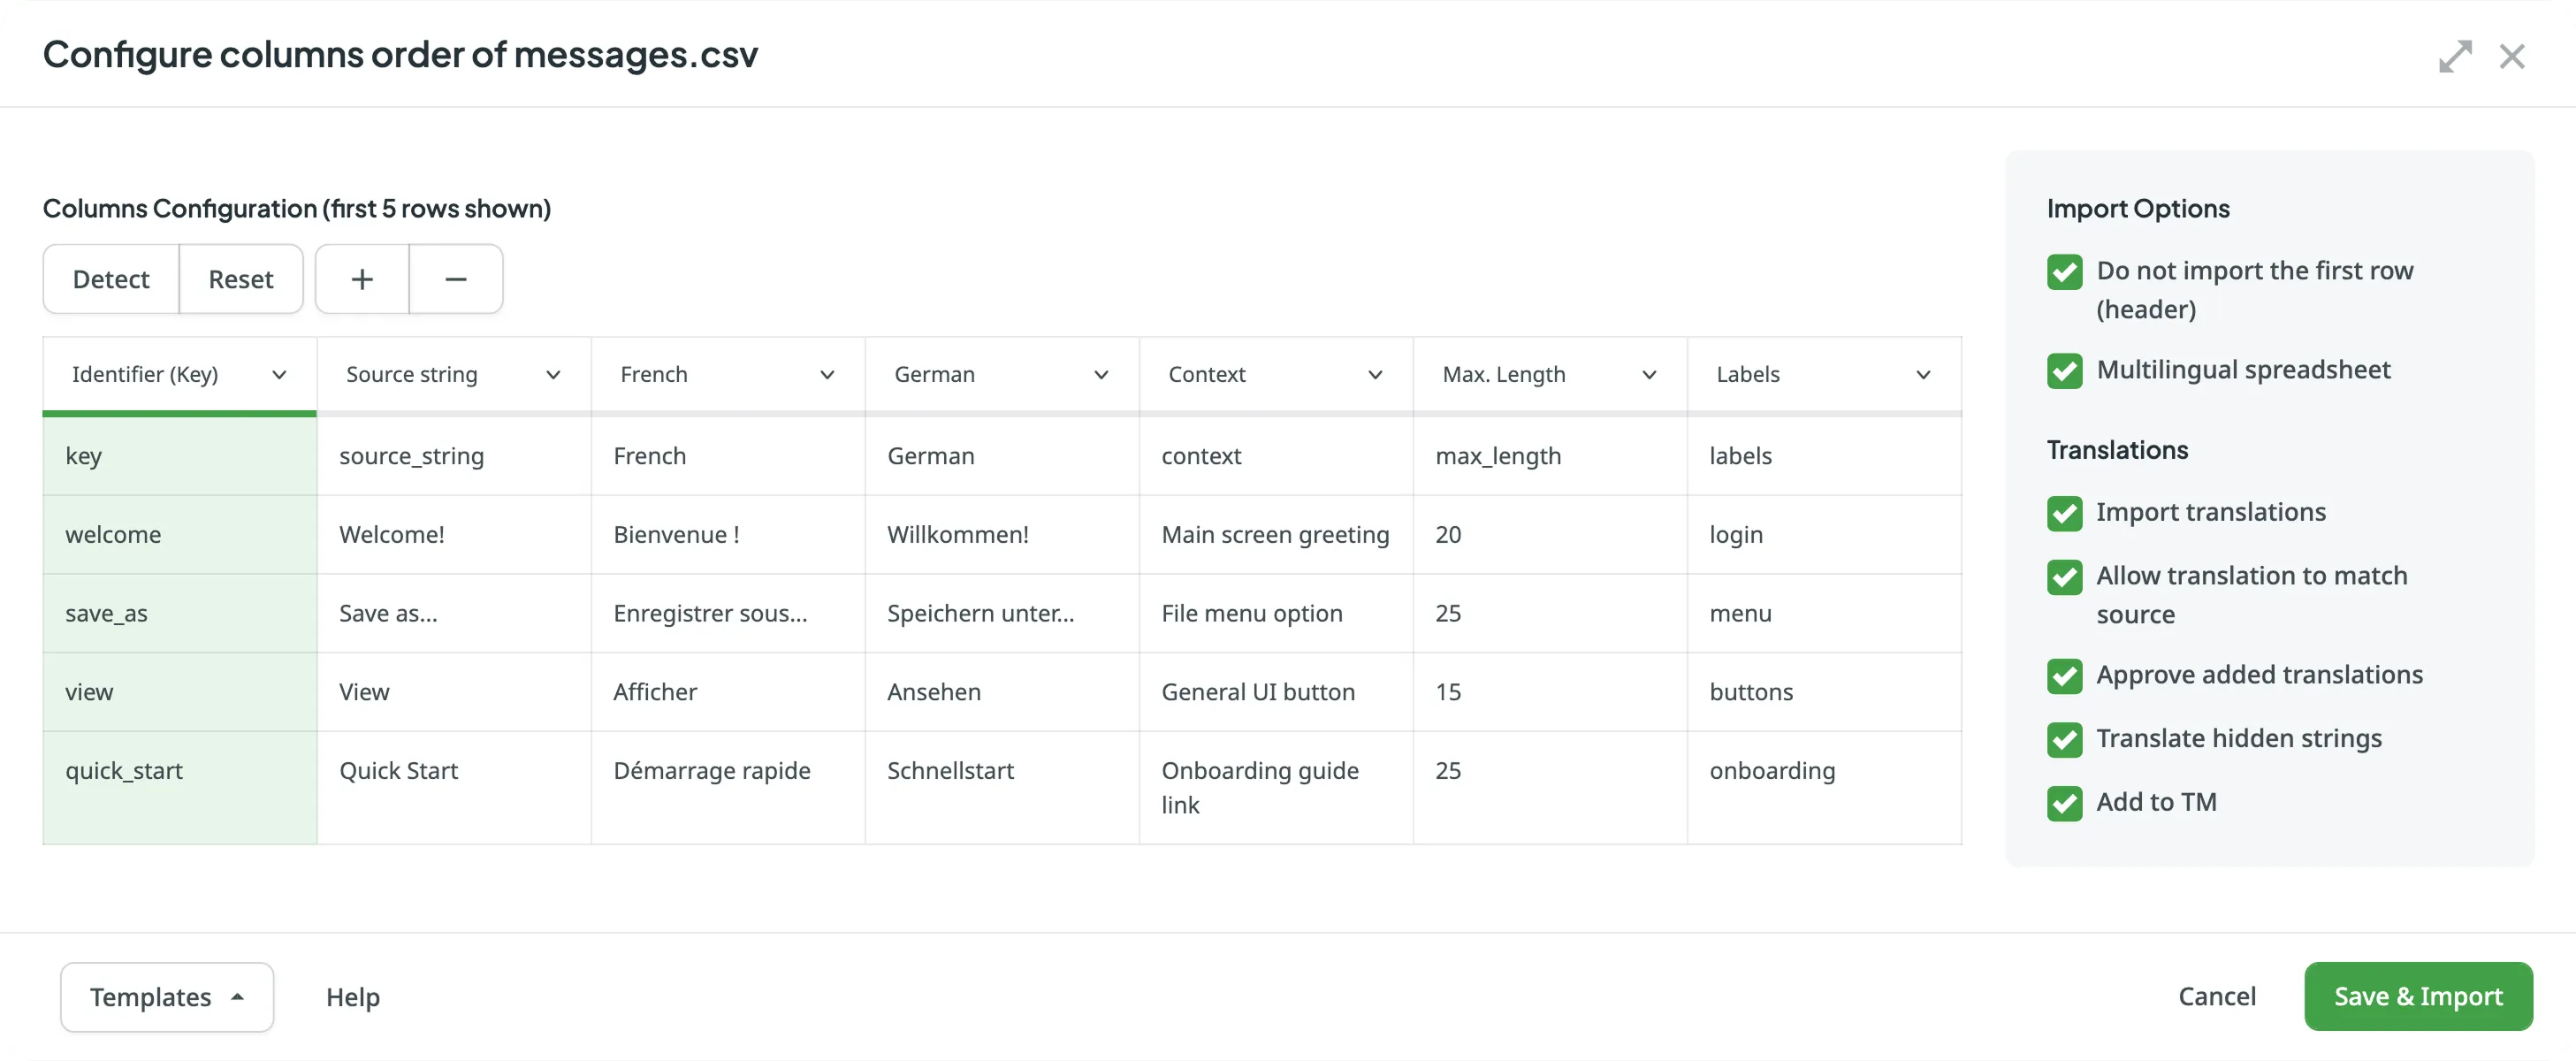
When you open the configuration dialog, the system automatically detects the file scheme based on the column names in the first row. The detection is case-insensitive. Columns that aren’t detected automatically will be left as Not selected for manual configuration.
Automatic column detection is especially helpful when you upload multiple multilingual spreadsheets that contain many languages and additional columns (e.g., Context, Labels, Max. Length).
By default, the system initially treats spreadsheets as monolingual. To correctly autodetect columns containing translations for multiple languages, select Multilingual spreadsheet in the Import Options section, and then click Detect.
To get the most out of automatic column detection, name the columns in your CSV or XLSX files using the values from the table below:
| Column type | Expected value |
|---|---|
| Key | identifier, key |
| Source String | source phrase, source_phrase, source string, source_string |
| Source String/Translation | source or translation, source_or_translation, source/translation |
| Translation | translation |
| Context | context |
| Labels | labels |
| Max. Length | max. length, max_length |
| Language (for multilingual files) | Language name (e.g., Ukrainian), Crowdin language code (e.g., uk-UA), Locale (e.g., uk-UA), Locale with underscore (e.g., uk_UA), Language code ISO 639-1 (e.g., uk), Language code ISO 639-2/T (e.g., ukr) |
The sidebar on the right allows you to define how the file structure is handled.
- Do not import the first row (header) - Select this option if the first row of your file contains column headers that should not be imported for translation.
- Multilingual spreadsheet - Select this option if your file contains source texts in one column and translations into different languages in other columns. This enables the system to correctly map languages to the appropriate columns and unlocks the Translations section.
- Import hidden sheets (XLSX only) - Import content from hidden sheets within your XLSX file.
- Import hidden rows (XLSX only) - Import content from hidden rows within your XLSX file.
This set of options, also in the right sidebar, allows you to fine-tune how existing translations from your file are processed. These options become available when Multilingual spreadsheet is selected.
- Import translations - By default, Crowdin imports any translations present in the file. Clear this checkbox if you only want to import source strings.
- Allow translation to match source – Enable this if a translation is intentionally the same as the source text (e.g., for product names, brands, or code terms).
- Approve added translations – Automatically approve the uploaded translations. This is useful when you are confident in the accuracy of the translations in your file.
- Translate hidden strings – Import translations for strings that are marked as hidden in Crowdin. Hidden strings are typically not visible to translators in the Editor and are used for system purposes or placeholders.
- Add to TM - Add the imported translations to the project’s primary Translation Memory (TM).
Located at the bottom of the dialog, this option allows you to manage configurations for files with the same column structure.
- To save your current setup as a template, click Templates > Save as template, specify a template name, and click Save.
- You can then apply this template to newly imported files. To find a specific template from a long list, use the Search field available in the templates dropdown.
You might want to update CSV or XLSX files and change the initially configured scheme. The scheme update might be needed when you add a new target language to your Crowdin project.
To change the scheme for your source file, follow these steps:
- Right-click on the needed files and select Change scheme.
- Select the new file on your machine.
- Set the new configuration/template for the file correspondingly.