BLEND Integration
Dette indhold er ikke tilgængeligt i dit sprog endnu.
Translate in CrowdinIntegrate your Crowdin projects with the BLEND agency and allow BLEND translators to work with translation files in Crowdin Editor.
The integration provides:
- Instant synchronization of localization content from Crowdin to BLEND using Crowdin tasks.
- Possibility for BLEND translators to easily access and work in Crowdin Editor.
- 2-way synchronization of comments between BLEND and Crowdin.
You need to have a client account in BLEND to enable integration and sufficient Credit Balance so you can use BLEND translation services. Register at BLEND if you don’t have an account yet.
To establish the connection, follow these steps:
- Log in to Crowdin.
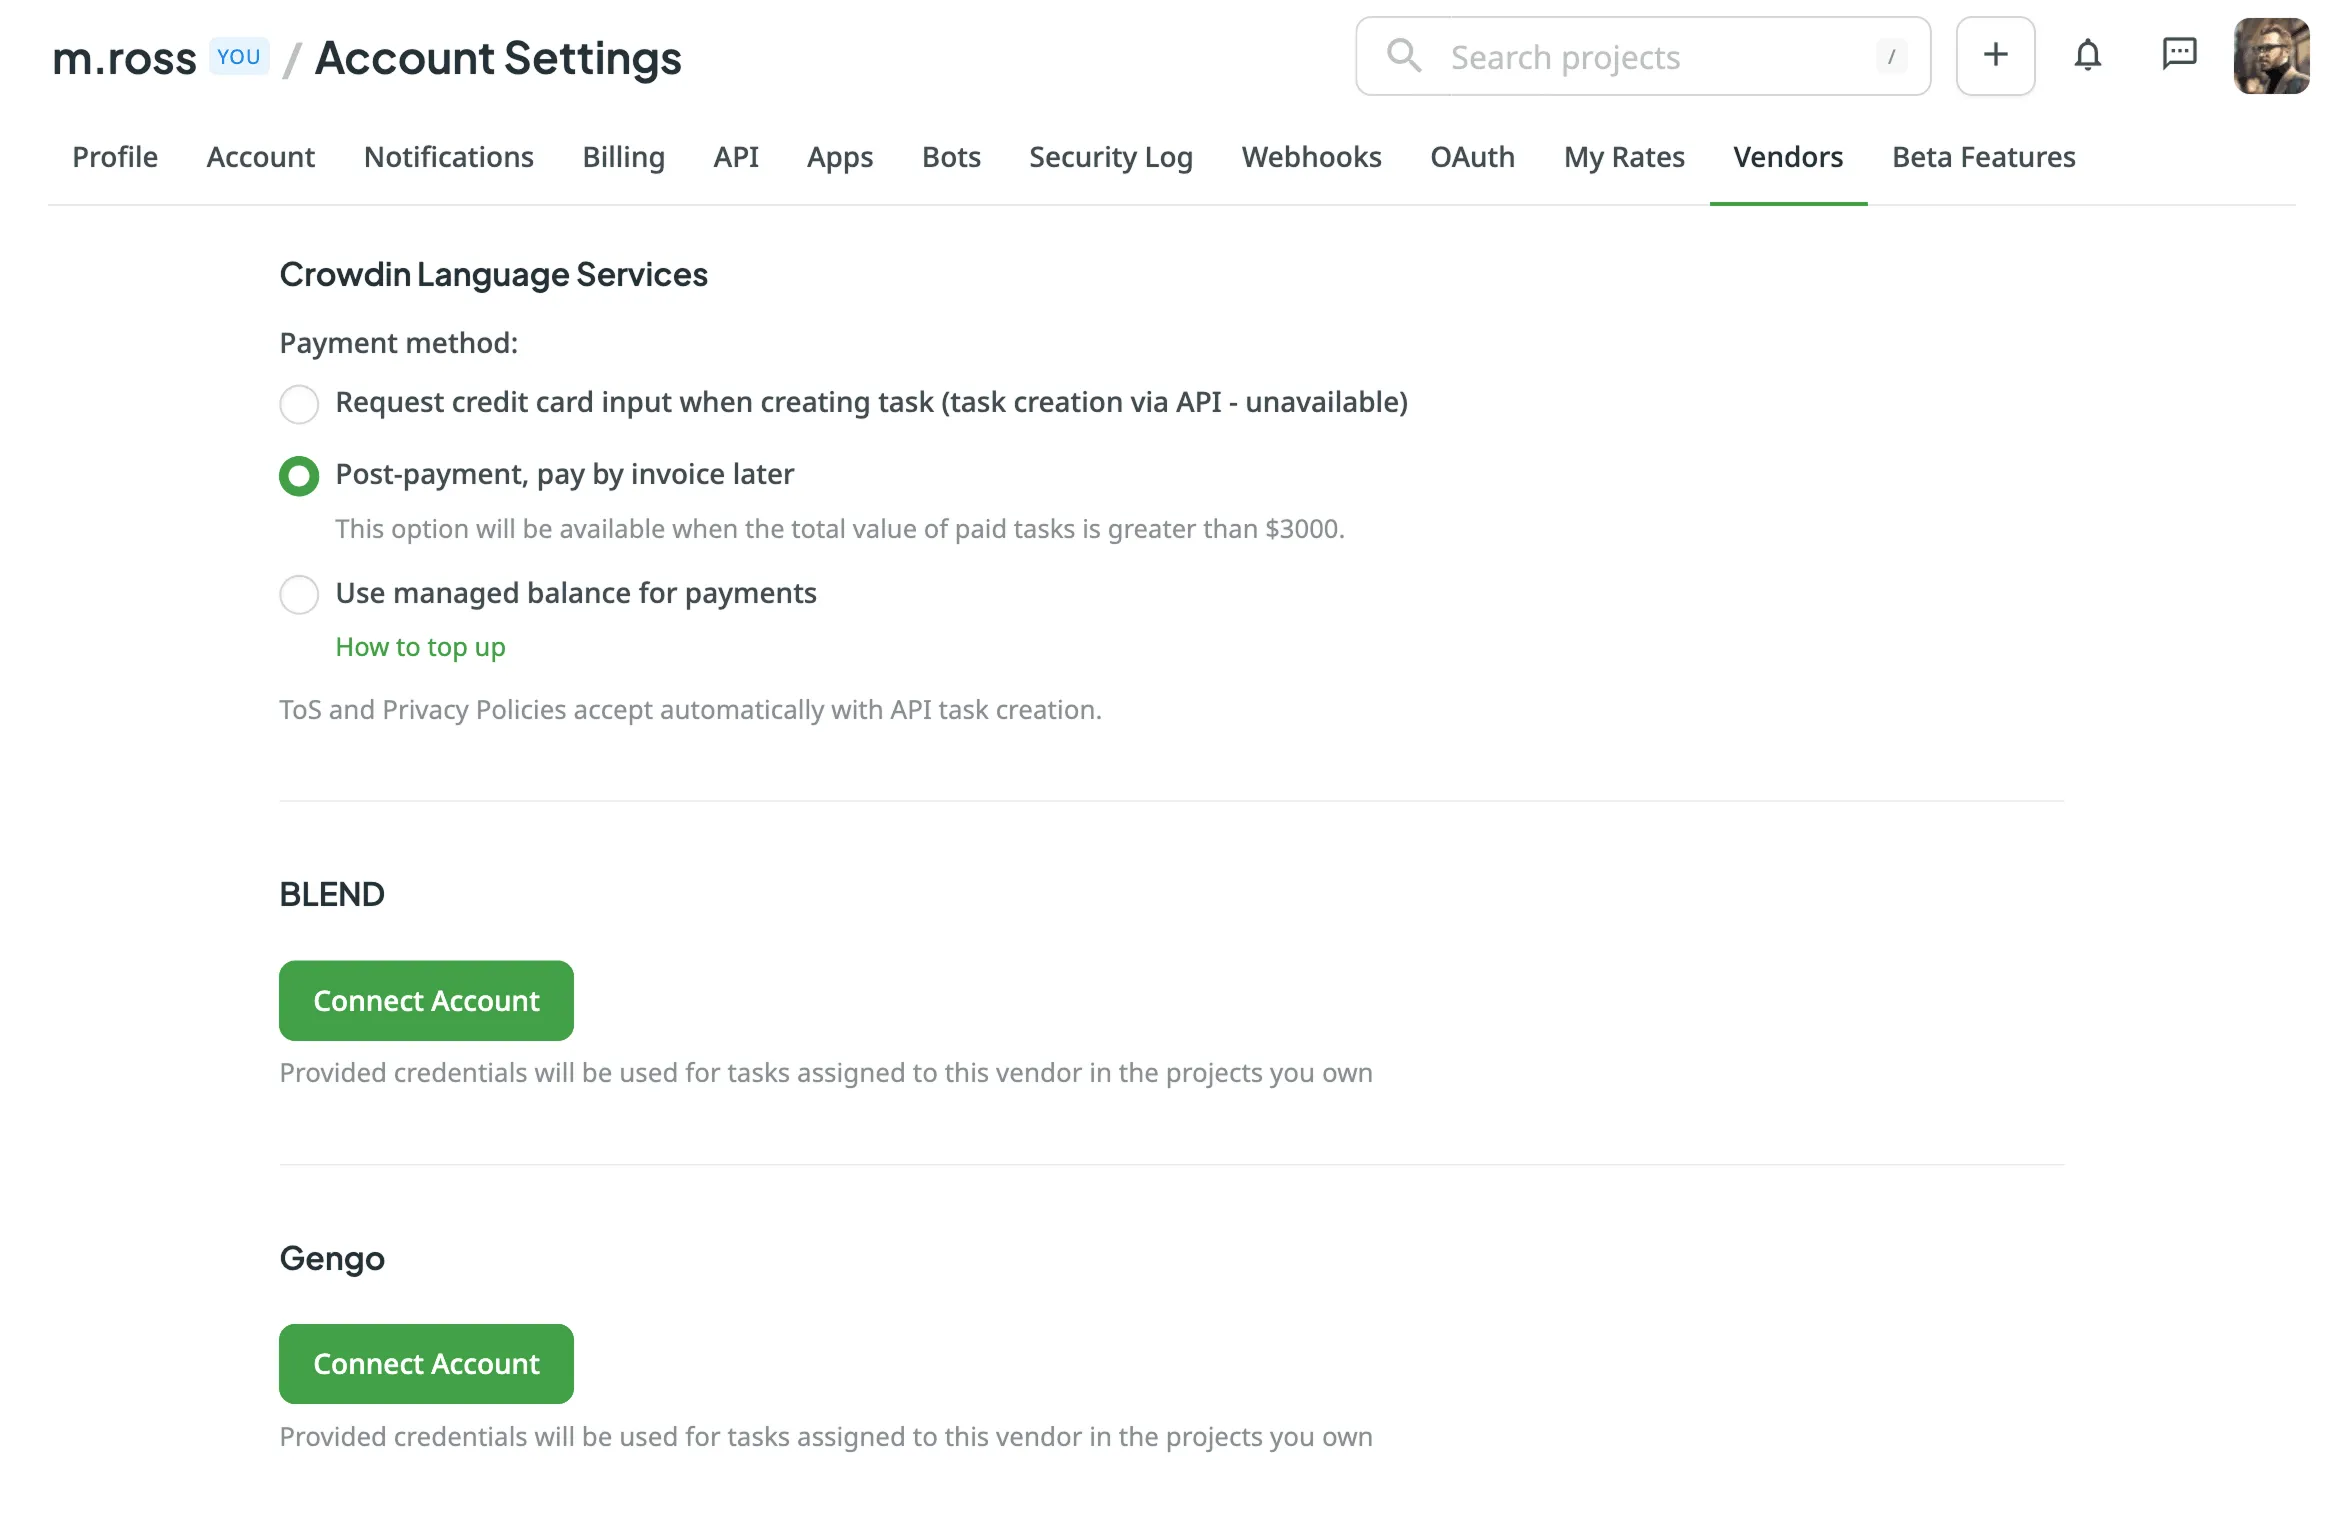
- Open your Account Settings and go to the Vendors tab.
Alternatively, click on the BLEND’s tile in the Store > Vendors page. - In the BLEND section, click Connect Account.
- Enter Public Key and Secret Key from the BLEND API keys tab. Click Submit Keys.
Creating Tasks for Content Synchronization
Section titled “Creating Tasks for Content Synchronization”To send the localization content to BLEND, you need to create tasks in the Crowdin project. Follow these step-by-step instructions for task creation:
- Click Create Task using the project’s Tasks tab.
- Alternatively, you can initiate a task from the Store:
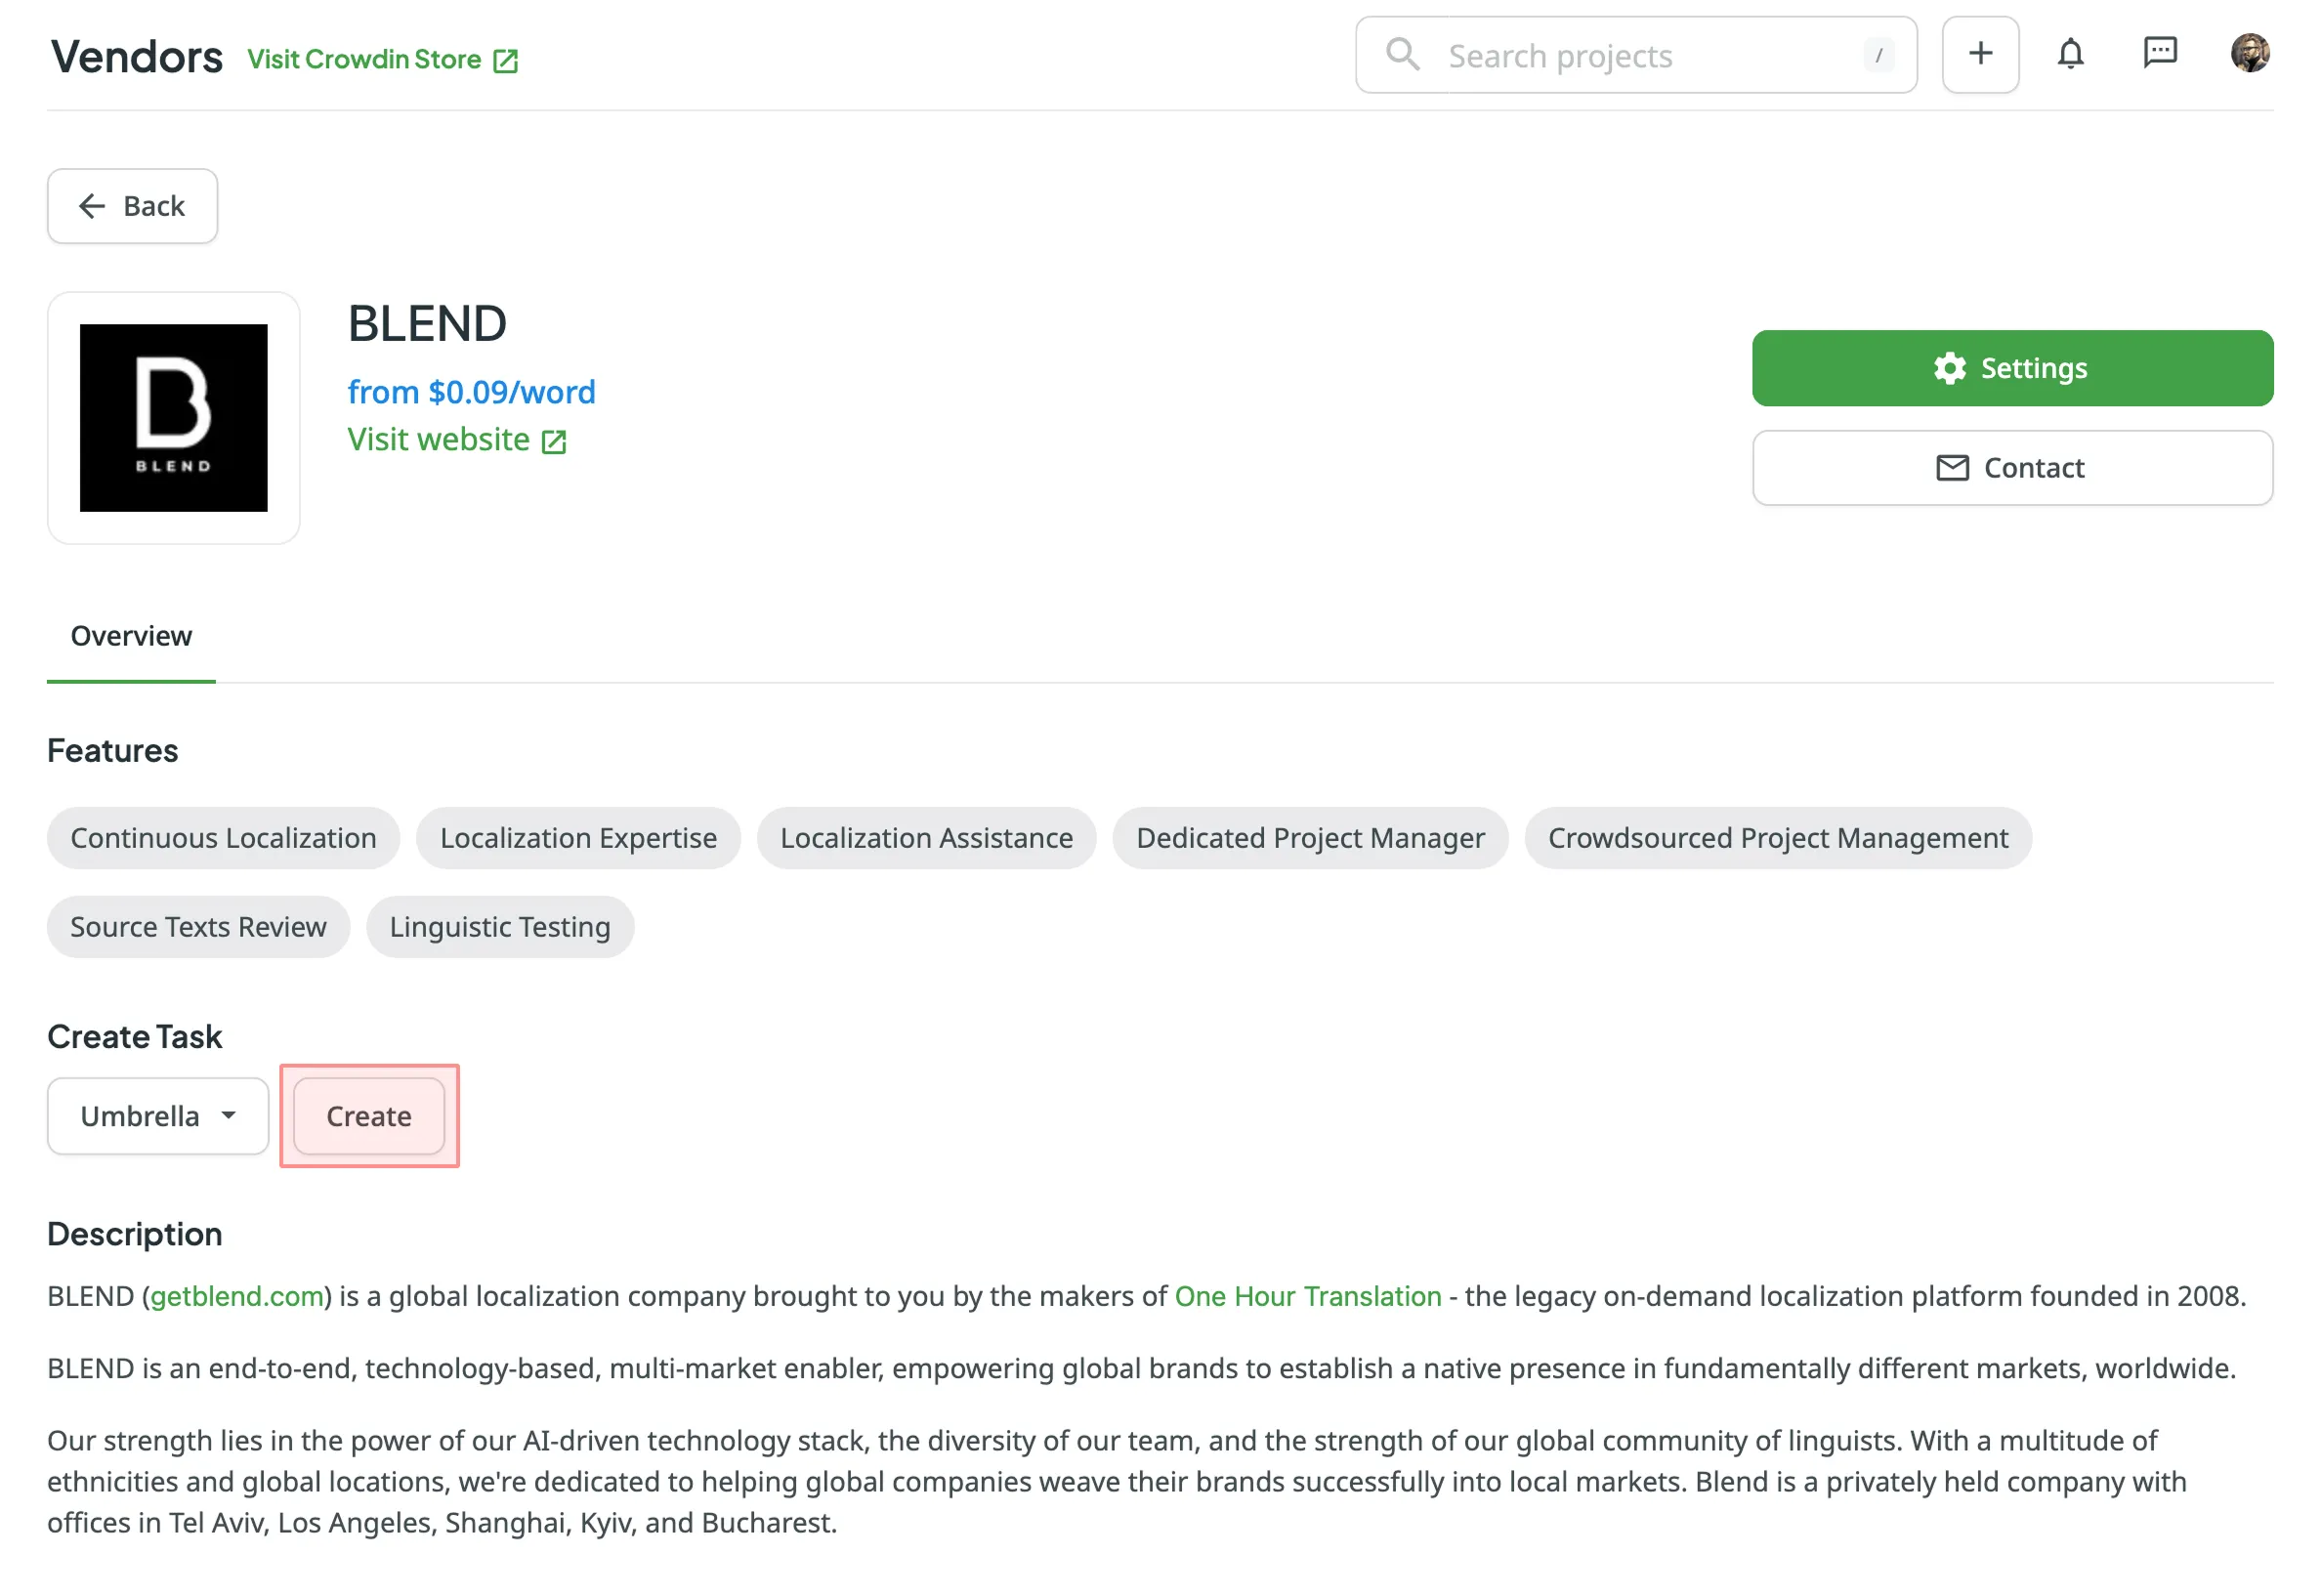
- Go to Store > Vendors on your profile home page.
- Click on the BLEND tile to open the vendor page.
- In the Create Task section, select the project from the drop-down list.
- Click Create to open the task creation page in a new tab.
- Set the task parameters:
- Title – specify the name of the task that will be visible to BLEND translators.
- Description (optional) – add any additional details that may be helpful for BLEND translators.
- Type – select either Translate by vendor or Proofread by vendor.
- Translation Vendor – select BLEND from the list.
- Expertise – select the required subject matter expertise (e.g., Standard, Technical, etc.).
- Include edit service (only for Translate by vendor) – adds an Editing project on the BLEND side for an additional linguistic review.
- Preceding task (only for Proofread by vendor) – link the task to a previously created translation task to inherit its scope and language settings.
- Skip strings already included in other tasks – skip strings that are already assigned to other tasks.
- Create Cost Estimate Report – automatically generate a cost estimate based on selected content and the rates template.
- Rates template – select the template to be used for calculating the estimate.
- String filters – filter which strings should be included in the task:
- Strings – select whether to include all untranslated strings or not approved strings, or only those modified within a specific period.
- Filter by labels (optional) – select one or more labels to include only strings with the specified labels. Then, select the match rule:
- All selected labels – includes only strings that have all selected labels (AND logic).
- Any selected label – includes strings that have at least one of the selected labels (OR logic).
- Exclude by labels (optional) – select one or more labels to exclude strings with the specified labels. Then, select the match rule:
- All selected labels – excludes only strings that have all selected labels (AND logic).
- Any selected label – excludes strings that have at least one of the selected labels (OR logic).
- Include pre-translated strings only (only for Proofread by vendor) – include only strings that were previously pre-translated.
- Files (for file-based projects) or Branches (for string-based projects) – select content to include in the task.
- Languages – select target languages (a separate task will be created for each selected language).
- Click Create Task to complete the translation order and send project files to BLEND.
Read more about BLEND Editing project.
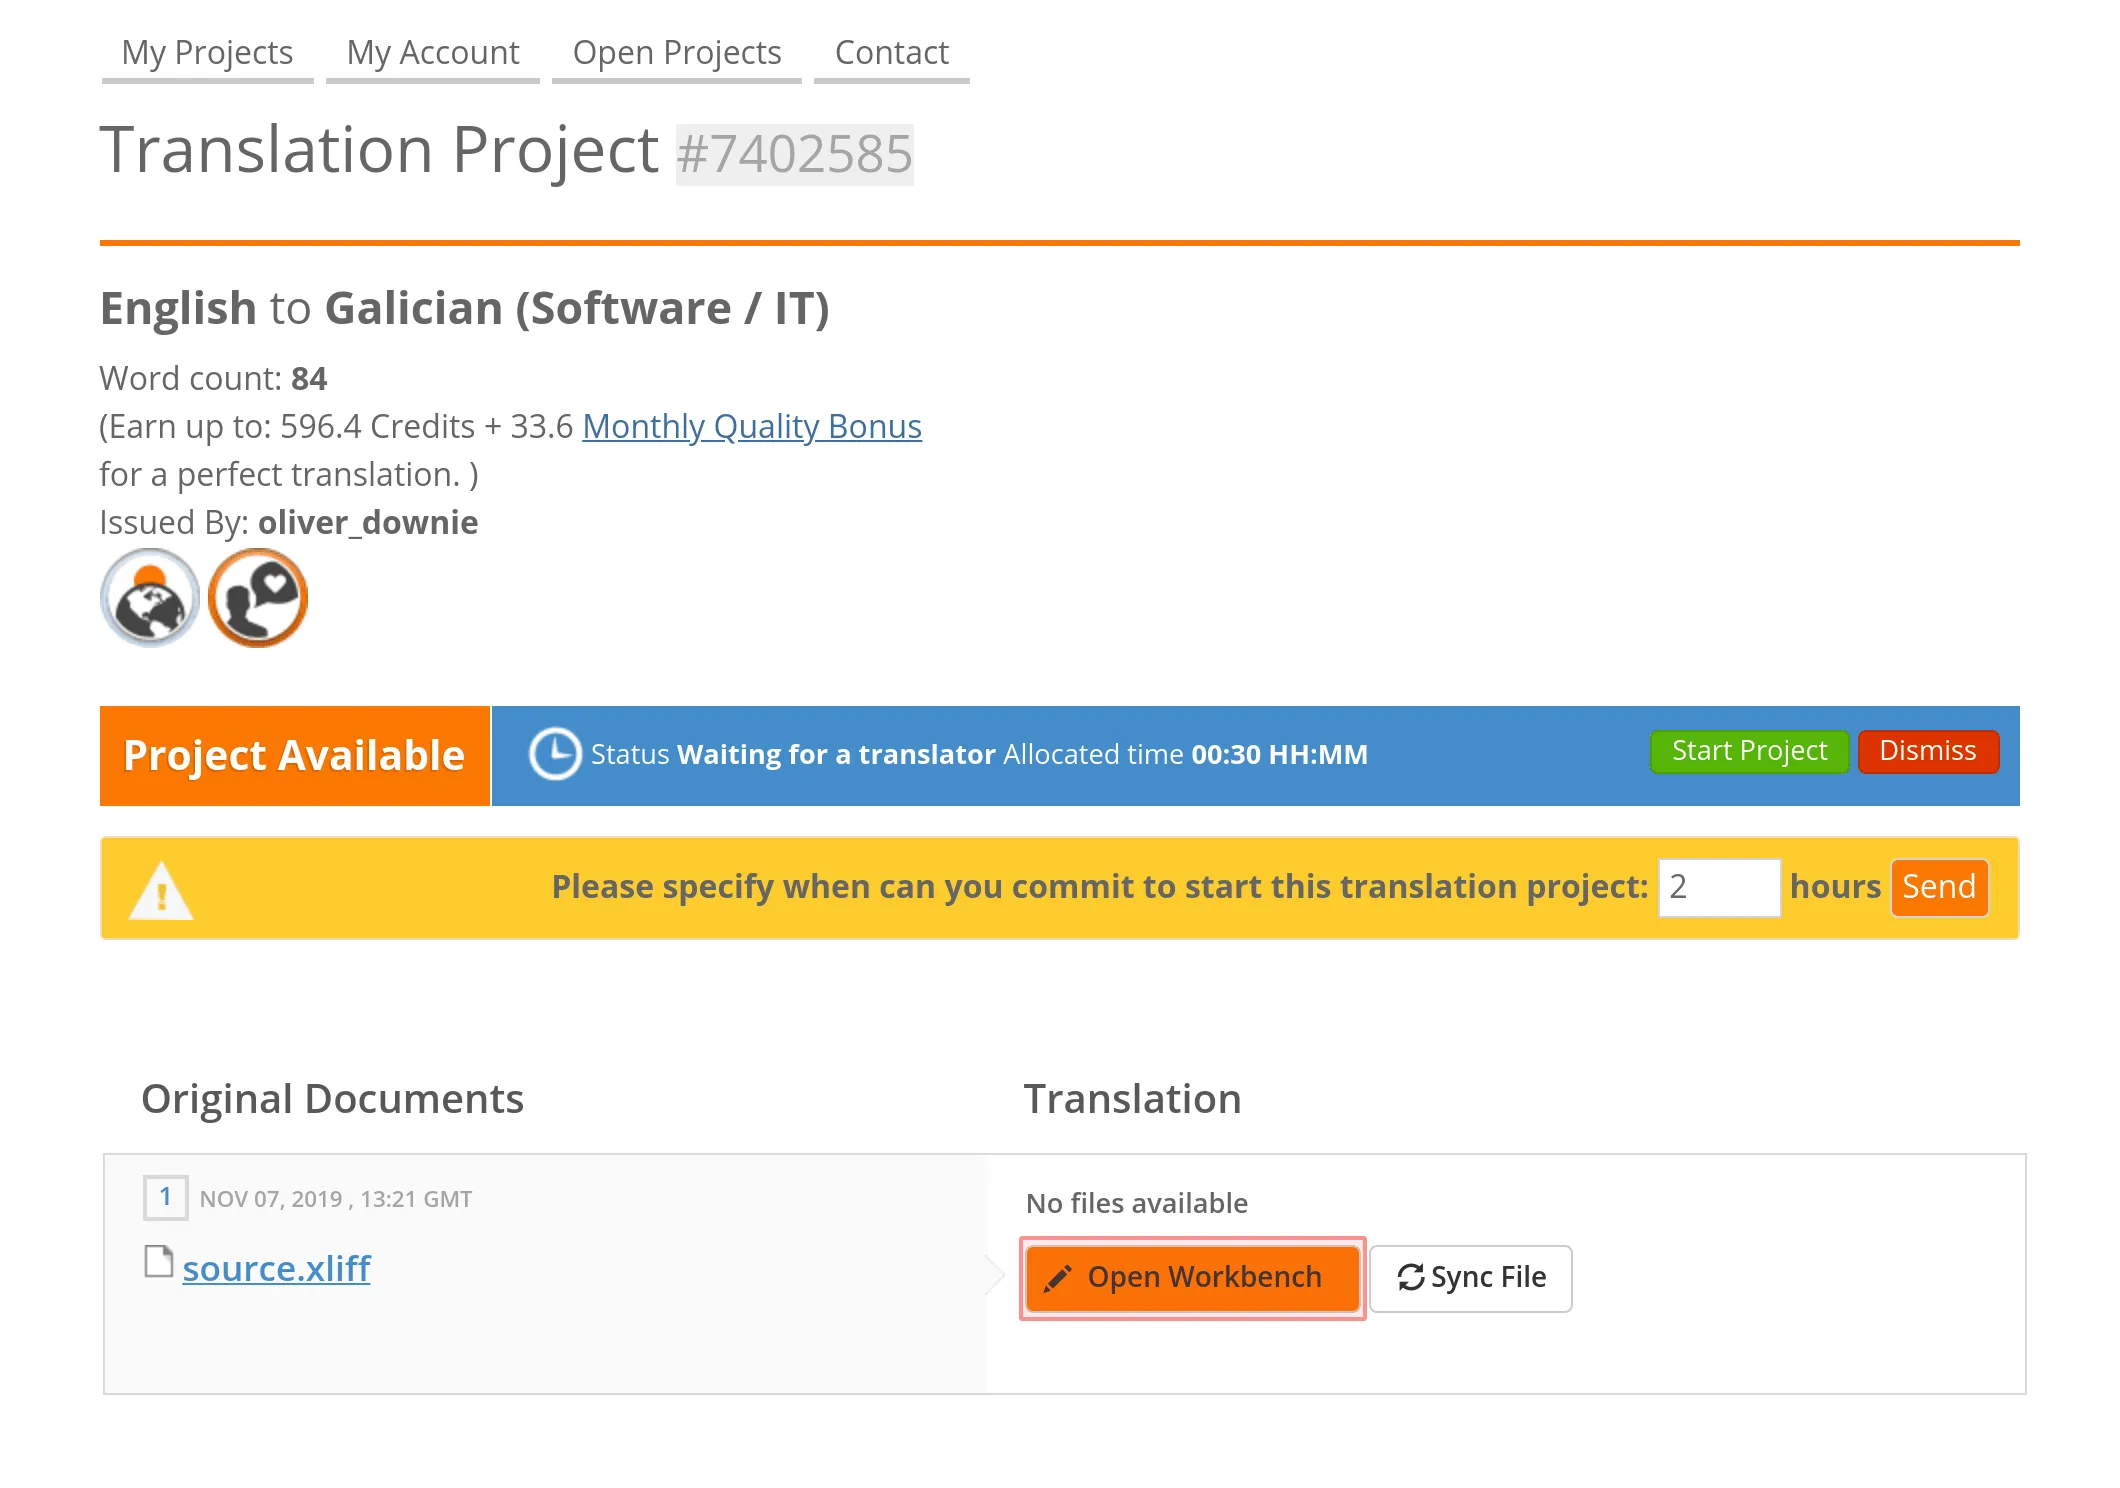
When the task is created, it’s automatically sent to BLEND and visible to BLEND translators/proofreaders in the Open Projects tab. BLEND translator/proofreader will need to Start Project and then use the Open Workbench button to access Crowdin Editor.
Read more about Crowdin Editor.
A translator/proofreader will be logged in Crowdin with BLEND profile data to work on content localization. When the work starts, the related task in Crowdin will automatically move to the In Progress status. And when the work is finished (project marked as Completed on the BLEND side), the task will gain Done status in Crowdin.
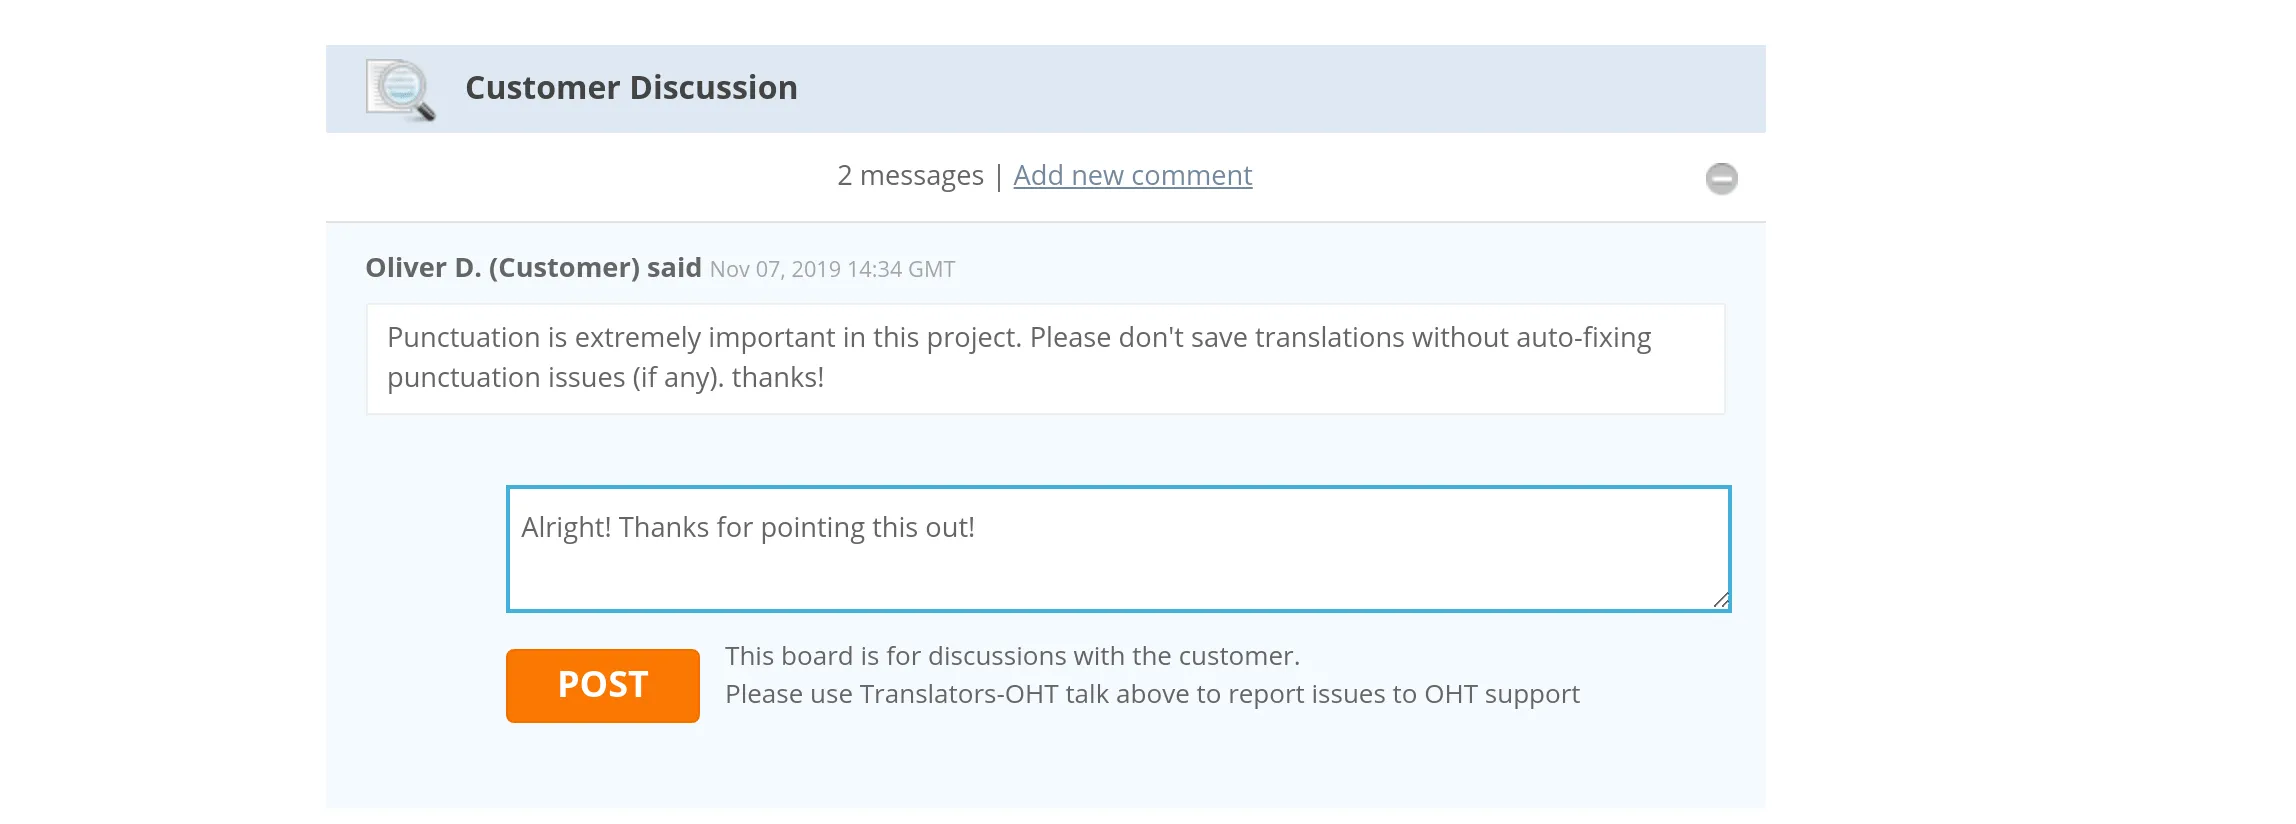
If you need to add some details to an already created task, you can add Comments.
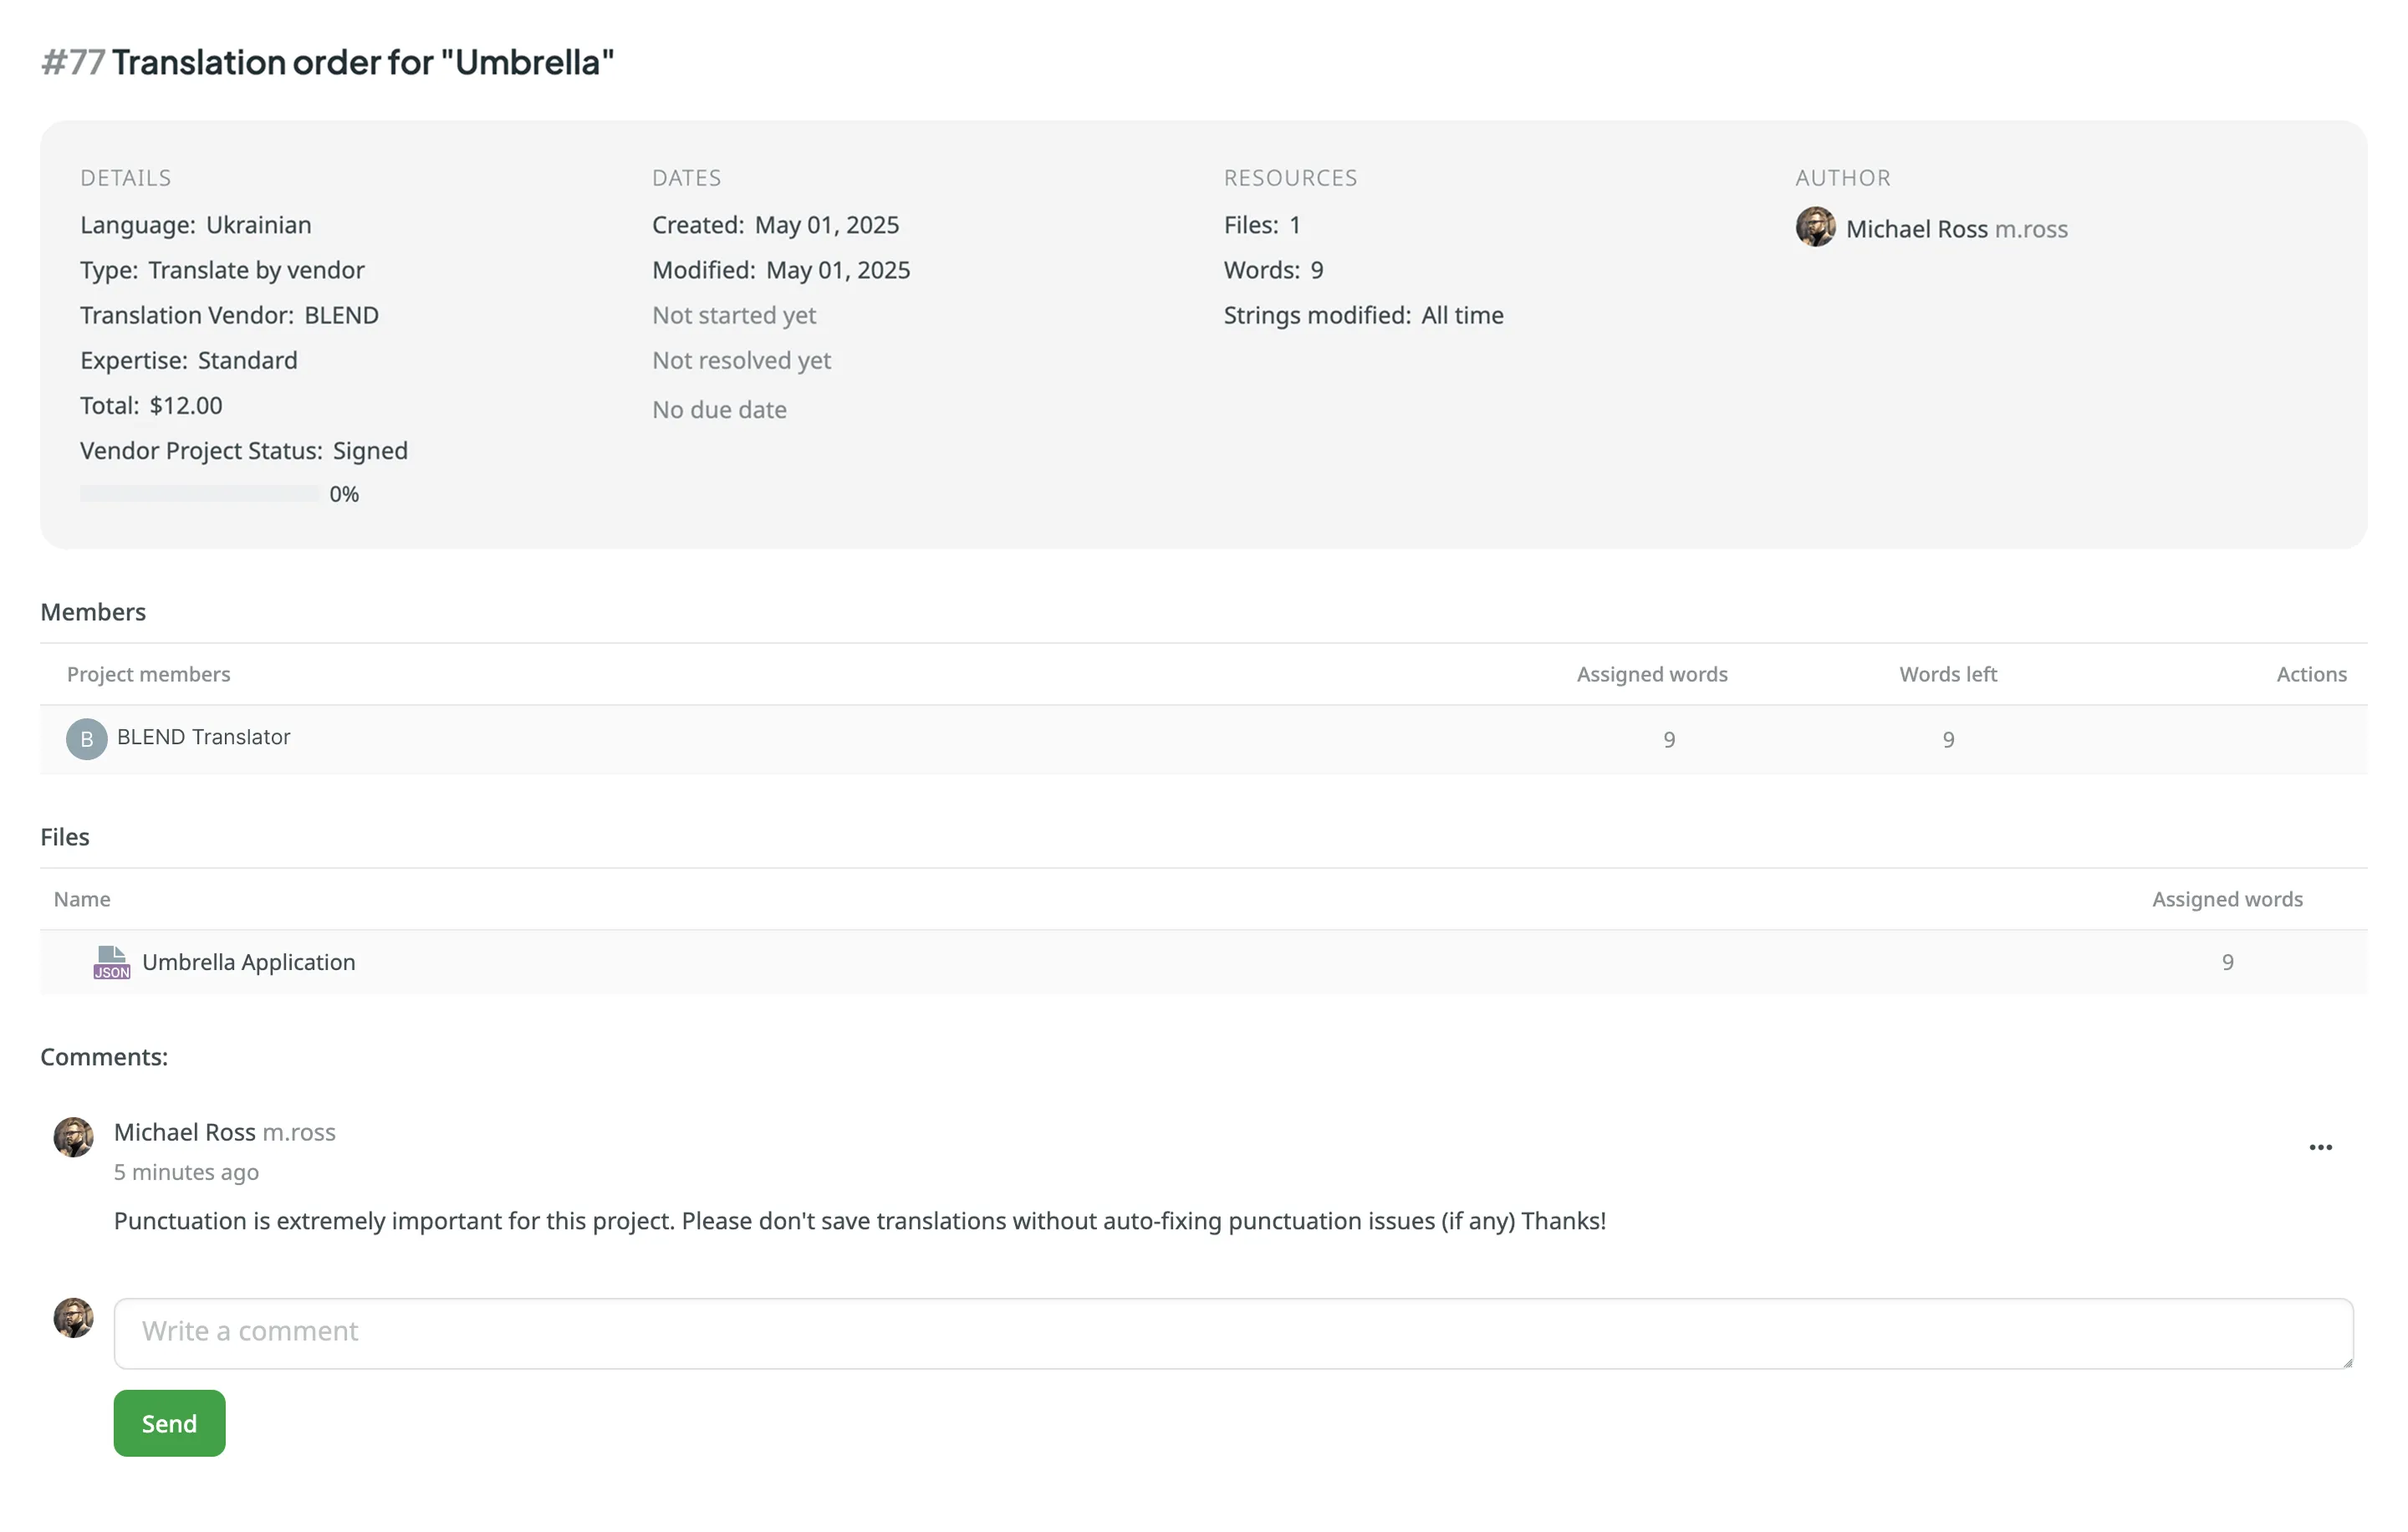
Comments are synchronized with BLEND so that a translator can see them in the Customer Discussion section and reply if needed. Translator messages left in the Customer Discussion section in the BLEND project are also automatically sent to Crowdin and shown in the Comments section inside the Crowdin task.
Access integration by opening Account Settings and going to the Vendors tab. You can Switch Account or Disconnect Account if necessary.