Freshdesk-integration
Crowdin integration with Freshdesk allows you to localize your Knowledge base articles, FAQs, and other helpful content to provide support to your customers in their native language. When working in Crowdin, your translators can use glossaries, translation memory, and other localization resources you’ve added to your project. This helps keep translations consistent across languages.
Note: You will need to install the Freshdesk integration in your Crowdin account before you can set it up and use it.
Hvordan fungerer integrationen?
Once you configure the integration, the content from Freshdesk is automatically added to your Crowdin project as XML files. Besides articles, you can localize names and descriptions of your helpdesk categories and folders. These texts are added to the project as separate XML files.
Here’s how your project files will look like after the successful configuration:
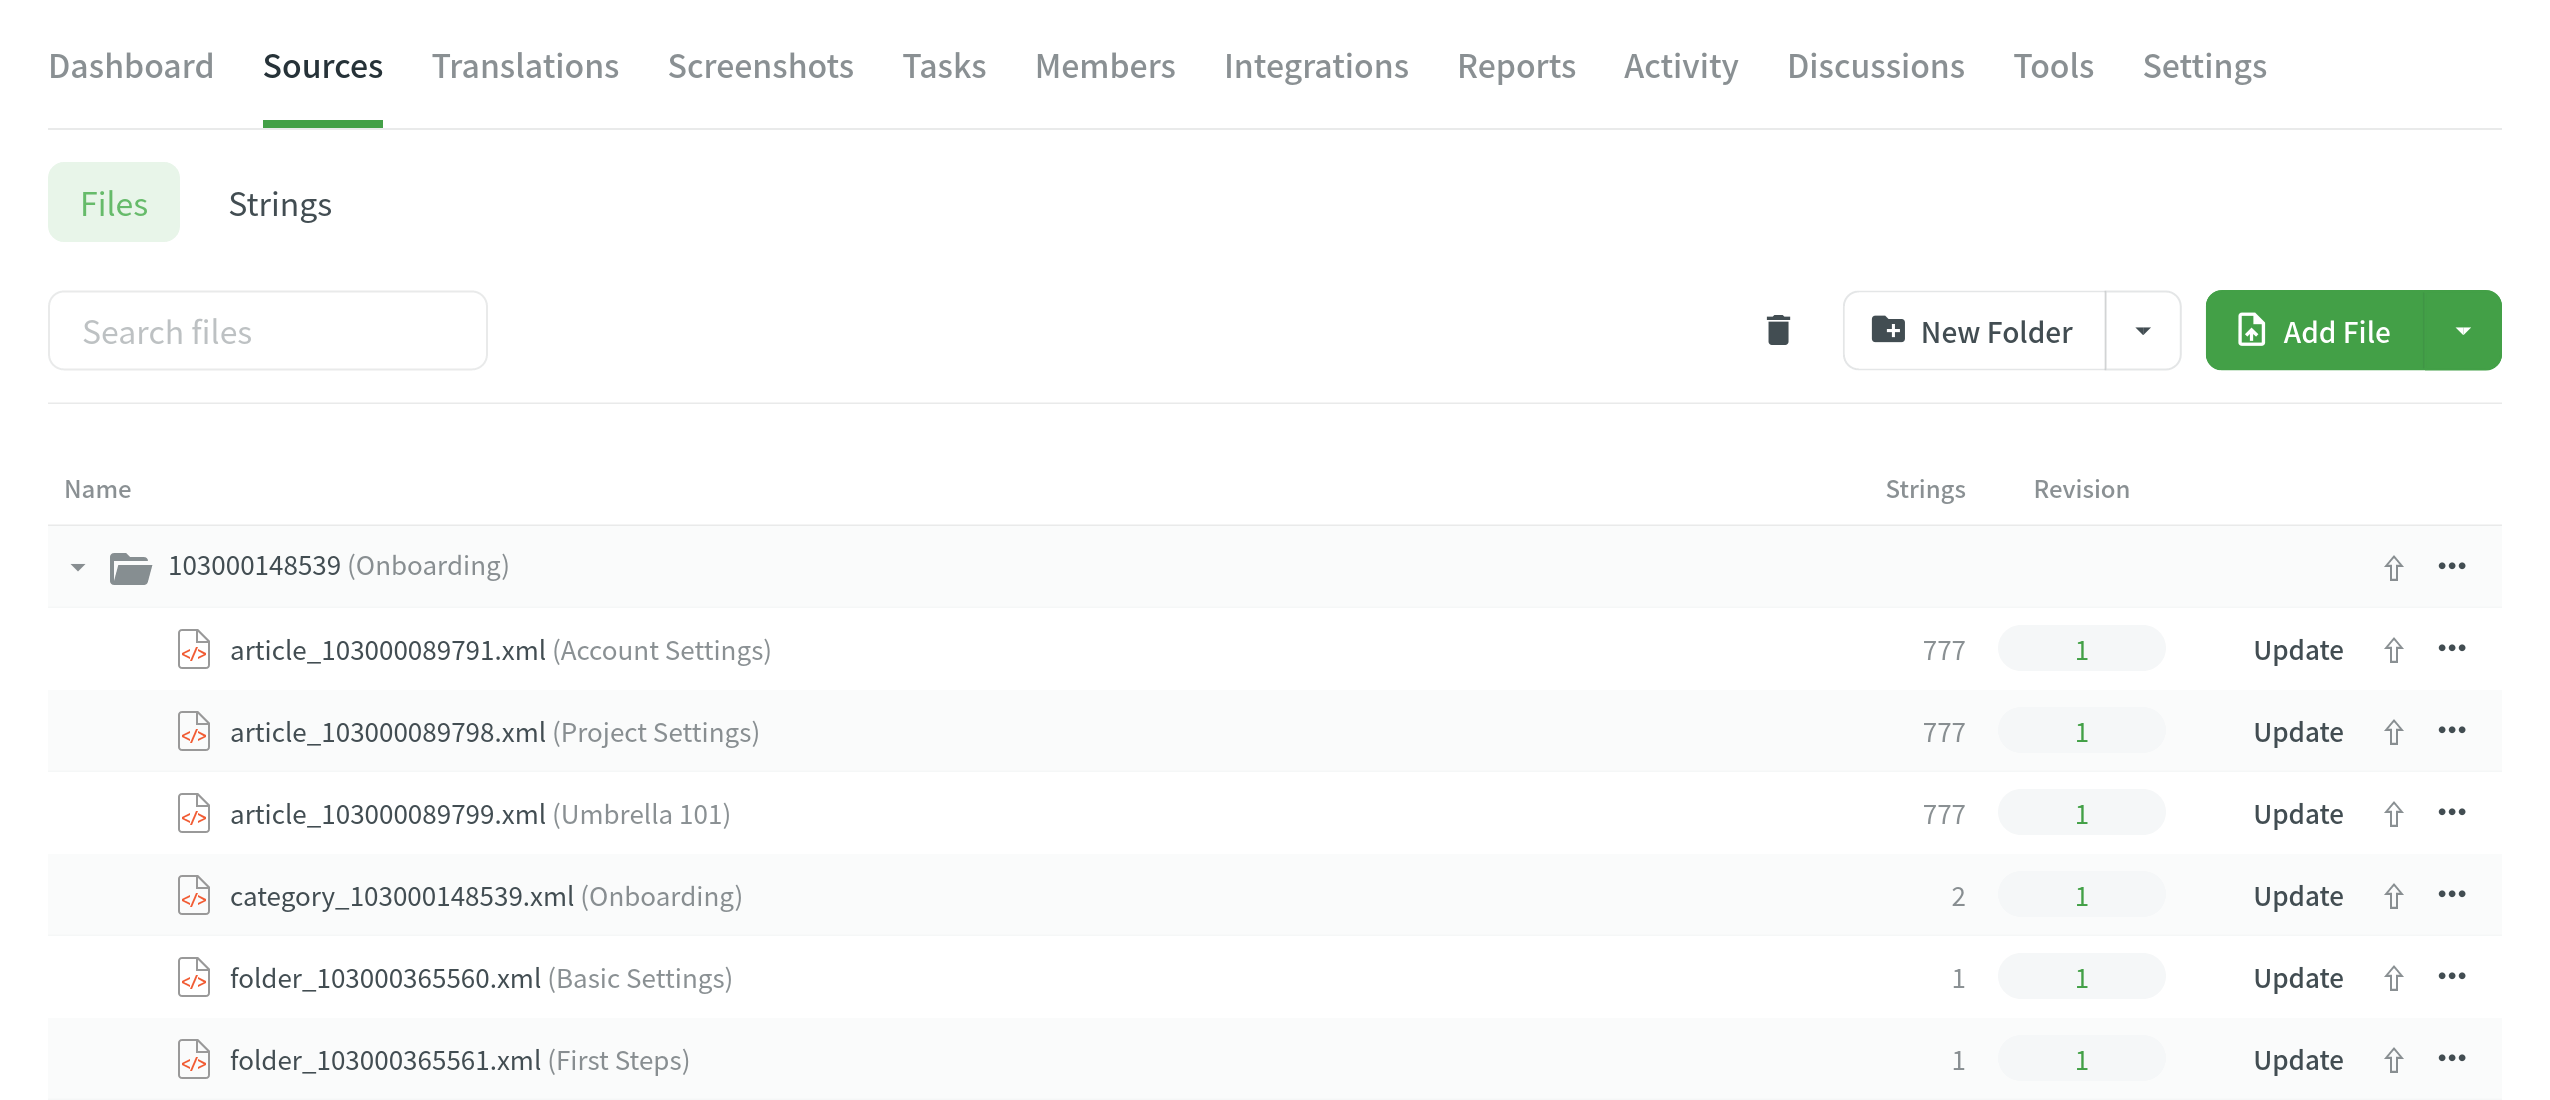
A separate folder is created for each category you choose to localize. Hver kategorimappe vil indeholde separate filer for disse datatyper:
- Kategorinavn og -beskrivelse.
- Mappenavne og -beskrivelser.
- Separat fil for hver artikel.
The numbers in the folder and file names are the IDs of the categories, folders, and articles in Freshdesk. These IDs are visible only to the project owner and managers. I stedet for ID’erne vil oversætterne og korrekturlæserne se de egentlige kategori-, mappe- og artikelnavne.
Once you have uploaded the files to the project, you can invite contributors to translate and proofread the texts. Read more about the translation approaches you can use in Crowdin.
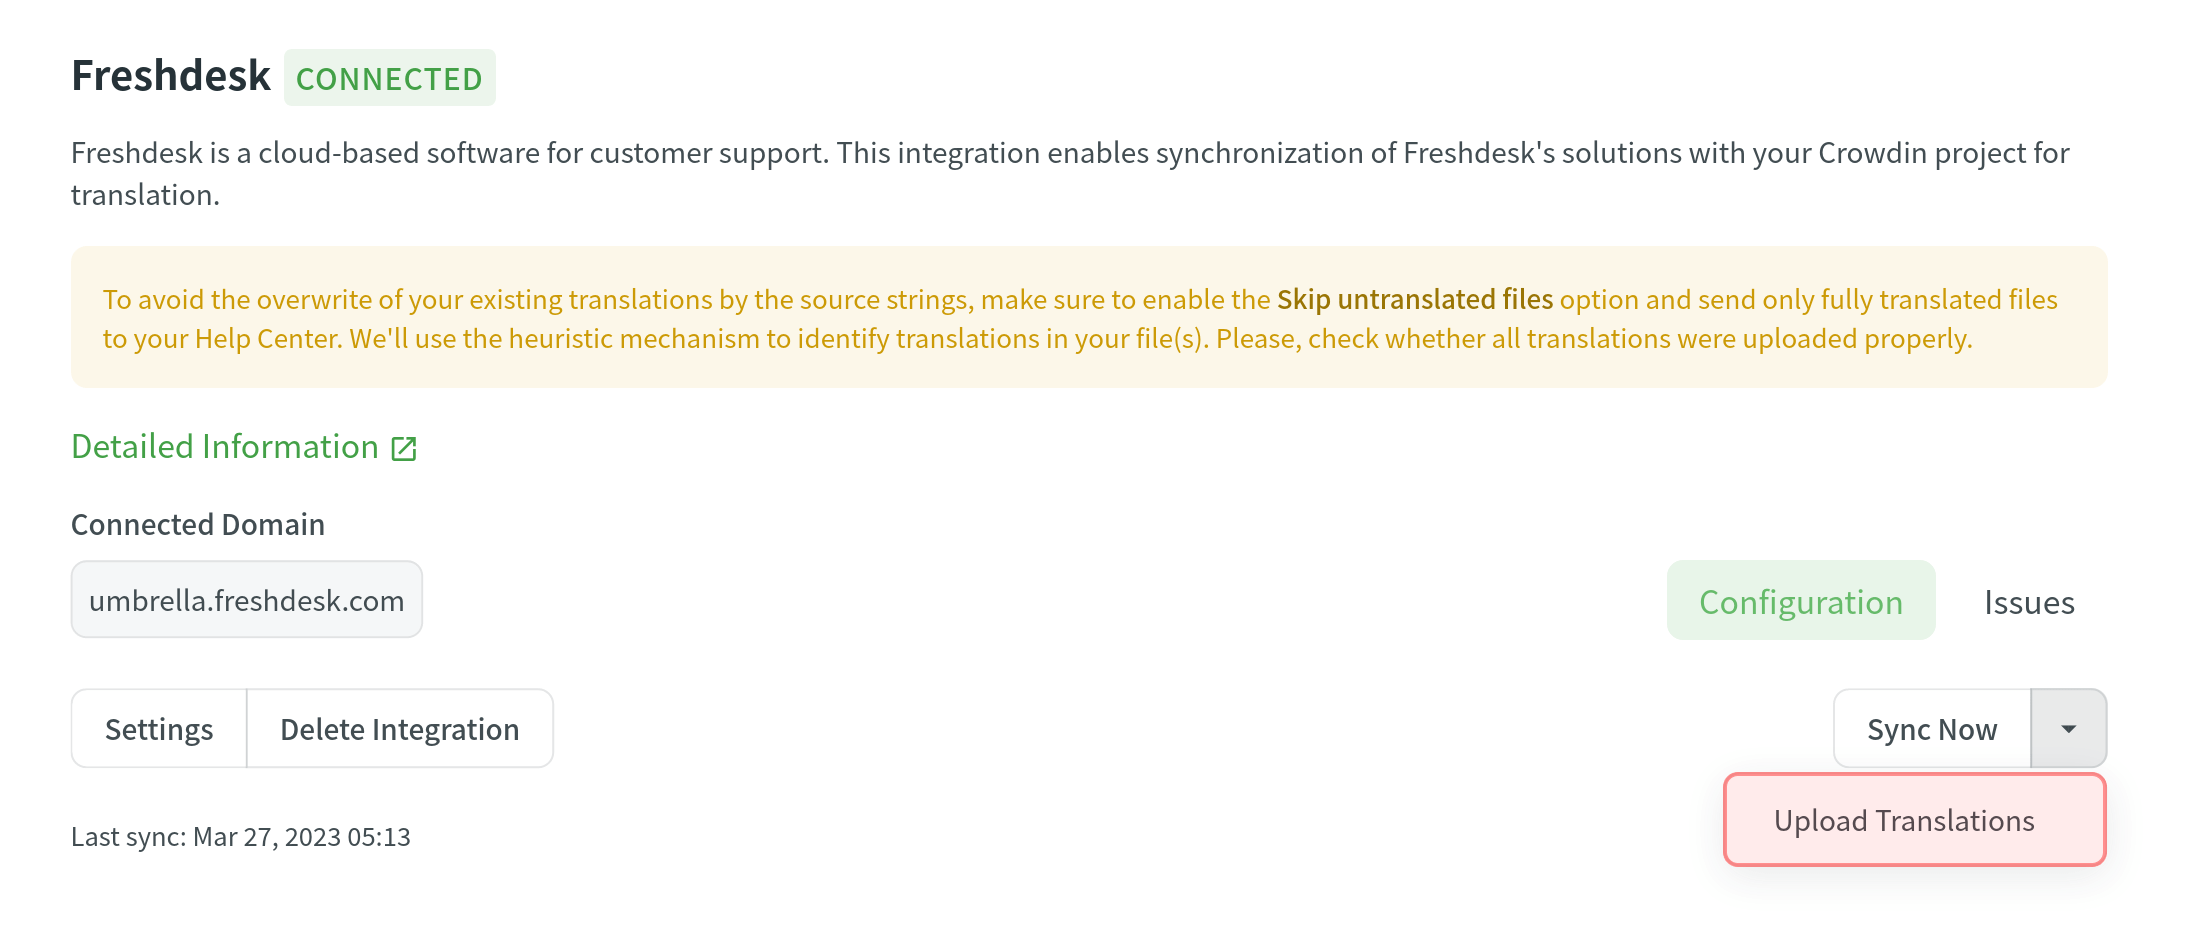
To upload translations to Freshdesk, you can either set up a sync schedule to automatically add translations to the help center at set intervals, or you can initiate a sync on demand. The sync schedule is the final step in setting up the integration.
Tilslutning af Freshdesk til Crowdin
Følg disse trin for at forbinde en Freshdesk-konto med et Crowdin-projekt:
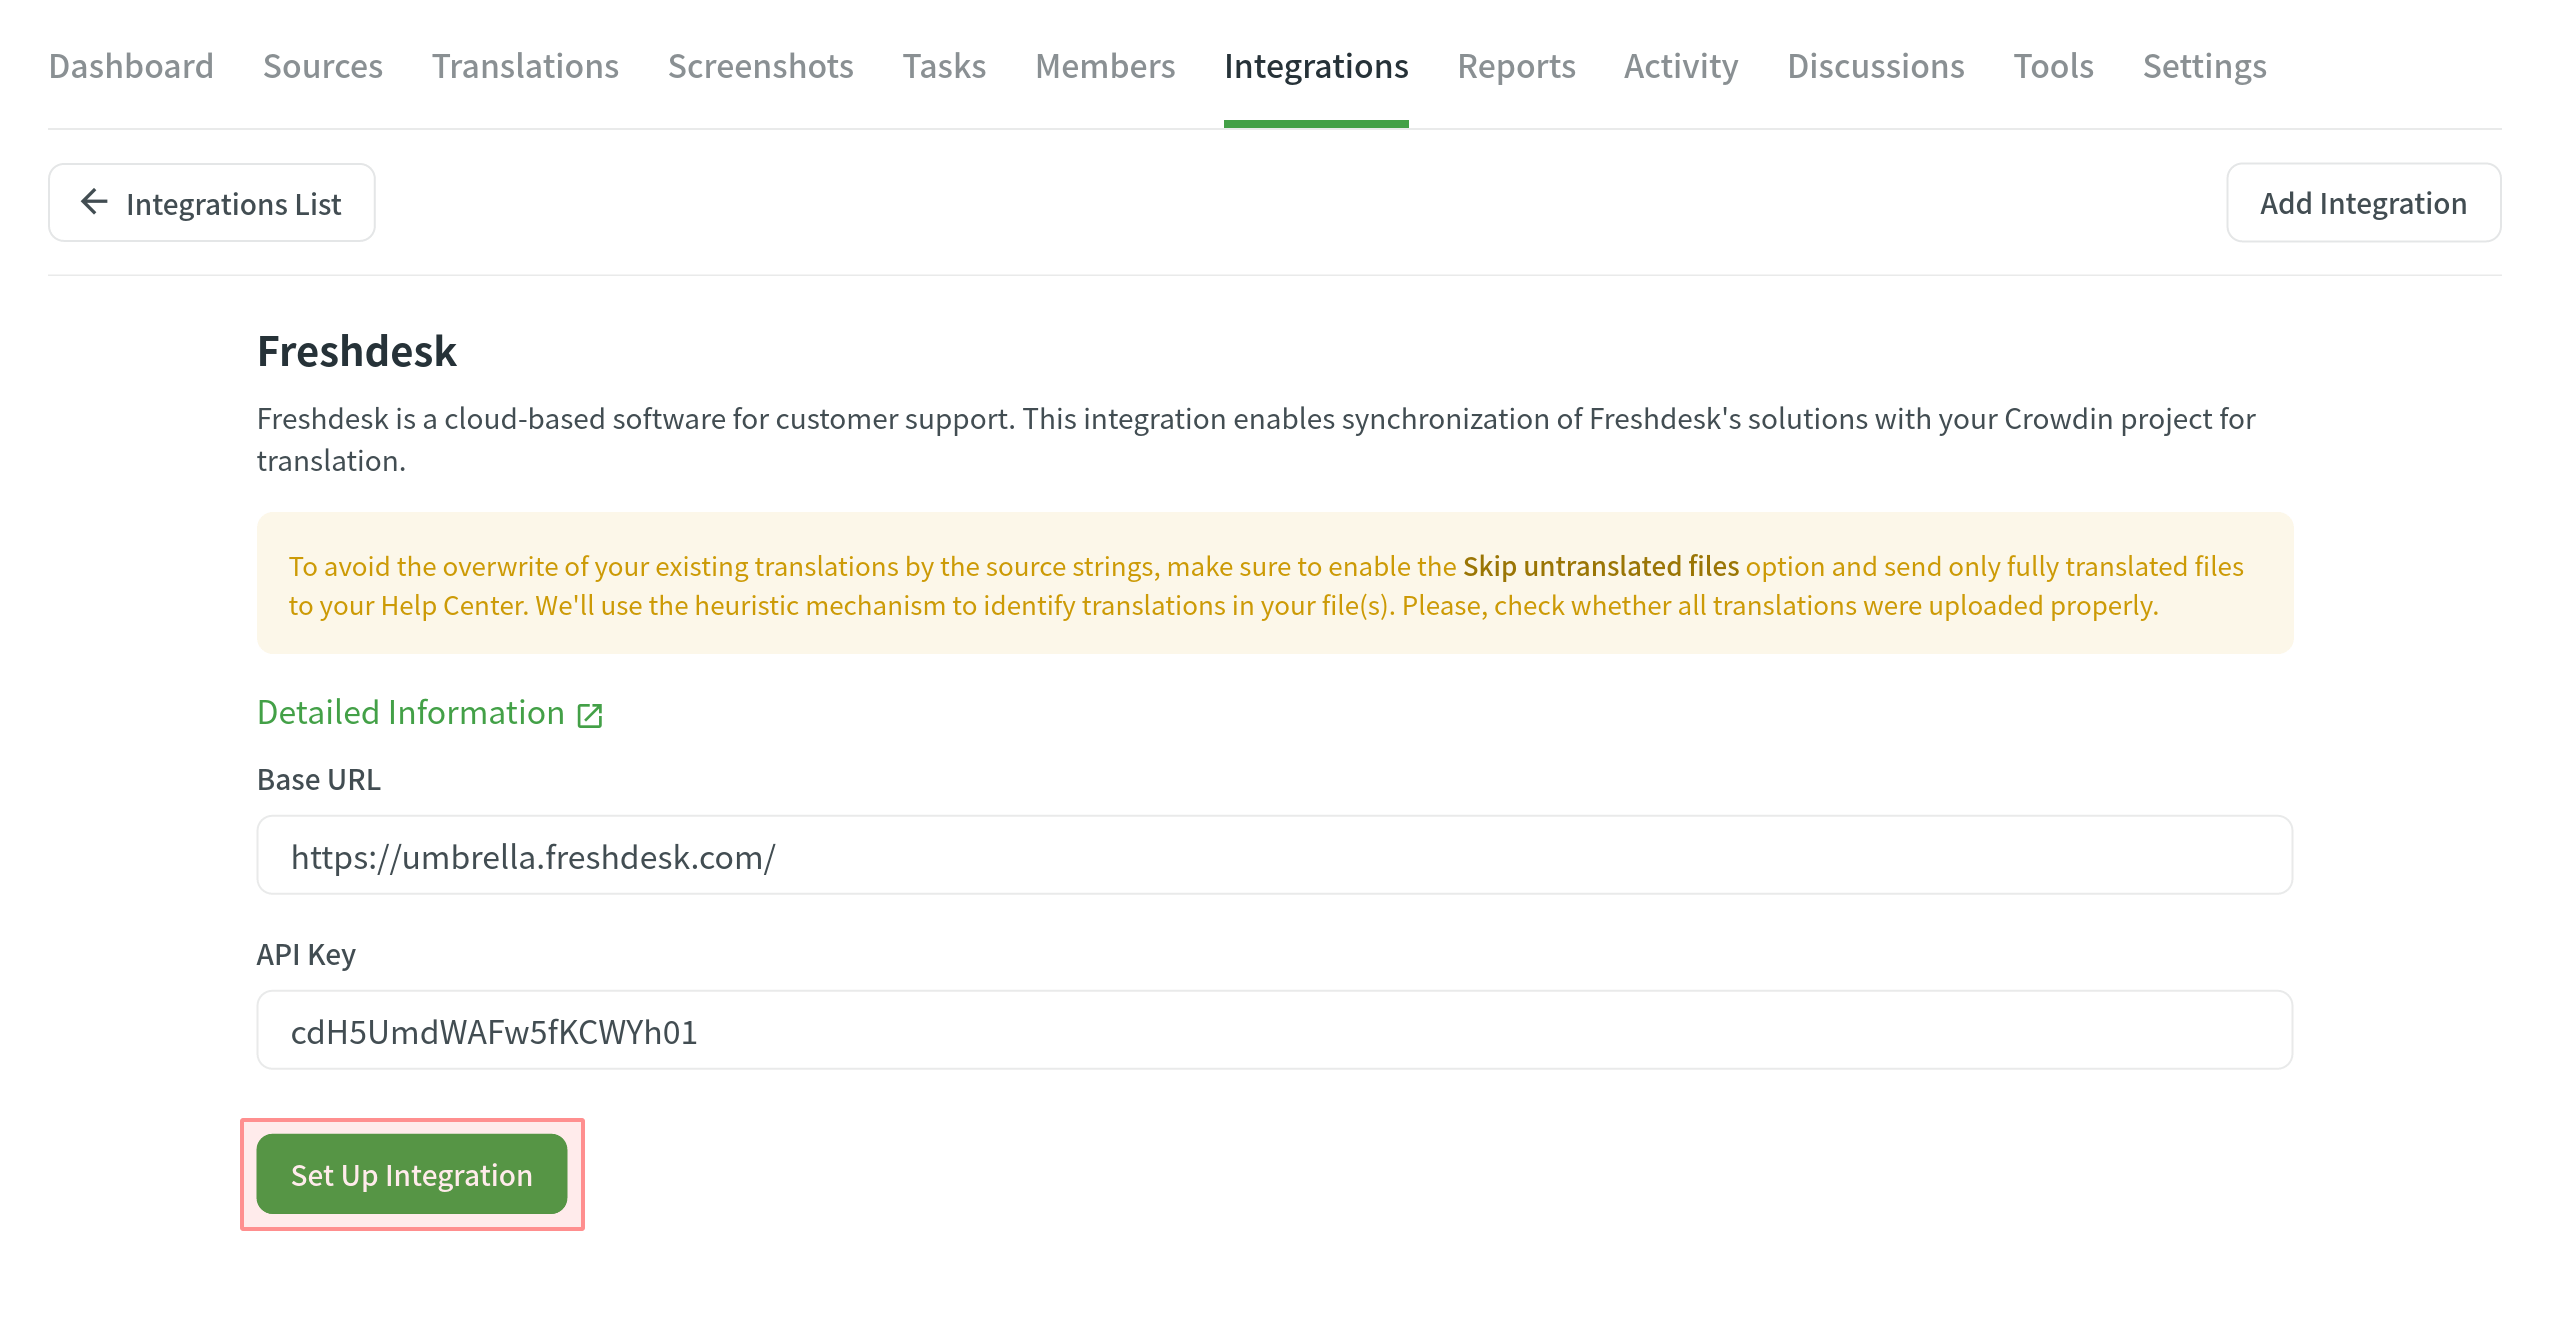
- Åbn projektet og gå til fanen Integrationer.
- Klik på Freshdesk på integrationslisten.
- Angiv Freshdesk Portal URL (f.eks. https://mitfirma.freshdesk.com) og Freshdesk-profilens API-nøgle (der kan findes i Freshdesk-profilindstillingerne).
- Click Set Up Integration.
- Klik på Indstillinger for at afslutte opsætningen.
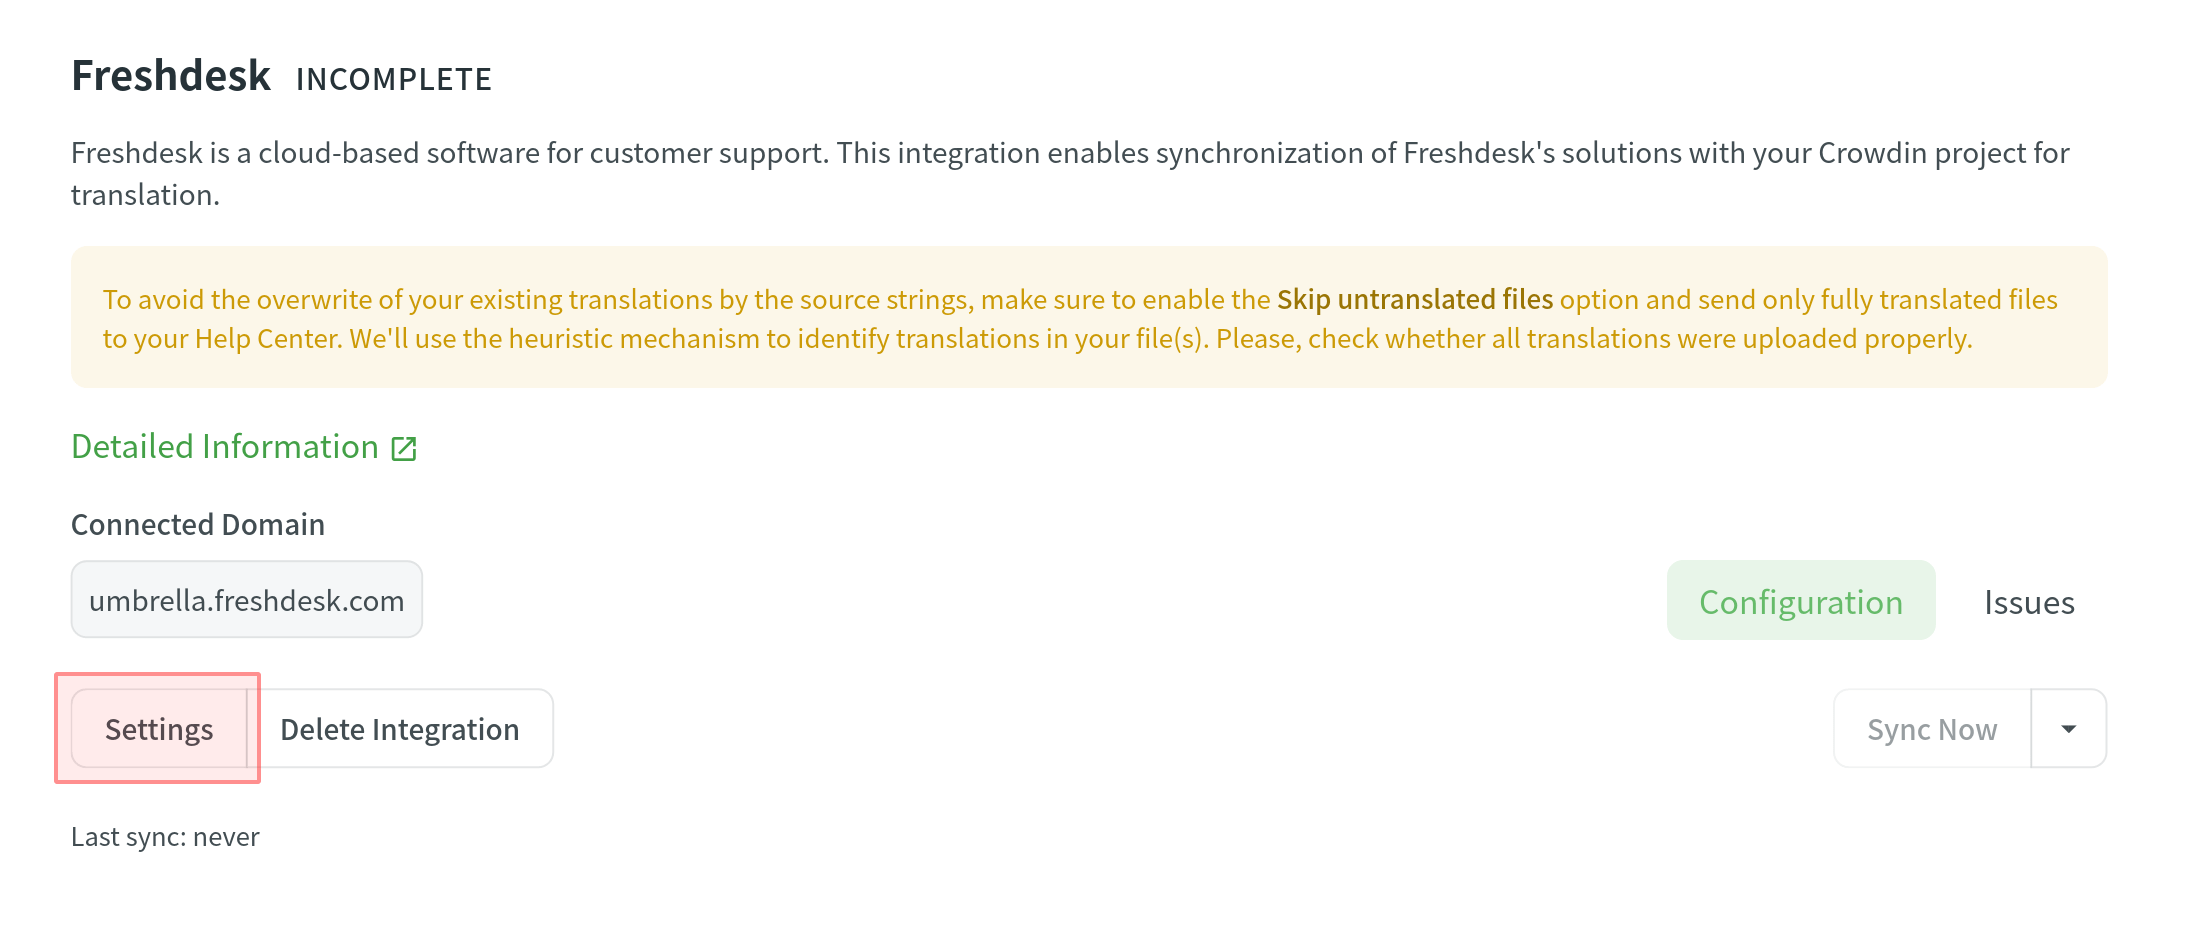
- Opsæt flg. indstillinger:
- Angiv tidsintervallet til at opsætte synktidsplanen.
- Vælg de kategorier, hvorfra beskrivelser og artikler ønskes uploadet.
- Vælg Publicér Løsningsoversættelser, hvis det oversatte indhold ønskes automatisk publiceret i helpdesken efter synkningen.
- Klik på Gem.
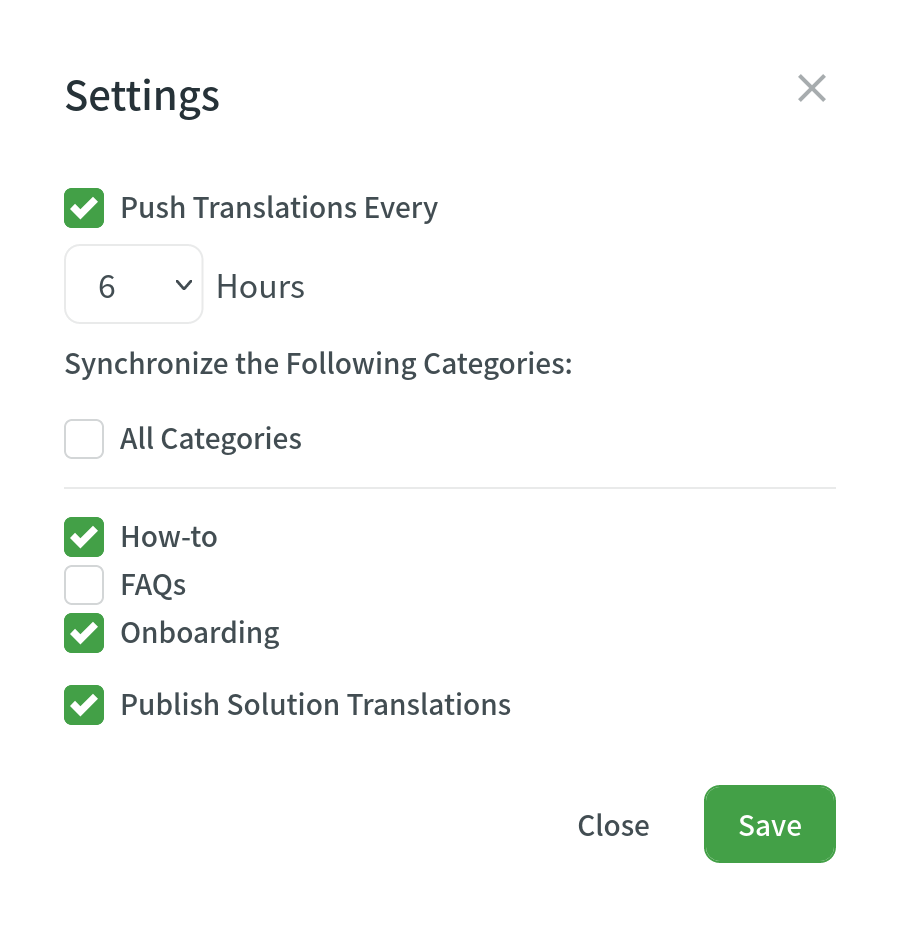
You can leave Push Translations Every empty and use Sync Now to manually initiate synchronization as needed. 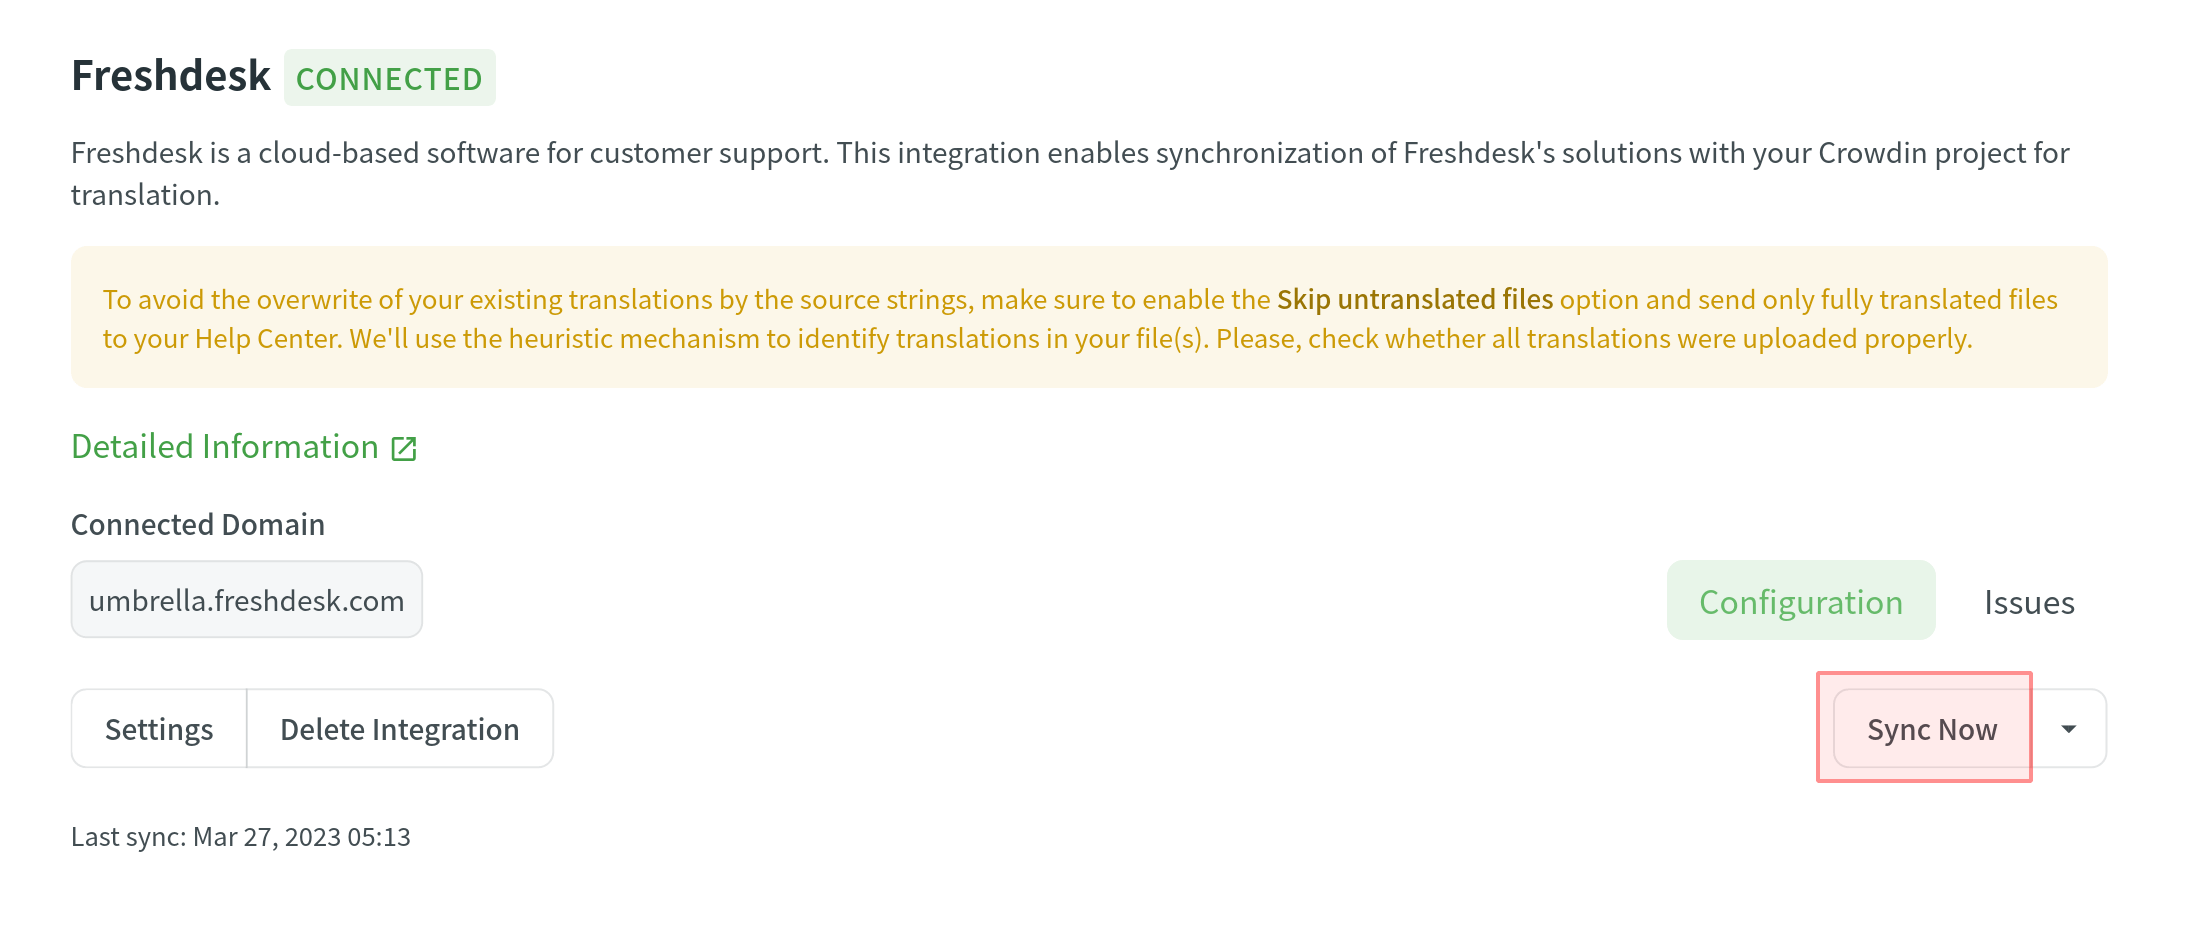
Upload af oversættelser fra Freshdesk
By default, the translations stored in Freshdesk are only uploaded to Crowdin during the initial sync. To manually upload translations to Crowdin, click on the drop-down toggle on the Sync Now button, and click Upload Translations. Integrationen vil uploade eksisterende oversættelser til Crowdin-projektet.