Freshdesk Integration
Crowdin integration with Freshdesk allows you to localize your Knowledge base articles, FAQs, and other helpful content to provide support to your customers in their native language. When working in Crowdin, your translators can use glossaries, translation memory, and other localization resources you’ve added to your project. This helps keep translations consistent across languages.
Note: You will need to install the Freshdesk integration in your Crowdin account before you can set it up and use it.
Az integráció működése
Once you configure the integration, the content from Freshdesk is automatically added to your Crowdin project as XML files. Besides articles, you can localize names and descriptions of your helpdesk categories and folders. These texts are added to the project as separate XML files.
Here’s how your project files will look like after the successful configuration:
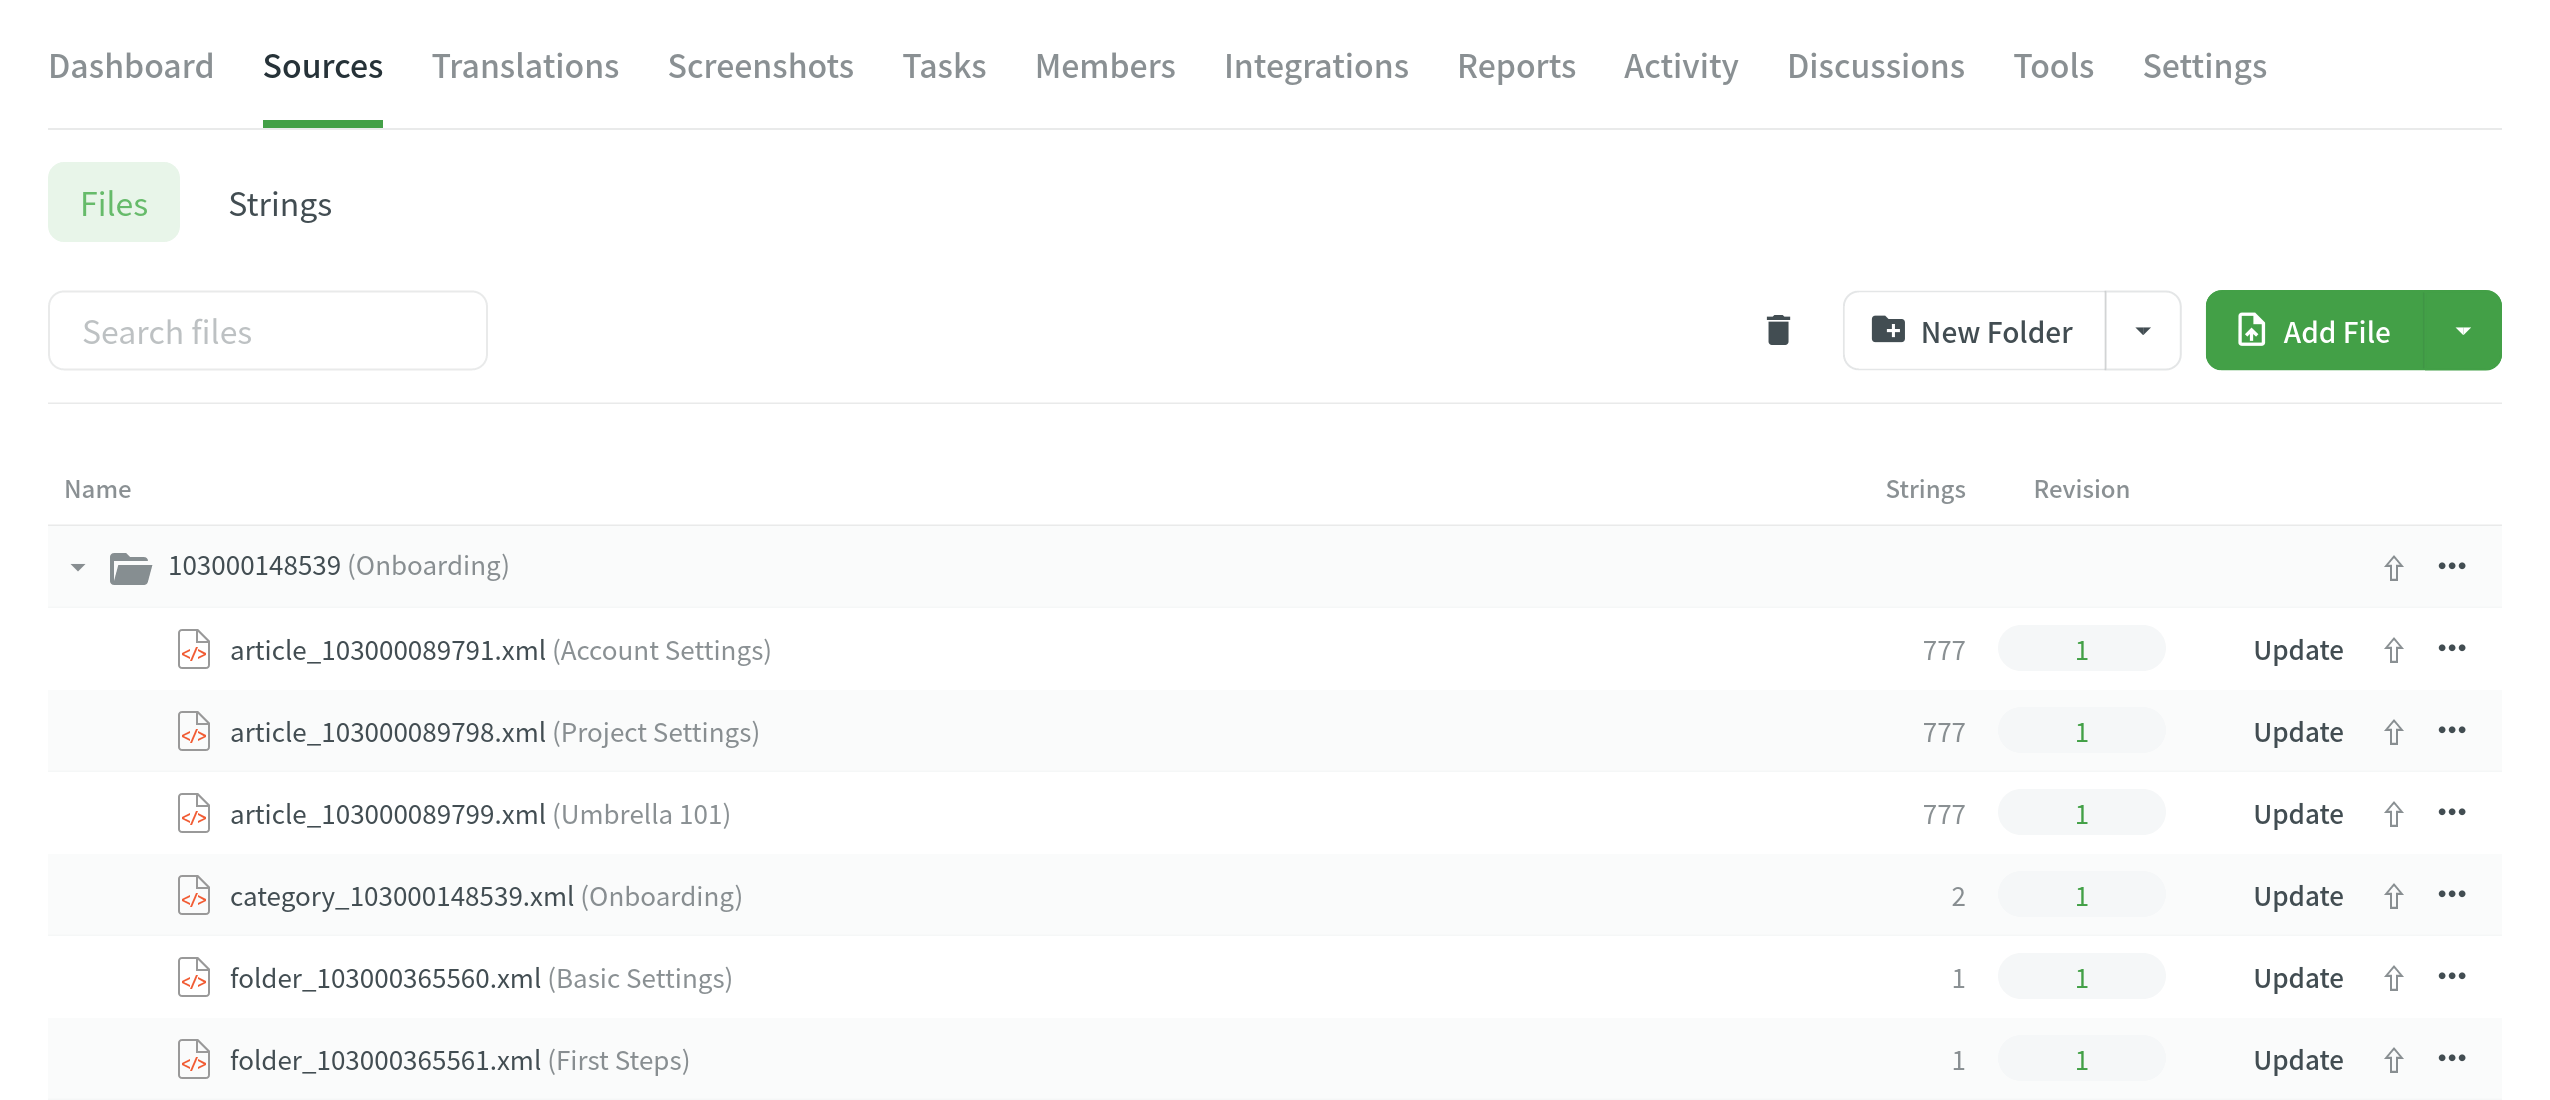
A separate folder is created for each category you choose to localize. Each category folder will contain separate files for these data types:
- Category name and description.
- Folder names and descriptions.
- Separate file for each article.
The numbers in the folder and file names are the IDs of the categories, folders, and articles in Freshdesk. These IDs are visible only to the project owner and managers. Instead of the IDs, your translators and proofreaders will see the real category, folder, and article names.
Once you have uploaded the files to the project, you can invite contributors to translate and proofread the texts. Read more about the translation approaches you can use in Crowdin.
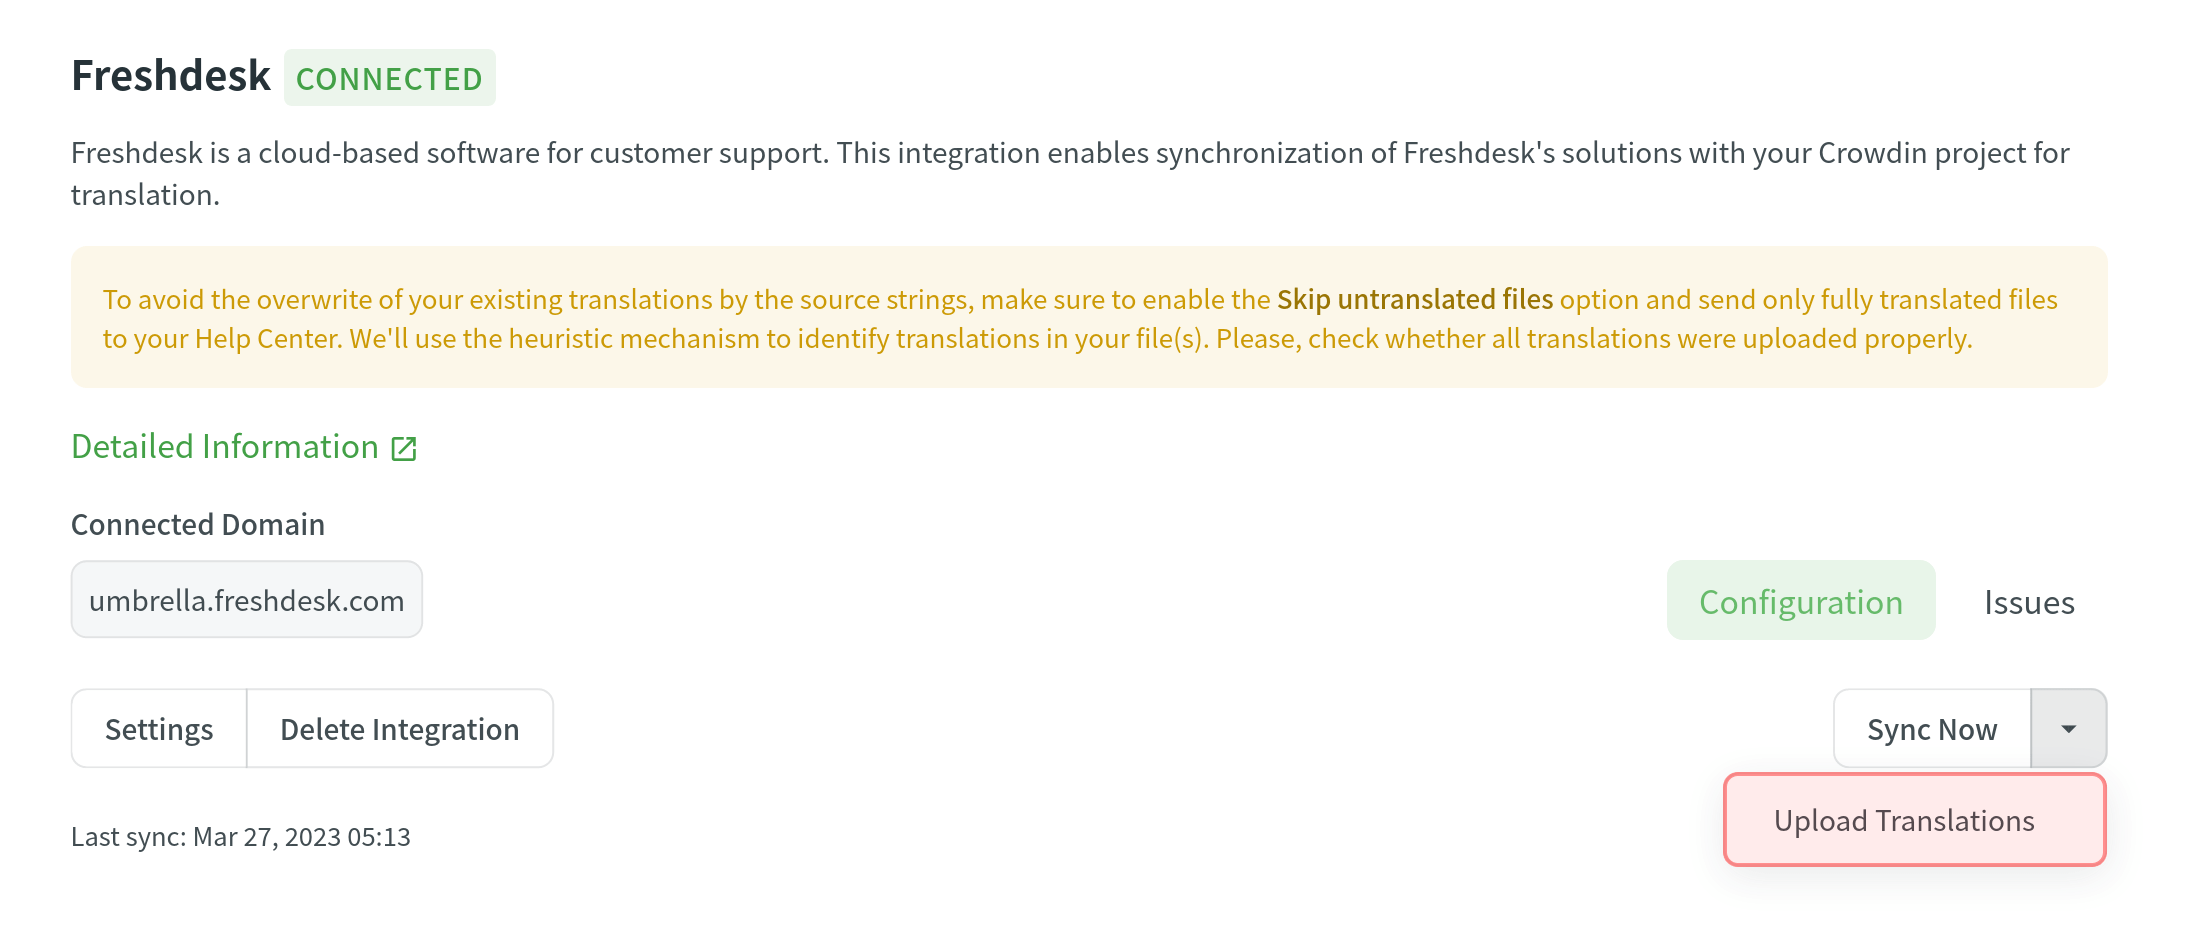
To upload translations to Freshdesk, you can either set up a sync schedule to automatically add translations to the help center at set intervals, or you can initiate a sync on demand. The sync schedule is the final step in setting up the integration.
Connecting Freshdesk with Crowdin
To connect your Freshdesk account with your Crowdin project, follow these steps:
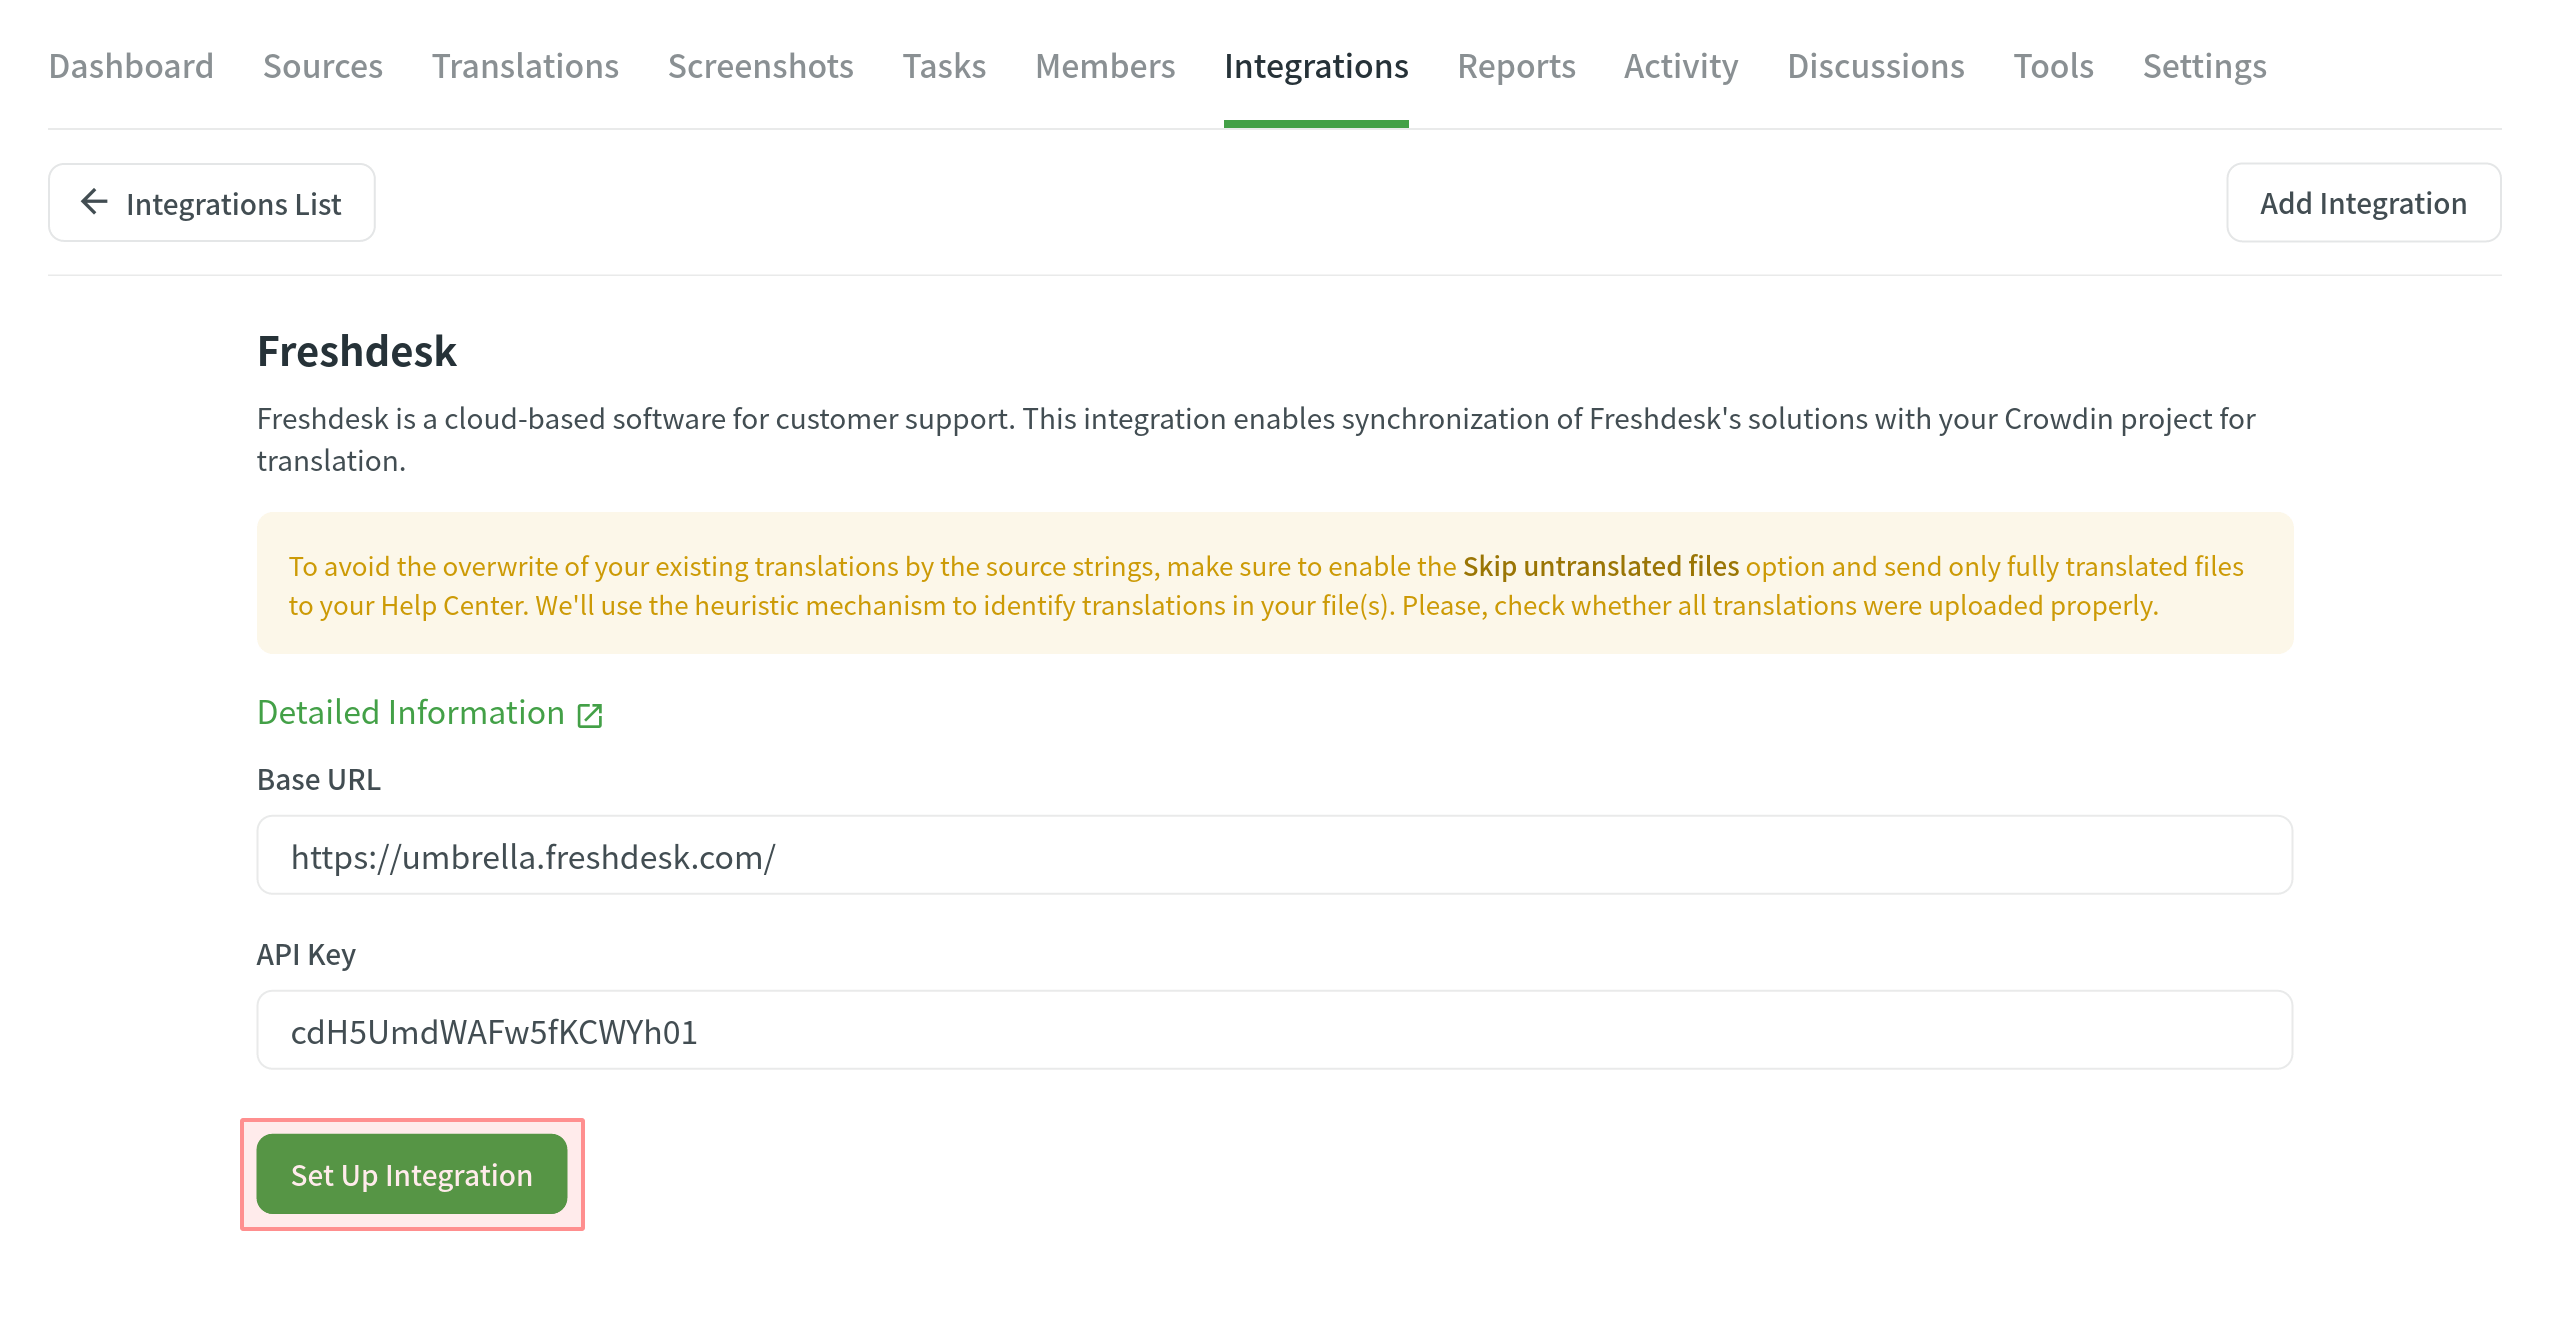
- Open your project and go to the Integrations tab.
- Click on Freshdesk in the Integrations list.
- Specify your Freshdesk Portal URL (e.g., https://mycompany.freshdesk.com) and your Freshdesk profile API key (you can find it in your Freshdesk Profile settings).
- Click Set Up Integration.
- Kattintson Beállítások lehetőségre, hogy befejezze a beállítást.
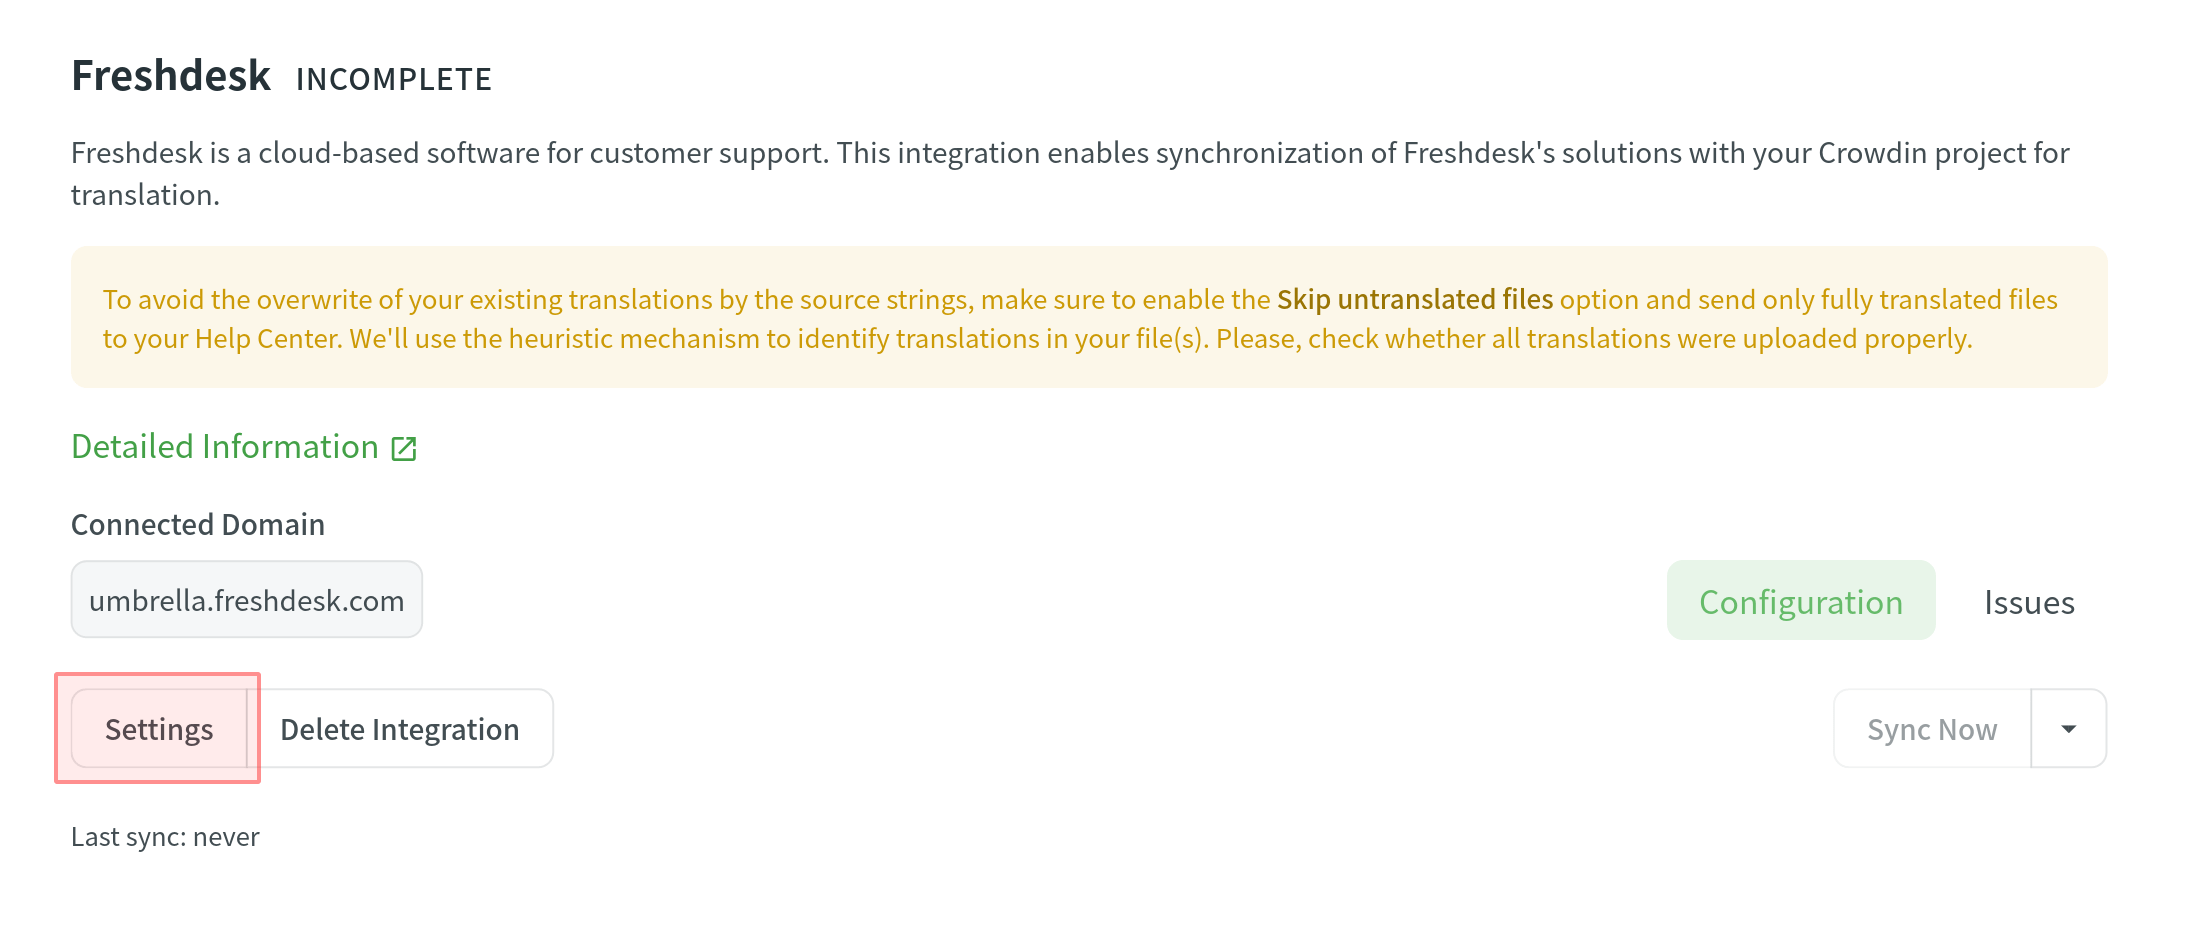
- Set the following options:
- Set the time interval to configure the synchronization schedule.
- Select the categories you’d like to upload descriptions and articles from.
- Select Publish Solution Translations if you’d like the translated content to be automatically published on your helpdesk after the synchronization.
- Click Save.
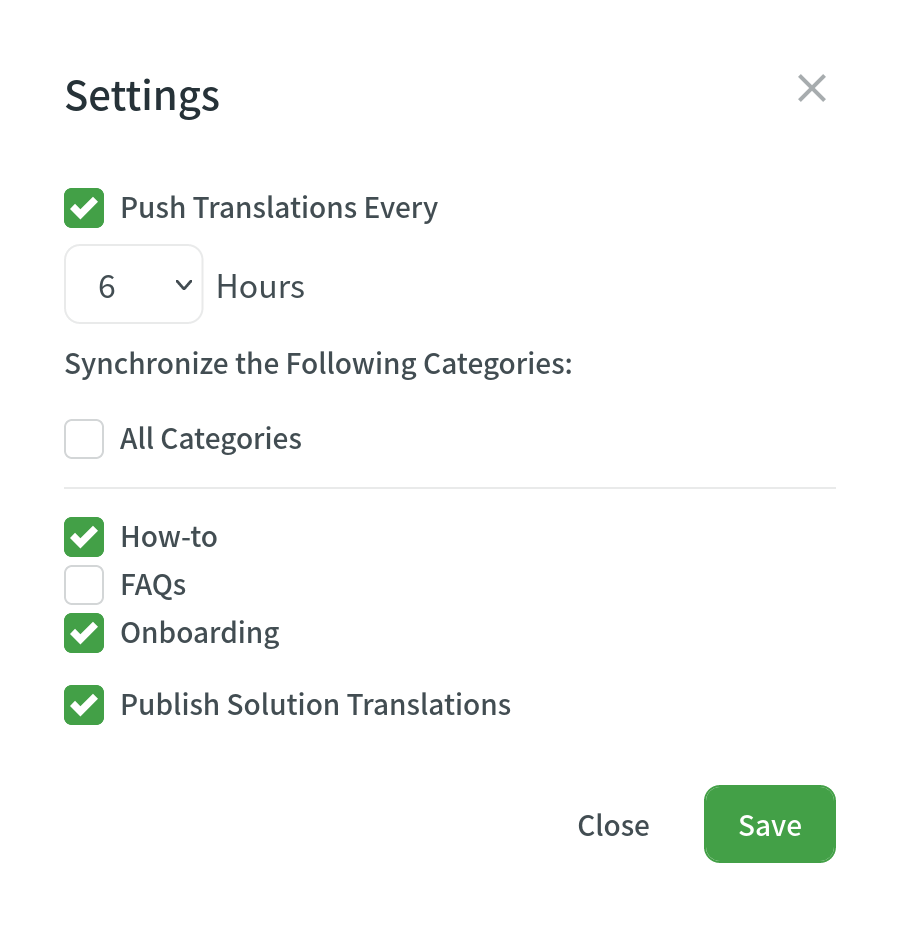
You can leave Push Translations Every empty and use Sync Now to manually initiate synchronization as needed. 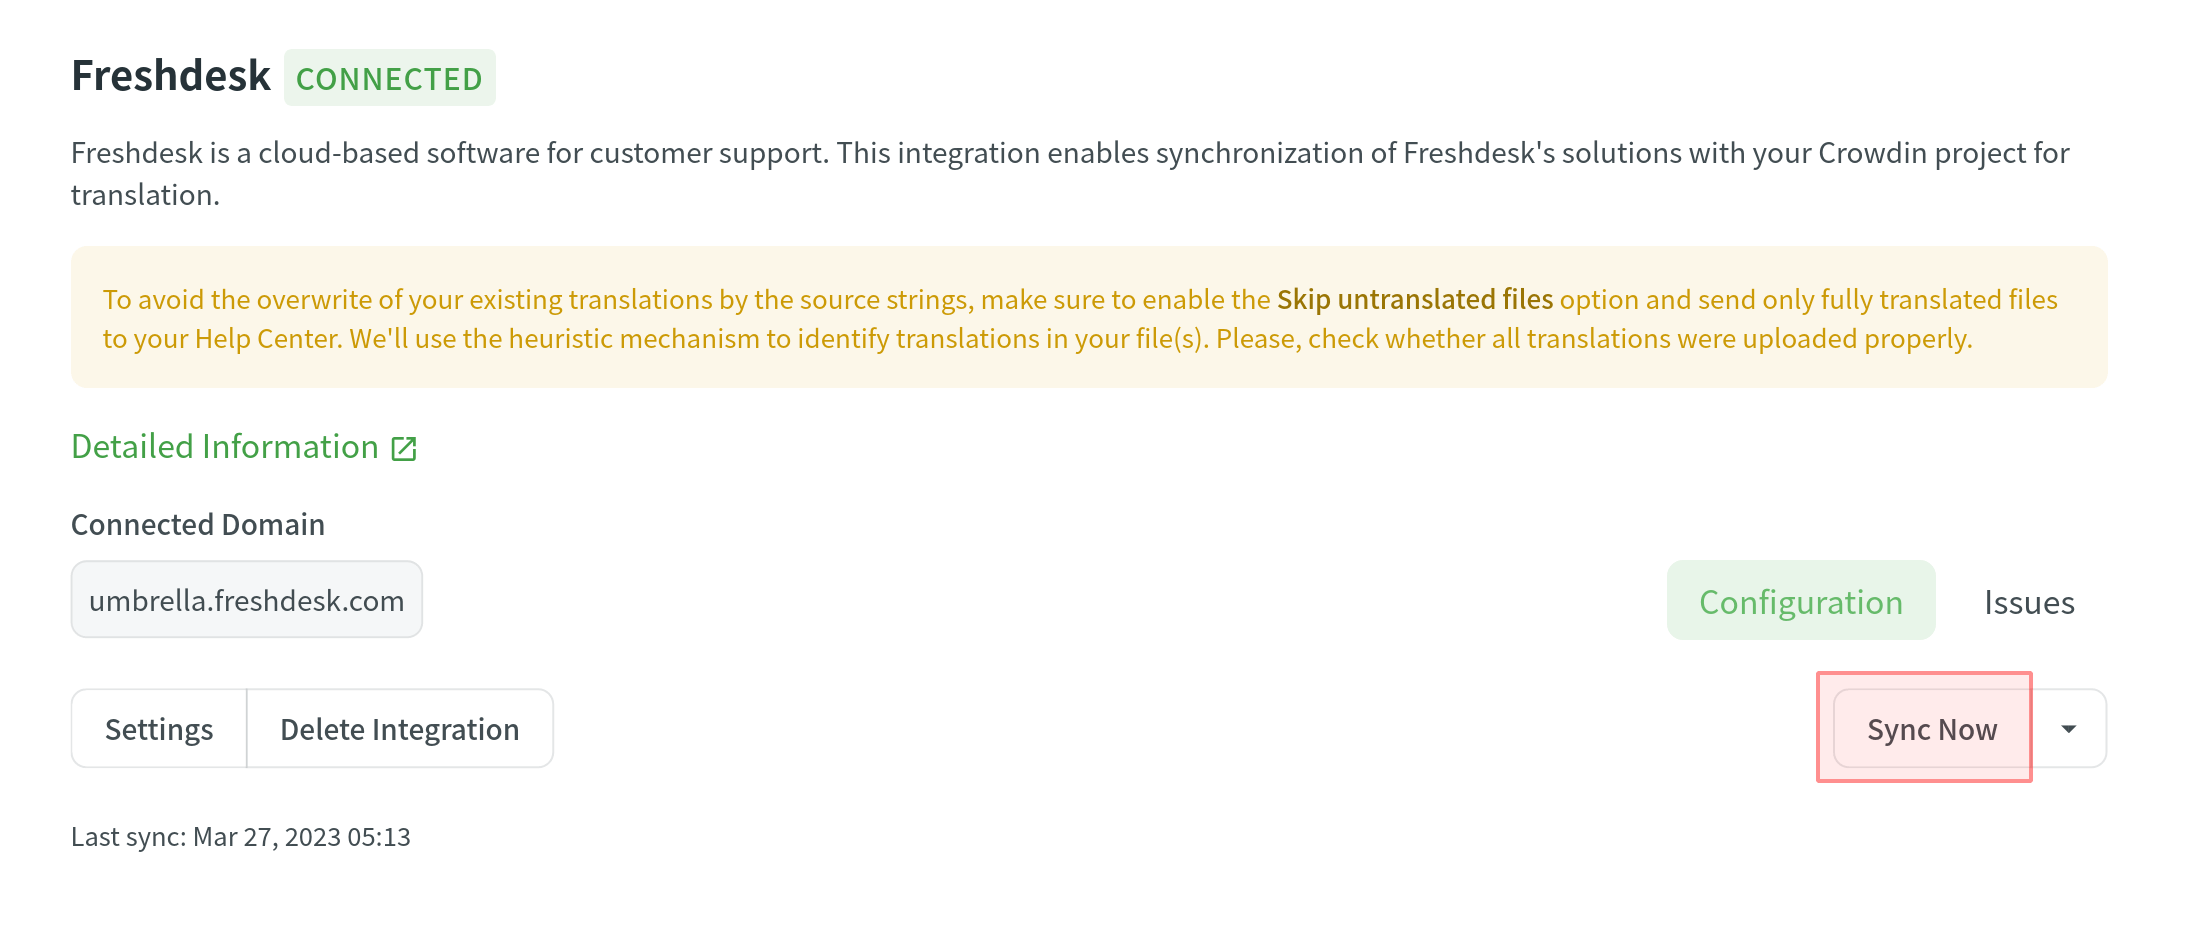
Uploading Translations from Freshdesk
By default, the translations stored in Freshdesk are only uploaded to Crowdin during the initial sync. To manually upload translations to Crowdin, click on the drop-down toggle on the Sync Now button, and click Upload Translations. The integration will upload existing translations to your Crowdin project.