Tilpassede notifikationer
Custom Notifications allow you to receive information about the new events that happen in Crowdin. Når tilpassede notifikationer opsættes for kontoen, begynder Crowdin at sende POST-anmodninger med data til den tilpassede notifikations-URL via HTTP.
Brugsstudier
Tilpassede notifikationer kan opsættes for at opbygge integrationer med tjenesterne eller med en backend. F.eks.:
- Opsæt tilpassede notifikationer for at sende notifikationer til det anvendte system.
- Pass information to the third-party services with the specific request requirements (e.g., content type, headers, payload).
- Opret tilpassede integrationer med Crowdin.
Opsætning af tilpassede notifikationer
Følg disse trin for at opsætte tilpassede notifikationer i Crowdin:
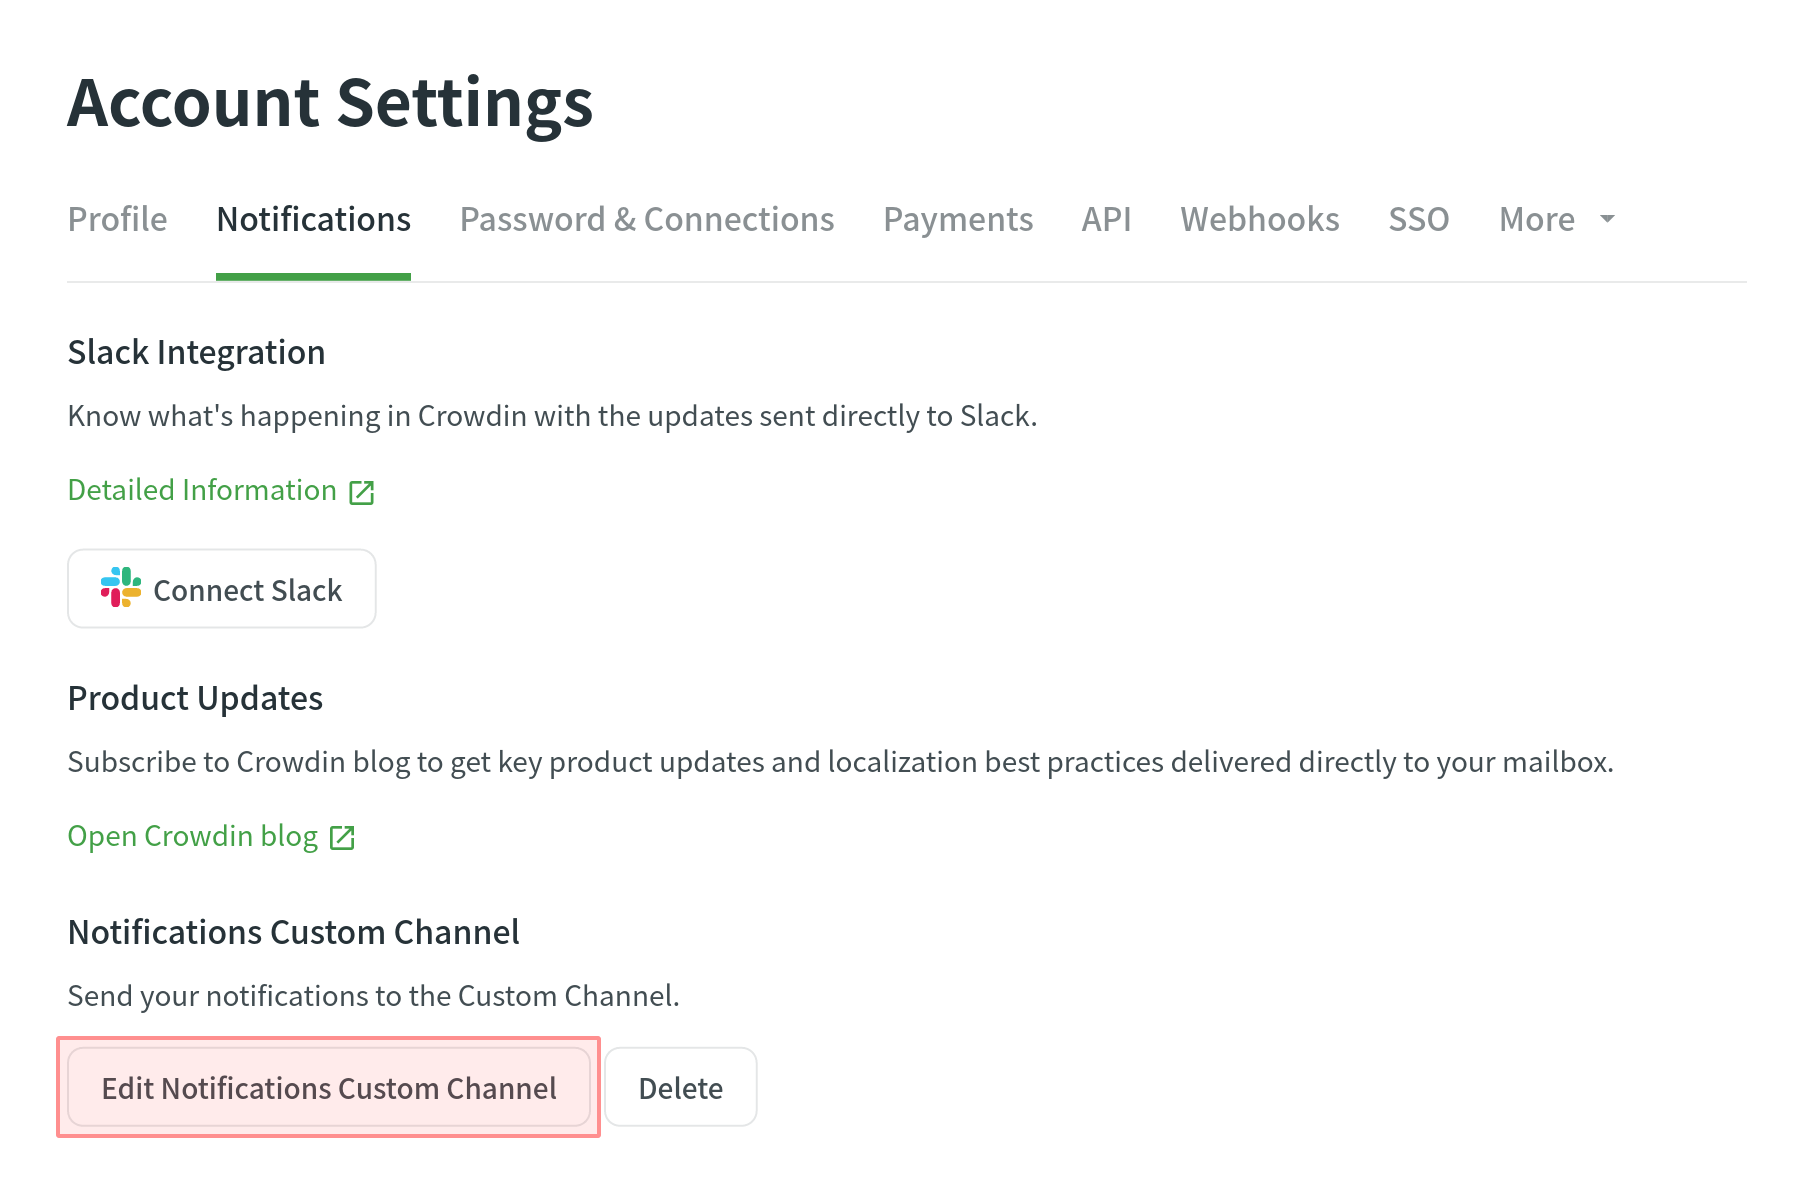
- Åbn Kontoindstillinger og gå til fanen Notifikationer.
- In the Notifications Custom Channel section, click Set Up Notifications Custom Channel to start configuring your custom notifications.
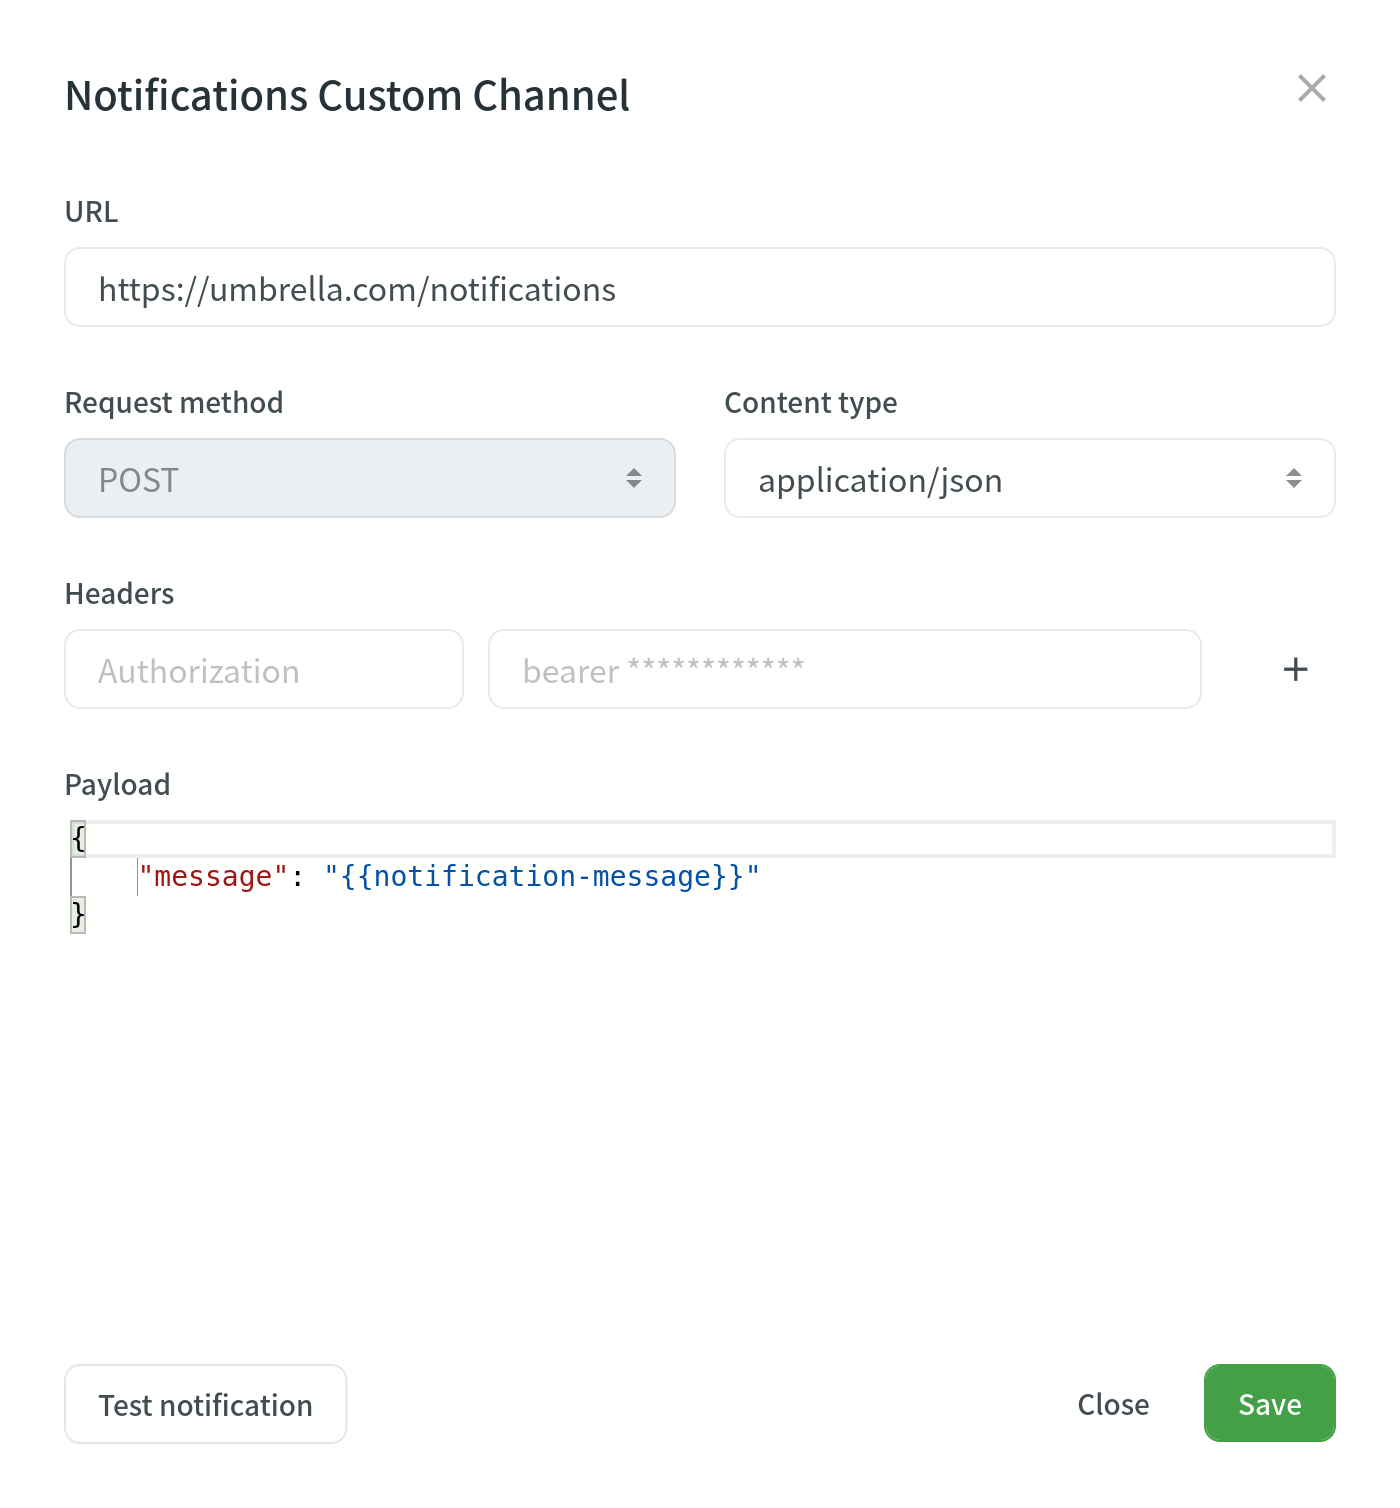
Flg. oplysninger skal angives for at opsætte tilpassede notifikationer:
- URL’en, hvortil callback skal sendes.
- Indholdstypen for POST-anmodningsmetoden (multipart/form-data, application/json, eller application/x-www-form-urlencoded).
Alternativt kan der føjes særlige headers til tilpassede notifikationer. De kan bruges til ekstra sikkerhed som en godkendelsesmetode og meget mere. Tilføjes f.eks. headers, kan det tilpassede notifikationsendepunkt bekræfte dem og sikre, at oplysninger kommer fra Crowdin.
Klik under opsætningen af tilpassede notifikationer på Test notifikation for at se, hvordan appen reagerer på dette kald. Når opsætning er færdig, så klik på Gem.
Depending on your approach to custom notification management, you might need to add dedicated Crowdin IP addresses to your firewall to allow Crowdin to open the pre-configured custom notification URLs.
Read more about IP Addresses.
Tilpassede payloads
You can modify the custom notification payload to add and organize the elements as your system requires. For at få informative og brugervenlige notifikationer, så sørg for at inkludere {{notification-message}} variablen i payload.

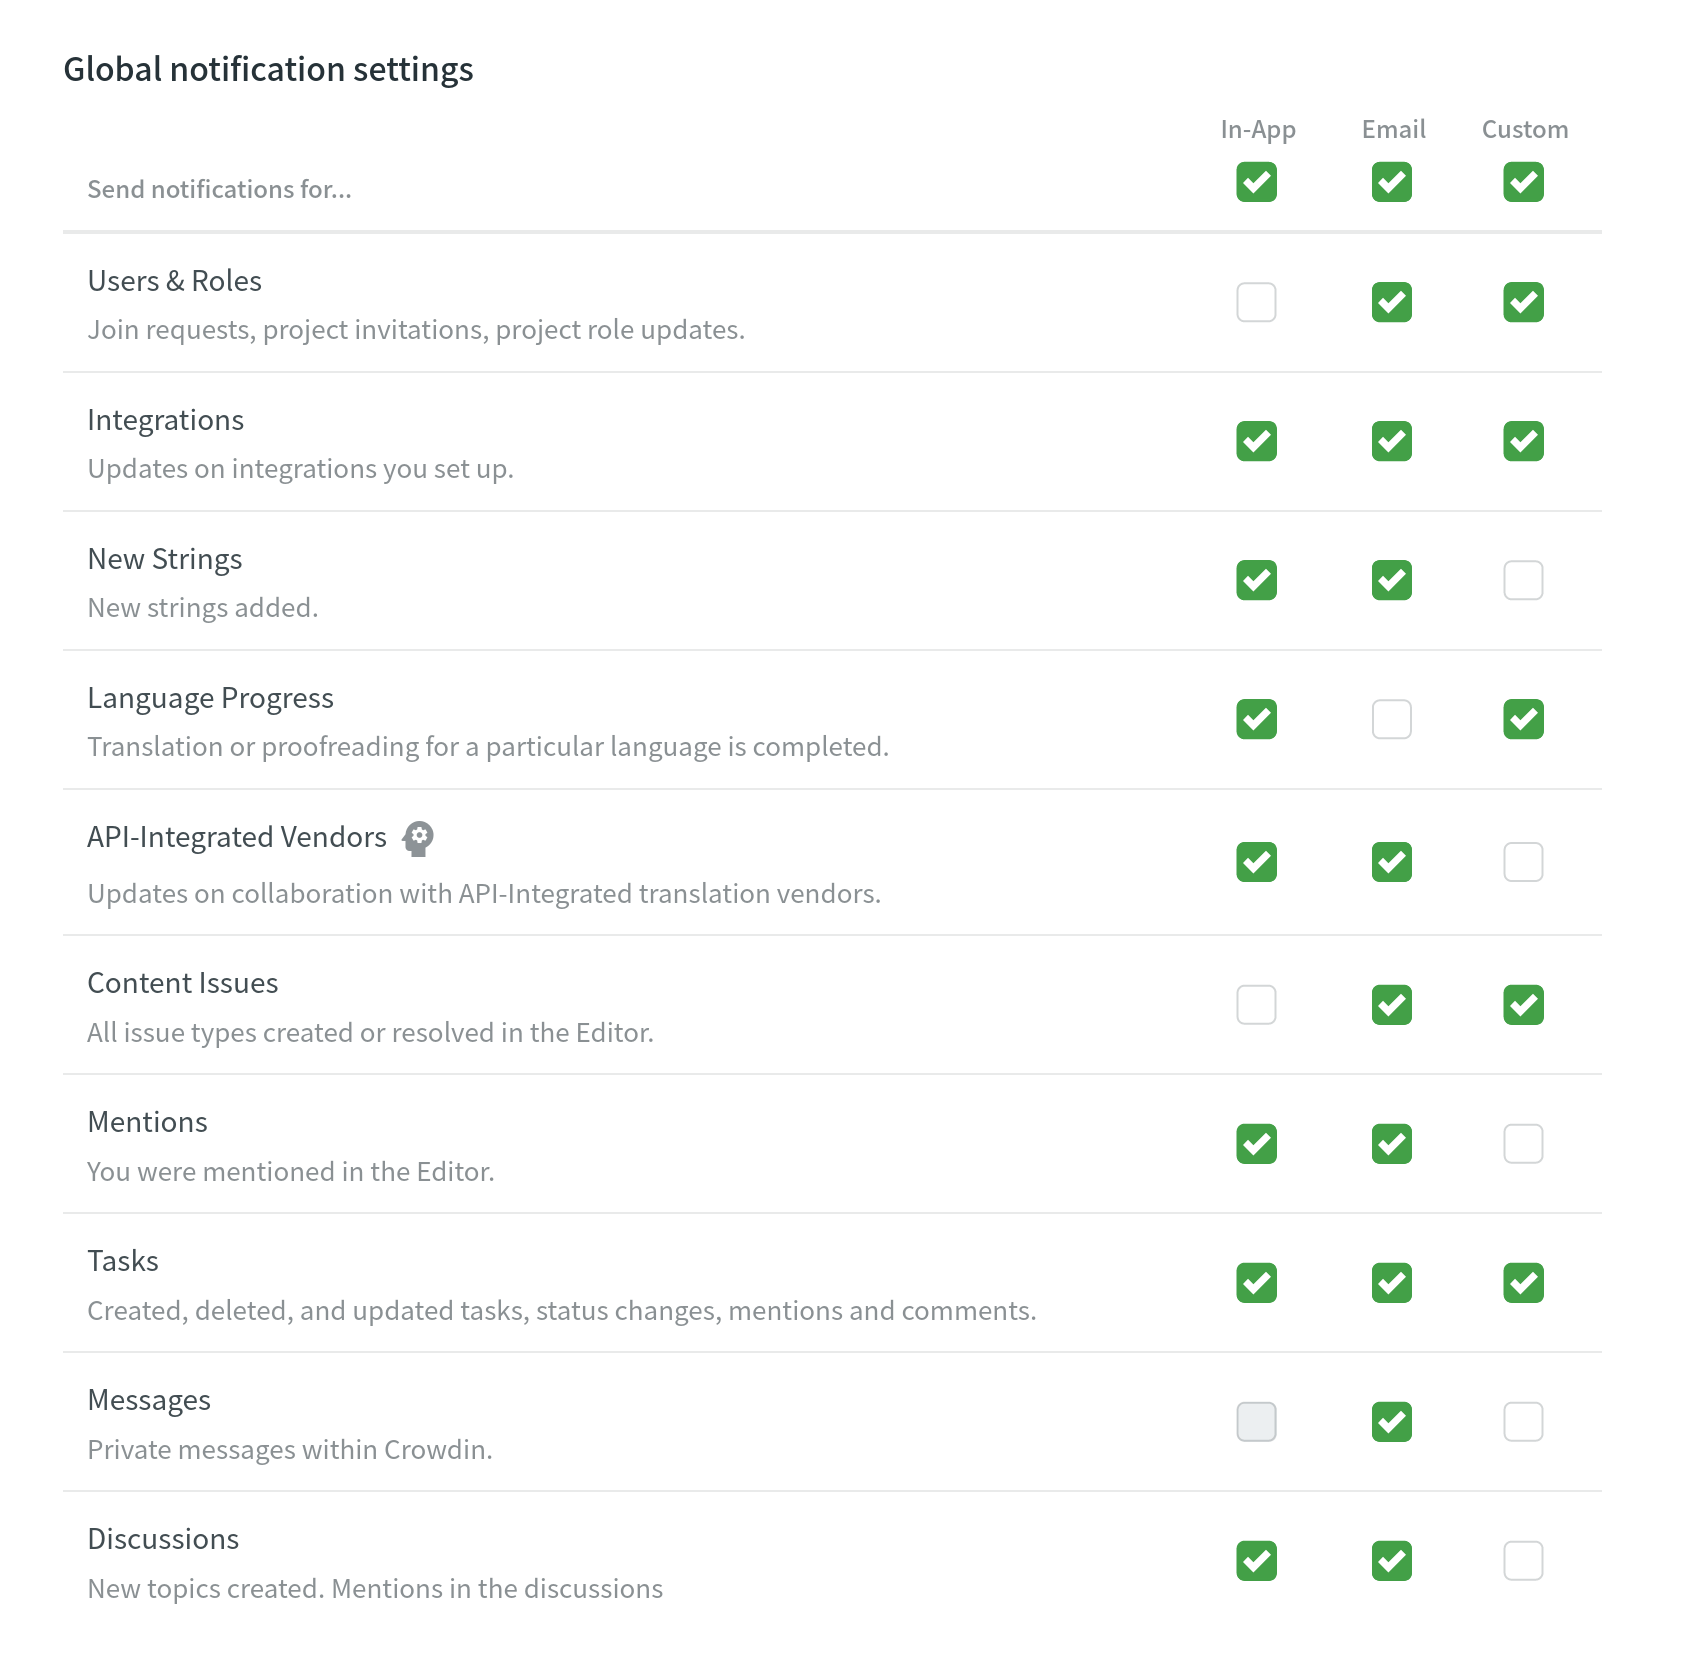
Begivenhedstyper
Once you’ve configured custom notifications, you can select the event types you’d like to receive the notifications about in the Custom column.
Editing or Deleting Custom Notifications
You can edit or delete custom notifications in the Notifications Custom Channel section of the Notifications tab.
Søge assistance
Behov for hjælp til Tilpassede notifikationer eller evt. spørgsmål? Kontakt Supportteamet.