Jira 集成
与 Atlassian Jira 集成使您能够跟踪在 Crowdin 中从事项目翻译的用户报告的源字符串和译文问题。
通过当前集成,Jira 仪表板支持 Crowdin 中报告的以下问题类型:
- 一般问题
- 缺少语境信息
- 当前译文有误
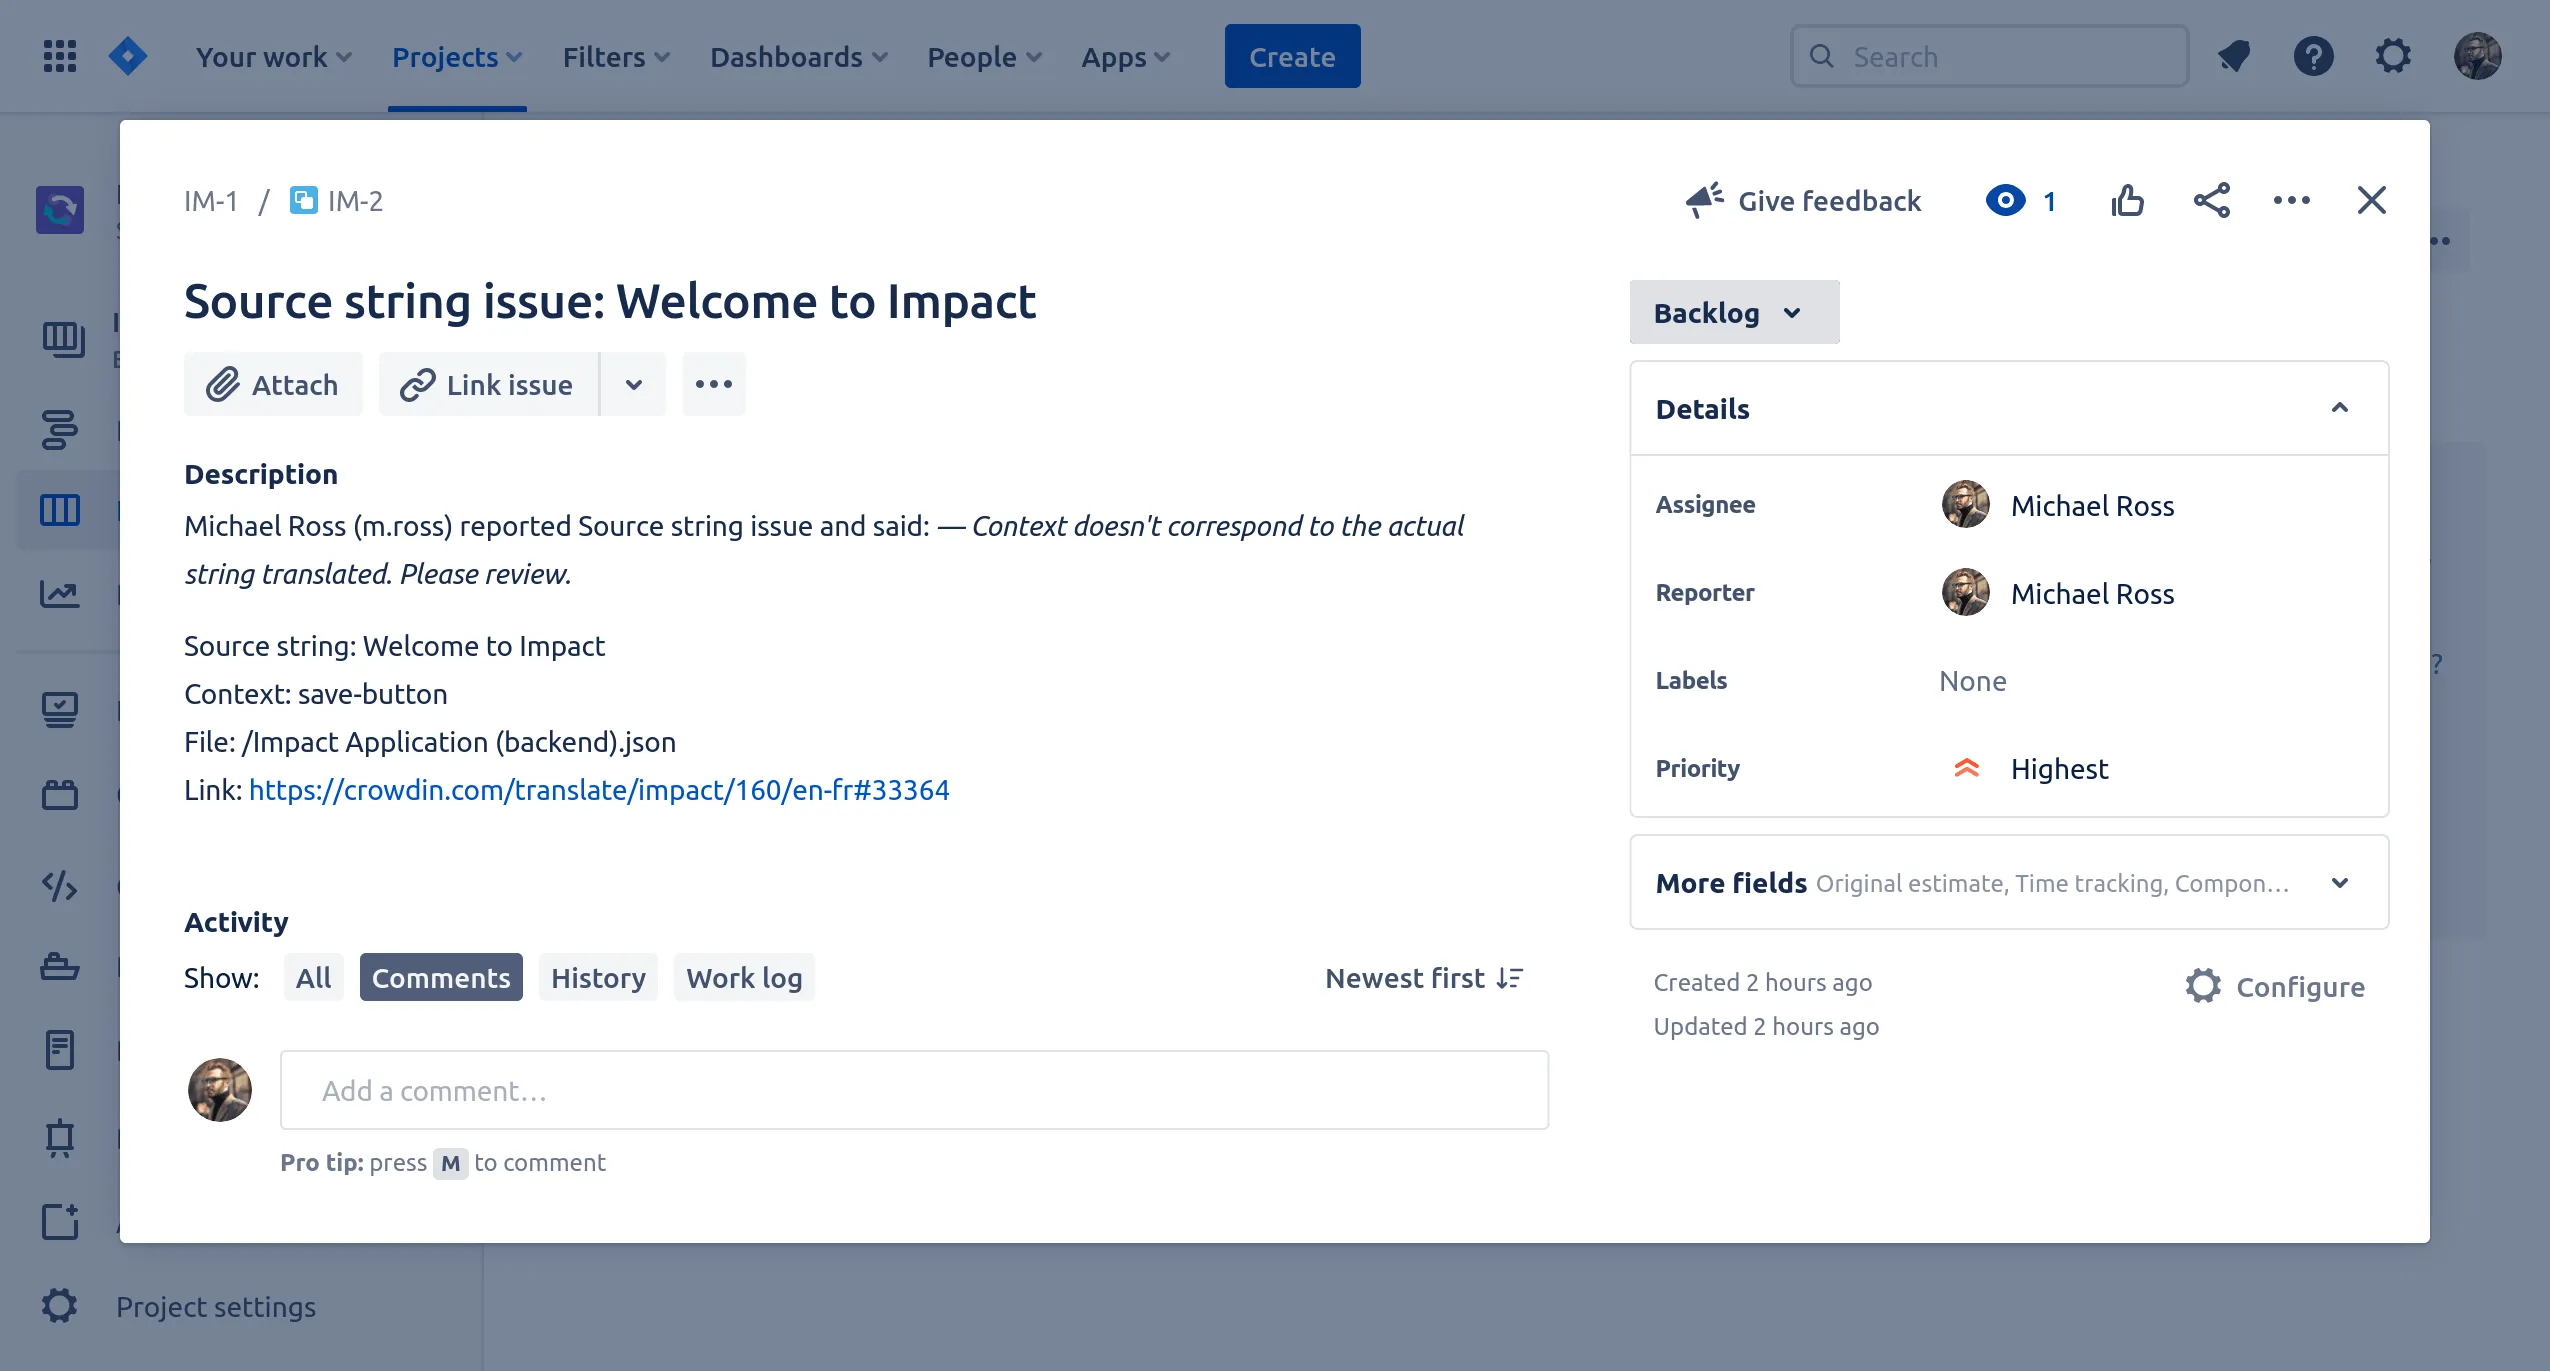
- 源字符串有误
每个同步的问题类型在 Jira 中都会有一个以其名字命名的父任务。 Crowdin 中报告的每个问题都会在 Jira 中相应的父任务中创建一个子任务。
一旦所有报告的问题都得到解决并且其各自的子任务在 Jira 中关闭,您还可以关闭代表 Crowdin 问题类型之一的父 Jira 任务。
当翻译员在 Crowdin 项目中报告新问题时,Jira 集成将为 Crowdin 项目中的每个问题创建新的父 Jira 任务及其相应的子任务。
要将 Jira 与 Crowdin 中的项目连接起来,请按照以下步骤操作:
-
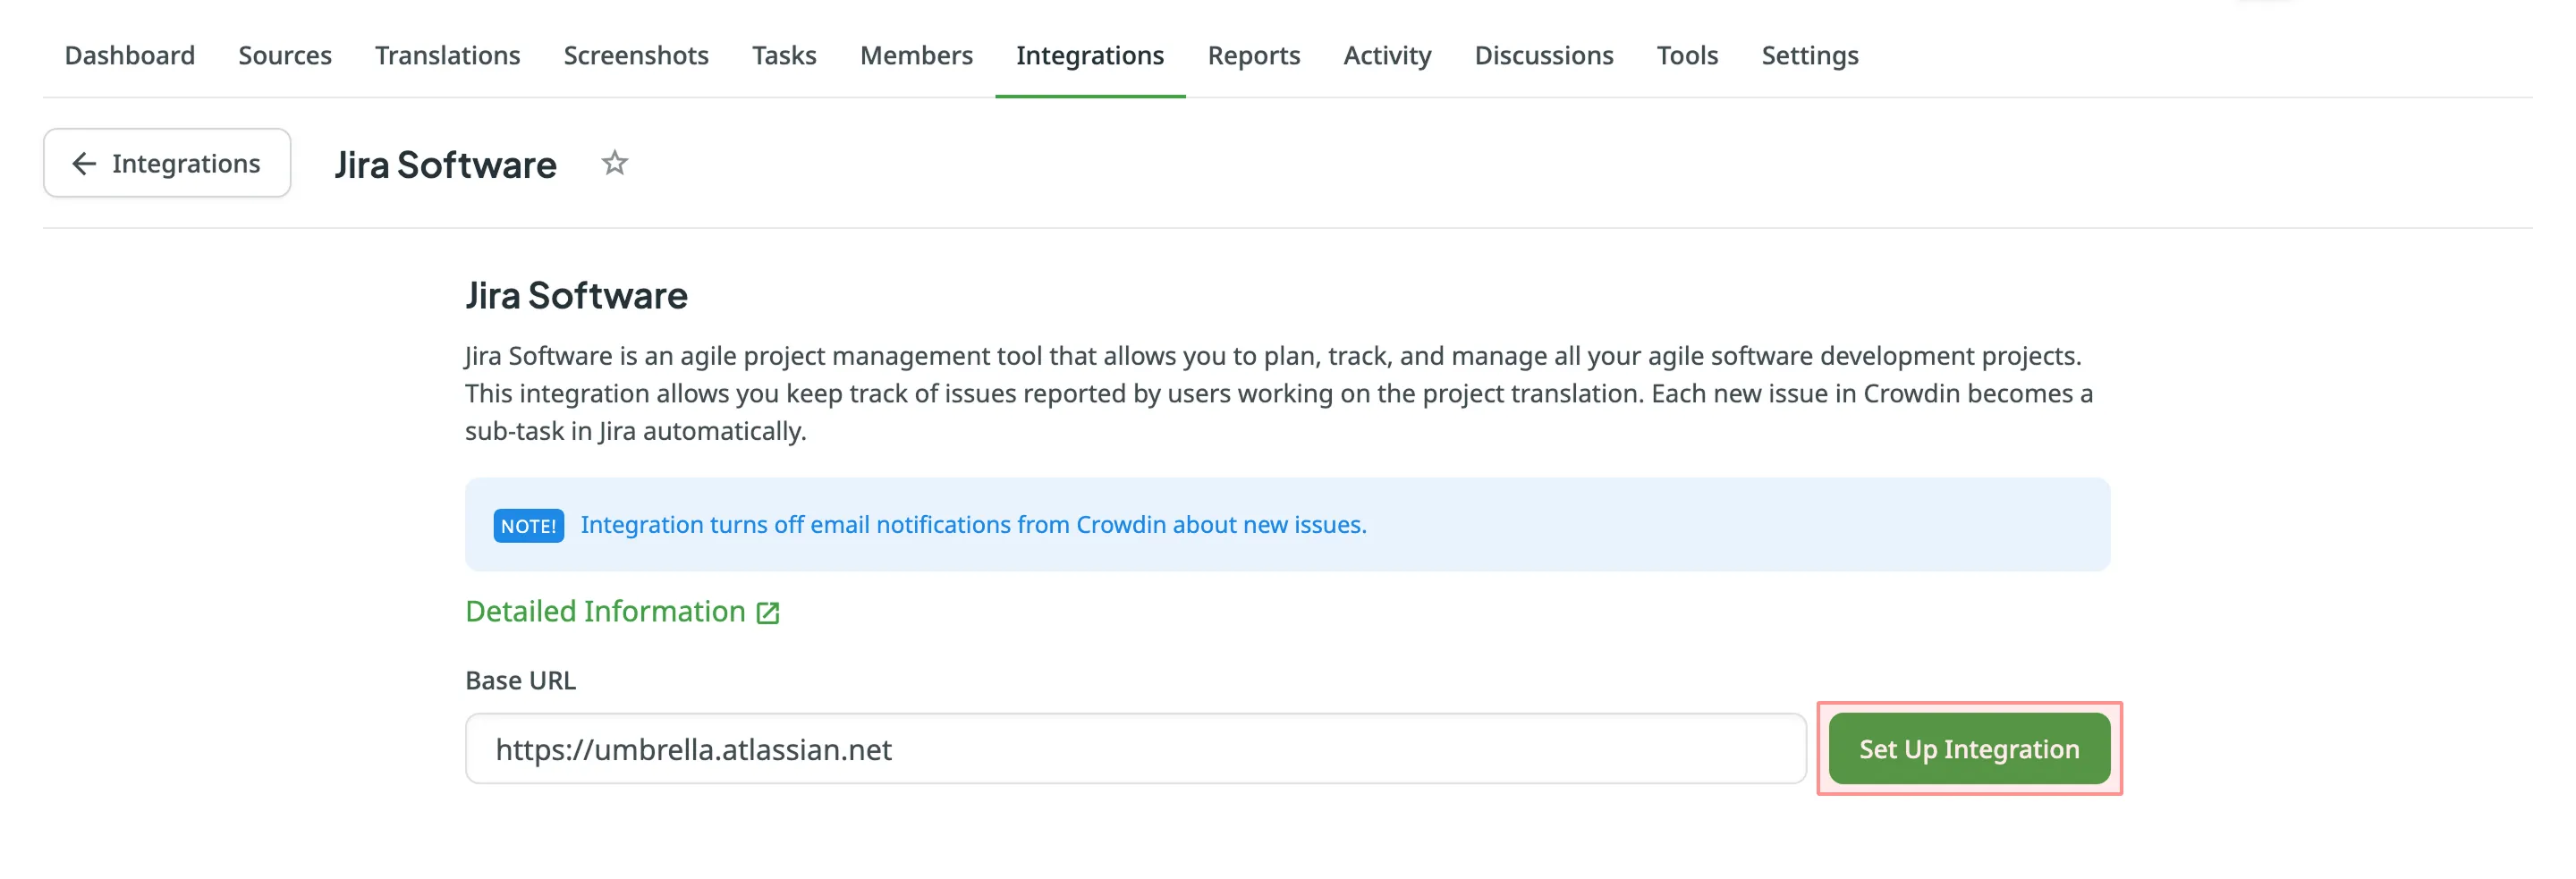
打开您的项目并前往 集成 选项卡。
-
单击集成列表中的 Jira Software。
-
输入您的 Jira 项目的基本 URL,然后单击 设置集成。
 然后您将进入 提供对 Jira 项目的访问权限 对话框。
 -
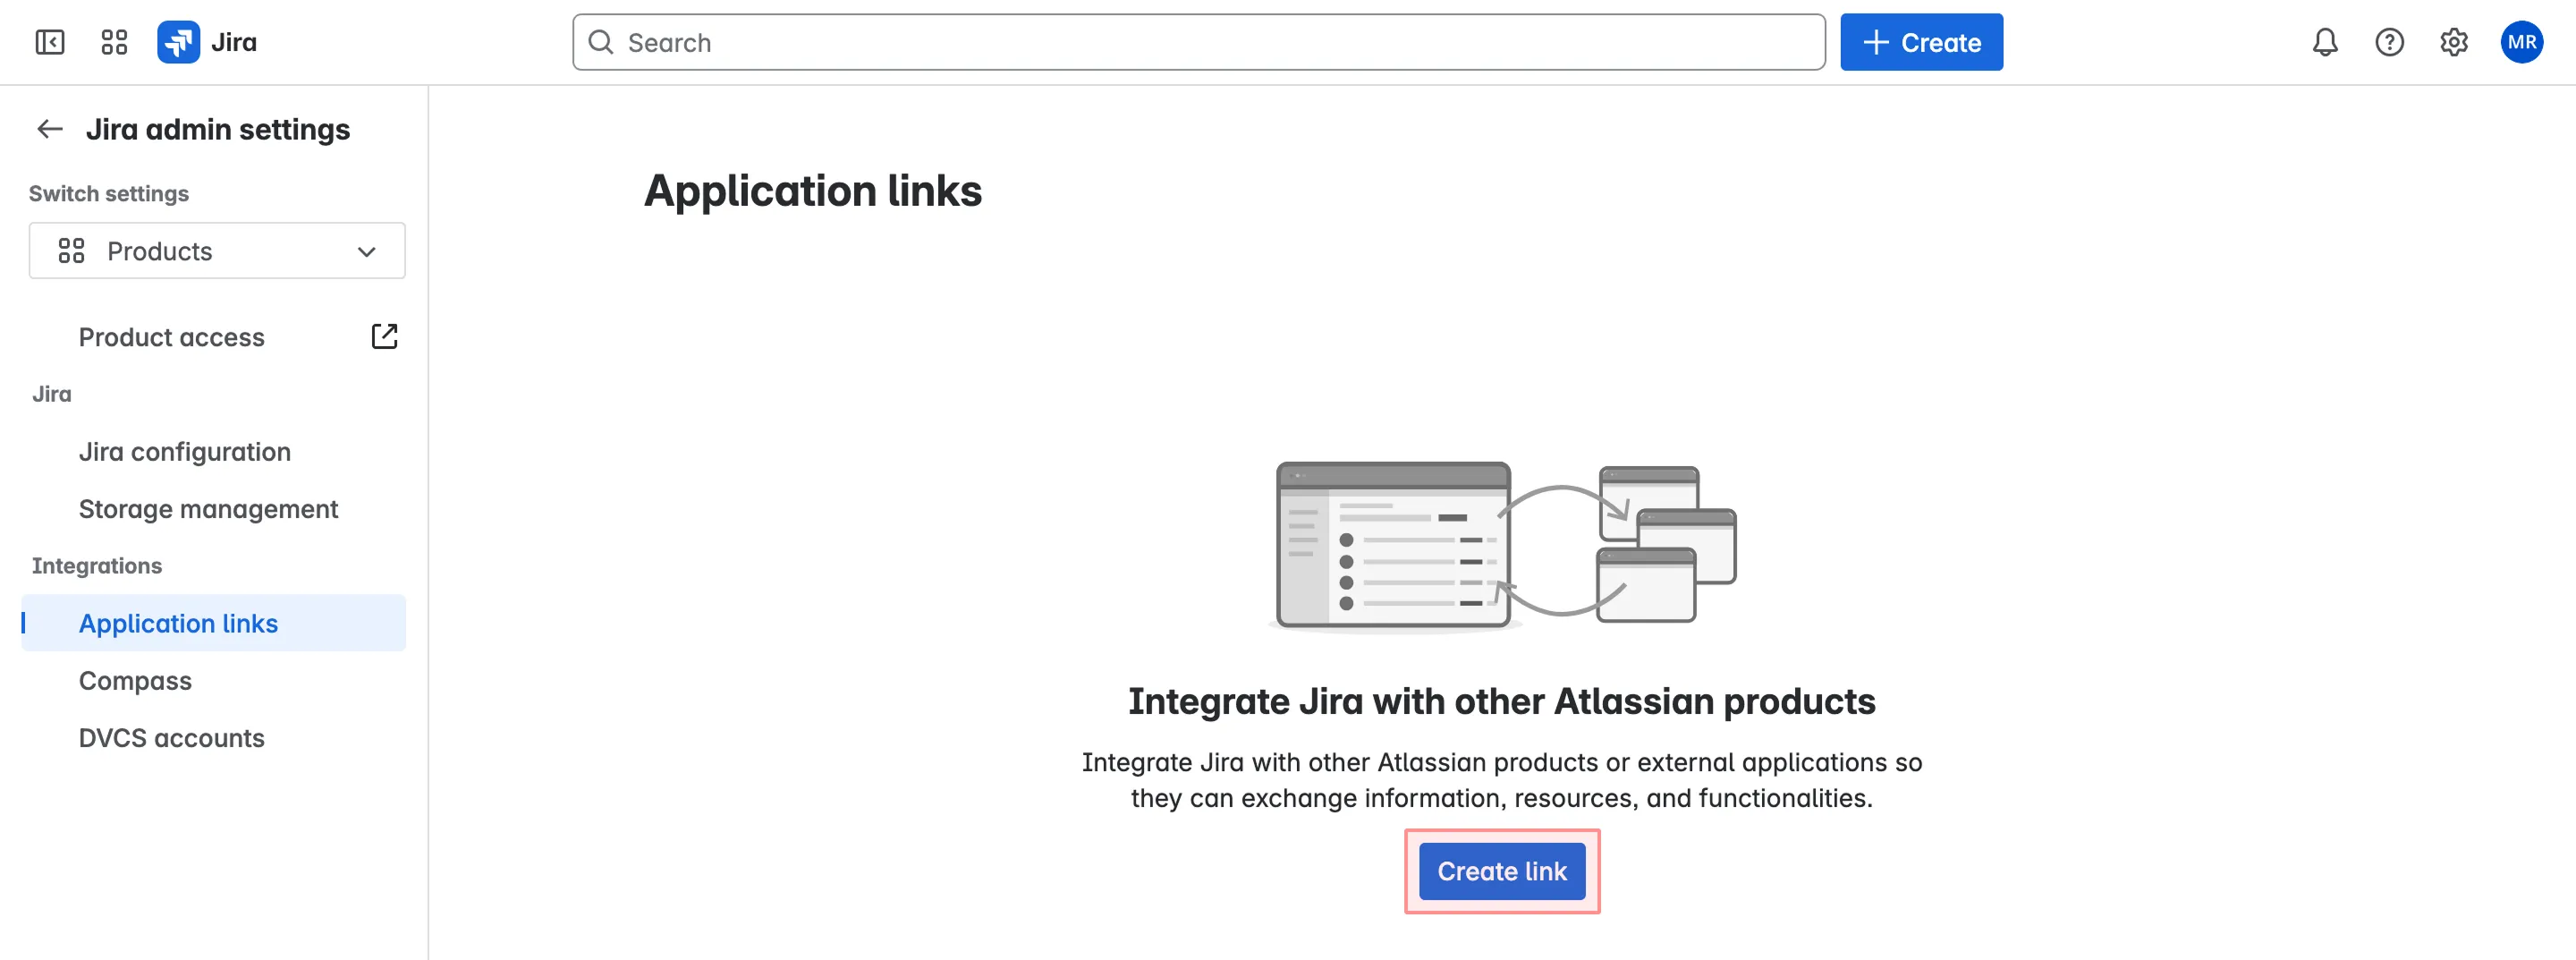
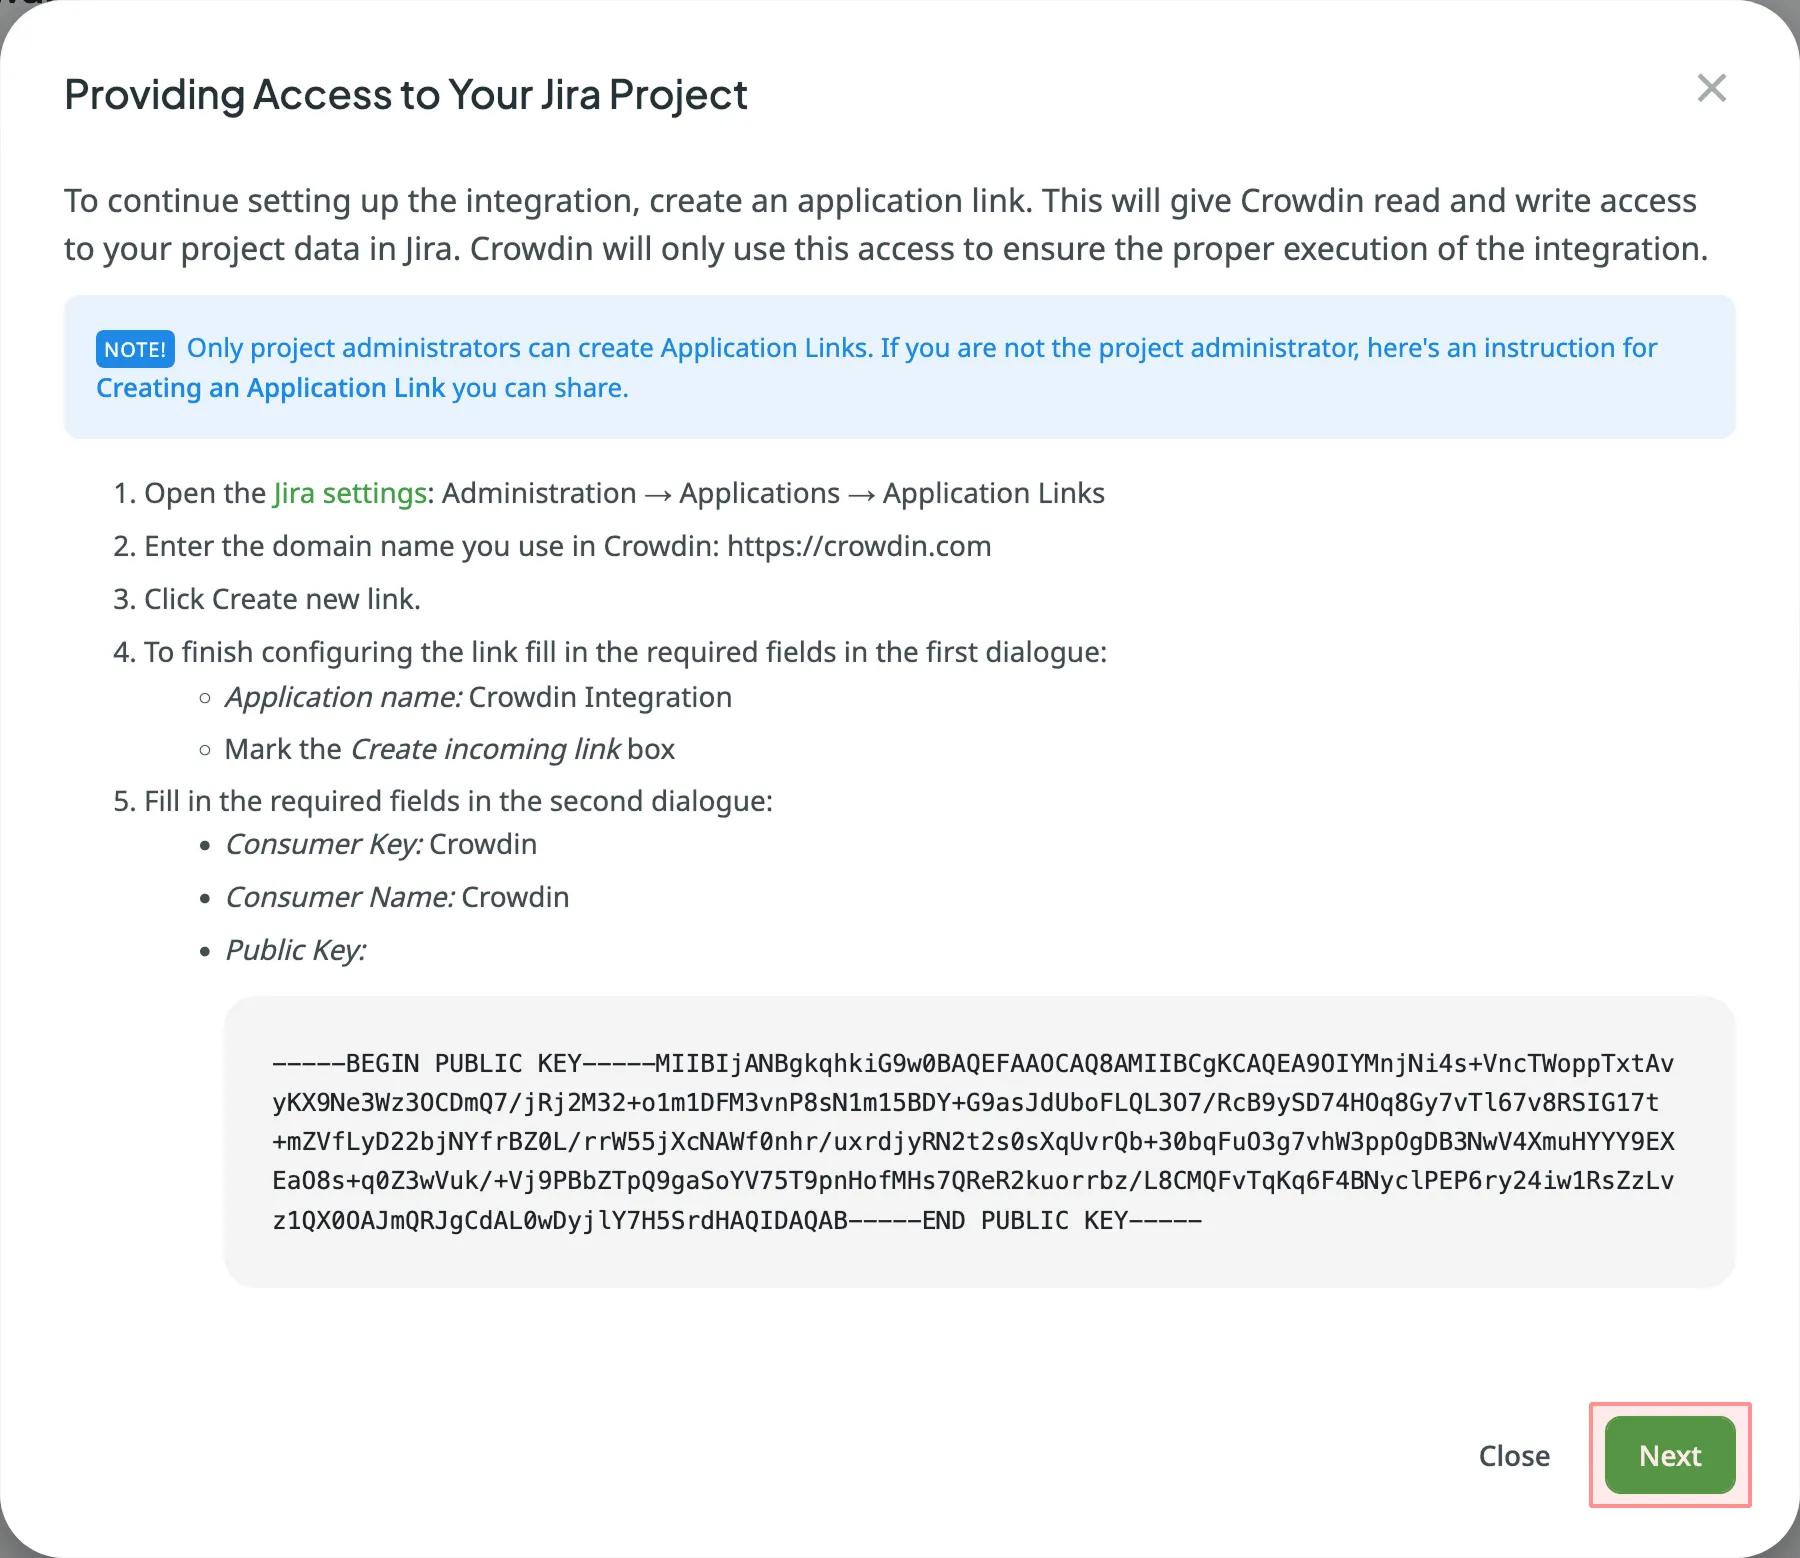
在 Jira 中配置 应用程序链接:
- 以具有 Jira 管理员 权限的用户身份登录 Jira。
- 前往 Jira 设置 > 产品 > 应用程序链接。
- 单击 创建链接。
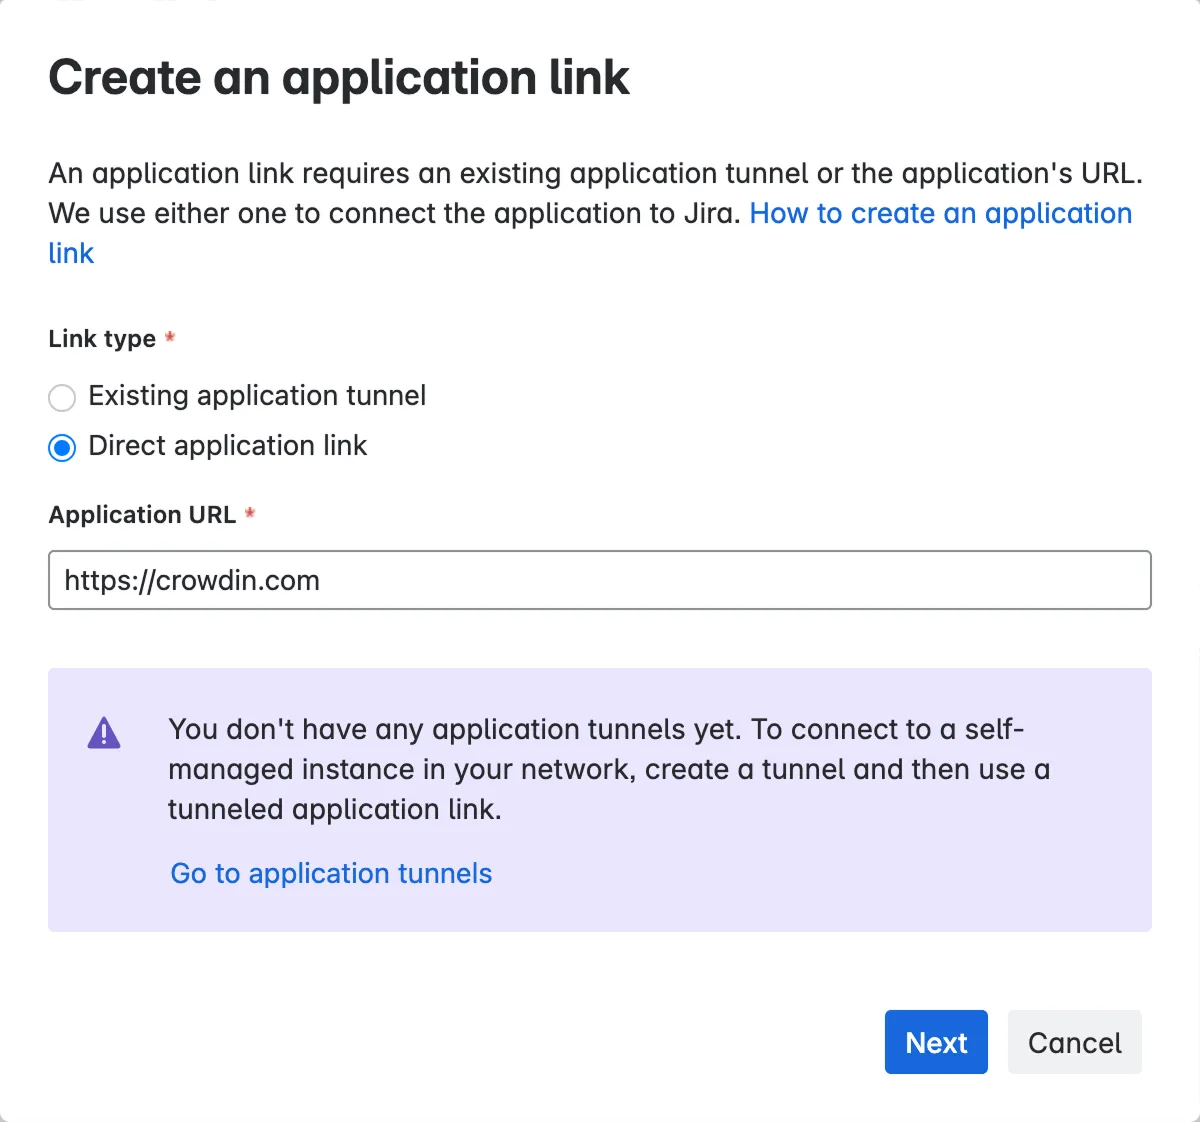
- 选择 直接应用程序链接,输入您的 Crowdin URL,然后单击 下一步。
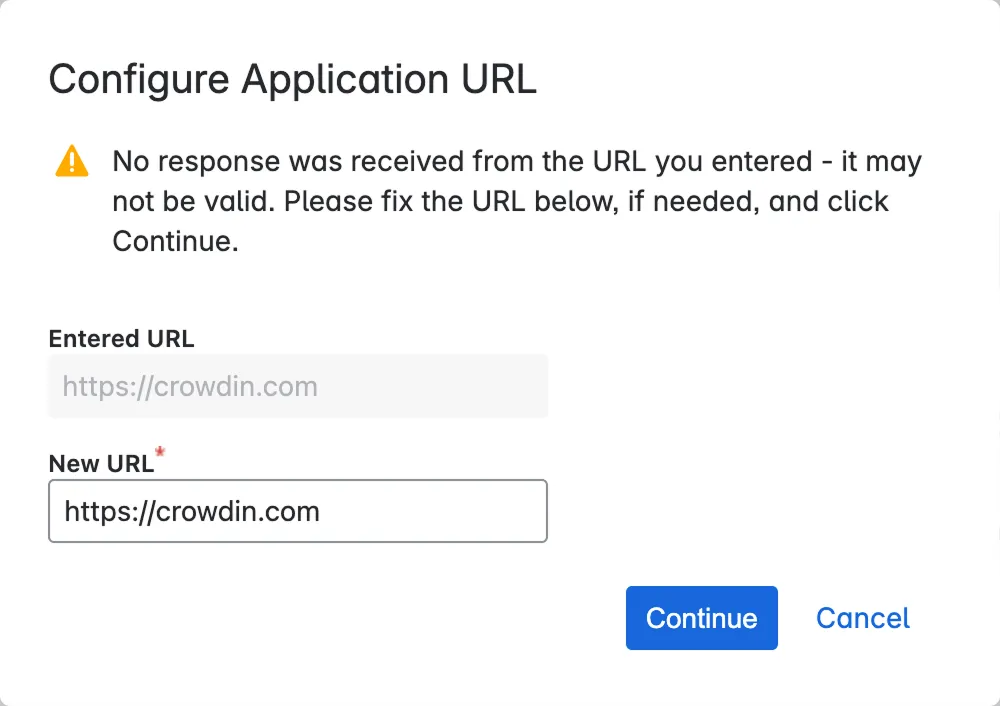
 由于 Jira 功能的原因,有时它无法收到输入的 URL 的响应。 如果您看到以下消息,请检查所提供的 URL 是否正确,然后单击 继续。
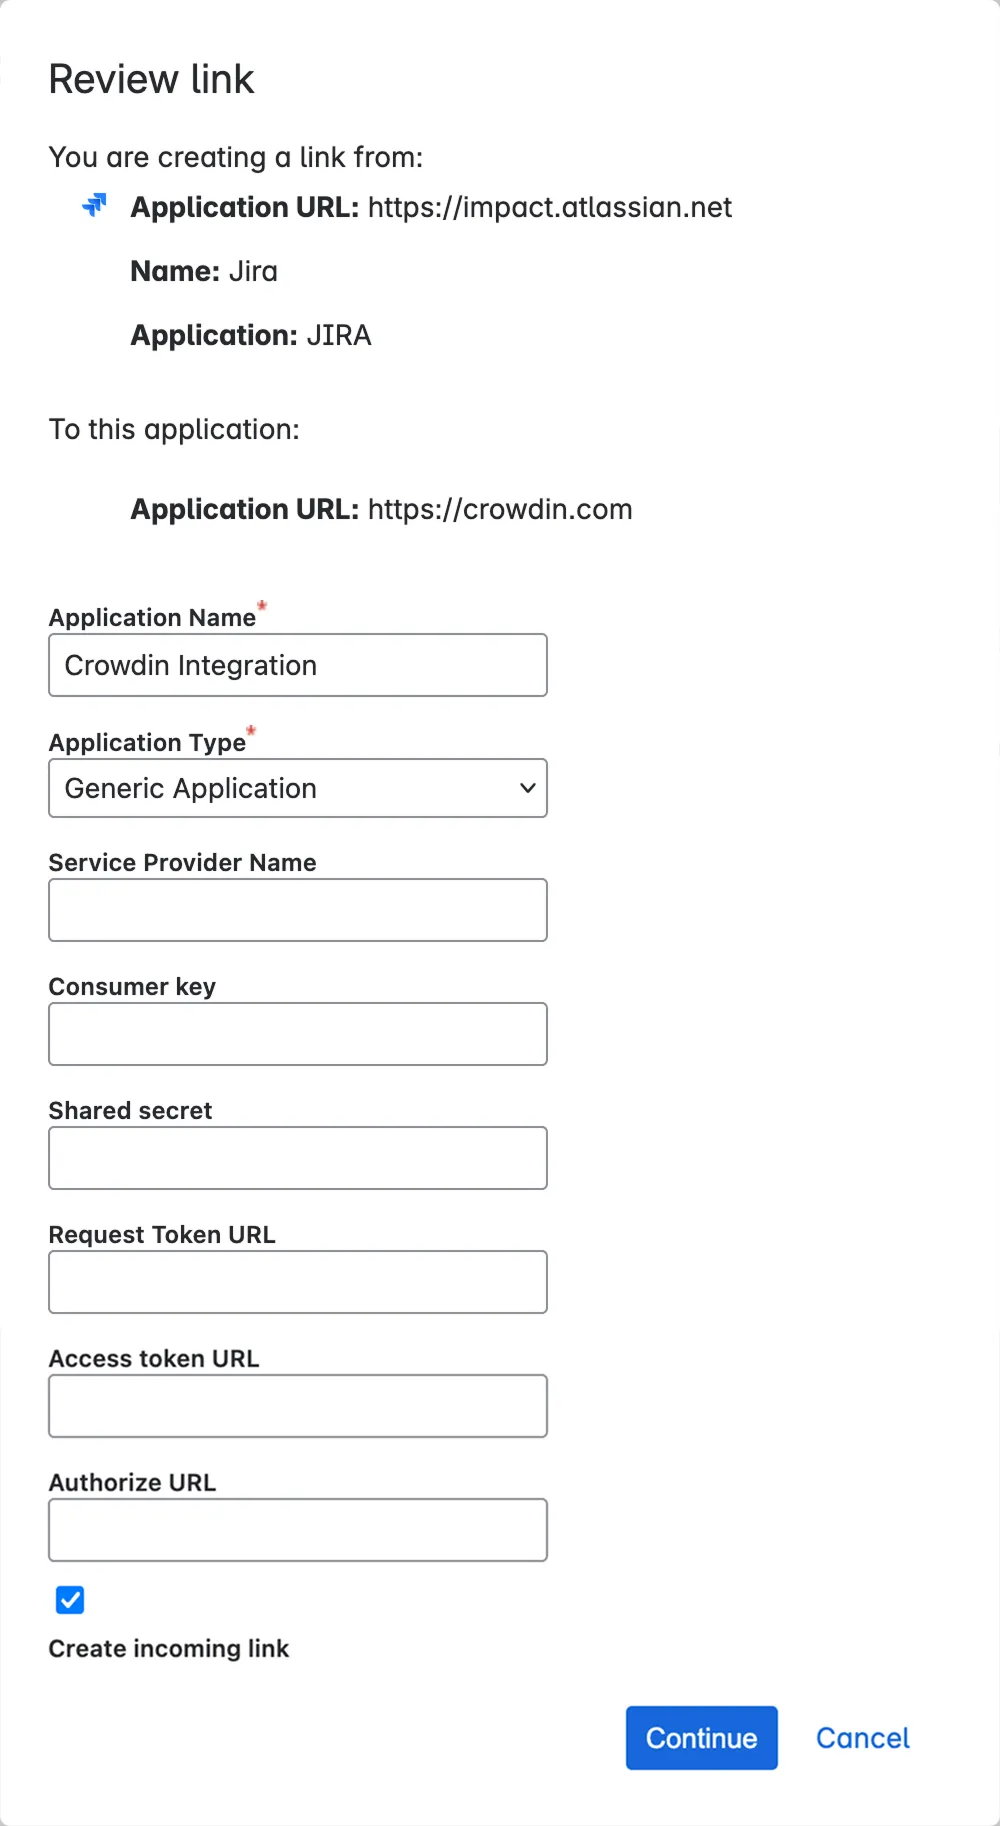
- 在对话框窗口中填写所有必填字段,然后单击 继续 以完成链接配置:
- 应用程序名称:Crowdin Integration
- 应用程序类型:通用应用程序(Generic Application)
- 选择 创建传入链接 并单击 继续
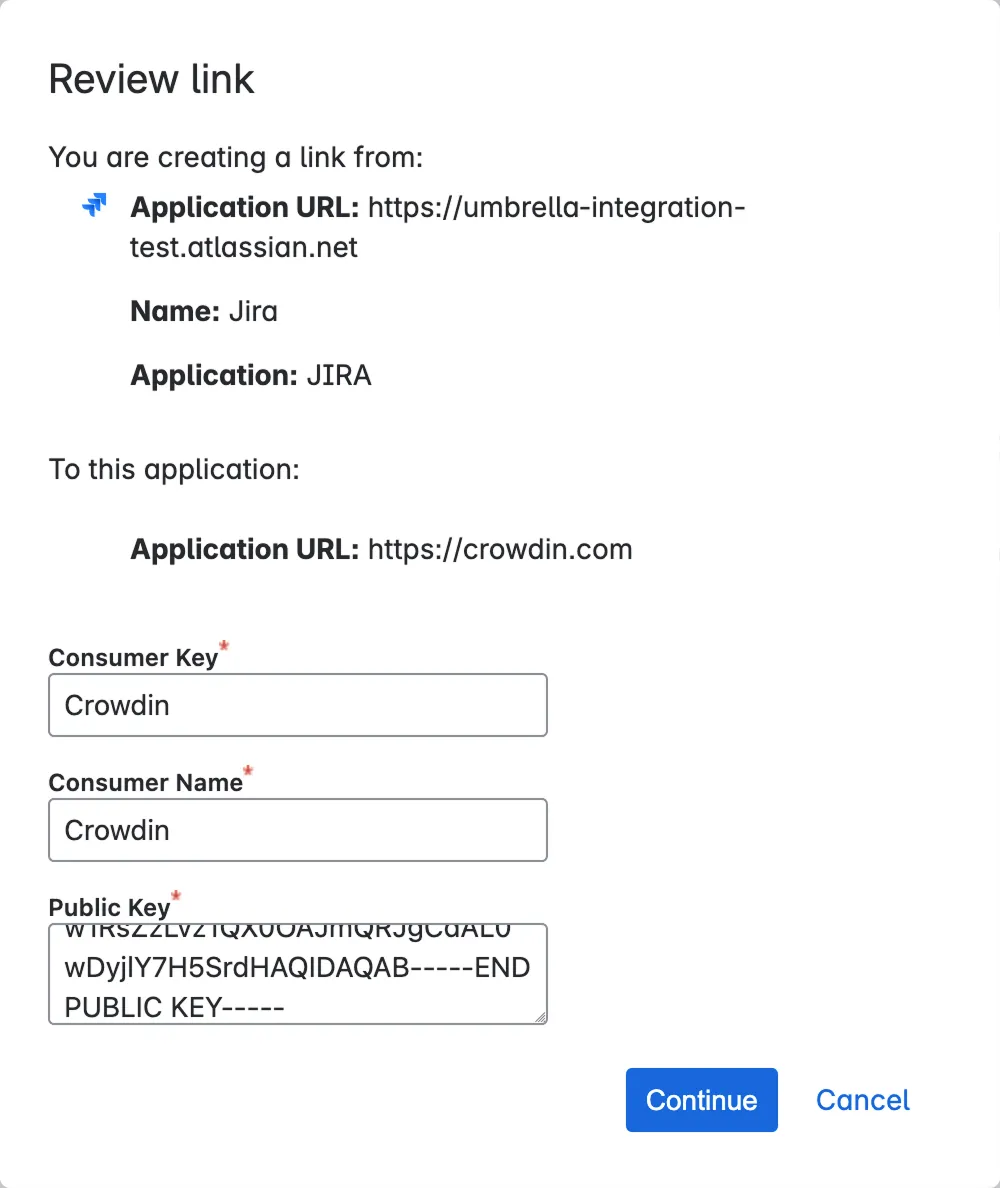
- 消费者密钥:Crowdin
- 消费者名称:Crowdin
- 公钥:从 Crowdin 中的 提供对 Jira 项目的访问权限 对话框中复制
 单击 继续 以完成应用程序链接设置。
-
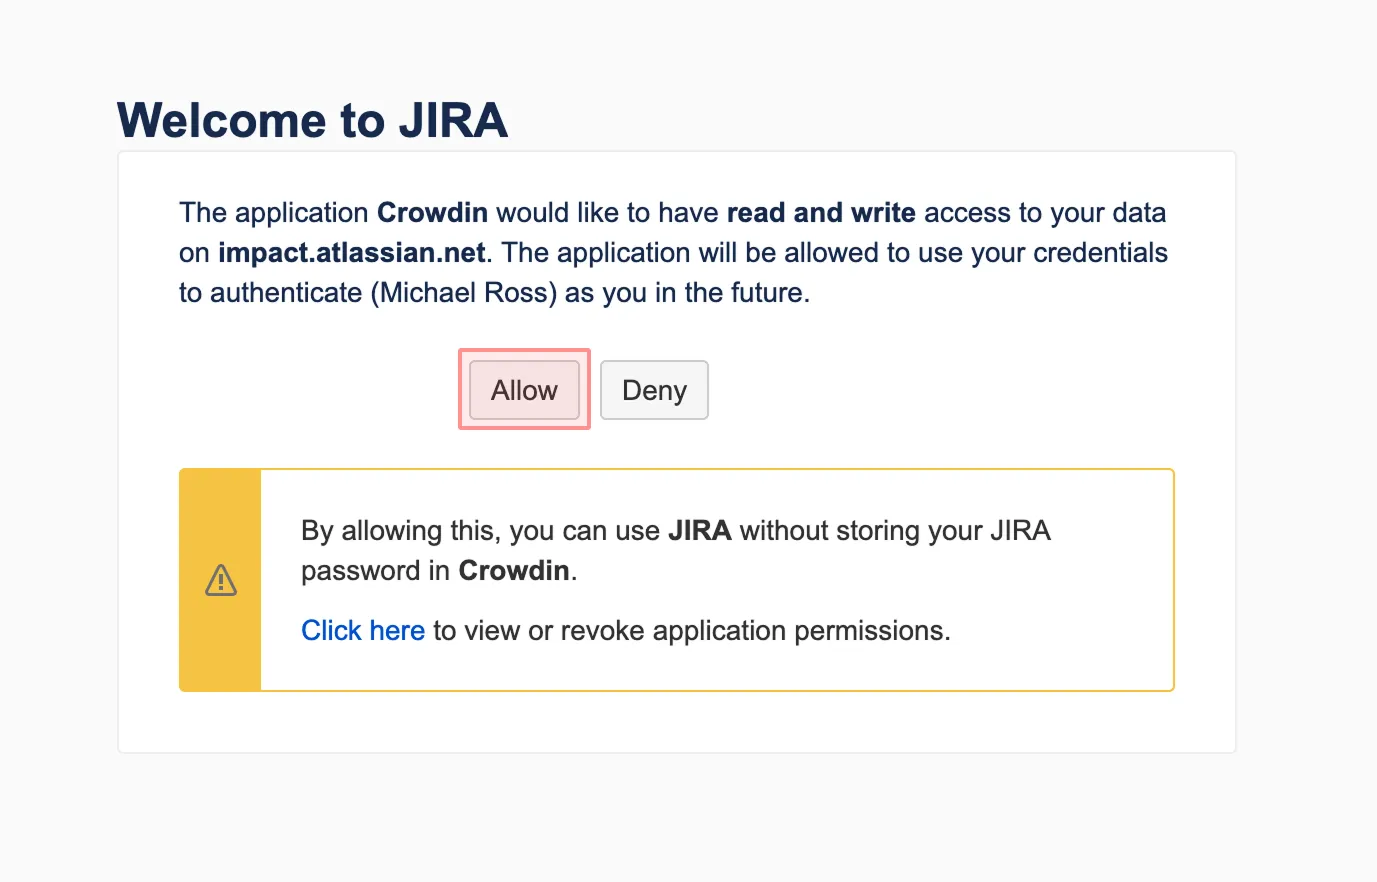
返回到 Crowdin,然后单击 提供对 Jira 项目的访问权限 对话框中的 下一步。
-
允许对 Jira 中的项目数据进行读写访问。 Crowdin 将使用此访问权限来帮助集成正确运行。
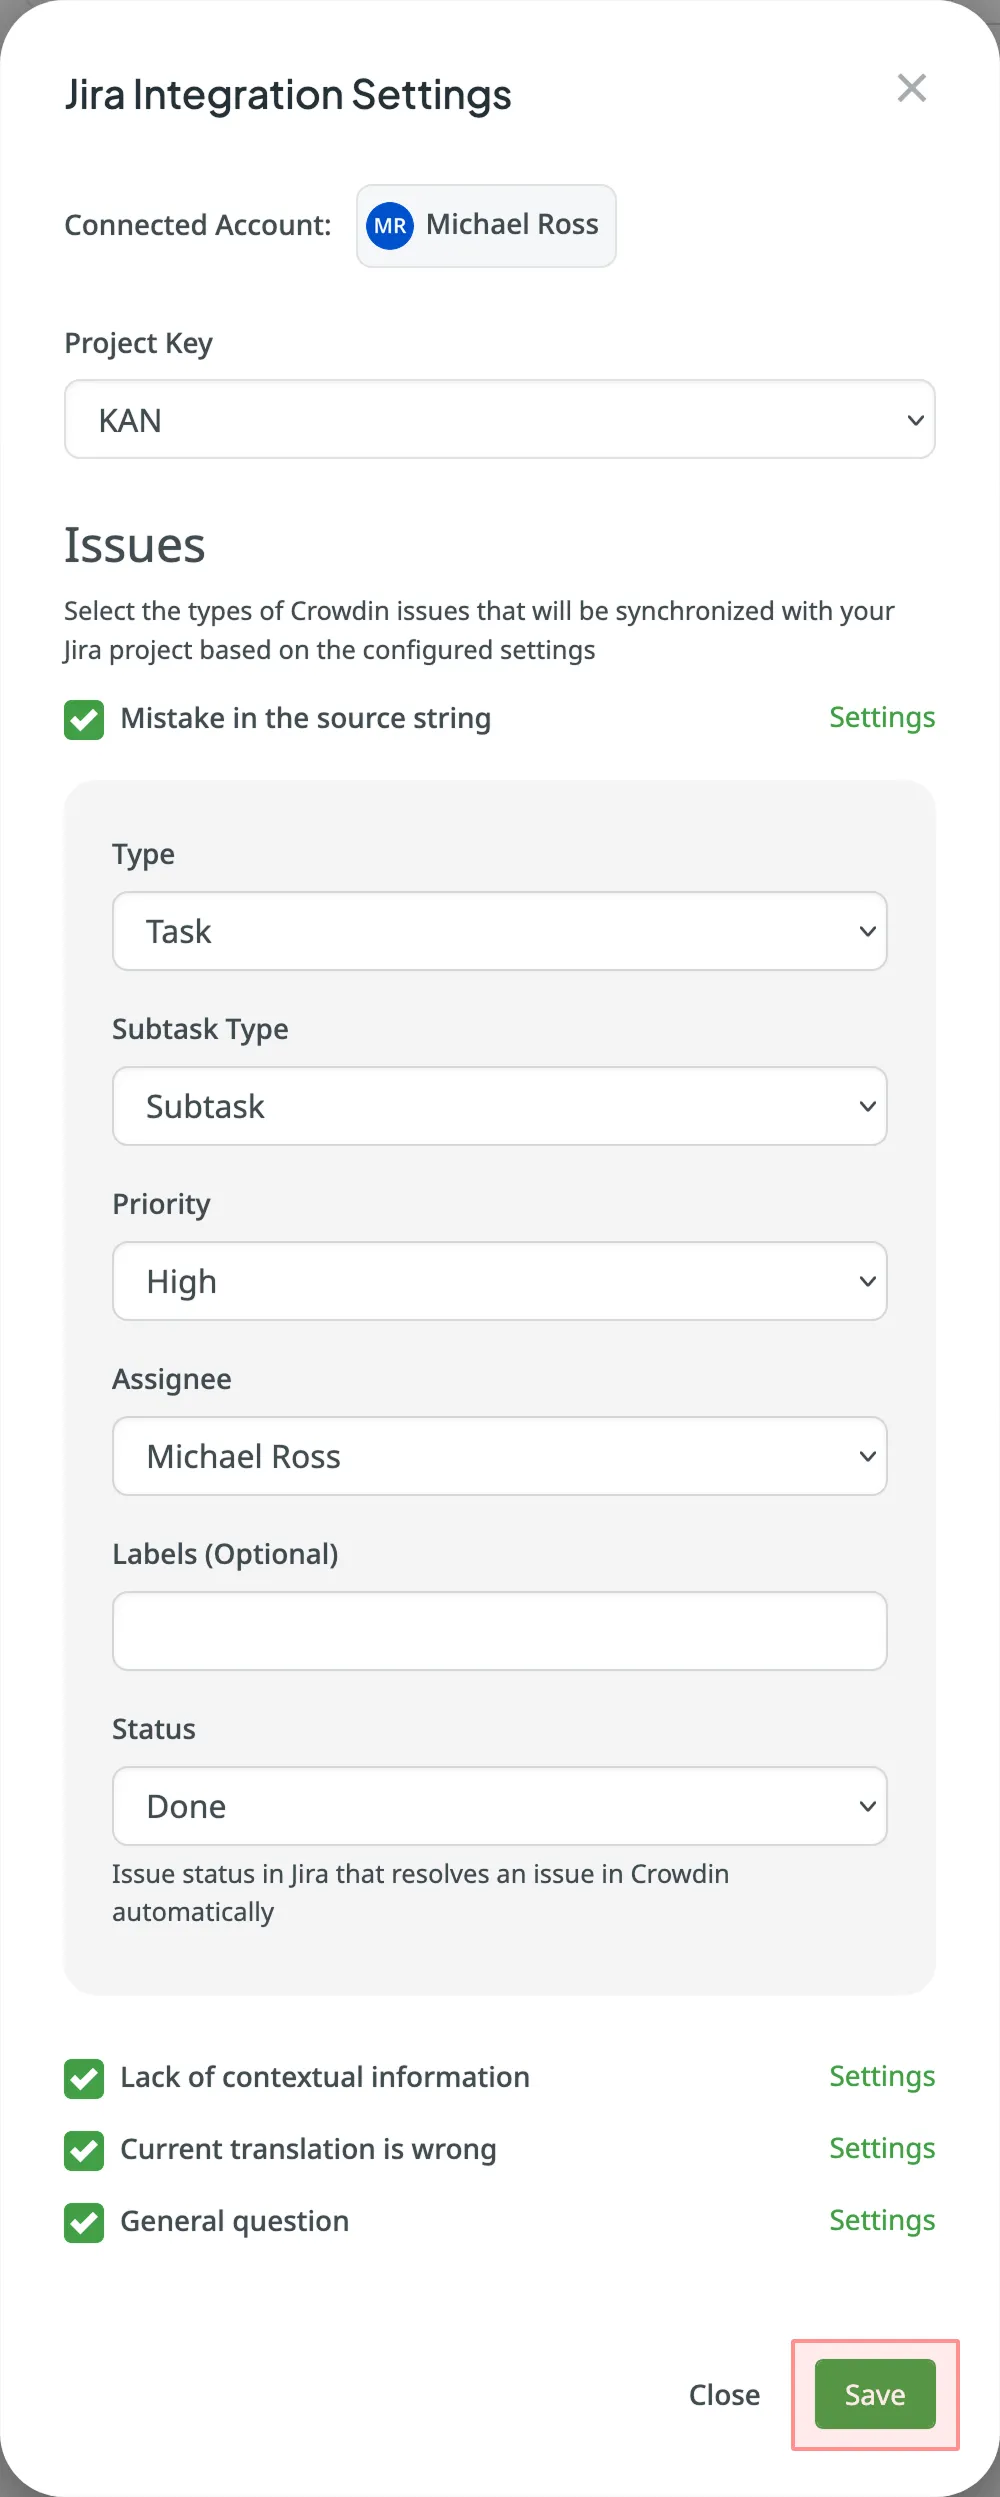
-
选择 Jira 项目密钥,选择类型,并配置您想要与 Jira 项目同步的 Crowdin 问题的设置。 可用的 Jira 问题设置包括:
- 类型
- 子任务类型
- 优先级
- 受托人
- 标记(可选)
- 状态 – 用于选择将触发 Crowdin 项目中相关字符串问题关闭的 Jira 状态值。
-
点击保存。
一旦设置了集成,您就可以同步 Crowdin 中已经存在的问题(如果有的话)。 一条简短的消息会告诉您有多少问题尚未同步。 要同步它们,请单击 同步问题。
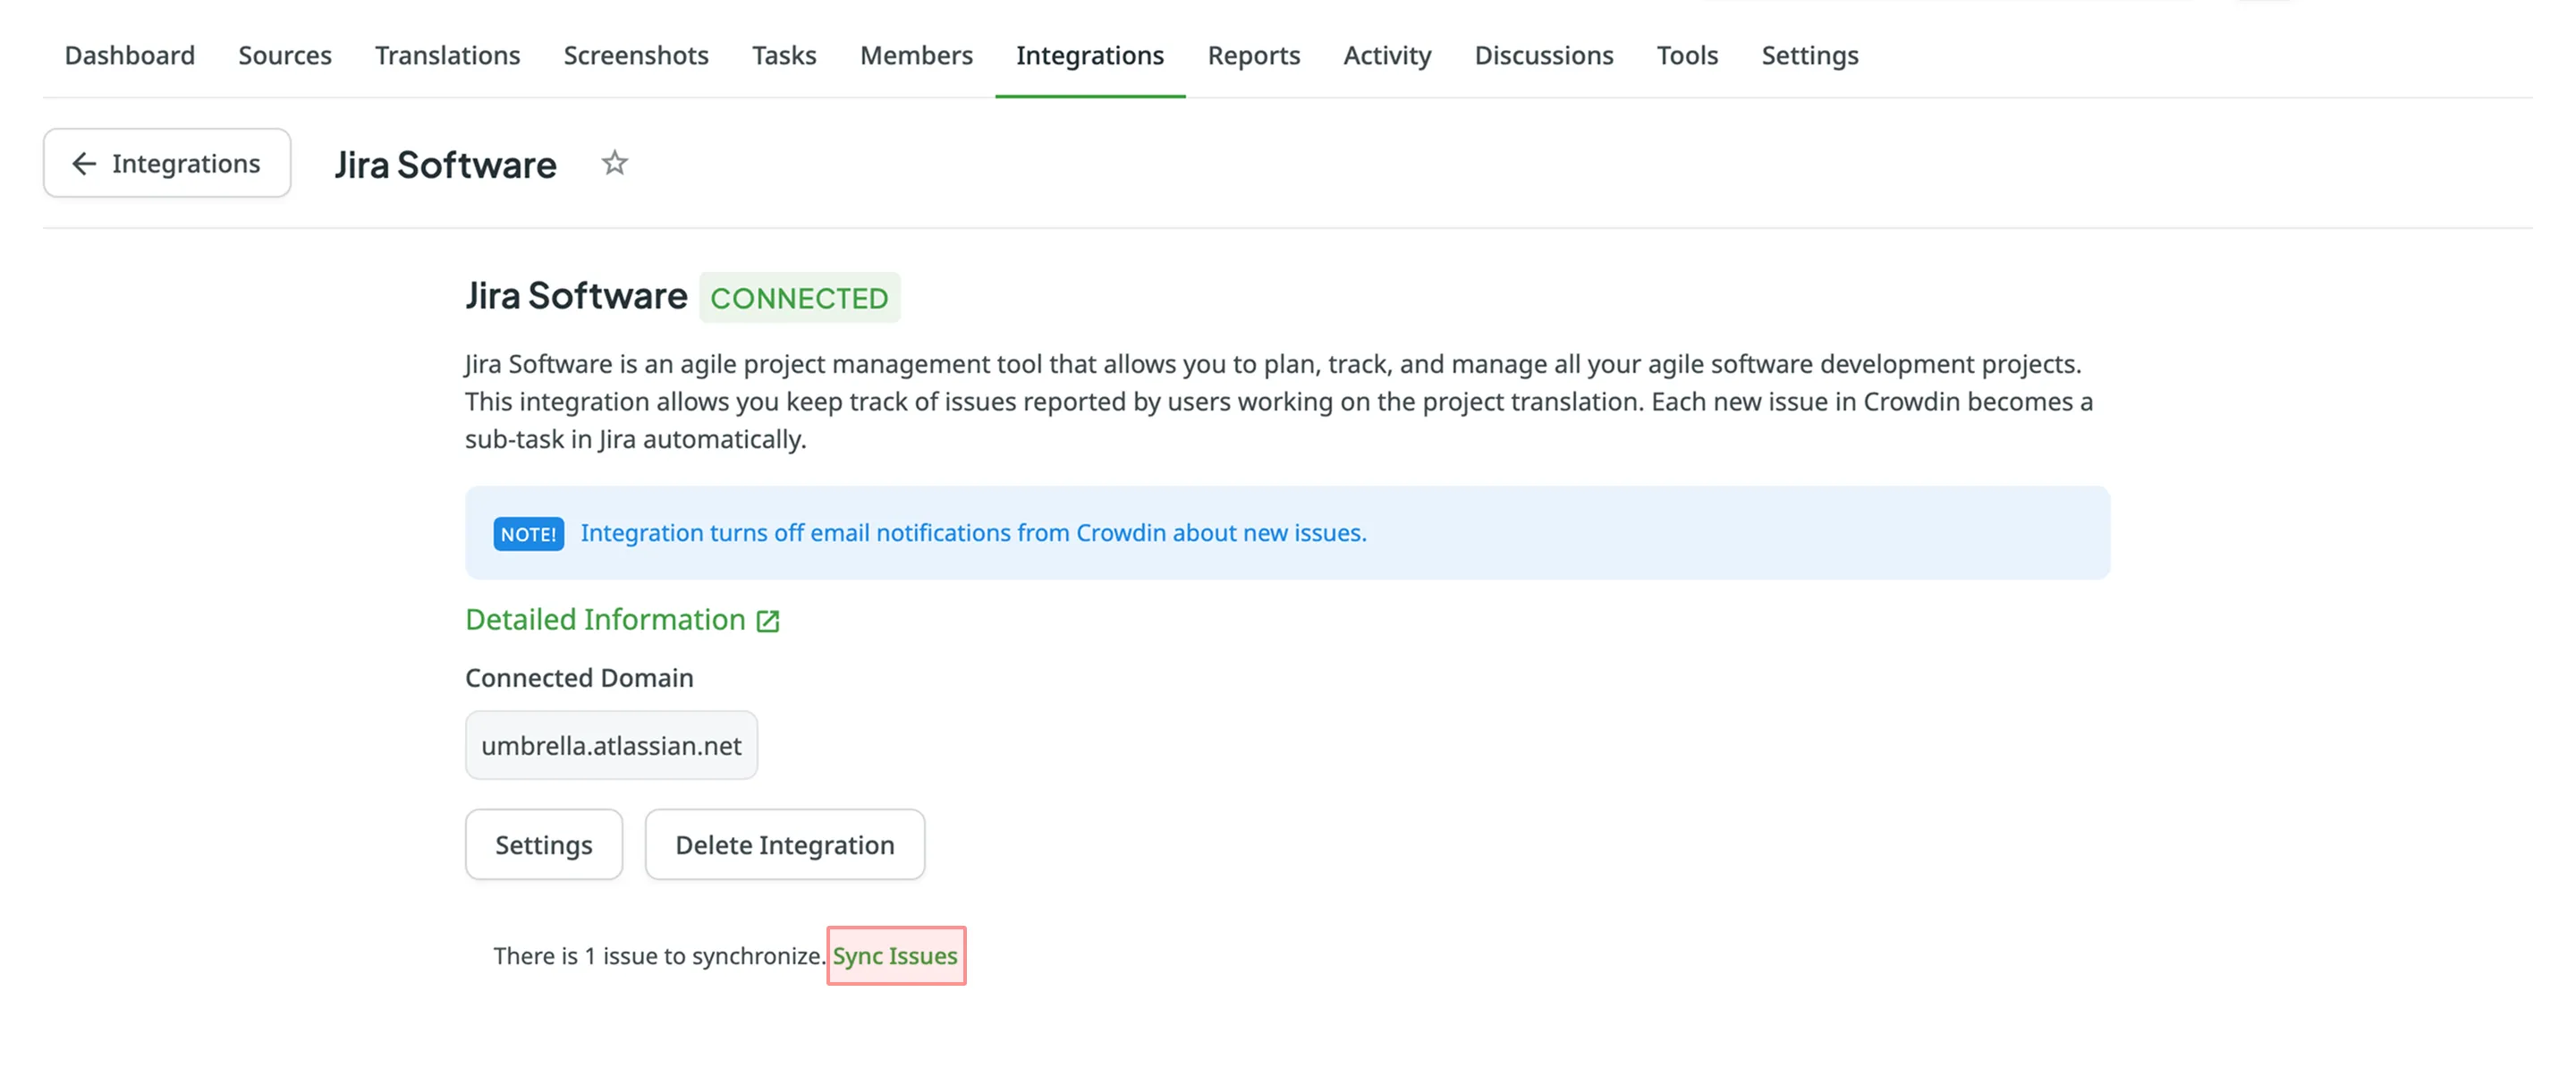
要更改集成设置,请单击 设置 并应用必要的更改。 更新的设置将仅应用于新同步的问题。 先前同步的所有问题将不会有任何变化。
若要删除集成,请单击 删除集成。