Bitbucket 集成
Bitbucket 集成允许您在 Bitbucket 存储库和 Crowdin 项目之间同步文件。
在基于文件的项目中,有两种可能的 Bitbucket 集成模式可供选择:
- 源文件和翻译文件模式 – 在您的 Bitbucket 存储库和 Crowdin 项目之间同步源文件和翻译文件。
- 目标文件包模式 – 根据您选择的格式,从 Crowdin 项目生成并推送到您的 Bitbucket 仓库的翻译文件。 在此模式下,集成会推送翻译文件,但不会同步仓库中的源。 如果您在 Crowdin 项目中执行源文本审阅并希望将更新的源文本添加到您的仓库中,您可以将源语言添加为目标语言,该语言将与翻译一起推送到您的仓库中。
在基于字符串的项目中,Bitbucket 集成仅限于目标文件包模式运作。
详细了解项目类型。
所有已翻译和已批准的文件(或目标文件包)将自动合并到 Bitbucket 存储库的 l10n 分支中。
- 打开您的项目并前往 集成 选项卡。
- 在集成列表中单击 Bitbucket。
- 点击设置集成,然后从下拉列表中选择源文件和翻译文件模式或目标文件包模式,以通过您的 Bitbucket 账户进行集成。

- 然后在 Bitbucket 端授权与 Crowdin 的连接:

如果您需要的仓库是私有的,且您对其访问权限有限或没有访问权限,请联系仓库所有者为您提供访问令牌。 所需的权限范围如下:pullrequest:write、repository:write、webhook。 之后,在使用个人访问令牌(可选)部分,将您的工作区名称填入工作区字段,将令牌填入令牌字段,然后单击设置集成。
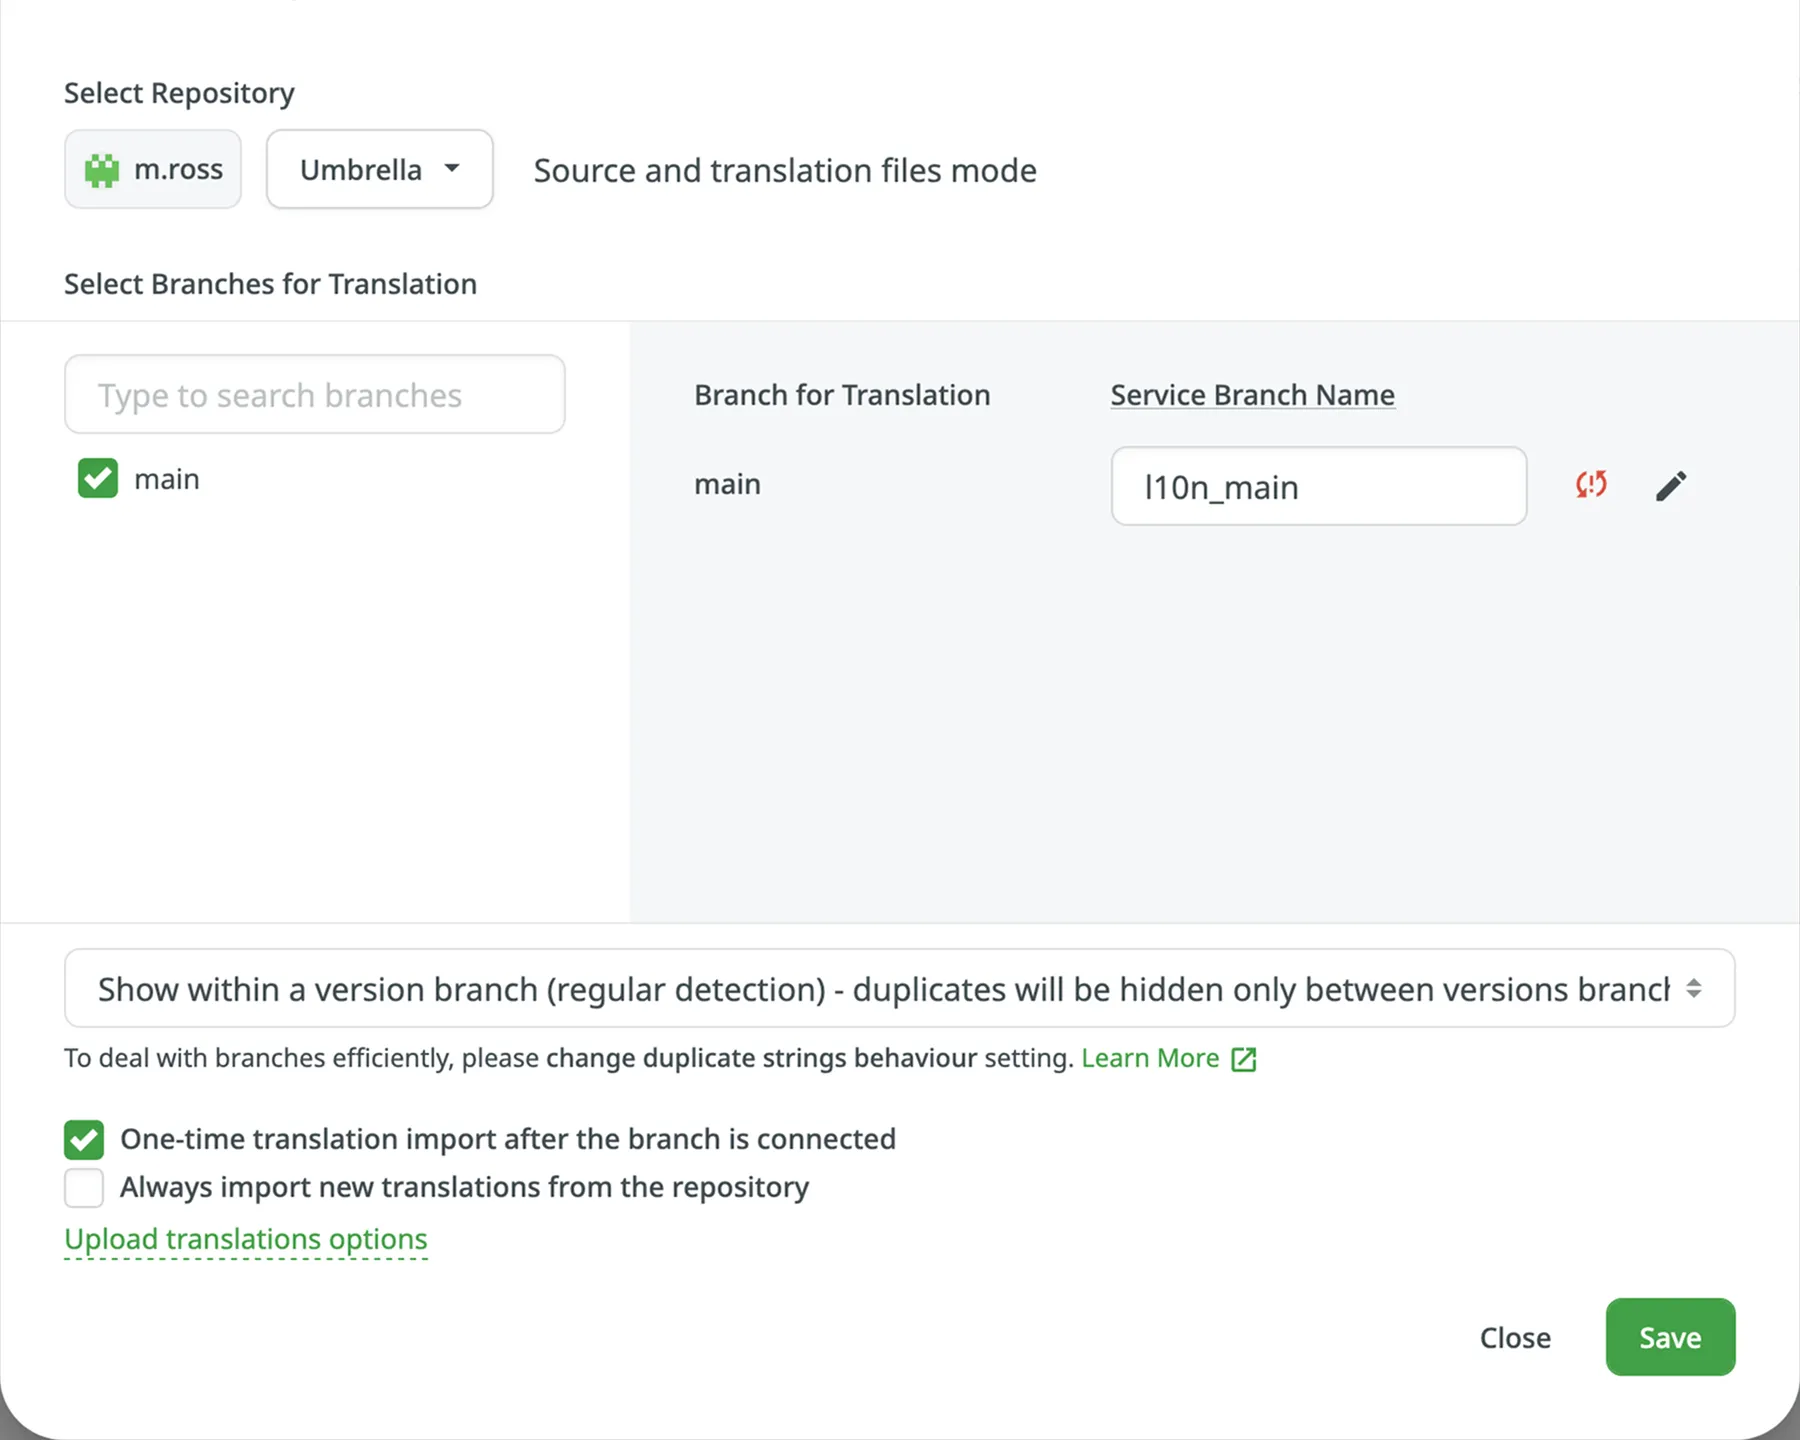
在出现的对话框中,选择您的仓库和需要翻译的分支。
建议将重复字符串切换为在版本分支内显示,这样相同的字符串将被隐藏在分支之间。 如果您的源文件包含具有明显标识符(键)的字符串,最好使用此选项的严格版本。 在其他情况下,请随意使用常规版本。
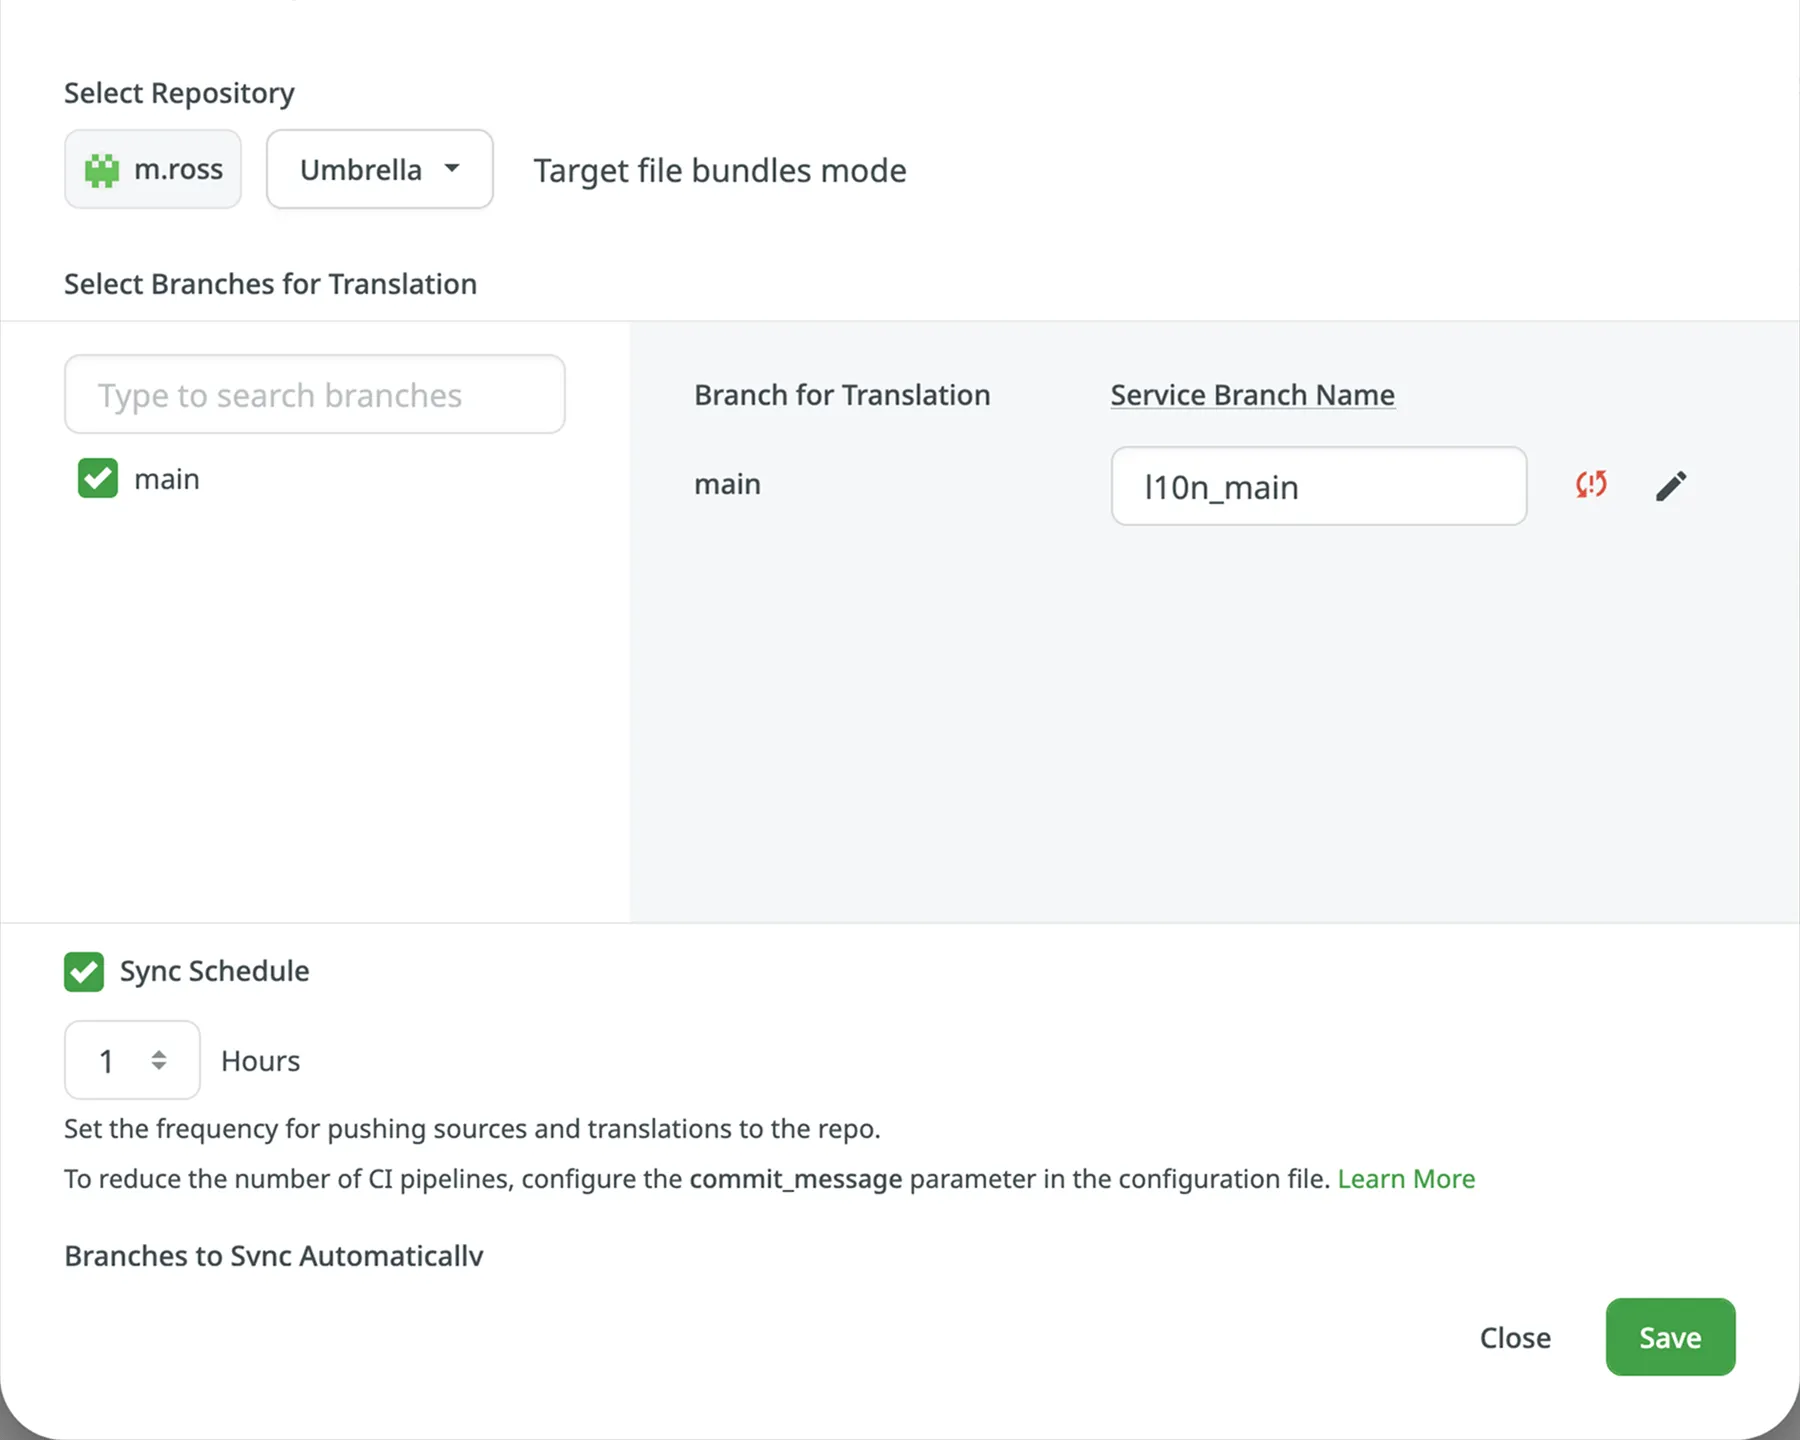
在目标文件包模式下使用 Bitbucket 集成时,集成将从您的 Crowdin 项目发送已完成的翻译,而无需从您的存储库中提取源文件。 因此,在选择应翻译的仓库和分支时,您可以指定集成应将生成的带有翻译的包放在何处。
详细了解为 VCS 集成配置目标文件包。
当您使用私有集成(例如,与自托管 VCS 集成)时,您需要将专用的 Crowdin IP 地址添加到白名单中,以确保其正常运行并保持安全。
详细了解 IP 地址。
当翻译完成并且您的语言准备好上线时,Crowdin 会将附有译文的拉取请求发送到您的版本控制系统。 对于每个正在本地化的分支,Crowdin 会创建一个包含译文的附加服务分支。 我们不会直接提交到主分支,以便您可以先验证译文。
默认情况下,l10n_ 会添加到所创建的服务分支名称中。 如有必要,可以轻松更改它。
根据您的需求和偏好配置同步设置。
要从仓库导入现有翻译,请选择以下选项之一:
- 分支连接后一次性导入译文
- 始终从仓库导入新译文
默认情况下,选择第一个选项仅导入翻译一次。 或者,如果您不想从仓库导入翻译,则可以清除这两个选项。
单击上传译文选项以访问以下附加选项:
- 允许目标译文与源文件相同
- 审批已添加的译文
默认情况下,源文件不会随译文一起推送到仓库。 不过,如果您在 Crowdin 项目中执行源文本审查,并希望将对 Crowdin 上的源文件所做的更改推送回您的仓库,请单击编辑,在集成设置中选择推送源文件,然后单击保存。
同步每小时自动进行一次。 如有必要,您可以在集成设置中更改更新间隔。 要配置同步计划,请单击编辑,向下滚动到同步计划,设置首选间隔,然后单击保存。
在某些情况下,有必要暂时禁止将译文推送到仓库。 在这种情况下,单击编辑,清除集成设置中的同步计划,然后单击保存。 准备好将译文与仓库同步时,选择同步计划,然后单击保存。
不依赖于同步设置,仓库上的源文件的更改仍将与 Crowdin 持续同步。
设置集成时,您可以选择要添加到 Crowdin 项目的现有仓库分支。 要将未来的分支从 Bitbucket 自动添加到 Crowdin,请在集成设置中为分支名称创建一个模式。
例如,您在 Bitbucket 集成设置中添加**功能*模式。 在这种情况下,标题末尾包含该词的未来分支将被添加到项目中。
要添加分支名称的模式,请按照以下步骤操作:
- 在 Bitbucket 集成部分单击 编辑。
- 在出现的对话框中,向下滚动到要自动同步的分支。
- 在要自动同步的分支字段中,使用通配符选择器(例如
*、?、[set]、\等)来标识必要的分支。 - 点击保存。
crowdin.yml 是用于自动同步分支的默认文件名。 要更改默认设置,请单击编辑,在集成设置的默认配置文件名字段中指定首选名称,然后单击保存。
如果您没有为自动同步的分支指定自定义配置文件名,并且集成在分支的根目录中找不到默认名称为 crowdin.yml 的配置文件,则这些分支将在集成设置中用红色图标标记,并带有感叹号,显示“未准备好。 检查配置”。
要使集成正常工作,您需要指定应翻译哪些源文件以及 Crowdin 应如何在您的仓库中构建翻译文件。 要使集成在目标文件包模式下正常工作,您需要选择要推送到存储库的所需包。
有两种方式可以指定要同步的内容:
- 在线配置
- 通过创建配置文件手动配置
此过程对所有版本控制系统 (VCS) 集成都相同。
查看在线配置 VCS 集成,了解如何在线选择同步内容。
为了让 Crowdin 知道需要翻译哪些文件,配置文件 crowdin.yml 需要与您想要翻译的每个单独分支一起存储在 Bitbucket 仓库中。
它应该具有与 CLI 所需的相同结构,但出于安全原因,项目的凭据不应存储在文件头中。
详细了解创建配置文件。
如果您正在使用具有适用于不同操作系统版本的多平台产品,则可能需要连接包含每个操作系统源文件的多个仓库。 在这种情况下,本地化资源(例如翻译记忆库、术语库)和译文可以得到更有效的利用,从而减少项目本地化所需的时间。
要添加另一个仓库,请按照以下步骤操作:
- 打开您的项目并前往 集成 选项卡。
- 在集成列表中单击 Bitbucket。
- 单击添加仓库。
- 根据您的需求和偏好配置与新仓库的集成。
设置集成后,所有相关信息都存储在集成 > Bitbucket 中。
集成连接后,只有配置集成的项目成员才能更新设置。 除配置集成的人员外,所有项目管理员都将看到编辑按钮被禁用,并在鼠标悬停时显示以下消息:集成由 {Full Name} ({username}) 配置。
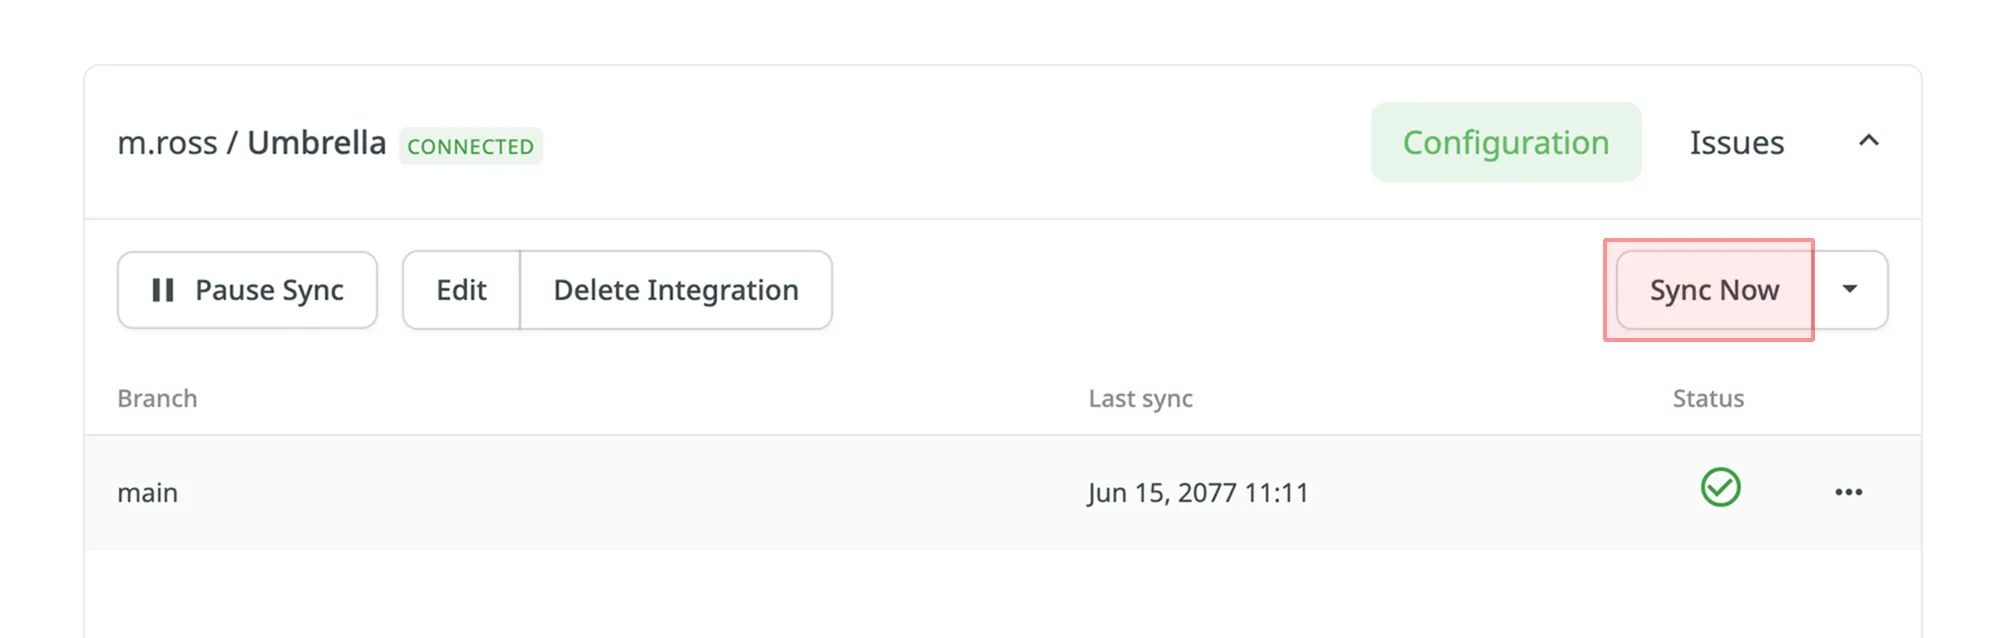
默认情况下,每小时自动进行一次同步。 如果您需要立即启动同步,请单击立即同步。
或者,如果您只需要单独同步一个分支,请单击所需分支上的 ,然后选择同步分支。
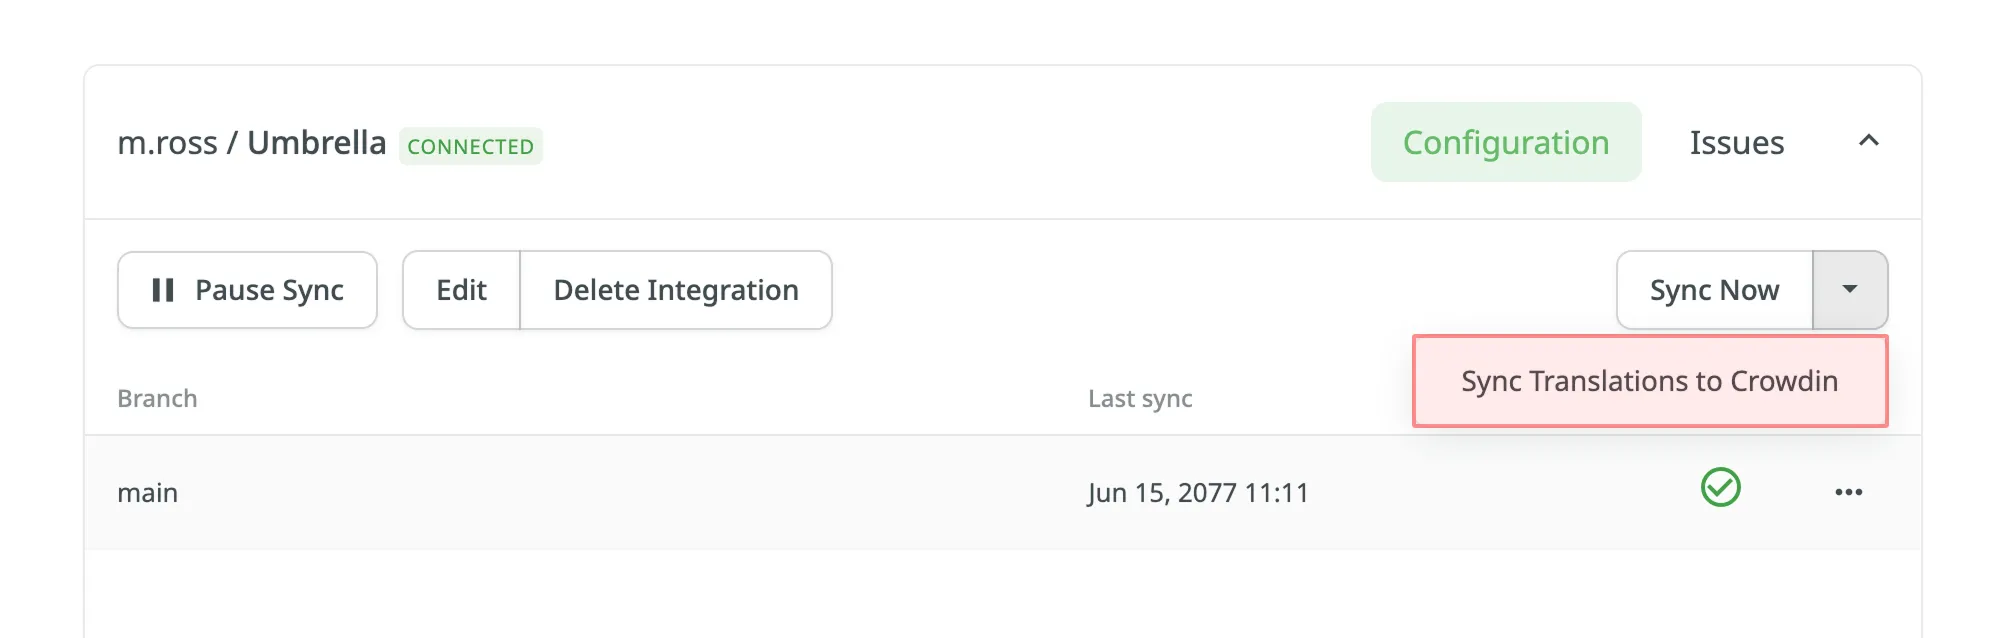
默认情况下,存储在 仓库中的译文仅在第一次同步期间上传到 Crowdin。 要手动将译文上传到 Crowdin,请单击立即同步按钮上的下拉切换按钮,然后单击将译文同步到 Crowdin。 该集成会将现有译文上传至您的 Crowdin 项目。