Bitbucket Integration (String-based)
The Bitbucket integration allows you to synchronize translations from your Crowdin project to Bitbucket repo.
Note: You will need to install the Bitbucket integration in your Crowdin account before you can set it up and use it.
In string-based projects, Bitbucket integration exclusively operates in the Target file bundles mode.
Target file bundles mode – generate and push translation files to your Bitbucket repository from the Crowdin project in the selected format. In this mode, integration pushes translation files and doesn’t sync sources from your repo. In this mode, integration pushes translation files and doesn’t sync sources from your repo.
All completed translations are collected into bundles and automatically pushed as a merge request to the l10n branch in the Bitbucket repository.
Connecting Bitbucket Account
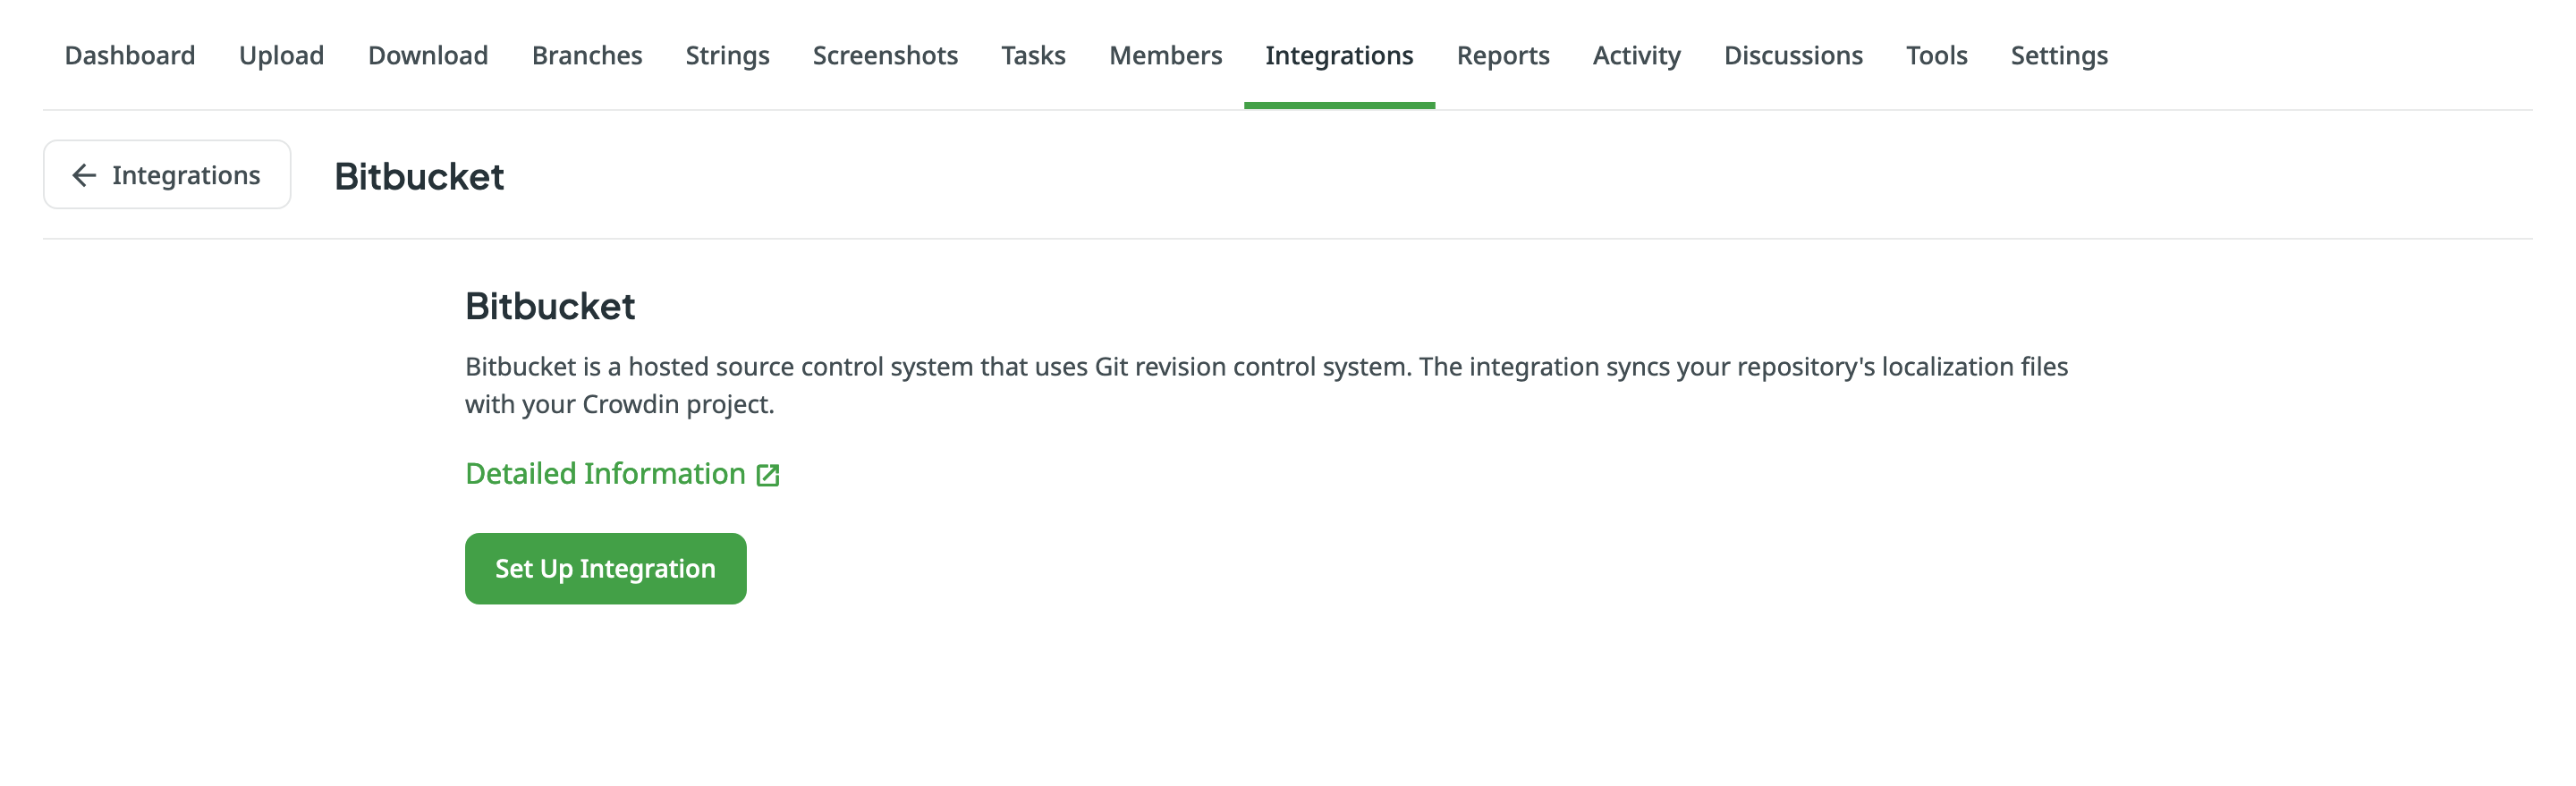
- Open your project and go to the Integrations tab.
- Click on Bitbucket in the Integrations list.
- Click Set Up Integration to integrate via your Bitbucket account.
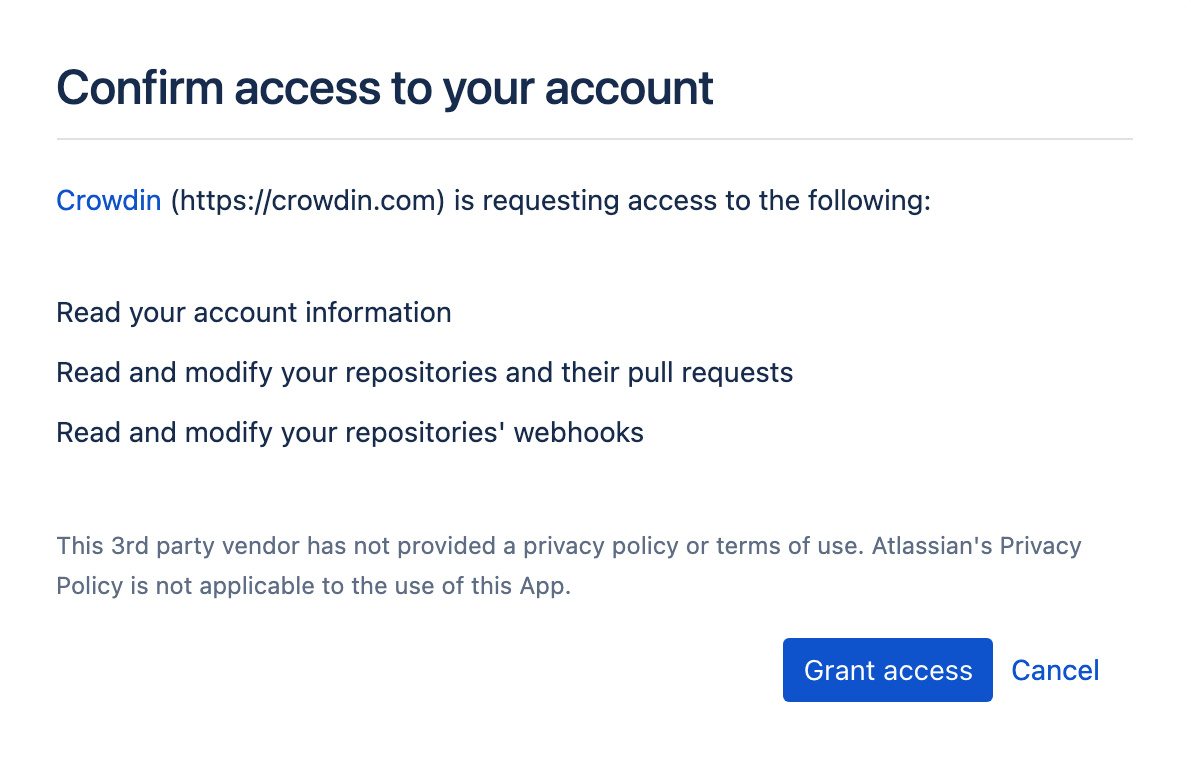
- Then authorize the connection with Crowdin on the Bitbucket side:
Selecting Repository
In the appeared dialog, select your repository and branches that should be translated.
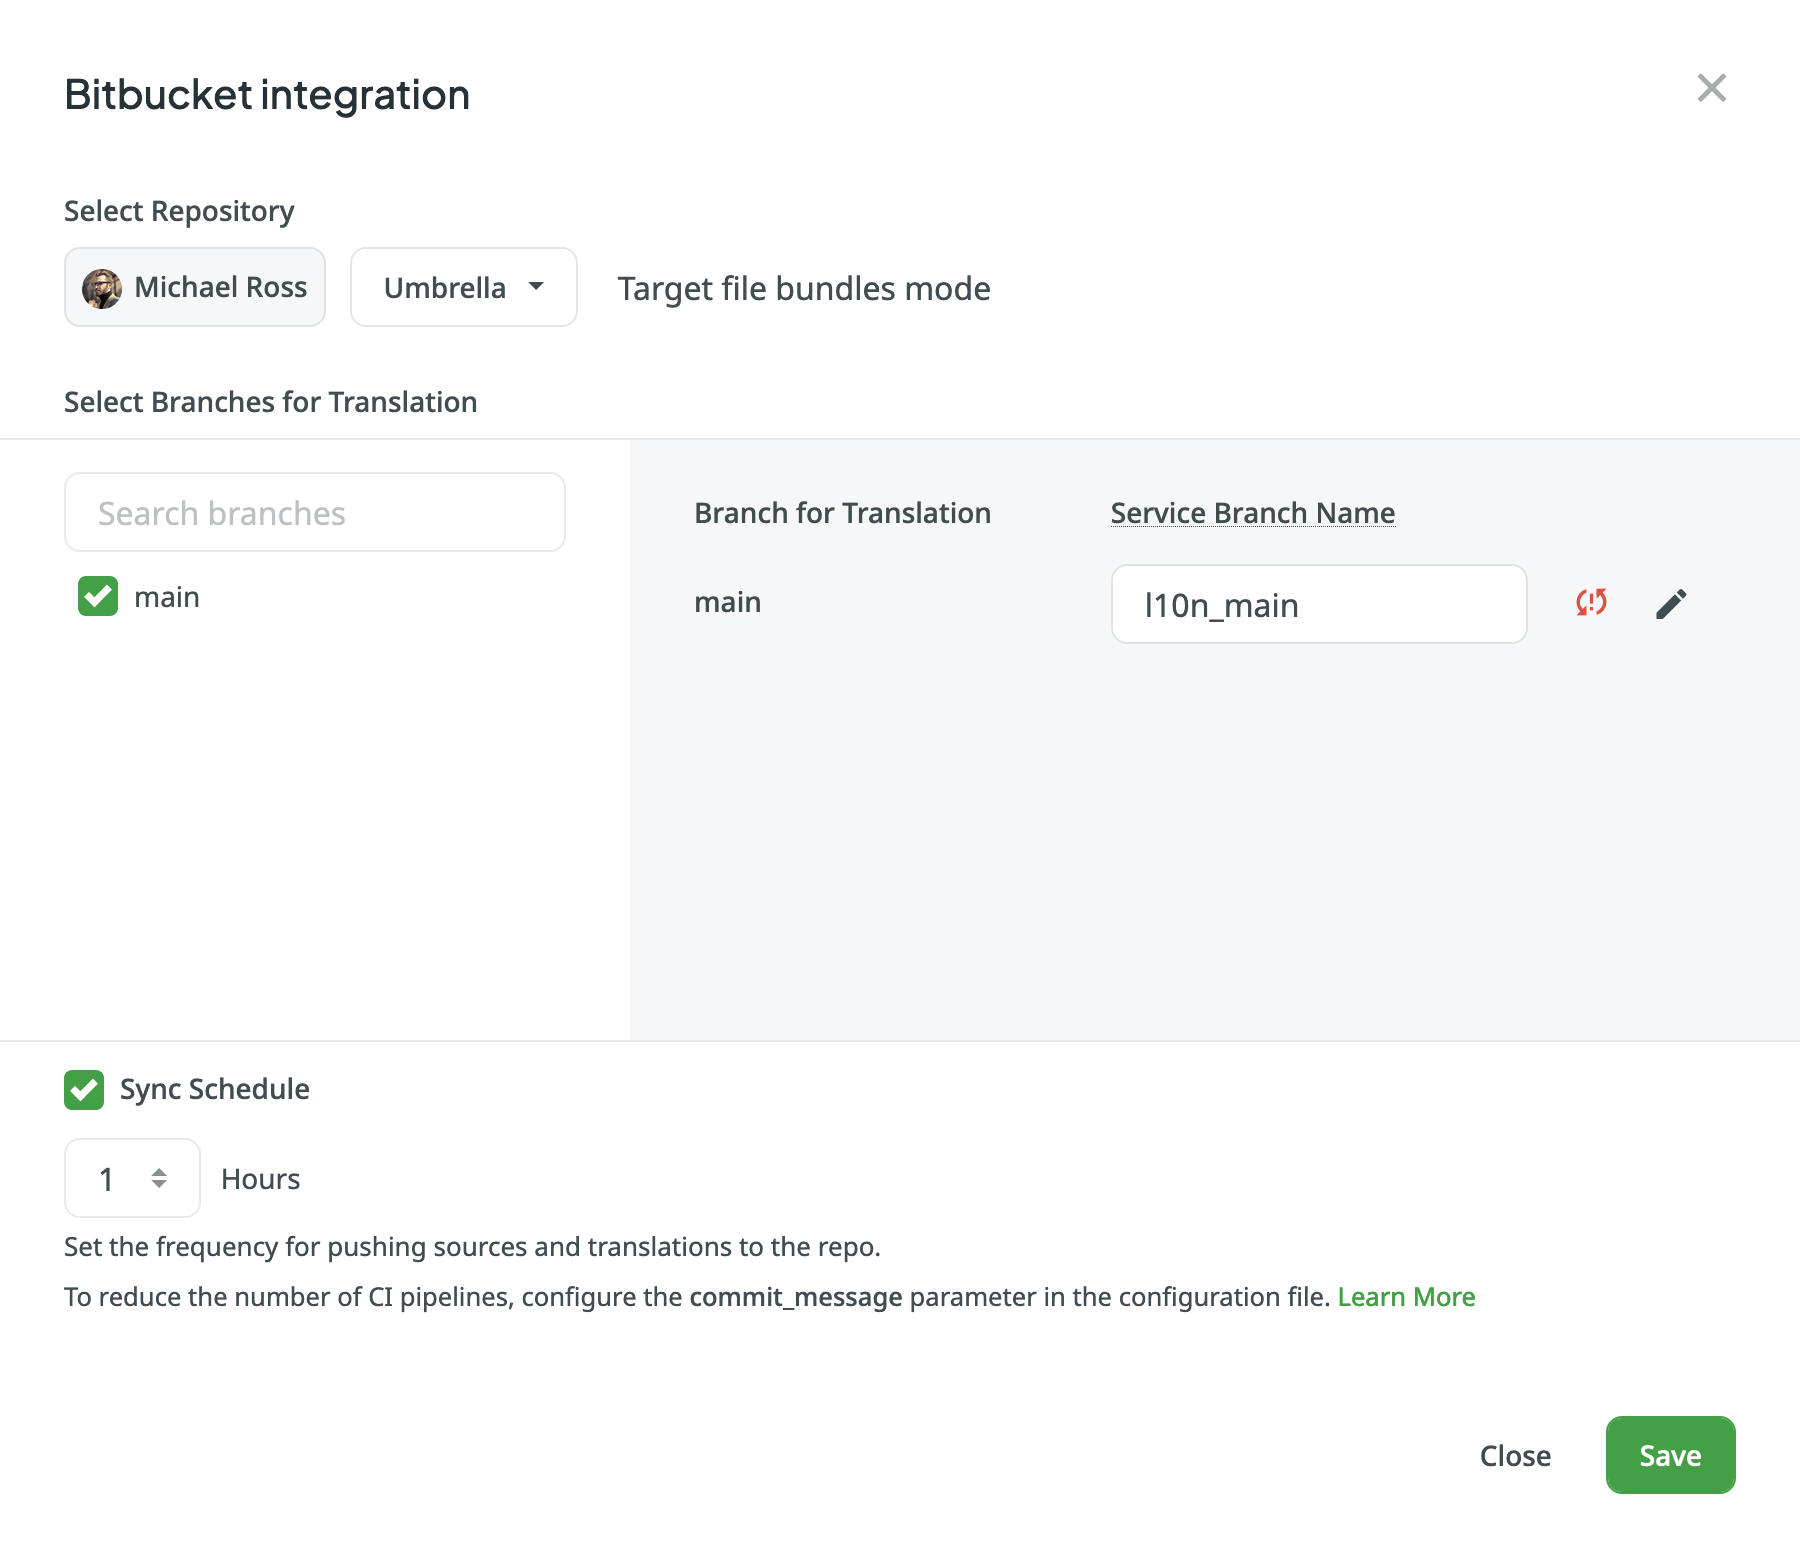
Bitbucket integration in the Target File Bundles Mode will send the completed translations from your Crowdin project without pulling sources from your repo. So when selecting a repository and branches that should be translated, you specify where the integration should put the generated bundles with translations.
Read more about configuring target file bundles for VCS integration.
When you work with private integrations (e.g., integrations with self-hosted VCS), you need to add dedicated Crowdin IP addresses to the allowlist to ensure that it operates properly while staying secure.
Read more about IP Addresses.
Ramos de Serviço
When translations are finished and your languages are ready to go live, Crowdin sends the pull request with translations to your version control system. For every branch that is under localization, Crowdin creates an additional service branch with translations. We don’t commit directly to the master branch so that you can verify translations first.
By default, _l10n__ is added to the created service branch name. If necessary, you can easily change it.
Definições de sincronização
There are cases when it’s necessary to disable translations from being pushed to the repo temporarily. In this situation, click Edit, clear Sync Schedule in the integration settings, and click Save. When ready to sync translations with the repo, select the Sync Schedule, and click Save.
The synchronization is processed every hour automatically. If necessary, you can change the update interval in the integration settings. To configure the synchronization schedule – click Edit, scroll down to the Sync Schedule, set the preferred interval, and click Save.

Branches to Sync Automatically
When you set up the integration, you select existing repository branches to be added to the Crowdin project. To add future branches from Bitbucket to Crowdin automatically, create a pattern for the branch names in the integration settings.
For example, you add a pattern *feature in the Bitbucket integration settings. In this case, the future branches that contain this word at the end of the title will be added to the project.
To add a pattern for branch names, follow these steps:
- Click Edit in the Bitbucket integration section.
- In the appeared dialog, scroll down to the Branches to Sync Automatically.
- In the Branches to Sync Automatically field, use wildcard selectors such as ‘*’, ‘?’, ‘[set]’, ‘' and others to identify the necessary branches.
- Click Save.
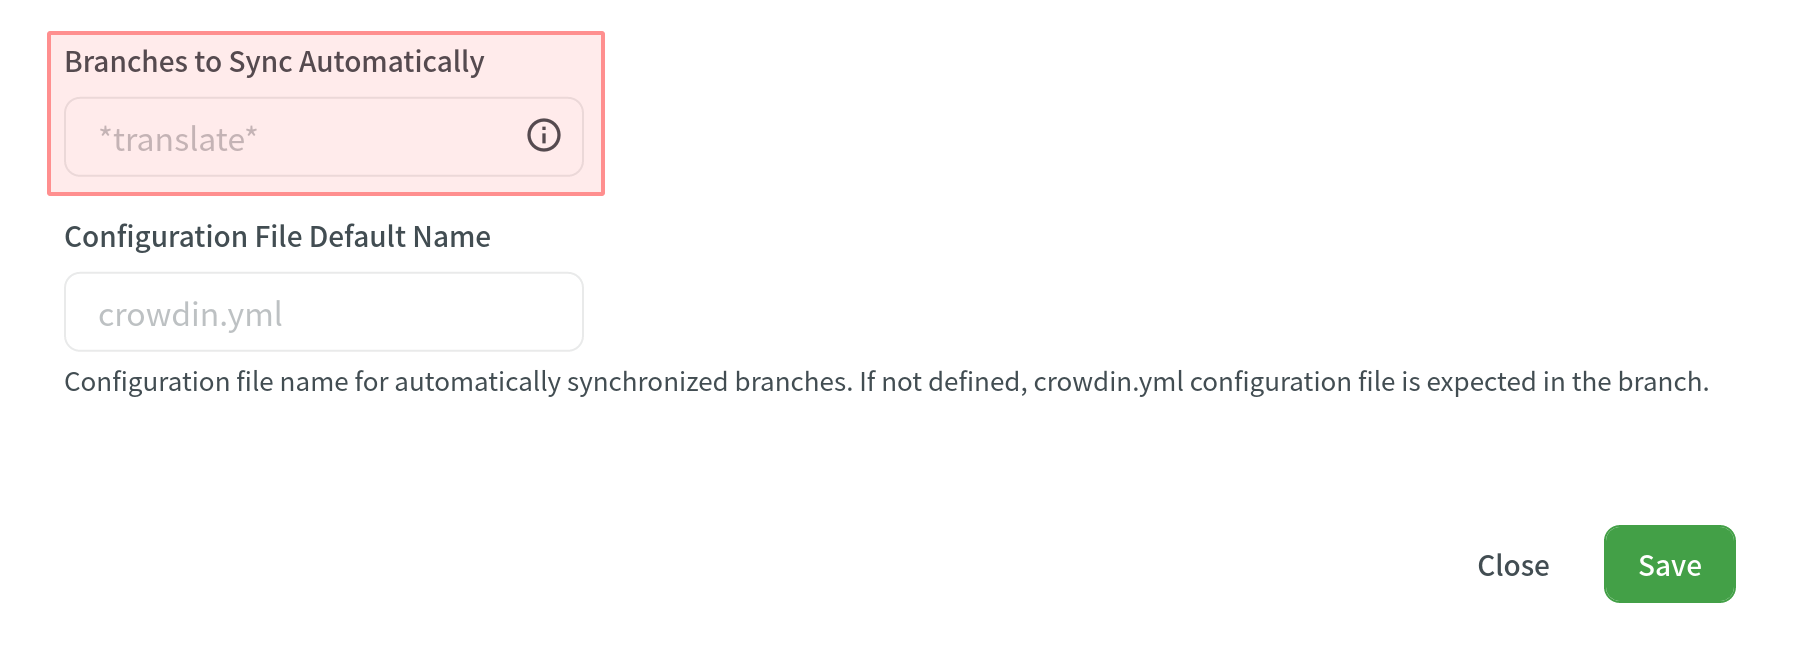
Default Configuration File Name
crowdin.yml is the default file name that is used for automatically synchronized branches. To change the default settings, click Edit, specify the preferred name in the Default configuration file name field in the integration settings, and click Save.
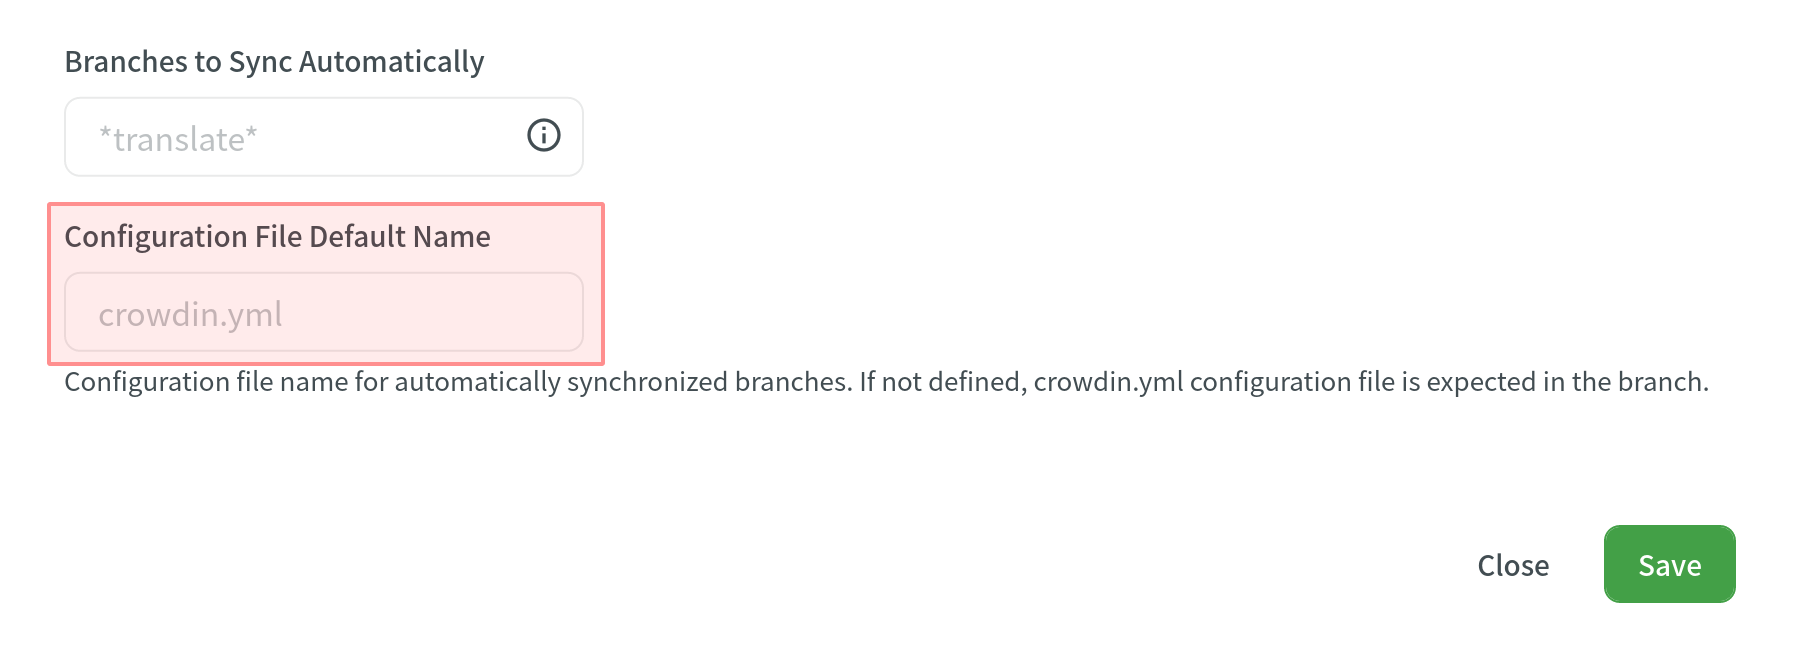
If you don’t specify your custom configuration file name for automatically synchronized branches, and the integration doesn’t find a configuration file with the default name crowdin.yml in the root of the branch, these branches will be marked in the integration settings with a red icon with an exclamation mark saying “Not Ready. Check the configuration”.
Selecionar Conteúdo para Sincronização
To make integration work in the Target file bundles mode, you need to select the required bundles that you want to push to your repository. If you see a red icon with an exclamation mark next to the service branch name, it means that you haven’t selected any content for synchronization.
There are two ways you can specify content for synchronization:
- Configuring online
- Configuring manually by creating a configuration file
Configuração Online
This procedure is the same for all integrations with version control systems (VCS). Read more about configuring target file bundles for VCS integration.
Criar Ficheiro de Configuração
Configuration file crowdin.yml should be stored in the Bitbucket repository along with each separate branch that you want to translate, so Crowdin knows what files exactly should be sent for translations.
It should have the same structure as required for CLI, but your project’s credentials should not be stored in the file’s header for security reasons.
Read more about creating a configuration file.
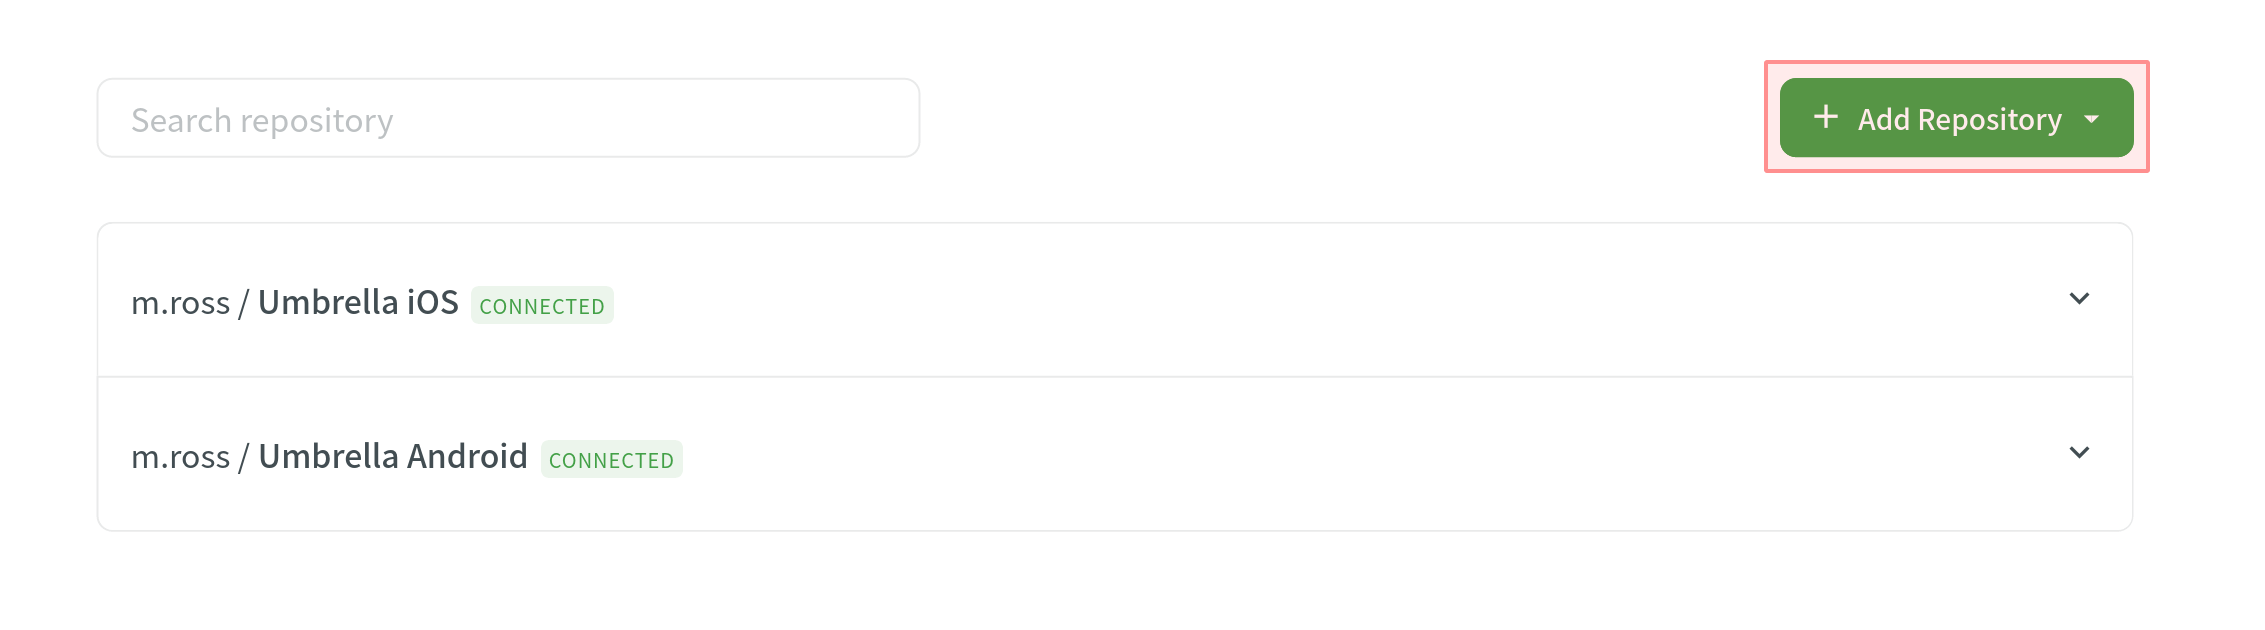
Working with Multiple Repositories within One Project
If you’re working with a multi-platform product that has versions for different operating systems, you may want to connect multiple repositories that store content for each operating system. In this case, localization resources (e.g., TMs, Glossaries) and translations could be used more efficiently, reducing the time needed for project localization.
To add another repository, follow these steps:
- Open your project and go to the Integrations tab.
- Click on Bitbucket in the Integrations list.
- Click Add Repository.
- Configure the integration with the new repository according to your needs and preferences.
Verificar o Estado de Sincronização
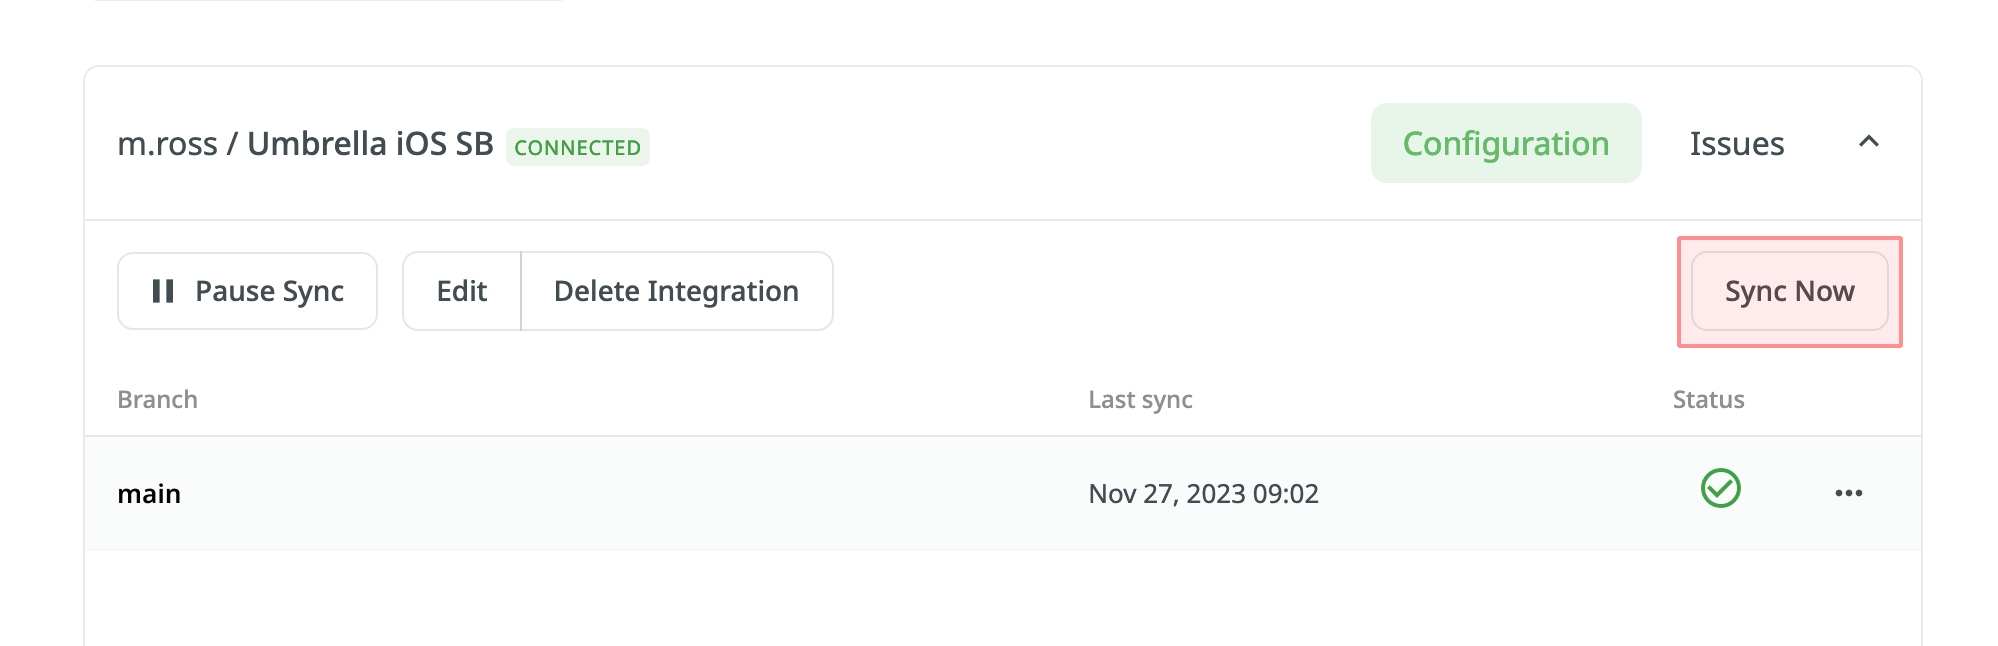
Once the integration is set up, all related information is stored in the Integrations tab > Bitbucket section.
After the integration is connected, the settings can be updated only by the project member who configured it. All project managers except the person who configured the integration will see the Edit button disabled with the following message when hovering over it: Integration was configured by {Full Name} ({username}).
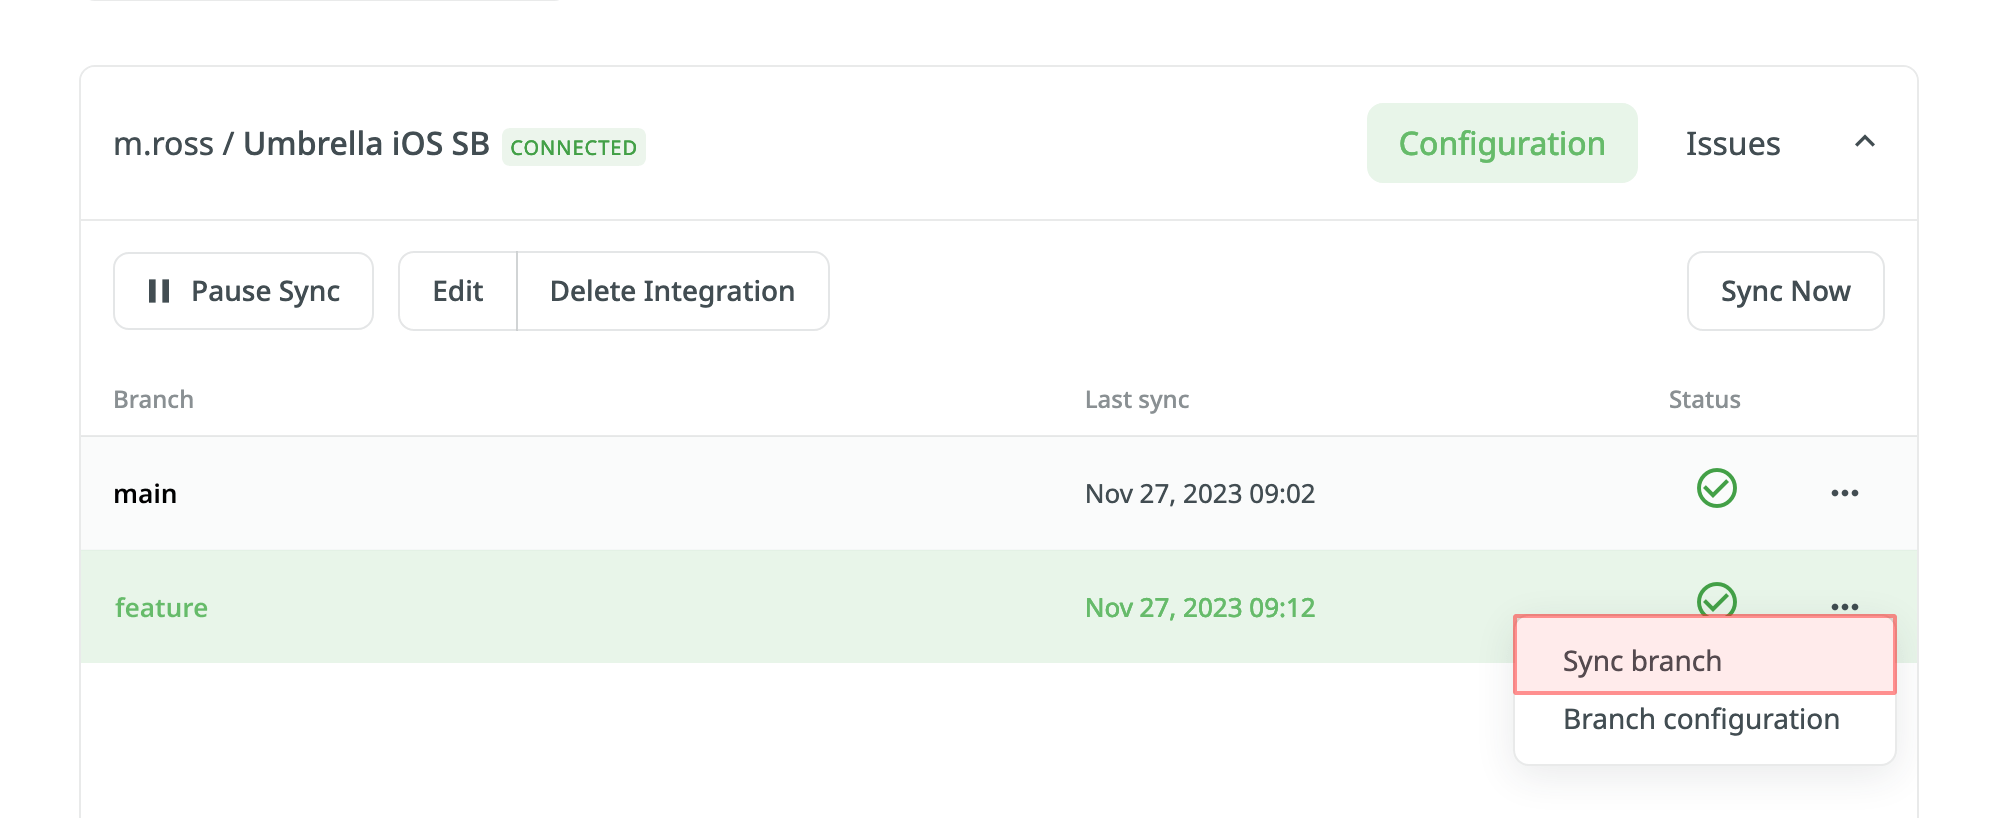
By default, synchronization is processed every hour automatically. If you need to launch the synchronization immediately – click Sync Now.
Alternatively, if you need to sync only one branch separately, click ![]() on the needed branch and select Sync branch.
on the needed branch and select Sync branch.
Q&A
Q: I have an application build configured to be triggered by every commit. Since Crowdin commits each translation file in a separate commit, how can I avoid unnecessary application builds triggered by commits from Crowdin?
A: Since VCS integrations in Crowdin use API to commit files but not Git, each file is committed separately.
Here are a few recommendations that might help solve similar situations:
- Use the
export_languagesoption to skip commits from languages you’re not interested in yet. Read more about the Export languages parameter for VCS integrations. - Use the [ci skip] tag in the commit messages to skip unnecessary builds. Read more about the Commit Message parameter for VCS integrations.
- Configure the preferred sync interval using Sync Schedule (e.g., set the sync once in 24 hours).
- Squash commits when merging a localization branch to keep the master branch history clean and uncluttered.