Для постачальників
Загальний огляд
A vendor is an organization that provides professional translation services. In Crowdin Enterprise, a translation vendor can create a separate organization. Within this organization, a vendor can:
- Add incoming projects from Clients to the Vendor’s workspace
- Organize incoming client projects into groups, assign managers to each of them
- Set up workflows for each separate project
- Invite in-house translators and assign people to the necessary workflow steps
- Generate reports and set flexible rates
After a Vendor organization (Vendor) accepts the invitation to cooperate, a Client organization (Client) will be able to assign this Vendor to the workflow steps, like translation or proofreading by Vendor.
A Vendor receives a secured copy of the project workflow steps it was assigned to, along with translation resources of the assigned project, such as Translation Memory and Glossaries.
The Vendor then can add the assigned steps to its own workspace and organize the processes - set up own workflows, assign people to different steps, and use its translation resources.
The client won’t have access to the vendor’s organization. This means that the vendor’s projects, workflows, or users are only visible to the vendor. The client will only receive the strings translated or proofread on the vendor organization’s side. Also, the client won’t see the usernames of the translators or proofreaders. The strings will be marked as Translated or Approved by the vendor organization.
Vendor Organization Mode
To become a Translation Vendor in Crowdin Enterprise, create an Organization and contact Crowdin Support to switch your organization to the Vendor Mode.
After your organization is switched to a Vendor mode, you’ll see the sections Clients and Incoming Projects on the left sidebar of your organization.
Клієнти
Clients are organizations to which you can provide translation services within shared projects. In the Clients section of your workspace, you’ll find a list of all the clients you collaborate with.
When a new organization wants to collaborate with you as a vendor, they will send you an invitation. This can be done in the Vendors section of the client’s workspace.
The client organization can invite vendors either by using a subdomain in Crowdin or a shareable link. In the first case, the client organization will need your organization’s name to send you the vendor invitation. Once you confirm the invitation, this organization can assign you to the workflow steps of their projects.
If you have clients you’d like to cooperate with in Crowdin Enterprise, you can invite them with the help of a shareable link.
Note: Shareable links expire in one week automatically.
To contact the Client organization and, for example, discuss any localization-related questions, follow these steps:
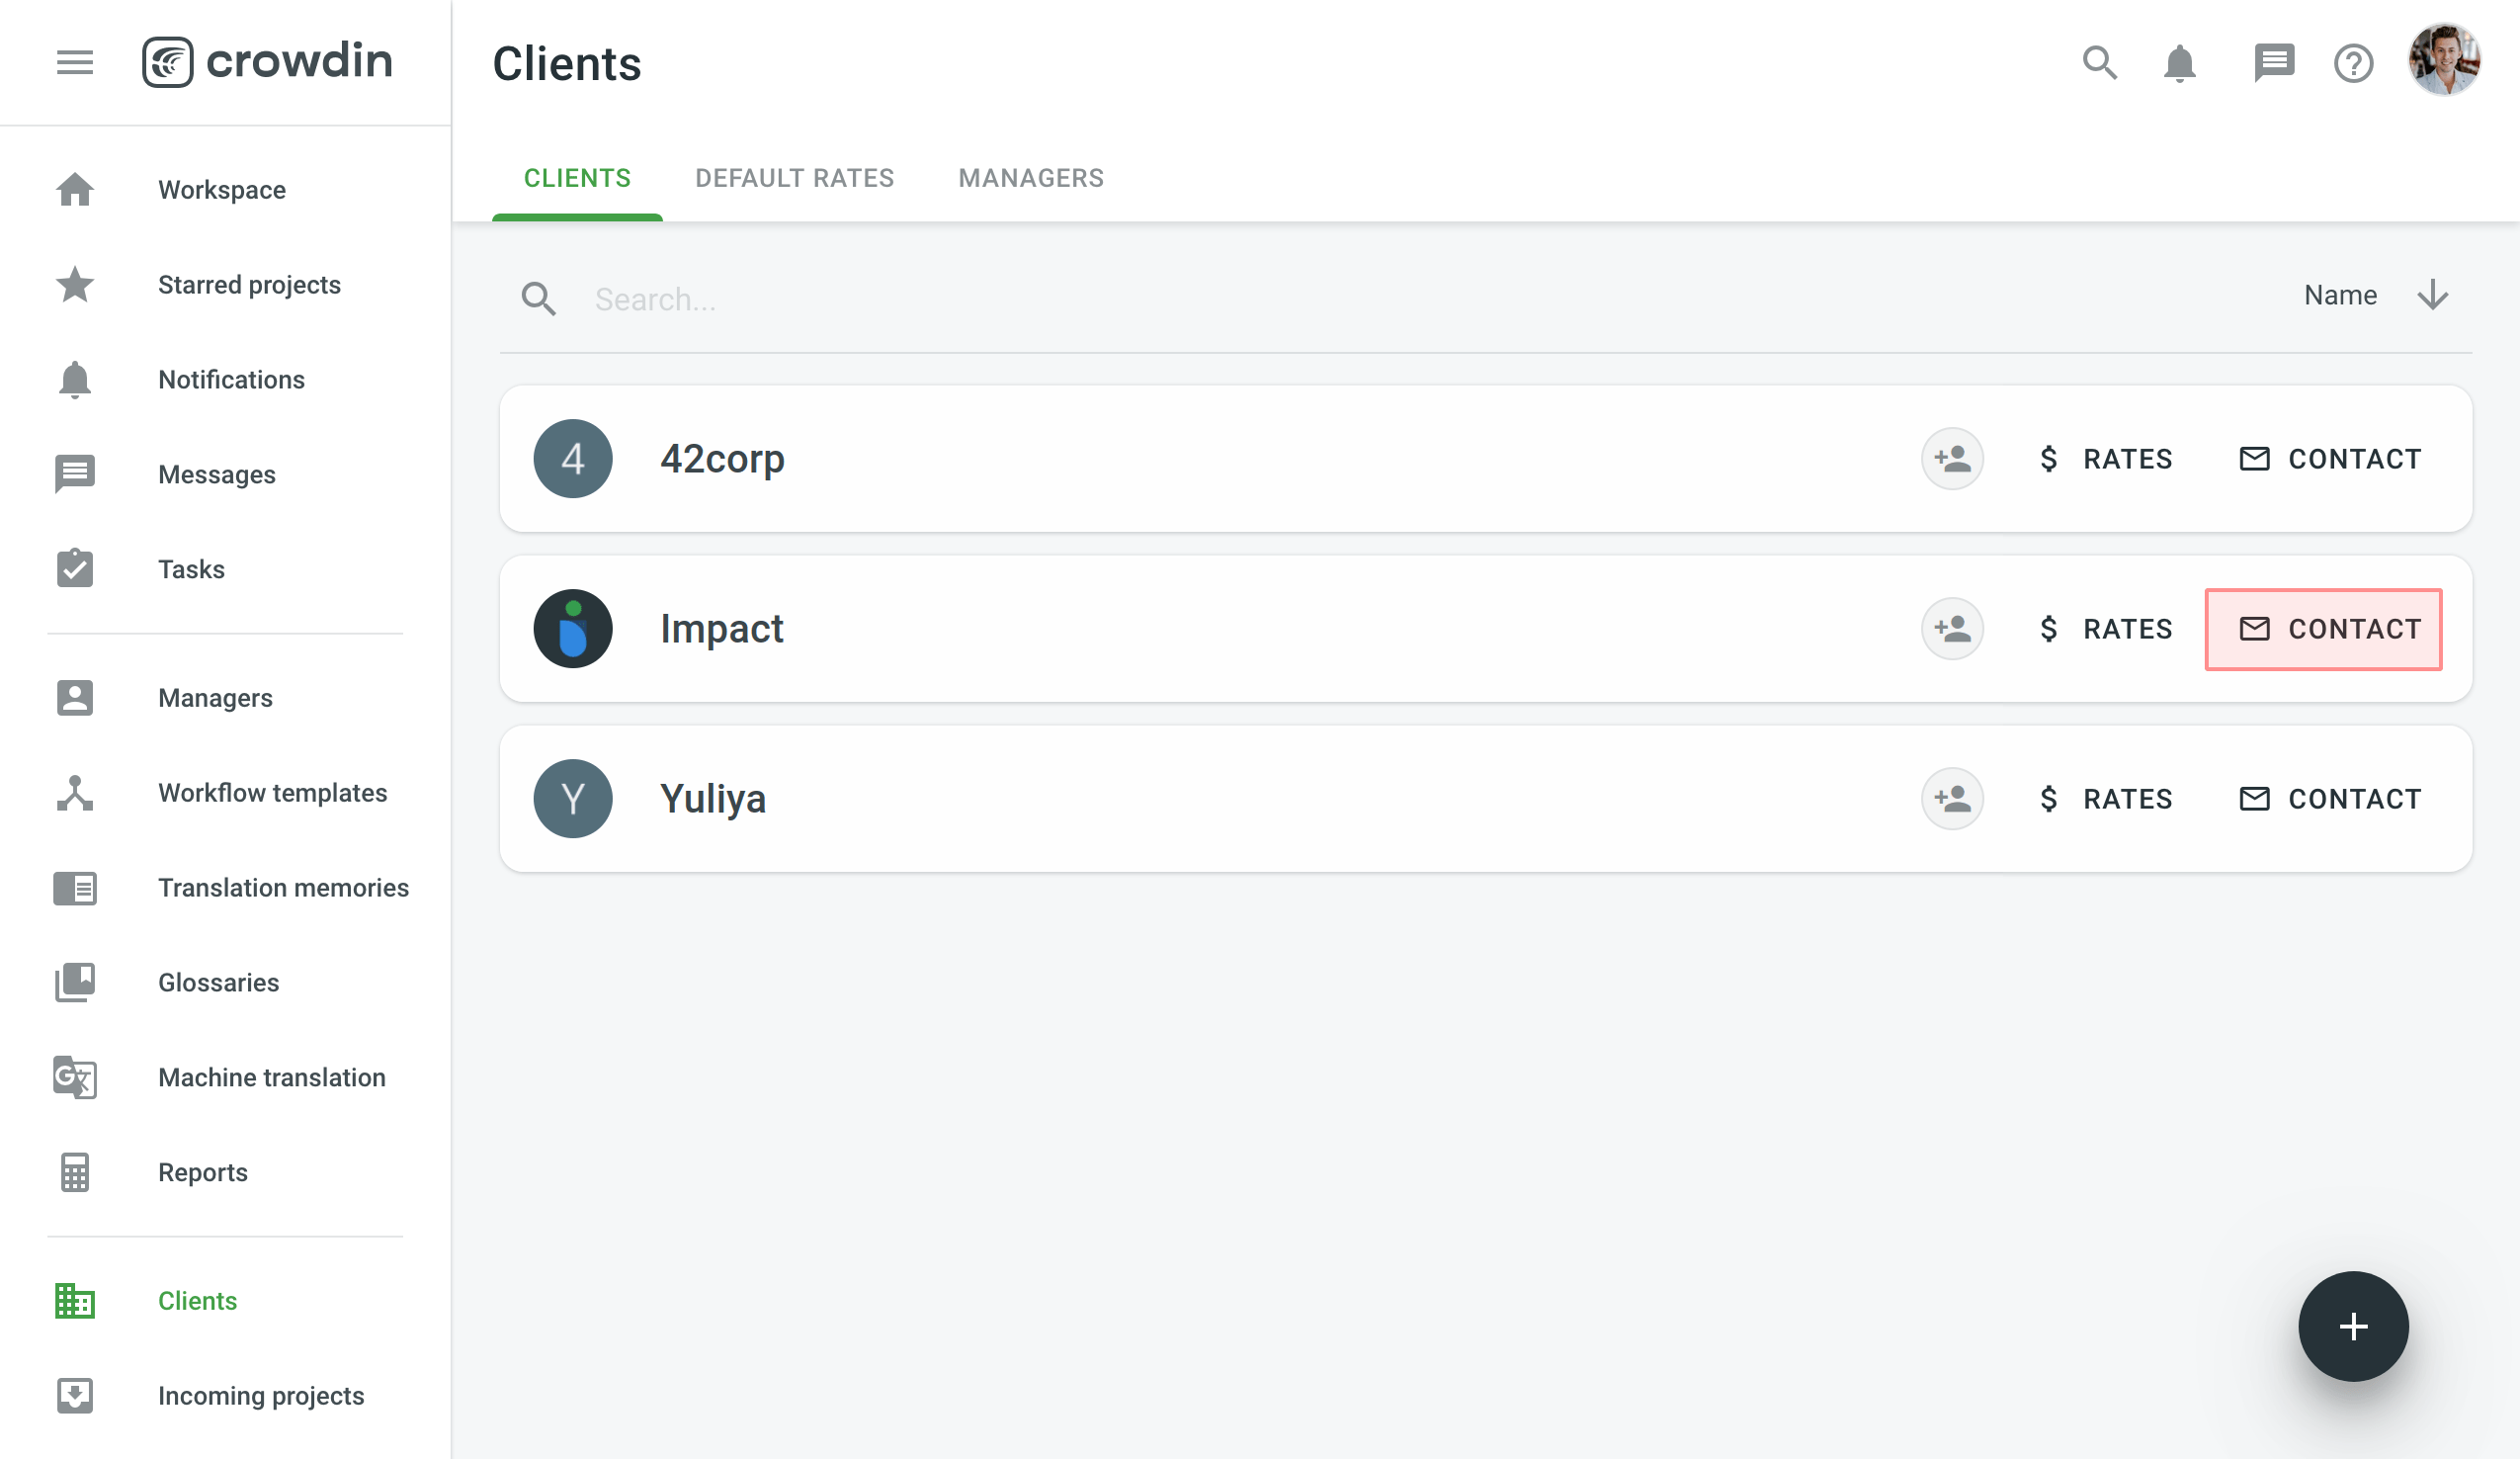
- Open your organization’s Workspace and go to Clients.
- Click Contact on the needed client.
Alternatively, you can contact a specific client the following way:
- Open your organization’s Workspace and go to Clients.
- Click on the needed client.
- Click Contact client.
Incoming Projects
The Incoming Projects section will include all the projects you’re working on as a Vendor.
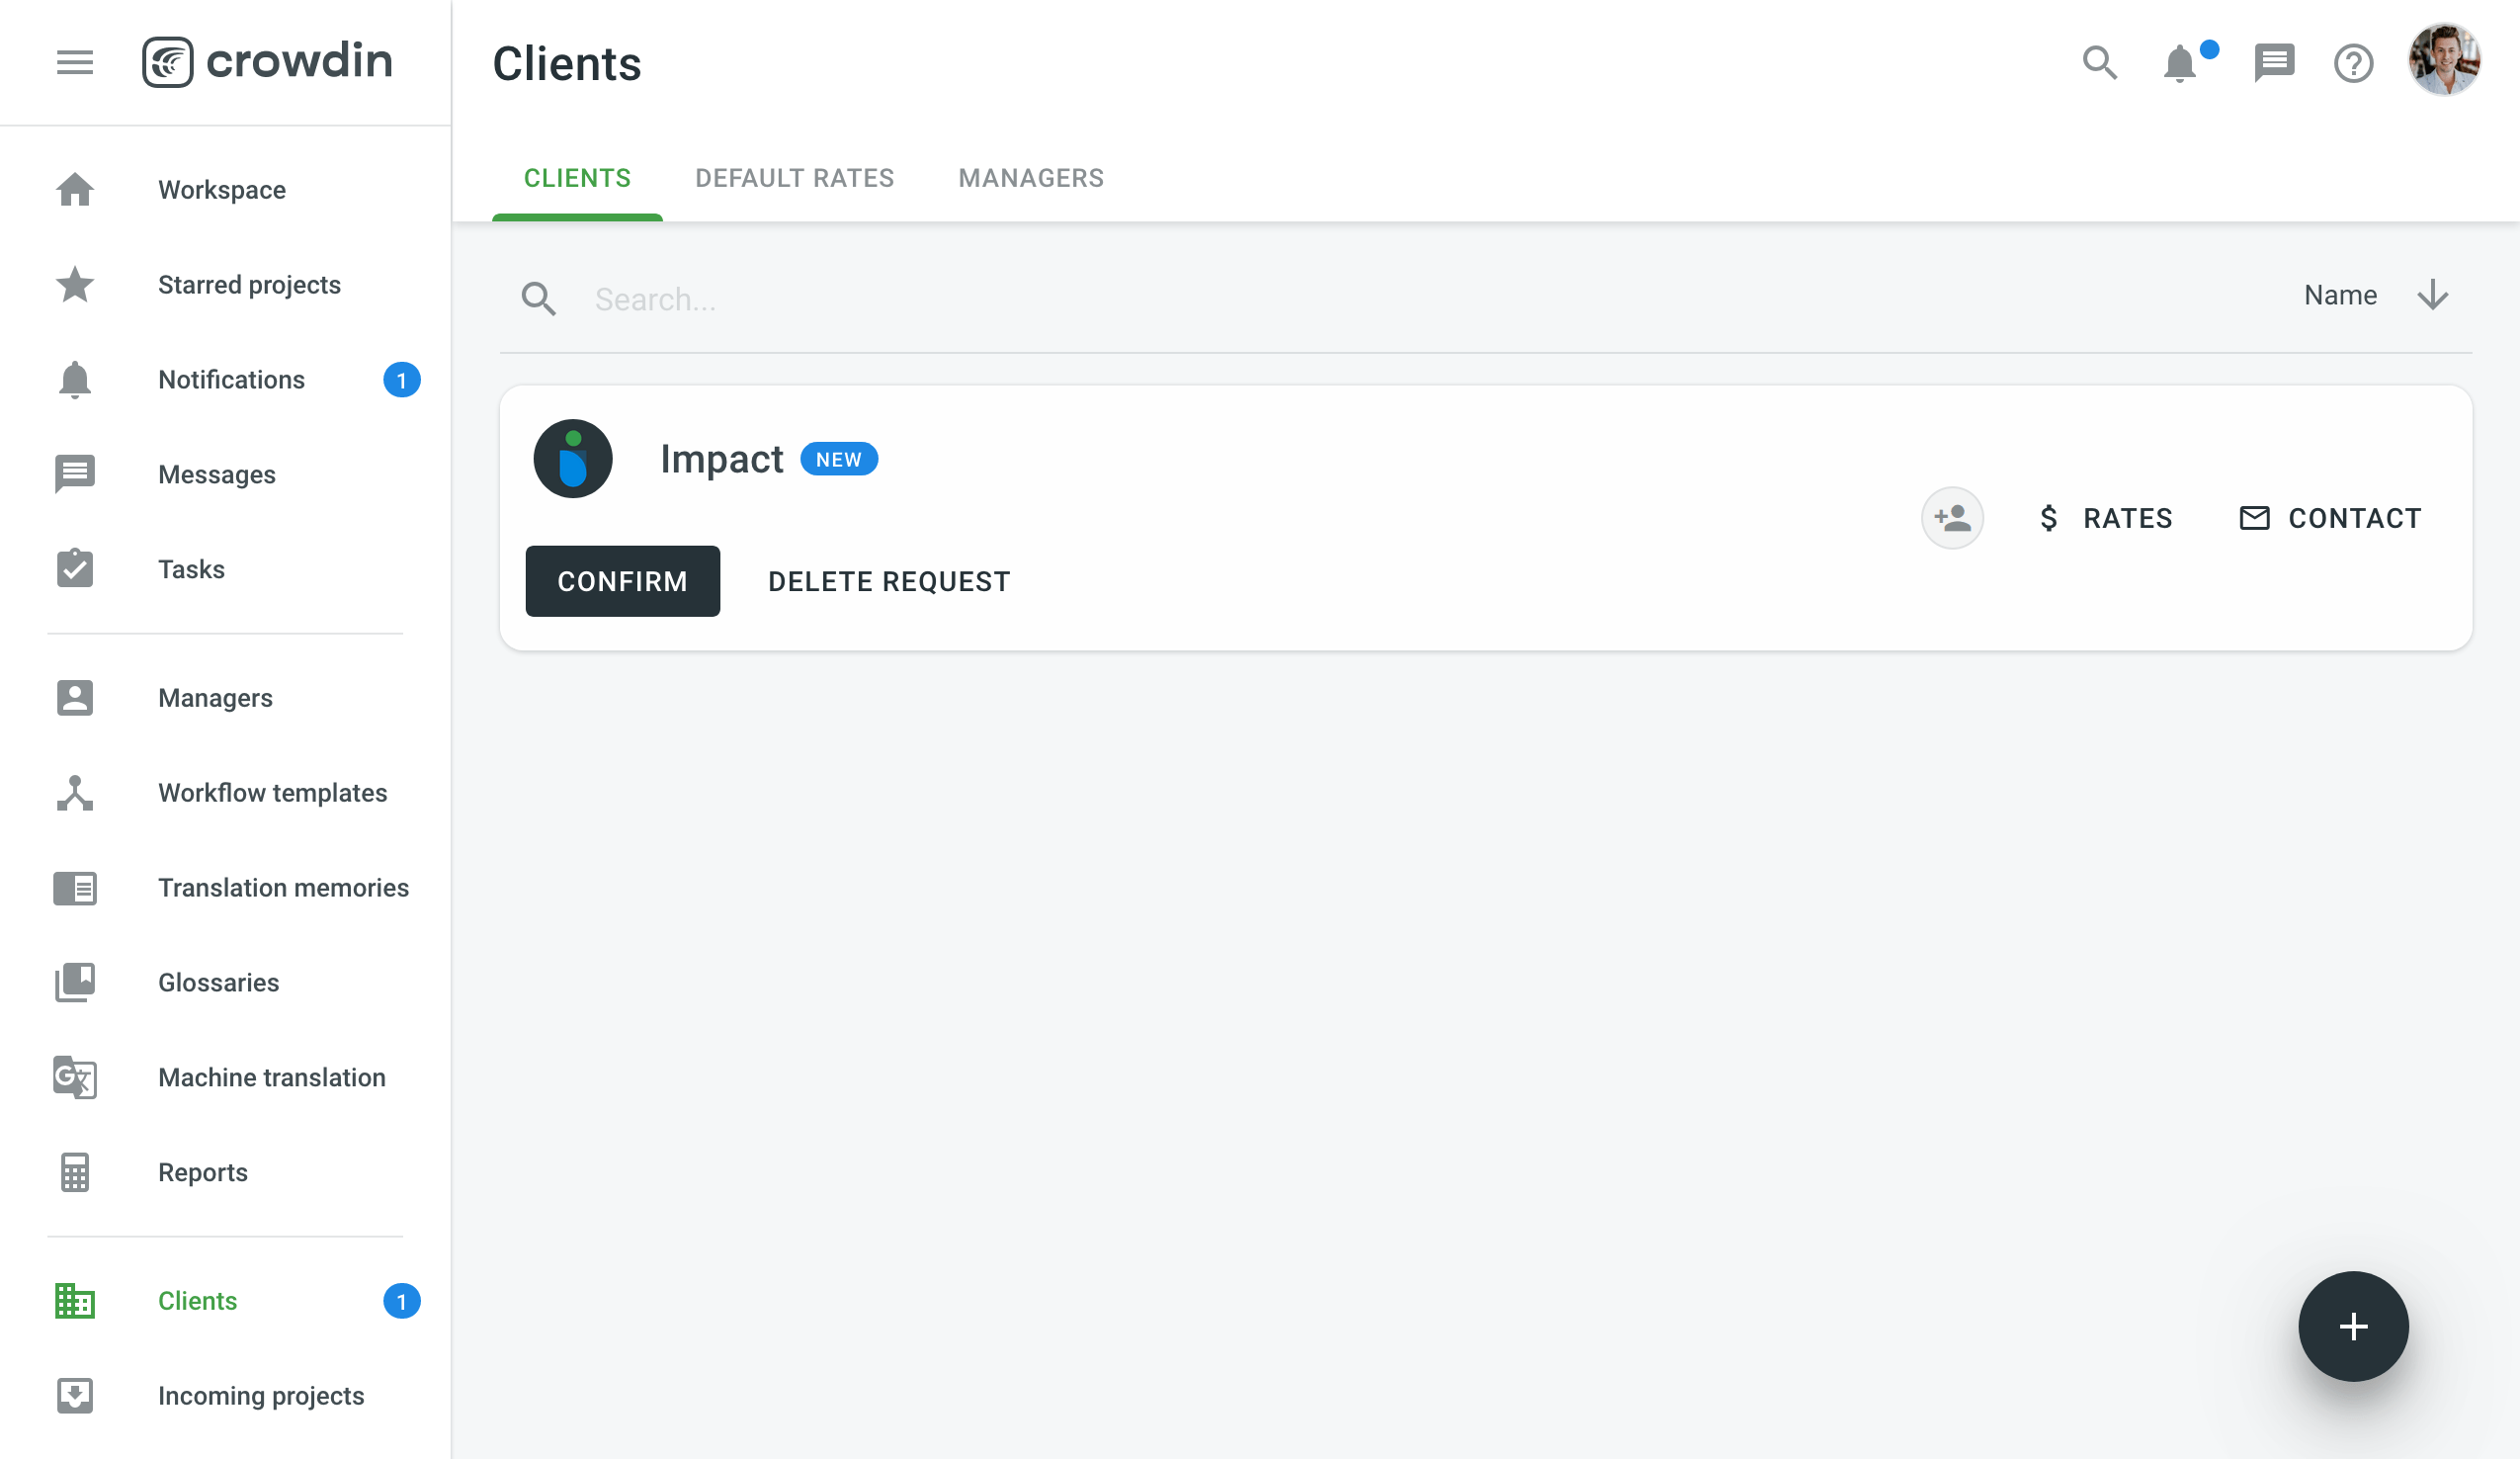
If your organization is assigned to work on a project, you’ll see a pending request and will be able to add it to your workspace. You can organize incoming projects into groups for easier navigation and user management.
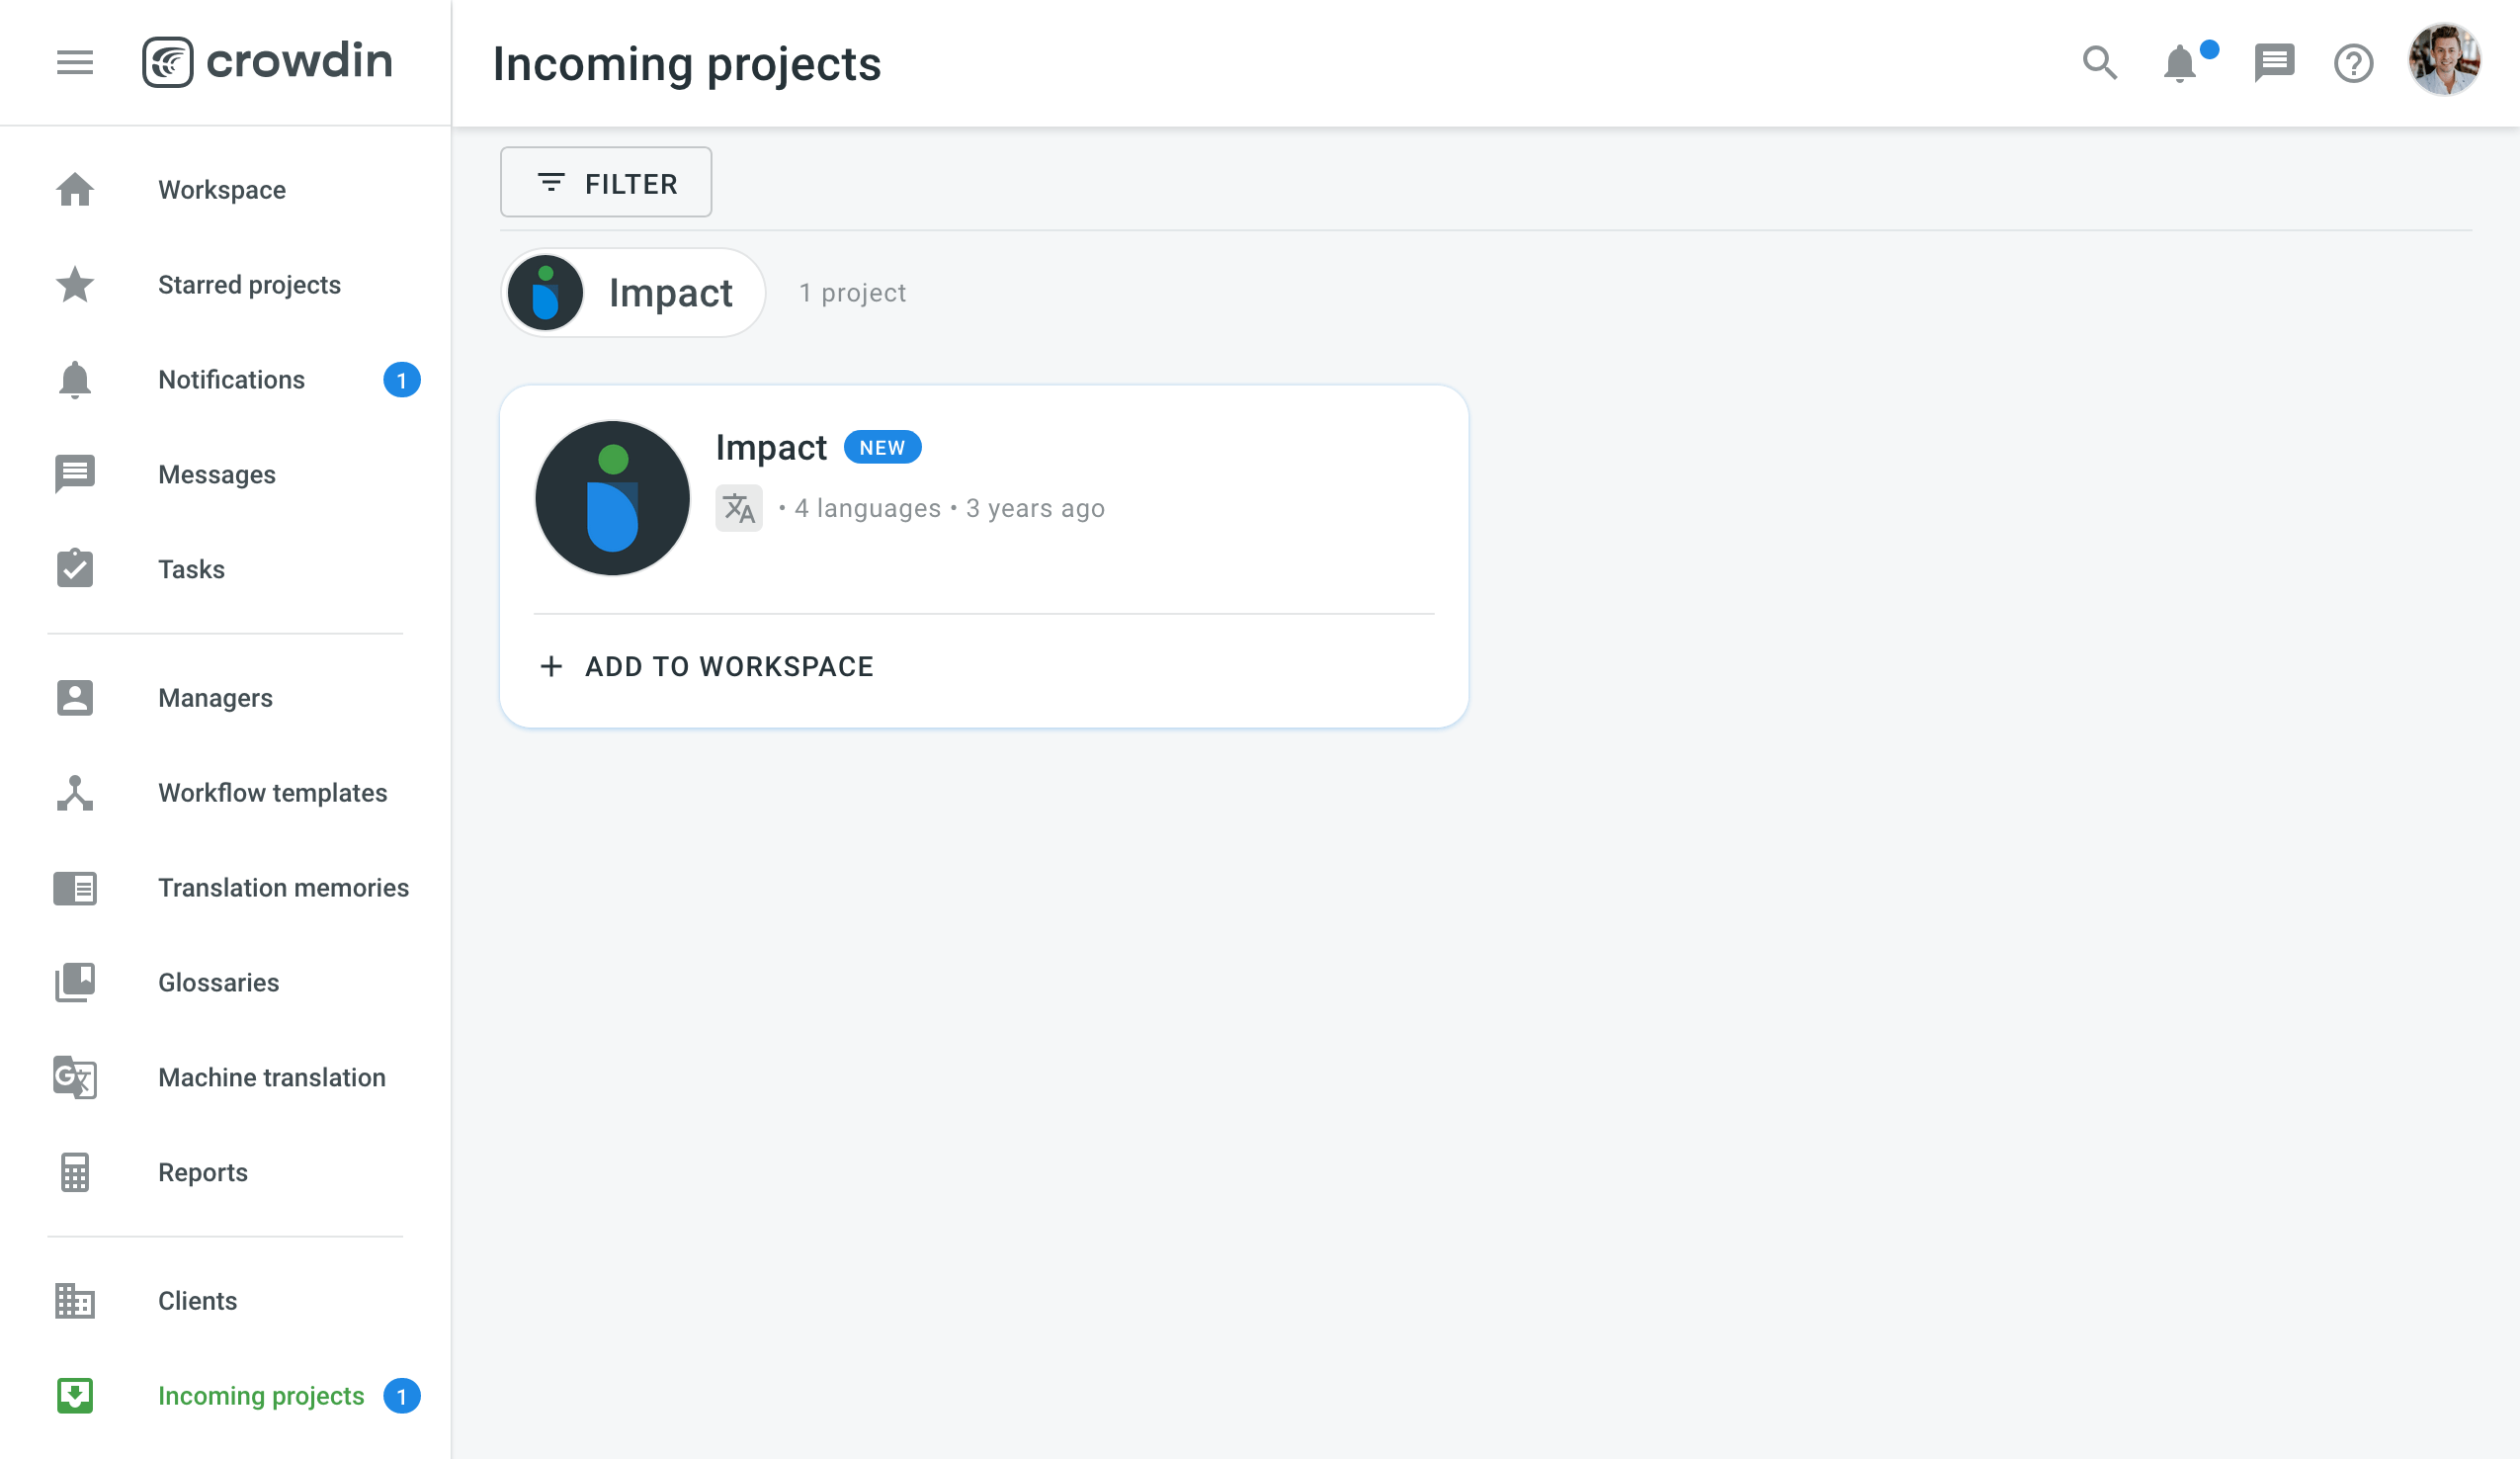
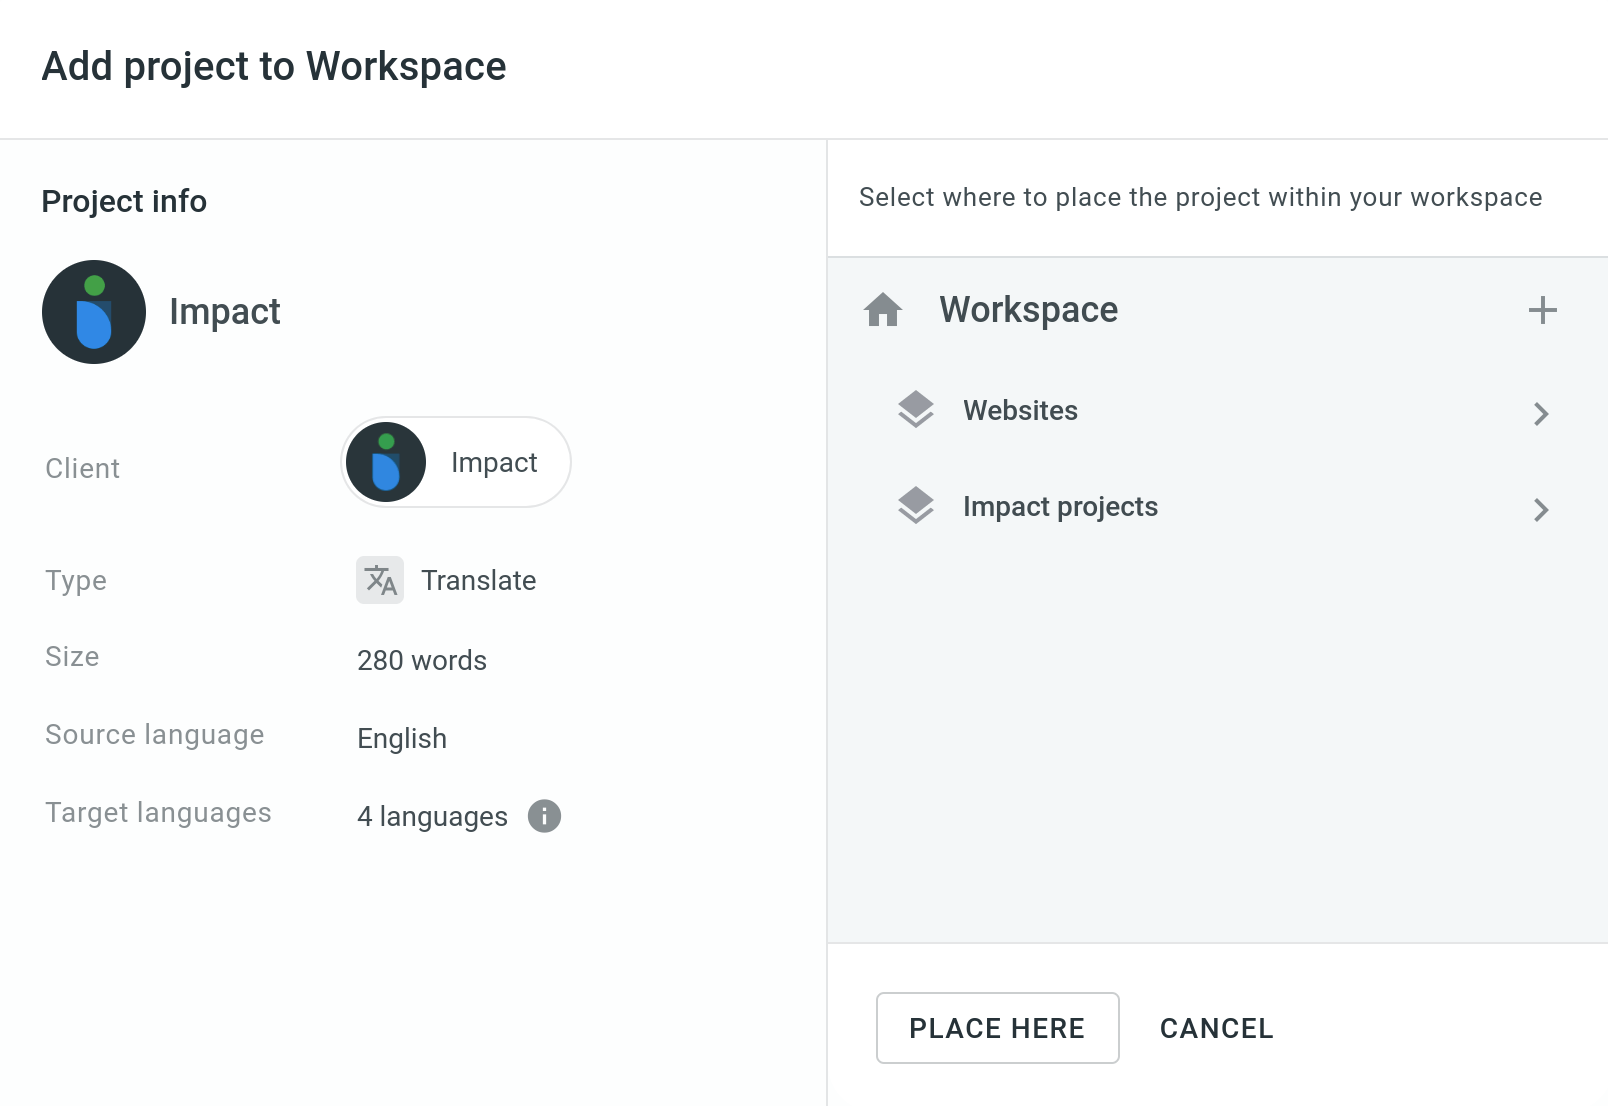
After you click Add to Workspace next to the Incoming project, you’ll be able to organize the project on your workspace.
User Management
Users you invite to your organization will have different permissions depending on their roles.
Read more about User Management.
Organization Admins
Admins have access to all the projects within the organization. They can accept vendor invitations, add incoming projects to the organization’s workspace, set up workflows, and assign people to the workflow steps. Give people admin access in the Users section.
Group and Project Managers
Group managers can access and manage the projects within a specific group. Project managers have the same permissions but only within a specific project.
Client Managers
You can assign managers to each client within the vendor organization. Client managers coordinate the collaboration with this client and its incoming projects.
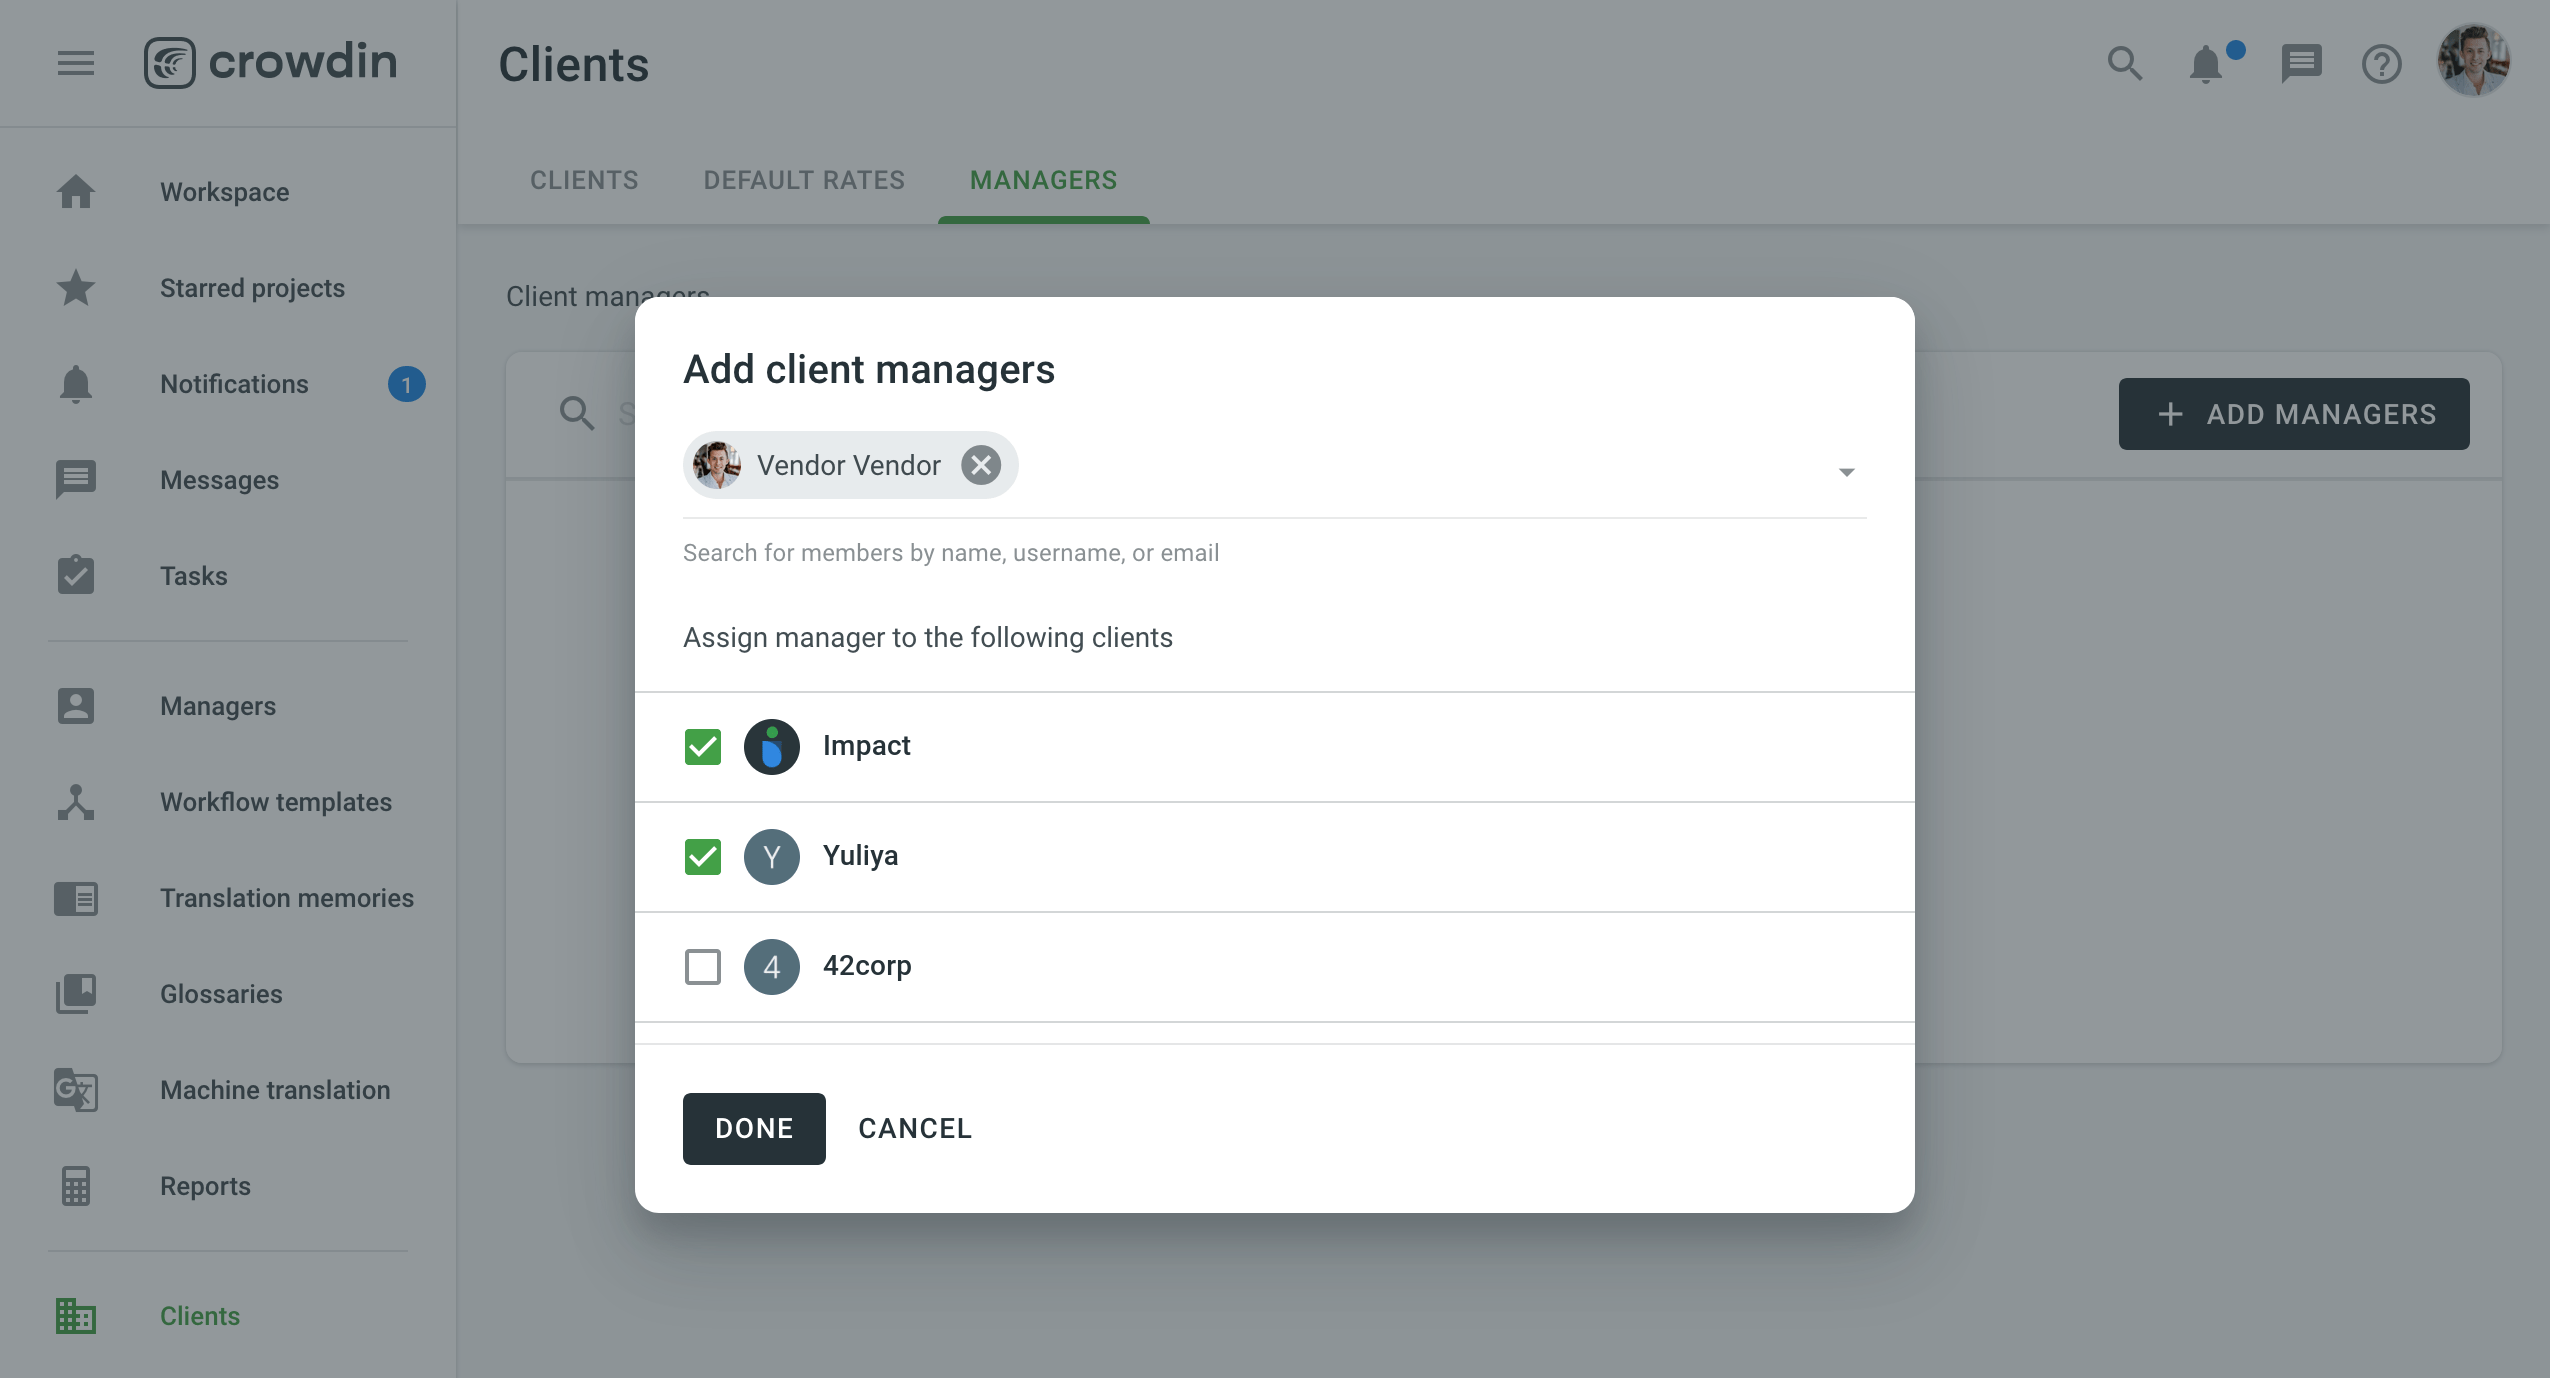
To assign Client managers for multiple Client organizations, follow these steps:
- Open your organization’s Workspace and go to Clients > Managers.
- Click Add managers.
- Select needed managers. You can search for members by name, username, or email.
- Select clients you’d like to assign the selected managers to.
- Click Done.
To assign Client managers for a specific Client organization, follow these steps:
- Open your organization’s Workspace and go to Clients.
- Click Assign client managers on the needed Client organization.
- Select needed managers. You can search for members by name, username, or email.
- Click Done.
In-house Translators and Proofreaders
You can invite all the translators and proofreaders you work with to your organization. They will be able to access these projects within your workspace, where they are assigned to workflow steps. You can assign people to workflow steps, languages and split strings between the project members assigned together to one step.
Our useful Getting Started for Translators will help translators and proofreaders start working in Crowdin Enterprise.
Sub-vendors
You can also assign vendors to the projects added to your workspace. To do this, you should create a workflow that includes Translation by Vendor or Proofreading by Vendor steps. This is helpful if you need help translating some rare or less common language pairs. The sub-vendor receives a copy of the project steps you assign to them.
Read more about inviting a Vendor and Translation and Proofreading by Vendor workflow steps.
Workflows in Client Projects
The only limitation when creating a workflow for a customer project is that the source and target languages are already predefined. Within these two languages, you can choose any steps the strings should go through on your side.
You can use workflow templates or create custom workflows for each project.
Read more about Workflows.
Translation resources
Translation Memories and Glossaries are automatically shared with a vendor when they are assigned to specific workflow steps by a client. The resources are available to the users assigned to translate or proofread strings in the project.
To check the resources available for the project, open the needed project and go to Resources.
Read more about Translation Memory and Glossary.
Organization Rates
You can set up default and specific (custom) rates as a vendor. These are the rates you will charge the client for translation and proofreading performed by the members of your organization.
Note: You will negotiate the specific rates and the ways your payments will be processed directly with the Client that assigns your organization to the project as a Vendor.
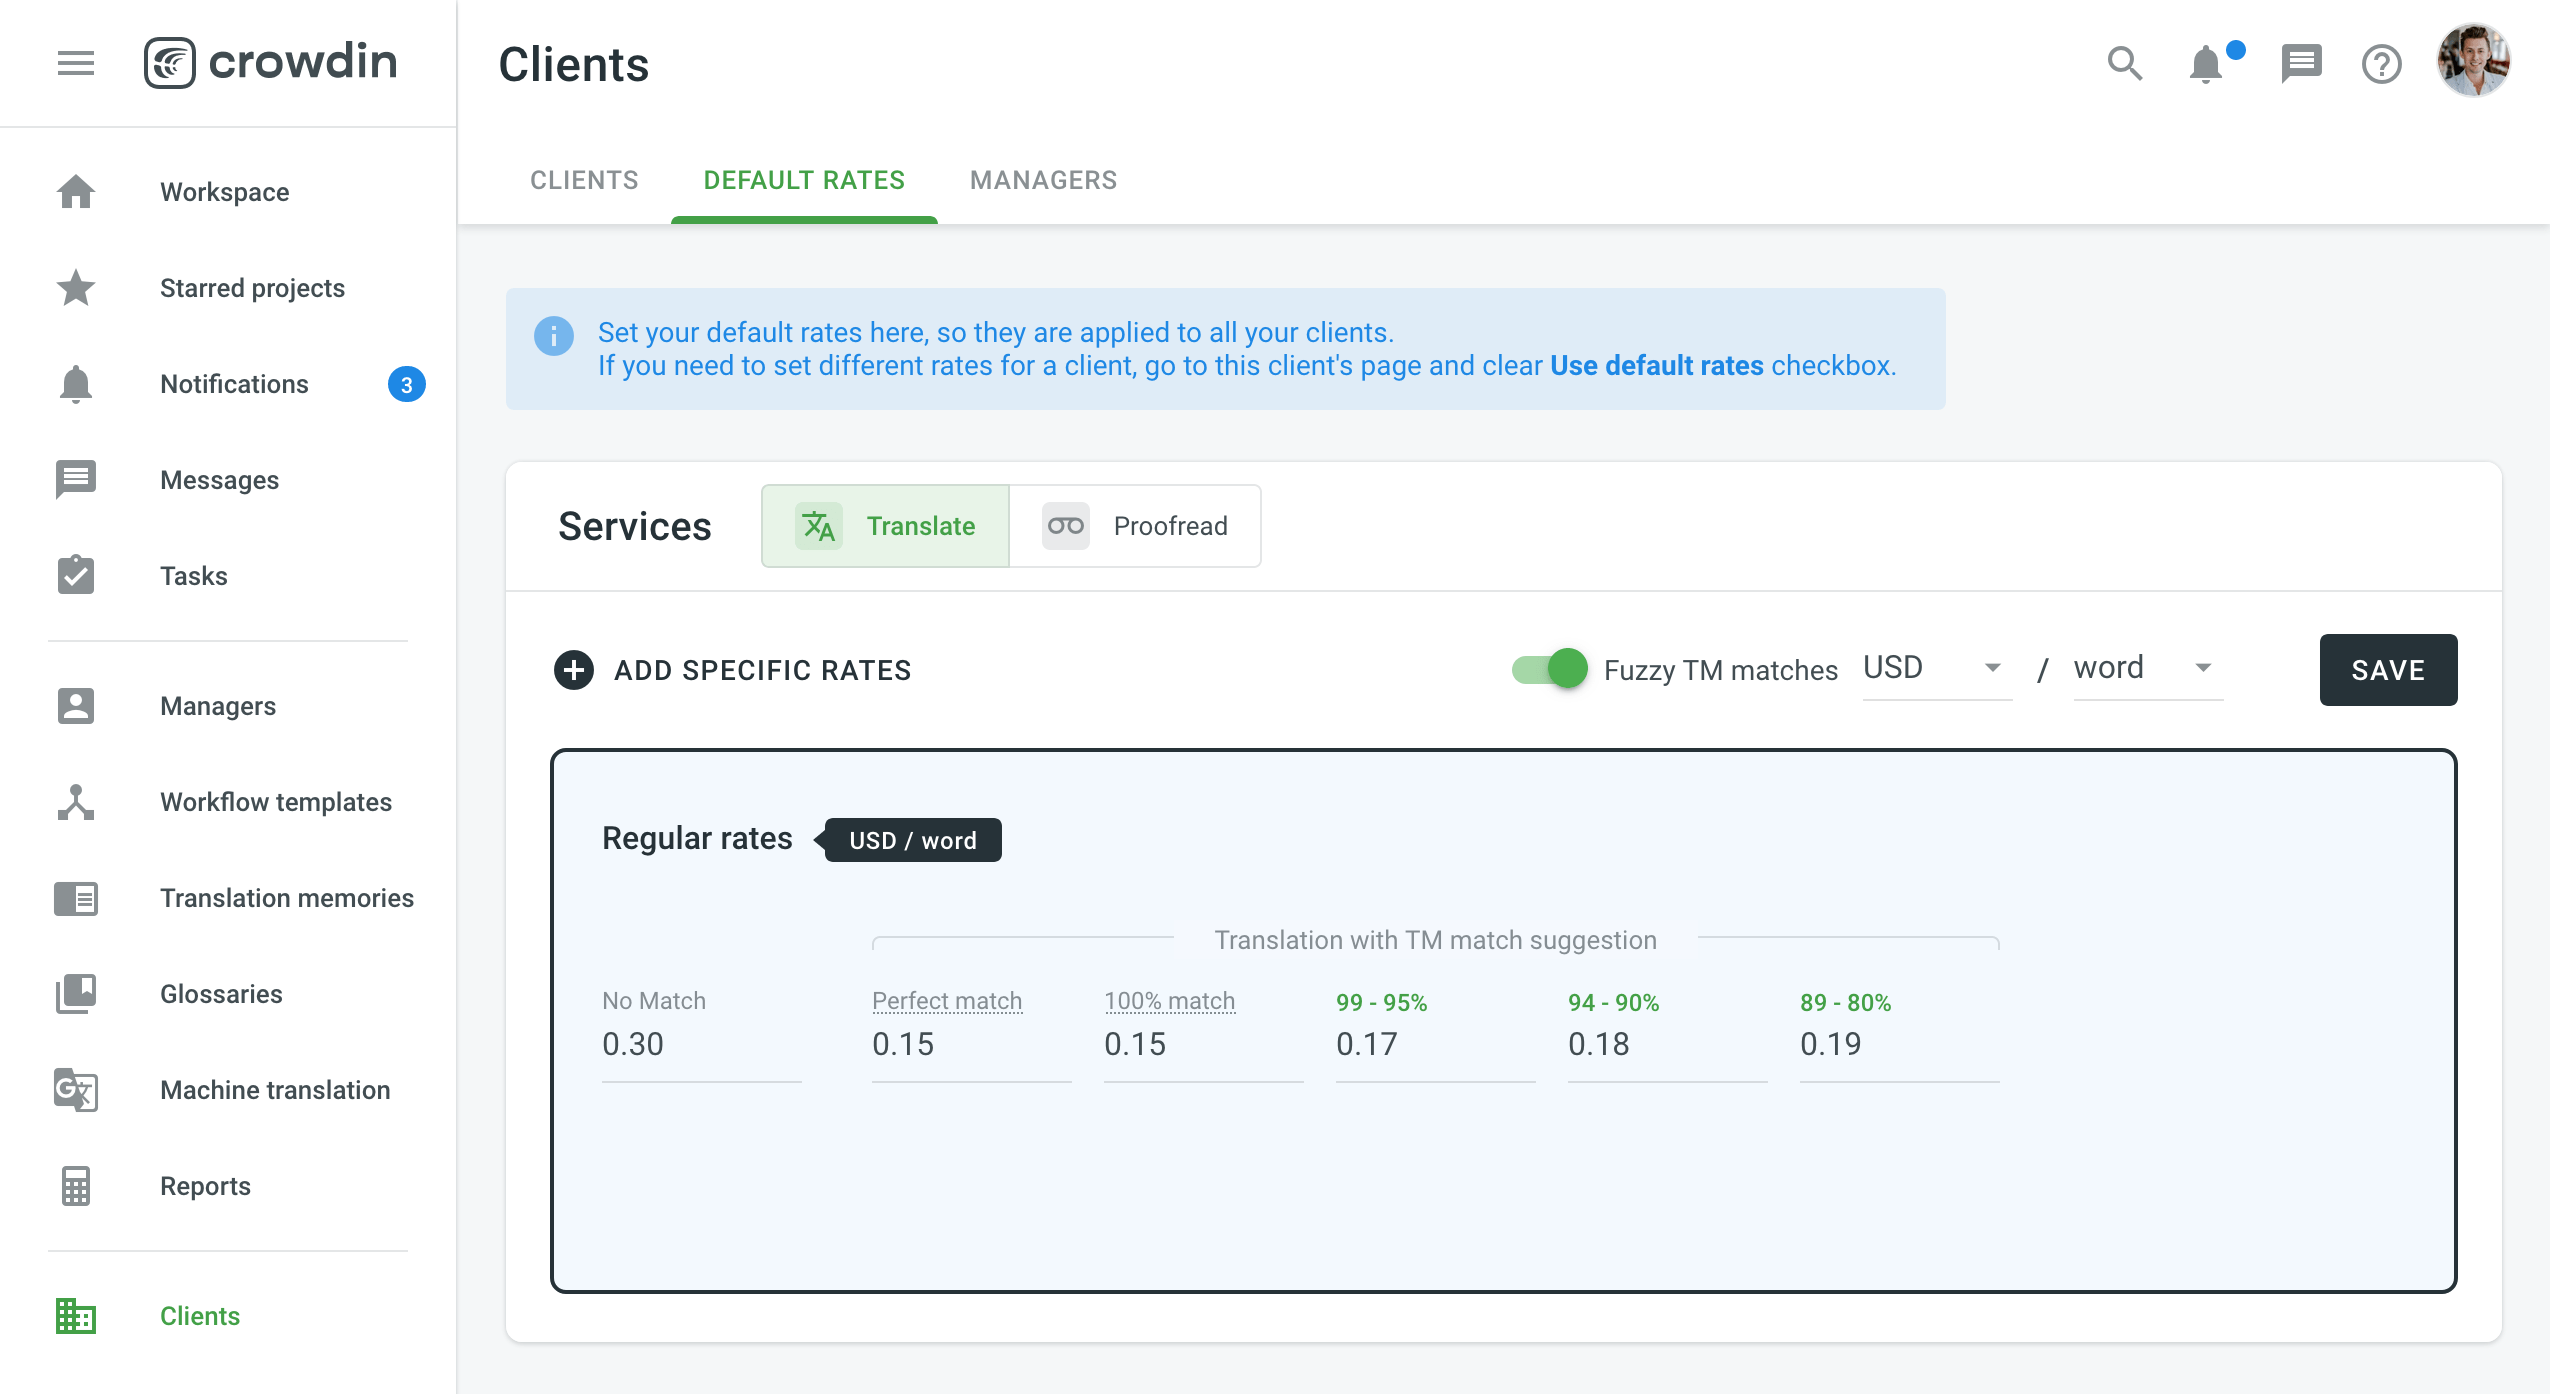
Default Rates
To set the default rates, follow these steps:
- Open your organization’s Workspace and go to Clients > Default rates.
- Set the rates for translation and proofreading services.
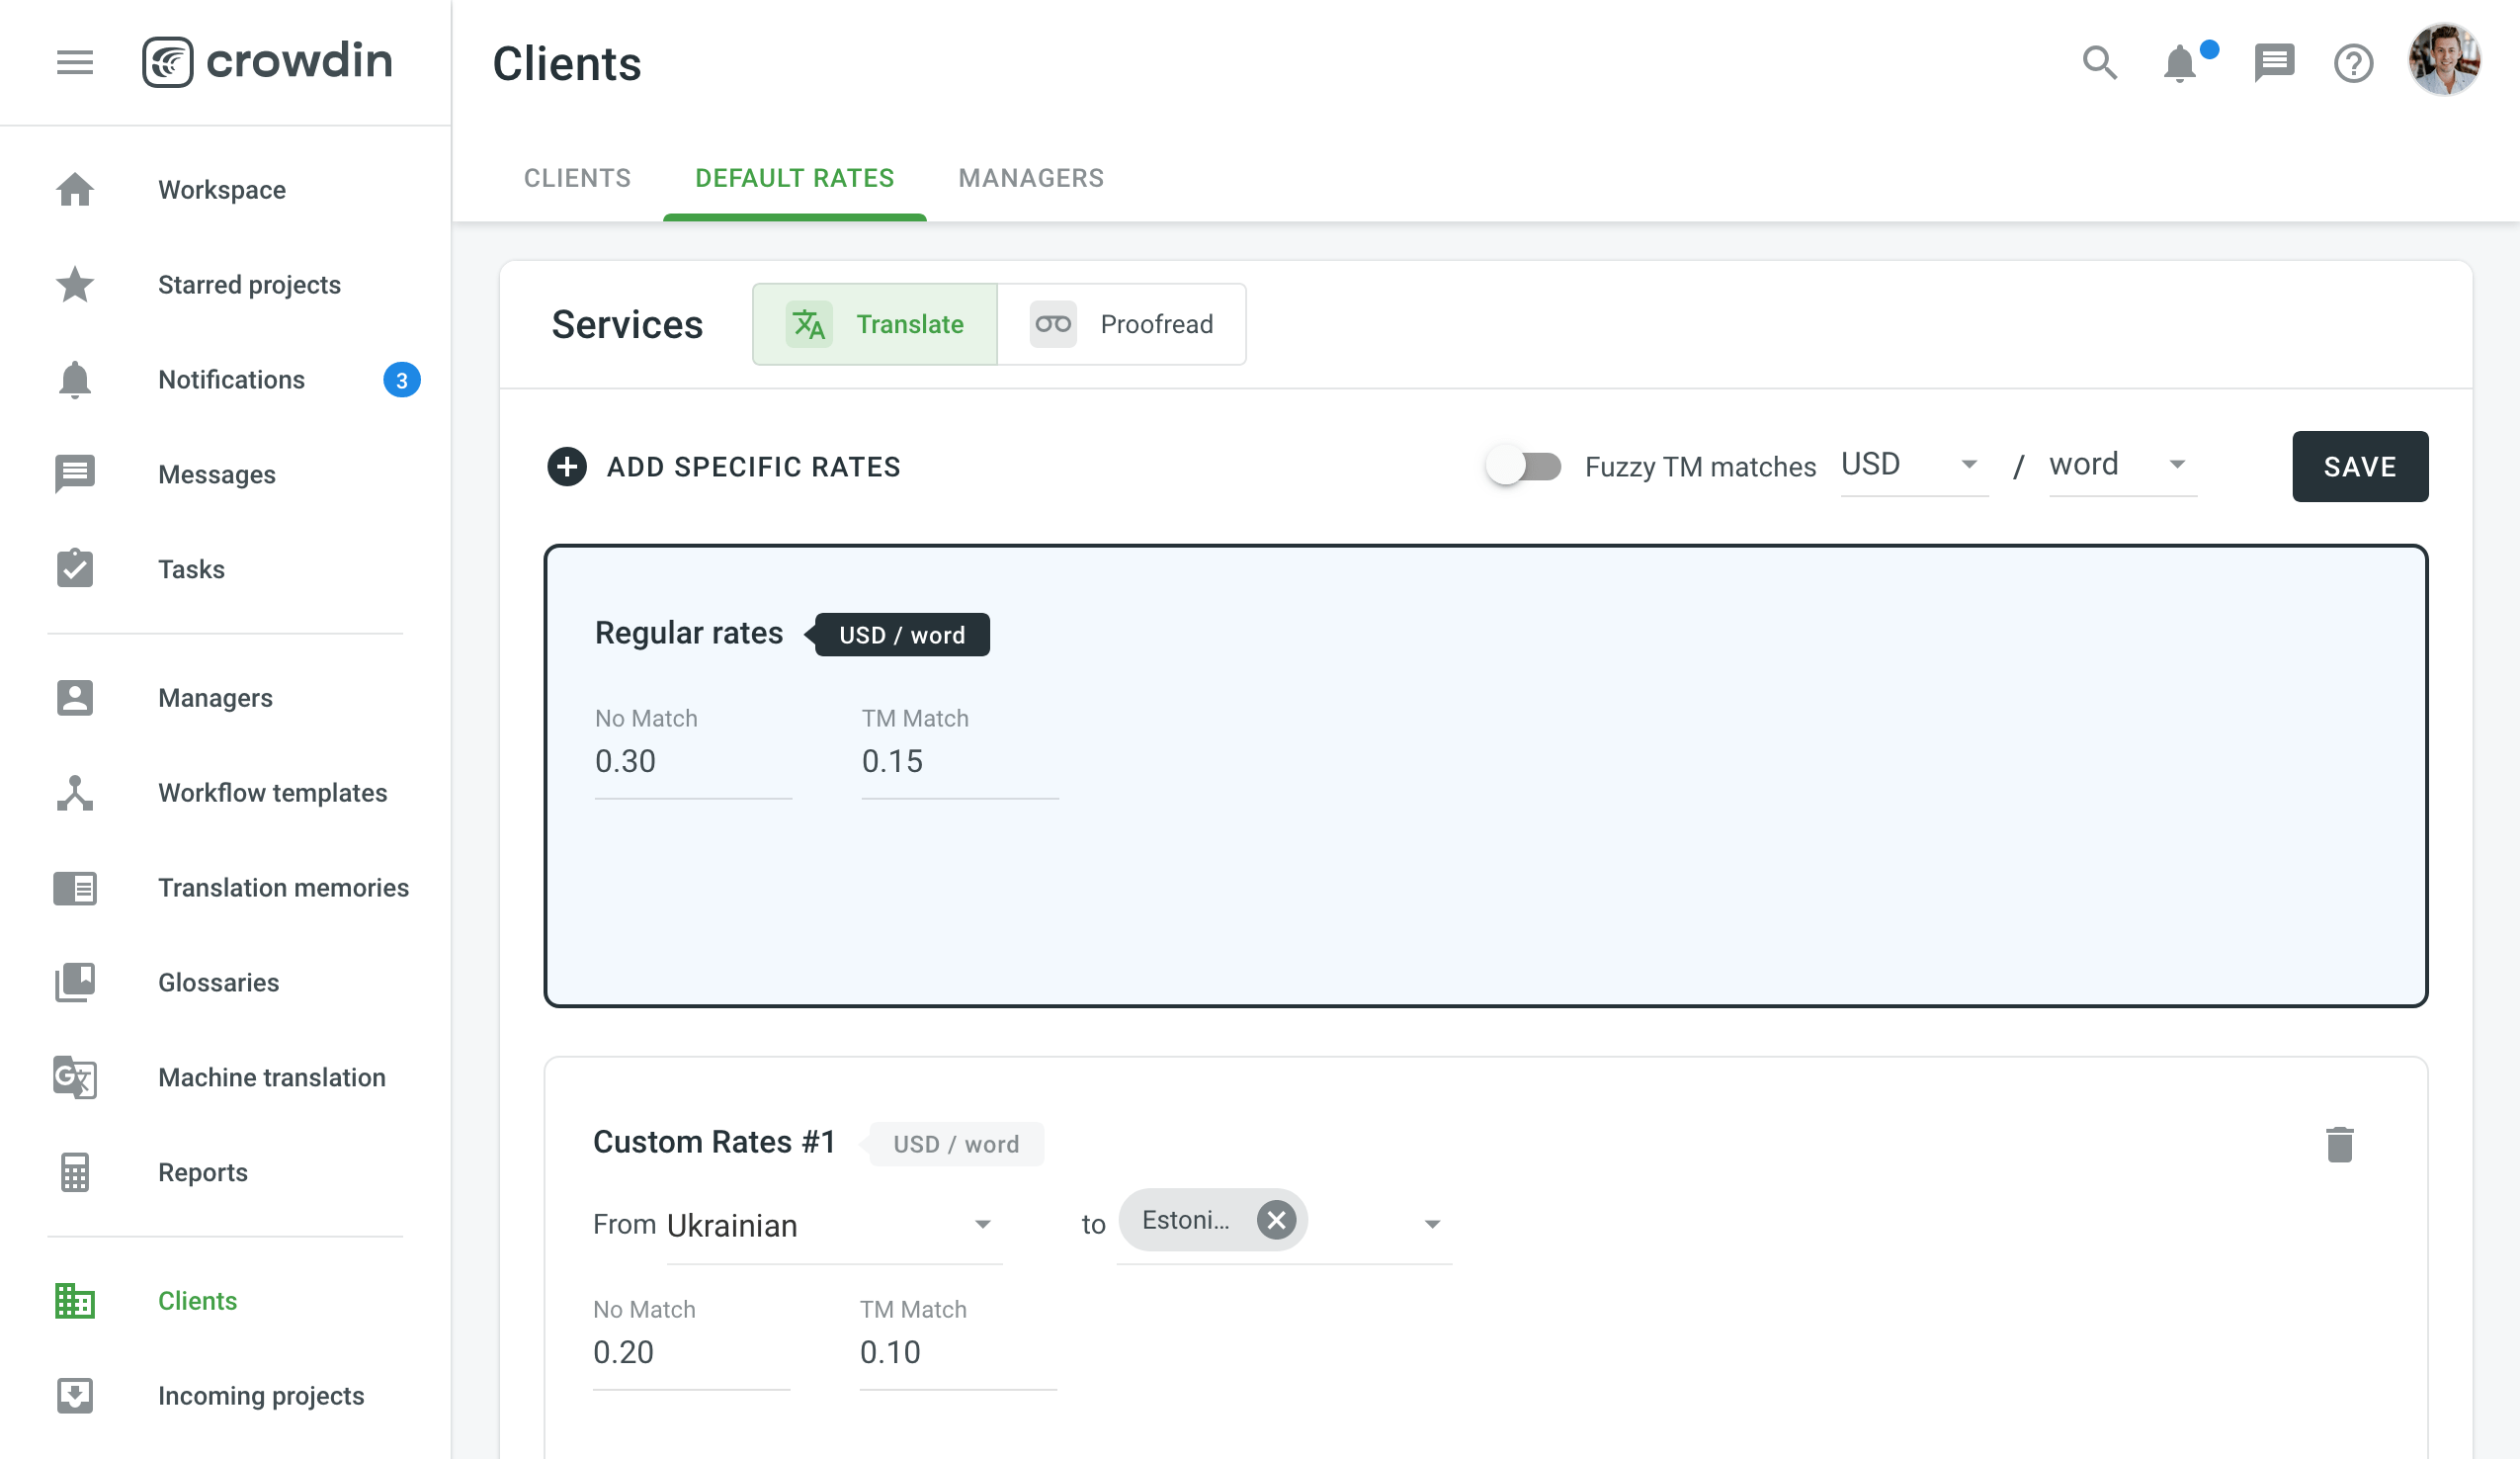
- To add specific rates for translations with different TM match ranges, enable Fuzzy TM matches.
- Click Save.
Specific Rates
The default rates can be overridden by the specific rates for some language pairs or specific Clients.
To set specific rates for a Client, follow these steps:
- Open your organization’s Workspace and go to Clients.
- Click Rates on the needed Client organization.
- Click
 and clear Use default rates.
 - Set the rates for translation and proofreading services.
- To add specific rates for translations with different TM match ranges, click and enable Fuzzy TM matches.
- Click Save.
To set specific rates for the language pairs, follow these steps:
- Open your organization’s Workspace and go to Clients > Default rates
- Click Add specific rates.
- Select the needed languages.
- Set the rates for translation and proofreading services.
- To add specific rates for translations with different TM match ranges, enable Fuzzy TM matches.
- Click Save.