Für freiwillige Übersetzer
Eager to help with translations of your favorite website or application and want to know where to start? Check the instructions below to proceed.
What is Crowdsourcing
Crowdsourcing is a practice that engages a community for one common goal – to translate the product on a volunteer basis into several languages. You, as a volunteer translator, can do translations through Crowdin Enterprise and help the organization with the localization process.
Create an Account
Each company in Crowdin Enterprise has its unique URL. Company can either share with you the link to the Project Page directly or to the organization page with all crowdsourcing projects it has. Project manager can also send an invitation straight to your email. Using that specific link, you need to create a new account in Crowdin Enterprise. To create an account (sign up), you can use your social media profiles (Facebook, Google, Twitter), GitHub, or GitLab profiles.
After you create the account, you can use your username and password to access the needed organization page in Crowdin Enterprise. If you decide to contribute to more than one organization, you will need to have separate Crowdin Enterprise accounts for each of them.
Kontoeinstellungen
You can view and manage settings for your Crowdin Enterprise account using the Account Settings page.
Click the profile photo in the upper-right corner to access Account Settings. There you’ll be able to modify your personal information, manage profile security and notifications.
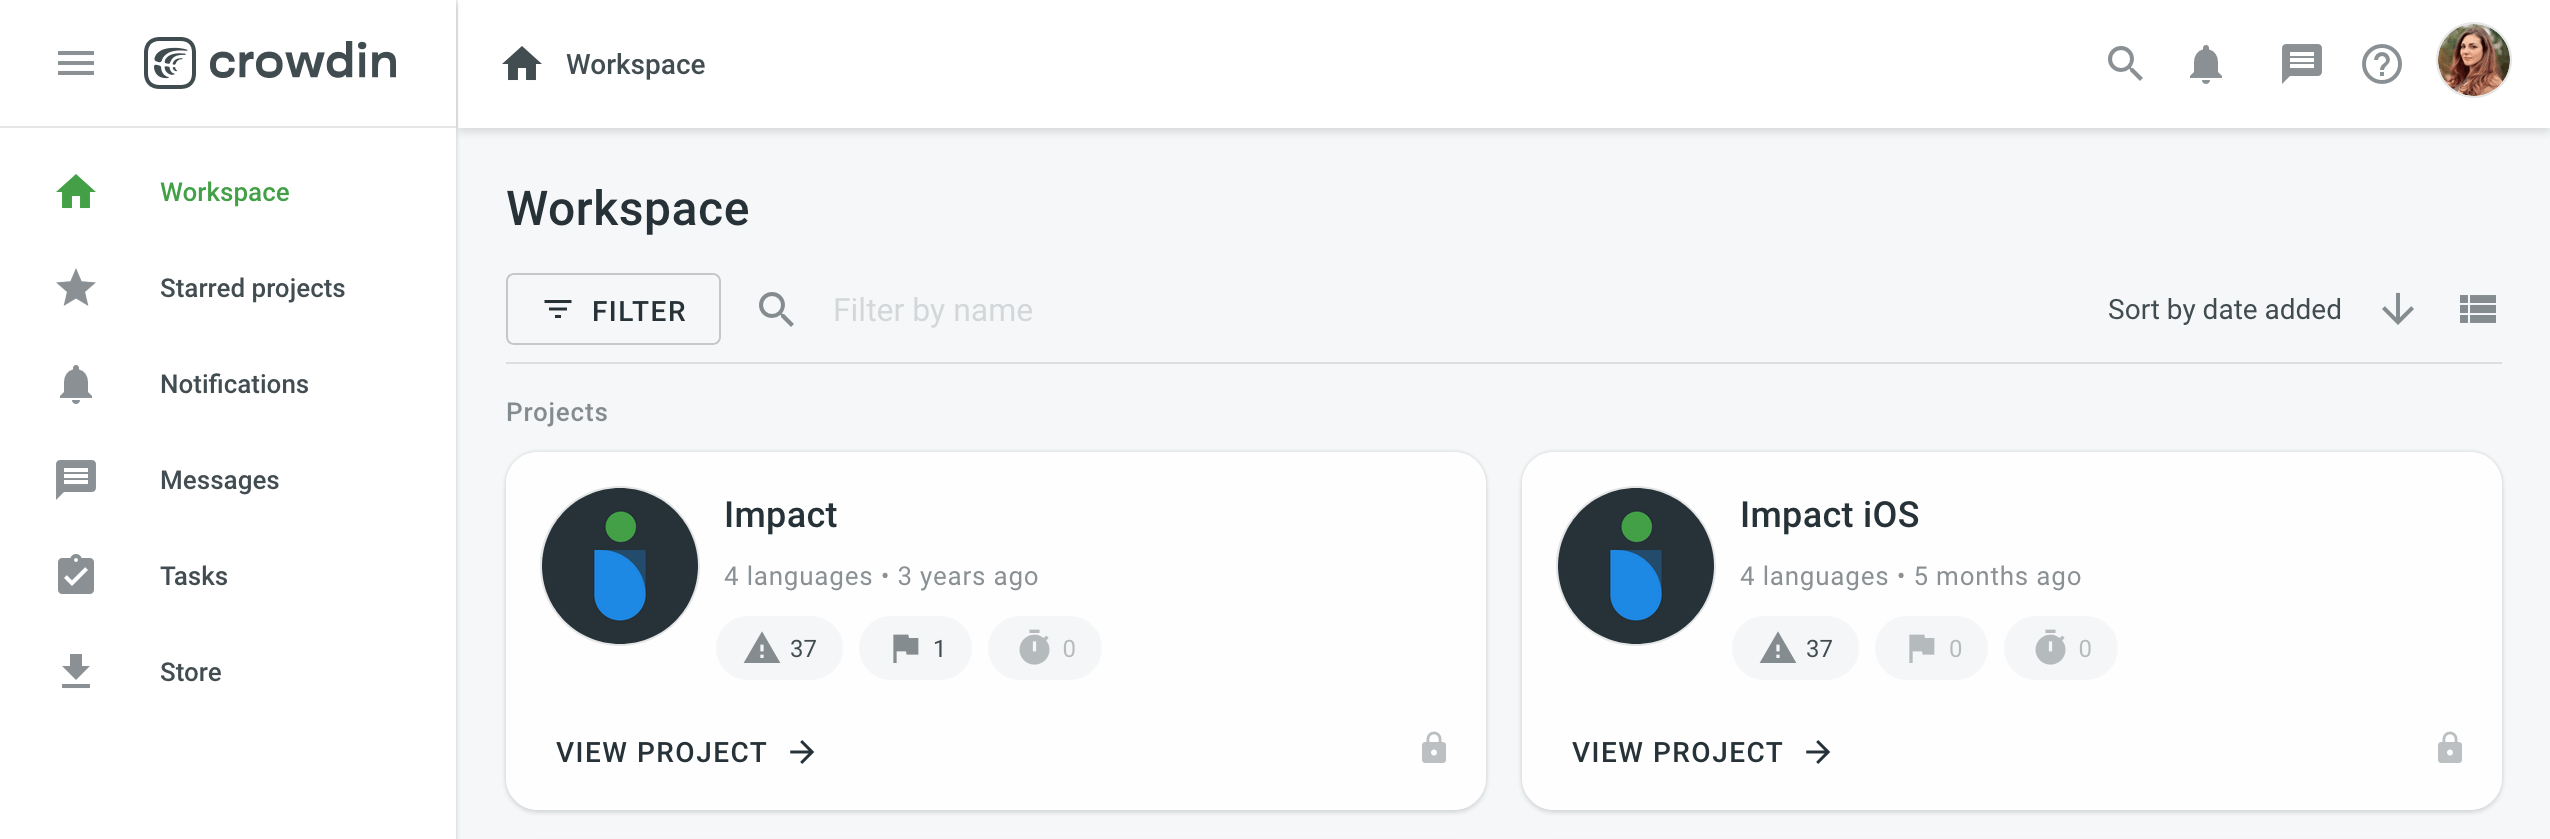
Explore Your Workspace
To access the workspace click Go To Console from the top right menu panel. Left-hand navigation gives you access to:
Left-hand navigation gives you access to:
-
Starred projects
This page contains all your starred projects. Use it for quick access to the projects you open the most often. -
Notifications
Check this page for all the key updates on all of the projects you’re a member of. For example, notifications on the new strings added, new tasks created, and more. You can also receive updates via email or in Slack. Go to Account Settings to change your notification preferences. -
Messages
Create one-to-one conversations or add as many project members to a conversation as needed. Every time you receive a message in any of the conversations, you’ll see it appear here. -
Tasks
This page will contain all the list of tasks assigned to you. Use the filter for better navigation and archive the completed tasks. -
Store
Crowdin Store offers 500+ apps you can install to extend Crowdin functionality. Explore Crowdin apps on the Crowdin Marketplace.
Project Page
Each project has its Home page that you can access from the Workspace by clicking View Project. On the main page, there’s a list of languages with which you can work.
Click the disclosure button next to the needed language and Go To Editor to start the translation. This way, you can access all strings at once.
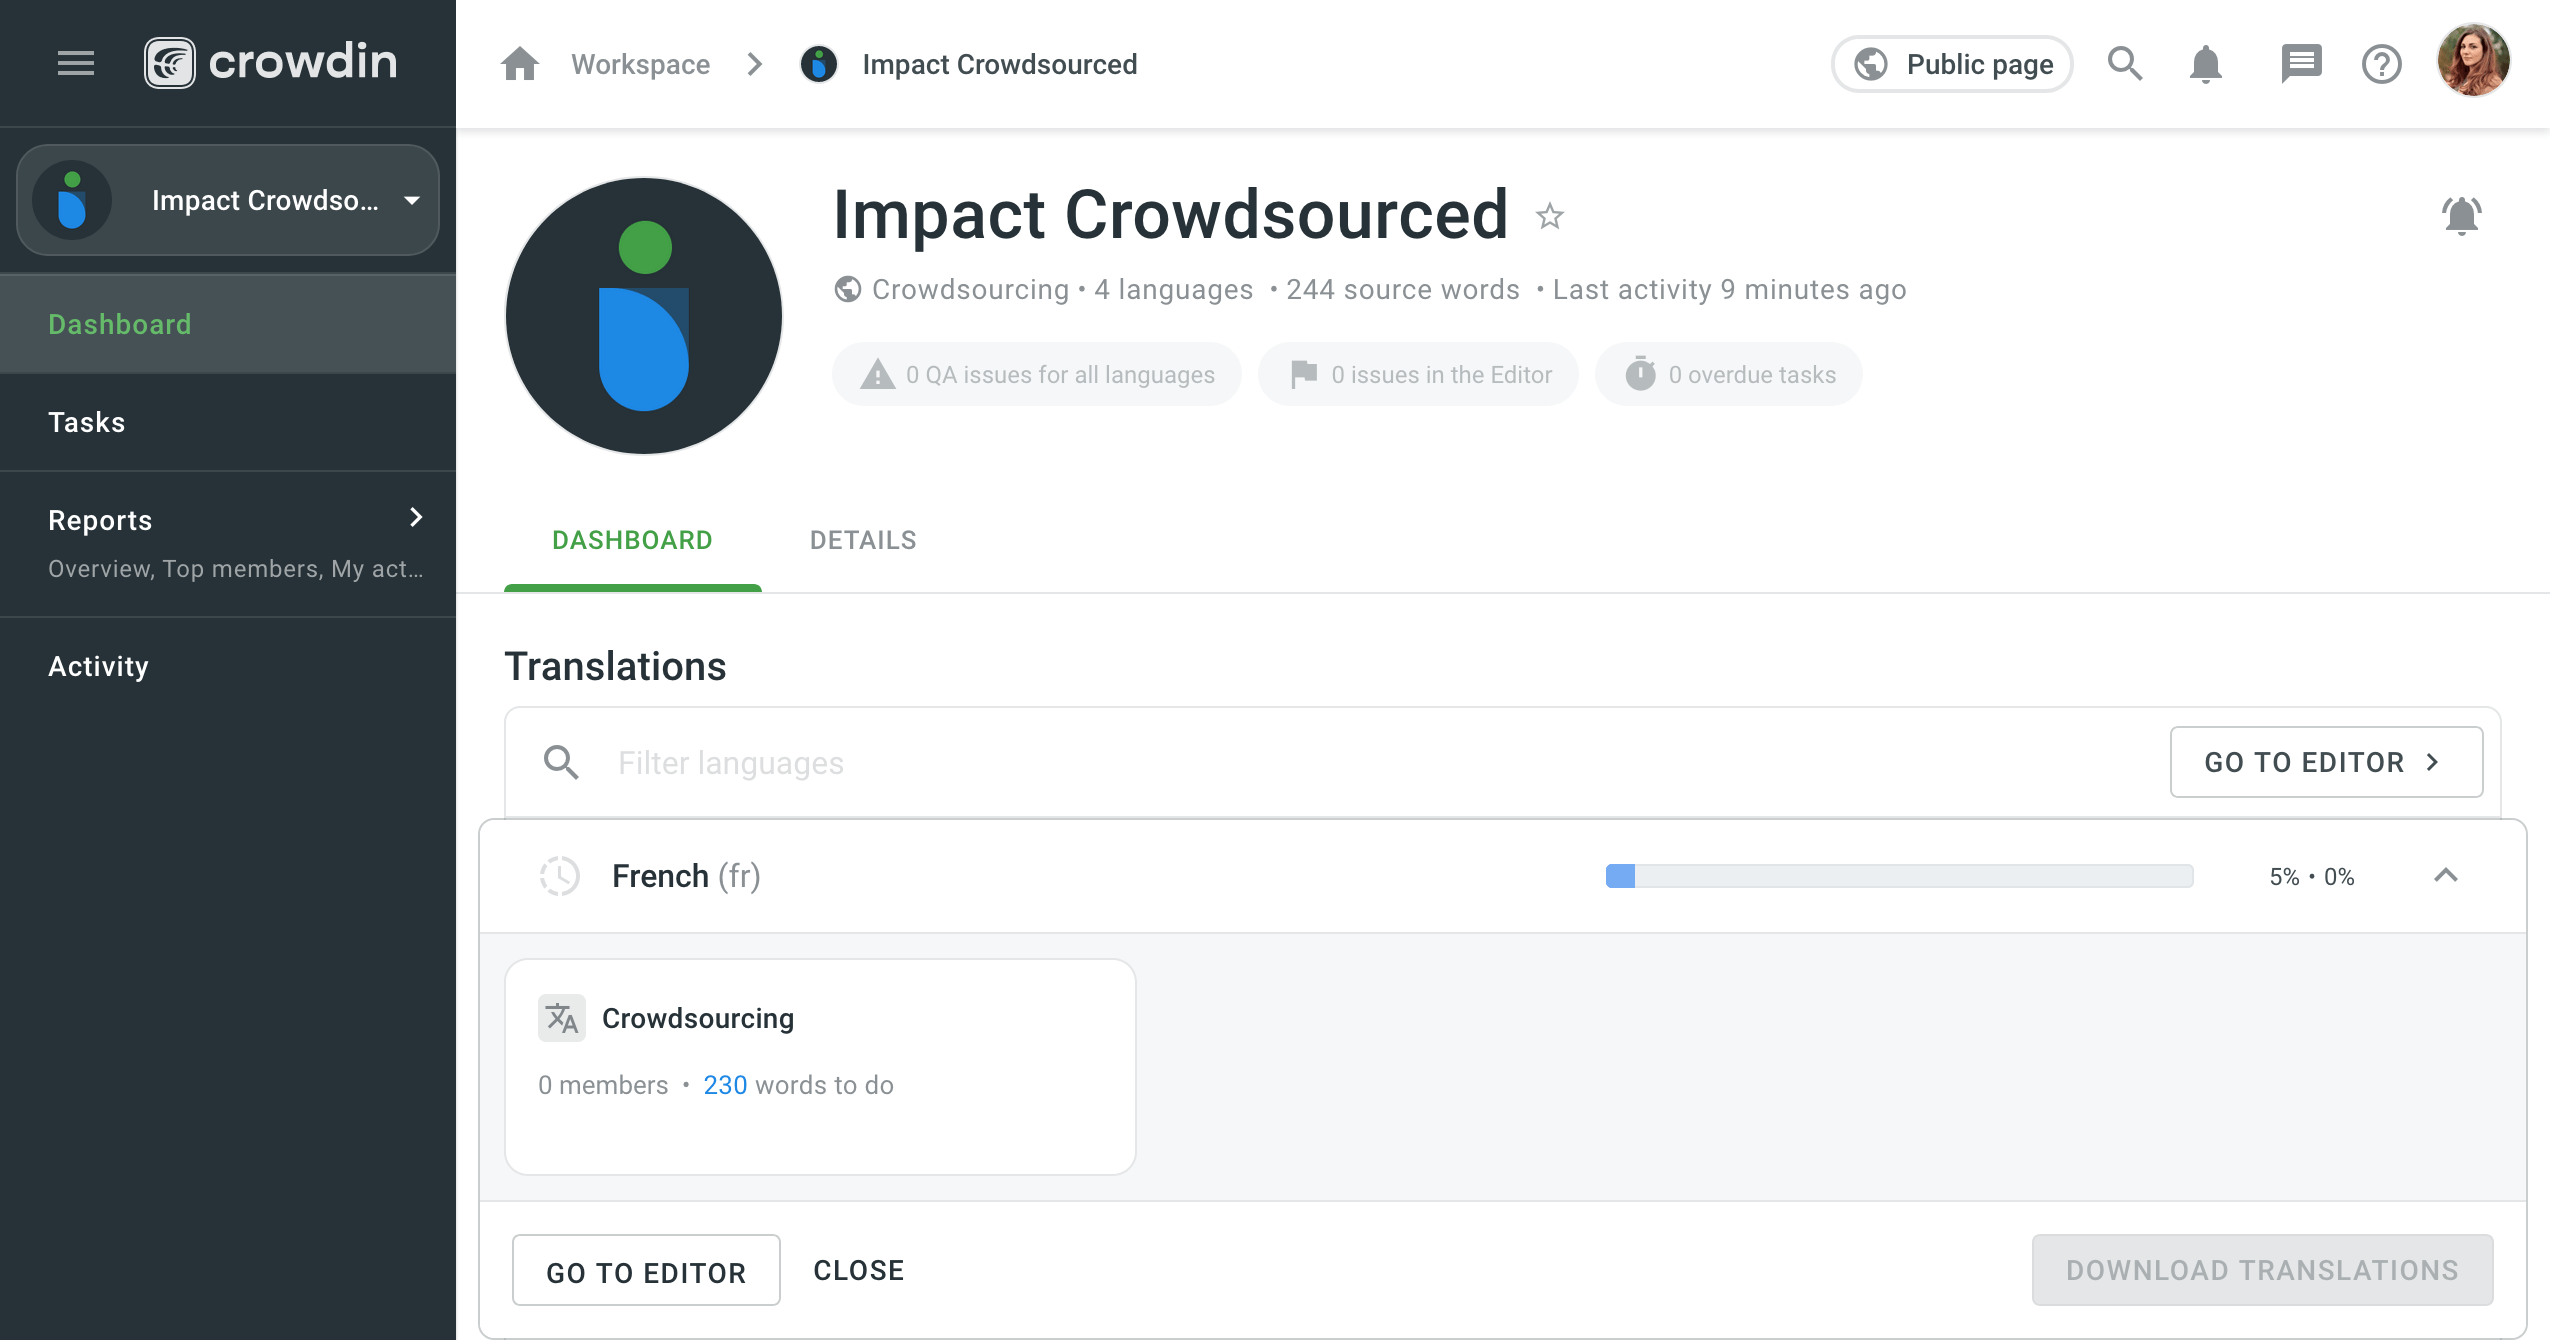
To access separate source files, click on the necessary target language from the list.
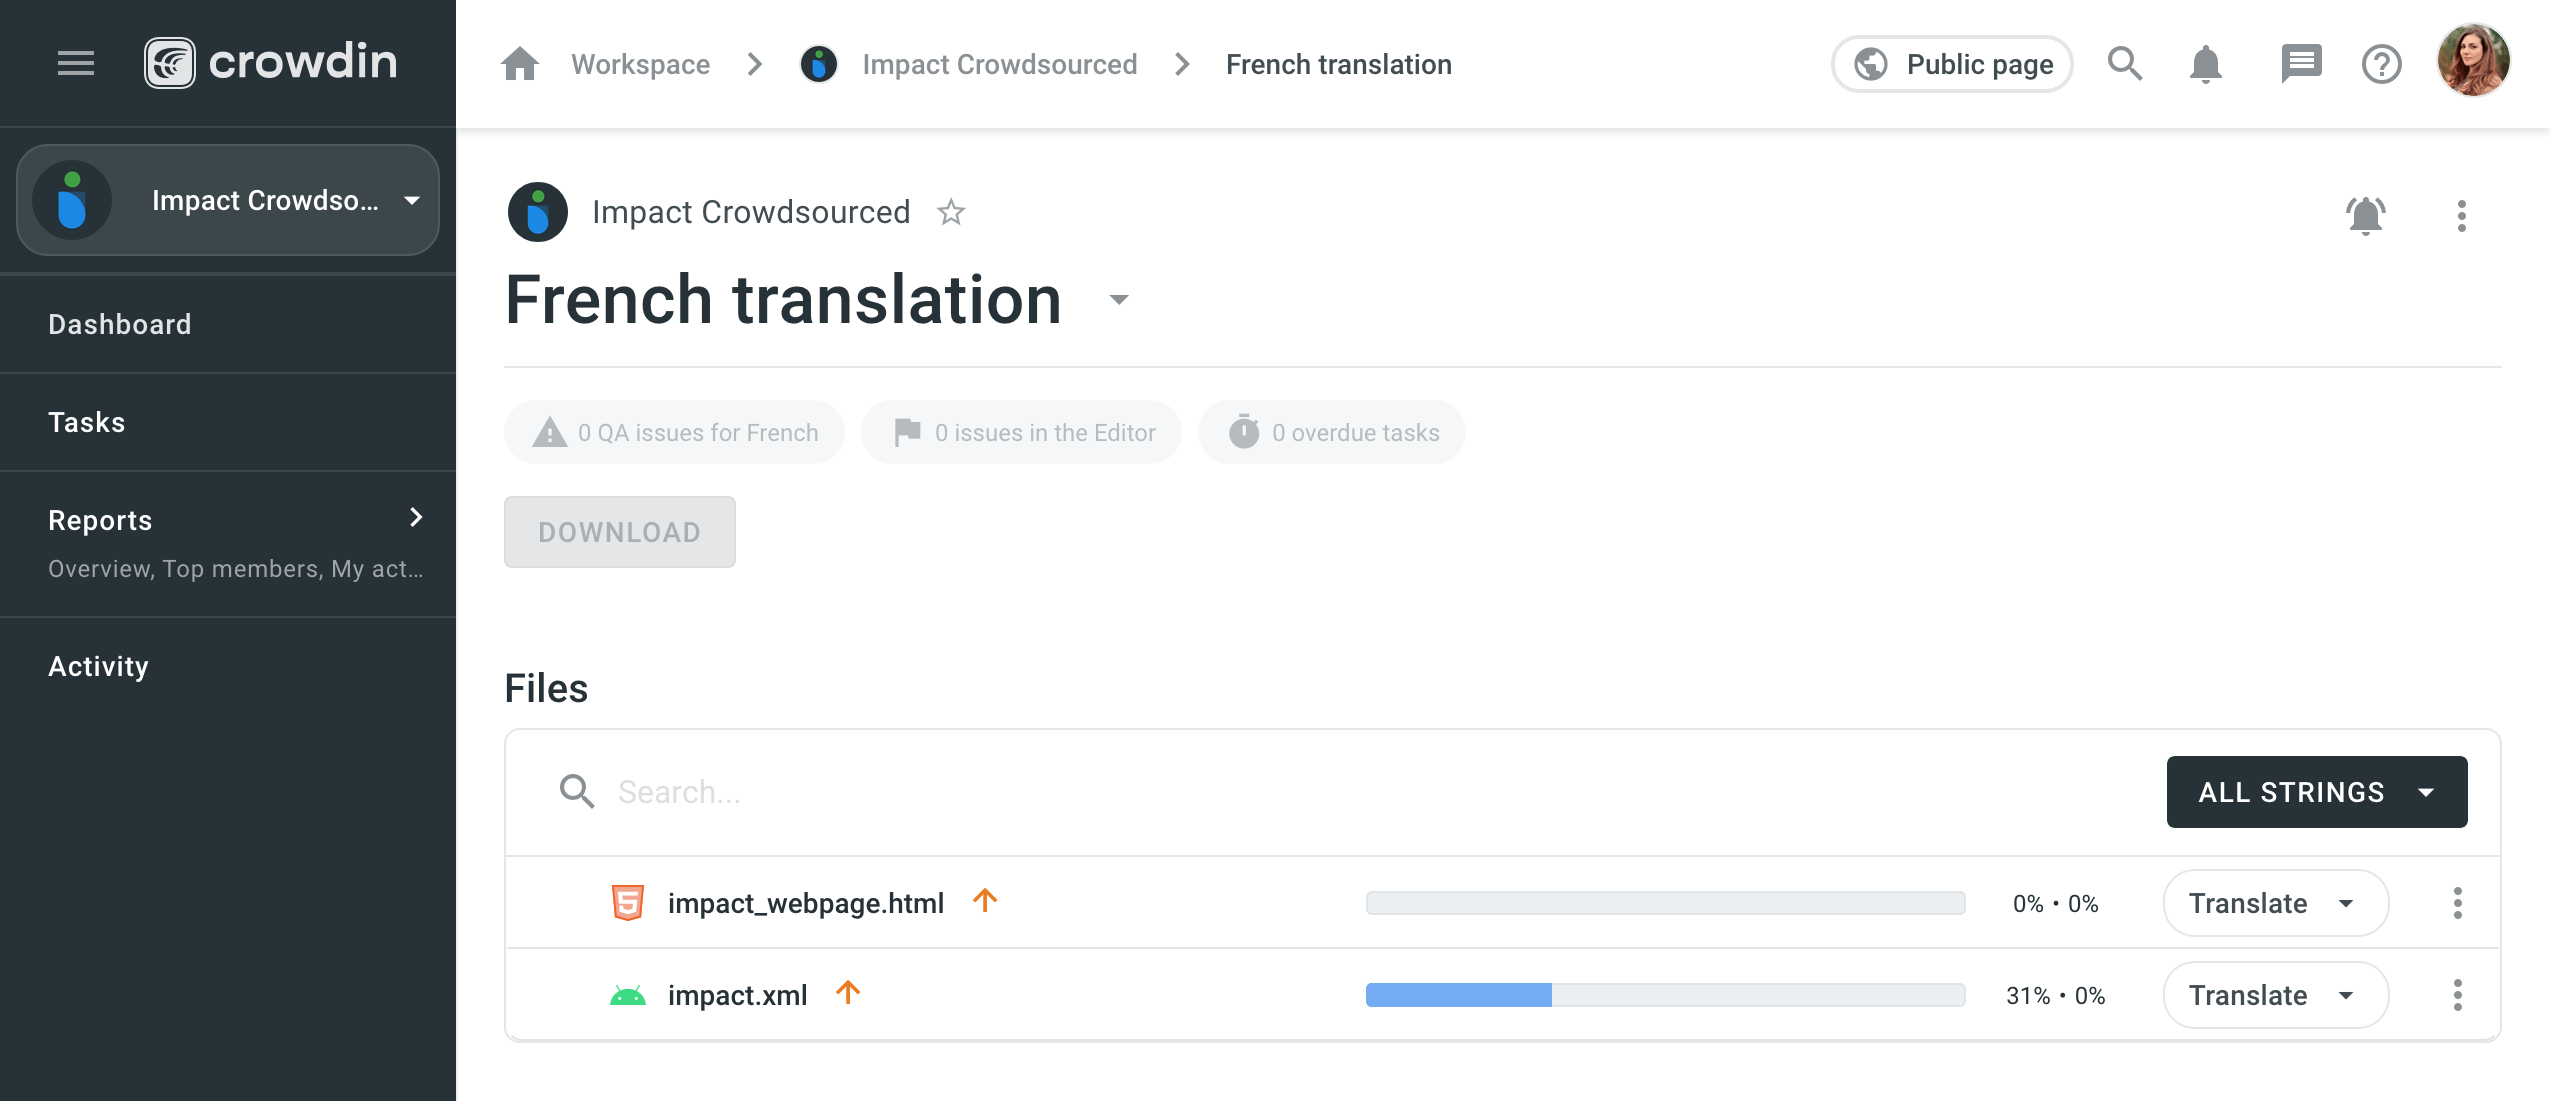
As soon as you do the first translation, you’ll become a member of the project. Managers will then be able to assign specific tasks to you.
Work in the Editor
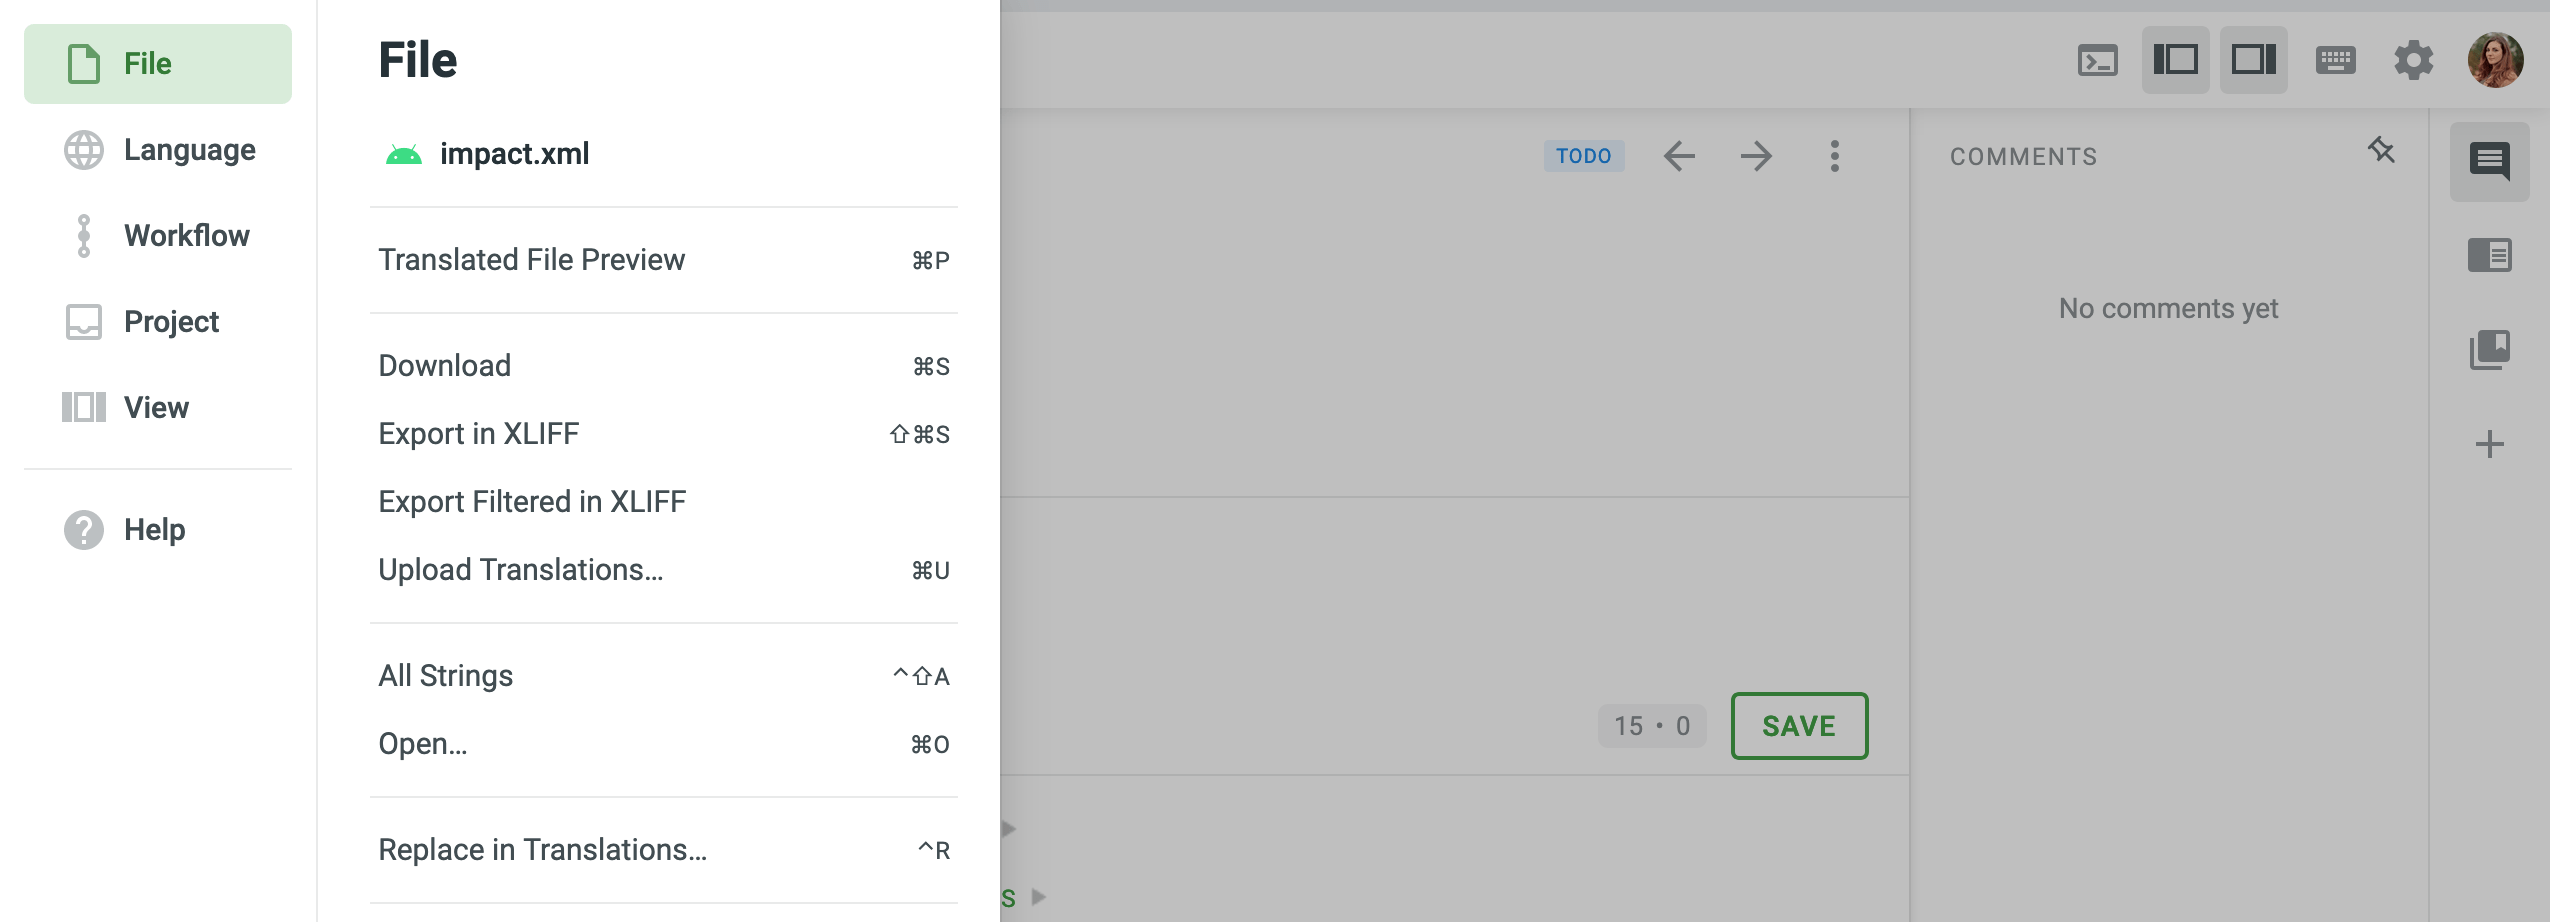
Menu ![]() in the upper-left corner allows you to switch between files for translations, change translation language, contact manager, configure the view or quit editor.
in the upper-left corner allows you to switch between files for translations, change translation language, contact manager, configure the view or quit editor.
All the translations are mainly done in Editor and it has four main sections as shown below.
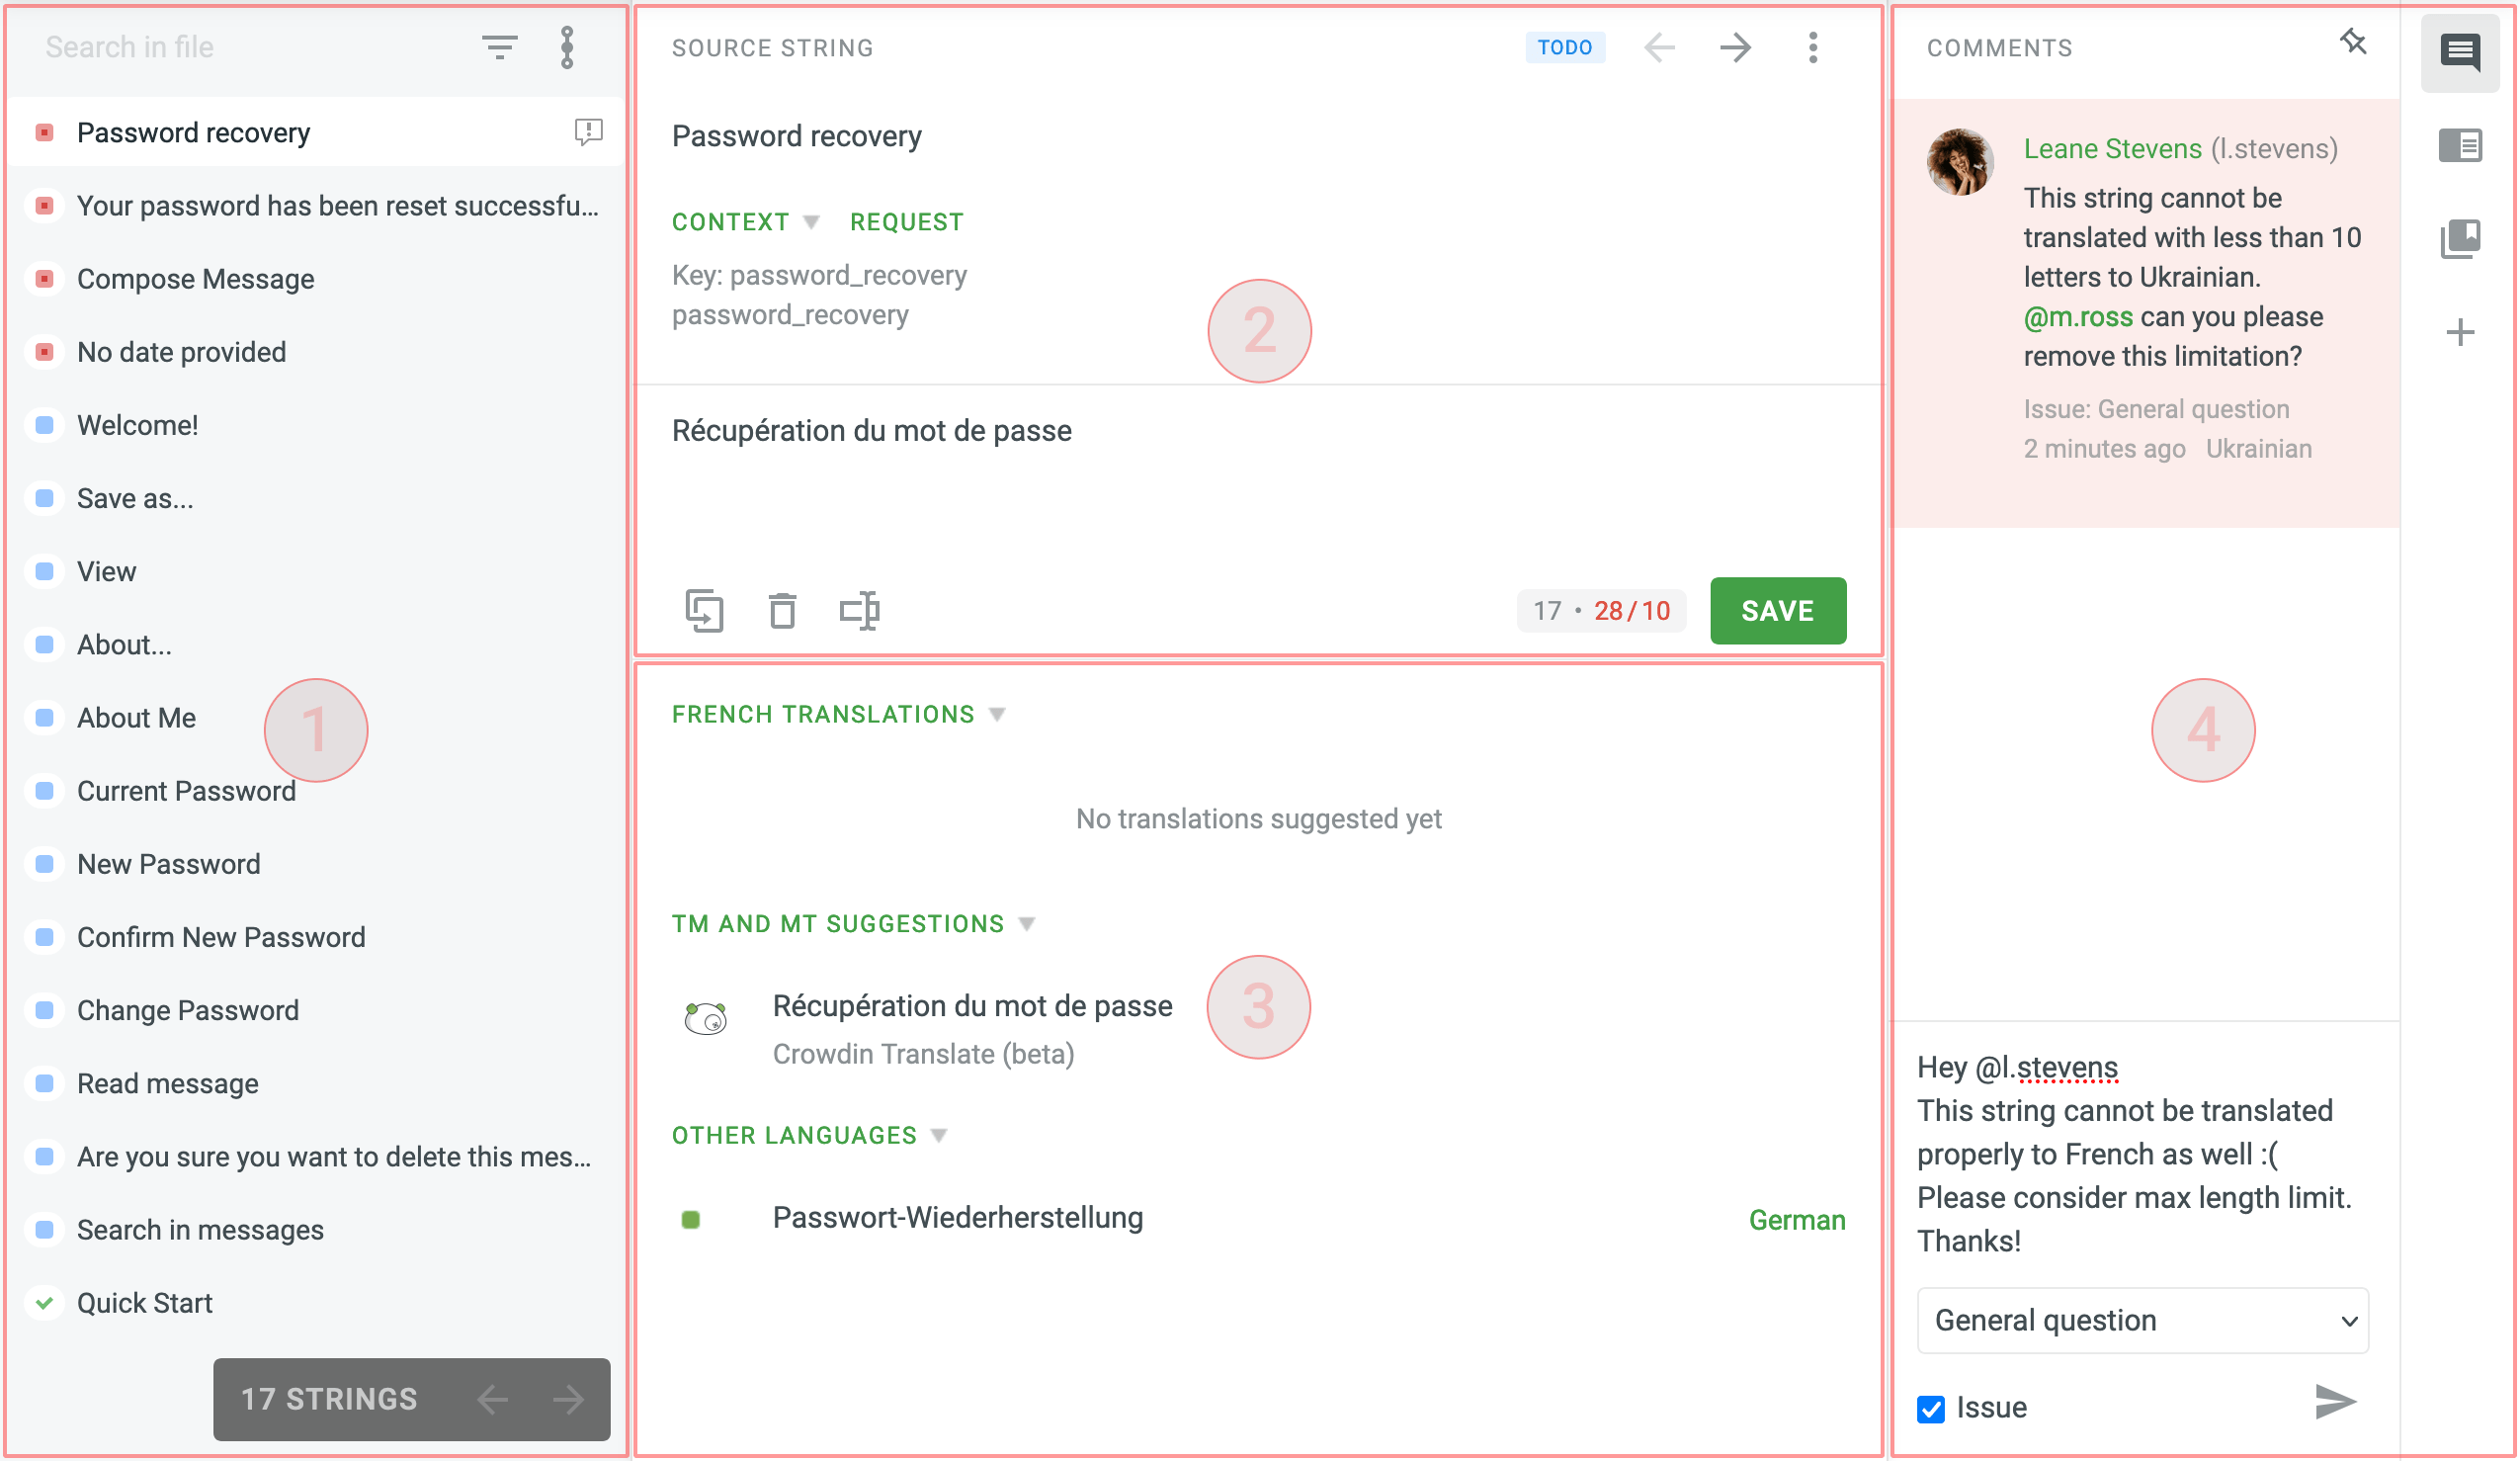
Section 1 (Left sidebar)
In the left section, you will see the list of strings for translation. Strings are text elements that are either individual words, expressions, or sentences. Some of them might have replacement tokens ({0}, {1}, or %1) or elements of ICU message syntax. To work with such strings, you should copy the source string and translate only the real words.
Section 2 (Middle-top area)
The main working area with the source string on the top, and the section where you can type in translations below.
The context to the string is shown right below the source string. Typically it can include descriptions and screenshots. You can request context from here if necessary.
In the translation window, you may also see the maximum length of the translation limit in case it’s exceeded.
Section 3 (Middle-bottom area)
This section will contain all the resources and previous translations you might refer to:
- Translations by other project members
- Translation Memory (TM) suggestions
- Machine Translation (MT) suggestions
- Translations to other languages
Section 4 (Right sidebar)
Discuss the meaning of the source string or other related questions here. You can mention the particular person you’d like to address or create an issue related to the string.
Tastaturkürzel
Click keyboard ![]() icon in the upper-right corner to check the list of available shortcuts. They will help to take actions in the Editor quickly. All hotkeys can be customized. Click on the necessary key combination, and modify it with the help of your keyboard.
icon in the upper-right corner to check the list of available shortcuts. They will help to take actions in the Editor quickly. All hotkeys can be customized. Click on the necessary key combination, and modify it with the help of your keyboard.
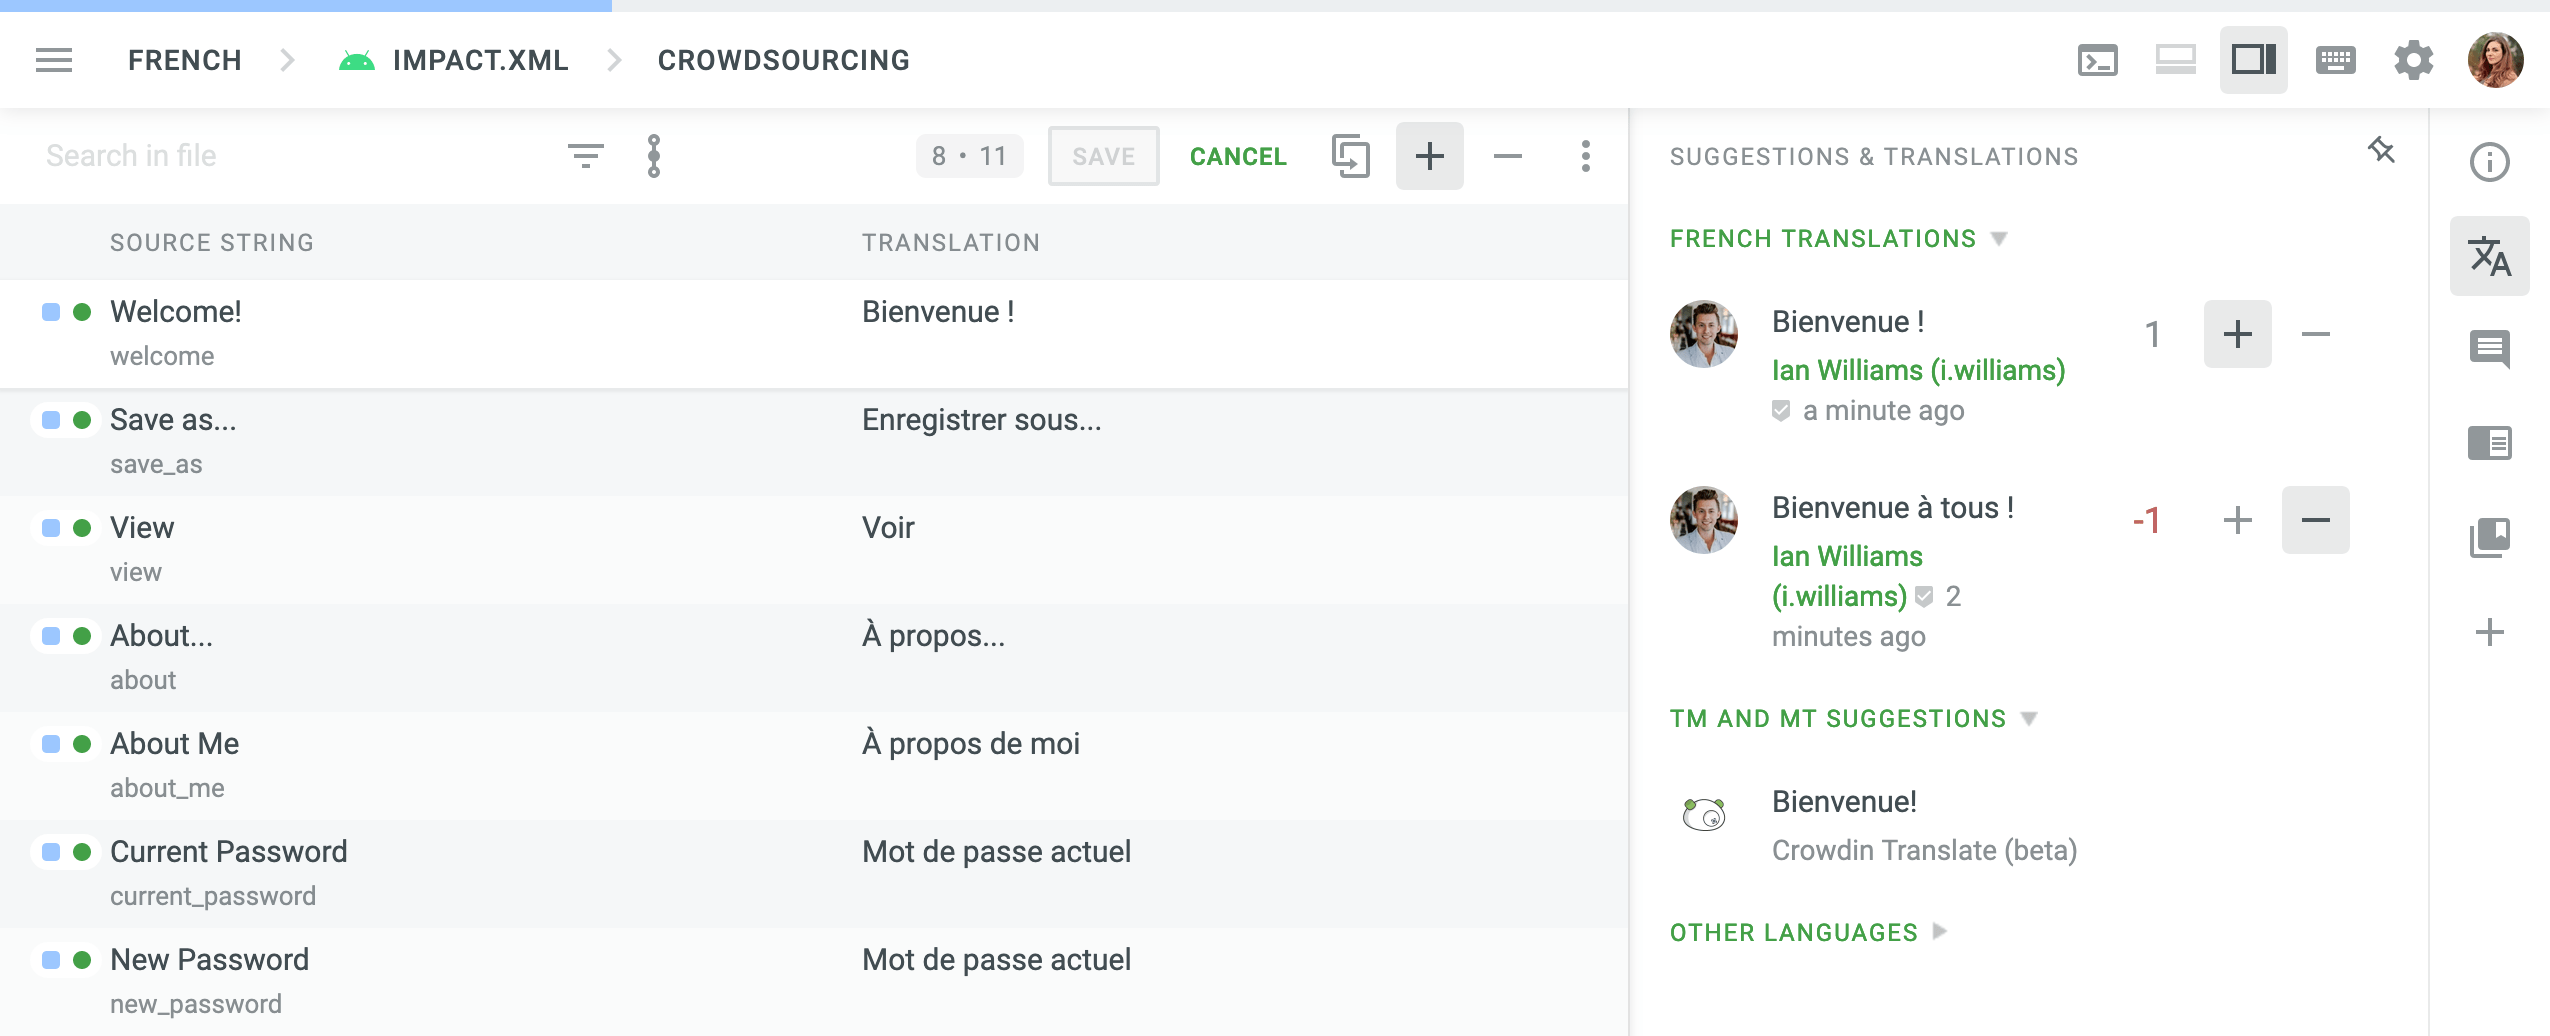
Voting in Side-by-Side View
You can switch to the Side-by-Side view for comfortable voting for multiple best translations in a row. Vote up or down the translations of strings made by other project members.
To switch to the Side-by-Side view, click on the Main menu ![]() in the upper-left corner and choose View > Side-by-Side.
in the upper-left corner and choose View > Side-by-Side.
To vote, click on the plus ![]() sign if you like the translation or minus
sign if you like the translation or minus ![]() - if the translation doesn’t seem correct. Translations that get the most positive votes will then appear on the top of all the translations available for the string.
- if the translation doesn’t seem correct. Translations that get the most positive votes will then appear on the top of all the translations available for the string.