Für Übersetzer
You’ve been invited to the Crowdin Enterprise project and not sure where to start? Here’s everything you need to proceed with translating and proofreading. This article will walk you through the basics of the translation process in Crowdin Enterprise.
Accept Invitation and Create an Account
You will receive an invitation email or a link from a project manager to join the organization in Crowdin Enterprise. After you accept the invitation, you will be redirected to the Signup page where you will create a new account.
Explore Your Workspace
Workspace is the first page you’ll see after a successful registration. You will have proofreader or translator (or both) access to the project steps you’ve been assigned to work with. You can access each of them from the main window.
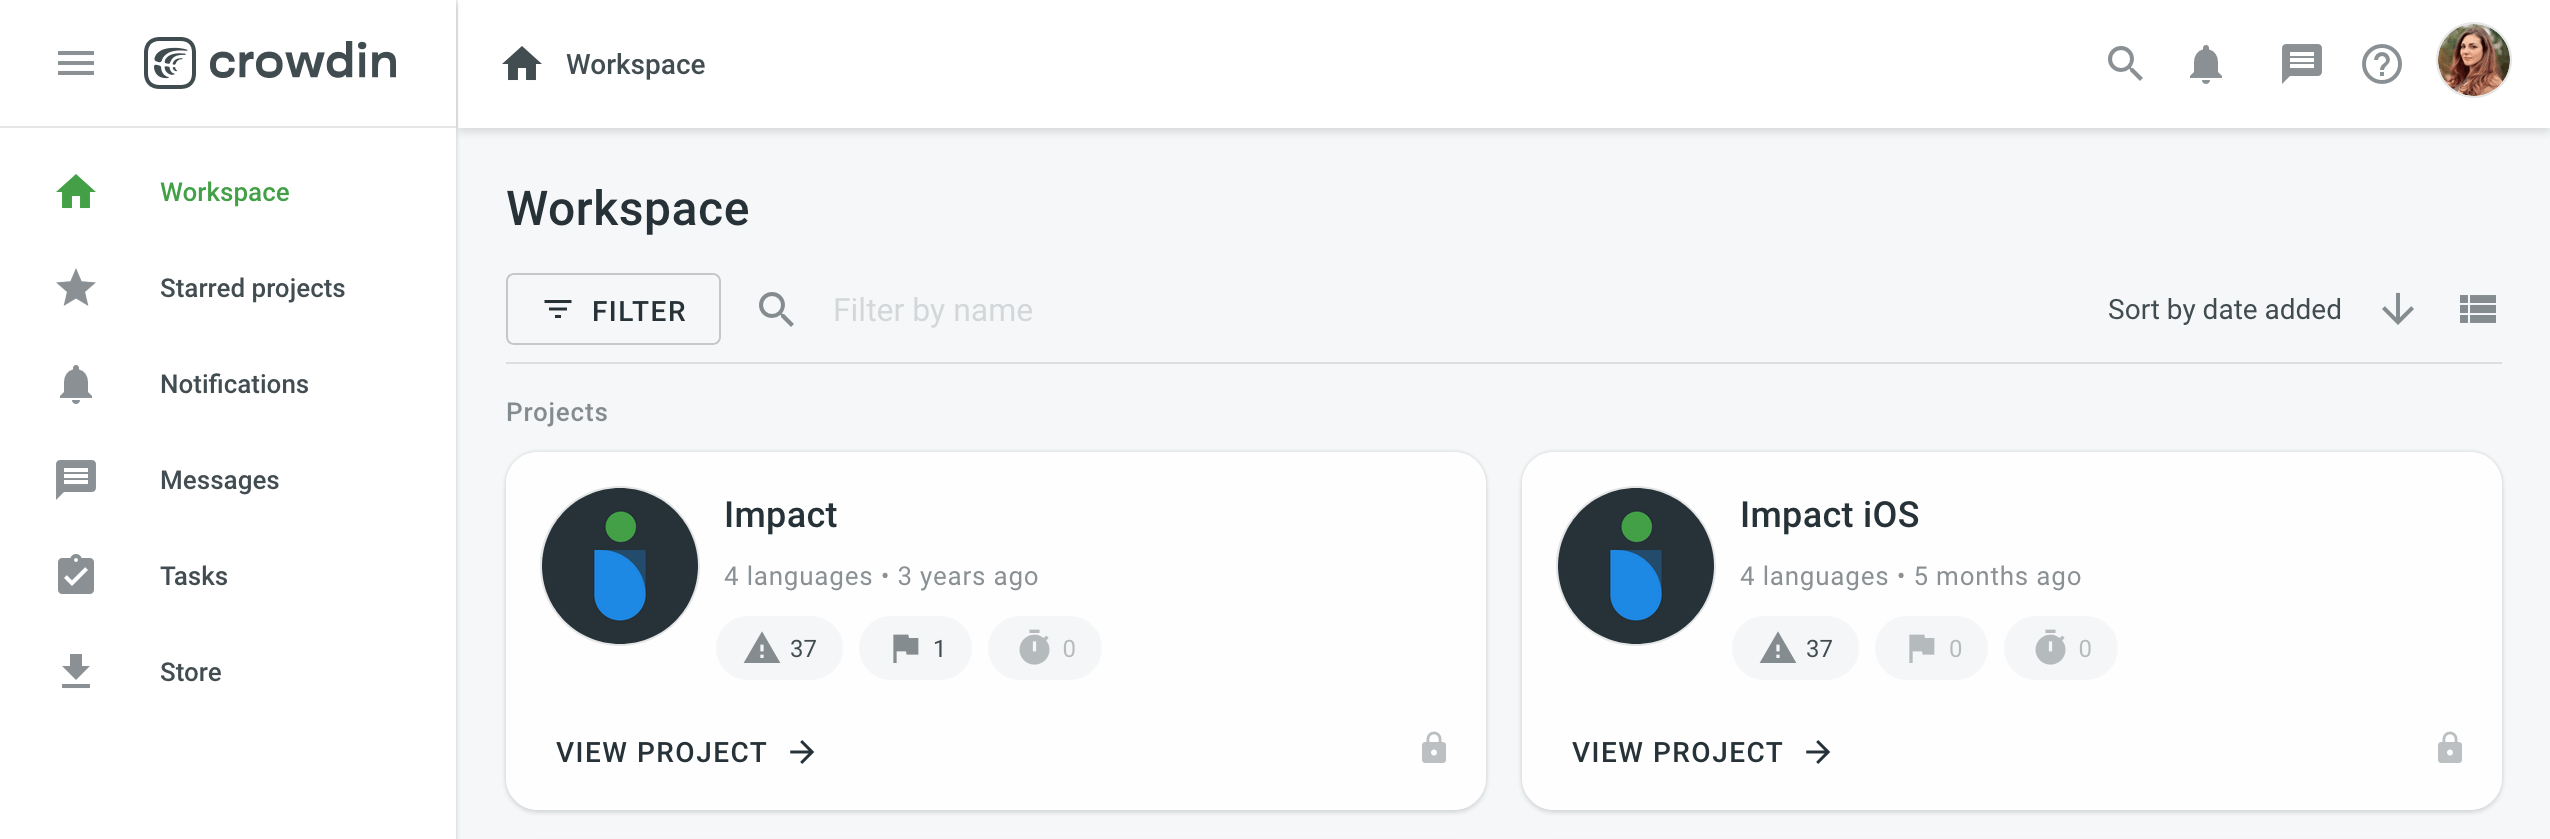
Left-hand navigation gives you access to:
-
Starred projects
This page contains all your starred projects. Use it for quick access to the projects you open the most often. -
Notifications
Check this page for all the key updates on all of the projects you’re a member of. For example, notifications on the new strings added, new tasks created, and more. You can also receive updates via email or in Slack. Go to Account Settings to change your notification preferences. -
Messages
Create one-to-one conversations or add as many project members to a conversation as needed. Every time you receive a message in any of the conversations, you’ll see it appear here. -
Tasks
This page will contain all the list of tasks assigned to you. Use the filter for better navigation and archive the completed tasks. -
Store
Crowdin Store offers 500+ apps you can install to extend Crowdin functionality. Explore Crowdin apps on the Crowdin Marketplace.
Project Page
Each project has its own Dashboard page where you can see some basic information about the project, such as the number of target languages and source words, the last activity, and a list of the languages you’ve been assigned to work with.
Click the disclosure button next to the language to see workflow steps assigned to you. You can choose the workflow step and open all the strings you will work with at this step in the Editor.
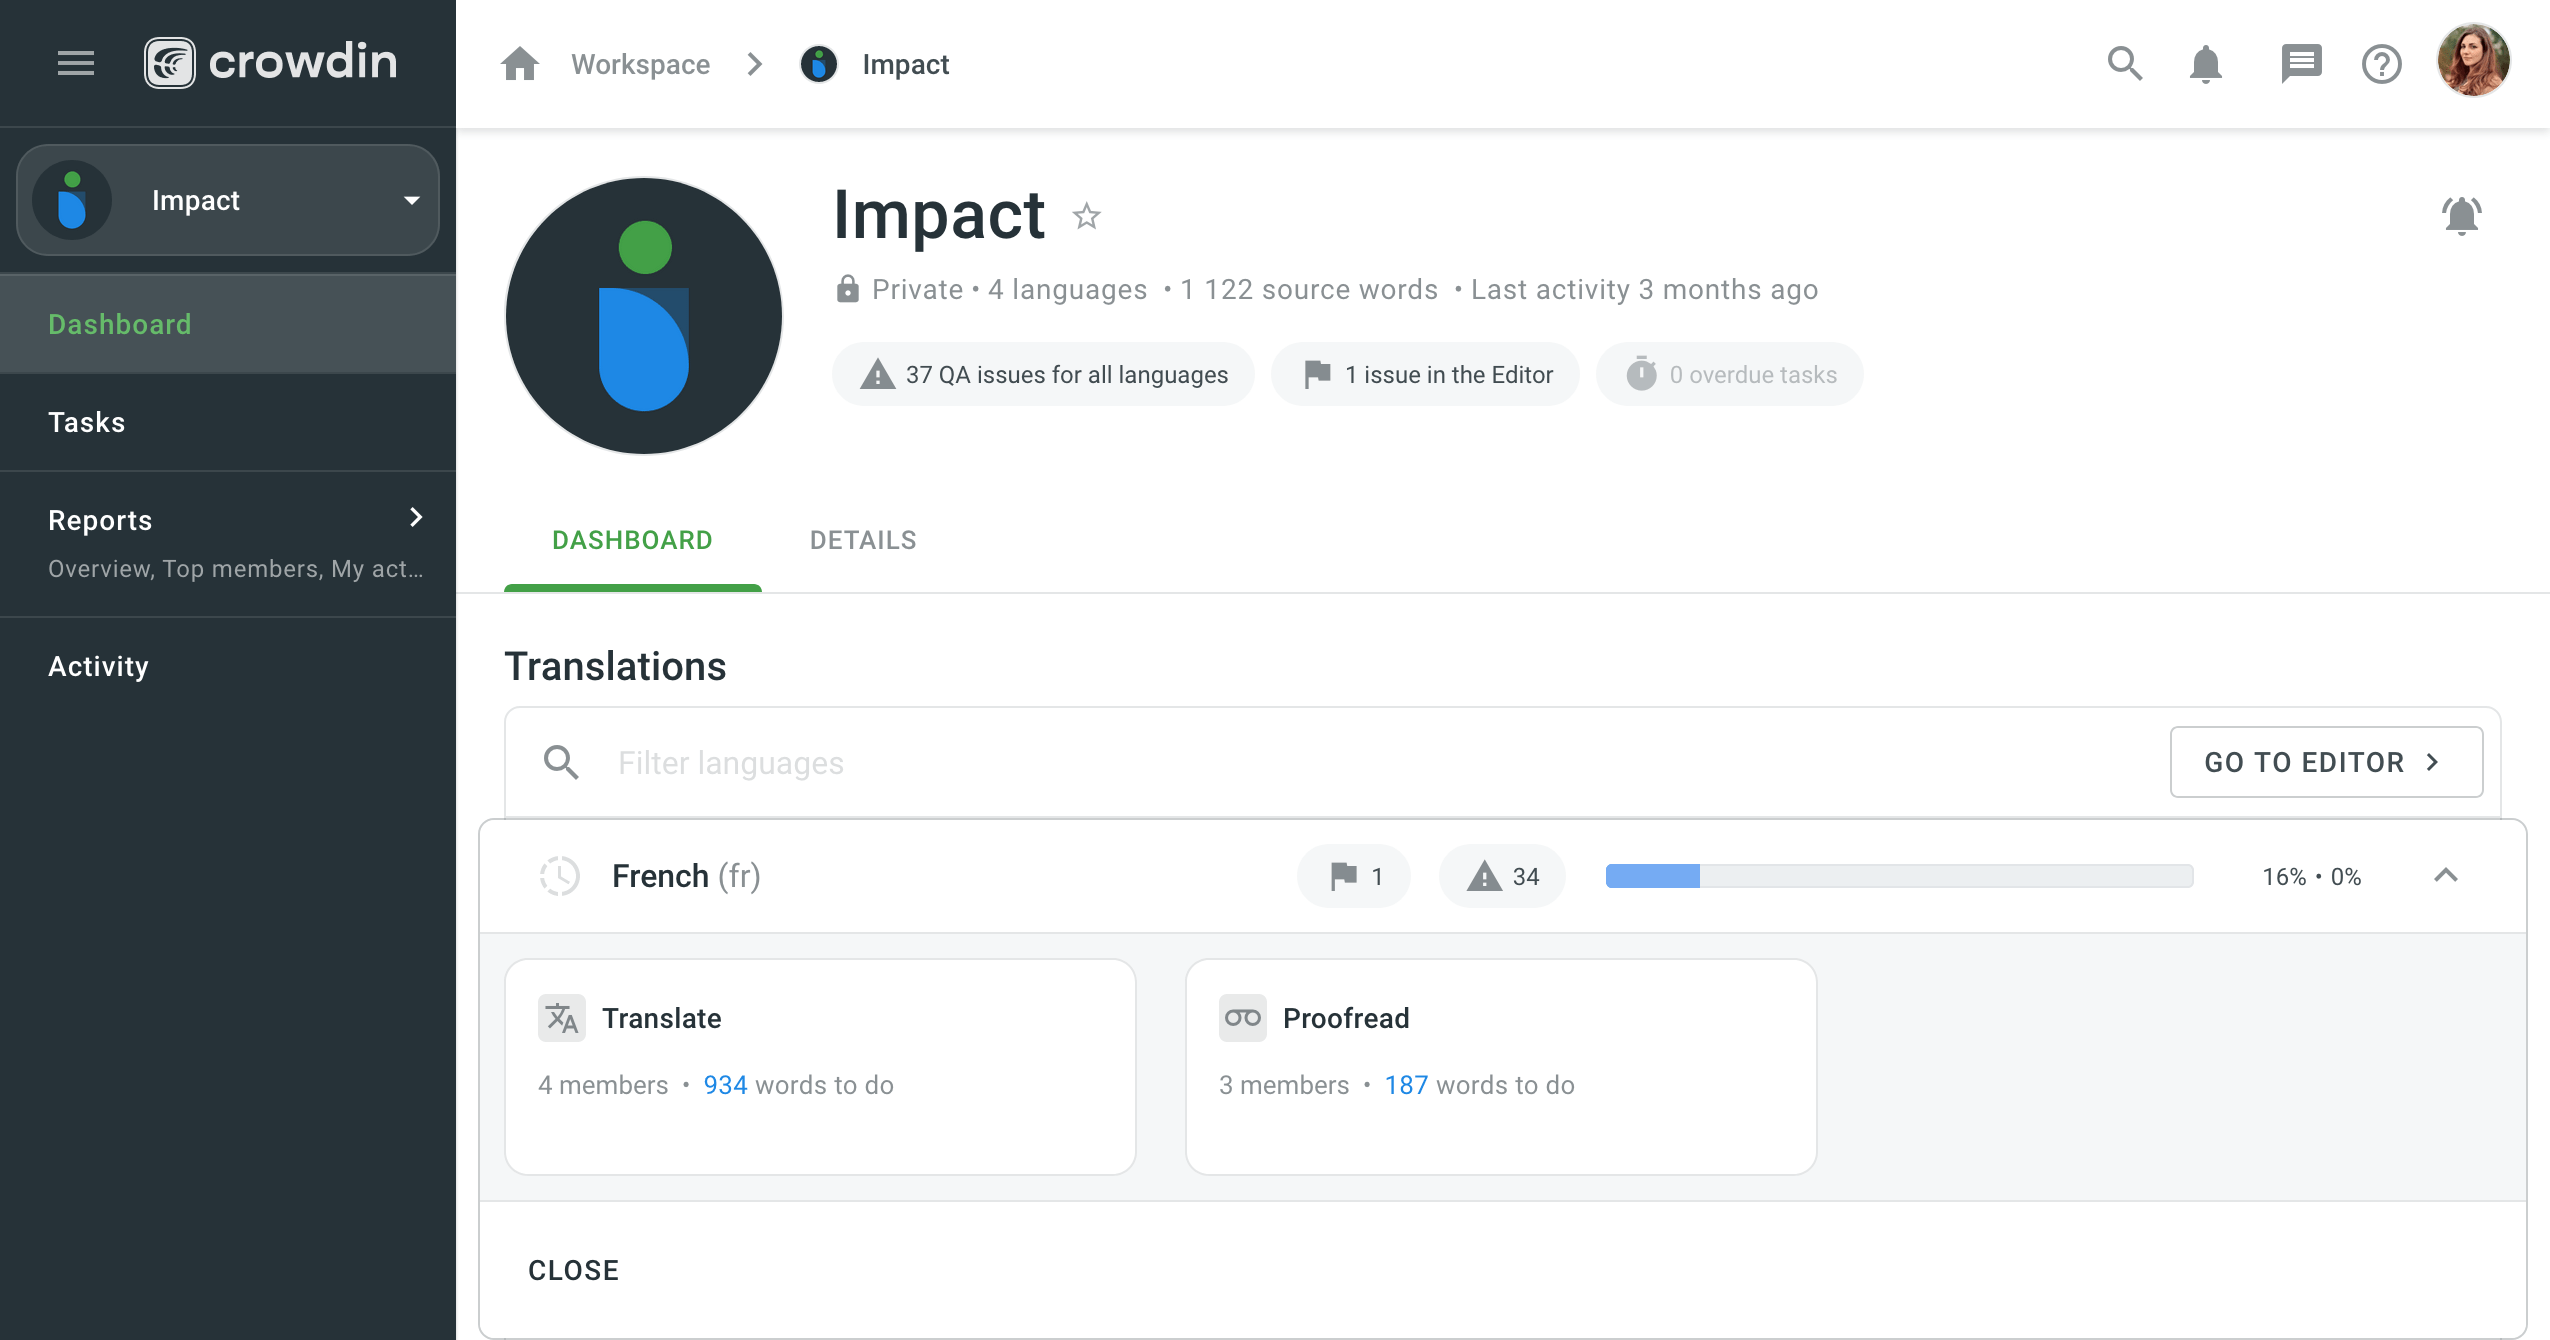
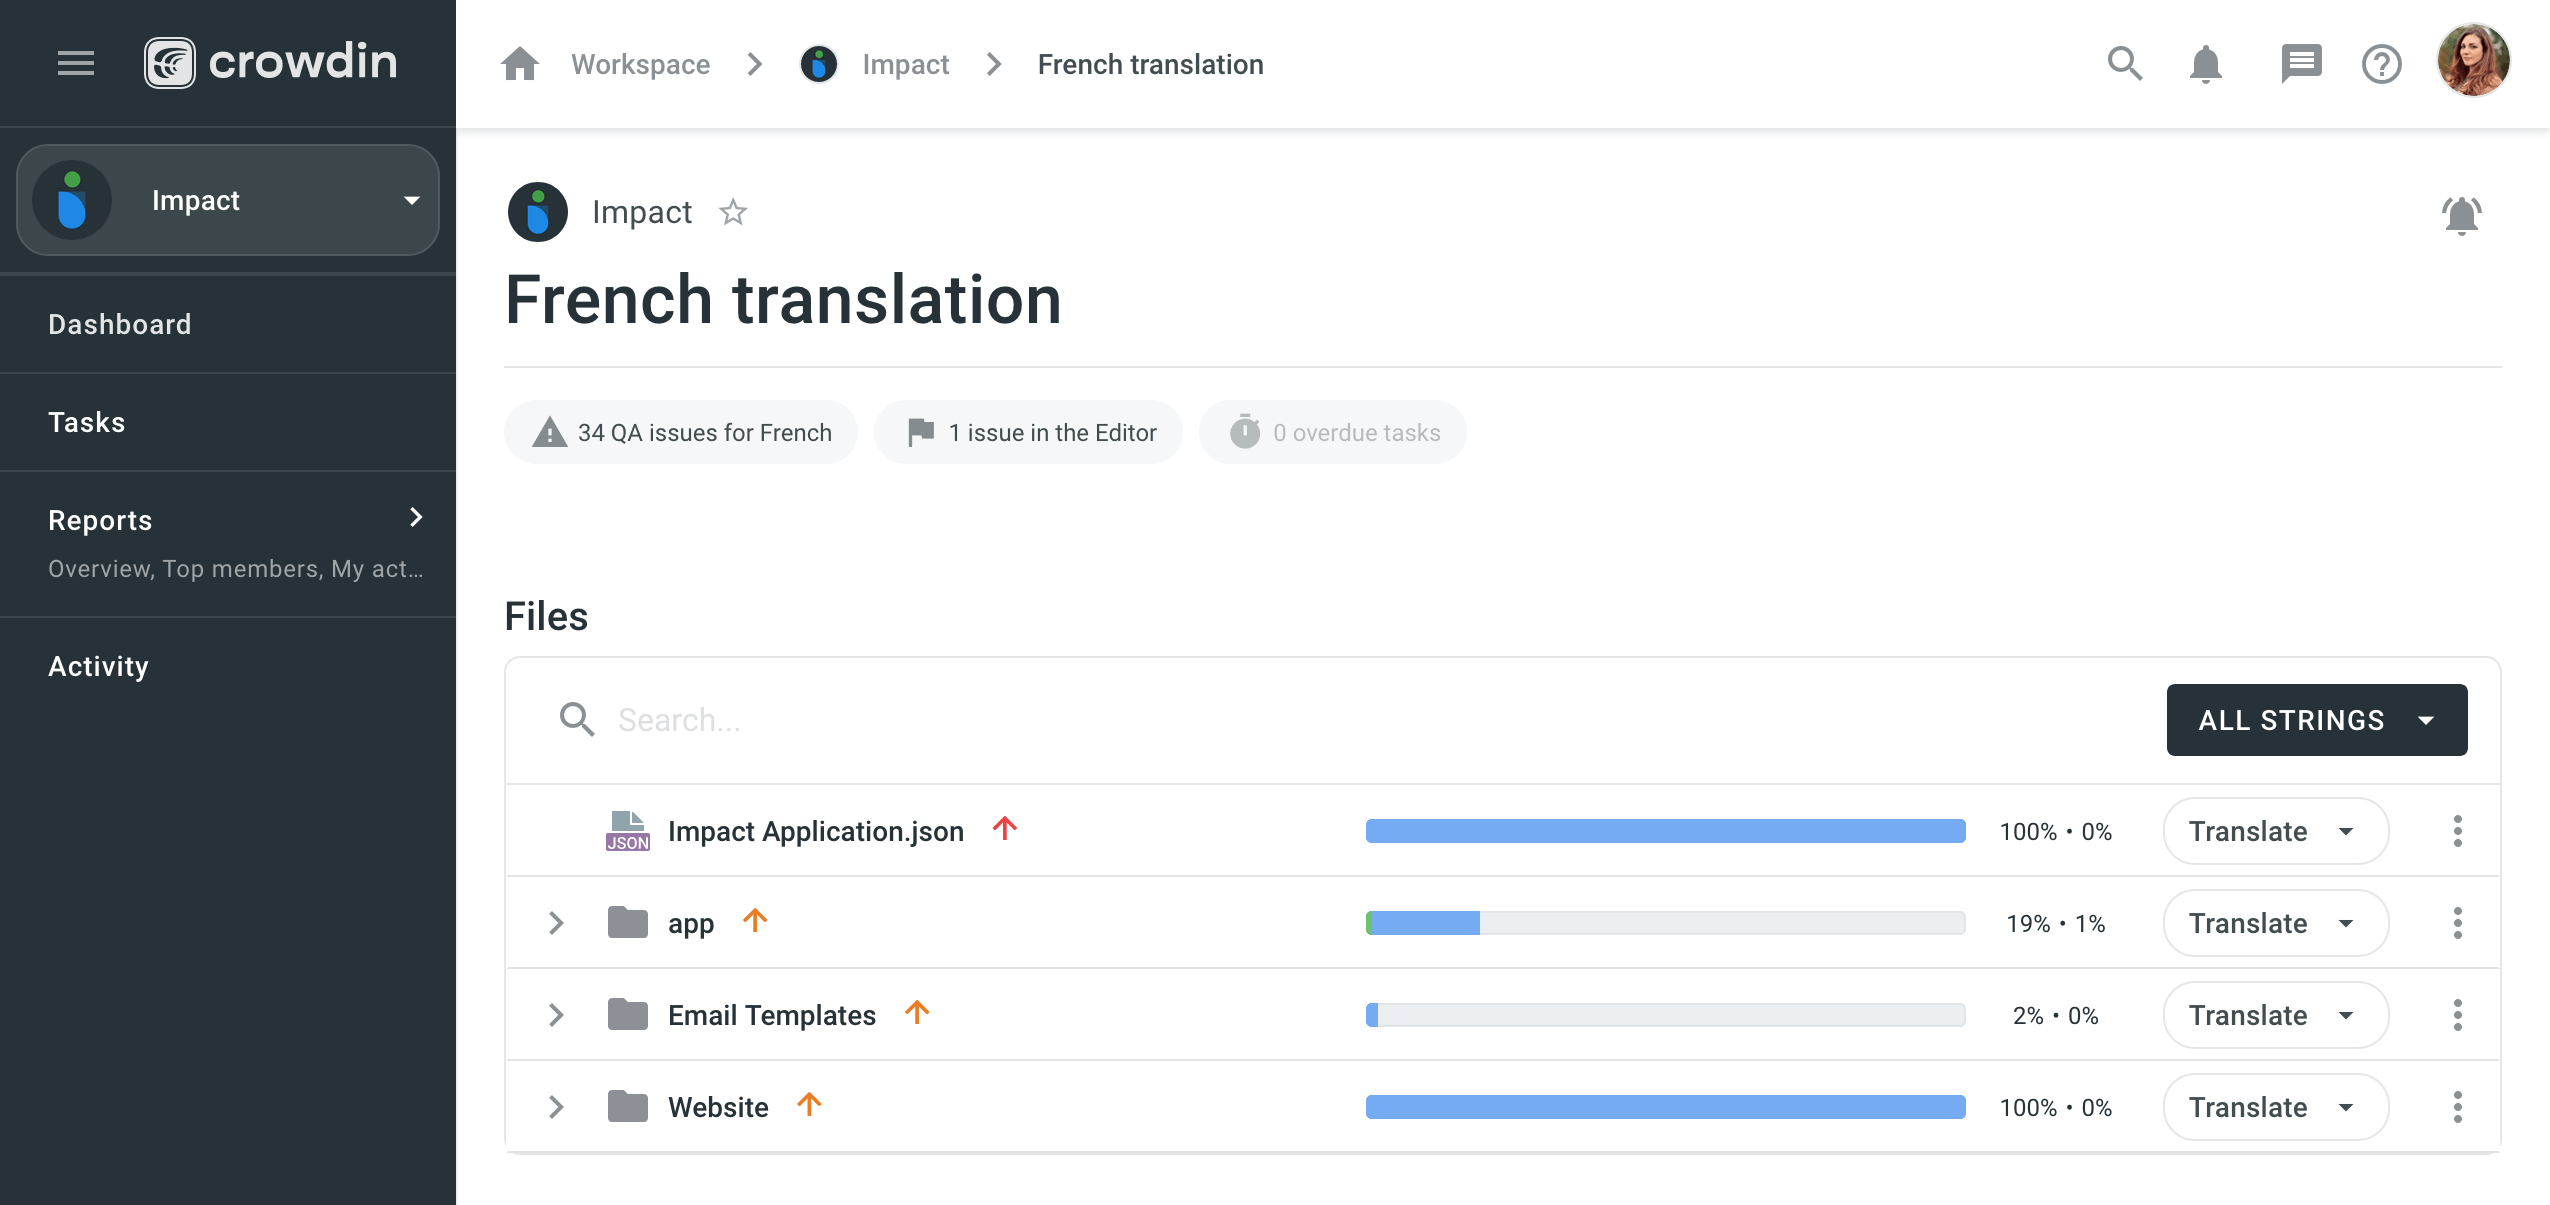
To access separate source files, click on the necessary target language from the list.
Work in the Editor
Translators and proofreaders work in the Editor. Open each file in the Editor separately or access all the strings of the assigned workflow step at once. You can switch between the files directly in the Editor. You can switch between the files directly in Editor.
There are shortcuts you can use in the Editor.
Übersetzung
If you open the Editor on a translation step, you’ll see the following sections:
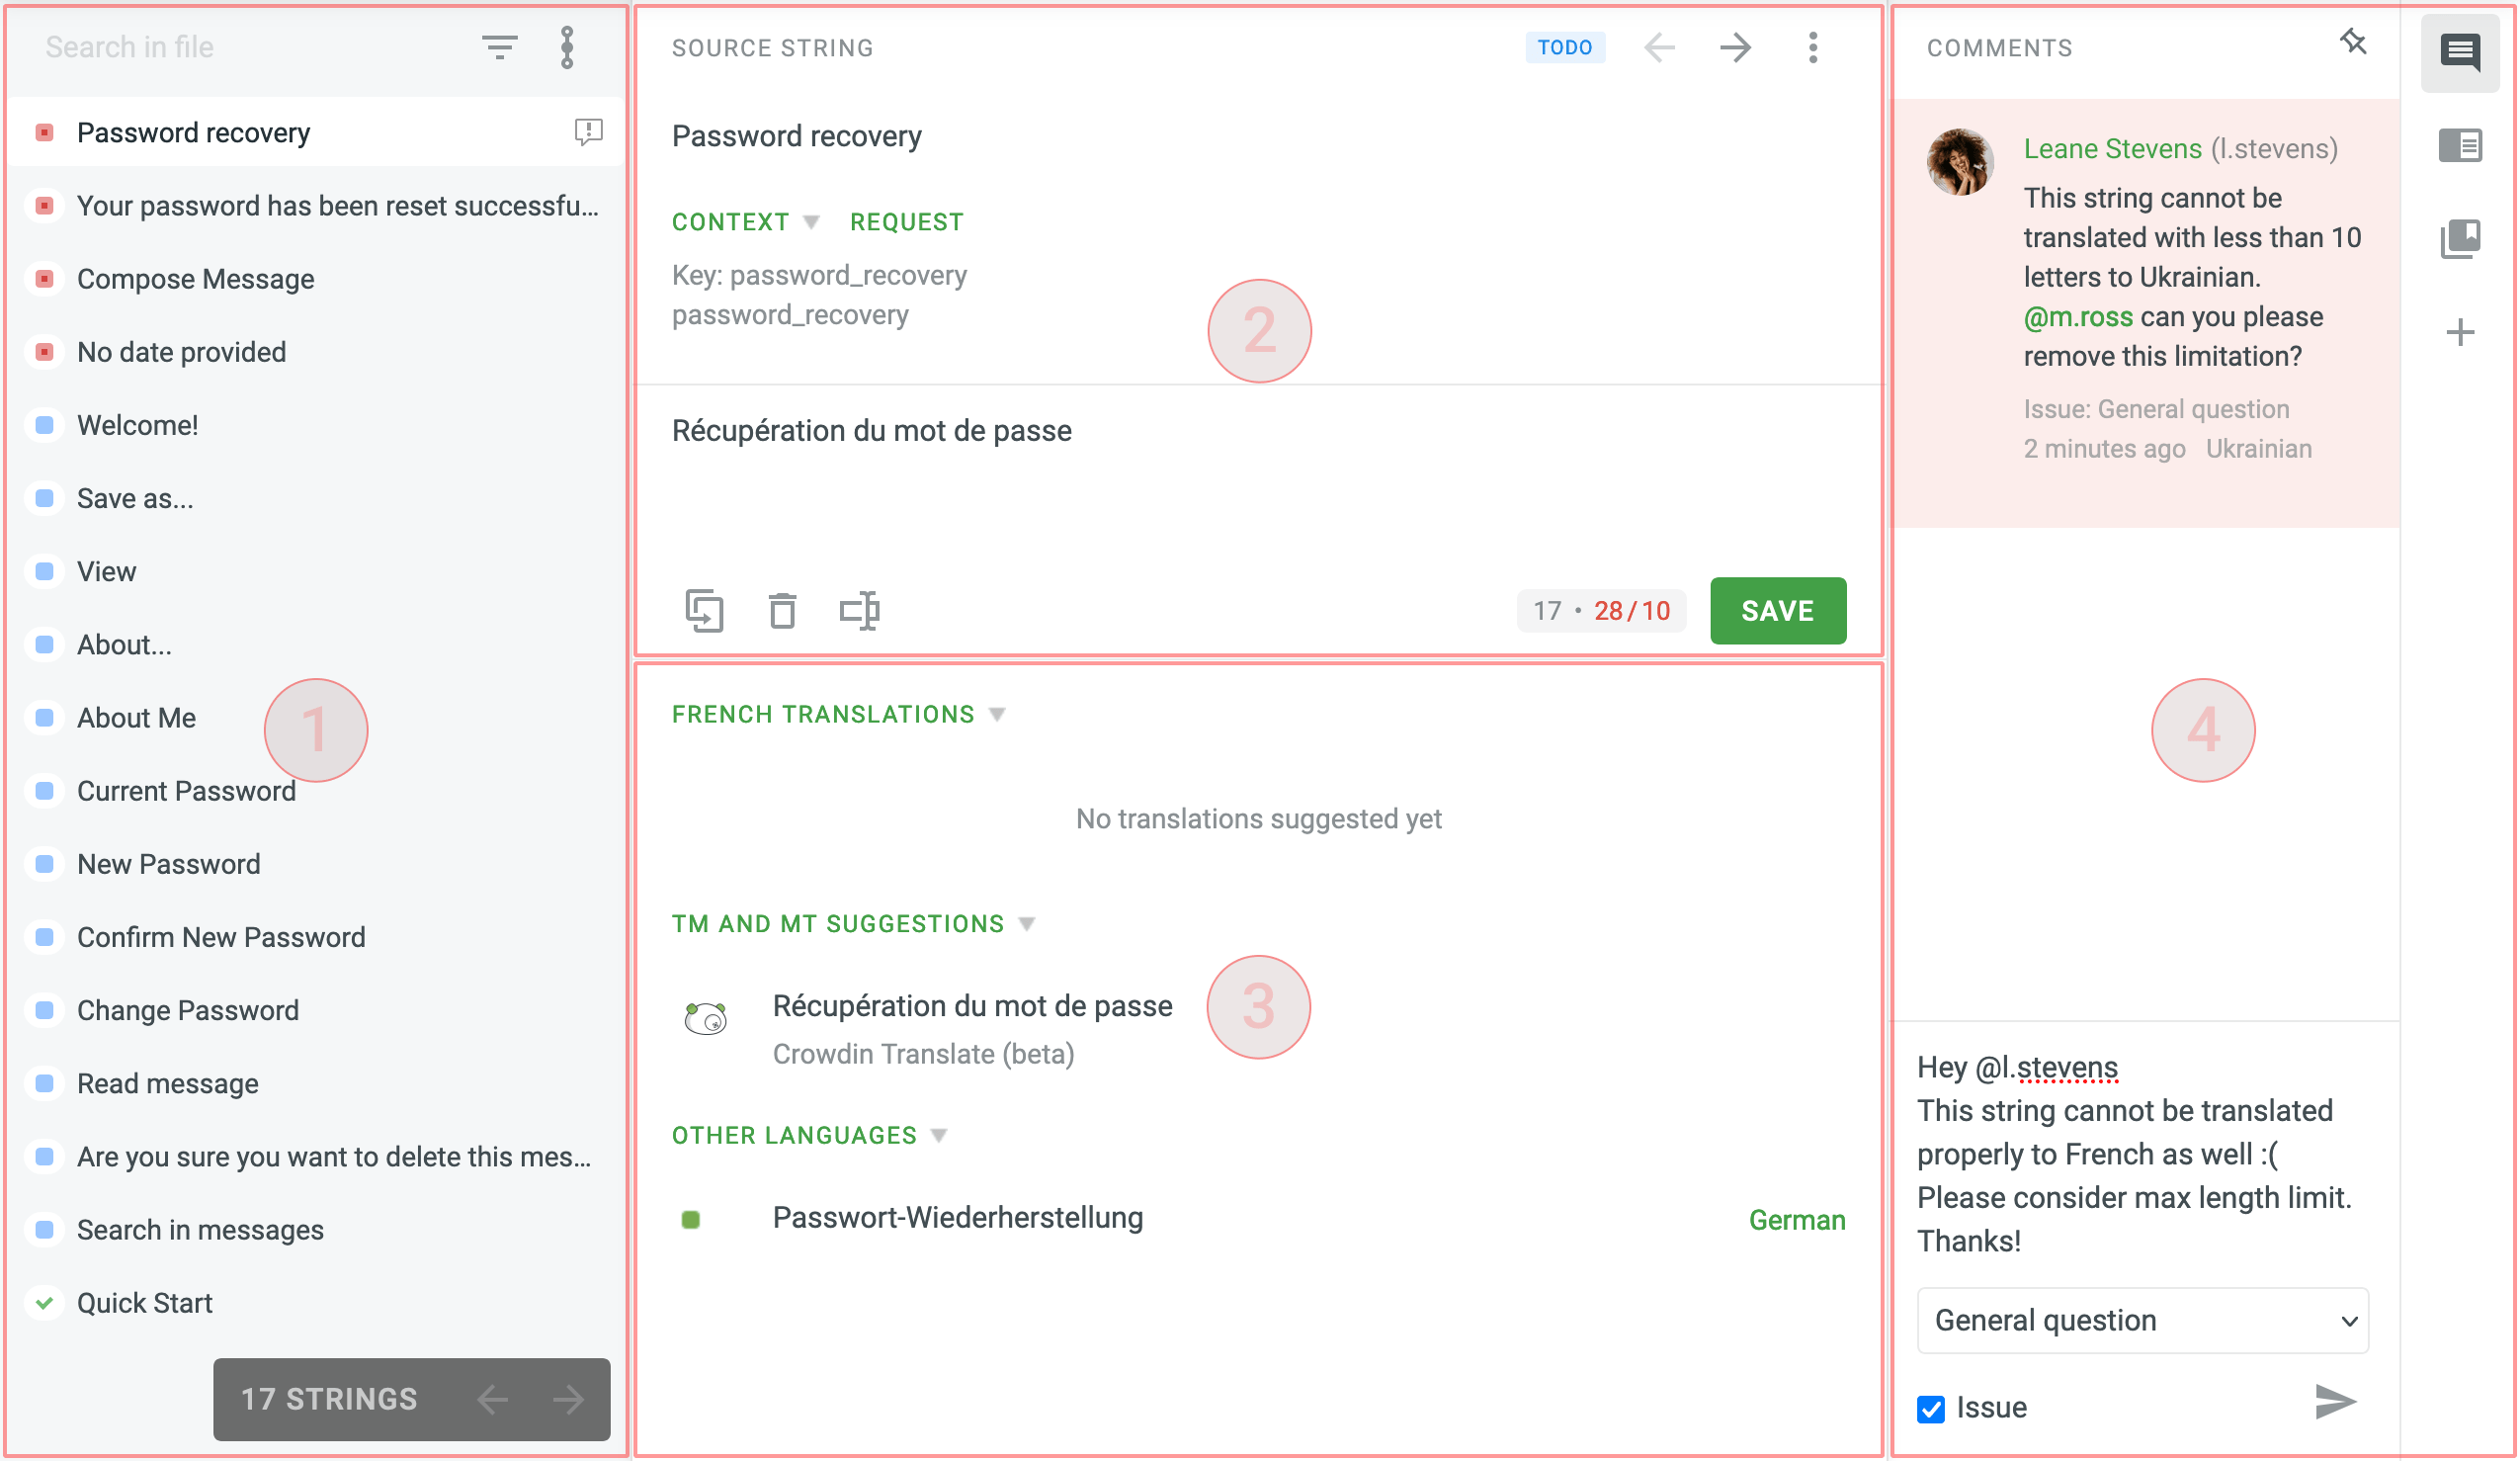
Section 1 (Left sidebar)
A list of the source strings. Each string is marked with the symbol that helps you identify its state - untranslated, translated, or approved. Erfahren Sie mehr You’ll also be able to identify strings that have comments or related issues. You’ll also be able to identify strings that have comments or related issues.
To find the necessary string, use the Search box in this section. You can sort out the source strings using the Simple or Advanced Filter.
Section 2 (Middle-top area)
The main working area with the source string on the top, and the section where you can type in translations below.
The context to the string is shown right below the source string. Typically it can include descriptions and screenshots. You can request context from here if necessary.
The terms that were added to the project glossary will be underlined in the source string. You can check additional explanation added to the term for the accurate translation. A project manager can also give you permission to add terms to the project glossary.
If the source string has highlighted elements that means the string contains the elements of ICU message syntax. You should copy the source to translate this type of source strings.
You might also get pop-up QA checks messages that will help to avoid some translation inaccuracy, for example, inconsistency in punctuation, spaces mismatch, missing variables, and more.
Section 3 (Middle-bottom area)
This section will contain all the resources and previous translations you might refer to:
- Translations by other project members
- Translation Memory (TM) suggestions
- Machine Translation (MT) suggestions
- Translations to other languages
Section 4 (Right sidebar)
Discuss the meaning of the source string or other related questions here. You can mention the particular person you’d like to address or create an issue related to the string.
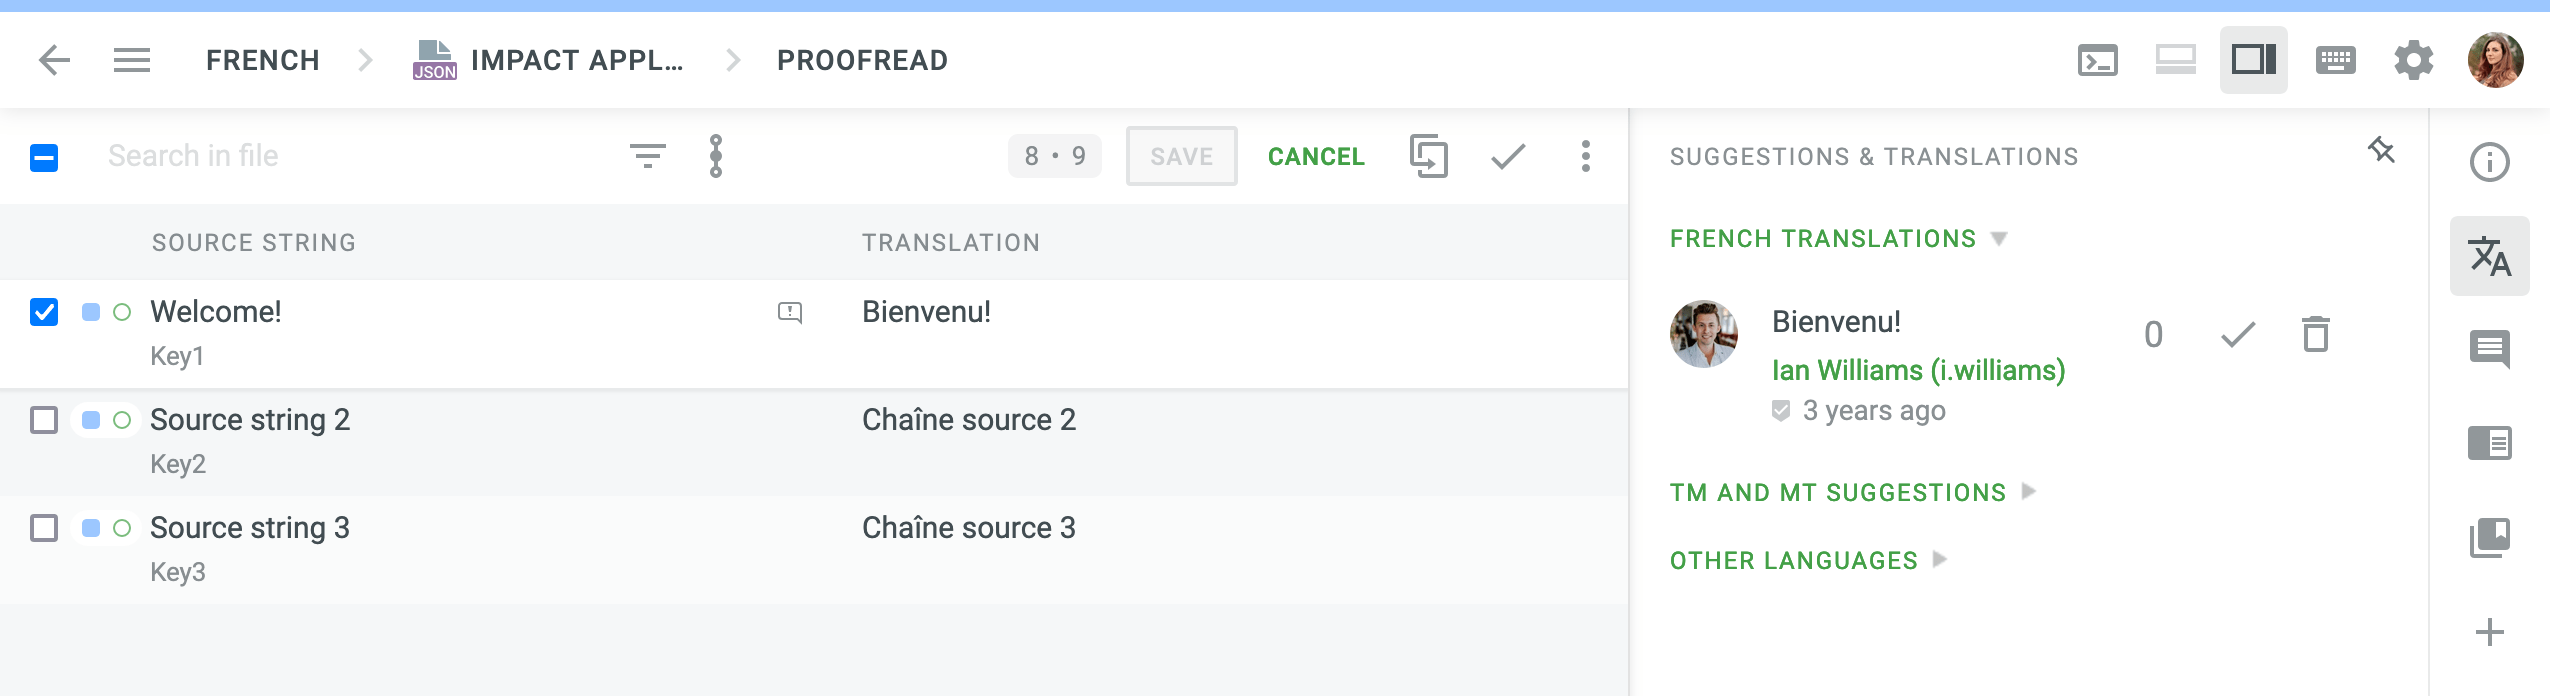
Korrekur
If you are assigned to proofread the translations you’ll see the list of source strings and their translations that you can approve or correct. The strings with the QA checks issues will be highlighted in this mode. You’ll also see the strings that were translated with the help of Translation Memory or Machine Translation engine.
String Status on the Workflow Steps
In every project, strings move from one workflow step to the next one. There are two statuses ToDo and Done. They are applied to each string depending on its status on the workflow step they’re currently on.
For example, if you’re assigned to translate the string, once you save the translation it is marked as Done and moves to the next step.
The Pending status can be applied to the string in the following scenario:
The source string is translated at the Translation workflow step and marked as Done. It then moves to the next workflow step, e.g., Proofreading, where it’s marked as ToDo. If the translation of the string is deleted at the Translation workflow step, the string remains at the Proofreading workflow step and is marked as Pending until the translation is added again at the Translation workflow step.
Offline-Übersetzung
You can download files (in XLIFF format preferably), translate the strings offline and upload translations back to the project.