Migrating to Crowdin Enterprise
Dieser Inhalt ist noch nicht in deiner Sprache verfügbar.
In Crowdin uebersetzenCrowdin Enterprise provides team cooperation features (e.g., inviting project members, defining permission levels, tasks, messages, etc.), workflow automation and customization, integrations and plugins, and many more features you would need for efficient project localization.
The migration to Crowdin Enterprise is very simple and straightforward. For example, if your projects share most of the settings and configurations, you can create and configure one project and then, using the Project Duplicator application, create all other projects based on the initial project settings, later changing some settings where needed. Depending on the project and resource number, the complete migration could be done in several hours.
Migrating to Crowdin Enterprise from Other Translation Tools
Section titled “Migrating to Crowdin Enterprise from Other Translation Tools”To start your migration, you can use the following step-by-step migration instructions.
-
Download source files.
In most cases, you’ll have them on your machine/server, so this step is optional. -
Download translations.
Download all the latest translations you have at the moment of transition. -
Download TM and Glossary.
Download the translation memory and glossary so your translators can reuse them in your Crowdin Enterprise projects.
Migrating to Crowdin Enterprise from Crowdin
Section titled “Migrating to Crowdin Enterprise from Crowdin”If you’re currently using Crowdin and would like to switch to Crowdin Enterprise, you can migrate your Crowdin projects with all related data and resources to your new Crowdin Enterprise organization using the Migration to Crowdin Enterprise tool in your Crowdin Account Settings.
You can migrate your Crowdin projects with all related data, TMs, and Glossaries to your Crowdin Enterprise organization and continue the localization process without losing the current progress.
Data you can migrate:
- Projects with related data
- Source strings (for String-based projects) or source files (for File-based projects)
- Project members – this includes the removed former members who performed any translation or proofreading activities and pending members who haven’t joined the projects. After migration, project members from both of these categories will appear as pending users in Crowdin Enterprise.
- Translations
- String comments
- Screenshots
- Labels
- Custom processors (if any)
- Translation Memories
- Glossaries
Data not being migrated:
- CDN Distributions settings
- Project activities
- Master and Duplicate string statuses for projects with branches – master strings and duplicates are migrated without preserving the original (Crowdin) status of which string is the duplicate and which is the master. This might result in a situation where a duplicate string in Crowdin becomes a master string in Crowdin Enterprise and vice versa.
- Files from custom processing apps – these files either do not migrate or may migrate incorrectly.
Before starting the migration, you need to select your Crowdin Enterprise organization, projects, and resources.
To configure your migration settings, follow these steps:
- Open Account Settings and go to the Profile tab.
- In the Migration to Crowdin Enterprise section, click Migrate Account to start configuring your migration.
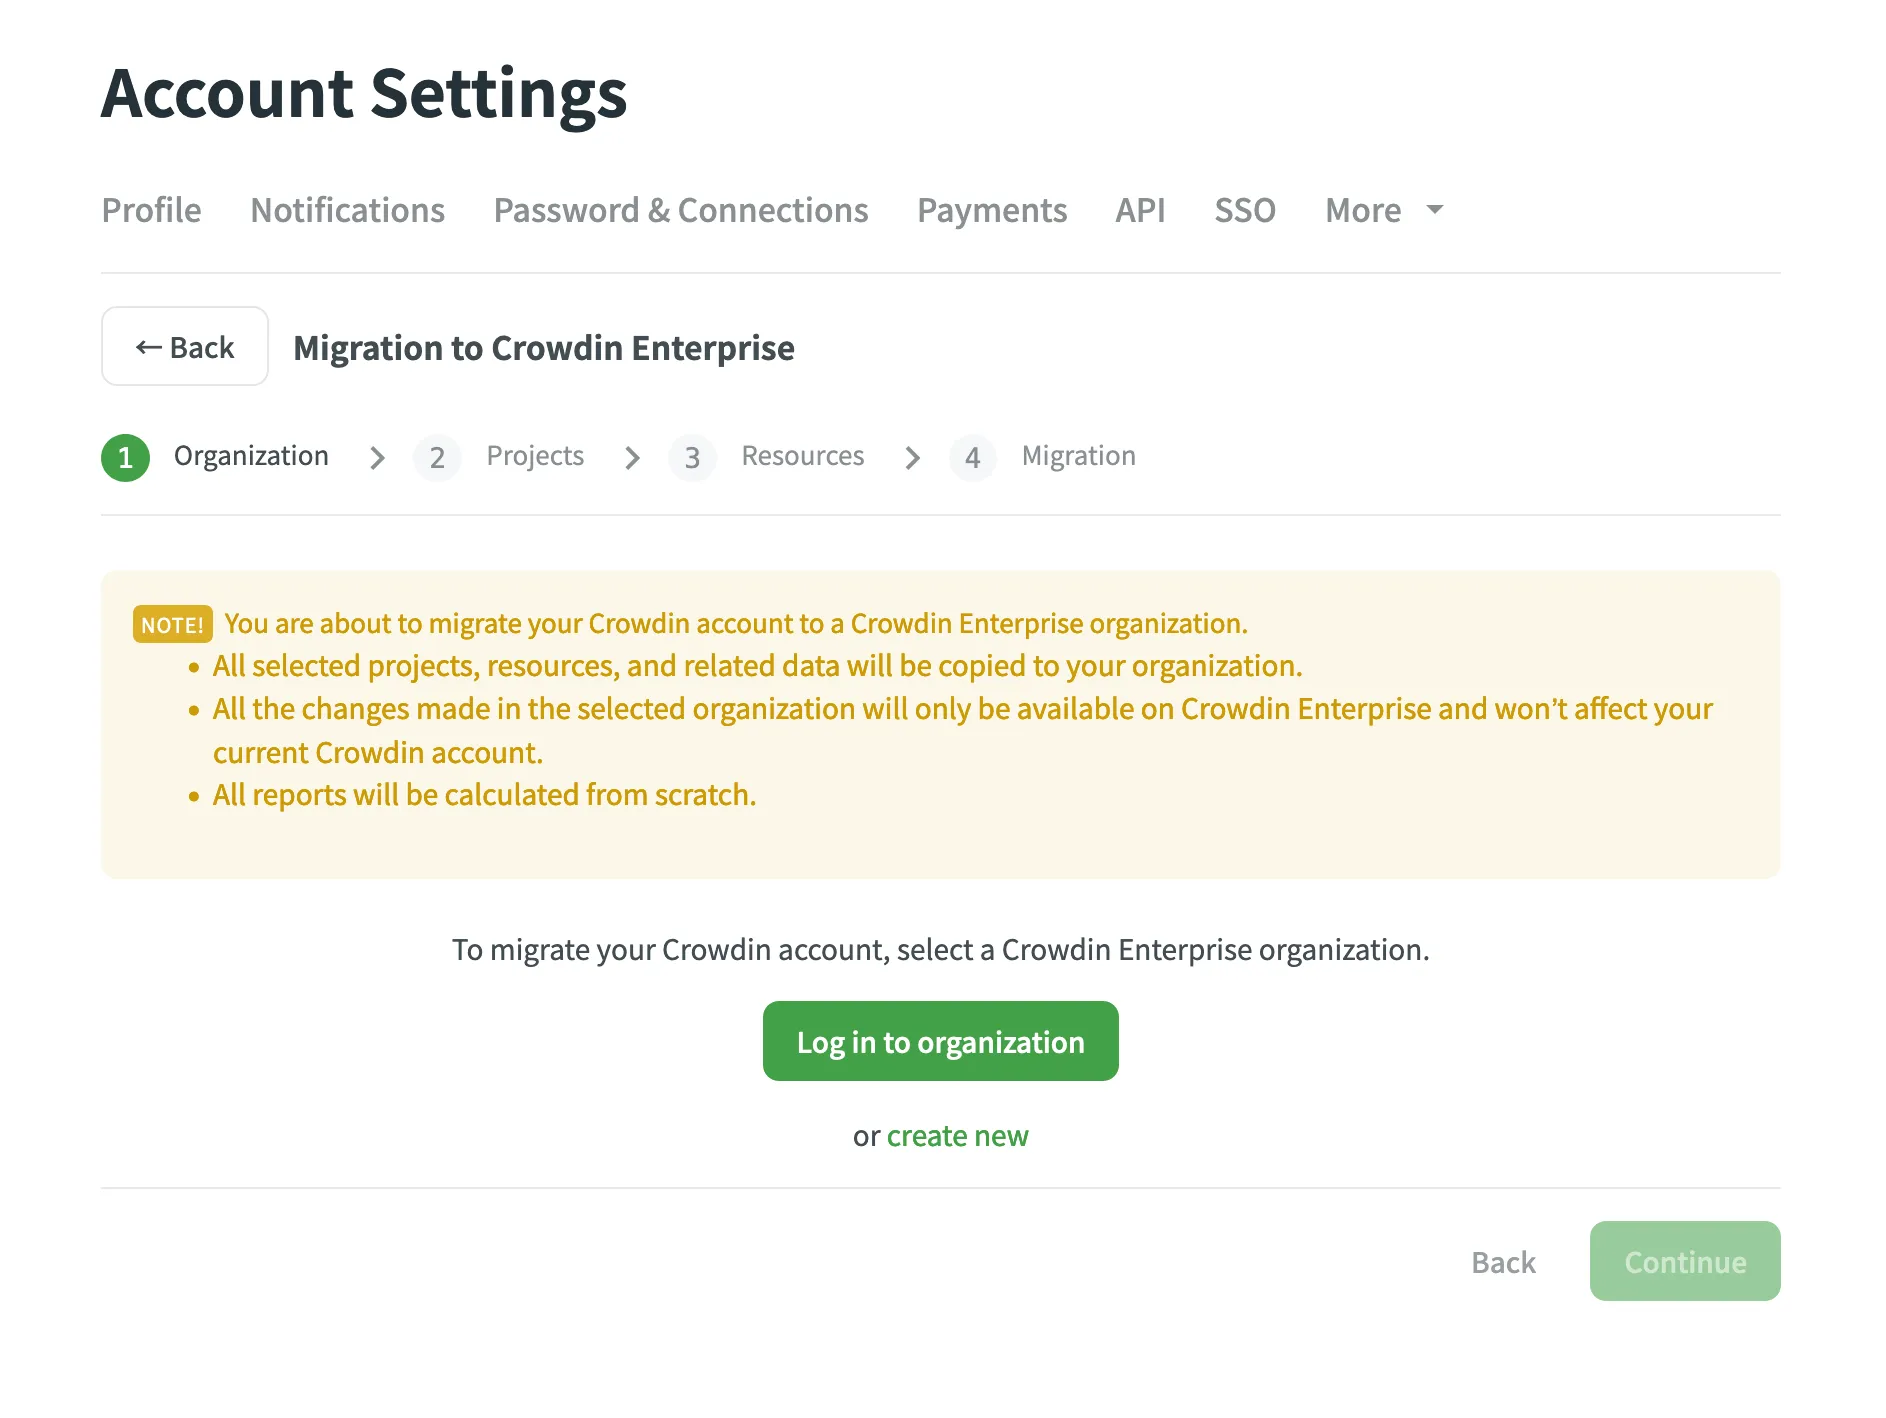
On the first step of the migration, select a Crowdin Enterprise organization to which you will migrate your Crowdin account’s data. You can log into your existing Crowdin Enterprise organization or create a new organization from scratch.
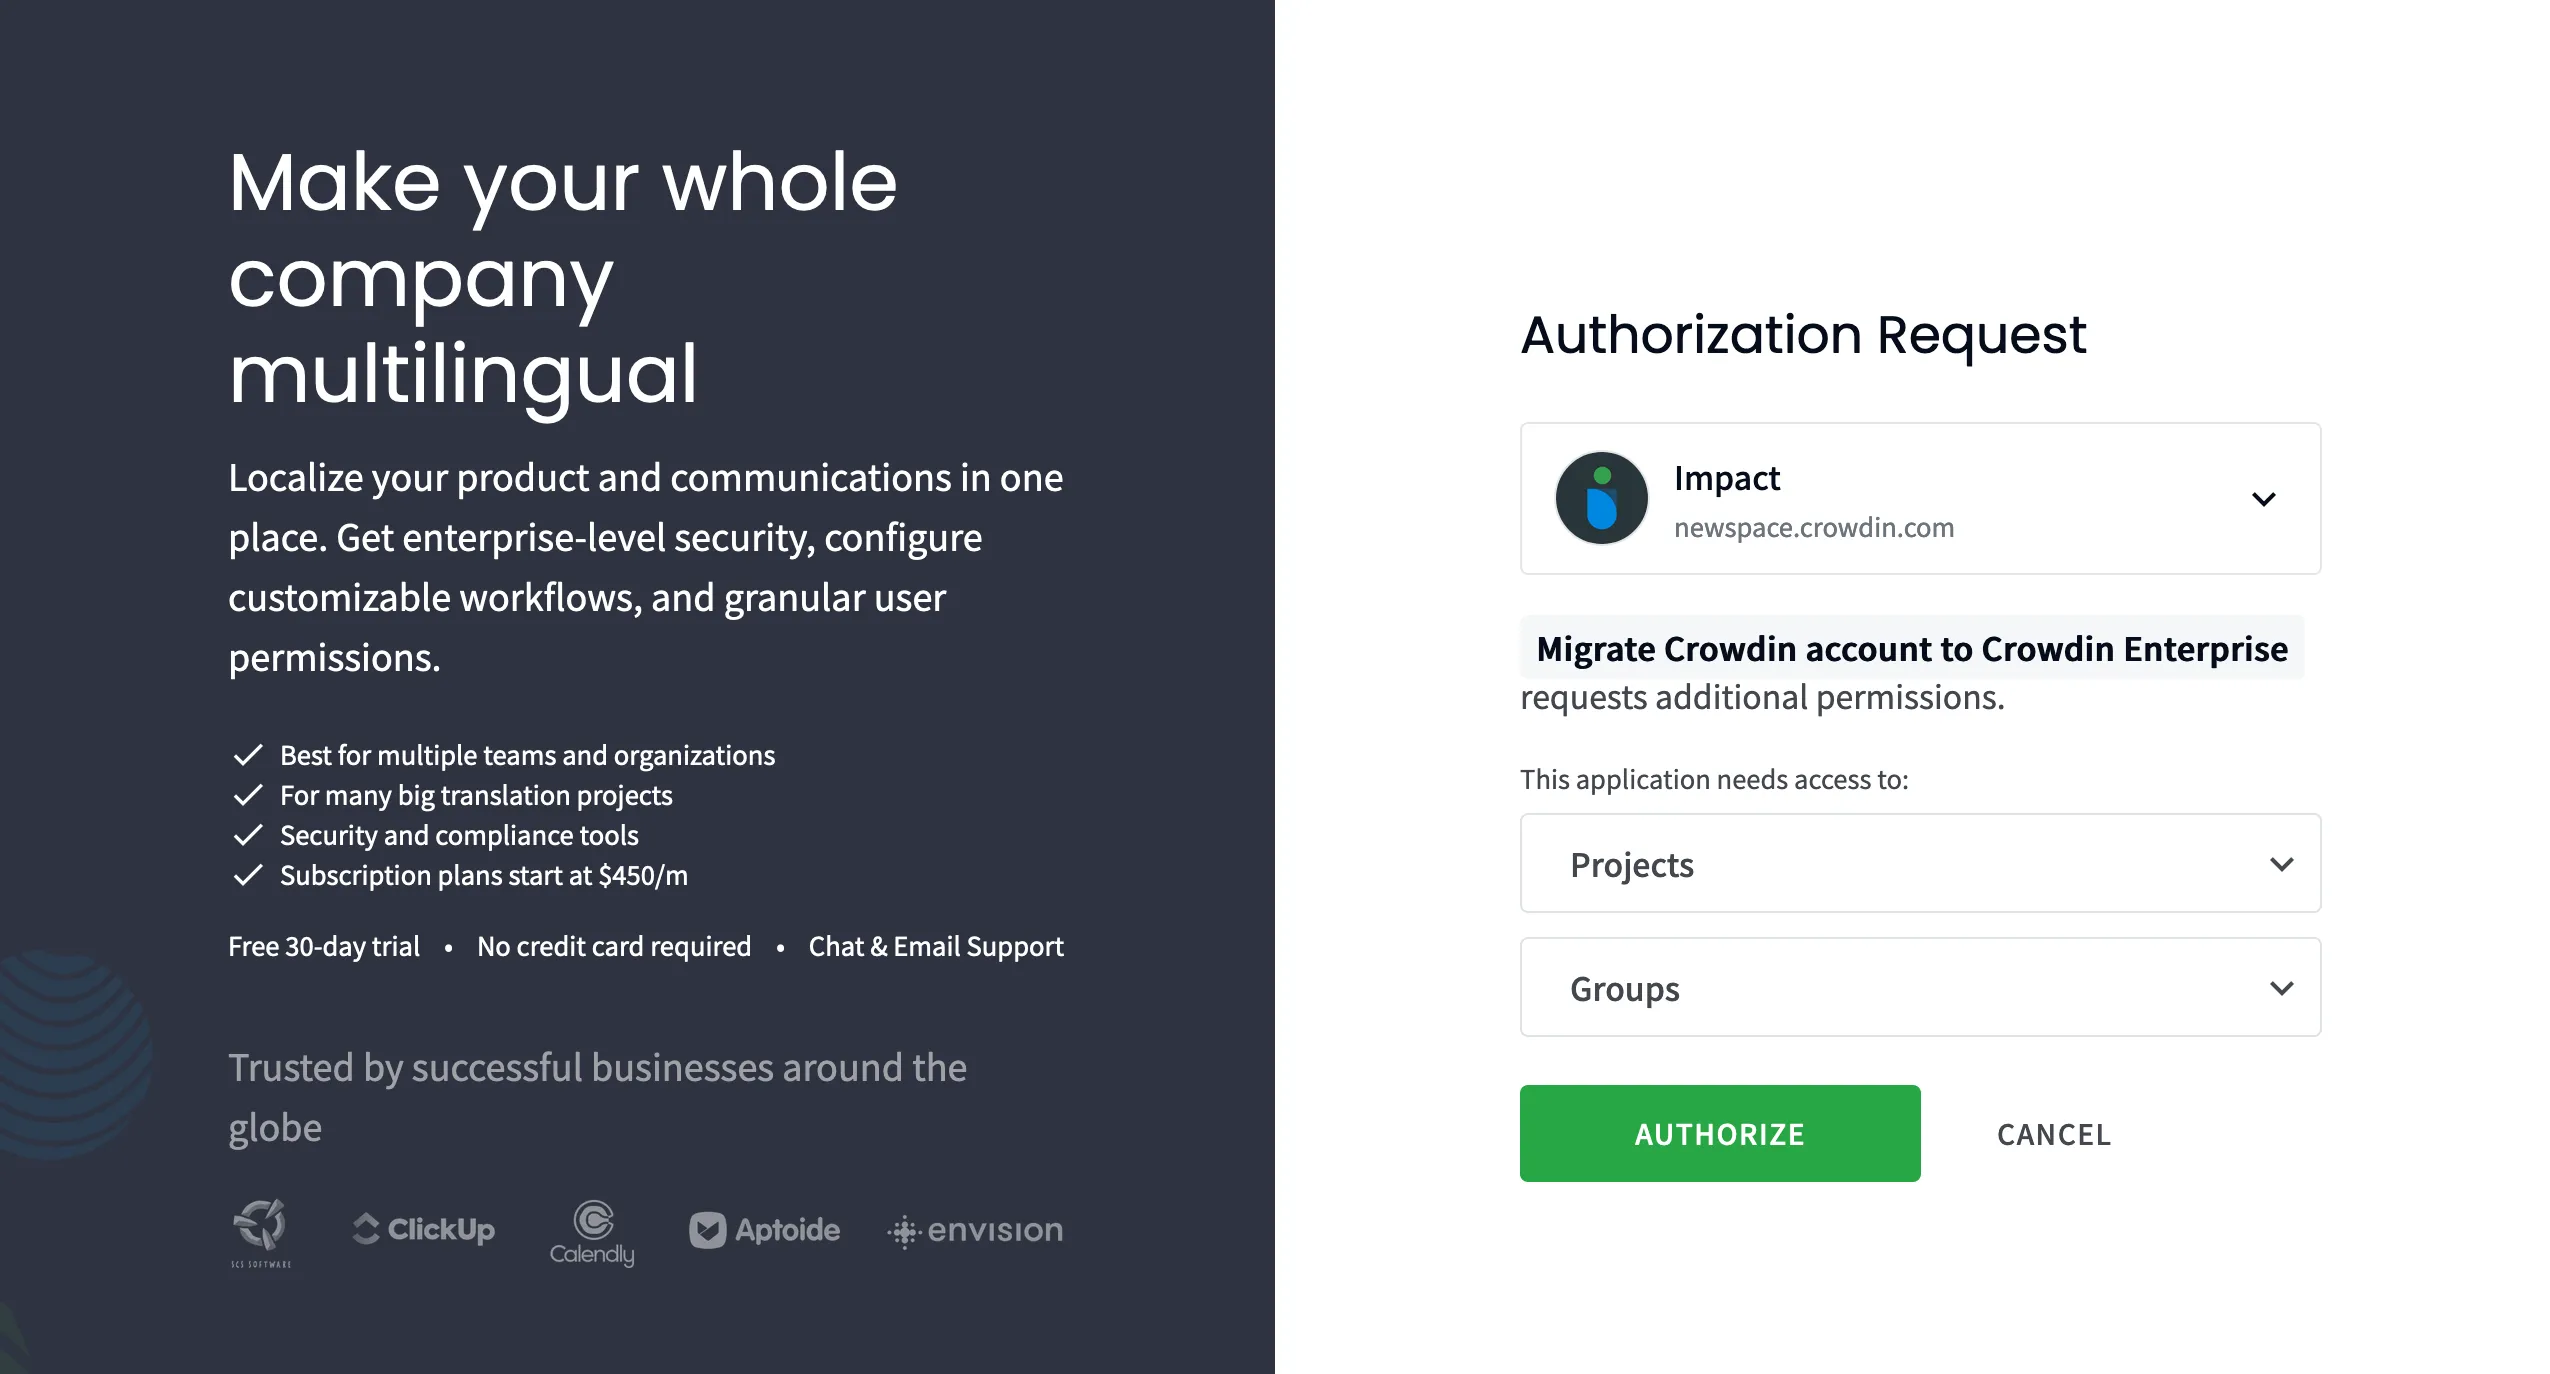
Once you’ve selected your Crowdin Enterprise organization, the system will ask you to authorize the Migrate Crowdin account to Crowdin Enterprise application and grant access to projects and groups within your organization. It’s necessary because the migrator app will create your projects and resources in Crowdin Enterprise on your behalf.
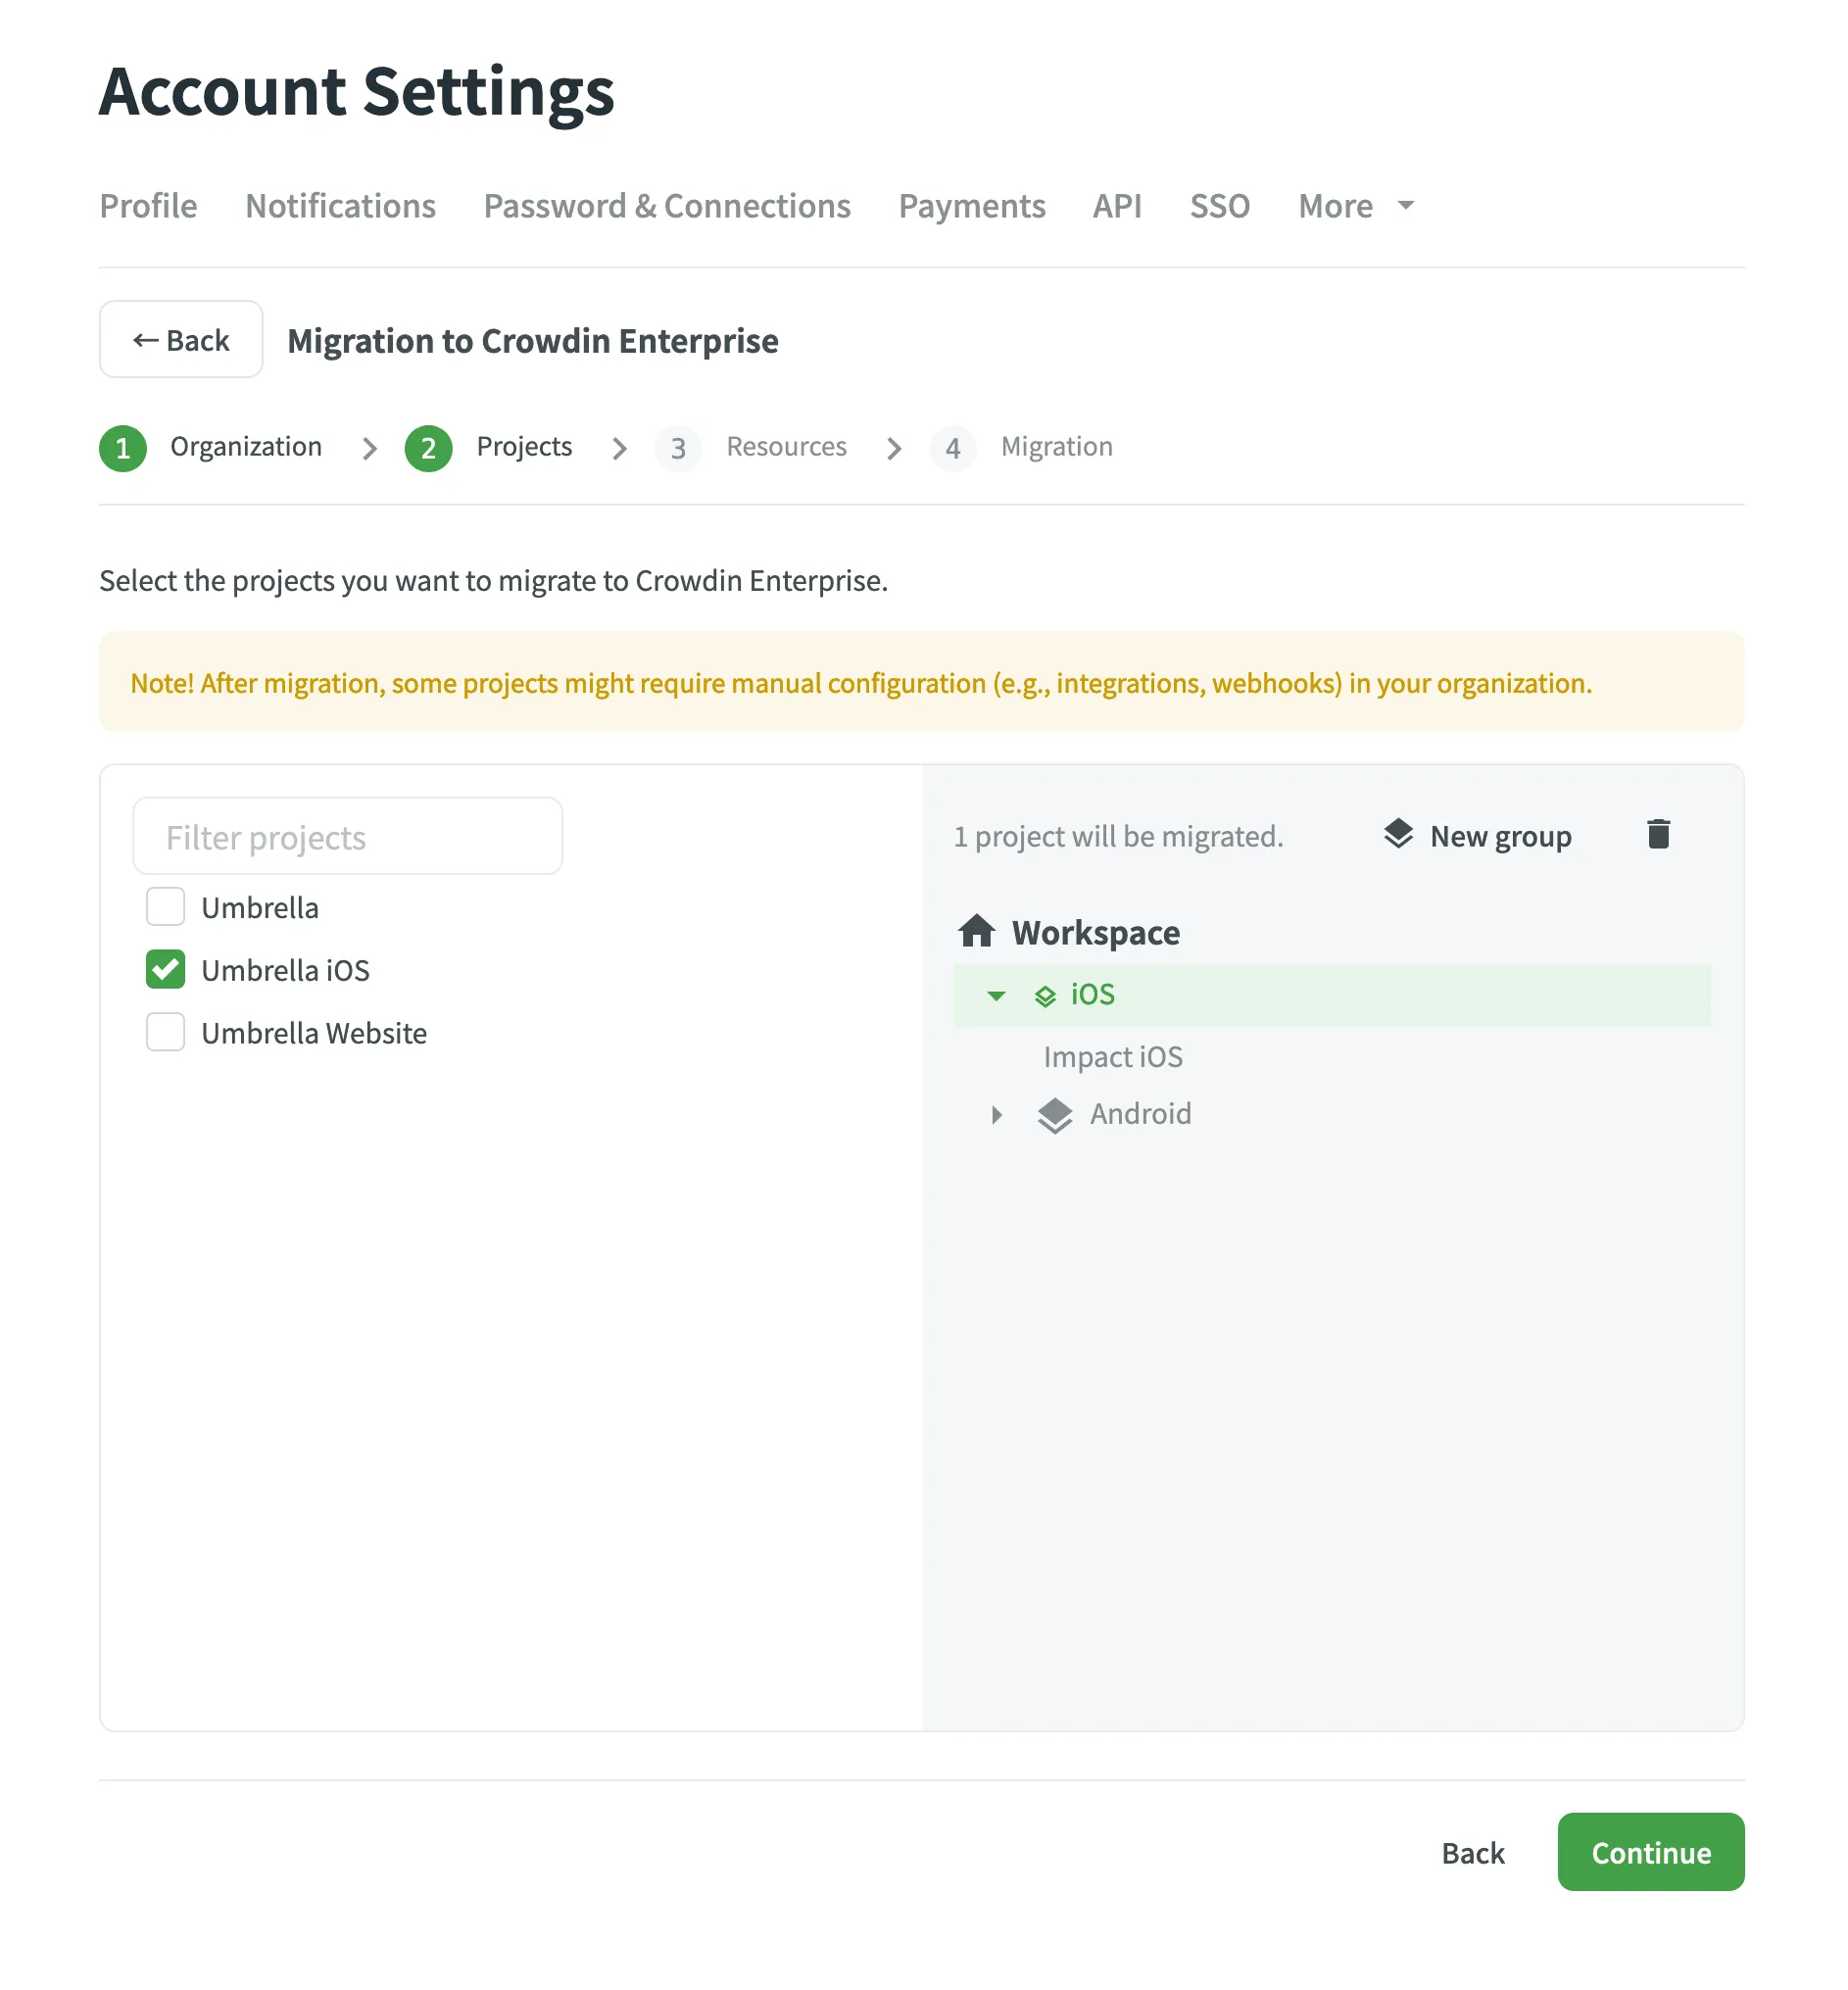
On the Projects step, you will see the list of your projects in Crowdin and your Crowdin Enterprise Workspace. Select the projects you’d like to migrate. By default, selected projects will be migrated to the organization’s Workspace. If needed, you can create separate groups for different projects.
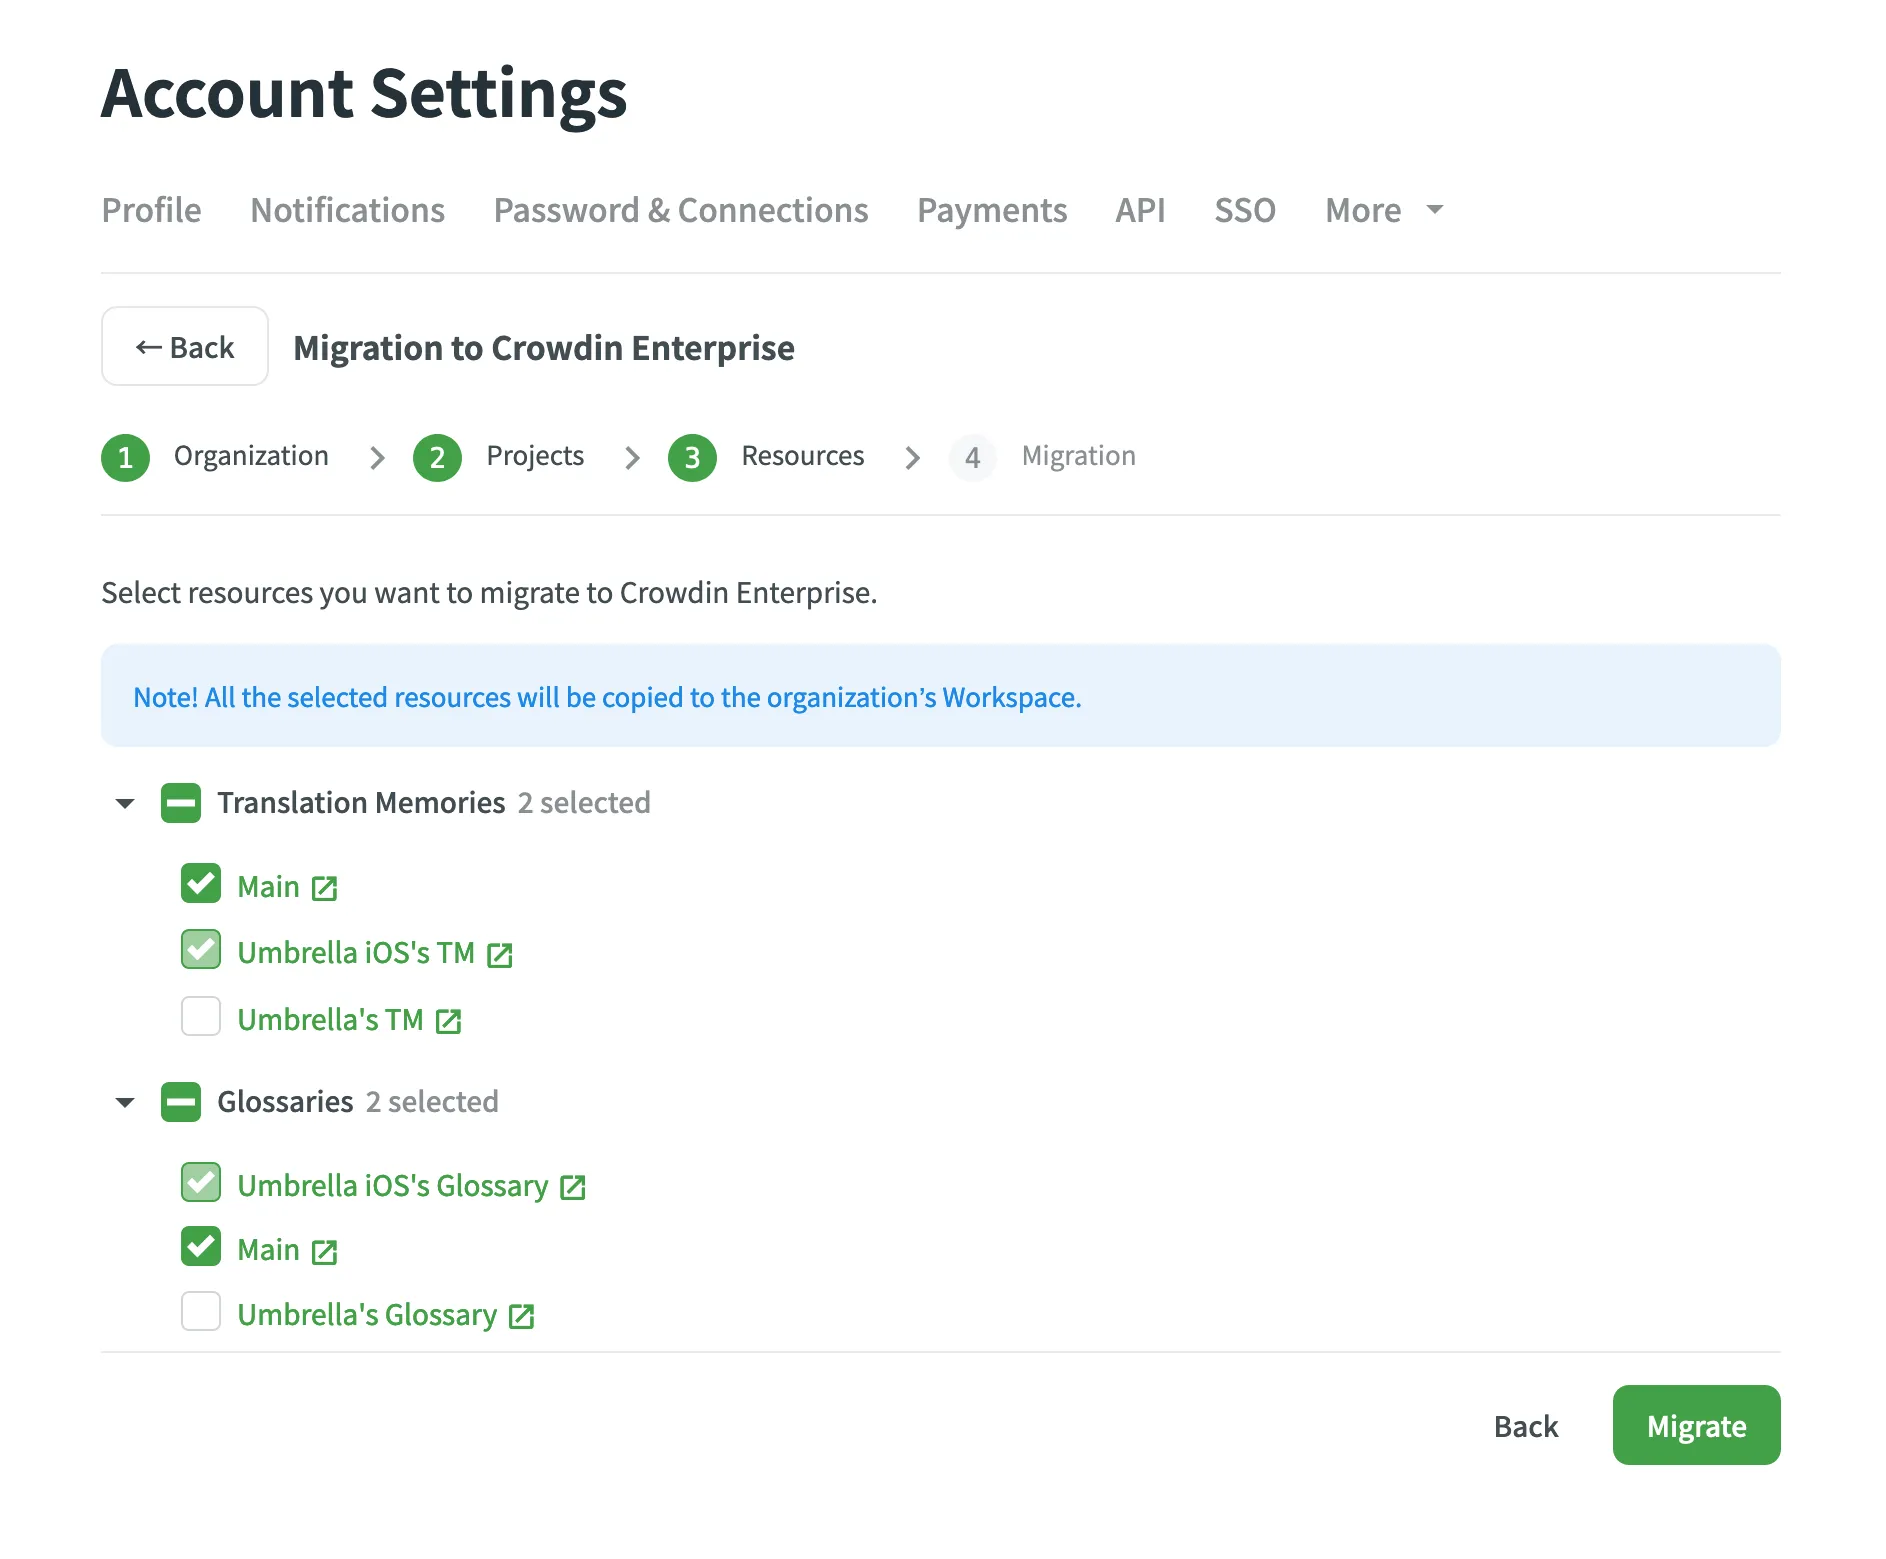
On the Resources step, you will see the list of your Translation Memories and Glossaries. By default, resources related to the projects you selected in the previous step will be automatically selected. Select the additional ones you’d like to migrate. Then, click Migrate to start the migration process.
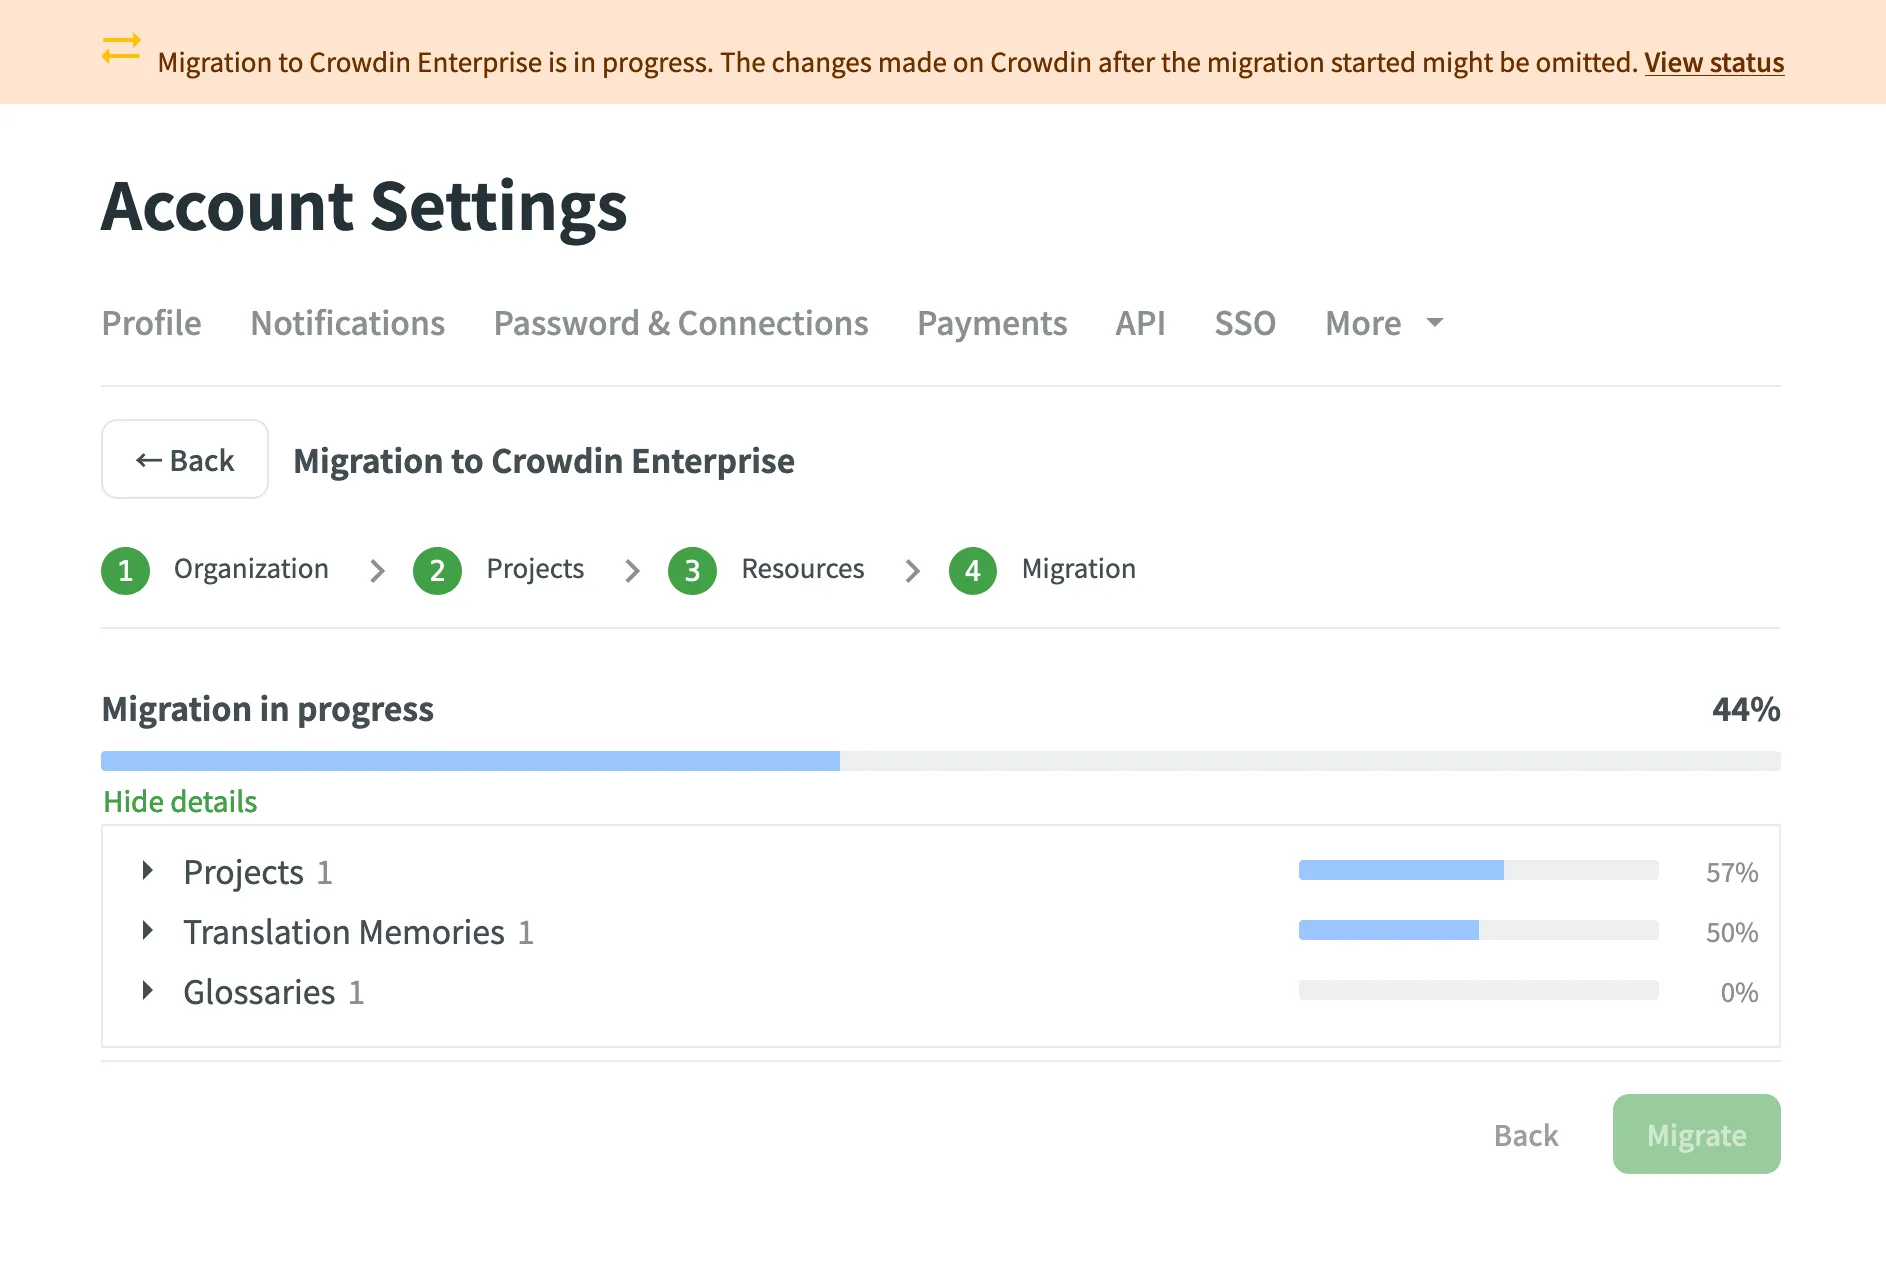
After you start the migration, you will be able to track its overall and detailed progress. Depending on the number of projects and resources, it might take from a few minutes to a few hours to migrate all the data. You will see the Migration to Crowdin Enterprise is in progress notification at the top of every page during the migration process. If needed, you can leave the Account Settings page. The migration will continue running in the background.
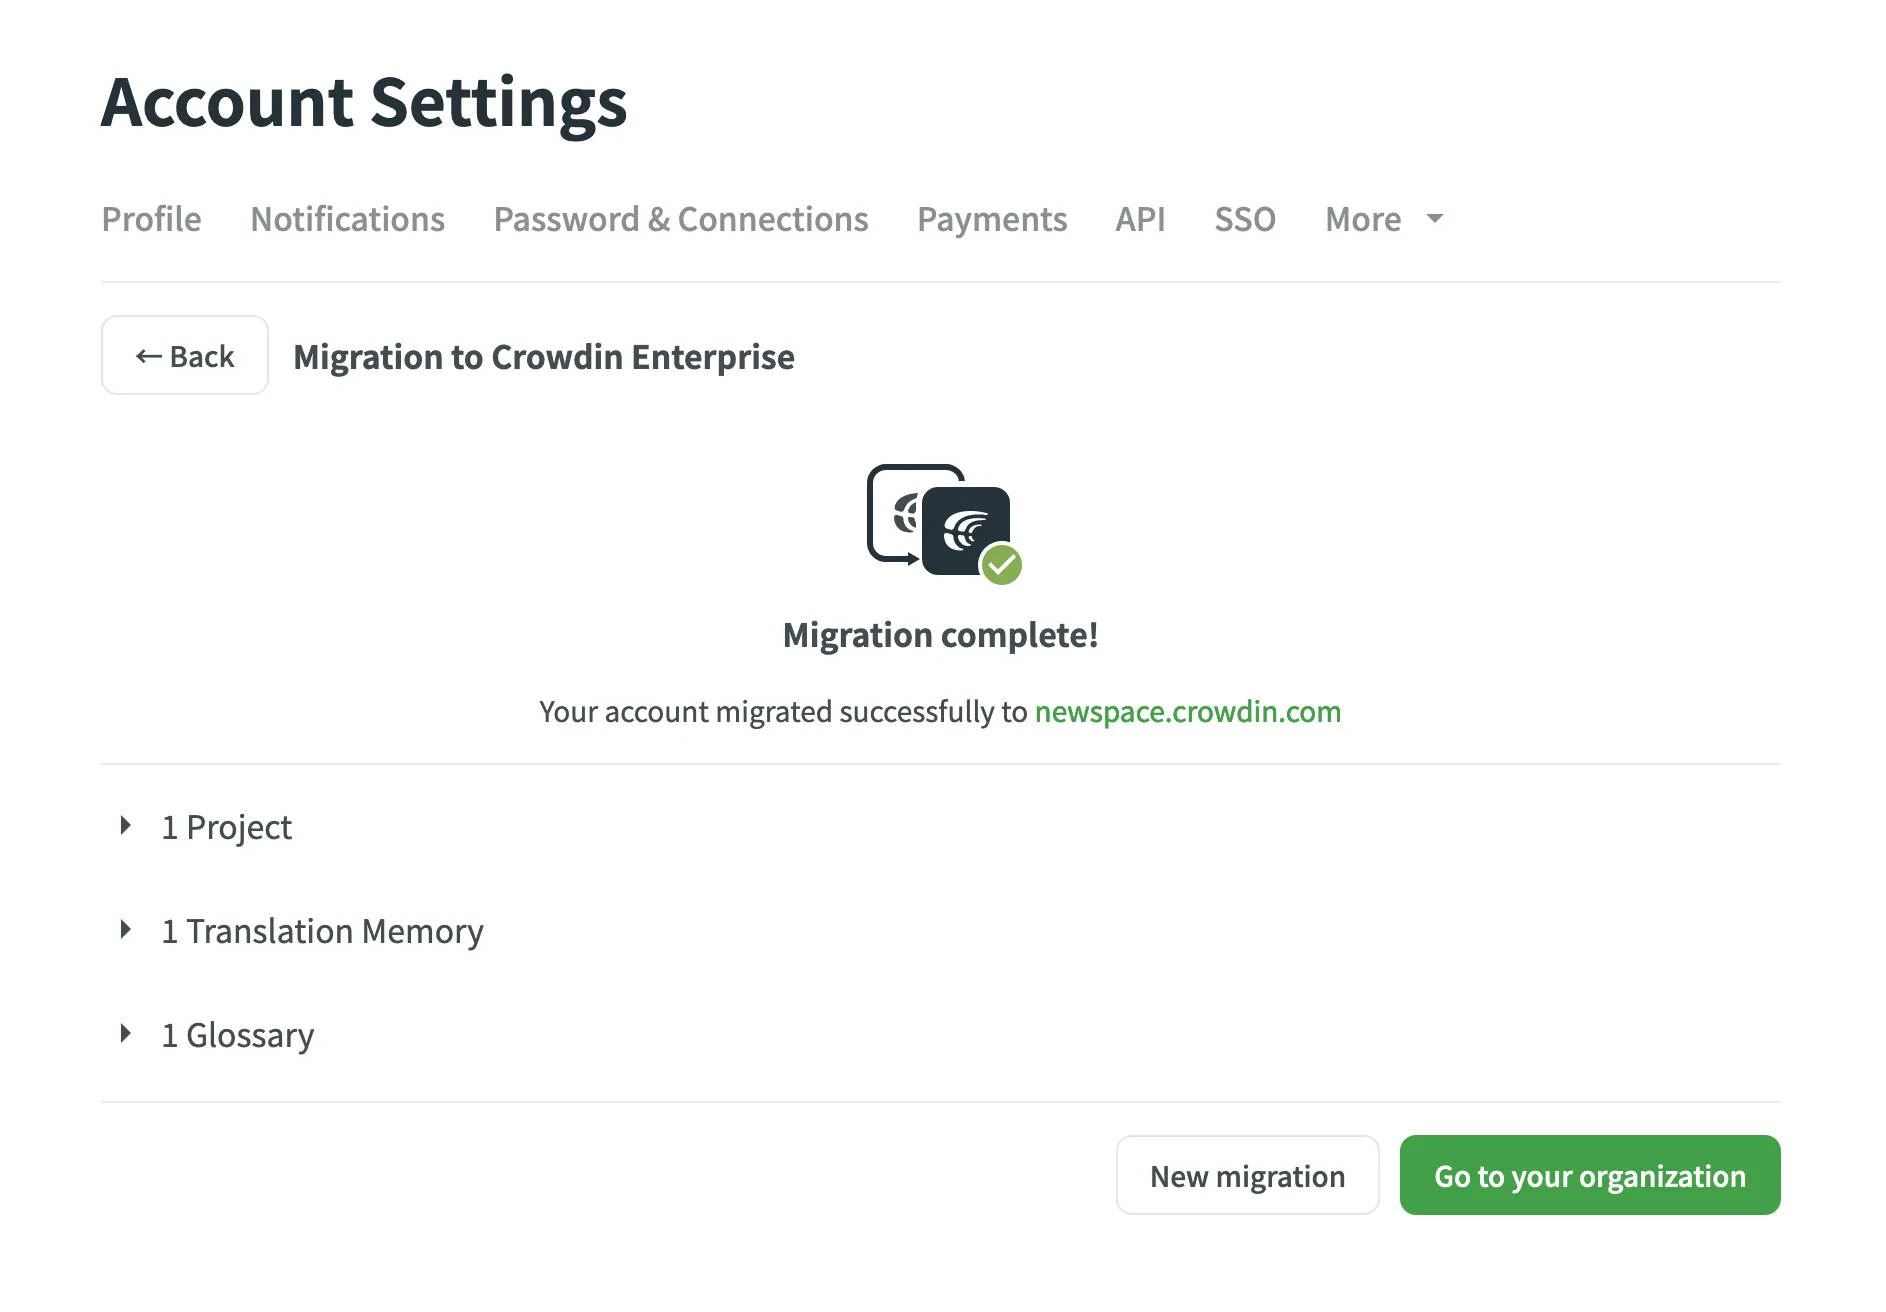
When the migration is finished, you can go to your Crowdin Enterprise organization and continue translating your projects.
-
Inviting the translation team.
In Crowdin Enterprise you can choose your translation strategy based on the content you’re localizing. Choose one and combine several translation strategies: send a request to a translation vendor integrated with Crowdin Enterprise, bring a translation agency you already work with, invite your community, use auto-translation via Machine Translation or Translation Memory, etc. -
Integration with external services.
In Crowdin Enterprise, you can use system integrations (e.g., integrations with GitHub, GitLab, BitBucket, Azure Repos, etc.) to synchronize your source and translation files, install additional applications from the Crowdin Store to add new features and integrate with even more services. Even if there is no integration with some services/platforms you use, you can create your custom integration by developing Crowdin Apps.
If you require any assistance during the migration process, our team is ready to help you with any step. For any guidance, feel free to contact us.