Для менеджеров
Общий обзор
Добро пожаловать! Crowdin Enterprise is a cloud-based solution for streamlined localization management. With our technology solution, you can localize your software, games, documentation, and other products.
You’ll be able to upload your translatable content and automate its updates, cooperate with your own translation team or outsource translations, see real-time progress on translations, and easily integrate ready translations into your products.
To get the most out of your Crowdin Enterprise experience, we made this quick start guide. This article will help you start using Crowdin Enterprise to grow your business, and we’ll provide some helpful resources to use as you work. Ready to get started?
Создать проект
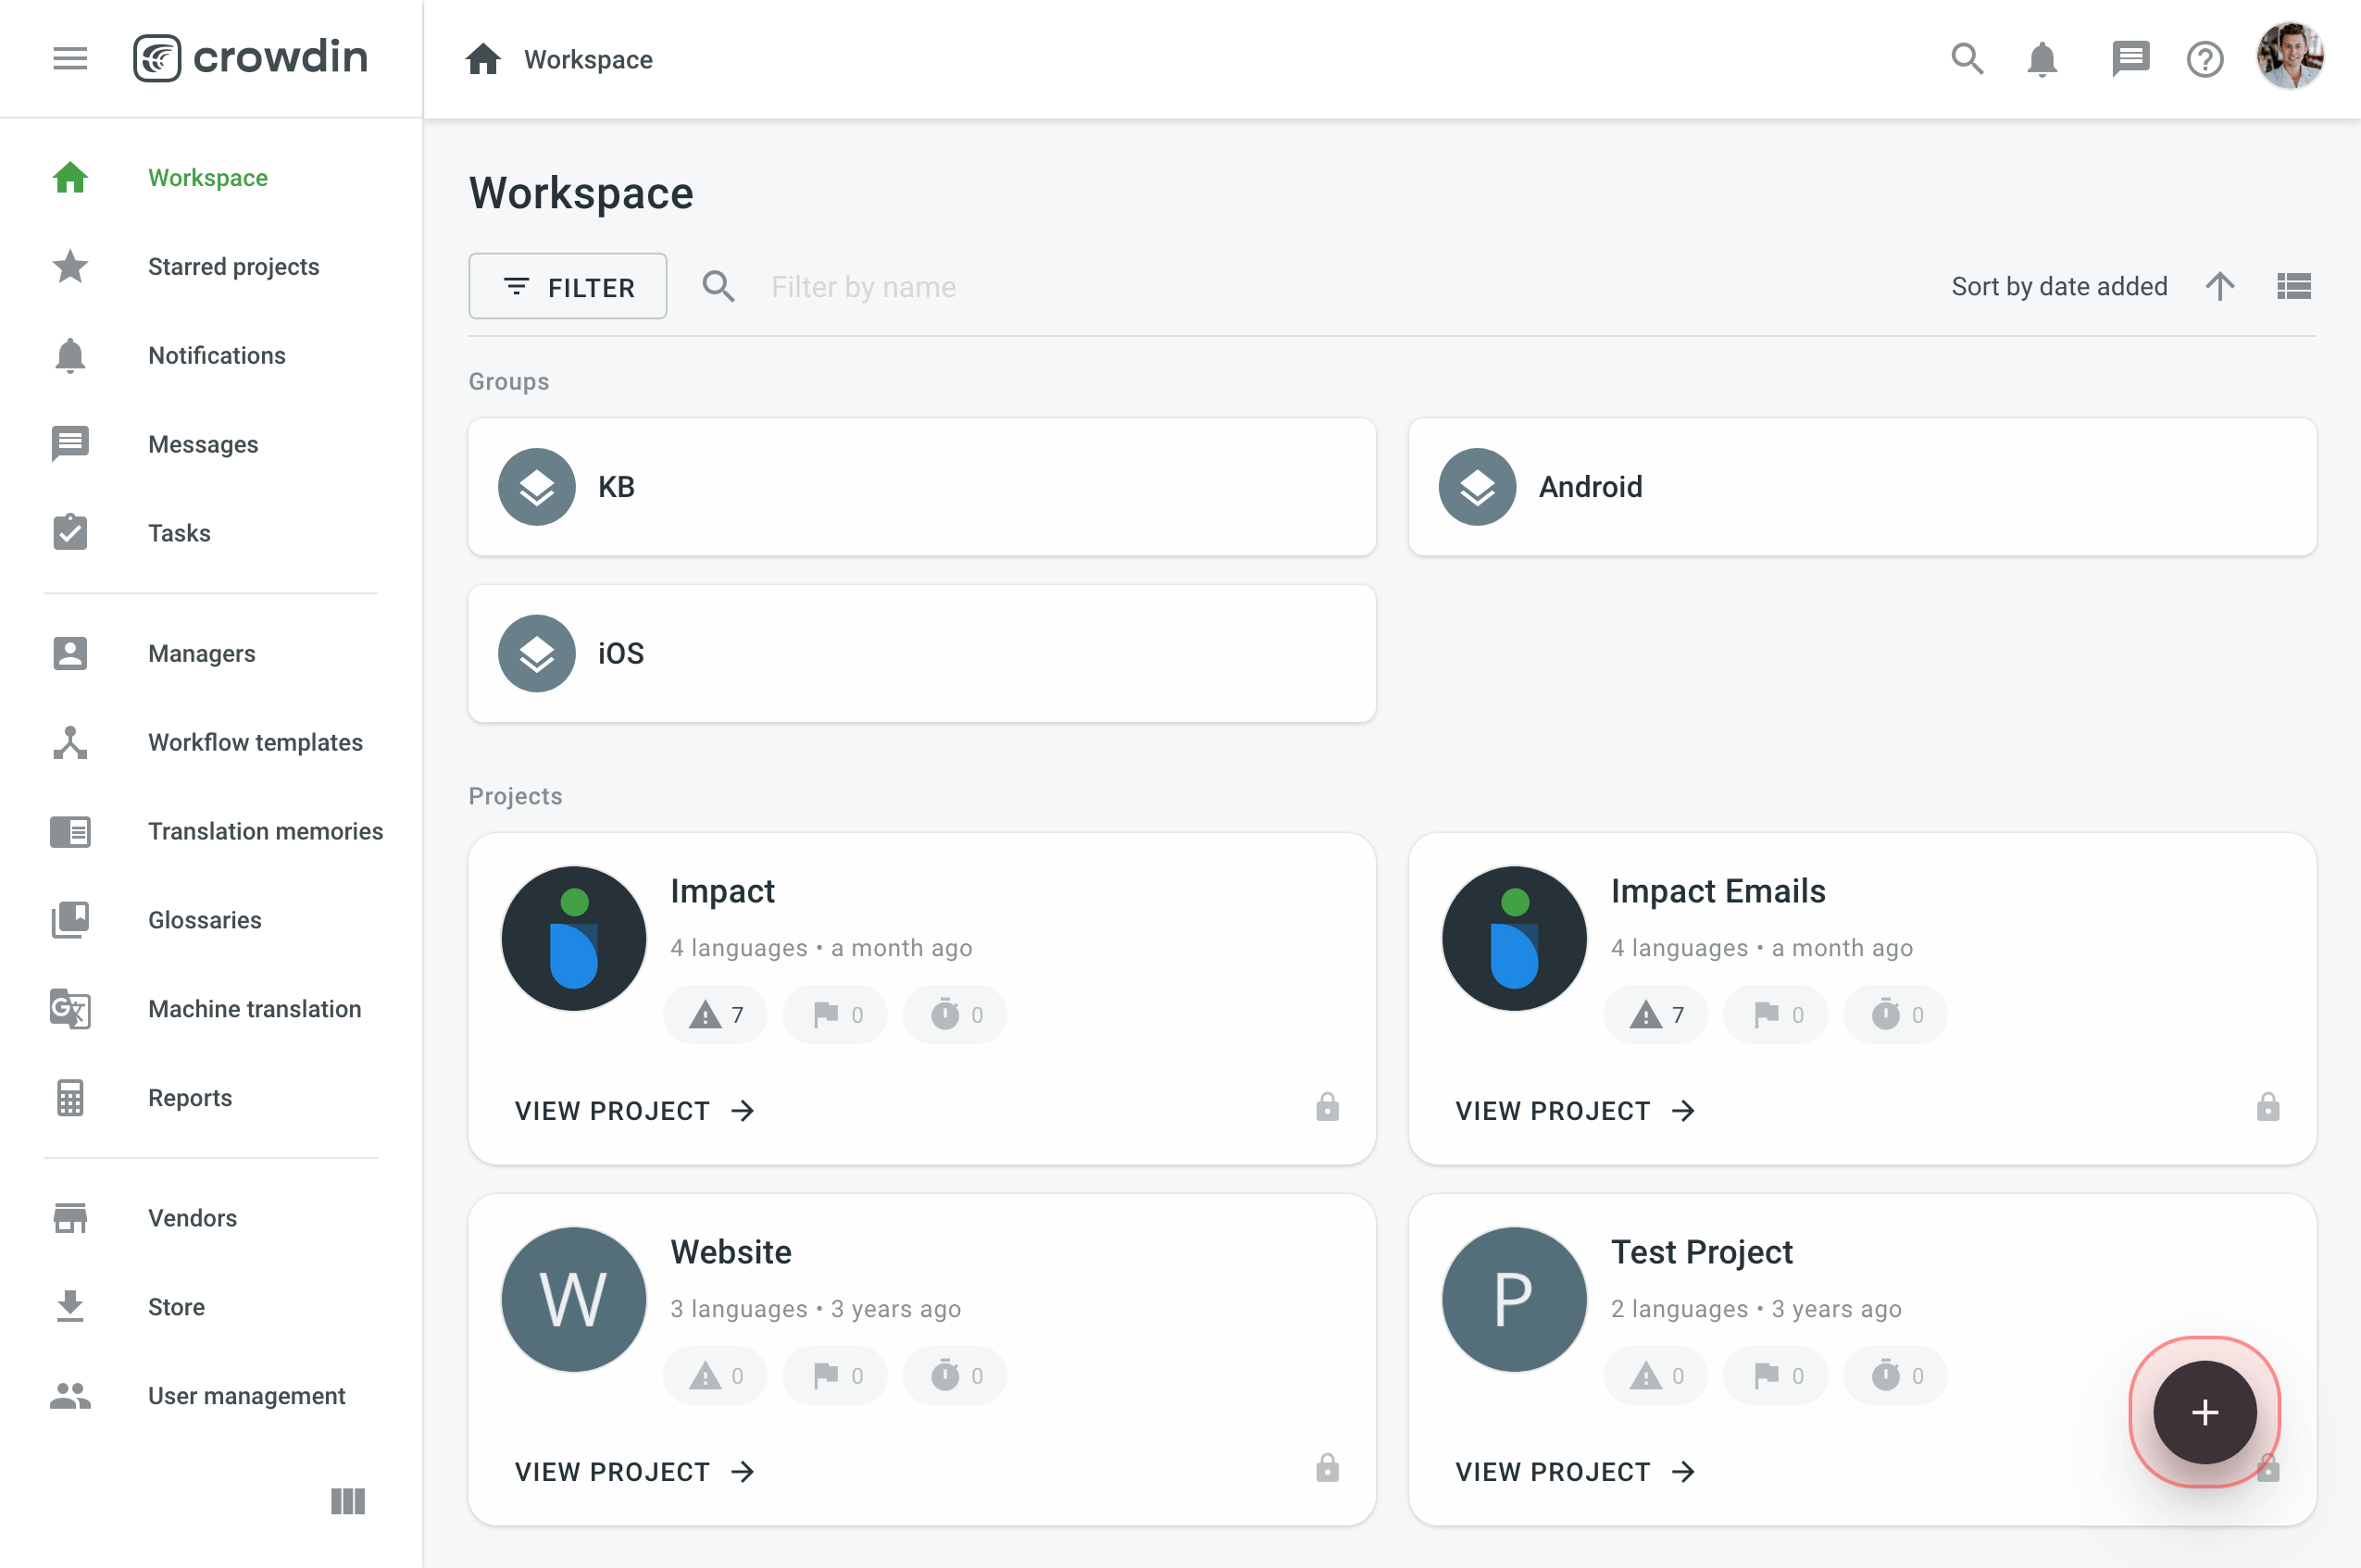
Open your organization’s Workspace, hover over the add button at the bottom right, and select Create a project.
When creating a project, you can select the preferred project type. You can choose between:
- File-based – translatable content is managed with source files.
- String-based – translatable content is managed with source strings.
Once you’ve created a project, you can add content to be translated. Each project has its own source content, resources, target languages, integrations, members, and more.
In Crowdin Enterprise, most users create separate projects for different kinds of products or content. For example, you can create individual projects for your mobile application, website, desktop application, and documentation. This allows you to set up different workflows, as some projects can be translated by machine and post-edited by real people. Others may require multiple translation teams and additional proofreading steps.
All your projects are created and managed within an organization. They are only available to members of the organization, or to a vendor organization if you invite one.
To learn more about organizations, read the article Start with an Organization.
Upload Source Content
There are a few different ways to import source files to Crowdin Enterprise.
- Manually via the web interface (UI)
- Integrate your Crowdin Enterprise project with the tools you already use. Explore available integrations on the Crowdin Store.
- To learn more, read articles API and CLI.
Загрузка файлов
To upload translatable content in a file-based project, open your project and go to Sources > Files.
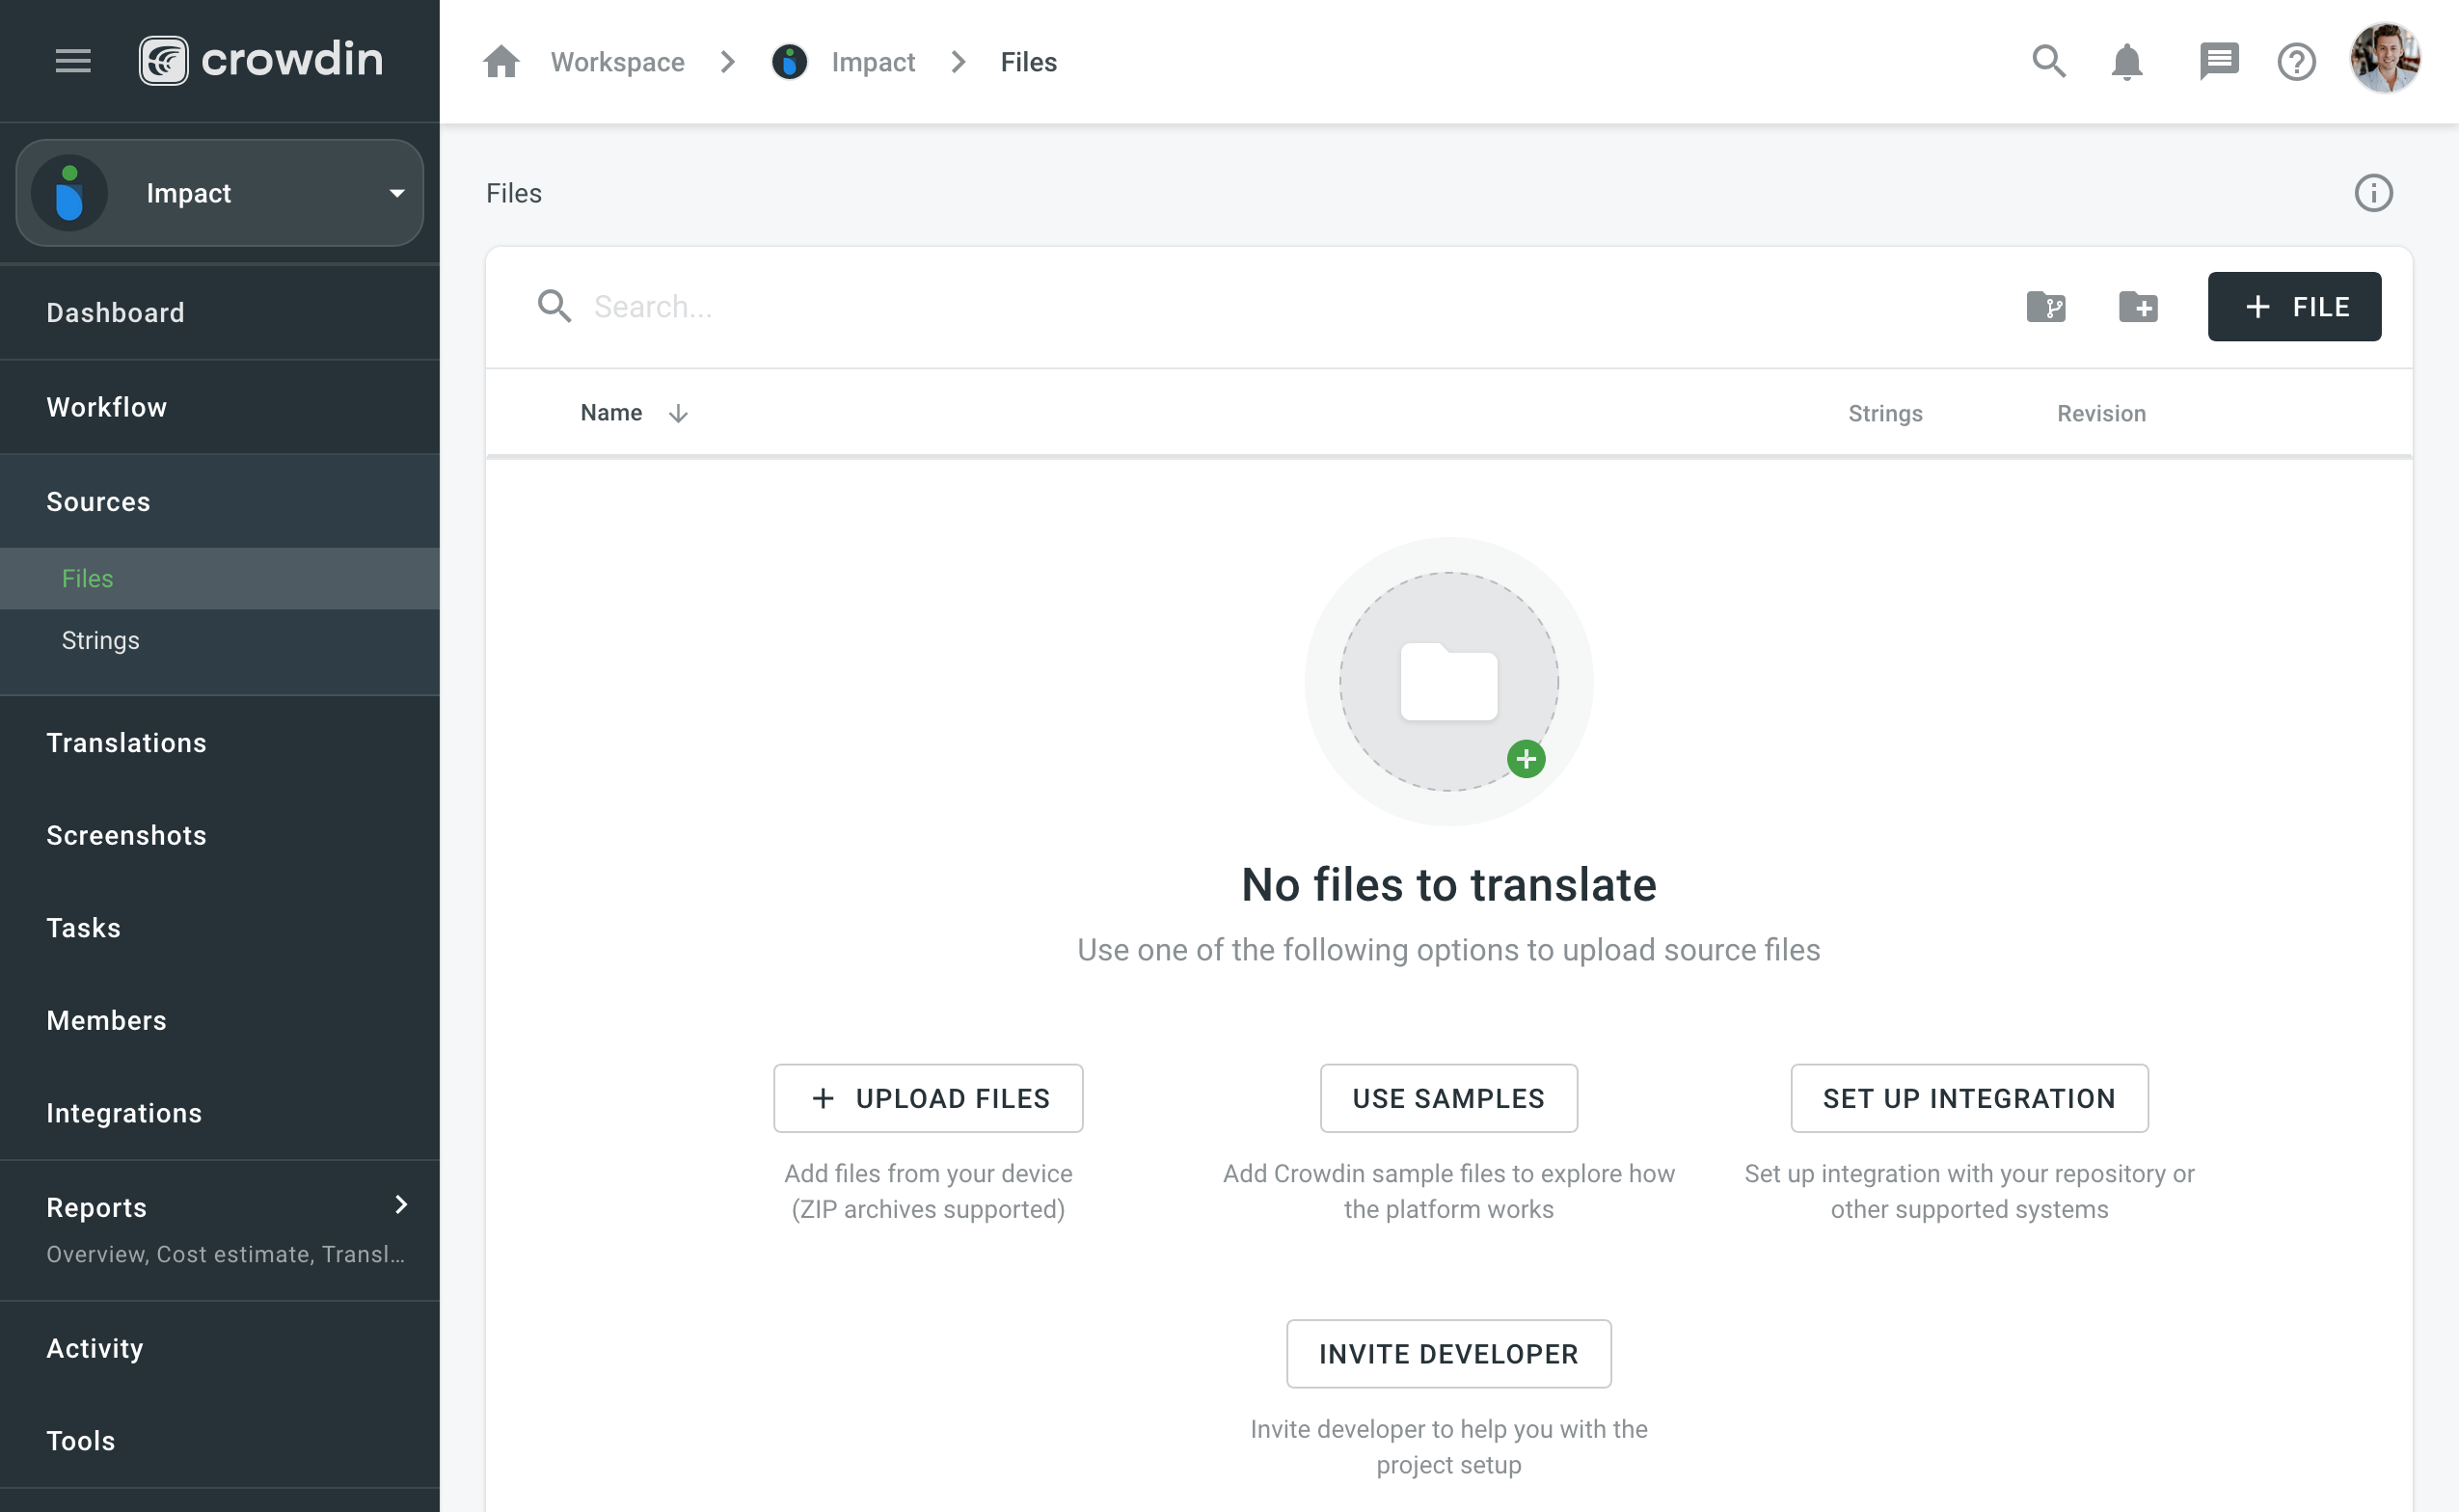
Read more about uploading files to a file-based project.
To upload translatable content in a string-based project, open your project and go to the Upload tab.
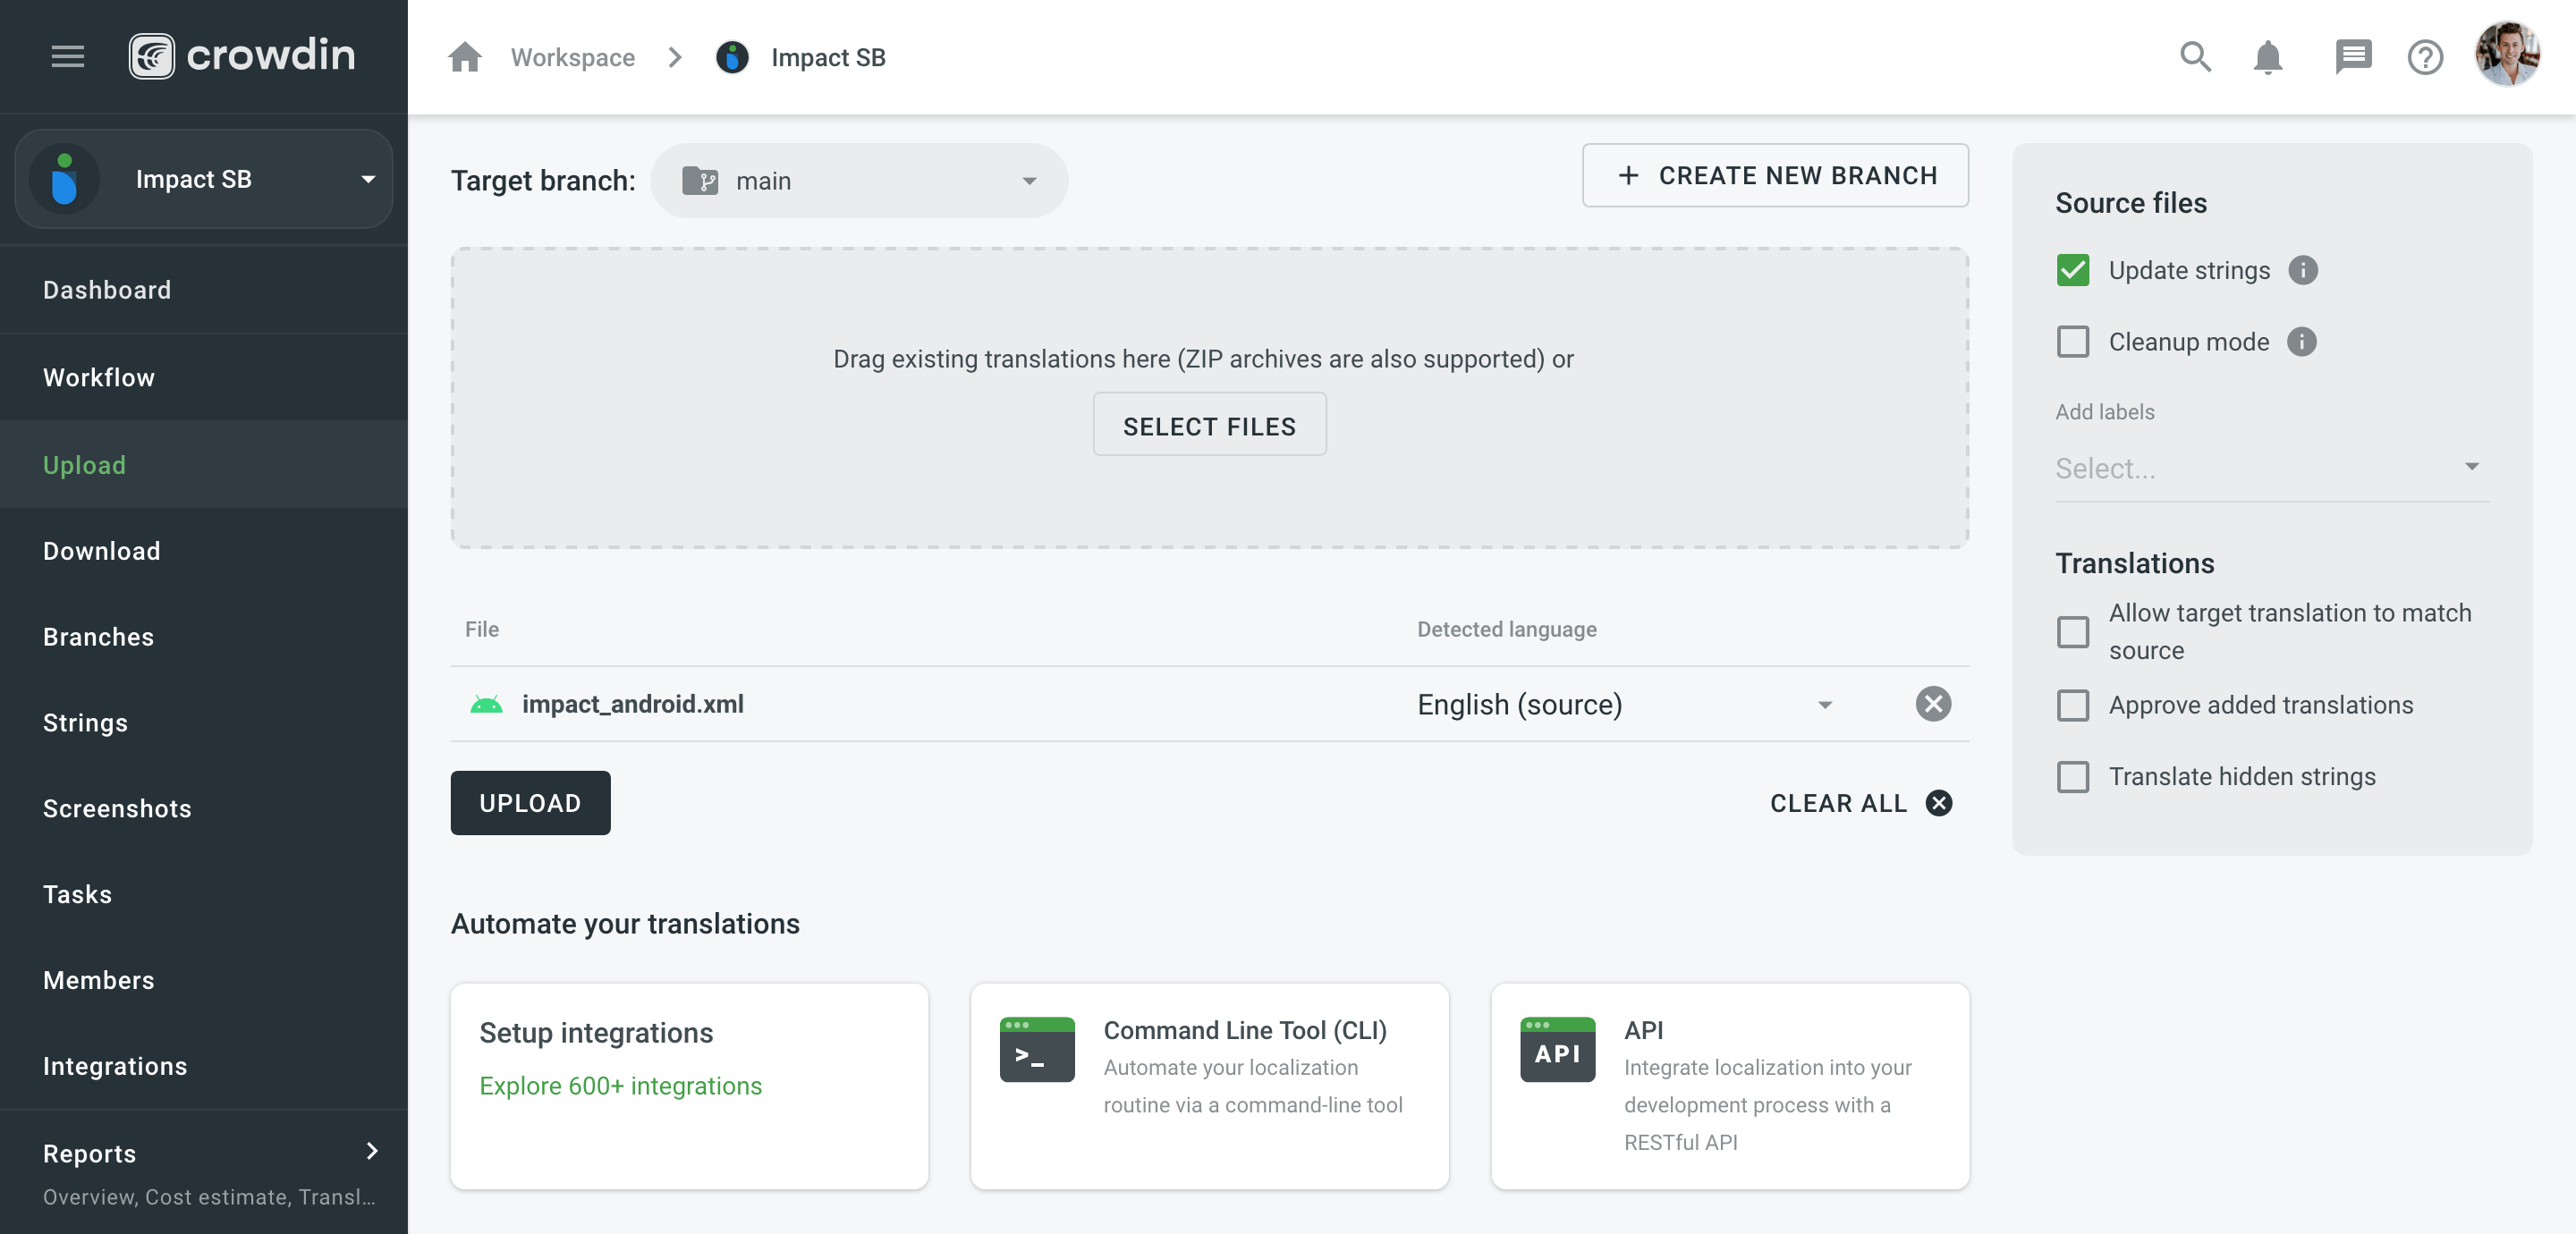
Read more about uploading files to a string-based project.
About Integrations
Connect the tools you already use: code repository, help desk, task tracking, communication, custom API or CLI, and more. Crowdin Enterprise connects well with many tools from your stack, or you can build custom integrations.
Here are a few integrations you can use to integrate your source content with Crowdin Enterprise, as well as sync translations back to these tools:
- VCS Integrations: Bring source content from your repository chat history into Crowdin Enterprise so your translators could translate content in parallel with development. We sync with GitHub, GitLab, Bitbucket, and Azure Repos.
- Android development: Connect Google Play to translated app descriptions and connect Android Studio to translate the app itself, so you can release multilingual versions at the same time with the main version of your Android app.
- Help Center: Connect your documentation, so the help articles you store in Zendesk could be translated into the languages your customers speak.
- Issues: With Jira integration, every issue created by translators in the editor (lack of context, mistakes in the source, wrong translations, and other) will become a task in your Jira project, so you won’t miss it and be able to address as soon as possible.
- Notifications: Receive notifications from your Crowdin Enterprise projects right into Slack, so you always keep up with important updates.
Setting up VCS integrations with Your Project
Sync source content from your repository with Crowdin Enterprise, and pull translations made in Crowdin Enterprise back to your repository.
- Open your project and go to the Integrations tab.
- Click Create.
- Click Install on the needed integration and follow the instructions.
- Click Install.
Once you add the integration, you can proceed to the setup.
/ru/enterprise/gitlab-integration/
Configure the branch online or create a configuration file and load this file.
Upload Localization Resources (Optional)
All the resources, including TM, Glossary, MT engines can be added to your Workspace or directly to the project. All the resources, including TM, Glossary, MT engines can be added to your Workspace or directly to the project. Each project also has a default Glossary and Translation Memory that are created automatically.
You can also switch to Permissions granularity mode, where you can add different resources to each group as well. Resources added to a Group will be available only to the projects in this Group.
Read more about the Permissions Granularity Mode
Память переводов
With Translation Memory, you can leverage previous translations from your project. When the same or similar texts are used across your content, you can use the same translation and thus save your time. Pre-translate your project with a TM and previous translations will be reused. Translators can also check how similar strings were translated earlier to keep translations consistent.
Project Translation Memory (TM) is created automatically for each project. You can also upload your existing TMs in tmx, xlsx, and csv file formats.
Read more about Translation Memory.
Словарь
Use a Glossary to make sure your product terminology is translated correctly and used consistently across all languages.
Project Glossary is created automatically for each project. You can also upload your existing Glossary tbx, xlsx, and csv file formats.
To learn more, read the article Glossary.
Machine Translation Engines
Machine Translation is a great assistance for human-translators. Work goes faster with translators post-editing translations suggested by machine.
You can currently connect Google Translate and AutoML Translation, Microsoft Translator, DeepL Pro, Amazon Translate, and Watson (IBM) Language Translator engines.
To learn more, read the article Machine Translation.
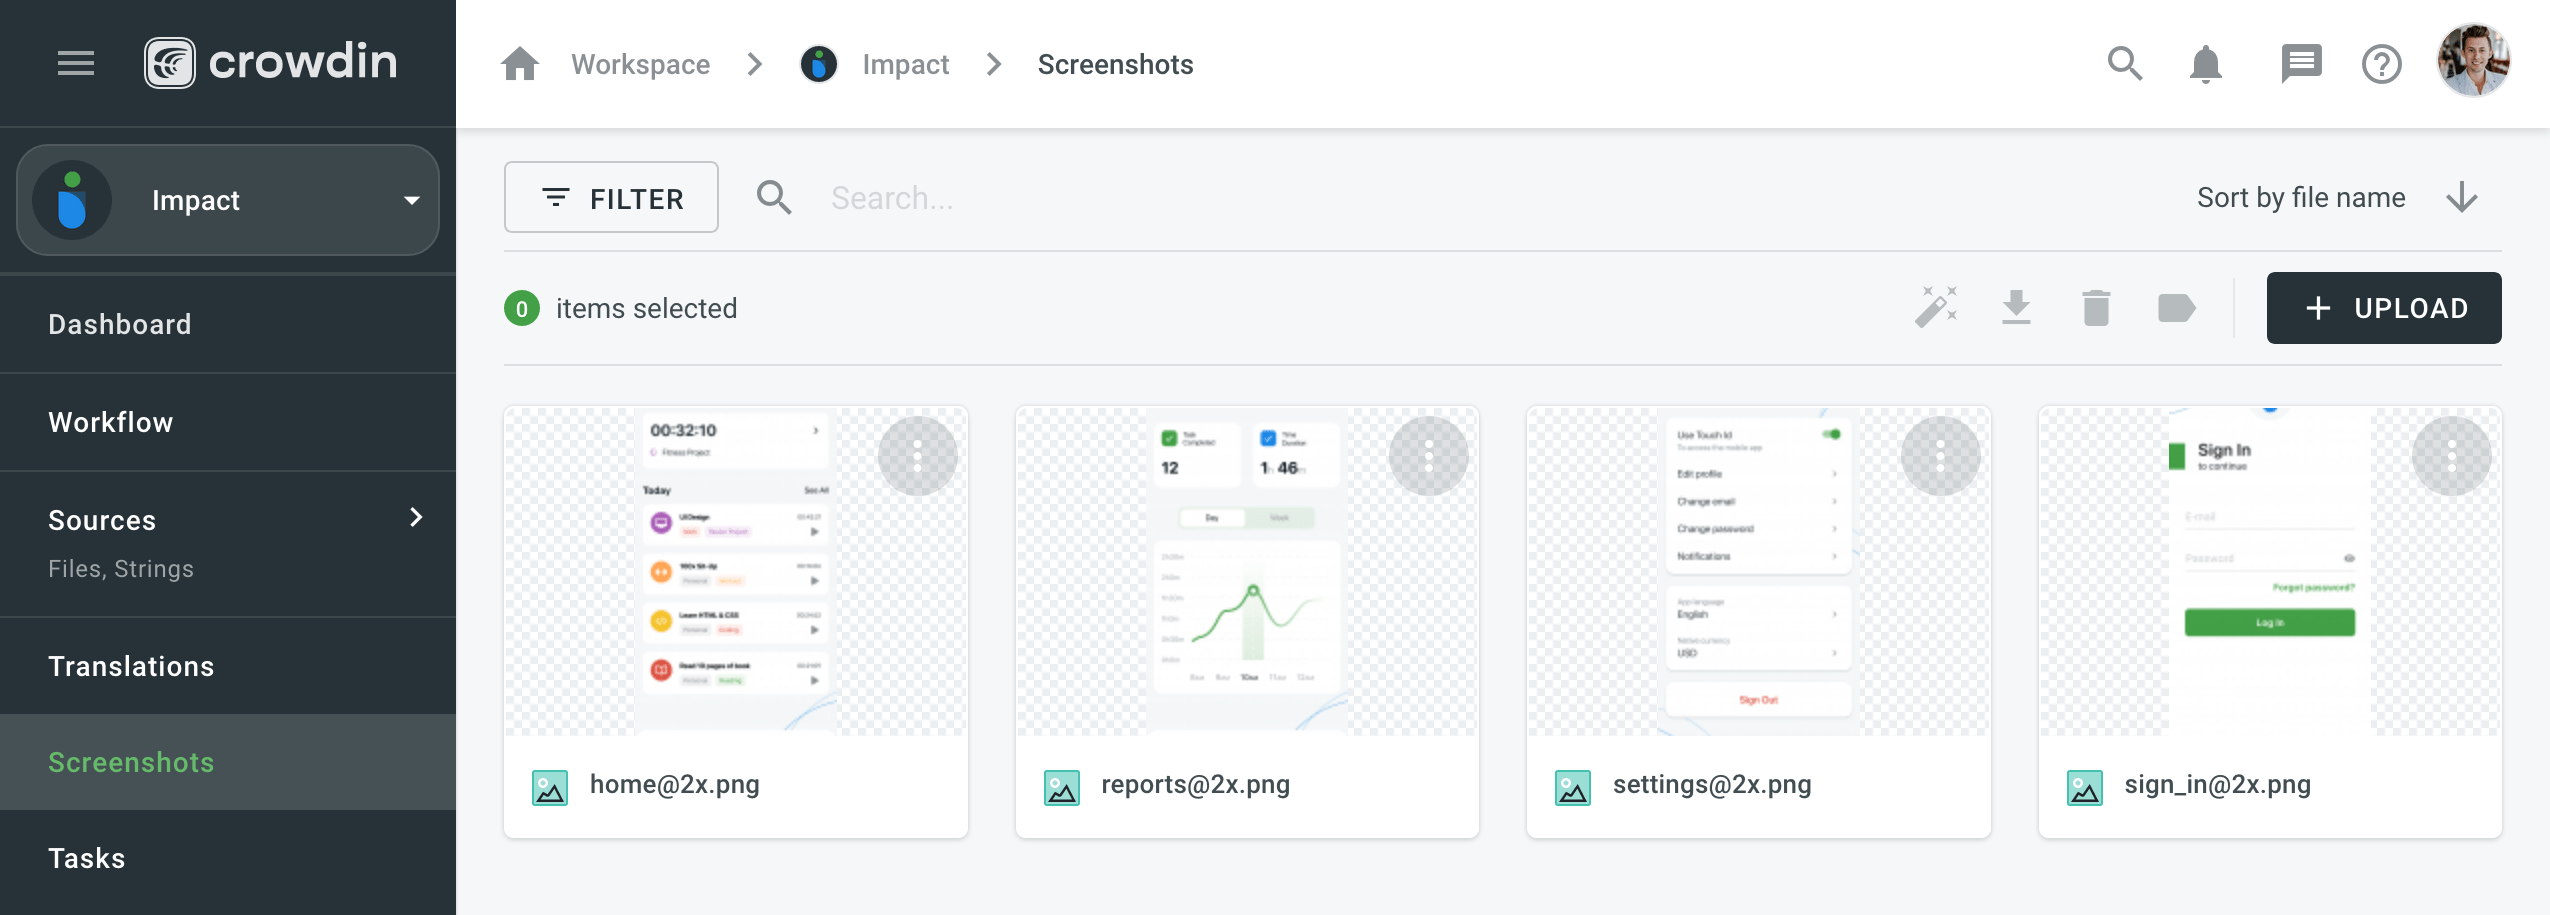
Скриншоты
Provide additional context to the uploaded files by adding screenshots. Пометьте исходные строки на снимках экрана, чтобы они отображались в редакторе, где переводчики увидят их в разделе контекст.
/ru/enterprise/github-integration/
Invite Translators and Translation Agencies
Translate your projects with the right teams and technologies involved. You can invite your in-house translators, freelancers, translation agencies, and your community.
In Crowdin Enterprise, you can invite people to your organization or to a specific project directly. Project members can be assigned with contributor or manager role. Also, you can invite managers directly to groups on organizational level.
To learn more, read the article Screenshots.
User Management
People invited into your Organization will see an empty Workspace by default. With an exception for Crowdsourcing projects, which are visible to all the organization members.
To invite people to your organization, open your organization’s Workspace and select Users on the left sidebar.
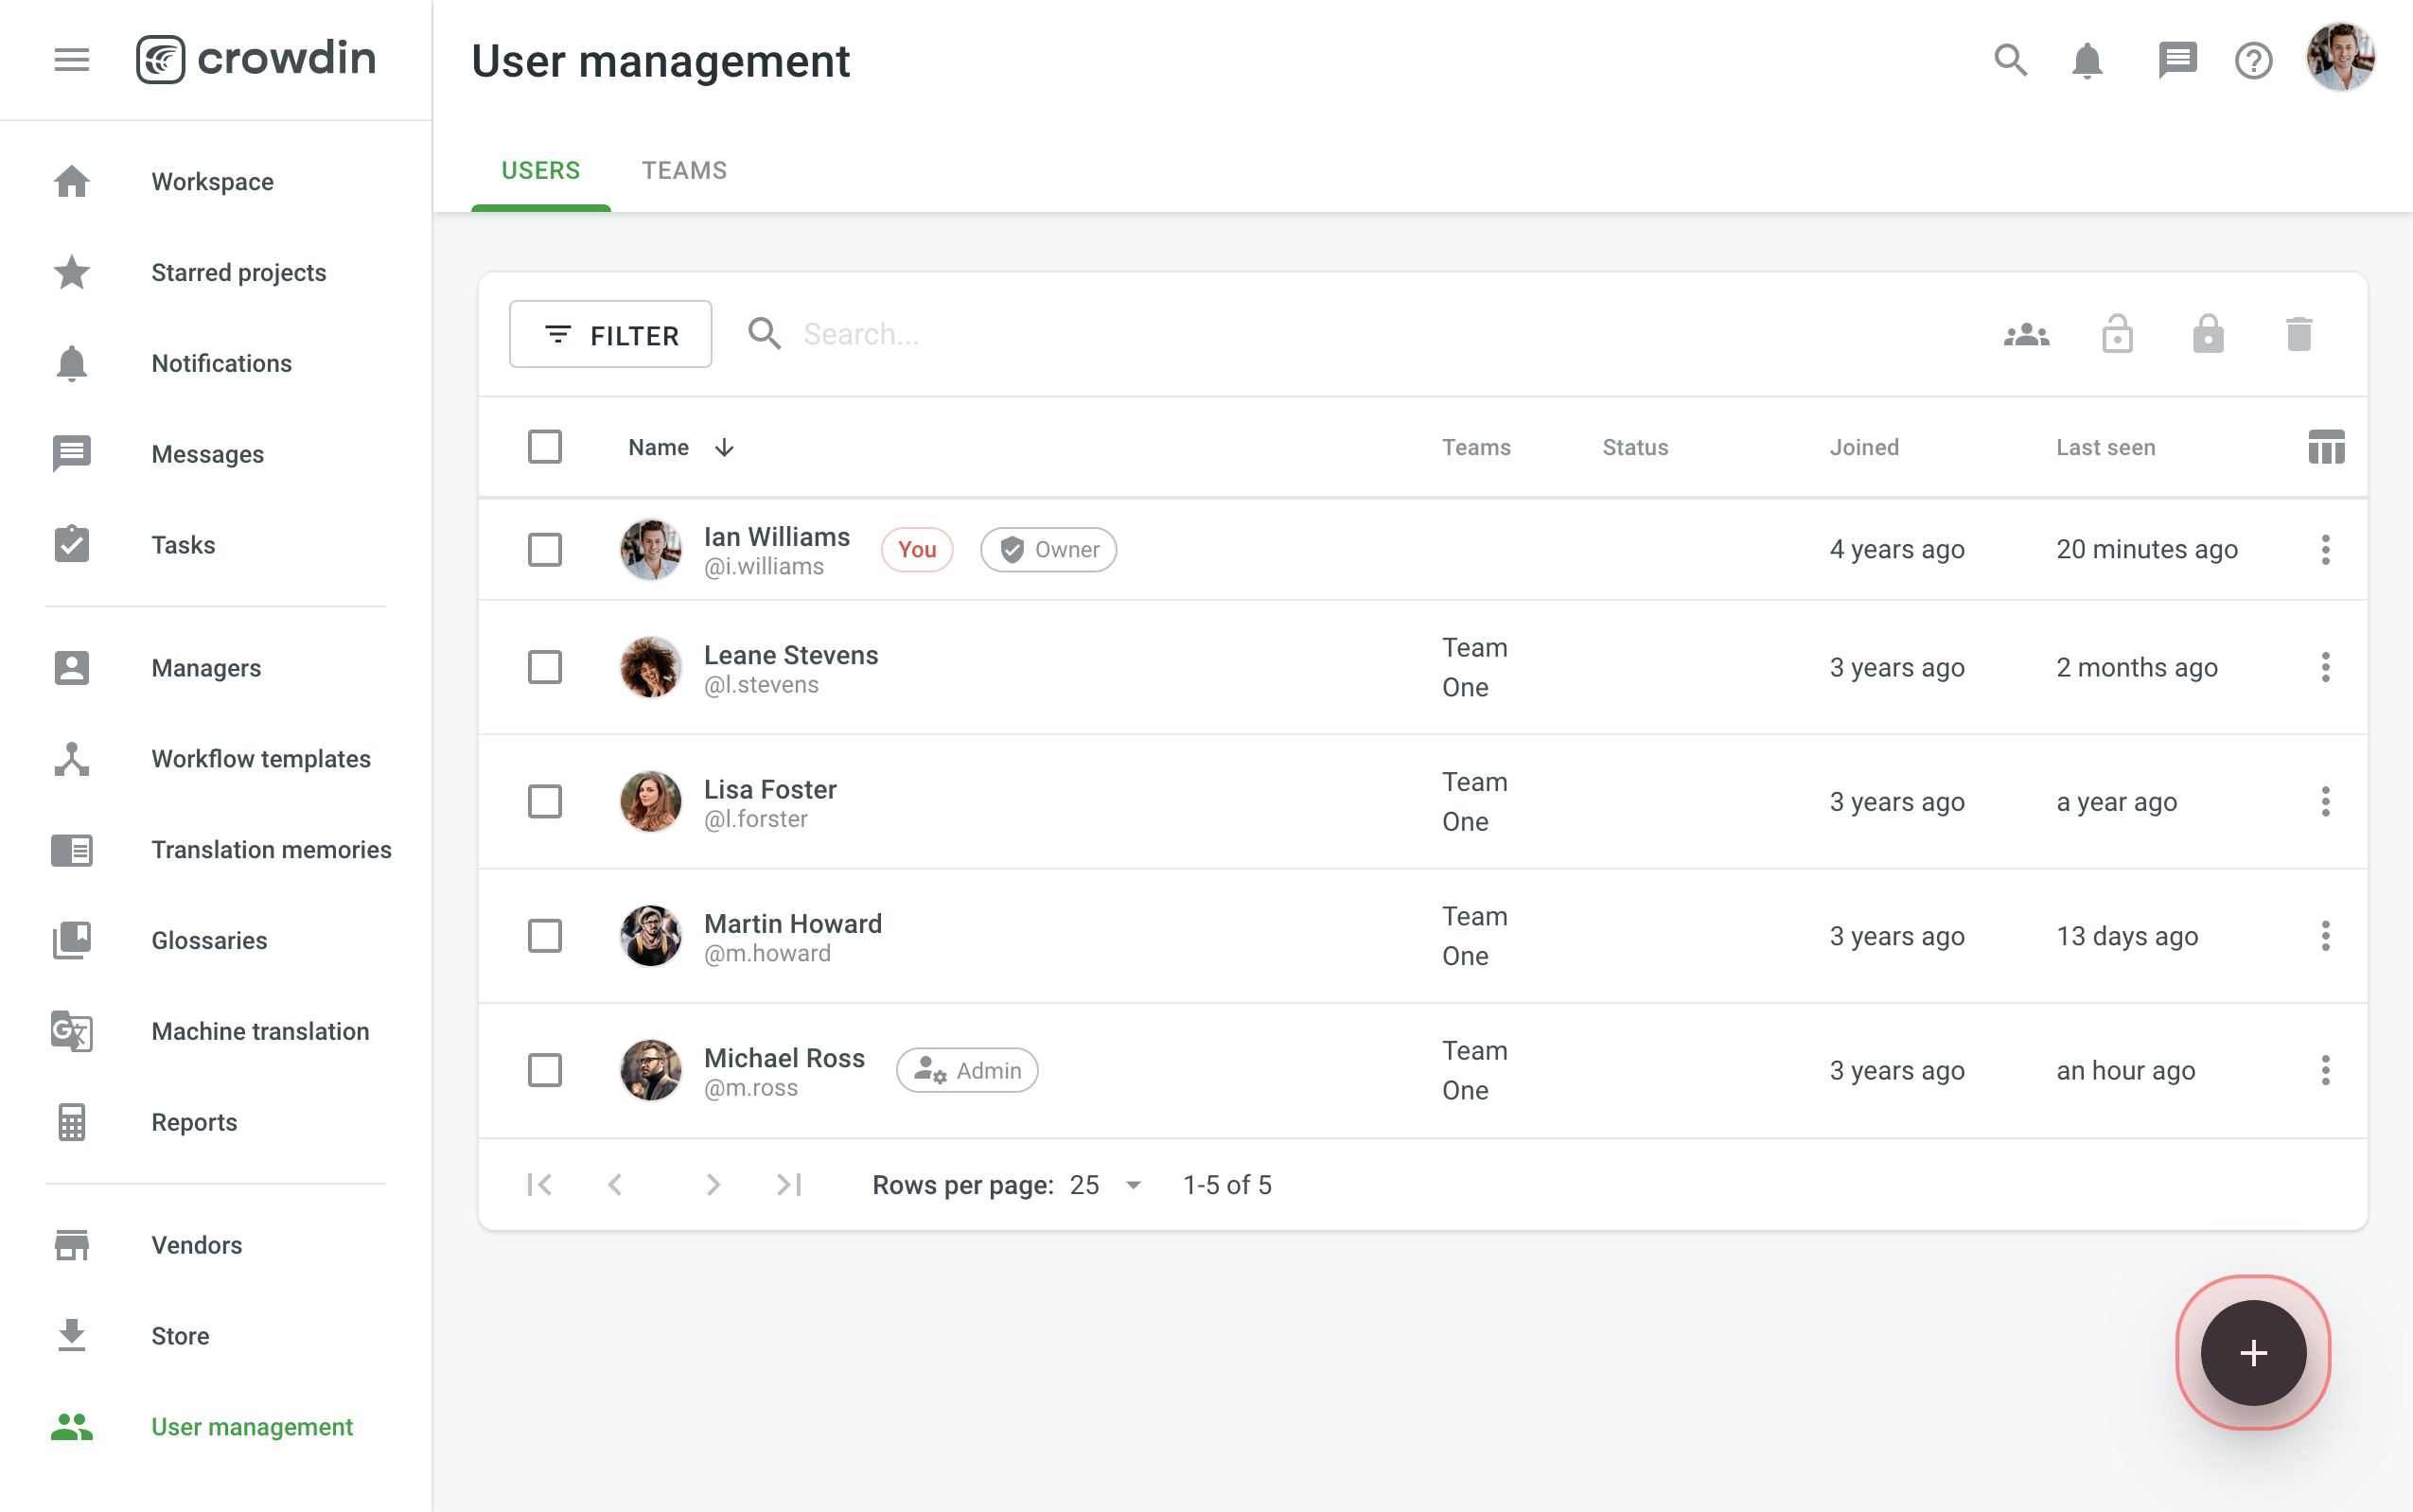
Select User management on the left.
Once you invite people to your Organization, you’ll be able to assign them to workflow steps, add to projects, give them admin or manager access, and more.
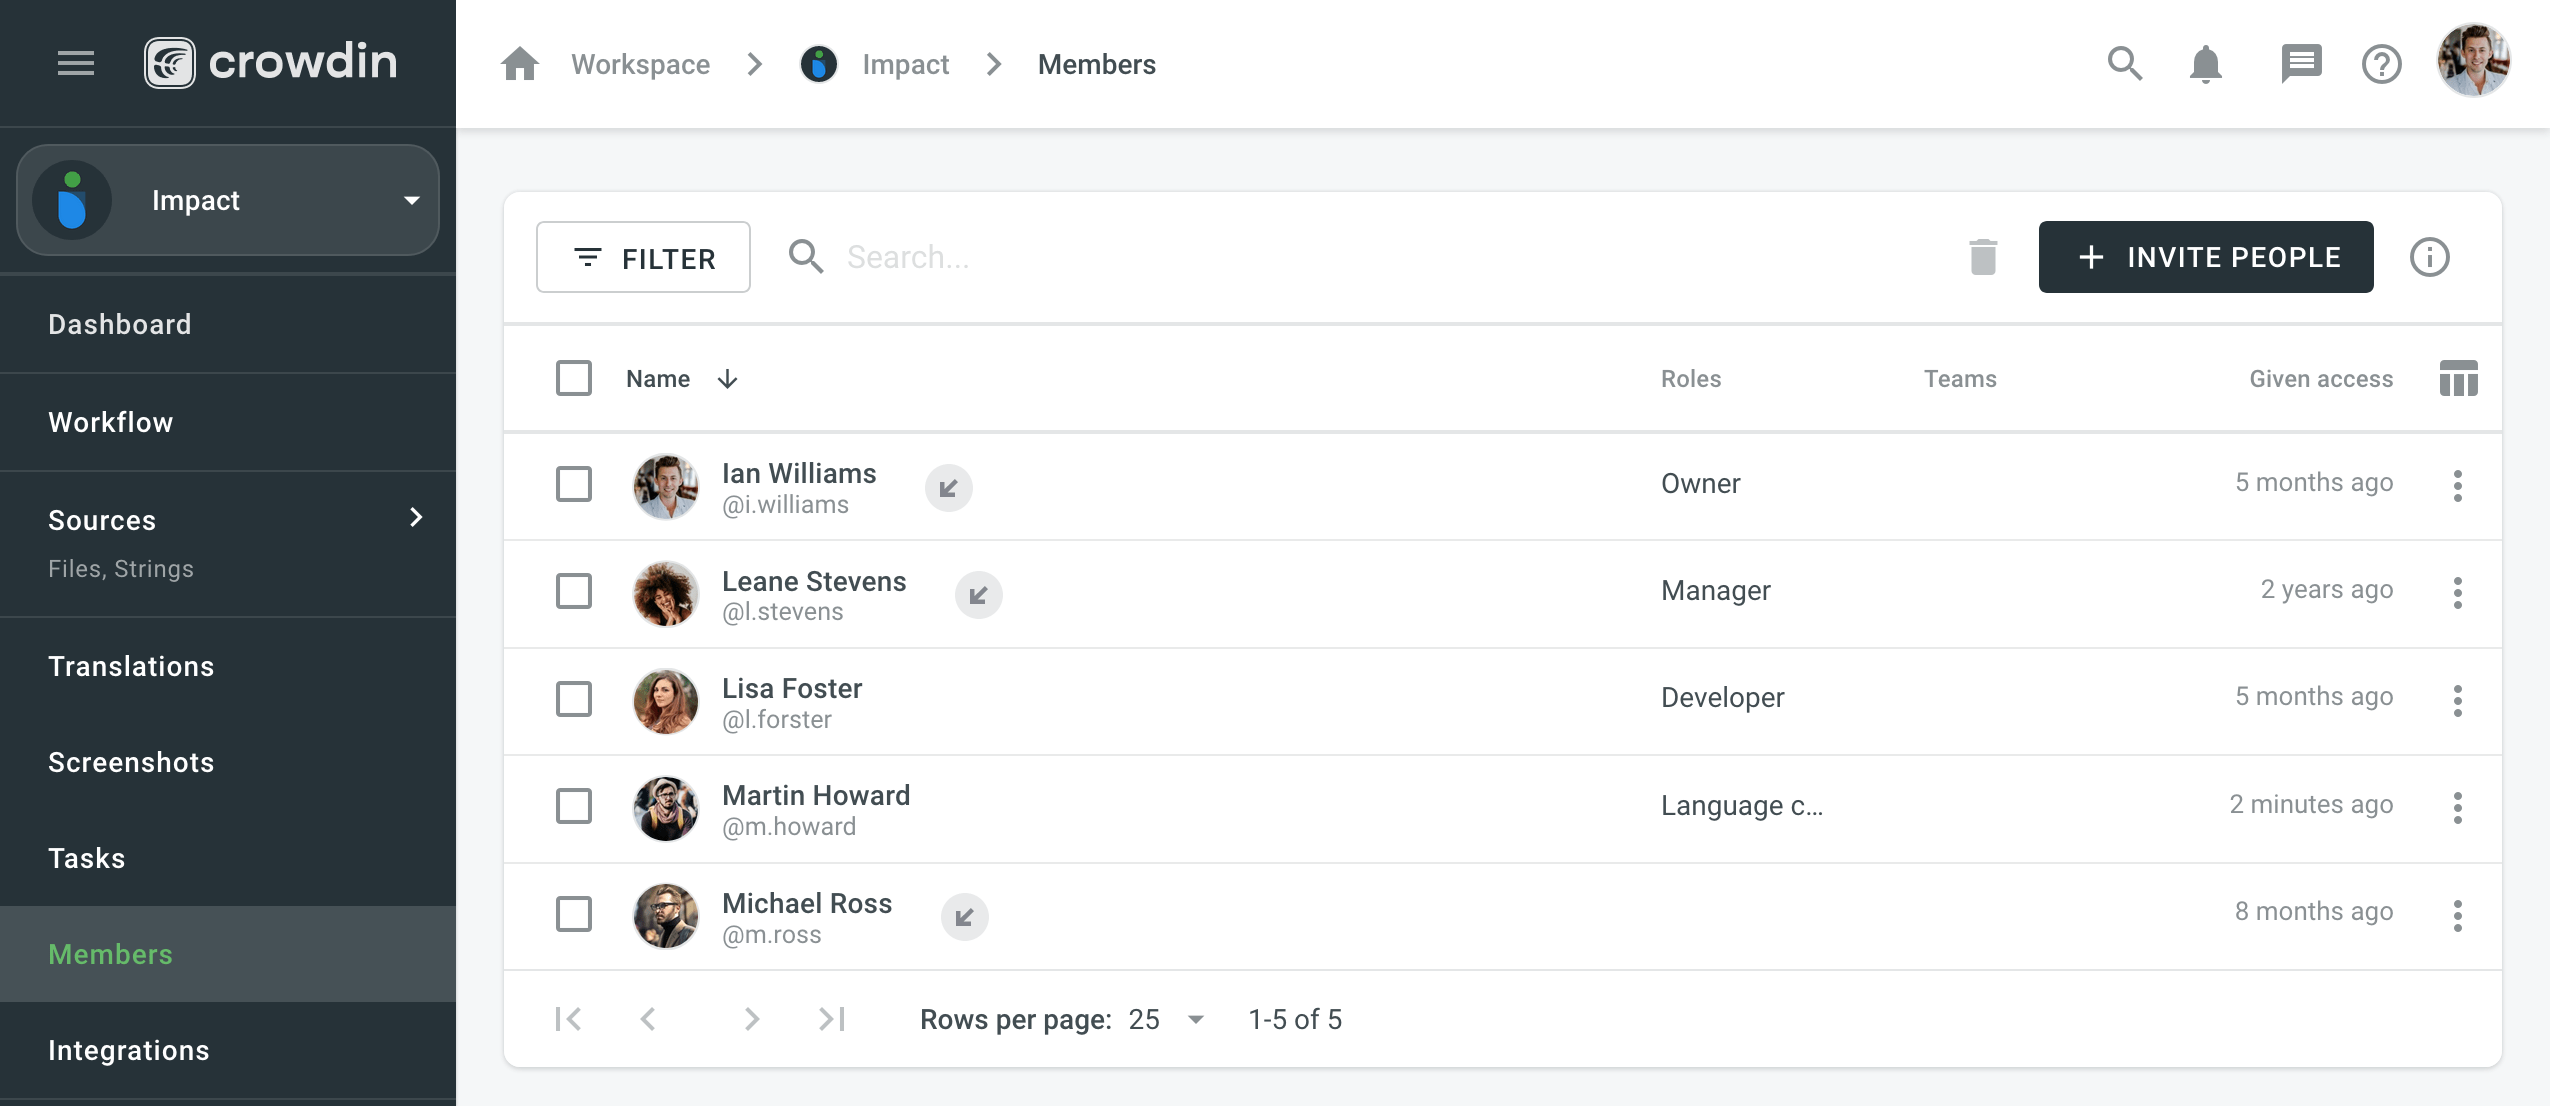
To learn how to add users to specific Project, read the article User Management.
Inviting Existing Organization as Vendor
To start cooperation with a Vendor organization, you first invite them to your organization and then assign to workflow steps. Working with a Vendor you won’t see specific people who made translations, instead you’ll see which Vendor organization made them. Instead, you see which vendor organization did them.
Translation agencies can have their own Vendor Organizations in Crowdin Enterprise. If the agency you cooperate with already has an organization you can simply invite them, if not - they can also create an organization and then contact our support in chat or at support@crowdin.com, so we convert their organization to a Vendor.
This way you’ll be able to have more control over projects and resources you share, an ability to create complex workflows, that would include translation and proofreadng by vendor, and more.
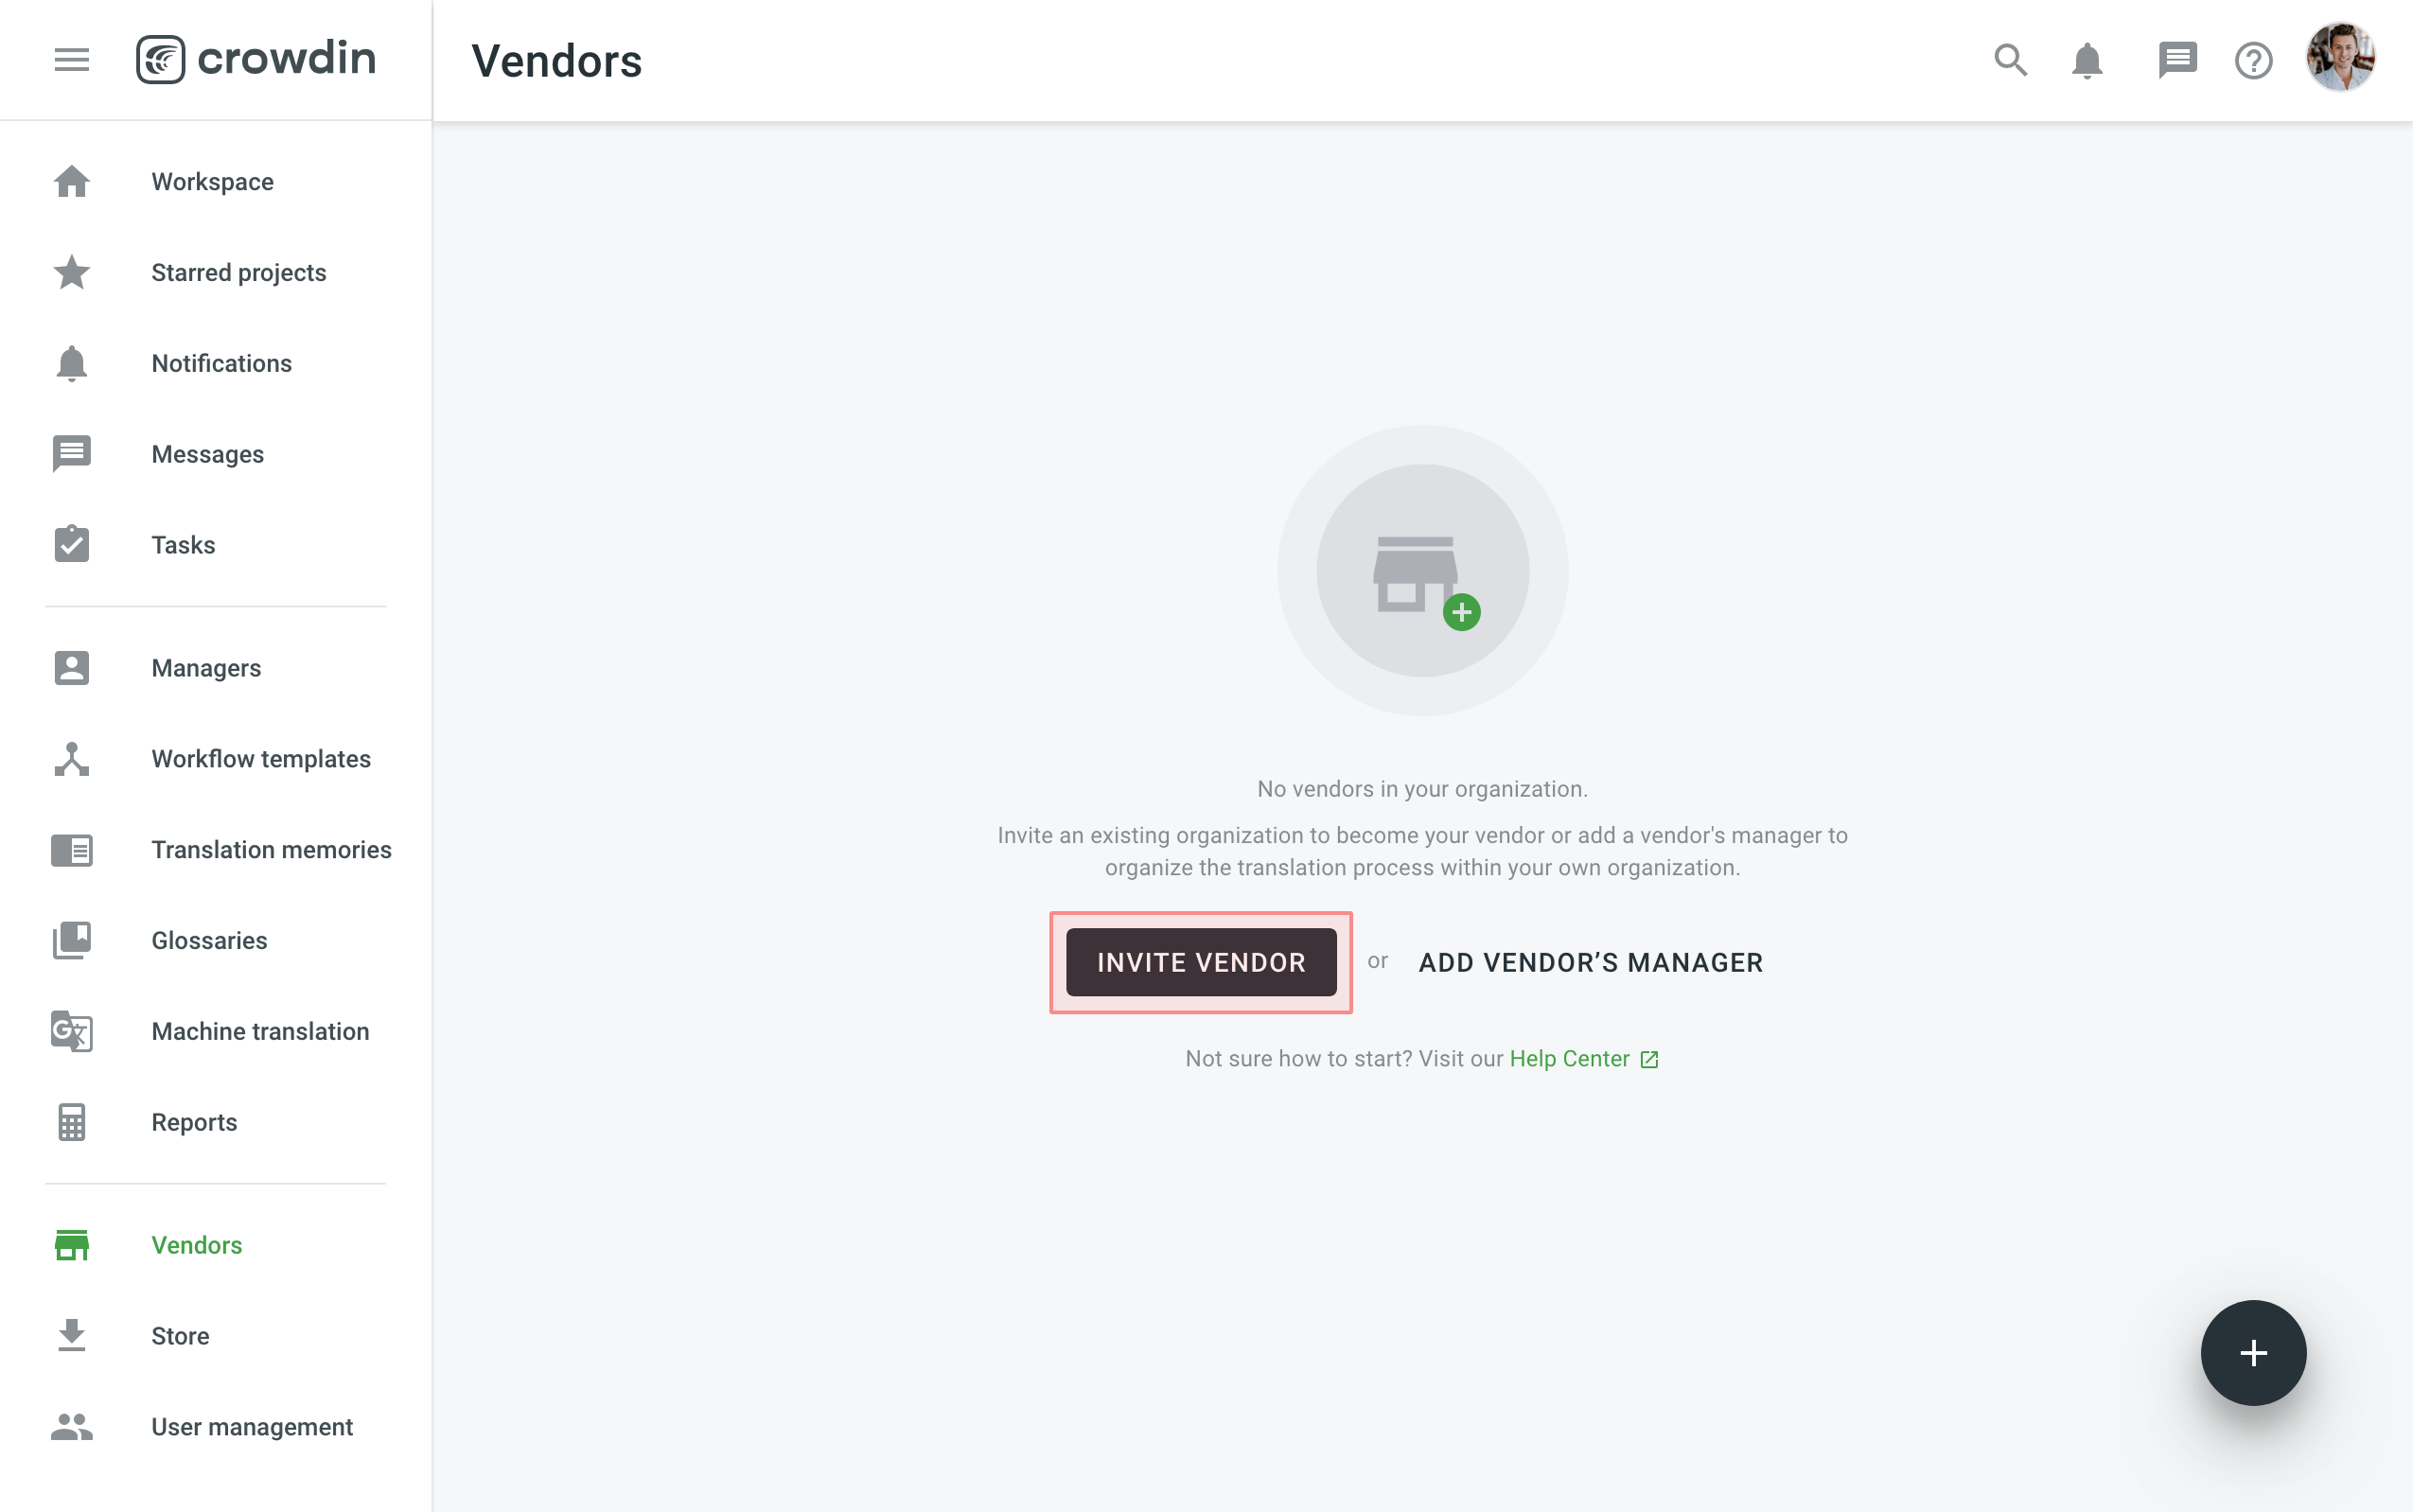
Vendor Organization receives a copy of your project in the Incoming Projects tab. This Organization should accept the incoming project to receive the workflow step you invite them to, and can independently set their own workflows and invite their own contributors.
At the bottom right click Invite vendor.
/ru/enterprise/azure-repos-integration/
Configure Workflow
Creating Workflow Template
Workflow is a combination of steps that content in your project should go through before it’s ready to be used in your product. You can create a workflow template that works best for you and then assign it to your projects. You’ll be able to edit your Workflow inside the project, it will not change the Workflow template. You can use unlimited workflow steps and the only requirement is that each workflow step should have an assignee and target languages selected.
Navigate to Workflow templates, at the bottom right, click Create.
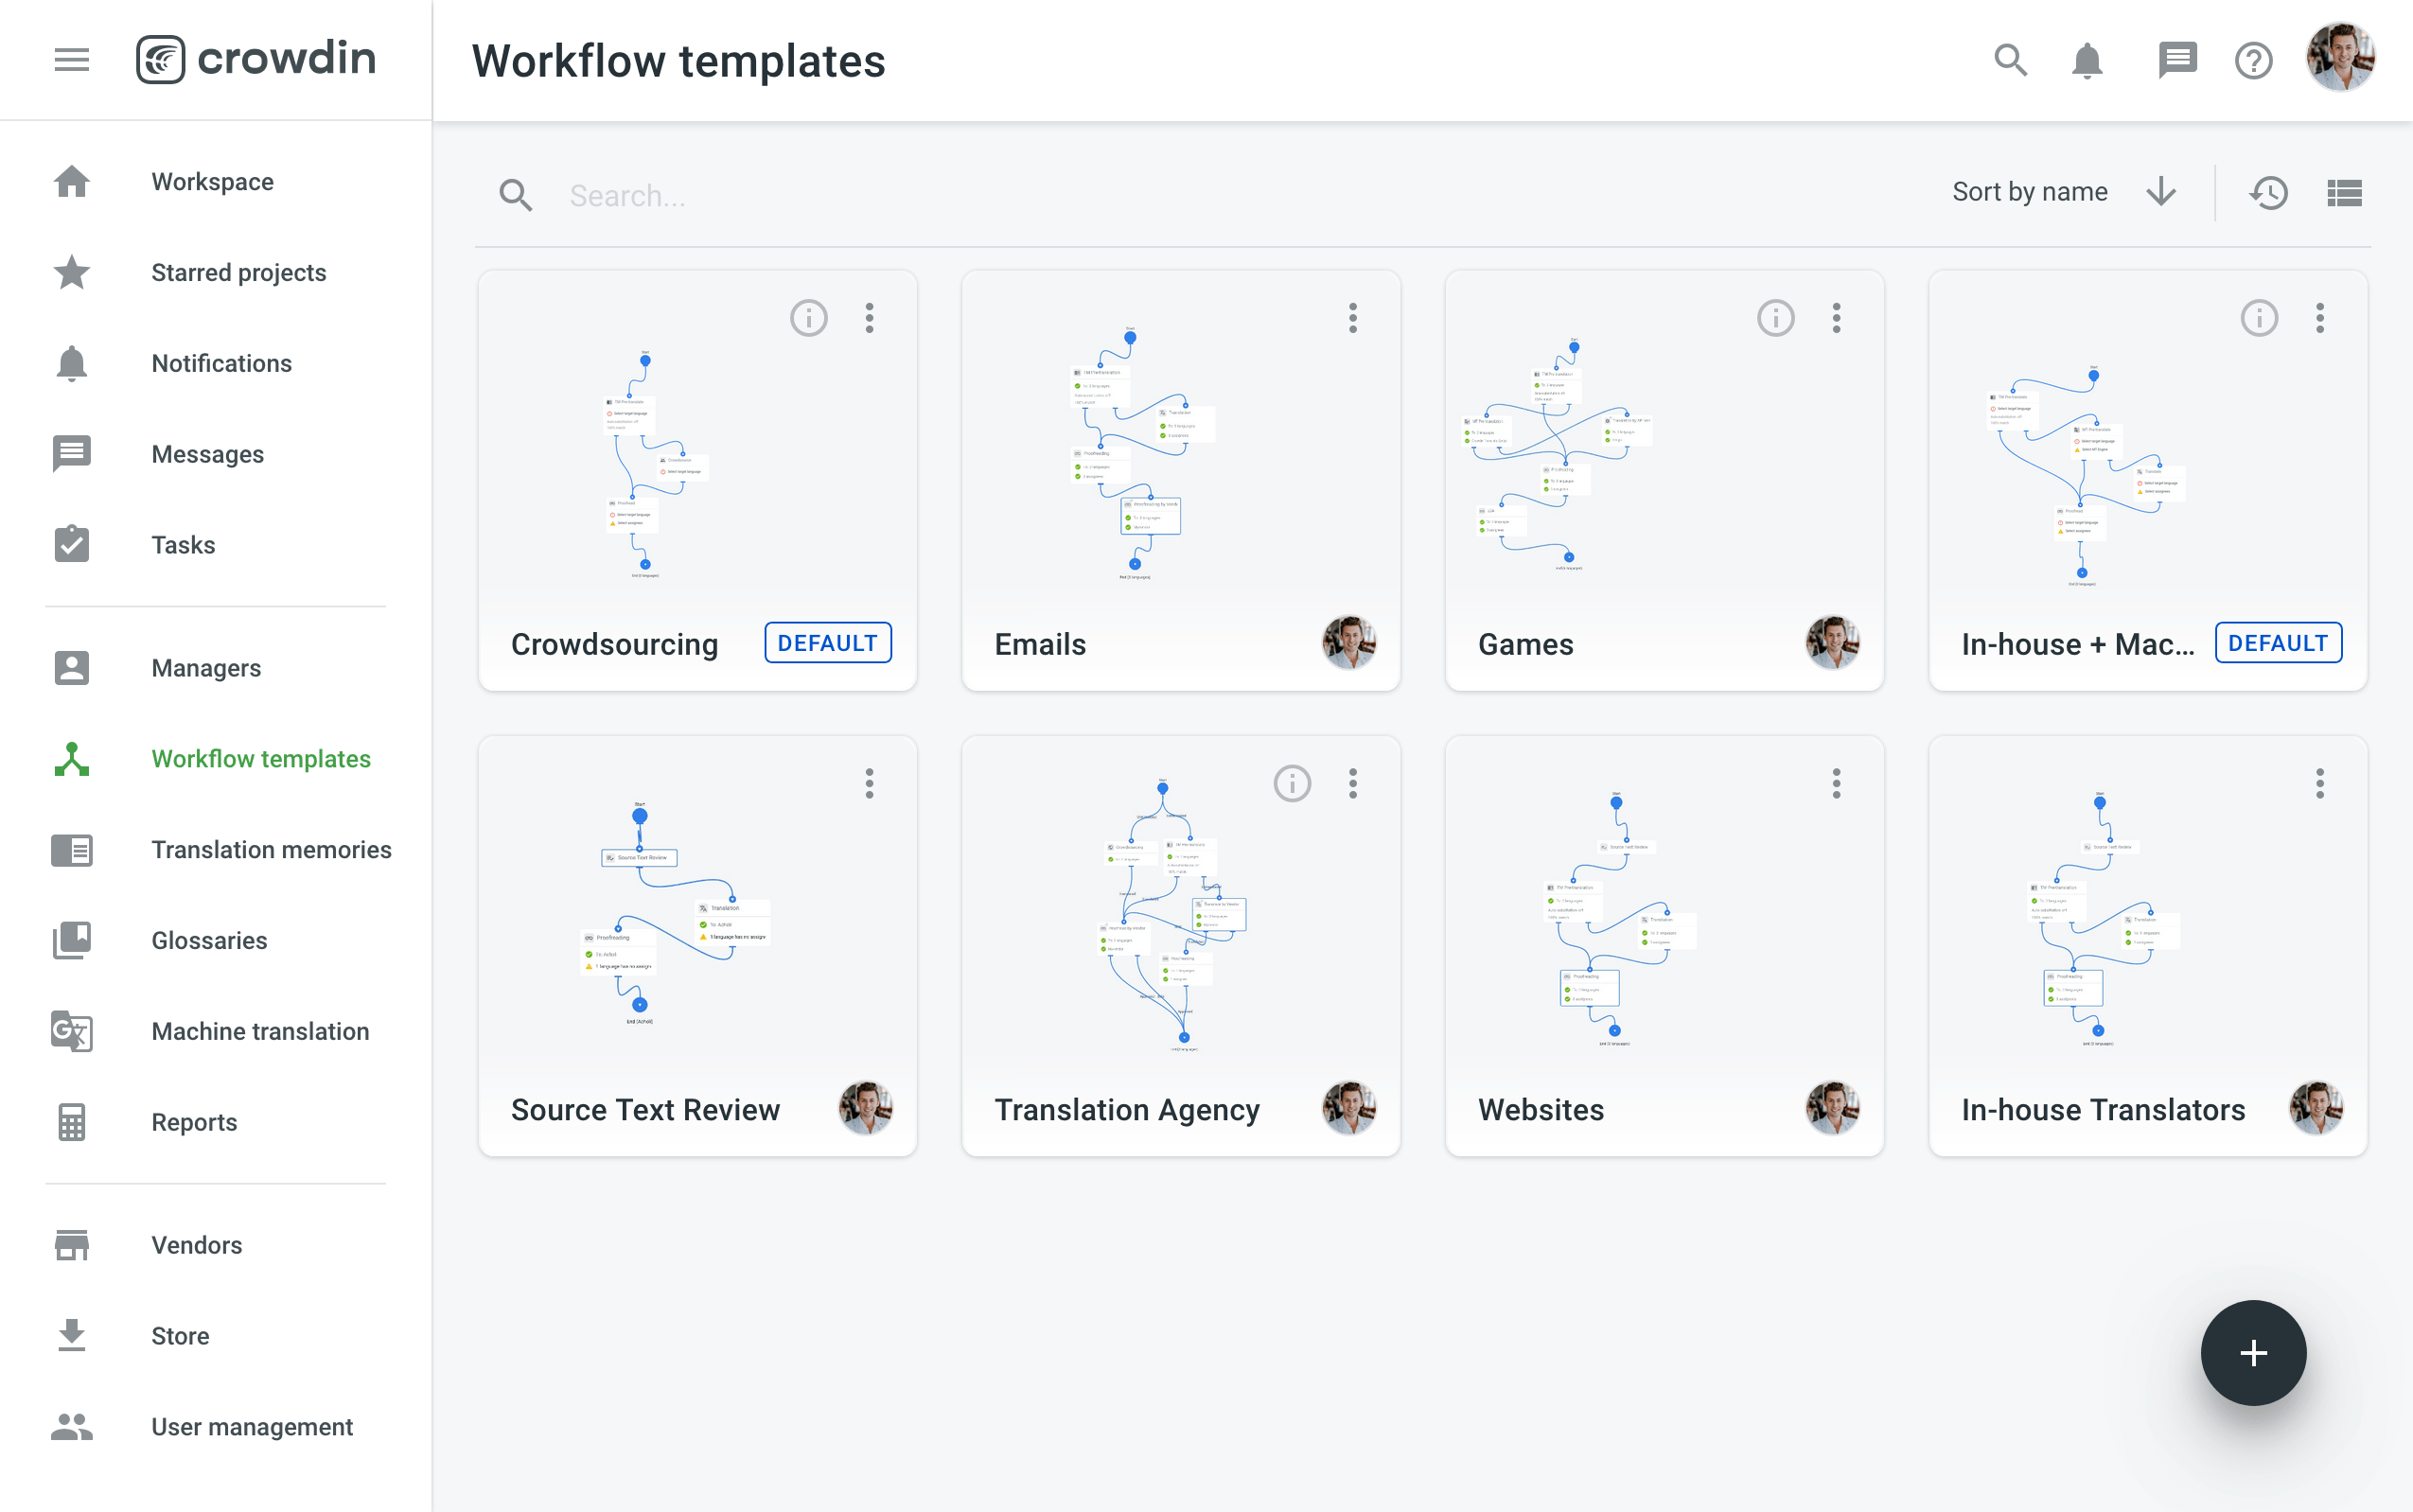
Select a preferred workflow template or create a project without a workflow.
Read more about Working with Projects with or without a Workflow.
Workflow Steps
You can combine an unlimited number of workflow steps (both in parallel or subsequently), setting up your own workflows that work perfectly for your projects.
See the full list of available Workflow Steps.
Personalized Demo
Have 20-30 minutes, and want one of our skilled Customer Success managers to walk you through your organization? Go ahead and Schedule a demo call to get a personalized tour and get recommendations on how to handle your organization best.