CSV / XLSX File Configuration
After uploading CSV or XLSX files to a file-based project, they require additional configuration before the system can import the content of these files.
To configure CSV or XLSX files in a file-based project, follow these steps:
- Open your project and go to Sources > Files.
- Click Configure next to the file to open the configuration window.

The configuration process is similar in a string-based project as well. CSV or XLSX files require additional configuration before they are uploaded to the project.
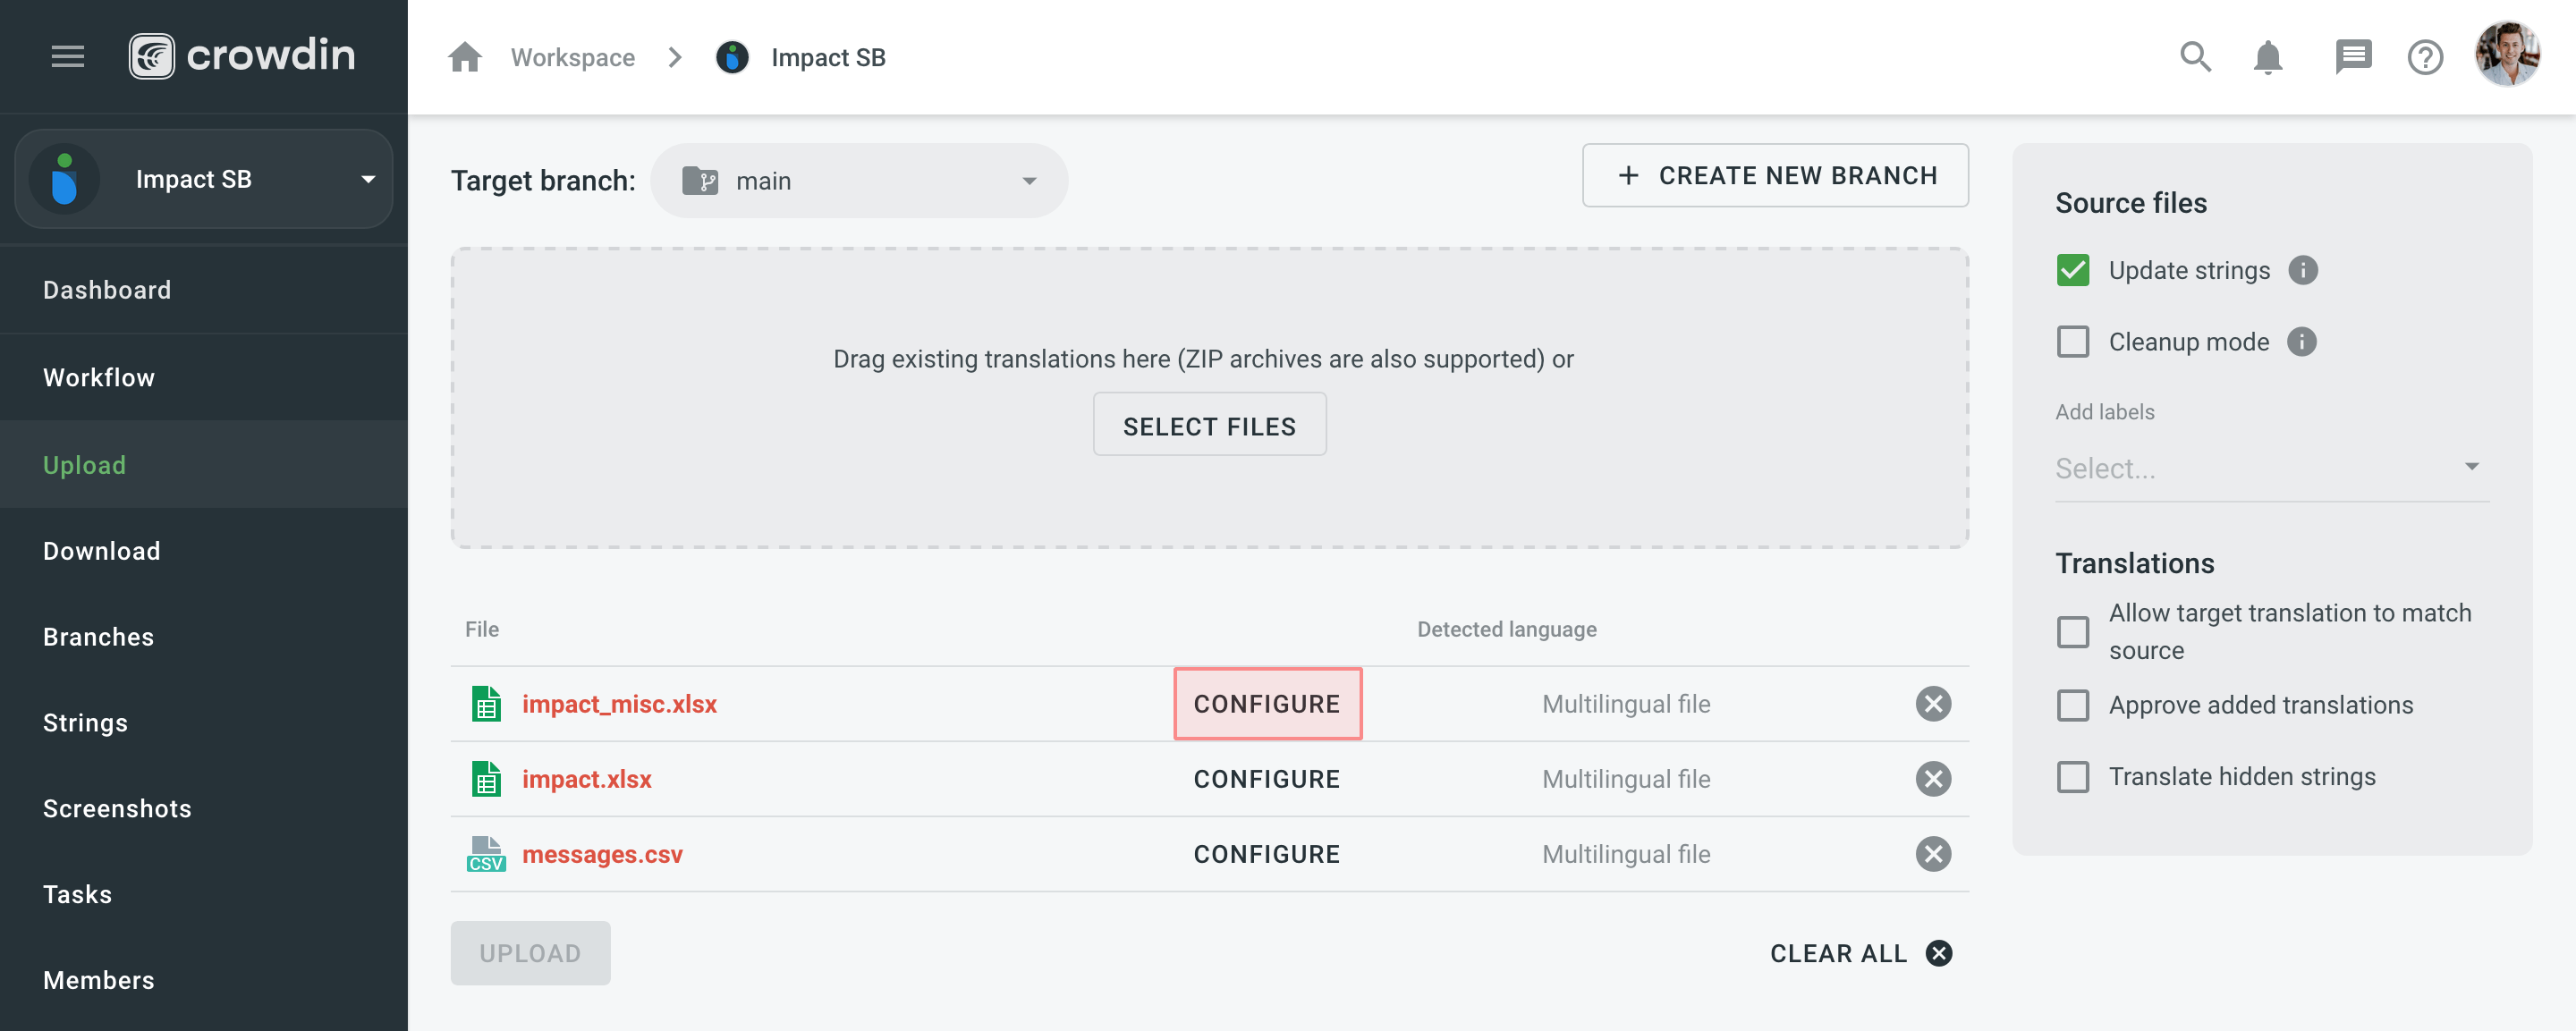
To configure CSV or XLSX files in a string-based project, follow these steps:
- Open your project and go to the Upload tab.
- Drag and drop files from your machine.
- Click Configure next to the file to open the configuration window.
The same configurations mentioned in this article are also applicable to the TSV file format. The main difference between CSV and TSV files is that they use different delimiters between columns (i.e., commas in CSV and tabs in TSV).
Configuration Options for XLSX Files
When configuring XLSX files, you’ll have the following options:
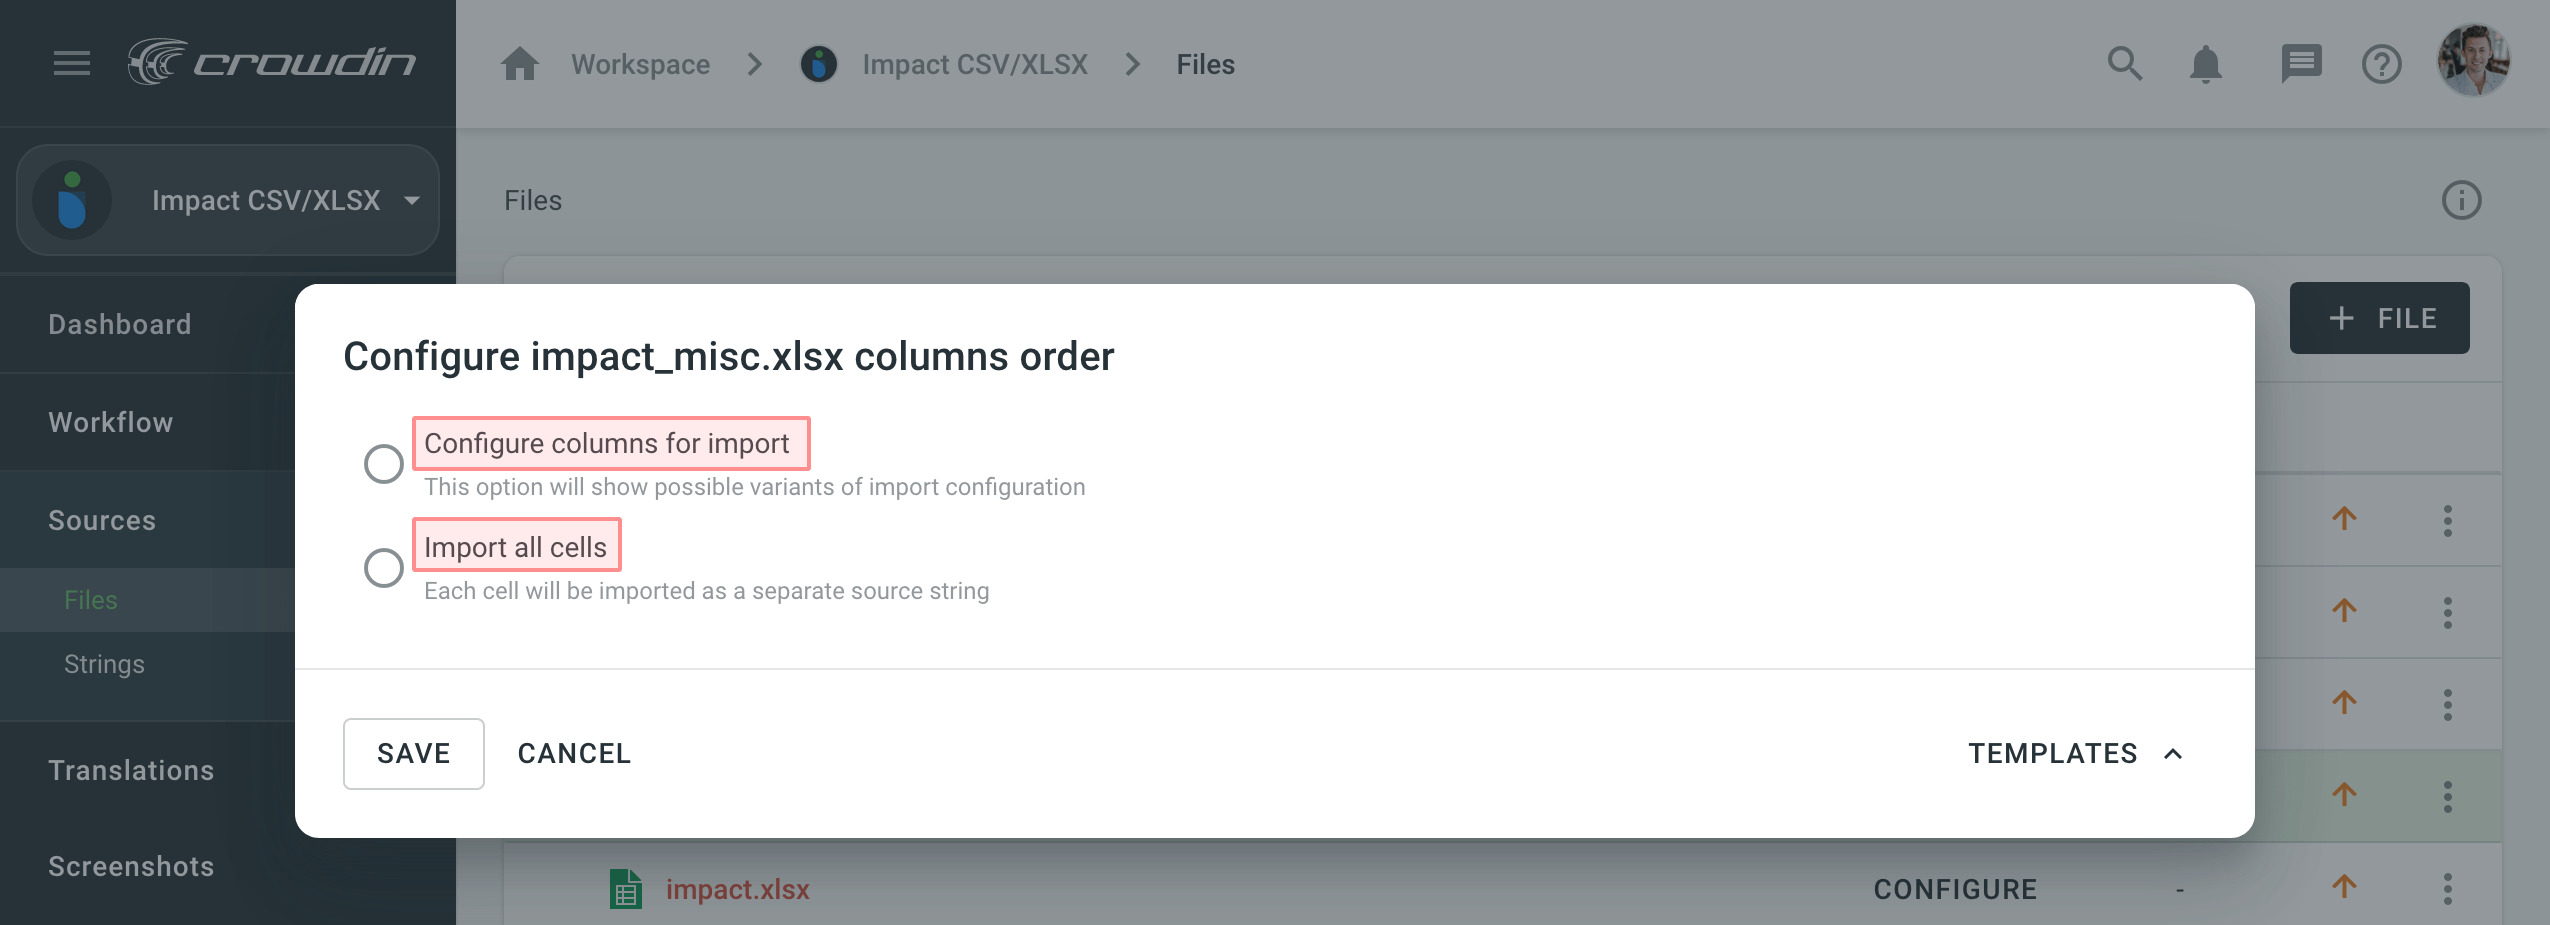
-
Import all cells - import each cell as a separate source string. Additionally, you can use Content Segmentation to split the source file’s content into shorter text pieces, mostly sentences and short paragraphs. This is helpful when translating content units consisting of several sentences because it will be easier to translate smaller pieces of text. Segmentation Rules eXchange (SRX) are used for automatic content segmentation.
-
Configure columns for import - specify the preferred column order.
Configuring Columns for Import for XLSX and CSV Files
When configuring CSV or XLSX file with Configure columns for import option, you can specify the following column types:
- Key – Column contains string identifiers. Typically an alphanumeric value.
- Source string – Column contains source strings that should be translated.
- Source string/Translation – Column contains source strings, but the same column will be filled with translations when the file is exported. When uploading existing translations, the values from this column will be used as translations.
- Translation – Column for resulting translations added on export. On import and when uploading existing translations, the system will check this column for existing translations and upload them to the project.
- Context – Column contains comments or context information for the source strings.
- Labels – Column contains labels for the source strings. You can add multiple labels to each string, separating them with commas.
- Max. Length – Column contains max.length limit values for the translations of the strings.
- Not chosen – Column that will be skipped on import.
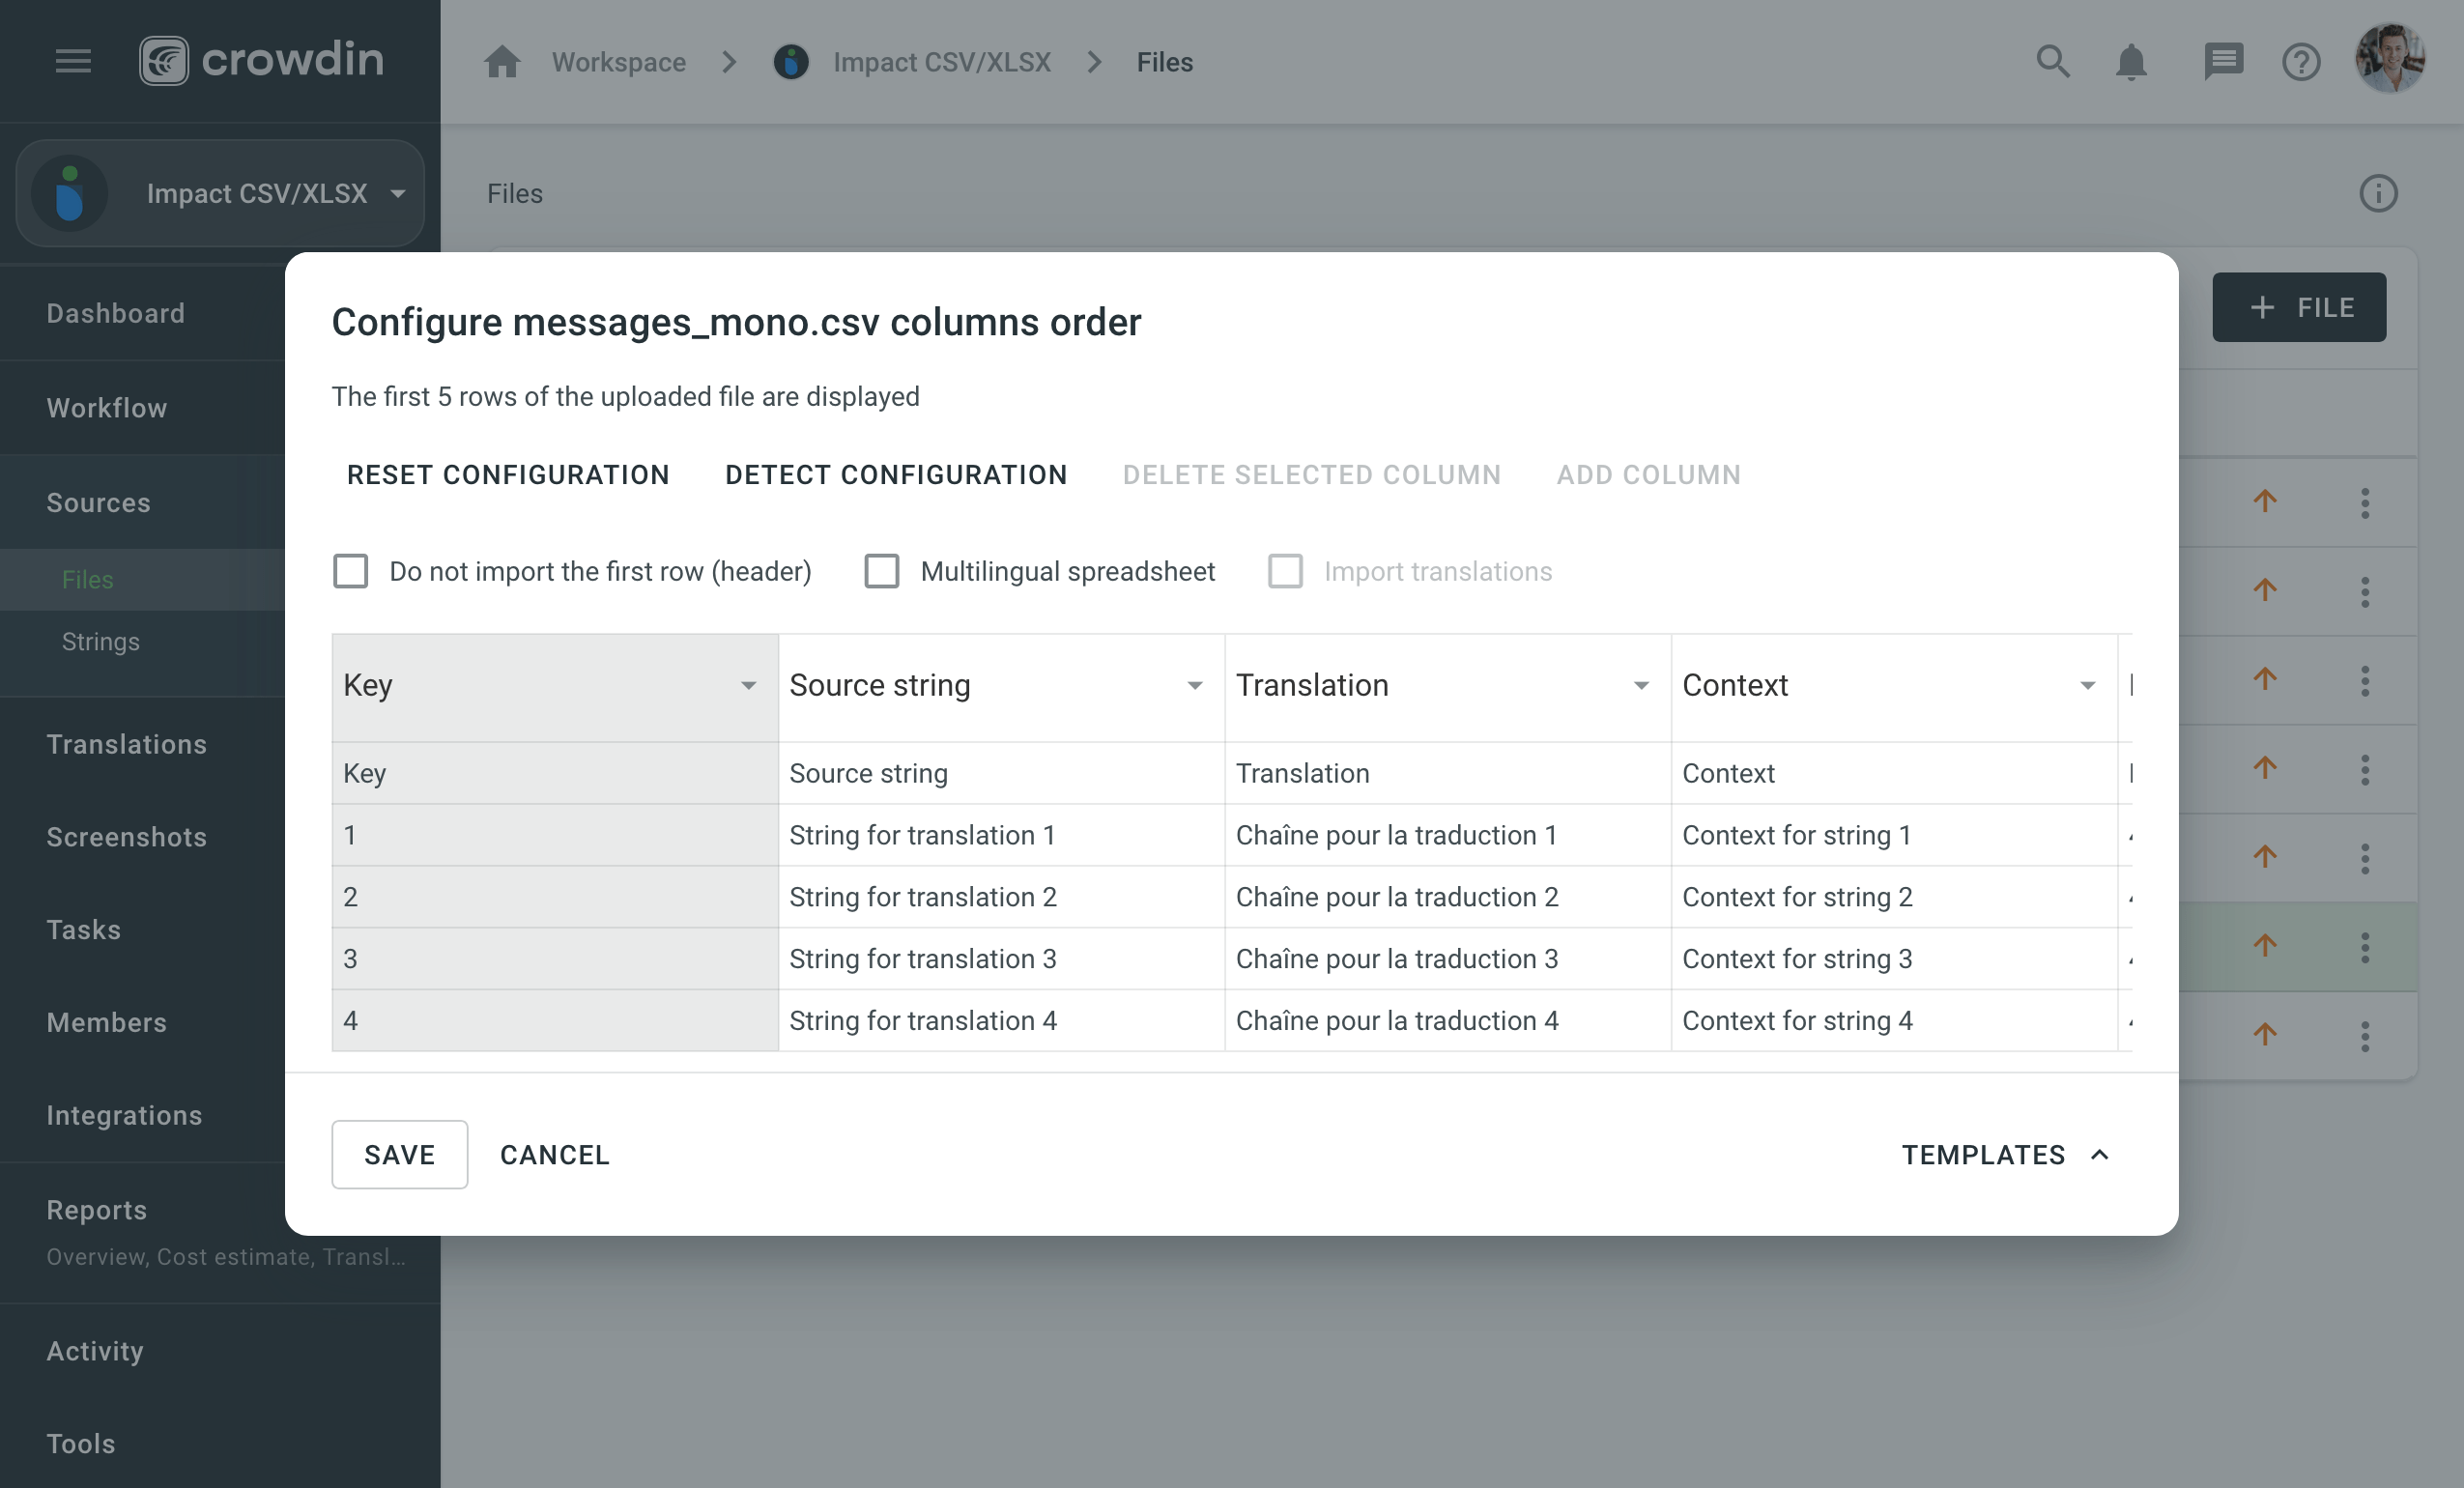
Automatic Column Identification
Once you open the configuration dialog for source files in CSV or XLSX formats, the system automatically detects the file scheme based on the column names specified in the first row. The identification is performed in a case-insensitive manner. Columns that weren’t detected automatically will be left as Not chosen for manual configuration. Automatic column identification is especially helpful when you upload multiple multilingual spreadsheets that contain many languages and additional columns (e.g., Context, Labels, Max. Length).
To get the most out of the automatic column detection, we recommend that you name the columns in your CSV or XLSX source files using the values displayed in the table below:
| Column type | Expected value |
|---|---|
| Key | identifier, key |
| Source String | source phrase, source_phrase, source string, source_string |
| Source String/Translation | source or translation, source_or_translation, source/translation |
| Fordítás | translation |
| Context | context |
| Labels | labels |
| Max. Length | max. length, max_length |
| Language (for multilingual files) | Language name (e.g., Ukrainian), Crowdin language code, Locale (e.g., uk-UA), Locale with underscore (e.g., uk_UA), Language code ISO 639-1 (e.g., uk), Language code ISO 639-2/T (e.g., ukr) |
By default, during scheme configuration, the system treats CSV and XLSX source files as monolingual. To autodetect file scheme for multilingual source files, follow these steps:
- Select Multilingual spreadsheet.
- Click More and select Detect Configuration.
Configuration Templates
If multiple files have the same configuration scheme, save your current configuration as a template by clicking Templates > Save as template, then specify the template name and click Create. You’ll be able to apply the template to the newly imported files.
Column Headers
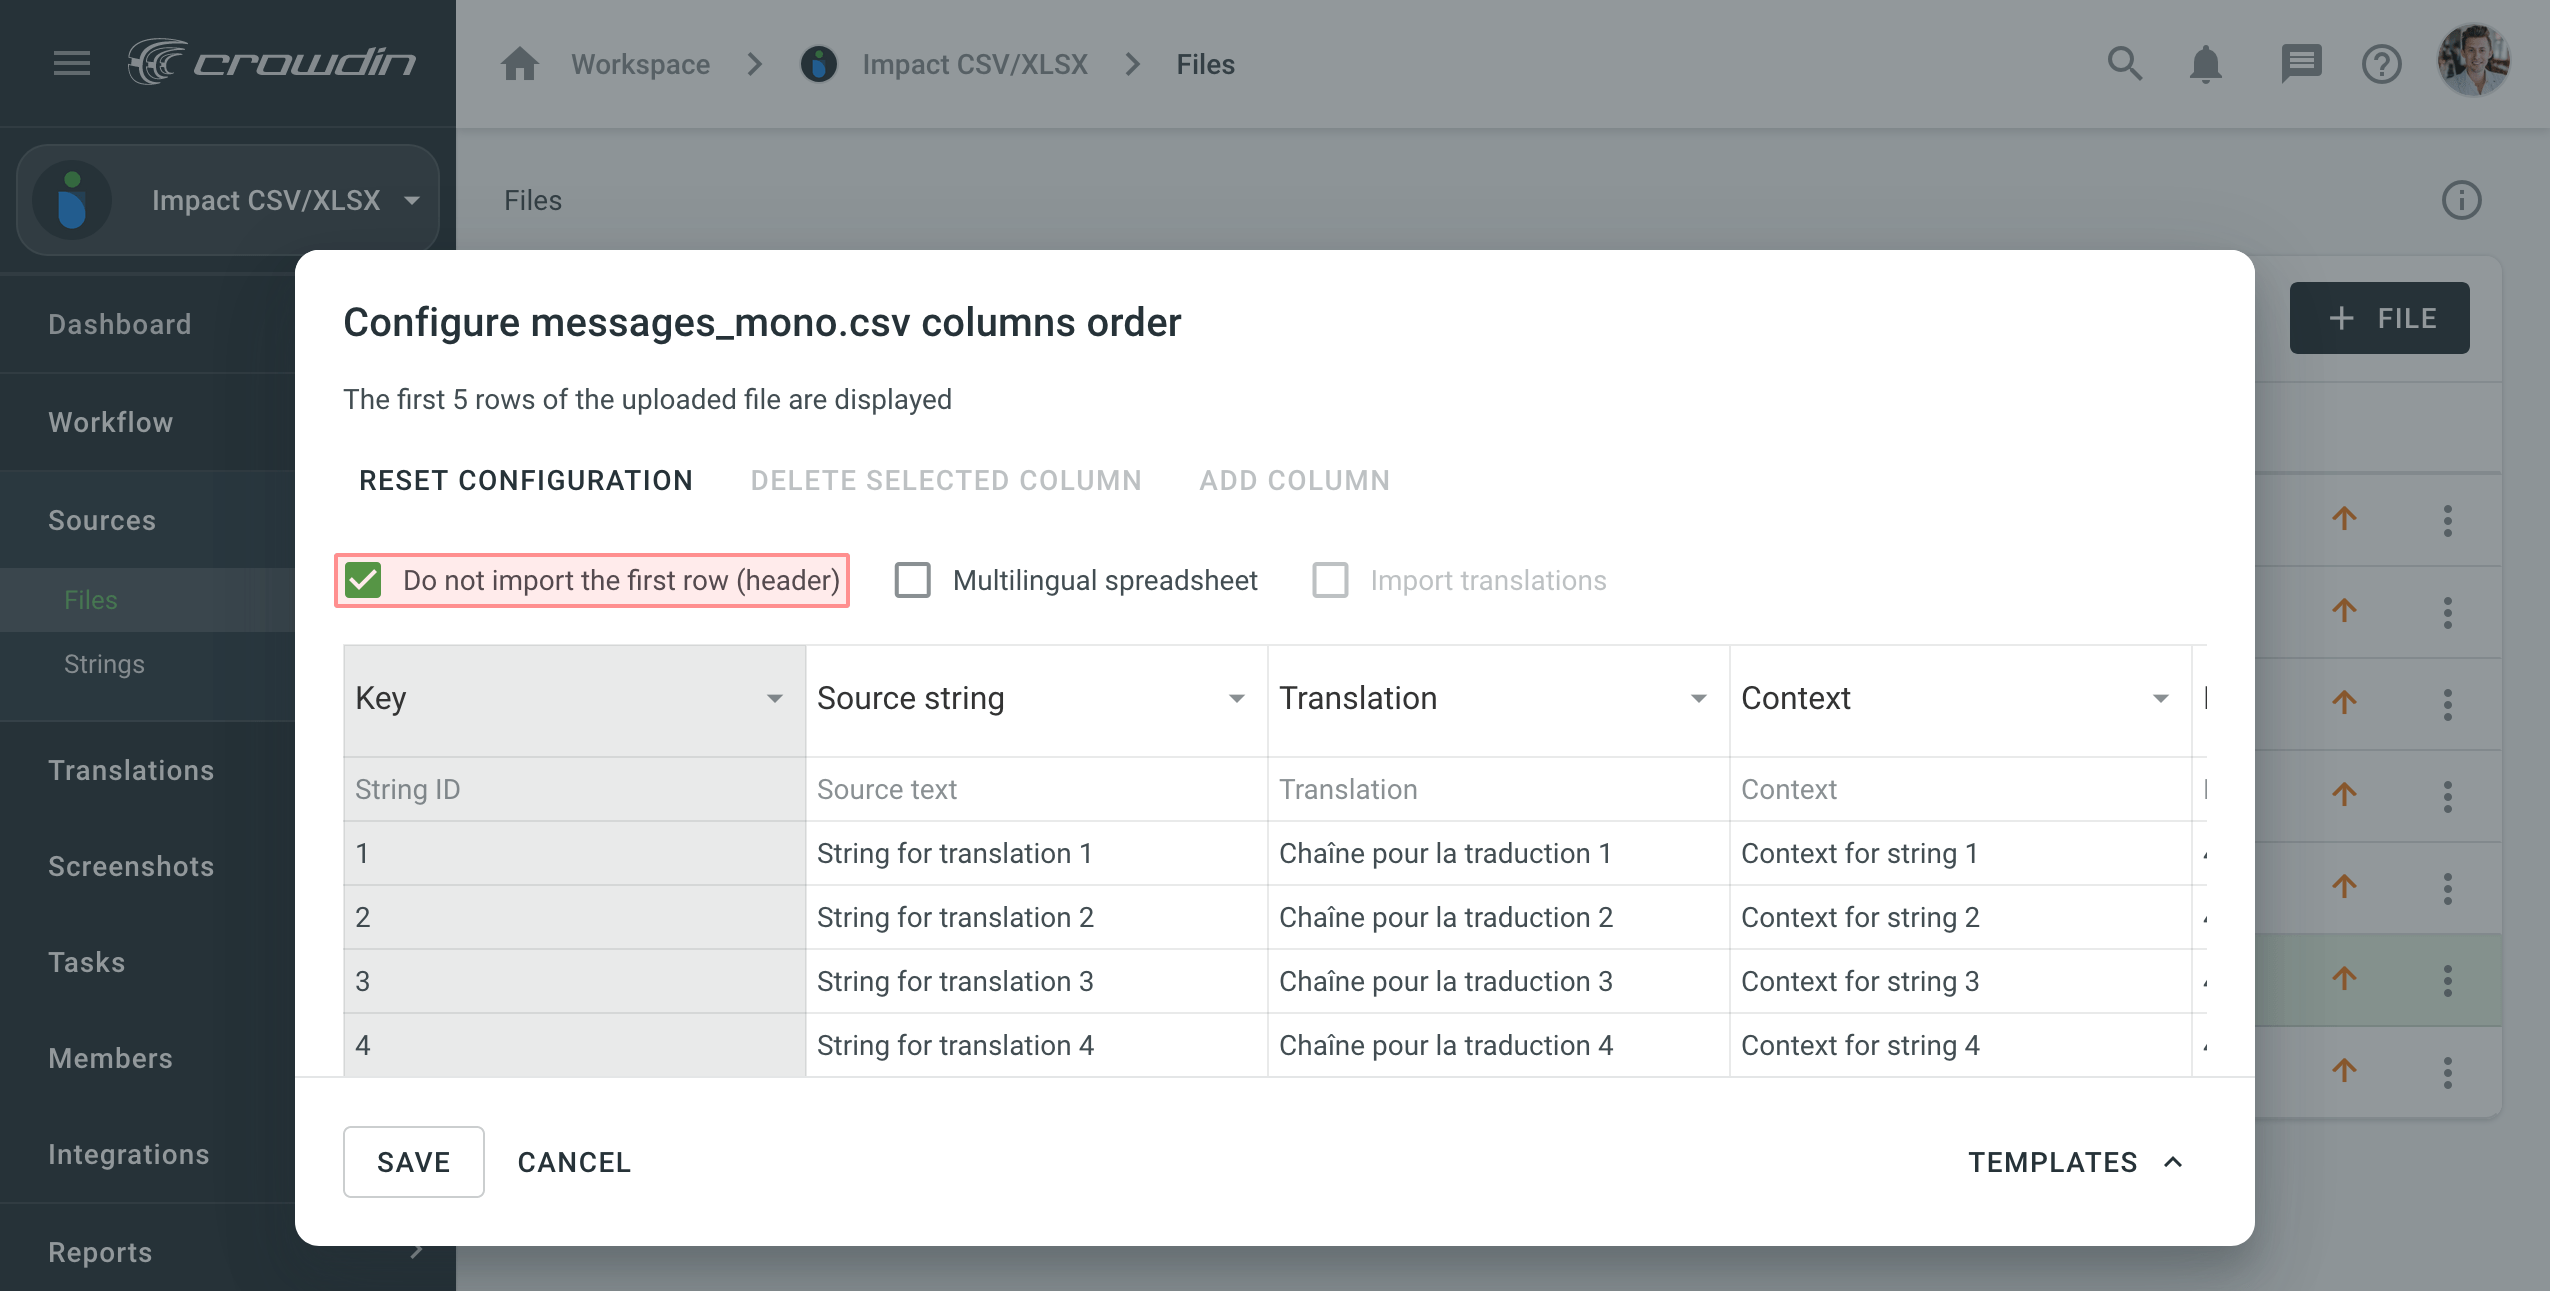
If you don’t want to translate the column headers, select Do not import the first row (header).
Note: The Do not import the first row (header) option is automatically selected if the automatic scheme detection identifies all columns in the source file.
Táblázat konfiguráció visszaállítása
If you’d like to start the spreadsheet configuration over, click Reset configuration.
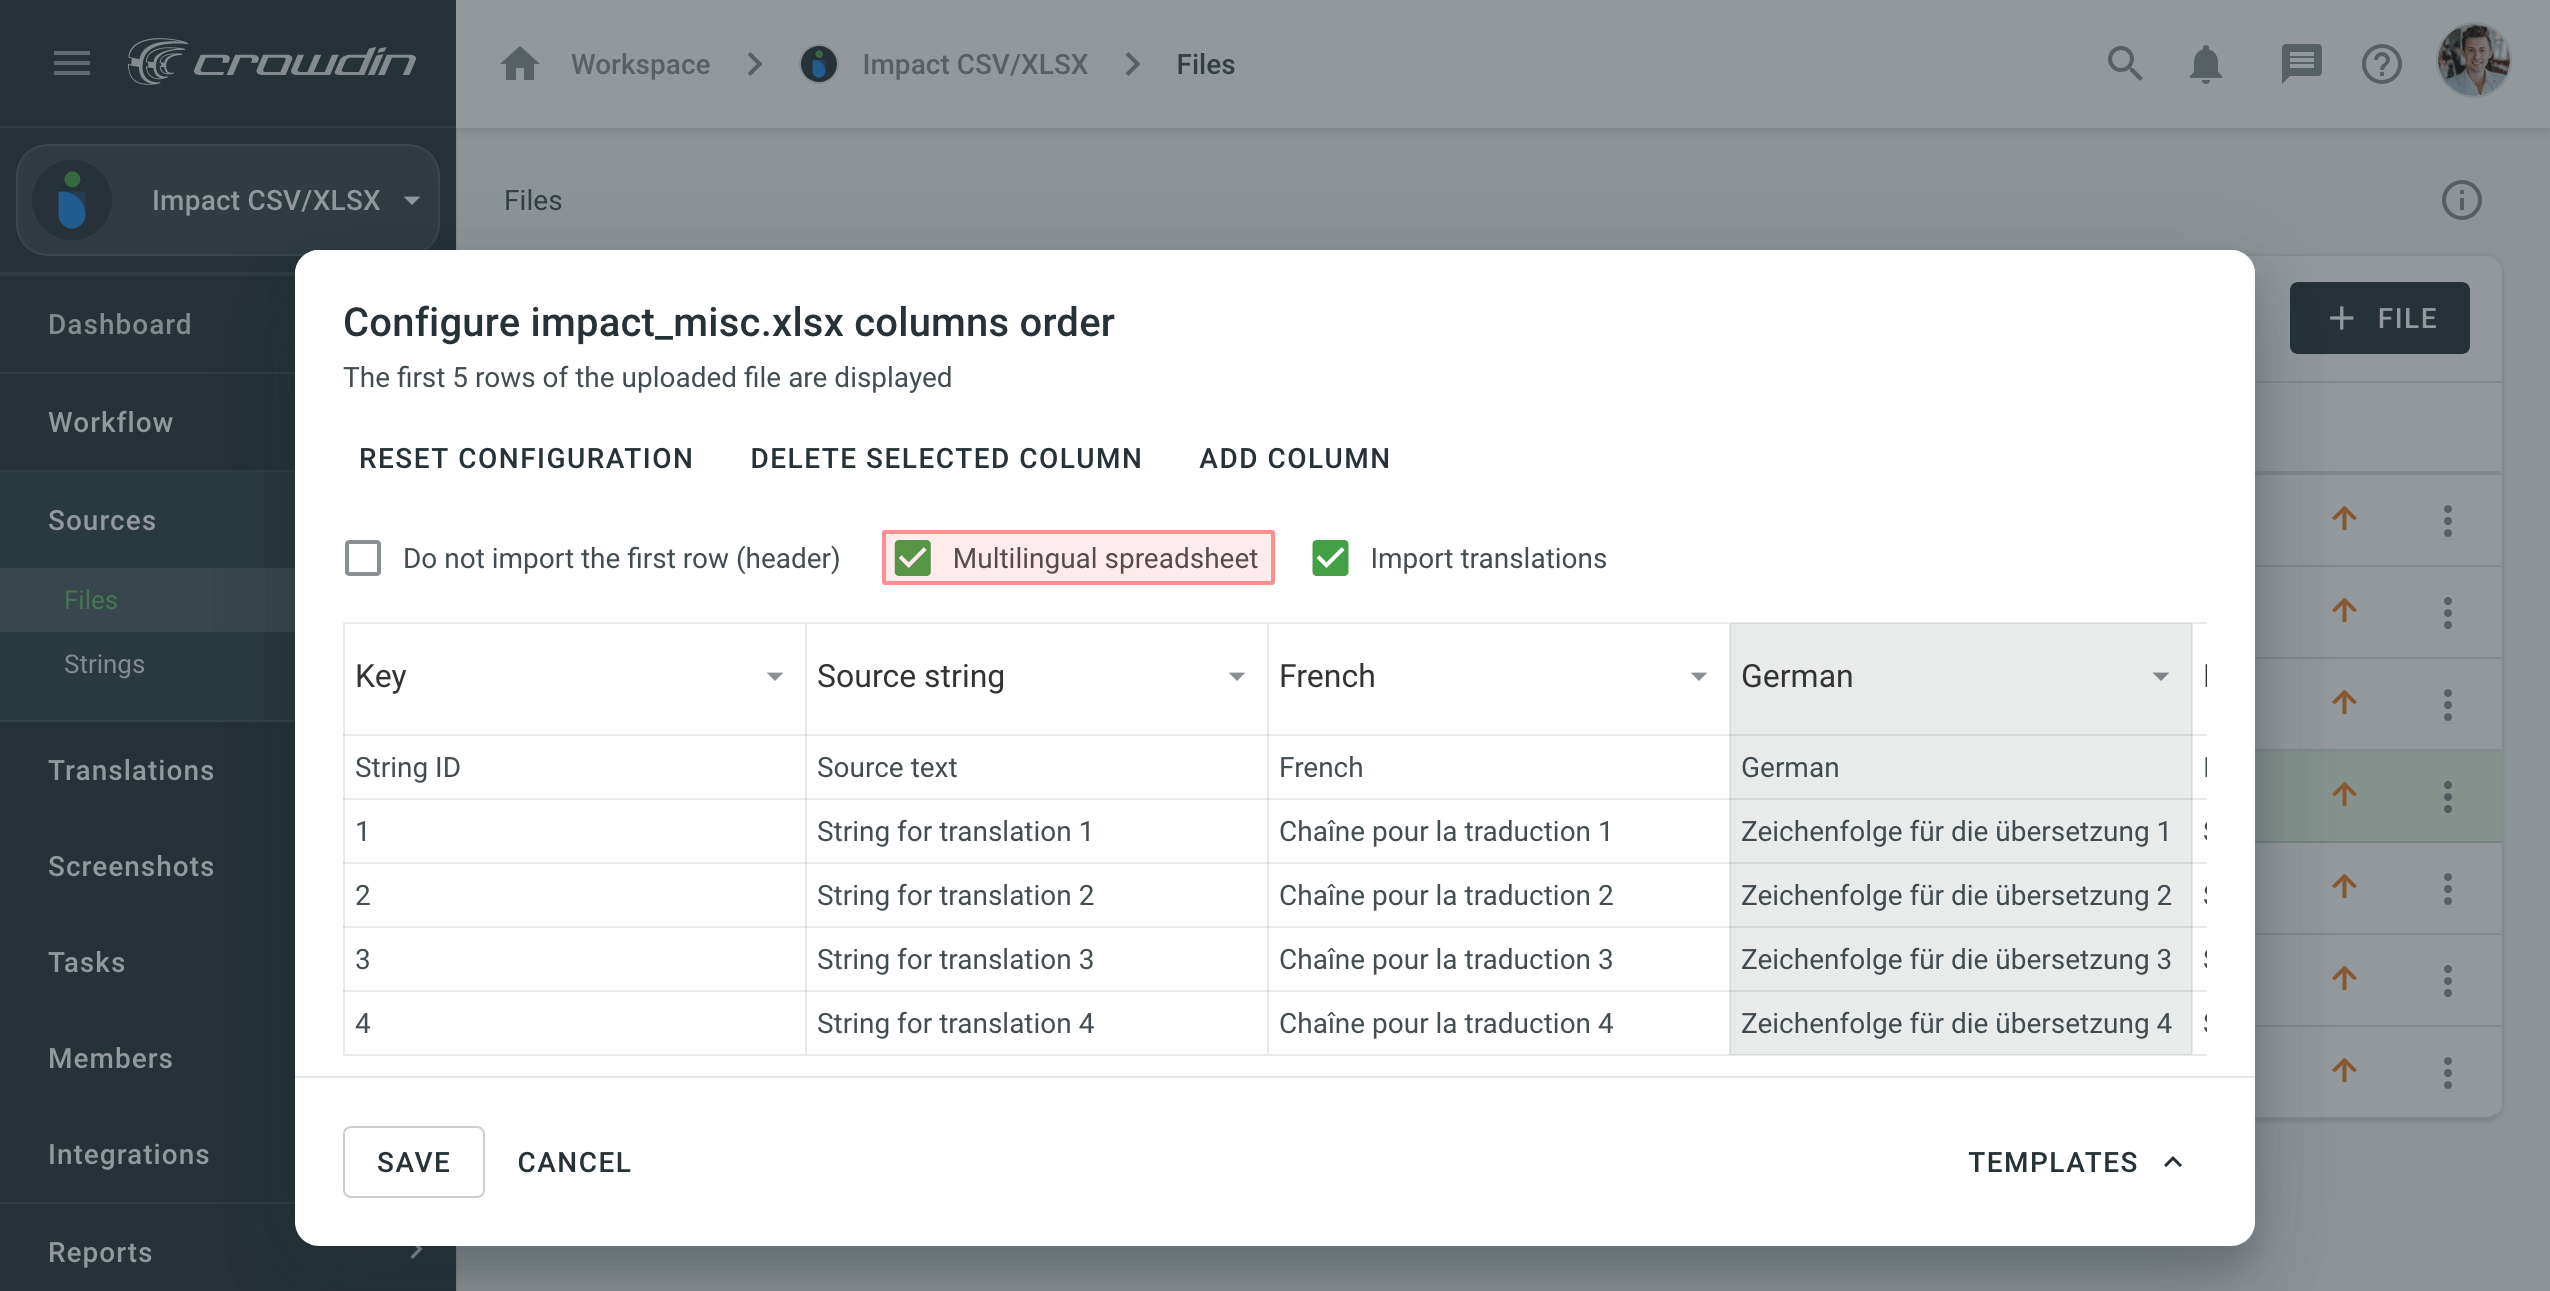
Többnyelvű táblázatok
If your file contains several columns with translations into different languages, select Multilingual spreadsheet and map the languages to the appropriate columns.
By default, when you configure the multilingual spreadsheets, the Import translations option is selected. If you’d like not to import the existing translations from the file, you can clear this option.
If your multilingual source file doesn’t contain enough columns for all project target languages, click Add column. To remove one of the added columns, click Delete selected column.
Egyszerre több fájl konfigurálása
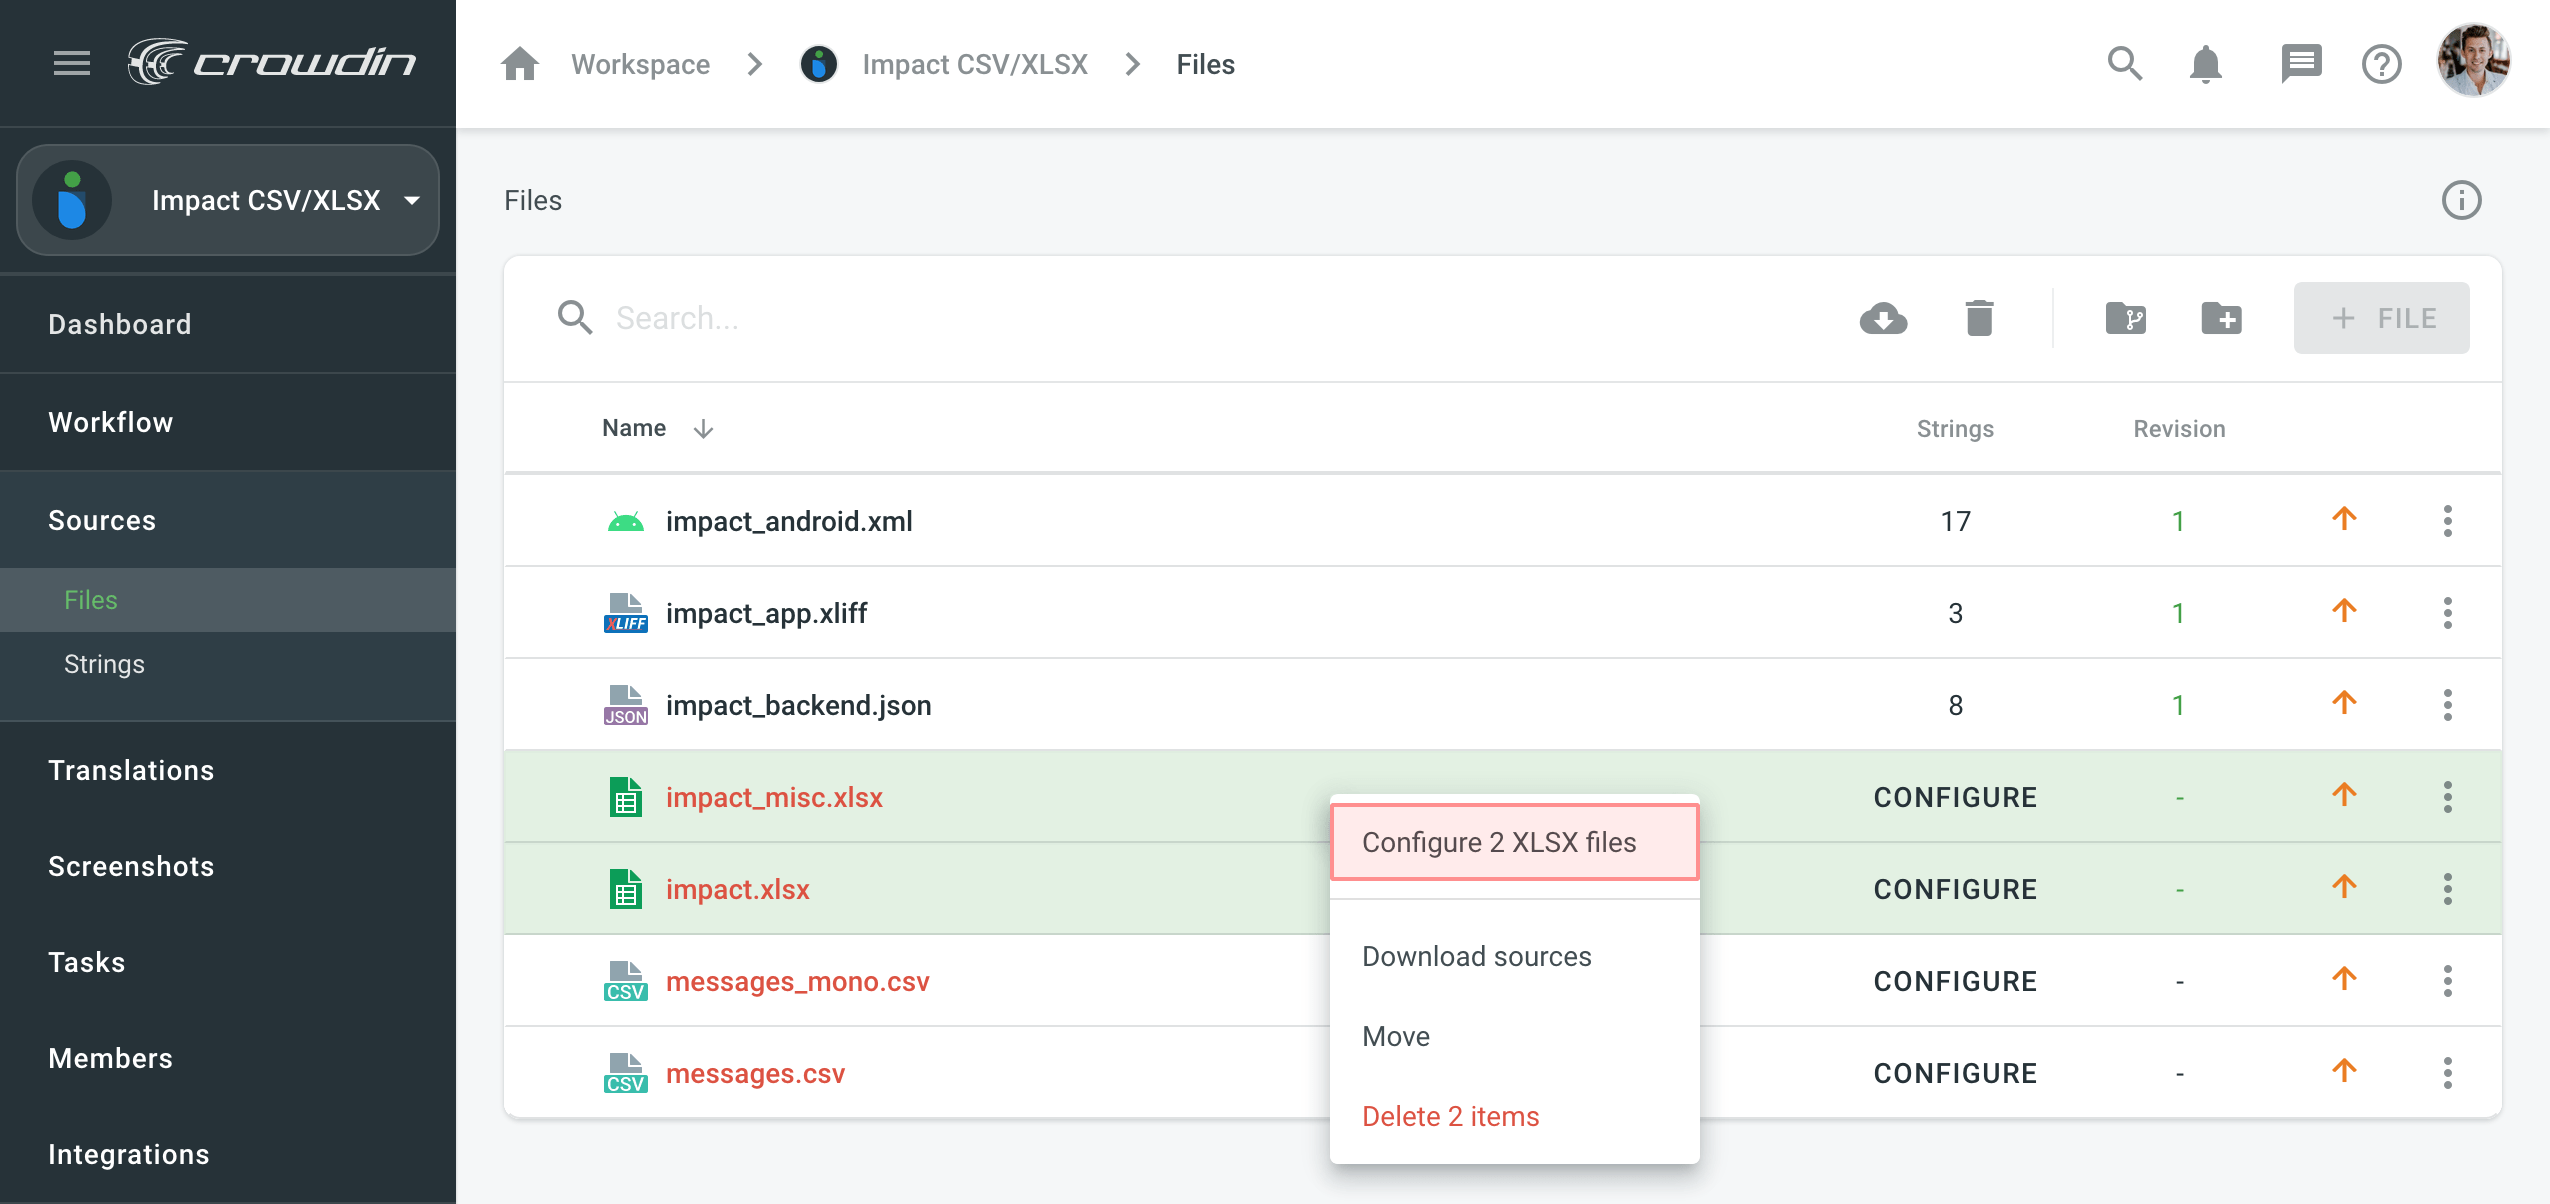
To configure several selected CSV or XLSX files, right-click and select Configure files.
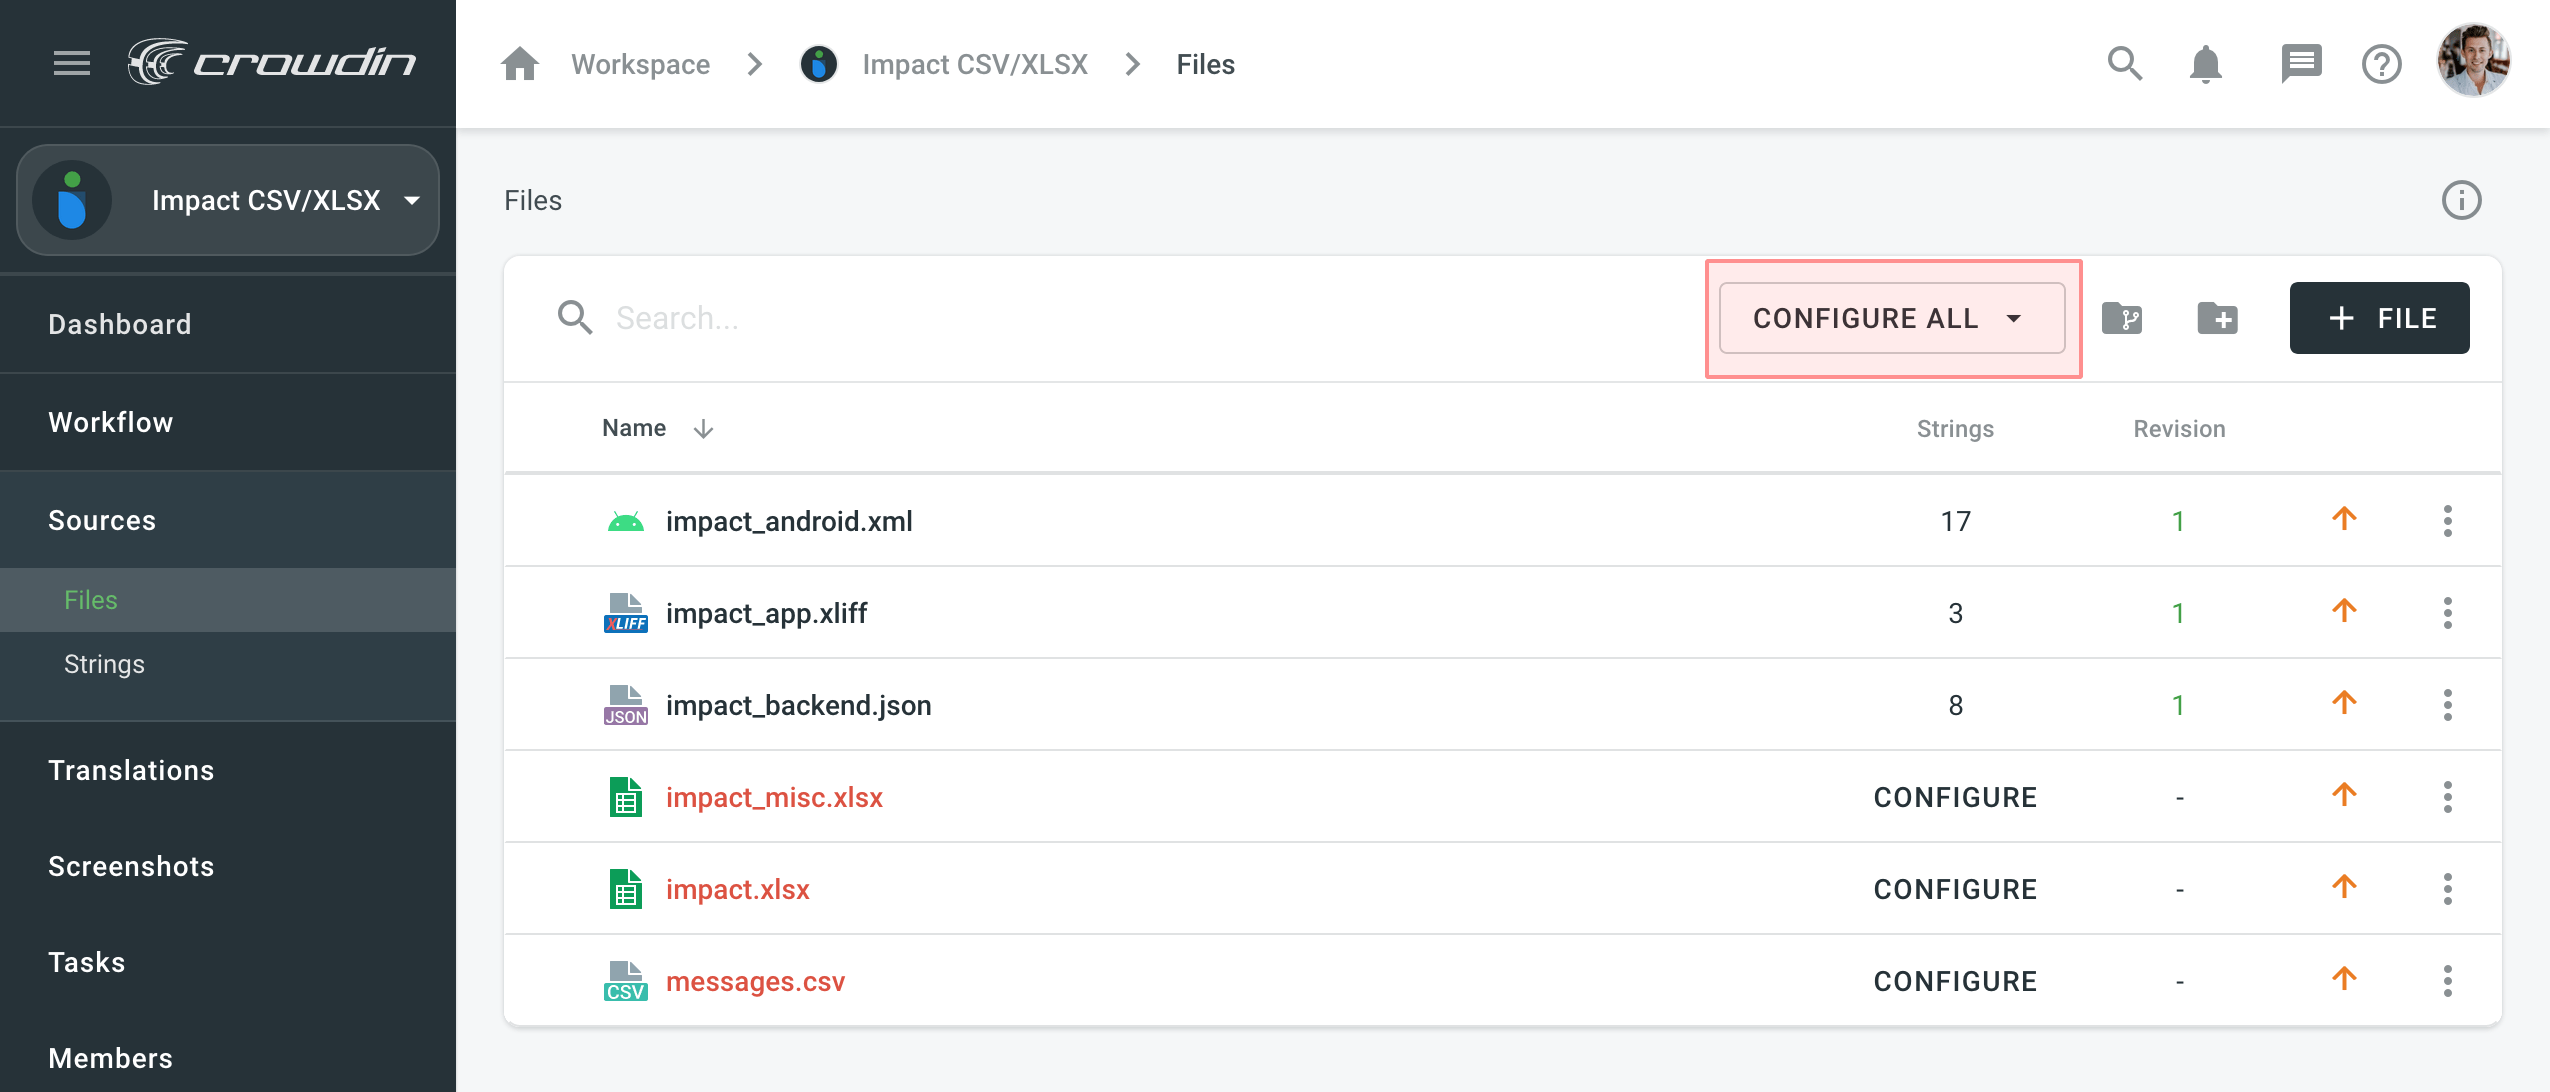
To configure all CSV or all XLSX files at once, click Configure All.
In the configuration window, you’ll be able to switch between the selected files to preview and verify if the applied configuration is correct for all files.
Changing Scheme for CSV and XLSX Files
You might want to update CSV or XLSX files and change the initially configured scheme. The scheme update might be needed when you add a new target language to your Crowdin Enterprise project.
To change the scheme for your source file, follow these steps:
- Right-click on the needed files and select Change scheme.
- Select the new file on your machine.
- Set the new configuration/template for the file correspondingly.
Note: You can't edit the existing configuration template. Instead, you can remove it or create a new one.