Projetos
A project is the main place where you can manage and organize your localization process.
You can create an independent project in the Workspace root or within a specific group. Each project within the group inherits the group’s resources, managers, workflow templates, Translation Memories, Glossaries, and Machine Translation engines.
Working with Projects with or without a Workflow
When creating a project, you have two possible options for how you can organize your localization process within the project:
Anytime you can switch between these two different approaches to managing a project’s localization process by assigning or removing a workflow.
Projects without a Workflow
A project without a workflow is a streamlined localization project setup where translations are managed without predefined steps or automated processes.
When working with this kind of project configuration, you can assign dedicated translators and proofreaders to the project target languages or use Tasks to manage the localization process.
This type of project setup allows you to start the localization process right away in cases when the preferred workflow still needs to be agreed upon or if you prefer a simpler approach. While this setup provides more freedom, it also requires more manual coordination and management of translation tasks.
Use cases
- Get to know the main features of Crowdin Enterprise.
- Quickly start translating content without having to spend time setting up a workflow. Especially useful if you still need an agreed workflow.
- Good if there is no need for automation (e.g., automated pre-translation via TM/MT, filtering content via custom code step, ordering translations and proofreading via vendors, etc.).
- Good when the translation strategy is the same for all target languages in the project.
Projects with a Workflow
A project with a workflow is a structured localization project setup that follows a predefined sequence of steps for managing translations.
Workflows consist of multiple steps (e.g., source text review, pre-translation, translation, proofreading, etc.), which define the order and conditions that content in your project should go through and the responsibilities of project members involved in the localization process. Each step can be assigned to specific project members or vendors, ensuring a systematic and controlled progression of translation tasks.
Read more about Workflows.
Using a workflow in your project, you can automate certain actions, such as pre-translation via translation memory or machine translation engines, filtering and splitting content into two workflow threads according to specific predefined conditions, sending content for translation and proofreading to vendors, etc.
This type of project setup suits larger or more complex localization projects where consistent and standardized processes are desired.
Use cases
- Order professional translation and proofreading services from vendors.
- Involve your community in the translation process.
- Automate content translation via translation memory or machine translation engines.
- Use individual localization strategies for different target languages (translate some languages with the help of the community and others with vendors, translate languages with different MT engines, etc.).
Project Types
Crowdin Enterprise offers flexibility in the way you structure and manage your localization projects. There are two main project types:
- File-based project
- String-based project
File-based Project
The file-based project in Crowdin Enterprise revolves around uploading source files containing translatable content. This project type is well-suited for scenarios with well-defined source files, such as Android XML, iOS Strings, JSON, and more. It allows for precise mapping between source and translation files, making it a preferred choice for many localization workflows.
String-based Project
In string-based projects, the focus is on managing translatable content as individual strings rather than source files. In this project type, after uploading source files, Crowdin Enterprise parses them into source strings. Unlike file-based projects, source files aren’t stored, and the emphasis is on managing the content at the string level. This approach is beneficial when dealing with projects that involve continuous content updates, dynamic content, or where a string-oriented structure is preferred.
Criar um Projeto
To create a project, follow these steps:
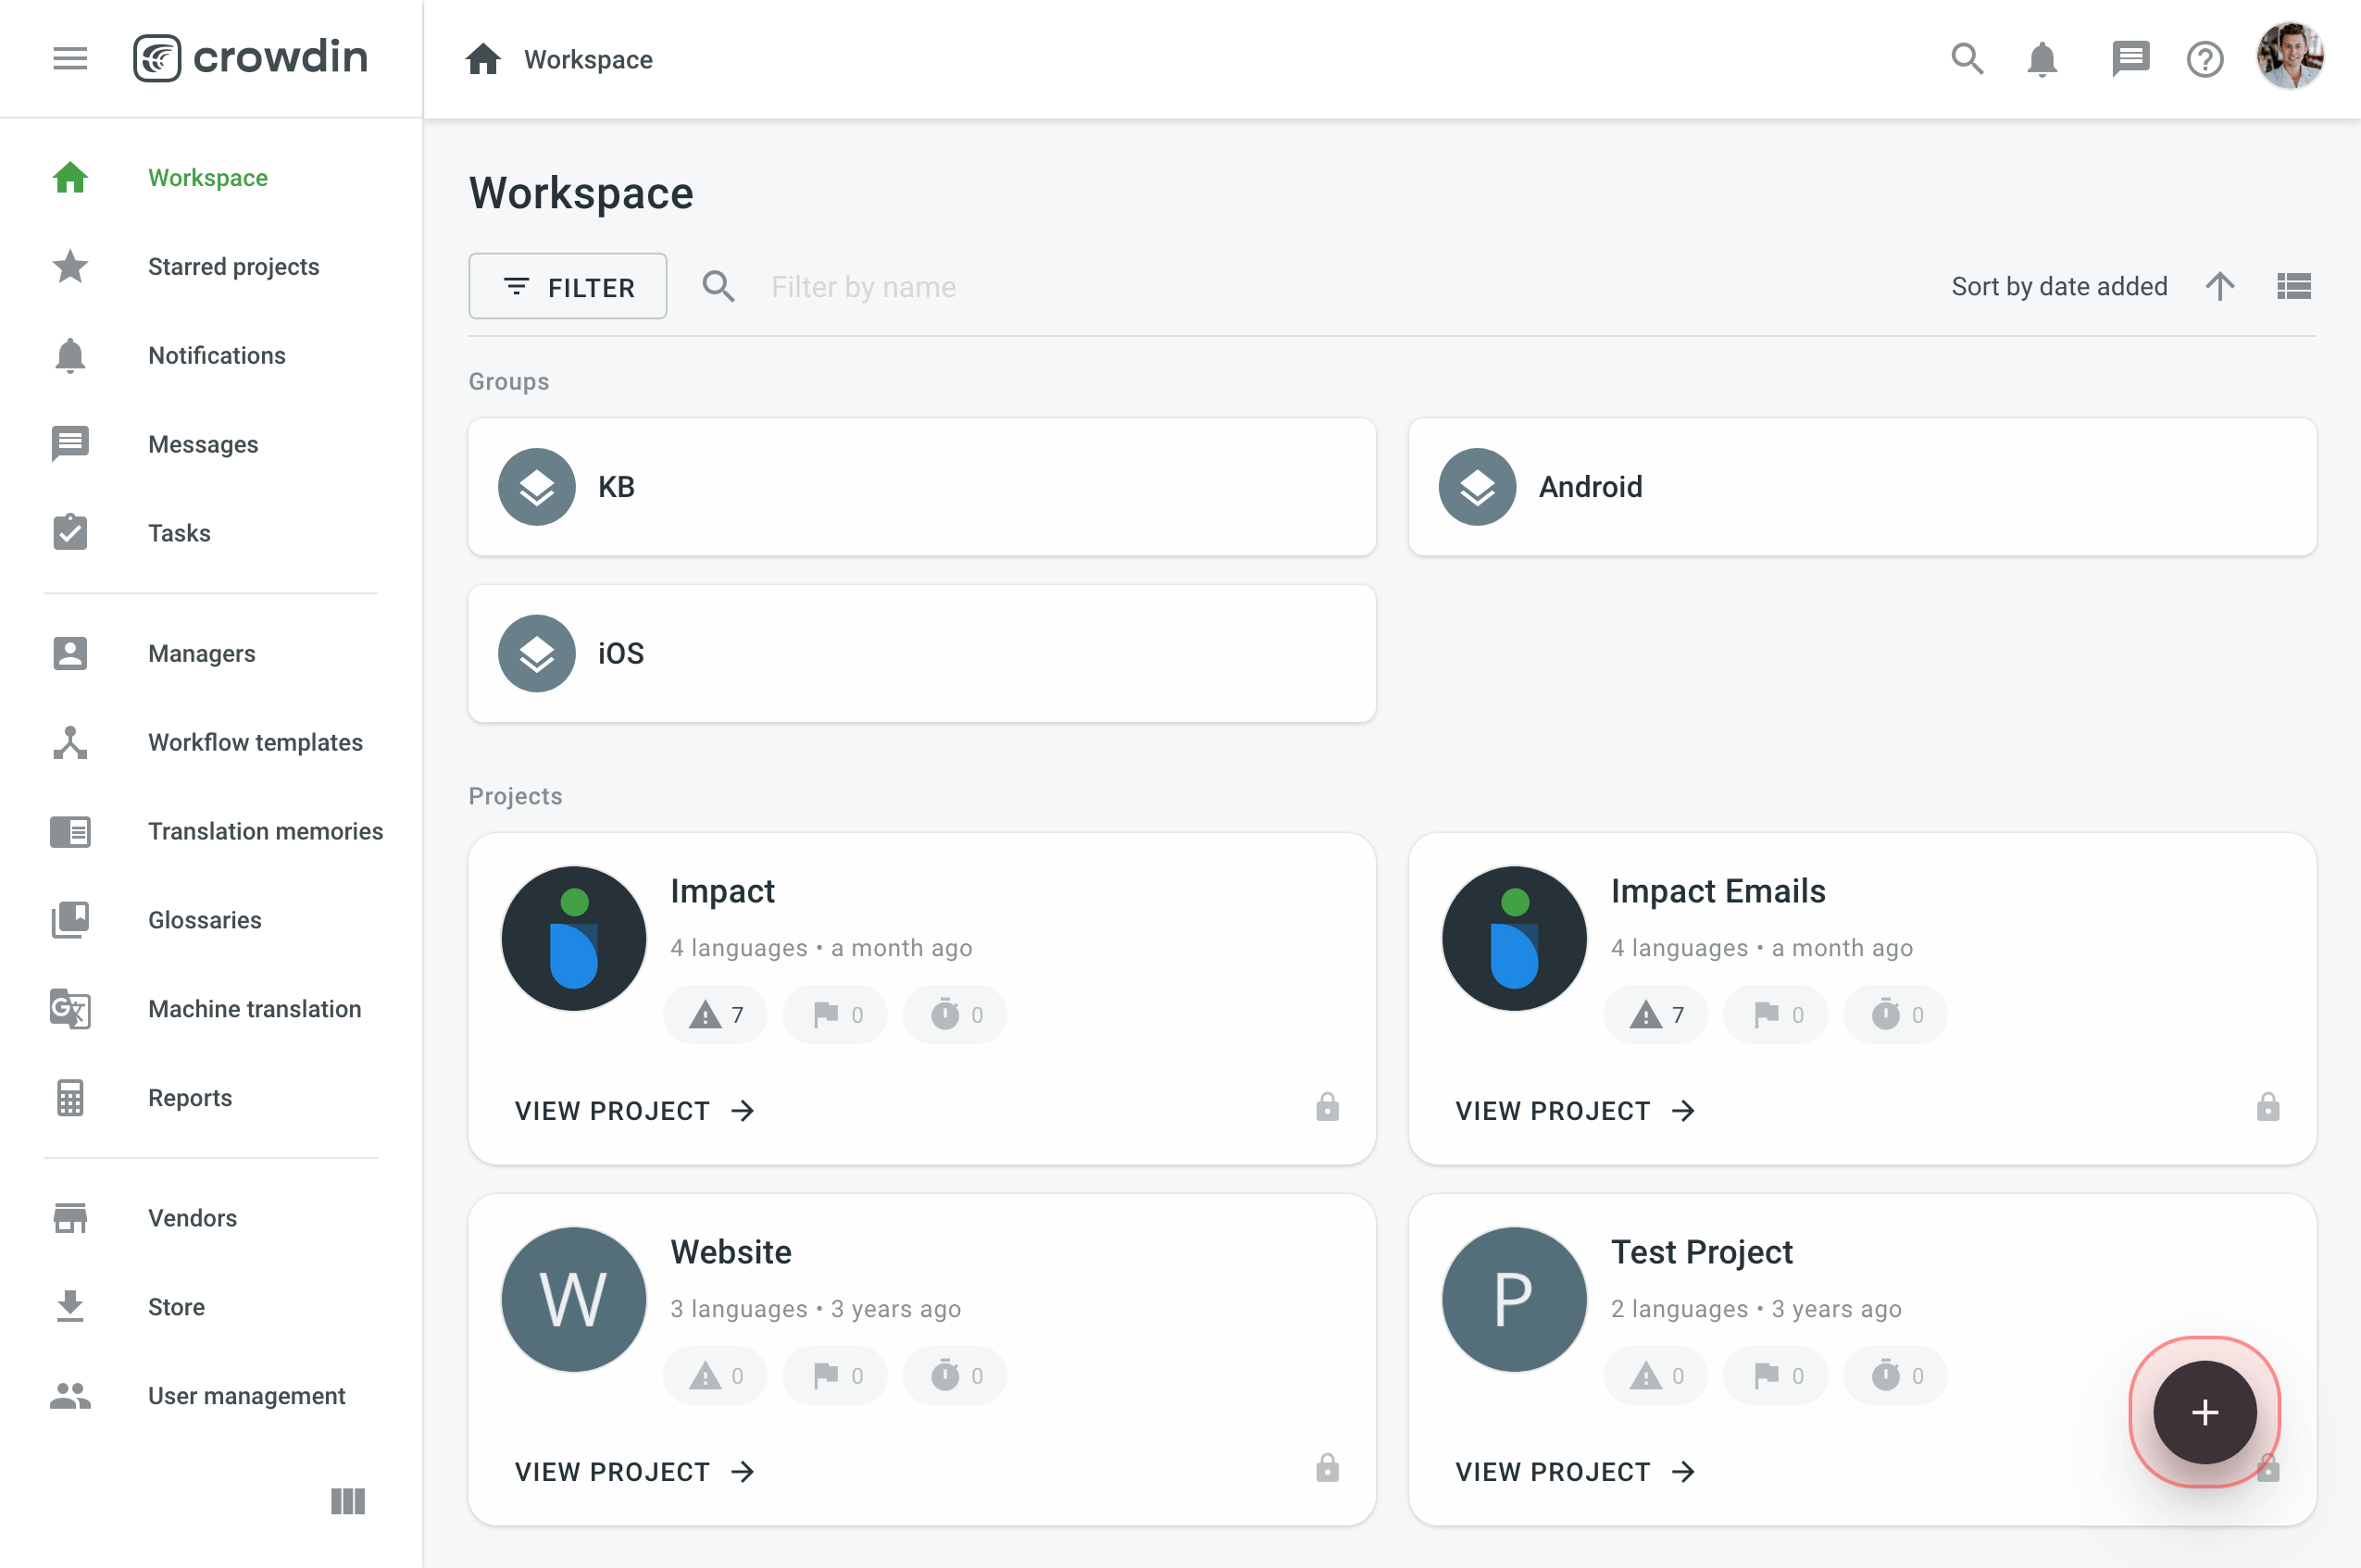
- Open your organization’s Workspace, hover over the add button at the bottom right, and select Create a project.
- Enter the project name.
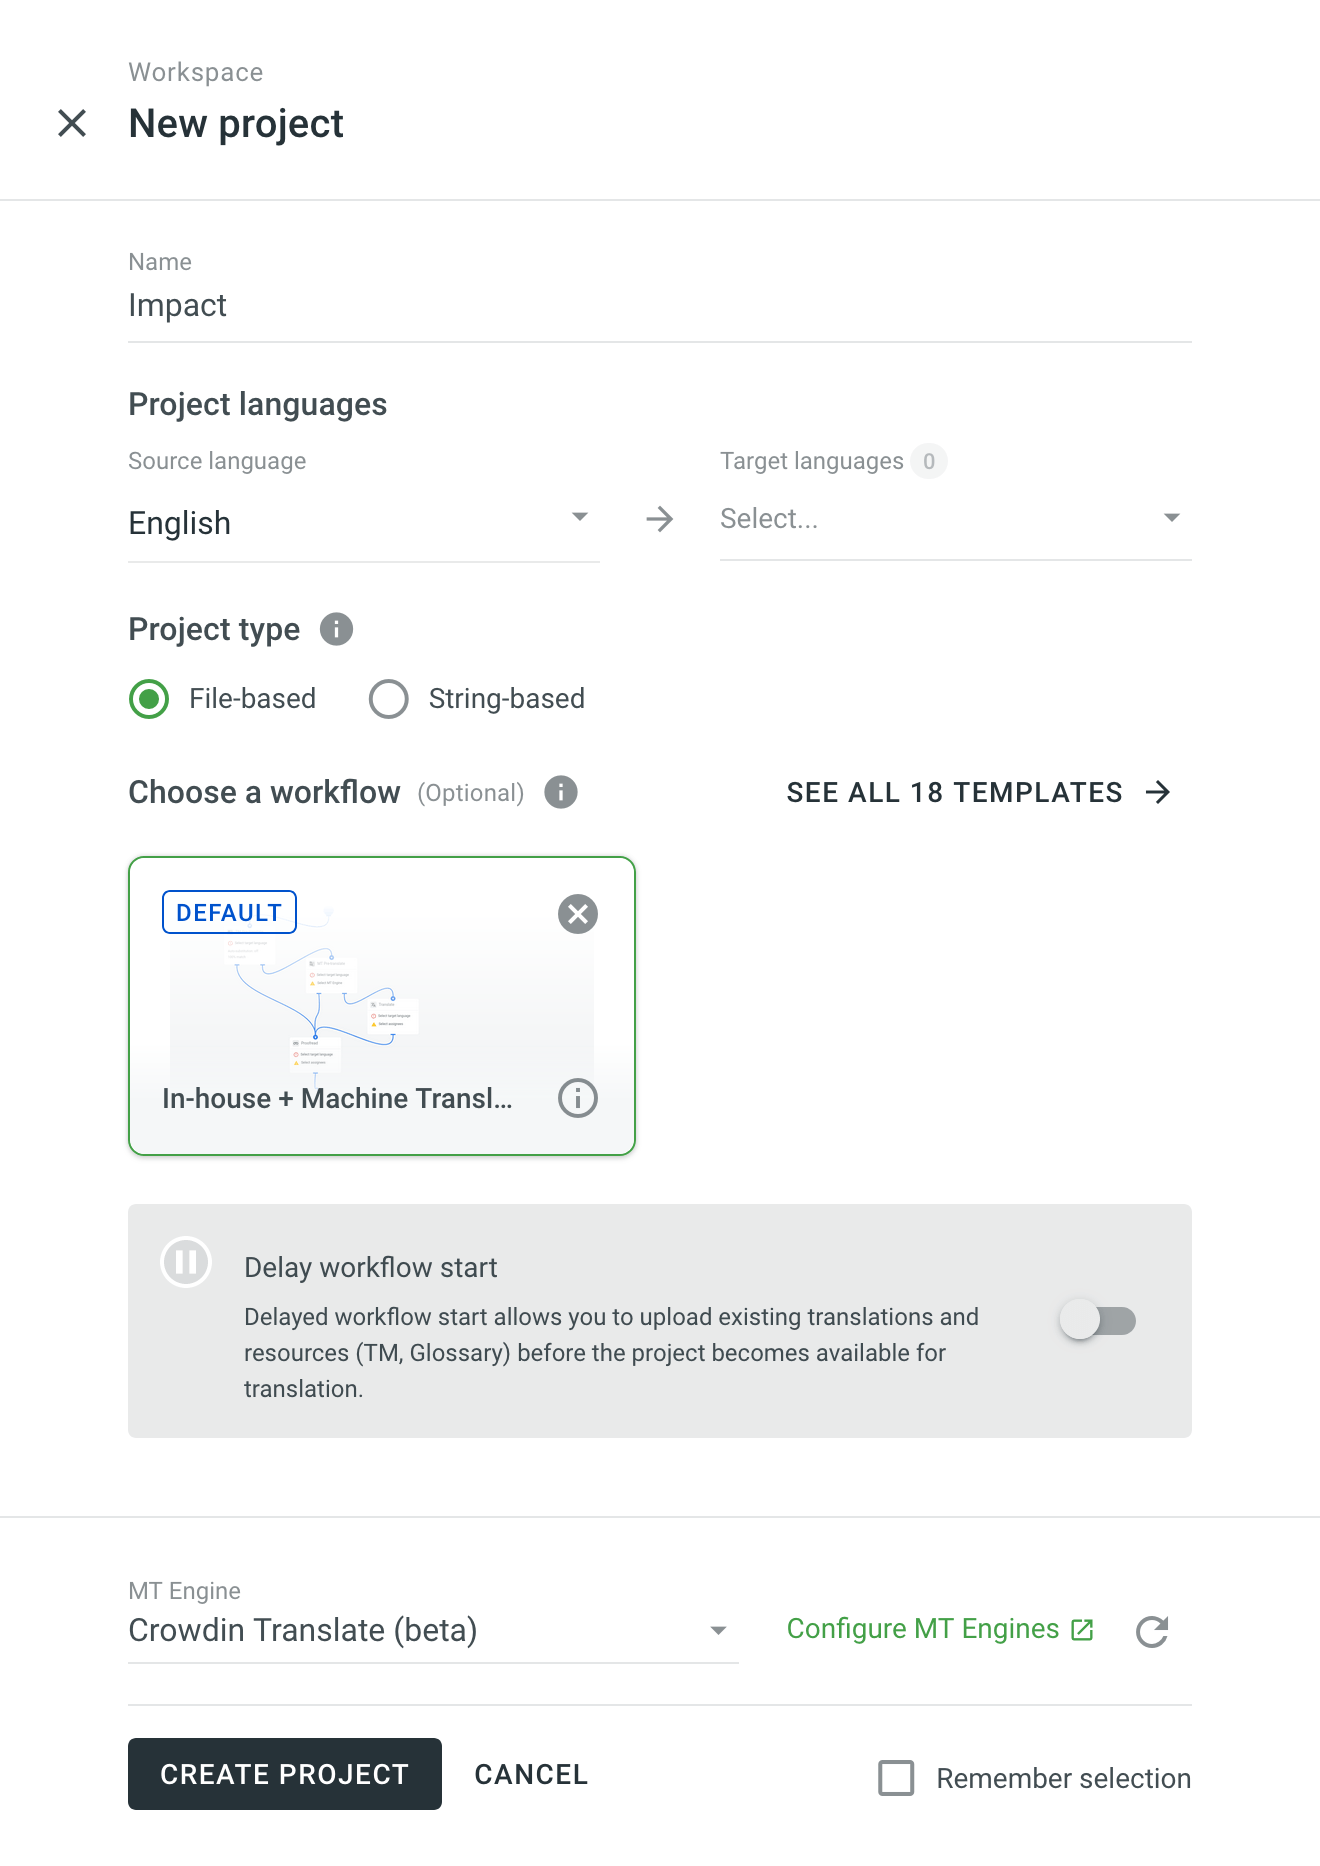
- Select the source language. You can change the source language in the project settings if necessary.

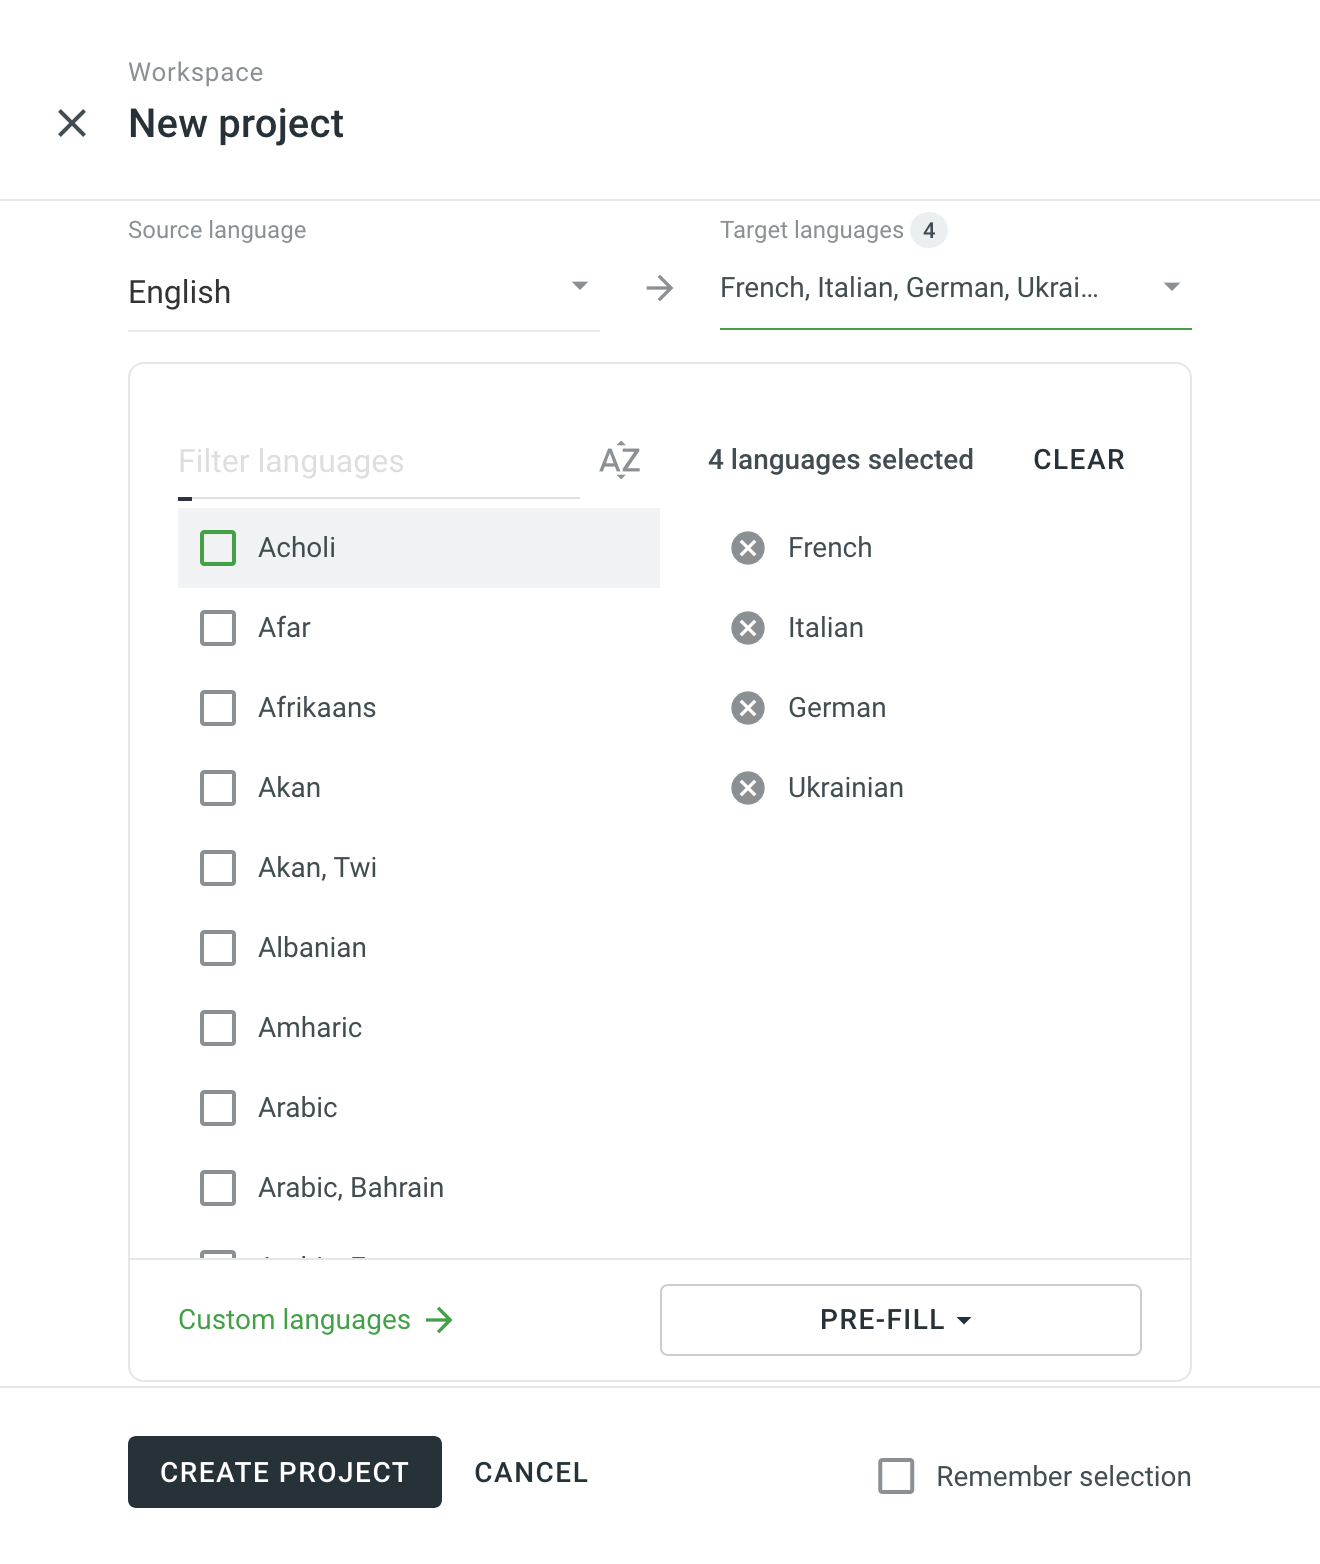
- Select target languages. You can update the project target languages in the project settings.
- Select String-based if you want to manage your translatable content as individual strings. Otherwise, keep File-based selected to manage your translatable content as source files. Note: The project type can't be changed once the project is created.
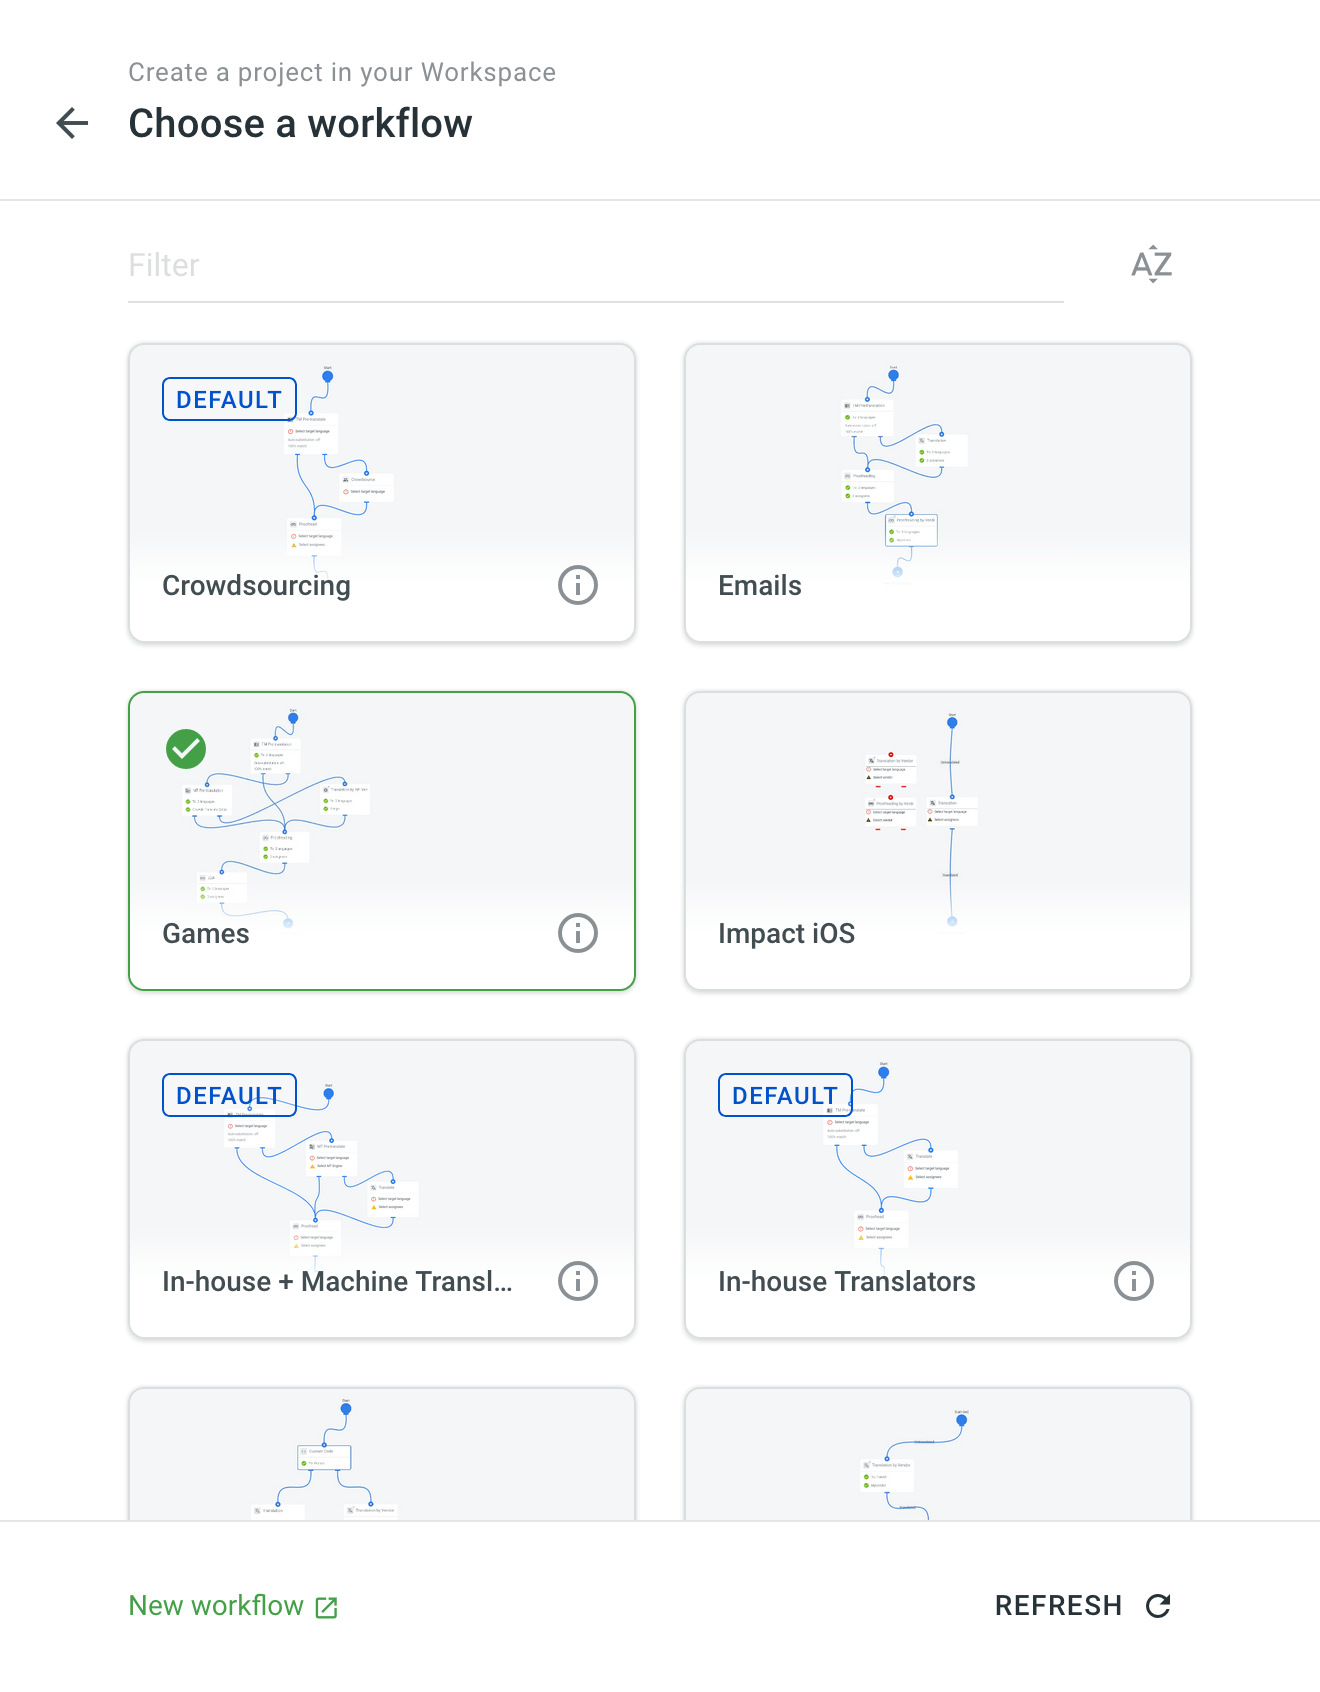
- (Optional) Assign a workflow or create a new one. For projects with an assigned workflow, you can enable the Delay workflow start during the project creation. This will allow you to upload existing translations and resources (TM, Glossary) before the project becomes available for translation. Once ready to start with the translation, open your project and click Start workflow in the Dashboard.
Alternatively, remove the workflow to create a project without a workflow.
- Click Create project.
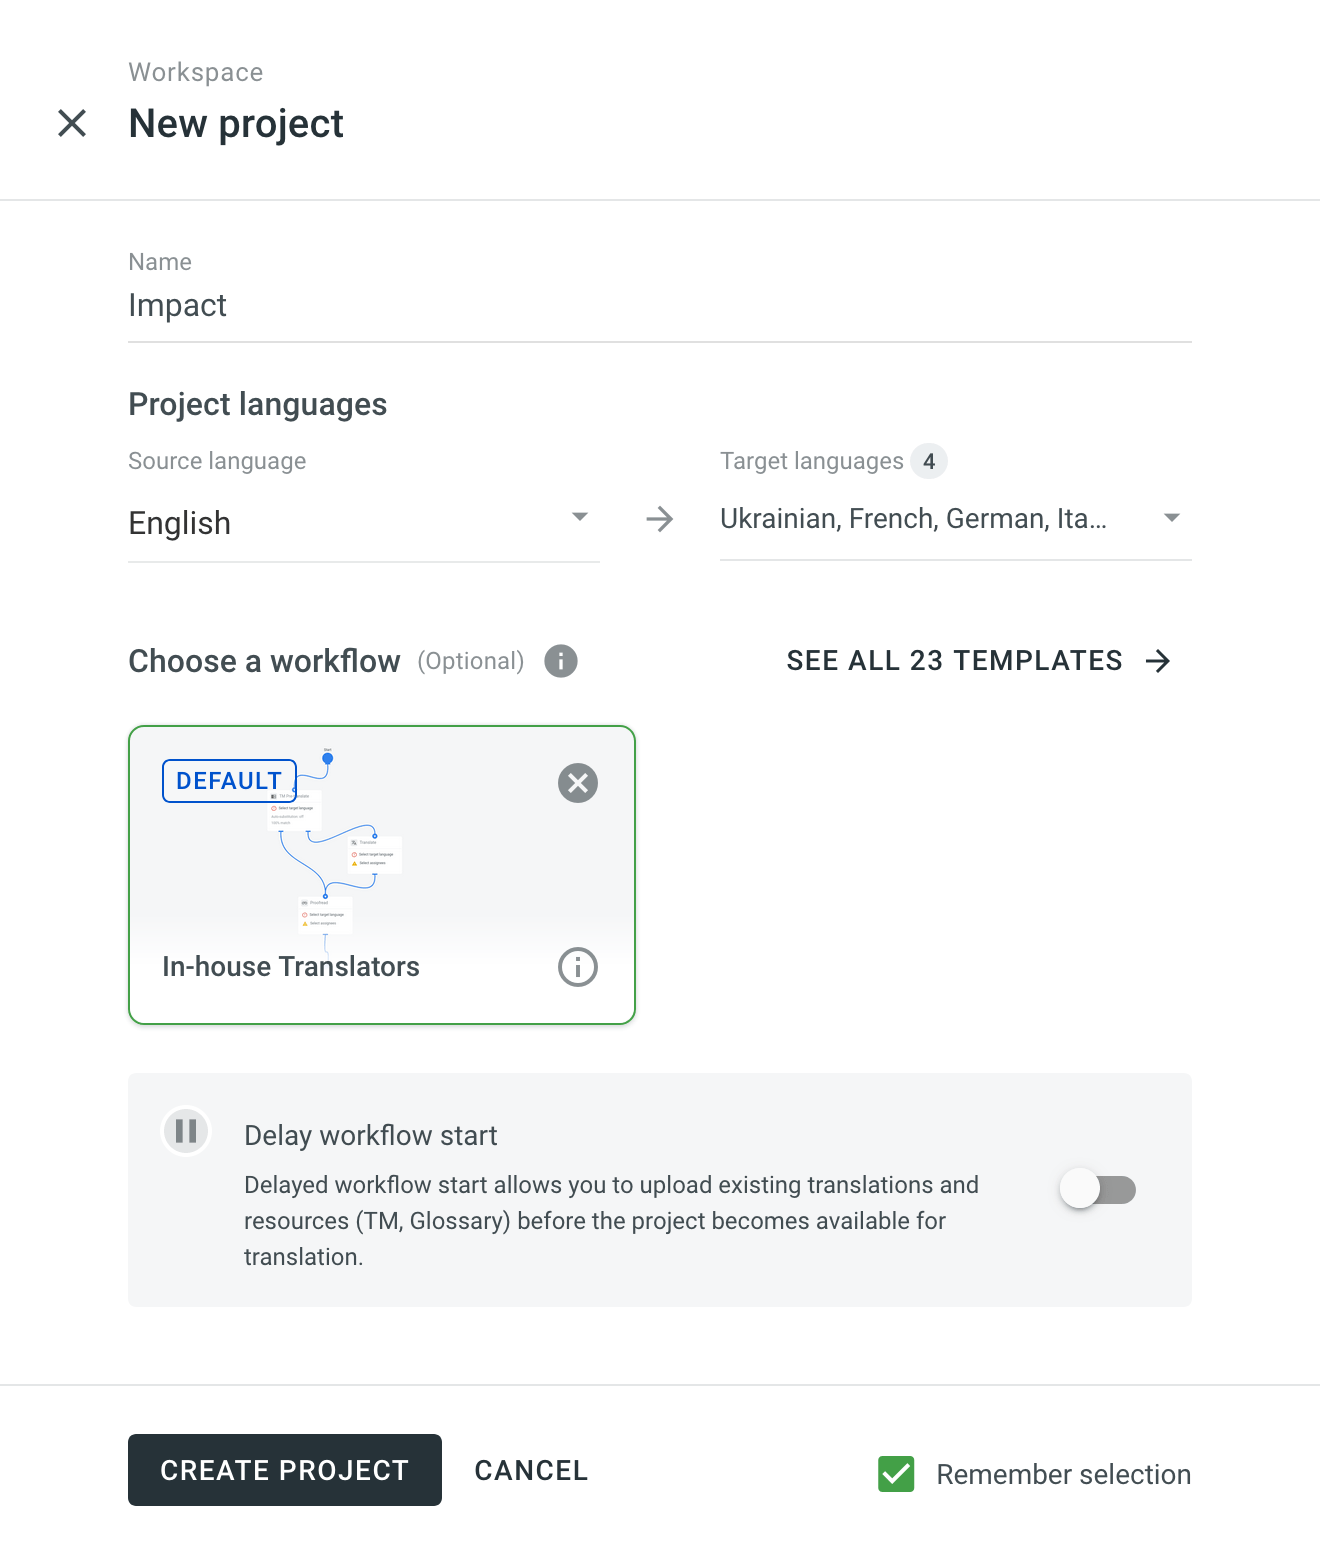 Note: If you click Remember selection at the bottom right, the selected settings will be used as a template the next time you create a project. You can edit the settings afterward.