Migrating to Crowdin Enterprise from Crowdin
You can migrate your Crowdin projects with all related data, TMs, and Glossaries to your Crowdin Enterprise organization and continue the localization process without losing the current progress.
Увага: Ви можете перенести проєкти з Crowdin на Crowdin Enterprise, лише якщо ви одночасно є власником проєкту в Crowdin і власником організації в Crowdin Enterprise.
Read more about Crowdin Enterprise.
Data you can migrate includes:
- Projects with related data
- Source strings (for String-based projects) or source files (for File-based projects)
- Project members
- Translations
- String comments
- Скріншоти
- Labels
- Custom processors (if any)
- Translation Memories
- Словники
Migration Settings
Before starting the migration, you need to select your Crowdin Enterprise organization, projects, and resources.
To configure your migration settings, follow these steps:
- Open Account Settings and go to the Profile tab.
- In the Migration to Crowdin Enterprise section, click Migrate Account to start configuring your migration.

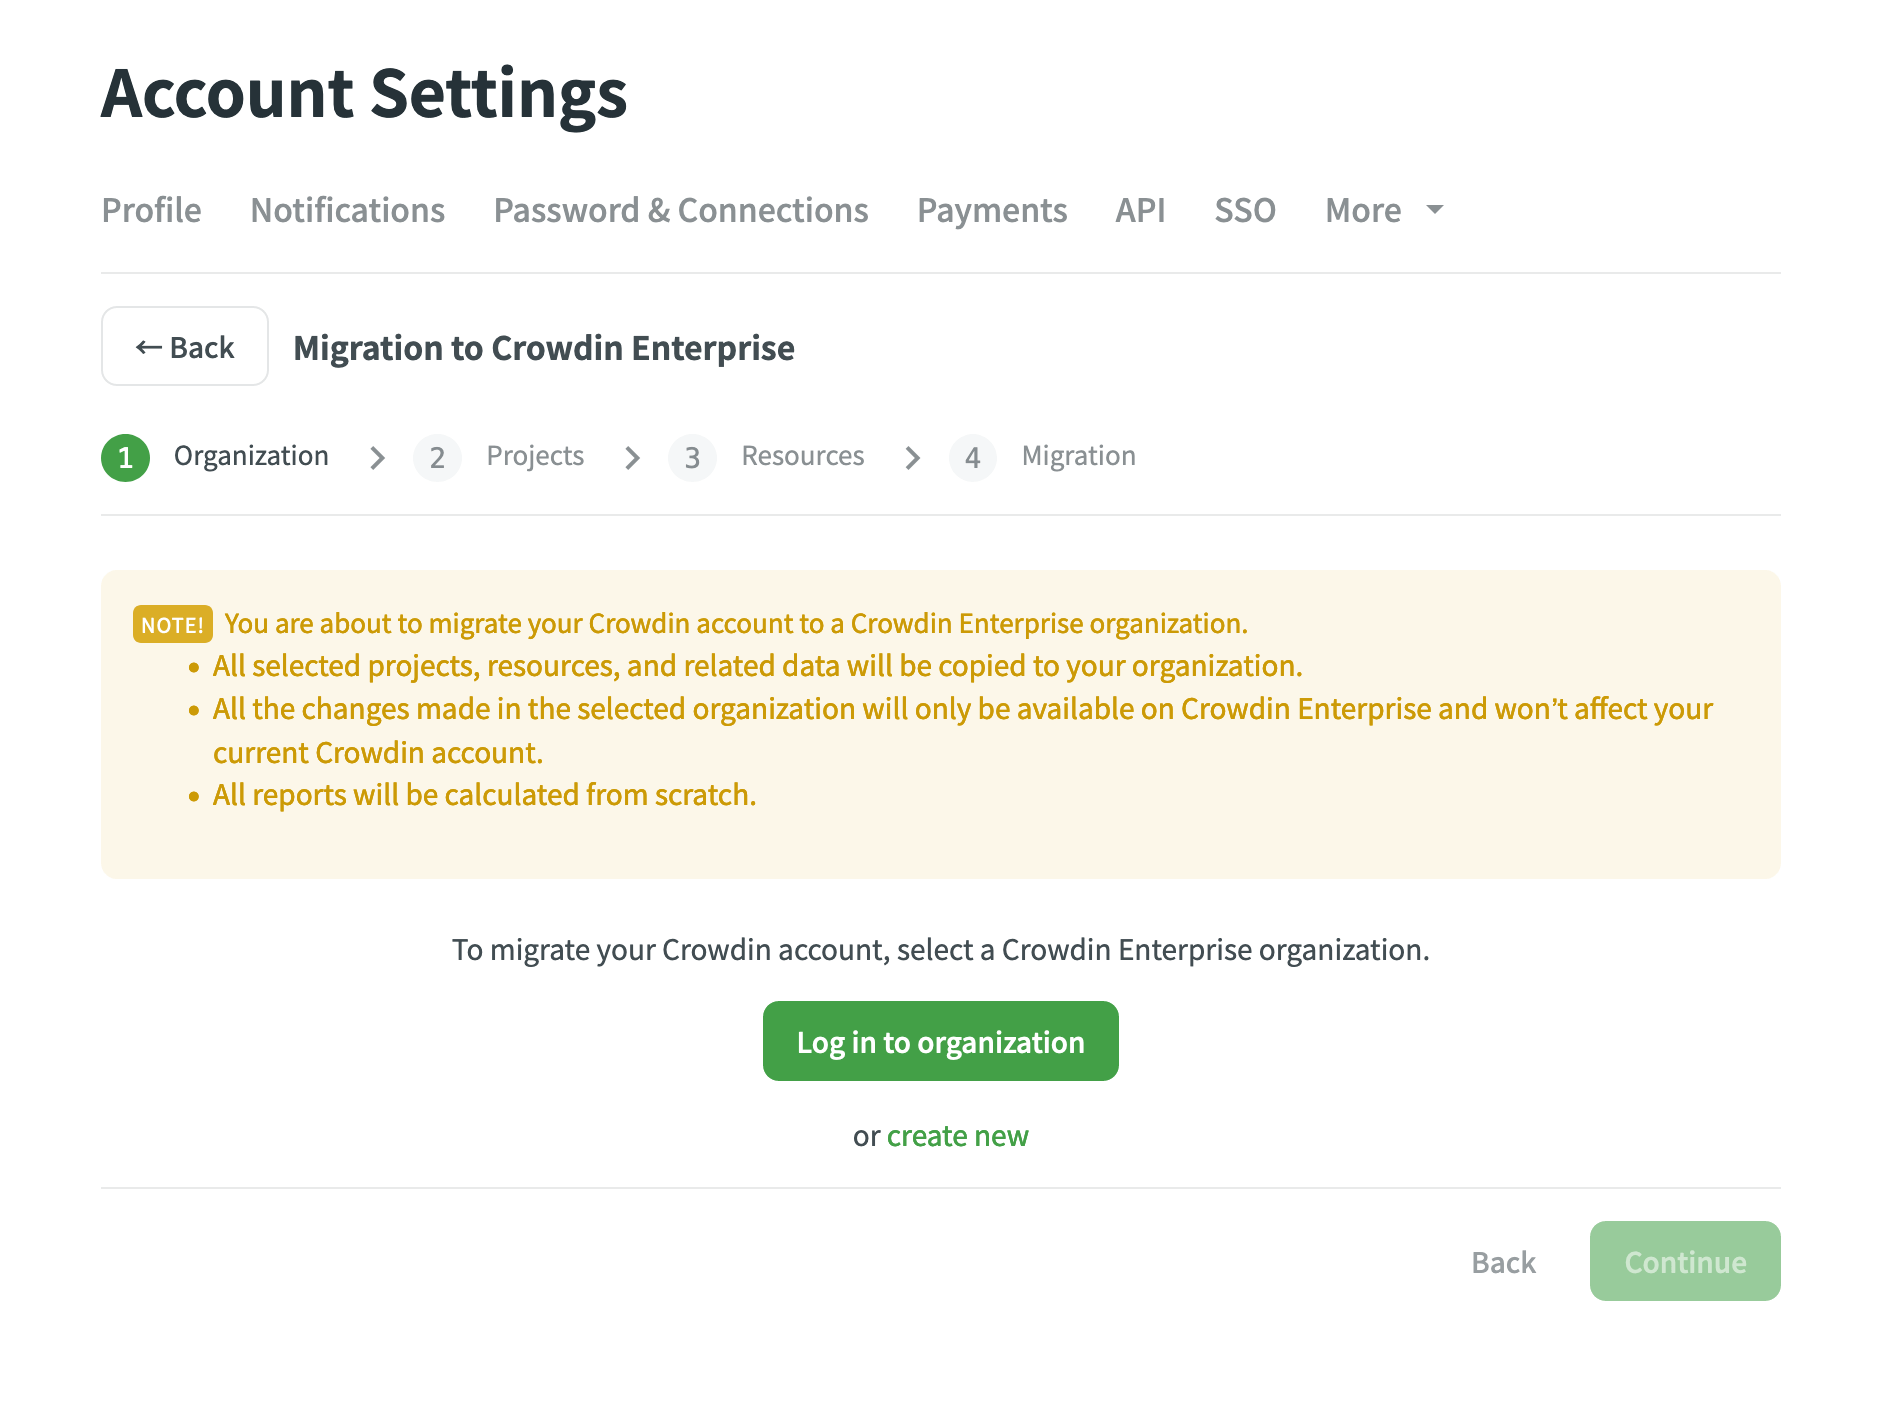
Organization Step
On the first step of the migration, select a Crowdin Enterprise organization to which you will migrate your Crowdin account’s data. You can log into your existing Crowdin Enterprise organization or create a new organization from scratch.
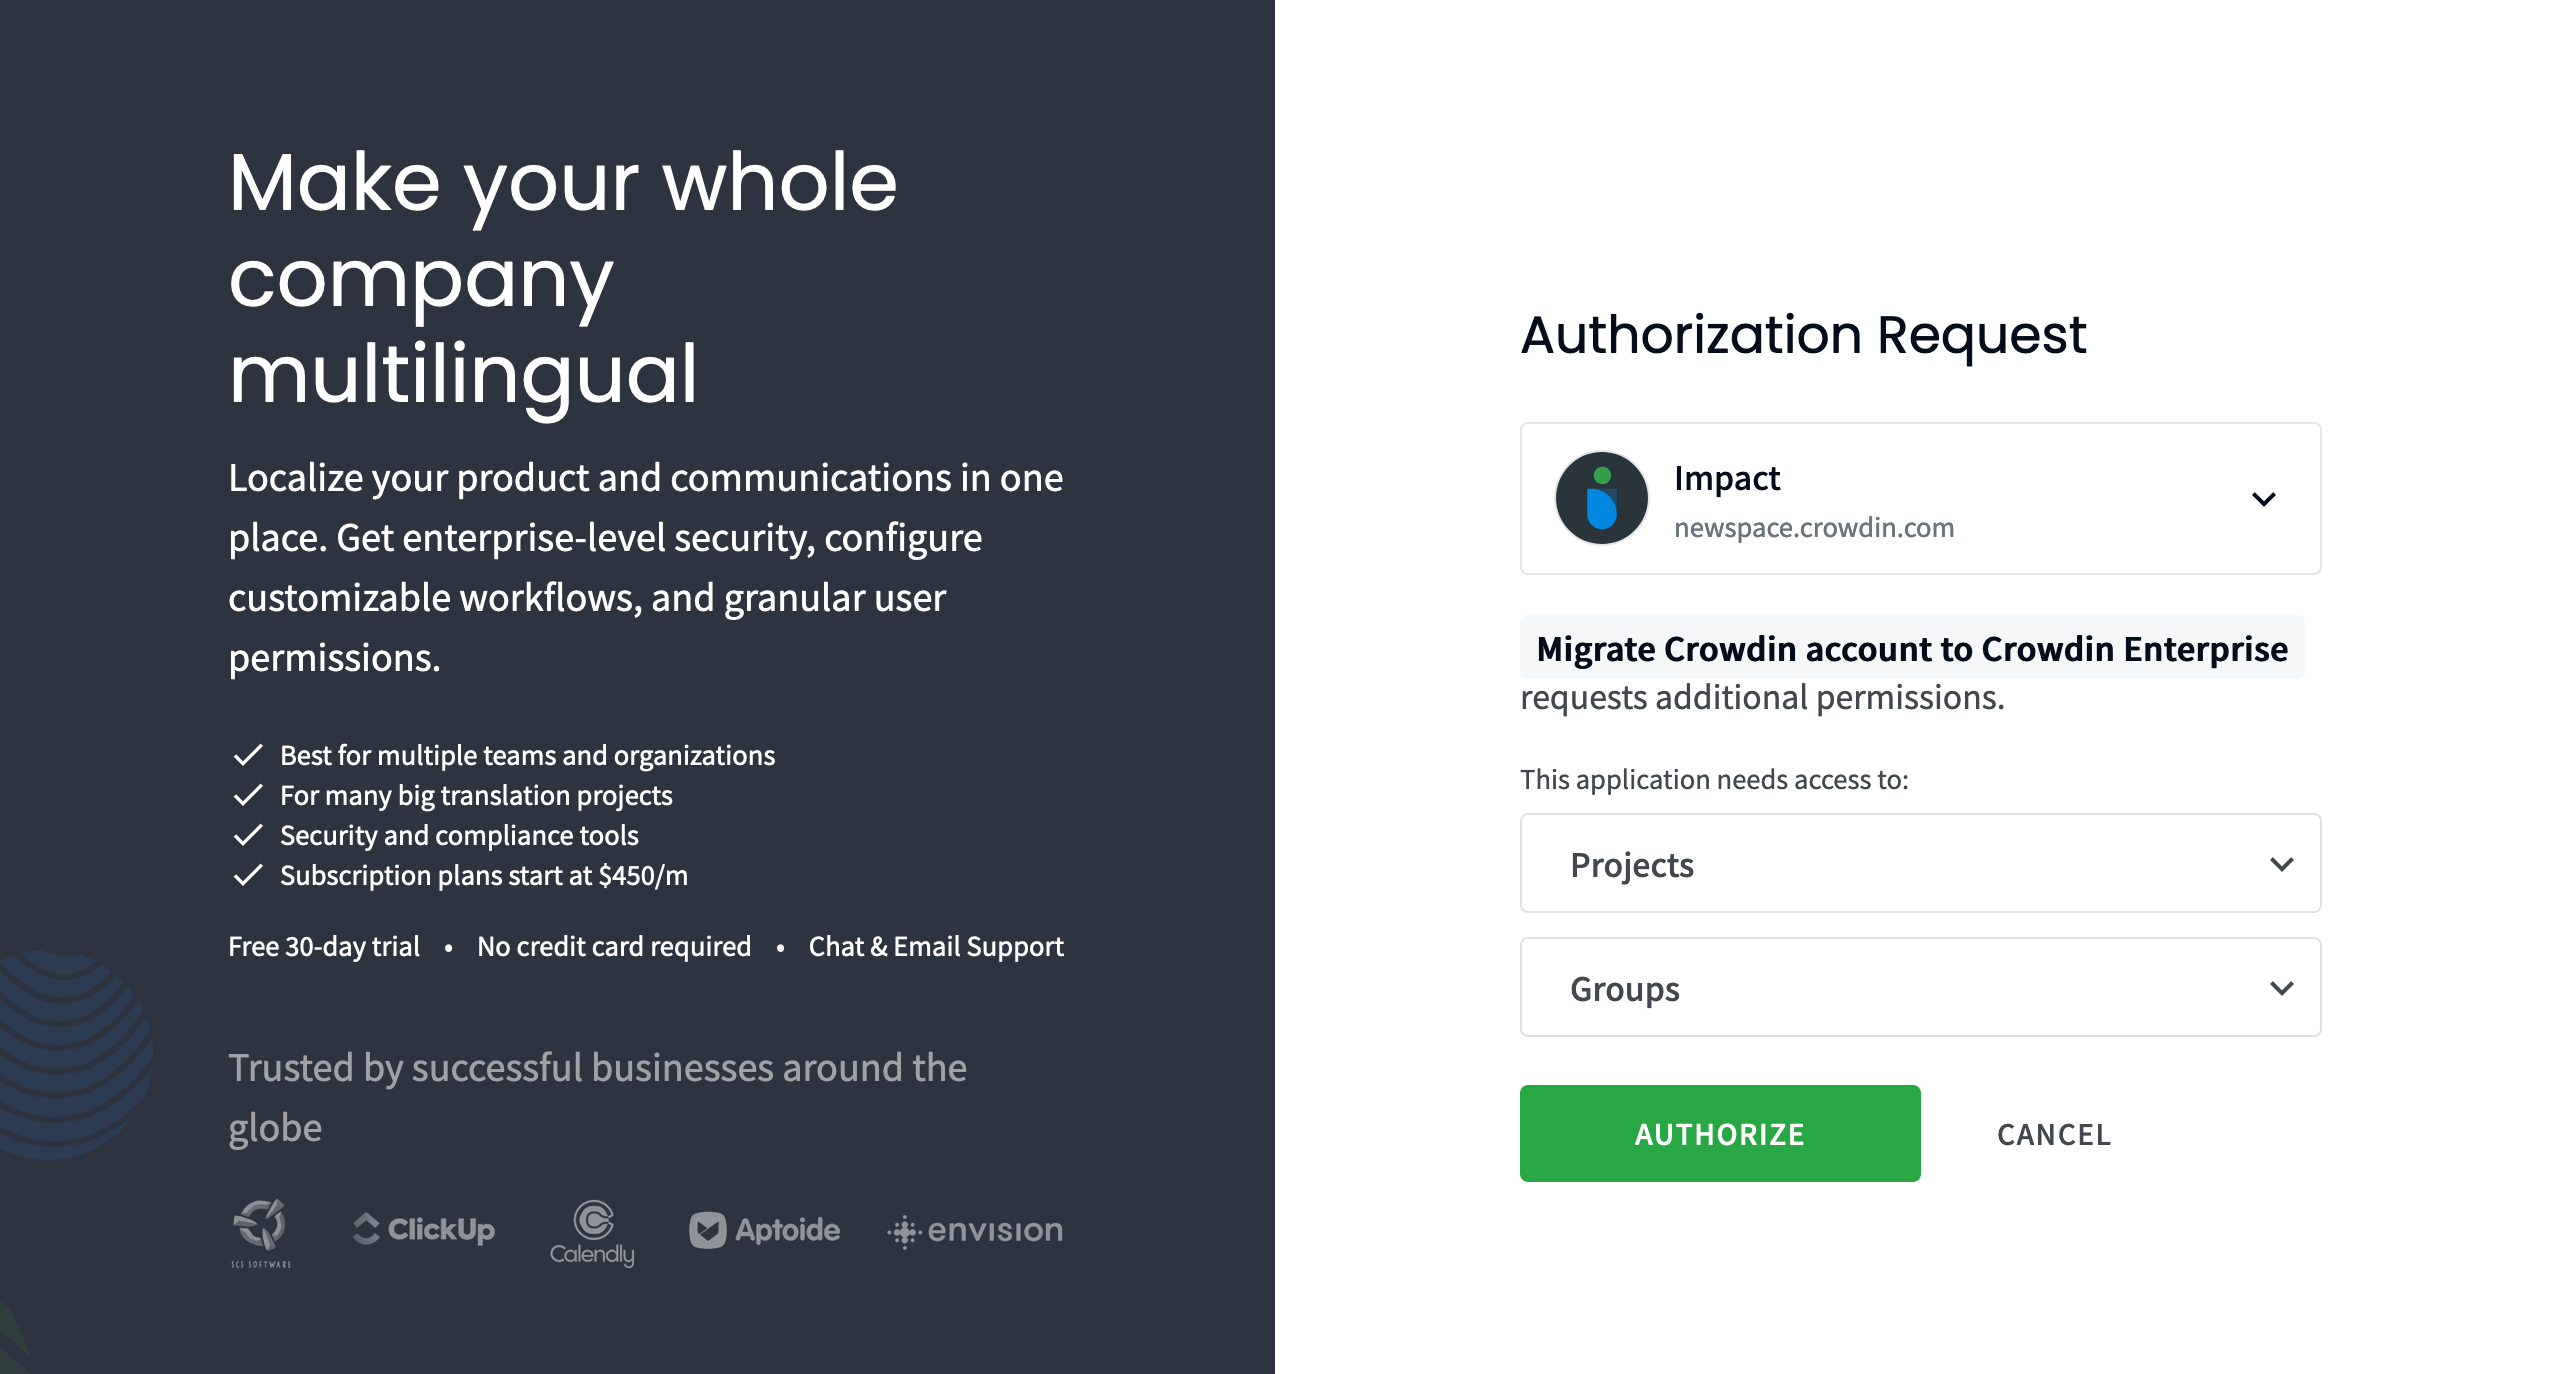
Once you’ve selected your Crowdin Enterprise organization, the system will ask you to authorize the Migrate Crowdin account to Crowdin Enterprise application and grant access to projects and groups within your organization. It’s necessary because the migrator app will create your projects and resources in Crowdin Enterprise on your behalf.
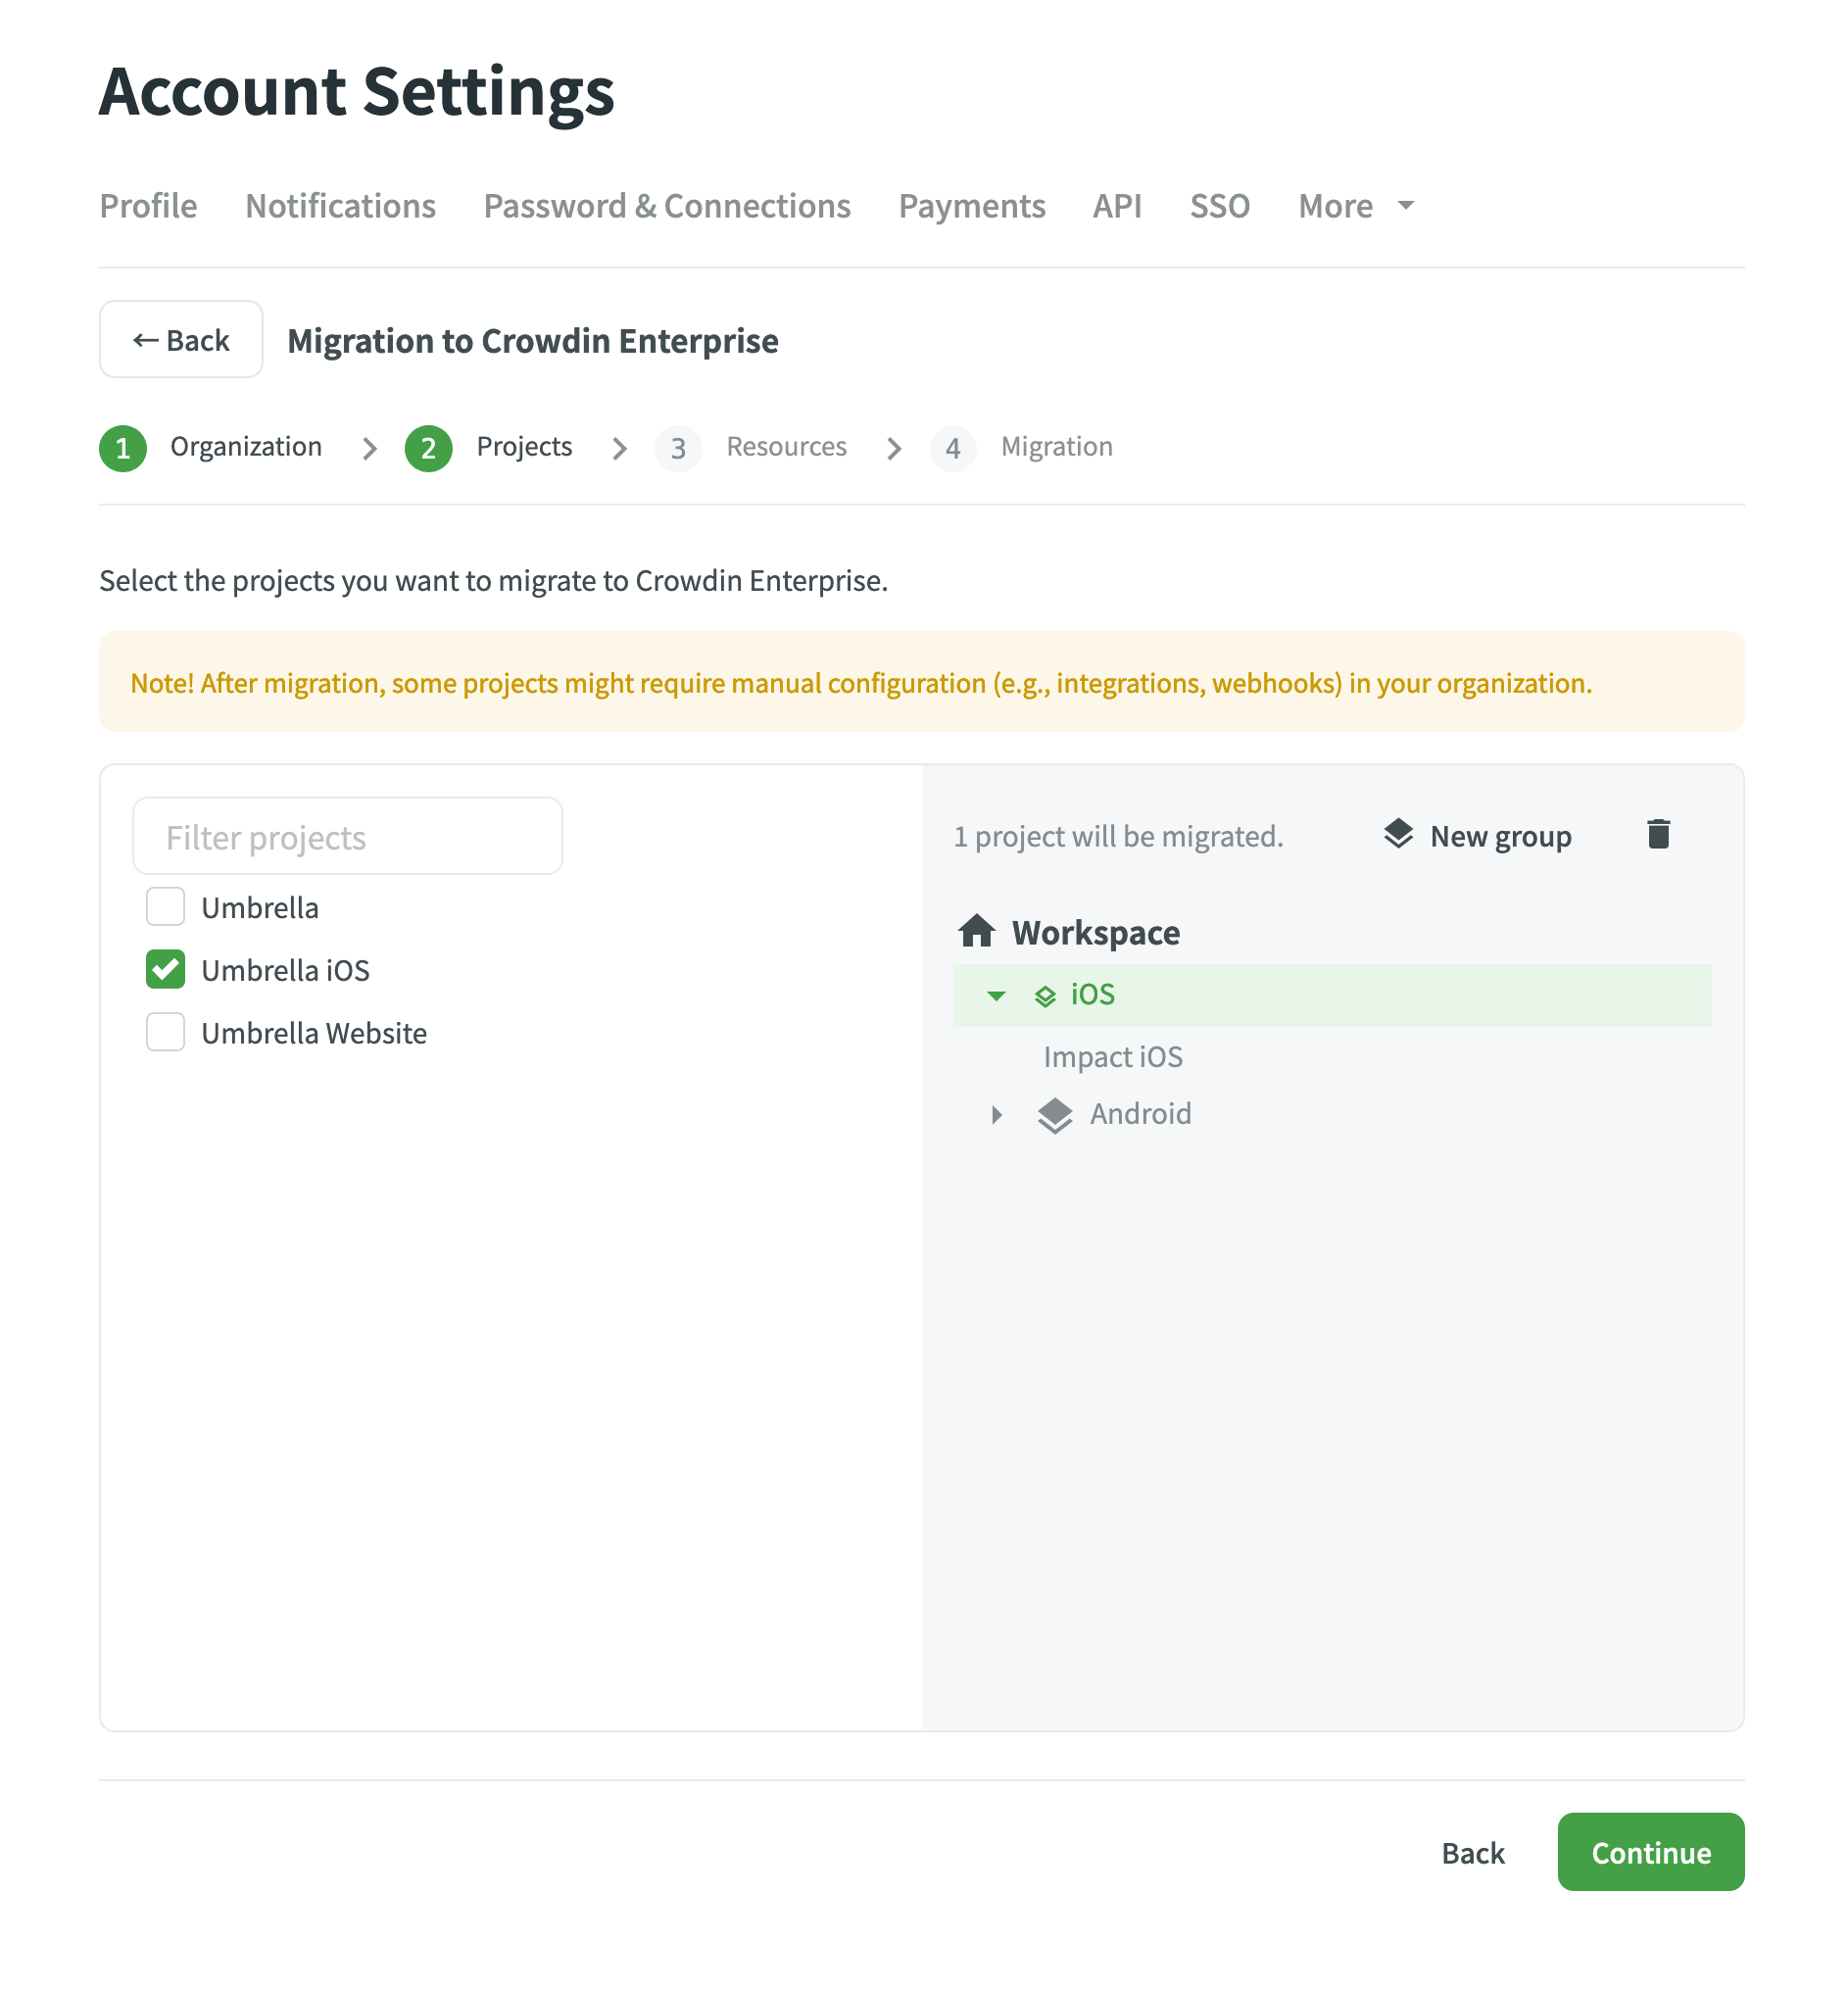
Projects Step
On the Projects step, you will see the list of your projects in Crowdin and your Crowdin Enterprise Workspace. Select the projects you’d like to migrate. By default, selected projects will be migrated to the organization’s Workspace. If needed, you can create separate groups for different projects.
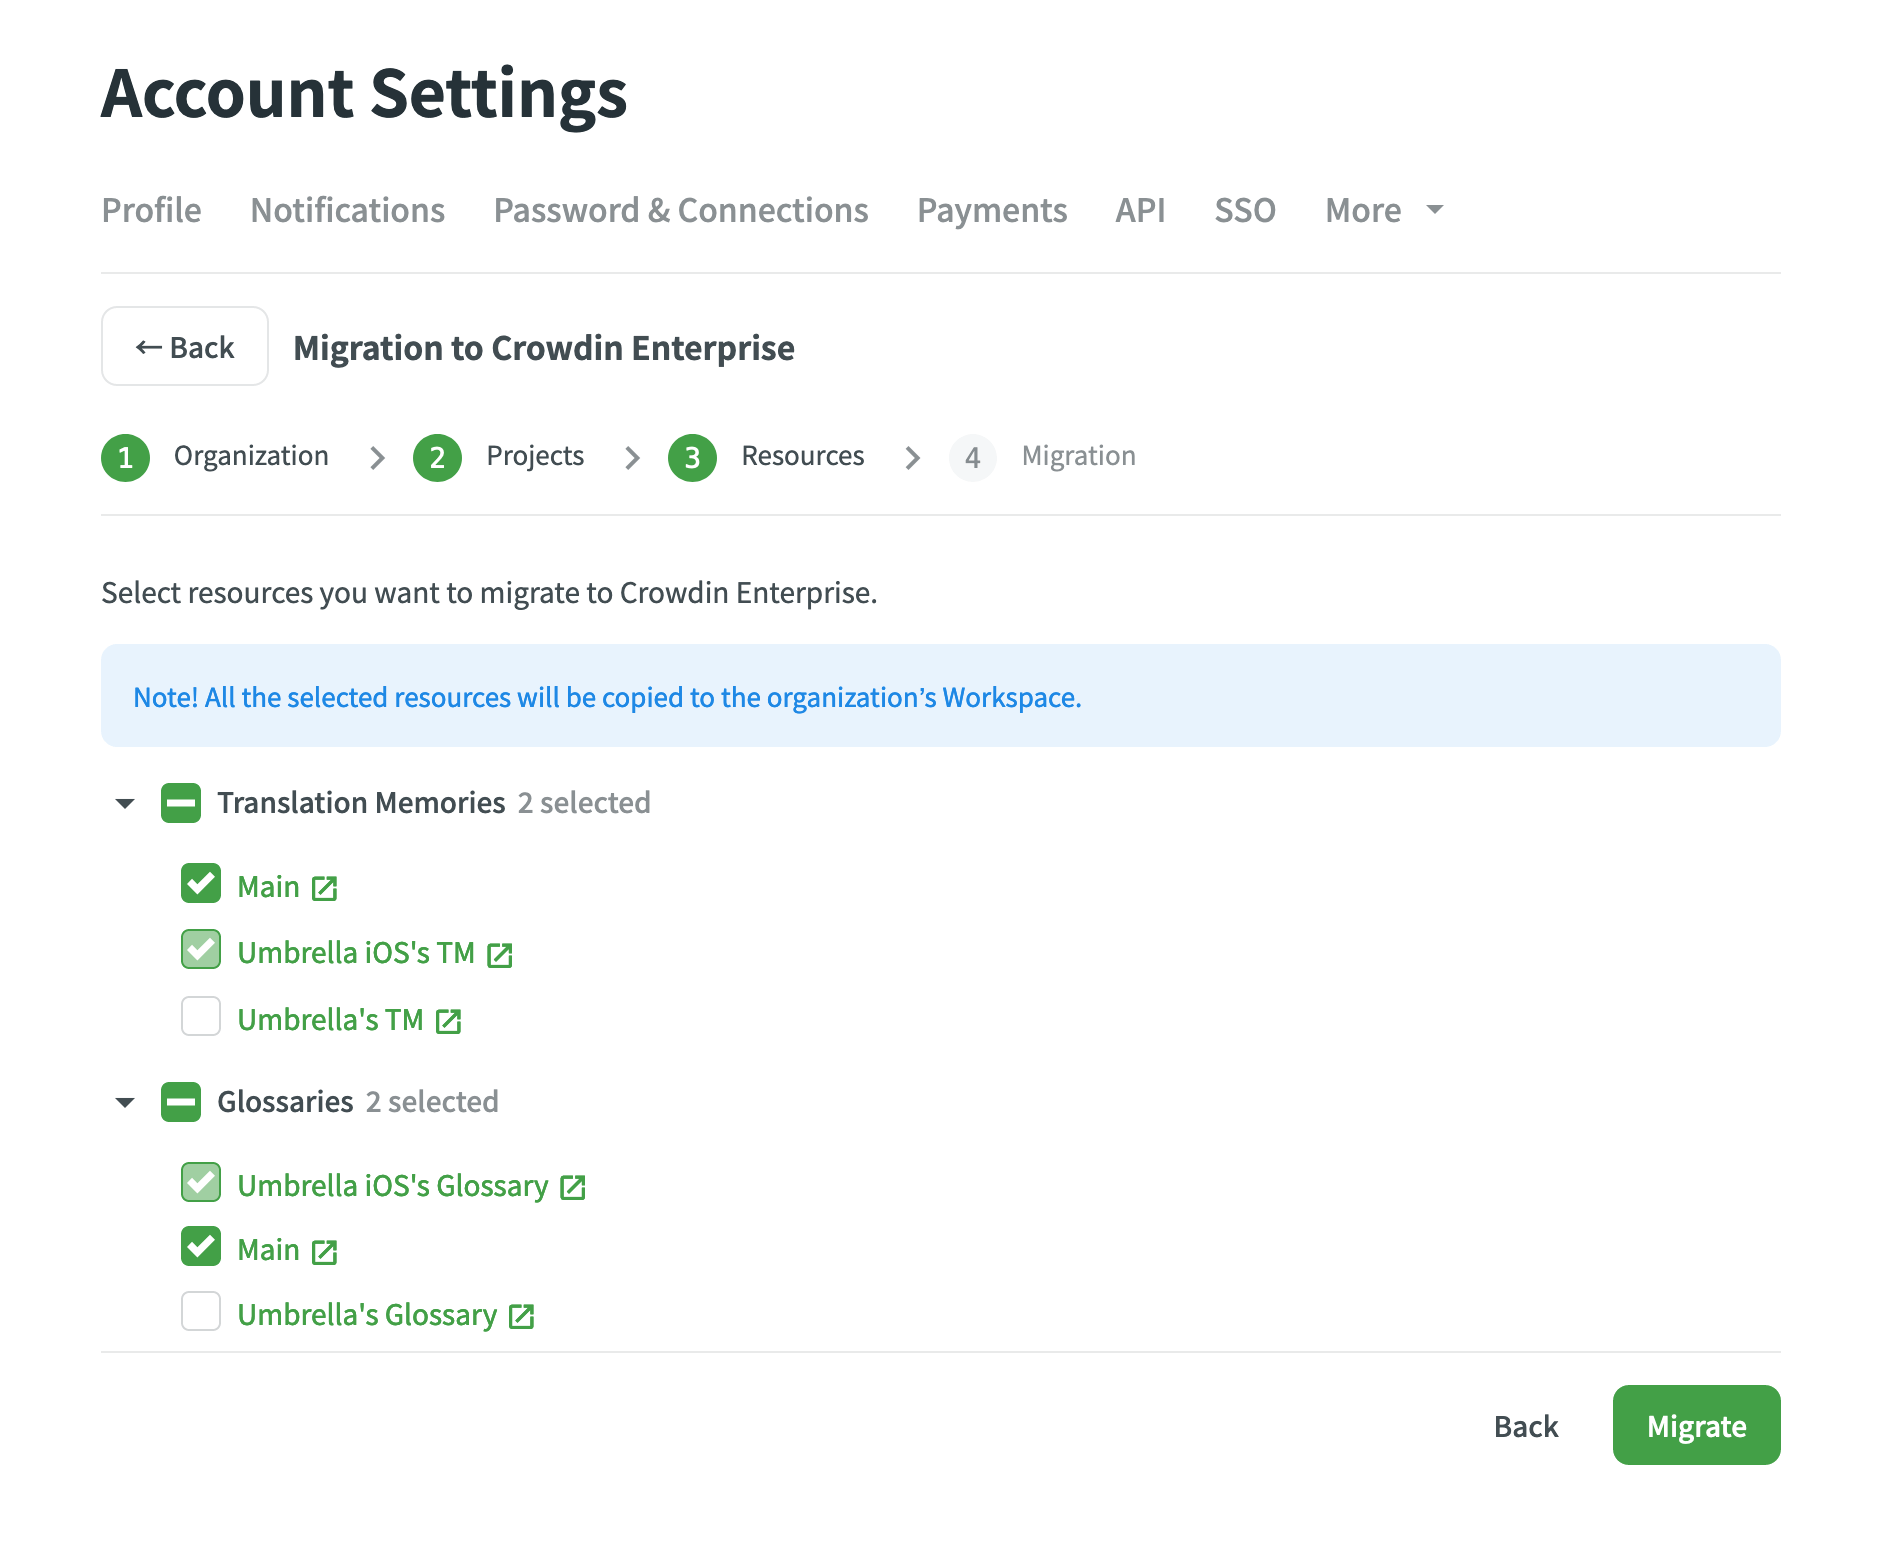
Resources Step
On the Resources step, you will see the list of your Translation Memories and Glossaries. By default, resources related to the projects you selected in the previous step will be automatically selected. Select the additional ones you’d like to migrate. Then, click Migrate to start the migration process.
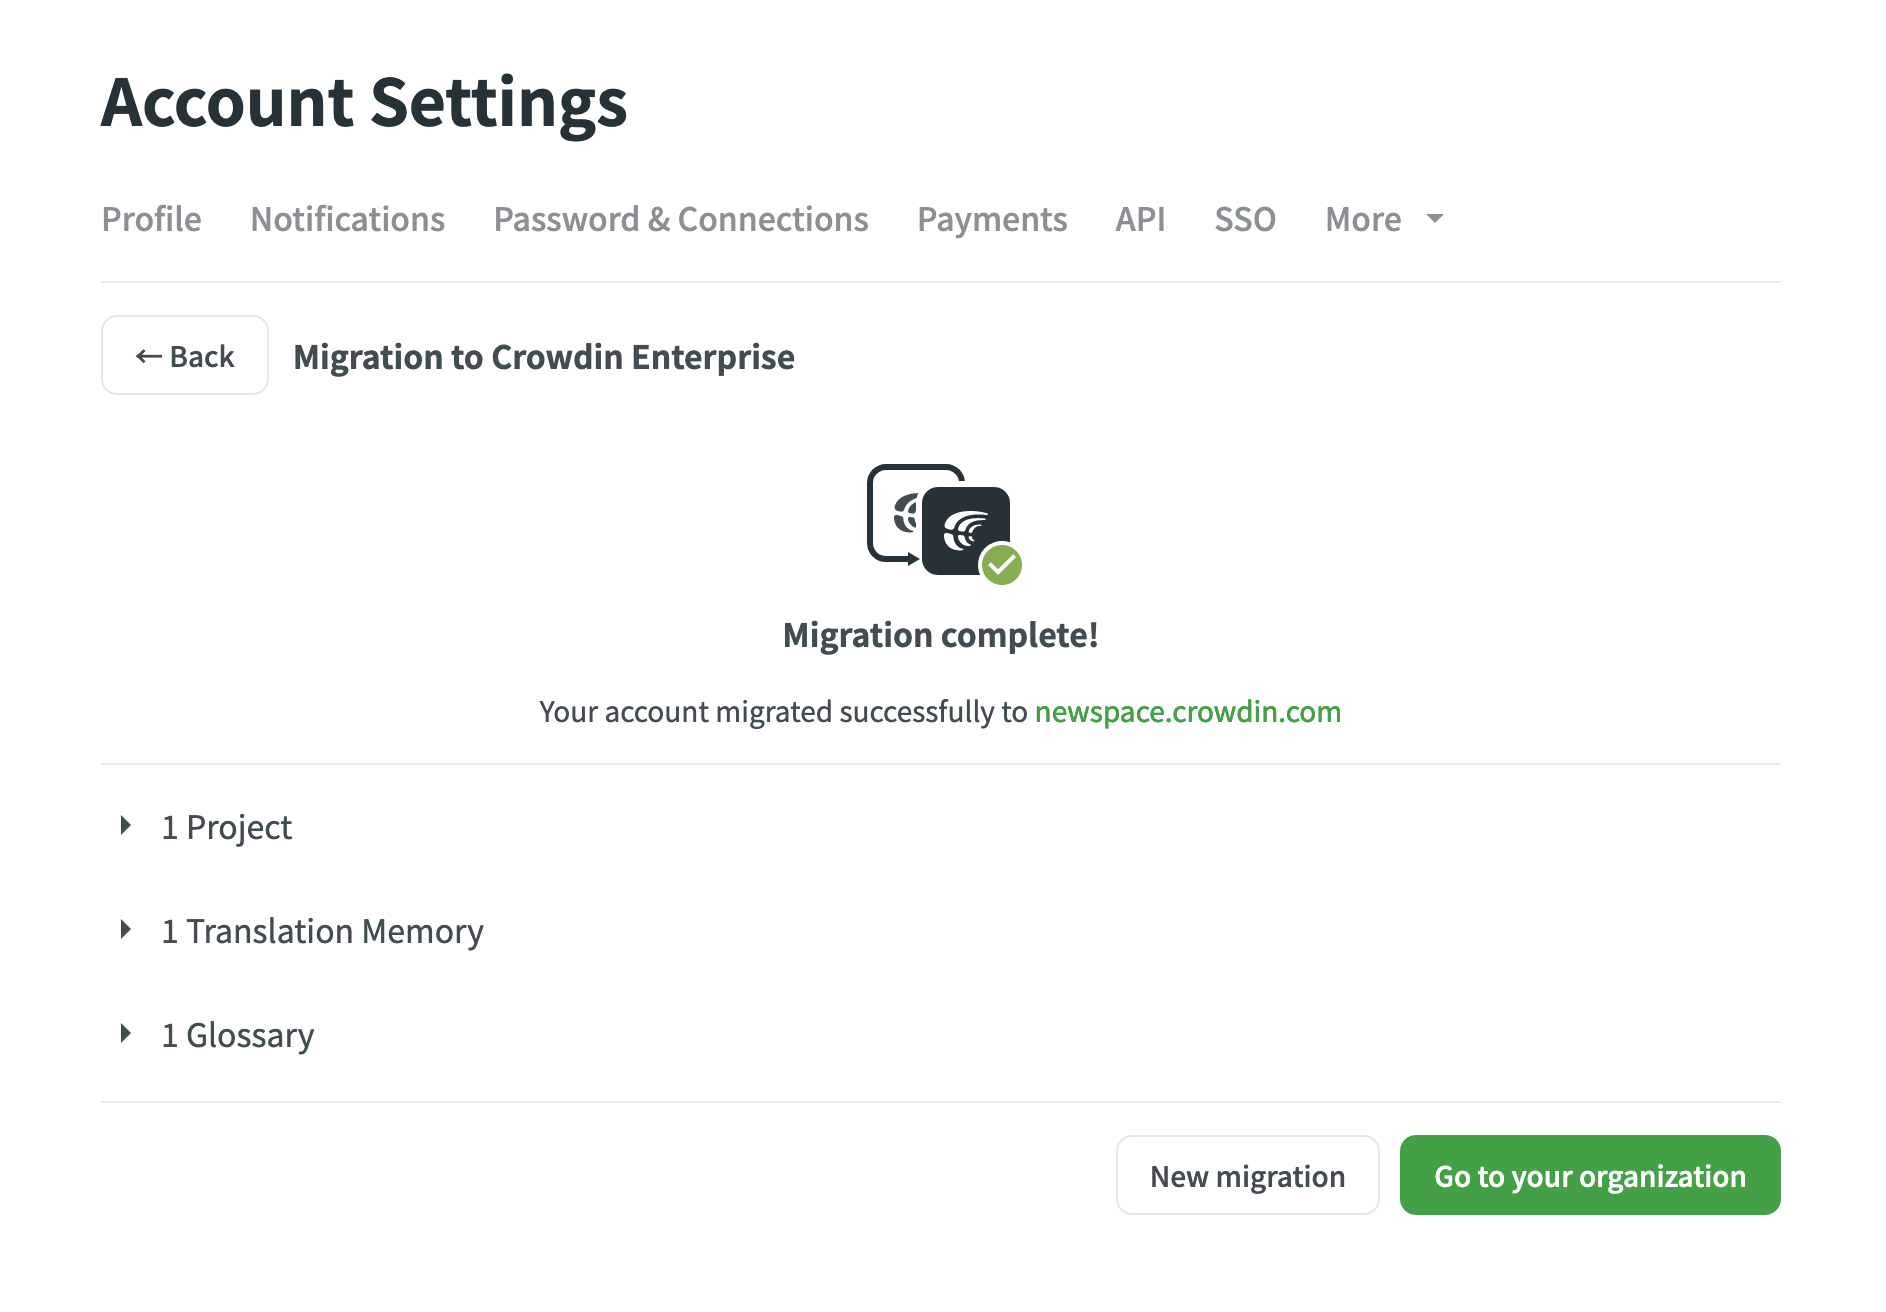
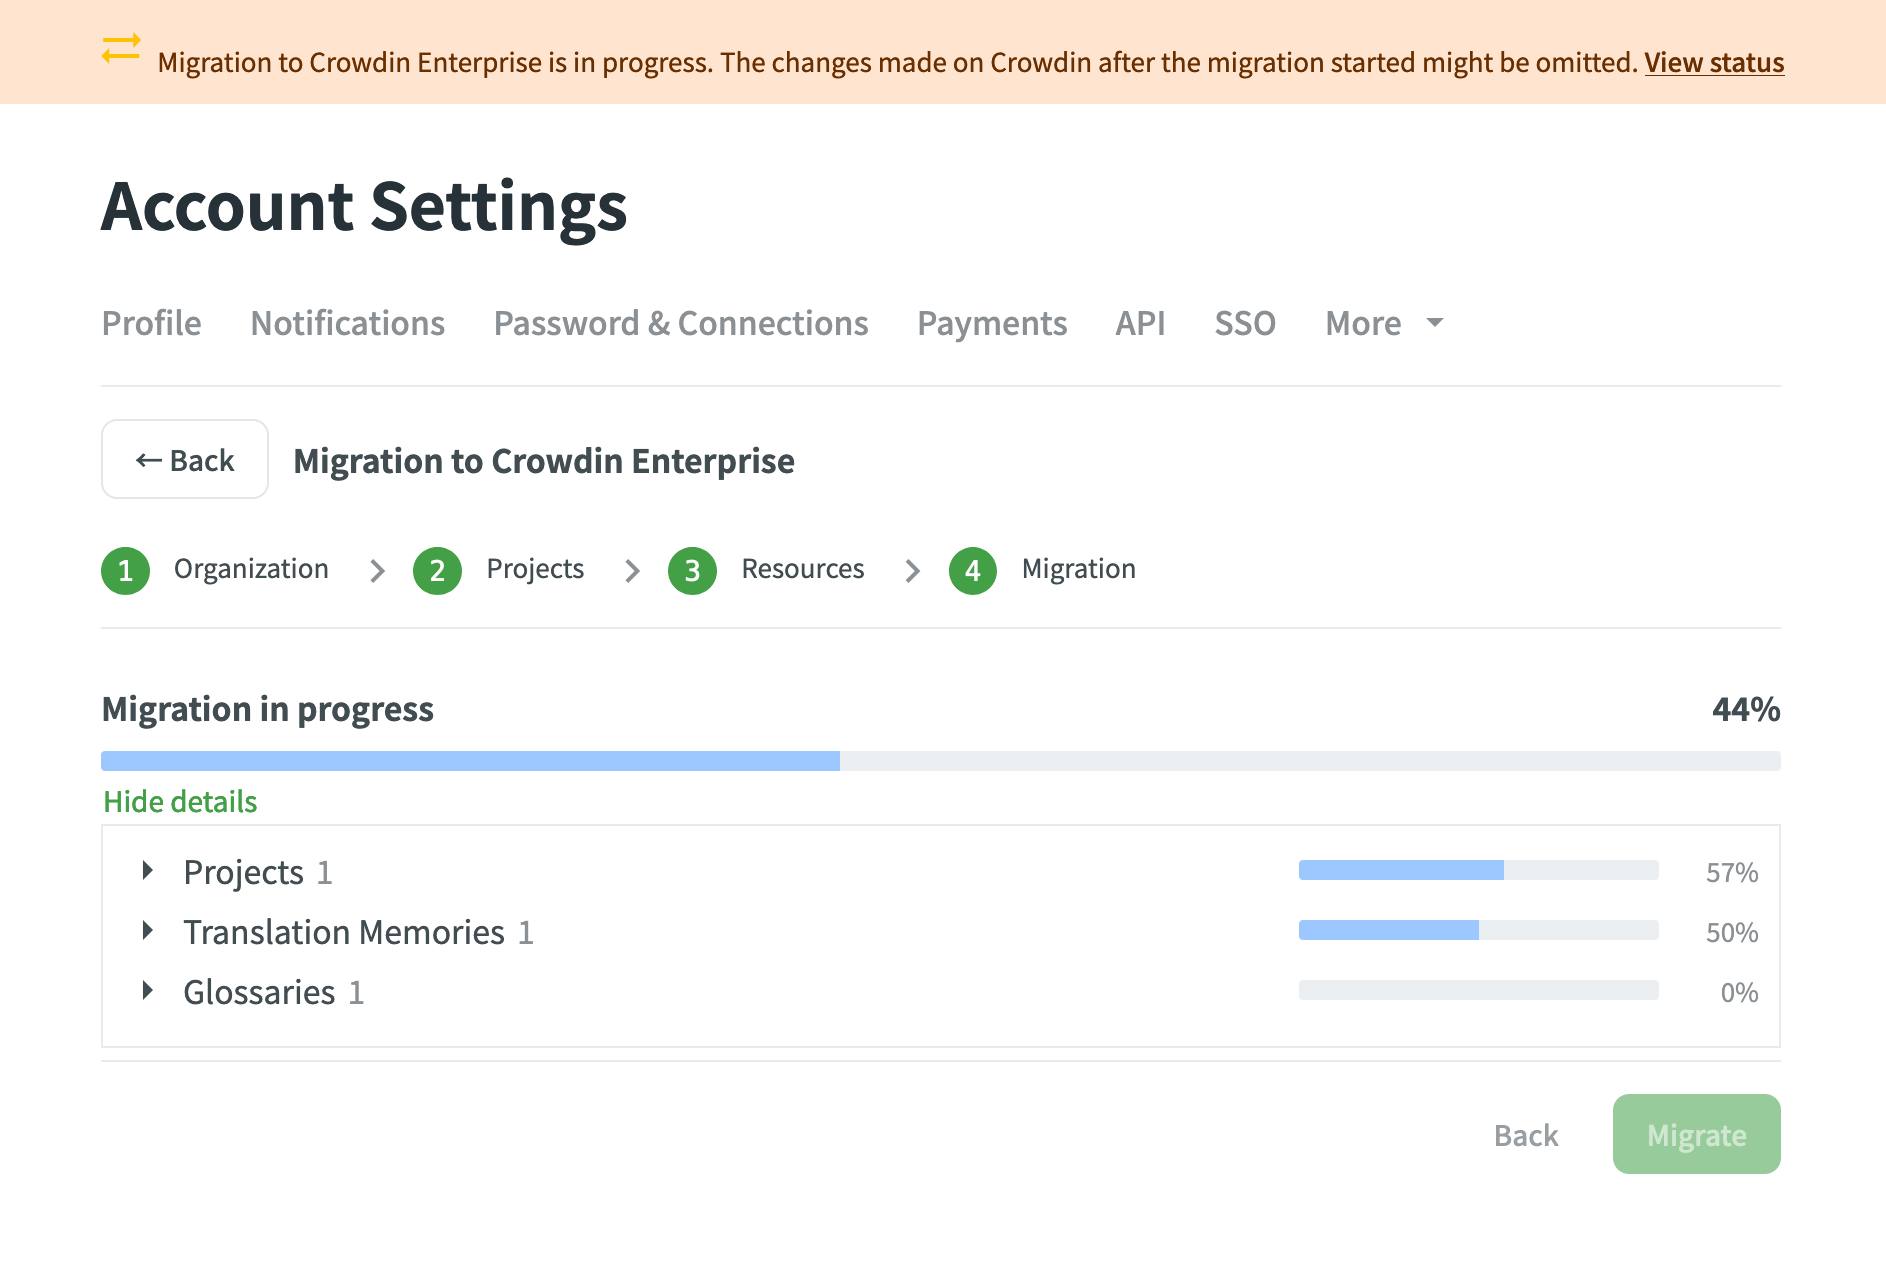
Migration Step
After you start the migration, you will be able to track its overall and detailed progress. Depending on the number of projects and resources, it might take from a few minutes to a few hours to migrate all the data. You will see the Migration to Crowdin Enterprise is in progress notification at the top of every page during the migration process. If needed, you can leave the Account Settings page. The migration will continue running in the background.
Note: The changes made on Crowdin after the migration started might not be migrated.
When the migration is finished, you can go to your Crowdin Enterprise organization and continue translating your projects.
Note: When migrating a string-based project from Crowdin to Crowdin Enterprise, source strings are gathered in a Strings.csv file, which is then uploaded to the migrated project in Crowdin Enterprise.