Plugin di Adobe XD
Con il plugin Crowdin per Adobe XD, puoi usare i testi di Crowdin Enterprise nei tuoi progetti per risparmiare tempo sia per progettisti che per sviluppatori. These could include original or translated texts. Se necessario, puoi aggiungerne di nuovi (es. titoli delle finestre, etichette dei pulsanti) e inviarli ai traduttori in Crowdin Imprese.
Casi d’Uso
- Quickly generate multilingual creative assets.
- Traduci i mockup e testali in diverse lingue prima che la programmazione inizi.
- Smetti di usare ‘Lorem Ipsum’, aggiungi testi reali da Crowdin Enterprise ai tuoi prototipi.
- Crea e carica le stringhe di partenza dai tuoi design al tuo progetto di Crowdin Imprese. This way, uploaded strings could be used by developers, which reduces time spent on development.
- Carica screenshot etichettati al tuo progetto di Crowdin Imprese.
Installing Crowdin plugin for Adobe XD
- Sign in to Adobe XD.
- Navigate to Plugins > Browse plugins….
- Click Browse.
- Use the Search all plugins field to find Crowdin for Adobe XD plugin.
- Click Install.
Connettere Adobe XD al Profilo di Crowdin Imprese
Configurare le Credenziali di Crowdin Imprese
Per specificare le tue credenziali di Crowdin Imprese in Adobe XD, segui questi passaggi:
- On the left panel, click Plugins > Crowdin for Adobe XD.
- Click
 .
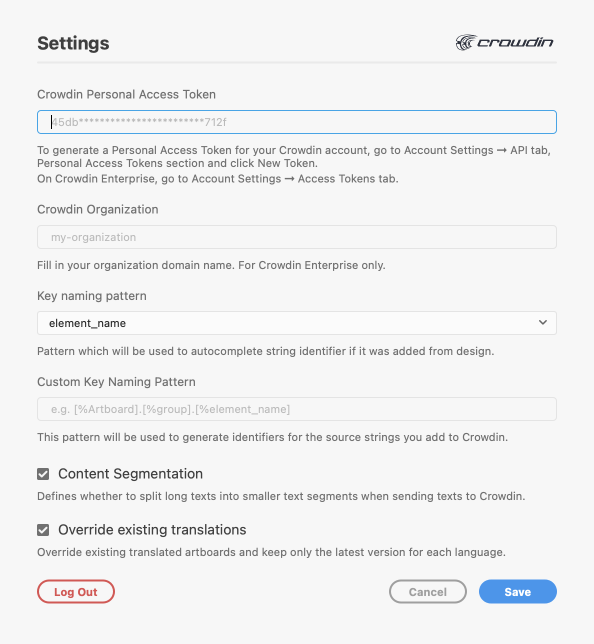
. - Fornisci il tuo Token di Accesso Personale.
- Specifica il nome di dominio della tua organizzazione e clicca Salva.
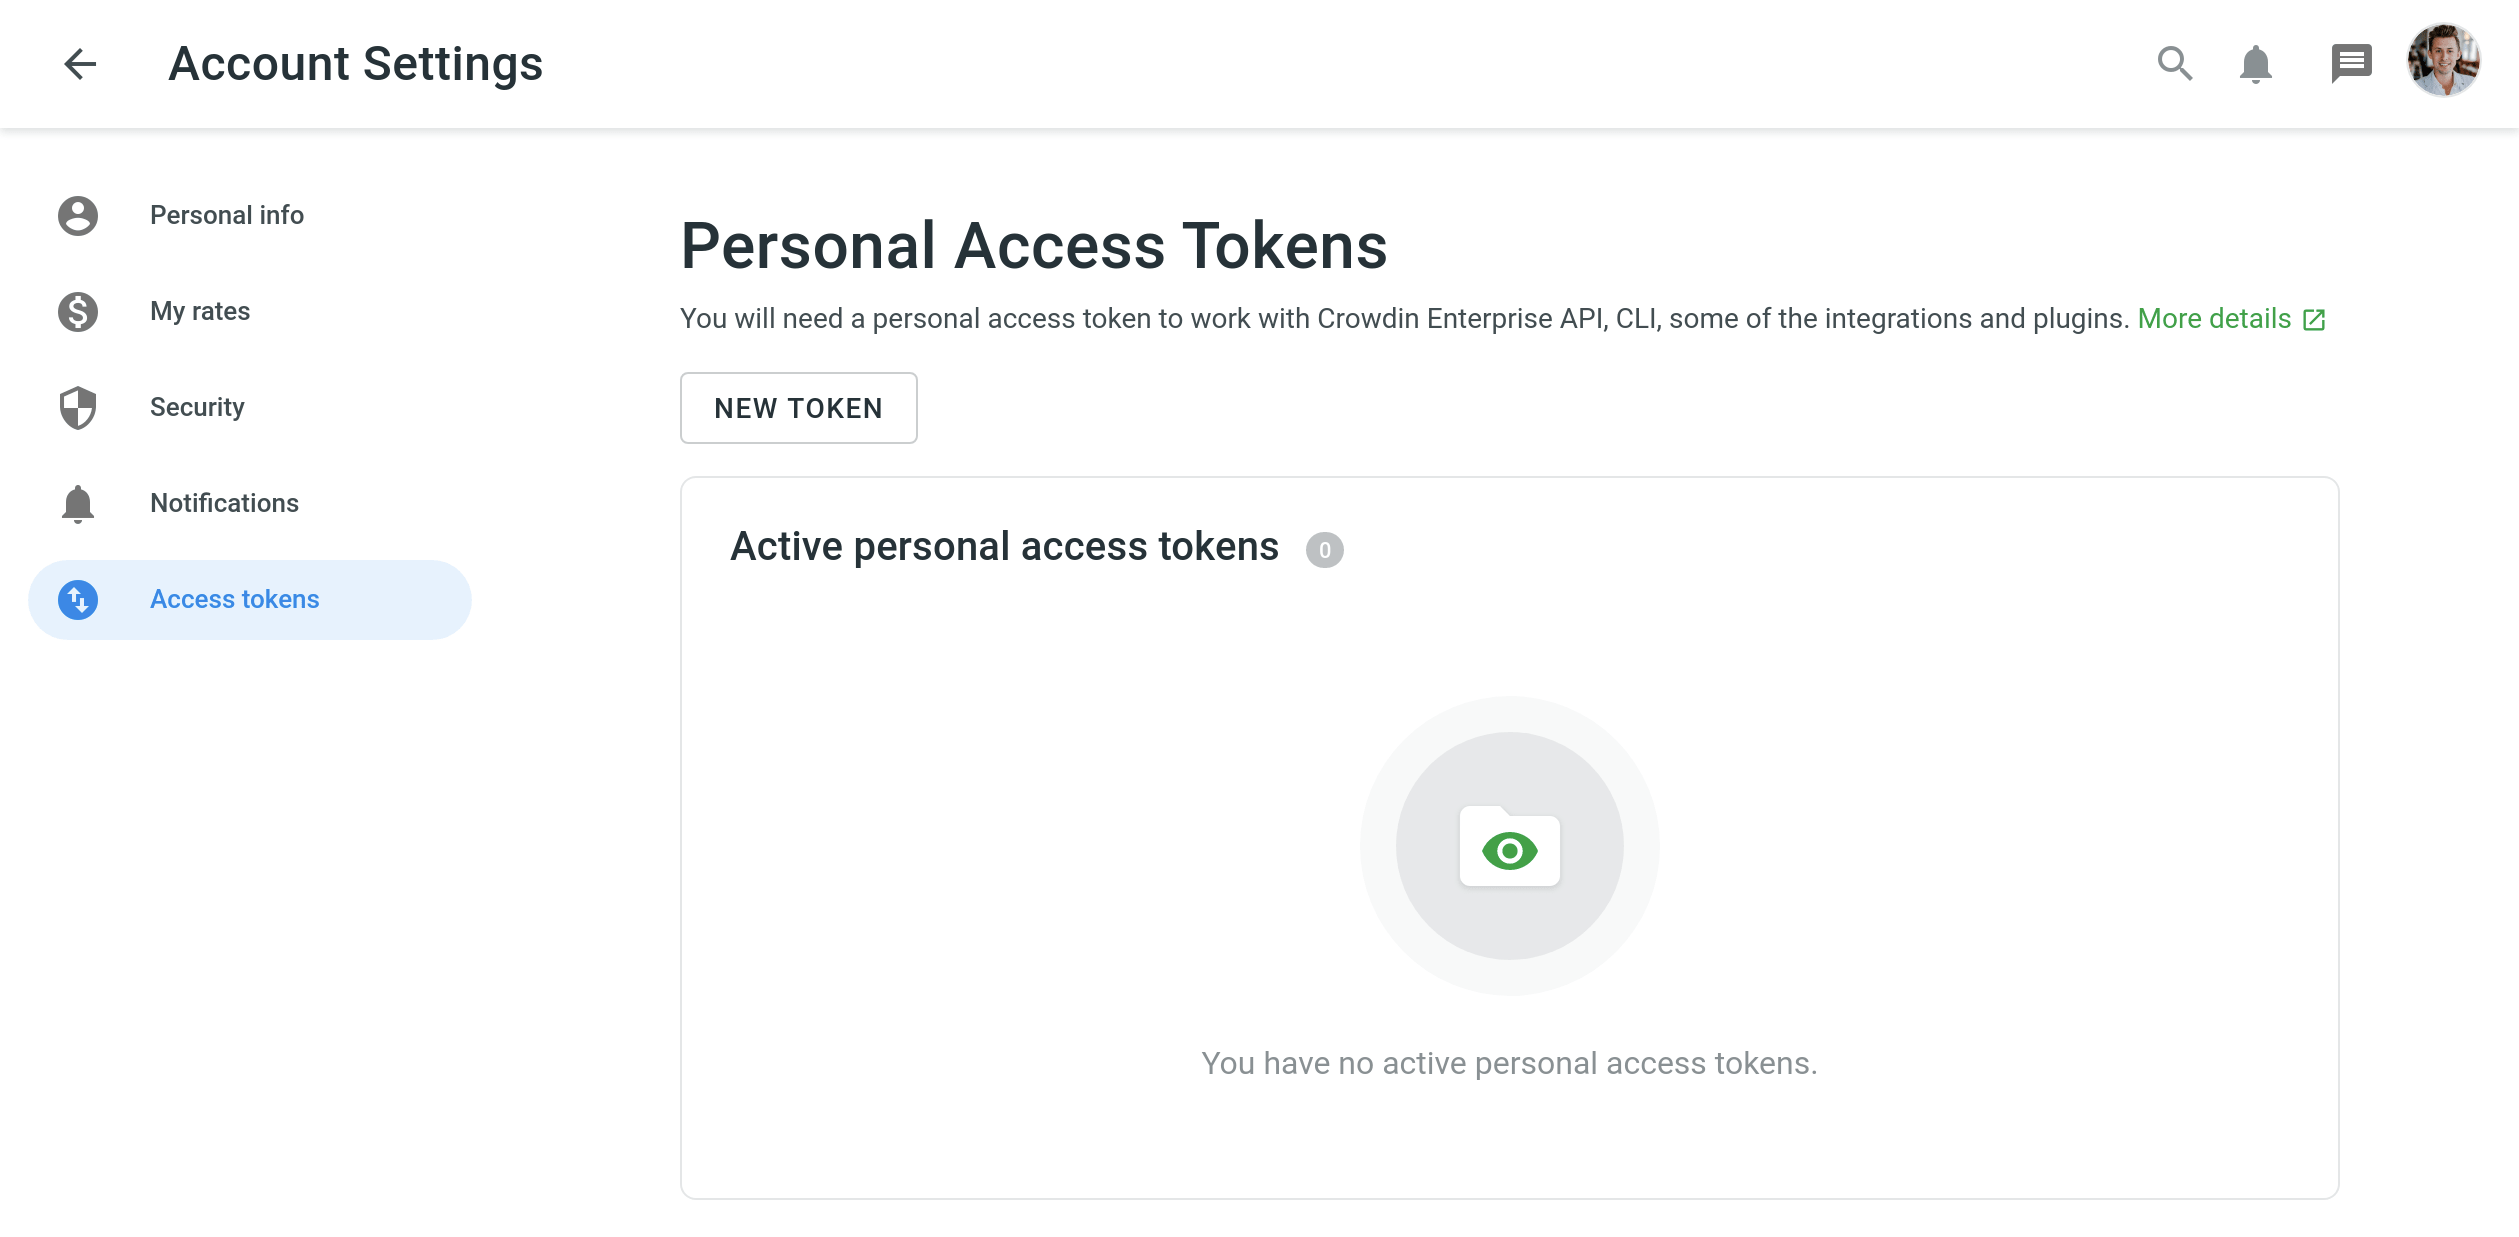
Per generare un nuovo token su Crowdin Imprese, segui questi passaggi:
- Vai alla scheda Impostazioni dei Profilo, Token d’accesso e clicca Nuovo token.
- Specifica il Nome del Token, seleziona Ambiti e Progetti, clicca Crea.
Selezionare il progetto di Crowdin Imprese
To select the project you’d like to work with, click the drop-down menu, and select a project from the list. In seguito, potrai usare lo stesso menu a tendina per passare a un altro progetto, se necessario.
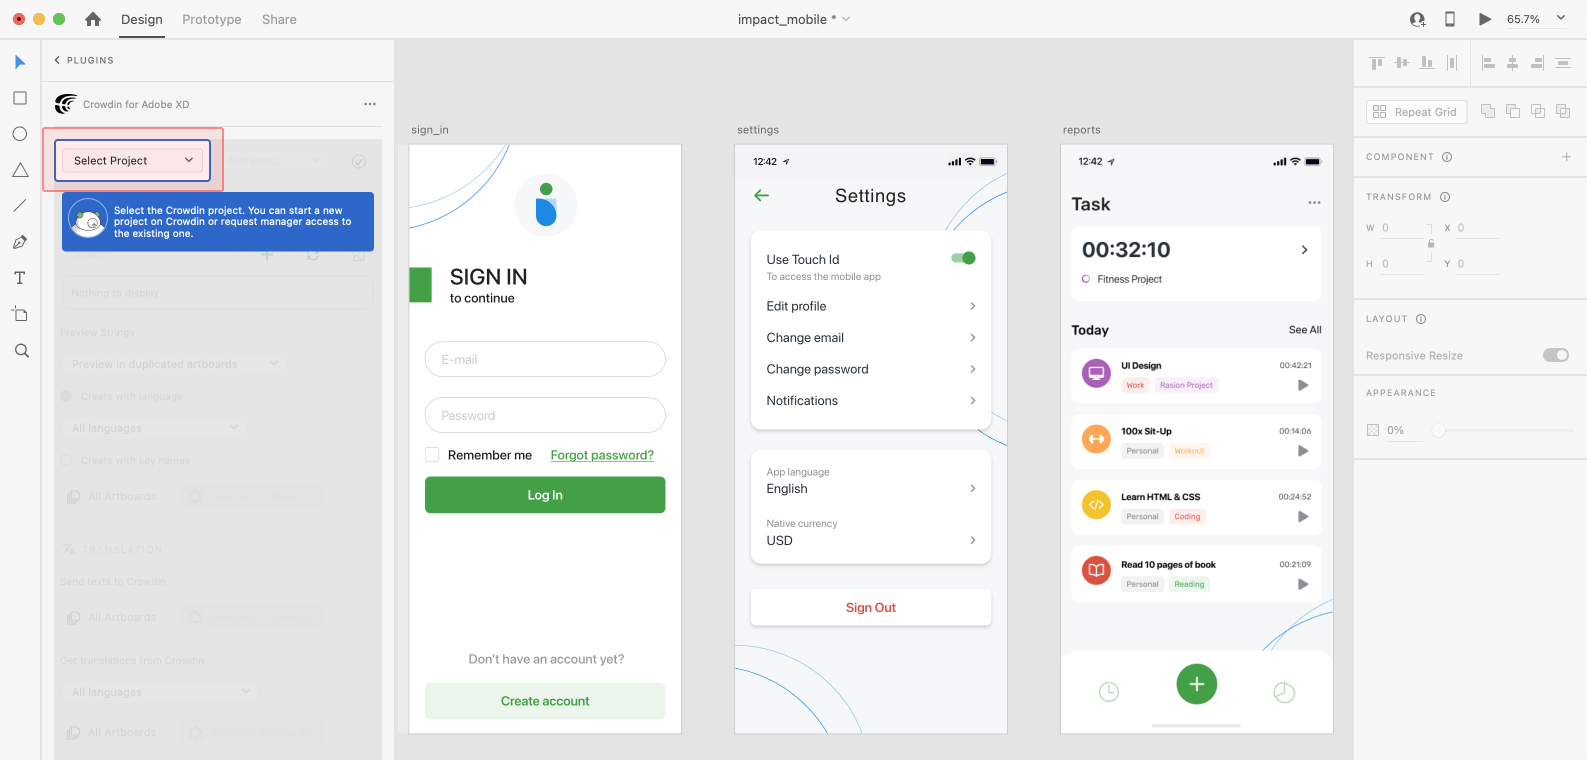
Seleziona il ramo specifico in cui saranno caricati i tuoi contenuti. Se il tuo progetto di Crowdin Imprese non contiene rami, lascialo vuoto.

UI Localization
Use the Strings section when localizing UI and working on dynamic pages with your development and marketing teams. In questa sezione, puoi aggiungere stringhe di origine da Crowdin Imprese ai tuoi progetti su Adobe XD, in un solo click. Dopo che i testi sono usati nei design, puoi automaticamente caricare gli screenshot etichettati per riferimento ai traduttori in Crowdin Imprese.
Usare le Stringhe di Partenza da Crowdin Imprese in Adobe XD
- Open the Crowdin plugin for Adobe XD.
- In the Strings section, use the Search field to find the specific copy. Puoi cercare le stringhe per testo sorgente, identificativo della stringa o contesto.
- Select the text layer to which you want to add text and click on the needed string.

Dopo aver usato le stringhe di origine di Crowdin Enterprise nei tuoi disegni, sono collegate con i campi di testo e puoi visualizzare in anteprima le traduzioni per queste stringhe in Adobe XD e caricarne le schermate sul tuo progetto Crowdin Enterprise.
You can link a single Crowdin string to one or multiple text fields in Adobe XD. Tuttavia, un campo di testo è collegabile solo a una stringa di Crowdin. Se colleghi un campo di testo con una connessione esistente a una nuova stringa di Crowdin, la connessione precedente sarà terminata e ne sarà stabilita una nuova. Se vorresti scollegare una stringa di Crowdin da tutti i campi di testo a cui era precedentemente stata collegata, clicca con il destro sull’icona del link affianco alla stringa necessaria.
Aggiungere le Stringhe di Partenza da Adobe XD a Crowdin Imprese
Puoi aggiungere le stringhe già usate nei progetti o crearne e aggiungerne di completamente nuove.
- Open the Crowdin plugin for Adobe XD.
- To add the strings used in the designs, select the whole artboard, multiple artboards, or the needed strings on the artboards. Alternatively, skip this step if you want to add a new string.
- In the Strings section, click
 .
. - In the appeared dialog, fill in the required fields.
- (Optional) To add labels to the strings, alternately select them from the Label drop-down menu and click Save.
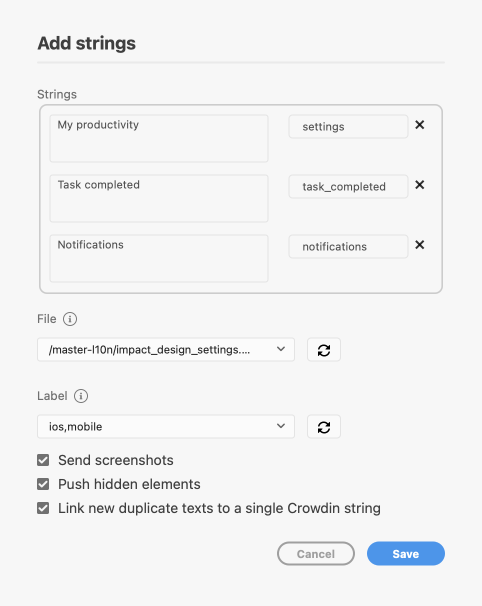
Per aggiungere le stesse stringhe in più file su Crowdin Imprese, altrimenti seleziona i file necessari dal menu’ a tendina File.
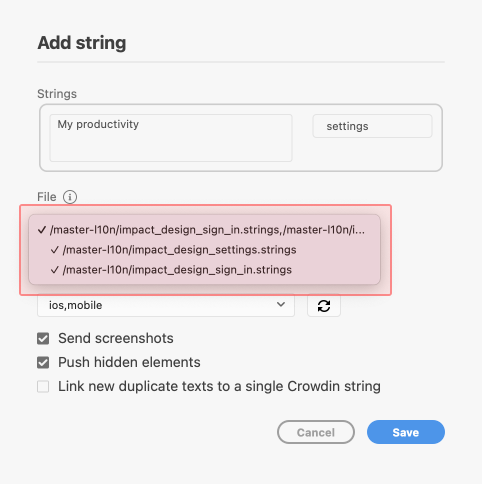
Cancella l’opzione Mostra elementi nascosti se alcune schede artefatte contengono elementi nascosti che non dovrebbero essere aggiunti a Crowdin Enterprise.
Aggiungendo più stringhe, potresti voler selezionare Collega nuovi testi duplicati a una singola stringa di Crowdin. È utile nei seguenti casi:
- Aggiungendo diversi campi di testo con lo stesso testo, il plugin aggiungerà solo una stringa al tuo progetto di Crowdin Imprese e collegherà a essa tutti i campi di testo duplicati.
- Se il tuo progetto di Crowdin Imprese contiene già una stringa con lo stesso testo che stai aggiungendo dai progetti, il plugin collegherà solo i campi di testo alla stringa esistente e non ne creerà di nuovi.
Le stringhe aggiunte saranno trasferite al tuo progetto di Crowdin Imprese e, inoltre, saranno mostrate nell’elenco della sezione Stringhe. You can edit or delete the strings from the same list anytime. Le rispettive modifiche saranno applicate anche alle stringhe nel tuo progetto Crowdin Enterprise.
Configurare i Segnaposto della Stringa Sorgente ICU
Usando le stringhe ICU nel tuo design, puoi impostare i valori dei segnaposto e, dopo aver aggiunto tali stringhe ai design, saranno mostrate in una vista formattata coi valori pre-configurati.
Una volta che usi la stringa ICU necessaria da Crowdin Enterprise nel tuo progetto, puoi configurarne i valori dei segnaposti.
- Open the Crowdin plugin for Adobe XD.
- In the Strings tab, use the Search field to find the specific copy. Puoi cercare le stringhe per testo sorgente, identificativo della stringa o contesto.
- Clicca
 sulla stringa ICU necessaria.
 - Clicca Imposta segnaposto.
- Digita i valori necessari per i segnaposto della stringa ICU.
- Clicca Invia per salvare i segnaposto inseriti.
- Clicca Modifica Stringa per aggiornare il testo della stringa sorgente nei design.
When previewing translations for ICU strings in Adobe XD, they will also be displayed in a formatted view if the values were preconfigured beforehand.
Key Naming Pattern Settings
Per semplificare l’aggiunta di stringhe da Adobe XD al progetto di Crowdin Imprese, puoi configurare lo schema di denominazione della chiave desiderato per gli identificativi delle stringhe di partenza nelle impostazioni del plugin. The Crowdin plugin for Adobe XD will suggest the string identifiers for new strings based on the selected pattern. While adding new source strings, you can always edit the suggested identifier to the preferred look.
To select the key naming pattern, follow these steps:
- Open the Crowdin plugin for Adobe XD.
- Open the plugin Settings.
- In the Key naming pattern section, select the preferred option from the drop-down menu.
Oltre agli schemi esistenti, puoi configurare il tuo. Per usare uno schema personalizzato, seleziona l’opzione Schema di denominazione della chiave personalizzata dall’elenco a tendina e specifica il tuo schema nel campo Schema di Denominazione della Chiave Personalizzata.
Caricamento di schermate etichettate su Crowdin Enterprise
Quando aggiungi stringhe di origine utilizzate nei disegni, assicurati di mantenere Invia schermate selezionato. As a result, the Crowdin plugin for Adobe XD will upload screenshots along with the source strings.
Inoltre, puoi aggiornare gli screenshot con un’opzione Aggiorna screenshot, modificando una stringa di Crowdin collegata ai campi di testo nei progetti.
Inoltre, puoi caricare in massa gli screenshot su Crowdin Imprese, per le stringhe collegate con i campi di testo nei progetti.
- Open the Crowdin plugin for Adobe XD.
- Select one or more artboards with the linked strings.
- In the Strings section, click
 to upload screenshots for selected artboards.
Per scoprire di più, leggi l’articolo sugli Screenshot.
Previewing Strings
Anteprima delle traduzioni da Crowdin Imprese per le stringhe usate nei design su Adobe XD. You can preview translations in the new artboards or the original ones. When previewing translations in the new artboards, you can populate them with the actual translations or with string keys for further use by developers.
To preview strings populated with translations, follow these steps:
- Open the Crowdin plugin for Adobe XD.
- In the Strings > Preview Strings section, select Preview in duplicated artboards or Preview in the current artboards.
- Select Create with language.
- Select the target language you want to preview translations for. You can also choose All languages.
- Choose the content you want to preview in Adobe XD. Select All Artboards or Selected Artboards.
To preview strings populated with key names, follow these steps:
- Open the Crowdin plugin for Adobe XD.
- In the Strings > Preview Strings section, select Preview in duplicated artboards.
- Select Create with key names.
- Choose the content you want to preview in Adobe XD. Select All Artboards or Selected Artboards.
Marketing Visuals Localization
Use the Translation section to localize static pages, like brochures and banners. In questa sezione puoi inviare testi con il contesto per i traduttori a Crowdin Imprese e ricaricare le copie tradotte ad Adobe XD.
Invio di testi per la traduzione a Crowdin Enterprise
You can send text for translation either from selected or all artboards from an Adobe XD file. Translators will work with those texts in the list view and use designs as an additional context for even higher translation quality.
In Crowdin Enterprise, sarà creata una cartella radice Adobe XD plugin. It will contain a subfolder named after your XD file with HTML files for each artboard inside. This folder can also contain a free-text.html file with texts not included in any of the artboards. If needed, you can disable content segmentation in the plugin Settings so long texts will not be split into sentences.
To send Adobe XD designs for translation, follow these steps:
- Open the necessary Adobe XD file.
- Go to Plugins > Crowdin for Adobe XD.
- In the Translation > Send texts to Crowdin section, select the content you’d like to translate. Select All Artboards or Selected Artboards.

Quando i file sorgente sono caricati al tuo progetto di Crowdin Imprese, puoi invitare collaboratori a tradurli e revisionarli.
Leggi di più sulle strategie di traduzione.
Pseudo-localizzazione
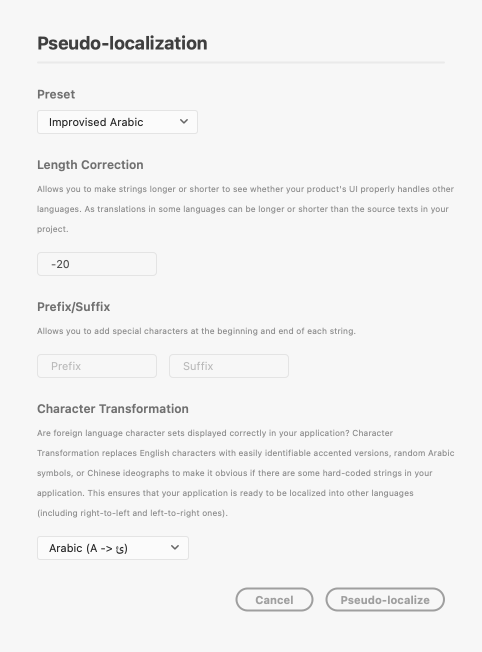
Anche prima del completamento delle traduzioni, puoi verificare se la tua applicazione è pronta a esser localizzata usando la pseudo-localizzazione. Questa funzionalità ti consente di stimolare come apparirà l’UI dell’applicazione con diverse lingue, per verificare se le stringhe sorgente dovrebbero esser modificate prima dell’inizio della localizzazione del progetto.
Una volta inviati i tuoi testi per la traduzione, puoi avviare la pseudo-localizzazione.
- Open the necessary Adobe XD file.
- Go to Plugins > Crowdin for Adobe XD.
- In the Pseudo-localization section, select the content you’d like to test with pseudo-localization. Select All Artboards or Selected Artboards.
- Nella finestra apparsa, configura le impostazioni secondo le tue preferenze.
- Clicca su Pseudo-localizza.
Leggi di più sulla Pseudo-localizzazione.
Caricamento traduzioni da Crowdin Enterprise a Adobe XD
Puoi sincronizzare i testi tra progetti Adobe XD e Crowdin Enterprise ogni volta che vuoi testare la copia tradotta all’interno di Adobe XD o generare risorse multilingue.
To upload translated copies to Adobe XD, follow these steps:
- Open the necessary Adobe XD file.
- Go to Plugins > Crowdin for Adobe XD.
- In the Translation > Get translations from Crowdin section, select the target language you want to upload translations for. You can also select All languages.
- Select the content you want to preview in Adobe XD. Select All Artboards or Selected Artboards.
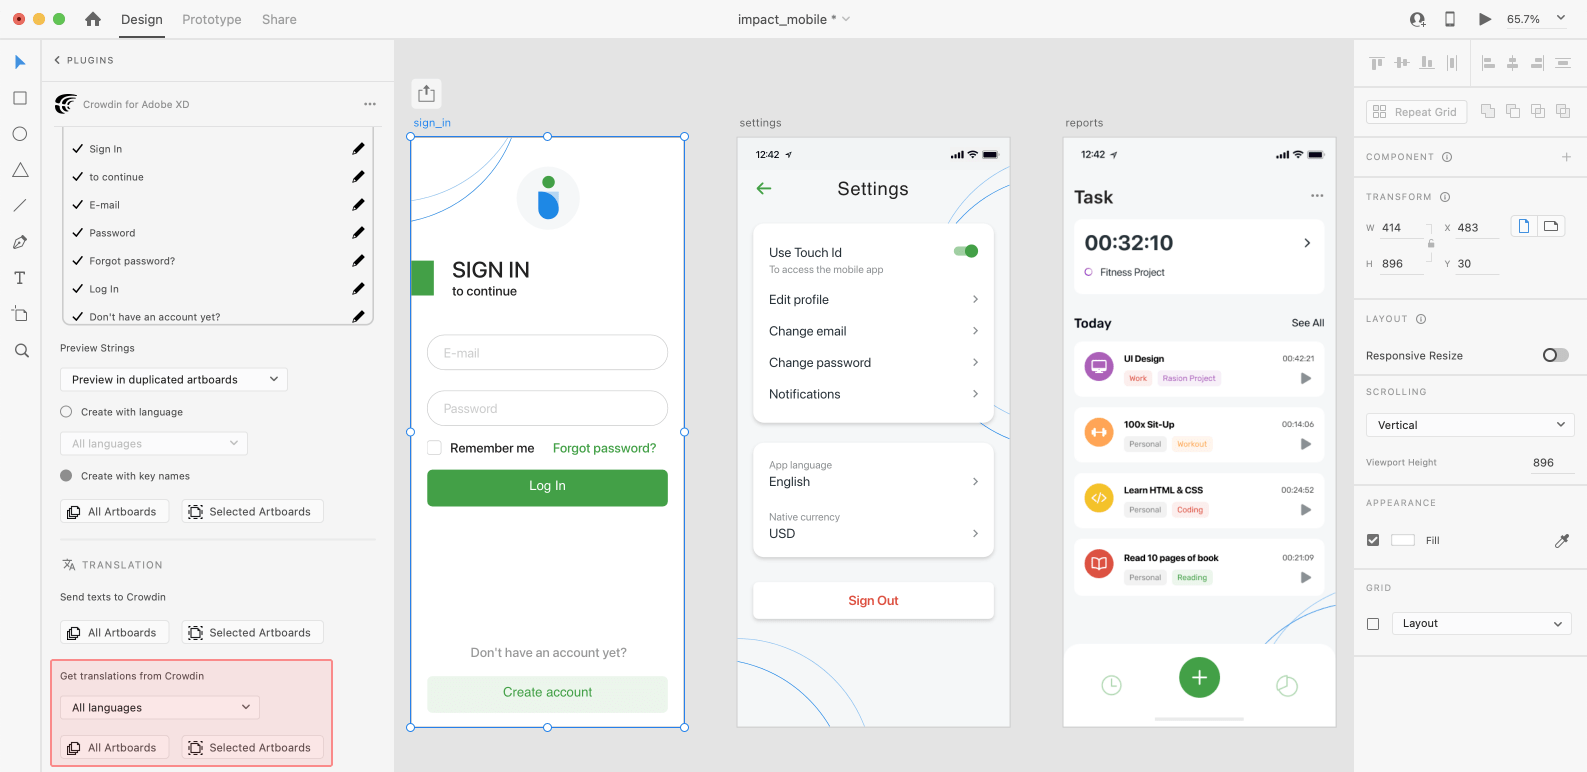
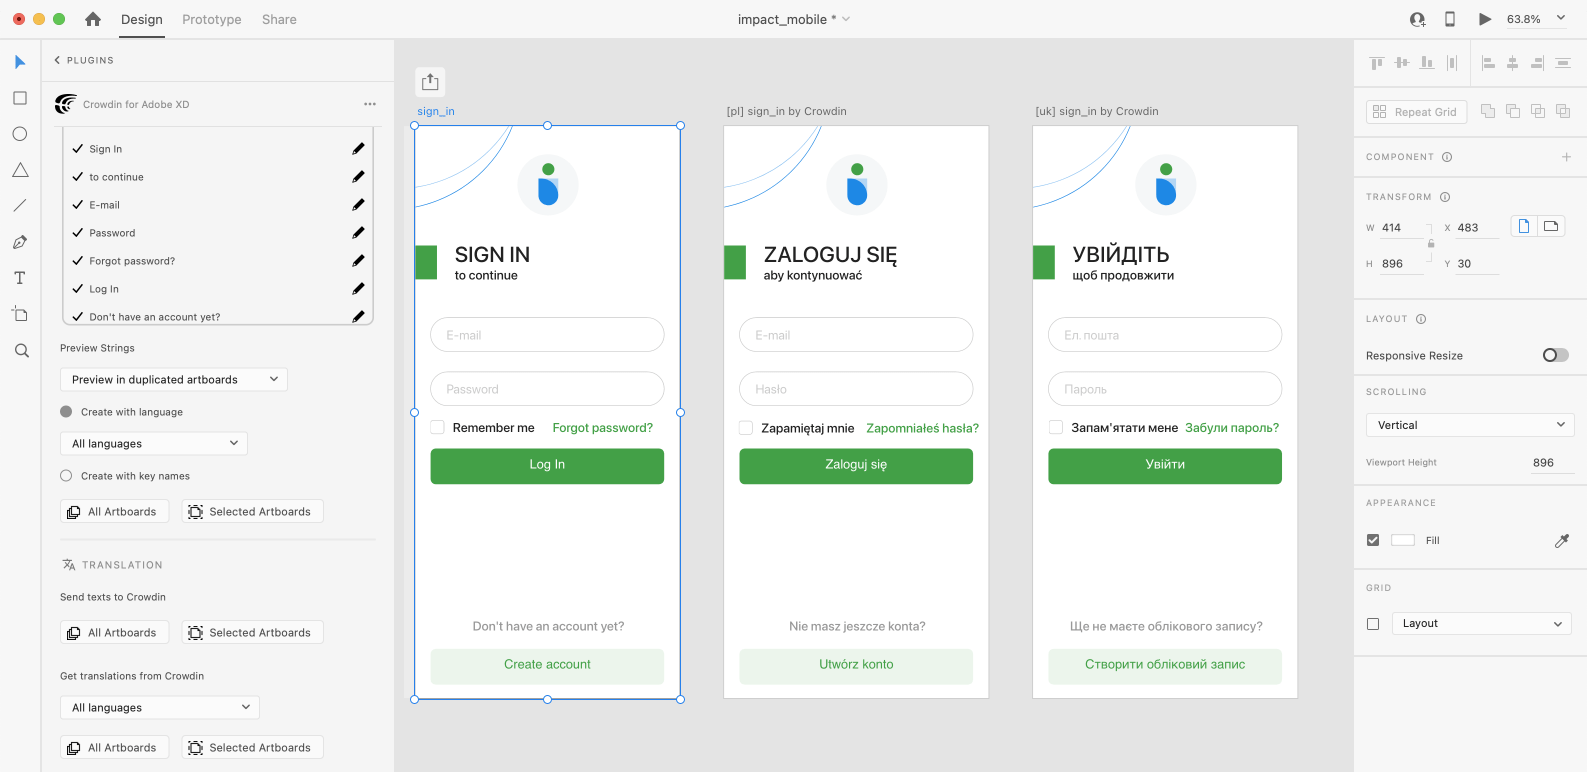
After uploading translations to Adobe XD, the modified file will contain a separate artboard with translations for each target language. The newly uploaded translated versions won’t override the ones you uploaded previously. You can always delete the translated copies you no longer need.
If you’d like the newly uploaded translated versions to override the previously uploaded ones, open the plugin Settings and select Override existing translations.