Crowdin Enterprise: Crowdin Enterprise documentation
# Notifications
> Get notified about the new events that happen in Crowdin
Crowdin Enterprise offers several types of notifications to meet the different needs of users, such as the following: * *Project Updates*: Notify users of changes to the project, such as new content to translate or updates to existing content. * *Translation Activity*: Notify users of new translations, approvals, or comments on translations. * *Task Management*: These notifications inform users about new tasks, deadlines and task completions. * *Team Communication*: These alerts notify users of messages and discussions within the project. To see the notifications, click on the bell icon in the top right corner of the page. [Notification Settings ](/enterprise/account-settings/#notifications) ## [Slack Integration](#slack-integration) [Section titled “Slack Integration”](#slack-integration) With updates sent directly to Slack, you’ll instantly know what’s happening in the Crowdin Enterprise projects you manage or contribute to. After integrating your Crowdin Enterprise account with Slack, select the notifications you’d like to receive, and the Crowdin bot will send them as direct messages. To receive Crowdin Enterprise notifications via Slack, follow these steps: 1. Open your **Account Settings** and select **Notifications** on the left sidebar. 2. Select **Slack**, then click **Connect**. 3. Authorize the connection with Crowdin on the Slack side. 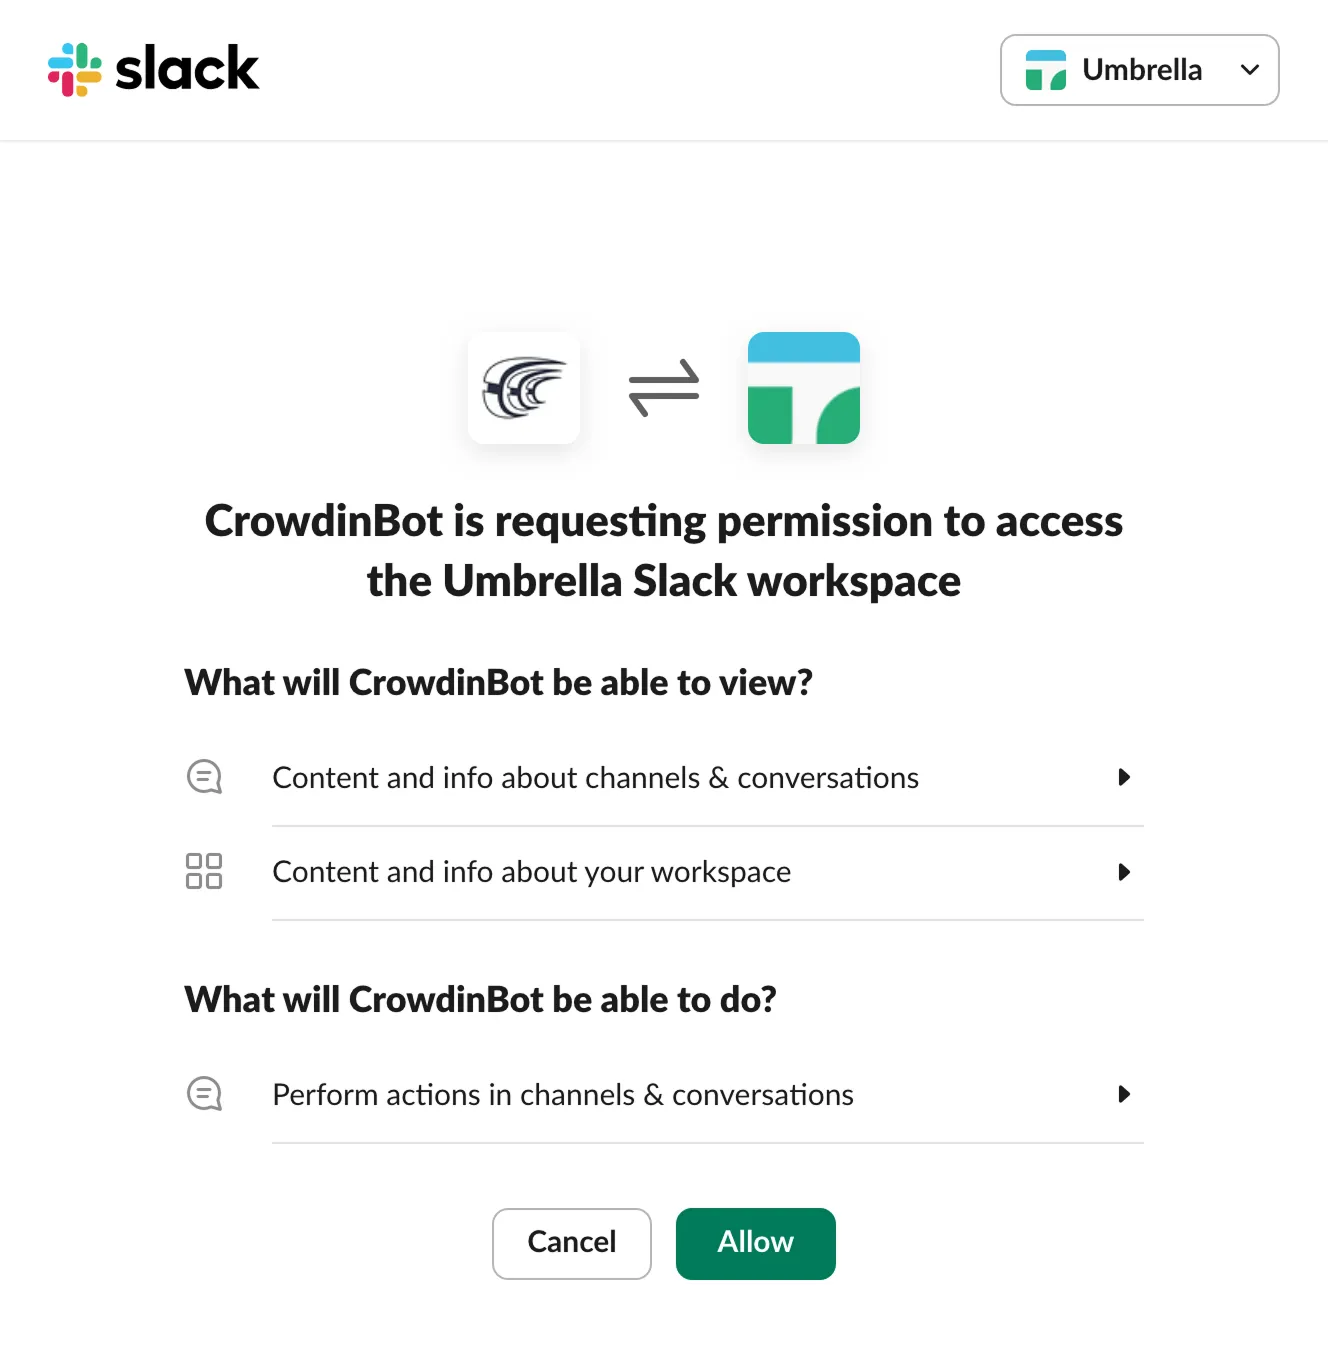 4. Go back to Crowdin and select the notifications you want to receive in Slack. Read More about [Global Notification Settings](/enterprise/account-settings/#notifications). You will receive the selected types of notifications as direct messages from the Crowdin bot. 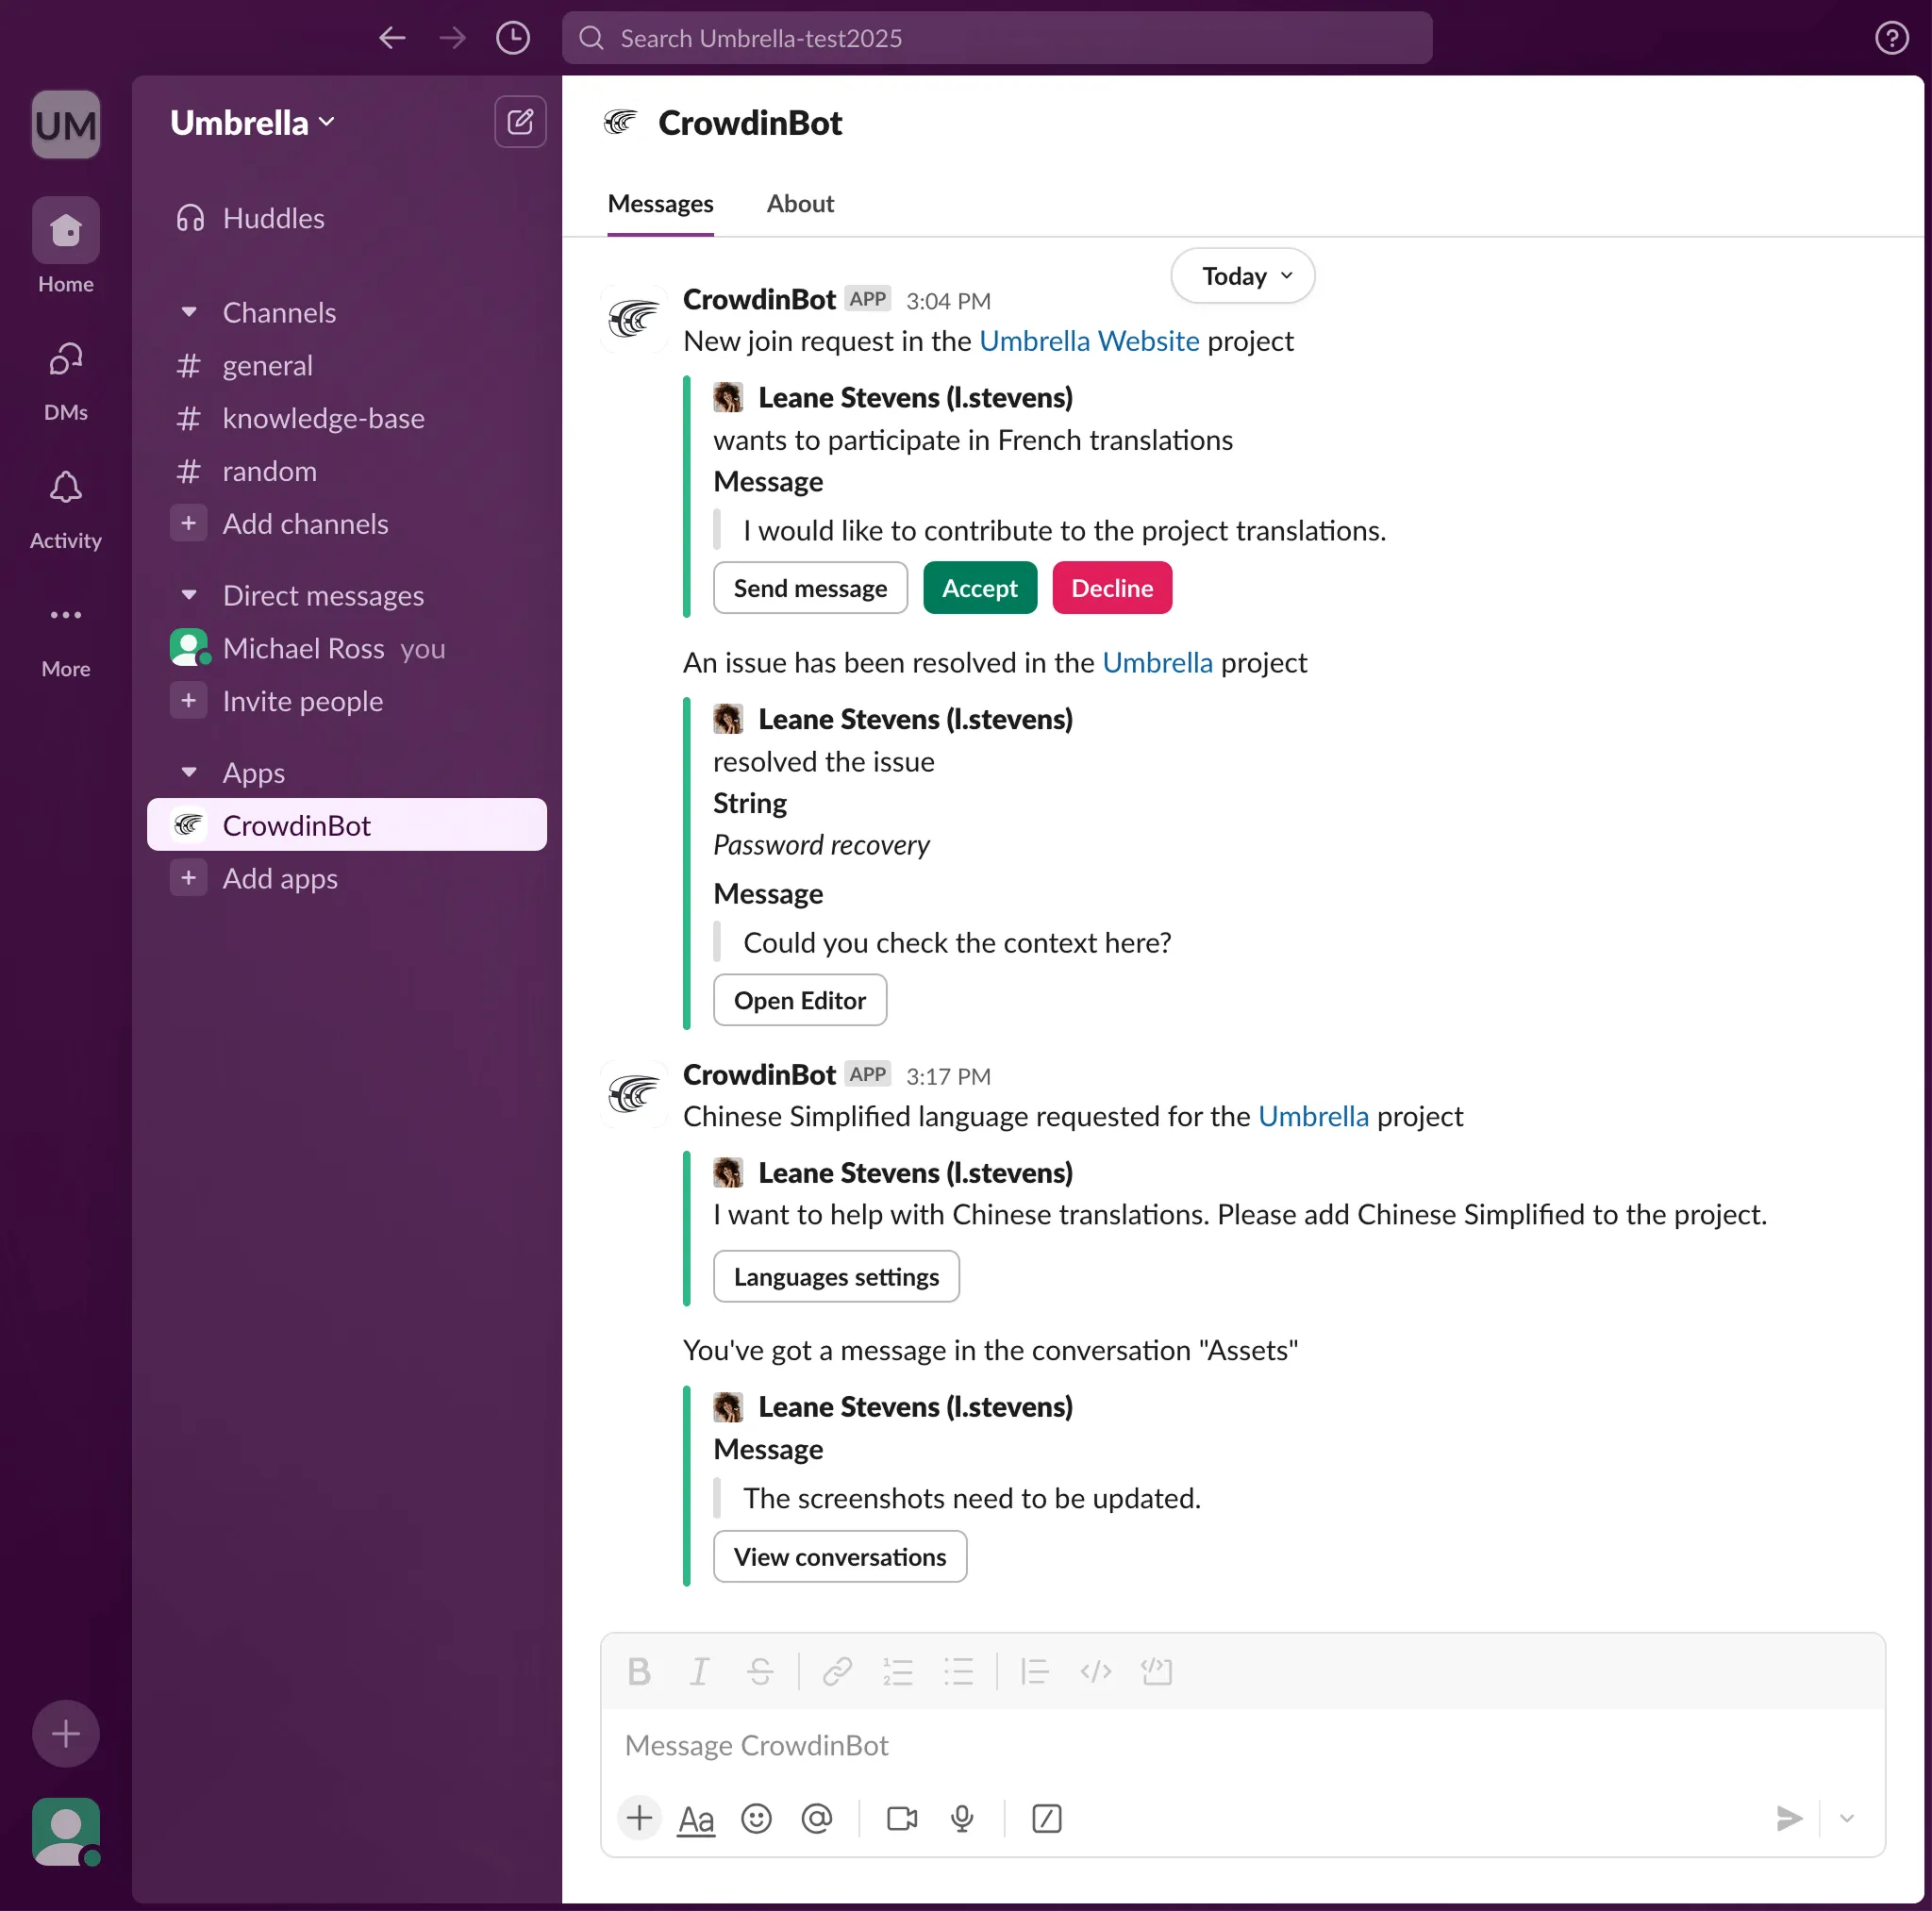 You can disable notifications and disconnect Slack from Crowdin Enterprise anytime. ## [Custom Notifications](#custom-notifications) [Section titled “Custom Notifications”](#custom-notifications) Custom Notifications notify and help you collect information about the new events that happen in Crowdin Enterprise. Once you configure custom notifications for your account, Crowdin Enterprise will start sending POST requests with data to the custom notification URL via HTTP. ### [Use Cases](#use-cases) [Section titled “Use Cases”](#use-cases) You can configure custom notifications to build integrations with the services or with your backend. For example: * Set up custom notifications to send notifications to the system you use. * Pass information to the third-party services with the specific request requirements (e.g., сontent type, headers, payload). * Create custom integrations with Crowdin Enterprise. ### [Configuring](#configuring) [Section titled “Configuring”](#configuring) To configure custom notifications in Crowdin Enterprise, follow these steps: 1. Open your **Account Settings** and select **Notifications** on the left sidebar. 2. Click **Custom notifications** to start configuring your custom notifications. You will need to provide the following information to set up custom notifications: * The URL where the callback should be sent. * The content type for the POST request method (`multipart/form-data`, `application/json`, or `application/x-www-form-urlencoded`). Optionally, you can add special headers to your custom notifications. They can be used for additional security, as an authorization method, and more. For example, if you add headers, your custom notification endpoint can verify them and ensure that information is coming from Crowdin Enterprise. When configuring custom notifications, click **Test notification** to see how your application will react to that call. Once finished with the configuration, click **Save**. 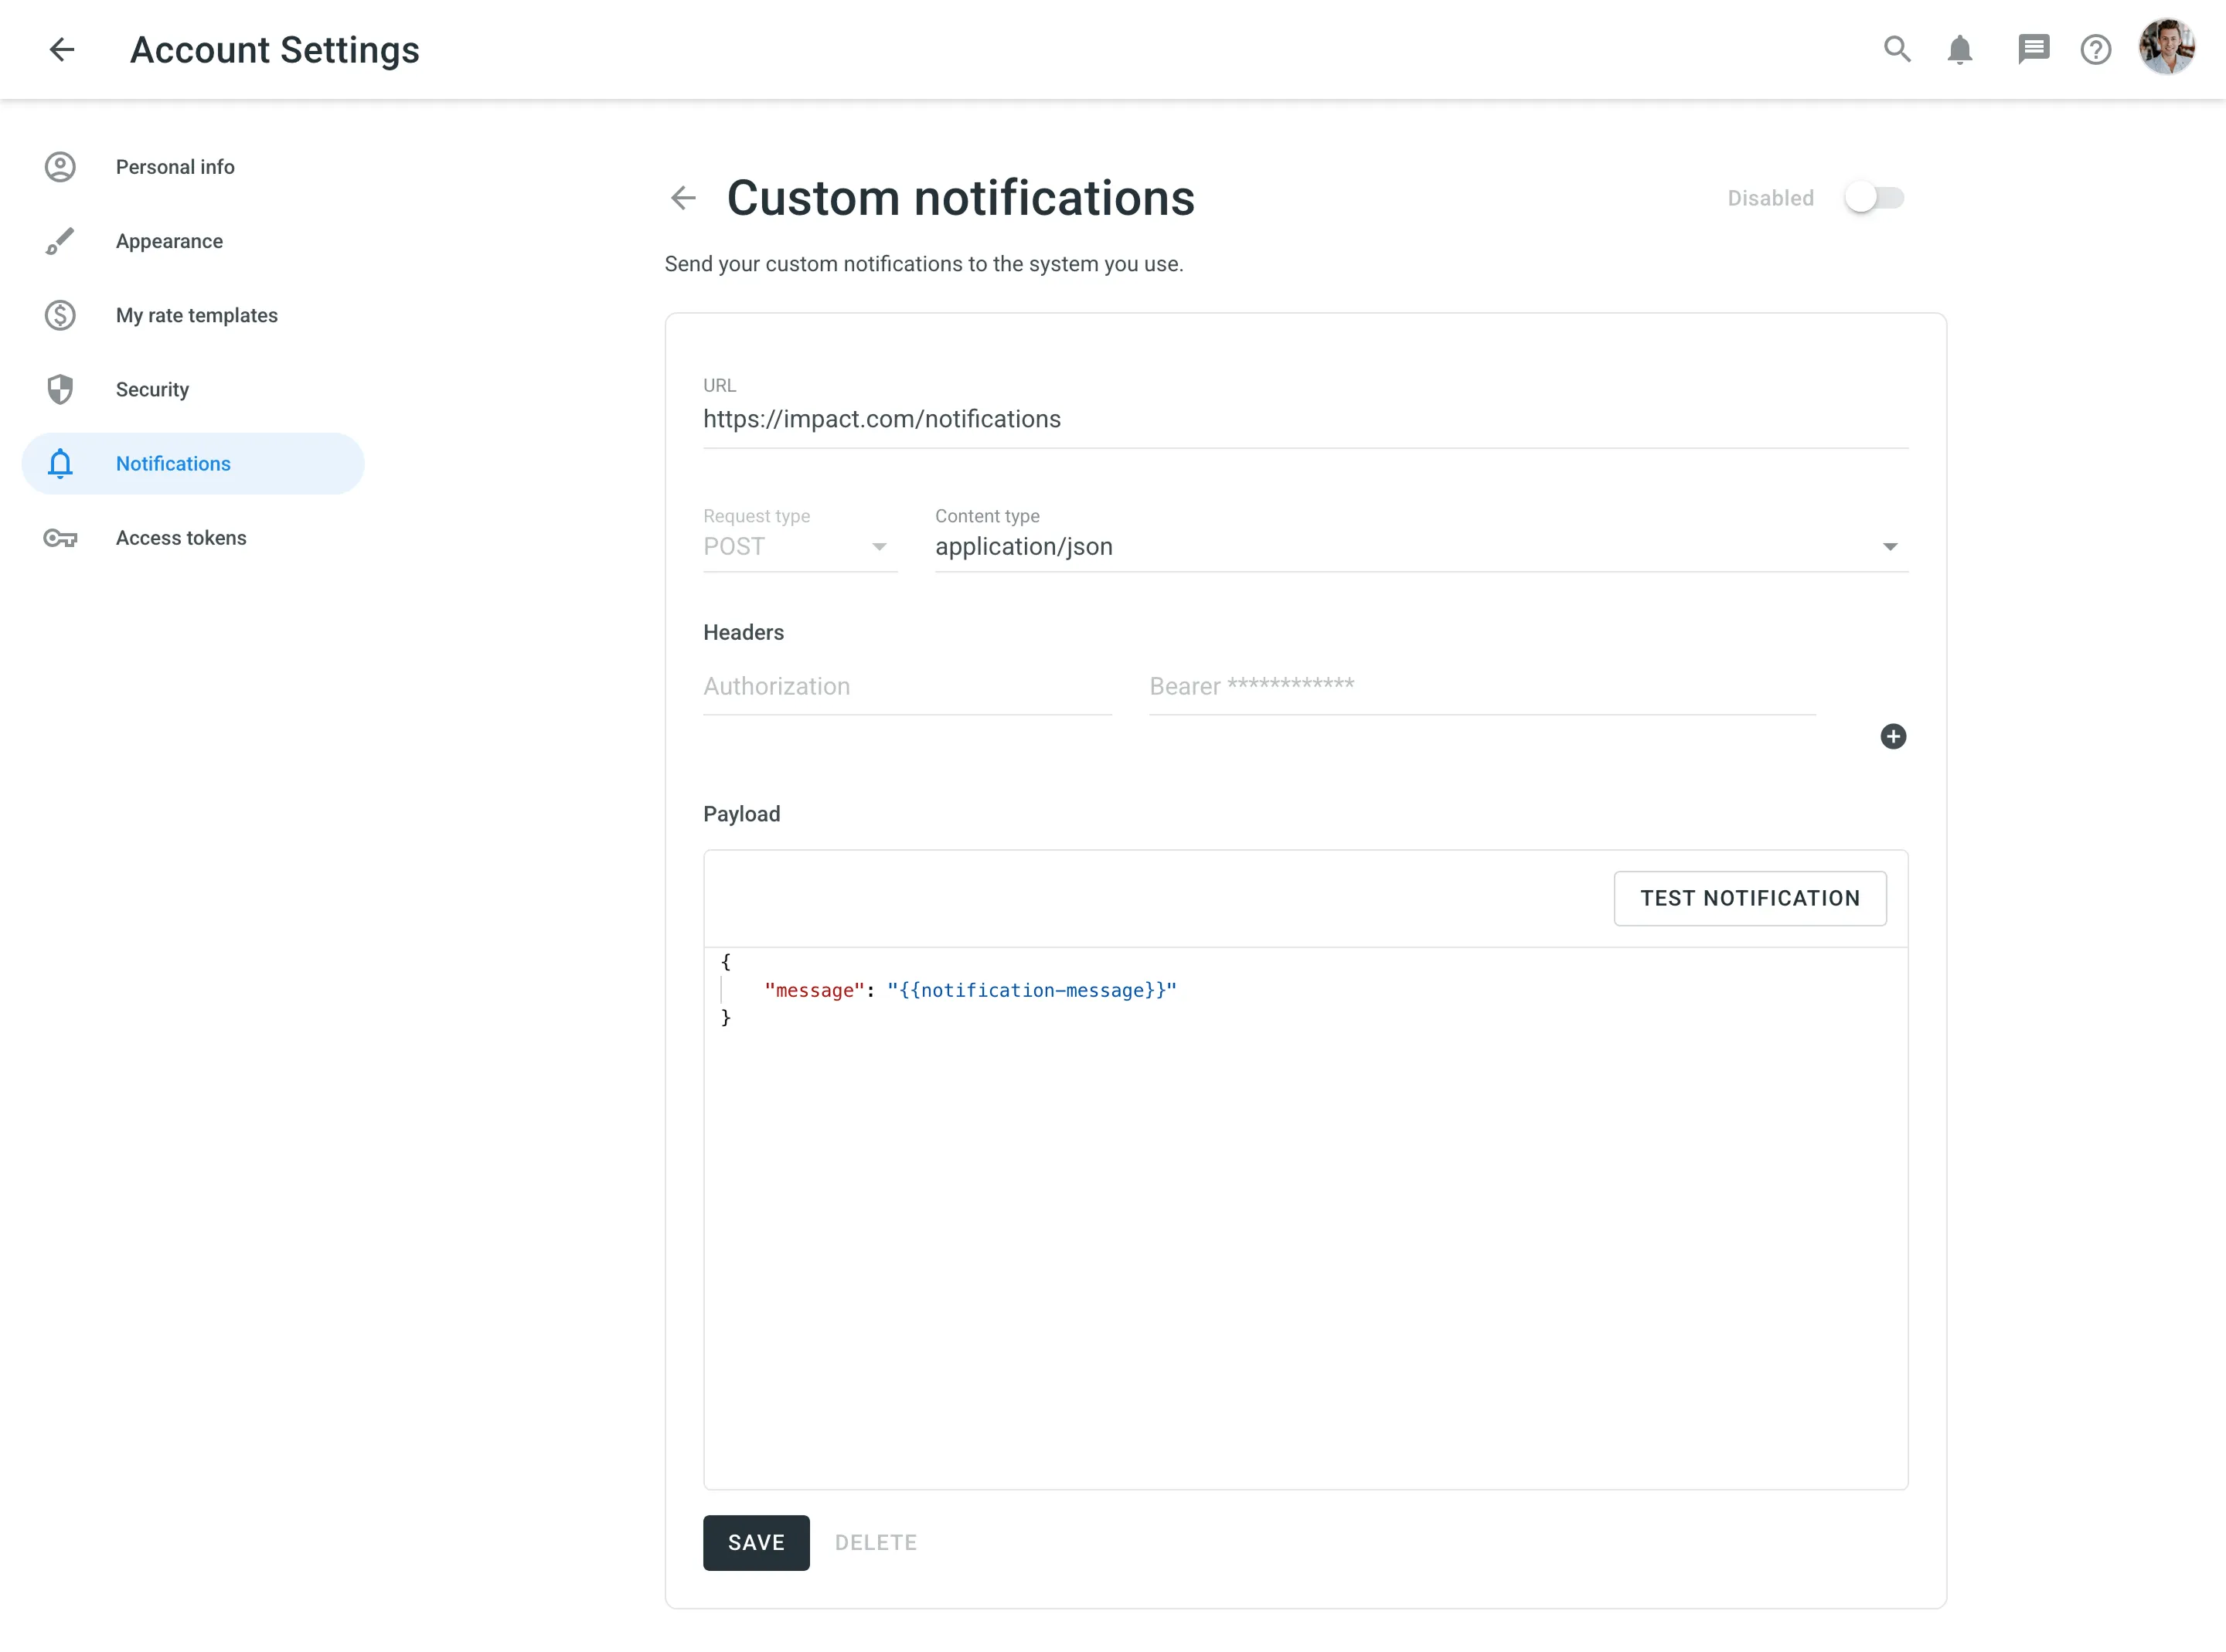 Depending on your approach to custom notifications management, you might need to add dedicated Crowdin Enterprise IP addresses to your firewall to allow Crowdin Enterprise to open the pre-configured custom notification URLs. Read more about [IP Addresses](/developer/ip-addresses/). ### [Custom Payloads](#custom-payloads) [Section titled “Custom Payloads”](#custom-payloads) You can modify the custom notification payload to add and organize the elements the way your system requires. To get informative and user-friendly notifications, make sure to include the `{{notification-message}}` placeholder in your payload. 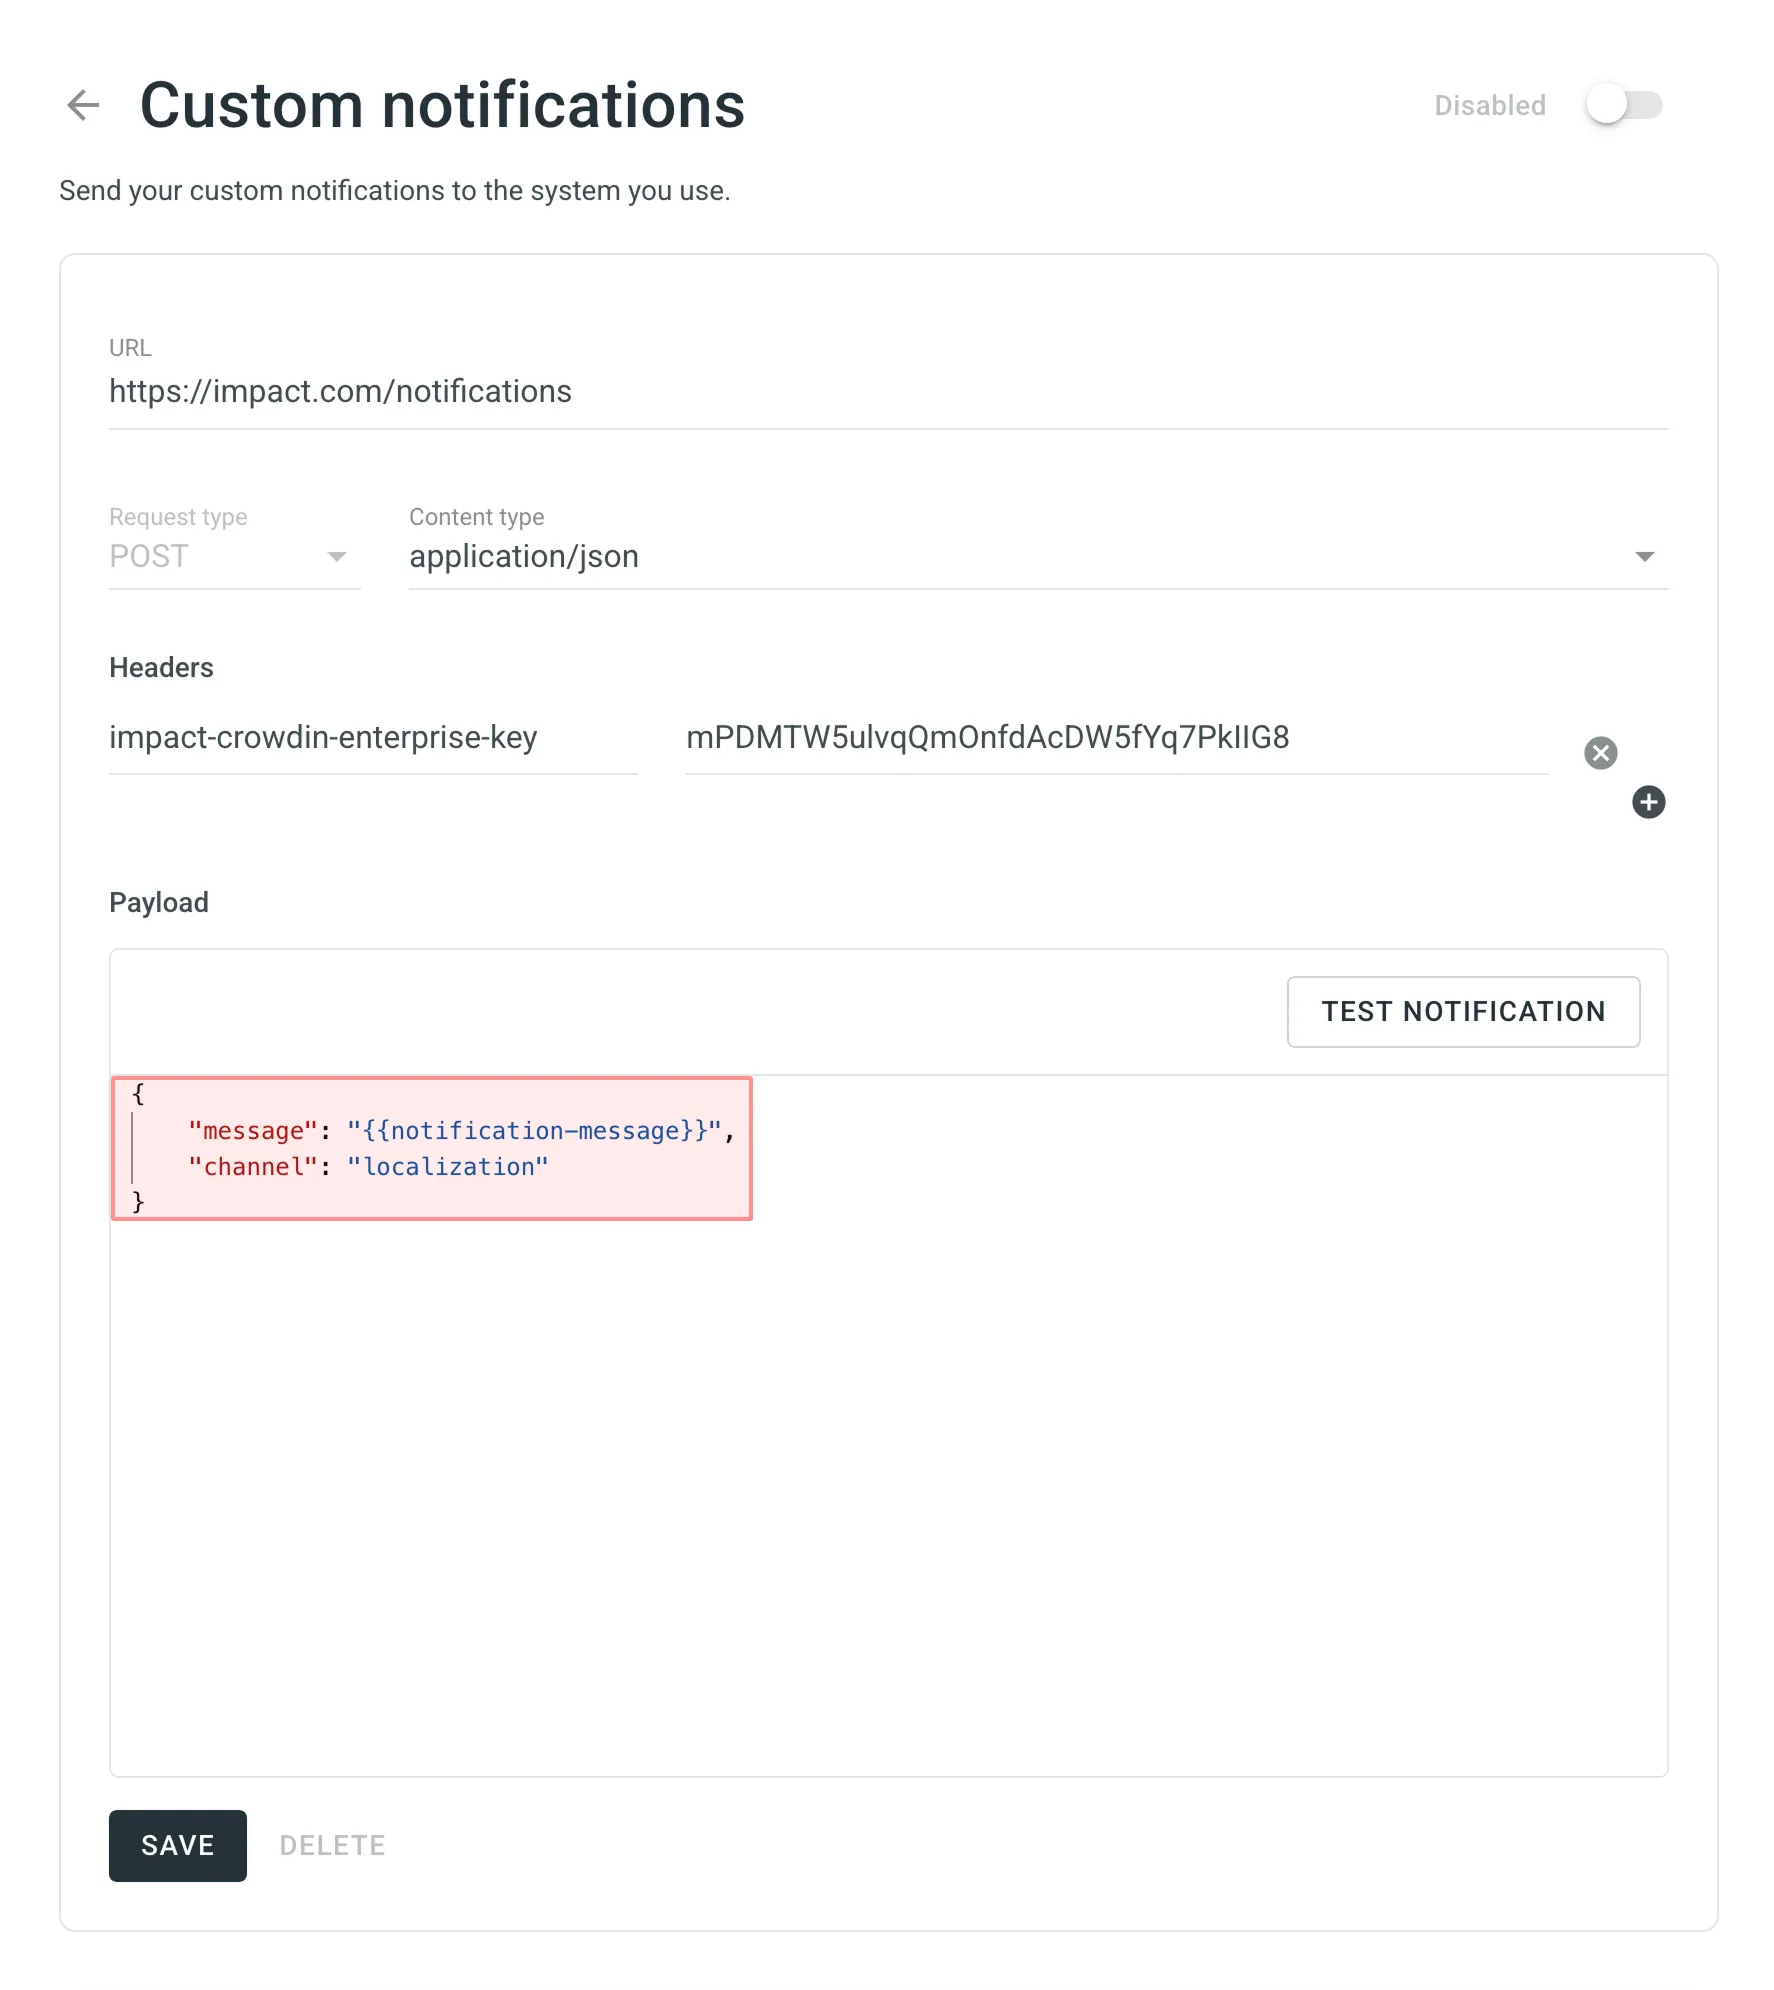 ### [Event Types](#event-types) [Section titled “Event Types”](#event-types) Once you configured custom notifications, you can select the event types you’d like to receive the notifications about: You can configure custom notifications for the following event types: | Event type | Description | | ---------------------- | --------------------------------------------------------------------------- | | Users & Roles | Join requests, project invitations, project role updates. | | Collaboration | Updates on collaboration between translation vendors and clients. | | Integrations | Updates on integrations you set up. | | New Strings | New strings added. | | Language Progress | Translation or proofreading for a particular language is completed. | | API-Integrated Vendors | Updates on collaboration with API-Integrated translation vendors. | | Content Issues | All issue types created or resolved in the Editor. | | Mentions | Updates on you being mentioned in the Editor. | | Tasks | Created, deleted, and updated tasks, status changes, mentions and comments. | | Messages | Private messages within Crowdin. | | API Notifications | Notifications sent by apps, API integrations, and users via API. | ### [Manage Custom Notifications](#manage-custom-notifications) [Section titled “Manage Custom Notifications”](#manage-custom-notifications) You can edit or delete custom notifications in the **Custom notifications** section of the **Notifications** page. ### [Configuring for Discord](#discord) [Section titled “Configuring for Discord”](#discord) To set up Custom Notifications from Crowdin Enterprise in Discord, follow the steps below. #### [Creating Discord Account](#creating-discord-account) [Section titled “Creating Discord Account”](#creating-discord-account) If you don’t have a Discord account already, you will need to [create one](https://discord.com/register). Download and install the [Discord desktop app](https://discord.com/download). Alternatively, you may use the Discord web interface for further configurations. #### [Creating Discord Webhook](#creating-discord-webhook) [Section titled “Creating Discord Webhook”](#creating-discord-webhook) To receive notifications in Discord, you need to create a webhook. Once finished, copy the webhook URL. You’ll need it for configurations on the Crowdin Enterprise side. Read more about [creating a Discord webhook](https://support.discord.com/hc/en-us/articles/228383668-Intro-to-Webhooks). #### [Configuring Custom Notifications Channel](#custom-channel-discord) [Section titled “Configuring Custom Notifications Channel”](#custom-channel-discord) 1. Go to **Account Settings > Notifications**. 2. Click **Custom notifications**. 3. In the appeared dialog, paste the Discord webhook URL in the **URL** field. 4. Select **application/json** for the **Content type**. 5. Paste the following payload in the **Payload** field: ```json { "content": "{{notification-message}}" } ``` 6. Click **Test notification** to receive a test message from Crowdin Enterprise to your Discord channel. 7. Once finished with the configuration, click **Save**. ### [Configuring for Google Chat](#google-chat) [Section titled “Configuring for Google Chat”](#google-chat) To set up Custom Notifications from Crowdin Enterprise in Google Chat, follow the steps below. #### [Creating Google Account](#creating-google-account) [Section titled “Creating Google Account”](#creating-google-account) If you already have a Google account, it gives you access to many Google products, including Google Chat. If you don’t have a Google account, you will need to [create one](https://accounts.google.com/signup). Download and install the [Google Chat desktop app](https://chat.google.com/download/). Alternatively, you may use the Google Chat web interface for further configurations. #### [Creating Google Chat Webhook](#creating-google-chat-webhook) [Section titled “Creating Google Chat Webhook”](#creating-google-chat-webhook) To receive notifications in Google Chat, you need to create a webhook. Once finished, copy the webhook URL. You’ll need it for configurations on the Crowdin Enterprise side. Read more about [creating a Google Chat webhook](https://developers.google.com/chat/how-tos/webhooks#step_1_register_the_incoming_webhook). #### [Configuring Custom Notifications Channel](#custom-channel-google-chat) [Section titled “Configuring Custom Notifications Channel”](#custom-channel-google-chat) 1. Go to **Account Settings > Notifications**. 2. Click **Custom notifications**. 3. In the appeared dialog, paste the Google Chat webhook URL in the **URL** field. 4. Select **application/json** for the **Content type**. 5. Paste the following payload in the **Payload** field: ```json { "text": "{{notification-message}}" } ``` 6. Click **Test notification** to receive a test message from Crowdin Enterprise to your Google Chat channel. 7. Once finished with the configuration, click **Save**. ### [Configuring for Microsoft Teams](#microsoft-teams) [Section titled “Configuring for Microsoft Teams”](#microsoft-teams) To set up Custom Notifications from Crowdin Enterprise in Microsoft Teams, follow the steps below. #### [Creating Microsoft Teams Account](#creating-microsoft-teams-account) [Section titled “Creating Microsoft Teams Account”](#creating-microsoft-teams-account) If you don’t have a Microsoft Teams account already, you will need to [create one](https://go.microsoft.com/fwlink/p/?linkid=2123761\&lm=deeplink\&lmsrc=NeutralHomePageWeb\&cmpid=FreemiumSignUpHero). Download and install the [Microsoft Teams desktop app](https://www.microsoft.com/en-us/microsoft-teams/download-app). Alternatively, you may use the Microsoft Teams web interface for further configurations. #### [Creating Microsoft Teams Webhook](#creating-microsoft-teams-webhook) [Section titled “Creating Microsoft Teams Webhook”](#creating-microsoft-teams-webhook) To receive notifications in Microsoft Teams, you need to create a webhook. Once finished, copy the webhook URL. You’ll need it for configurations on the Crowdin Enterprise side. Read more about [creating a Microsoft Teams webhook](https://docs.microsoft.com/en-us/microsoftteams/platform/webhooks-and-connectors/how-to/add-incoming-webhook). #### [Configuring Custom Notifications Channel](#custom-channel-microsoft-teams) [Section titled “Configuring Custom Notifications Channel”](#custom-channel-microsoft-teams) 1. Go to **Account Settings > Notifications**. 2. Click **Custom notifications**. 3. In the appeared dialog, paste the Microsoft Teams webhook URL in the **URL** field. 4. Select **application/json** for the **Content type**. 5. Paste the following payload in the **Payload** field: ```json { "text": "{{notification-message}}" } ``` 6. Click **Test notification** to receive a test message from Crowdin Enterprise to your Microsoft Teams channel. 7. Once finished with the configuration, click **Save**. #### [Per-project notifications with the Microsoft Teams App](#per-project-notifications-with-the-microsoft-teams-app) [Section titled “Per-project notifications with the Microsoft Teams App”](#per-project-notifications-with-the-microsoft-teams-app) Custom notifications allow you to receive your account-specific notifications from Crowdin Enterprise. If you’d like to receive notifications related to some specific project you manage in Crowdin Enterprise, feel free to use our [Microsoft Teams app](https://store.crowdin.com/teams). ### [Configuring for Telegram](#telegram) [Section titled “Configuring for Telegram”](#telegram) To set up Custom Notifications from Crowdin Enterprise in Telegram, follow the steps below. #### [Creating Telegram Account](#creating-telegram-account) [Section titled “Creating Telegram Account”](#creating-telegram-account) If you don’t have a Telegram account already, you will need to connect with a phone. Telegram uses your phone number as a primary credential which you’ll use to log into your account. So firstly, download and install the Telegram app using [Android](https://telegram.org/dl/android) or [iOS](https://telegram.org/dl/ios). Once signed up, you may use the [Telegram web interface](https://telegram.org/dl/webogram) with a PC or Mac to simplify further configurations, but this part is up to you. #### [Creating Telegram Bot](#creating-telegram-bot) [Section titled “Creating Telegram Bot”](#creating-telegram-bot) To receive notifications in Telegram, you need to create a bot. Once finished, you will be provided with a bot’s API token. Make sure to save it; you’ll need it later. Read more about [creating a Telegram bot](https://core.telegram.org/bots#creating-a-new-bot). #### [Configuring Telegram Channel](#configuring-telegram-channel) [Section titled “Configuring Telegram Channel”](#configuring-telegram-channel) The next step is to create a public Telegram channel which will be used to get notifications from Crowdin Enterprise. Later you’ll be able to change the channel’s privacy if needed. To create a Telegram channel, follow these steps: 1. Open Telegram on your device. 2. Click on the pen icon and select **New Channel**. 3. Name your channel in the **Channel name** field. 4. *(Optional)* Specify a channel description. 5. *(Optional)* Click on the camera icon to set a display picture for your channel. 6. Click **Next** in the top-right corner. 7. Select **Public** channel type. 8. Specify a permanent link for your channel. This link is what people would use to search and join your channel. 9. Click **Next** in the top-right corner. 10. *(Optional)* In this step, Telegram will ask you to add subscribers to your Telegram channel. Select contacts you’d like to add, including your new bot (provide your bot with Admin permissions). You can choose not to add any members for now since you’ll be able to do it later. 11. Click **Next** in the top-right corner to continue and create your channel on Telegram. #### [Configuring Custom Notifications Channel](#custom-channel-telegram) [Section titled “Configuring Custom Notifications Channel”](#custom-channel-telegram) 1. Go to **Account Settings > Notifications**. 2. Click **Custom notifications**. 3. In the appeared dialog, specify the **URL** in the following format: `https://api.telegram.org/bot{bot_API_token}/sendMessage`. 4. Select **application/json** for the **Content type**. 5. Paste the following payload in the **Payload** field: ```json { "chat_id": "{public_chat_id}", "text": "{{notification-message}}" } ``` where `{public_chat_id}` – Your public chat id you specified for your channel link during the Telegram channel configuration. 6. Click **Test notification** to receive a test message from Crowdin Enterprise to your Telegram channel. 7. Once finished with the configuration, click **Save**. #### [Changing Telegram Channel Type](#changing-telegram-channel-type) [Section titled “Changing Telegram Channel Type”](#changing-telegram-channel-type) If you’d like to make your Telegram channel private and keep receiving notifications from Crowdin Enterprise, follow these steps: 1. First of all you need to acquire your Telegram channel’s original chat id by visiting: `https://api.telegram.org/bot{bot_API_token}/sendMessage?chat_id={public_chat_id}&text=Test` 2. You’ll get a response in a JSON format that will contain your Telegram channel’s original chat id. 3. In Crowdin Enterprise, open your **Account Settings** and select **Notifications** on the left sidebar. 4. Click **Custom notifications**. 5. In the appeared dialog, modify the **URL** by replacing the chat id with the one received in the JSON response above. 6. Click **Save**. 7. In Telegram, open your channel. 8. Click on your channel name and click **Edit**. 9. Click **Channel Type**. 10. Select **Private** and click **Done**.
# Account Settings
> View and manage settings for your Crowdin Enterprise account
Manage your Crowdin Enterprise account settings, including profile details, notification preferences, security settings, and more using the **Account Settings** page. To access it, click on your profile picture in the upper-right corner and select **Account Settings**. ## [Personal Info](#personal-info) [Section titled “Personal Info”](#personal-info) On the **Personal Info** page, you can update your personal information and account preferences to help colleagues recognize and connect with you. The available settings include: * **Photo** – Upload or remove a profile picture that helps others recognize you. * **First Name & Last Name** – Displayed to teammates across the platform. * **Pronouns** – Choose your preferred pronouns or select *Prefer not to say*. * **Timezone & Format** – Set your local time zone and choose between 12-hour or 24-hour display. * **Platform Language** – Select the language for the Crowdin Enterprise interface. New languages are added regularly. * **Username** – This is your unique visible ID in your Crowdin Enterprise organization. * **Email** – Used for login, password resets, and notifications. You can also link an additional login method. 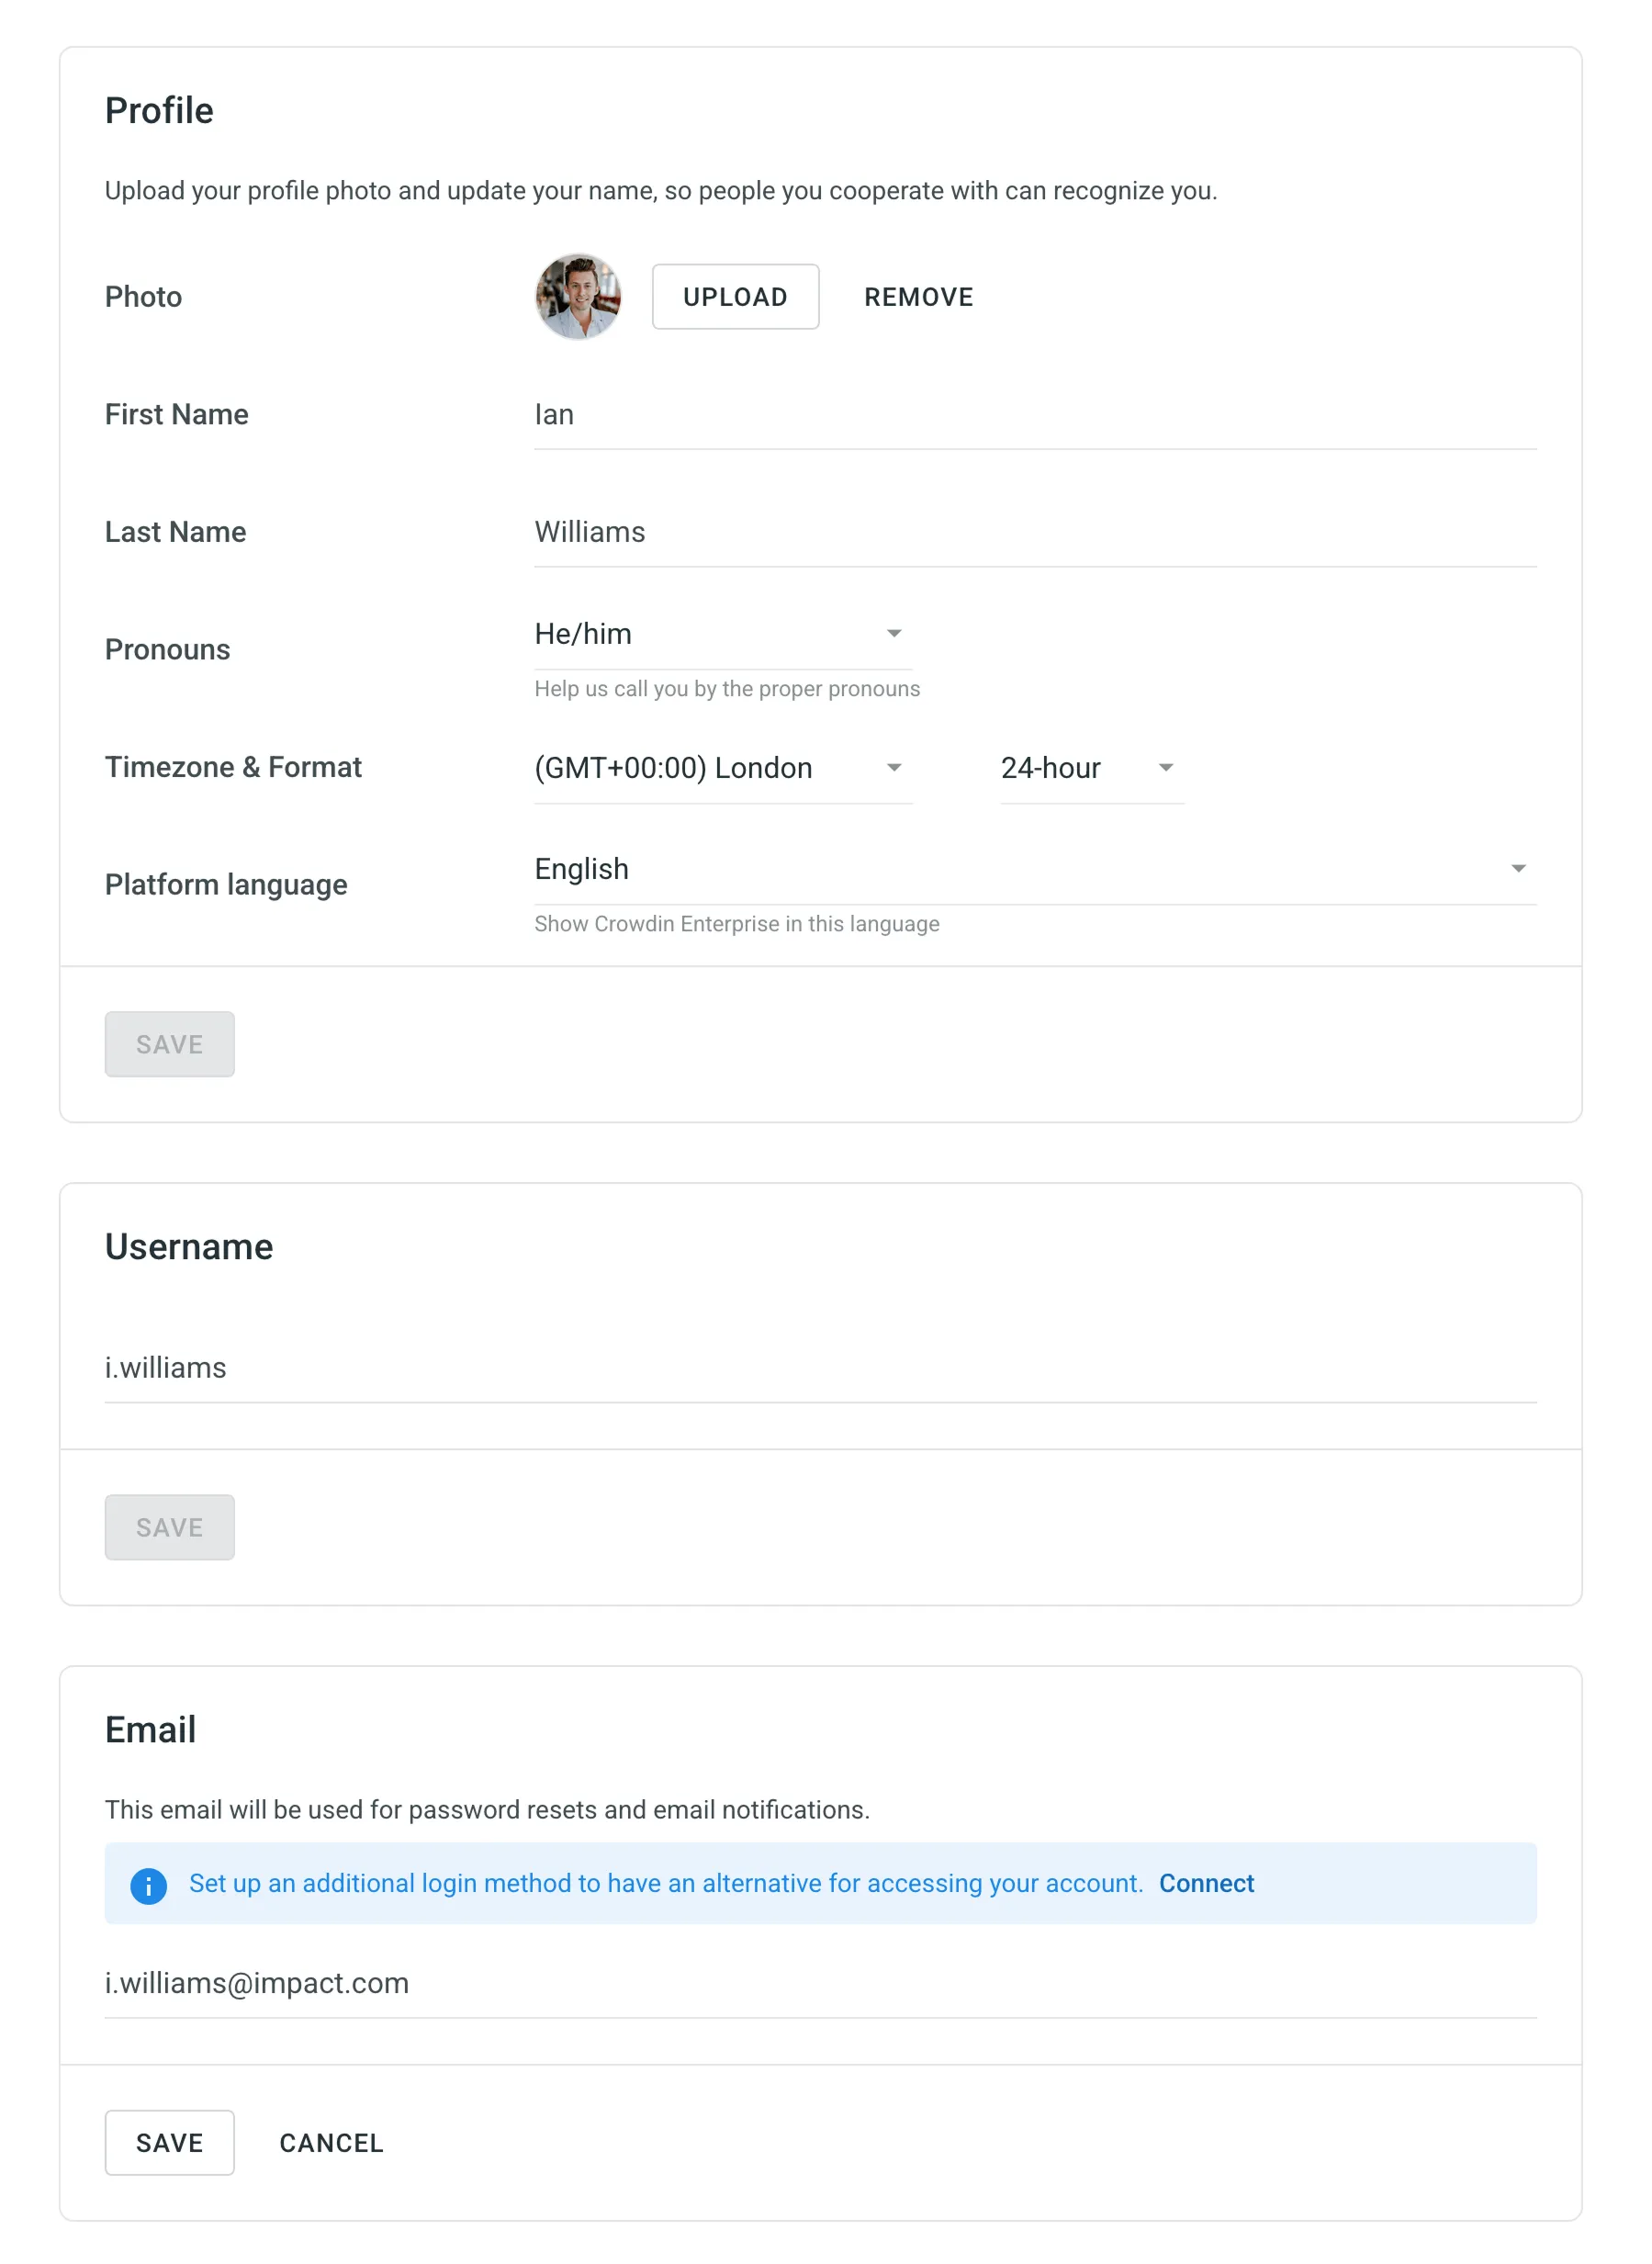 ## [Appearance](#appearance) [Section titled “Appearance”](#appearance) Choose how Crowdin Enterprise appears on your device. You can select a Light or Dark theme or sync it with your system settings to switch automatically between day and night modes.  ## [My Rate Templates](#my-rate-templates) [Section titled “My Rate Templates”](#my-rate-templates) On the **My rate templates** page, you can create and manage personal templates for report settings. These templates are visible only in your profile and can be used when generating **Cost Estimate** and **Translation Cost** reports. Each template can include: * **Base rates** – Set rates for full translation and proofreading. Applied to all languages by default. * **Net Rate Schemes** – Set percentage rates for TM, MT, AI, and other match types, based on the full translation rate. * **Custom rates** – Add language-specific (and in some cases, user-specific) rate configurations. * **Additional options** – Include or exclude pre-translated strings, adjust how repetitive translations are categorized, and calculate internal fuzzy matches. Saved templates help standardize your rate setup and make it easy to reuse configurations across reports. To use a saved template, click **Templates** when configuring your report and select the one you’d like to apply. To create a new rate template, follow these steps: 1. Go to **Account Settings > My rate templates**. 2. Click **Add Rates Template**. 3. Enter a template name and define your base rates and net rate schemes. 4. *(Optional)* Add custom rates for specific languages. 5. Click **Save**. 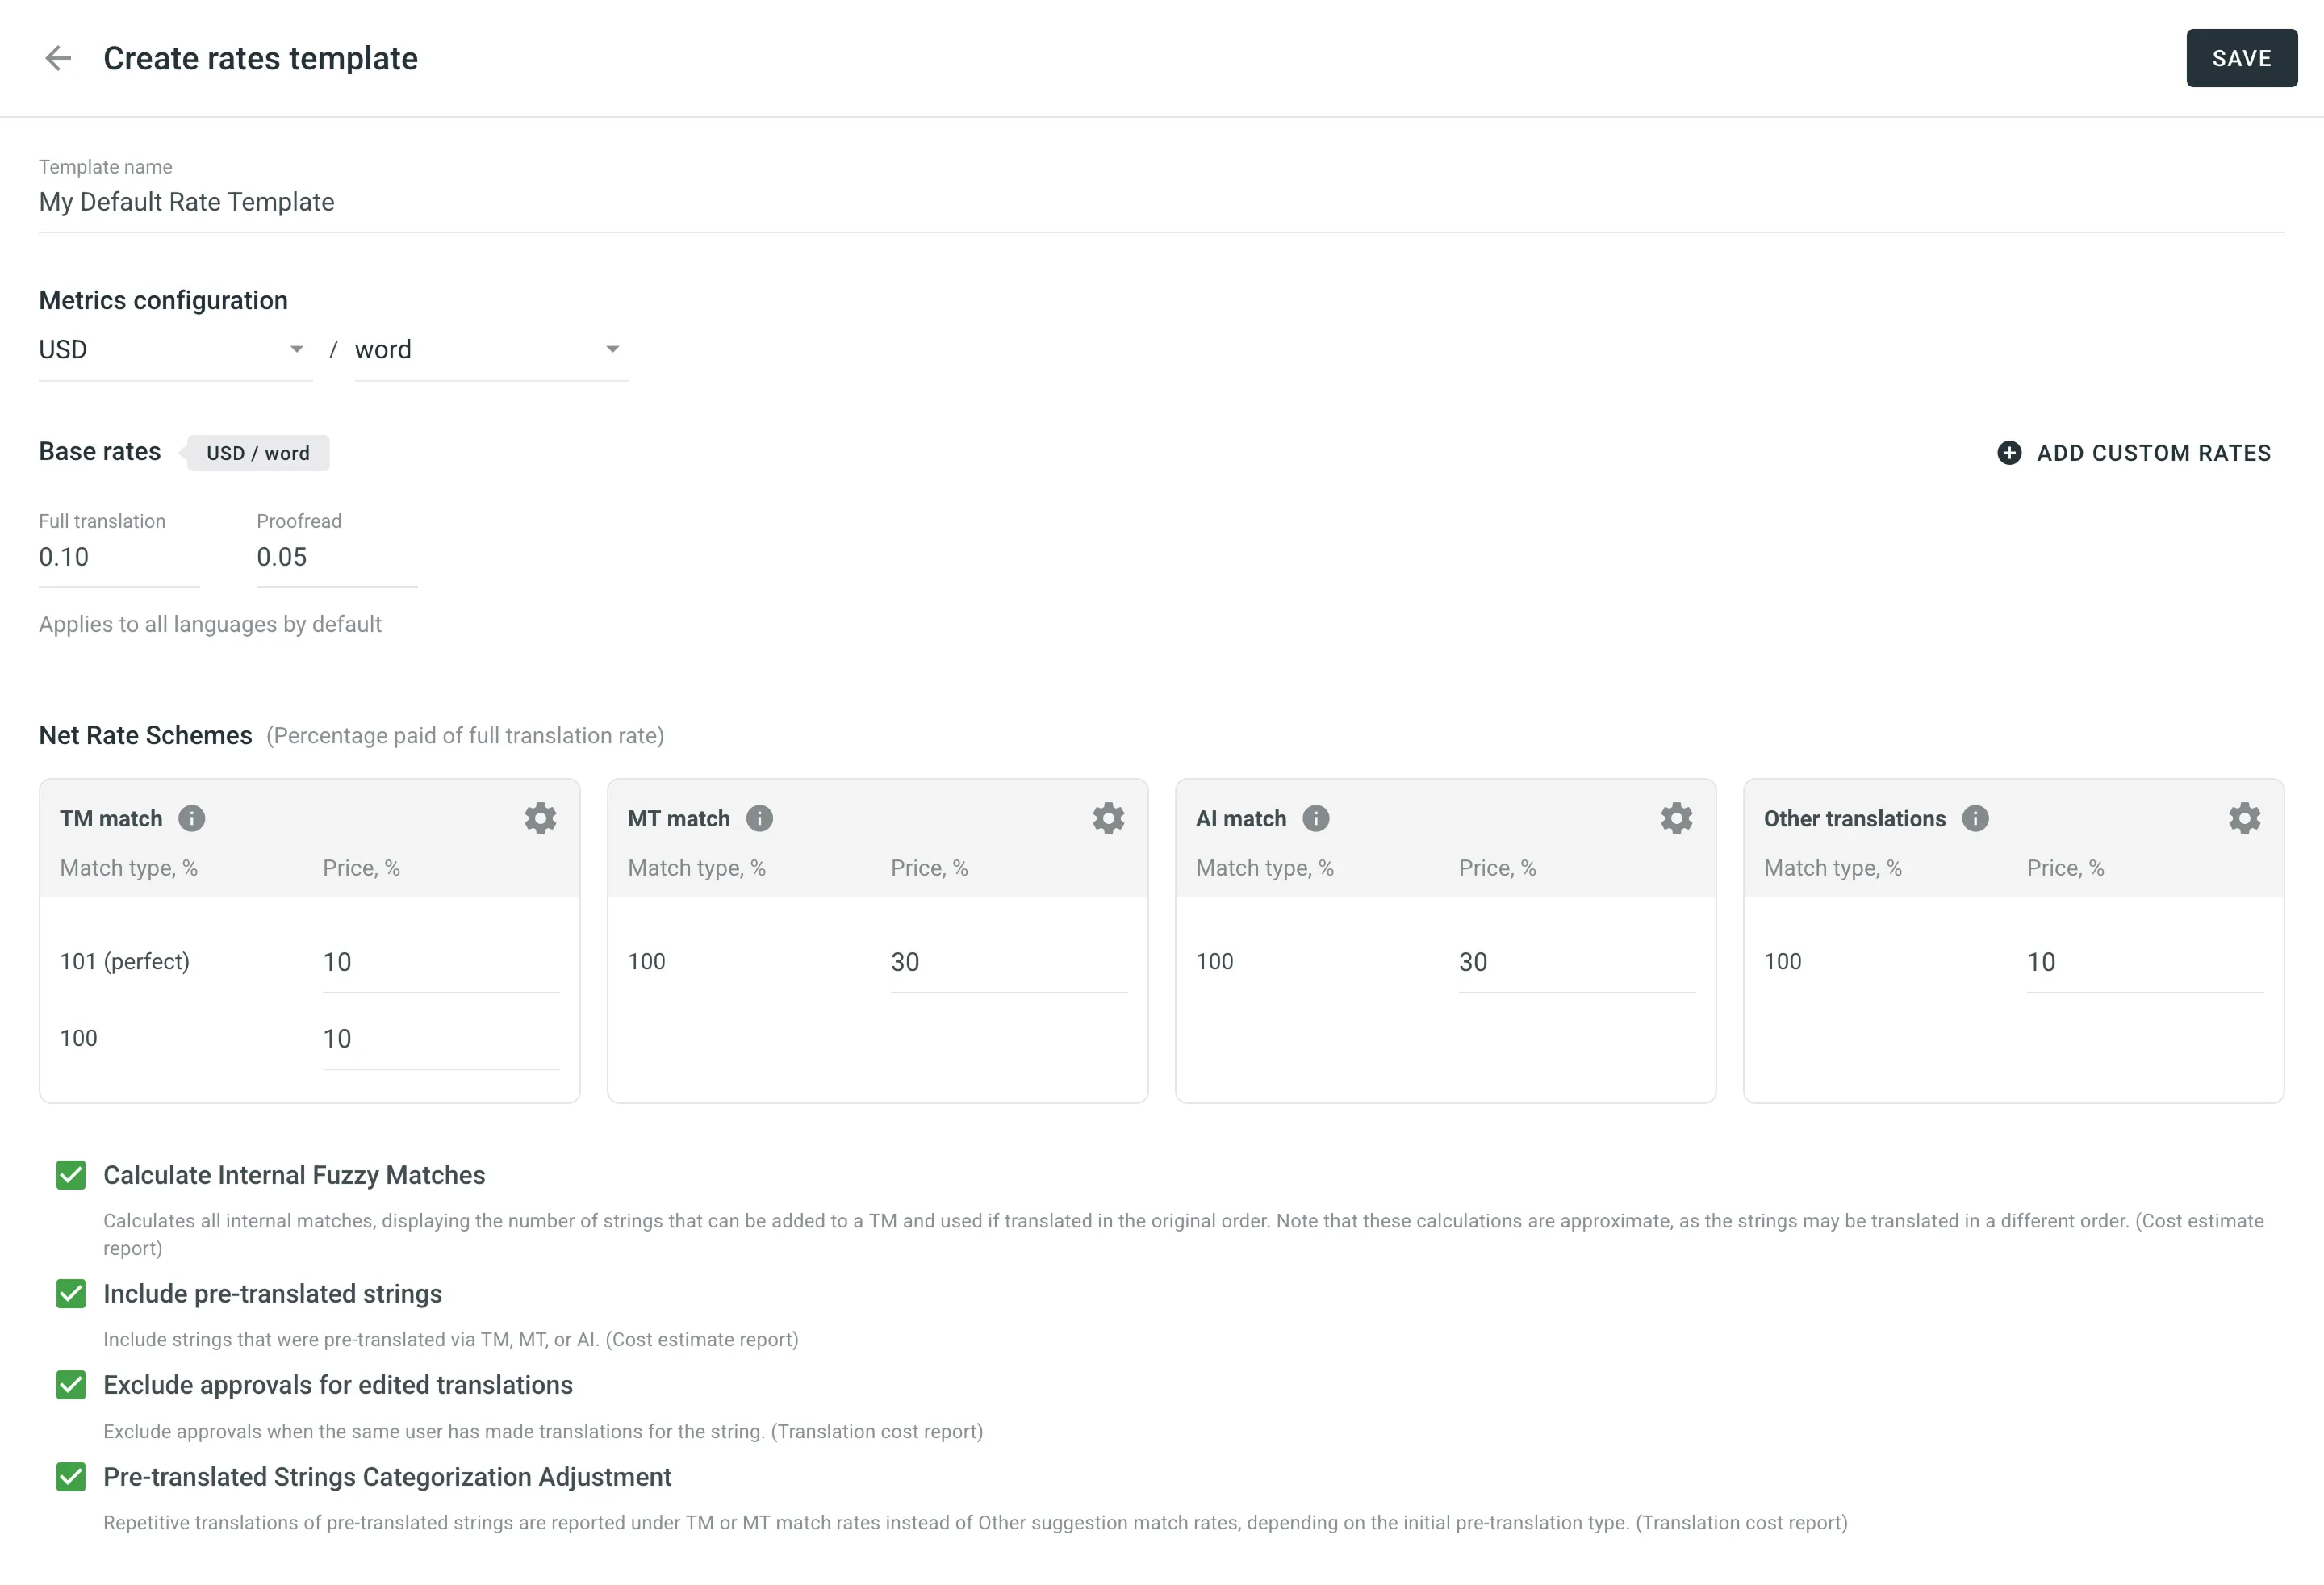 ## [Security](#security) [Section titled “Security”](#security) Change your current password, manage two-factor authentication for the Account, and check linked applications. You can also control authentication for external services and log out of all the devices. 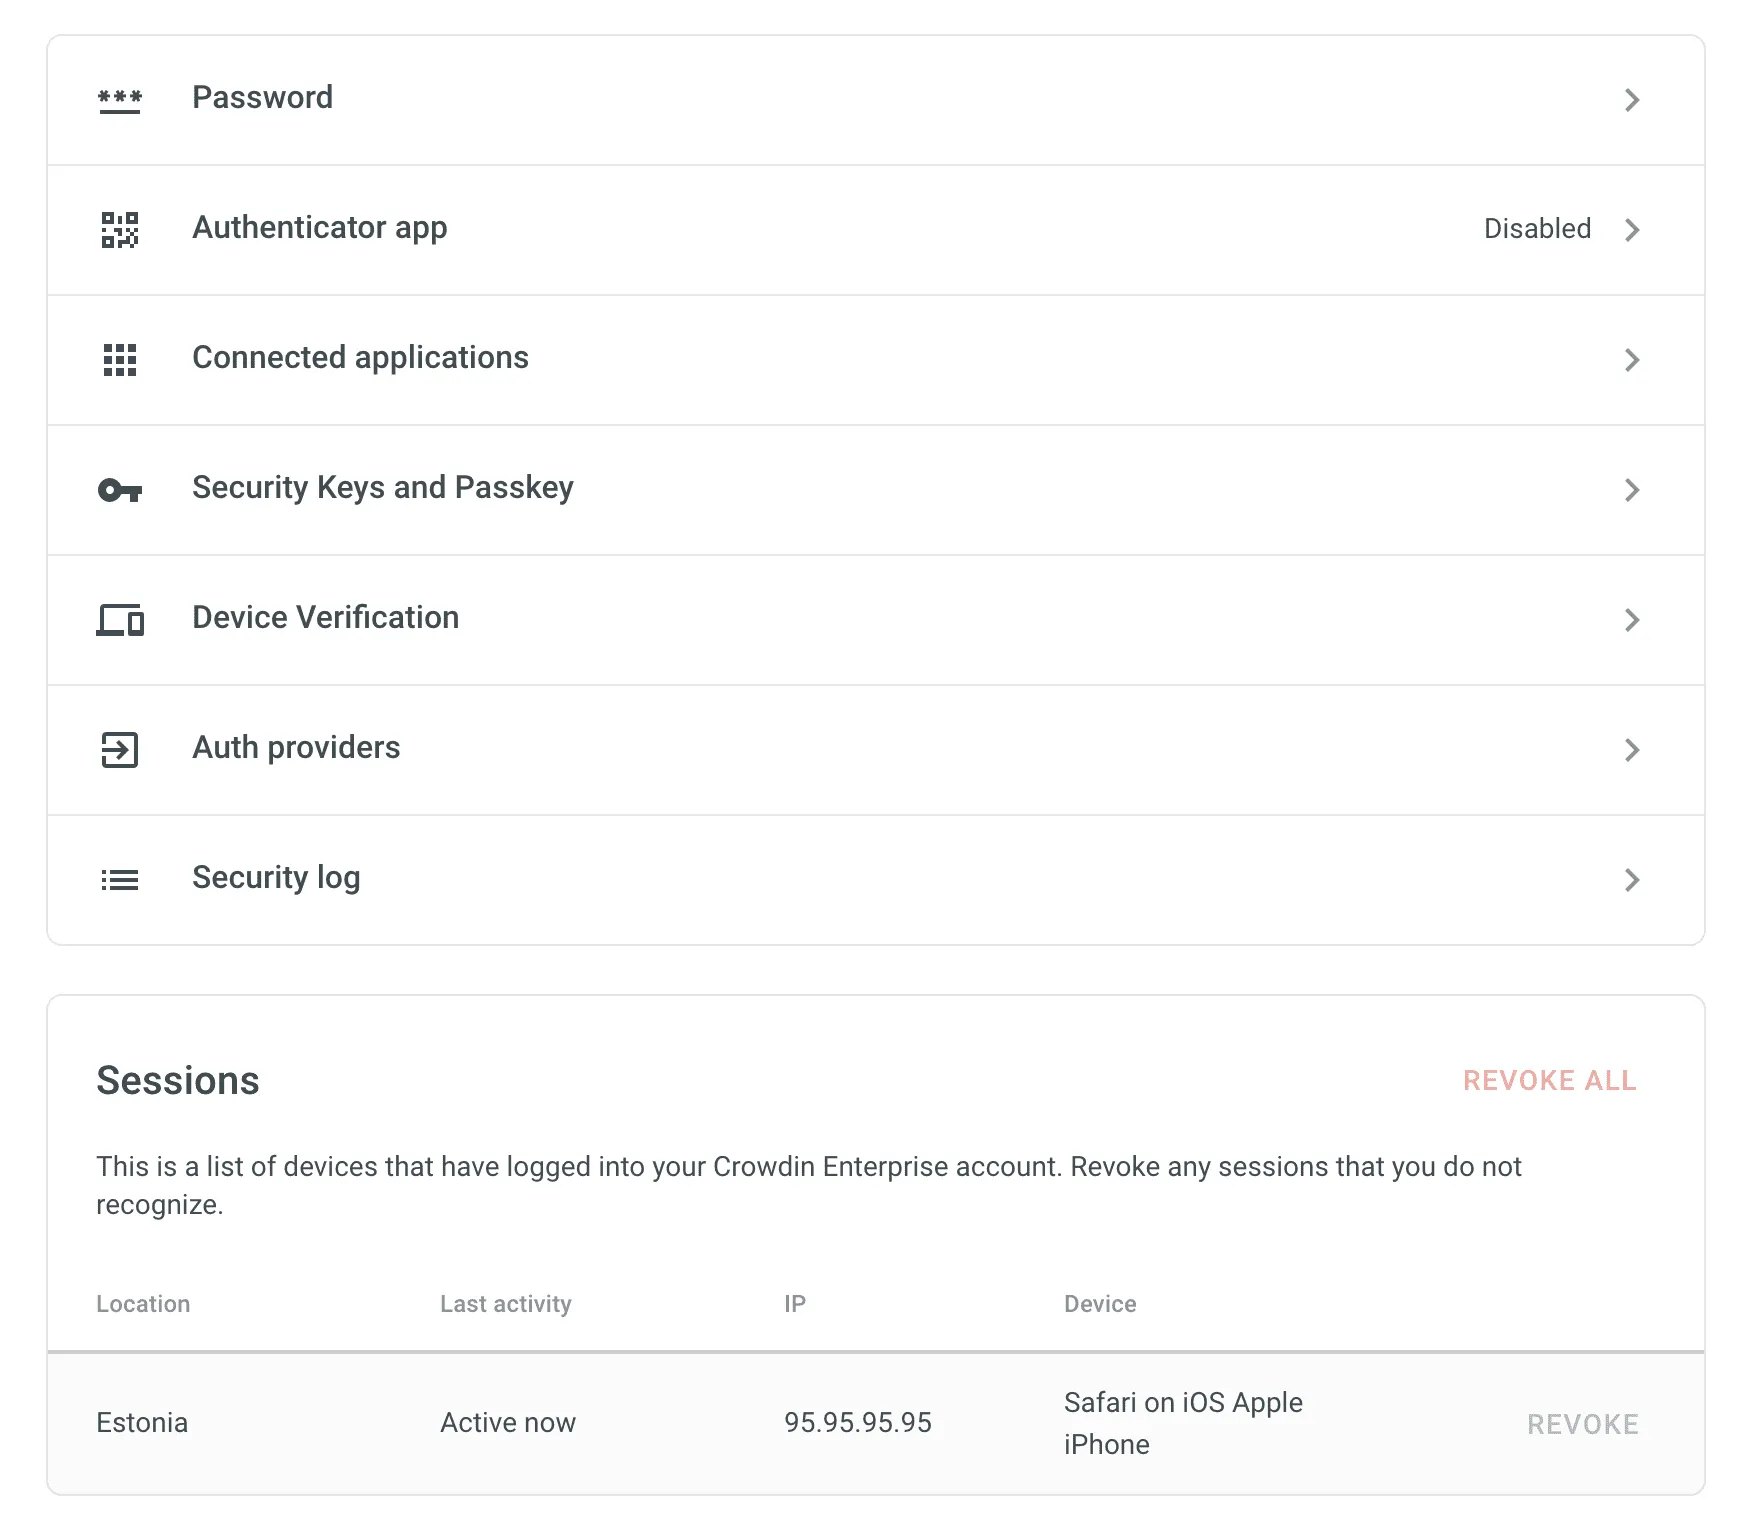 ### [Password](#password) [Section titled “Password”](#password) To change your password, click **Password**, enter your current password, and set a new one. Click **Save** to apply the changes. ### [Authenticator App](#authenticator-app) [Section titled “Authenticator App”](#authenticator-app) Activate two-factor authentication (2FA) to add an additional layer of security to your Crowdin Enterprise account. Use an authenticator app on your mobile device or computer to generate one-time verification codes. To enable two-factor authentication, follow these steps: 1. Open your **Account Settings** and select **Security** on the left sidebar. 2. Click **Authenticator app**. 3. Using the **Google Authenticator** app on your mobile device, scan the QR code on the screen. 4. Enter the 6-digit verification code generated by your authenticator app, then click **Submit**. 5. Download recovery codes, so you can use them if you can’t access your mobile device. ### [Connected Applications](#connected-applications) [Section titled “Connected Applications”](#connected-applications) Manage third-party apps you’ve authorized to access your Crowdin Enterprise account. You can view a list of connected apps and revoke access as needed. ### [Security Keys and Passkey](#security-keys-and-passkey) [Section titled “Security Keys and Passkey”](#security-keys-and-passkey) Register a physical security key or passkey to strengthen your account protection. These can be used alongside your password to verify your identity during login. ### [Device Verification](#device-verification) [Section titled “Device Verification”](#device-verification) Enable **Device Verification** to require identity confirmation when logging in from a new device. A verification code will be sent to your registered email address, and the device will be added to your trusted list once verified. You can manage trusted devices by removing individual entries or clicking **Remove All** to clear the list. ### [Auth Providers](#auth-providers) [Section titled “Auth Providers”](#auth-providers) Manage external accounts linked to your Crowdin Enterprise account. You can connect services like Google, Facebook, GitHub, X, or GitLab to enable one-click login. ### [Security Log](#security-log) [Section titled “Security Log”](#security-log) View a list of important account events, such as logins, password changes, authentication updates, and more. Each entry includes the event type, device, IP address, and timestamp. ### [Sessions](#sessions) [Section titled “Sessions”](#sessions) View a list of devices that have accessed your Crowdin Enterprise account, along with details like location, last activity, IP address, and device type. You can revoke individual sessions or click **Revoke All** to end all sessions except the current one. ### [Sudo Mode](#sudo-mode) [Section titled “Sudo Mode”](#sudo-mode) Crowdin Enterprise may ask you to confirm your password before performing sensitive actions, such as changing your password, email, or authentication settings. Once verified, you’ll stay in sudo mode for five minutes without needing to re-authenticate. 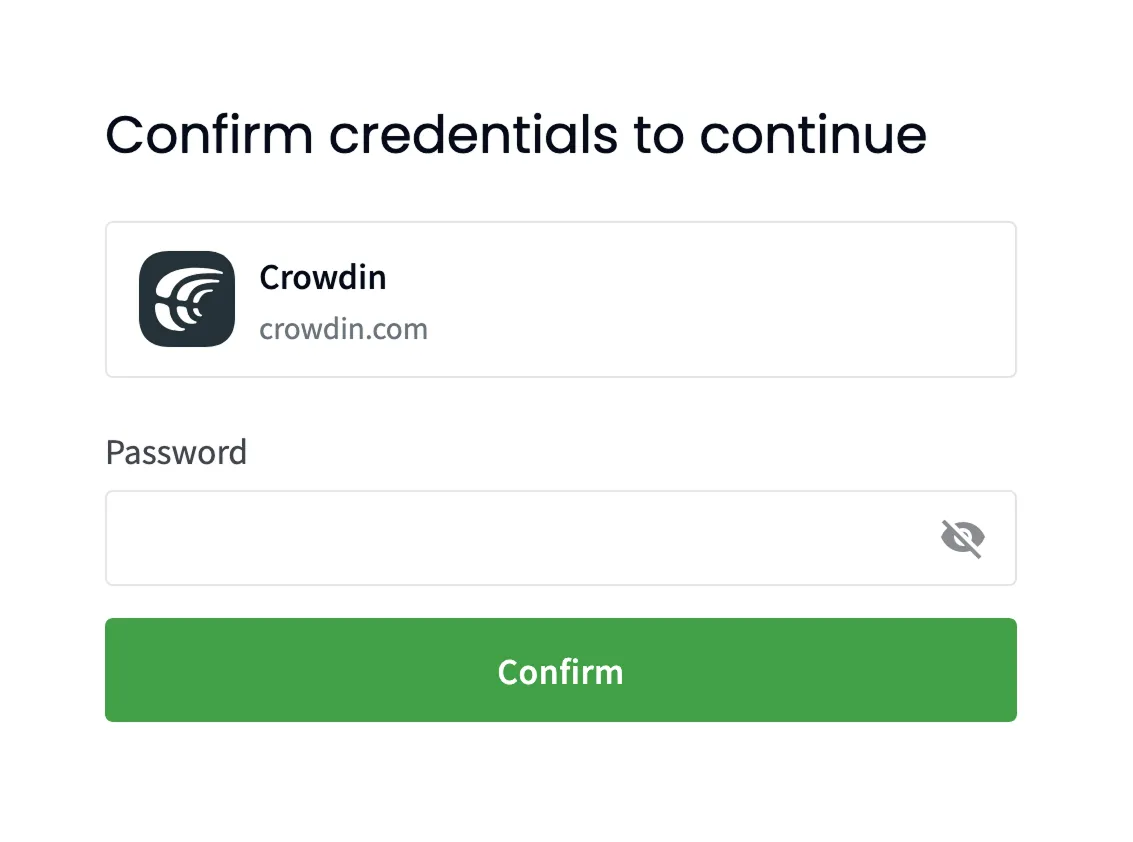 ## [Notifications](#notifications) [Section titled “Notifications”](#notifications) On the **Notifications** page, you can customize which notifications you receive and how they are delivered. You can choose delivery channels, select relevant events, and apply project-level preferences. ### [Channels & Events](#channels--events) [Section titled “Channels & Events”](#channels--events) Crowdin Enterprise provides several channels for notifications: * In-App (Crowdin Enterprise) * Email * Slack * Custom Notifications To customize notifications, click the arrow next to a channel name and select the events you want to be notified about. Available notification events include: | Event type | Description | | ---------------------- | --------------------------------------------------------------------------- | | Users & Roles | Join requests, project invitations, project role updates. | | Collaboration | Updates on collaboration between translation vendors and clients. | | Integrations | Updates on integrations you set up. | | New Strings | New strings added. | | Language Progress | Translation or proofreading for a particular language is completed. | | API-Integrated Vendors | Updates on collaboration with API-Integrated translation vendors. | | Content Issues | All issue types created or resolved in the Editor. | | Mentions | Updates on you being mentioned in the Editor. | | Tasks | Created, deleted, and updated tasks, status changes, mentions and comments. | | Messages | Private messages within Crowdin. | | API Notifications | Notifications sent by apps, API integrations, and users via API. | ### [Slack Notifications](#slack-notifications) [Section titled “Slack Notifications”](#slack-notifications) To receive notifications in Slack, click **Slack** and authorize Crowdin Enterprise to integrate with your workspace. After setup, choose which events should be sent to Slack. Read more about [Slack Integration](/enterprise/account-notifications/#slack-integration). ### [Custom Notifications](#custom-notifications) [Section titled “Custom Notifications”](#custom-notifications) To send notifications to a custom service, click **Set Up Notifications Custom Channel** and follow the instructions. After setup, select which events should be sent to the custom channel. Read more about [Custom Notifications](/enterprise/account-notifications/#custom-notifications). ### [Product Updates](#product-updates) [Section titled “Product Updates”](#product-updates) Subscribe to the [Crowdin blog](https://crowdin.com/blog) to get product news and localization best practices delivered to your inbox. ### [Notification Rules for Projects](#notification-rules-for-projects) [Section titled “Notification Rules for Projects”](#notification-rules-for-projects) You can adjust notifications for each project: * **Global** – Receive all selected notification types. * **Mentions only** – Only receive notifications when @mentioned. * **Mute project** – Turn off all notifications for the project. ## [Access Tokens](#access-tokens) [Section titled “Access Tokens”](#access-tokens) Personal access tokens serve as an alternative to passwords for authorizing third-party applications and scripts in Crowdin Enterprise. 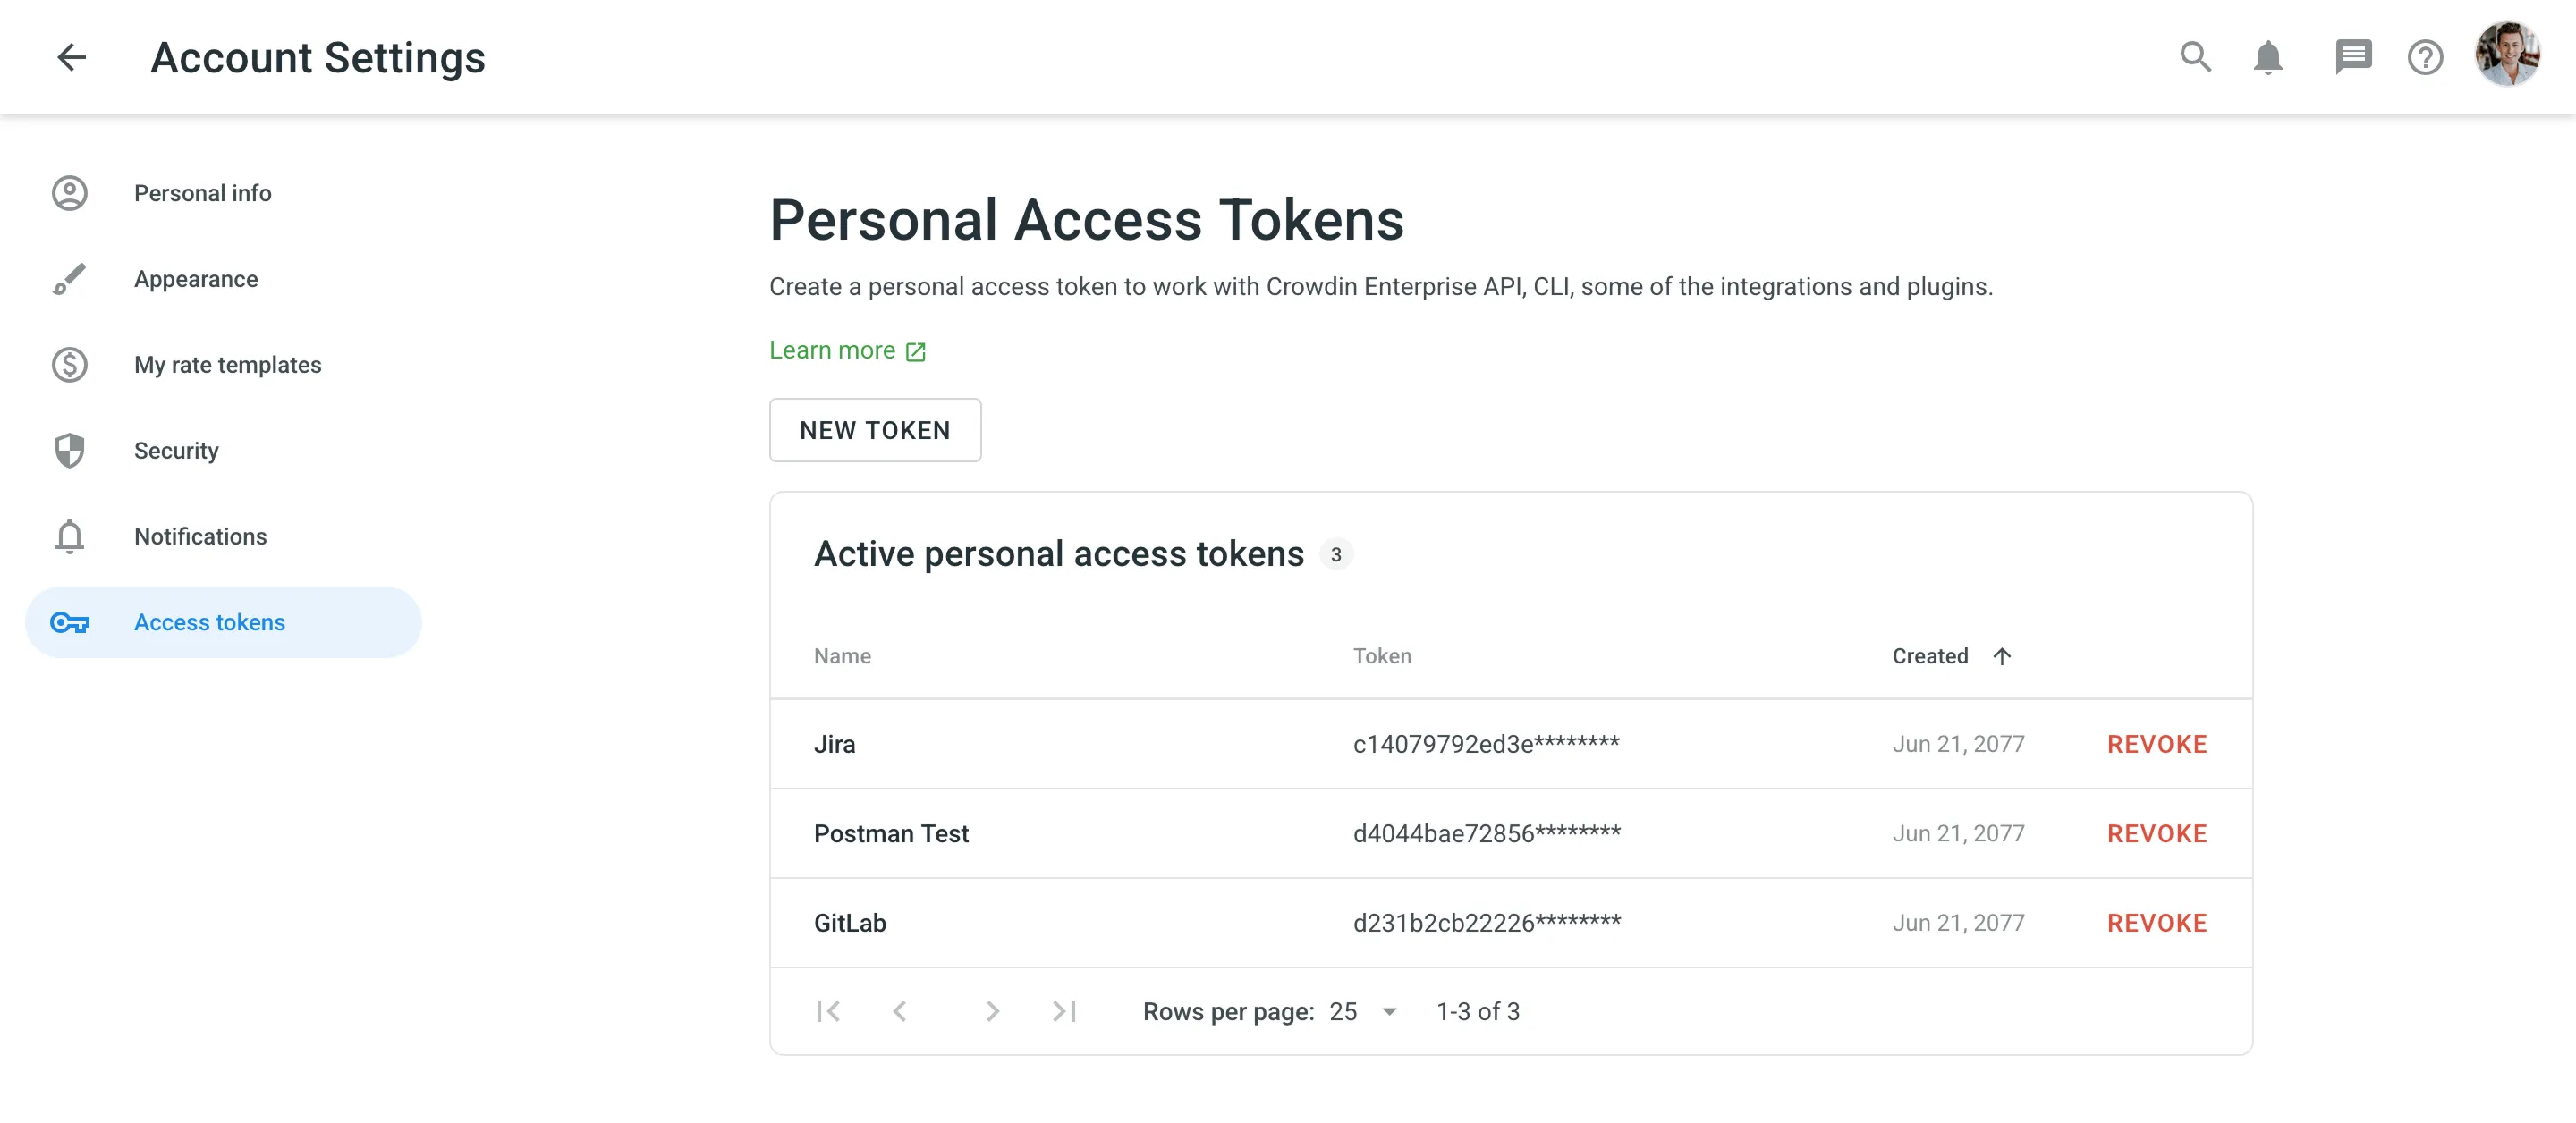 Caution Treat personal access tokens like passwords. Store them securely and avoid hardcoding them into scripts. Use environment variables instead. ### [Use Cases](#use-cases) [Section titled “Use Cases”](#use-cases) You’ll need a personal access token for authorization in the following cases: * Automating localization workflows via the [Crowdin API](/developer/api/). * Managing and syncing localization resources with the [Crowdin CLI](https://crowdin.github.io/crowdin-cli/). * Pushing design content for translation from design tools (i.e., Figma, Sketch, Adobe XD). * Uploading and downloading content using IDE plugins (i.e., Visual Studio Code, Android Studio). * And other integrations or tools that require secure access to your Crowdin Enterprise account. ### [Creating a Personal Access Token](#creating-a-personal-access-token) [Section titled “Creating a Personal Access Token”](#creating-a-personal-access-token) When creating a new personal access token, you can select [specific scopes](/developer/understanding-scopes/) and, if needed, limit access to specific resources using the **Granular access** option. For example, you can create a token that interacts only with a specific project or group. When listing all projects or groups via the API, only selected items will be returned. To create a new personal access token, follow these steps: 1. Open your **Account Settings** and select **Access tokens** on the left sidebar. 2. Click **New Token**. 3. In the appeared dialog, enter a name to help you identify the token later. 4. Select the required scopes. 5. *(Optional)* Enable **Granular access** to restrict the token’s access to specific resources. 6. Depending on the selected scopes, select **Grant access to selected projects**, **Grant access to selected TMs**, and **Grant access to selected Glossaries**. 7. Click **Select Groups**, **Select projects**, **Select glossaries**, **Select TMs**, and respectively select the needed resources. 8. Click **Create**. After creating a token, make sure to copy and store it securely — for security reasons, it won’t be shown again. You can create as many personal access tokens as needed. Caution If a resource wasn’t selected during token creation, attempting to access it by ID will result in a `404 Not Found` error. ### [Revoking a Personal Access Token](#revoking-a-personal-access-token) [Section titled “Revoking a Personal Access Token”](#revoking-a-personal-access-token) Revoke a personal access token if it’s no longer needed or you suspect it was compromised. To revoke a personal access token, follow these steps: 1. Open your **Account Settings** and select **Access tokens** on the left sidebar. 2. Find the token in the list and click **Revoke** next to it to remove its access.
# Additional Support Services
> Learn about the additional support services Crowdin offers
Along with services like Crowdin Customer Forum, Crowdin Documentation, Email Support, and Chat Support, Crowdin customers can also benefit from additional support services they can purchase in addition to the primary subscription plan. Below you can see the available additional support services. ## [On-demand Tutorials and Onboarding Sessions](#on-demand-tutorials-and-onboarding-sessions) [Section titled “On-demand Tutorials and Onboarding Sessions”](#on-demand-tutorials-and-onboarding-sessions) * Customer’s team education * Onboarding sessions after subscription purchase ## [Technical Calls and Troubleshooting](#technical-calls-and-troubleshooting) [Section titled “Technical Calls and Troubleshooting”](#technical-calls-and-troubleshooting) * Integration setup * Streamlining the localization workflow * Troubleshooting the technical cases * Crowdin engineers can be involved if necessary ## [Dedicated Account Management](#dedicated-account-management) [Section titled “Dedicated Account Management”](#dedicated-account-management) Dedicated account management includes all benefits from Premium Support plus the following: * Assigned personal account manager – Personal account manager will respond to your emails with high priority. Your team will be provided with a dedicated link to a call with a manager. * Unlimited support calls – You can schedule an unlimited number of on-demand tutorials, onboarding sessions, technical calls, and troubleshooting sessions. * Tracking important feature releases – Personal account manager will track and inform you about newly released features important to your team. * Tracking subscription – Personal account manager will track and inform you about subscription-related questions. Available for the following subscription plans: Pro, Team, Team+, and Business. [Contact Sales ](https://crowdin.com/contact-sales)[View Pricing ](https://crowdin.com/pricing) ## [Custom Development](#custom-development) [Section titled “Custom Development”](#custom-development) Custom development includes the following services: * Developing custom processors and apps * Custom placeholders configuration * API-related requests * Expanding the functionality with the help of the Crowdin Apps development, etc. Available for the following subscription plans: Pro, Team, Team+, and Business. Price: Negotiated depending on request complexity.
# Adobe XD Plugin
> Start localizing at the design stage
With the Crowdin for Adobe XD plugin, you can use texts from Crowdin Enterprise in your designs to save time for both designers and developers. These could include original or translated texts. If necessary, you can add new ones (e.g., dialog titles, button labels) and send them to translators in Crowdin Enterprise. ## [Use Cases](#use-cases) [Section titled “Use Cases”](#use-cases) * Quickly generate multilingual creative assets. * Translate mockups and test them in different languages before the programming starts. * Stop using ‘Lorem Ipsum’, add real texts from Crowdin Enterprise to your prototypes instead. * Create and upload source strings from your designs to your Crowdin Enterprise project. This way, uploaded strings could be used by developers, which reduces time spent on development. * Upload tagged screenshots to your Crowdin Enterprise project. ## [Installation](#installation) [Section titled “Installation”](#installation) 1. Sign in to Adobe XD. 2. Navigate to **Plugins > Browse plugins…**. 3. Click **Browse**. 4. Use the *Search all plugins* field to find **Crowdin for Adobe XD** plugin. 5. Click **Install**. ## [Configuration](#configuration) [Section titled “Configuration”](#configuration) ### [Setting up Credentials](#setting-up-credentials) [Section titled “Setting up Credentials”](#setting-up-credentials) To specify your Crowdin Enterprise credentials in Adobe XD, follow these steps: 1. On the left panel, click **Plugins > Crowdin for Adobe XD**. 2. Click . 3. Provide your Personal Access Token. 4. Specify your organization domain name. 5. Click **Save**. 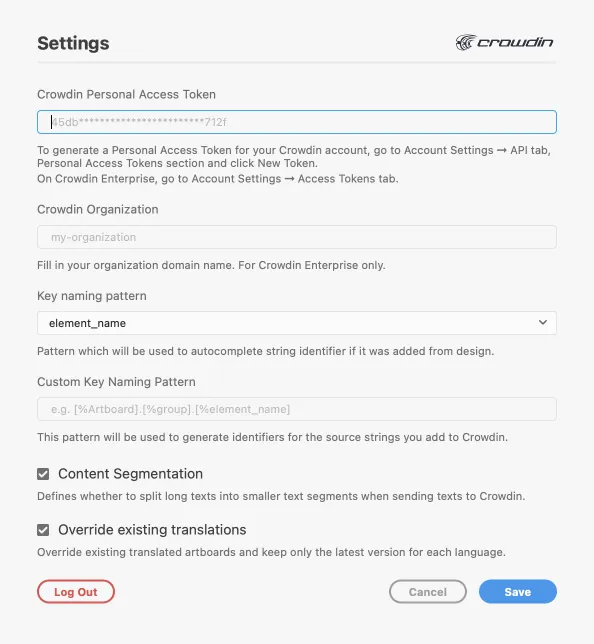 To generate a new token in Crowdin Enterprise, follow these steps: 1. Go to **Account Settings > Access tokens**, and click **New Token**. 2. Specify *Token Name*, select *Scopes* and *Projects*, and click **Create**. ### [Selecting a Project](#selecting-a-project) [Section titled “Selecting a Project”](#selecting-a-project) To select the Crowdin Enterprise project you’d like to work with, click the drop-down menu, and select a project from the list. Later, you can use the same drop-down menu to switch to another project if needed. 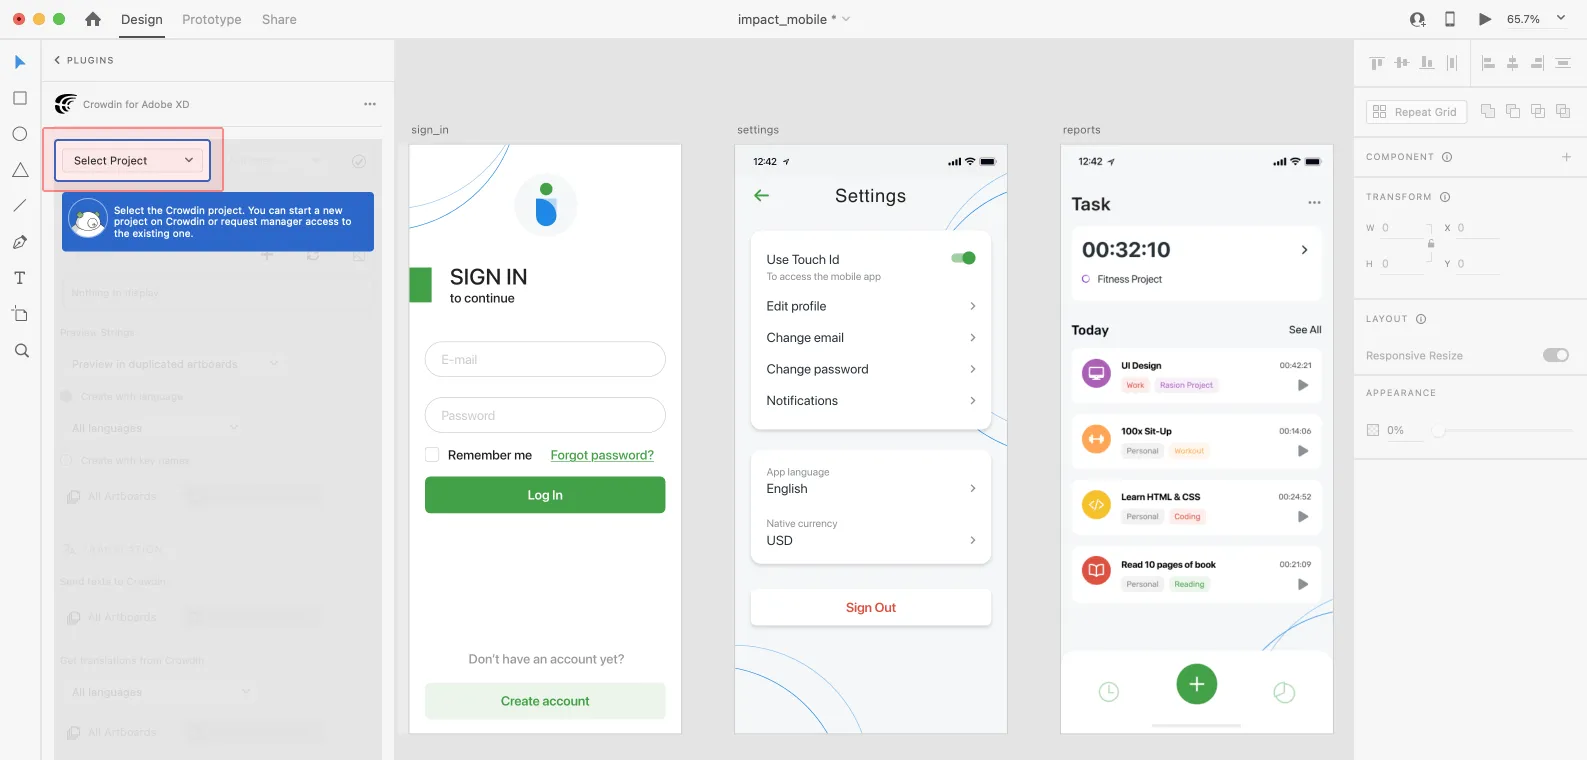 Select the specific branch your content will be uploaded to. If your Crowdin Enterprise project doesn’t have branches, leave it empty. 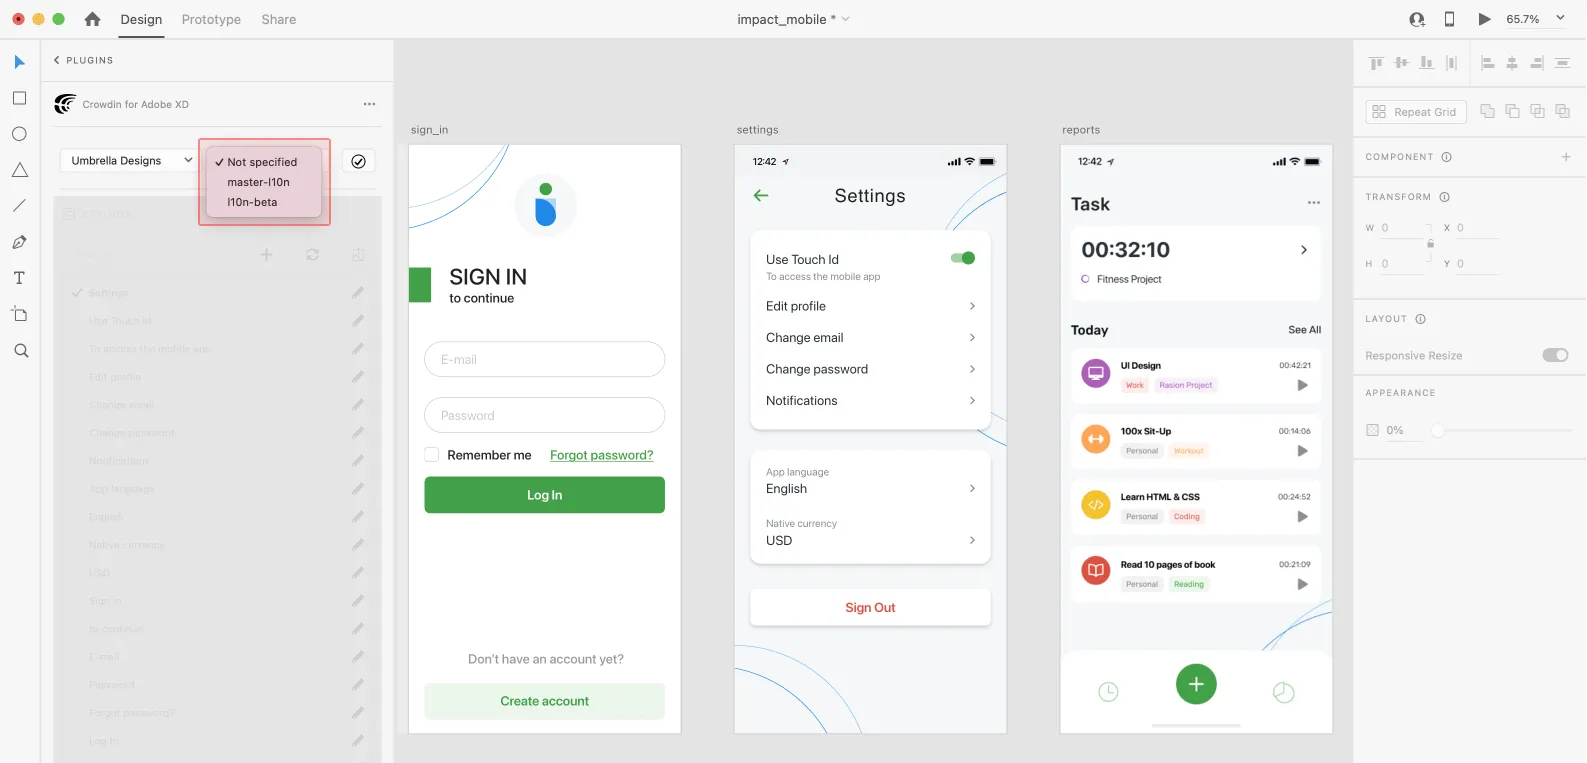 ## [UI Localization](#ui-localization) [Section titled “UI Localization”](#ui-localization) Use the *Strings* section when localizing UI and working on dynamic pages with your development and marketing teams. In this section, you can add source strings from Crowdin Enterprise to your designs in Adobe XD in a click. After the texts are used in the designs, you can automatically upload tagged screenshots for translators’ reference back to Crowdin Enterprise. ### [Using Source Strings from Crowdin in Adobe XD](#using-source-strings-from-crowdin-in-adobe-xd) [Section titled “Using Source Strings from Crowdin in Adobe XD”](#using-source-strings-from-crowdin-in-adobe-xd) 1. Open the Crowdin plugin for Adobe XD. 2. In the *Strings* section, use the *Search* field to find the specific copy. You can search strings by source text, string identifier, or context. 3. Select the text layer to which you want to add text and click on the needed string.  After using the source strings from Crowdin Enterprise in your designs, they become linked with the text fields, and you can [preview translations](#previewing-strings) for these strings in Adobe XD and [upload screenshots](#uploading-tagged-screenshots-to-crowdin) for them to your Crowdin Enterprise project. You can link a single Crowdin Enterprise string to one or multiple text fields in Adobe XD. However, one text field can be linked only to a single Crowdin Enterprise string. If you link a text field with an existing connection to a new Crowdin string, the previous connection will be terminated, and a new connection will be established. If you’d like to unlink a Crowdin Enterprise string from all text fields it was previously linked to, right-click on the link icon next to the needed string. ### [Adding Source Strings from Adobe XD to Crowdin](#adding-source-strings-from-adobe-xd-to-crowdin) [Section titled “Adding Source Strings from Adobe XD to Crowdin”](#adding-source-strings-from-adobe-xd-to-crowdin) You can add strings already used in the designs or create and add completely new strings. 1. Open the Crowdin plugin for Adobe XD. 2. To add the strings used in the designs, select the whole artboard, multiple artboards, or the needed strings on the artboards. Alternatively, skip this step if you want to add a new string. 3. In the *Strings* section, click . 4. In the appeared dialog, fill in the required fields. 5. *(Optional)* To add labels to the strings, alternately select them from the **Label** drop-down menu and click **Save**. 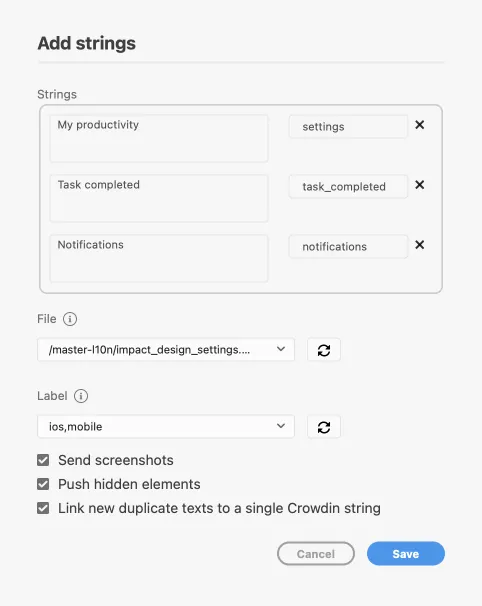 To add the same strings into multiple files in Crowdin Enterprise, alternately select the needed files from the **File** drop-down menu. Clear the **Push hidden elements** option if some artboards contain hidden elements that should not be added to Crowdin Enterprise. When adding multiple strings, you may want to select **Link new duplicate texts to a single Crowdin string**. It’s useful in the following cases: * When adding multiple text fields with the same text, the plugin will add only one string to your Crowdin Enterprise project and link all duplicate text fields to it. * If your Crowdin Enterprise project already contains a string with the same text you’re adding from designs, the plugin will only link the text fields to the existing string and won’t create a new one. Added strings will be transferred to your Crowdin Enterprise project and also displayed in the **Strings** section’s list. You can edit or delete the strings from the same list anytime. The respective changes will also be applied to the strings in your Crowdin Enterprise project. ### [Configuring ICU Source String Placeholders](#configuring-icu-source-string-placeholders) [Section titled “Configuring ICU Source String Placeholders”](#configuring-icu-source-string-placeholders) When using ICU strings in your design, you can set the placeholders’ values, and after adding such strings to designs, they will be displayed in a formatted view with the preconfigured values. Once you [use](#using-source-strings-from-crowdin-in-adobe-xd) the needed ICU string from Crowdin Enterprise in your design, you can configure its placeholders’ values. 1. Open the Crowdin plugin for Adobe XD. 2. In the *Strings* tab, use the *Search* field to find the specific copy. You can search strings by source text, string identifier, or context. 3. Click on the needed ICU string. 4. Click **Set placeholders**. 5. Type the needed values for ICU string placeholders. 6. Click **Submit** to save the entered placeholders. 7. Click **Edit String** to update the source string text in designs. When [previewing translations](#previewing-strings) for ICU strings in Adobe XD, they will also be displayed in a formatted view if the values were preconfigured beforehand. ### [Key Naming Pattern Settings](#key-naming-pattern-settings) [Section titled “Key Naming Pattern Settings”](#key-naming-pattern-settings) To simplify adding strings from Adobe XD to the Crowdin Enterprise project, you can set up the desired key naming pattern for the source string identifiers in the plugin settings. The Crowdin Enterprise plugin for Adobe XD will suggest the string identifiers for new strings based on the selected pattern. While adding new source strings, you can always edit the suggested identifier to the preferred look. To select the key naming pattern, follow these steps: 1. Open the Crowdin plugin for Adobe XD. 2. Open the plugin **Settings**. 3. In the *Key naming pattern* section, select the preferred option from the drop-down menu. Besides the existing patterns, you can configure your own pattern. To use a custom pattern, select the **Custom key naming pattern** option from the drop-down list and specify your pattern in the **Custom Key Naming Pattern** field. ### [Uploading Tagged Screenshots to Crowdin](#uploading-tagged-screenshots-to-crowdin) [Section titled “Uploading Tagged Screenshots to Crowdin”](#uploading-tagged-screenshots-to-crowdin) When [adding source strings used in the designs](#adding-source-strings-from-adobe-xd-to-crowdin), make sure to keep **Send screenshots** selected. As a result, the Crowdin Enterprise plugin for Adobe XD will upload screenshots along with the source strings. Also, you can update screenshots with an **Update screenshots** option while editing a Crowdin Enterprise string that is linked to the text fields in designs. Additionally, you can mass upload screenshots to Crowdin Enterprise for strings linked with text fields in designs. 1. Open the Crowdin plugin for Adobe XD. 2. Select one or more artboards with the linked strings. 3. In the *Strings* section, click to upload screenshots for selected artboards. Read more about [Screenshots](/enterprise/screenshots/). ### [Previewing Strings](#previewing-strings) [Section titled “Previewing Strings”](#previewing-strings) Preview translations from Crowdin Enterprise for the strings used in the designs in Adobe XD. You can preview translations in the new artboards or the original ones. When previewing translations in the new artboards, you can populate them with the actual translations or with string keys for further use by developers. To preview strings populated with translations, follow these steps: 1. Open the Crowdin plugin for Adobe XD. 2. In the *Strings* > *Preview Strings* section, select *Preview in duplicated artboards* or *Preview in the current artboards*. 3. Select *Create with language*. 4. Select the target language you want to preview translations for. You can also choose *All languages*. 5. Choose the content you want to preview in Adobe XD. Select *All Artboards* or *Selected Artboards*.  To preview strings populated with key names, follow these steps: 1. Open the Crowdin plugin for Adobe XD. 2. In the *Strings* > *Preview Strings* section, select *Preview in duplicated artboards*. 3. Select *Create with key names*. 4. Choose the content you want to preview in Adobe XD. Select *All Artboards* or *Selected Artboards*.  ## [Marketing Visuals Localization](#marketing-visuals-localization) [Section titled “Marketing Visuals Localization”](#marketing-visuals-localization) Use the *Translation* section to localize static pages, like brochures and banners. In this section, you can send texts with context for translators to Crowdin Enterprise and upload translated copies back to Adobe XD. ### [Sending Texts for Translation to Crowdin](#sending-texts-for-translation-to-crowdin) [Section titled “Sending Texts for Translation to Crowdin”](#sending-texts-for-translation-to-crowdin) You can send text for translation either from selected or all artboards from an Adobe XD file. Translators will work with those texts in the list view and use designs as an additional context for even higher translation quality. In Crowdin Enterprise, a root folder *Adobe XD plugin* will be created. It will contain a subfolder named after your XD file with HTML files for each artboard inside. This folder can also contain a *free-text.html* file with texts not included in any of the artboards. If needed, you can disable content segmentation in the plugin **Settings** so long texts will not be split into sentences. To send Adobe XD designs for translation, follow these steps: 1. Open the necessary Adobe XD file. 2. Go to **Plugins > Crowdin for Adobe XD**. 3. In the *Translation* > *Send texts to Crowdin* section, select the content you’d like to translate. Select *All Artboards* or *Selected Artboards*. 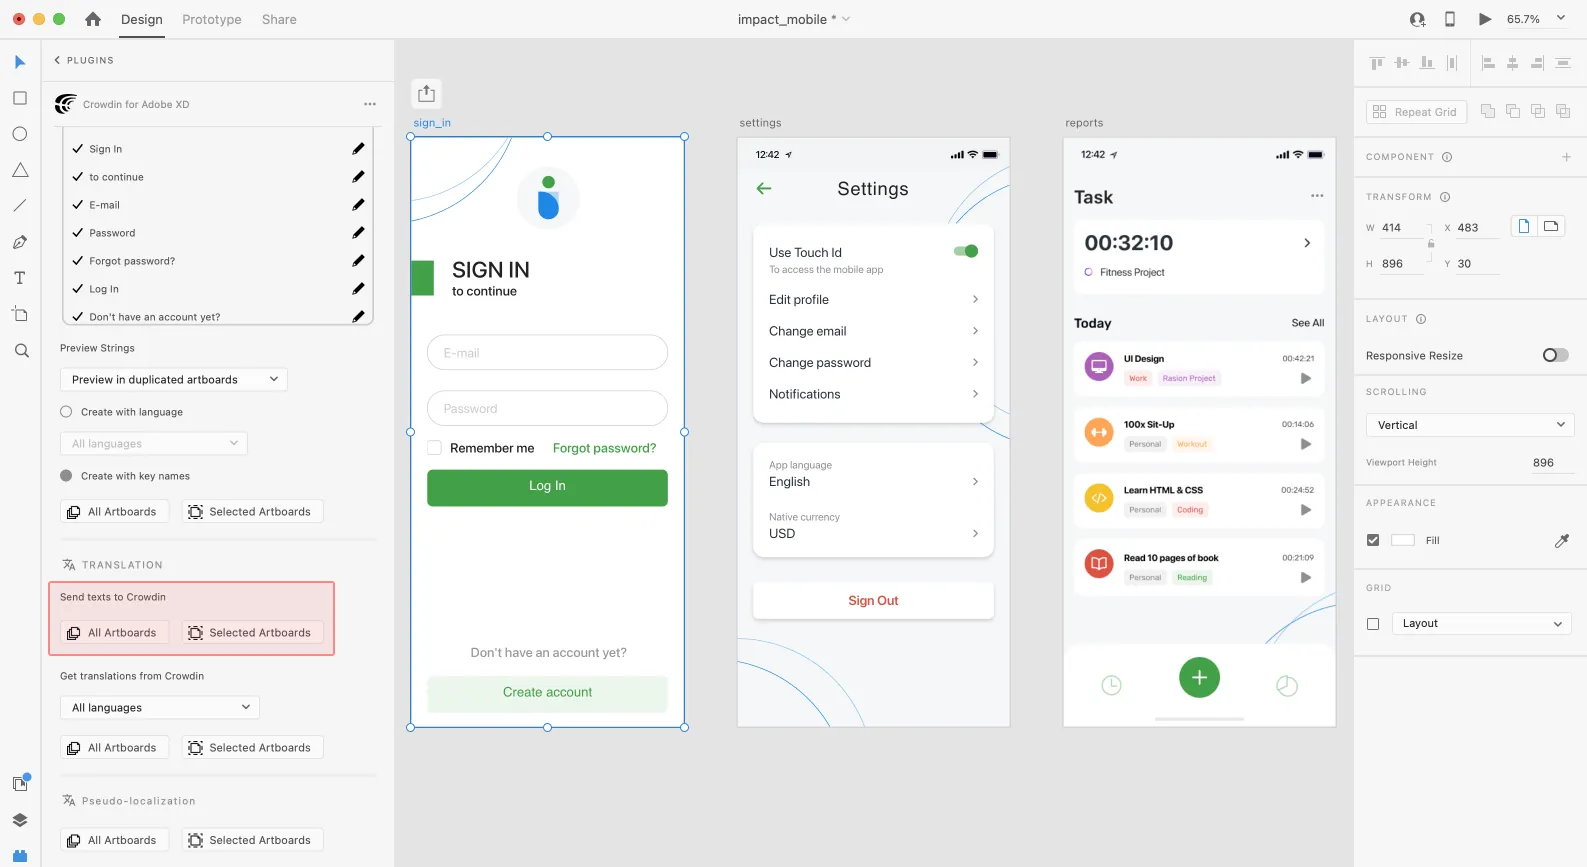 When the source files are uploaded to your Crowdin Enterprise project, you can invite contributors to translate and proofread them. Read more about [translation strategies](/enterprise/translation-strategies/). ### [Uploading Translations from Crowdin to Adobe XD](#uploading-translations-from-crowdin-to-adobe-xd) [Section titled “Uploading Translations from Crowdin to Adobe XD”](#uploading-translations-from-crowdin-to-adobe-xd) You can synchronize texts between Adobe XD and Crowdin Enterprise projects whenever you want to test the translated copy inside Adobe XD or generate multilingual assets. To upload translated copies to Adobe XD, follow these steps: 1. Open the necessary Adobe XD file. 2. Go to **Plugins > Crowdin for Adobe XD**. 3. In the *Translation* > *Get translations from Crowdin* section, select the target language you want to upload translations for. You can also select *All languages*. 4. Select the content you want to preview in Adobe XD. Select *All Artboards* or *Selected Artboards*. 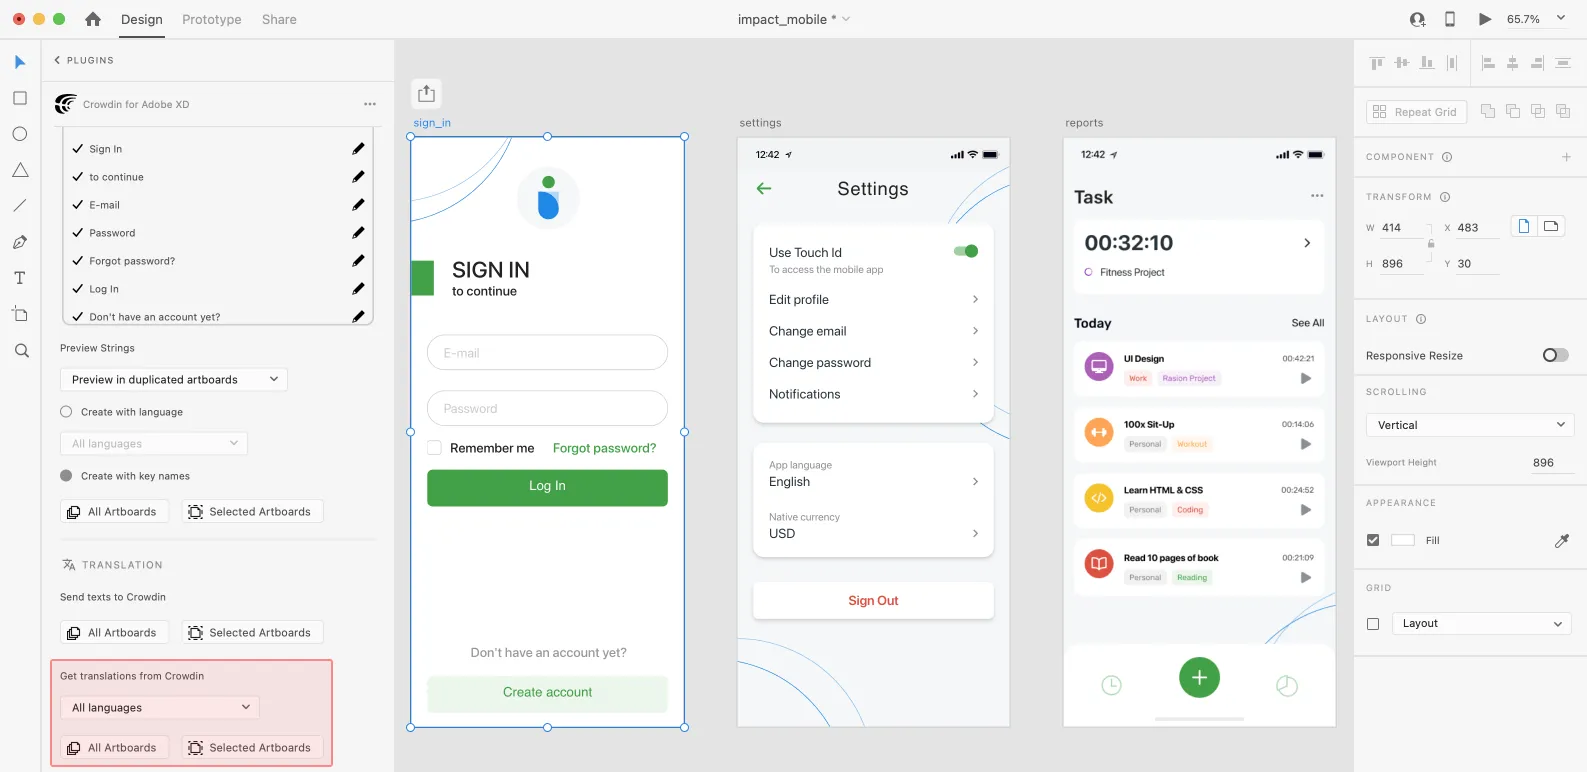 After uploading translations to Adobe XD, the modified file will contain a separate artboard with translations for each target language. The newly uploaded translated versions won’t override the ones you uploaded previously. You can always delete the translated copies you no longer need. 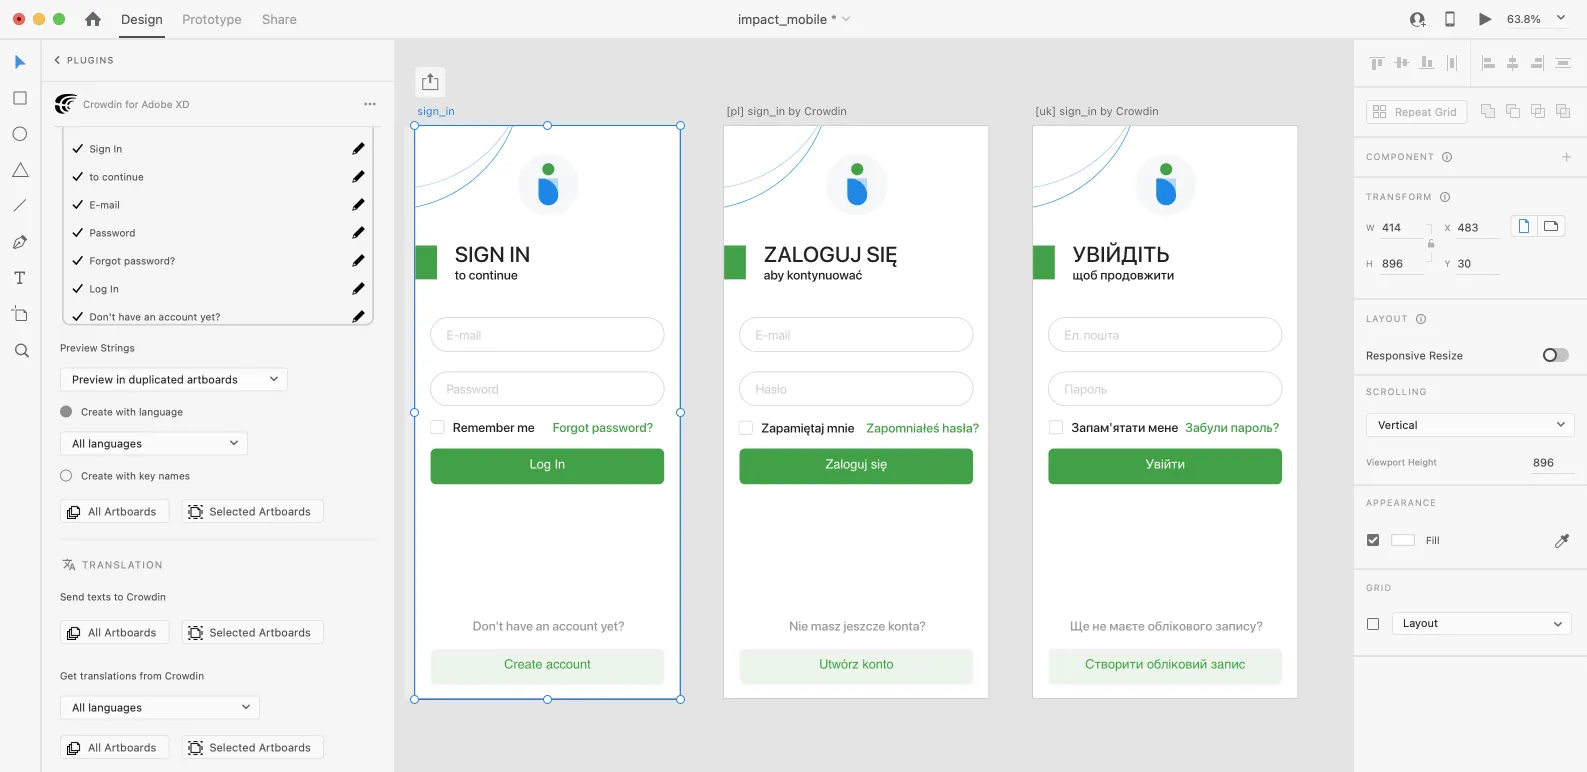 If you’d like the newly uploaded translated versions to override the previously uploaded ones, open the plugin **Settings** and select **Override existing translations**. ### [Pseudo-localization](#pseudo-localization) [Section titled “Pseudo-localization”](#pseudo-localization) Even before translations are completed, you can test whether your application is ready to be localized using pseudo-localization. This feature allows you to simulate how the application’s UI will look with different languages to check whether the source strings should be modified before the project localization starts. Once you send your texts for translation, you can start pseudo-localization. 1. Open the necessary Adobe XD file. 2. Go to **Plugins > Crowdin for Adobe XD**. 3. In the *Pseudo-localization* section, select the content you’d like to test with pseudo-localization. Select *All Artboards* or *Selected Artboards*. 4. In the dialog box that appears, you can choose from predefined presets (French, Cyrillic, Chinese, Arabic) and configure the settings according to your preferences: * *Length Correction* – allows you to make strings longer or shorter to see whether your product’s UI properly handles other languages. As translations in some languages can be longer or shorter than the source texts in your project. * *Prefix/Suffix* – allows you to add special characters at the beginning and end of each string. * *Character Transformation* – replaces English characters with easily identifiable accented versions, random Arabic symbols, or Chinese ideographs to make it obvious if there are some hard-coded strings in your application. 5. Click **Pseudo-localize**. Read more about [Pseudo-localization](/developer/pseudolocalization/).
# AI Fine-tuning
> Refine AI models with fine-tuning for improved localization results
Fine-tuning in Crowdin Enterprise enhances AI models using your project-specific data, tailoring translations to your style, tone, and terminology. By leveraging approved translations from your projects and translation memories (TMs), fine-tuning improves translation quality, reduces operational costs, and adapts AI performance to your localization workflows. Fine-tuning is available for Pre-translate prompts that use supported AI models and providers with custom API credentials, enabling the creation of AI models tailored to your localization needs. ## [Key Benefits of Fine-tuning](#key-benefits-of-fine-tuning) [Section titled “Key Benefits of Fine-tuning”](#key-benefits-of-fine-tuning) Fine-tuning enhances the performance of AI models, offering the following advantages: * **Improved Accuracy** – Models trained on your data align closely with your style, tone, and domain-specific terminology. * **Better Context Handling** – Handle edge cases and complex scenarios by training the model with real-world examples from your projects. * **Cost Savings** – Fine-tuning reduces token usage by enabling shorter and more precise prompts. * **Incremental Updates** – Train models on new data without starting from scratch, saving time and resources. ## [Managing Fine-tuning Jobs](#managing-fine-tuning-jobs) [Section titled “Managing Fine-tuning Jobs”](#managing-fine-tuning-jobs) You can create new fine-tuning jobs, monitor their progress, and review detailed metrics for completed jobs. ### [Creating Fine-tuning Job](#creating-fine-tuning-job) [Section titled “Creating Fine-tuning Job”](#creating-fine-tuning-job) To create a fine-tuning job, follow these steps: 1. Open your organization’s **Workspace** and select **AI** on the left sidebar. 2. In the **Fine-tuning** tab, click **Create** to set up a new fine-tuning job. 3. Configure the [basic parameters](#basic-parameters) and optional [advanced parameters](#advanced-parameters). Advanced parameters are typically adjusted for complex datasets or when fine-tuning a model for specific domain requirements. 4. *(Optional)* [Estimate the fine-tuning cost](#estimating-fine-tuning-cost) before proceeding. 5. Click **Start fine-tuning**.  6. Monitor the fine-tuning progress in the **Fine-tuning Jobs** section and [evaluate results](#evaluating-fine-tuned-models) after completion. ### [Estimating Fine-tuning Cost](#estimating-fine-tuning-cost) [Section titled “Estimating Fine-tuning Cost”](#estimating-fine-tuning-cost) Estimating the cost of fine-tuning before running the process helps you ensure that the training fits within your budget and allows you to adjust parameters for optimal results. This step is particularly useful if you’re working with a large dataset or running multiple fine-tuning jobs. To estimate the cost of fine-tuning, follow these steps: 1. Go to **Advanced Parameters** and set the **Epochs Number** to 1. 2. Click **Start fine-tuning**. 3. The system will calculate and display the approximate fine-tuning price. At this point, you can: * Click **Proceed** to start the actual fine-tuning if the price aligns with your expectations. * Click **Back** to adjust the parameters and refine your configuration to potentially lower the cost. By estimating costs upfront, you avoid unnecessary expenses and can experiment with different configurations to strike the right balance between performance and budget. ### [Viewing and Filtering Fine-tuning Jobs](#viewing-and-filtering-fine-tuning-jobs) [Section titled “Viewing and Filtering Fine-tuning Jobs”](#viewing-and-filtering-fine-tuning-jobs) Once you open the **Fine-tuning** tab on the **AI** page, you can view and filter fine-tuning jobs to monitor their progress and results. You can view a list of all created fine-tuning jobs with the following details: * Job ID – the unique identifier of the fine-tuning job. * Status – the current state of the job (e.g., In Progress, Finished, Failed). * Created At – the date and time the job was created. 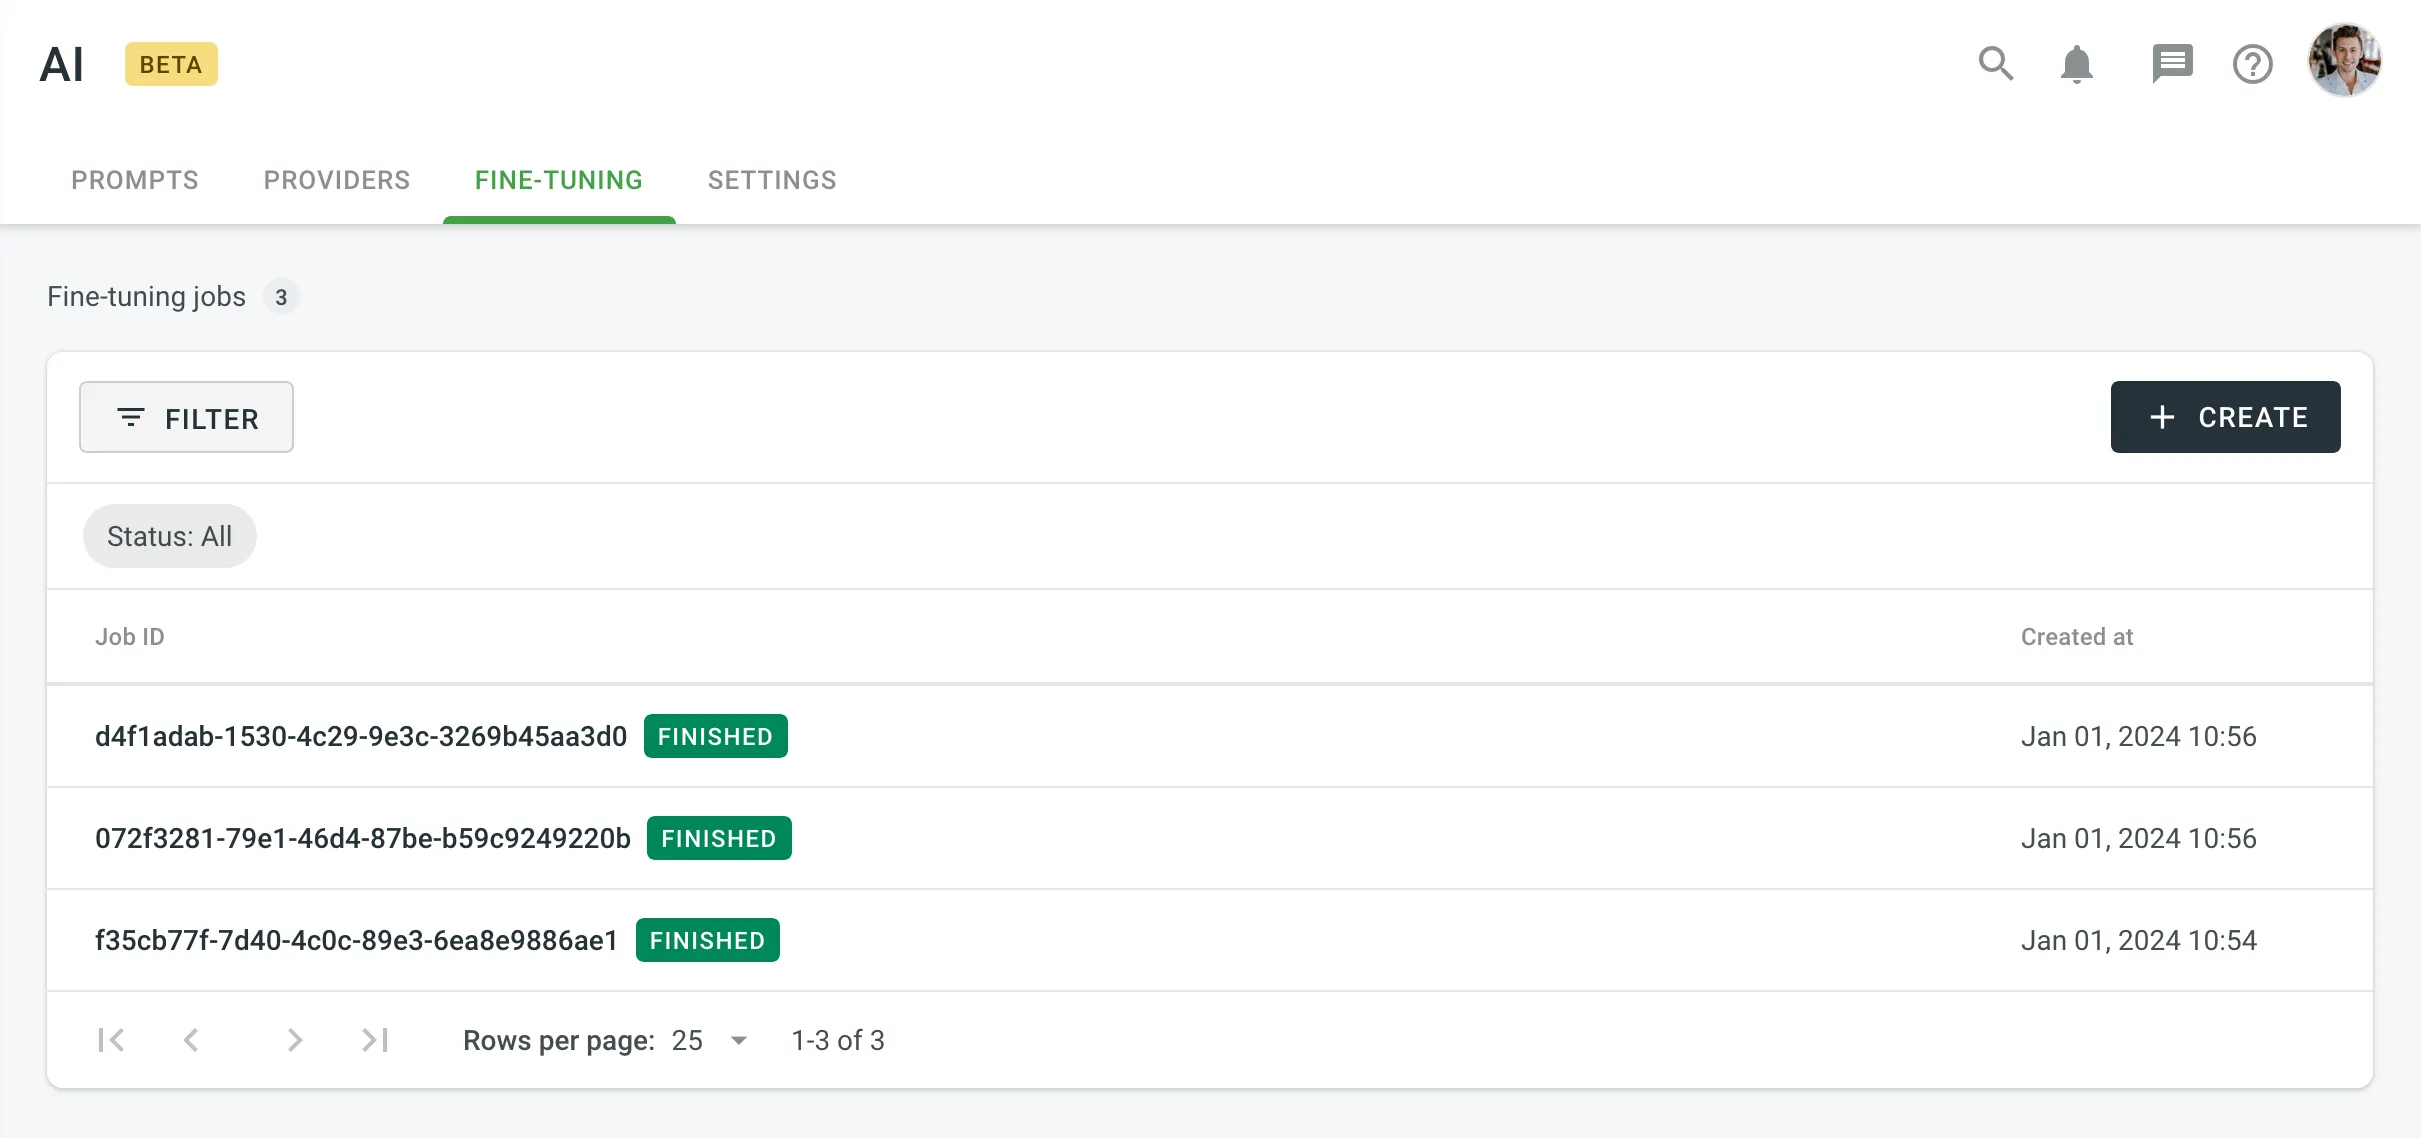 To filter jobs, click and apply the following filters: * Status: All, Finished, In Progress, Failed. Click **Clear** to reset filters and display all jobs. Clicking on a job opens its detailed metrics, including parameters, results, logs, and other relevant information. ### [Fine-tuning Configuration Parameters](#fine-tuning-configuration-parameters) [Section titled “Fine-tuning Configuration Parameters”](#fine-tuning-configuration-parameters) You can configure a fine-tuning job using basic and advanced parameters. #### [Basic Parameters](#basic-parameters) [Section titled “Basic Parameters”](#basic-parameters) The following parameters are required for initiating fine-tuning: * **Prompt** – Choose the Pre-translate prompt to be fine-tuned. * **Projects** – Select projects whose translations will be used for training. Ensure the selected projects contain approved translations. * **Translation Memories** – Include TM segments for training data. Leave blank to exclude TMs. * **Date Range** *(Optional)* – Specify the approval date range for filtering translations. #### [Advanced Parameters](#advanced-parameters) [Section titled “Advanced Parameters”](#advanced-parameters) Advanced parameters provide greater control over the fine-tuning process and include options for both training and validation datasets. ##### [Training Dataset Parameters](#training-dataset-parameters) [Section titled “Training Dataset Parameters”](#training-dataset-parameters) Training dataset parameters control the data used to train your model. These settings determine the size and scope of the dataset, ensuring it’s sufficient for effective training: * **Batch Size** – The number of examples in each batch during training. Larger batch sizes reduce variance but increase training time. * **Learning Rate Multiplier** – Adjust the scaling factor for the learning rate. Smaller values help prevent overfitting, while larger values speed up learning. * **Epochs Number** – The number of complete passes through the training dataset. Higher values improve accuracy but increase costs. * **Dataset Size Constraints** – * **Maximum Dataset File Size (in bytes)** – Restricts the size of the training dataset. * **Minimum Number of Examples in Dataset** – Sets the lower limit for training data size. * **Maximum Number of Examples in Dataset** – Sets the upper limit for training data size. Caution Adjust these parameters only if you fully understand their impact on the fine-tuning process and model performance. ##### [Validation Dataset Parameters](#validation-dataset-parameters) [Section titled “Validation Dataset Parameters”](#validation-dataset-parameters) Validation datasets are used to test how well the fine-tuned model performs on unseen data. Configuring a validation dataset is optional but recommended for assessing model performance. * **Projects** – Select different projects from those used for training. * **Translation Memories** – Include TM segments for validation. * **Date Range** – Filter translations by approval dates for validation. * **Dataset Size Constraints** – * **Maximum Dataset File Size (in bytes)** – Restricts the size of the validation dataset. * **Minimum Number of Examples in Dataset** – Sets the lower limit for validation data size. * **Maximum Number of Examples in Dataset** – Sets the upper limit for validation data size. ## [Evaluating Fine-tuned Models](#evaluating-fine-tuned-models) [Section titled “Evaluating Fine-tuned Models”](#evaluating-fine-tuned-models) After fine-tuning is complete, a new model is generated along with detailed metrics, including training and validation losses, job parameters, and logs. Use this data to evaluate your model’s performance and determine if it’s ready to integrate into your Pre-translate prompt. ### [Model Details](#model-details) [Section titled “Model Details”](#model-details) Key information about your fine-tuned model includes: * **Model**: Name of the fine-tuned model. * **Status**: Job status (e.g., In progress, Finished, Failed). * **Job ID**: Unique identifier for the fine-tuning job. * **Base Model**: Initial model used as a starting point for fine-tuning. * **Output Model**: Name of the resulting fine-tuned model. * **Created At**: Date and time when the job was initiated. ### [Fine-tuning Parameters](#fine-tuning-parameters) [Section titled “Fine-tuning Parameters”](#fine-tuning-parameters) Details about the parameters configured for the fine-tuning job: * **Trained Tokens**: Total tokens processed during training. * **Epochs Number**: Number of full passes through the dataset. * **Batch Size**: Number of examples in each training batch. * **Learning Rate Multiplier**: Scaling factor for the learning rate, determining how quickly the model adjusts weights during training. ### [Dataset Files](#dataset-files) [Section titled “Dataset Files”](#dataset-files) Dataset files used for fine-tuning, allowing you to download them for further analysis or external processing: * **Training**: File containing the training dataset used to train the fine-tuned model. * **Validation**: File containing the validation dataset used to evaluate the fine-tuned model’s accuracy and generalization performance. ### [Fine-tuning Results](#fine-tuning-results) [Section titled “Fine-tuning Results”](#fine-tuning-results) Metrics and tools available for assessing your fine-tuned model’s performance: * **Training Loss**: Indicates how well the model fits the training data. Lower values indicate better learning. * **Validation Loss**: Assesses who well the model performs on unseen data. Available only if a validation dataset is configured. * **Full Validation Loss**: Represents the model’s overall performance on the entire validation dataset, if applicable. Review the results to determine whether they meet your requirements. If so, you can [integrate](/enterprise/crowdin-ai/#configuring-ai-prompts) the fine-tuned model into your Pre-translate prompt for immediate use. #### [Metrics and Graphs](#metrics-and-graphs) [Section titled “Metrics and Graphs”](#metrics-and-graphs) Crowdin Enterprise provides multiple ways to evaluate fine-tuning results, including interactive graphs and a detailed metrics table. * **Interactive Graphs** – Visualize fine-tuning metrics such as Training Loss, Validation Loss, and Full Validation Loss over the course of training. Hover over points on the graph for step-specific details. You can highlight or hide specific metrics by clicking their titles below the graph. 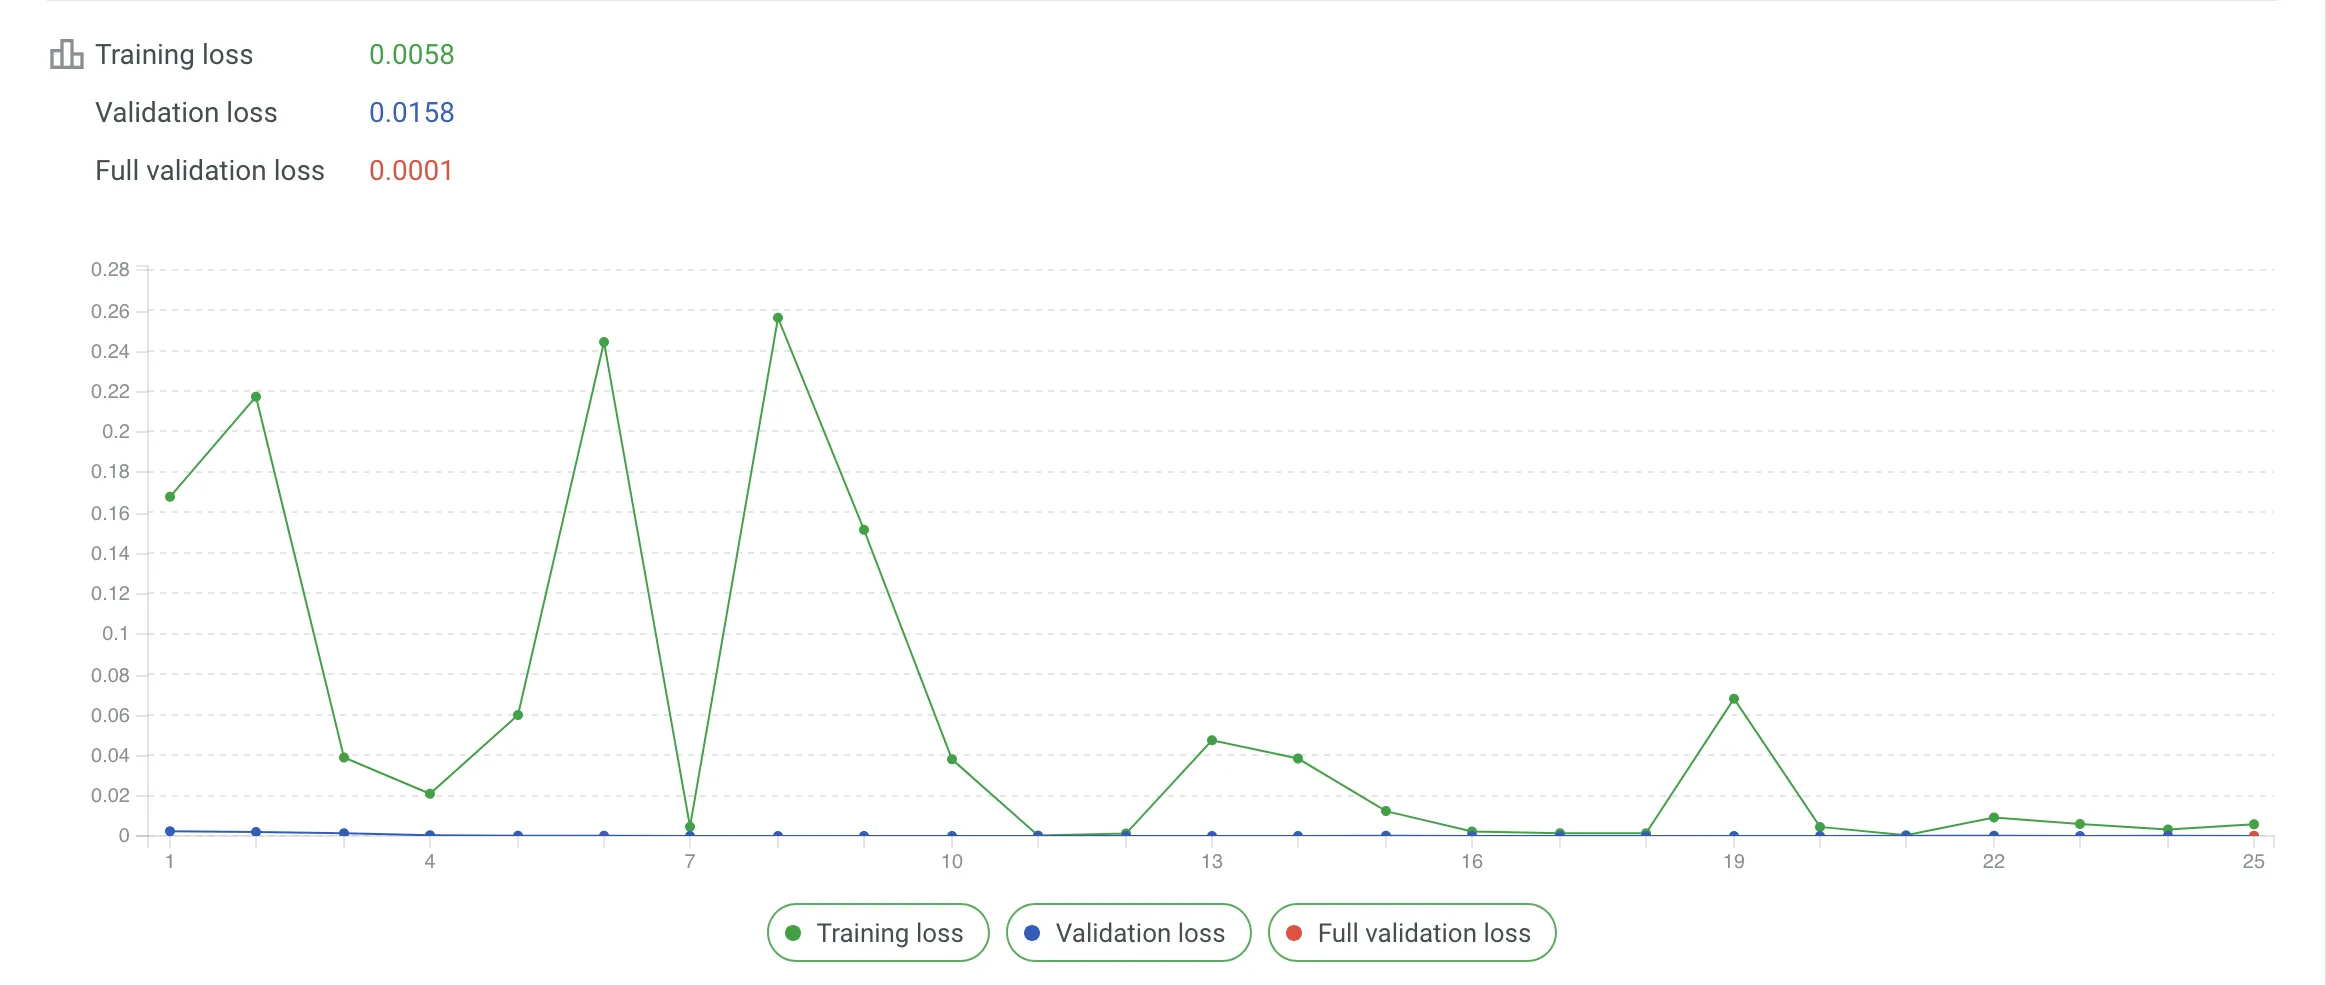 * **Metrics Tab** – Access the same data in table format for a comprehensive overview. The table provides a step-by-step breakdown, making it easier to identify patterns or issues during fine-tuning. A steady decline in loss values across steps reflects effective training, with values closer to zero indicating better results. Both tools are available in the Fine-tuning Job Details page, allowing you to analyze performance trends and troubleshoot any anomalies effectively. #### [Messages Tab](#messages-tab) [Section titled “Messages Tab”](#messages-tab) The **Messages** tab provides logs returned by the AI provider, offering a detailed timeline of the job’s progress, including key milestones (e.g., checkpoint creation, job completion) and troubleshooting insights. ## [Incremental Fine-tuning](#incremental-fine-tuning) [Section titled “Incremental Fine-tuning”](#incremental-fine-tuning) Update fine-tuned models iteratively to include newly approved translations. Use the **Date Range** parameter to avoid retraining from scratch. Example workflow: * **Initial Fine-tuning** – Train a base model using the full dataset. * **Subsequent Fine-tuning** – Train on newly approved translations only to create an updated model while retaining prior training data. Incremental fine-tuning is ideal for projects with ongoing updates, allowing you to keep your model optimized without retraining from scratch. [Continuous Fine-tuning ](https://store.crowdin.com/continuous-fine-tuning)Automate the fine-tuning process with incremental updates to your AI models based on new translations in Crowdin Enterprise projects. ## [Downloading Datasets](#downloading-datasets) [Section titled “Downloading Datasets”](#downloading-datasets) Crowdin Enterprise allows you to download datasets for external tools or local validation, or in cases where fine-tuning is not performed within the platform. Available dataset options: * **Training Dataset** – Contains data used for model training, including translations from selected projects and translation memories. * **Validation Dataset** – Contains data used to evaluate model accuracy, ensuring the trained model performs well on unseen data. To download a dataset, follow these steps: 1. Open your organization’s **Workspace** and select **AI** on the left sidebar. 2. In the **Fine-tuning** tab, click **Create**. 3. Configure the datasets using [basic parameters](#basic-parameters) and [advanced parameters](#advanced-parameters). 4. Click **Download dataset** and select your preferred dataset type for export.
# AI Setup Wizard
> Quickly configure AI features in Crowdin Enterprise using the AI Setup Wizard
The AI Setup Wizard simplifies and speeds up the configuration of Crowdin AI, allowing you to leverage AI-powered translations that adapt to various levels of context. With just a few steps, you can enable AI Pre-translate to apply these translations to your content or use AI as an assistant in the Editor for translation, proofreading, and more. Designed to get you started quickly, the wizard guides you through selecting needed features, configuring providers, and automatically creating AI prompts for the selected features. To further customize settings, read more about [configuring AI prompts](/enterprise/crowdin-ai/#configuring-ai). ## [When to Use the AI Setup Wizard](#when-to-use-the-ai-setup-wizard) [Section titled “When to Use the AI Setup Wizard”](#when-to-use-the-ai-setup-wizard) You’ll see a **Start Using Crowdin AI Right Now!** banner if you haven’t configured your prompts yet. Click the **AI Setup Wizard** button to begin configuring Crowdin AI. ## [Selecting AI Features](#selecting-ai-features) [Section titled “Selecting AI Features”](#selecting-ai-features) On the **Features** step, select the AI functionalities you’d like to enable in your Crowdin Enterprise projects: * **AI Pre-translate** – Automatically pre-translate strings with contextual awareness. * **AI in Editor** – Provides translators with AI-powered assistance. * *Show AI Suggestions:* Displays AI suggestions along with TM and MT suggestions. Caution Enabling AI suggestions may increase token usage, depending on your provider. Once you select the needed features, Crowdin Enterprise will create AI prompts for them. You can adjust these prompts later in the **AI > Prompts** settings if needed. 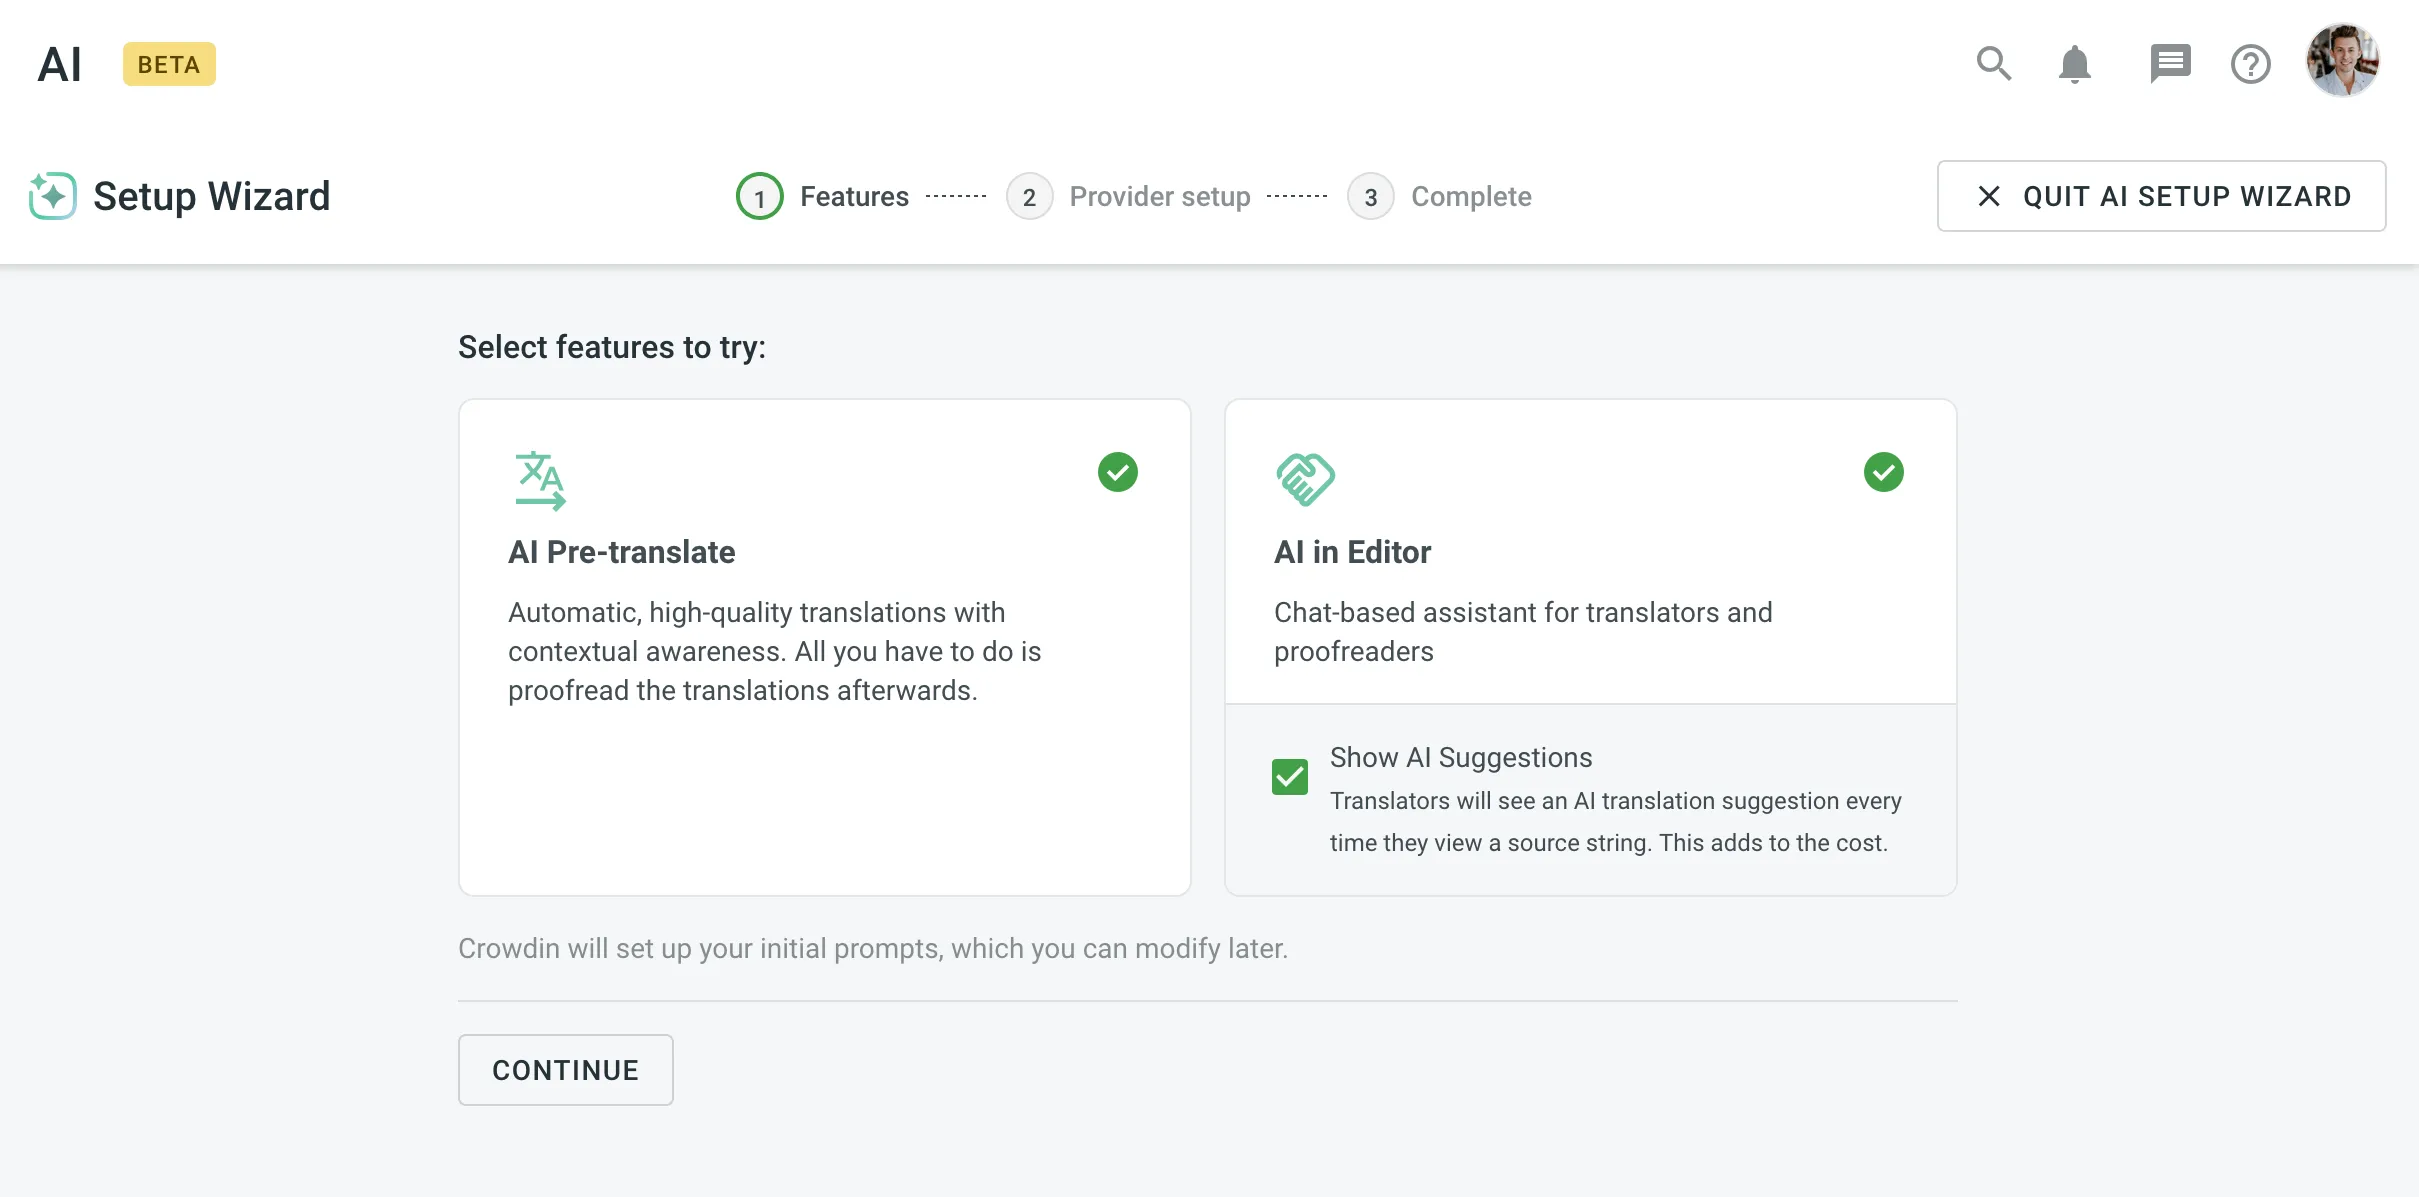 ## [Configuring AI Providers](#configuring-ai-providers) [Section titled “Configuring AI Providers”](#configuring-ai-providers) On the **Provider Setup** step, choose an AI provider and configure the credentials: 1. Select a provider from the **AI Provider** drop-down menu. 2. Click to explore and add more providers from the [Crowdin Store](https://store.crowdin.com/) if needed. 3. Choose how to manage your credentials: * **I have my own API key** – Recommended for enhanced privacy and ownership. * **Managed by Crowdin** – Ideal for testing or smaller volumes. After selecting and configuring your provider, click **Continue** to proceed to the final step. 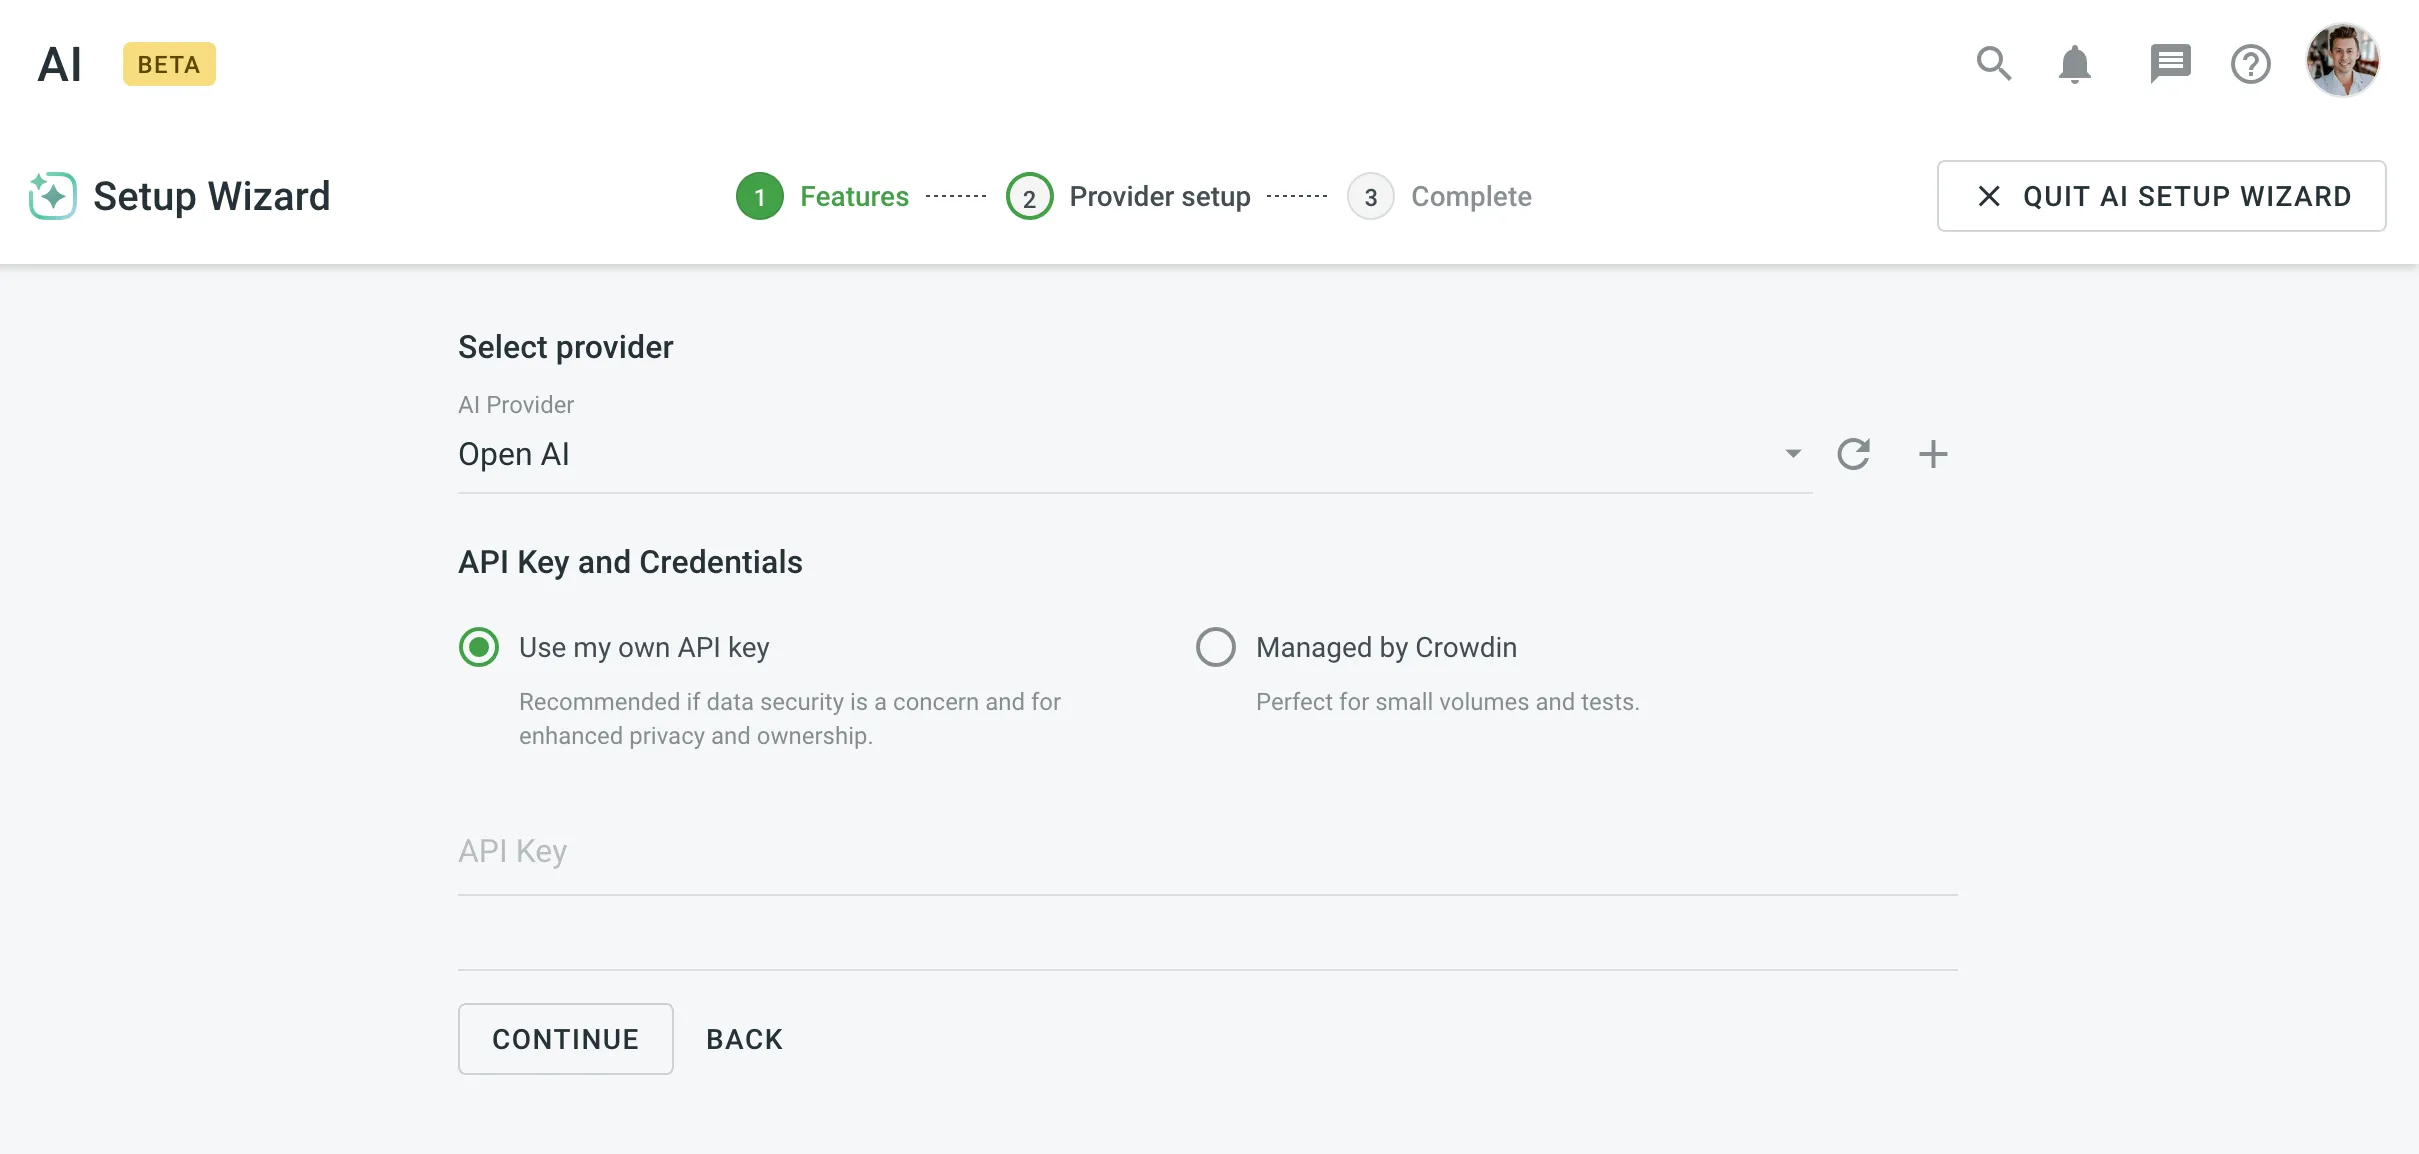 ## [Setup Summary](#setup-summary) [Section titled “Setup Summary”](#setup-summary) The final step provides a summary of the AI features and settings configured for your projects: * **Pre-translate with AI** – Available in the Pre-translate menu and the Editor. * **AI in the Editor** – Enables the AI Assistant for translators working on strings. * **AI Suggestions** – Available in the Editor along with TM and MT suggestions. To complete the setup, click **Got It!**. 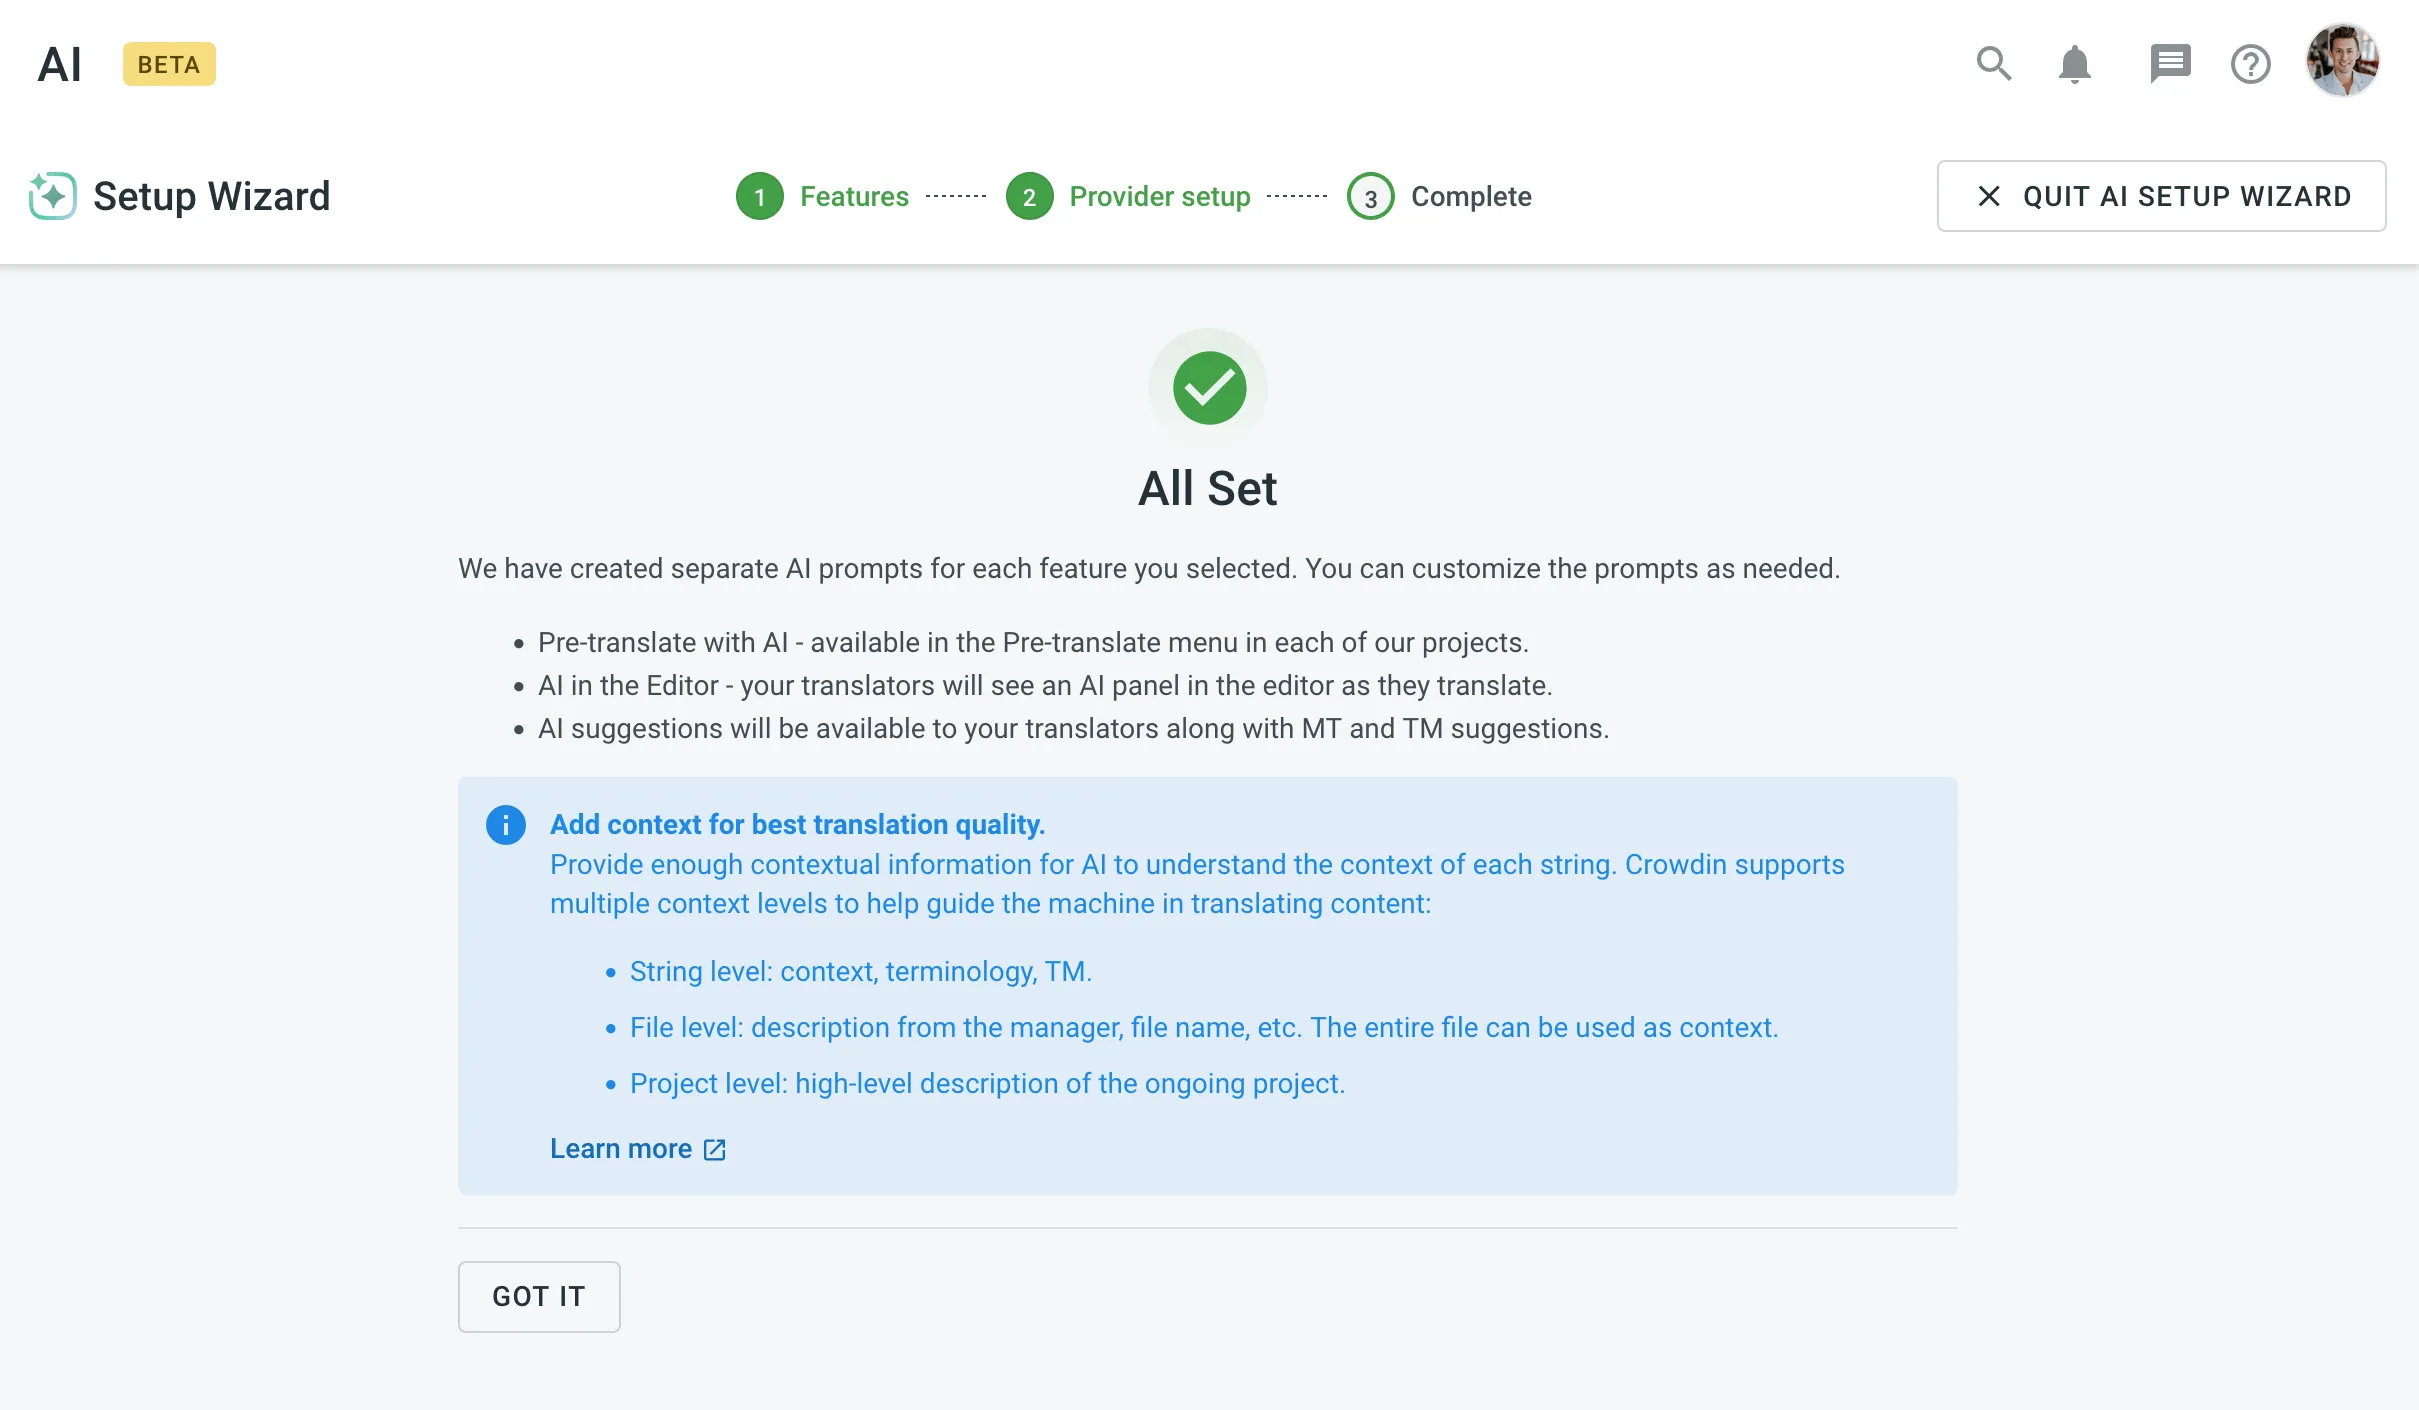 ### [Add Context for Better Translations](#add-context-for-better-translations) [Section titled “Add Context for Better Translations”](#add-context-for-better-translations) AI performs best when provided with sufficient contextual information. Crowdin supports multiple levels of context to improve translation accuracy: * **String level** – Includes terminology, context, and TM data. * **File level** – Includes descriptions, file names, and the file’s overall context. * **Project level** – Includes a high-level description of the ongoing project. ## [Best Practices for Setting Up Crowdin AI](#best-practices-for-setting-up-crowdin-ai) [Section titled “Best Practices for Setting Up Crowdin AI”](#best-practices-for-setting-up-crowdin-ai) Follow these best practices to optimize your Crowdin AI setup and ensure smooth operation: * **Adjust Settings to Your Needs** – You can revisit the AI settings anytime to enable or disable features, switch providers, or modify prompts. * **Monitor Usage and Costs** – If using a managed AI service, track your balance and billing to avoid disruptions. Read more about [Using Crowdin Managed Services](/enterprise/crowdin-managed-services/#using-crowdin-managed-services). * **Enhance Security** – For better control over data privacy and ownership, consider using your own API key. ## [Q\&A](#qa) [Section titled “Q\&A”](#qa)
# App-based Workflow Step
> Configure new workflow steps unlocked by installing apps from the Crowdin Store
App-based workflow steps become available after you install specific apps from the [Crowdin Store](https://store.crowdin.com/) or add private apps to your Crowdin Enterprise organization. These steps can provide specialized functionality like AI-driven proofreading, delayed processing, etc., and are a powerful way to tailor workflows to your team’s exact needs. By adding them to your workflow, you expand Crowdin Enterprise’s default capabilities with unique conditions, automation, and integrations. ## [Use Cases](#use-cases) [Section titled “Use Cases”](#use-cases) Below are a few examples of how app-based steps can enhance your workflows. Some are drawn from existing Crowdin Store apps, while others illustrate broader possibilities: * **Workflow Delay** – The [Workflow Delay](https://store.crowdin.com/workflow-step-delay) app adds checkpoint-style steps that pause segments until conditions are met or on a set schedule. This helps prevent incomplete or unverified segments from moving forward prematurely, improving overall translation consistency. * **AI Proofreader** – The [AI Proofreader](https://store.crowdin.com/ai-proofread-agent) app introduces an **AI Proofreader** workflow step. It can automatically proofread content across multiple languages using custom AI prompts and perform various actions, reducing or even eliminating the need for manual proofreading. * **AI Source Review** – Another possible scenario could be an app that automatically reviews and refines source text before translation, catching typos, style inconsistencies, or placeholders that might cause issues later. This approach helps ensure higher-quality translations by starting with well-polished source strings. * **AI Labeling** – A step that could analyze your strings and automatically apply labels (e.g., “Marketing Content,” “Technical Doc,” “High Priority”), helping route content to the most appropriate translation or review paths. [Workflow Overview ](/enterprise/workflows/) [Crowdin Store ](https://store.crowdin.com/) ## [Installing Apps from the Crowdin Store](#installing-apps-from-the-crowdin-store) [Section titled “Installing Apps from the Crowdin Store”](#installing-apps-from-the-crowdin-store) Before you can add an app-based workflow step, you need to install the corresponding app. You can install apps from the Crowdin Store or, if you’ve developed your own, add it as a private app. Read more about [Creating Workflow Step Apps](/developer/crowdin-apps-module-workflow-step-type/). Depending on the app, you may need specific permissions (e.g., Manager or Admin) to install it. Once installed, the new step types appear in your workflow editor or workflow template editor. Read more about [Installing Crowdin Apps](/developer/crowdin-apps-installation/#installation-in-crowdin-enterprise). Caution If you uninstall the app later, any workflow that uses the app-based step will show an error or be flagged as having issues. ## [Adding App-based Workflow Steps to Your Workflow](#adding-app-based-workflow-steps-to-your-workflow) [Section titled “Adding App-based Workflow Steps to Your Workflow”](#adding-app-based-workflow-steps-to-your-workflow) You can add app-based workflow steps directly to a project’s workflow in the workflow editor or include them in workflow templates via the workflow template editor. 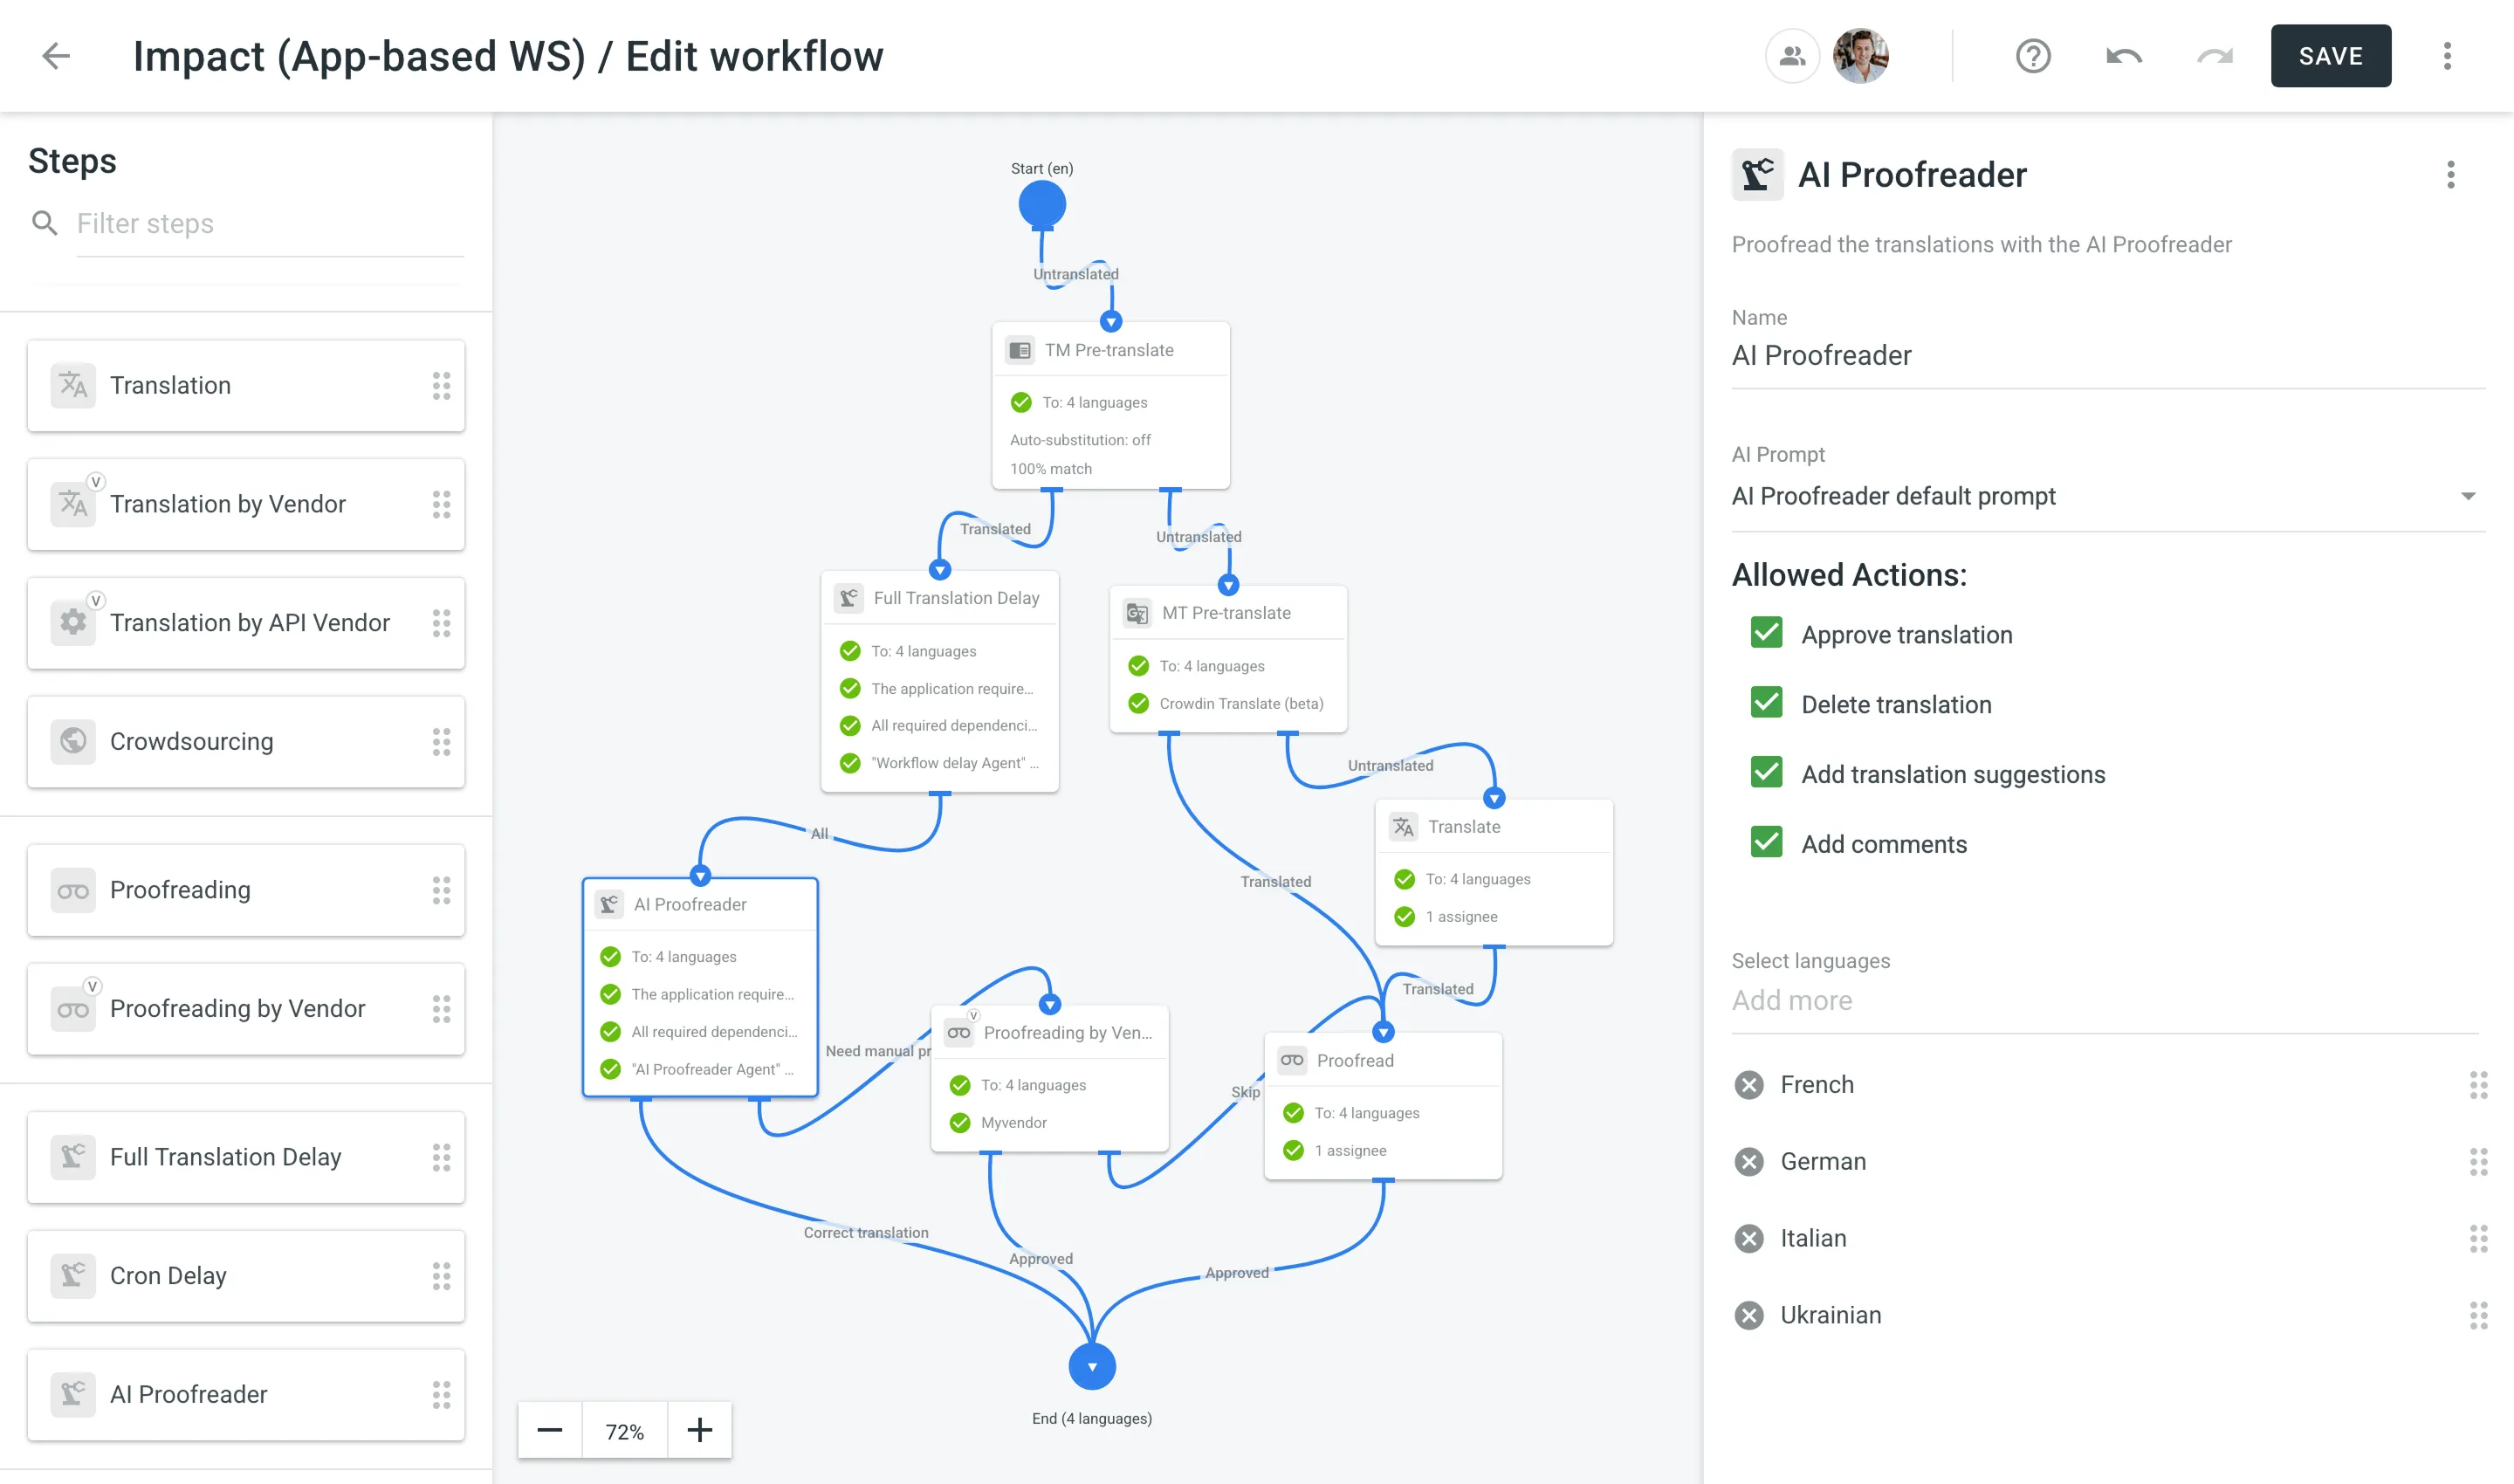 ## [Step Configuration](#step-configuration) [Section titled “Step Configuration”](#step-configuration) Depending on how the app is implemented, an app-based workflow step may offer various configuration options, or none at all. For example: * **Configurable Steps** – Some steps allow you to adjust parameters in the workflow editor (e.g., specifying a delay for content processing). In these cases, you can modify the available options to suit your needs. * **Pre-configured Steps** – Other steps have all their settings predefined by the app (e.g., delaying content until an entire file is fully translated), so no additional fields appear in the workflow editor. If a step provides configuration fields, they typically appear in the step’s settings panel once you drag it into the workflow. These fields can include anything from AI prompts and allowed actions (e.g., approving or deleting translations, adding translation suggestions or comments, etc.) to API tokens, delay intervals, or match conditions — whatever the app developer has enabled. If there are no visible configuration options, the app likely manages all necessary setup internally. ## [Troubleshooting](#troubleshooting) [Section titled “Troubleshooting”](#troubleshooting) When an app-based step is misconfigured, Crowdin Enterprise flags the workflow as having issues. You may notice: * **Error Banners and Inactive Steps** – If the app is removed or becomes inactive, your project’s Dashboard may display a banner informing about the workflow issues with instructions on how to resolve them.  In the workflow editor, you may see steps with failed validations (e.g., *The application required for this step type is uninstalled*). To fix this, reinstall the app and reconfigure its step, or remove the step if it’s no longer needed. * **Validation Warnings** – When saving changes to the workflow, a warning might appear if the app-based step is misconfigured or has unmet dependencies (e.g., *Workflow Delay Agent requires manager permissions*). * **No Access to the App-based Step** – Occasionally, an app-based step may not appear in the workflow editor if the app was installed with limited project access or if you lack the required role (e.g., Manager). Check your project settings to confirm you have Manager or Admin rights and that the app is allowed in the intended project. * **Connectivity or External Service Errors** – If an app-based step relies on a third-party service or API, timeouts or network failures may cause the step to fail or get stuck. * **Check Service Status**: Verify that any external service used by the app is online and functioning properly. * **Inspect Logs**: If the app provides logs or an admin panel, review any error messages it may have generated. * **Network & Firewall Settings**: Verify that your firewall or VPN isn’t blocking the app’s requests.
# App Subscriptions
> Learn how to subscribe to paid apps in Crowdin Store
Crowdin Store offers various apps you can install to extend Crowdin functionality, synchronize your content stored on a CMS, and more. [Crowdin Store ](https://store.crowdin.com/)Explore 700+ apps and integrations to streamline your localization process. Some of the apps are available for free, while others are paid. You might easily distinguish paid apps since all of them have the subscription price specified. Once you install the paid app, the 30-day free trial will be activated for you. After the free trial, you will be asked to [subscribe](#subscribing-to-paid-app). Depending on the date you activate the paid app subscription in relation to your primary Crowdin Enterprise subscription, the first payment amount might differ from the default app subscription cost. While on the next billing cycle, the app subscription will be included in your primary Crowdin Enterprise subscription in full. Information about all active paid app subscriptions will be added to your invoices. 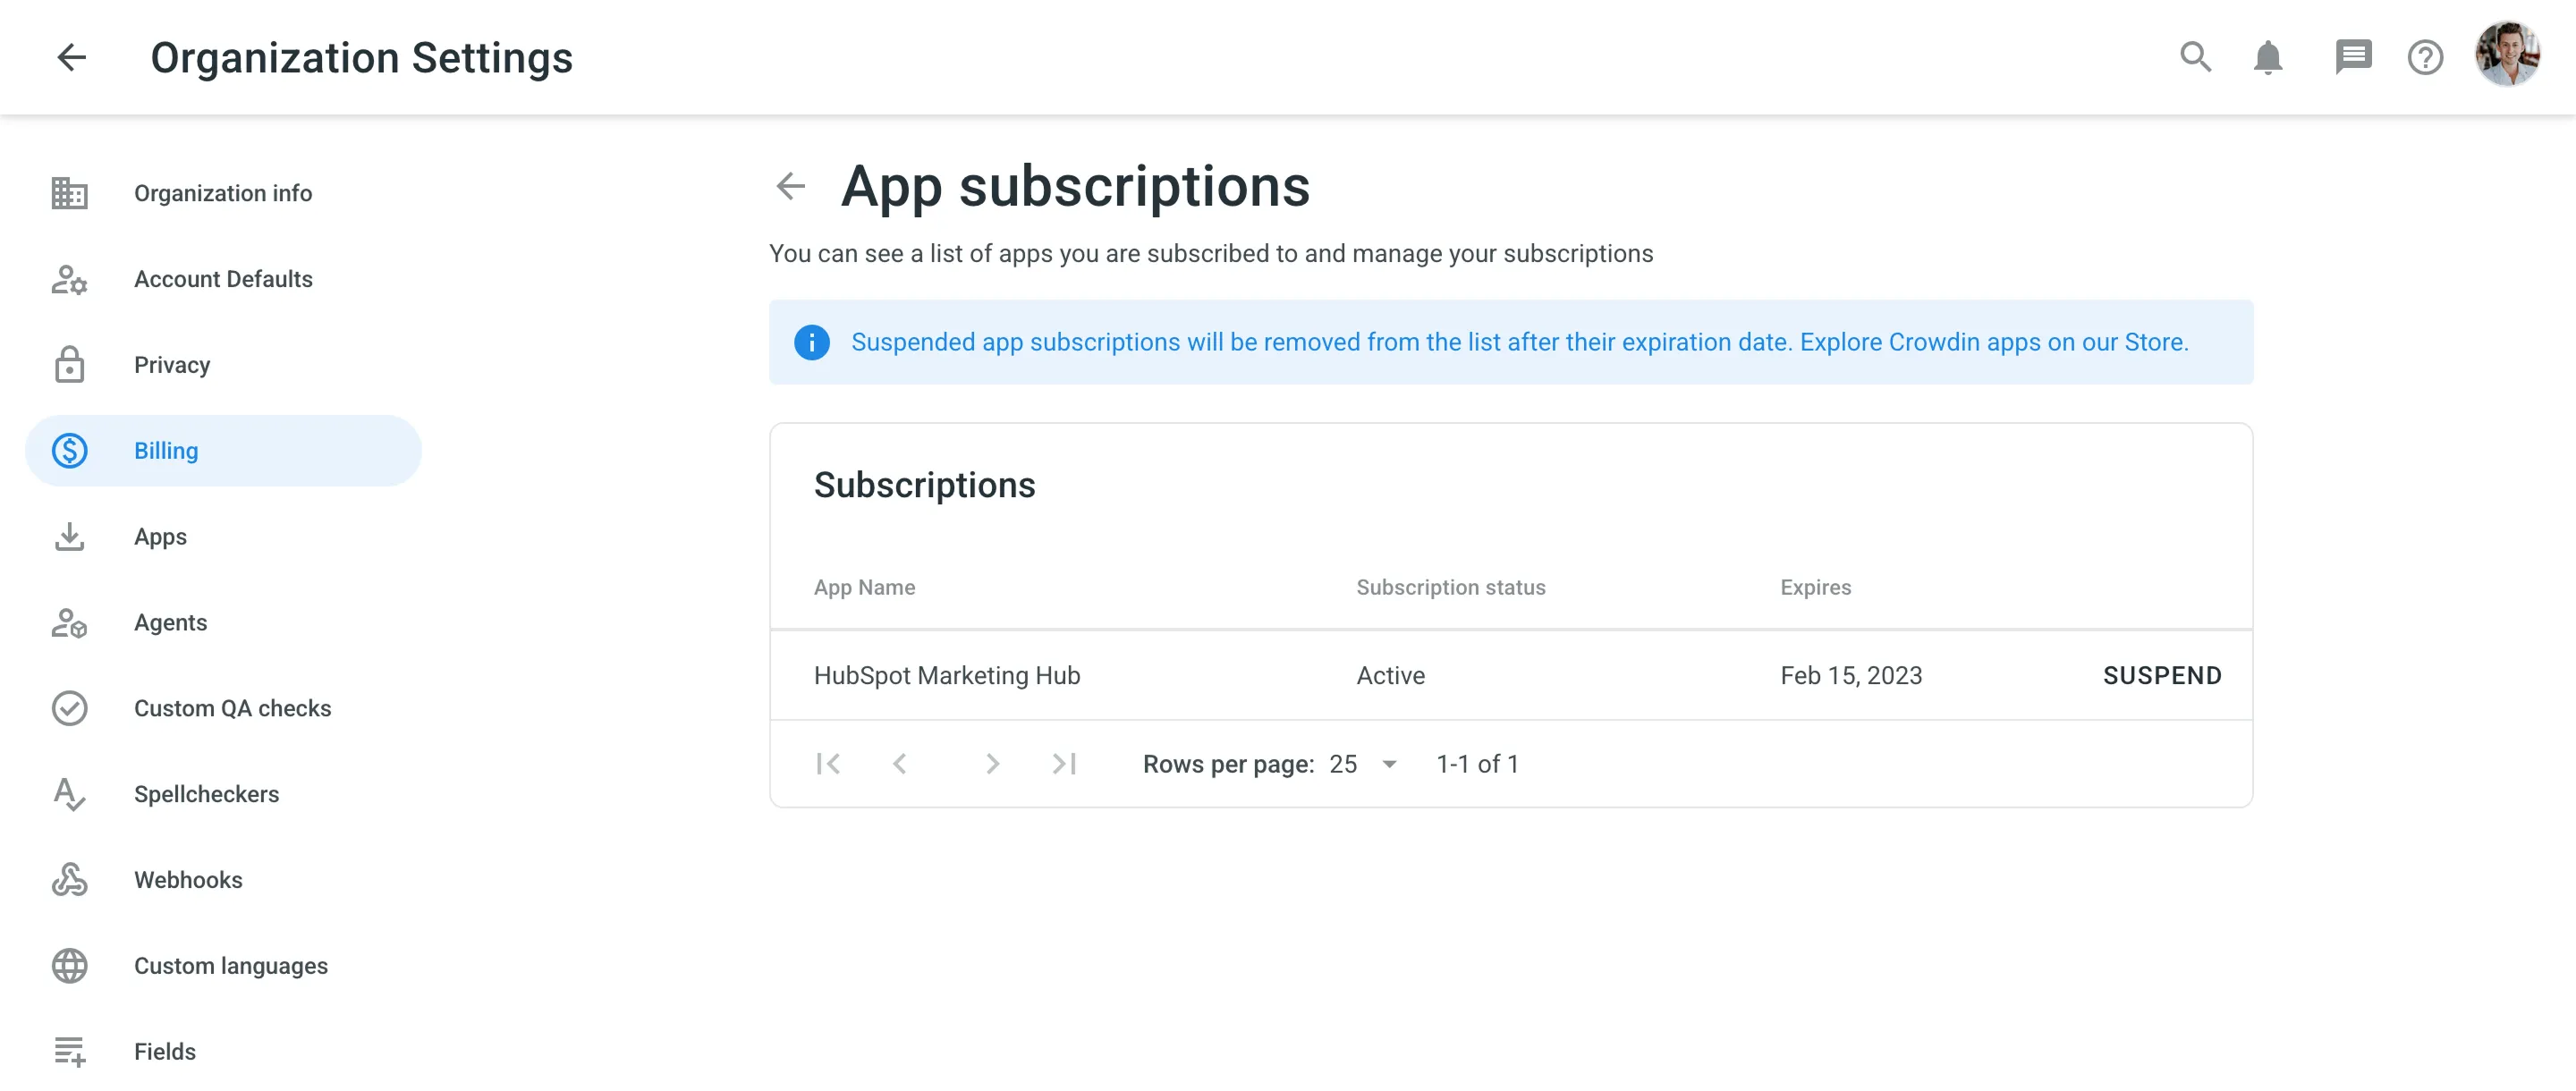 ## [Subscribing to Paid App](#subscribing-to-paid-app) [Section titled “Subscribing to Paid App”](#subscribing-to-paid-app) Once the 14-day trial period ends, you’ll be asked to subscribe to continue using the paid app. To subscribe to the paid app, follow these steps: 1. Open the app you’d like to purchase a subscription for. Depending on the app type, it might be located in the Crowdin Enterprise UI on the project’s Integrations page, Editor, etc. 2. Click **Subscribe**. 3. You’ll be redirected to the checkout page. 4. Fill in all the required fields. 5. Click **Proceed to payment** to complete the purchase. ## [How App Subscriptions Work](#how-app-subscriptions-work) [Section titled “How App Subscriptions Work”](#how-app-subscriptions-work) Since all Crowdin Enterprise subscription charged annually, your paid app subscriptions will be deducted from your account balance along with the primary Crowdin Enterprise subscription pseudo-charges. For example, your primary Crowdin Enterprise subscription is a Team+ plan ($5,400 billed annually and deducted from your Crowdin Enterprise account balance as $450/month pseudo-charges), and you’re subscribing to a paid app that costs $139/month, which would result in a total of $589 deducted from your account balance every month. ## [Managing Paid App Subscriptions](#managing-paid-app-subscriptions) [Section titled “Managing Paid App Subscriptions”](#managing-paid-app-subscriptions) You can view your currently active paid app subscriptions, and if needed, you can suspend any of the app subscriptions at any time. To suspend paid app subscription, follow these steps: 1. Go to **Organization Settings > Billing**. 2. Click **App subscriptions**. 3. Click **Suspend** toward the app name. ## [See Also](#see-also) [Section titled “See Also”](#see-also) [Pricing page ](https://crowdin.com/pricing)Plans, Pricing, and Free Trial. [Payments and Invoices ](/enterprise/payments-invoices/)Learn how payments work in Crowdin and how to download invoices. [Changing Subscription Plan ](/enterprise/changing-subscription-plan/)Upgrade or downgrade your subscription plan. [Billing Settings ](/enterprise/billing-settings/)Update your billing information and payment method.
# Asset Localization
> Localize project content with all the graphics in one place
Localize project content with all the graphics (pictures, logos, non-textual files) in one place. File formats that are not supported by Crowdin Enterprise (e.g., .png, .psd, .jpeg) will be uploaded as assets. ## [Use Cases](#use-cases) [Section titled “Use Cases”](#use-cases) You may upload assets and make all localization data accessible for translators in Crowdin Enterprise. This helps to: * Keep all translation data stored under the same roof * Avoid miscommunication, as you may provide detailed translation instructions for project members by adding context * Ease the integration of translated content back online, as the initial file formats will be preserved ## [Typical Workflow](#typical-workflow) [Section titled “Typical Workflow”](#typical-workflow) To work with assets, follow these steps:. 1. Upload files to your Crowdin Enterprise project. 2. Add necessary [references](#typical-asset-references) for the translators to understand how the translations should be done. Use *Context* for additional details. 3. Allow translators to download the files. For this, open your project and go to **Settings > Privacy > Translations** and enable **Allow offline translation**. Read more about [offline translation](/enterprise/offline-translation/). 4. Translators will download the files, localize them offline, and upload the translated versions back ## [Typical Asset References](#typical-asset-references) [Section titled “Typical Asset References”](#typical-asset-references) * Adobe Photoshop PSD file (an editable source file that translators can modify according to the localization requirements). * Font files since some assets may use custom fonts. * Style guide (is shown in the editor as a context or additional downloadable file). * Manual/instruction that guides through the localization process step by step. ## [Assets in TXT Format](#assets-in-txt-format) [Section titled “Assets in TXT Format”](#assets-in-txt-format) Some unsupported text formats (e.g., .toc, .gitignore) will be imported to Crowdin Enterprise as .txt files. Users can translate such files in Crowdin Enterprise directly.
# Azure Repos Integration
> Synchronize files between your Azure Repos repository and Crowdin
The Azure Repos integration allows you to synchronize files between your Azure Repos repository and Crowdin Enterprise project. In file-based projects, there are two possible Azure Repos integration modes you can choose from: * **Source and translation files mode** – synchronize source and translation files between your Azure Repos repository and Crowdin Enterprise project. * **Target file bundles mode** – generate and push translation files to your Azure Repos repository from the Crowdin Enterprise project in the selected format. In this mode, integration pushes translation files and doesn’t sync sources from your repo. In cases when you perform a source text review in your Crowdin Enterprise project and want to get updated source texts to your repo, you can add a source language as a target language, which will be pushed to your repo along with translations. In string-based projects, Azure Repos integration exclusively operates in the **Target file bundles mode**. Read more about [project types](/enterprise/creating-project/#project-types). All translated and approved files (or target file bundles) are automatically merged into the `l10n` branch of the Azure Repos repository. ## [Connecting Azure Repos Account](#connecting-azure-repos-account) [Section titled “Connecting Azure Repos Account”](#connecting-azure-repos-account) 1. Open your project and select **Integrations** on the left sidebar. 2. Click on **Azure Repos** in the Integrations list. 3. Click **Set Up Integration** and select **Source and translation files mode** or **Target file bundles mode** from the drop-down list to integrate via your Azure Repos account. 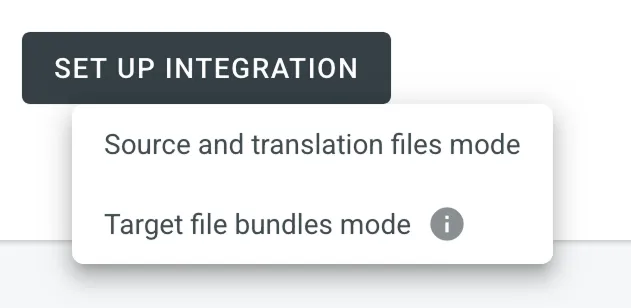 4. Then authorize the connection with Crowdin on the Azure Repos side: 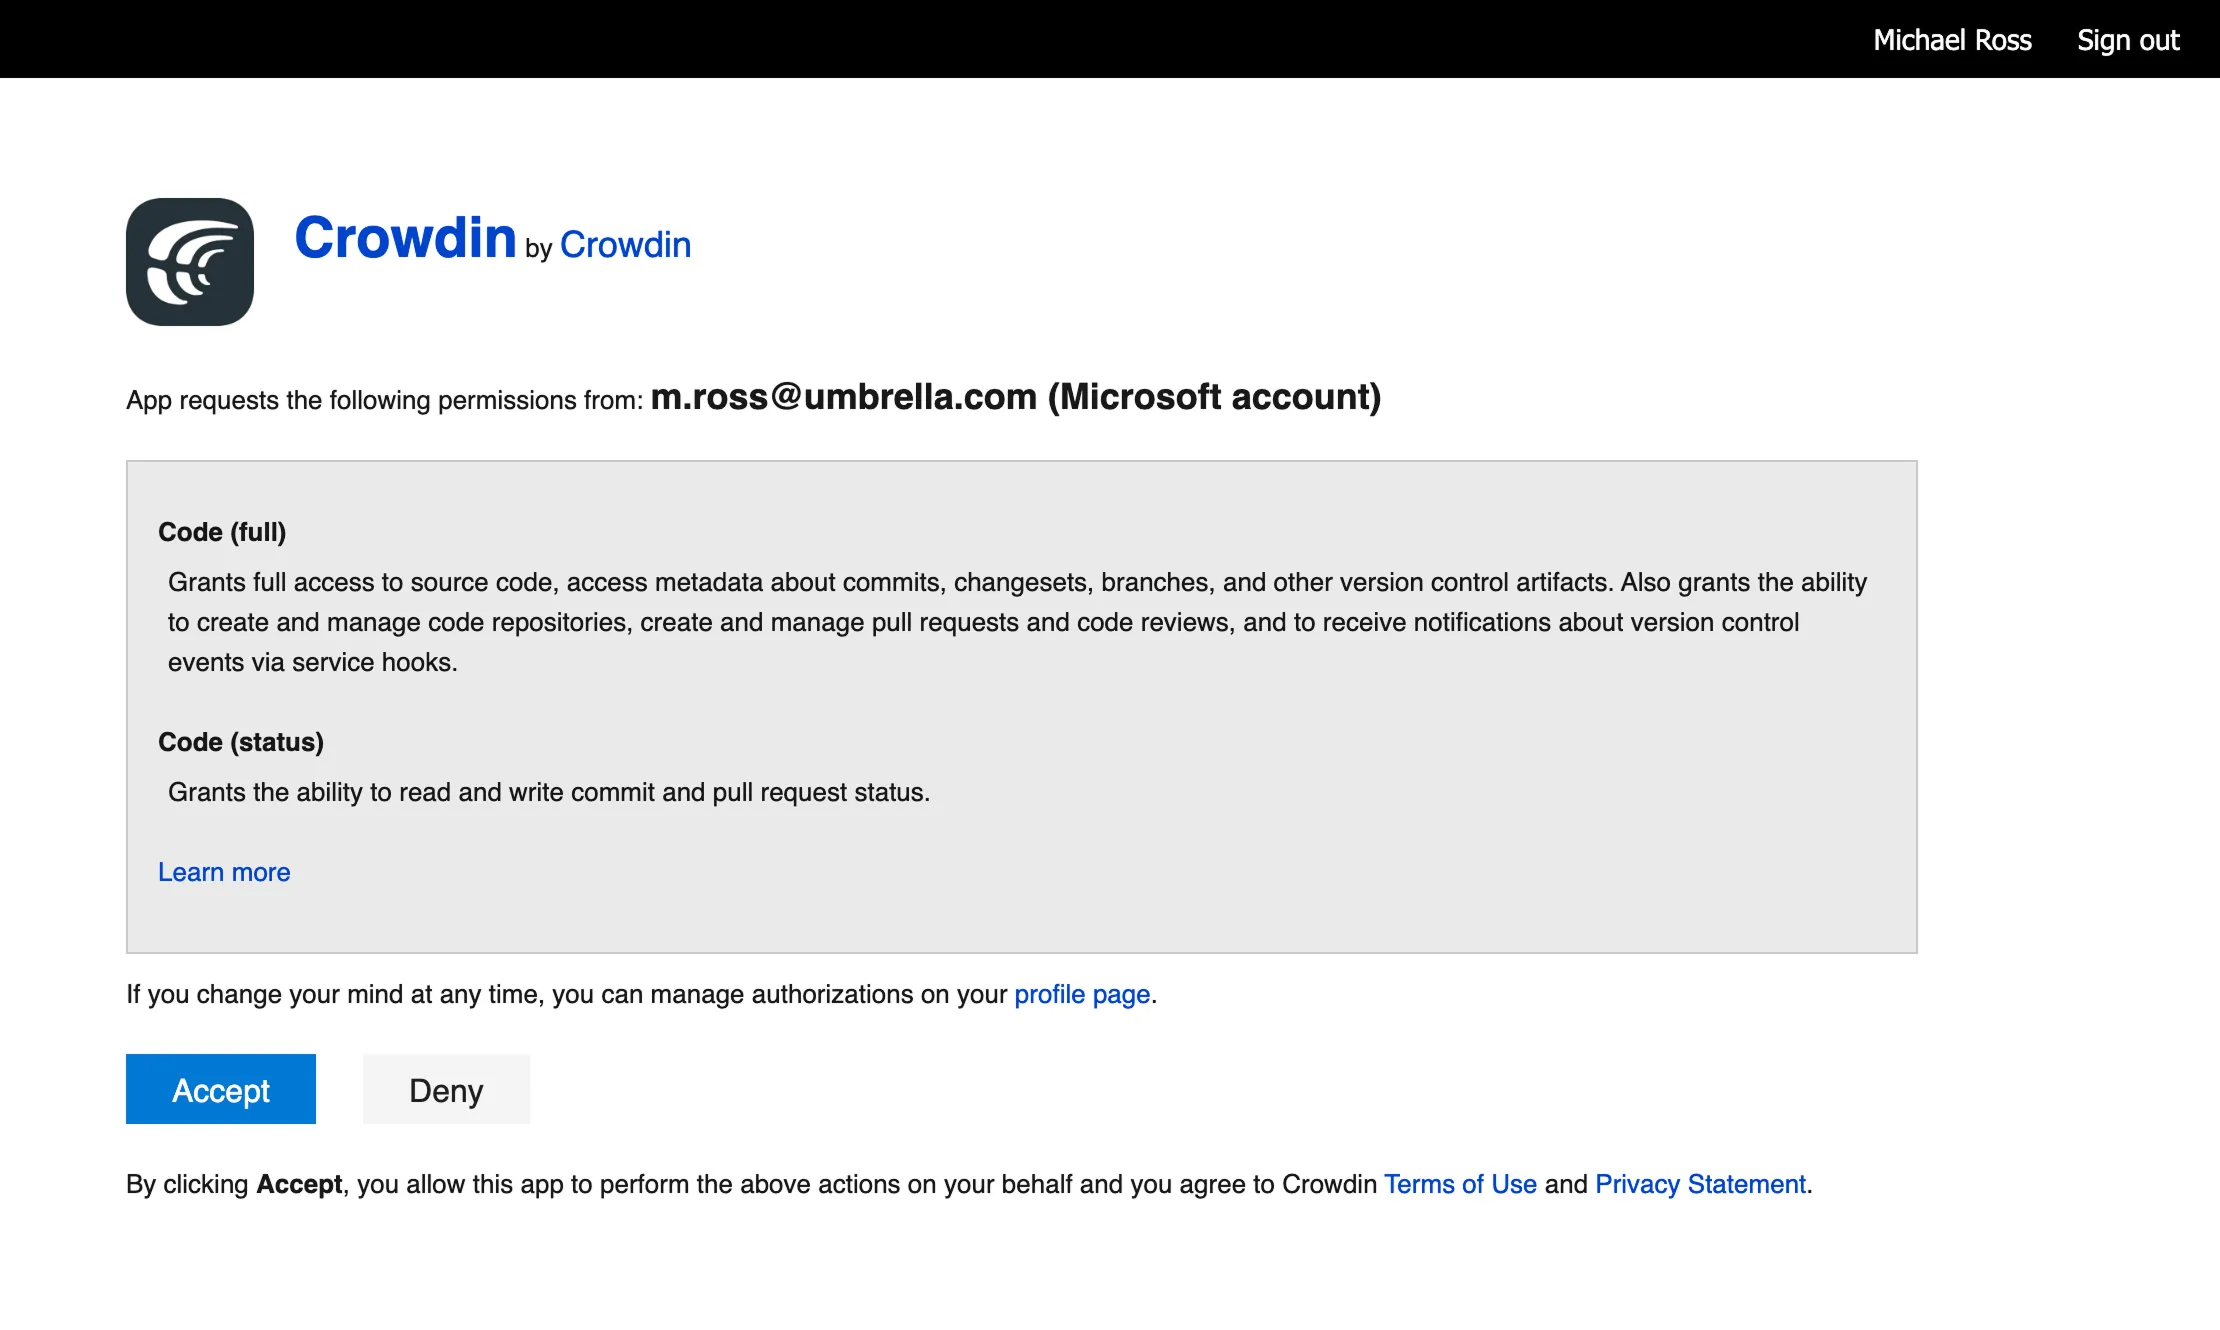 In case the repository you need is private, and you have limited or no access to it, please ask the repository owner to provide you with an access token. Afterward, click **Use personal access token** and insert the token into the *Token* field and click **Set Up Integration**. ### [Selecting Repository](#selecting-repository) [Section titled “Selecting Repository”](#selecting-repository) In the appeared dialog, select your repository and branches that should be translated. * File-based project 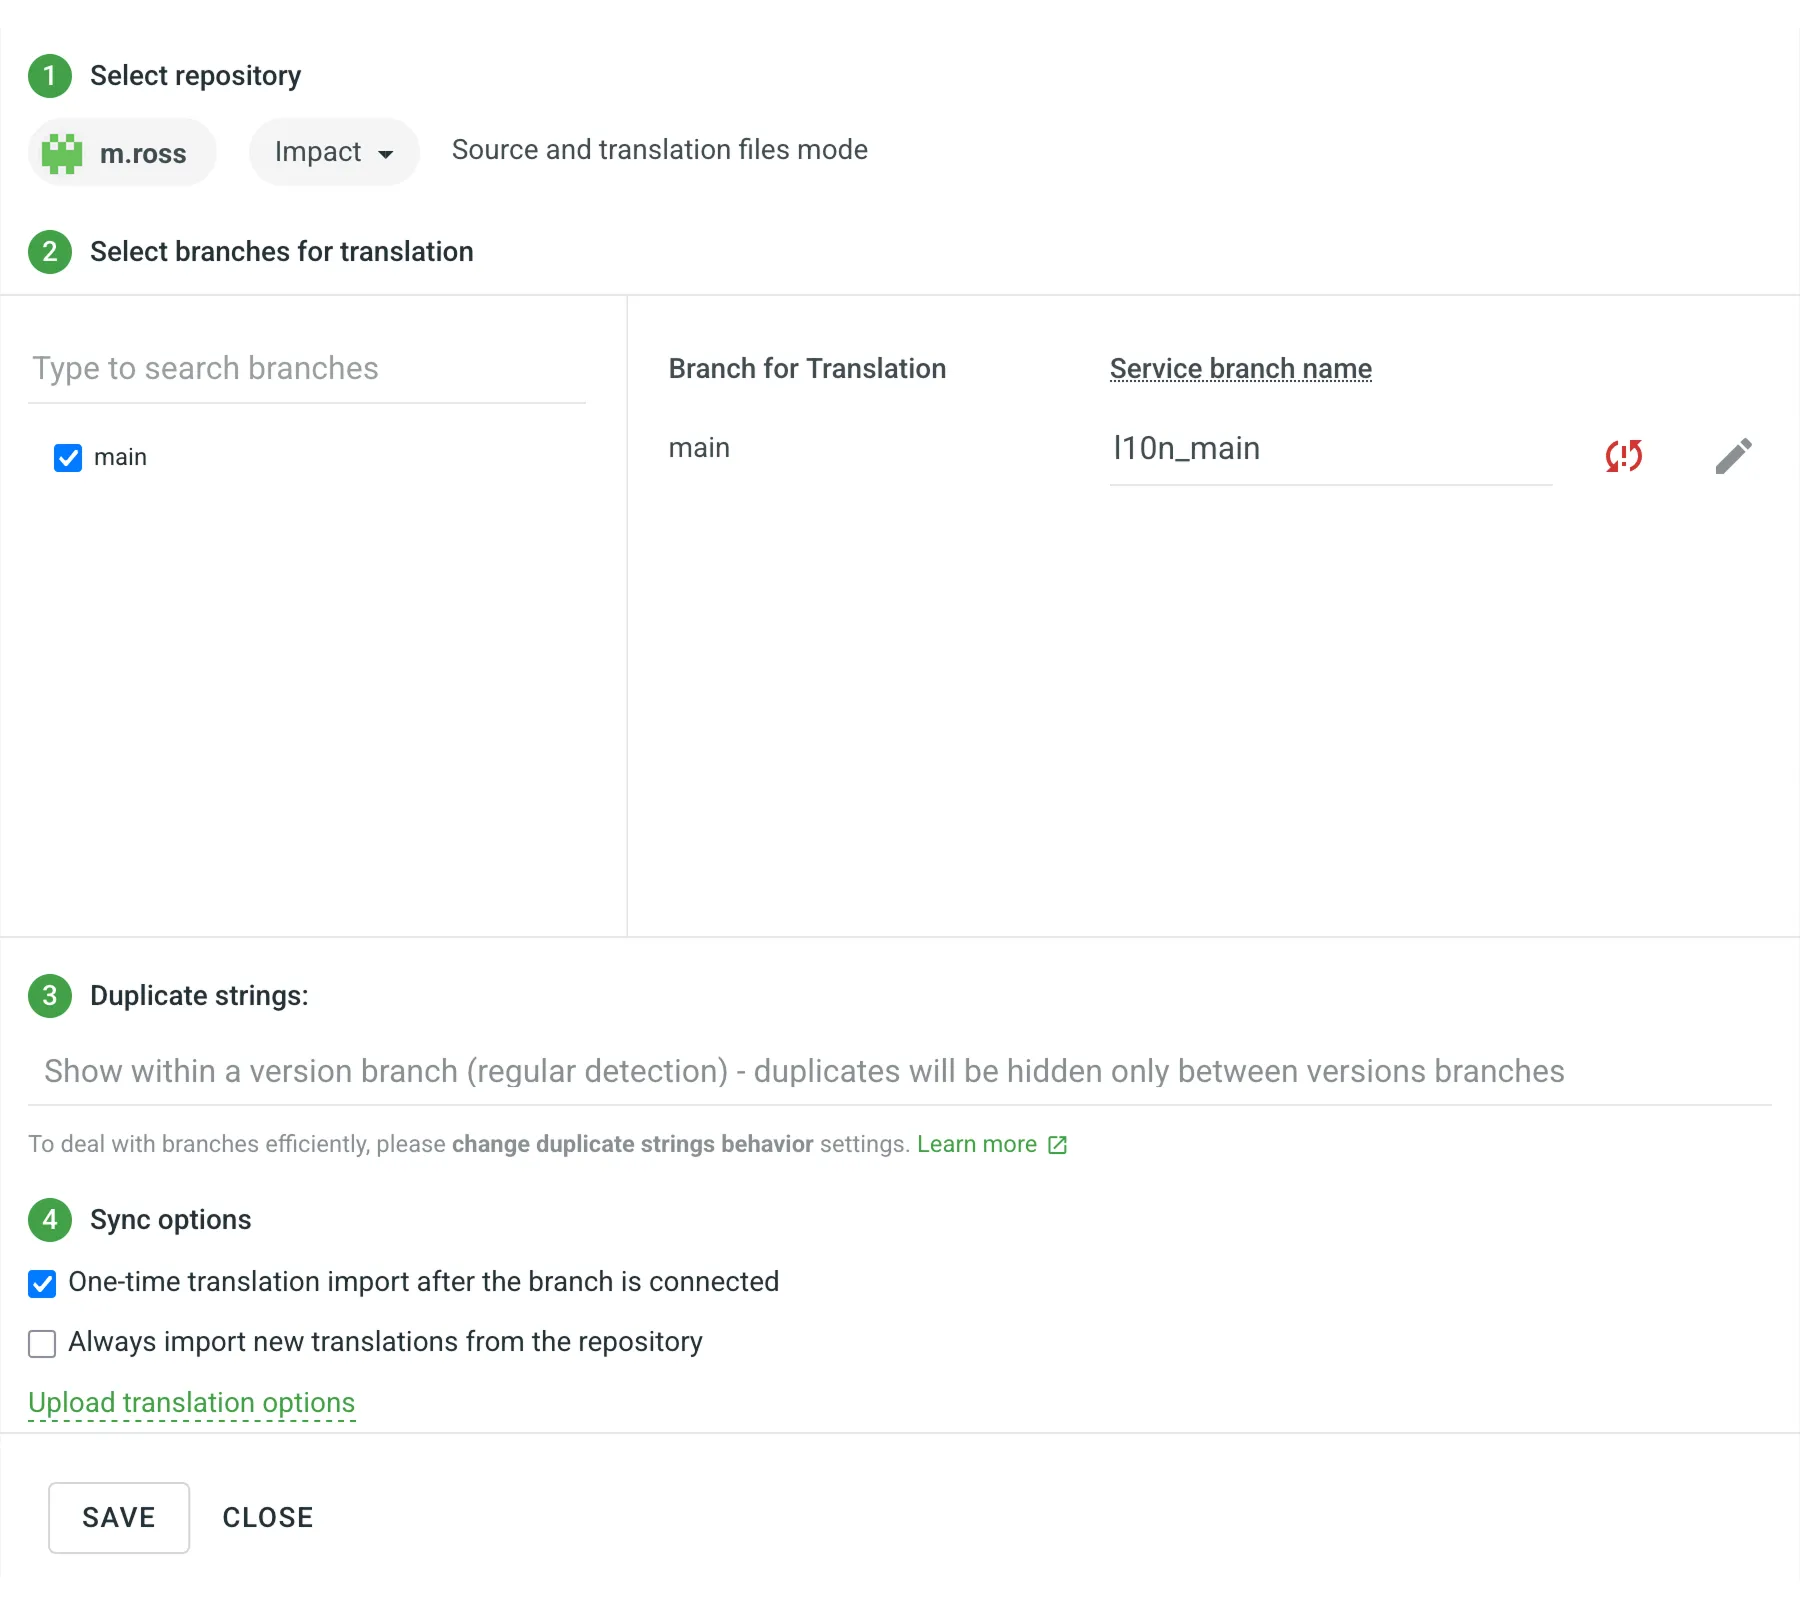 It’s recommended to switch Duplicate Strings to **Show within a version branch**, so identical strings will be hidden between branches. If your source files contain strings with apparent identifiers (keys), it’s better to use a *strict* version of this option. In other cases, feel free to use a *regular* one. * String-based project 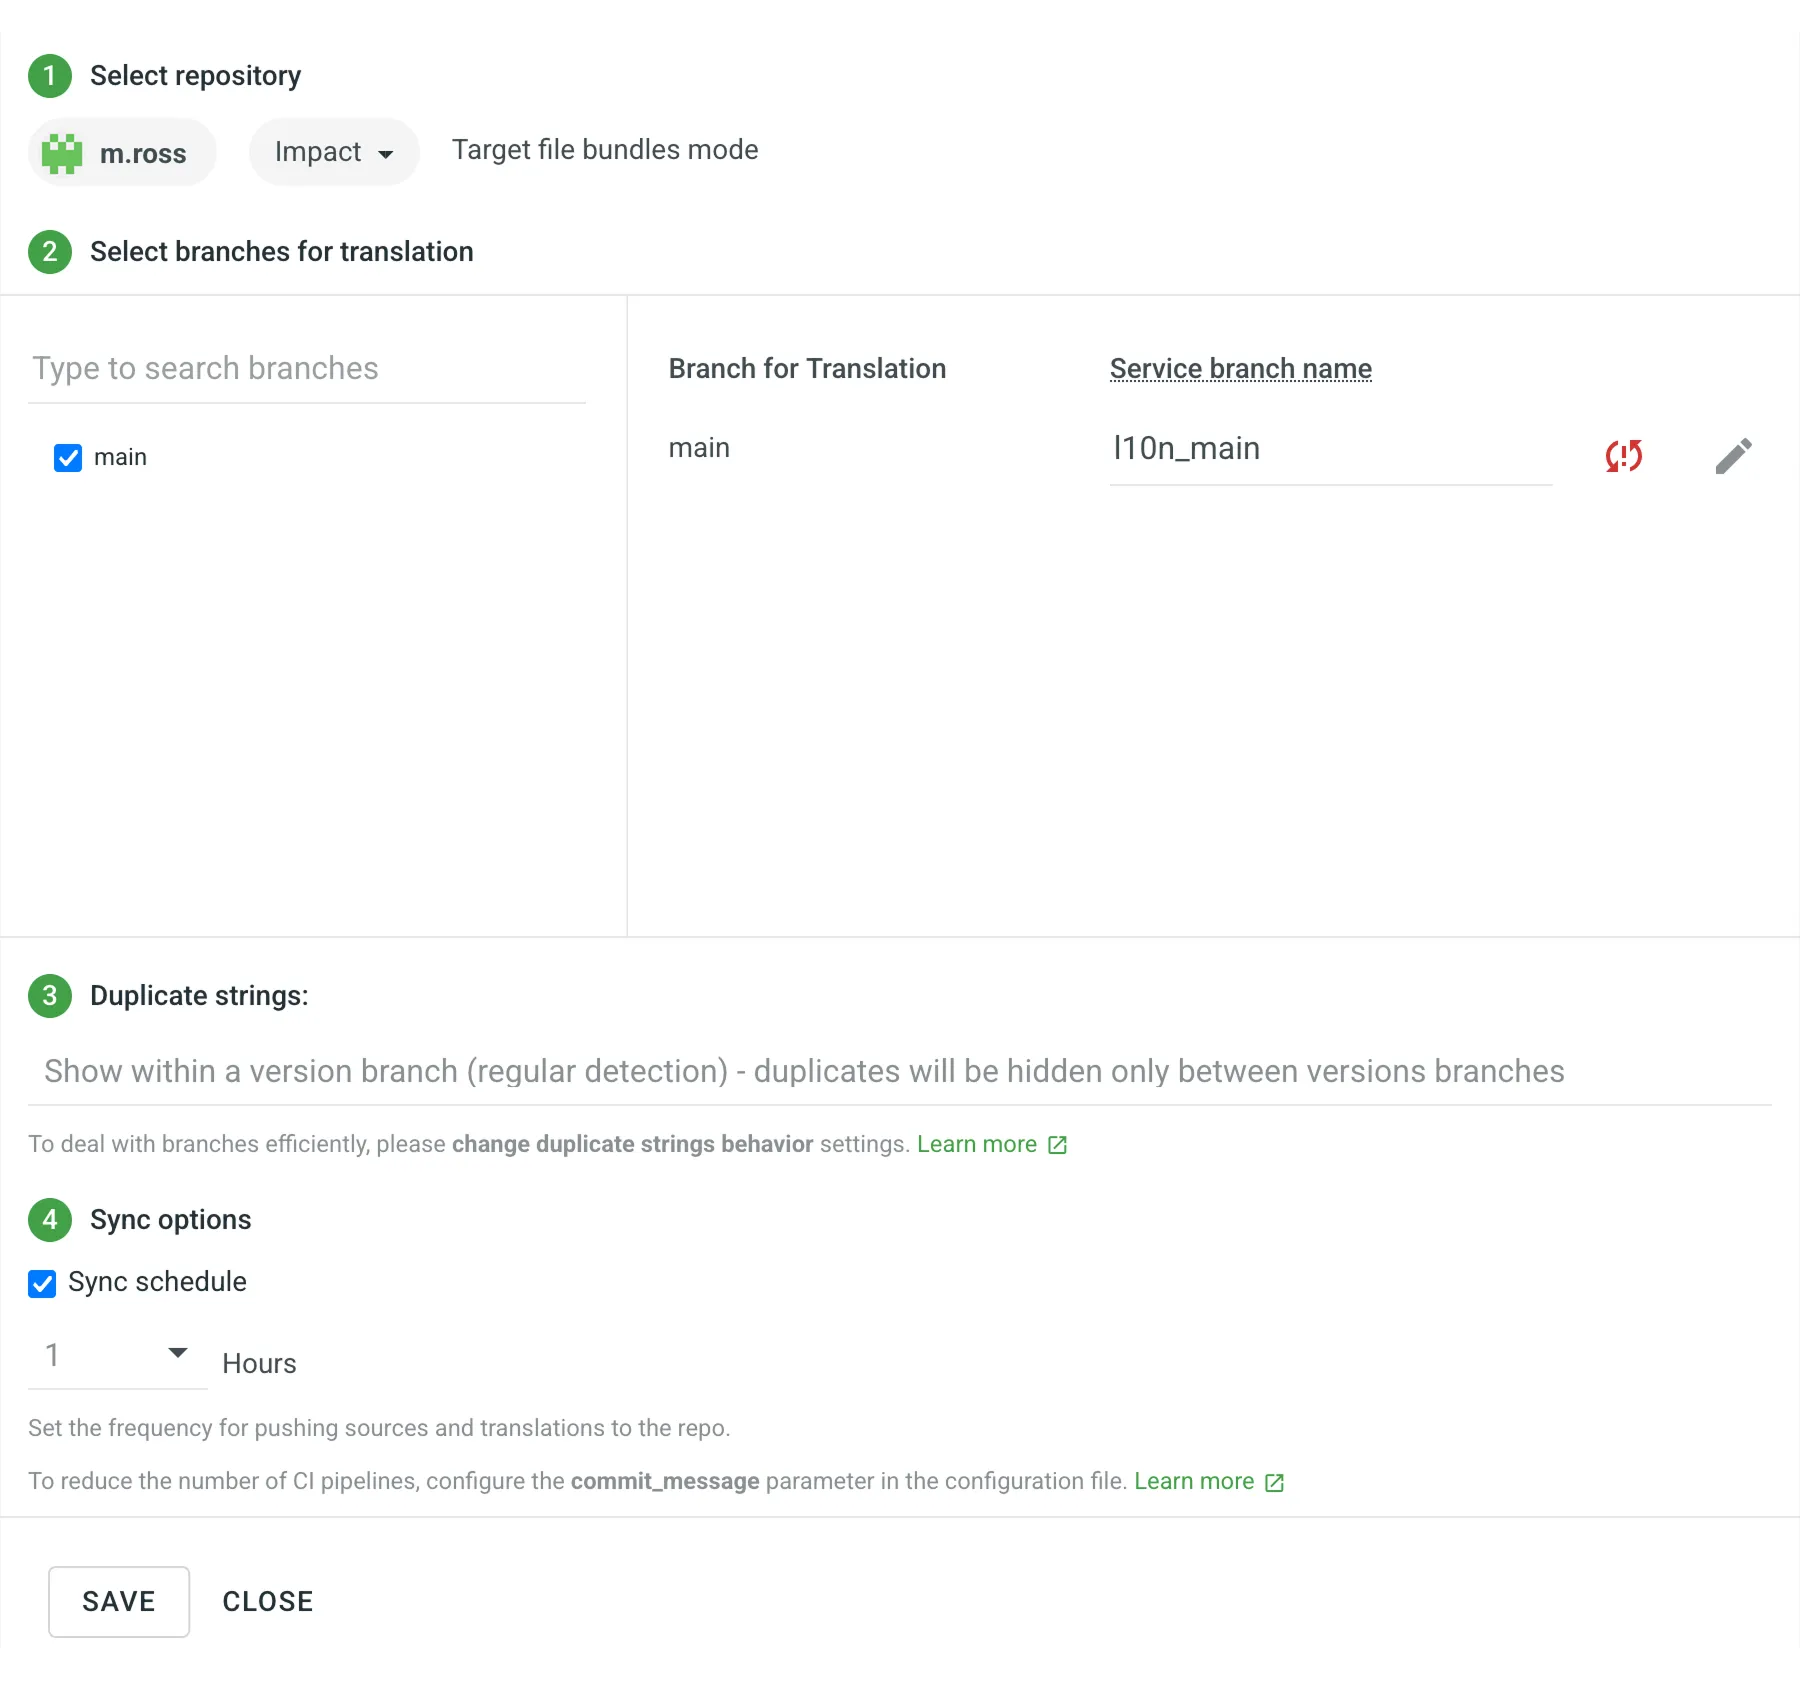 [Duplicate Strings ](/enterprise/project-settings/import/#duplicate-strings) [Version Management ](/enterprise/version-management/) When working with Azure Repos integration in the **Target File Bundles Mode**, the integration will send the completed translations from your Crowdin Enterprise project without pulling sources from your repo. So when selecting a repository and branches that should be translated, you specify where the integration should put the generated bundles with translations. Read more about [configuring target file bundles for VCS integration](/enterprise/bundles/#bundles-in-vcs-integrations). When you work with private integrations (e.g., integrations with self-hosted VCS), you need to add dedicated Crowdin IP addresses to the allowlist to ensure that it operates properly while staying secure. Read more about [IP Addresses](/developer/ip-addresses/#integrations). ### [Service Branches](#service-branches) [Section titled “Service Branches”](#service-branches) When translations are finished and your languages are ready to go live, Crowdin Enterprise sends the pull request with translations to your version control system. For every branch that is under localization, Crowdin Enterprise creates an additional service branch with translations. We don’t commit directly to the master branch so that you can verify translations first. By default, `l10n_` is added to the created service branch name. If necessary, you can easily change it. ### [Synchronization Settings](#synchronization-settings) [Section titled “Synchronization Settings”](#synchronization-settings) Configure the synchronization settings according to your needs and preferences. Limitations The *Import existing translations* and *Push Sources* options are only available for file-based projects. #### [Import Existing Translations](#import-existing-translations) [Section titled “Import Existing Translations”](#import-existing-translations) To import existing translations from your repo, select one of the following options: * **One-time translation import after the branch is connected** * **Always import new translations from the repository** By default, the first option is selected to import translations only once. Alternatively, you can clear both options if you don’t want to import translations from your repo. Click **Upload translations options** to access the following additional options: * **Allow target translation to match source** * **Approve added translations** #### [Push Sources](#push-sources) [Section titled “Push Sources”](#push-sources) By default, sources are not pushed to the repo with translations. Although, if you perform a source text review in your Crowdin Enterprise project and would like to push the changes made to your source files on Crowdin Enterprise back to your repo, click **Edit**, select *Push Sources* in the integration settings, and click **Save**. #### [Sync Schedule](#sync-schedule) [Section titled “Sync Schedule”](#sync-schedule) The synchronization is processed every hour automatically. If necessary, you can change the update interval in the integration settings. To configure the synchronization schedule – click **Edit**, scroll down to the *Sync Schedule*, set the preferred interval, and click **Save**. There are cases when it’s necessary to disable translations from being pushed to the repo temporarily. In this situation, click **Edit**, clear *Sync Schedule* in the integration settings, and click **Save**. When ready to sync translations with the repo, select the *Sync Schedule*, and click **Save**. Not depending on the synchronization settings, the source files’ changes on the repo will still be synced with Crowdin Enterprise continuously. ### [Branches to Sync Automatically](#branches-to-sync-automatically) [Section titled “Branches to Sync Automatically”](#branches-to-sync-automatically) When you set up the integration, you select existing repository branches to be added to the Crowdin Enterprise project. To add future branches from Azure Repos to Crowdin Enterprise automatically, create a pattern for the branch names in the integration settings. For example, you add a pattern \**feature* in the Azure Repos integration settings. In this case, the future branches that contain this word at the end of the title will be added to the project. To add a pattern for branch names, follow these steps: 1. Click **Edit** in the Azure Repos integration section. 2. In the appeared dialog, scroll down to the *Branches to Sync Automatically*. 3. In the *Branches to Sync Automatically* field, use wildcard selectors such as `*`, `?`, `[set]`, `\` and others to identify the necessary branches. 4. Click **Save**. ### [Default Configuration File Name](#default-configuration-file-name) [Section titled “Default Configuration File Name”](#default-configuration-file-name) `crowdin.yml` is the default file name that is used for automatically synchronized branches. To change the default settings, click **Edit**, specify the preferred name in the *Default configuration file name* field in the integration settings, and click **Save**. If you don’t specify your custom configuration file name for automatically synchronized branches, and the integration doesn’t find a configuration file with the default name `crowdin.yml` in the root of the branch, these branches will be marked in the integration settings with a red icon with an exclamation mark saying “Not Ready. Check the configuration”. ## [Selecting Content for Synchronization](#selecting-content-for-synchronization) [Section titled “Selecting Content for Synchronization”](#selecting-content-for-synchronization) To make integration work, you need to specify which source files should be translated and how Crowdin Enterprise should structure translated files in your repository. There are two ways you can specify content for synchronization: * Configuring online * Configuring manually by creating a configuration file ### [Configuring Online](#configuring-online) [Section titled “Configuring Online”](#configuring-online) This procedure is the same for all integrations with version control systems (VCS). Check [Configuring VCS Integrations Online](/enterprise/configuring-vcs-integrations-online/) to get to know how to select content for synchronization online. ### [Creating Configuration File](#creating-configuration-file) [Section titled “Creating Configuration File”](#creating-configuration-file) The configuration file `crowdin.yml` should be stored in the Azure Repos repository along with each separate branch that you want to translate, so Crowdin Enterprise knows what files exactly should be sent for translations. It should have the same structure as required for CLI, but your project’s credentials should not be stored in the file’s header for security reasons. Read more about [creating a configuration file](/developer/configuration-file/). ## [Working with Multiple Repositories within One Project](#working-with-multiple-repositories-within-one-project) [Section titled “Working with Multiple Repositories within One Project”](#working-with-multiple-repositories-within-one-project) If you’re working with a multi-platform product that has versions for different operating systems, you may want to connect multiple repositories that contain source files for each operating system. In this case, localization resources (e.g., TMs, Glossaries) and translations could be used more efficiently, reducing the time needed for project localization. To add another repository, follow these steps: 1. Open your project and select **Integrations** on the left sidebar. 2. Click on **Azure Repos** in the Integrations list. 3. Click **Add Repository**. 4. Configure the integration with the new repository according to your needs and preferences. ## [Checking the Status of Synchronization](#checking-the-status-of-synchronization) [Section titled “Checking the Status of Synchronization”](#checking-the-status-of-synchronization) Once the integration is set up, all related information is stored in **Integrations > Azure Repos**. After the integration is connected, the settings can be updated only by the project member who configured it. All project managers except the person who configured the integration will see the **Edit** button disabled with the following message when hovering over it: `Integration was configured by {Full Name} ({username})`. By default, synchronization is processed every hour automatically. If you need to launch the synchronization immediately – click **Sync Now**. 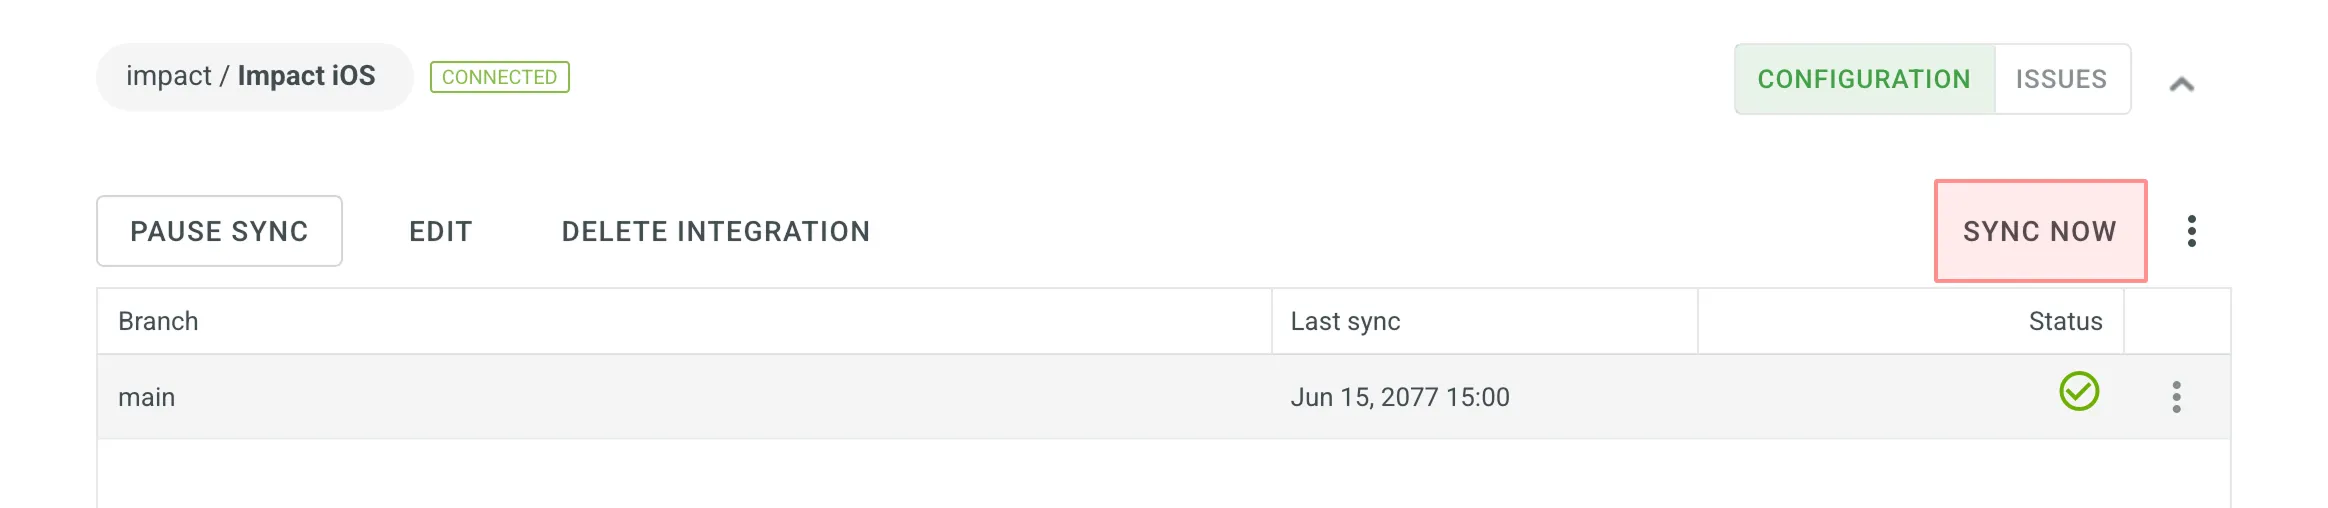 Alternatively, if you need to sync only one branch separately, click on the needed branch and select **Sync branch**. ## [Uploading Translations from Repo](#uploading-translations-from-repo) [Section titled “Uploading Translations from Repo”](#uploading-translations-from-repo) By default, the translations stored on the repo are uploaded to Crowdin Enterprise during the first synchronization only. To upload translations to Crowdin Enterprise manually, click icon next to the **Sync Now** button, and click **Sync Translations to Crowdin Enterprise**. The integration will upload existing translations to your Crowdin Enterprise project. Limitations The *Sync Translations to Crowdin Enterprise* option is available for file-based projects only. ## [Q\&A](#qa) [Section titled “Q\&A”](#qa)
# Billing Settings
> Update your billing information and payment method
Crowdin Enterprise uses the FastSpring service for payment processing. With the help of the FastSpring account management page, you can manage settings like your payment methods, your billing email, and other related information. You can also view your subscriptions, billing dates, and past invoices. ## [Updating Billing Details](#updating-billing-details) [Section titled “Updating Billing Details”](#updating-billing-details) To update your billing information, follow these steps: 1. Go to the [FastSpring Account Management page](https://crowdin.onfastspring.com/account). 2. To log in, specify the same email that was used to purchase your Crowdin Enterprise subscription. 3. Click **Continue**. 4. Click **Edit**. 5. Change the fields with your billing information. 6. Save changes. As a result, the updated billing information will be applied to future payments. 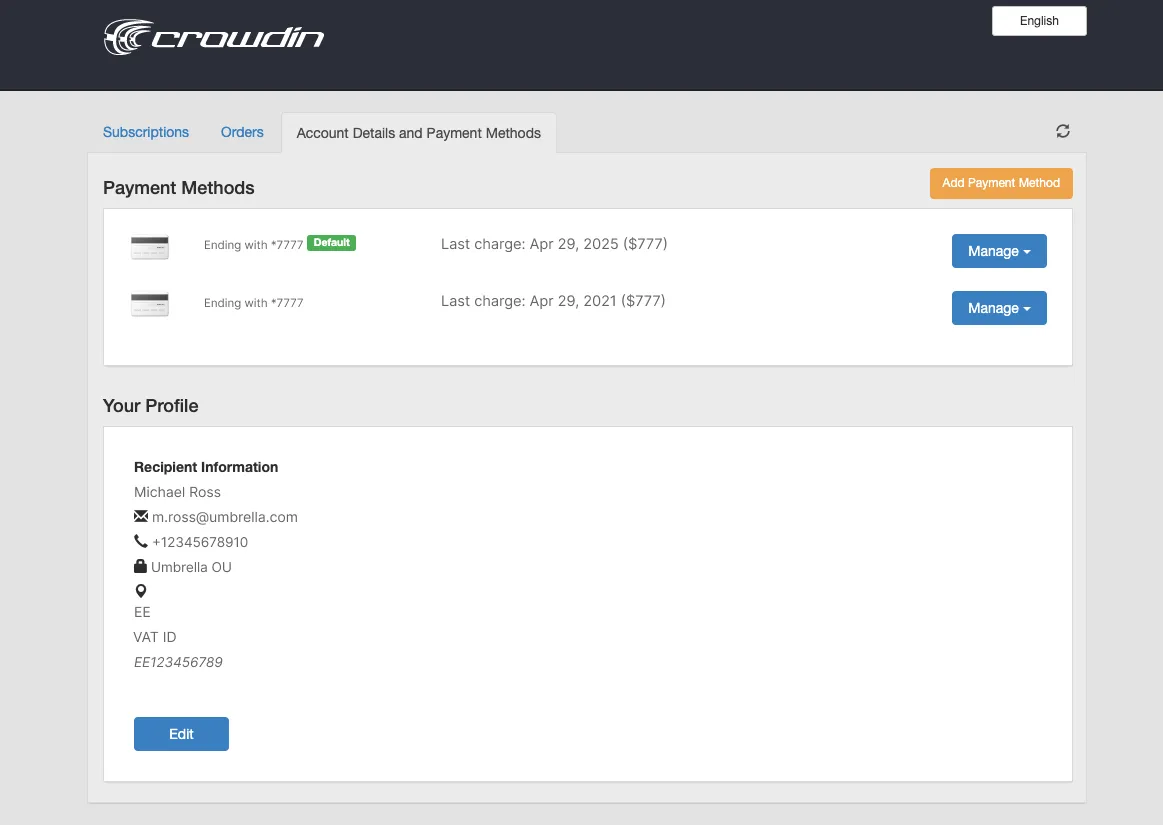 ## [Updating Payment Method](#updating-payment-method) [Section titled “Updating Payment Method”](#updating-payment-method) You can change the payment method used for your Crowdin Enterprise subscription. To update your payment method, follow these steps: 1. Go to the [FastSpring Account Management page](https://crowdin.onfastspring.com/account). 2. To log in, specify the same email that was used to purchase your Crowdin Enterprise subscription. 3. Click **Continue**. 4. Click **Add Payment Method**. 5. Specify your new credit card details. 6. Save changes. Set your new payment method as default to make sure that it will be used for future charges. ## [See Also](#see-also) [Section titled “See Also”](#see-also) [Pricing page ](https://crowdin.com/pricing)Plans, Pricing, and Free Trial. [Payments and Invoices ](/enterprise/payments-invoices/)Learn how payments work in Crowdin and how to download invoices. [Changing Subscription Plan ](/enterprise/changing-subscription-plan/)Upgrade or downgrade your subscription plan. [App Subscriptions ](/enterprise/app-subscriptions/)Learn how to subscribe to paid apps in Crowdin Store.
# Bitbucket Integration
> Synchronize files between your Bitbucket repository and Crowdin
The Bitbucket integration allows you to synchronize files between your Bitbucket repo and Crowdin Enterprise project. In file-based projects, there are two possible Bitbucket integration modes you can choose from: * **Source and translation files mode** – synchronize source and translation files between your Bitbucket repository and Crowdin Enterprise project. * **Target file bundles mode** – generate and push translation files to your Bitbucket repository from the Crowdin Enterprise project in the selected format. In this mode, integration pushes translation files and doesn’t sync sources from your repo. In cases when you perform a source text review in your Crowdin Enterprise project and want to get updated source texts to your repo, you can add a source language as a target language, which will be pushed to your repo along with translations. In string-based projects, Bitbucket integration exclusively operates in the **Target file bundles mode**. Read more about [project types](/enterprise/creating-project/#project-types). All translated and approved files (or target file bundles) are automatically merged into the `l10n` branch of the Bitbucket repository. ## [Connecting Bitbucket Account](#connecting-bitbucket-account) [Section titled “Connecting Bitbucket Account”](#connecting-bitbucket-account) 1. Open your project and select **Integrations** on the left sidebar. 2. Click on **Bitbucket** in the Integrations list. 3. Click **Set Up Integration** and select **Source and translation files mode** or **Target file bundles mode** from the drop-down list to integrate via your Bitbucket account.  4. Then authorize the connection with Crowdin on the Bitbucket side: 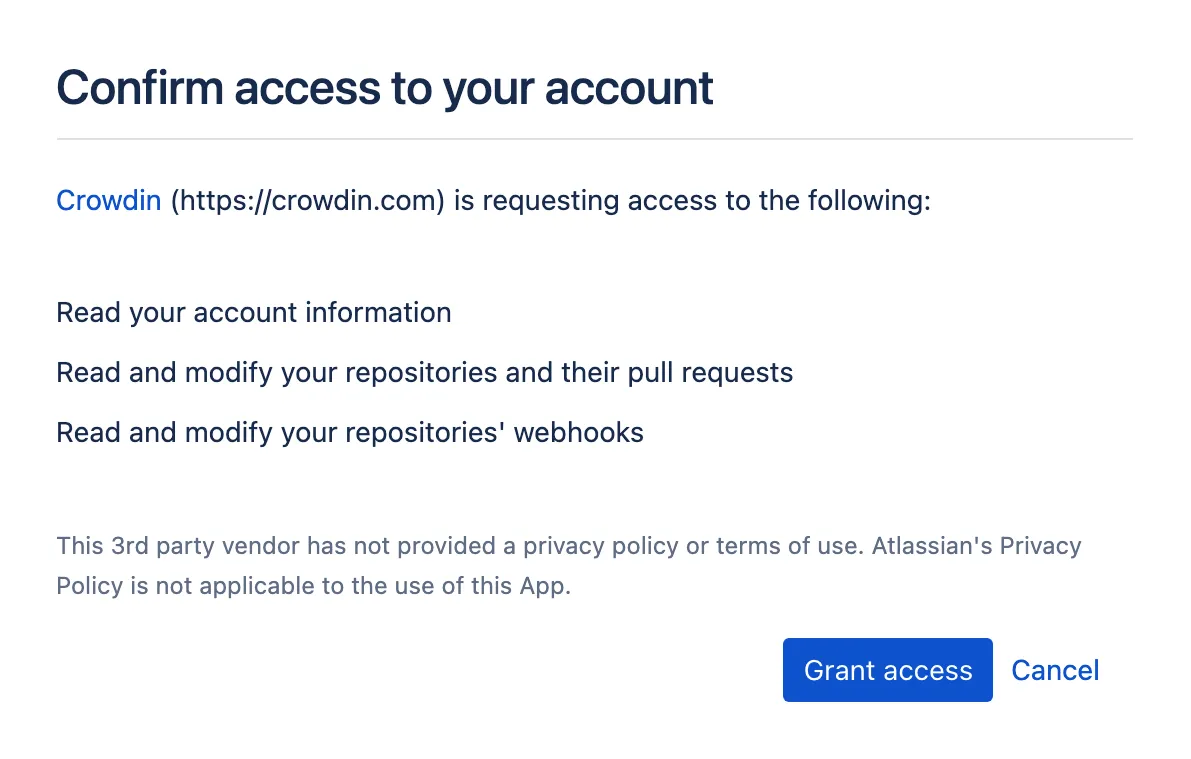 ### [Selecting Repository](#selecting-repository) [Section titled “Selecting Repository”](#selecting-repository) In the appeared dialog, select your repository and branches that should be translated. * File-based project  It’s recommended to switch Duplicate Strings to **Show within a version branch**, so identical strings will be hidden between branches. If your source files contain strings with apparent identifiers (keys), it’s better to use a *strict* version of this option. In other cases, feel free to use a *regular* one. * String-based project  [Duplicate Strings ](/enterprise/project-settings/import/#duplicate-strings) [Version Management ](/enterprise/version-management/) When working with Bitbucket integration in the **Target File Bundles Mode**, the integration will send the completed translations from your Crowdin Enterprise project without pulling sources from your repo. So when selecting a repository and branches that should be translated, you specify where the integration should put the generated bundles with translations. Read more about [configuring target file bundles for VCS integration](/enterprise/bundles/#bundles-in-vcs-integrations). When you work with private integrations (e.g., integrations with self-hosted VCS), you need to add dedicated Crowdin IP addresses to the allowlist to ensure that it operates properly while staying secure. Read more about [IP Addresses](/developer/ip-addresses/#integrations). ### [Service Branches](#service-branches) [Section titled “Service Branches”](#service-branches) When translations are finished and your languages are ready to go live, Crowdin Enterprise sends the pull request with translations to your version control system. For every branch that is under localization, Crowdin Enterprise creates an additional service branch with translations. We don’t commit directly to the master branch so that you can verify translations first. By default, `l10n_` is added to the created service branch name. If necessary, you can easily change it. ### [Synchronization Settings](#synchronization-settings) [Section titled “Synchronization Settings”](#synchronization-settings) Configure the synchronization settings according to your needs and preferences. Limitations The *Import existing translations* and *Push Sources* options are only available for file-based projects. #### [Import Existing Translations](#import-existing-translations) [Section titled “Import Existing Translations”](#import-existing-translations) To import existing translations from your repo, select one of the following options: * **One-time translation import after the branch is connected** * **Always import new translations from the repository** By default, the first option is selected to import translations only once. Alternatively, you can clear both options if you don’t want to import translations from your repo. Click **Upload translations options** to access the following additional options: * **Allow target translation to match source** * **Approve added translations** #### [Push Sources](#push-sources) [Section titled “Push Sources”](#push-sources) By default, sources are not pushed to the repo with translations. Although, if you perform a source text review in your Crowdin Enterprise project and would like to push the changes made to your source files on Crowdin Enterprise back to your repo, click **Edit**, select *Push Sources* in the integration settings, and click **Save**. #### [Sync Schedule](#sync-schedule) [Section titled “Sync Schedule”](#sync-schedule) The synchronization is processed every hour automatically. If necessary, you can change the update interval in the integration settings. To configure the synchronization schedule – click **Edit**, scroll down to the *Sync Schedule*, set the preferred interval, and click **Save**. There are cases when it’s necessary to disable translations from being pushed to the repo temporarily. In this situation, click **Edit**, clear *Sync Schedule* in the integration settings, and click **Save**. When ready to sync translations with the repo, select the *Sync Schedule*, and click **Save**. Not depending on the synchronization settings, the source files’ changes on the repo will still be synced with Crowdin Enterprise continuously. ### [Branches to Sync Automatically](#branches-to-sync-automatically) [Section titled “Branches to Sync Automatically”](#branches-to-sync-automatically) When you set up the integration, you select existing repository branches to be added to the Crowdin Enterprise project. To add future branches from Bitbucket to Crowdin Enterprise automatically, create a pattern for the branch names in the integration settings. For example, you add a pattern \**feature* in the Bitbucket integration settings. In this case, the future branches that contain this word at the end of the title will be added to the project. To add a pattern for branch names, follow these steps: 1. Click **Edit** in the Bitbucket integration section. 2. In the appeared dialog, scroll down to the *Branches to Sync Automatically*. 3. In the *Branches to Sync Automatically* field, use wildcard selectors such as `*`, `?`, `[set]`, `\` and others to identify the necessary branches. 4. Click **Save**. ### [Default Configuration File Name](#default-configuration-file-name) [Section titled “Default Configuration File Name”](#default-configuration-file-name) `crowdin.yml` is the default file name that is used for automatically synchronized branches. To change the default settings, click **Edit**, specify the preferred name in the *Default configuration file name* field in the integration settings, and click **Save**. If you don’t specify your custom configuration file name for automatically synchronized branches, and the integration doesn’t find a configuration file with the default name `crowdin.yml` in the root of the branch, these branches will be marked in the integration settings with a red icon with an exclamation mark saying “Not Ready. Check the configuration”. ## [Selecting Content for Synchronization](#selecting-content-for-synchronization) [Section titled “Selecting Content for Synchronization”](#selecting-content-for-synchronization) To make integration work, you need to specify which source files should be translated and how Crowdin Enterprise should structure translated files in your repository. To make integration work in the Target file bundles mode, you need to select the required bundles that you want to push to your repository. There are two ways you can specify content for synchronization: * Configuring online * Configuring manually by creating a configuration file ### [Configuring Online](#configuring-online) [Section titled “Configuring Online”](#configuring-online) This procedure is the same for all integrations with version control systems (VCS). Check [Configuring VCS Integrations Online](/enterprise/configuring-vcs-integrations-online/) to get to know how to select content for synchronization online. ### [Creating Configuration File](#creating-configuration-file) [Section titled “Creating Configuration File”](#creating-configuration-file) Configuration file `crowdin.yml` should be stored in the Bitbucket repository along with each separate branch that you want to translate, so Crowdin Enterprise knows what files exactly should be sent for translations. It should have the same structure as required for CLI, but your project’s credentials should not be stored in the file’s header for security reasons. Read more about [creating a configuration file](/developer/configuration-file/). ## [Working with Multiple Repositories within One Project](#working-with-multiple-repositories-within-one-project) [Section titled “Working with Multiple Repositories within One Project”](#working-with-multiple-repositories-within-one-project) If you’re working with a multi-platform product that has versions for different operating systems, you may want to connect multiple repositories that contain source files for each operating system. In this case, localization resources (e.g., TMs, Glossaries) and translations could be used more efficiently, reducing the time needed for project localization. To add another repository, follow these steps: 1. Open your project and select **Integrations** on the left sidebar. 2. Click on **Bitbucket** in the Integrations list. 3. Click **Add Repository**. 4. Configure the integration with the new repository according to your needs and preferences. ## [Checking the Status of Synchronization](#checking-the-status-of-synchronization) [Section titled “Checking the Status of Synchronization”](#checking-the-status-of-synchronization) Once the integration is set up, all related information is stored in **Integrations > Bitbucket**. After the integration is connected, the settings can be updated only by the project member who configured it. All project managers except the person who configured the integration will see the **Edit** button disabled with the following message when hovering over it: `Integration was configured by {Full Name} ({username})`. By default, synchronization is processed every hour automatically. If you need to launch the synchronization immediately – click **Sync Now**.  Alternatively, if you need to sync only one branch separately, click on the needed branch and select **Sync branch**. ## [Uploading Translations from Repo](#uploading-translations-from-repo) [Section titled “Uploading Translations from Repo”](#uploading-translations-from-repo) By default, the translations stored on the repo are uploaded to Crowdin Enterprise during the first synchronization only. To upload translations to Crowdin Enterprise manually, click icon next to the **Sync Now** button, and click **Sync Translations to Crowdin Enterprise**. The integration will upload existing translations to your Crowdin Enterprise project. Limitations The *Sync Translations to Crowdin Enterprise* option is available for file-based projects only. ## [Q\&A](#qa) [Section titled “Q\&A”](#qa)
# Target Files Bundles
> Export sets of strings or files in any format you select
Target file bundles or simply Bundles is the feature that allows you to export sets of strings or files in the formats you select, regardless of the original file format. By default, you can choose from the following three formats: XLIFF, Android XML, and iOS Strings. You can add more target file formats by installing respective applications from the Crowdin [Store](https://store.crowdin.com/tags/string-exporter). You can work with bundles in several ways: * Manage bundles manually via the project’s UI. * Connect a VCS integration in Target file bundles mode. * Manage bundles using OTA Content Delivery. * Manage bundles using Crowdin CLI and API. ## [Use Cases](#use-cases) [Section titled “Use Cases”](#use-cases) The most common use cases are the following: * You can upload a single source file (e.g., Android XML) to your project, translate it, and then, using bundles, export translations for multiple platforms (e.g., Android XML for the Android app, iOS strings for the iOS app, JSON for the web app, etc.). * You can have a single spreadsheet (e.g., XLSX or CSV) where you store source strings for all platforms your app is developed for, and each string is labeled with a respective label. Upload this file to your project, translate it, and then create separate bundles for multiple platforms using a combination of source file paths and string labels. * You can localize your mobile app without source files by combining Crowdin design tool plugins (Figma, Sketch, Adobe XD) to send strings straight to the Crowdin Enterprise project and export translations in the preferred formats using bundles. * You can export specific sets of strings for offline translation in XLIFF format and then [upload finished translations](/enterprise/offline-translation/#uploading-translations) back to Crowdin Enterprise. [Custom Bundle Generator ](https://store.crowdin.com/custom-bundle-generator)The app allows you to generate resource files from translated Crowdin strings. [Custom Bundle Builder ](https://store.crowdin.com/custom-export)Create your own script to build files from bundles. ## [Managing Bundles in UI](#managing-bundles-in-ui) [Section titled “Managing Bundles in UI”](#managing-bundles-in-ui) To work with bundles manually, you can configure and download them from your Project page. ### [Configuring Bundles](#configuring-bundles) [Section titled “Configuring Bundles”](#configuring-bundles) To configure a bundle, follow these steps: * File-based project 1. Open your project and select **Translations** on the left sidebar. 2. Click **Target File Bundles** to expand the respective section. 3. Click **Add bundle**. 4. In the appeared page, name your bundle. 5. Specify the source and resulting file paths. If needed, you can add multiple source path patterns using . In the right panel, you can preview the structure of the source and translation files based on the specified paths. 6. *(Optional)* To ignore some folders or files, select **Ignore files or folders**, specify their respective pattern, and Crowdin Enterprise will skip these specific files or folders during the bundle generation. If needed, you can add multiple ignore patterns using . 7. *(Optional)* You can specify labels in the **Filter by labels** and **Exclude by labels** fields to filter strings, including or excluding them in the generated bundle. 8. Select the file format you’d like your strings to be exported in. To add other formats, install the respective applications from [Crowdin Store](https://store.crowdin.com/tags/string-exporter). 9. *(Optional)* If a bundle file format has a icon, it indicates that it has additional options (e.g., **Copy source to empty target** and **Export Translator’s Comments** for XLIFF (system), **Convert placeholders to target file format** for Android XML (system), etc.) you may use when setting up your bundle. Click the icon on a selected bundle file format and configure it according to your preferences. 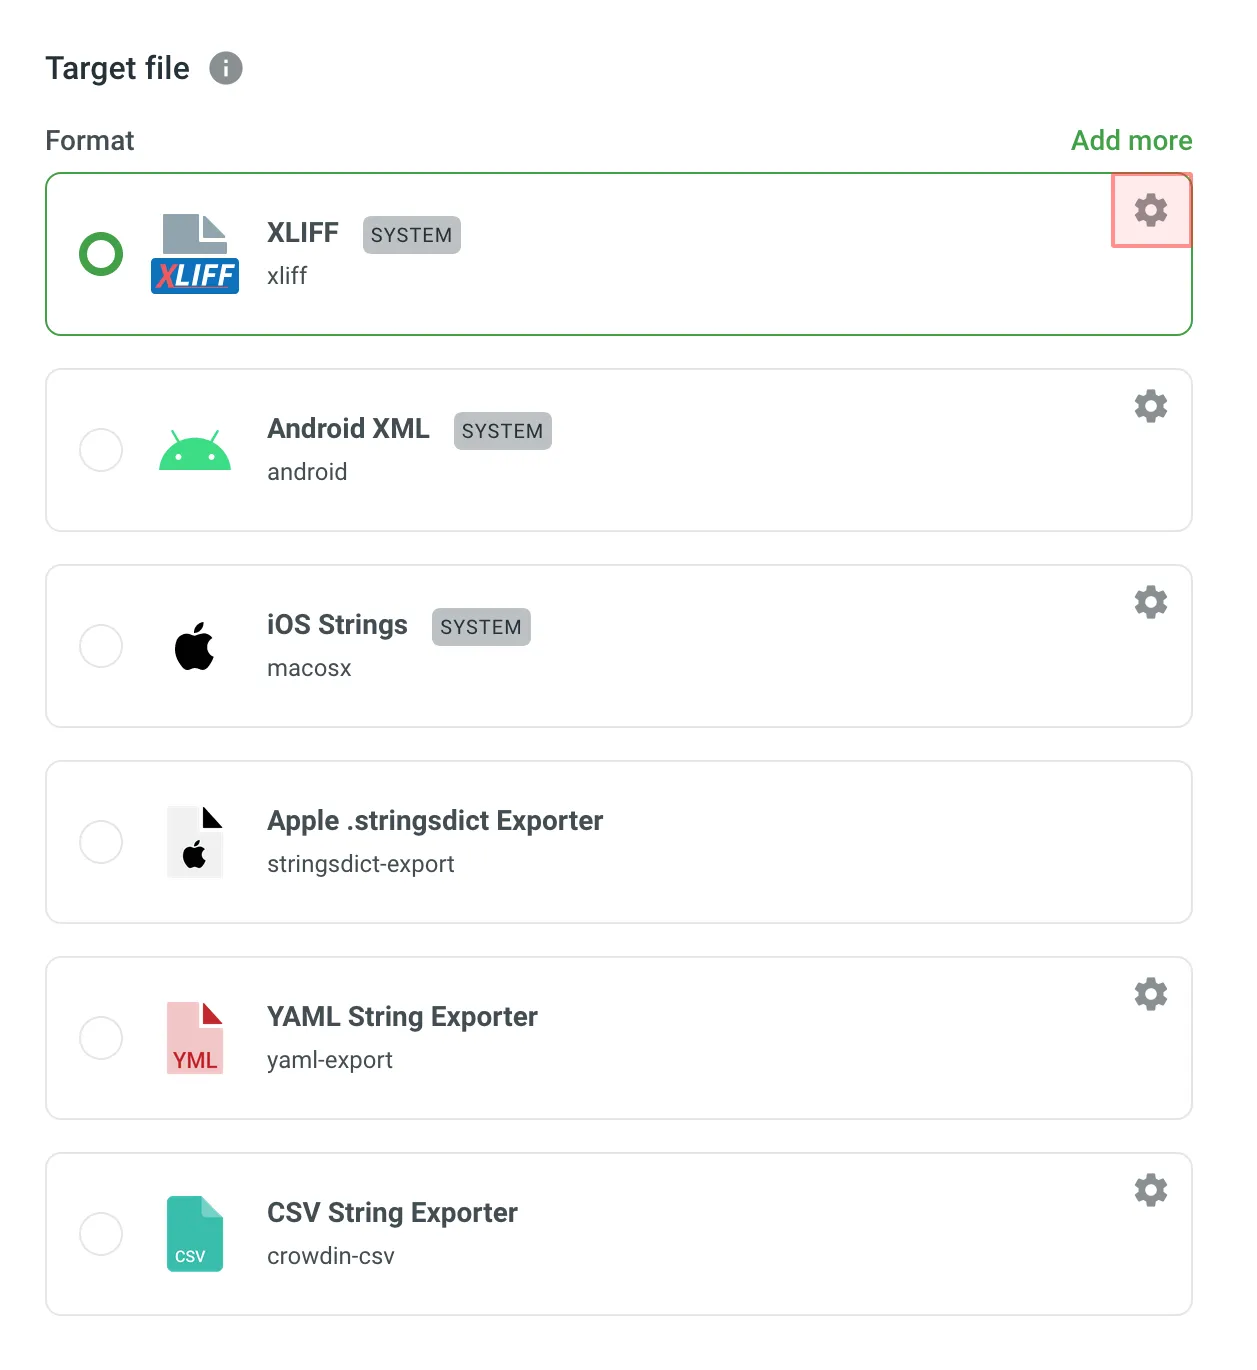 10. Click **Create**. 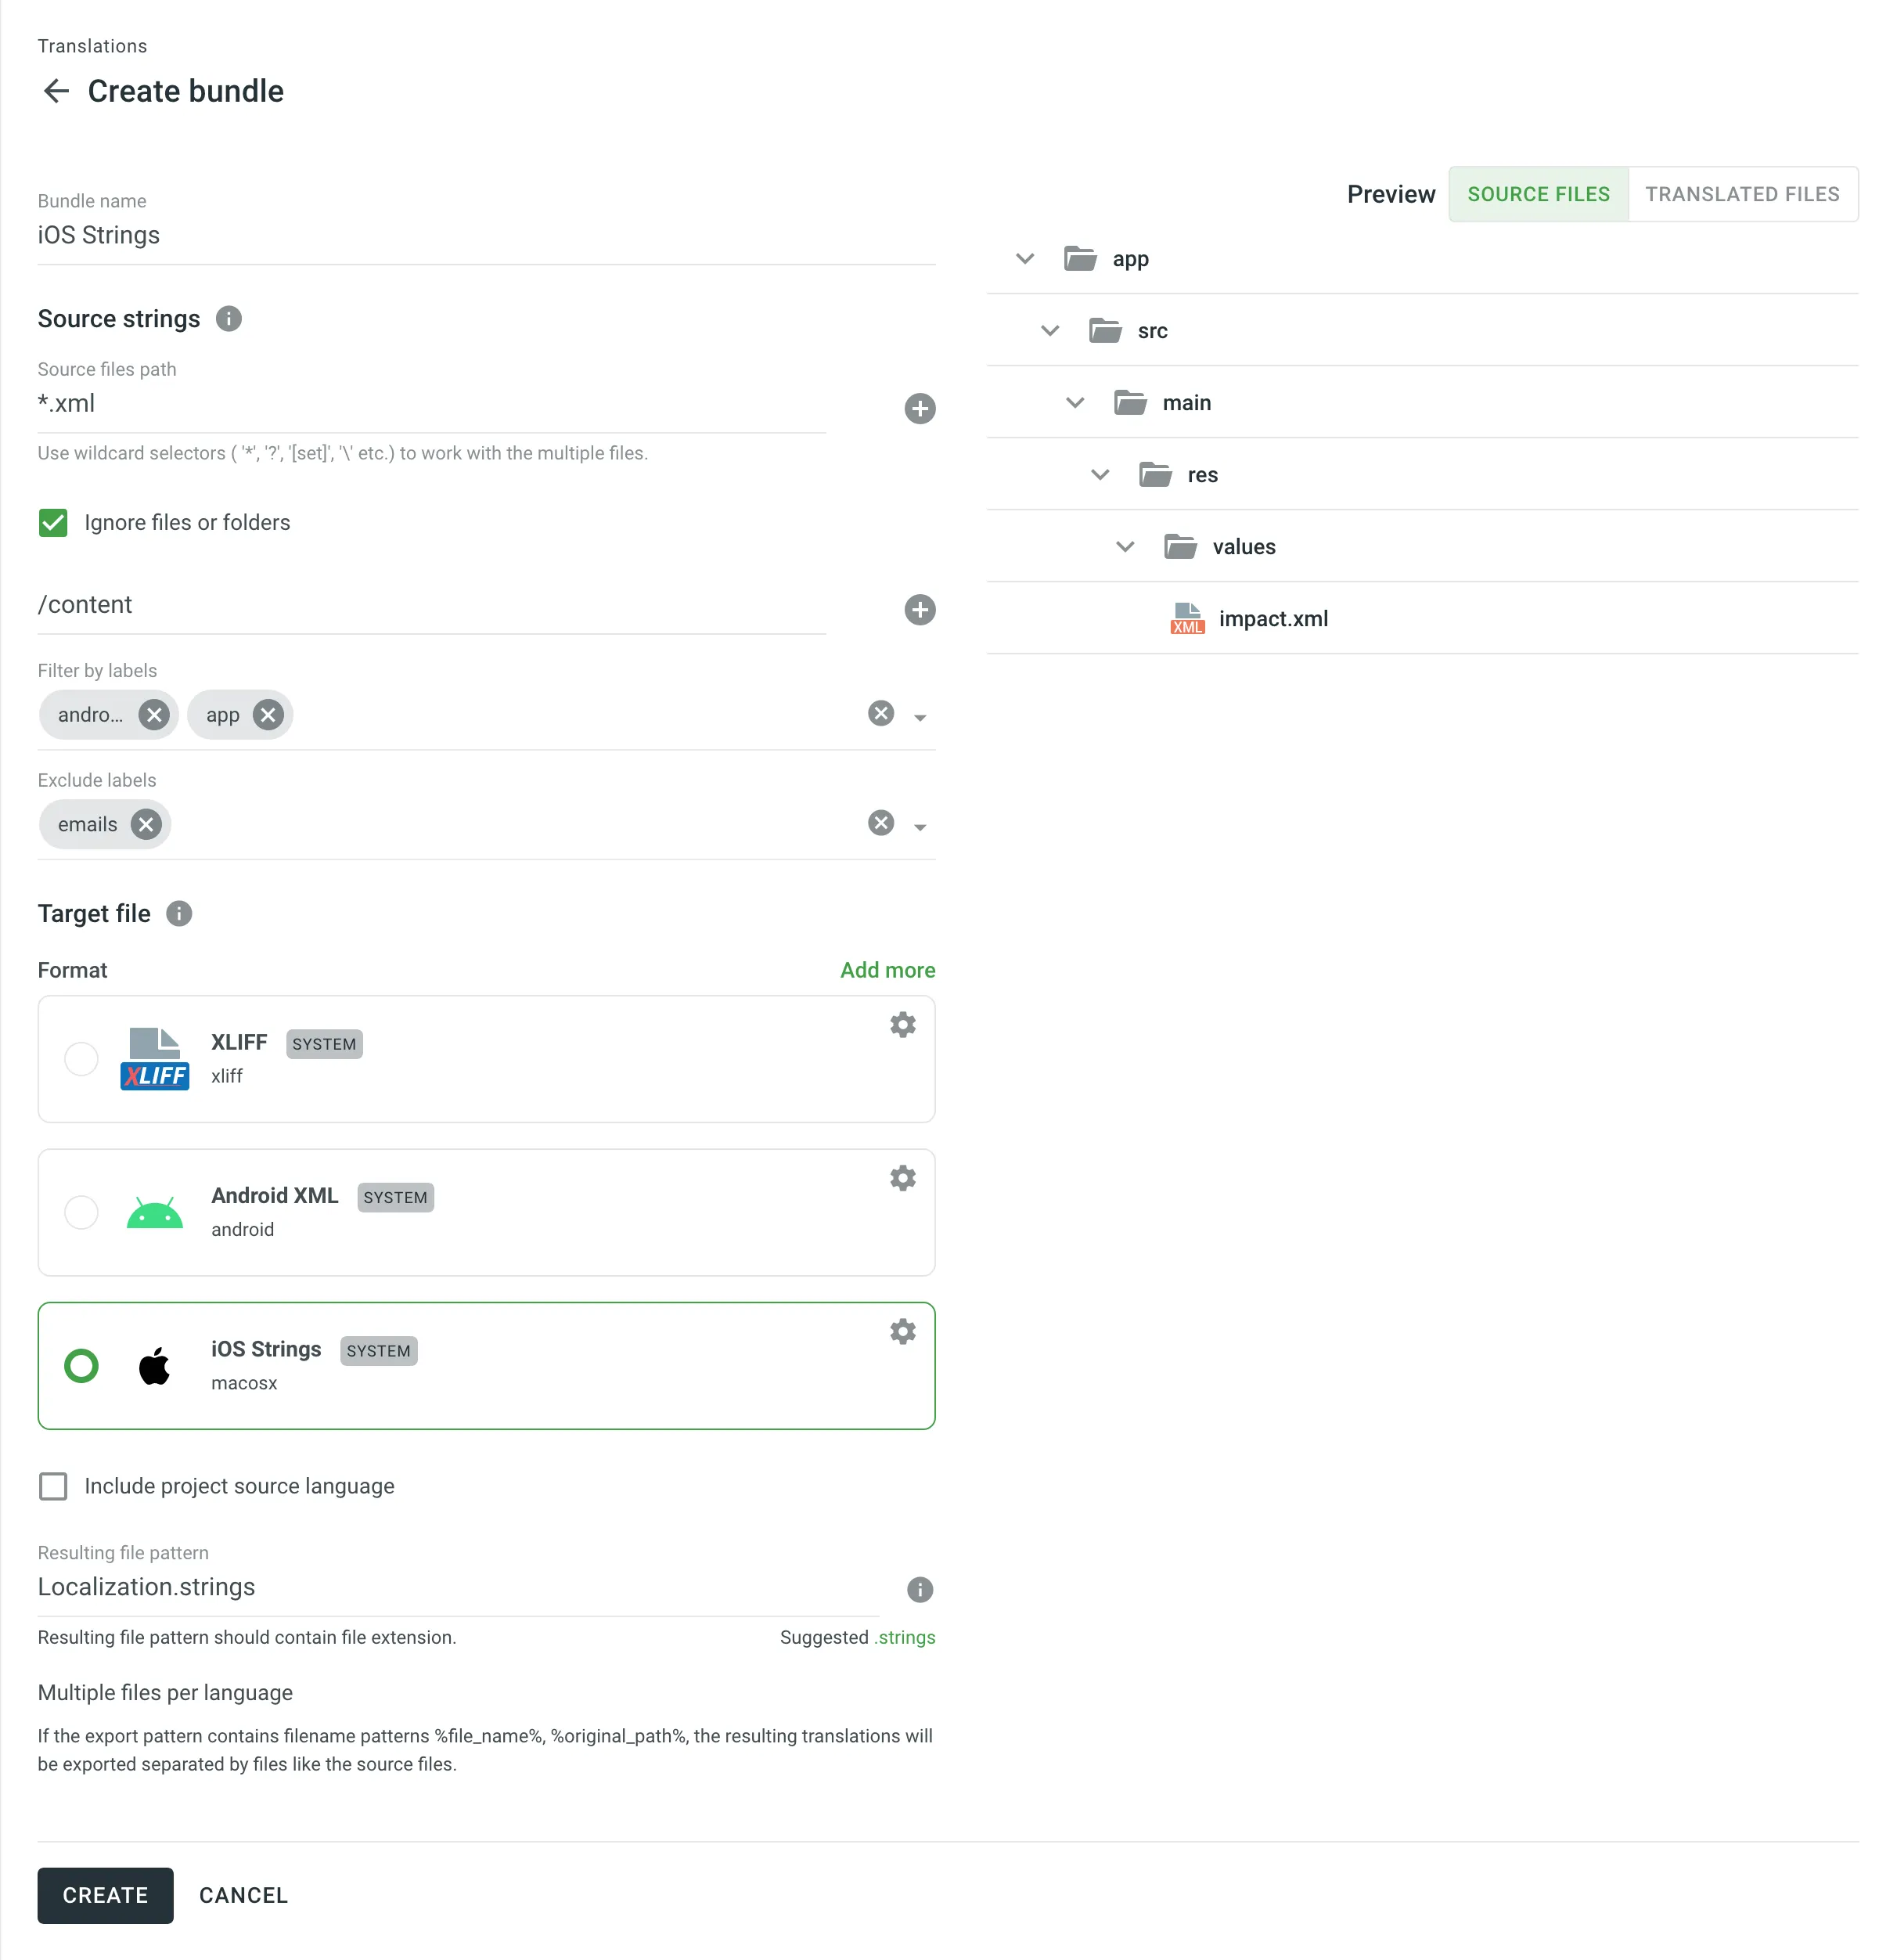 * String-based project 1. Open your project and select **Download** on the left sidebar. 2. Click **Target File Bundles** to expand the respective section. 3. Click **Add bundle**. 4. In the appeared page, name your bundle. 5. Specify the source branches and resulting file paths. If needed, you can add multiple source branch path patterns using . In the right panel, you can preview the source branches and structure of the translation files based on the specified paths. 6. *(Optional)* You can specify labels in the **Filter by labels** and **Exclude by labels** fields to filter strings, including or excluding them in the generated bundle. 7. Select the file format you’d like your strings to be exported in. To add other formats, install the respective applications from [Crowdin Store](https://store.crowdin.com/tags/string-exporter). 8. *(Optional)* If a bundle file format has a icon, it indicates that it has additional options (e.g., **Copy source to empty target** and **Export Translator’s Comments** for XLIFF (system), **Convert placeholders to target file format** for Android XML (system), etc.) you may use when setting up your bundle. Click the icon on a selected bundle file format and configure it according to your preferences.  9. Click **Create**. 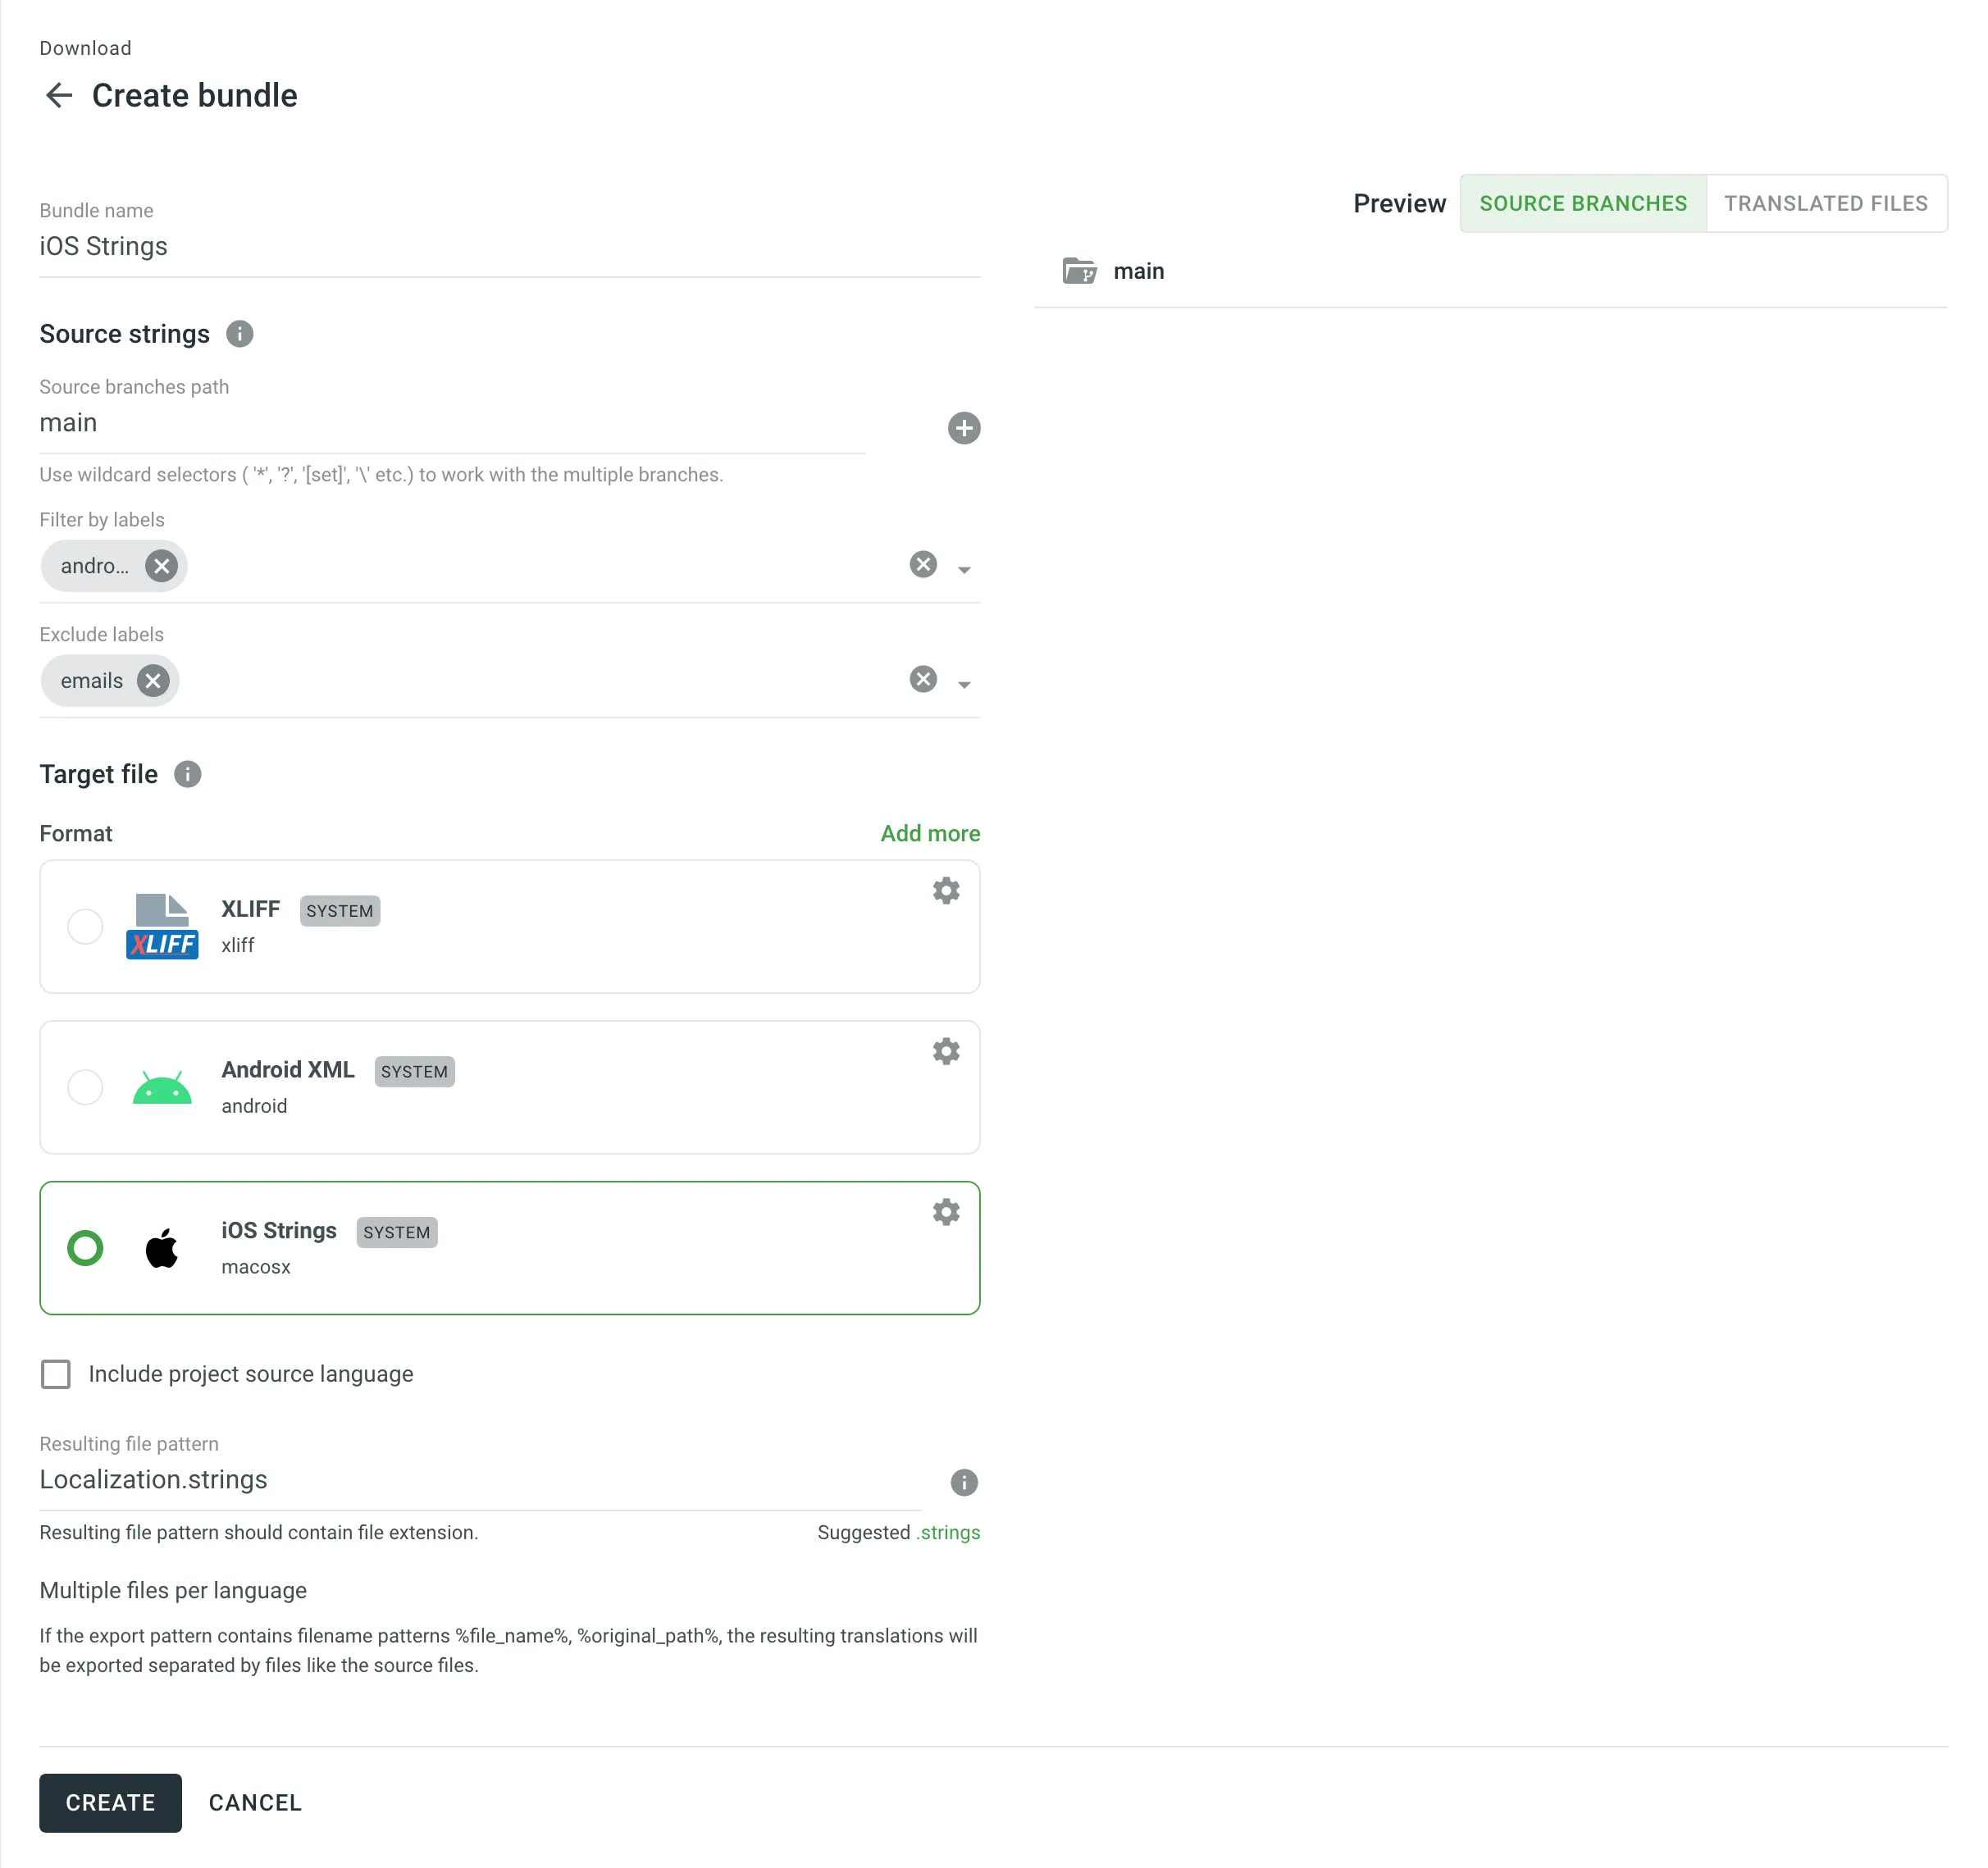 Read more about [Labels](/enterprise/string-management/#labels). ### [Downloading Configured Bundles](#downloading-configured-bundles) [Section titled “Downloading Configured Bundles”](#downloading-configured-bundles) To download configured bundles, follow these steps: * File-based project 1. Open your project and select **Translations** on the left sidebar. 2. Click **Target File Bundles** to expand the respective section. 3. Click **Build** toward the needed bundle. 4. Once the bundle build activity is completed, click **Download**. 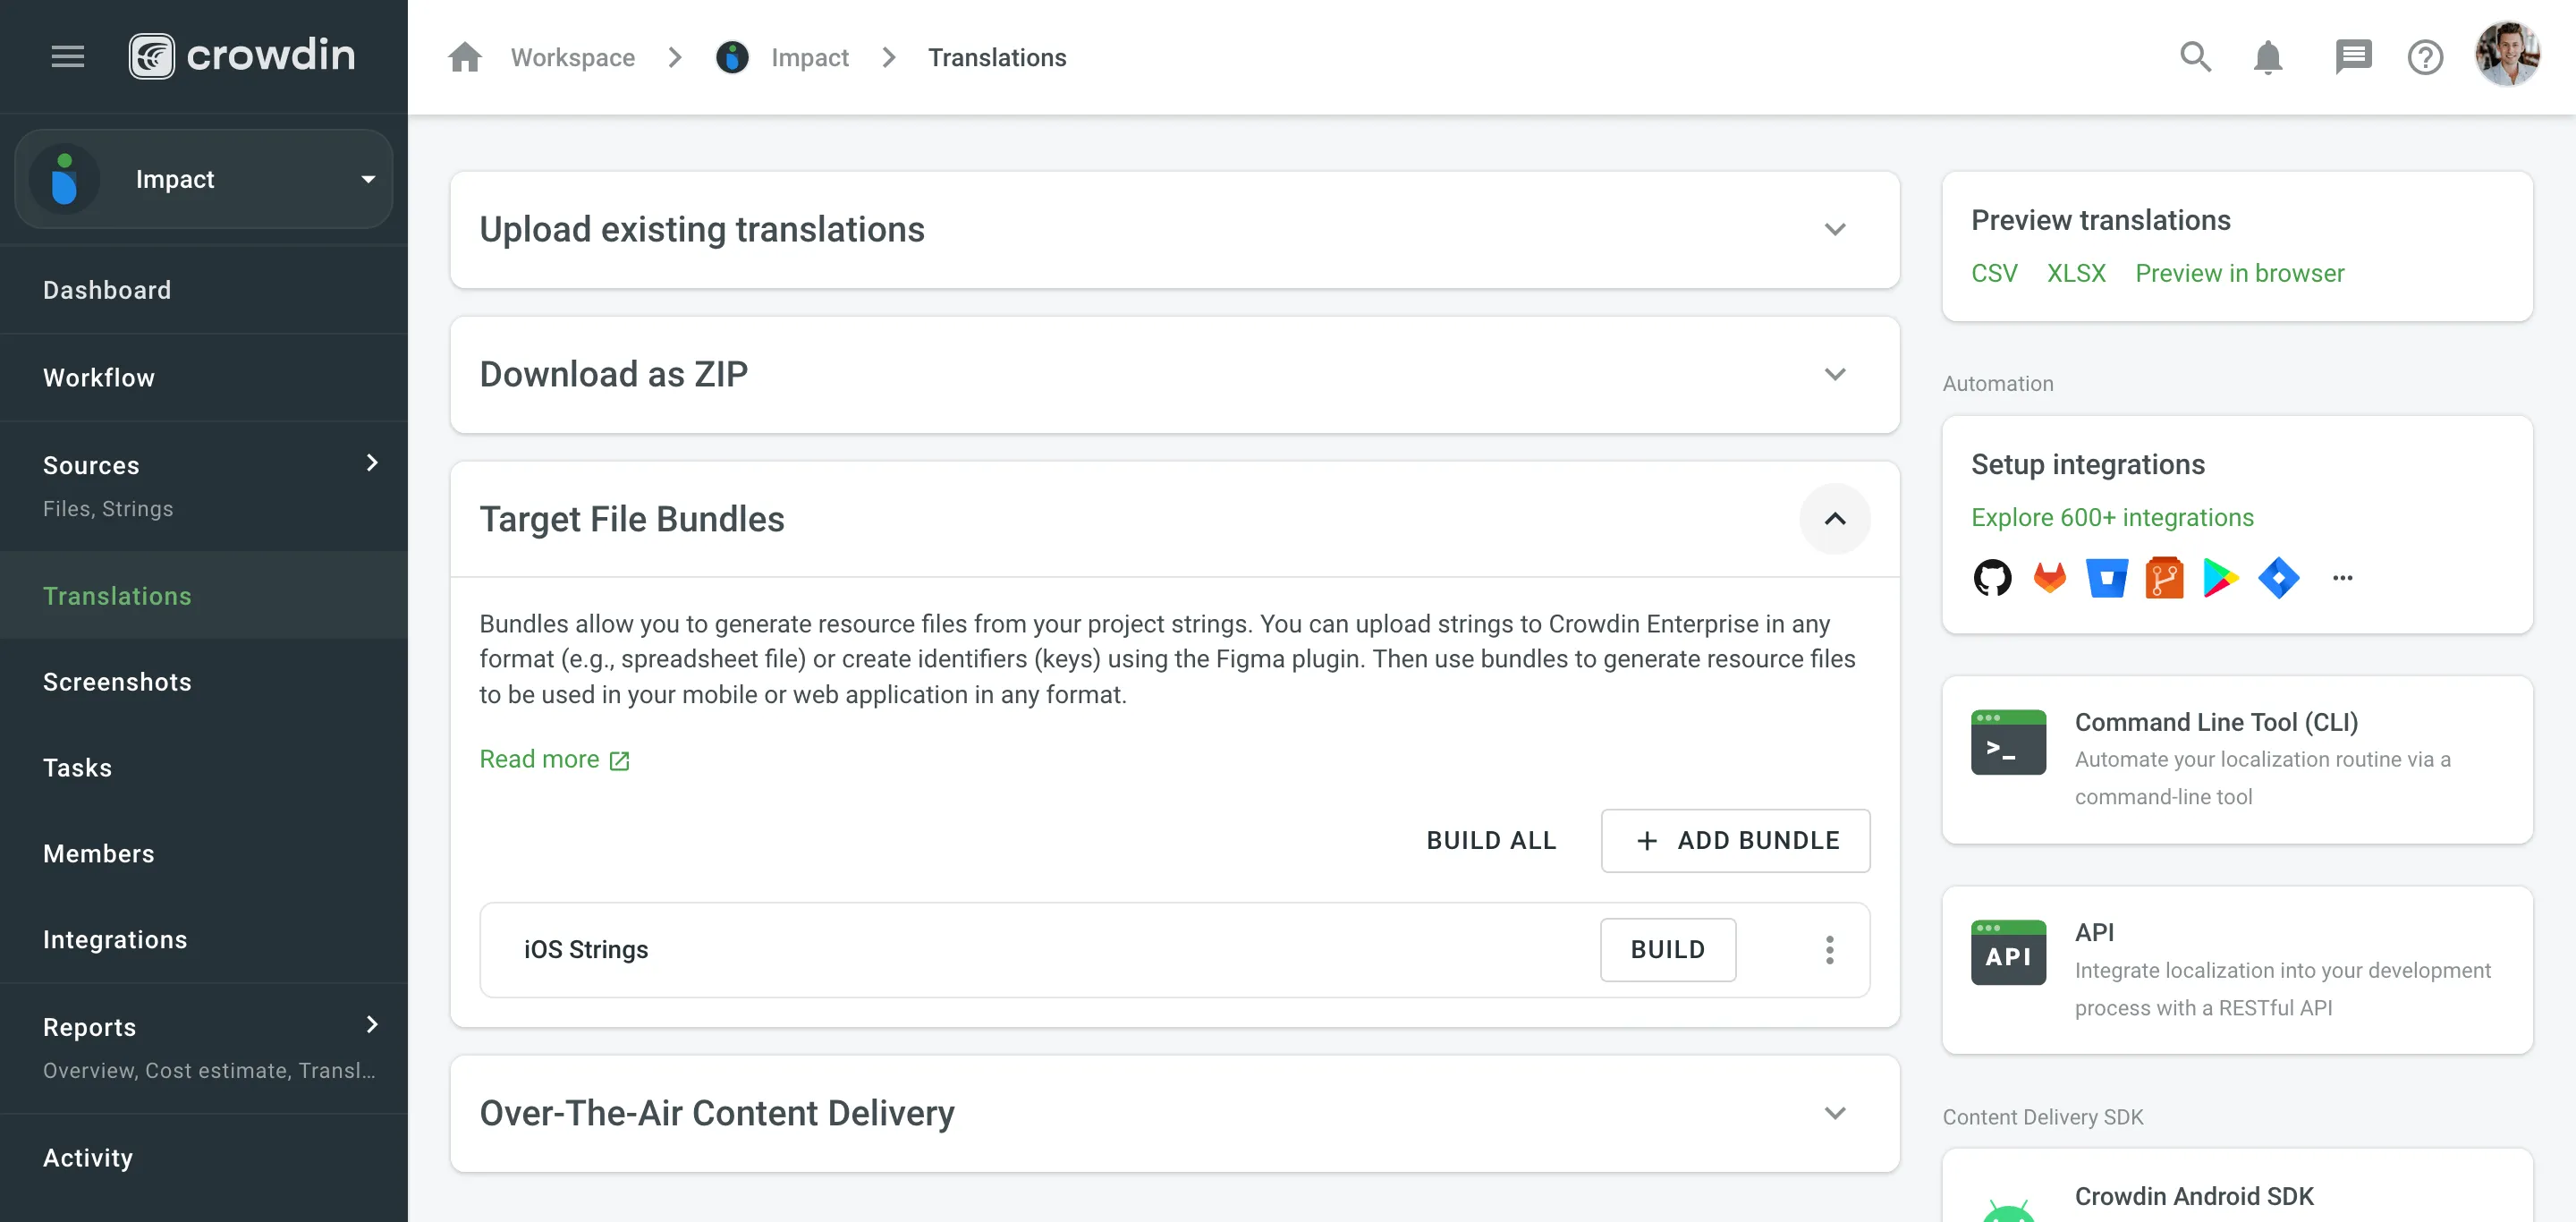 * String-based project 1. Open your project and select **Download** on the left sidebar. 2. Click **Target File Bundles** to expand the respective section. 3. Click **Build** toward the needed bundle. 4. Once the bundle build activity is completed, click **Download**.  The system will build and download a ZIP archive with folders for each of the project’s target languages containing the translation files of the selected format. ### [Editing Bundles](#editing-bundles) [Section titled “Editing Bundles”](#editing-bundles) To edit configured bundles, follow these steps: * File-based project 1. Open your project and select **Translations** on the left sidebar. 2. Click **Target File Bundles** to expand the respective section. 3. Click toward the needed bundle and select **Edit**. Alternatively, just click on the needed bundle. 4. Make the necessary edits and click **Save**. * String-based project 1. Open your project and select **Download** on the left sidebar. 2. Click **Target File Bundles** to expand the respective section. 3. Click toward the needed bundle and select **Edit**. Alternatively, just click on the needed bundle. 4. Make the necessary edits and click **Save**. ### [Deleting Bundles](#deleting-bundles) [Section titled “Deleting Bundles”](#deleting-bundles) To delete bundles, follow these steps: * File-based project 1. Open your project and select **Translations** on the left sidebar. 2. Click **Target File Bundles** to expand the respective section. 3. Click toward the needed bundle and select **Delete**. 4. Confirm the deletion by clicking **Delete** in the appeared dialog. * String-based project 1. Open your project and select **Download** on the left sidebar. 2. Click **Target File Bundles** to expand the respective section. 3. Click toward the needed bundle and select **Delete**. 4. Confirm the deletion by clicking **Delete** in the appeared dialog. ## [Bundles in VCS Integrations](#bundles-in-vcs-integrations) [Section titled “Bundles in VCS Integrations”](#bundles-in-vcs-integrations) In file-based projects, VCS integrations allow you to work with bundles using the **Target file bundles mode**. To configure a VCS integration that works in **Target file bundles mode**, follow these steps: 1. Once you select **Target file bundles mode** and authorize the connection with Crowdin Enterprise on the VCS side, select the repository and branches to which you want to send translations. 2. Click to start the configuration of the selected branch. 3. In the **Branch Configuration** dialog, specify the preferred name for your configuration file or leave it as is and click **Continue**. 4. Select the needed bundles from the list or click **Create new** to create one from scratch. 5. Once you’ve selected all the needed bundles in the **Branch Configuration** dialog, click **Save**. 6. To complete the VCS integration configuration, click **Save** in the dialog where you selected your repo and branches. 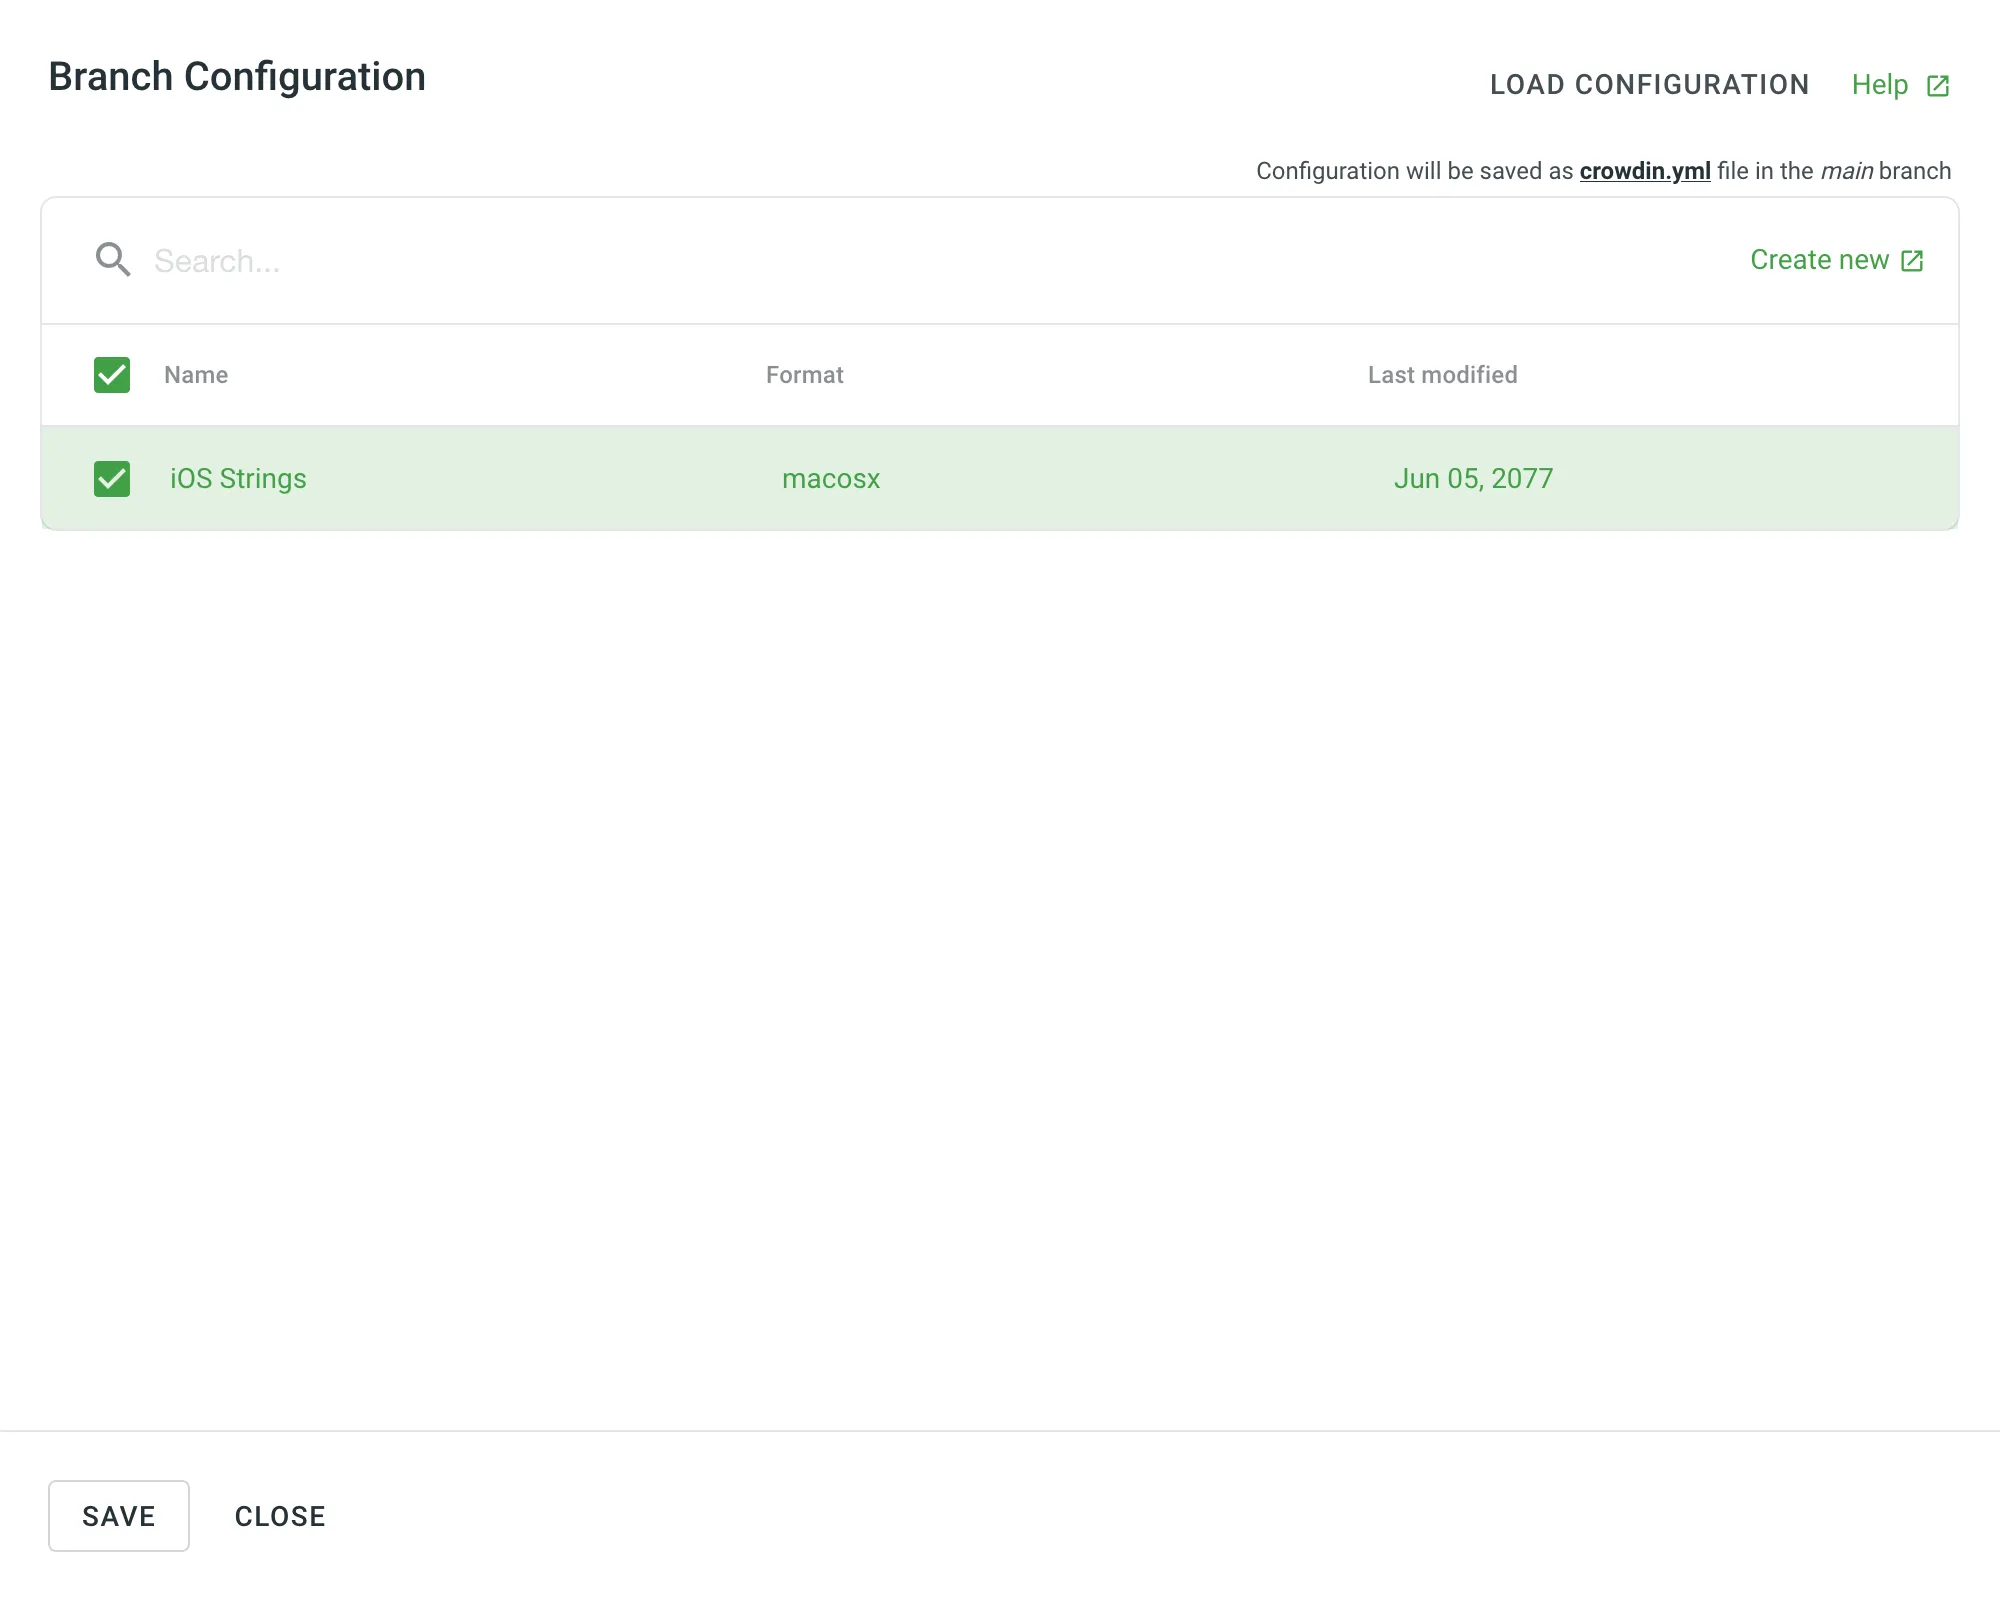 Caution In string-based projects, VCS integrations exclusively operate in the **Target file bundles mode**. Read more about [configuring VCS integrations online](/enterprise/configuring-vcs-integrations-online/). ## [Bundles in OTA Content Delivery](#bundles-in-ota-content-delivery) [Section titled “Bundles in OTA Content Delivery”](#bundles-in-ota-content-delivery) To add a distribution that exports translations using bundles, follow these steps: * File-based project 1. Open your project and select **Translations** on the left sidebar. 2. Click **Over-The-Air Content Delivery** to expand the respective section. 3. Add new distribution using the **Add distribution** button. 4. In the appeared dialog, name your distribution. 5. Select **Target file bundles** in the **Export options** section. 6. Select the needed bundles from the list or click **Create new** to create one from scratch. 7. Once you’ve selected all the needed bundles in the **Add distribution** dialog, click **Create**. 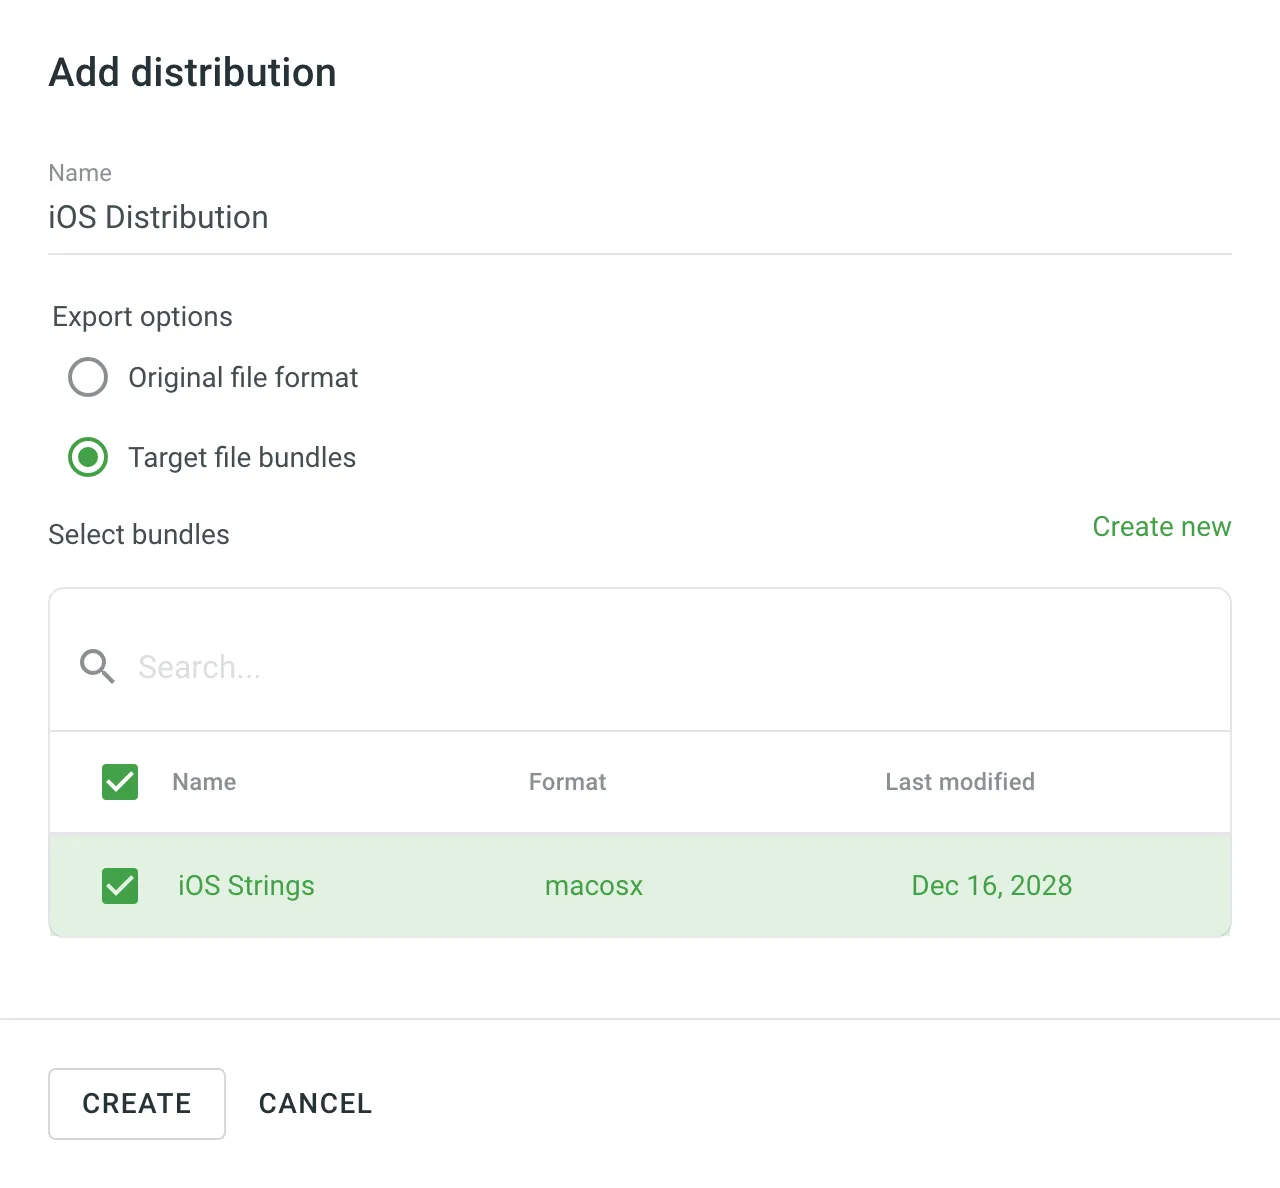 8. Copy the **Distribution Hash** and **Distribution Manifest**. The manifest is a JSON file containing key distribution details (e.g., files, languages, paths) that can be used in your integration. * String-based project 1. Open your project and select **Download** on the left sidebar. 2. Click **Over-The-Air Content Delivery** to expand the respective section. 3. Add new distribution using the **Add distribution** button. 4. In the appeared dialog, name your distribution. 5. Select the needed bundles from the list or click **Create new** to create one from scratch. 6. Once you’ve selected all the needed bundles in the **Add distribution** dialog, click **Create**. 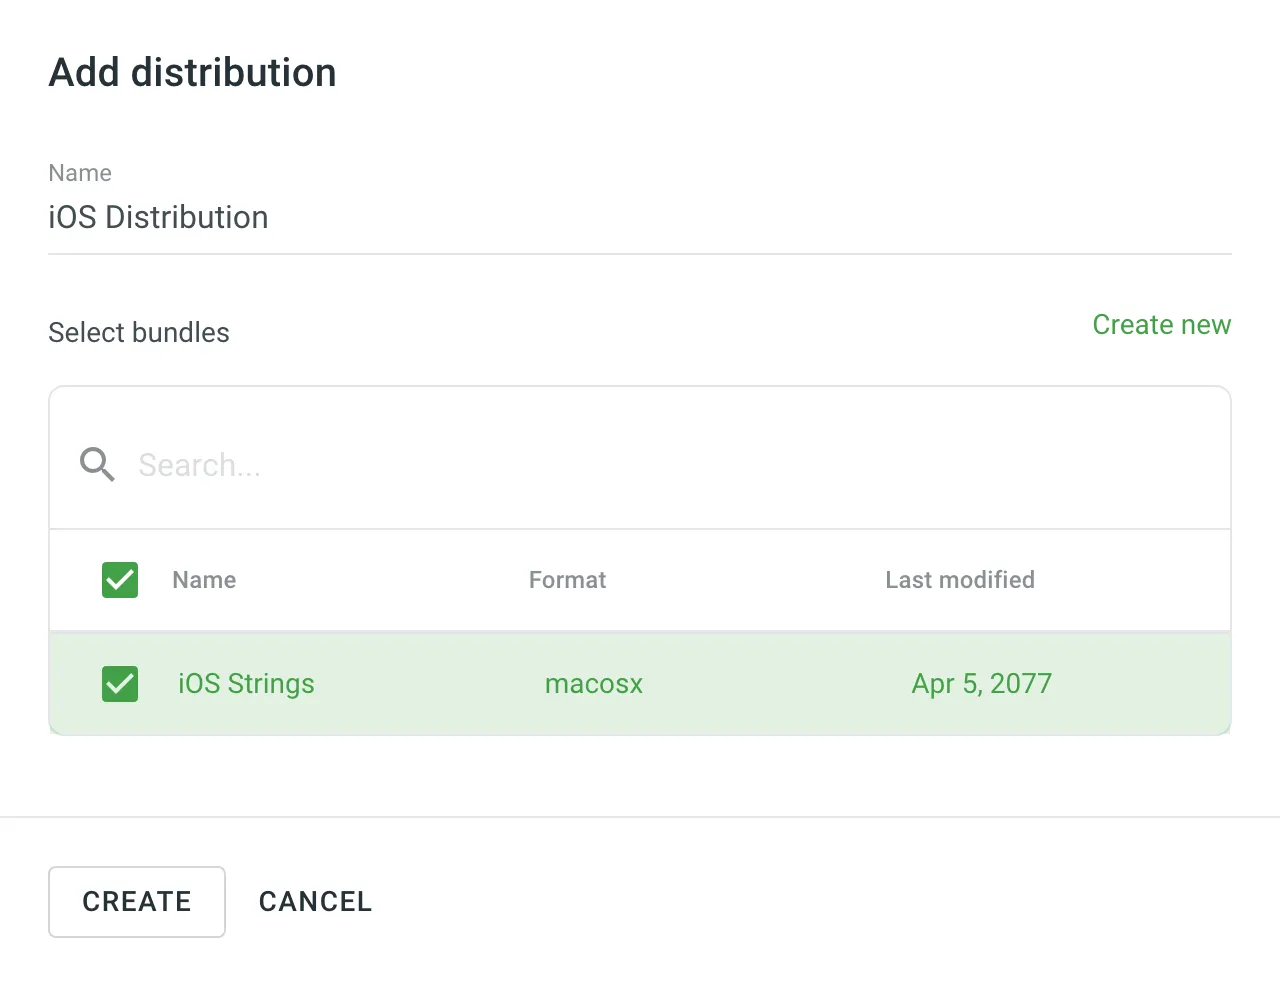 7. Copy the **Distribution Hash** and **Distribution Manifest**. The manifest is a JSON file containing key distribution details (e.g., files, languages, paths) that can be used in your integration. Read more about [OTA Content Delivery](/enterprise/content-delivery/). ## [Bundles in CLI/API](#bundles-in-cliapi) [Section titled “Bundles in CLI/API”](#bundles-in-cliapi) You can also export translations using bundles when working with Crowdin CLI and API. [Bundles in CLI ](https://crowdin.github.io/crowdin-cli/commands/crowdin-bundle/) [Bundles in API ](/developer/api/v2/#tag/Bundles)
# Changing Subscription Plan
> Upgrade or downgrade your subscription plan in Crowdin Enterprise
You can upgrade or downgrade your subscription plan at any time. Visit the [Pricing page](https://crowdin.com/pricing) to compare available plans and choose the most suitable one. There are two types of upgrades: * Within the plan – the customization by adding managers and hosted words within a subscription plan. * Between the plans – the switch to a different subscription plan. A similar principle is also applicable to downgrades. 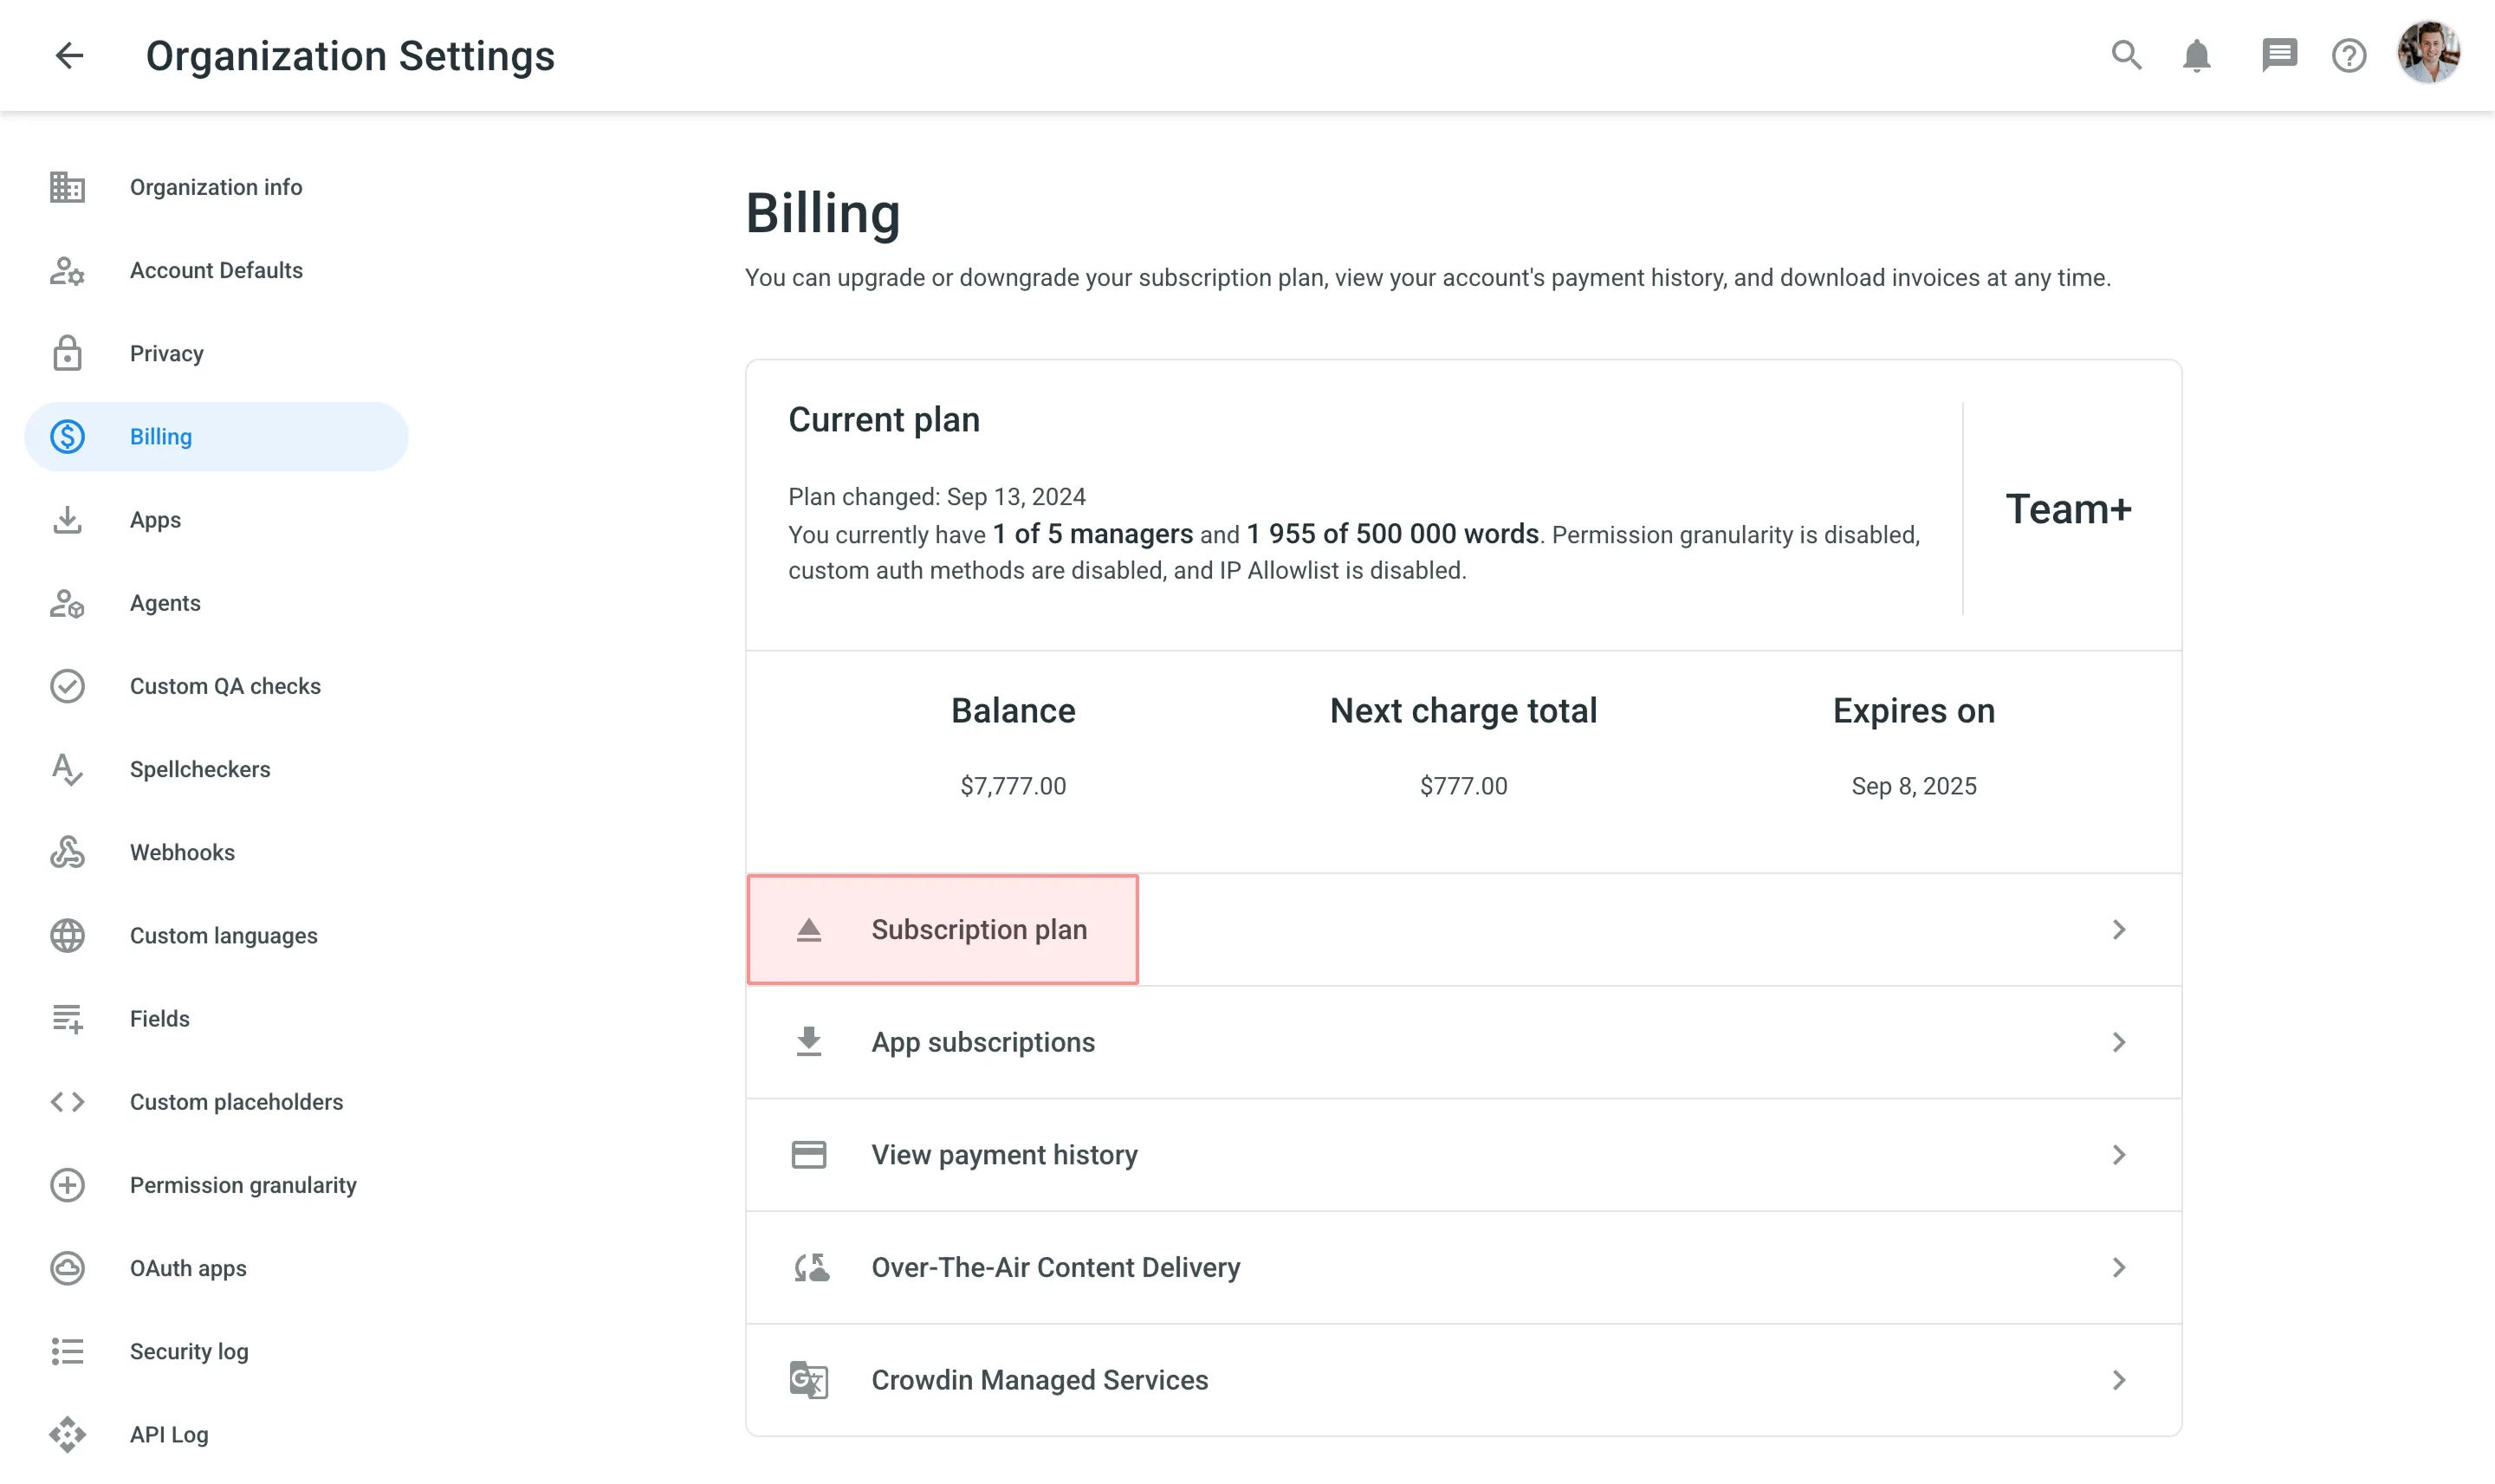 ## [Enabling Advanced Features](#enabling-advanced-features) [Section titled “Enabling Advanced Features”](#enabling-advanced-features) Depending on your current subscription plan, some features might not be available. In such cases, you might notice the respective message in Crowdin Enterprise UI informing you that to be able to use the feature, it’s necessary to upgrade to a higher plan. [View Pricing ](https://crowdin.com/pricing) For example, if your current subscription plan is Team+, features like SAML, Teams, and IP allowlist will become available once you upgrade to the Business subscription plan or higher. 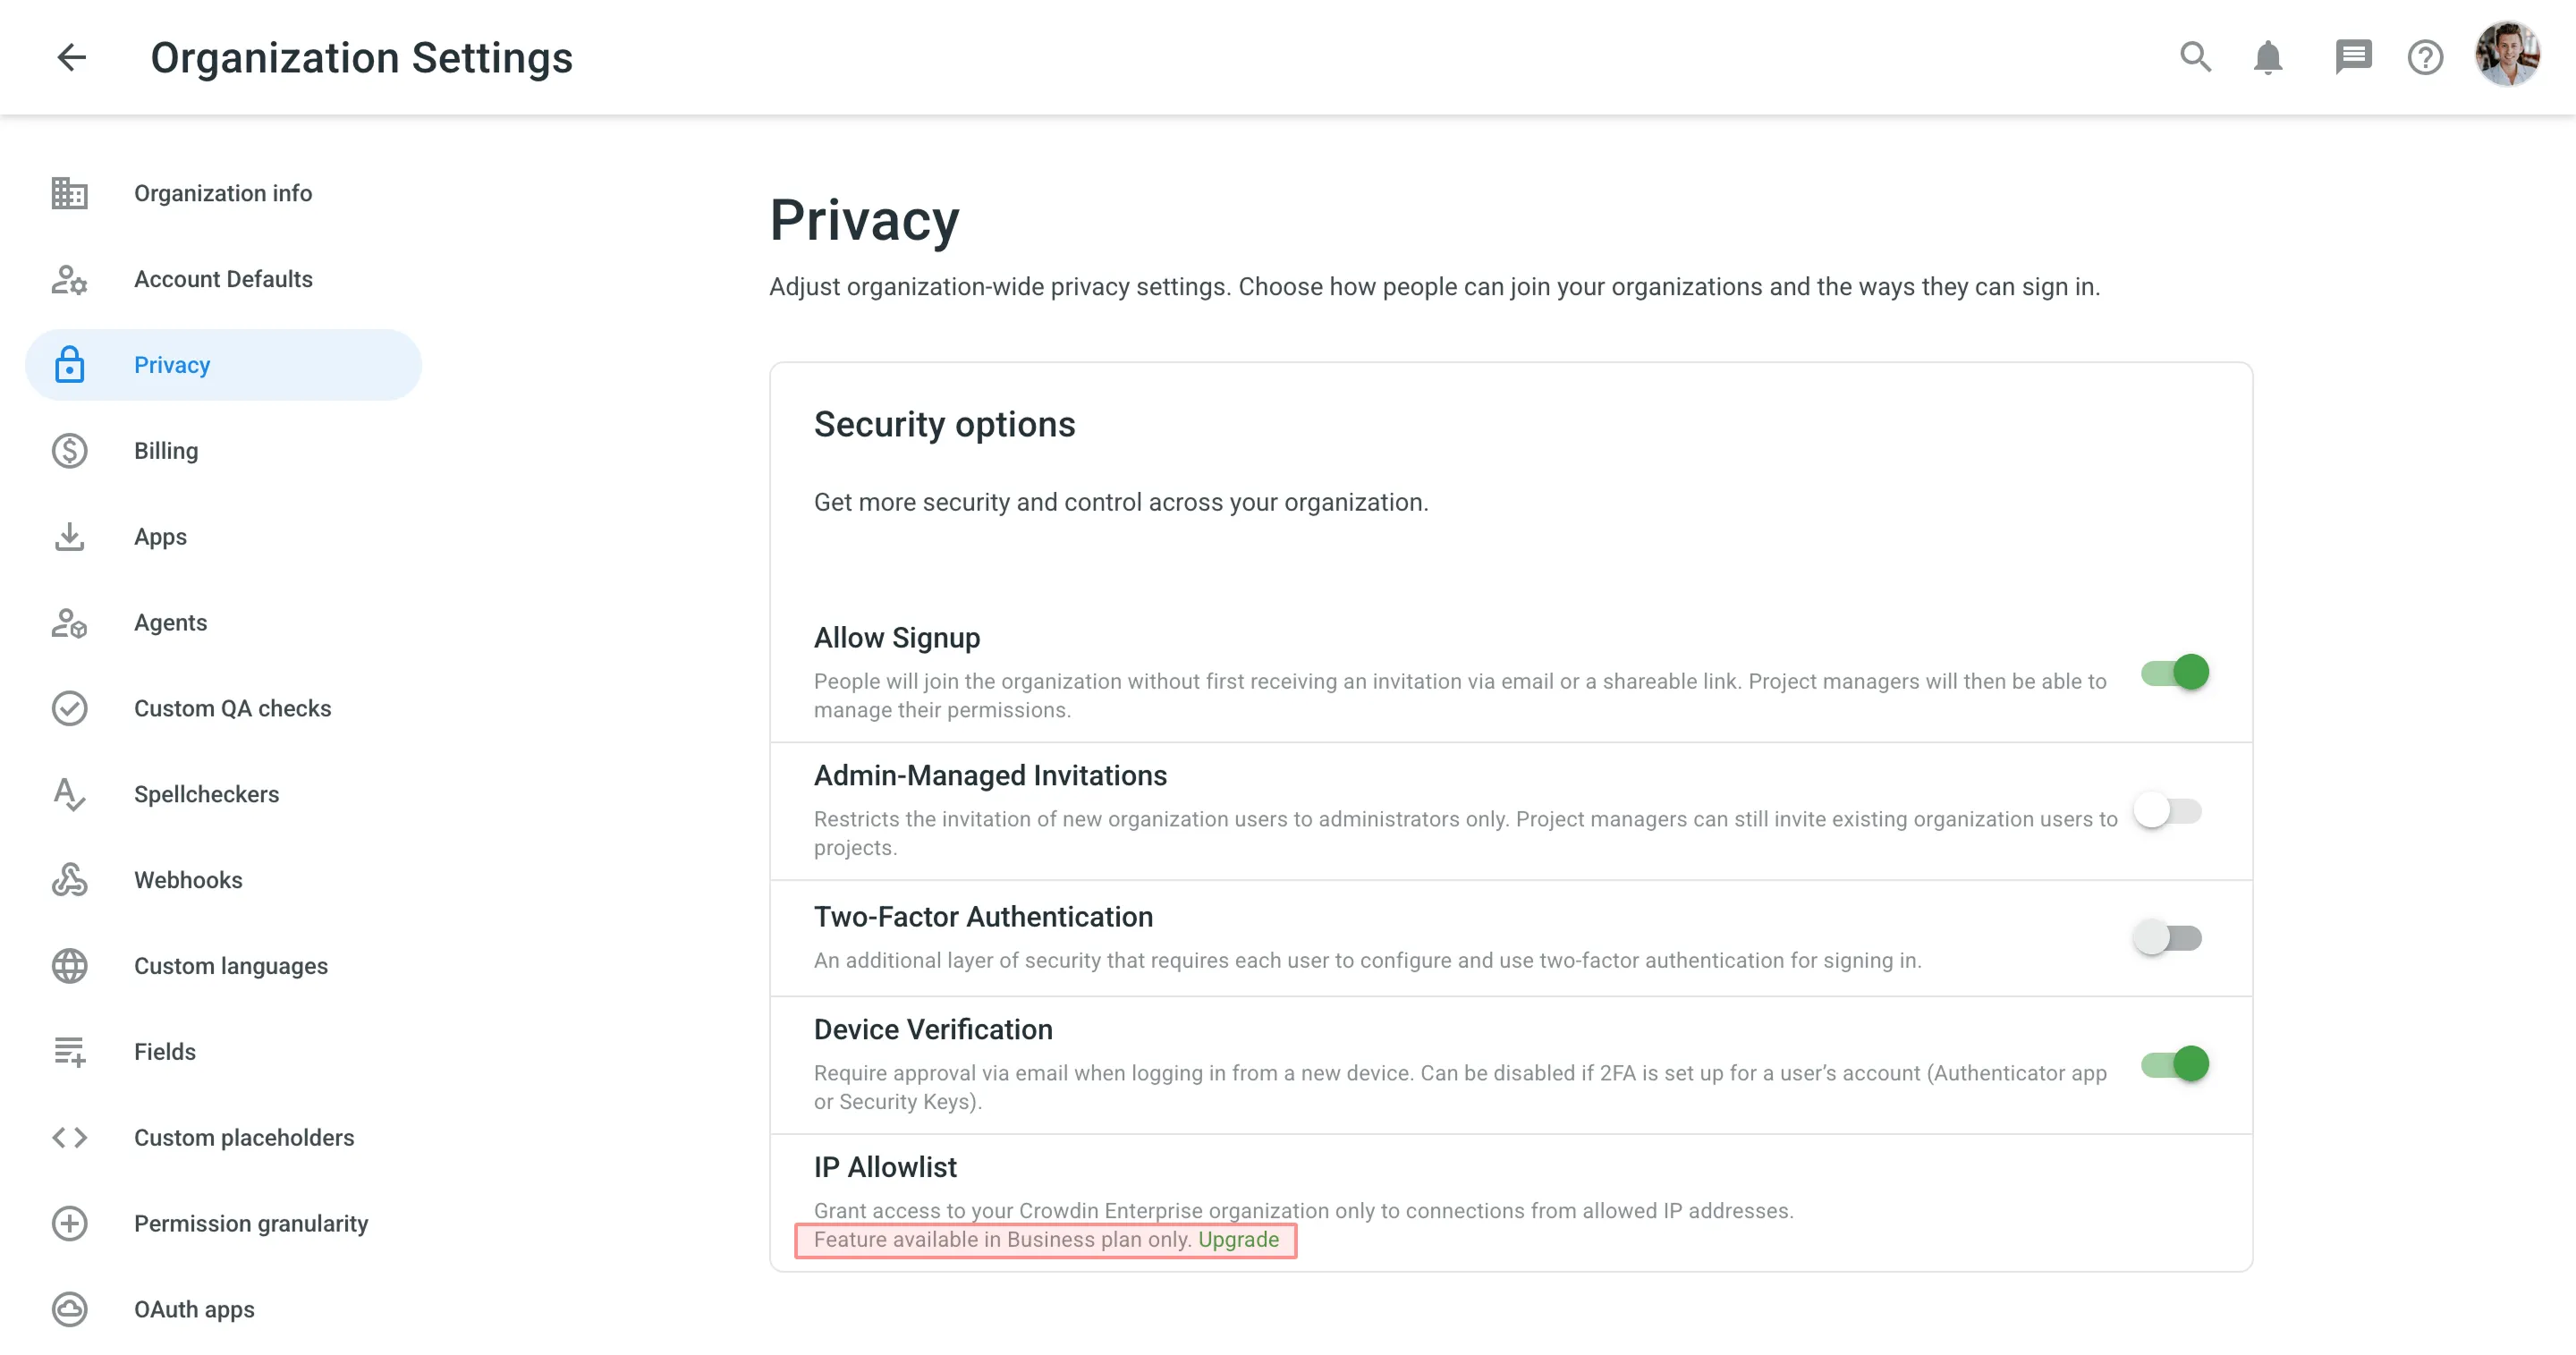 ## [What Happens if You Exceed Your Plan Quota](#what-happens-if-you-exceed-your-plan-quota) [Section titled “What Happens if You Exceed Your Plan Quota”](#what-happens-if-you-exceed-your-plan-quota) When you exceed your hosted words quota, you will receive an email from us asking to upgrade. After exceeding the limit of your plan quota, you have 10 more days to upgrade the subscription. Otherwise, your project will be suspended for translators. However, you will still be able to access your account and project settings. Moreover, all data will remain as is until the subscription is updated. We recommend upgrading the subscription plan beforehand if you expect to have more hosted words uploaded soon. ## [Upgrading the Subscription](#upgrading-the-subscription) [Section titled “Upgrading the Subscription”](#upgrading-the-subscription) If your current subscription plan is Team+ and you’d like to upgrade it by adding more managers and hosted words, follow these steps: 1. Go to **Organization Settings > Billing**. 2. Click **Subscription plan**. 3. Customize the subscription plan according to your needs. 4. Click **Upgrade**. To upgrade to the Business or Enterprise subscription plans, [Contact Sales team](https://crowdin.com/contact-sales). ## [See Also](#see-also) [Section titled “See Also”](#see-also) [Pricing page ](https://crowdin.com/pricing)Plans, Pricing, and Free Trial. [Payments and Invoices ](/enterprise/payments-invoices/)Learn how payments work in Crowdin and how to download invoices. [App Subscriptions ](/enterprise/app-subscriptions/)Learn how to subscribe to paid apps in Crowdin Store. [Billing Settings ](/enterprise/billing-settings/)Update your billing information and payment method.
# Clients
> Learn how to manage clients in Crowdin Enterprise as a vendor
Clients are organizations to which you can provide translation services within shared projects. In the **Clients** section of your workspace, you’ll find a list of all the clients you collaborate with. The client organization can [invite vendors](/enterprise/vendors/#inviting-an-existing-organization-to-be-a-vendor) either by using a subdomain in Crowdin or a shareable link. In the first case, the client organization will need your organization’s name to send you the vendor invitation. Once you confirm the invitation, this organization can assign you to the workflow steps of their projects. 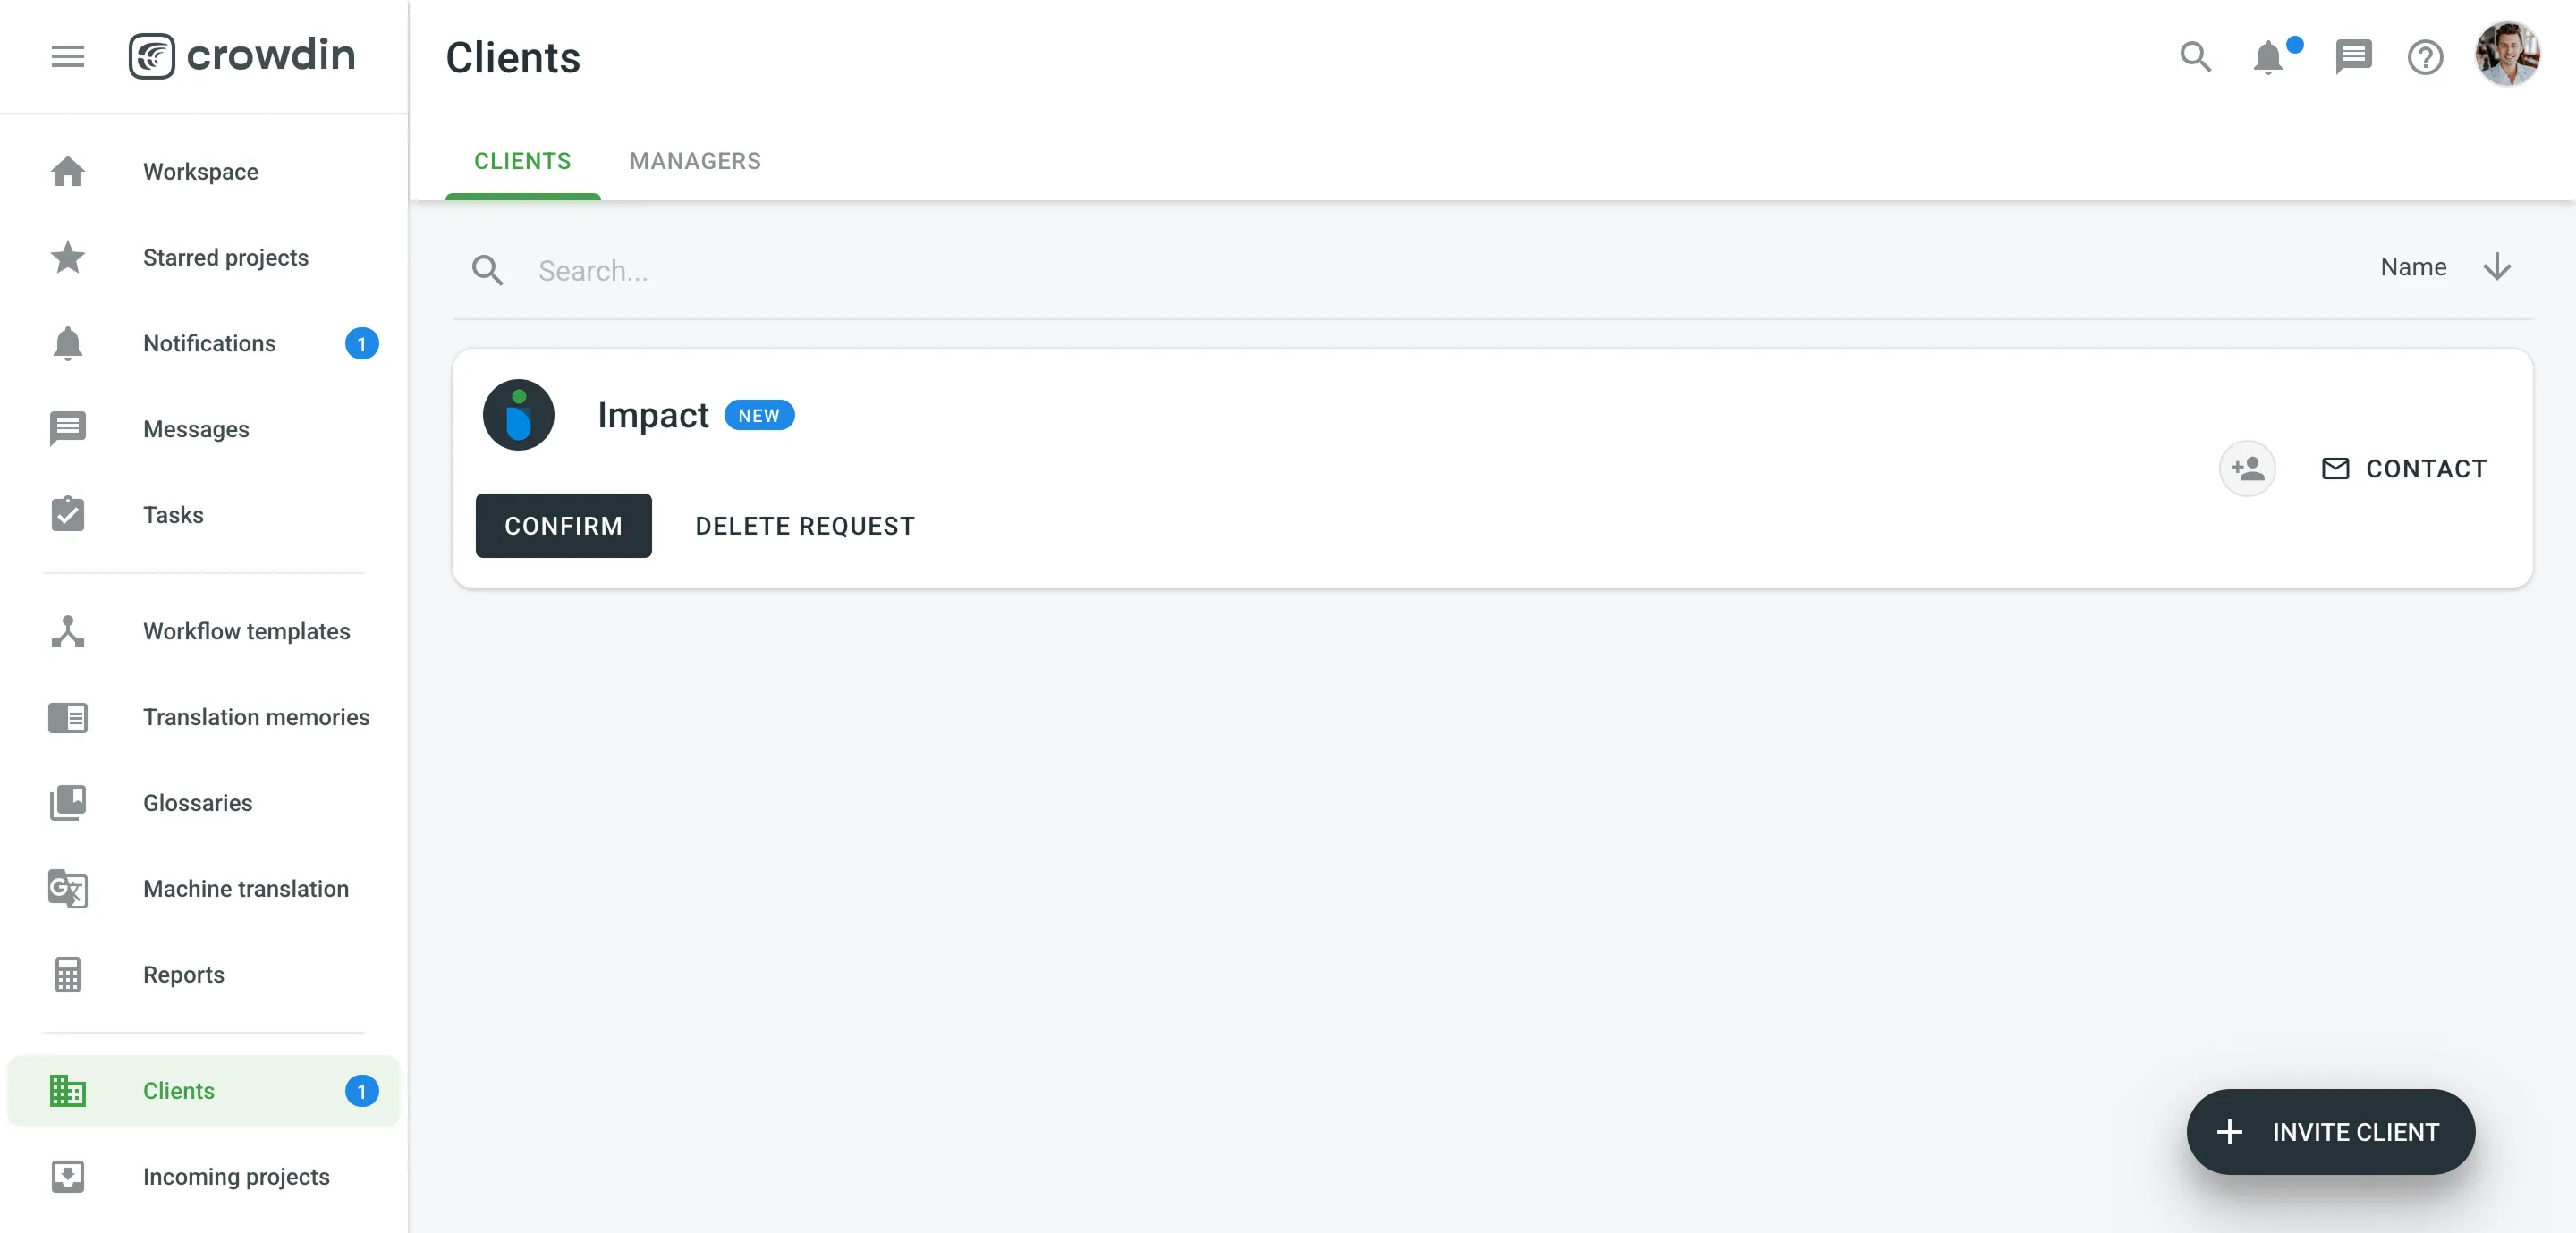 If you have clients you’d like to collaborate with in Crowdin Enterprise, you can invite them using a shareable link: 1. Open your organization’s **Workspace** and select **Clients** on the left sidebar. 2. Click the **Invite** button at the bottom right. 3. Click **Copy Link**. Caution Shareable links automatically expire after one week. To contact the client organization and discuss any localization-related questions, follow these steps: 1. Open your organization’s **Workspace** and select **Clients** on the left sidebar. 2. Click **Contact** next to the needed client. ## [Confirm a Client Request](#confirm-a-client-request) [Section titled “Confirm a Client Request”](#confirm-a-client-request) After you confirm the client’s request, the Client Organization will be able to assign your Organization to the workflow steps of their projects. To accept a request from a Client and start cooperation, follow these steps: 1. Open your organization’s **Workspace** and select **Clients** on the left sidebar. 2. Click **Confirm** next to the new Client request. ## [Incoming Projects](#incoming-projects) [Section titled “Incoming Projects”](#incoming-projects) The **Incoming Projects** section will contain all the projects you’re working on as a vendor. If your organization is assigned to work on a project, you’ll see a pending request and will be able to add it to your workspace. You can organize incoming projects into groups for easier navigation and user management. 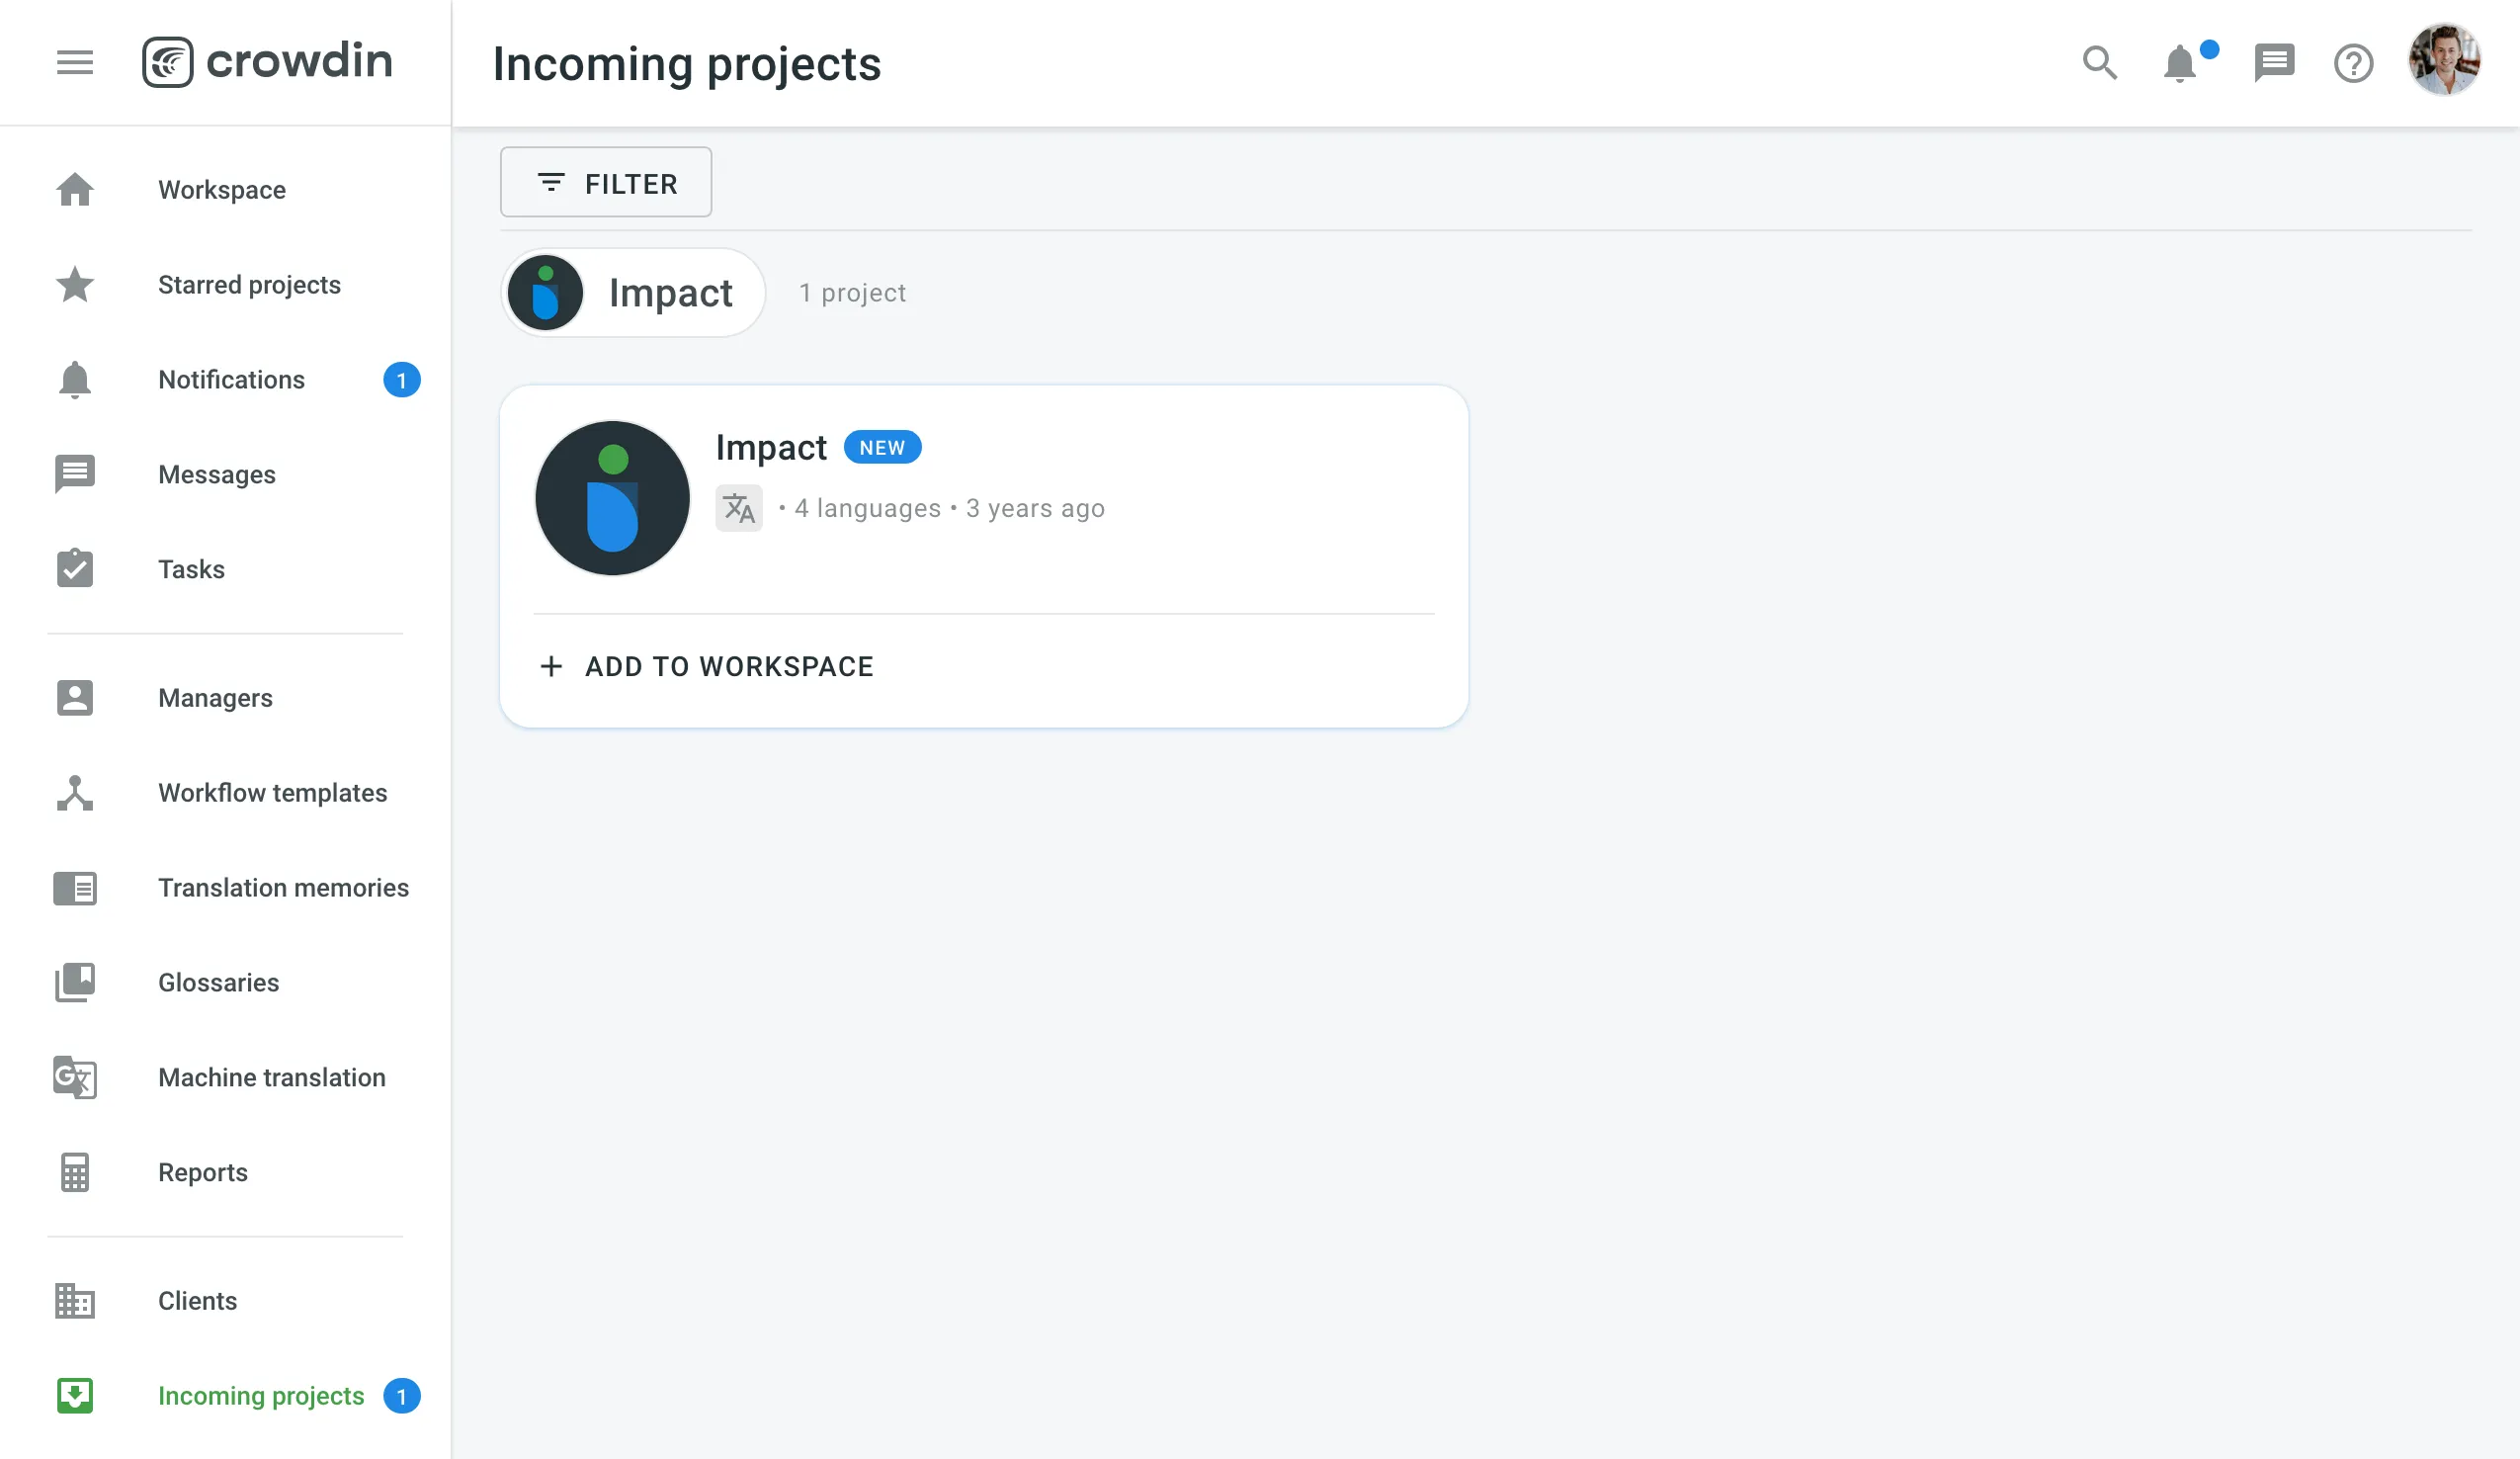 After you click **Add to Workspace** next to the Incoming project, you can organize that project in your workspace. ## [Accepting a Client Project](#accepting-a-client-project) [Section titled “Accepting a Client Project”](#accepting-a-client-project) To accept a project from a Client, follow these steps: 1. Open your organization’s **Workspace** and select **Incoming Projects** on the left sidebar. 2. Click **Add to Workspace** next to the incoming project. 3. Select whether you want to add this project to a Group. 4. Assign a workflow. 5. Click **Place Here**. 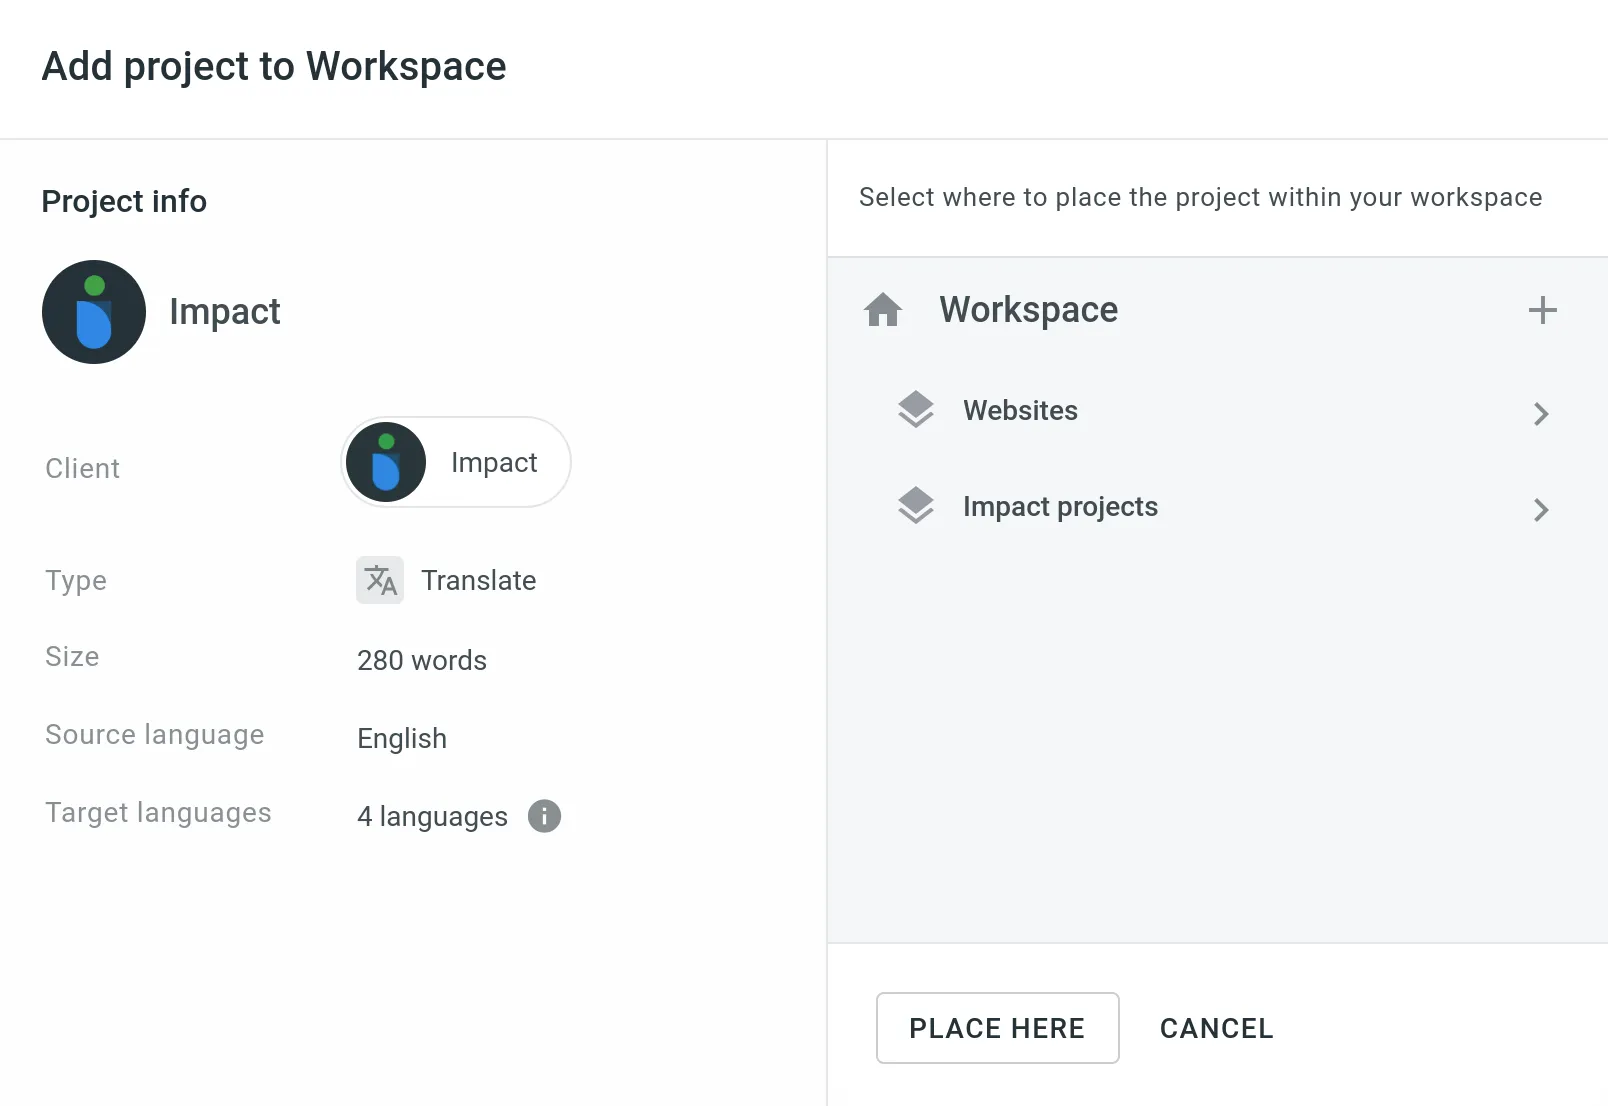 ## [Client Managers](#client-managers) [Section titled “Client Managers”](#client-managers) You can assign managers to each client within the vendor organization. Client managers coordinate the collaboration with this client and its incoming projects. To assign client managers for multiple client organizations, follow these steps: 1. Open your organization’s **Workspace** and go to **Clients > Managers**. 2. Click **Add managers**. 3. Select needed managers. You can search for members by name, username, or email. 4. Select clients to which you’d like to assign the selected managers. 5. Click **Done**. 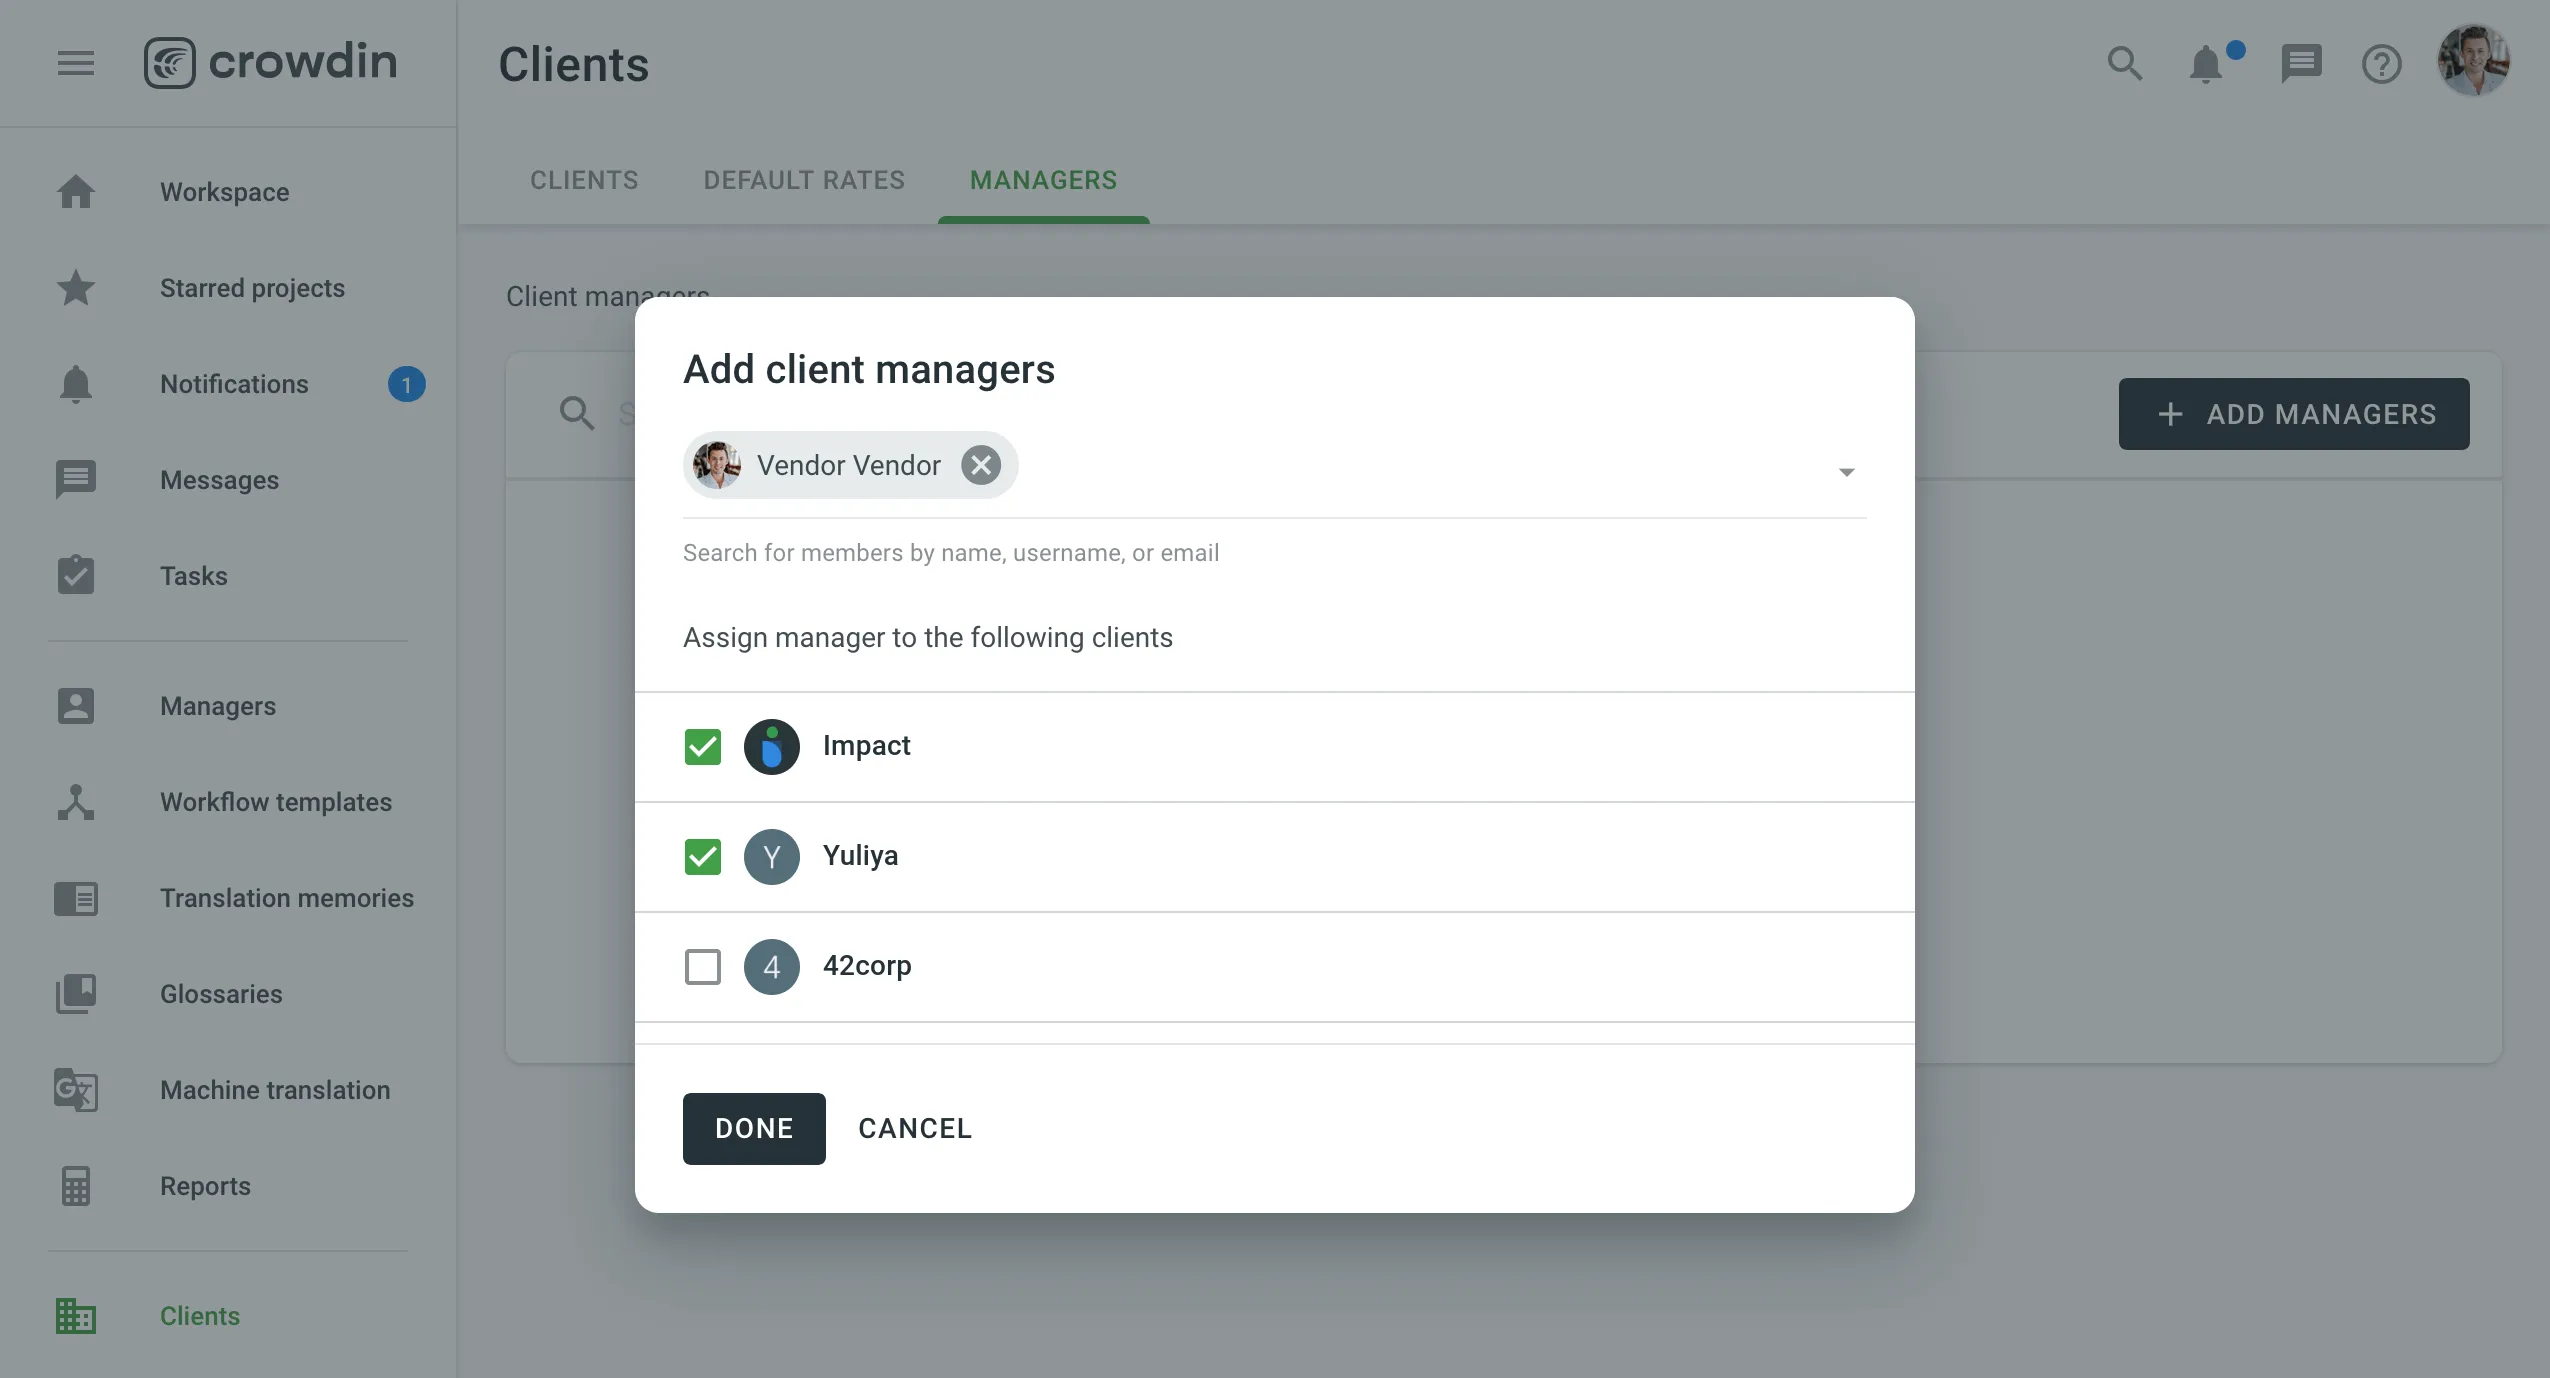 To assign client managers to a specific client organization, follow these steps: 1. Open your organization’s **Workspace** and select **Clients** on the left sidebar. 2. Click **Assign client managers** on the needed client organization. 3. Select needed managers. You can search for members by name, username, or email. 4. Click **Done**. ## [Organization Rates](#organization-rates) [Section titled “Organization Rates”](#organization-rates) As a Vendor, you can configure default and language-specific rates for your organization. These are the rates you will charge the client for translation and proofreading performed by the members of your organization. ### [Default Rates](#default-rates) [Section titled “Default Rates”](#default-rates) To set the default rates, follow these steps: 1. Open your organization’s **Workspace** and go to **Clients > Default rates**. 2. Set the rates for translation and proofreading services. 3. To add specific rates for translations with different TM match ranges, enable **Fuzzy TM matches**. 4. Click **Save**. 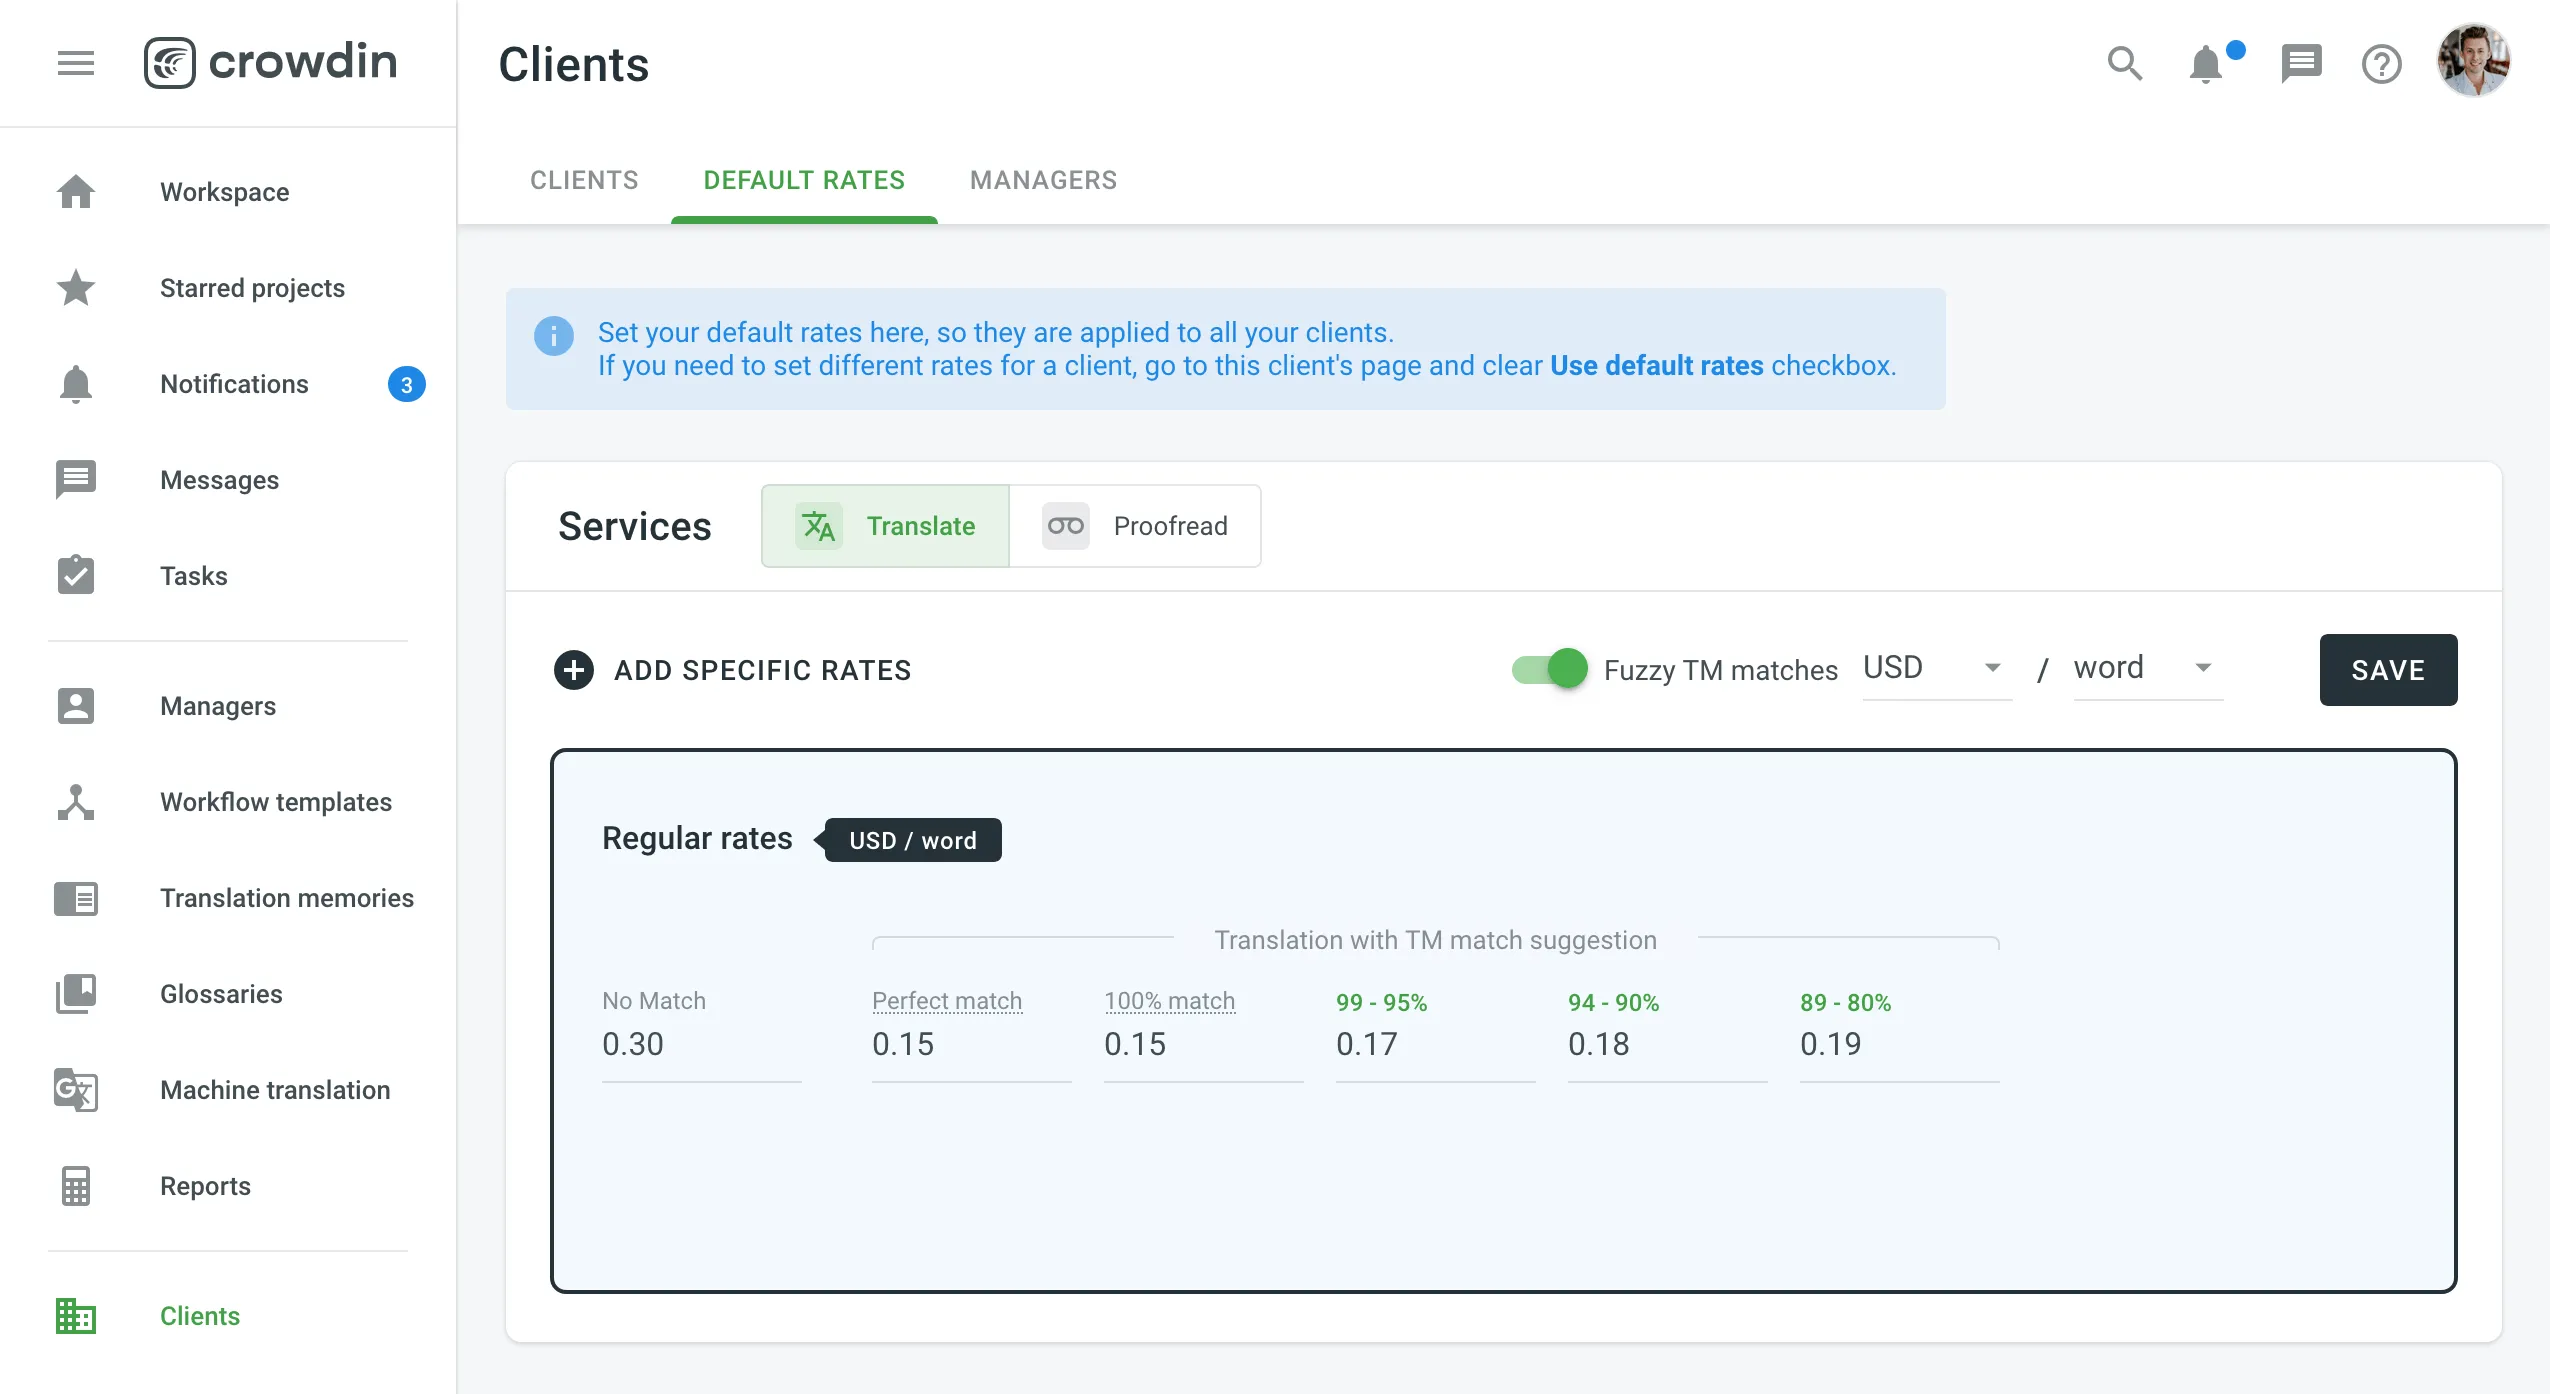 ### [Specific Rates](#specific-rates) [Section titled “Specific Rates”](#specific-rates) The default rates can be overridden by the specific rates for some language pairs or specific clients. To set specific rates for a client, follow these steps: 1. Open your organization’s **Workspace** and select **Clients** on the left sidebar. 2. Click **Rates** next to the needed client organization. 3. Click and clear **Use default rates**. 4. Set the rates for translation and proofreading services. 5. To add specific rates for translations with different TM match ranges, click and enable **Fuzzy TM matches**. 6. Click **Save**. To set specific rates for the language pairs, follow these steps: 1. Open your organization’s **Workspace** and go to **Clients > Default rates** 2. Click **Add specific rates**. 3. Select the needed languages. 4. Set the rates for translation and proofreading services. 5. To add specific rates for translations with different TM match ranges, enable **Fuzzy TM matches**. 6. Click **Save**. 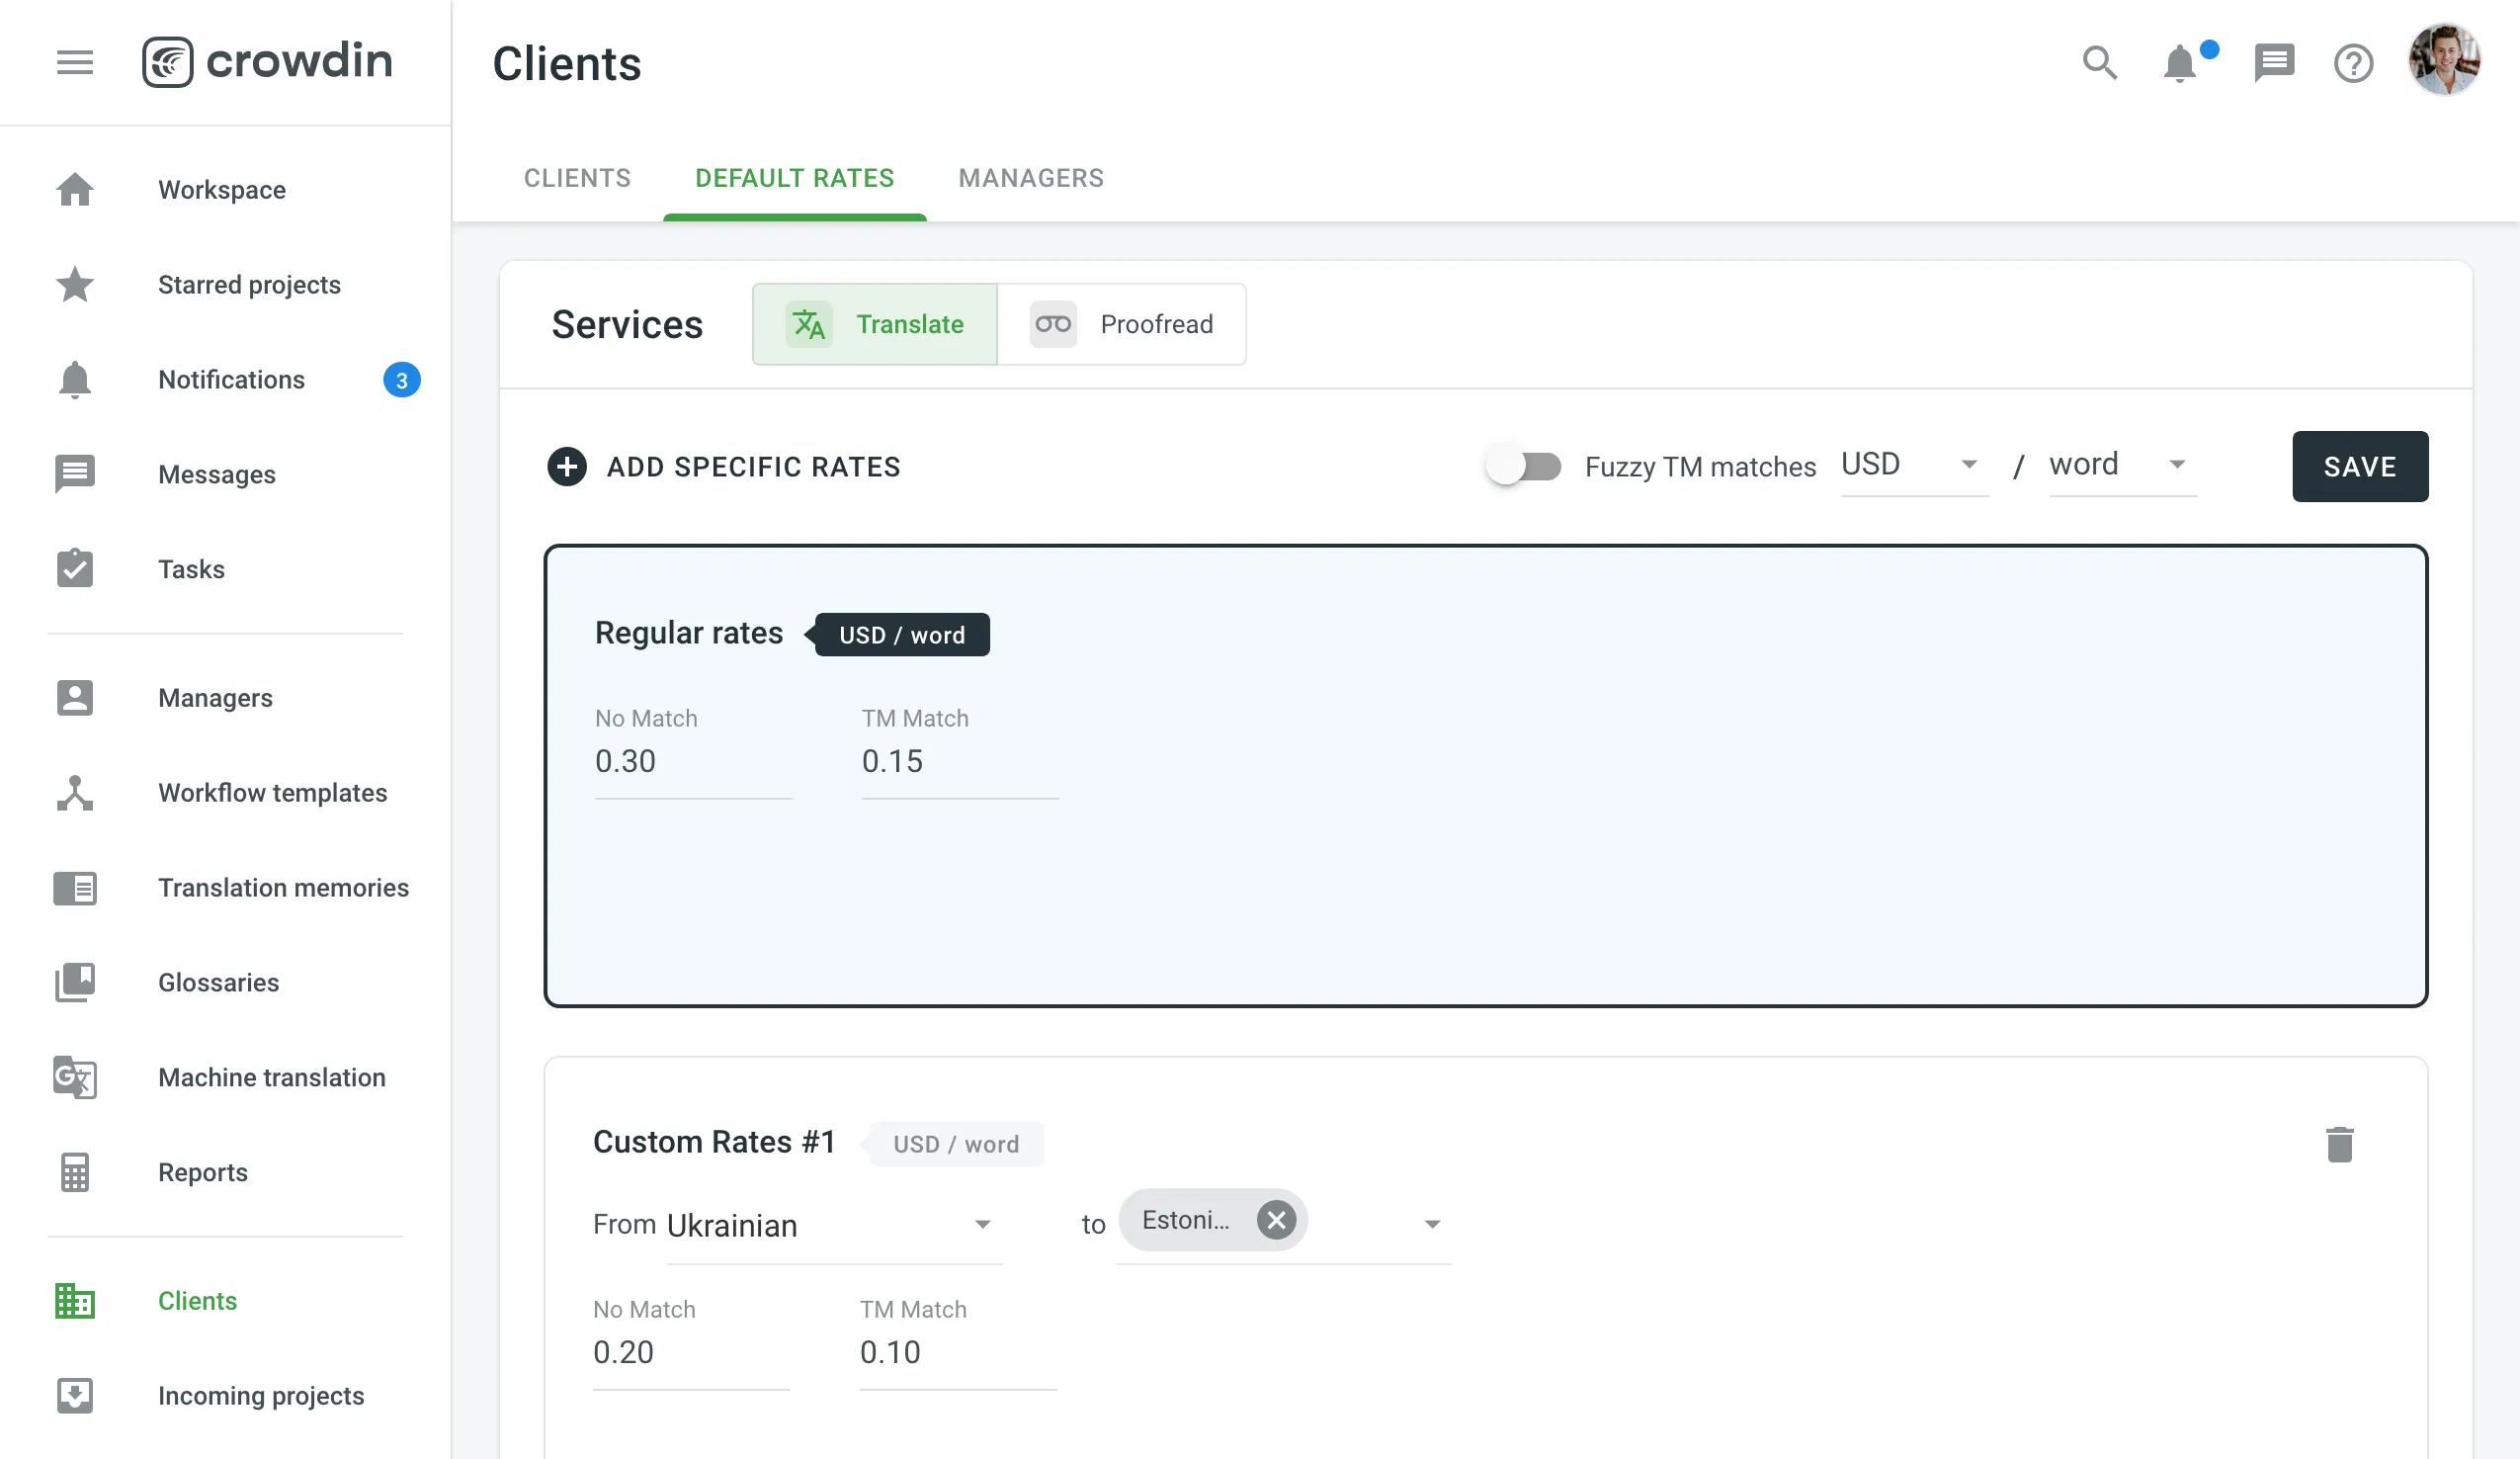 ## [See Also](#see-also) [Section titled “See Also”](#see-also) [Vendors ](/enterprise/vendors/)Learn how to work with vendors in Crowdin Enterprise.
# Configuring VCS Integrations Online
> Learn how to configure a DVCS integration online in Crowdin
To configure a version control system integration, specify the source files you’d like to translate and how Crowdin Enterprise should structure the translated files in your repository. ## [Branch Configuration](#branch-configuration) [Section titled “Branch Configuration”](#branch-configuration) Once you’ve selected your repository and branch for translation, the next step is to configure the selected branch. Click to open the **Branch Configuration** dialog and start the configuration. In the **Branch Configuration** dialog, you can either load the existing configuration file stored in your repository or create a new configuration from scratch. 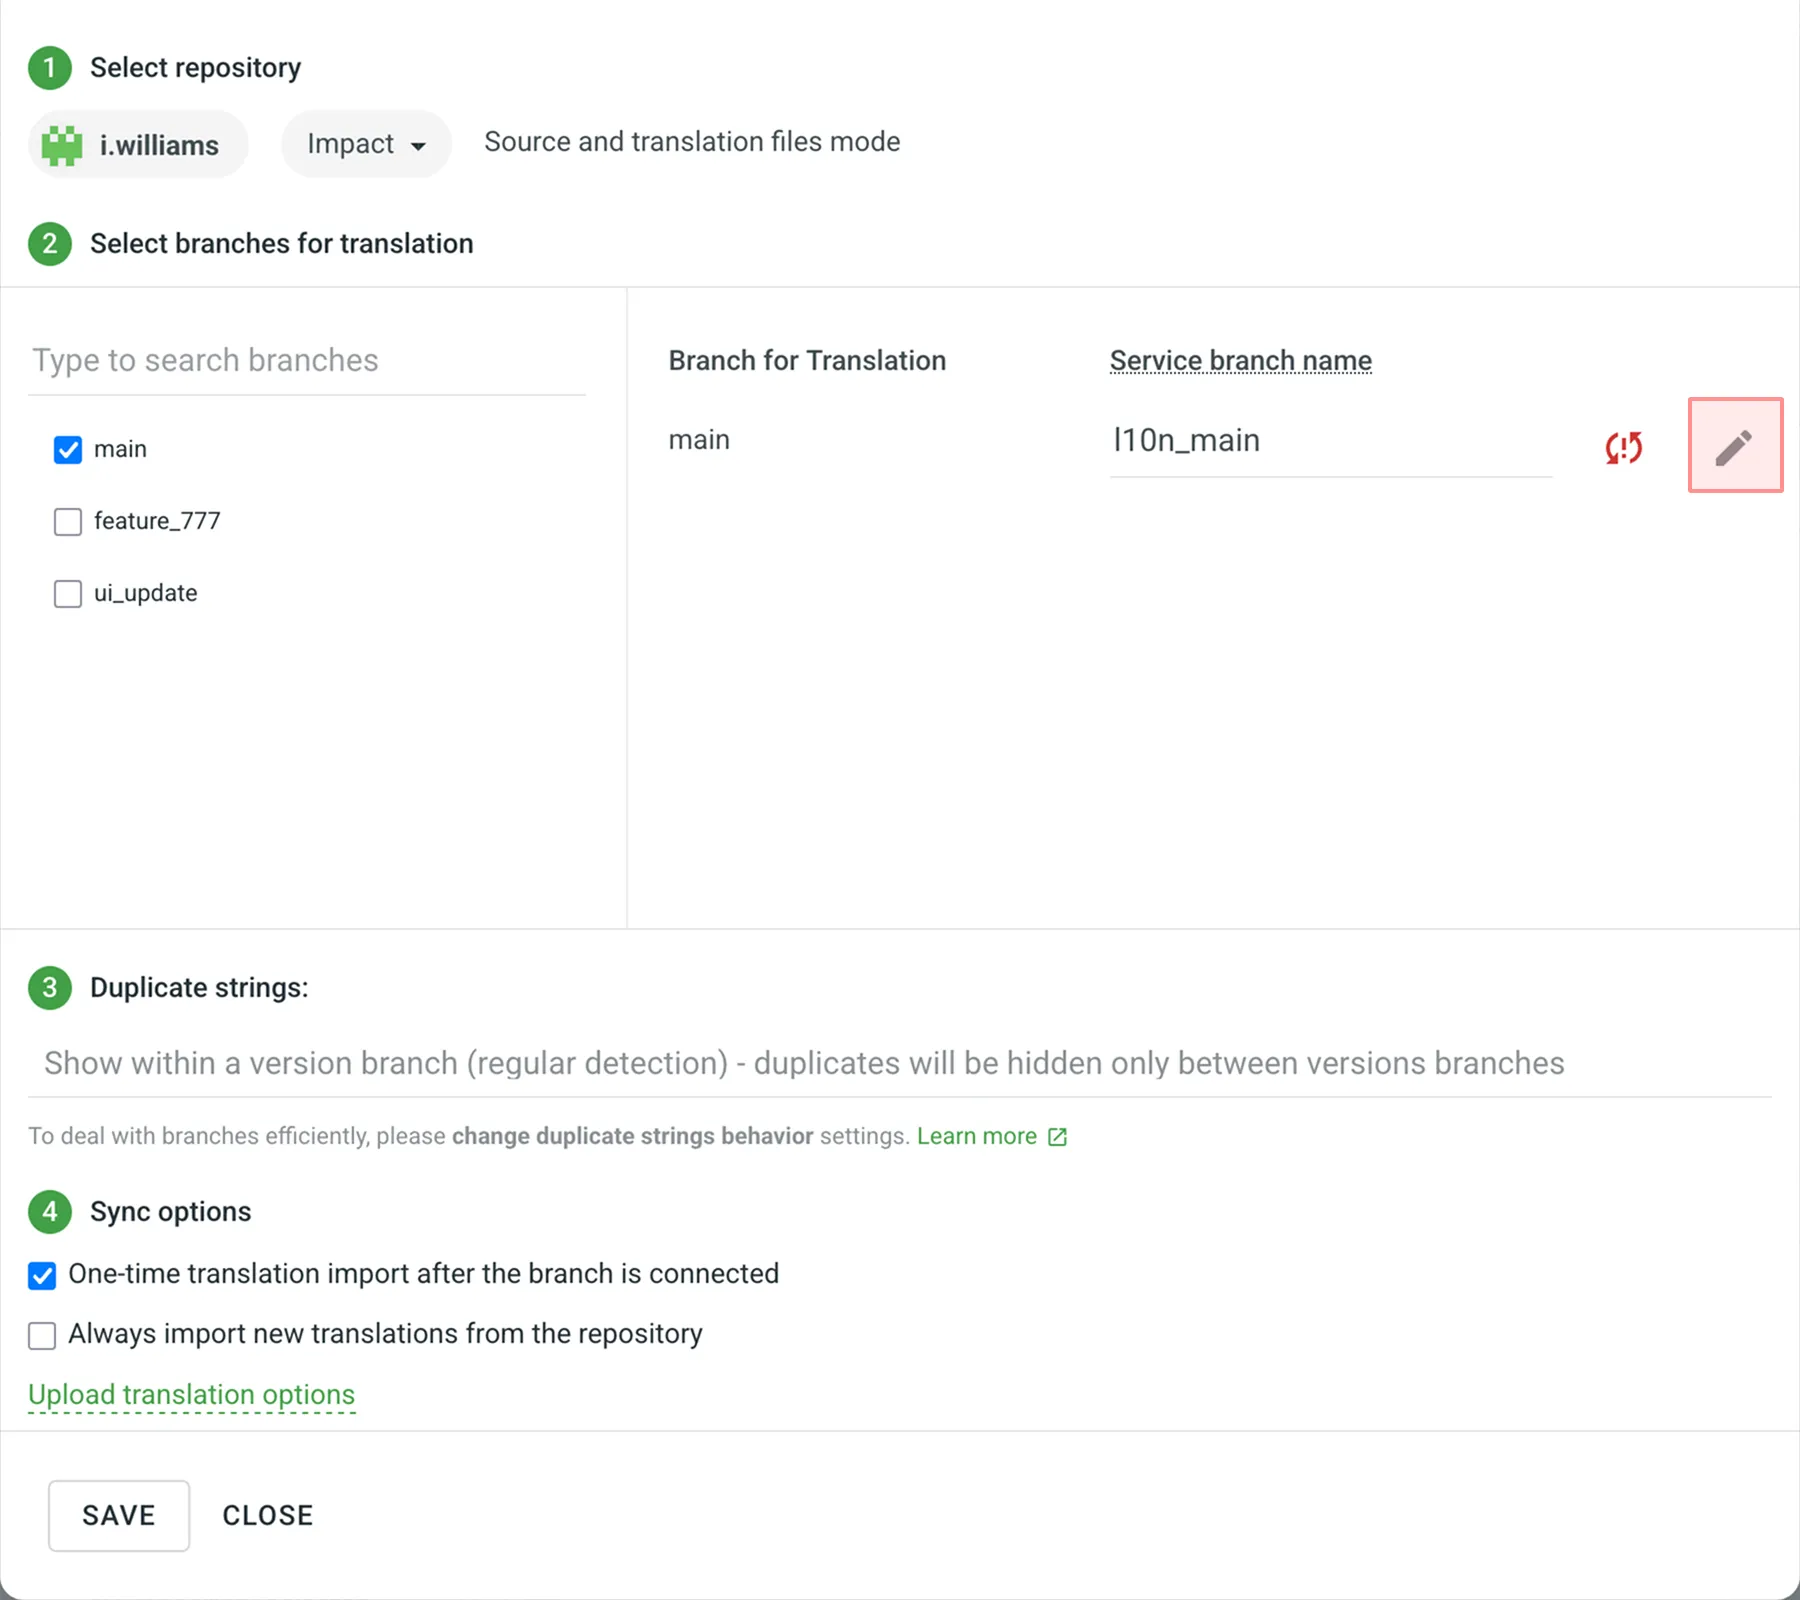 If you want your VCS integration to work in the **Target File Bundles Mode**, you need to configure target file bundles for each branch you have selected for translation. Read more about [configuring target file bundles for VCS integration](/enterprise/bundles/#bundles-in-vcs-integrations). ## [Loading a Configuration](#loading-a-configuration) [Section titled “Loading a Configuration”](#loading-a-configuration) To load the existing configuration file stored in your repository, follow these steps: 1. Click **Load configuration**. 2. Enter the name of the configuration file from your repository. 3. Click **Continue**. The configuration will be displayed in the **Branch Configuration** dialog. You can use it as is or modify it if necessary. ## [Creating a Configuration](#creating-a-configuration) [Section titled “Creating a Configuration”](#creating-a-configuration) To create a new configuration file to be used by the integration, specify the preferred name and click **Continue** in the **Branch Configuration** dialog. Then specify the source and translated file paths using the patterns and placeholders listed below. In the right panel, you can preview the structure of the source files that will be uploaded for translation and the structure of the translated files based on the specified paths. Once you’ve finished setting up the configuration for the selected branch and saved the changes, the configuration file will be saved in the root of the translation branch in your repository. ### [Patterns](#patterns) [Section titled “Patterns”](#patterns) You can use wildcard (`*`, `**`, `?`, `[set]`, `\`) patterns to specify which files should be uploaded for translation. Read more about [wildcard patterns](/developer/configuration-file/#general-configuration). ### [Placeholders](#placeholders) [Section titled “Placeholders”](#placeholders) Use placeholders to specify where translated files will be placed and how they will be named: | **Name** | **Description** | | -------------------------- | ----------------------------------------------------------------------------------------------------- | | `%original_file_name%` | Original file name | | `%original_path%` | Take parent folder names in the Crowdin Enterprise project to build file path in the resulting bundle | | `%file_extension%` | Original file extension | | `%file_name%` | File name without extension | | `%language%` | Language name (e.g., Ukrainian) | | `%two_letters_code%` | Language code ISO 639-1 (e.g., uk) | | `%three_letters_code%` | Language code ISO 639-2/T (e.g., ukr) | | `%locale%` | Locale (e.g., uk-UA) | | `%locale_with_underscore%` | Locale (e.g., uk\_UA) | | `%android_code%` | Android Locale identifier used to name “values-” directories | | `%osx_code%` | OS X Locale identifier used to name “.lproj” directories | | `%osx_locale%` | OS X locale used to name translation resources (e.g., uk, zh-Hans, zh\_HK) | ## [Advanced Settings](#advanced-settings) [Section titled “Advanced Settings”](#advanced-settings) The advanced settings provide more control over the integration’s behavior. You can specify files to be excluded from translation, map custom language codes, and configure parsing options for structured file formats, such as spreadsheets and XML. This section also covers additional parameters that can be configured by manually editing the `crowdin.yml` file in your repository. ### [Ignoring Files](#ignoring-files) [Section titled “Ignoring Files”](#ignoring-files) If you don’t want some files to be translated, select **Ignore files or folders**, specify the pattern for those files, and Crowdin Enterprise will not upload those files for translation. 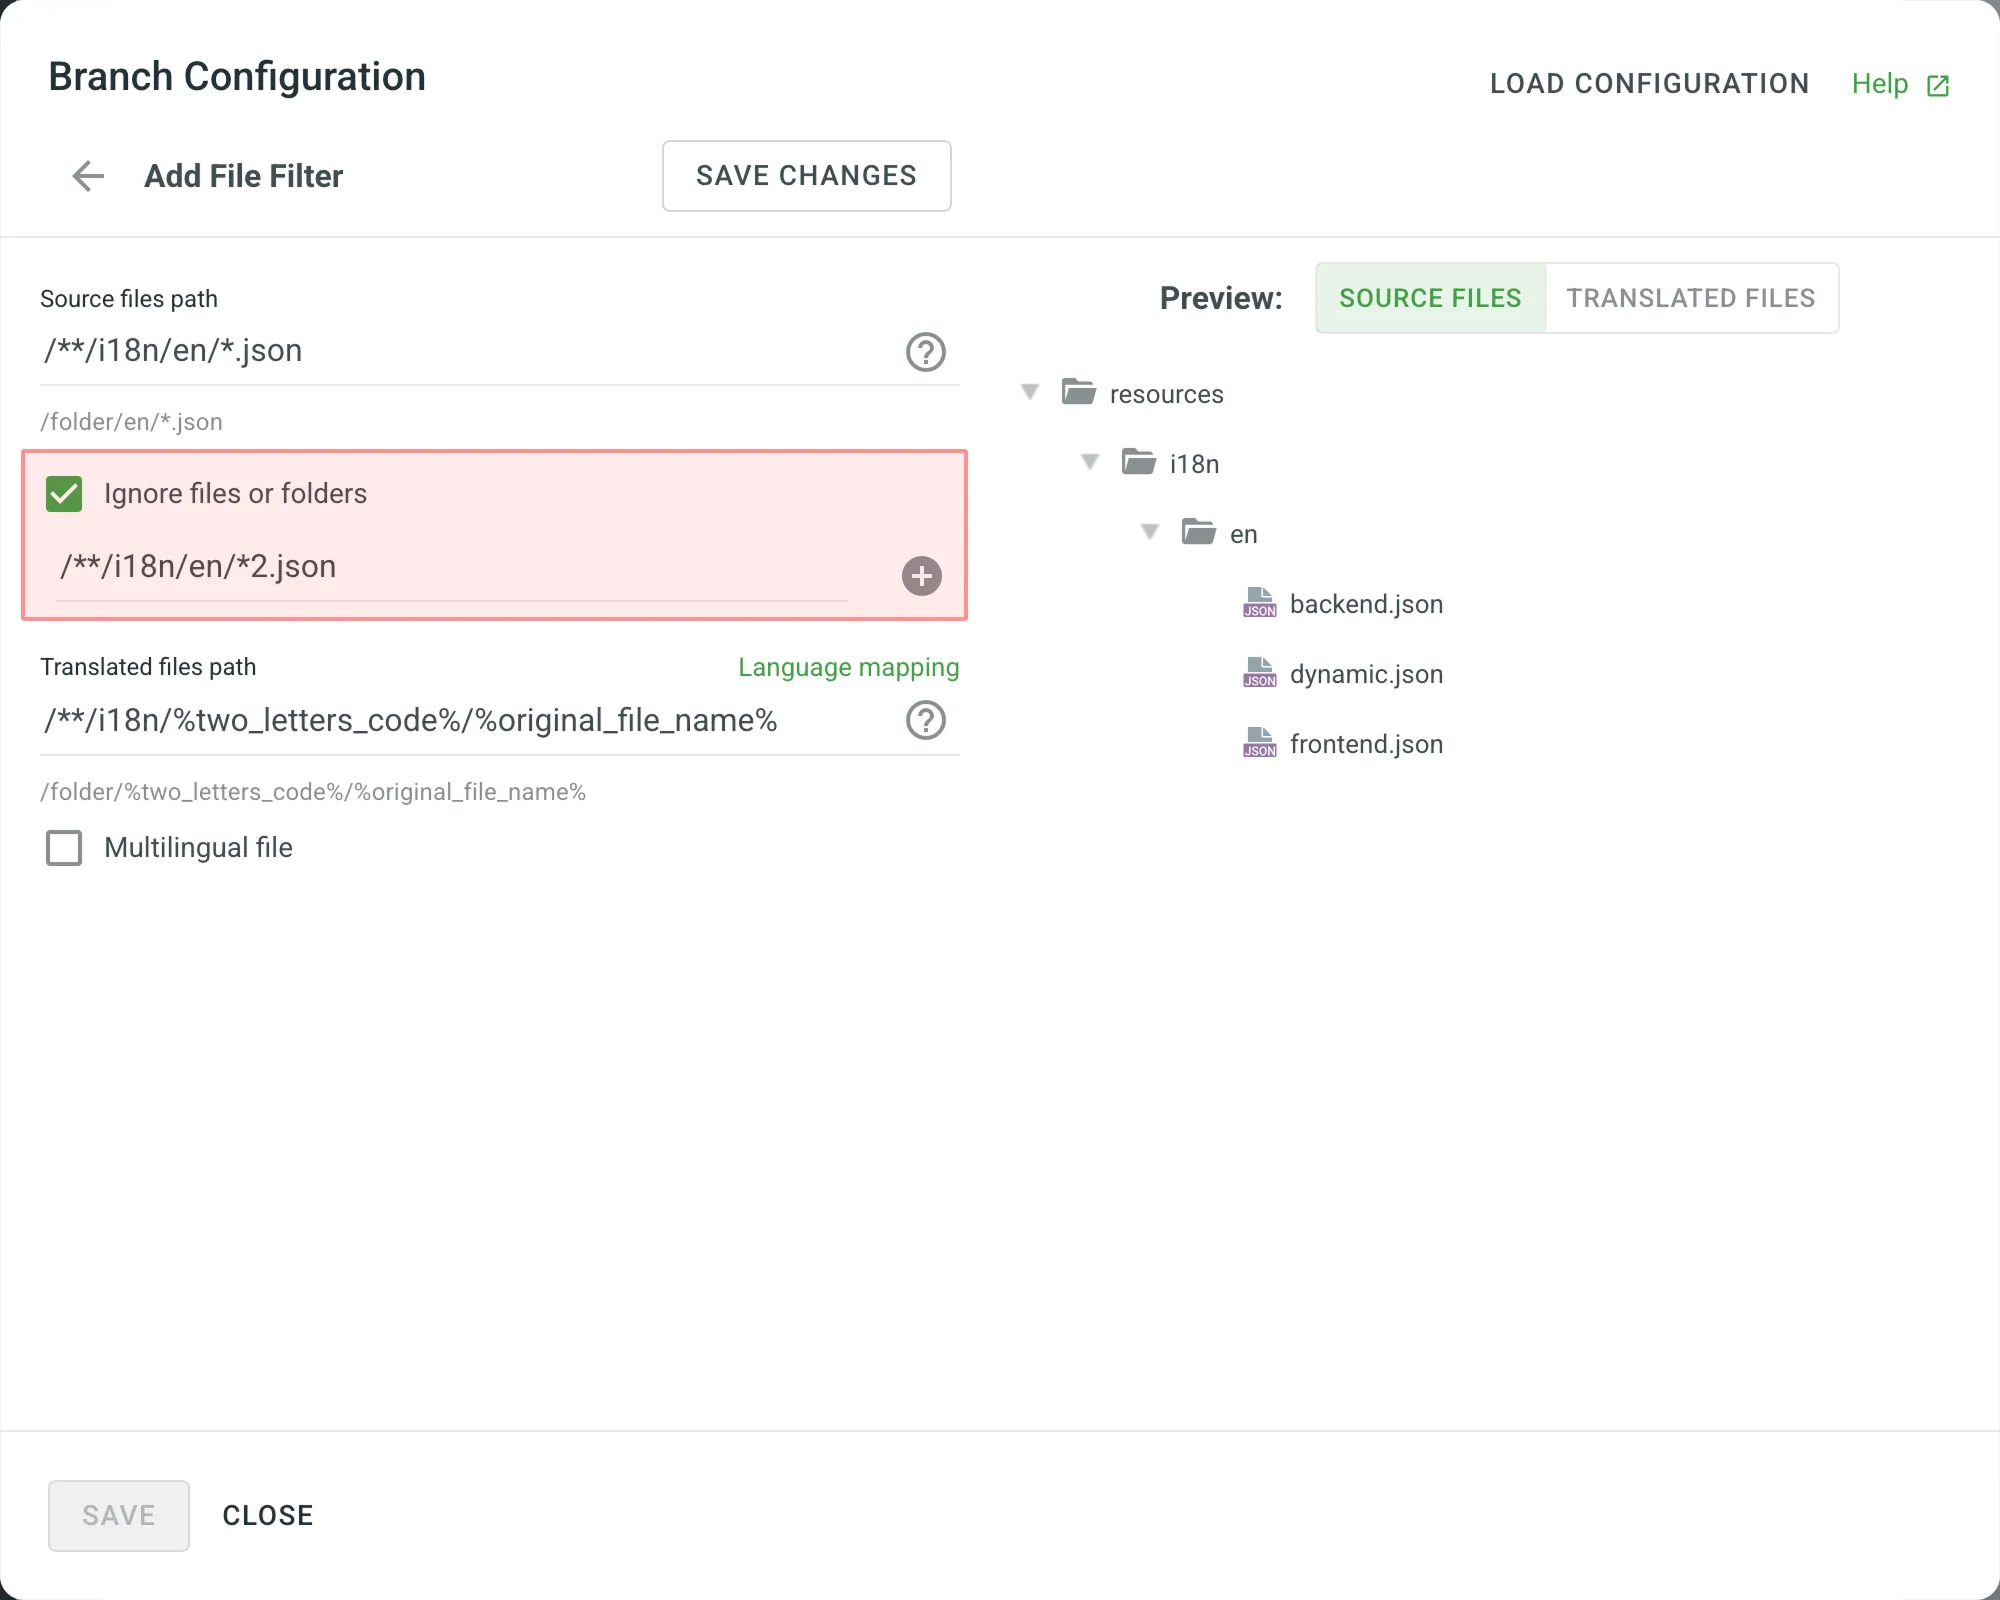 ### [Language Mapping](#language-mapping) [Section titled “Language Mapping”](#language-mapping) If your project uses custom names for locale directories, you can use language mapping to map your own languages to be recognized by Crowdin Enterprise. To add a language mapping, follow these steps: 1. Click **Language Mapping**. 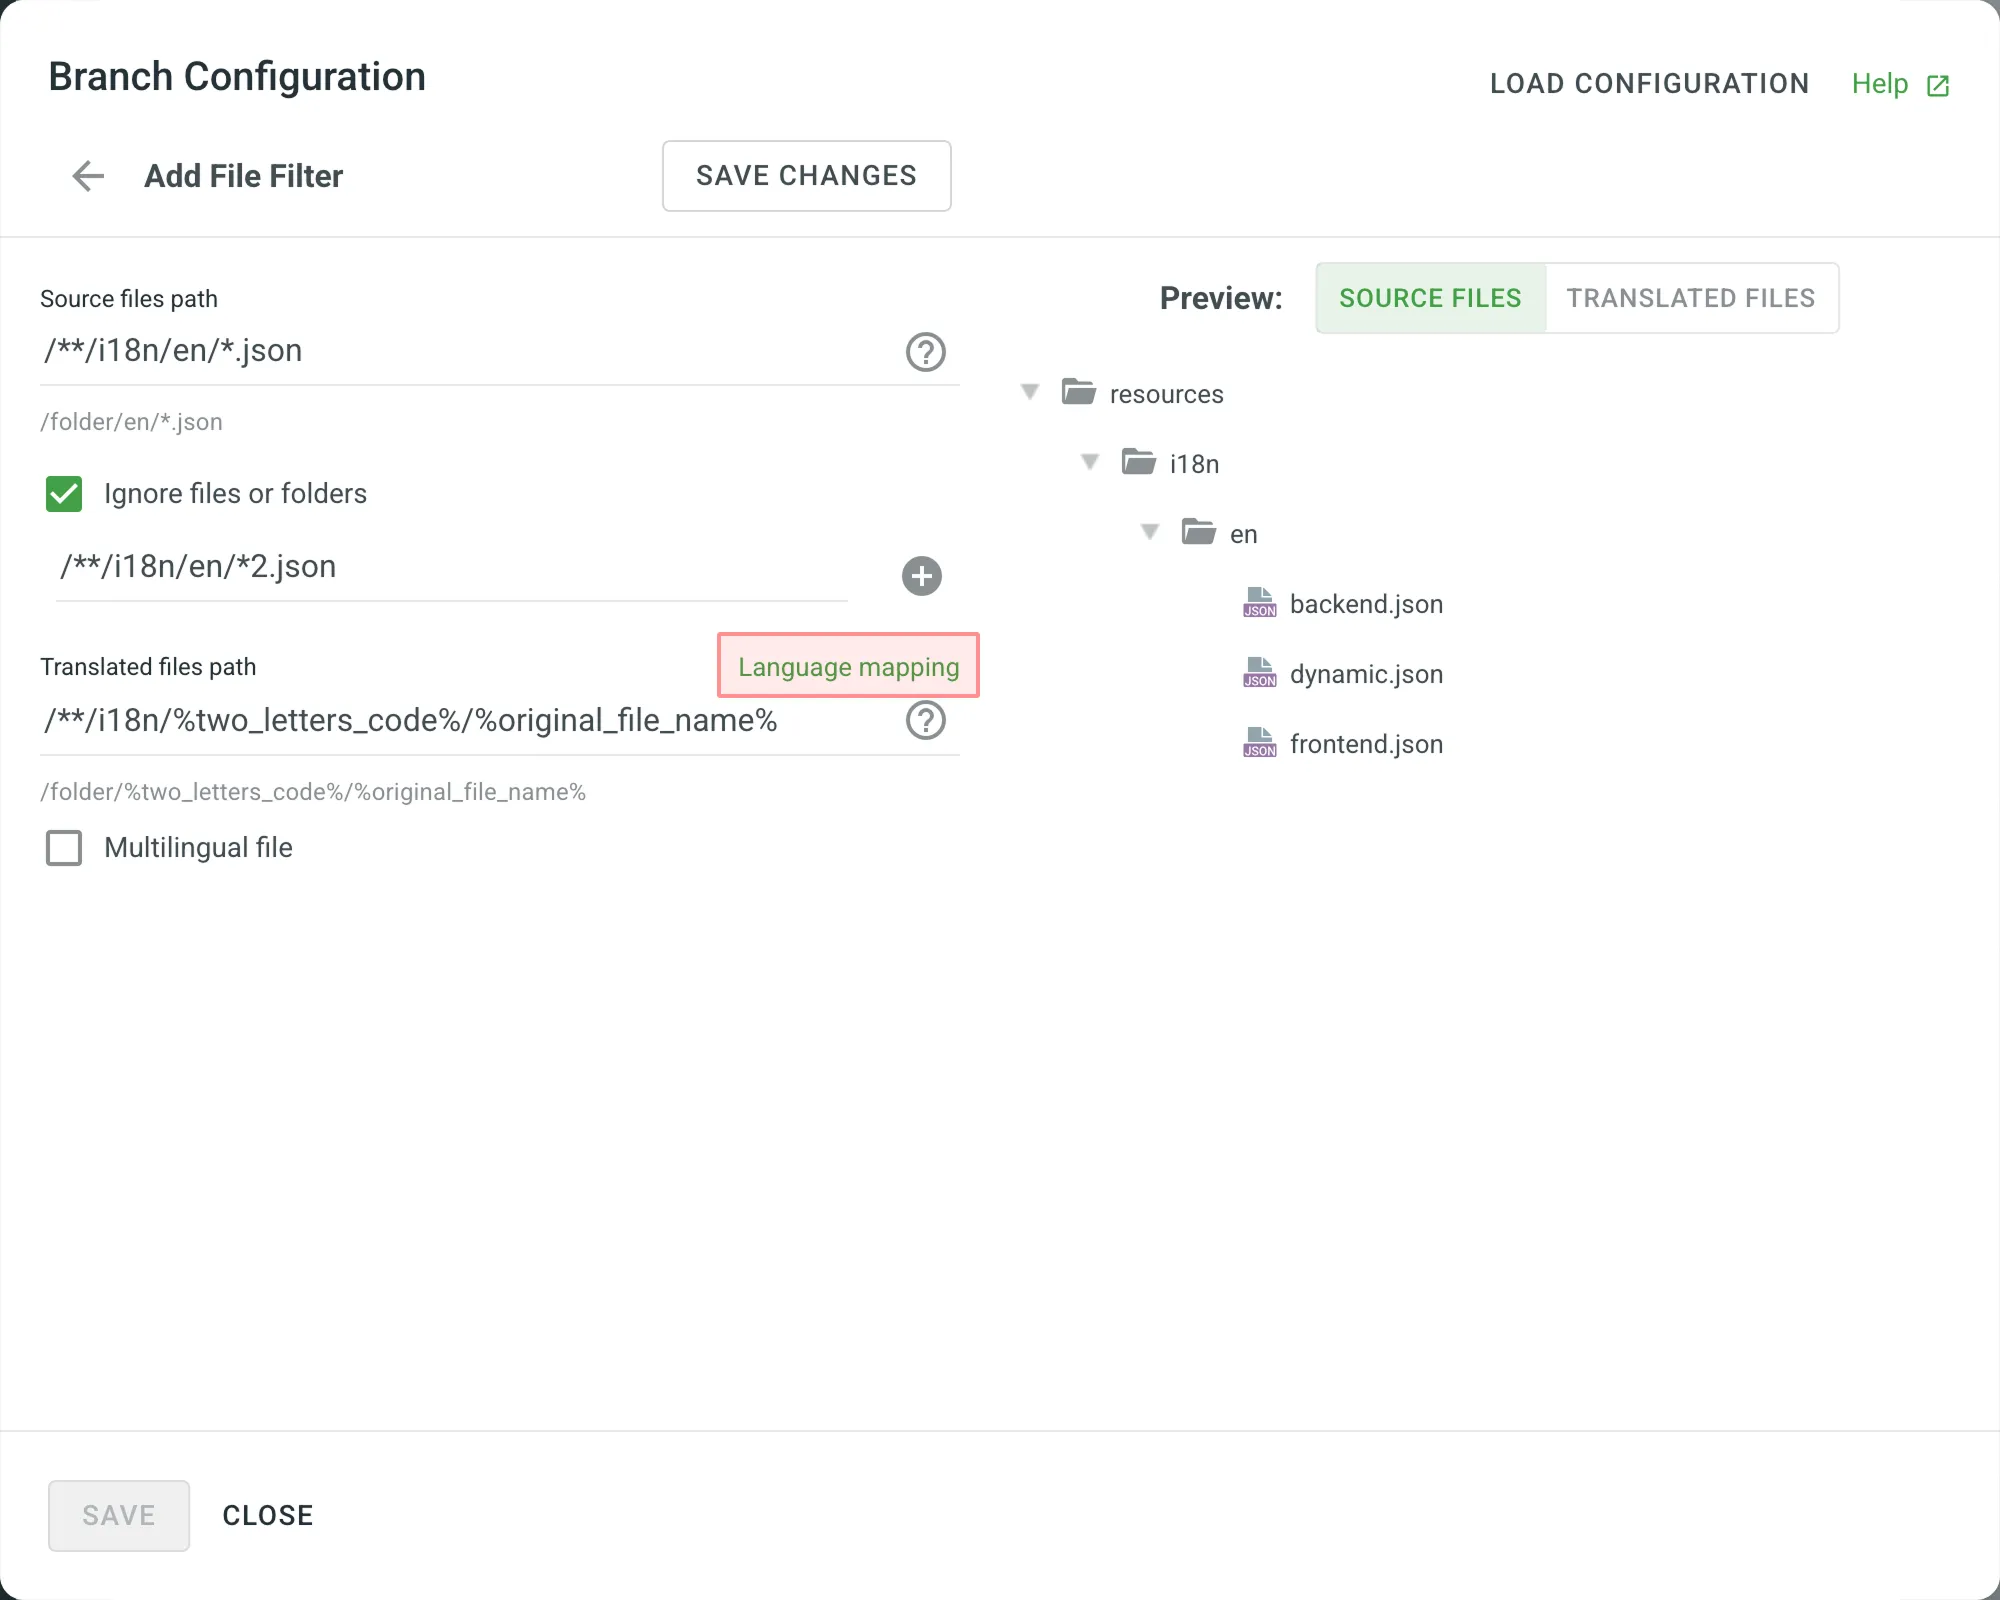 2. Select the necessary language and a placeholder. 3. Specify your custom code. 4. Click **Add Mapping** to add another custom code.  5. Click **Save**. ### [Configuring Spreadsheets](#configuring-spreadsheets) [Section titled “Configuring Spreadsheets”](#configuring-spreadsheets) You can specify the scheme of your spreadsheet file in the **Scheme** field. To create the scheme for your CSV or XLS/XLSX file, use the following constants: * `identifier` – column contains string identifiers. * `source_phrase` – column contains source strings. * `source_or_translation` – column contains source strings, but the same column will be filled with translations when the file is exported. If you upload existing translations, the values from this column will be used as translations. * `translation` – column contains translations. * `context` – column contains comments or context information for the source strings. * `max_length` – column contains max.length limit values for the string translations. * `labels` – column contains labels for the source strings. * `none` – column that will be skipped during import. **Scheme example**: `identifier,source_phrase,context,fr,de,it,uk` ([Language Codes](/developer/language-codes/)). If a spreadsheet contains the translations for several target languages, select **Multilingual file**. If you don’t want to translate the text stored in the first row, select **Import first line as a header**. 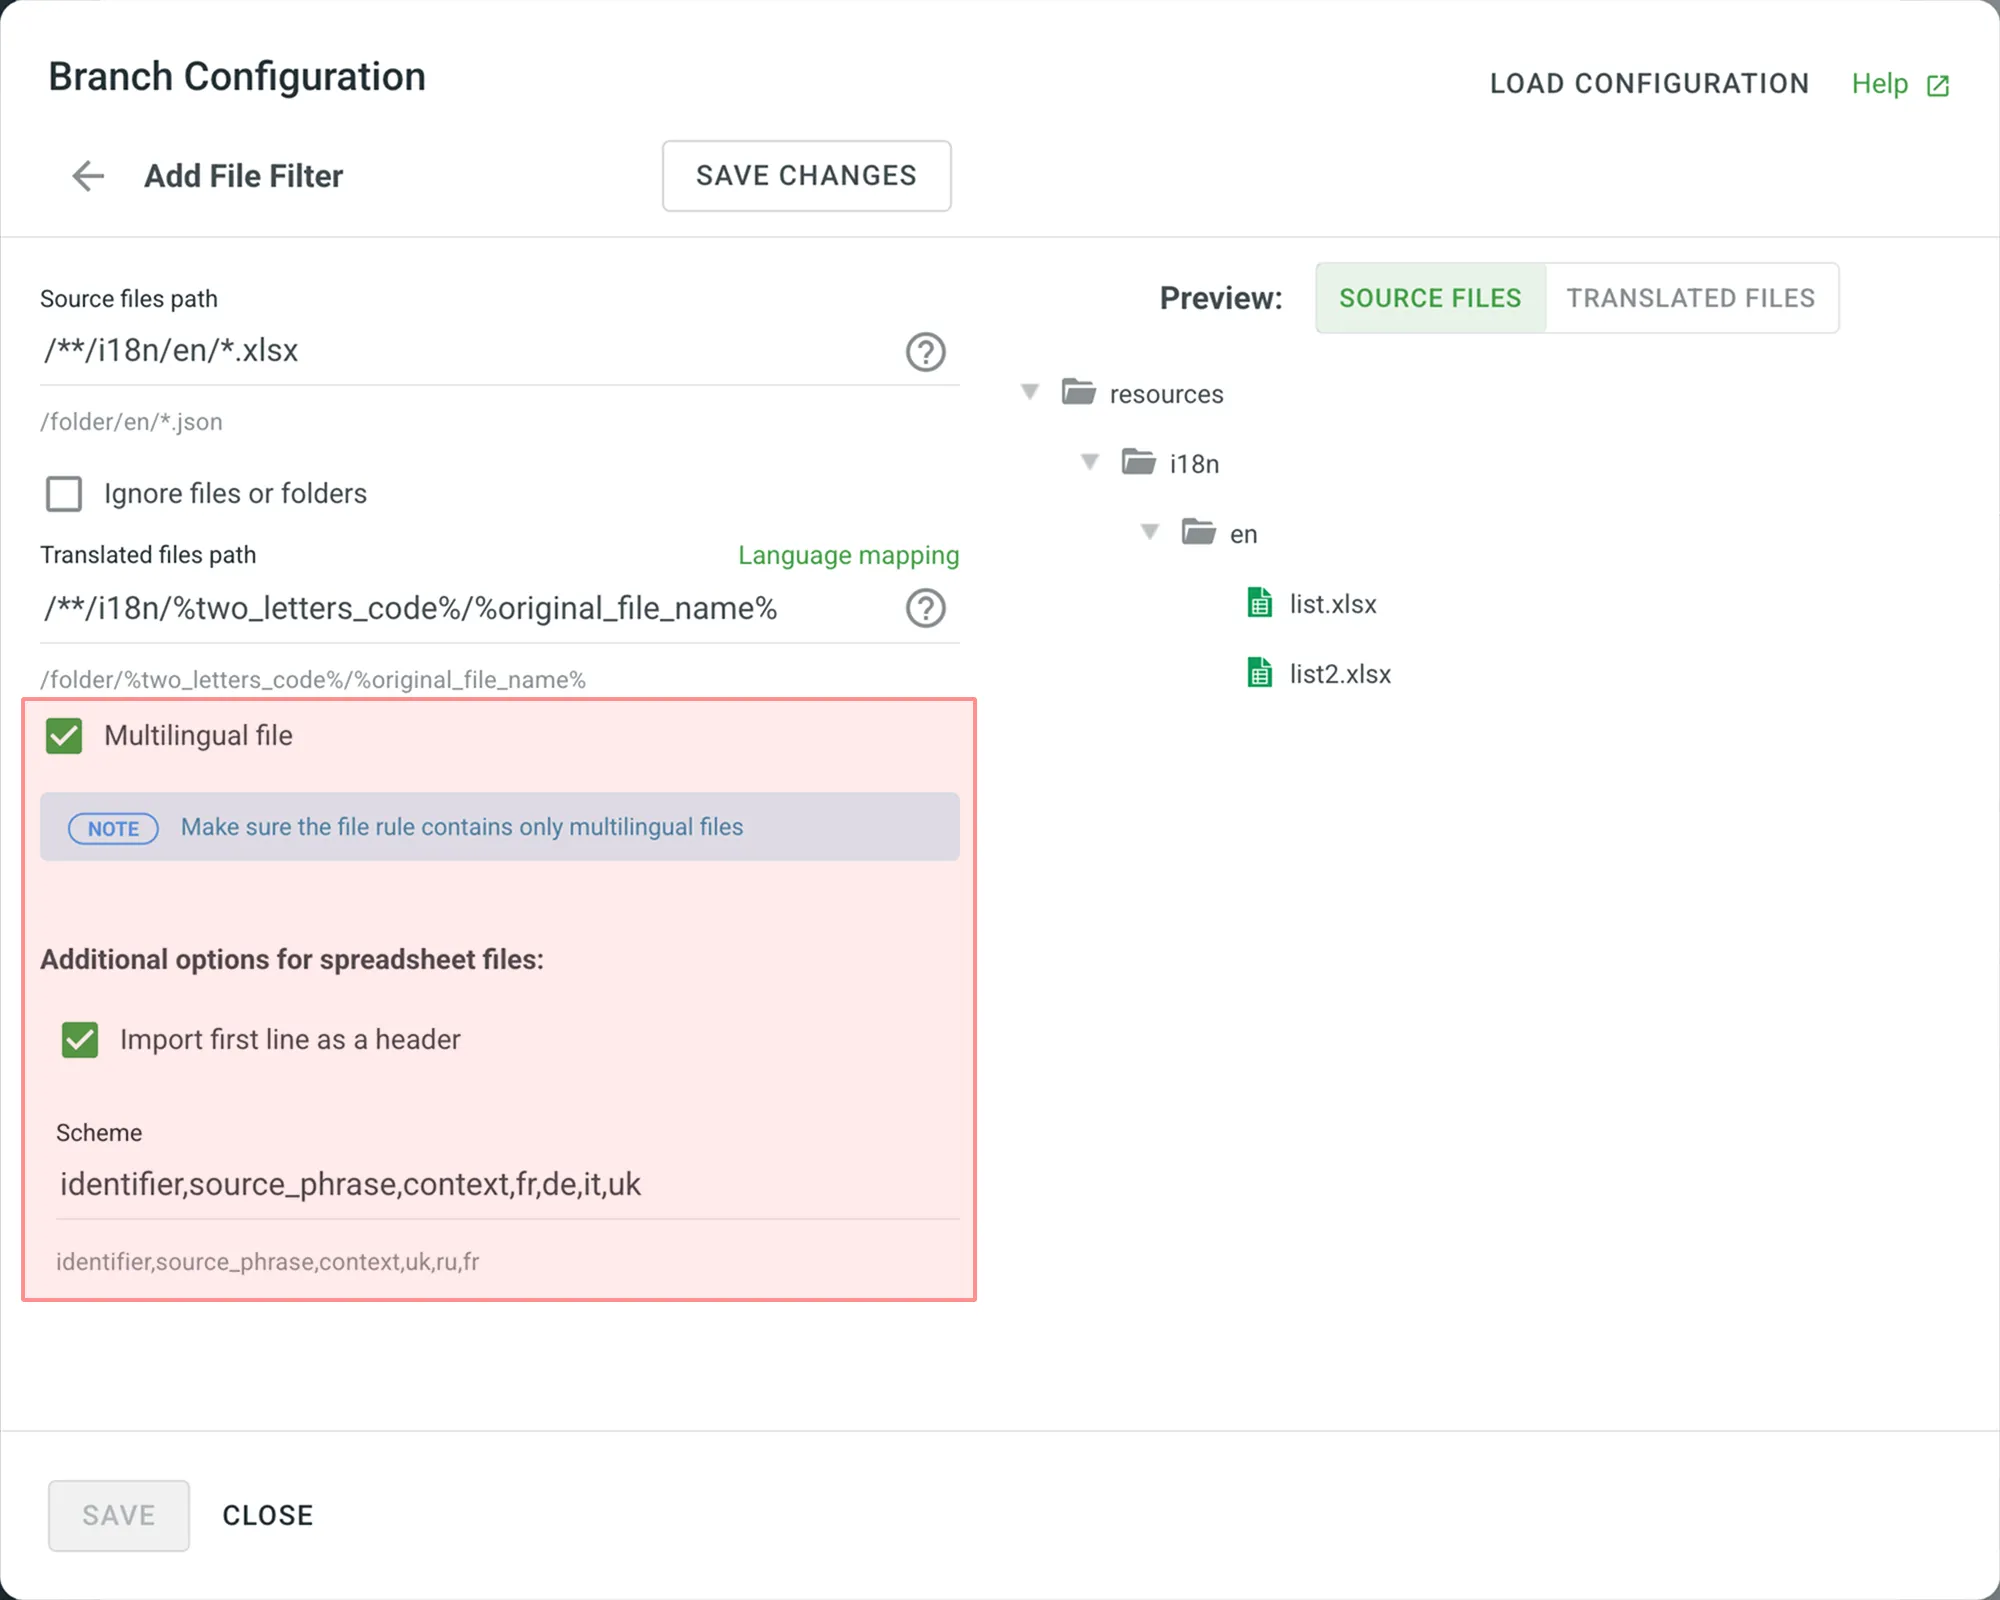 ### [Configuring XML Files](#configuring-xml-files) [Section titled “Configuring XML Files”](#configuring-xml-files) You can configure the XML file import settings to specify how Crowdin Enterprise should handle the XML files. 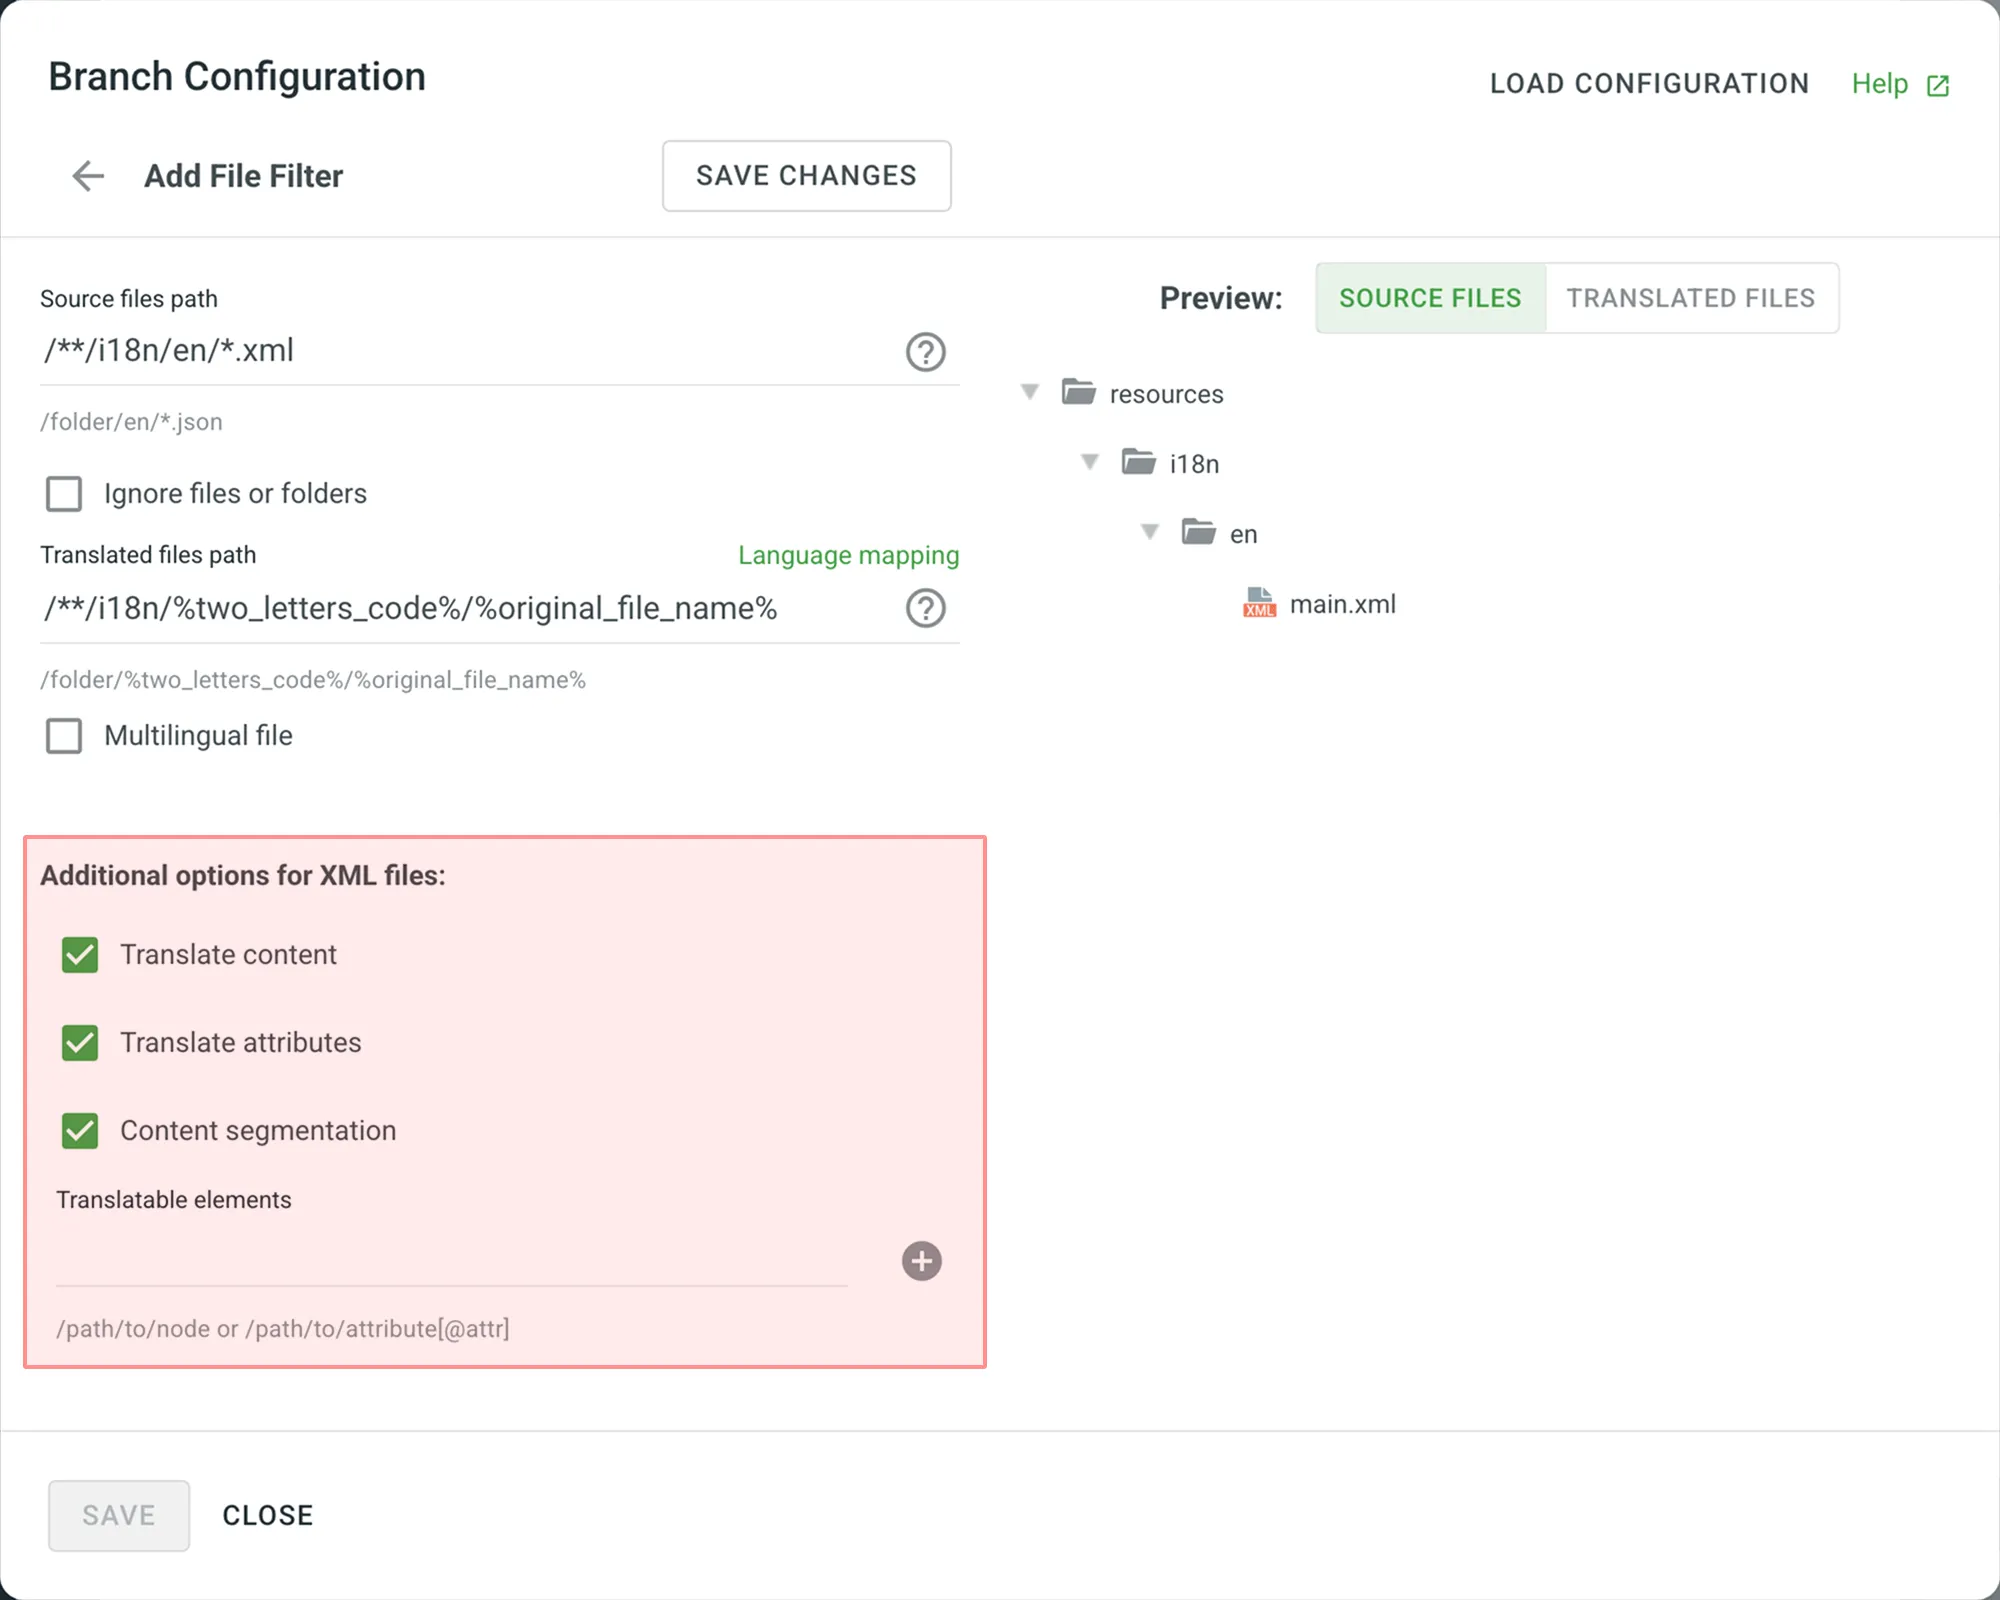 | **Option** | **Description** | | ------------------------- | ------------------------------------------------------------------------------------------------------------------------------------------------------------------ | | **Translate Content** | Select to translate texts stored inside the tags. | | **Translate Attributes** | Select to translate tag attributes. | | **Content Segmentation** | Select to split the XML source file’s content into shorter text segments. | | **Translatable Elements** | This is an array of strings, where each item is the XPaths to the DOM element that should be imported. Sample path: `/path/to/node` or `/path/to/attribute[@attr]` | ### [Additional Parameters](#additional-parameters) [Section titled “Additional Parameters”](#additional-parameters) The following parameters can’t be configured online: * `preserve_hierarchy` - preserves the directory structure in Crowdin Enterprise * `dest` - allows you to specify a file name in Crowdin Enterprise * `type` - allows you to specify a file type in Crowdin Enterprise * `update_option` - keeps translations and keeps/removes approvals of changed strings during a file update * `commit_message` - additional commit message that can include Git tags * `export_languages` - export translations for the specified languages Once you save the online configuration, a `crowdin.yml` file is saved in the root of the configured branch in your repository. You can edit this file manually to add the necessary parameters. Read more about the [configuration file](/developer/configuration-file/#configuration-file-for-vcs-integrations). ## [Saving Configuration](#saving-configuration) [Section titled “Saving Configuration”](#saving-configuration) 1. Click **Save Changes** to preview the created configuration.  2. Click **Add File Filter** if you have multiple file groups with different configurations.\ If several branches in the project have the same configuration, and you want the same filters to be applied to them, select **Apply filters to all translatable branches**. 3. Click **Save** to save the created configuration. 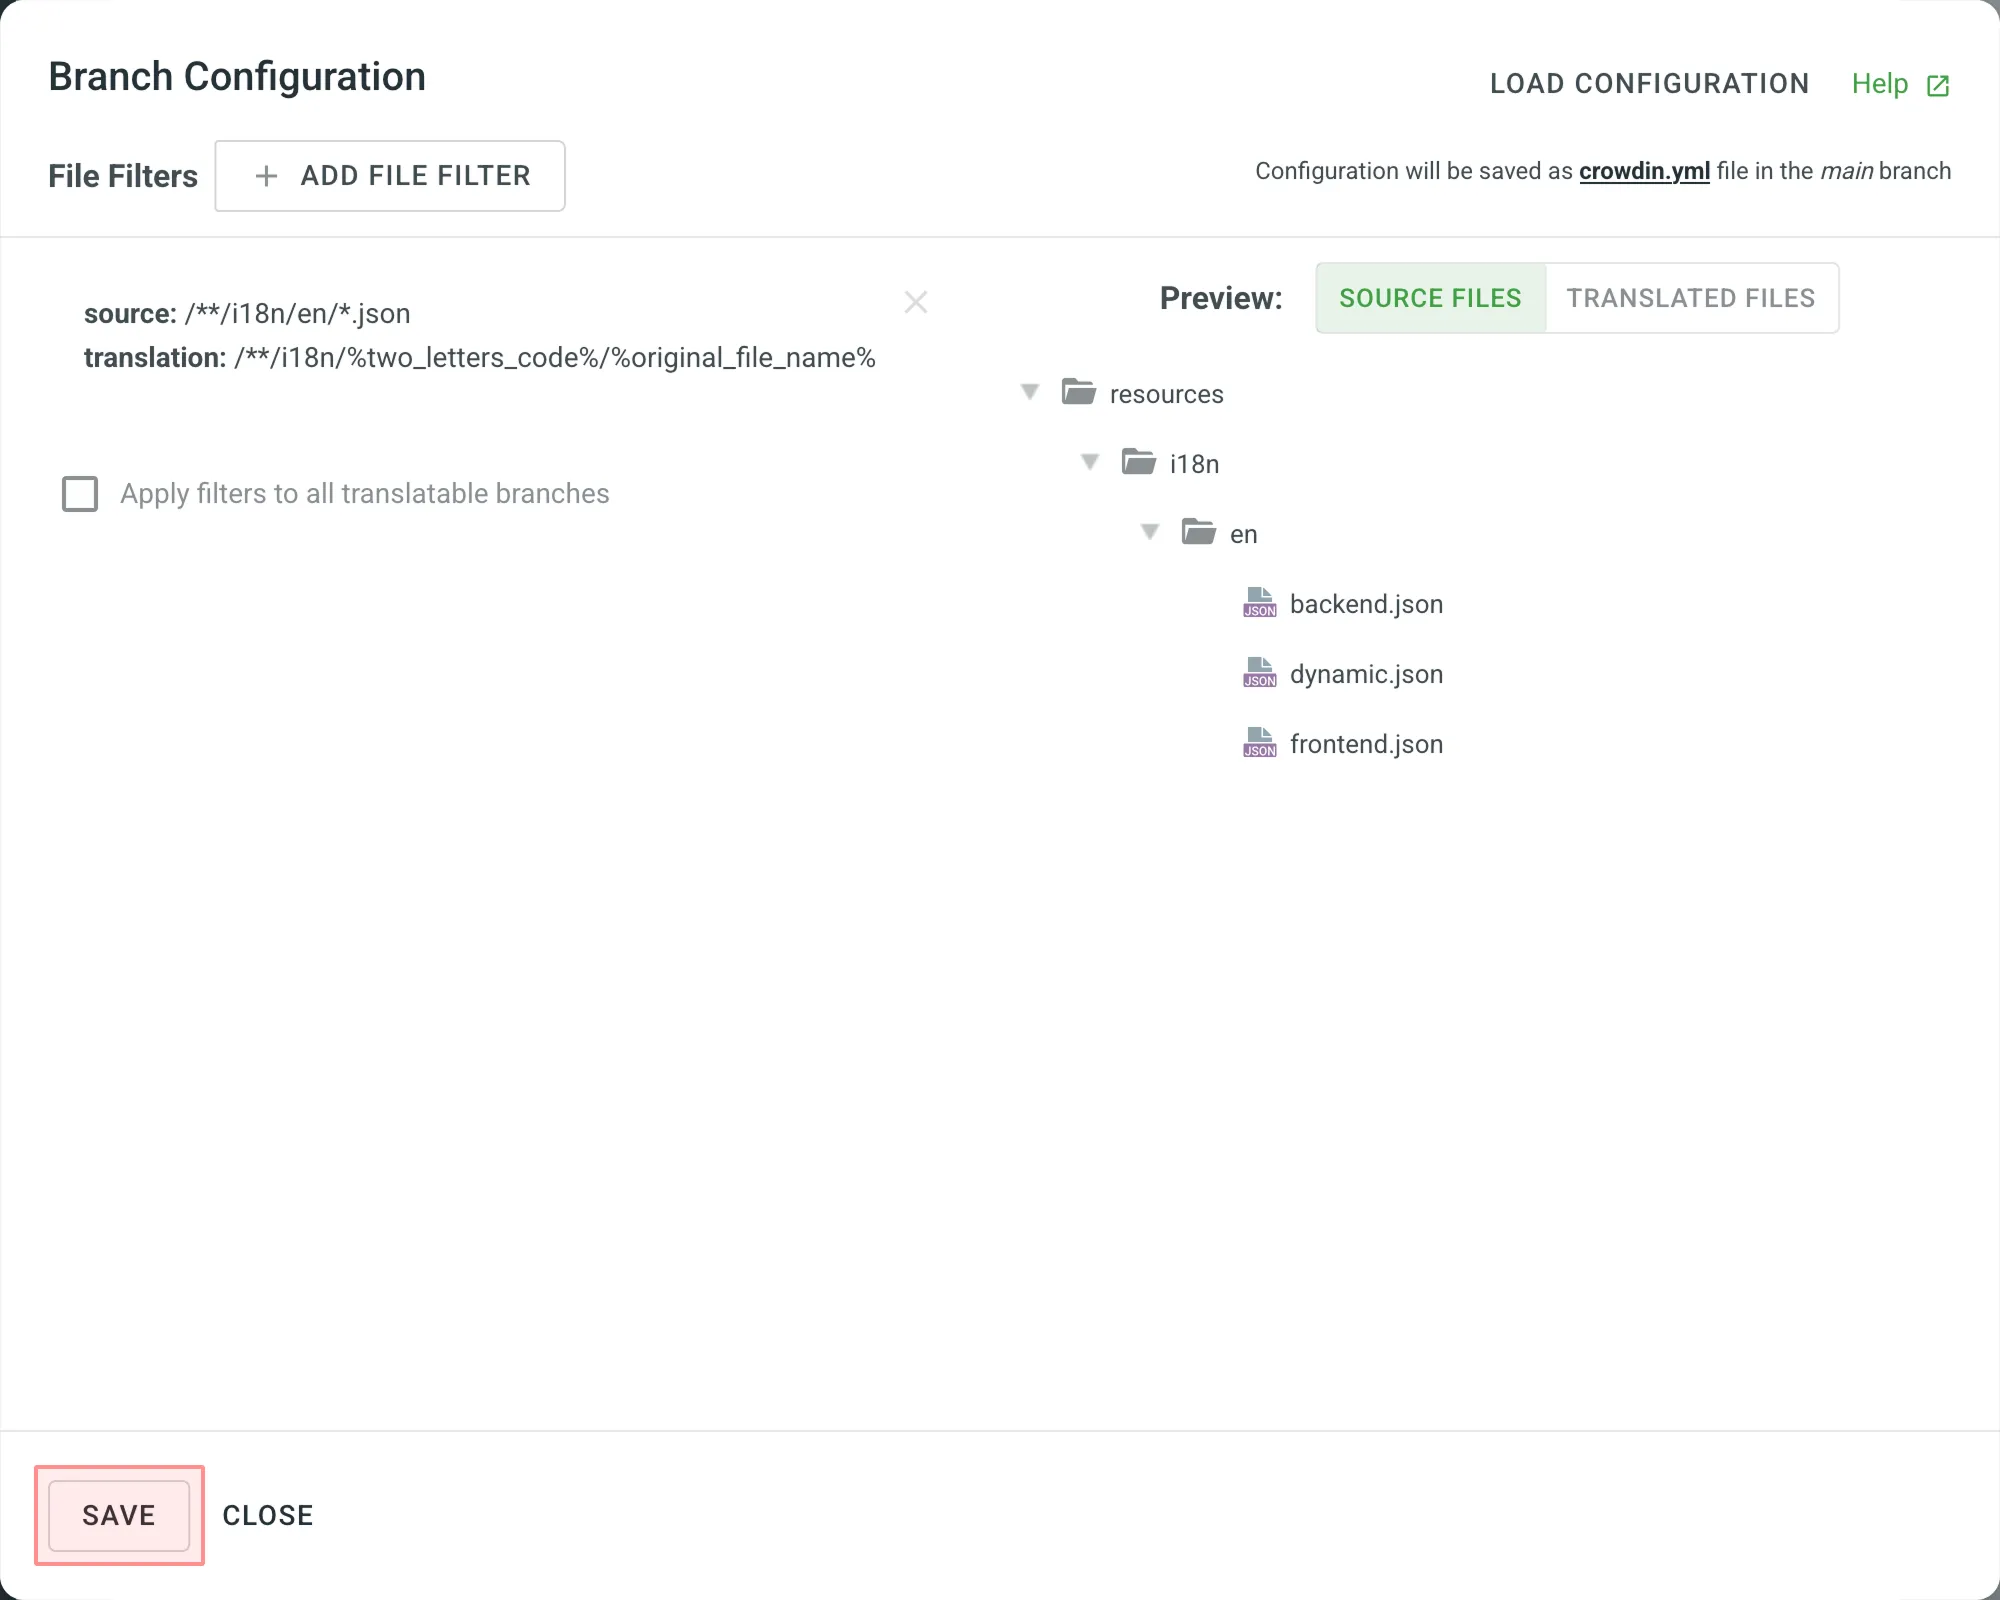 Once the configuration is saved, the localizable files will start uploading to your Crowdin Enterprise project. ## [See Also](#see-also) [Section titled “See Also”](#see-also) [GitHub ](/enterprise/github-integration/) [GitLab ](/enterprise/gitlab-integration/) [Bitbucket ](/enterprise/bitbucket-integration/) [Azure Repos ](/enterprise/azure-repos-integration/)
# Content Delivery
> Deliver translated content to your app instantly over-the-air
Over-the-Air Content Delivery is a feature that allows you to instantly update sources and translations in your mobile, server, desktop, or web apps with a single click without preparing a new release. ## [How It Works](#how-it-works) [Section titled “How It Works”](#how-it-works) The following illustrations provide a visual representation of how source and translation content delivery works for different types of applications. * Mobile, Server and Desktop Apps 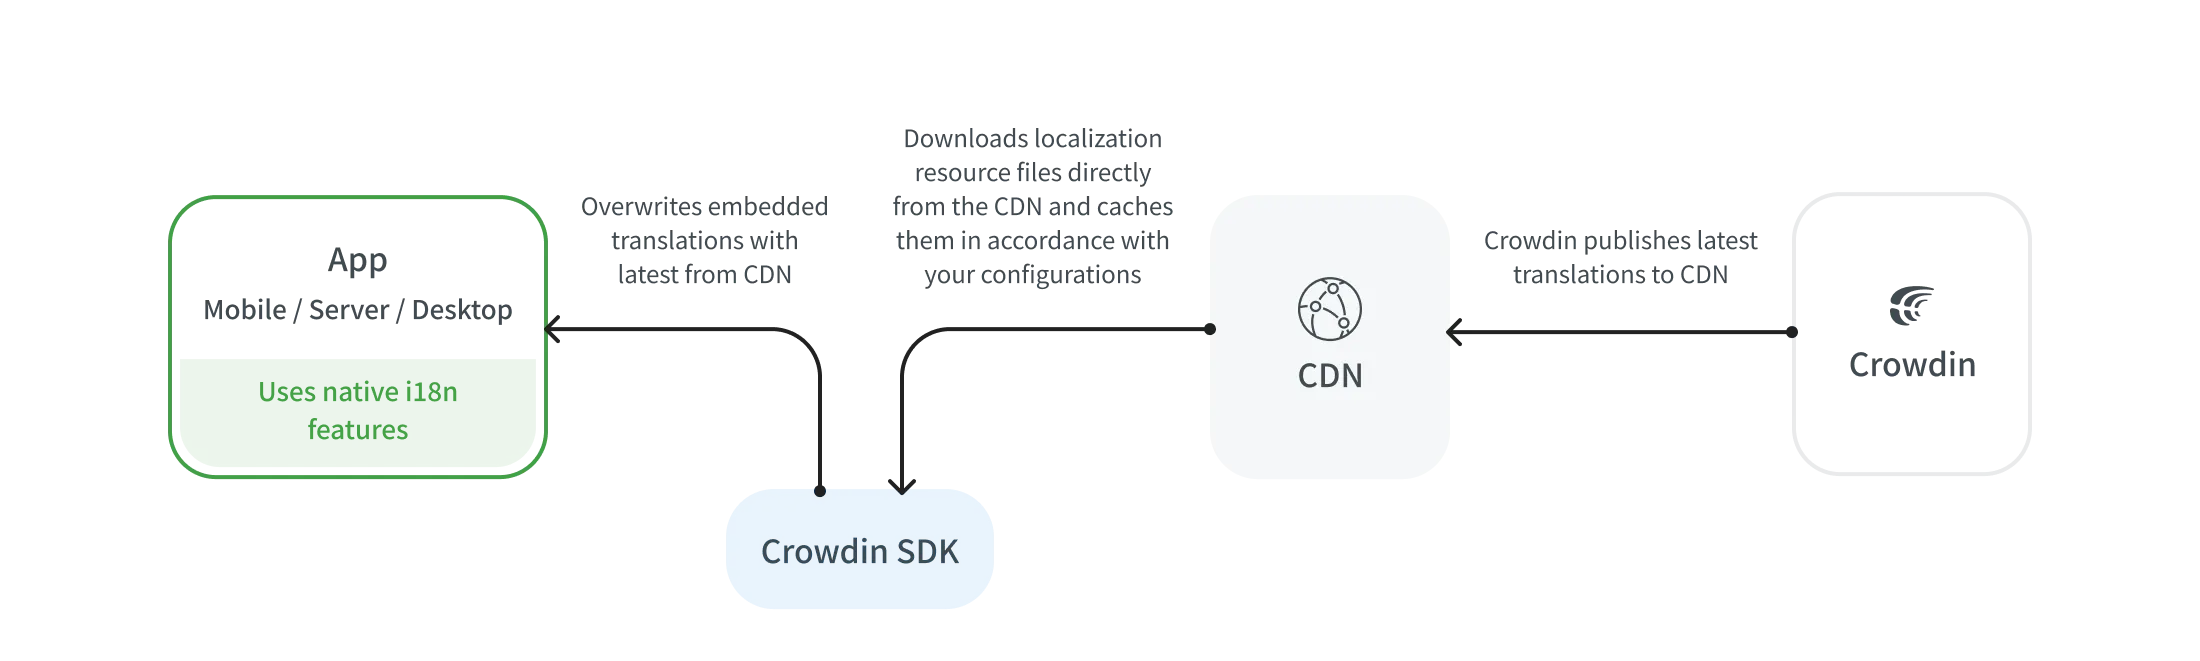 * Web Apps 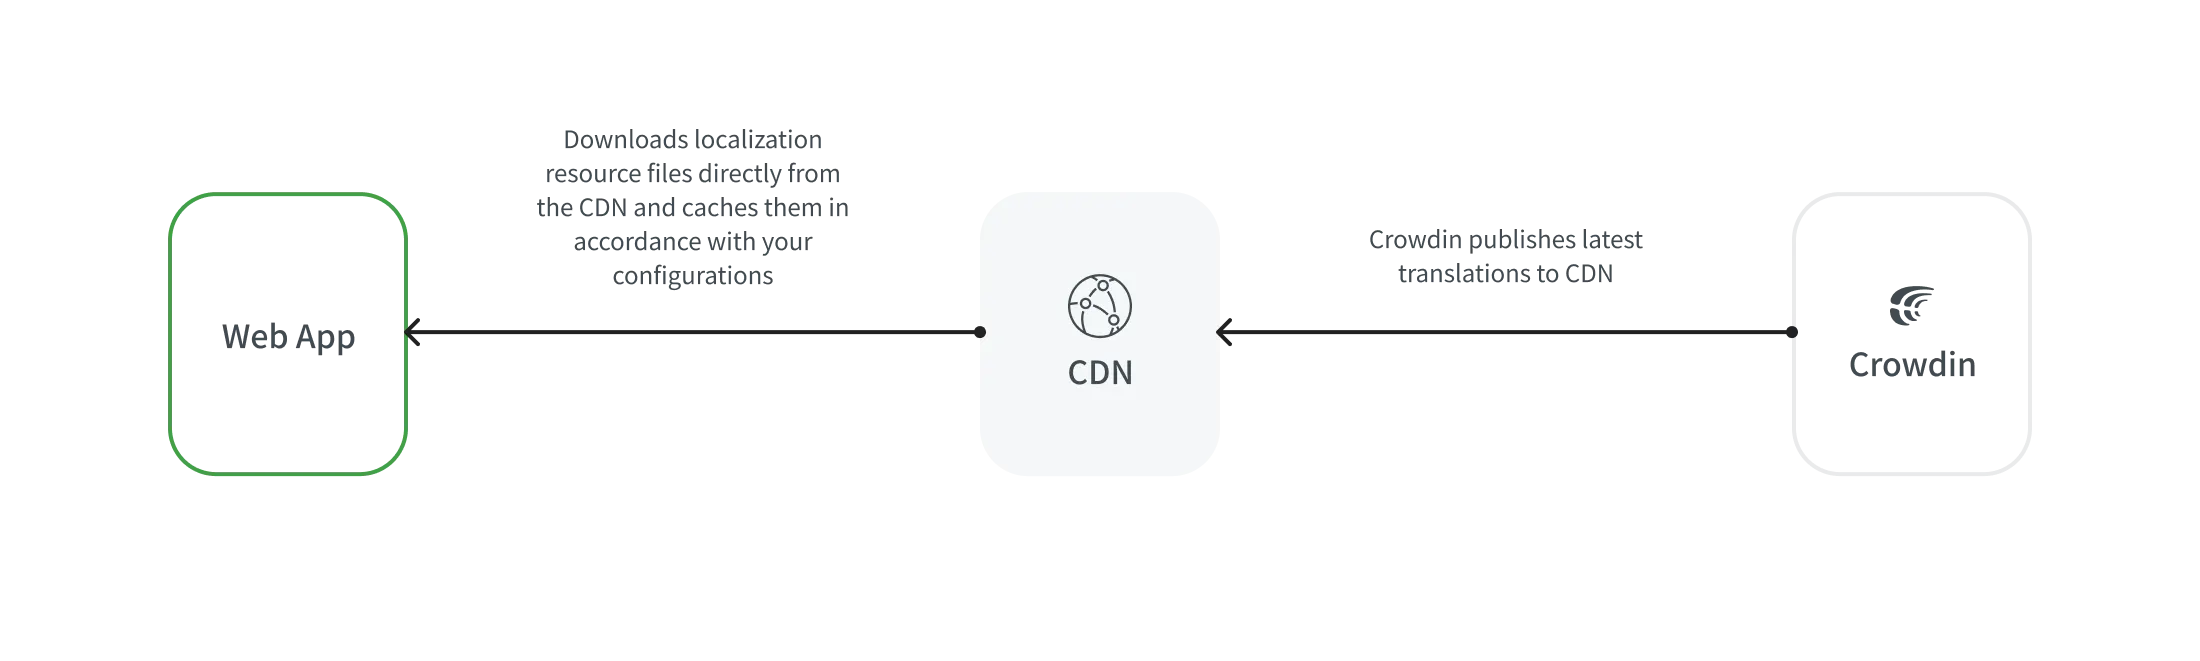 ## [Distribution Setup](#distribution-setup) [Section titled “Distribution Setup”](#distribution-setup) Distribution is a CDN vault that mirrors your project’s translated content and is required for integration with mobile, server, desktop, and web apps. To configure a distribution, follow these steps: 1. Open your project and select **Translations** on the left sidebar. 2. Click **Over-The-Air Content Delivery** to expand the respective section. 3. Add a new distribution using the **Add distribution** button. 4. In the appeared dialog, name your distribution. 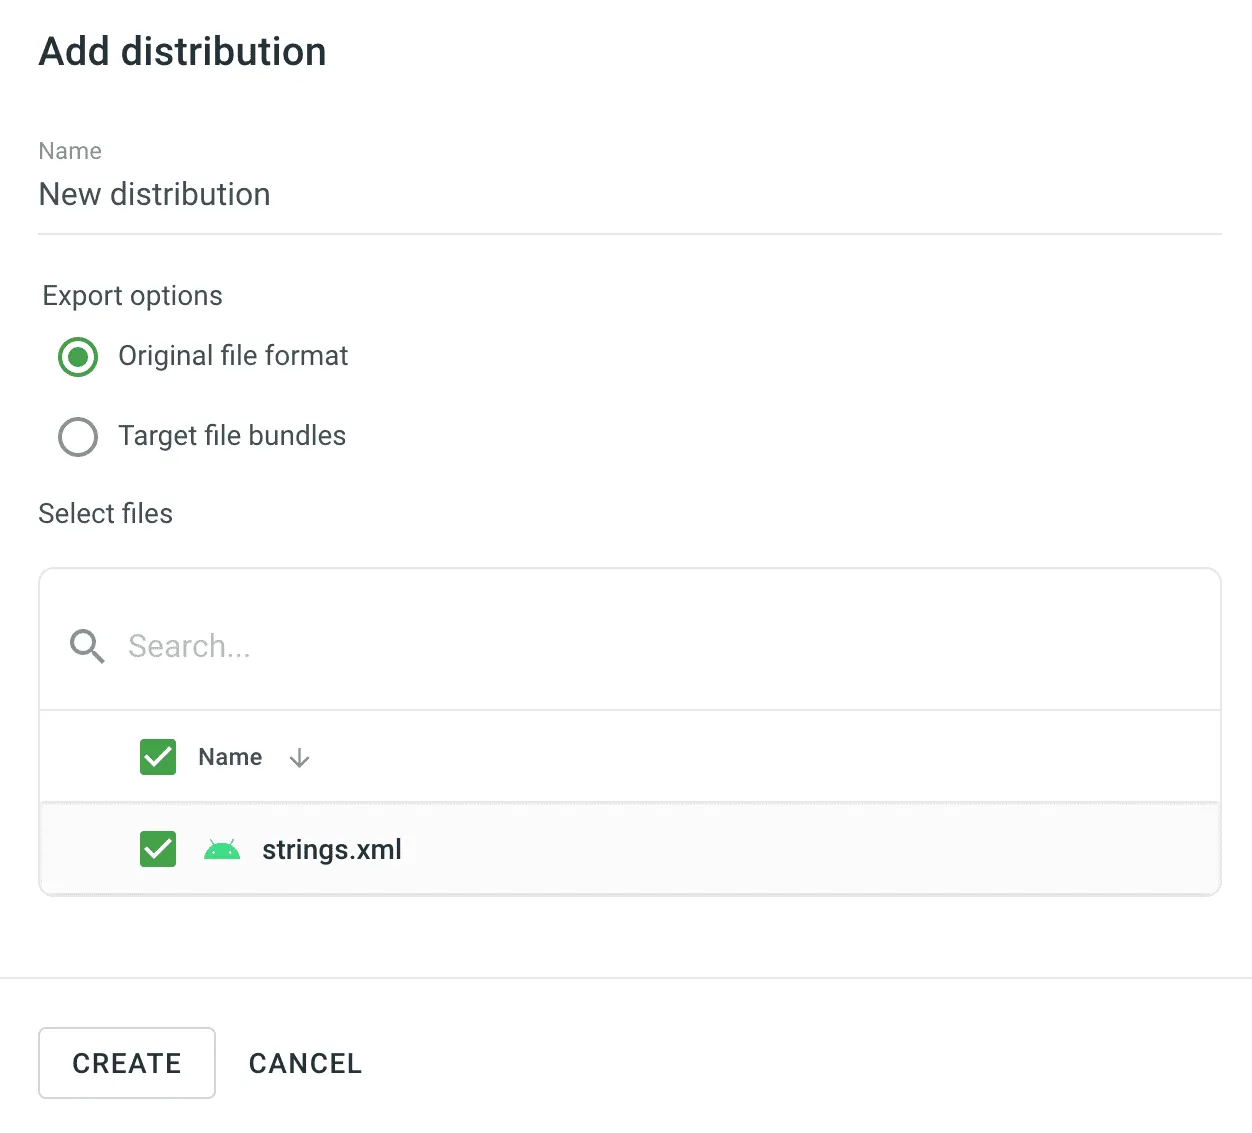 5. Select one of the following export options: * *Original file format* - export translations in the original format of the selected files. * *Target file bundles* - export translations in the selected format regardless of the original format of the selected files. 6. Select only the files whose translations you want to include in your application. 7. Click **Next**. 8. Copy the **Distribution Hash** and **Distribution Manifest**. The manifest is a JSON file containing key distribution details (e.g., files, languages, paths) that can be used in your integration. 9. Create as many distributions as you need and select different files for each distribution. Whenever you want to send new translations to the app, click **Release** next to the desired distribution. Alternatively, click **Release all** to send new translations to all apps at once. 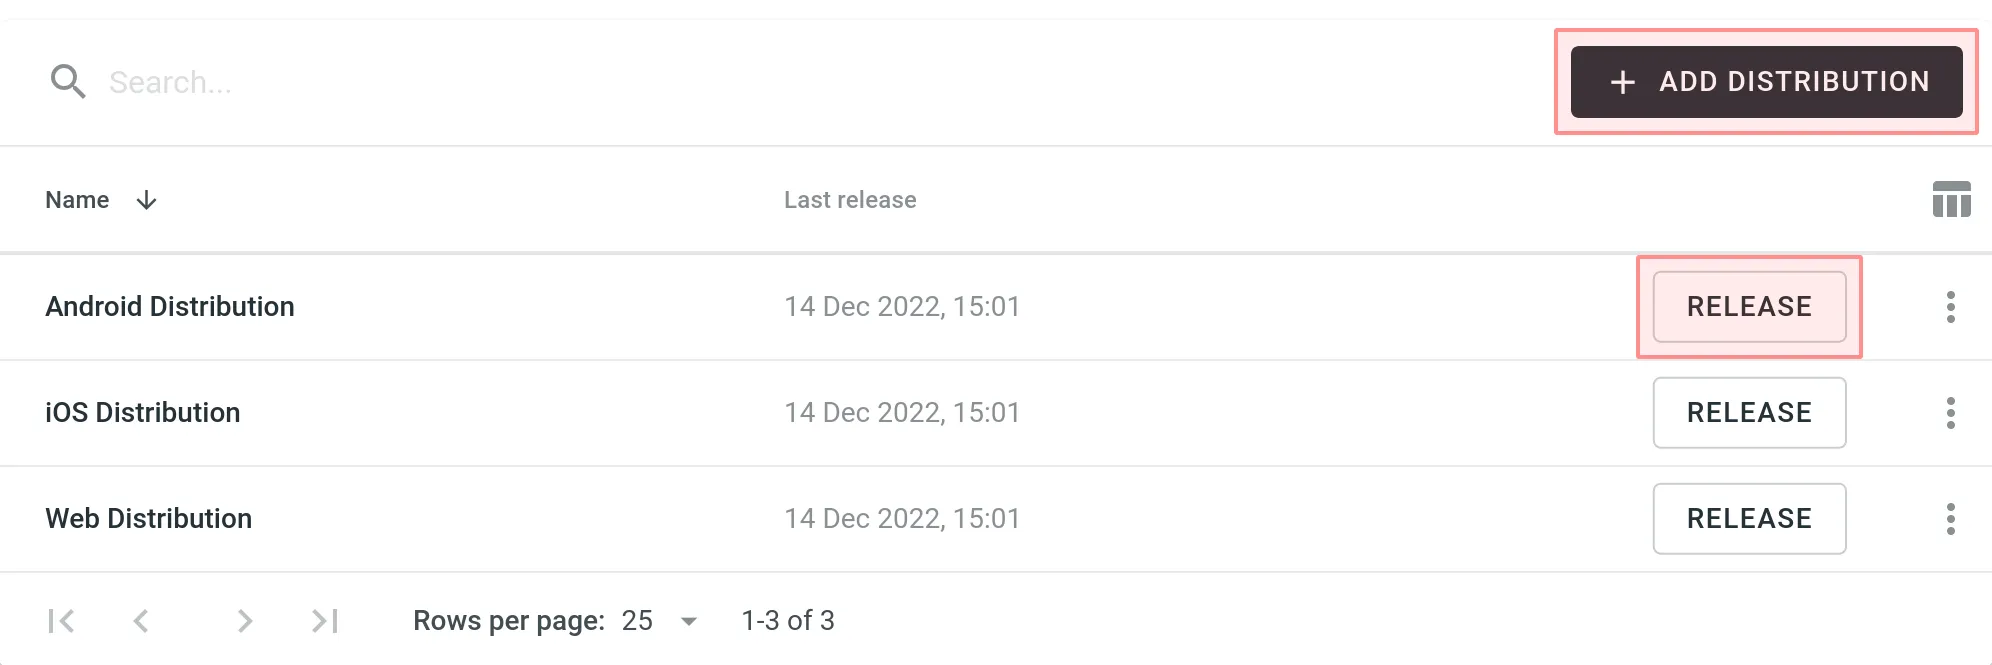 Read more about [configuring bundles for distribution](/enterprise/bundles/). ## [For Mobile Applications](#for-mobile-applications) [Section titled “For Mobile Applications”](#for-mobile-applications) To send the translated content to your mobile apps via content delivery, use the Crowdin SDKs. [iOS SDK ](https://crowdin.github.io/mobile-sdk-ios/) [Android SDK ](https://crowdin.github.io/mobile-sdk-android/) [Flutter SDK ](https://store.crowdin.com/flutter) [React Native SDK ](https://store.crowdin.com/react-native-sdk) ## [For Web Applications](#for-web-applications) [Section titled “For Web Applications”](#for-web-applications) To send the translated content to your web apps via content delivery, use the Crowdin OTA JavaScript client. Read more about the [Crowdin OTA JavaScript client](https://crowdin.github.io/ota-client-js/). To manage the translated content delivery to your web apps manually, you can either: * Use the **Distribution Manifest URL**, which displays a JSON file containing distribution details (files, languages, etc.), or * Form each file URL with the **distribution hash**, as shown below. Form the URL to the translation file as follows: ```shell https://distributions.crowdin.net/{distribution_hash}/content/{path_to_file} ``` `{path_to_file}` will match the path used in your regular translation build. If your files don’t have export patterns including language code placeholders (e.g., `%locale%`, `%two_letters_code%`, etc.), Crowdin Enterprise automatically adds the Crowdin language code at the beginning of the path. To see all available files and languages for your distribution, copy the Distribution Manifest URL (provided in the Crowdin Enterprise UI) and open it in your browser. You’ll see a JSON structure like: ```json { "files": ["/crowdin_sample_android.xml"], "languages": ["fr","de","uk"], "language_mapping": [], "custom_languages": [], "timestamp": 1234567890, "content": { "fr": ["/content/fr/crowdin_sample_android.xml"], "de": ["/content/de/crowdin_sample_android.xml"], "uk": ["/content/uk/crowdin_sample_android.xml"] }, "mapping": ["/mapping/en/crowdin_sample_android.xml"] } ``` This JSON includes the exact paths to use with the distribution. ## [Pricing](#pricing) [Section titled “Pricing”](#pricing) | **Pricing Component** | **Free Quota** | **Price** | | --------------------- | -------------- | ---------- | | Request Count | 1M/month | $3.00/1M | | Data Transfer | 10GB/month | $2.00/10GB | A request is considered any single query to a CDN (e.g., a request to a distribution manifest, a request to a distribution file, etc.). Data transfer is the amount of data transferred over the network (including headers). The system delivers your language packages via CDN, containing all the existing translations. If the distribution contains content divided into multiple files, a request to download each file is counted as a separate request. Additionally, the volume of files is also counted as a data transfer. For example, if a distribution contains 20 files, each of which is 5MB, the download is counted as 20 requests and 100MB of data transfer. To reduce requests to the CDN, you can put all the necessary content into one file (using Bundles), and when it is downloaded, the system counts one request instead of 20 separate ones. Additionally, caching configuration can be made on the app’s side. In our statistics, we use data provided by AWS. If 1,000,001 (1 million and 1) requests are made in a month, the price for requests will be $6. If 10GB and 1 byte are transferred in a month, the price for data transfer will be $4. The combined total will be $10 per month for requests and data transfer. ## [Managing Your OTA Usage](#managing-your-ota-usage) [Section titled “Managing Your OTA Usage”](#managing-your-ota-usage) You can manage your Over-The-Air Content Delivery usage price and set up notifications for daily usage limits in the **Organization Settings > Billing > Over-The-Air Content Delivery**. ### [OTA Usage Price](#ota-usage-price) [Section titled “OTA Usage Price”](#ota-usage-price) In the **Over-The-Air Content Delivery usage** section, you can see the total amount spent during the current billing cycle (one month). This includes a detailed breakdown of requests and data transfer with their respective prices. OTA usage fees are included in your primary Crowdin Enterprise subscription and charged during the next billing cycle. 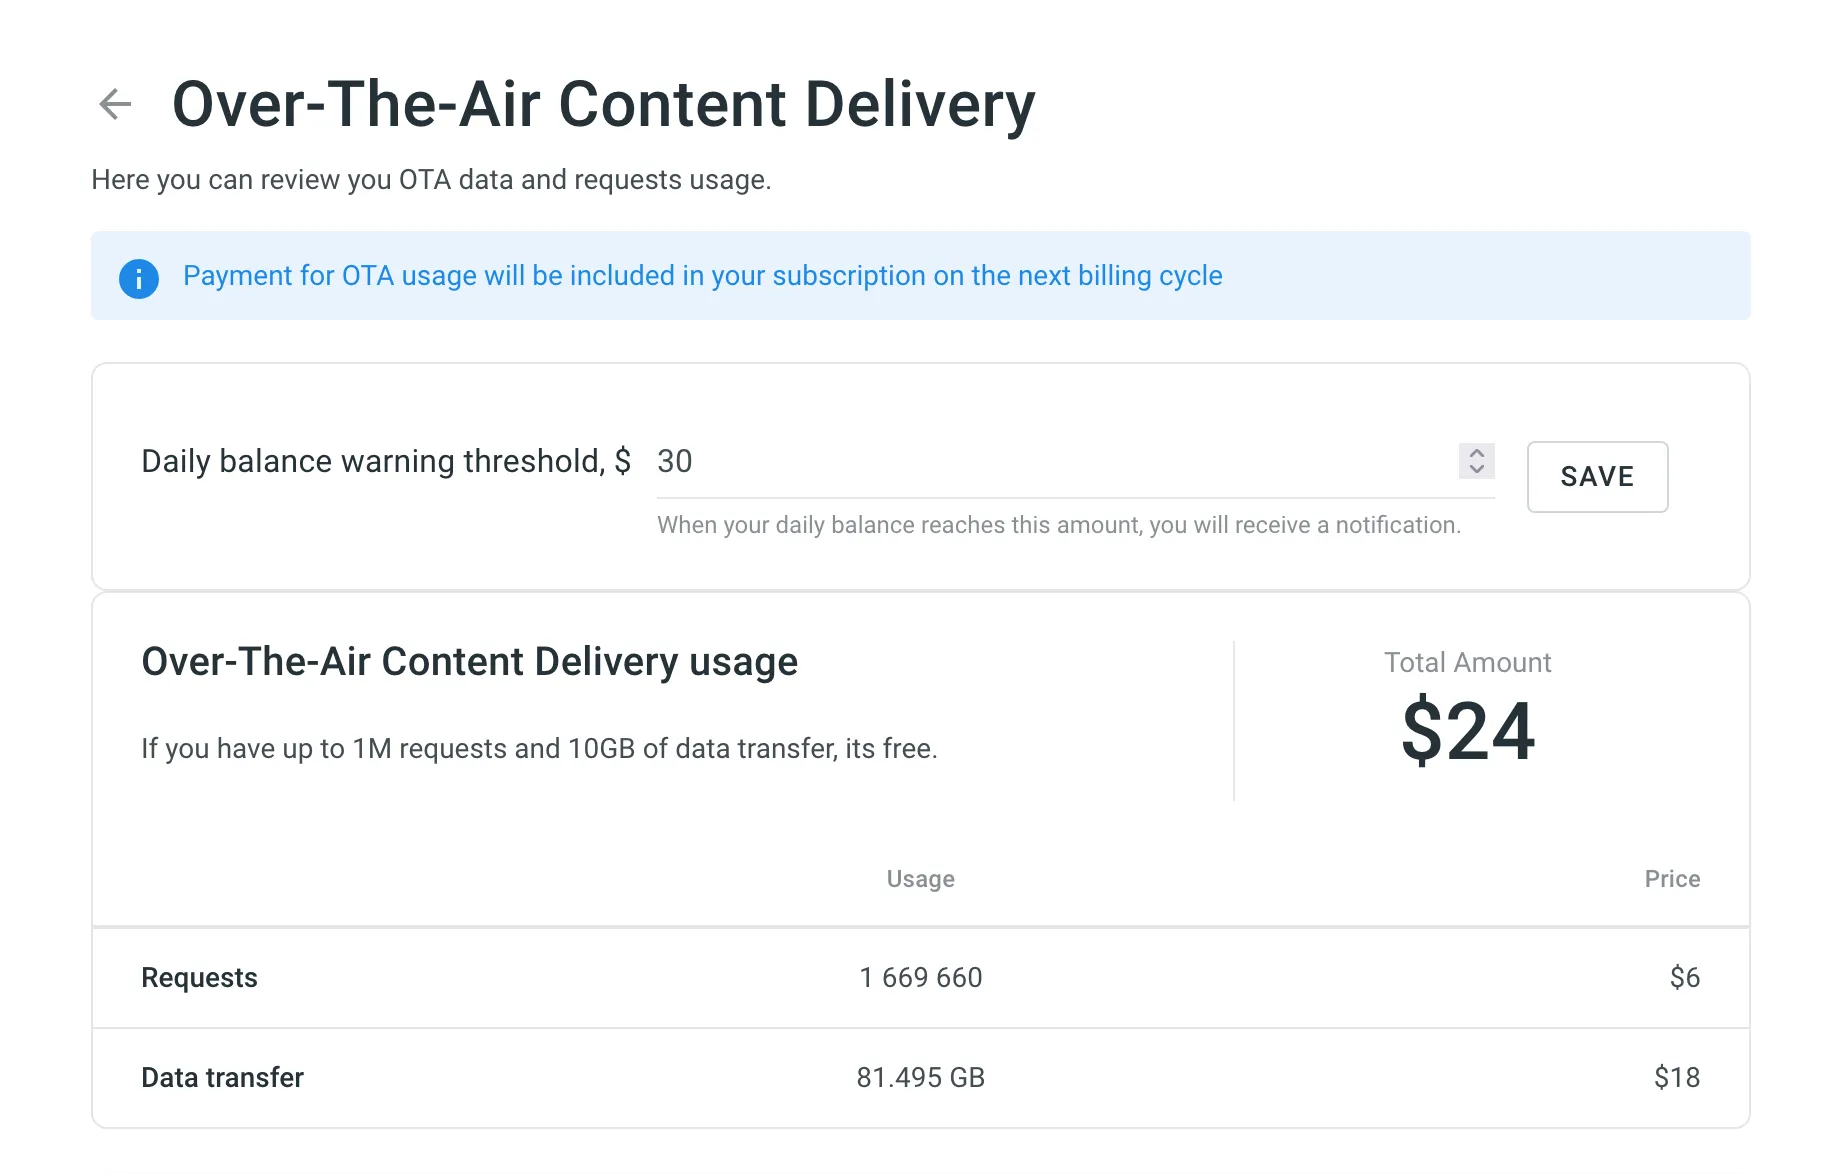 ### [Setting Daily Balance Warning Threshold](#setting-daily-balance-warning-threshold) [Section titled “Setting Daily Balance Warning Threshold”](#setting-daily-balance-warning-threshold) You can set a daily OTA usage limit, and when this threshold is exceeded, you’ll receive a notification. By default, the limit is set to $30 per day. This feature helps you stay informed of your OTA usage and avoid unexpected overages. You can update the limit anytime. Additionally, if your free quota (1M requests and 10GB of data transfer) is exceeded, a one-time notification will be sent. To set up usage notifications, follow these steps: 1. Open your **Organization Settings** and go to the **Billing** tab. 2. Click **Over-The-Air Content Delivery**. 3. Enter your desired threshold amount in the **Daily balance warning threshold, $** field. 4. Click **Save** to confirm your settings. ### [Usage Statistics](#usage-statistics) [Section titled “Usage Statistics”](#usage-statistics) The **Usage Statistics** section provides a visual analysis of your OTA usage via an interactive graph, showing detailed statistics for the month. You can view data for all distributions or focus on specific ones. The graph displays three lines simultaneously: request quantity, transfer costs, and data transferred. Hover over the data points to see daily totals for each category. You can also focus on specific category by hovering over the its title under the graph. To hide certain category from the graph, click on its title. 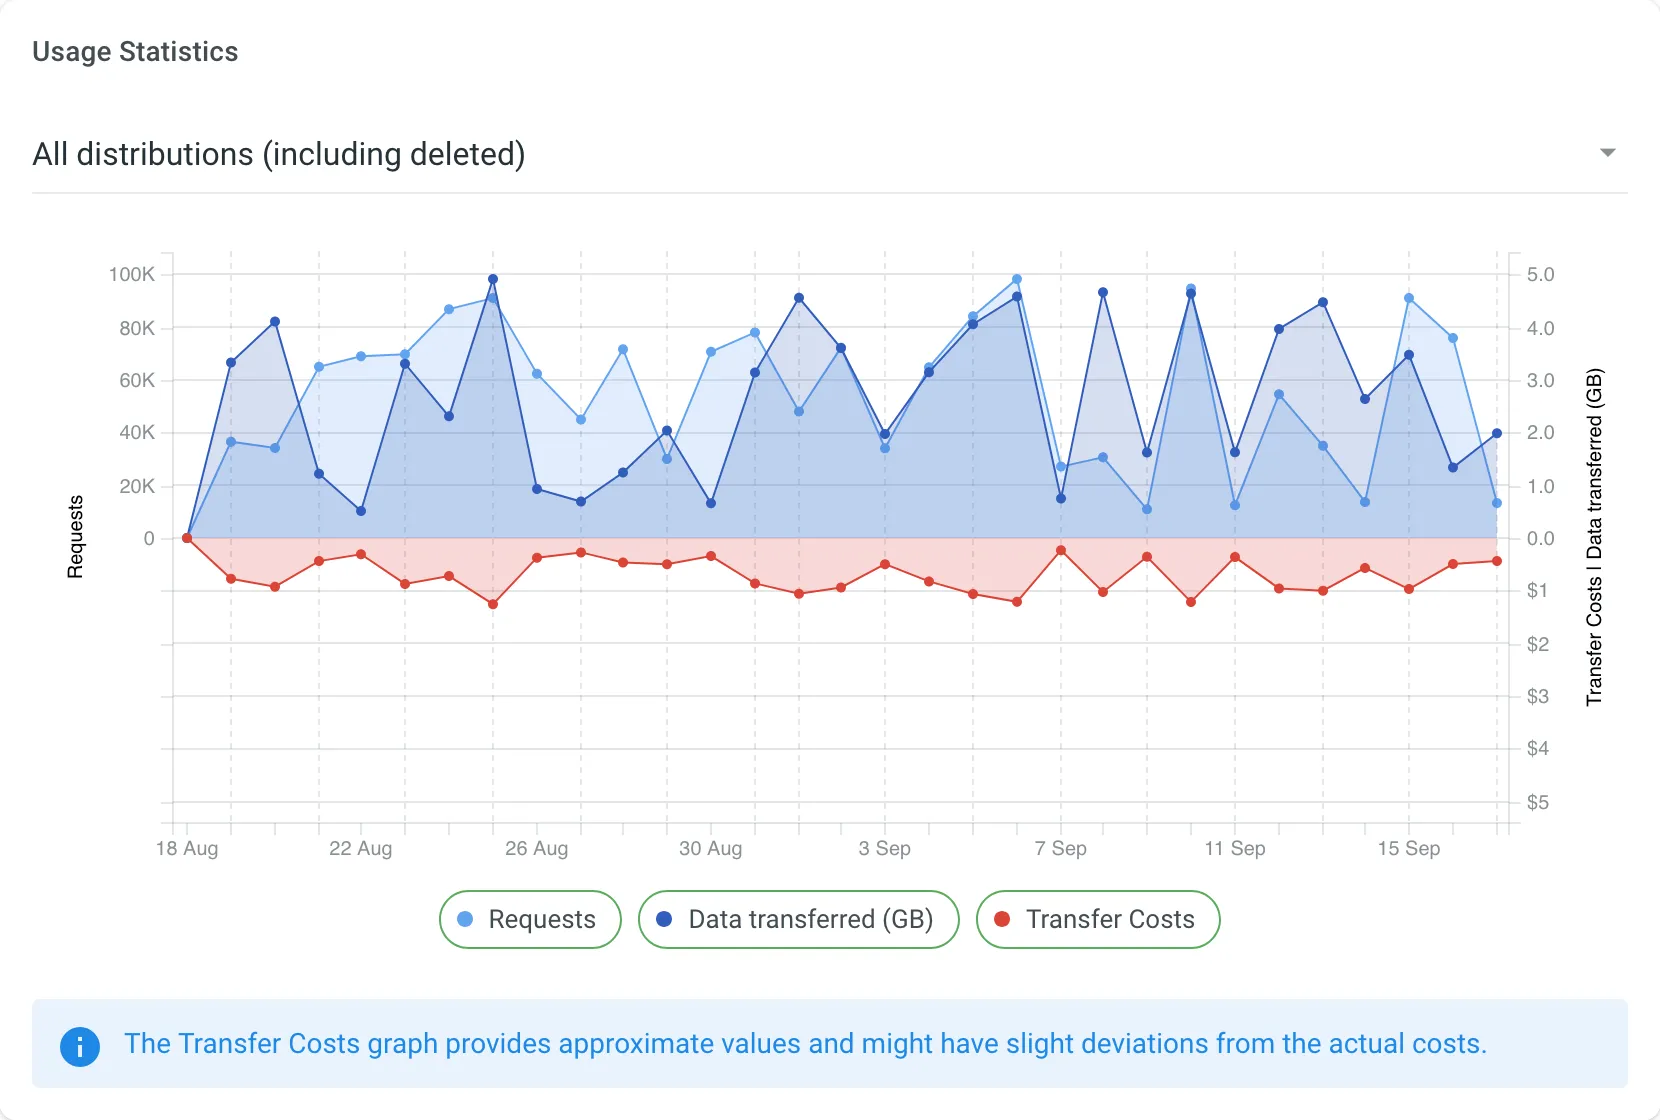
# Contributor Reports
> Estimate and count the price of your contribution to the project
As a translator or a proofreader, you can estimate and count the price of your contribution to the project and view your position in the Top Members list. You can also view the progress of the project and track contributions over a specific period of time. For this, open the project and select **Reports** on the left sidebar. 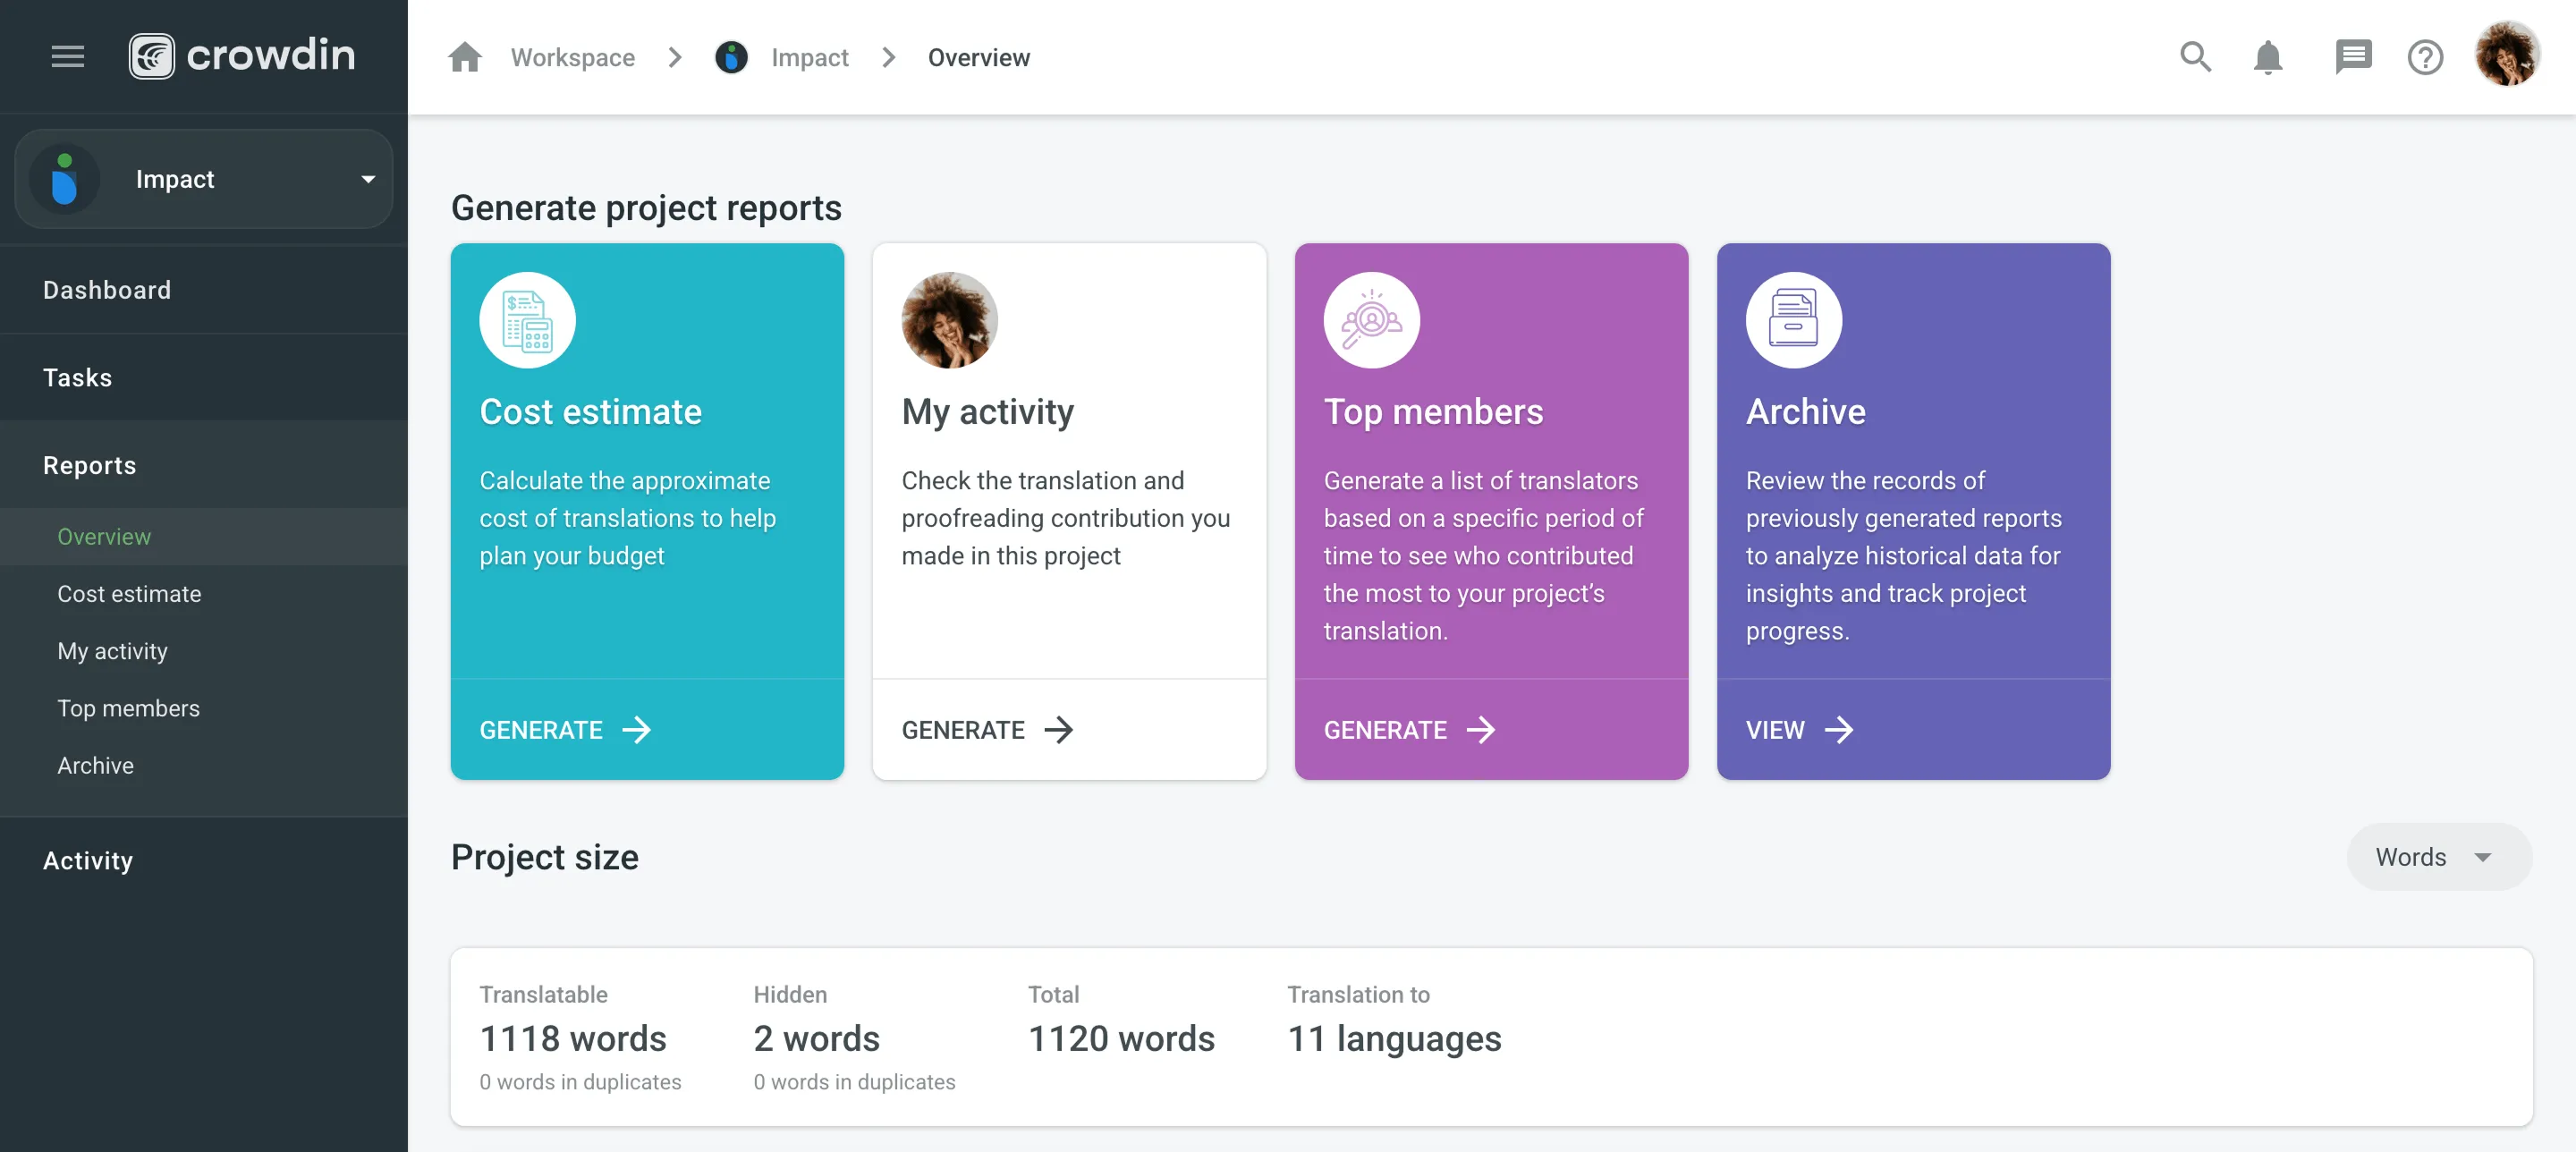 ## [Project Overview](#project-overview) [Section titled “Project Overview”](#project-overview) Use this section to get a summary of the project’s volume and monitor translation and proofreading activities over selected time periods. In the upper-right corner, you can select a report unit (*words*, *strings*, *characters*, or *characters with spaces*) that will apply to all reports in this section. The comparisons shown in percentage are counted by comparing the chosen period of time to the same previous period of time (e.g., if you select a month, the current month is compared to the previous one). To download reports for further analysis or record-keeping, click **Export** and select the preferred format (CSV, XLSX, or JSON). In the reports that feature interactive graphs, you can hover over data points for more detailed information, such as daily or monthly totals for each category. The top of the page displays the primary statistics for the project’s volume: * *Translatable*: The total amount of text available for translation. * *Hidden*: The total amount of text in hidden strings. * *Total*: The total amount of text in the project (*Translatable* + *Hidden*). * *Translation to*: The number of target languages in the project. Below the main statistics, the **Overview** section contains the following report: ### [Activity Summary](#activity-summary) [Section titled “Activity Summary”](#activity-summary) This report tracks the overall translation and proofreading activity in the project. You can filter the data by **Date Range** and **Language**. The report is split into two main parts: **Translation** and **Proofreading**. Each part displays the total work completed during the selected period with a percentage comparison to the previous period. You can expand the **Breakdown by Language** section in each part to view a table of the same metrics broken down by target language. #### [Translation](#translation) [Section titled “Translation”](#translation) This section shows the volume of translated text, broken down by the following key metrics: * *Total (end of period)* * *Human Translation* * *Translation Memory* * *Machine Translation* * *AI* The **Translation** graph below the metrics displays multiple lines simultaneously for each translation type. By hovering over the data points, you can view daily or monthly totals for each category. #### [Proofreading](#proofreading) [Section titled “Proofreading”](#proofreading) This section shows the volume of approved text and voting activity. The main metric displayed is *Approved* words. The **Proofreading** graph visualizes the approval and voting activity over time, showing two distinct lines: *Approved Words* and *Votes*. By hovering over the data points, you can view the daily or monthly totals for both approved texts and votes cast. ## [Cost Estimate](#cost-estimate) [Section titled “Cost Estimate”](#cost-estimate) The Cost Estimate report allows you to calculate the approximate price of your contribution (i.e., translation or proofreading) to the project based on all or specific tasks to which you were assigned. Set the translation and approval rates to see the cost for untranslated and not approved strings within selected tasks. You can generate a Cost Estimate report based on the following filter parameters: * Tasks: All tasks, or a specific task. ### [Generating a Report](#generating-cost-estimate) [Section titled “Generating a Report”](#generating-cost-estimate) To generate the Cost Estimate report, follow these steps: 1. Select the preferred currency and the report unit (word, string, character, or characters (including spaces)). 2. Use the available filter parameters to specify the report data you’re interested in. 3. Set your [rates](#rates-cost-estimate) for translations and approvals. 4. Click **Generate**. 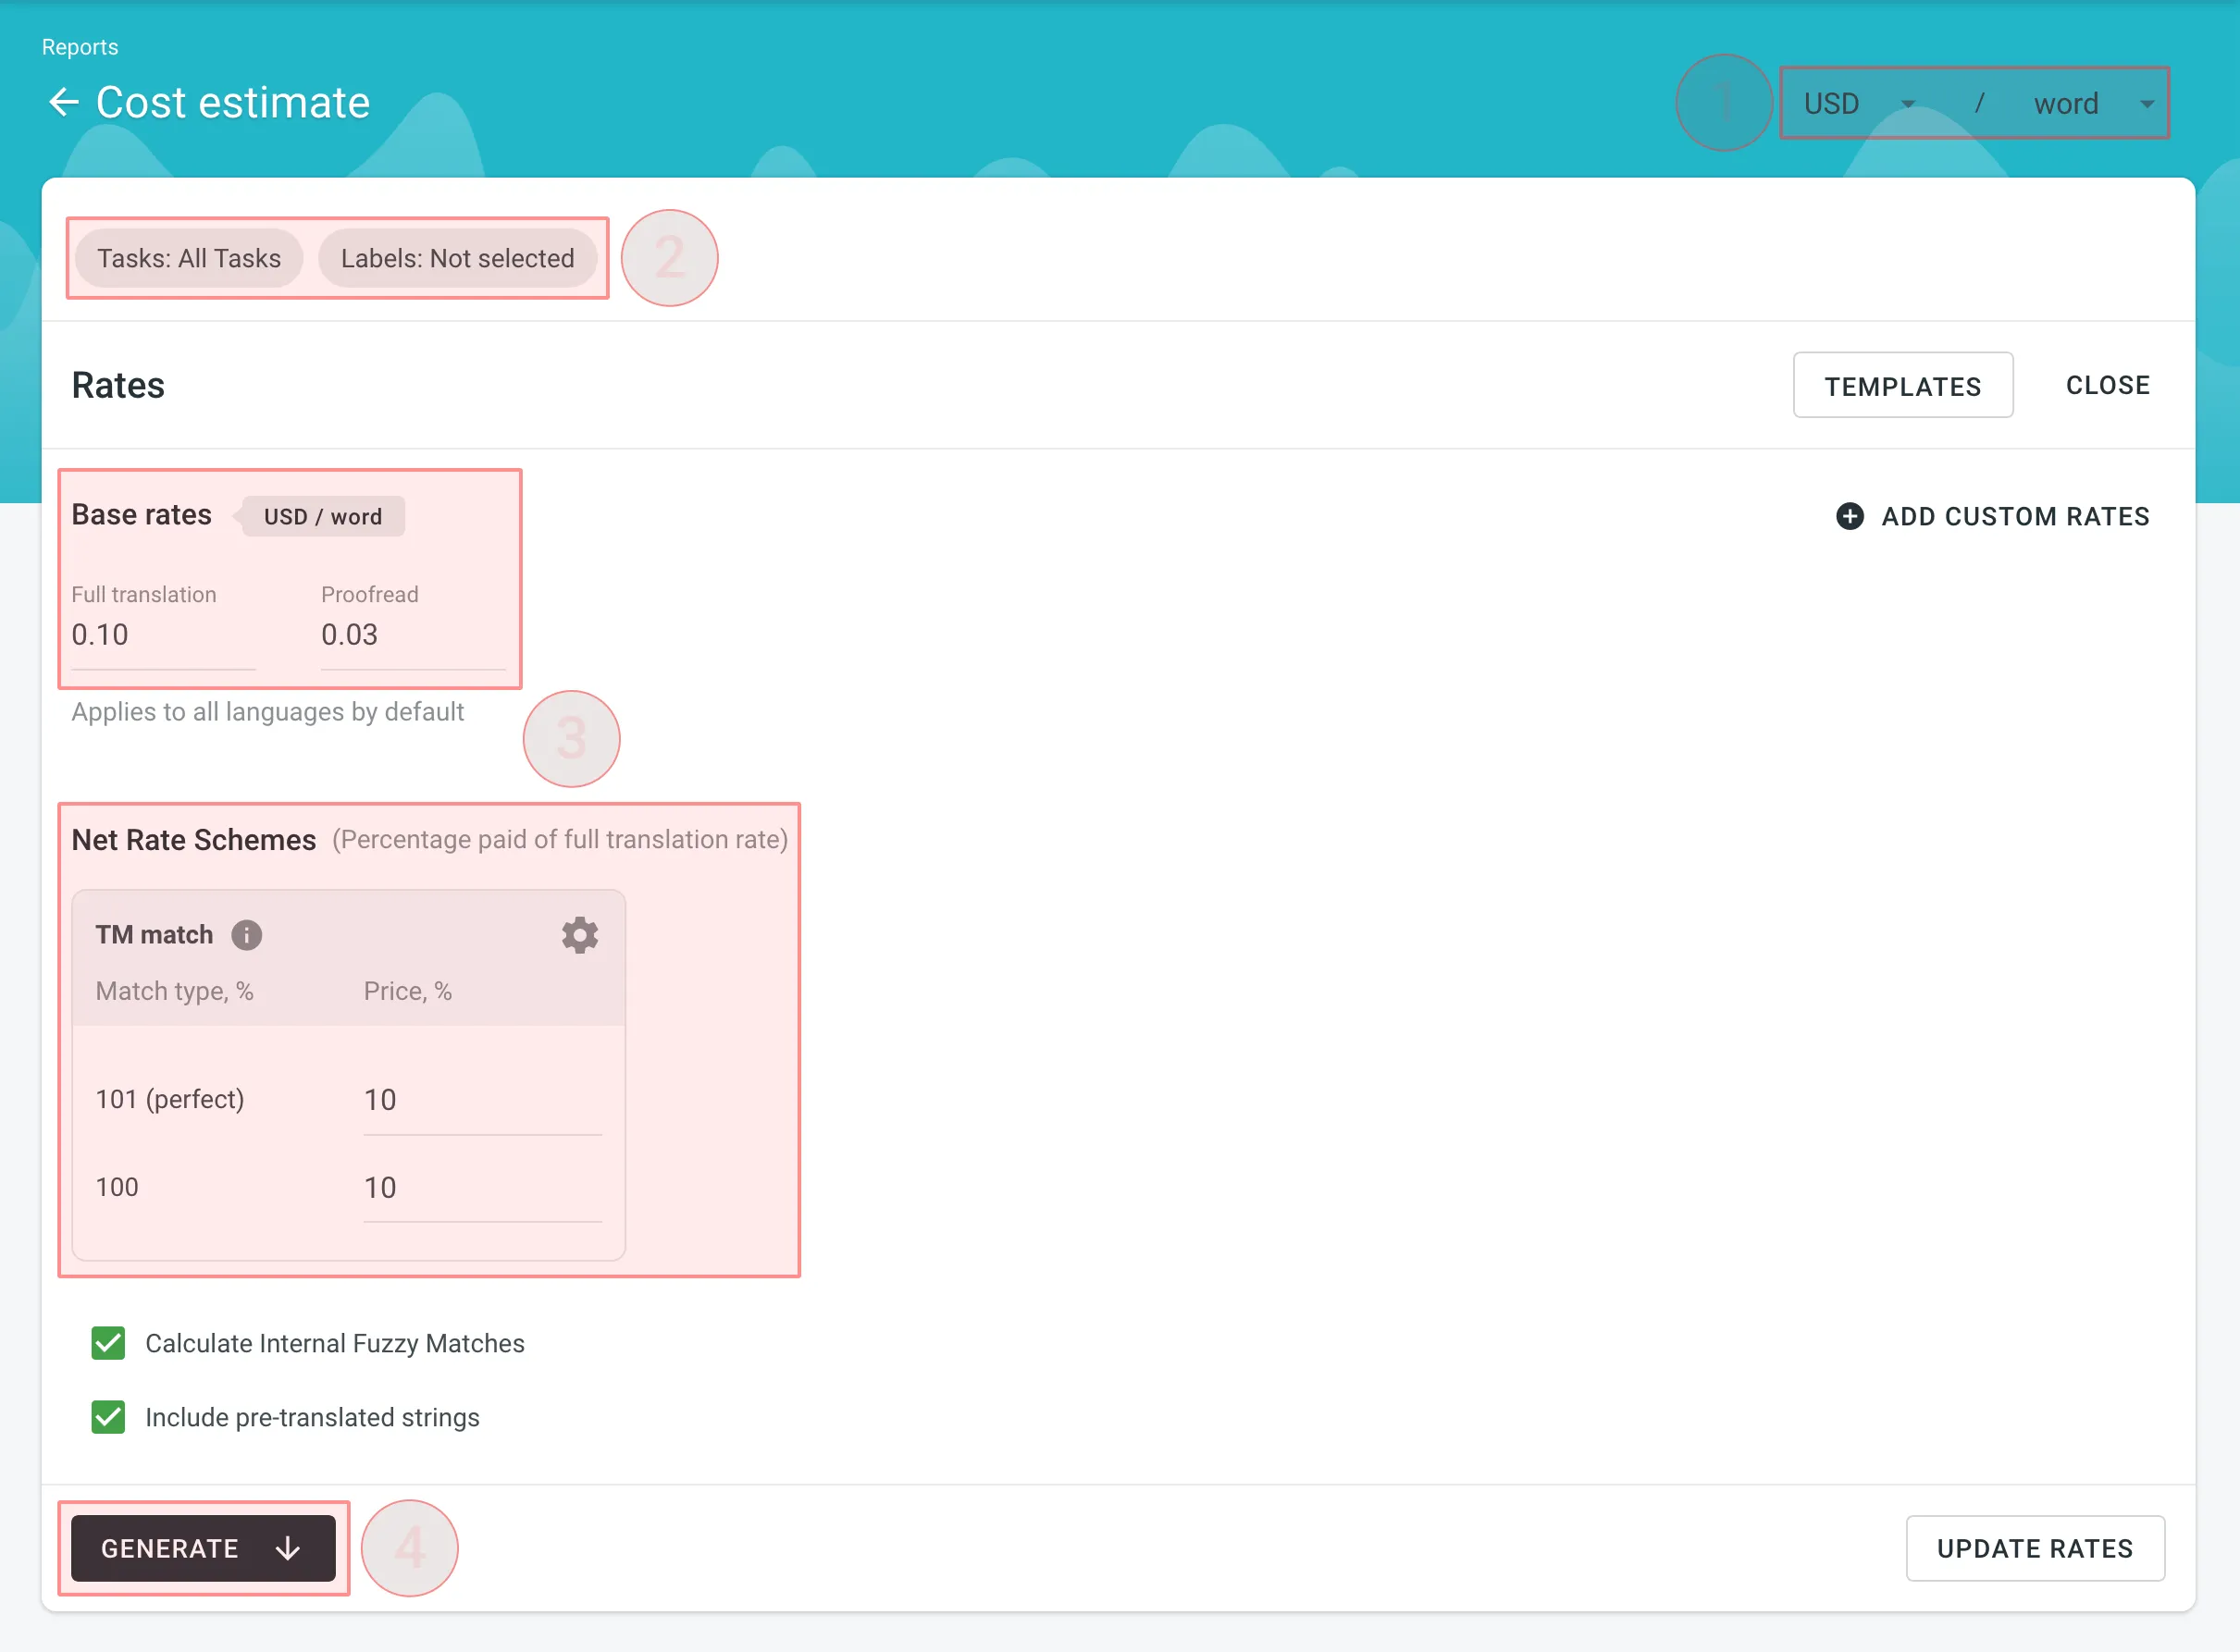 #### [Cost Estimate Queue](#queue-cost-estimate) [Section titled “Cost Estimate Queue”](#queue-cost-estimate) After you click **Generate**, the Cost Estimate report is added to a shared report queue for the project and processed in the background. This ensures that multiple reports generated with different filters don’t override one another. Each report is generated separately and appears in the **Reports > Archive** section once completed. Reports generated by managers have higher priority in the queue. If a manager starts generating a report while a contributor’s report is still in the queue, the manager’s report will be processed first. When a report is added to the queue, a notification appears confirming that the report generation has been queued, with quick access to view the queue or close the message. While the report is being generated, a pop-up in the lower-right corner of the screen shows the queue status. The status updates automatically as the report progresses: * **Pending** – the report is waiting in the queue and has not started processing yet. * **In progress** – the report generation has started. A progress bar shows the current percentage. * **Completed** – the report has been generated successfully and can be accessed via the [Archive](#archive). * **Failed** – an error occurred during report generation. Each report runs independently, so you can safely generate multiple Cost Estimate reports with different filters without affecting those that might have been started earlier and are still in progress. ### [Rates](#rates-cost-estimate) [Section titled “Rates”](#rates-cost-estimate) You can set the prices for Base rates (full translation, proofread) and configure Net Rate Schemes (percentage of the full translation rate paid for translation using TM suggestions). #### [Base Rates](#base-rates-cost-estimate) [Section titled “Base Rates”](#base-rates-cost-estimate) In the Base Rates section, you can set rates for the following types of work: * **Full translation** – for each translation made by a person. * **Proofread** – for each approved translation. #### [Net Rate Schemes](#net-rate-schemes-cost-estimate) [Section titled “Net Rate Schemes”](#net-rate-schemes-cost-estimate) In the Net Rate Schemes section, in addition to the base rates, you can set the percentage of the full translation rate to be paid for translations made using TM suggestions of various TM Match types. By default, you can configure the percentage of the full translation rate for the following TM Match types: * **101 (perfect)** – for translations made using Perfect match TM suggestions (source strings are identical to TM suggestion by text and context). * **100** – for translations made using 100% match TM suggestions (source strings are identical to TM suggestion only by text). You can also add your own TM match types, specifying the preferred percentage of text similarity and the percentage of the full translation rate to be paid for such a translation. To add your own TM match types, follow these steps: 1. Click in the Net Rate Schemes section. 2. Click on the appeared button. 3. Specify the TM match range and the percentage of the full translation rate. 4. Click to save the settings. 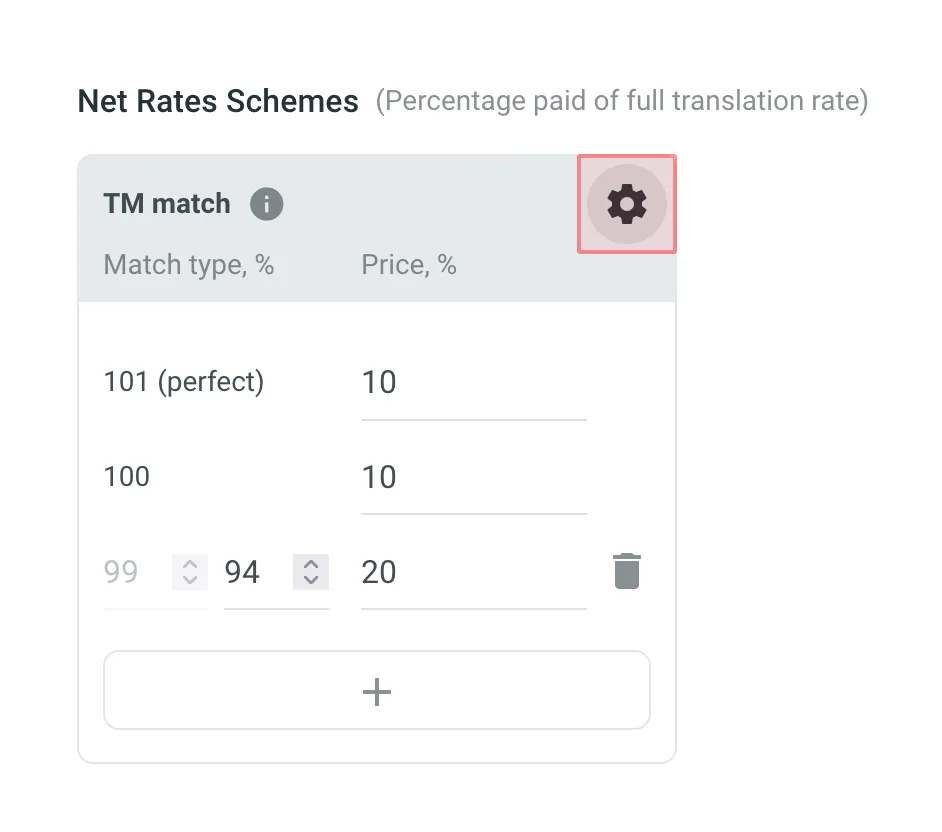 #### [Adding Custom Rates](#custom-rates-cost-estimate) [Section titled “Adding Custom Rates”](#custom-rates-cost-estimate) If you are multilingual and work with different languages, in addition to base rates that are applied to all languages by default, you can add custom rates for specific languages. To add custom rates, click **Add custom rates**. To select the languages for custom rates, click the drop-down menus and select the ones you need. You can create as many custom rates as you need. 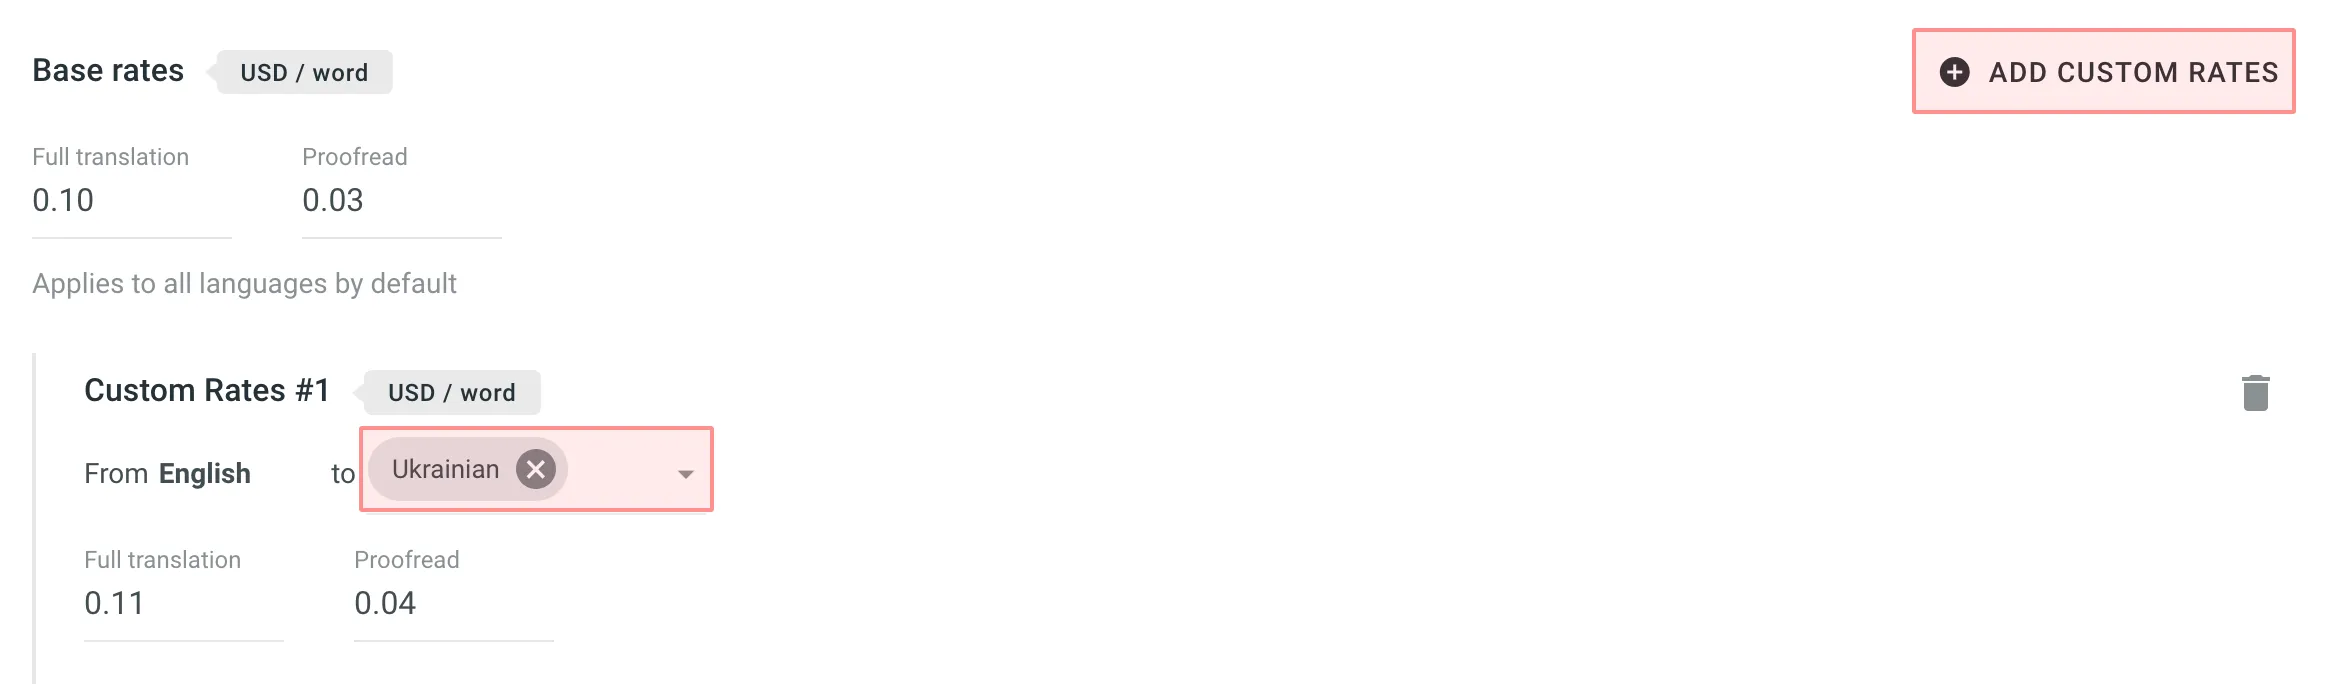 #### [Rate Templates](#rate-templates) [Section titled “Rate Templates”](#rate-templates) If project managers saved multiple rate configurations, you can use them for report generation. Saved templates allow you to quickly switch between different configurations. Click **Templates** to view and select saved rate templates. ### [Include Pre-translated Strings](#include-pre-translated-strings) [Section titled “Include Pre-translated Strings”](#include-pre-translated-strings) Select **Include pre-translated strings** if you want to include pre-translated strings in a Cost Estimate report. By default, this option is selected. For example, there is an untranslated string `Validate your username` in the project. You generate a Cost Estimate report with the **Include pre-translated strings** option selected. This string will be included in the Cost Estimate. Then a project manager pre-translates this string via TM or MT engine and you once again generate a Cost Estimate report with the **Include pre-translated strings** option selected. This time, the pre-translated string `Validate your username` won’t be included in the Cost Estimate report. On the other hand, with the **Include pre-translated strings** option cleared, the string `Validate your username` will be included in the Cost Estimate report both times, when untranslated and when pre-translated via TM or MT engine. ### [Calculate Internal Fuzzy Matches](#calculate-internal-fuzzy-matches) [Section titled “Calculate Internal Fuzzy Matches”](#calculate-internal-fuzzy-matches) Internal Fuzzy Matches are partial (fuzzy) TM matches found among untranslated strings in your project that can potentially be added to the Translation Memory. For example, if the first string in a file is `Validate your username` and the last one is `Validate your username again`, there is an internal fuzzy match. To include fuzzy (99% and less) internal matches, as well as perfect (101%) and 100% matches, in your Cost Estimate report and get a more comprehensive prediction of how many strings can be added to the TM if translated in sequence, select **Calculate Internal Fuzzy Matches**. Note that these calculations are approximate because the actual translation order may differ. If you clear **Calculate Internal Fuzzy Matches**, the Cost Estimate report will only show perfect (101%) and 100% internal matches (repetitions), and will not include any fuzzy matches. ### [Result Analysis](#result-analysis-cost-estimate) [Section titled “Result Analysis”](#result-analysis-cost-estimate) When the report is generated, you will see the following amounts: * **Total** - General cost estimate for all tasks. * **Subtotals** - Cost estimate for each task: * **Translation** – Cost for strings requiring new or updated translations (no high–percentage match leverage). * **Proofreading** – Cost for reviewing translations. * **TM Savings** – Savings from existing translations (in TM or within the project). * **Weighted Words / Strings / Characters / Characters with Spaces** – Final word count for cost calculations after applying TM/internal match discounts. * The main table with details on match categories and statuses. * The second table showing data for each folder or file included in the task. To download the Cost Estimate report, click **Export** and select the preferred export format (CSV, XLSX, or JSON). ## [Top Members](#top-members) [Section titled “Top Members”](#top-members) The Top Members report allows you to check your position on the list of project members and see who contributed the most to the project’s translation. Default parameters: * *Text unit*: words * *Time period*: Last 30 days * *Sorted by*: translated text units. A member who translated the most is placed at the top of the list. * *Languages*: all languages * *Contributors*: all The **You** label appears next to your own username in the report table, making it easier to identify your personal contribution. Re-sort the members by clicking on the needed parameter. For example, if you are a proofreader, you might want to know who approved most of the strings. For this, click on the *Approved* parameter to redo sorting. 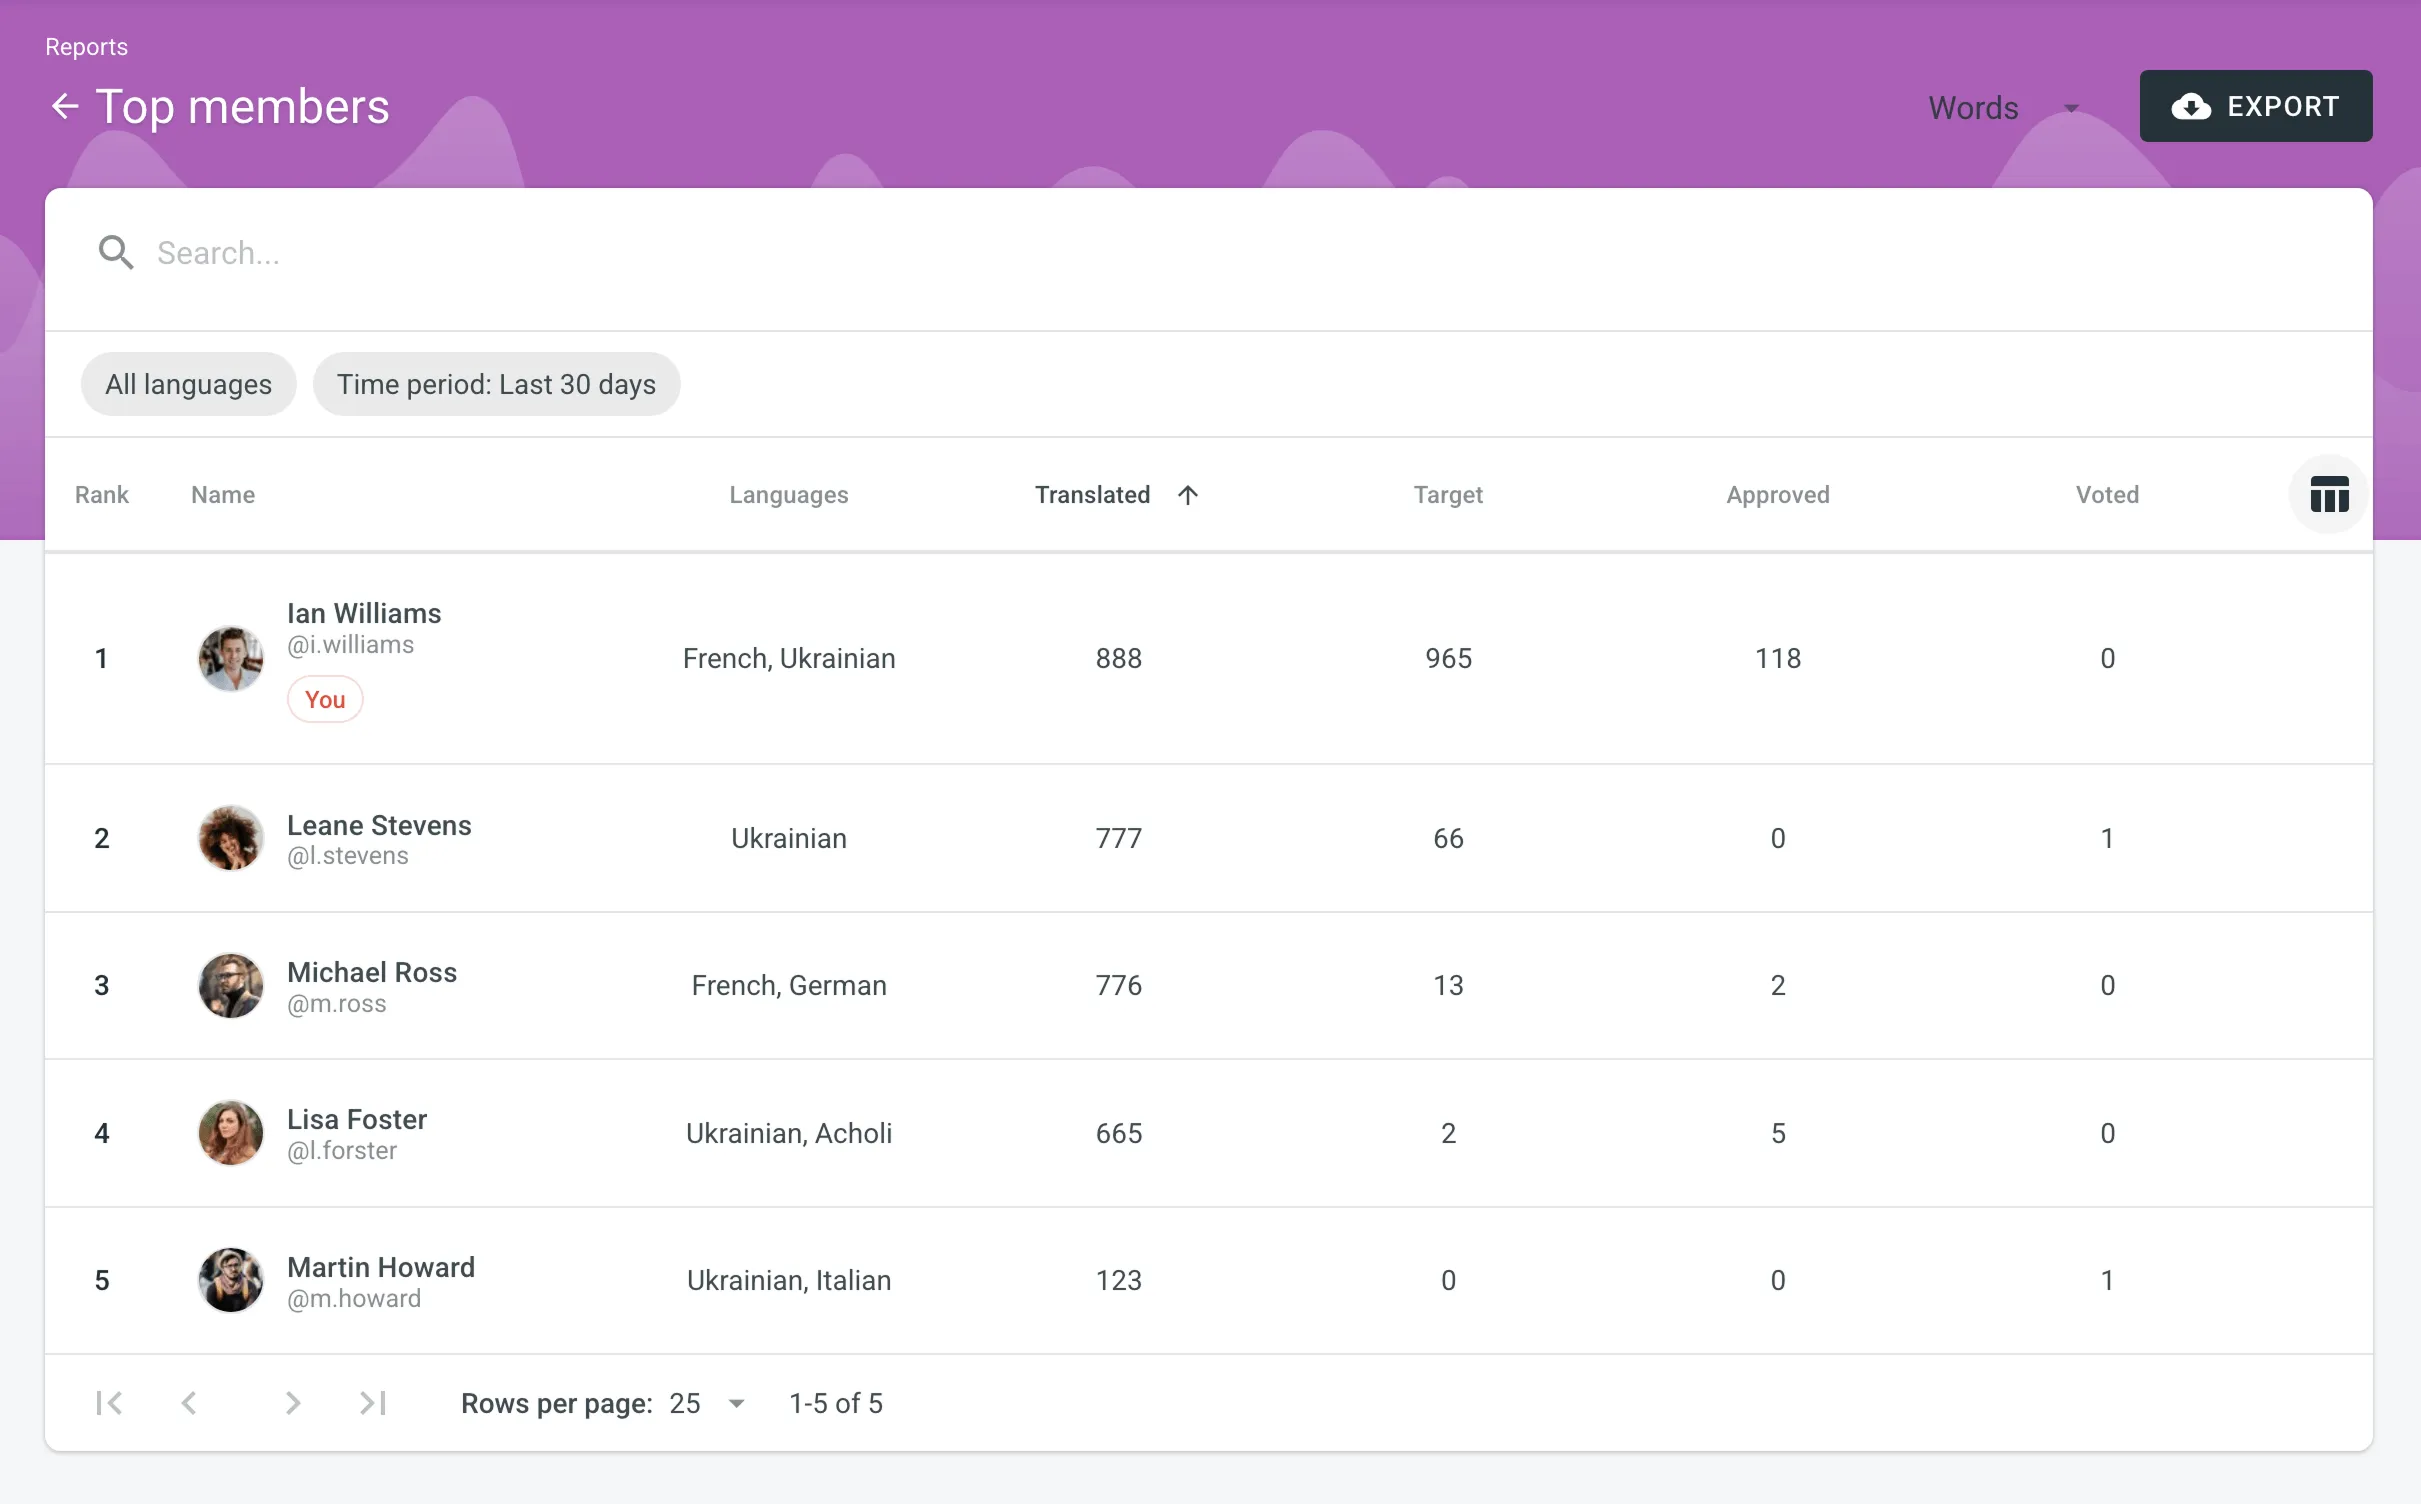 ### [Generating a Custom List of Top Members](#generating-a-custom-list-of-top-members) [Section titled “Generating a Custom List of Top Members”](#generating-a-custom-list-of-top-members) To generate a custom list of top members, follow these steps: 1. Select the preferred report unit (words, strings, characters with or without spaces). 2. Select the time period for which you want to see the activity of contributors. 3. To make a list of contributors for a specific language, select the language you need from the drop-down menu above the list. Alternatively, select **All languages**. To look for your account or account of any other contributor, use the search field. The Top Members list includes the following columns: * *Rank* – contributor’s position in the list based on the currently selected sorting criteria (e.g., *Translated*, *Approved*, etc.). * *Name* – contributor’s first name, last name and username. * *Languages* – project languages. * *Translated* – the number of translated source content units. * *Target* – the number of translated content units in a target language.\ This parameter is not available for the *Strings* content unit because the number of source and translated strings is always the same. * *Approved* – the number of approved content units. * *Voted* – the number of votes a contributor made. * *”+” votes received* – the number of upvotes a contributor received for translations. * *”-” votes received* – the number of downvotes a contributor received for translations. * *Winning* – the number of approvals a contributor received for translations. * *Given access* – indicates when a member was granted access to a project. To customize the visibility of columns in the report, click at the upper-right side of the table and select the preferred ones. ## [My Activity](#my-activity) [Section titled “My Activity”](#my-activity) The My Activity report allows you to calculate the price of your contribution (i.e., translation or proofreading) to the project. You can generate a My Activity report based on the following filter parameters: * Tasks: Not selected, All Tasks, or specific task. * Time period: All time, Today, Yesterday, Last 7 days, Last 30 days, Last month, or Custom range. * Workflow step (Specific to [projects with a workflow](/enterprise/creating-project/#projects-with-a-workflow)): All or a specific workflow step. * Files: All files (including deleted files and strings) or Selected files (including deleted strings). * Language: All or specific target language. * Labels (Specific to projects with [labels](/enterprise/project-settings/labels/)): Not selected, Strings with selected labels, or Strigns without selected labels. ### [Generating a Report](#generating-my-activity) [Section titled “Generating a Report”](#generating-my-activity) To generate the My Activity report, follow these steps: 1. Select the preferred currency and the report unit (word, string, character, or characters (including spaces)). 2. Use the available filter parameters to specify the report data you’re interested in. 3. Set your [rates](#rates-my-activity) for translations and approvals. 4. Click **Generate**. 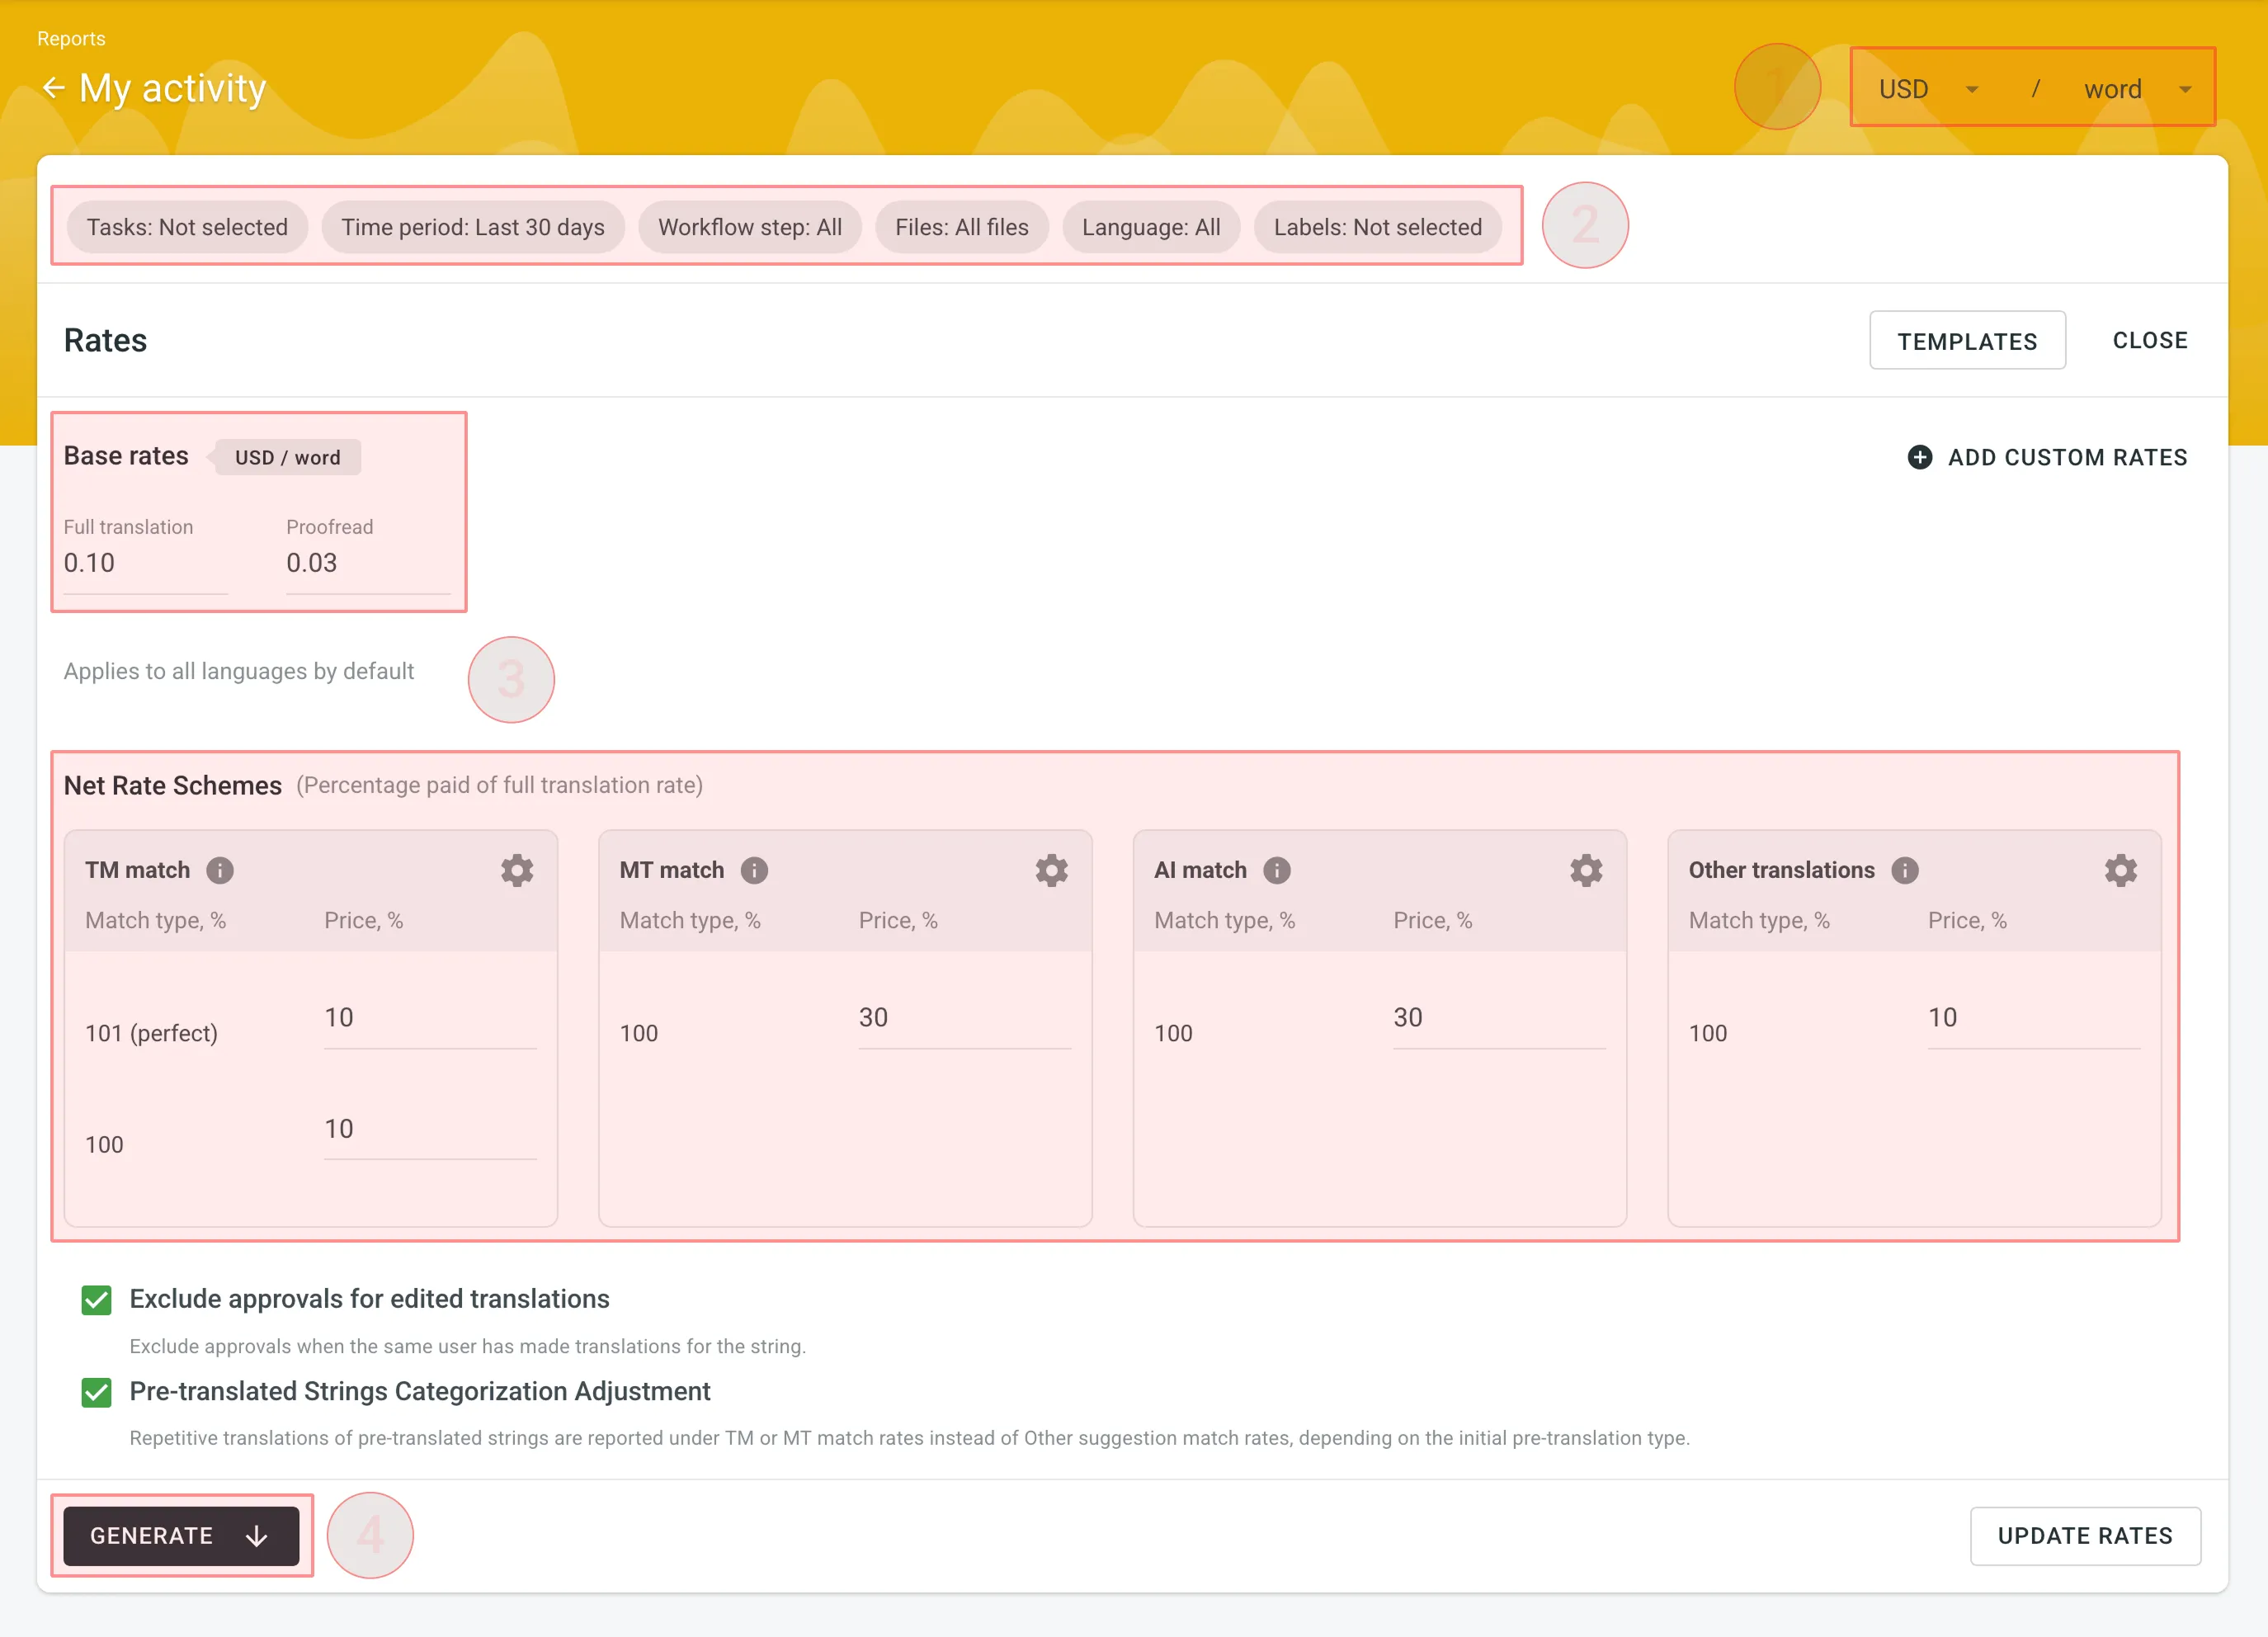 ### [Rates](#rates-my-activity) [Section titled “Rates”](#rates-my-activity) You can set the prices for Base rates (full translation, proofread) and configure Net Rate Schemes (percentage of the full translation rate paid for translation using TM suggestions, MT suggestions, and existing translations). #### [Base Rates](#base-rates-my-activity) [Section titled “Base Rates”](#base-rates-my-activity) In the Base Rates section, you can set rates for the following types of work: * **Full translation** – for each translation you made. * **Proofread** – for each approved translation. #### [Net Rate Schemes](#net-rate-schemes-my-activity) [Section titled “Net Rate Schemes”](#net-rate-schemes-my-activity) In the Net Rate Schemes section, in addition to the base rates, you can set the percentage of the full translation rate to be paid for translations made using TM suggestions, MT suggestions, and other translations of various Match types. By default, you can configure the percentage of the full translation rate for the following match type categories: **TM Match types:** * **101 (perfect)** – for translations made using Perfect match TM suggestions (source strings are identical to TM suggestion by text and context). * **100** – for translations made using 100% match TM suggestions (source strings are identical to TM suggestion only by text). **MT Match types:** * **100** – for translations made using 100% match MT suggestions (new suggested translations are identical to MT suggestion). **AI Match types:** * **100** – for translations made using 100% match AI suggestions (new suggested translations are identical to AI suggestion). **Other translations types:** * **100** – for translations made using existing translations (new suggested translations are identical to the existing translations). If a string has a combination of TM and MT suggestions and existing translations, the new translation is counted at the lowest Net Rate Scheme value. For example, if a string has a 101% (perfect) TM match suggestion (10% of the full translation rate) and a 100% MT match suggestion (5% of the full translation rate), the new translation added to this string will be counted at a 5% of the full translation rate. You can also add your own TM, MT, and Other translations match types, specifying the preferred percentage of text similarity and the percentage of the full translation rate to be paid for such a translation. To add your own match types, follow these steps: 1. Click in the Net Rate Schemes section. 2. Click on the appeared button. 3. Specify the match range and the percentage of the full translation rate. 4. Click to save the settings. 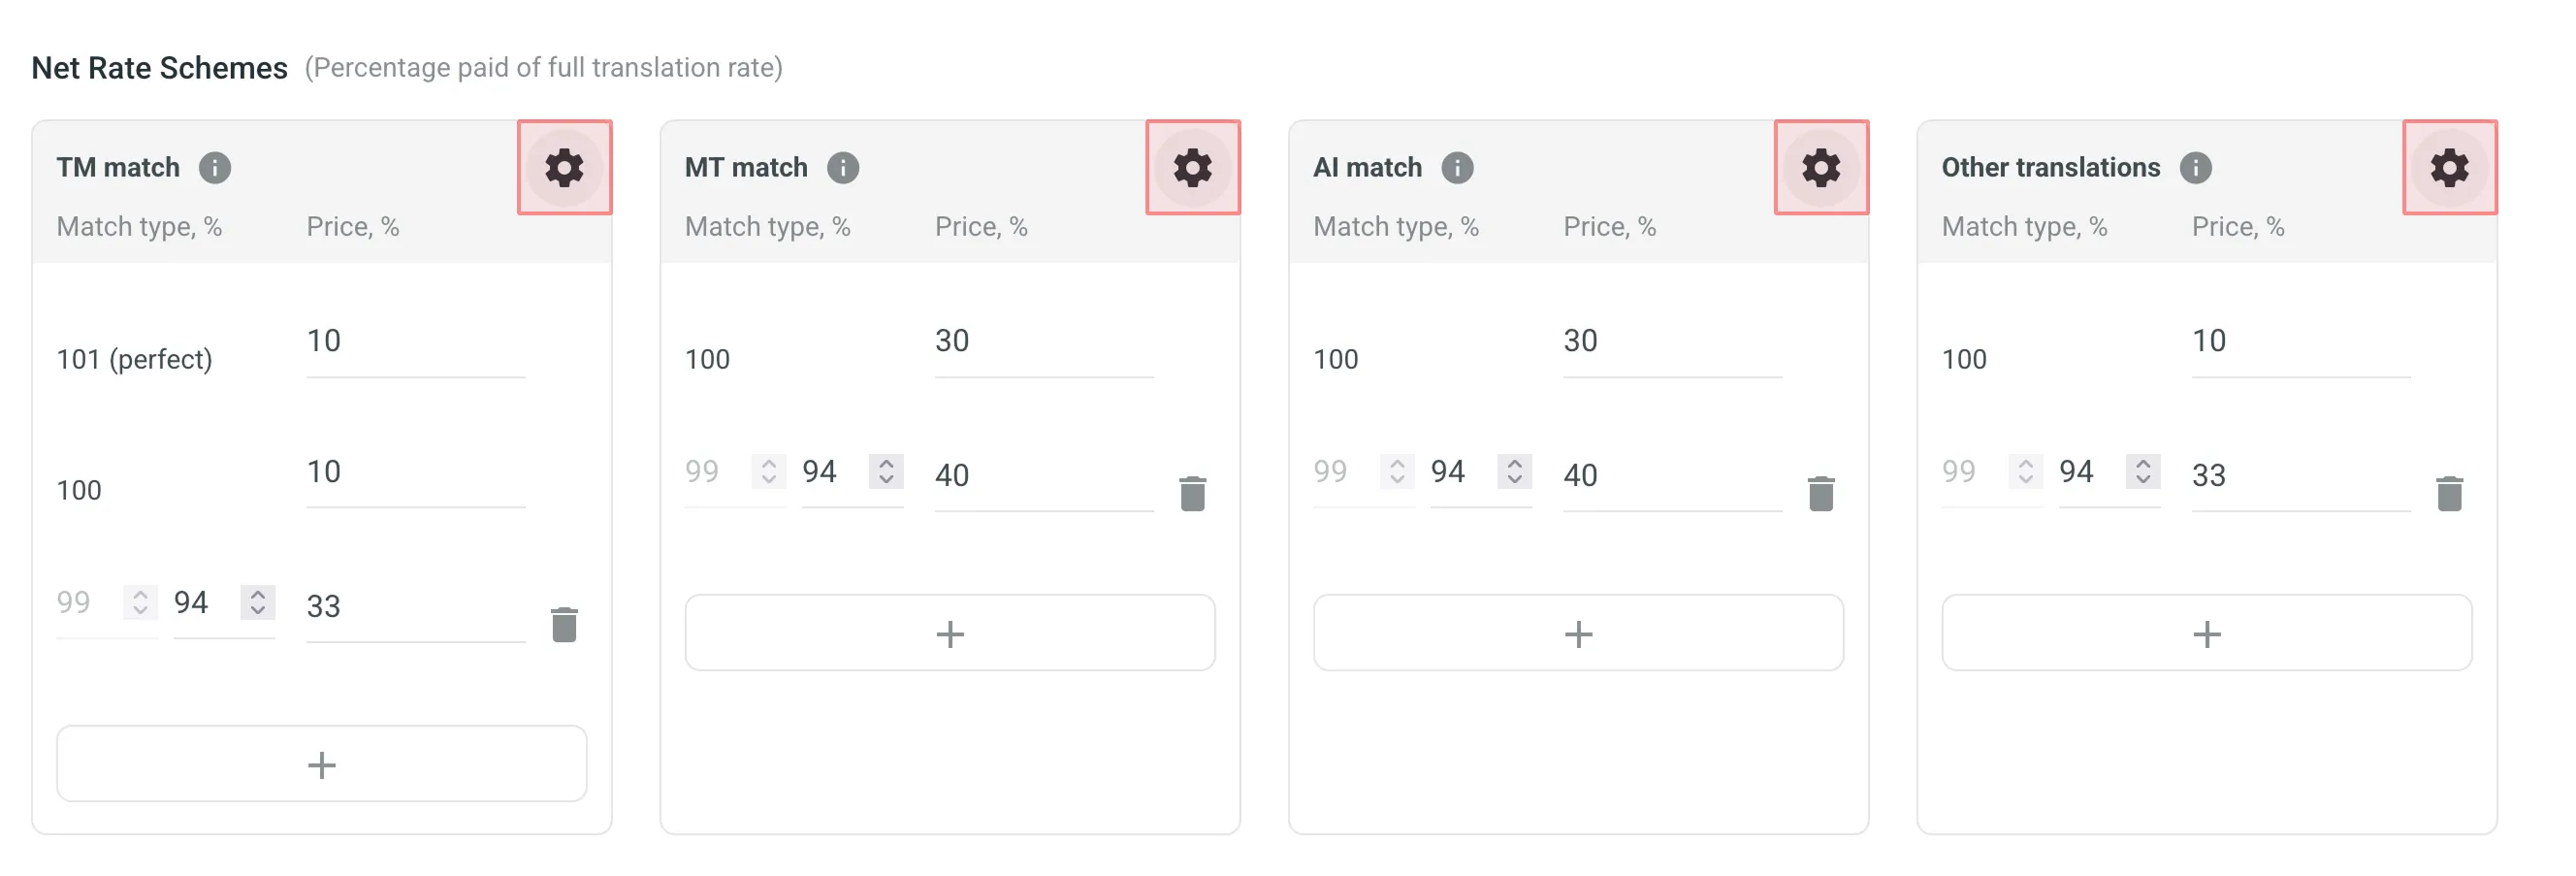 #### [Adding Custom Rates](#custom-rates-my-activity) [Section titled “Adding Custom Rates”](#custom-rates-my-activity) If you are multilingual and work with different languages, in addition to base rates that are applied to all languages by default, you can add custom rates for specific languages. To add custom rates, click **Add custom rates**. To select the languages for custom rates, click the drop-down menus and select the ones you need. You can create as many custom rates as you need. 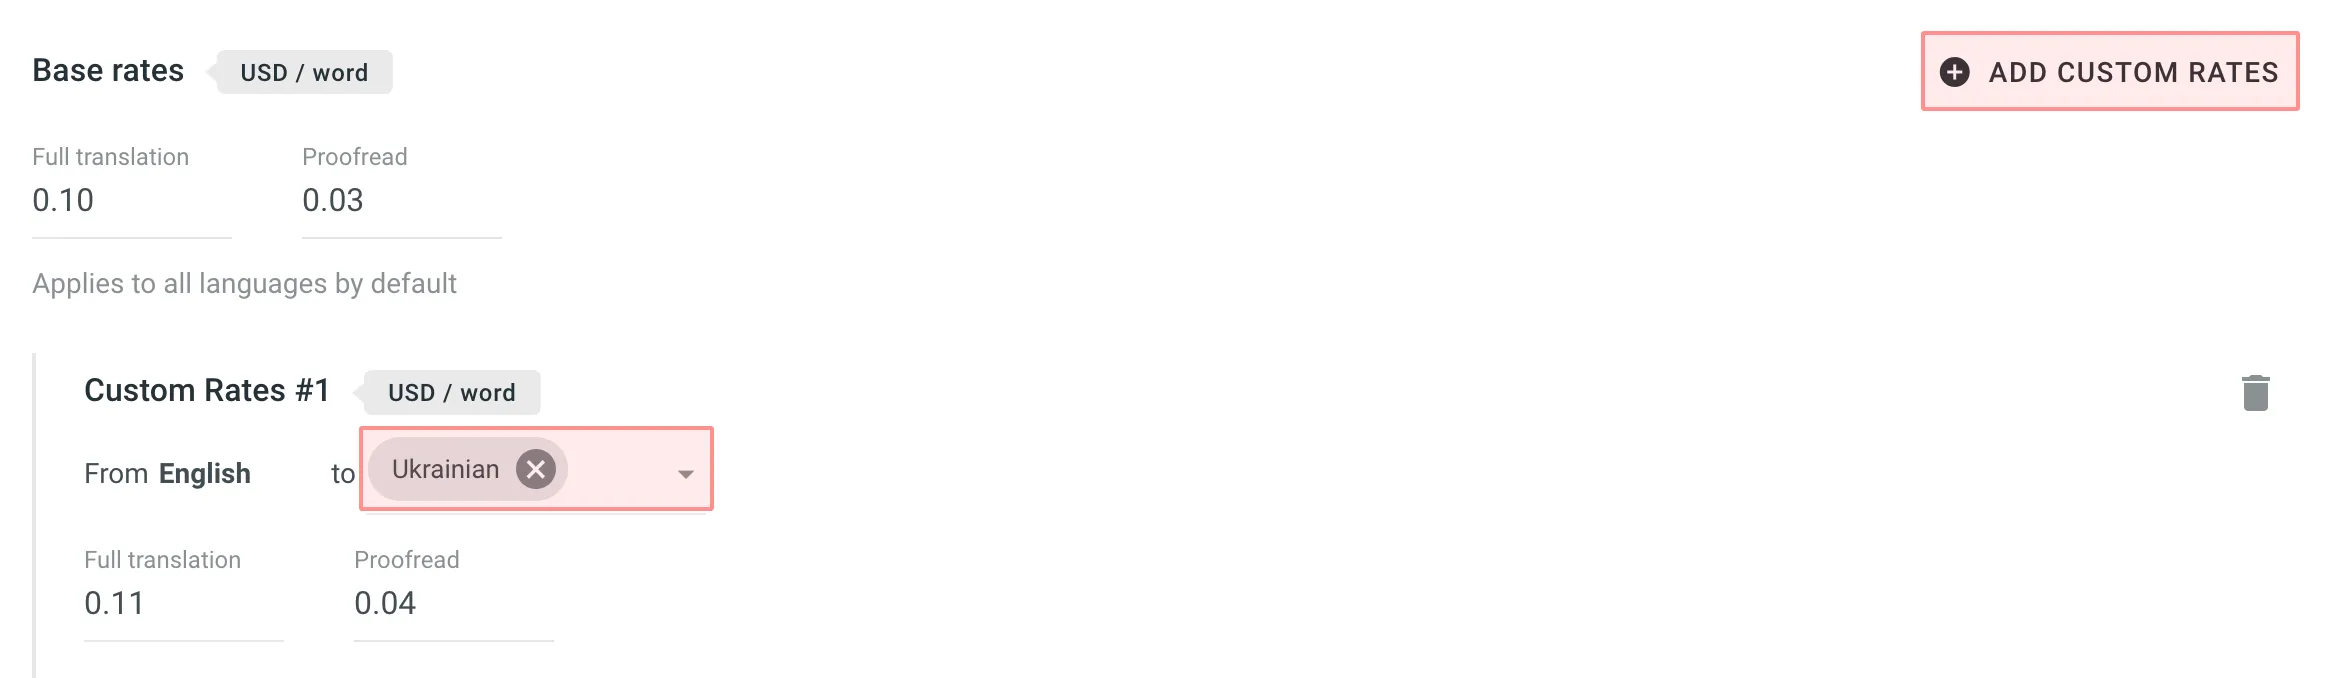 ### [Using Additional My Activity Options](#using-additional-my-activity-options) [Section titled “Using Additional My Activity Options”](#using-additional-my-activity-options) * **Exclude Approvals for Edited Translations:** select this option to exclude approvals when the same user has translated the string. * **Pre-Translated Strings Categorization Adjustment:** select this option to have repetitive translations of pre-translated strings categorized under TM or MT match rates, rather than the default Other suggestion match rates. ### [Result Analysis](#result-analysis-my-activity) [Section titled “Result Analysis”](#result-analysis-my-activity) When the report is generated, you will see the following amounts: * **User Information** - profile picture, full name, and username. * **Total** - General cost for all contributions. * **Language Subtotals** - A breakdown of costs for each target language: * **Savings** - The amount saved with leveraged matches from TM, MT, or AI. * **Weighted Words / Strings / Characters / Characters with Spaces** – Shows the adjusted metric after applying repetitions and fuzzy matches, reflecting the actual translation effort. * **Pre-translated Words / Strings / Characters / Characters with Spaces** - Shows how many units were pre-translated. * The table containing a further breakdown of work types (Translation & Post-editing and Proofreading) and match types (No Match, TM Match, MT Match, AI Match, Other translations Match). To download the My Activity report, click **Export report** and select the preferred export format (CSV, XLSX, or JSON). If you want to regenerate the report with other rates, click **Edit Rates** in the upper-right corner and follow the procedure again. ## [Archive](#archive) [Section titled “Archive”](#archive) The Archive section allows you to access the records of previously generated Cost estimate and My Activity reports, providing a convenient way to review historical data. This section also eliminates the need to wait for a report generation to complete. You can initiate a report generation and return to it later at your convenience. Within the Archive, you can review the report summary and, if necessary, download it in various supported file formats. Each project within an organization has its own independent archive section. As a contributor, you can view, export, and delete only the reports you generated yourself. ### [Viewing Previously Generated Reports](#viewing-previously-generated-reports) [Section titled “Viewing Previously Generated Reports”](#viewing-previously-generated-reports) To view the summary of the previously generated reports (i.e., archive records), follow these steps: 1. Open the project and go to **Reports > Archive**. 2. Click on the name of the needed archive record. 3. Once you open the archive report record, you can view all the needed data. 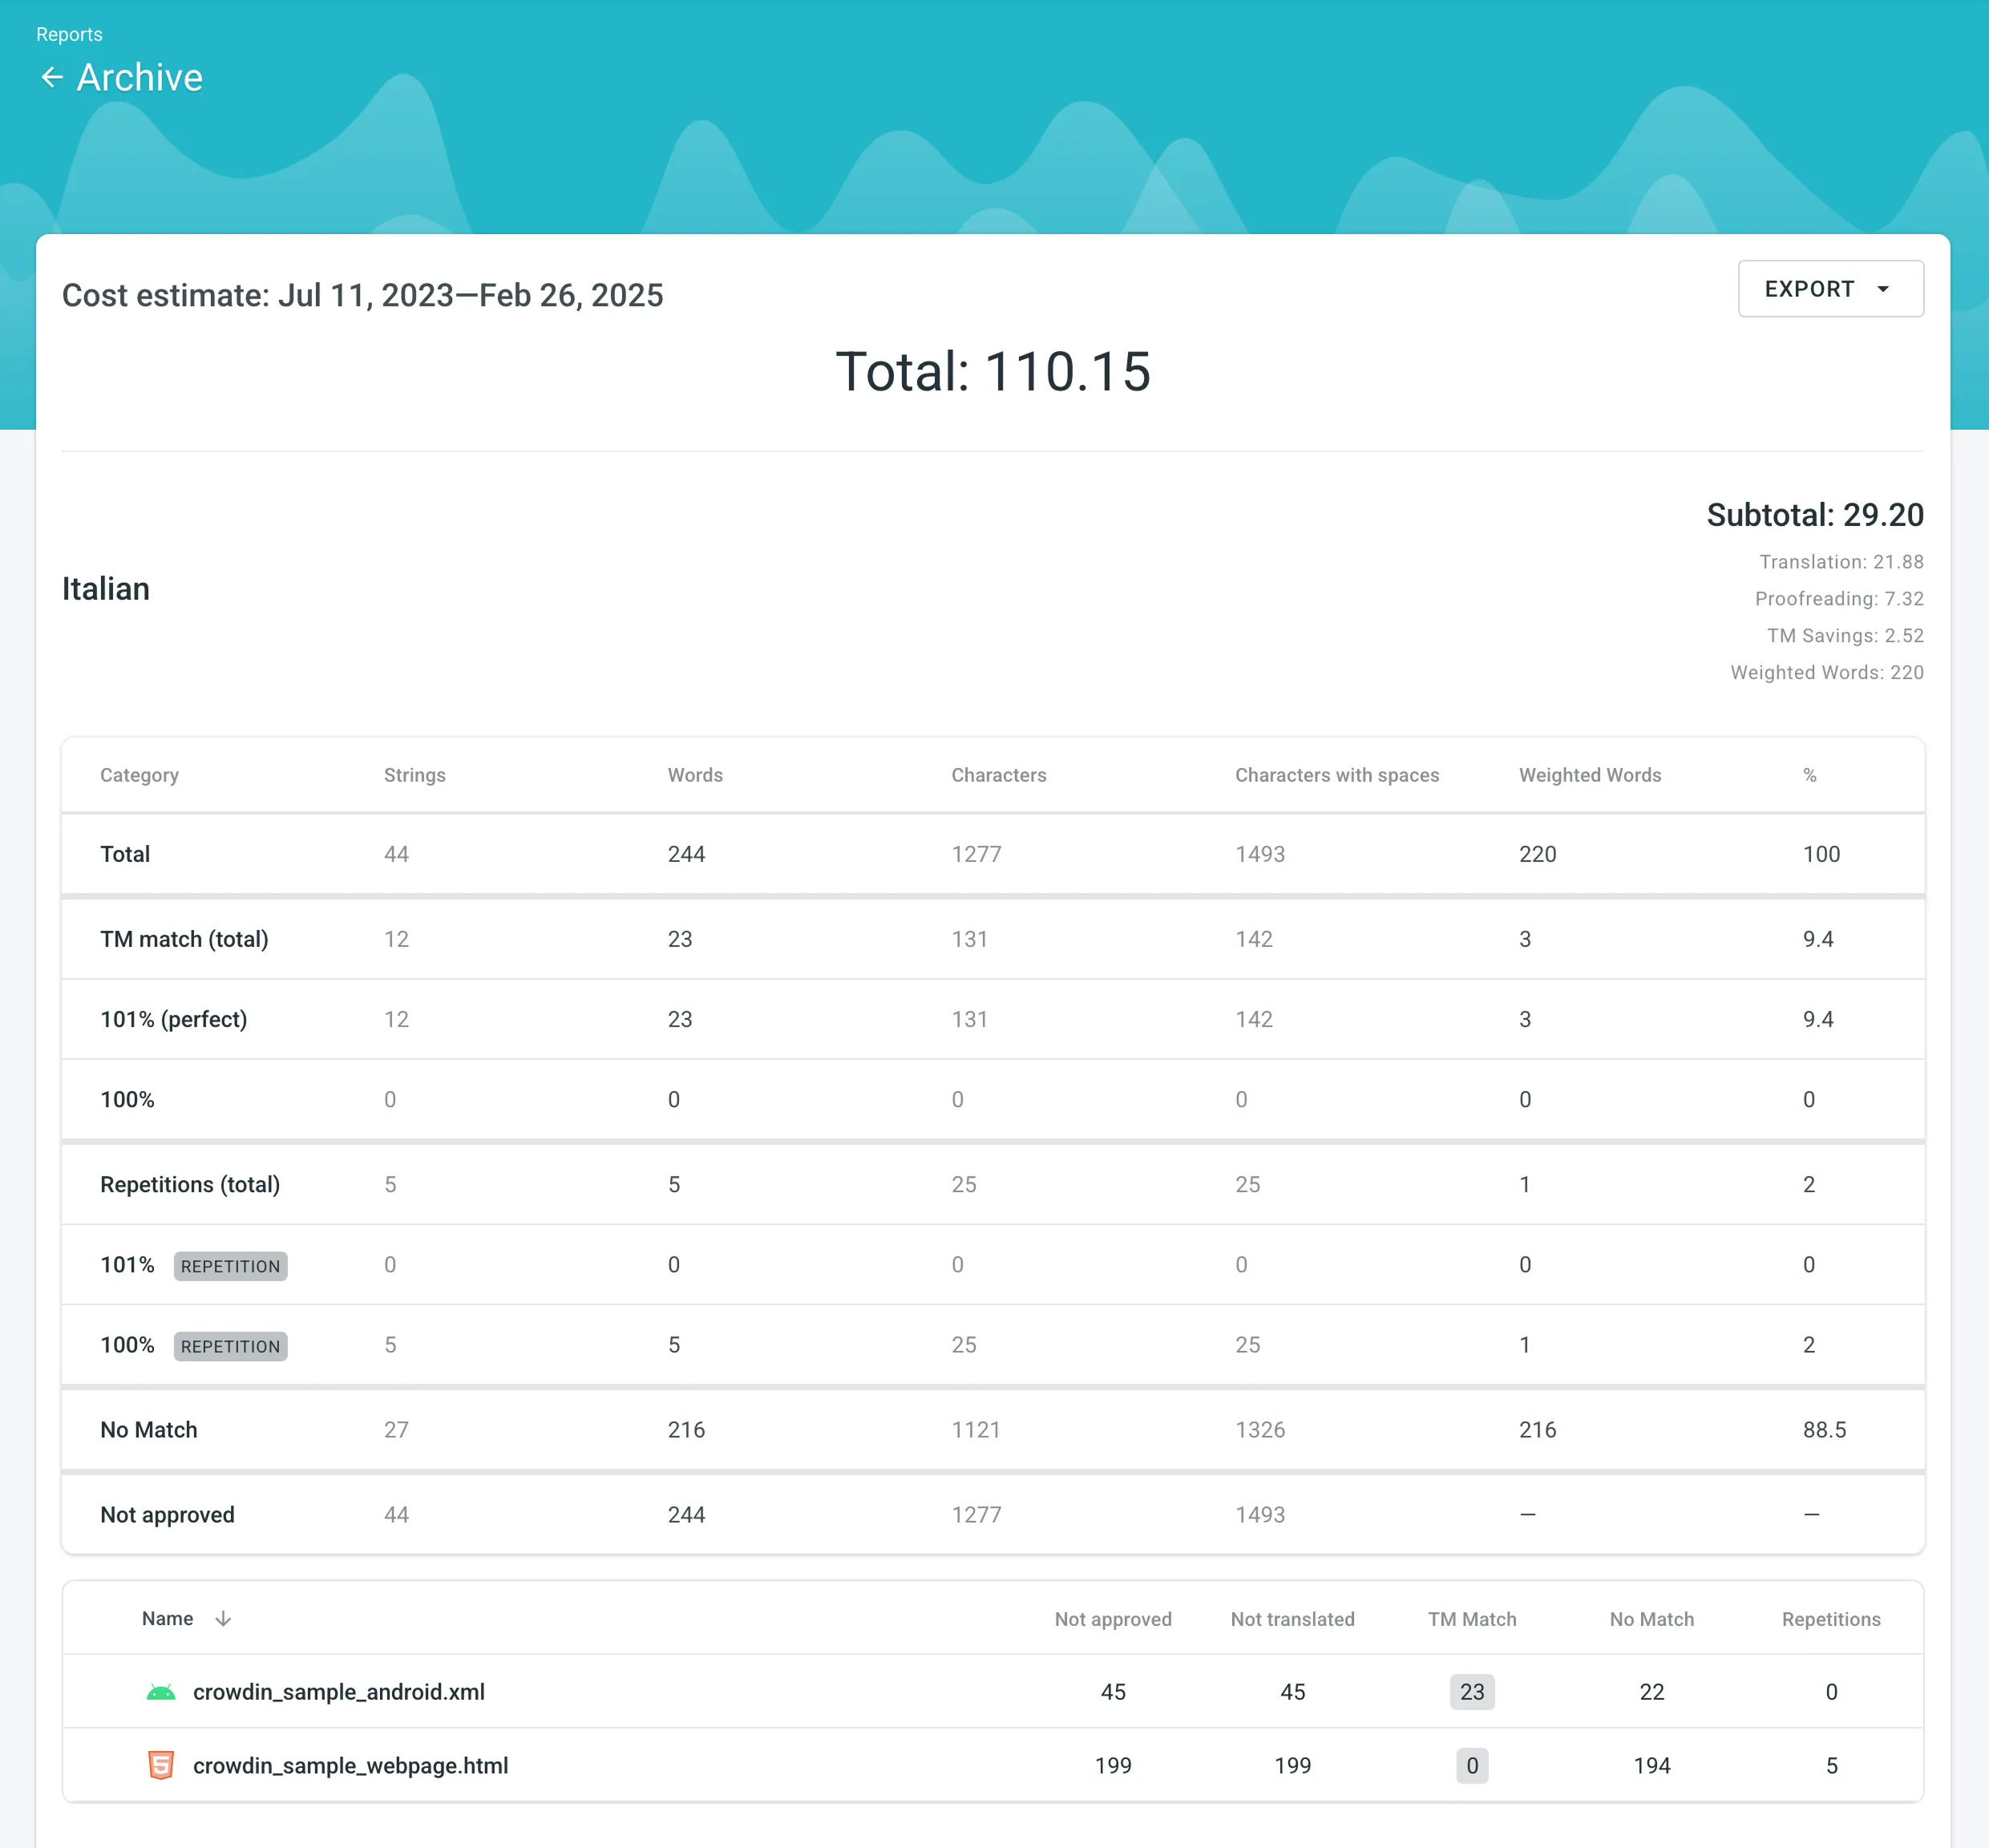 ### [Exporting Previously Generated Reports](#exporting-previously-generated-reports) [Section titled “Exporting Previously Generated Reports”](#exporting-previously-generated-reports) To export the previously generated reports, follow these steps: 1. Open the project and go to **Reports > Archive**. 2. Click (or right-click) on the needed report in the list. 3. Click on the preferred file format to export. ### [Deleting Previously Generated Reports](#deleting-previously-generated-reports) [Section titled “Deleting Previously Generated Reports”](#deleting-previously-generated-reports) To delete the previously generated reports, follow these steps: 1. Open the project and go to **Reports > Archive**. 2. Click (or right-click) on the needed report in the list. 3. Click **Delete**.
# Creating a Project
> Learn how to create a project in Crowdin Enterprise
A project is the main place where you can manage and organize your localization process. You can create an independent project in the Workspace root or within a specific group. Each project within the group inherits the group’s resources, managers, workflow templates, Translation Memories, Glossaries, and Machine Translation engines. Read more about [Groups](/enterprise/groups/). ## [Project Types](#project-types) [Section titled “Project Types”](#project-types) Crowdin Enterprise offers flexibility in how you organize and manage your localization process. There are two main project types: *File-based* and *String-based*. Choose the one that best fits how your content is structured and how you plan to manage translations. ### [File-based Project](#file-based-project) [Section titled “File-based Project”](#file-based-project) A file-based project is the standard localization setup in Crowdin Enterprise, ideal for translating apps and documents. In this project type, you upload source files containing translatable content. Crowdin Enterprise scans these files, identifies text for translation, and retains the original files within the project. After translation, you can export the files, preserving the original structure and format. This project type is ideal when maintaining the original file structure upon export is crucial, and when integrating with version control systems (e.g., GitHub, GitLab, Bitbucket, Azure Repos) and external data sources. Crowdin Enterprise supports [a wide range of formats](/enterprise/supported-formats/) used in software development and documentation, including Android XML, iOS Strings, JSON, XLIFF, Markdown, DOCX, and more. #### [Use Cases](#use-cases) [Section titled “Use Cases”](#use-cases) * Translate app strings and documents stored in structured files. * Maintain the original folder and file structure when exporting translations. * Keep source files in sync with code repositories. * Align localization with development and release workflows. * Suitable for version-controlled content or structured documents. ### [String-based Project](#string-based-project) [Section titled “String-based Project”](#string-based-project) A string-based project in Crowdin Enterprise is designed for managing dynamic content through a centralized string repository. Instead of storing source files, Crowdin Enterprise extracts individual translatable strings and maintains them within the platform. This setup is ideal for content that changes frequently, such as UI text and other modular content blocks. With this approach, you can update source strings directly in Crowdin Enterprise without needing to re-upload files. Translated strings can then be exported in various formats, including JSON, iOS Strings, or Android XML, facilitating reuse across multiple platforms like web, mobile, and desktop. #### [Use Cases](#use-cases-1) [Section titled “Use Cases”](#use-cases-1) * Manage and translate app or website UI text in a centralized location. * Let content writers update source strings online without developer involvement. * Translate database content without needing to manage source files. * Avoid duplicate translation effort for strings reused across platforms (e.g., Android, iOS, Web). * Export translations in your preferred format, including JSON, iOS Strings, or Android XML. * Ideal for teams working with dynamic content and frequent updates. Limitations Some connectors have limited support, and certain features may not be available in string-based projects. ## [Projects with or without a Workflow](#projects-with-or-without-a-workflow) [Section titled “Projects with or without a Workflow”](#projects-with-or-without-a-workflow) When creating a project, you have two possible options for how you can organize your localization process within the project: * [Project without a workflow](#projects-without-a-workflow) * [Project with a workflow](#projects-with-a-workflow) Anytime you can switch between these two different approaches to managing a project’s localization process by assigning or removing a workflow. ### [Projects without a Workflow](#projects-without-a-workflow) [Section titled “Projects without a Workflow”](#projects-without-a-workflow) A project without a workflow is a streamlined localization project setup where translations are managed without predefined steps or automated processes. When working with this kind of project configuration, you can assign dedicated translators and proofreaders to the project target languages or use [Tasks](/enterprise/tasks/) to manage the localization process. This type of project setup allows you to start the localization process right away in cases when the preferred workflow still needs to be agreed upon or if you prefer a simpler approach. While this setup provides more freedom, it also requires more manual coordination and management of translation tasks. #### [Use cases](#use-cases-2) [Section titled “Use cases”](#use-cases-2) * Get to know the main features of Crowdin Enterprise. * Quickly start translating content without having to spend time setting up a workflow. Especially useful if you still need an agreed workflow. * Good if there is no need for automation (e.g., automated pre-translation via TM/MT, filtering content via custom code step, ordering translations and proofreading via vendors, etc.). * Good when the translation strategy is the same for all target languages in the project. ### [Projects with a Workflow](#projects-with-a-workflow) [Section titled “Projects with a Workflow”](#projects-with-a-workflow) A project with a workflow is a structured localization project setup that follows a predefined sequence of steps for managing translations. Workflows consist of multiple steps (e.g., source text review, pre-translation, translation, proofreading, etc.), which define the order and conditions that content in your project should go through and the responsibilities of project members involved in the localization process. Each step can be assigned to specific project members or vendors, ensuring a systematic and controlled progression of translation tasks. Read more about [Workflows](/enterprise/workflows/). Using a workflow in your project, you can automate certain actions, such as pre-translation via translation memory or machine translation engines, filtering and splitting content into two workflow threads according to specific predefined conditions, sending content for translation and proofreading to vendors, etc. This type of project setup suits larger or more complex localization projects where consistent and standardized processes are desired. #### [Use cases](#use-cases-3) [Section titled “Use cases”](#use-cases-3) * Order professional translation and proofreading services from vendors. * Involve your community in the translation process. * Automate content translation via translation memory or machine translation engines. * Use individual localization strategies for different target languages (translate some languages with the help of the community and others with vendors, translate languages with different MT engines, etc.). ## [Creating a Project](#creating-a-project) [Section titled “Creating a Project”](#creating-a-project) To create a project, follow these steps: 1. Open your organization’s **Workspace**, hover over the **Create** button at the lower-right corner, and select **Create a project**. 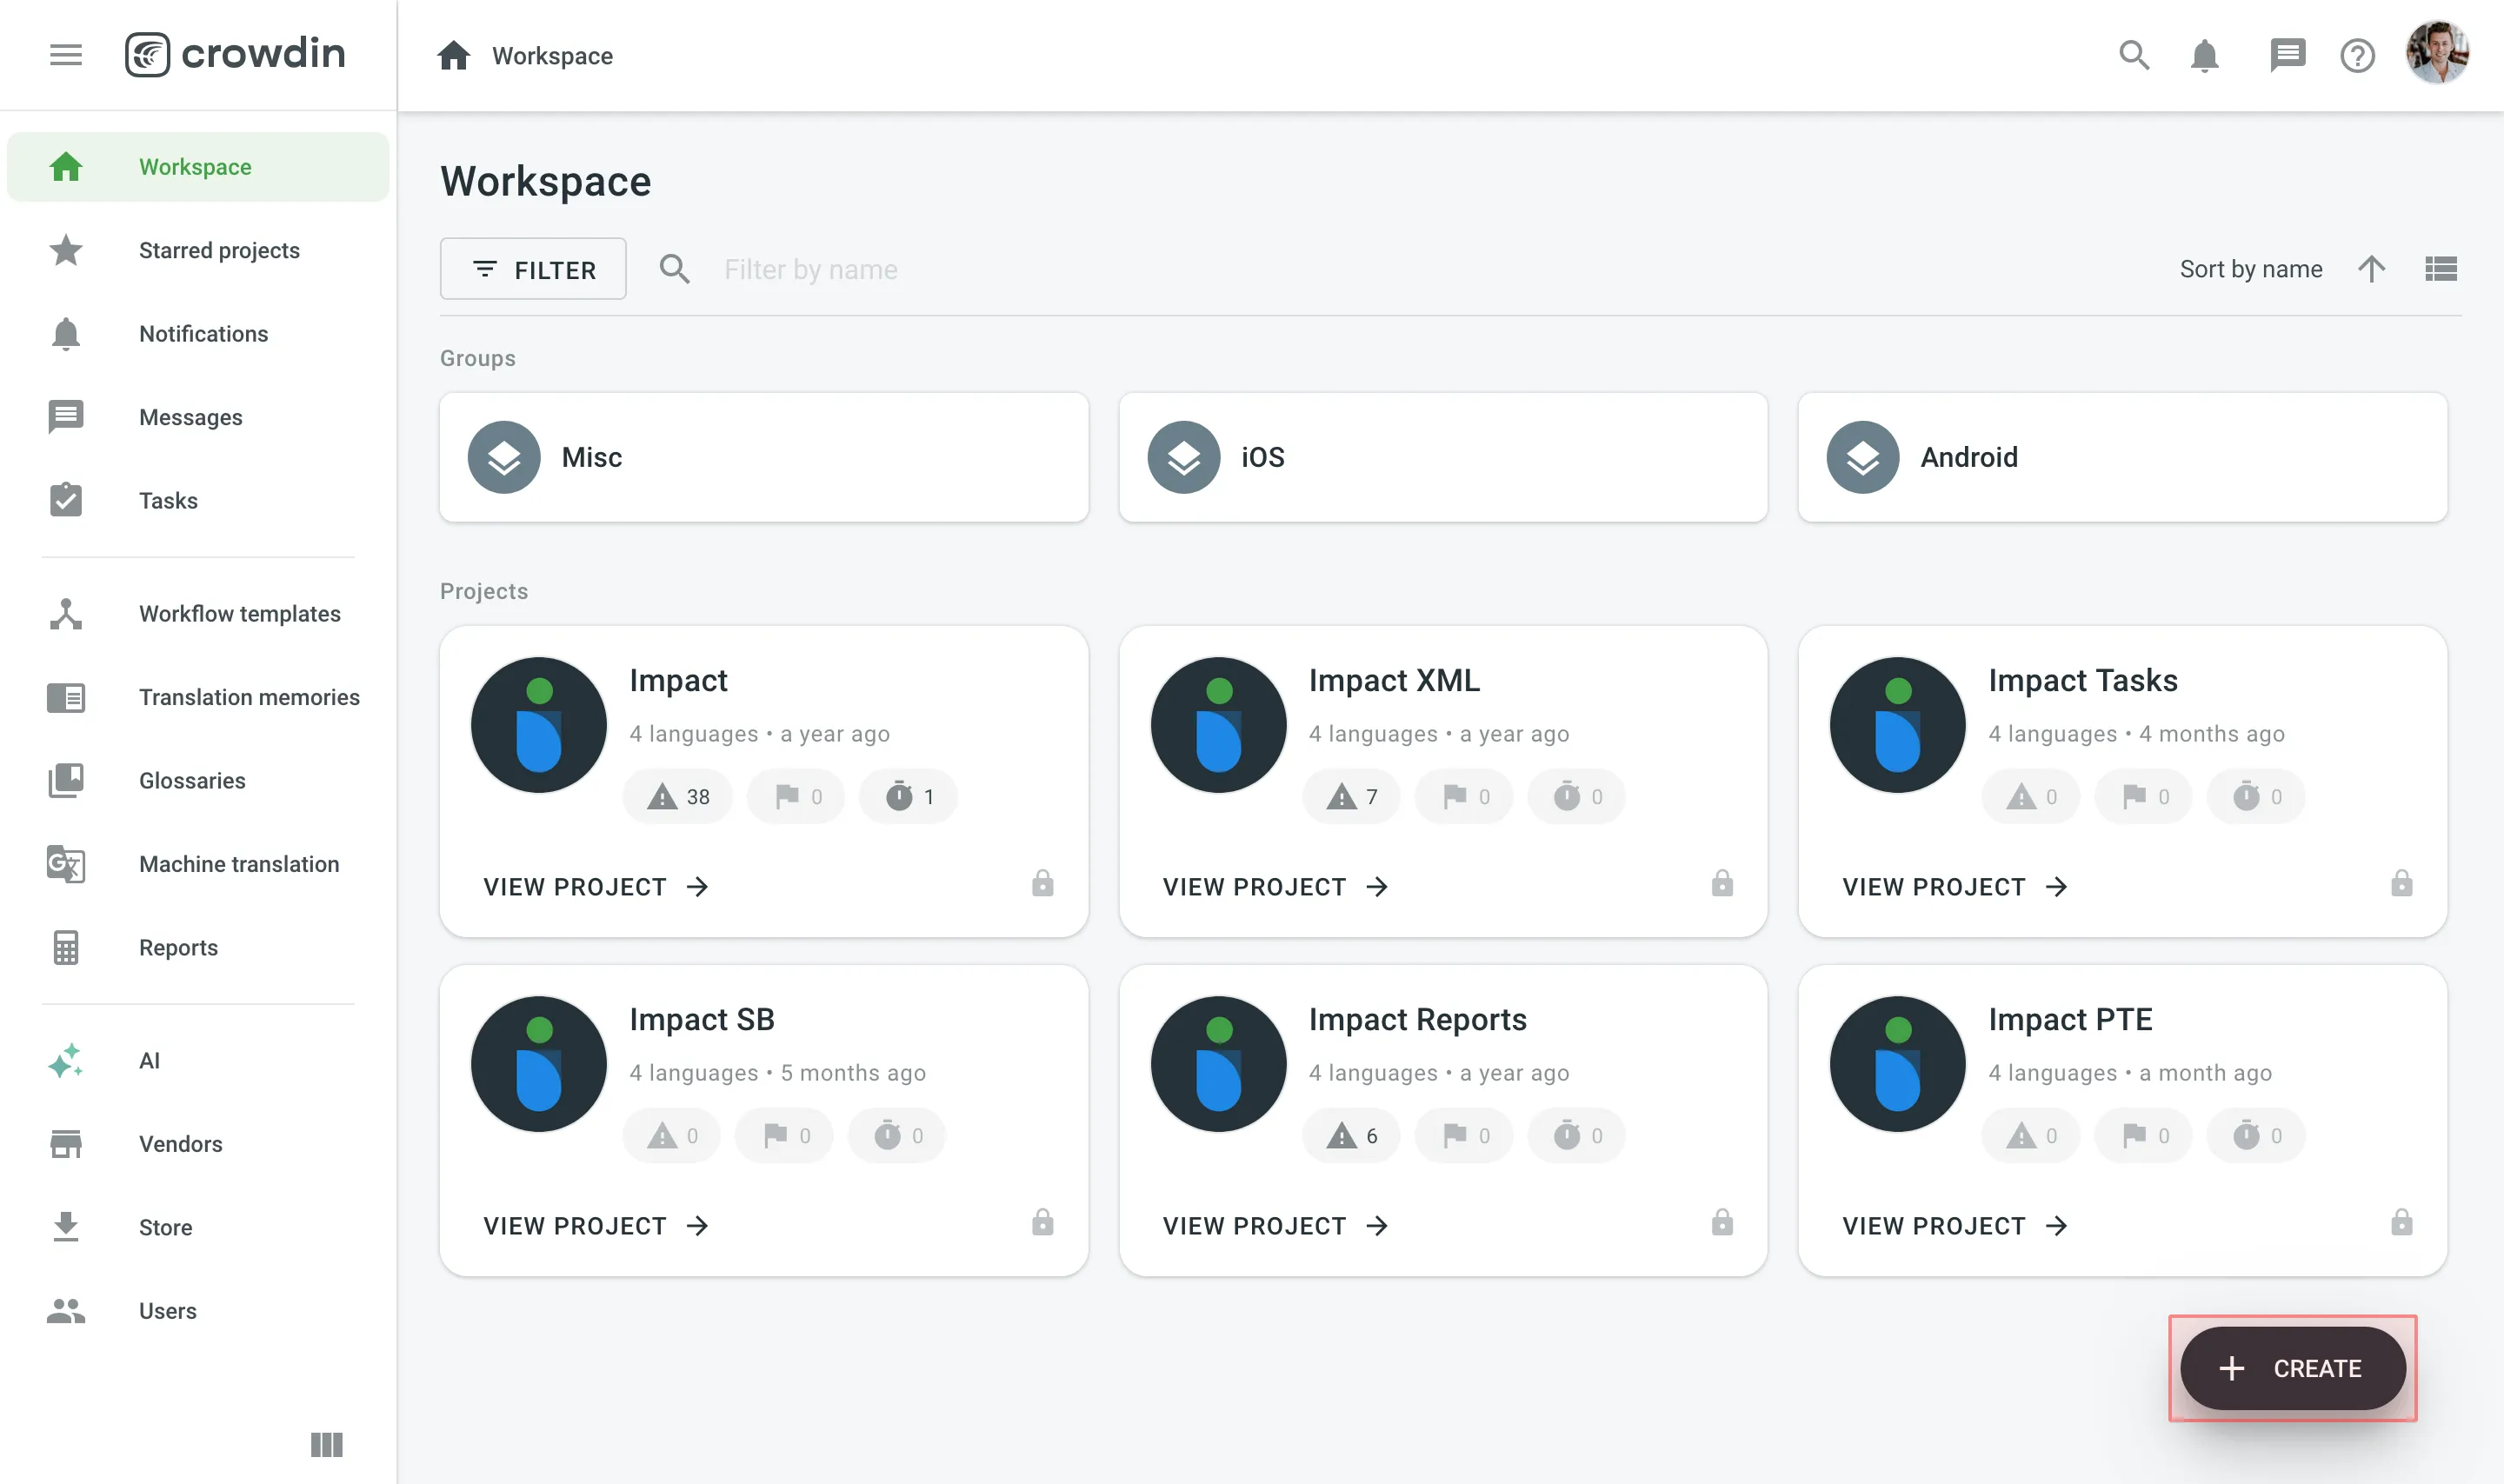 2. Enter the project name. 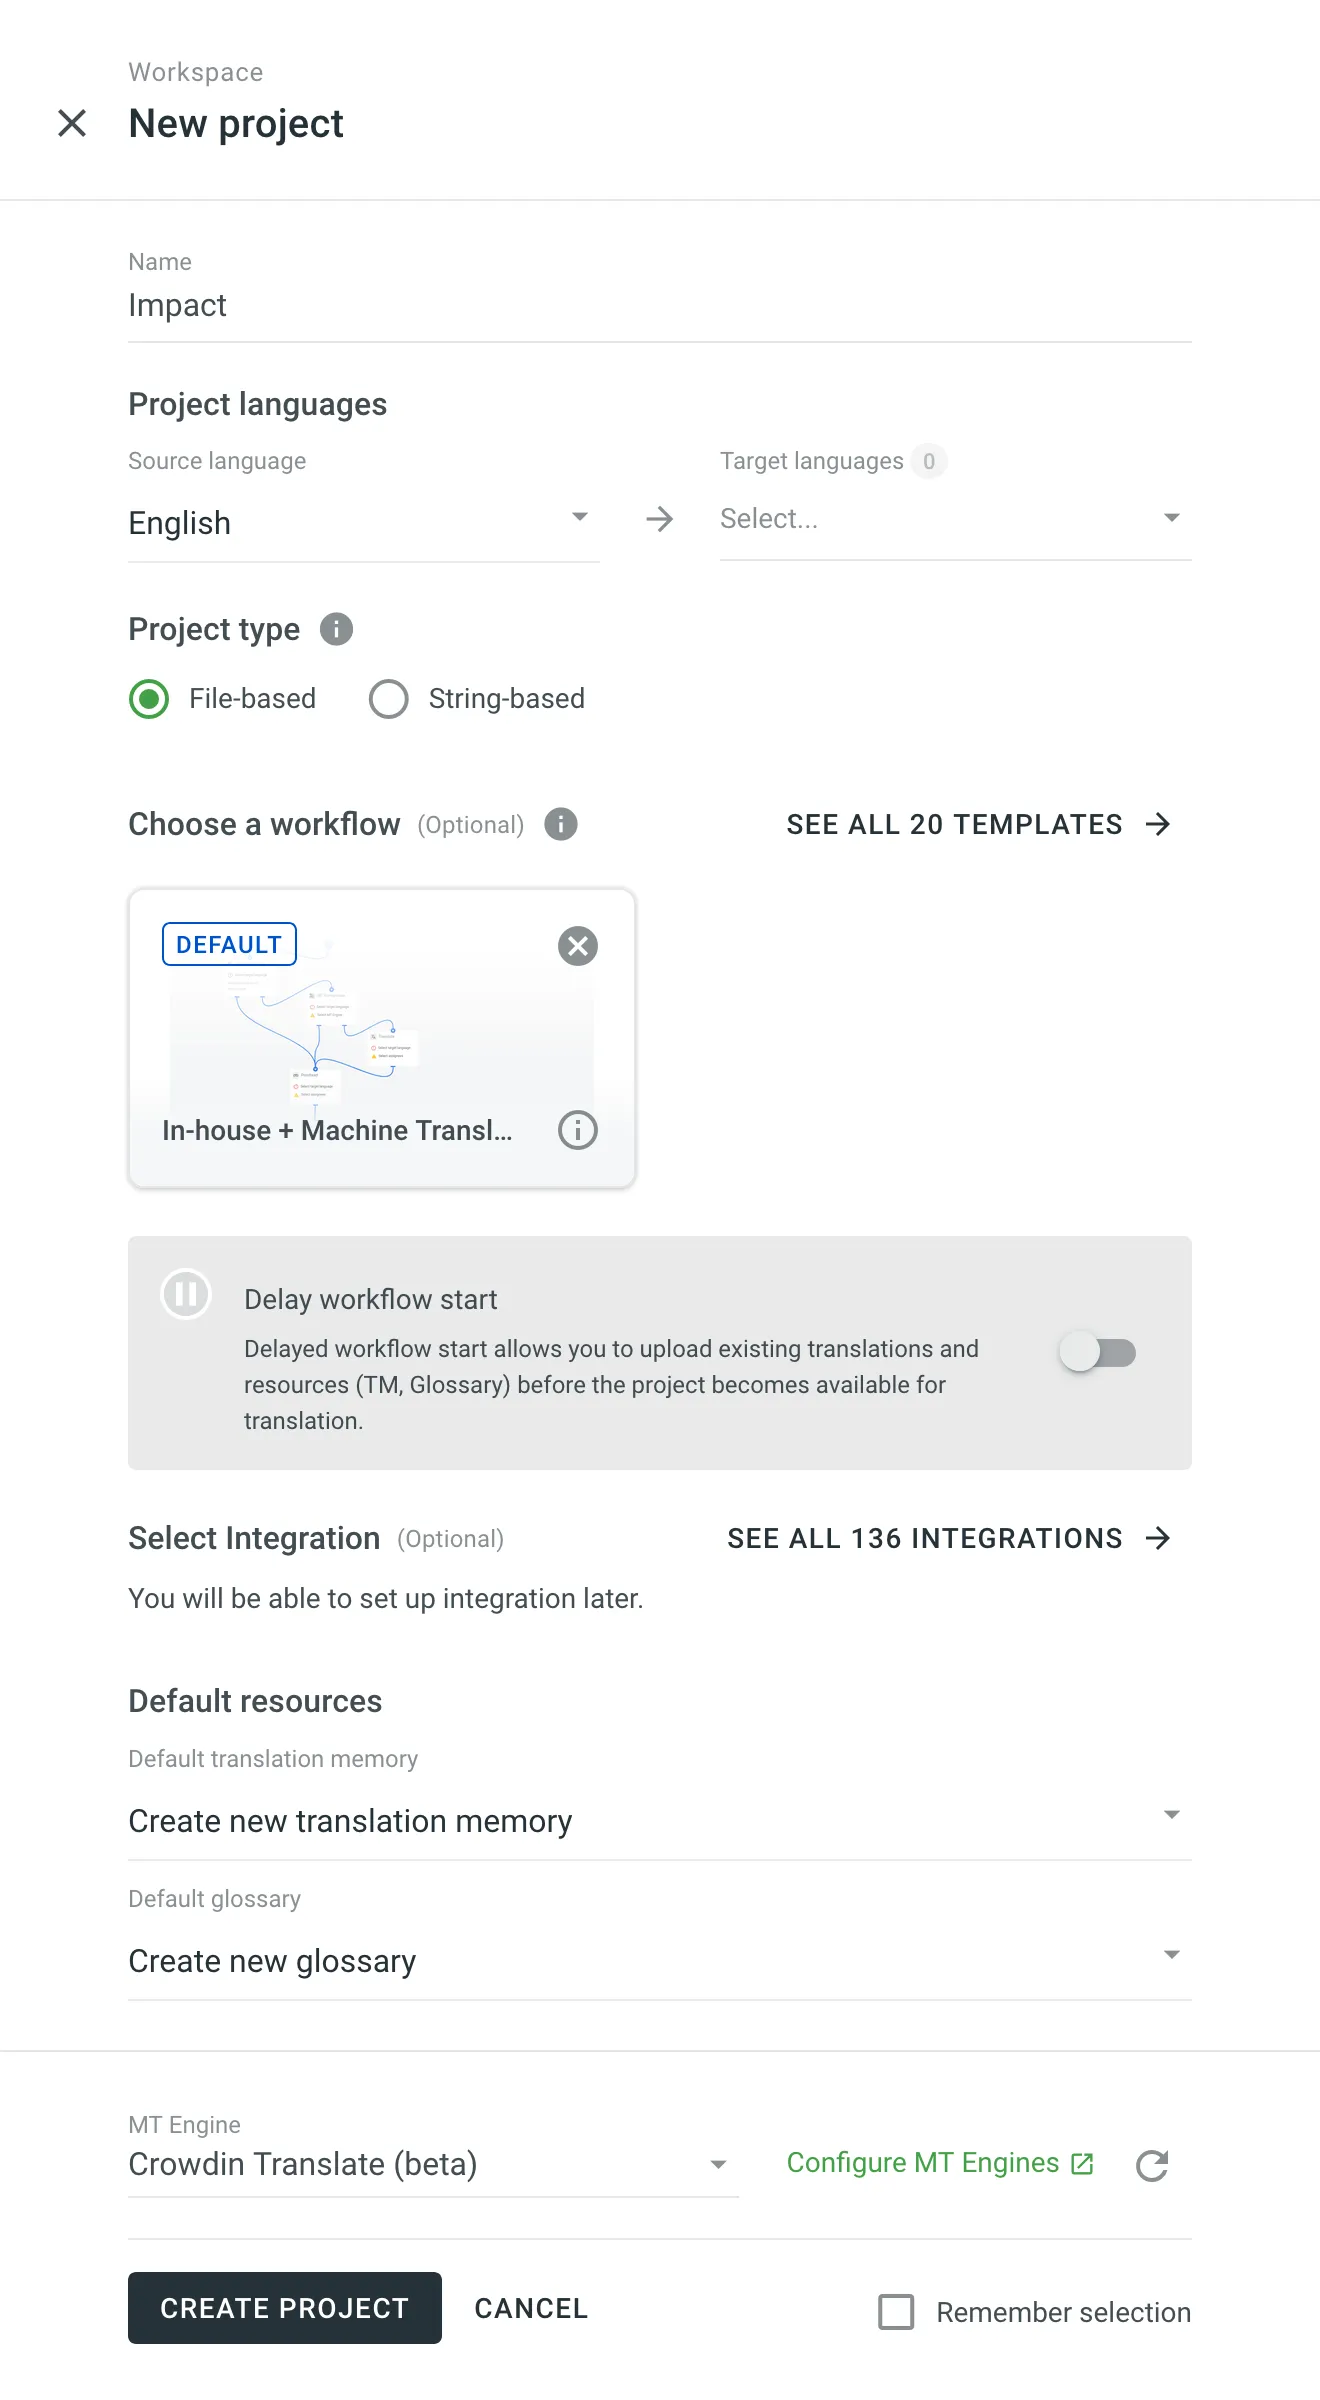 3. Select the source language and target languages. The source language is the language you’re translating from, and the target languages are the ones you’re translating into. 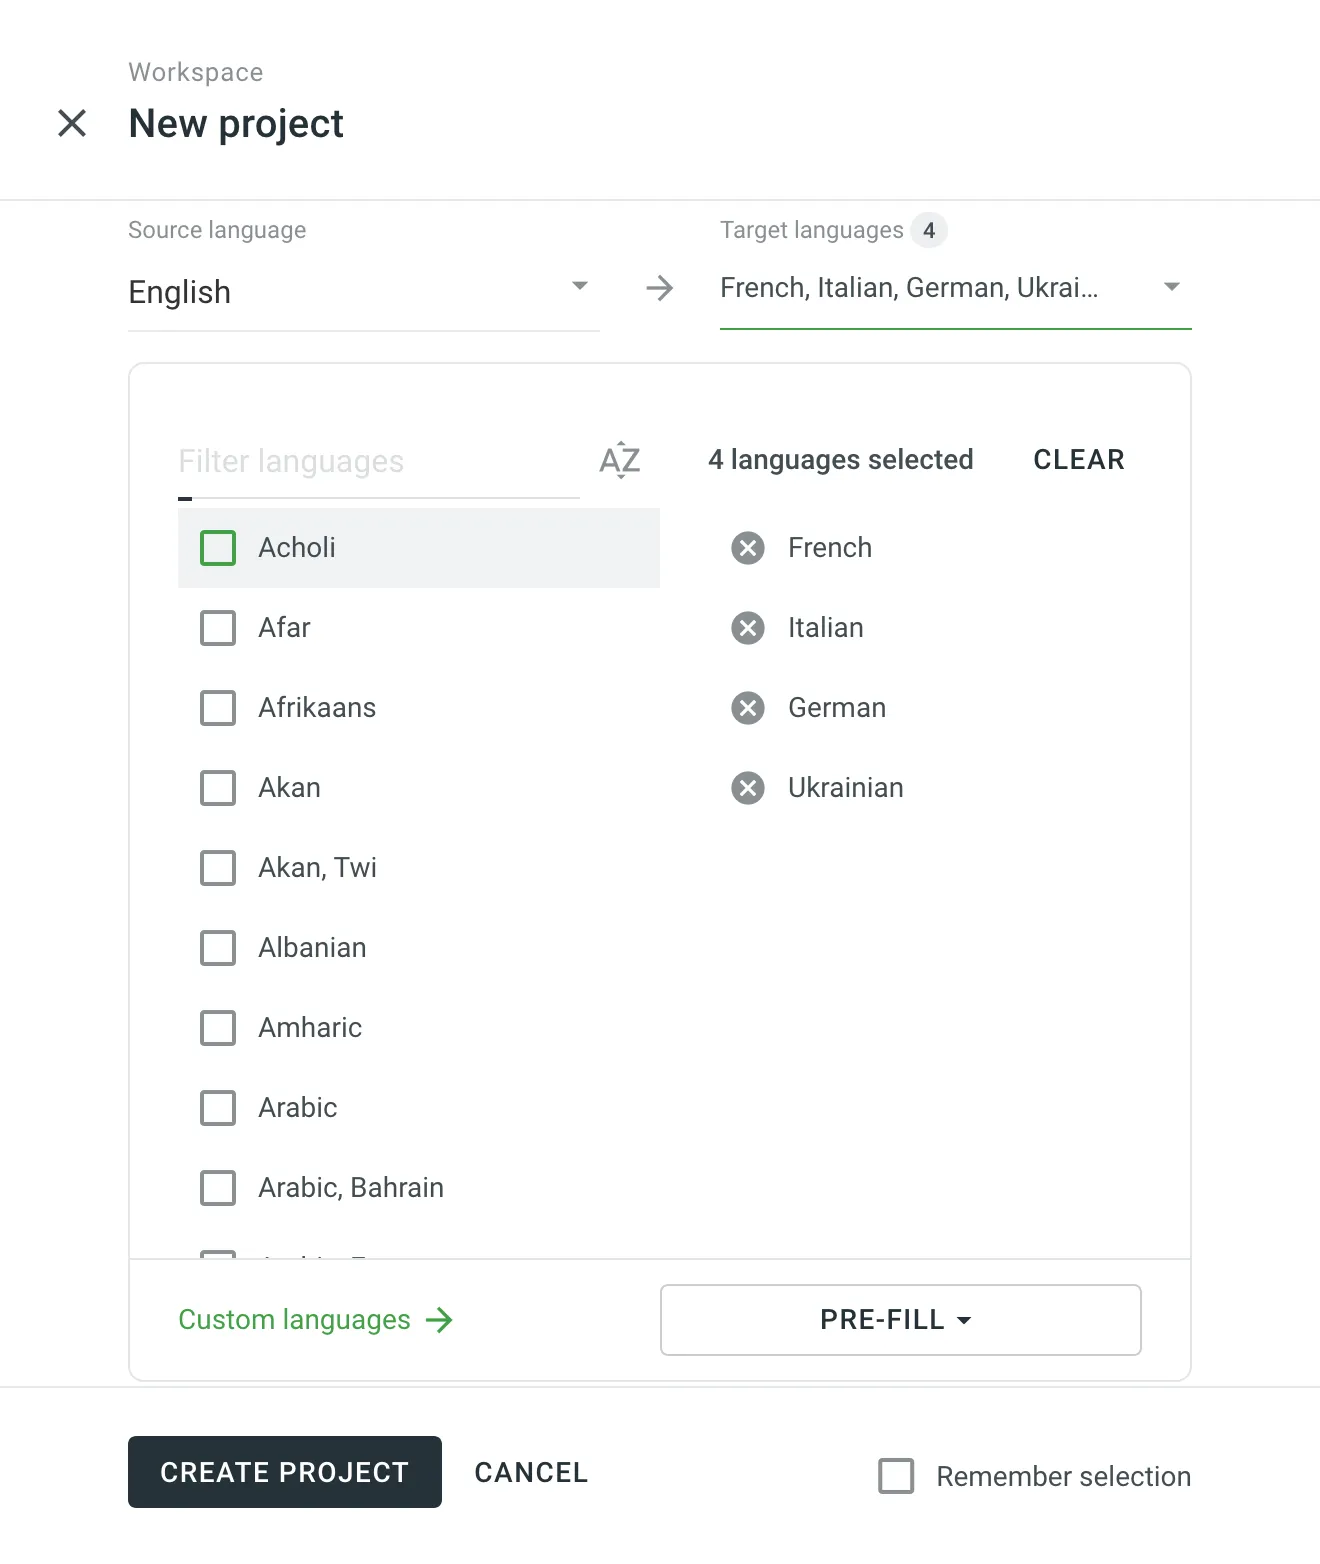 4. Decide on the project type that best fits your content and localization workflow. Select [**String-based**](#string-based-project) if you want to manage your translatable content as individual strings in a centralized repository. Otherwise, keep [**File-based**](#file-based-project) selected to work with structured source files that are preserved in the project. Caution The project type cannot be changed once the project is created. 5. *(Optional)* Assign a workflow or [create a new one](/enterprise/workflows/). For projects with an assigned workflow, you can enable the **Delay workflow start** during the project creation. This will allow you to upload existing translations and resources (TM, Glossary) before the project becomes available for translation. Once ready to start with the translation, open your project and click **Start workflow** in the **Dashboard**. Alternatively, remove the workflow to create a project without a workflow. 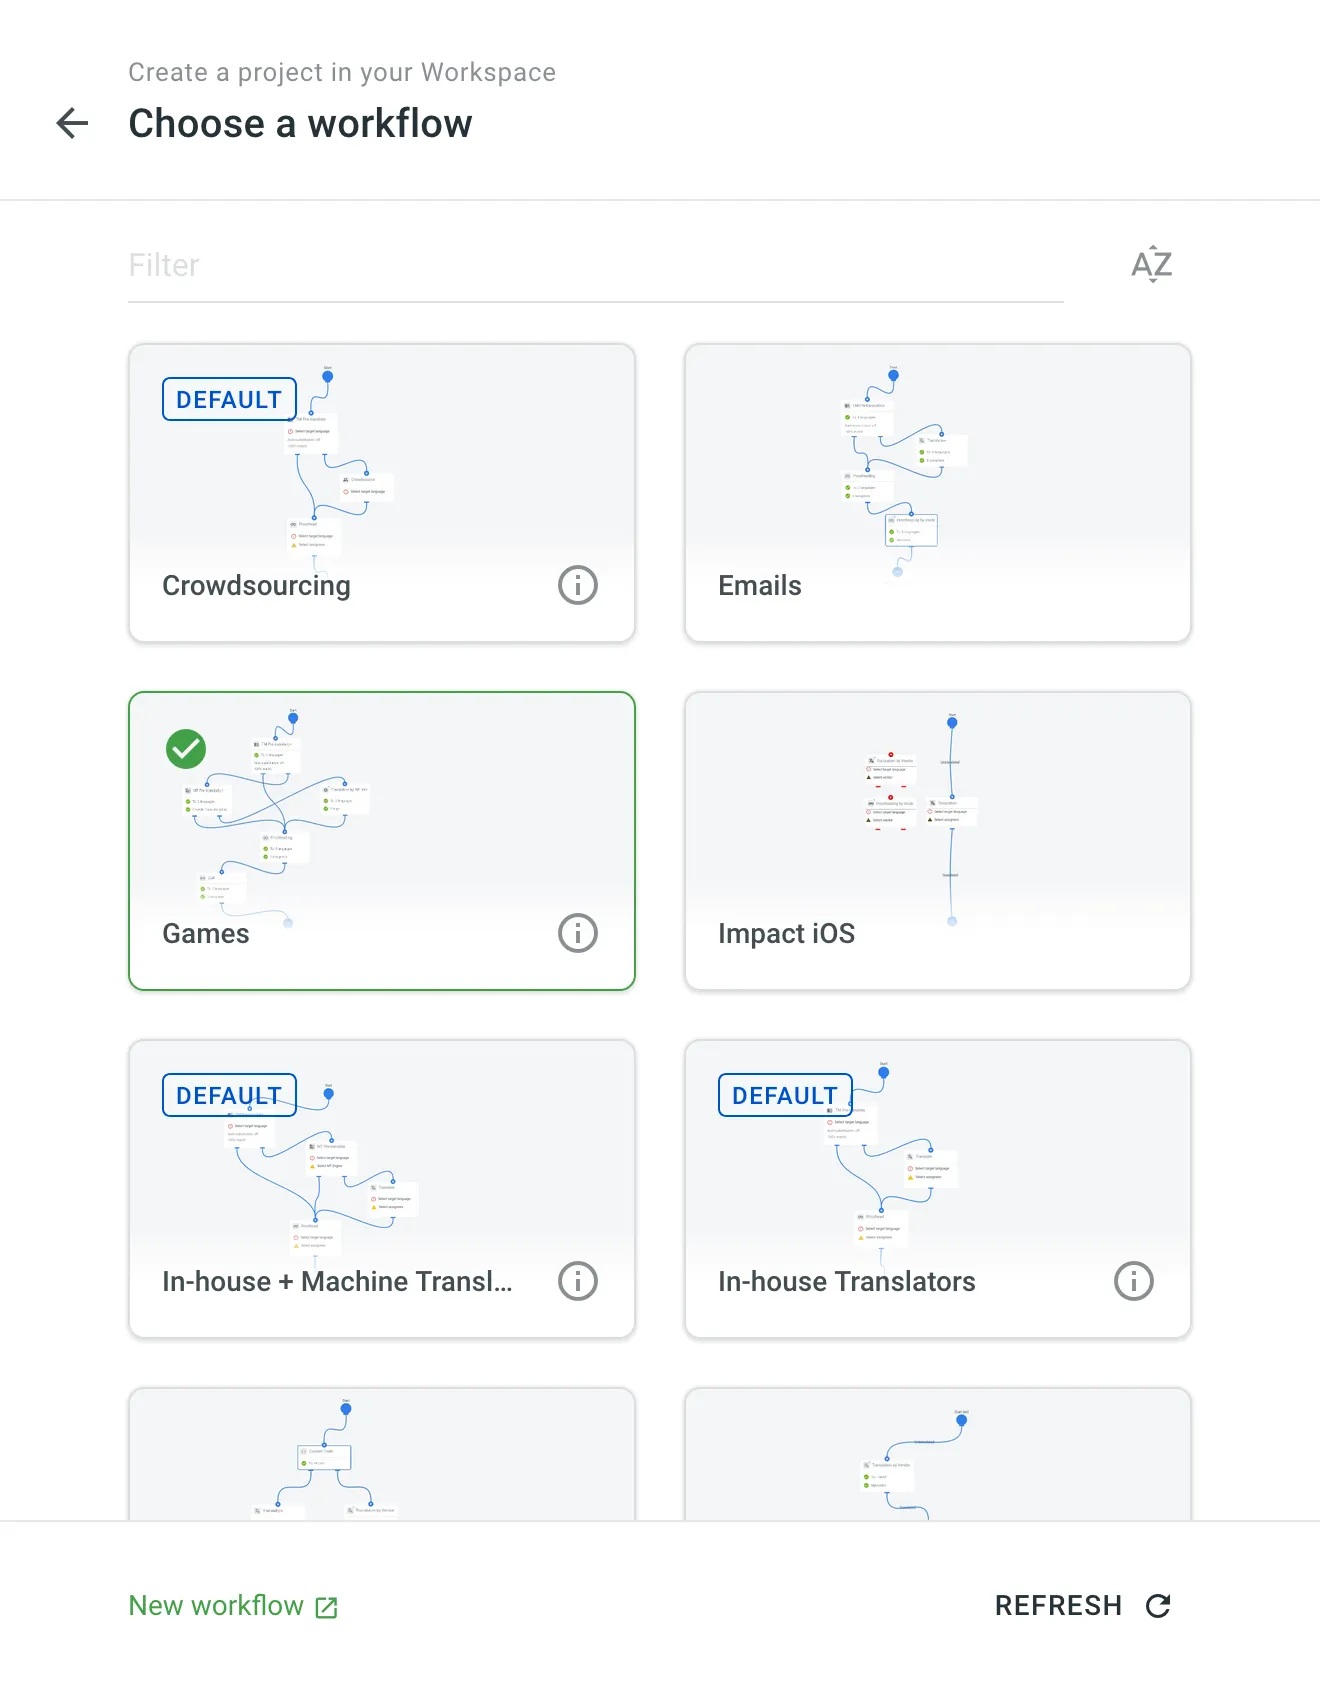 6. *(Optional)* Select an integration with your data source to help synchronize your content with Crowdin Enterprise. * If you choose an app already installed in your organization, permissions will be updated to ensure it is accessible in the new project. After the project is created, you will be redirected to the app to proceed with the setup. * If you choose a new app (not yet installed), it will be installed from the [Crowdin Store](https://store.crowdin.com/) automatically and made accessible in the new project with permissions configured to *Only admins*. After installation, you will be redirected to the app to proceed with the setup. You can adjust the app’s permissions, including role-based access and project availability, in **Organization Settings > Apps**. 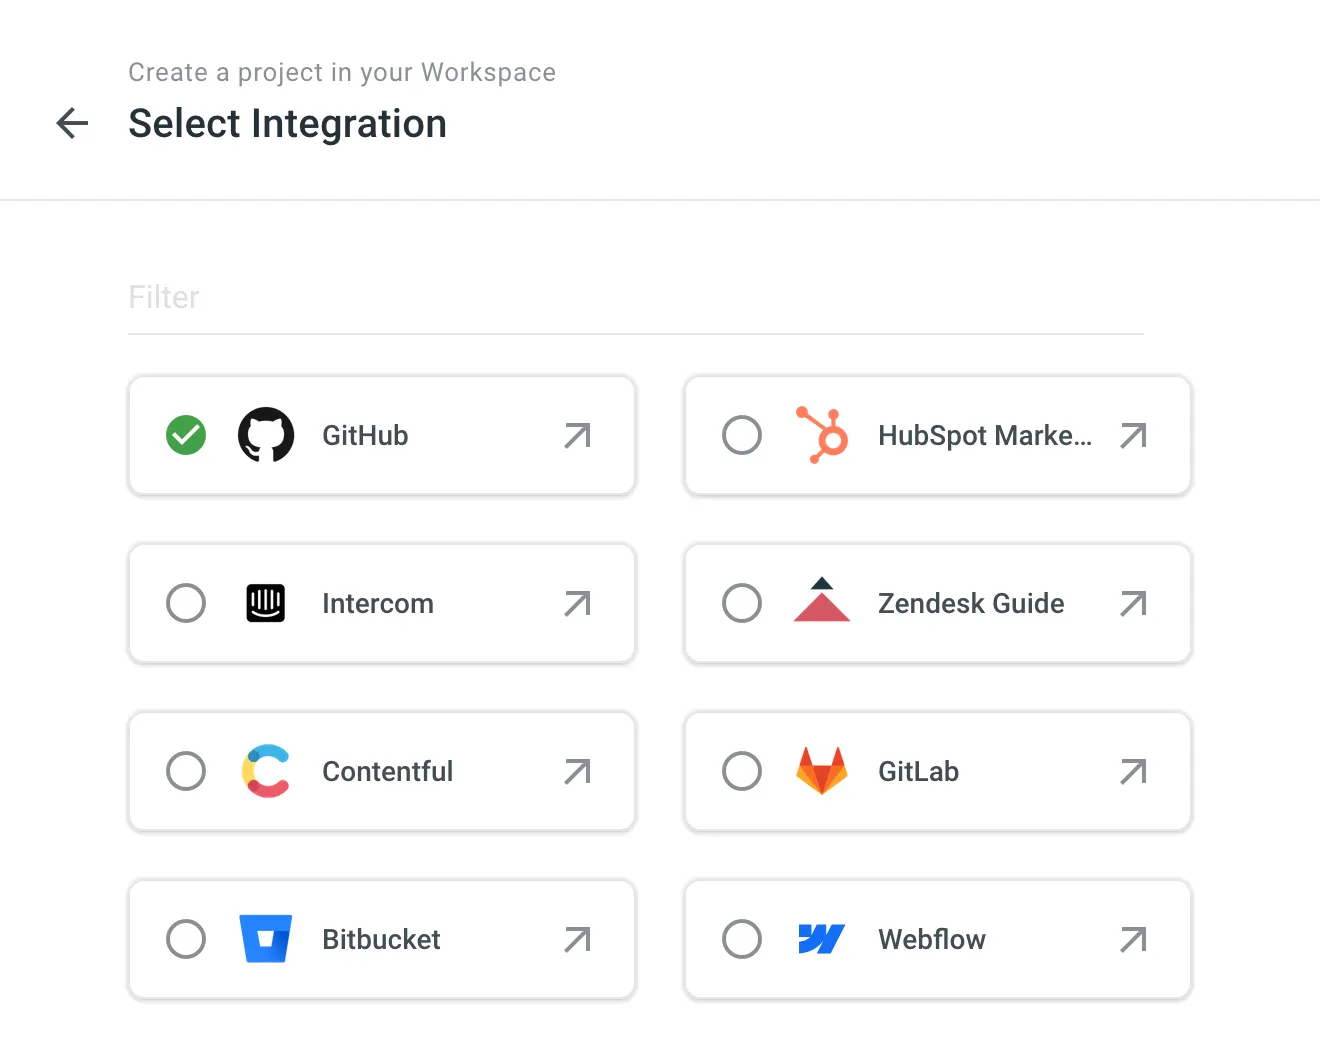 7. Select the existing TM and glossary for your new project to be used as defaults. Alternatively, to create your new project with clean resources, leave the **Create new translation memory** and **Create new glossary** options selected. You can change the [default TM](/enterprise/project-settings/translation-memories/#changing-default-tm) and [default glossary](/enterprise/project-settings/glossaries/#changing-default-glossary) in the project’s **Settings**. 8. Click **Create project**. ## [See Also](#see-also) [Section titled “See Also”](#see-also) [Uploading Source Files ](/enterprise/uploading-files/)Learn how to upload source files to your project for translation [Uploading Existing Translations ](/enterprise/uploading-translations/)Learn how to upload existing translations to your project [Project Settings ](/enterprise/project-settings/)Configure project settings according to your needs [Inviting People to Project ](/enterprise/inviting-people/)Learn how to invite people to your project
# Crowdin AI
> Powerful AI capabilities to improve localization workflows
Crowdin Enterprise integrates with top AI providers, including OpenAI, Google Gemini, Microsoft Azure OpenAI, and more, allowing you to leverage advanced AI-powered translations that consider additional context at different levels. These translations can be applied to your content with a few clicks using [pre-translation via AI](#pre-translation-via-ai). Additionally, AI in Crowdin Enterprise can be used as an [assistant in the Editor](#using-ai-in-the-editor) for translation, proofreading, and more. You can expand your AI provider options by installing respective applications from the Crowdin [Store](https://store.crowdin.com/tags/ai). ## [Configuring AI](#configuring-ai) [Section titled “Configuring AI”](#configuring-ai) Crowdin AI integration provides powerful capabilities for enhancing localization workflows. Configuring AI involves [setting up providers](#configuring-ai-providers) and [creating prompts](#configuring-ai-prompts). ### [Configuring AI Prompts](#configuring-ai-prompts) [Section titled “Configuring AI Prompts”](#configuring-ai-prompts) Prompt engineering is crucial for guiding AI in understanding context and providing accurate translations. Customizing prompts within Crowdin Enterprise ensures that AI algorithms comprehend the nuances of your project, resulting in improved translation quality. * **Contextual Prompts** – customize prompts to provide contextual information, such as project-specific terminology, style preferences, and target audience considerations. For example, include instructions on translating technical terms consistently or maintaining brand tone across languages. * **Placeholder Utilization** – incorporate placeholders to dynamically insert context-specific information into prompts, enabling AI to generate translations aligned with project requirements. * **File-Level Context** – use file-level context to provide instructions and contextual insights, enhancing AI’s understanding of content nuances. Include file descriptions, summaries, or references to glossaries and style guides. To configure AI prompts, follow these steps: 1. Open your organization’s **Workspace** and select **AI** on the left sidebar. 2. In the **Prompts** tab, click **New prompt**. Alternatively, you can go ahead with creating prompt samples clicking **Try a sample**. Crowdin allows you to quickly set up pre-configured prompts that are ready to perform effectively from the moment they are created. While these samples are designed to work good initially, you can customize them to your personal preferences. 3. In the appeared dialog, set the prompt parameters: * Select **Enabled** * Select the prompt type (i.e., [Pre-translate](#pre-translation-via-ai), [AI in editor](#using-ai-in-the-editor), [Alignment](#ai-alignment), [QA check](#ai-qa-check), or Create custom type) * Custom type name (Specific to the custom prompt type) * Title * AI Provider * AI Model * Use this prompt as the default prompt for AI in editor (Specific to the AI in editor prompt type) * Mode (i.e., Basic or Advanced) * Additional context (Basic mode) – specify which data will be included in the prompt using the following fields: * String context * String identifier (key) * Translation max. length * Other languages translations – select specific language tranlations to be considered by AI as additional context or leave this field as is to use translations from all languages. * Glossary terms – allows AI to consider domain glossary terms. * TM suggestions – allows AI to consider TM suggestions. * Previous and next strings – allows AI to consider previous and next strings for additional context. * File context – allows AI to consider a textual description of the file added in the [file settings](/enterprise/file-management/#file-context) or in the [Editor](/enterprise/online-editor/#file-context). * AI-Generated Context – automatically generate file context when it’s missing. If the file context isn’t provided manually, AI will analyze the source content and generate a contextual summary. This summary is used both during pre-translation and as reference material in the Editor. Caution This option is only available in file-based projects and requires the File context option to be enabled. * File content (Specific to the AI in editor prompt type) – allows AI to access the full file content during chat communication with the AI Assistant. The file content is added to context only when requested by AI. * Screenshots – allows AI to consider a visual context in the form of screenshots where the strings are tagged. This enhances accuracy and context awareness. Read more about [Screenshots](/enterprise/screenshots/). * Public project description – allows AI to consider public project description. * Custom placeholders – select reusable placeholders previously created in the organization’s AI settings from a drop-down menu to quickly insert standard text snippets into your prompt. * Evaluation steps (Specific to the QA check prompt type) – criteria the AI uses to evaluate translations. You can customize, remove, or create new steps tailored to your quality requirements. 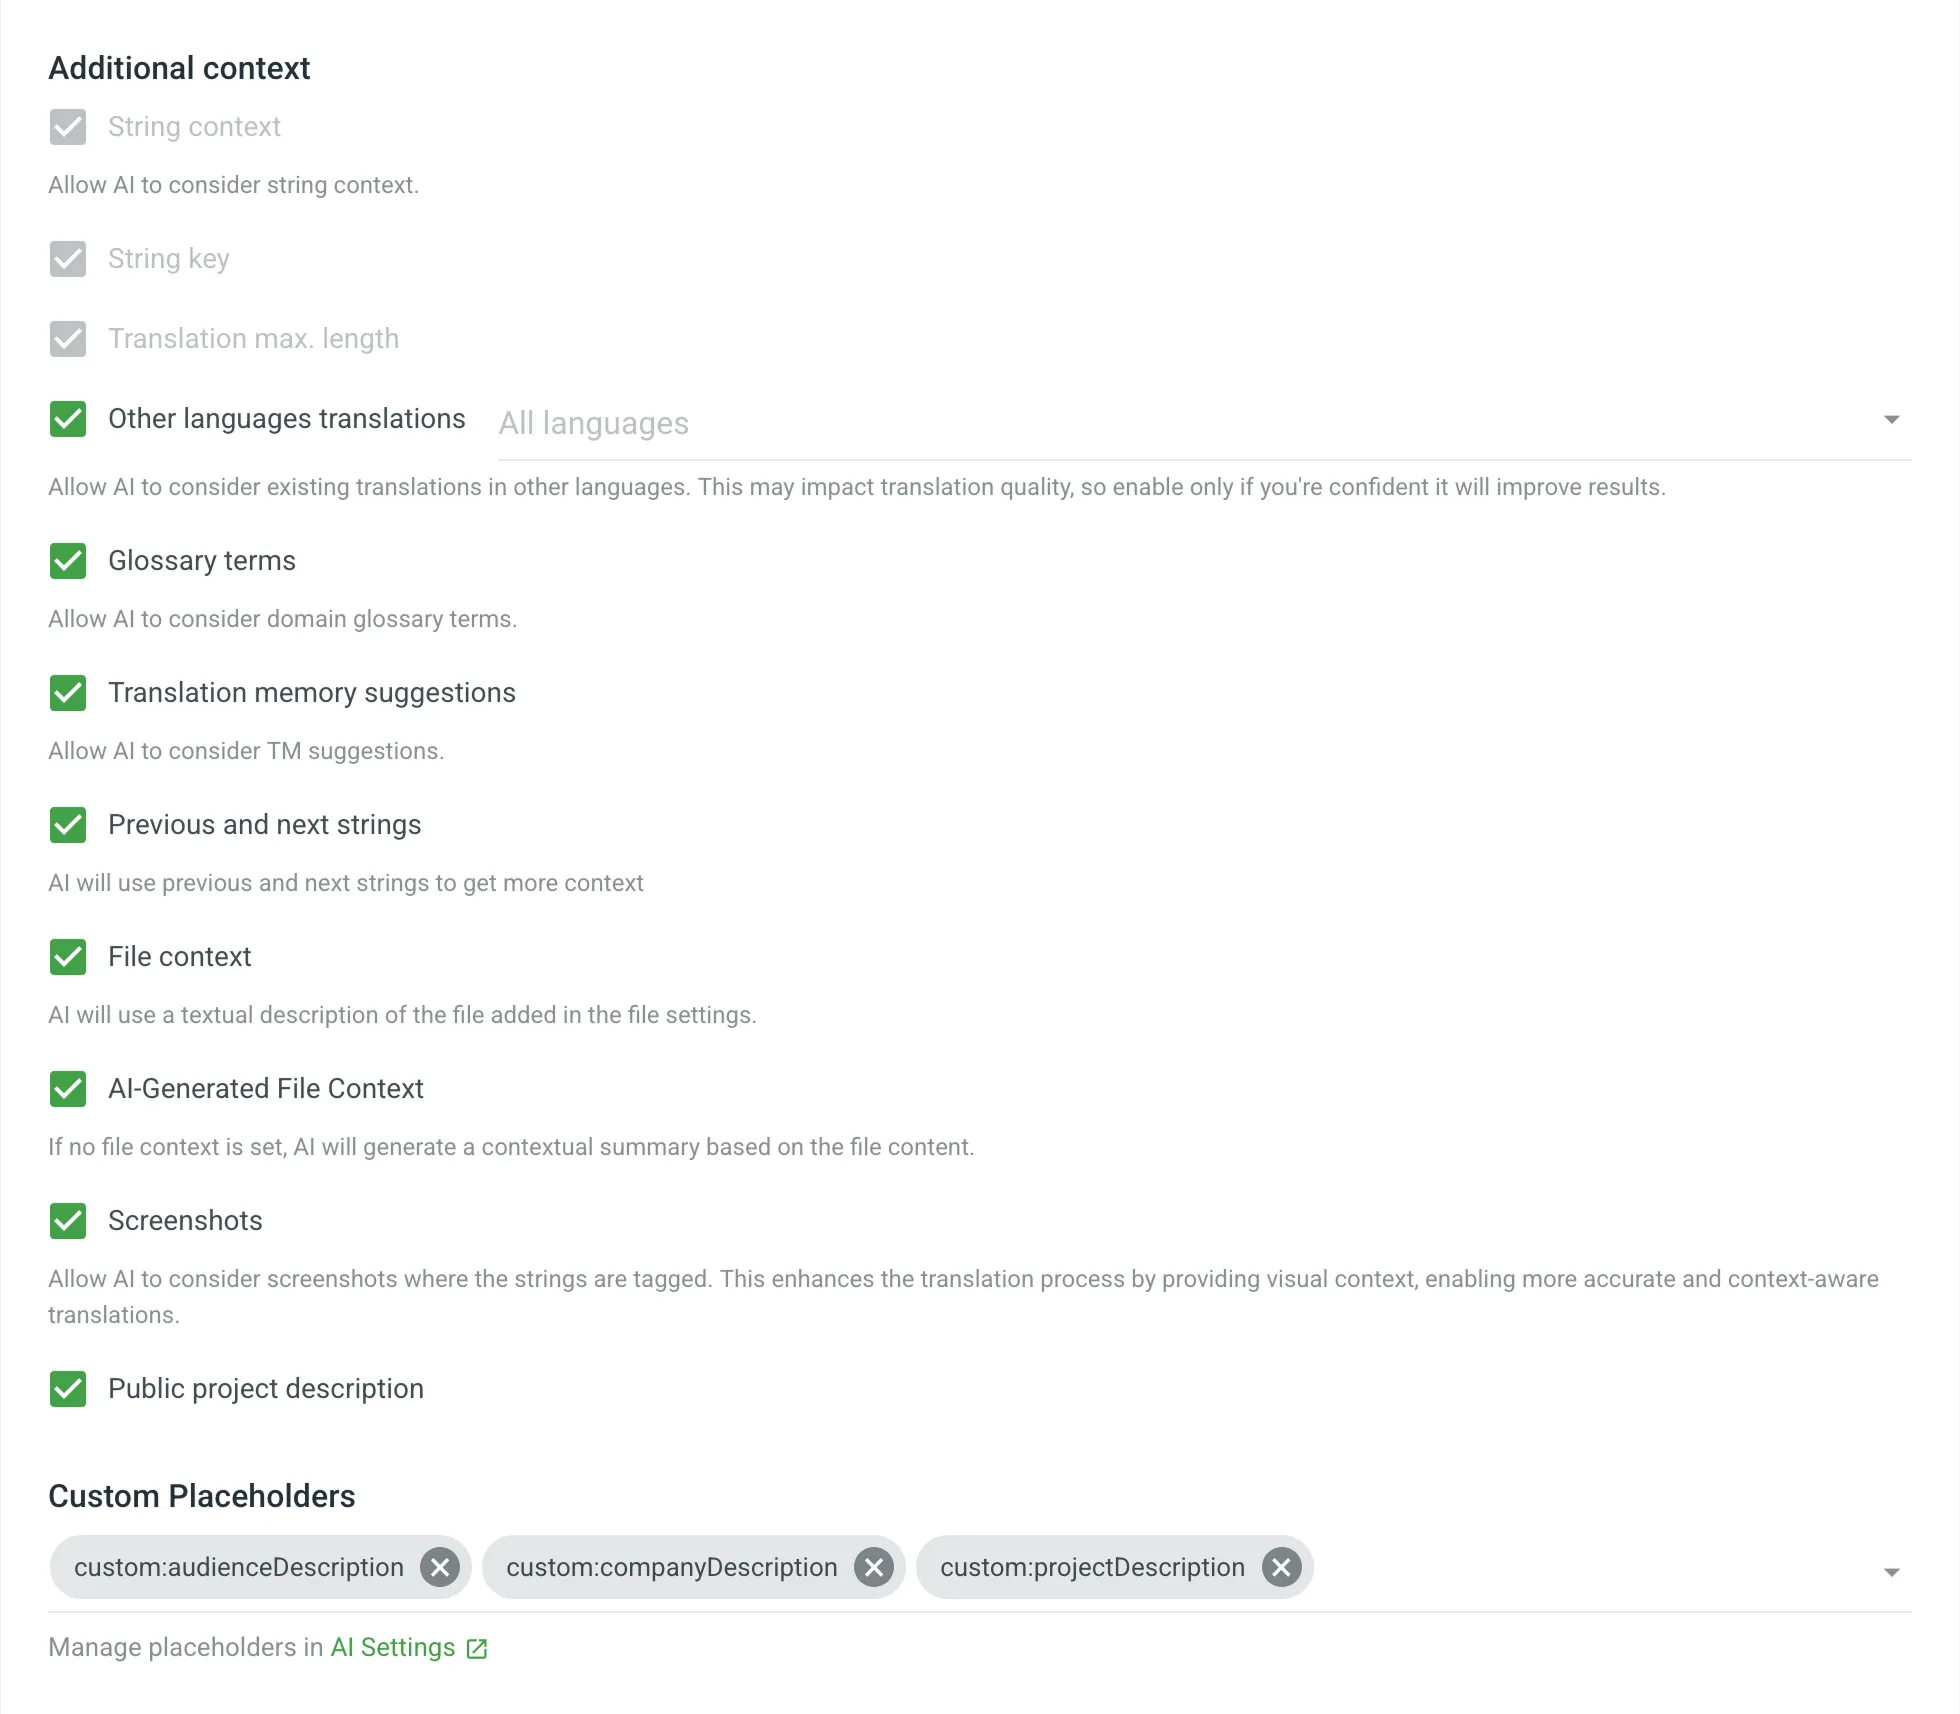 * Advanced mode – click **Advanced mode** to compose your prompt in the most precise way. While composing your prompt in the Advanced mode, you can increase translation quality by leveraging context information in your prompts using the following placeholders: * `%sourceLanguage%` – The source language of the project. * `%targetLanguage%` – The language the content is translated into. * `%targetLanguages%` – A list of all project’s target languages. * `%pluralForms%` – A list of plural forms for the target language. * `%json%` – A collection of strings for the current segment, including the string identifier (key), context, text, maximum length, and translations to other languages (if the translations placeholder is specified). * `%translationUnits%` – A list of translation units (source and translation) for the AI to evaluate during QA checks. * `%fileName%` – The file name of the current segment. * `%fileContext%` – The file context of the current segment (provided via the file settings modal in the ‘Files’ section). * `%siblingsStrings%` – The previous and next segments in the file, allowing for contextual translation. * `%filteredStrings%` – Strings that match the current filter in the Editor, provided to AI for improved evaluation accuracy and efficiency. * `%tm%` – Translation Memory (TM) matches relevant to the current segment. * `%terms%` – All the glossary terms relevant to the current segment. * `%projectName%` – Crowdin Enterprise project name. * `%projectPublicDescription%` – Project public description. * Custom placeholders – insert reusable placeholders previously defined in the organization’s AI settings by using the `%custom:placeholderName%` format. 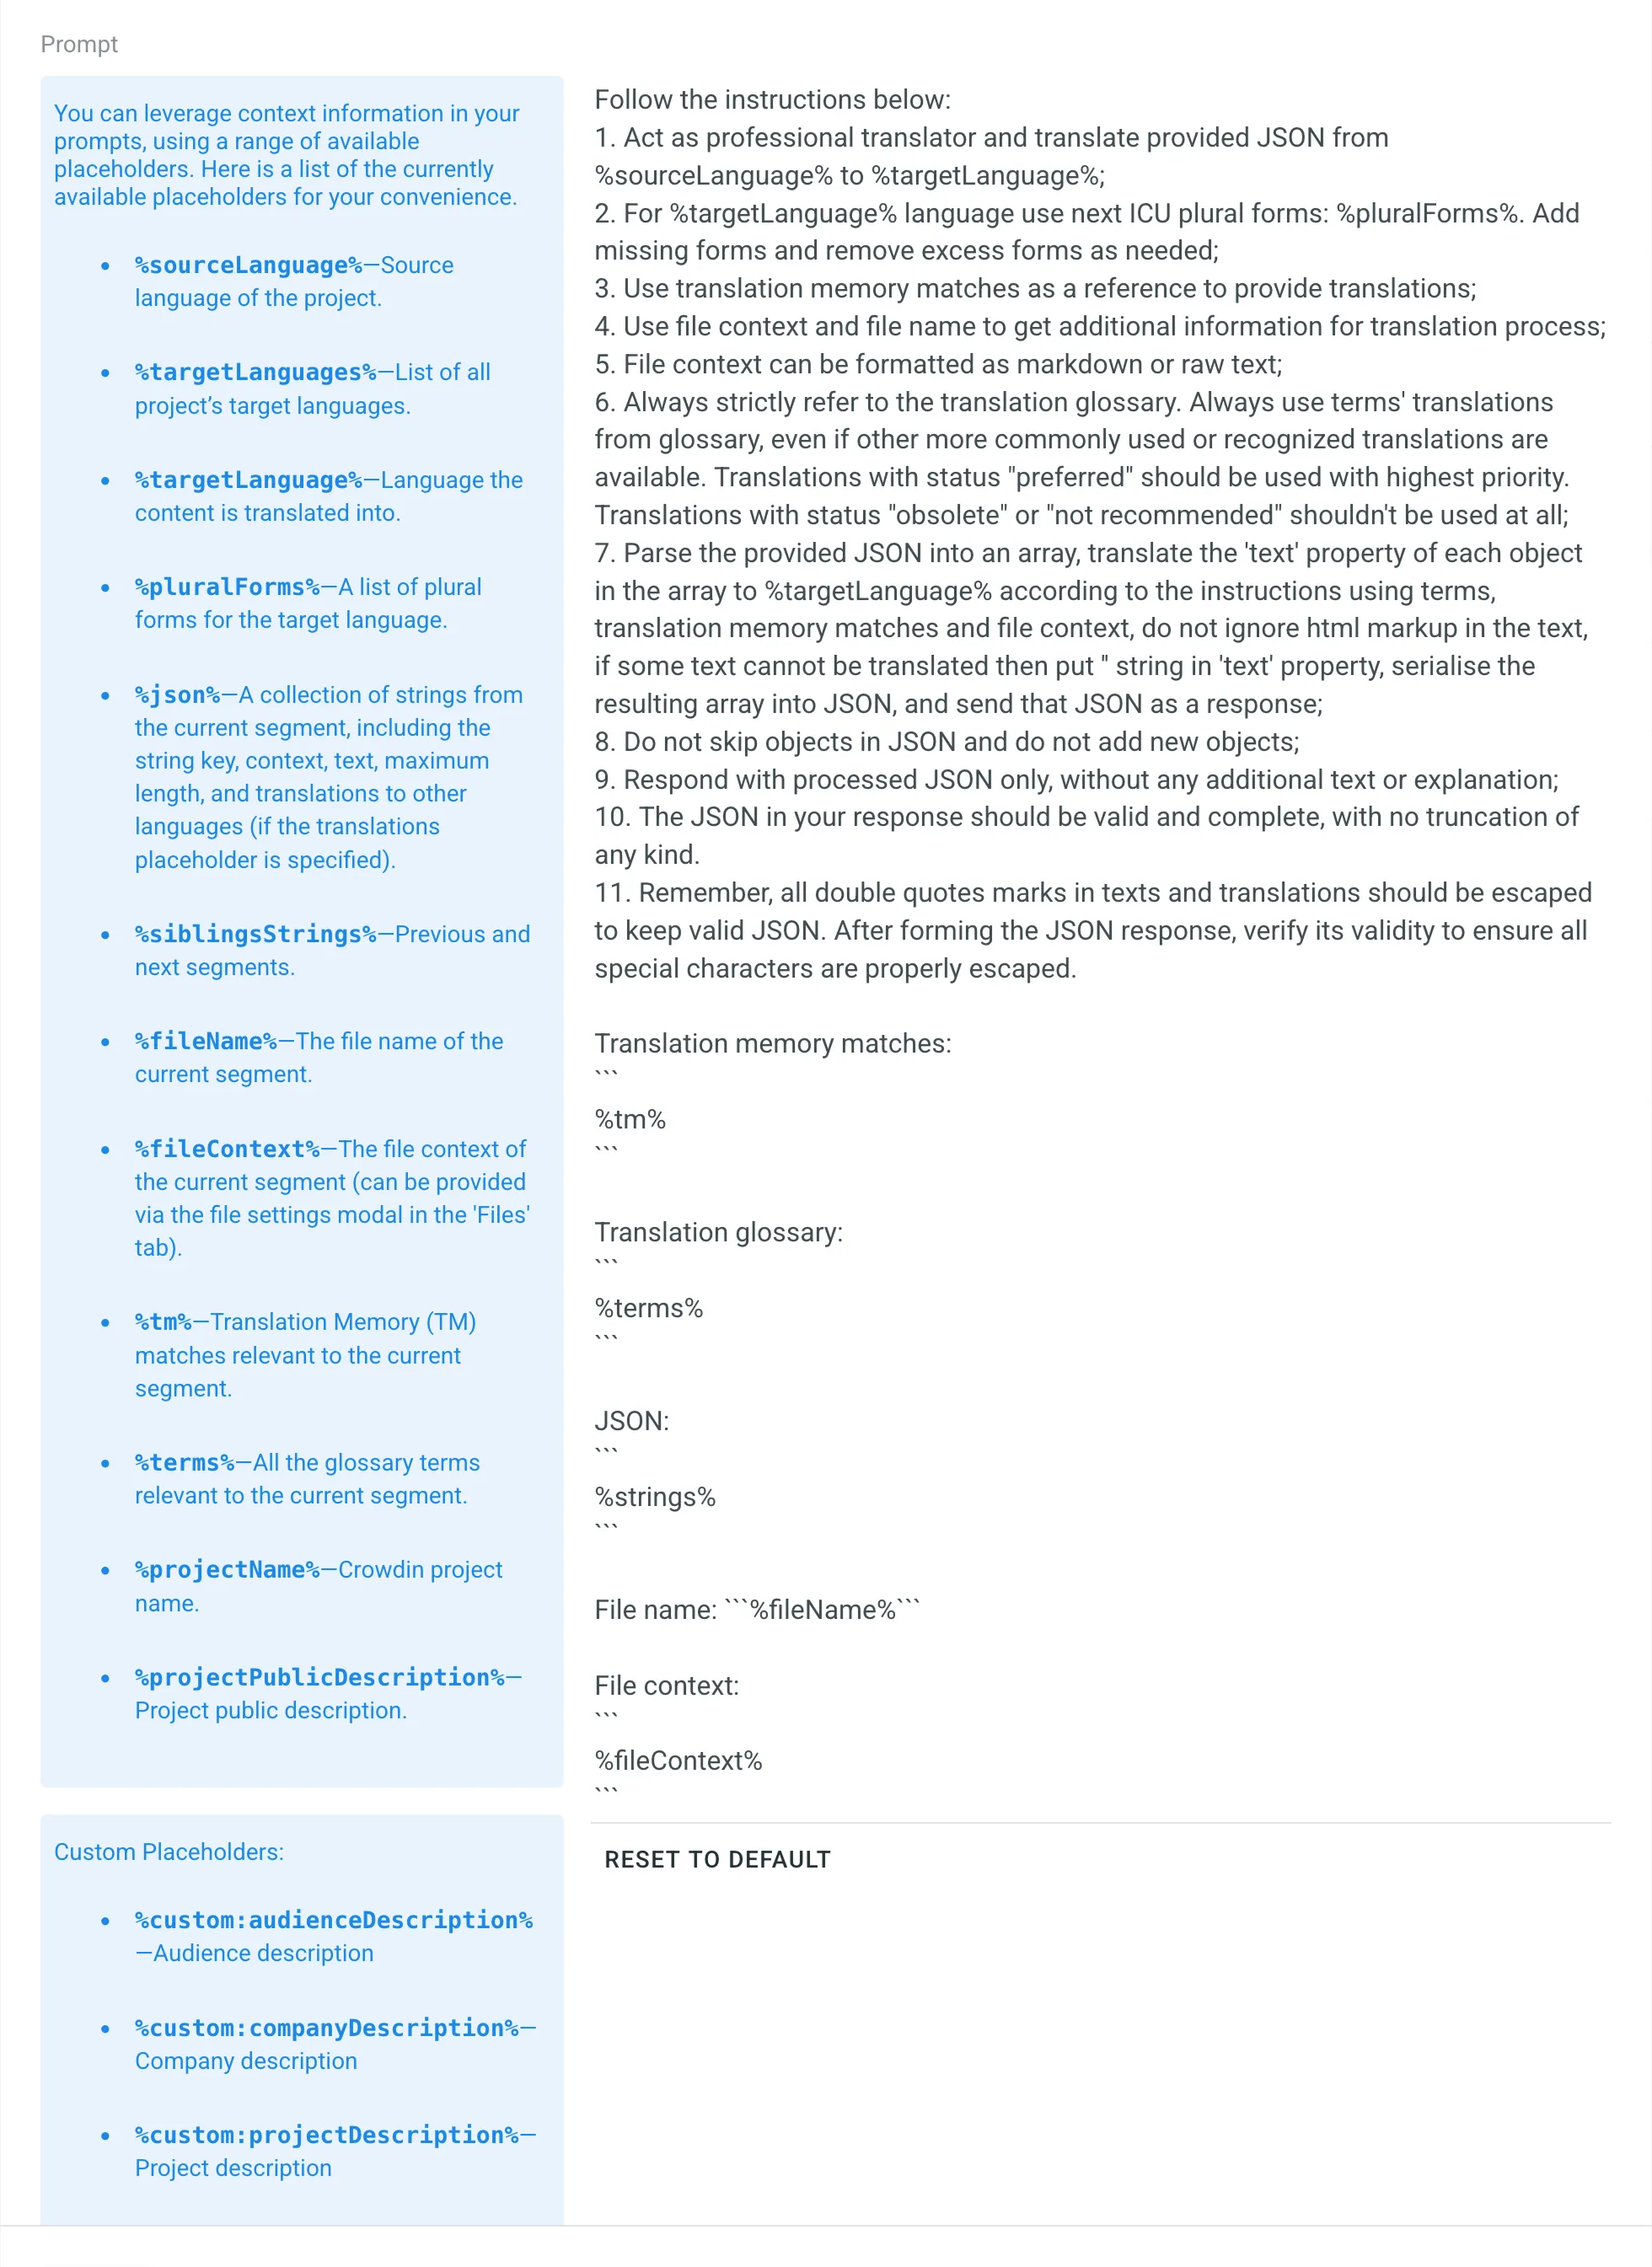 * Visibility – Select projects where a prompt can be used: * All Projects – The prompt is available in all projects. * Selected Projects – The prompt is available only in the projects you select. If no projects are selected, or if all assigned projects are later deleted, the prompt will not be available in any project. 4. Click **Create**. ### [Managing AI Prompts](#managing-ai-prompts) [Section titled “Managing AI Prompts”](#managing-ai-prompts) Managing AI prompts in Crowdin Enterprise involves various operations such as filtering and searching, editing, cloning, and deleting AI prompts. Below you can find instructions for each operation. #### [Viewing and Searching AI Prompts](#viewing-and-searching-ai-prompts) [Section titled “Viewing and Searching AI Prompts”](#viewing-and-searching-ai-prompts) Once you open the **AI** page, you can view and search for prompts in the **Prompts** tab. You can view the list of added prompts (one prompt per row) with the following details: * Title * Status * Type * Visibility By default, all prompts are displayed in the **Prompts** tab. To filter prompts displayed, click and use the available filter options: * Type: All, AI in editor, Pre-translate. * Status: All, Enabled, Disabled. To search for a particular prompt, type its title in the **Search** field. 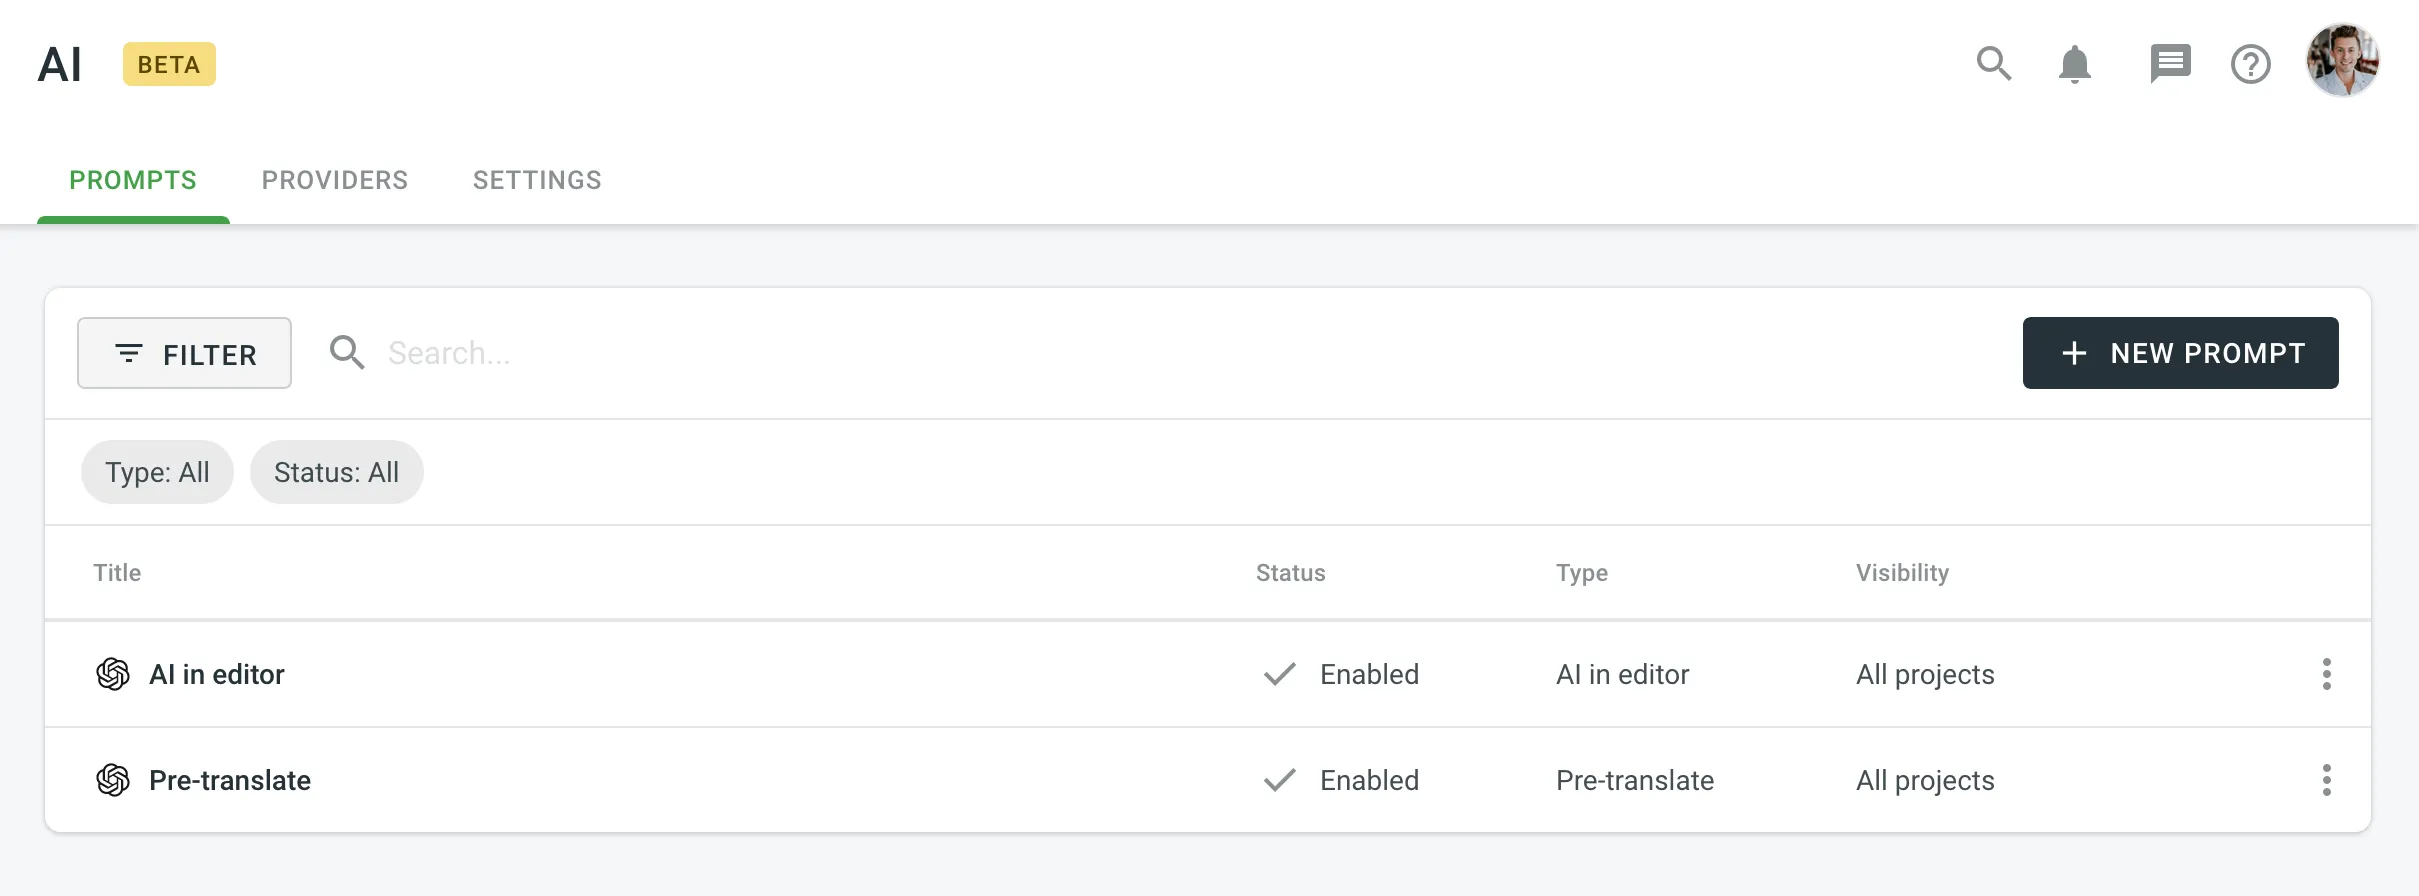 #### [Editing AI Prompts](#editing-ai-prompts) [Section titled “Editing AI Prompts”](#editing-ai-prompts) If you need to adjust your already configured prompt, you can simply edit it. To edit AI prompts, follow these steps: 1. Open your organization’s **Workspace** and select **AI** on the left sidebar. 2. In the **Prompts** tab, click toward the needed prompt and select **Edit**. 3. Modify the prompt as needed and click **Update** to save changes. Editing prompts allows you to update and improve them as needed to ensure they remain effective and aligned with your requirements. If you don’t want to lose the current prompt configuration and are uncertain about the changes, consider [cloning](#cloning-ai-prompts) your prompt and experimenting with the copy. #### [Cloning AI Prompts](#cloning-ai-prompts) [Section titled “Cloning AI Prompts”](#cloning-ai-prompts) Cloning AI prompts allows you to experiment with and refine prompt configurations without altering the original. This feature is particularly useful for testing improved versions of prompts while preserving the initial setup. To clone AI prompts, follow these steps: 1. Open your organization’s **Workspace** and select **AI** on the left sidebar. 2. In the **Prompts** tab, click toward the needed prompt and select **Clone**. 3. As a result, a copy of the prompt will appear in the prompt list. You can then [edit](#editing-ai-prompts) the cloned prompt to experiment with different configurations. This allows you to safely test enhancements and optimize performance without risking the loss of the original prompt configuration. #### [Deleting AI Prompts](#deleting-ai-prompts) [Section titled “Deleting AI Prompts”](#deleting-ai-prompts) Deleting AI prompts is a straightforward process, but it should be done with caution to avoid losing valuable configurations. This action is useful when you no longer need a specific prompt or want to clean up unused prompts. To delete AI prompts, follow these steps: 1. Open your organization’s **Workspace** and select **AI** on the left sidebar. 2. In the **Prompts** tab, click toward the needed prompt and select **Remove**. 3. Confirm the deletion. ### [Configuring AI Providers](#configuring-ai-providers) [Section titled “Configuring AI Providers”](#configuring-ai-providers) Crowdin Enterprise supports various AI providers, each offering unique models and features for translation tasks. By configuring providers, you can tailor AI functionality to suit your specific localization needs. Whether using managed by Crowdin services or integrating your own API keys, Crowdin Enterprise enables seamless integration with AI services. In the **Providers** tab, you can view the list of providers with the following details: * **Name** * **Status**: Enabled, Disabled. * **Managed by Crowdin**: yes, no. * **Prompts**: if there are one or more prompts configured with a particular provider, you’ll see the actual number of prompts, otherwise you’ll see the **Create** button that redirects to the prompt creation dialog. Crowdin AI providers are categorized into two types. System providers (e.g., OpenAI, Microsoft Azure OpenAI, Google Gemini) are built-in and available for immediate configuration. Additionally, you can expand your options by installing other AI providers from the Crowdin Store. Currently, Crowdin Enterprise supports the following AI providers: * OpenAI System * Microsoft Azure OpenAI System * Google Gemini System * Mistral AI System * Anthropic System * xAI System * IBM Watsonx System * DeepSeek System * [Groq](https://store.crowdin.com/groq) * [Cloudflare Workers AI](https://store.crowdin.com/cloudflare-workers-ai) * [Fireworks AI](https://store.crowdin.com/fireworks-ai) * [Together AI](https://store.crowdin.com/together-ai) * [OpenRouter](https://store.crowdin.com/openrouter) * [Cohere](https://store.crowdin.com/cohere) * [Replicate](https://store.crowdin.com/replicate) * [Credal](https://store.crowdin.com/credal) * [AWS Bedrock](https://store.crowdin.com/aws-bedrock) New AI providers are added regularly. When configuring AI providers, you can choose from two possible options: * **Use your own API keys** – Crowdin recommends this option if data security is a concern and for enhanced privacy and ownership. This option requires an external registration for getting API keys/credentials from AI providers. * **Use Managed by Crowdin service** – simplified AI integration without the need to manage your own API keys. Allows you to leverage Crowdin’s default settings and infrastructure to access AI capabilities in a convenient way. Ideal for straightforward, quick tasks. To start using AI providers managed by Crowdin, you just need to add funds to your balance. To configure an AI provider, follow these steps: 1. Open your organization’s **Workspace** and select **AI** on the left sidebar. 2. In the **Providers** tab, click toward the needed provider and select **Edit**. Alternatively, just click on the needed provider. 3. Select **Enabled**. 4. *(Optional)* Select the **{Provider} managed by Crowdin** option if you’d like to use the providers managed by Crowdin. In this case, you’ll need to [add funds to your account balance](#adding-funds-to-account-balance). 5. Specify your own AI provider API key. Follow AI provider instructions on how to generate an API key. 6. AI providers like Google Gemini and Microsoft Azure Open AI have slightly different configuration options compared to others: * Project ID (Specific to Google Gemini and IBM Watsonx) * Region (Specific to Google Gemini and IBM Watsonx) * Service Account Key (Specific to Google Gemini) * Resource name (Specific to Microsoft Azure Open AI) * Deployment name (Specific to Microsoft Azure Open AI) * API Version (Specific to Microsoft Azure Open AI) 7. Click the **Advanced settings** to access the model-related settings: * In the **Models** section, for each prompt type (i.e., Pre-translate and Ai in editor), select the preferred models you’d like to use from the drop-down menu or leave these fields as is to use all available models. * **Override Base URL** – Allows you to direct AI provider requests to a custom or region-specific endpoint rather than the default URL. Use this if you have a dedicated instance, compliance requirements, or need to route requests to a specific environment. Otherwise, you can leave this field blank. 8. Click **Update**. 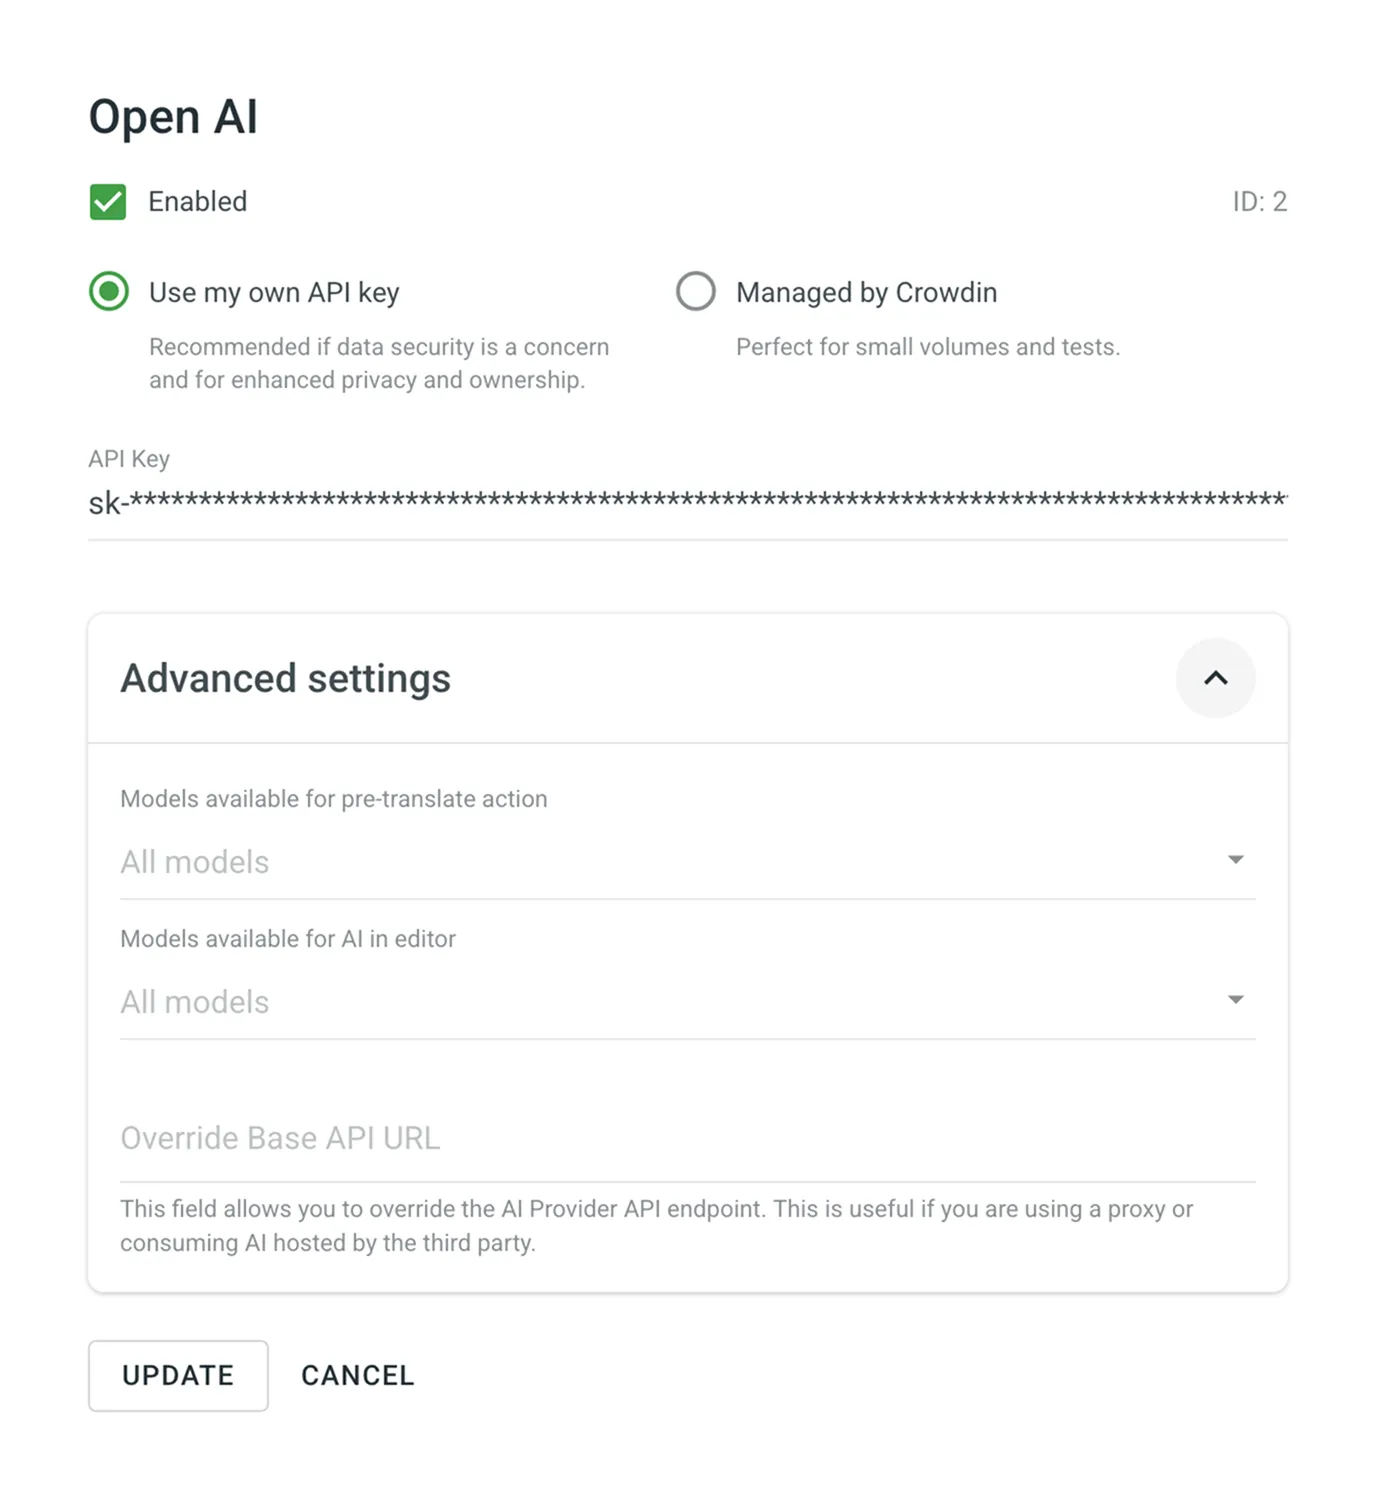 ### [Disabling AI Providers](#disabling-ai-providers) [Section titled “Disabling AI Providers”](#disabling-ai-providers) If needed, you can disable any of the previously enabled providers at any time. To disable the AI provider, follow these steps: 1. Open your organization’s **Workspace** and select **AI** on the left sidebar. 2. In the **Providers** tab, click toward the needed provider and select **Disable**. Alternatively, click on the needed provider and clear **Enabled** in the provider’s settings. ### [Adding Funds to Account Balance](#adding-funds-to-account-balance) [Section titled “Adding Funds to Account Balance”](#adding-funds-to-account-balance) MT engines and AI models managed by Crowdin are separately paid services. To use them, you first need to add funds to your Crowdin Enterprise account balance. Read more about [Adding Funds to Account Balance](/enterprise/crowdin-managed-services/#adding-funds-to-account-balance). ### [AI Settings for the Organization](#ai-settings-for-the-organization) [Section titled “AI Settings for the Organization”](#ai-settings-for-the-organization) To configure default AI settings across your Crowdin Enterprise organization, open your organization’s **Workspace** and go to **AI > Settings**. These default settings can be overridden for each project individually in the project’s **Settings > AI > Settings** as needed. #### [AI Assistant in editor](#ai-assistant-in-editor) [Section titled “AI Assistant in editor”](#ai-assistant-in-editor) Select the default prompt for interactions with AI Assistant in the Editor across all projects in your Crowdin Enterprise organization. #### [AI Suggestion in editor](#ai-suggestion-in-editor) [Section titled “AI Suggestion in editor”](#ai-suggestion-in-editor) Select the default prompt for AI suggestions that will appear in the Editor across all projects in your Crowdin Enterprise organization. If no organization-wide setting is configured and no prompt is manually selected for a specific project, AI suggestions will not be displayed in the Editor for that project. Once a prompt is selected, Crowdin Enterprise will use it to generate and display translation suggestions in the Editor. Caution Using **AI Assistant in editor** and **AI Suggestion in editor** may increase token usage. #### [AI Alignment](#ai-alignment-organization-settings) [Section titled “AI Alignment”](#ai-alignment-organization-settings) When enabled, [AI Alignment](#ai-alignment) automatically generates bilingual draft terms based on the translations made in the project, providing additional context for both human translators and AI. This feature enhances translation accuracy and consistency without requiring additional input. #### [AI QA Check](#ai-qa-check-organization-settings) [Section titled “AI QA Check”](#ai-qa-check-organization-settings) Select the default prompt for AI-powered QA checks across all projects in your Crowdin Enterprise organization. If no organization-wide setting is configured and no prompt is manually selected for a specific project, the AI-powered check will not be applied in that project. Once a prompt is selected, Crowdin Enterprise will use it to automatically detect and suggest fixes for translation issues during the translation process. #### [Shortcuts for chat with AI in editor](#shortcuts-for-chat-with-ai-in-editor) [Section titled “Shortcuts for chat with AI in editor”](#shortcuts-for-chat-with-ai-in-editor) Shortcuts provide quick actions in the Editor to start AI interactions. Create shortcuts with specific instructions for the AI to quickly access frequently used actions across projects. These shortcuts are global, applying to all projects within your organization, although individual users can create their own in the **Editor Settings > AI** tab. In the **Shortcuts for chat with AI in editor** section, you can view shortcuts with the following details: * Name – shortcut name. * Status – indicates whether the shortcut is enabled or disabled. * Prompt – the prompt text associated with the shortcut. Click on the necessary shortcut to open the context menu. Using the available options, you can do the following: * **Edit** – update the shortcut name and prompt text. * **Enable** – enable the shortcut. * **Disable** – disable the shortcut. * **Delete** – delete the shortcut. Use the **Search** field to search for specific shortcuts. To create a new global shortcut that will be available for all projects in your organization, follow these steps: 1. Click **Add shortcut** in the **Shortcuts for chat with AI in editor** section. 2. In the appeared dialog, select **Enabled**. 3. Specify a shortcut name and a prompt text it will be using. 4. Click **Create**. [AI Prompts in the Project Settings ](/enterprise/project-settings/ai/)Configure and manage AI Prompts for use in a project. #### [Custom Placeholders for AI Prompts](#custom-placeholders-for-ai-prompts) [Section titled “Custom Placeholders for AI Prompts”](#custom-placeholders-for-ai-prompts) Custom placeholders are reusable elements you can add to multiple AI prompts. They allow you to manage commonly used text snippets, descriptions, or instructions from a single location, ensuring consistency across prompts and saving time. In the **Custom Placeholders for AI Prompts** section, you can view placeholders with the following details: * **Placeholder** – the unique identifier used to insert the placeholder into prompts. * **Description** – a brief explanation of the placeholder’s purpose. * **Created at** – date the placeholder was created. Use the **Search** field to quickly find specific placeholders. To create a new custom placeholder for AI prompts, follow these steps: 1. Click **Add Custom Placeholder** in the **Custom Placeholders for AI Prompts** section. 2. In the appeared dialog, specify: * Placeholder identifier (automatically prefixed with `custom:`). * A brief description for easy identification. * The placeholder value (the actual text inserted into prompts). 3. Click **Save**. To edit or delete a custom placeholder, follow these steps: 1. Click on the desired placeholder. 2. Choose the action: * **Edit** – update the placeholder’s description and value, then click **Save**. * **Delete** – confirm the action to permanently remove the placeholder. Once created, placeholders are immediately available for use in both Basic and Advanced prompt modes across all your organization’s projects. ## [Pre-translation via AI](#pre-translation-via-ai) [Section titled “Pre-translation via AI”](#pre-translation-via-ai) Pre-translation via AI allows you to use AI Models to pre-translate your content with high-quality, context-aware translations. [Pre-translation ](/enterprise/pre-translation/)Explore various pre-translation options to speed up your project localization. ## [Using AI in the Editor](#using-ai-in-the-editor) [Section titled “Using AI in the Editor”](#using-ai-in-the-editor) After configuring a prompt with the **AI in editor** type, Crowdin AI can be used in the Editor as an AI Assistant for translators and proofreaders. The AI Assistant works in a chat format, allowing you to send prompts and receive replies. The AI Assistant is context-aware, meaning it automatically considers the string the translator is working on, the related glossaries, TM matches, the maximum acceptable length of the translation, the related screenshots, and more. This contextual awareness enables the AI Assistant to provide more accurate and relevant assistance. Here are some tasks the AI Assistant can help with: * **Correcting TM suggestions** - If you get a 60% match, the AI Assistant can improve the remaining 40%, ensuring consistency with your terminology and previous translations. * **Serving as an advanced dictionary** - The AI Assistant can provide term definitions, translation variants, synonyms, and more. * **Suggesting translations** - Similar to other MT tools, the AI Assistant can suggest translations that you can refine based on your specific needs or save as is. * **Summarizing content** – For example, when translating knowledge base articles, it can generate short summaries to help you understand the content before translating. To start using the AI Assistant, click the **AI Assistant** section in the right sidebar of the Editor. You can also interact with the AI Assistant faster using context-aware shortcuts. When you hover over an AI, TM, or MT suggestion in the Context and Translations section, the **Discuss suggestion with AI** button appears. Click it to open the chat with the suggestion already prefilled. To see what context is passed to the AI, click the **Show AI context** button in the AI Assistant panel header. This opens a modal that displays the full scope of context available to the AI, including the selected string, TM matches, glossary terms, file name, surrounding strings, filtered strings, project description, plural forms, and more.  For even faster and more efficient interaction with the AI Assistant, you can use prompt shortcuts. By default, three prompt shortcuts are available: * Rephrase * Shorten * Translate all To add your own prompt shortcuts, follow these steps: 1. Click in the upper-right corner to open the AI settings. 2. Click **Add shortcut**. 3. Specify a shortcut name and a prompt it will use. 4. Click **Save**. Additionally, in the **Editor Settings > AI** tab, you can create a custom prompt to provide the AI Assistant with a specific set of instructions that are sent each time you make a request. Note that the custom prompt is project-specific. 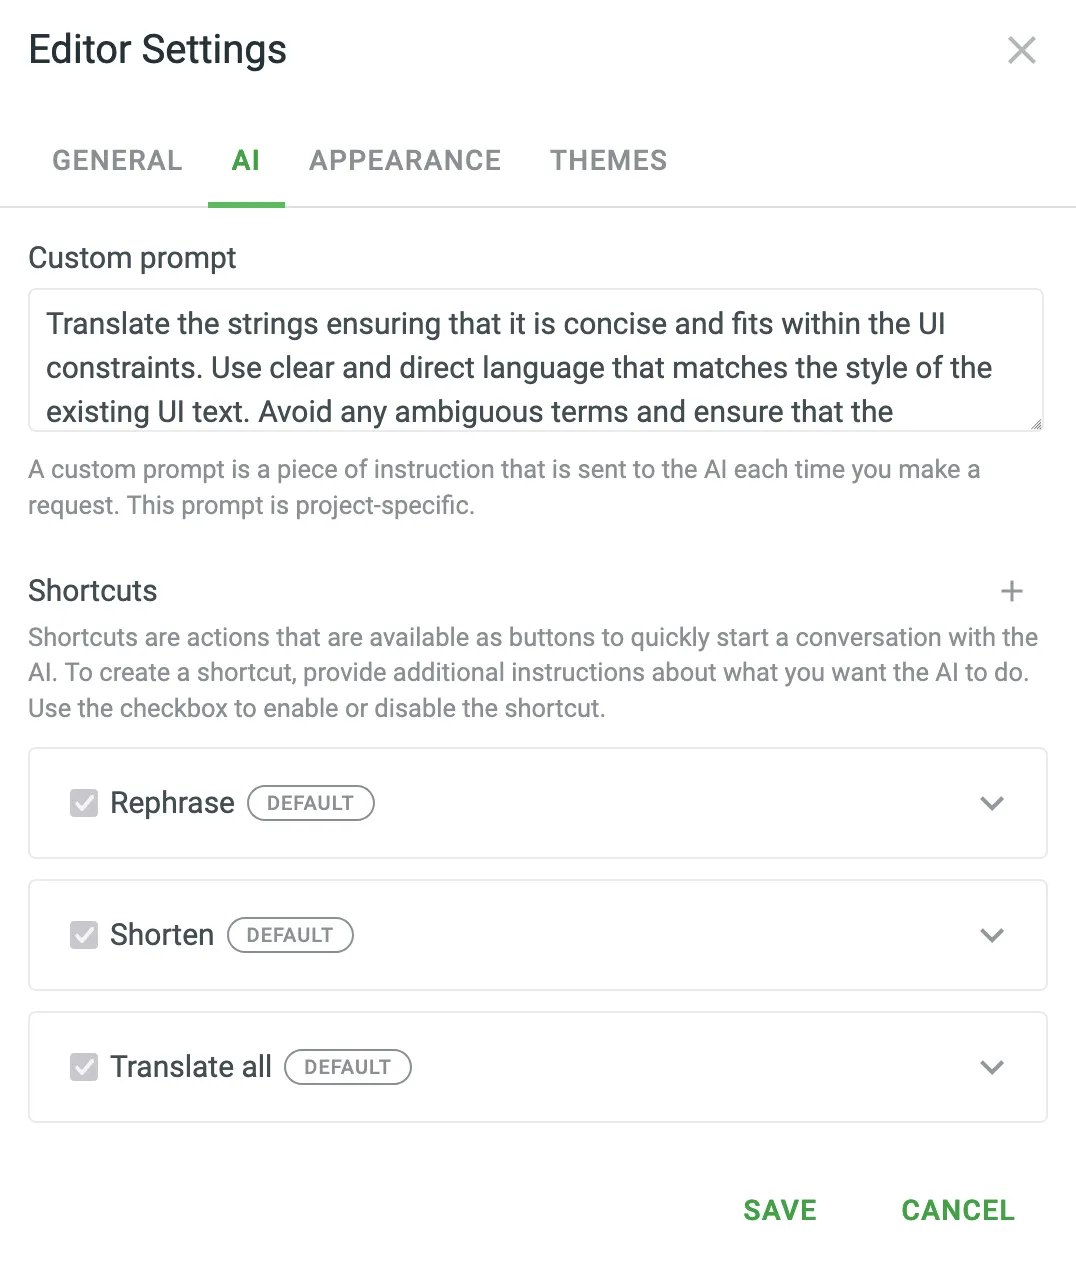 When sending prompts to the AI Assistant, the instruction priorities are considered in the following order: 1. Instructions specified in the [**AI in editor** prompt settings](#configuring-ai-prompts). 2. Instructions specified in the custom prompt settings. 3. Instructions specified in the prompt shortcut or manually entered in the AI Assistant chat. ## [AI Alignment](#ai-alignment) [Section titled “AI Alignment”](#ai-alignment) AI Alignment uses AI to analyze human translations, automatically generating glossary term drafts based on recurring terminology patterns. These terms add valuable context for both translators and AI, supporting consistent terminology across all project translations. Note that AI Alignment only analyzes translations submitted by users in the Editor or those uploaded to the project; pre-translations are not considered. ### [How AI Alignment Works](#how-ai-alignment-works) [Section titled “How AI Alignment Works”](#how-ai-alignment-works) When a translator submits a translation, AI Alignment analyzes the terminology used to identify and suggest draft glossary terms. This process involves reviewing translations for recurring terms and phrases that represent core project terminology. AI Alignment then generates glossary records in simplified forms (e.g., `location` rather than `locations`) to create a unified set of terms for the project. For example, in a project with the source string `Remove this location`, the initial AI suggestion for translation might be `Видалити це місце`. However, a human translator chooses `Видалити цю локацію`, using `локація` consistently for `location`. Based on this choice, AI Alignment creates a draft glossary term that pairs `location` with `локація`. Later, when another source string `Add location` is translated, the AI now aligns with this glossary term and suggests `Додати локацію`, ensuring consistency. This will happen if the AI Prompt for AI Suggestion in editor is set to consider glossary terms. Additionally, when human translators encounter source strings that contain `location`, they will see the glossary term `location` along with its translation `локація`. This helps translators use the preferred terminology, enhancing consistency across the project. If an existing term differs from the suggested AI translation, AI Alignment will add a draft term to the current record, allowing project managers to review and confirm preferred terminology. This approach ensures new terms don’t overwrite or conflict with established glossary records. ### [Setting Up AI Alignment](#setting-up-ai-alignment) [Section titled “Setting Up AI Alignment”](#setting-up-ai-alignment) To use AI Alignment, [configure a prompt](#configuring-ai-prompts) with the **Alignment** type and [apply it](/enterprise/project-settings/ai/#selecting-ai-prompts) to the needed projects. This prompt type enables AI Alignment to process and generate draft glossary terms as translators add their translation suggestions. In Advanced mode, project managers can further customize specific criteria for generating glossary terms from translations. This includes filtering terms to draft only those relevant to specific domains or adjusting tolerance levels to minimize irrelevant suggestions. Such customization allows AI Alignment to focus on essential terminology for the project. For example, managers can set AI Alignment to create term drafts only for industry-specific terminology, ensuring that only relevant records are included. Once configured, all draft terms generated by AI Alignment appear in the glossary with a draft status, allowing managers to review and confirm these terms before they become part of the active glossary. This review step provides control over terminology consistency and accuracy across the project. ## [AI QA Check](#ai-qa-check) [Section titled “AI QA Check”](#ai-qa-check) AI QA Check uses AI to automatically evaluate translations against defined quality standards. It helps translators quickly identify and resolve issues, ensuring accuracy, consistency, and compliance with project-specific requirements. AI QA Check complements and extends other QA methods (i.e., default QA Checks, Custom QA Checks, and External QA Checks) by providing comprehensive flexibility, reducing manual review efforts, and enhancing overall translation quality. ### [How AI QA Check Works](#how-ai-qa-check-works) [Section titled “How AI QA Check Works”](#how-ai-qa-check-works) When enabled, AI QA Check evaluates each submitted translation against a set of customizable evaluation criteria (Evaluation steps) defined in the configured QA Check prompt. Issues detected by the AI appear directly within the Editor as warnings, along with concise suggestions for corrections. Evaluation steps may include: * **Accuracy** – Ensuring no content is omitted, added, or incorrectly translated. * **Fluency** – Checking grammar, spelling, punctuation, and readability. * **Terminology** – Confirming consistent and correct use of project-specific terms. * **Style** – Verifying translations align with defined stylistic guidelines. * **Design** – Ensuring translations fit design constraints, including length and markup. * **Locale Convention** – Adapting formats for dates, currencies, addresses, and more. * **Cultural Adaptation (Verity)** – Localizing culture-specific references appropriately. * **General Issues** – Identifying other miscellaneous quality issues. For example, if a translation deviates from established glossary terms or fails to meet local formatting standards, the AI will highlight this and offer recommendations, guiding translators to achieve compliance and consistency. ### [Setting Up AI QA Check](#setting-up-ai-qa-check) [Section titled “Setting Up AI QA Check”](#setting-up-ai-qa-check) To use AI QA Check, create and configure a [QA Check prompt](#configuring-ai-prompts). Each QA Check prompt contains clearly defined evaluation steps the AI follows to detect translation issues. Unlike other AI prompts, the QA Check prompt includes a dedicated **Evaluation steps** section, allowing you to customize, edit, or expand upon predefined checks. You can also enhance the accuracy of the AI’s analysis by including various types of additional context relevant to your project’s content. After configuration, you can assign a QA Check prompt as the default for either your entire organization or individual projects. ### [Applying AI QA Check in Projects](#applying-ai-qa-check-in-projects) [Section titled “Applying AI QA Check in Projects”](#applying-ai-qa-check-in-projects) To enable AI QA Check in your projects, follow these steps: 1. [Create and enable a QA Check prompt](#configuring-ai-prompts). 2. Set it as the default QA prompt in the project’s **Settings > AI > Settings**. 3. Enable the **AI-powered check** in the project’s **Settings > QA Checks**. Once set, the AI continuously checks submitted translations, ensuring consistent compliance with your project’s quality guidelines. ## [See Also](#see-also) [Section titled “See Also”](#see-also) [How to Get the Most from the AI Translations ](https://crowdin.com/blog/2024/04/24/how-to-get-the-most-from-the-ai-translations)Discover how AI revolutionizes the localization process and workflow by enhancing translation accuracy through contextual understanding.
# Crowdin Managed Services
> Learn how to use Crowdin Managed Services
Crowdin offers a range of additional services that can significantly improve your localization workflow while simplifying payment and service management. These services are managed directly through your Crowdin Enterprise organization using a dedicated balance separate from your primary subscription. This means you won’t need to register additional accounts to access AI models. By consolidating payments in one place, you gain greater control over your localization resources and expenses, ensuring seamless workflow integration. ## [Available Services](#available-services) [Section titled “Available Services”](#available-services) Crowdin can manage the following paid services without the need to register separate accounts. AI Models Improve localization workflow by using OpenAI, Google Gemini, and other providers. [Read More ](/enterprise/crowdin-ai/) ## [Using Crowdin Managed Services](#using-crowdin-managed-services) [Section titled “Using Crowdin Managed Services”](#using-crowdin-managed-services) Crowdin Managed Services simplifies the use of paid tools like AI models and translation vendors by handling payments through a dedicated balance within your Crowdin account. This centralizes balance management and provides a clear overview of your spending. In the **Crowdin Managed Services** section, you can: * **Manage Balance**: Add funds to your dedicated balance for the Crowdin Managed Services you use. * **Set Balance Warnings**: Receive notifications when your balance is low. * **Track Usage**: View spending with detailed usage statistics. To start using Crowdin Managed Services, [add funds to your account balance](#adding-funds-to-account-balance) and activate the **managed by Crowdin** option for the services you want to use in your projects. ## [Managing Your Dedicated Balance](#managing-your-dedicated-balance) [Section titled “Managing Your Dedicated Balance”](#managing-your-dedicated-balance) You can manage your Crowdin Managed Services balance by adding funds and setting up notifications about low balance. 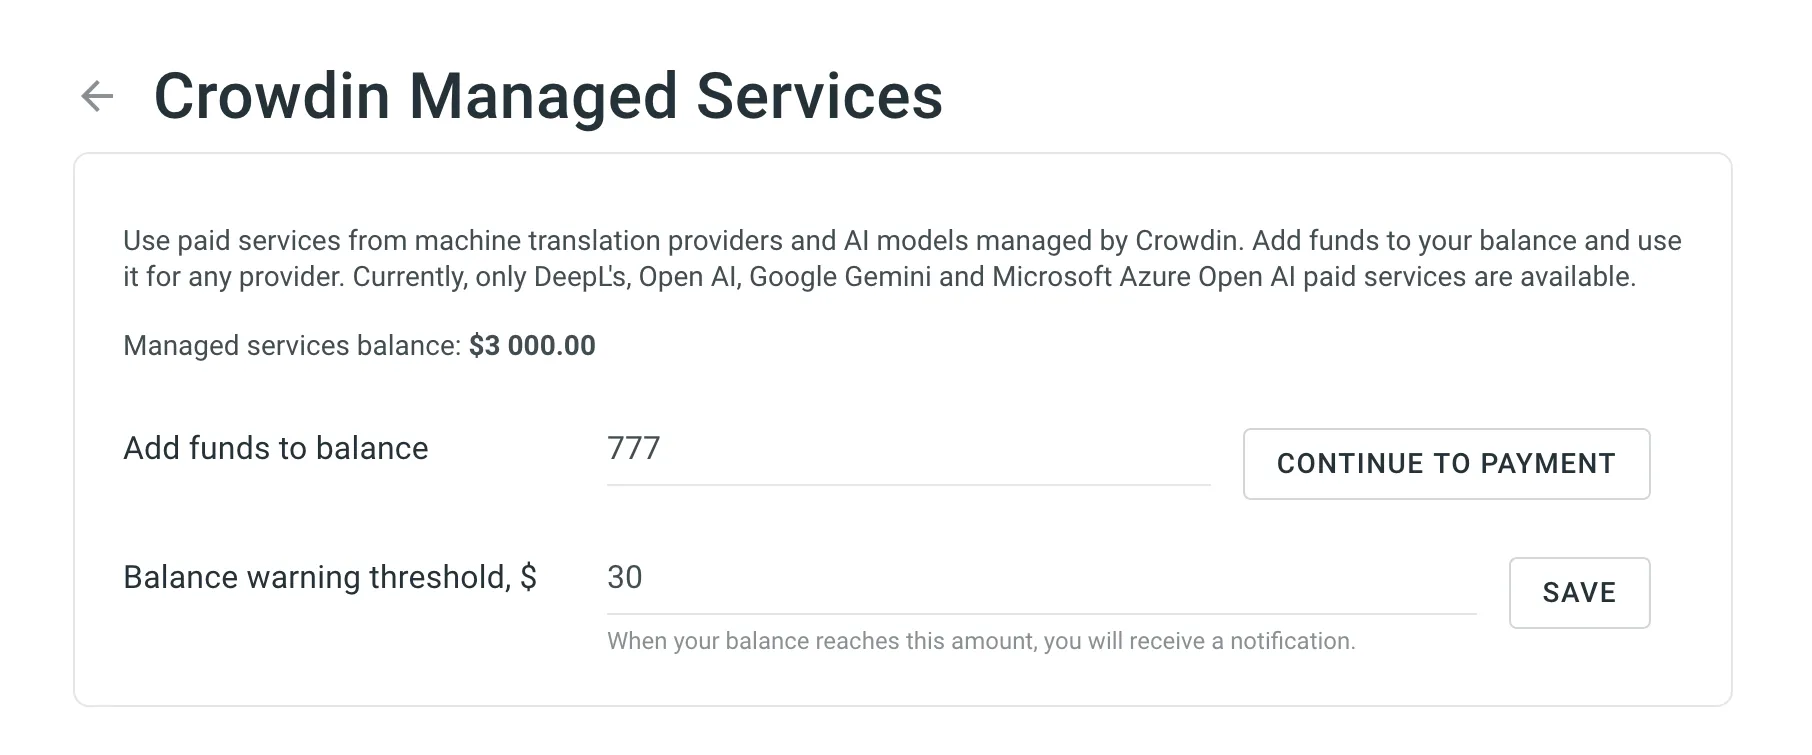 ### [Adding Funds to Account Balance](#adding-funds-to-account-balance) [Section titled “Adding Funds to Account Balance”](#adding-funds-to-account-balance) To add funds to your balance, follow these steps: 1. Go to **Organization Settings > Billing**. 2. Click **Crowdin Managed Services**. 3. Enter the desired amount in the **Add funds to balance** field. 4. Click **Continue to Payment** to proceed to the checkout page, where you can complete the payment. ### [Setting Balance Warning Threshold](#setting-balance-warning-threshold) [Section titled “Setting Balance Warning Threshold”](#setting-balance-warning-threshold) To ensure the uninterrupted operation of the Crowdin Managed Services, you can set the preferred amount in the **Balance warning threshold** field so that when your balance reaches this point, you’ll automatically receive a notification. To set up low-balance notifications, follow these steps: 1. Go to **Organization Settings > Billing**. 2. Click **Crowdin Managed Services**. 3. Enter your desired threshold amount in the **Balance warning threshold, $** field. 4. Click **Save** to confirm your settings. ## [Usage Statistics](#usage-statistics) [Section titled “Usage Statistics”](#usage-statistics) The **Usage Statistics** section provides a comprehensive visual analysis of your usage costs through an interactive graph, allowing you to review detailed statistics and track spending on each service based on your selected time period. In addition to the graph, the **Used during the selected time period** field shows the total amount spent during the chosen period. The graph displays usage costs for each service from the [available categories](#available-services). Hover over any bar to see a breakdown of the expenses per service for that day, month, or year. Depending on the selected date range, each stacked bar represents: * **One day** for ranges up to **2 months**. * **One month** for ranges up to **24 months**. * **One year** for ranges over **24 months**. You can also focus on specific services by hovering over the service titles under the graph. To hide certain services from the graph, click on their names.  ## [See Also](#see-also) [Section titled “See Also”](#see-also) [Payments and Invoices ](/enterprise/payments-invoices/)Learn how payments work in Crowdin and how to download invoices. [Changing Subscription Plan ](/enterprise/changing-subscription-plan/)Upgrade or downgrade your subscription plan. [App Subscriptions ](/enterprise/app-subscriptions/)Learn how to subscribe to paid apps in the Crowdin Store. [Billing Settings ](/enterprise/billing-settings/)Update your billing information and payment method.
# Crowdsourcing
> Engage your community in the translation process
Crowdsourcing is a collaborative localization strategy that engages your community to translate your product into multiple languages on a volunteer basis. It involves working with translators, proofreaders, and language enthusiasts who offer unique perspectives and insights, adapting your content for global audiences. By turning users into active contributors, crowdsourcing scales your localization efforts and strengthens their connection to your product. To configure additional features, first add and set up [Crowdsourcing](#adding-crowdsourcing-step-to-your-workflow) as a step in your project’s workflow. After that, you can access the [Crowdsourcing project settings](#crowdsourcing-project-settings). [Workflow Overview ](/enterprise/workflows/) ## [Key Benefits of Crowdsourcing](#key-benefits-of-crowdsourcing) [Section titled “Key Benefits of Crowdsourcing”](#key-benefits-of-crowdsourcing) Crowdsourcing in localization offers significant benefits, including: * **Cost-effective localization**: Crowdsourcing reduces traditional translation costs by engaging volunteers, allowing you to localize at scale without a proportional cost increase. * **Faster turnaround times**: By leveraging a large pool of contributors, you can localize content faster, reducing time-to-market for multilingual products and updates. * **Cultural authenticity**: Volunteers from different regions provide local insights, ensuring that translations reflect cultural nuances and are more relevant to target audiences than purely professional translations might be. * **Scalability**: With a flexible community of contributors, you can easily scale localization efforts as your product grows without being limited by in-house resources. * **Community engagement and participation**: Crowdsourcing transforms users into active contributors, encouraging them to participate in the product’s development and creating a stronger connection between your community and your brand. * **Continuous feedback and improvements**: Crowdsourcing allows for continuous refinement of translations, as contributors can suggest corrections and updates over time, improving content accuracy and consistency. ## [Adding Crowdsourcing Step to Your Workflow](#adding-crowdsourcing-step-to-your-workflow) [Section titled “Adding Crowdsourcing Step to Your Workflow”](#adding-crowdsourcing-step-to-your-workflow) You can add Crowdsourcing to your project workflow in the workflow editor or the Workflow template editor. 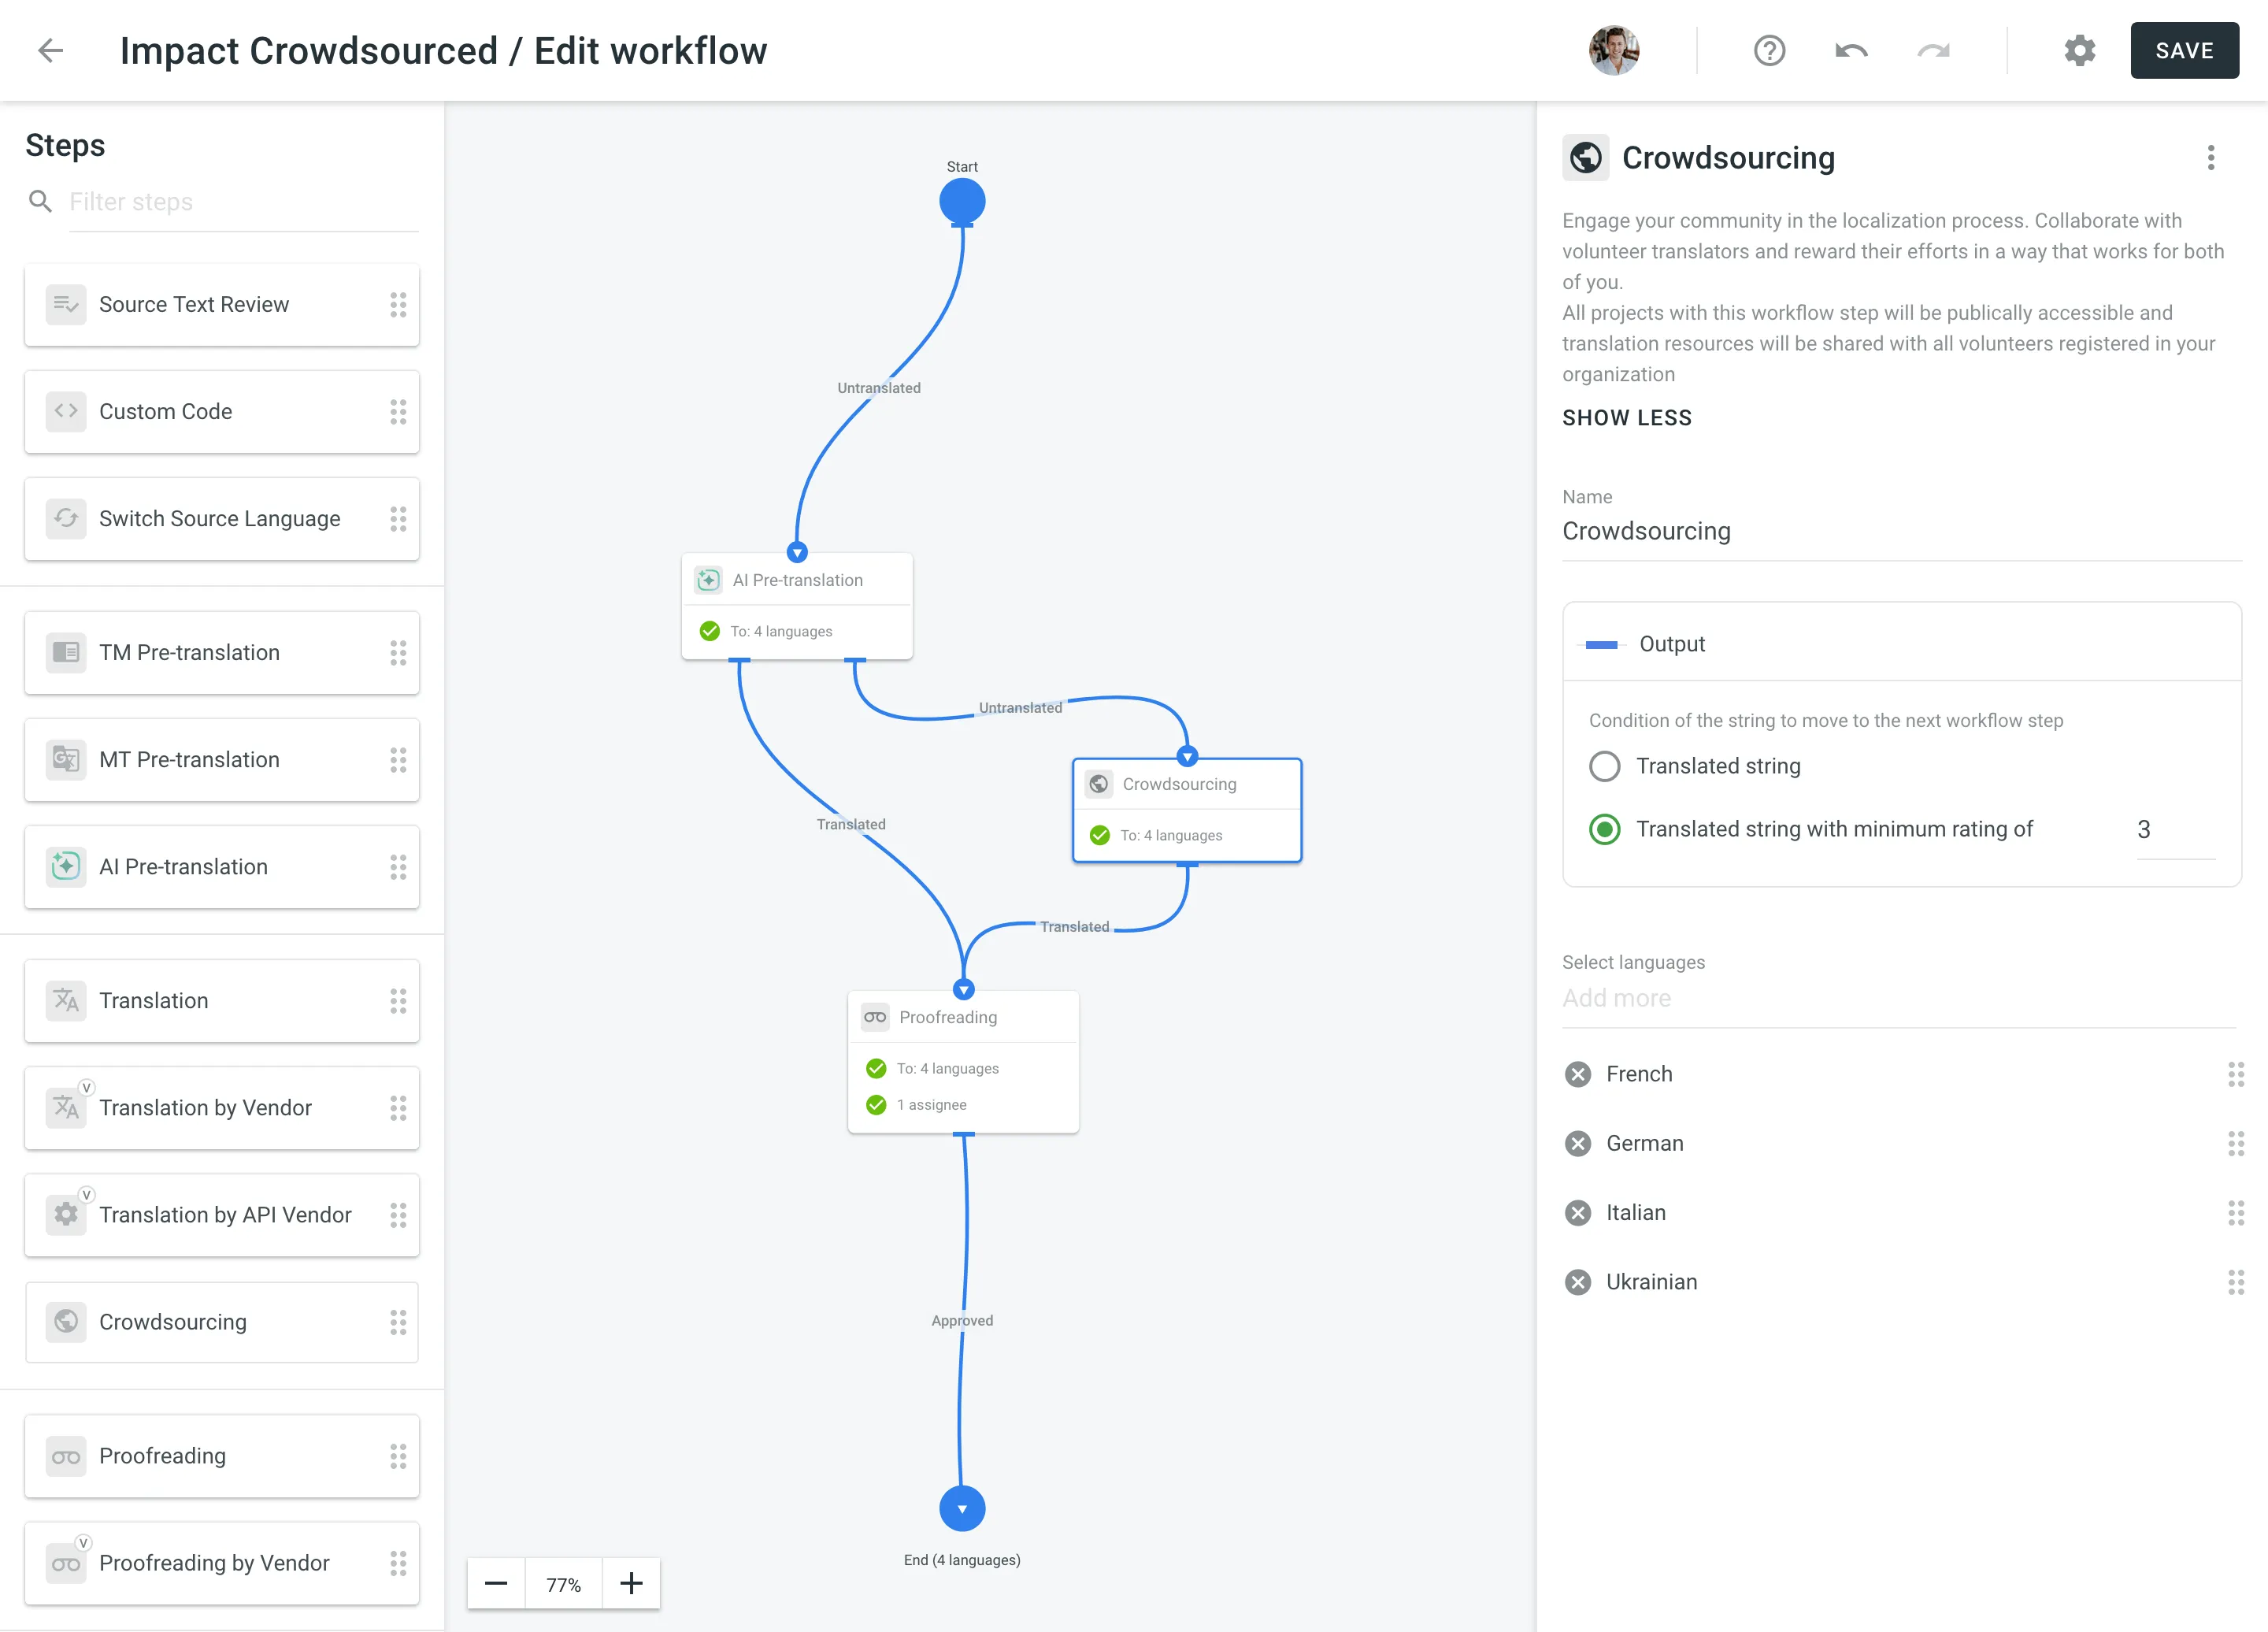 ### [Step Configuration](#step-configuration) [Section titled “Step Configuration”](#step-configuration) After adding the Crowdsourcing workflow step to your project, you can configure the following parameters: * Name – Set a custom name for the Crowdsourcing step. The default name is **Crowdsourcing**. * Output – Select the condition of the string to move to the next workflow step. You can choose between **Translated string** and **Translated string with minimum rating of**. For the latter, you can set the required minimum rating for the string before it moves to the next workflow step. * Languages – Select the languages that need translation. ## [Crowdsourcing Project Settings](#crowdsourcing-project-settings) [Section titled “Crowdsourcing Project Settings”](#crowdsourcing-project-settings) To start configuring your project’s Crowdsourcing settings, open your project and go to **Workflow > Crowdsourcing**. Here, you can manage key aspects, including general project details, Readme content for contributors, status images reflecting localization progress, and the project link to build your community. 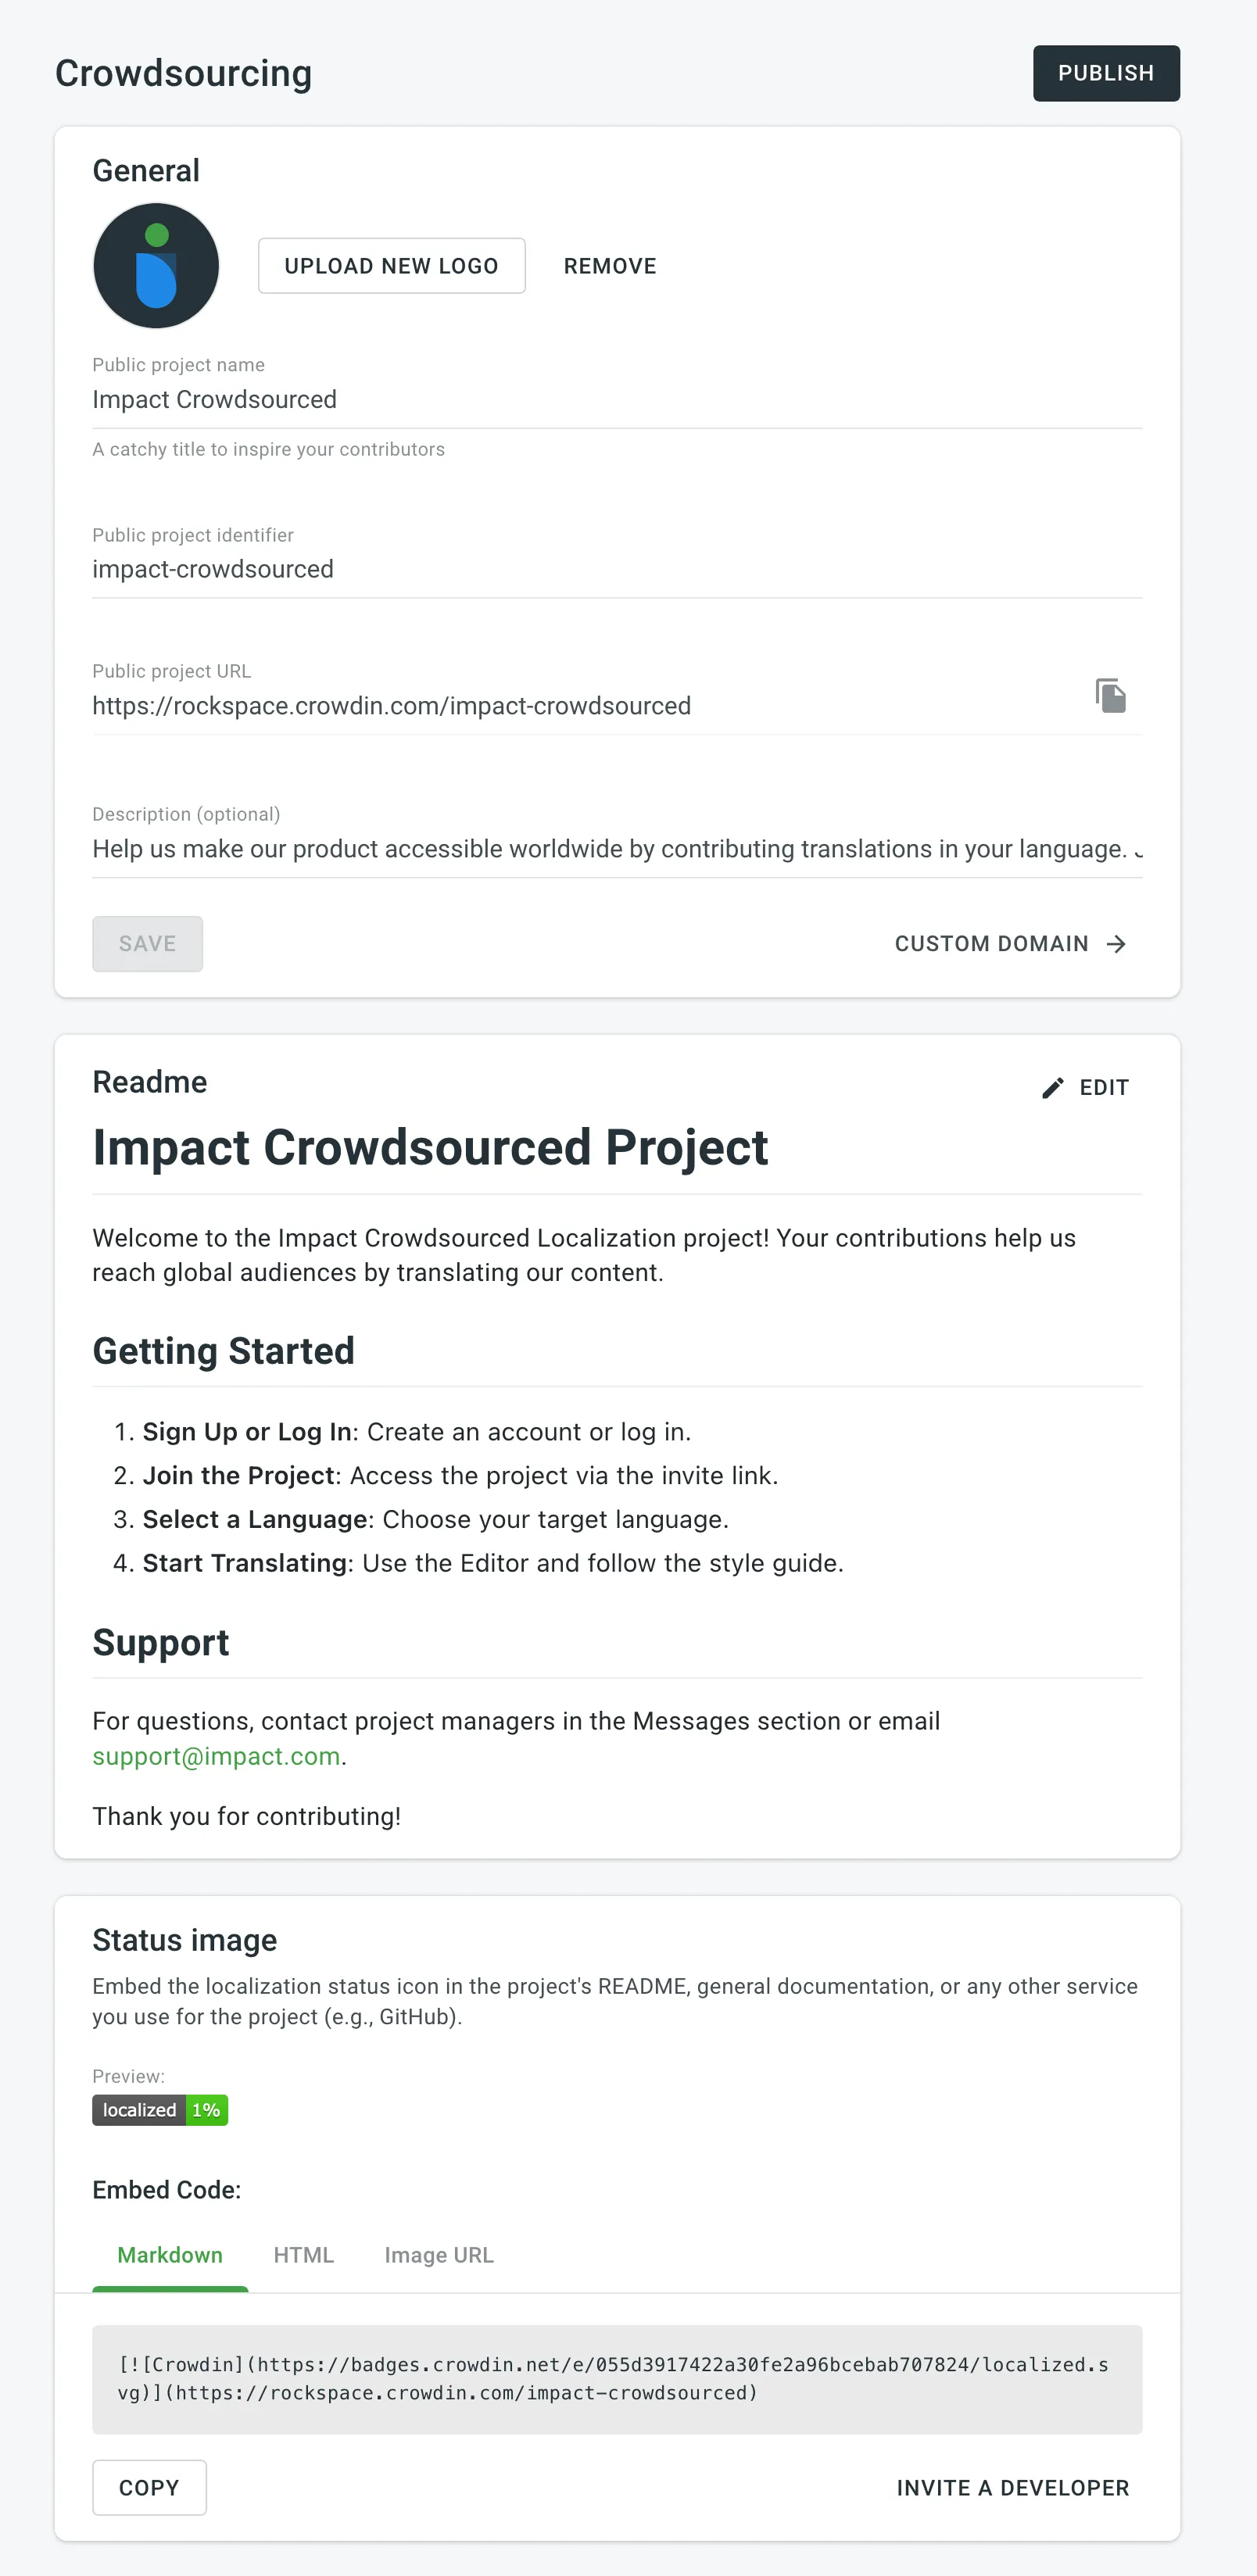 Once you’ve configured all Crowdsourcing project settings, click **Publish** to make your project visible on your [organization’s public page](#public-organization-settings). ### [General](#general) [Section titled “General”](#general) In the **General** section, you can update the public project name, logo, and description. You can also customize the public project URL for sharing with the community. [Set Up Custom Domain ](/enterprise/organization-settings/#custom-domain)Learn how to publish your Crowdin Enterprise organization on your own domain. ### [Readme](#readme) [Section titled “Readme”](#readme) In the **Readme** section, you can add a description that will appear in the **Readme** tab on your project’s public page. You can format the content using either plain text or Markdown. Use the **Preview** option to check how your instructions will look, especially if you’ve used Markdown for styling. ### [Status Image](#status-image) [Section titled “Status Image”](#status-image) You can embed status icons in your project’s README, documentation, or external services like GitHub. These icons allow visitors and users to quickly see the localization progress and contribute to translations. You have the following options for embedding the status image: * Markdown * HTML * Image URL [Badges & Status Images ](https://store.crowdin.com/bds)Badges & Status Images application allows to generate badges, charts, and additional graphics for each language in your Crowdin Project. ### [Building Community](#building-community) [Section titled “Building Community”](#building-community) In the **Building Community** section, you can copy the link to your translation project to invite contributors. Share this link on your website, social media, or via email to encourage participation in your crowdsourcing efforts. ## [Single Sign-on for Contributors](#single-sign-on-for-contributors) [Section titled “Single Sign-on for Contributors”](#single-sign-on-for-contributors) Community members can sign in to your Crowdin Enterprise project using their social media profiles or accounts from repository management services. You can configure single sign-on with Facebook, Google, Twitter, GitHub, GitLab, and OpenID Connect. The **Crowdin Single Sign-on API** enables contributors to join Crowdin using their existing usernames from your service, eliminating the need to create a separate Crowdin Enterprise account. Read more about [Authentication Methods](/enterprise/privacy/#authentication-methods) in Crowdin Enterprise. ## [Gamification](#gamification) [Section titled “Gamification”](#gamification) Gamification enhances user engagement through a rewards system for contributors. It helps to acknowledge their efforts and can significantly improve translation quality. You can set specific translation targets for your volunteers through the [Translation Goals](https://store.crowdin.com/translation-goals) app. This approach motivates contributors and fosters a sense of community involvement. To set goals and offer rewards, consider providing symbolic incentives such as a free month of service, a lifetime license, or additional features that add value for your community. [Translation Goals app ](https://store.crowdin.com/translation-goals)With this app, you can set a goal for the number of translations you expect a volunteer to translate, and the app will suggest how many contributors you, as a manager, should find. ## [Public Organization Settings](#public-organization-settings) [Section titled “Public Organization Settings”](#public-organization-settings) When you publish at least one project that includes the Crowdsourcing workflow step, a **Public Organization** page is automatically generated. This page provides an overview of your organization’s work and is accessible to volunteer translators or anyone with the link. The public page displays a description of your organization, featured projects, and the progress of active crowdsourced translation projects. You can customize how your organization is presented by configuring the following settings in **Organization Settings > Organization Info > Public Organization**: * Add a public description to introduce your organization. Like the [Readme](#readme) section, you can use plain text or Markdown and preview the description before saving. * Choose how projects are displayed: **List** or **Grid** view. * Enable the **Featured projects** section to highlight specific projects. You can customize these featured projects either from the **Organization Settings** or directly on the public page. These settings help you provide potential contributors with a clear and engaging overview of your organization’s localization efforts.
# CSV / XLSX File Configuration
> Configure CSV or XLSX files before importing their contents
After CSV or XLSX files are uploaded to the project, they require additional configuration before the system can import the contents of these files. To configure CSV or XLSX files, follow these steps: * File-based project 1. Open your project and go to **Sources > Files**. 2. Click **Configure** next to the file to open the configuration window. 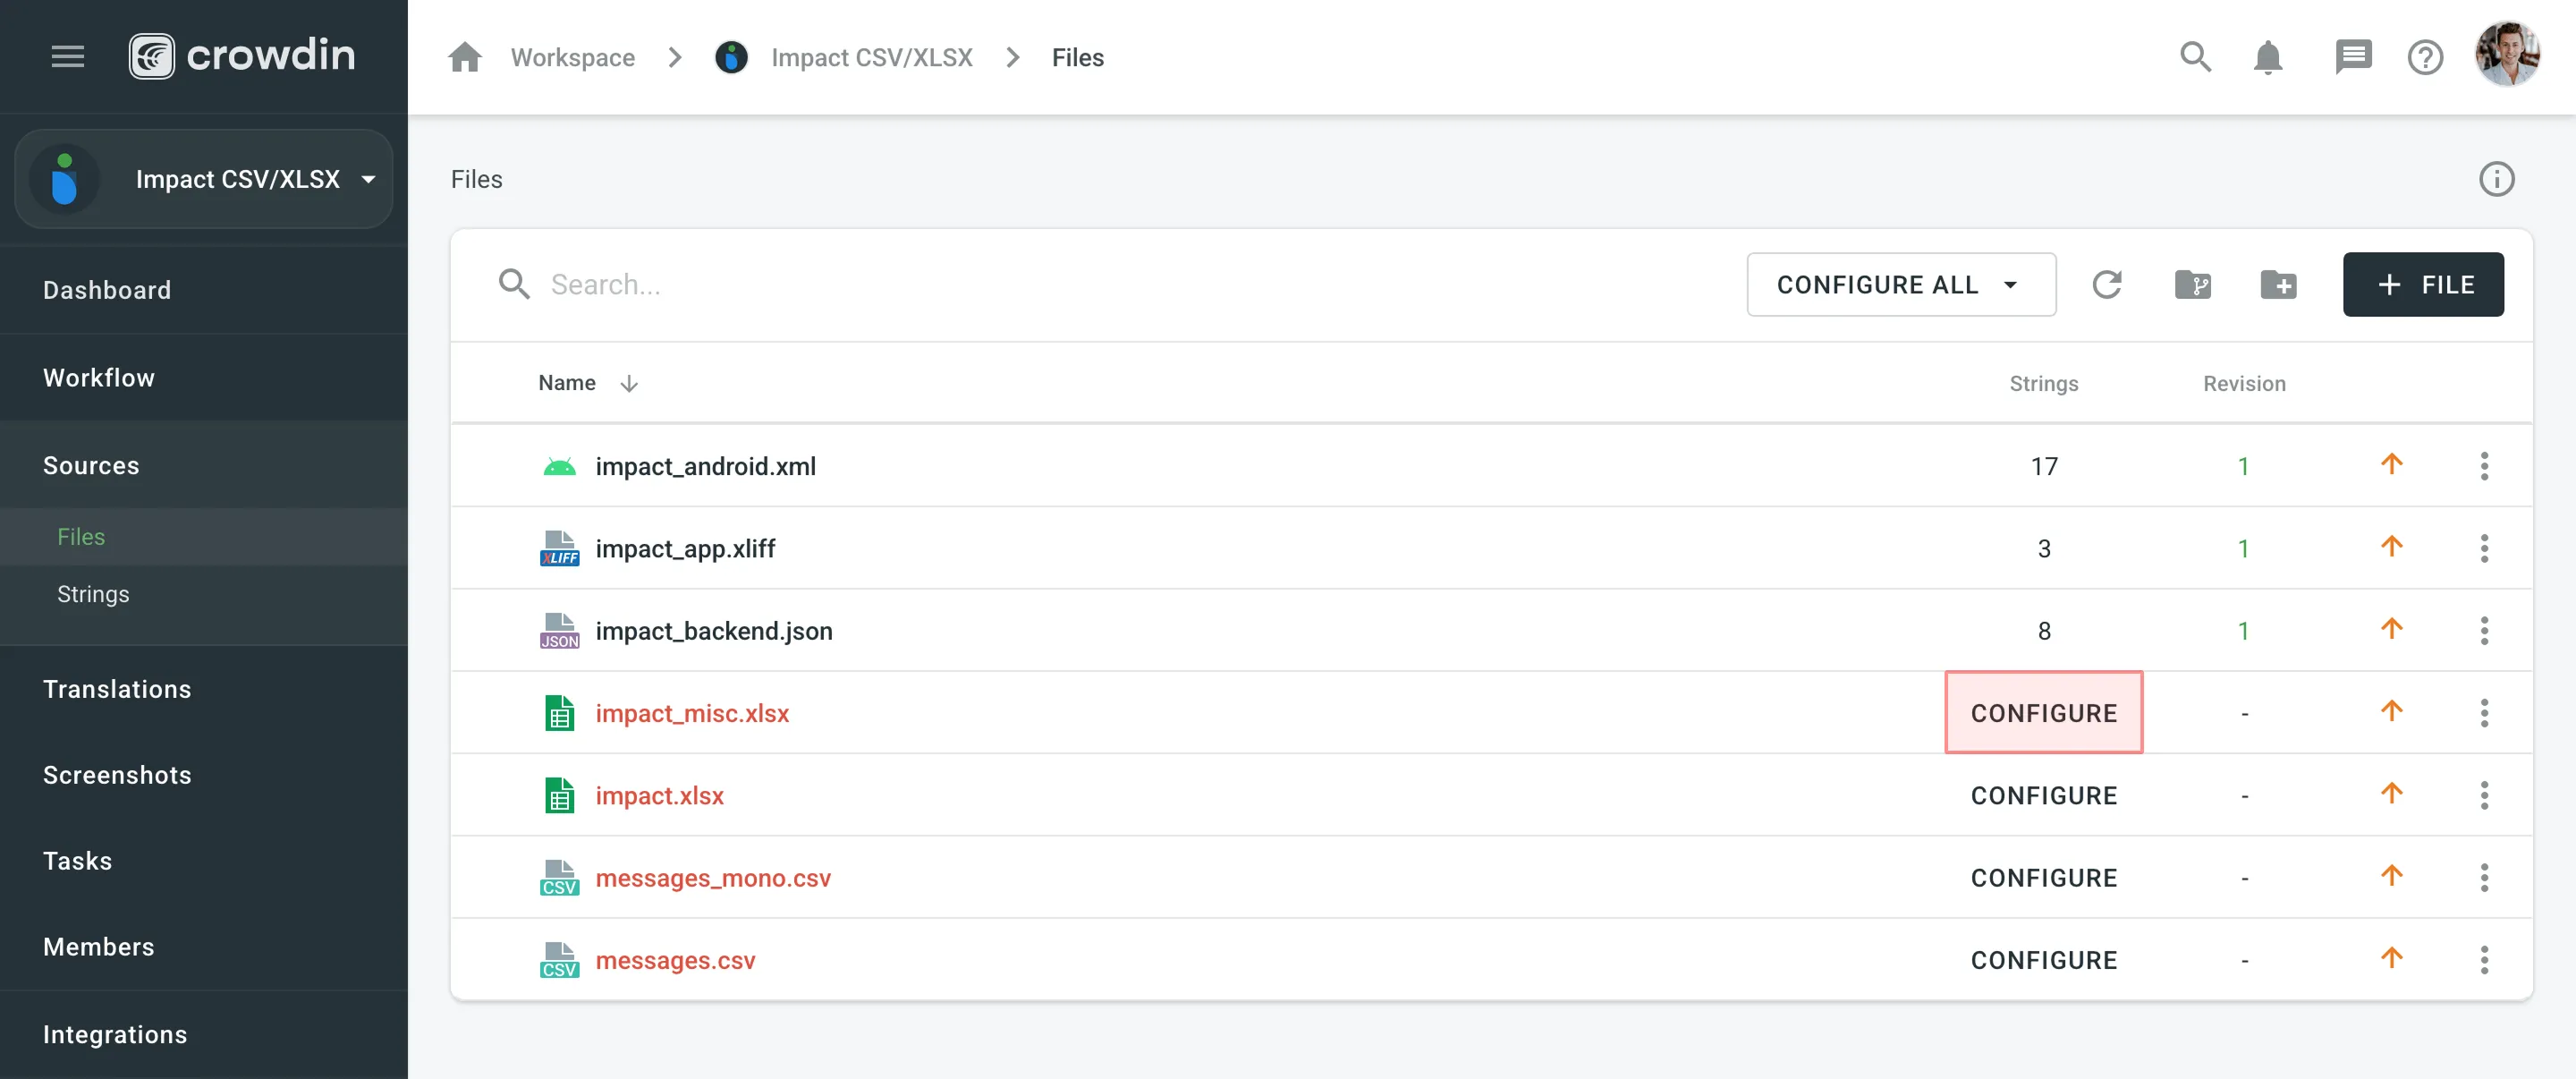 * String-based project 1. Open your project and select **Upload** on the left sidebar. 2. Drag and drop files from your machine. 3. Click **Configure** next to the file to open the configuration window. 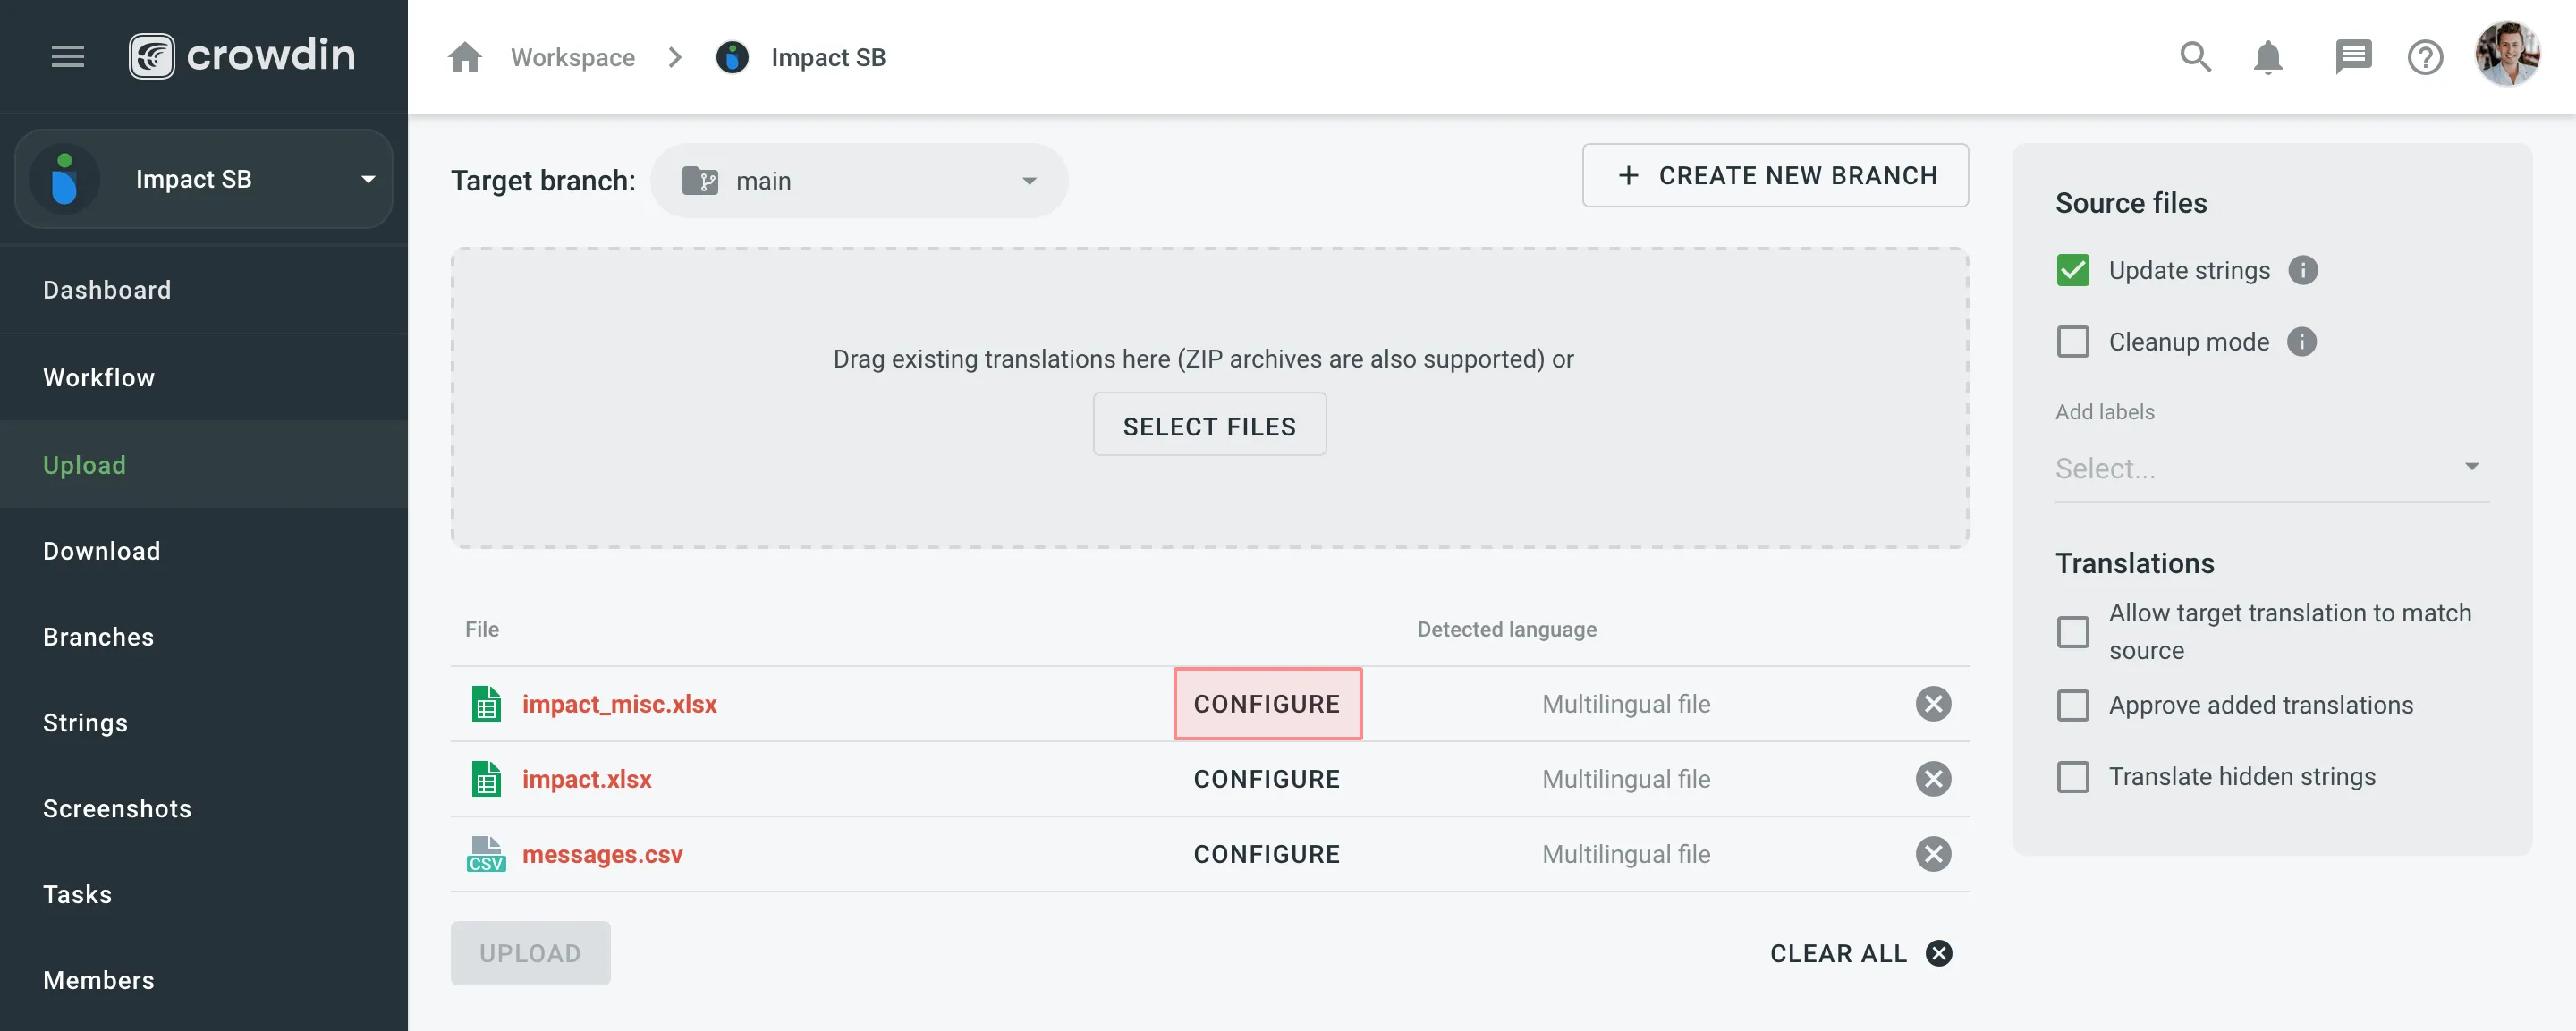 The same configurations mentioned in this article are also applicable to the TSV file format. The main difference between CSV and TSV files is that they use different delimiters between columns (i.e., commas in CSV and tabs in TSV). ## [Configuration Options for XLSX Files](#configuration-options-for-xlsx-files) [Section titled “Configuration Options for XLSX Files”](#configuration-options-for-xlsx-files) When configuring XLSX files, you’ll have the following options: * **Import all cells** - import each cell as a separate source string. Additionally, you can use *Content Segmentation* to split the source file’s content into shorter text pieces, mostly sentences and short paragraphs. This is helpful when translating content units consisting of several sentences because it will be easier to translate smaller pieces of text. Segmentation Rules eXchange (SRX) are used for automatic content segmentation. * **Configure columns for import** - specify the preferred column order. 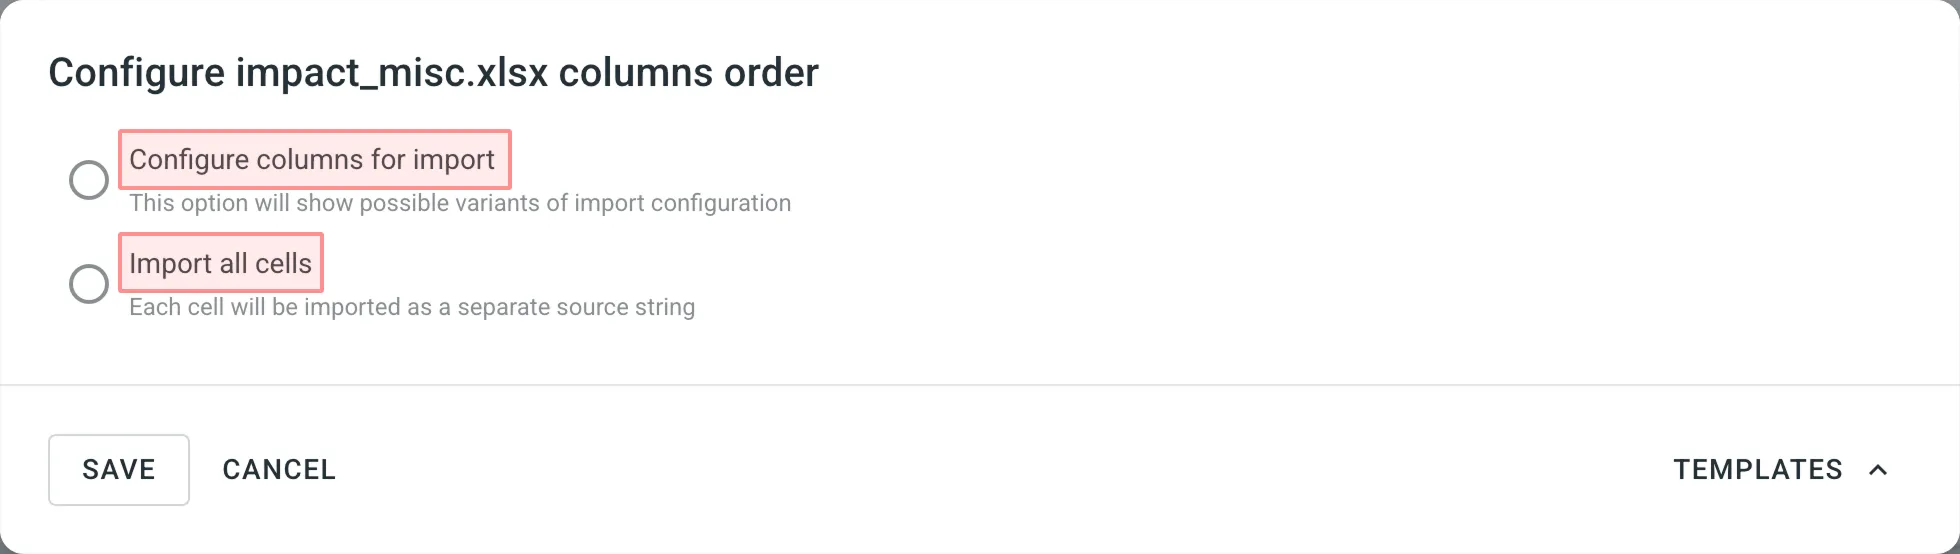 ## [Configuring Columns for Import](#configuring-columns-for-import) [Section titled “Configuring Columns for Import”](#configuring-columns-for-import) When configuring CSV or XLSX file with **Configure columns for import** option, you can specify the following column types: * *Key* – Column contains string identifiers. Typically, an alphanumeric value. * *Source string* – Column contains source strings that should be translated. * *Source string/Translation* – Column contains source strings, but the same column will be filled with translations when the file is exported. When uploading existing translations, the values from this column will be used as translations. * *Translation* – Column for resulting translations added on export. On import and when uploading existing translations, the system will check this column for existing translations and upload them to the project. * *Context* – Column contains comments or context information for the source strings. * *Labels* – Column contains labels for the source strings. You can add multiple labels to each string, separating them with commas. * *Max. Length* – Column contains max.length limit values for the translations of the strings. * *Not chosen* – Column that will be skipped on import. 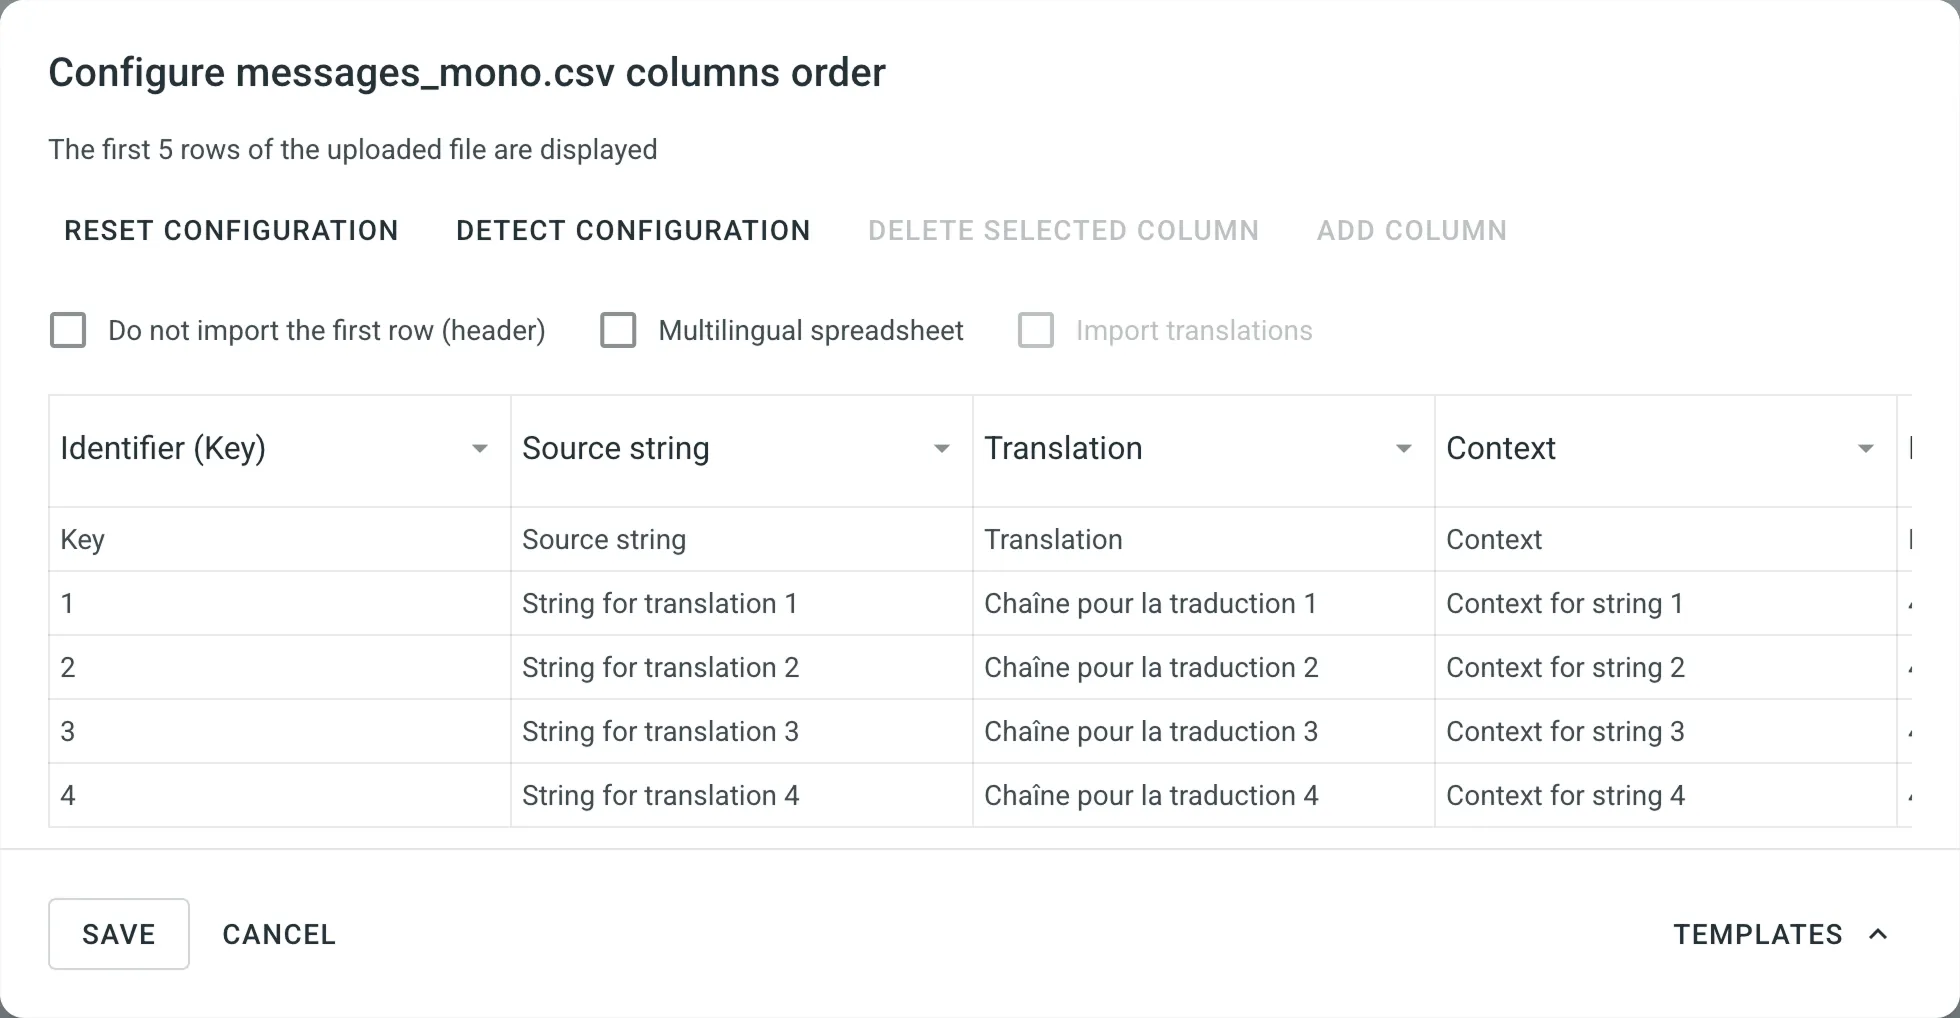 ### [Column Headers](#column-headers) [Section titled “Column Headers”](#column-headers) If you don’t want to translate the column headers, select **Do not import the first row (header)**. ### [Multilingual Spreadsheets](#multilingual-spreadsheets) [Section titled “Multilingual Spreadsheets”](#multilingual-spreadsheets) If your file contains several columns with translations into different languages, select **Multilingual spreadsheet** and map the languages to the appropriate columns. By default, when you configure the multilingual spreadsheets, the **Import translations** option is selected. If you’d like not to import the existing translations from the file, you can clear this option. If your multilingual source file doesn’t contain enough columns for all project target languages, click **Add column**. To remove one of the added columns, click **Delete selected column**. ### [Importing Hidden Content](#importing-hidden-content) [Section titled “Importing Hidden Content”](#importing-hidden-content) For XLSX files, you can decide whether to import hidden sheets and rows. By default, the **Import hidden sheets** and **Import hidden rows** options are enabled. This means all content from your spreadsheet, both hidden and visible, will be imported into Crowdin Enterprise and available for translation. If you prefer not to import hidden content, clear the respective options before saving the configuration. You can choose to import only hidden sheets, only hidden rows, or neither. ### [Automatic Column Identification](#automatic-column-identification) [Section titled “Automatic Column Identification”](#automatic-column-identification) Once you open the configuration dialog for source files in CSV or XLSX formats, the system automatically detects the file scheme based on the column names specified in the first row. The identification is performed in a case-insensitive manner. Columns that weren’t detected automatically will be left as **Not chosen** for manual configuration. Automatic column identification is especially helpful when you upload multiple multilingual spreadsheets that contain many languages and additional columns (e.g., Context, Labels, Max. Length). To get the most out of the automatic column detection, we recommend that you name the columns in your CSV or XLSX source files using the values displayed in the table below: | Column type | Expected value | | --------------------------------- | ------------------------------------------------------------------------------------------------------------------------------------------------------------------------------------------------------------ | | Key | `identifier`, `key` | | Source String | `source phrase`, `source_phrase`, `source string`, `source_string` | | Source String/Translation | `source or translation`, `source_or_translation`, `source/translation` | | Translation | `translation` | | Context | `context` | | Labels | `labels` | | Max. Length | `max. length`, `max_length` | | Language (for multilingual files) | Language name (e.g., Ukrainian), Crowdin language code (e.g., uk-UA), Locale (e.g., uk-UA), Locale with underscore (e.g., uk\_UA), Language code ISO 639-1 (e.g., uk), Language code ISO 639-2/T (e.g., ukr) | By default, during scheme configuration, the system treats CSV and XLSX source files as monolingual. To autodetect file scheme for multilingual source files, follow these steps: 1. Select **Multilingual spreadsheet**. 2. Click **More** and select **Detect Configuration**. ### [Reset Spreadsheet Configuration](#reset-spreadsheet-configuration) [Section titled “Reset Spreadsheet Configuration”](#reset-spreadsheet-configuration) If you’d like to start the spreadsheet configuration over, click **Reset configuration**. ### [Configuration Templates](#configuration-templates) [Section titled “Configuration Templates”](#configuration-templates) If multiple files have the same configuration scheme, save your current configuration as a template by clicking **Templates** > **Save as template**, then specify the template name and click **Create**. You’ll be able to apply the template to the newly imported files. ## [Changing Scheme for CSV and XLSX Files](#changing-scheme-for-csv-and-xlsx-files) [Section titled “Changing Scheme for CSV and XLSX Files”](#changing-scheme-for-csv-and-xlsx-files) You might want to update CSV or XLSX files and change the initially configured scheme. The scheme update might be needed when you add a new target language to your Crowdin Enterprise project. To change the scheme for your source file, follow these steps: 1. Right-click on the needed files and select **Change scheme**. 2. Select the new file on your machine. 3. Set the new configuration/template for the file correspondingly. Limitations You can’t edit the existing configuration template. Instead, you can remove it or create a new one. ## [See Also](#see-also) [Section titled “See Also”](#see-also) [Uploading Source Files ](/enterprise/uploading-files/)Learn how to upload source files to your project for translation. [File Management ](/enterprise/file-management/)Manage and configure source files in your project.
# Custom Code
> Specify your own code snippet to filter strings in the workflow
Custom Code is a workflow step that allows you to define code snippets to filter strings in your workflow. It has one input and two outputs (`true` and `false`), letting you split strings into separate paths based on custom JavaScript conditions. ## [Use Cases](#use-cases) [Section titled “Use Cases”](#use-cases) You can use the custom code workflow step in the numerous scenarios. Here are a few examples: * To send one part of the strings to in-house translators and another part to a translation agency. * To send one part of the strings to machine translation and another part to crowdsourcing. * To send one part of the strings to in-house proofreaders and another part to proofreading by a translation agency. [Workflow Overview ](/enterprise/workflows/) [Crowdin Script Editor ](https://crowdin.github.io/crowdin-script-editor/) ## [Adding Custom Code Step to Your Workflow](#adding-custom-code-step-to-your-workflow) [Section titled “Adding Custom Code Step to Your Workflow”](#adding-custom-code-step-to-your-workflow) You can add the Custom Code step to the workflow of your project in the workflow editor or the workflow template editor. 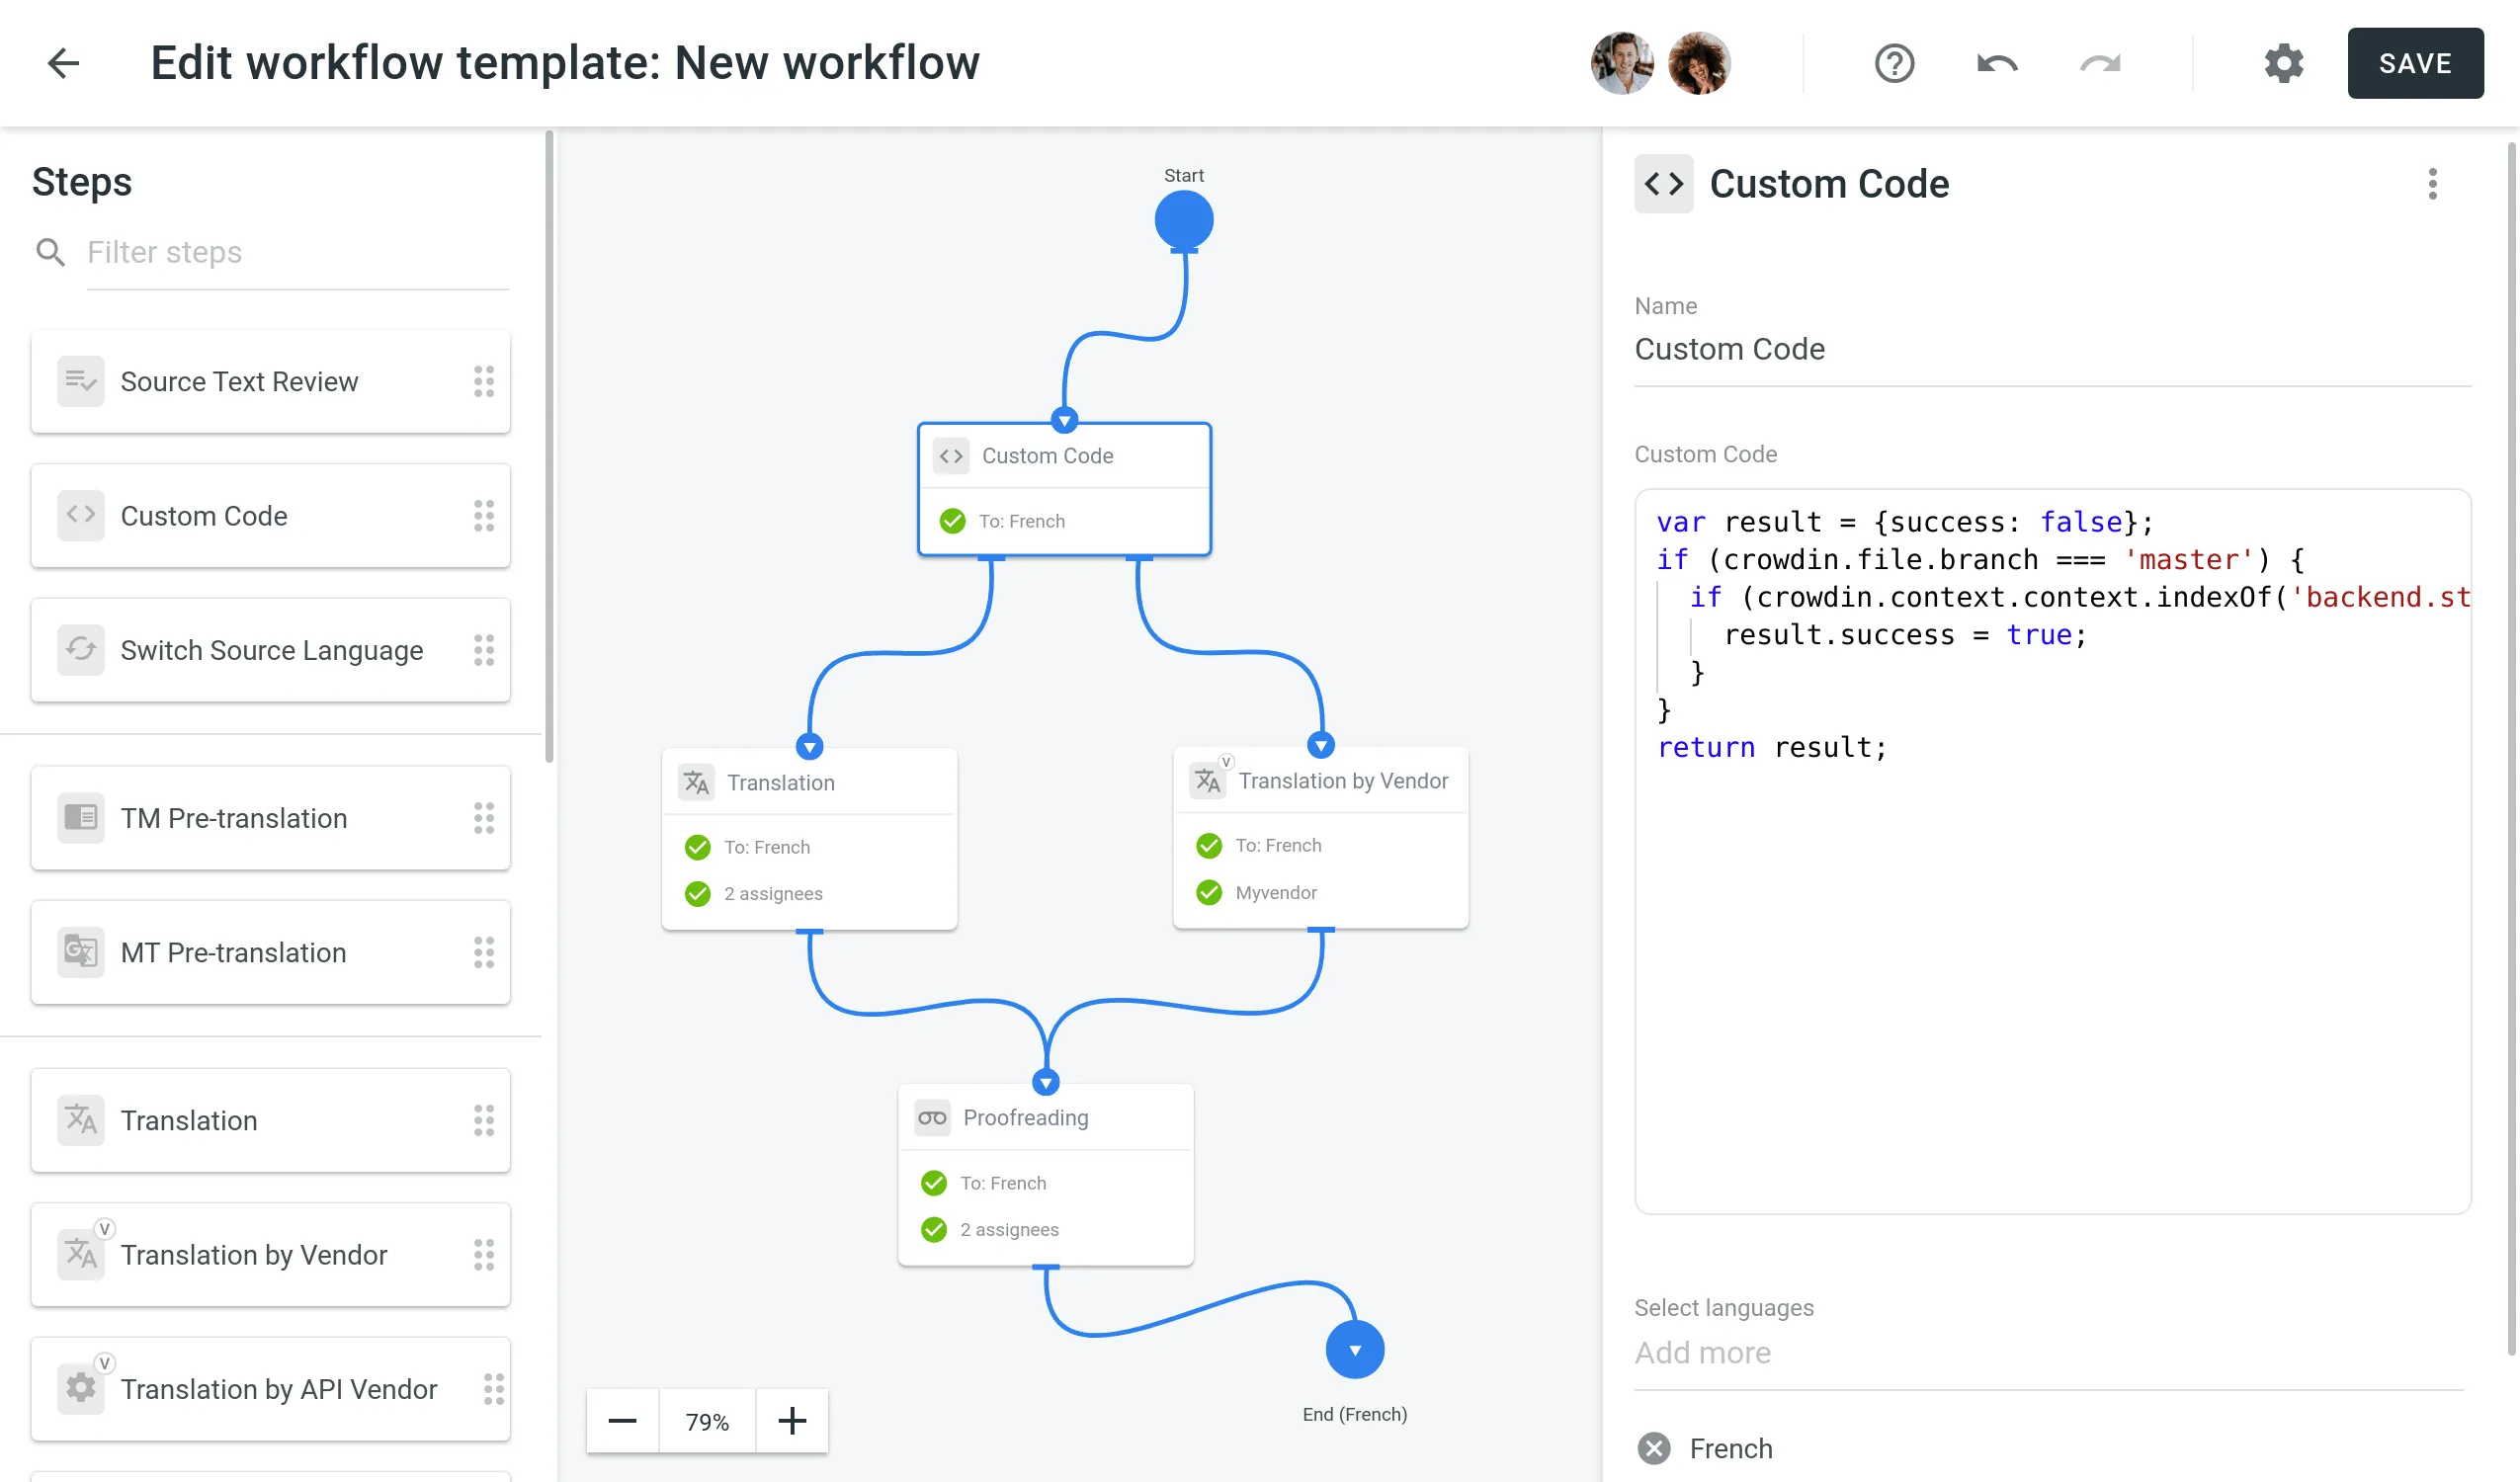 ## [Code Snippet Parameters](#code-snippet-parameters) [Section titled “Code Snippet Parameters”](#code-snippet-parameters) Once the Custom Code step is added, define a JavaScript-based code snippet in the *Custom Code* field to route strings to either the `true` or `false` output. The code snippet is JavaScript-based and uses a `crowdin` object that includes the properties listed below. To structure your code input correctly, use this object template: ```text object crowdin { object file { string name, string fullName, string title, string branchName, string type }, object string { int id, string key, string context, ?int maxLength, string createdAt, ?string updatedAt, string|array text, object fields }, string contentType, array labels } ``` Find the example of a custom code snippet in the [Crowdin Script Editor](https://crowdin.github.io/crowdin-script-editor/). Use the editor to inspect the structure, edit the code with your data, and verify it works as expected. ## [Code Snippet Request](#code-snippet-request) [Section titled “Code Snippet Request”](#code-snippet-request) The code snippet request includes the following properties: | Property | Description | | ------------------ | ------------------------------------------------------------------------------------------------------------------------------------------------------------------------------------------- | | `file.name` | Source file name | | `file.fullName` | Full path to the source file in the project (excluding branch if any) | | `file.title` | Source file title as it appears to translators | | `file.branchName` | Branch name the source file is stored in | | `file.type` | Source file type | | `string.id` | Source string ID | | `string.key` | Source string identifier (key) | | `string.context` | Context of the source string | | `string.maxLength` | Maximum length of the string (if set) | | `string.createdAt` | Timestamp of when the source string was created (ISO 8601 format) | | `string.updatedAt` | Timestamp of the latest string update (if available) (ISO 8601 format) | | `string.text` | Source string text; for plural content, this will be an array of plural form values | | `string.fields` | Object with key-value pairs representing [custom field](/enterprise/fields/) values assigned to the string | | `labels` | Array of labels assigned to the source string | | `contentType` | Type of the source string content. Affects the structure of the `text` property. Supported values: `text/plain`, `application/vnd.crowdin.text+plural`, `application/vnd.crowdin.text+icu`. | ### [Example of a Code Snippet Request](#example-of-a-code-snippet-request) [Section titled “Example of a Code Snippet Request”](#example-of-a-code-snippet-request) Below you can see an example of a code snippet request: ```json { "file": { "name": "file.csv", "fullName": "/folder/file.csv", "branchName": "main", "type": "csv", "title": "index.php" }, "labels": [ "Translate by Vendor" ], "contentType": "text/plain", "string": { "id": 2814, "key": "hello_world", "context": "Header string", "maxLength": 30, "createdAt": "2019-09-20T12:43:57+00:00", "updatedAt": "2019-09-20T13:24:01+00:00", "text": "Hello World!", "fields": { "seo-priority": "high", "is-critical": true, "word-count": 42 } } } ``` ## [Code Snippet Response](#code-snippet-response) [Section titled “Code Snippet Response”](#code-snippet-response) After running the code snippet, it should return a response indicating whether the specified conditions are met: * The response object should contain boolean `success` property indicating whether the specified conditions are met. For instance: ```json { "success": true } ``` * In case the specified conditions are not met, the string will be directed to the `false` output of the Custom Code step. For example: ```json { "success": false } ```
# Custom Placeholders
> Configure the highlight of custom placeholders in the Editor
Custom Placeholders are designed for cases when the source texts contain some less common placeholders that are not highlighted in the source strings (in the Editor) by default. ## [Configure your Custom Placeholders](#configure-your-custom-placeholders) [Section titled “Configure your Custom Placeholders”](#configure-your-custom-placeholders) You can manage Custom Placeholders in the **Organization Settings**. 1. Click on your profile picture in the upper-right corner and select **Organization Settings**. 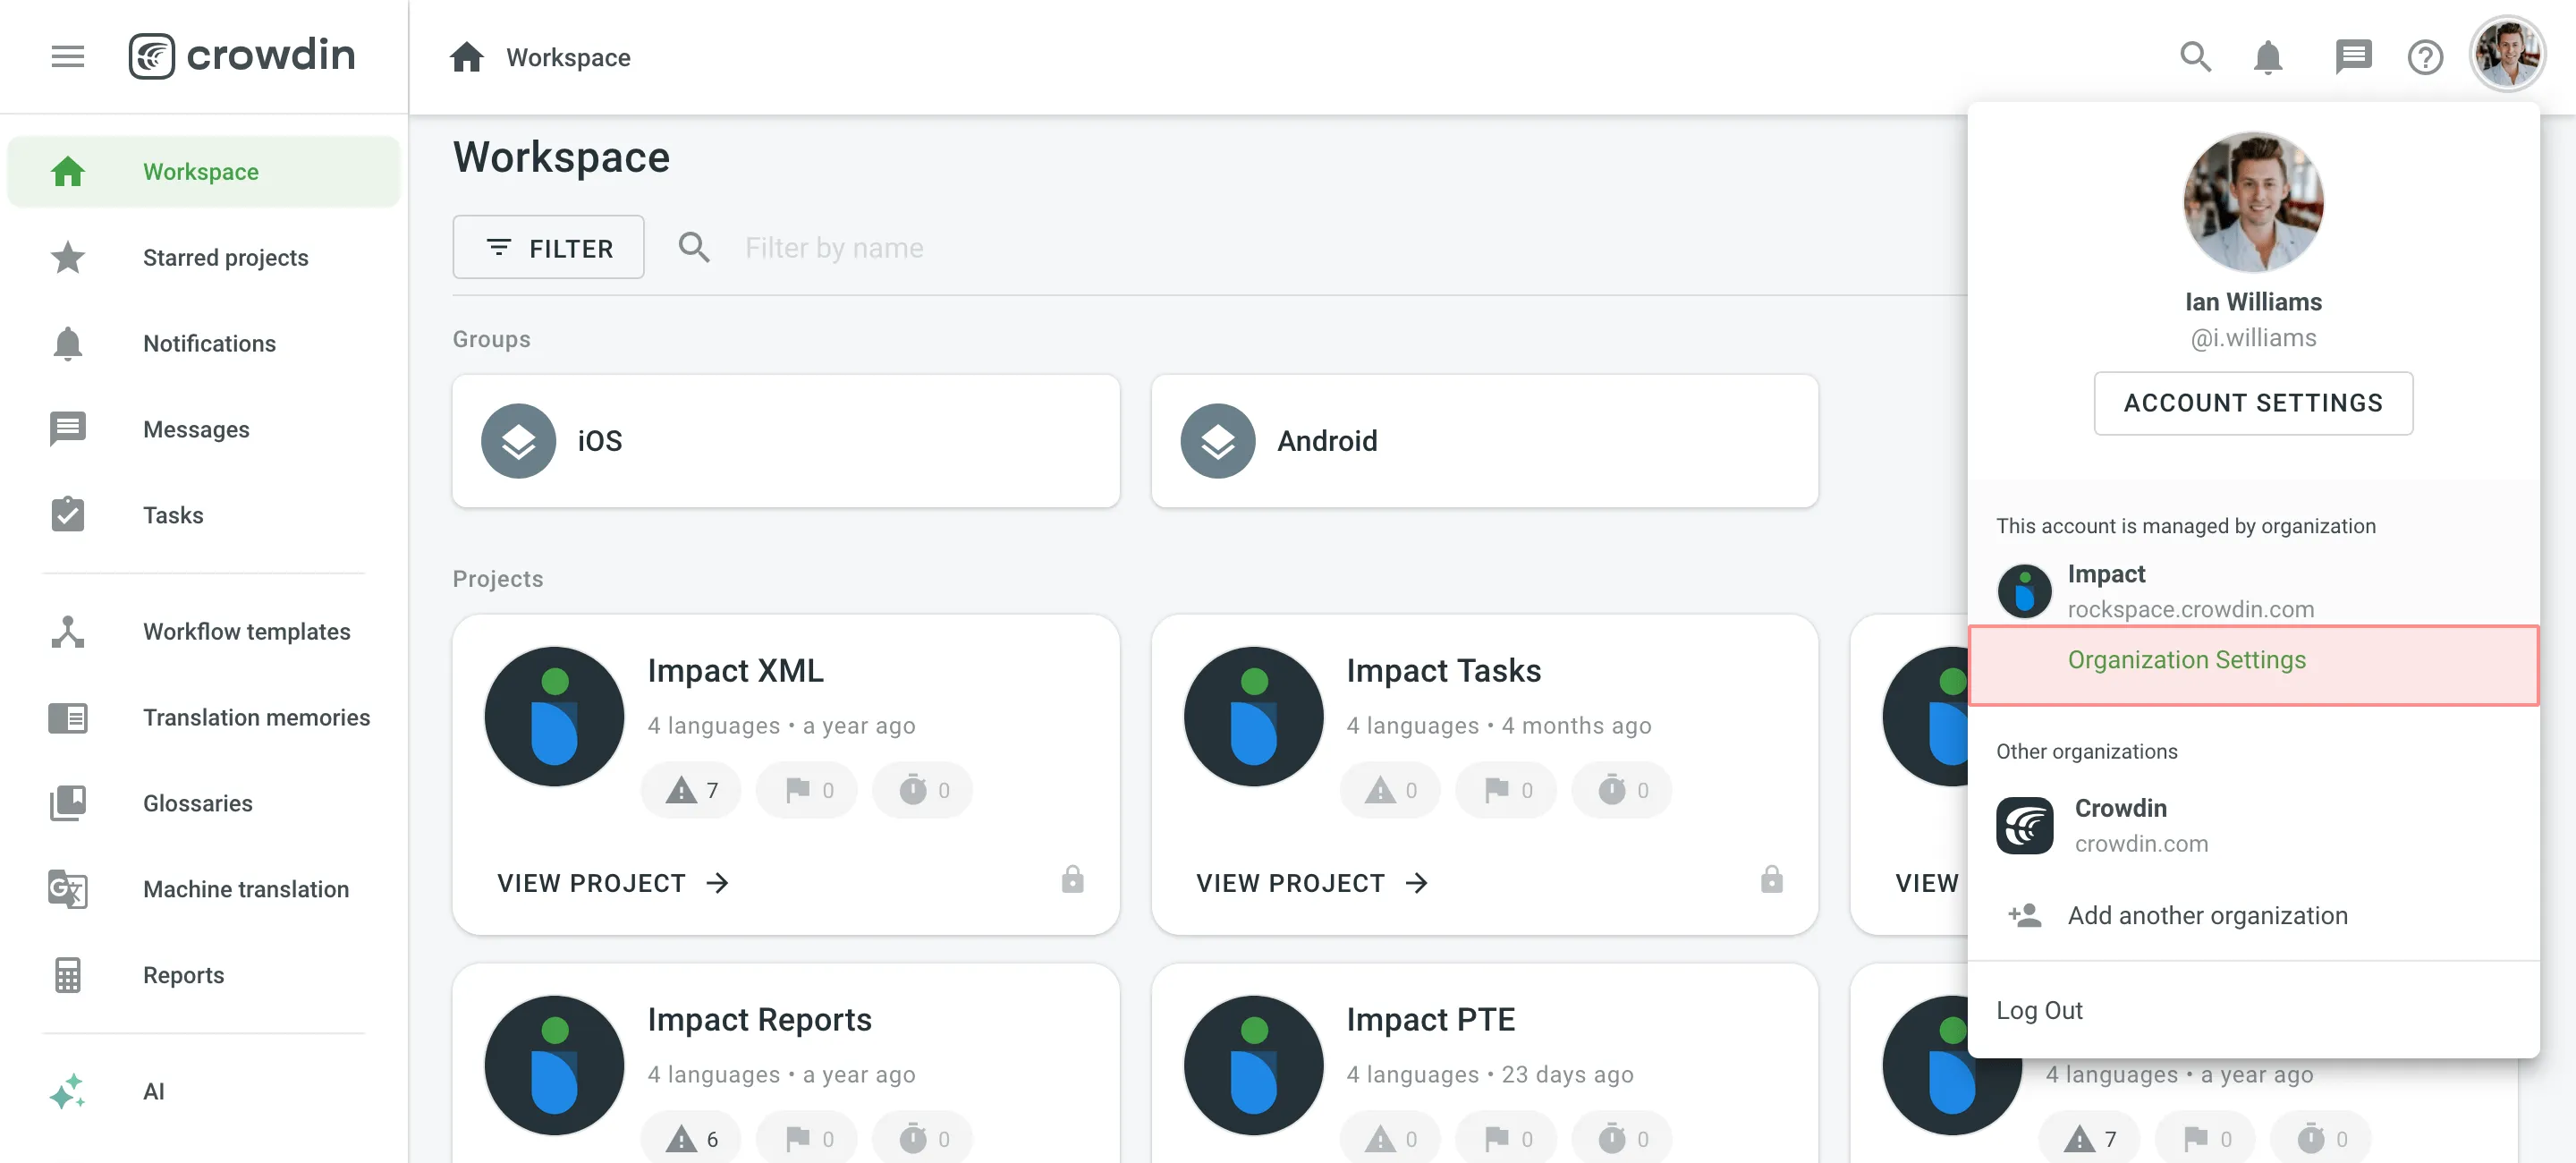 2. Switch to the **Custom placeholders** section on the left sidebar and click **Add Placeholder**. 3. In the appeared dialog, specify a custom placeholder expression using the Expressions syntax elements and click **Create**. 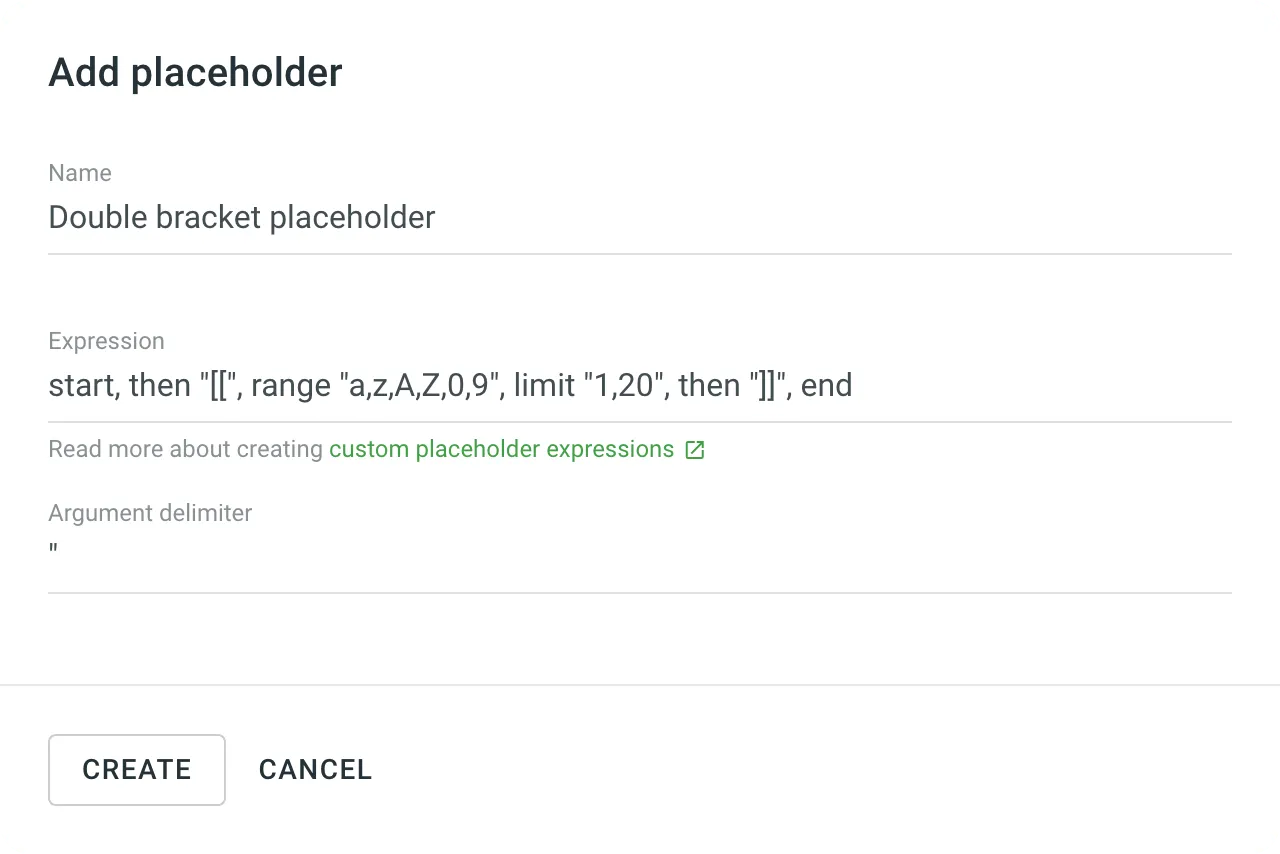 [Assign Custom Placeholder to the Project ](/enterprise/project-settings/import/#assign-custom-placeholder) Once the custom placeholders are assigned to the project, project members will see them highlighted in the Editor during the translation process. ## [Custom placeholders syntax elements](#custom-placeholders-syntax-elements) [Section titled “Custom placeholders syntax elements”](#custom-placeholders-syntax-elements) To configure your custom placeholder expression, you can use the elements from [the expression syntax table](/enterprise/expression-syntax-elements/). For example, if you’d like to highlight this `[[Placeholder1]]`, your expression might look like this: ```plaintext start, then "[[", range "a,z,A,Z,0,9", limit "1,20", then "]]", end ``` To simplify things a bit, let’s deconstruct the expression above. * `start` – indicates the beginning of the expression. * `then "[["` – means that your custom placeholder starts with two opening square brackets. * `range "a,z,A,Z,0,9"` – means that your custom placeholder might include characters ranging a-z and/or A-Z and/or 0-9. * `limit "1,20"` – means that the length of the placeholder is from 1 to 20 characters. * `then "]]"` – means that your custom placeholder ends with two closing square brackets. * `end` – indicates the end of the expression. [Verbal Tester ](https://store.crowdin.com/verbal-tester)Create, check and edit verbal expressions in Crowdin project with Verbal Tester application [Try Verbal Expressions GPT ](https://chat.openai.com/g/g-NdFRRXHwm-crowdin-verbal-expressions-maker)Helps with Verbal Expressions development in Crowdin. ## [Custom Placeholder expression examples](#custom-placeholder-expression-examples) [Section titled “Custom Placeholder expression examples”](#custom-placeholder-expression-examples) Below you can see a few examples of custom placeholder expression and how they will be highlighted in source strings in the Editor. ##### [Custom placeholder enclosed in percent characters and curly brackets](#custom-placeholder-enclosed-in-percent-characters-and-curly-brackets) [Section titled “Custom placeholder enclosed in percent characters and curly brackets”](#custom-placeholder-enclosed-in-percent-characters-and-curly-brackets) String example: ```plaintext A test string with a custom %{placeholder}% ``` Expression: ```graphql start, maybe "(", then "%", then "{", anything, then "}", maybe ")", then "%", end ``` ##### [Custom placeholder enclosed in double square brackets](#custom-placeholder-enclosed-in-double-square-brackets) [Section titled “Custom placeholder enclosed in double square brackets”](#custom-placeholder-enclosed-in-double-square-brackets) String example: ```plaintext A test string with a custom [[placeholder]] ``` Expression: ```graphql start, then "[[", anythingbut "[[", then "]]", multiple, end ``` ##### [Custom placeholder](#custom-placeholder) [Section titled “Custom placeholder”](#custom-placeholder) String example: ```plaintext A test string with a custom placeholder ``` Expression: ```graphql start, then "placeholder", end ``` ##### [Custom placeholder enclosed in paragraph characters](#custom-placeholder-enclosed-in-paragraph-characters) [Section titled “Custom placeholder enclosed in paragraph characters”](#custom-placeholder-enclosed-in-paragraph-characters) String example: ```plaintext A test string with a custom §placeholder§ ``` Expression: ```graphql start, then "§", anything, then "§", end ``` ##### [Long sentence that you might want to highlight as a single custom placeholder](#long-sentence-that-you-might-want-to-highlight-as-a-single-custom-placeholder) [Section titled “Long sentence that you might want to highlight as a single custom placeholder”](#long-sentence-that-you-might-want-to-highlight-as-a-single-custom-placeholder) String example: ```text A test string with a Long sentence that you might want to highlight as a single custom placeholder ``` Expression: ```graphql start, then "Long sentence that you might want to highlight as a single custom placeholder" ```
# Custom QA Checks
> Configure custom QA checks to ensure high-quality translations
In addition to the built-in QA checks available in every project, you can configure two additional types of QA checks at the organization level: [Custom QA Checks](#custom-qa-checks) and [External QA Checks](#external-qa-checks). * **Custom QA Checks** are lightweight and synchronous. They use a simplified JavaScript syntax and are executed in a sandboxed environment without access to network requests. These checks are ideal for validating simple, language-specific rules such as placeholder formatting, punctuation, spacing, or regular expressions. * **External QA Checks** are more advanced and asynchronous. They are implemented as [Crowdin Apps](/developer/crowdin-apps-about/) and can perform complex logic, make network requests, and integrate with external services (for example, AI-powered QA, style guide validation, or rendering translated text to measure size). Use them when you need more flexibility beyond the limitations of Custom QA Checks. Both types of checks are managed in **Organization Settings > Custom QA checks**, but differ in how they work and what they are best suited for. ## [Custom QA Checks](#custom-qa-checks) [Section titled “Custom QA Checks”](#custom-qa-checks) Custom QA Checks help efficiently handle language-specific aspects such as punctuation, numbers, and regular expressions to ensure more accurate QA check results and high-quality translations in all languages. With Custom QA Checks, you can detect the exact mistakes you want. It helps customers avoid mistakes in the texts and translators to translate the content more proficiently. ### [Creating and Adding Custom QA Checks](#creating-and-adding-custom-qa-checks) [Section titled “Creating and Adding Custom QA Checks”](#creating-and-adding-custom-qa-checks) You can manage Custom QA Checks in the **Organization Settings**. There are two ways to add new Custom QA Checks to your organization: create your own from scratch or add them from the [Crowdin Store](https://store.crowdin.com/types/qa-check). 1. Click on your profile picture in the upper-right corner and select **Organization Settings**.  2. Switch to the **Custom QA checks** section on the left sidebar and click **Create**. 3. Provide the details of the custom QA check in the required fields: * *Name* – provide a clear name for your custom QA check, so translators understand what needs to be corrected. * *Description* – explain what the custom QA check verifies or corrects. * *(Optional)* *Enable in all projects* - select this option if you want to make the Custom QA check available in all projects of your organization. * *Code Snippet* – provide the JavaScript-based [code snippet](#code-snippet) that makes the QA check work. It includes a `crowdin` object and several properties. 4. Click **Create**. 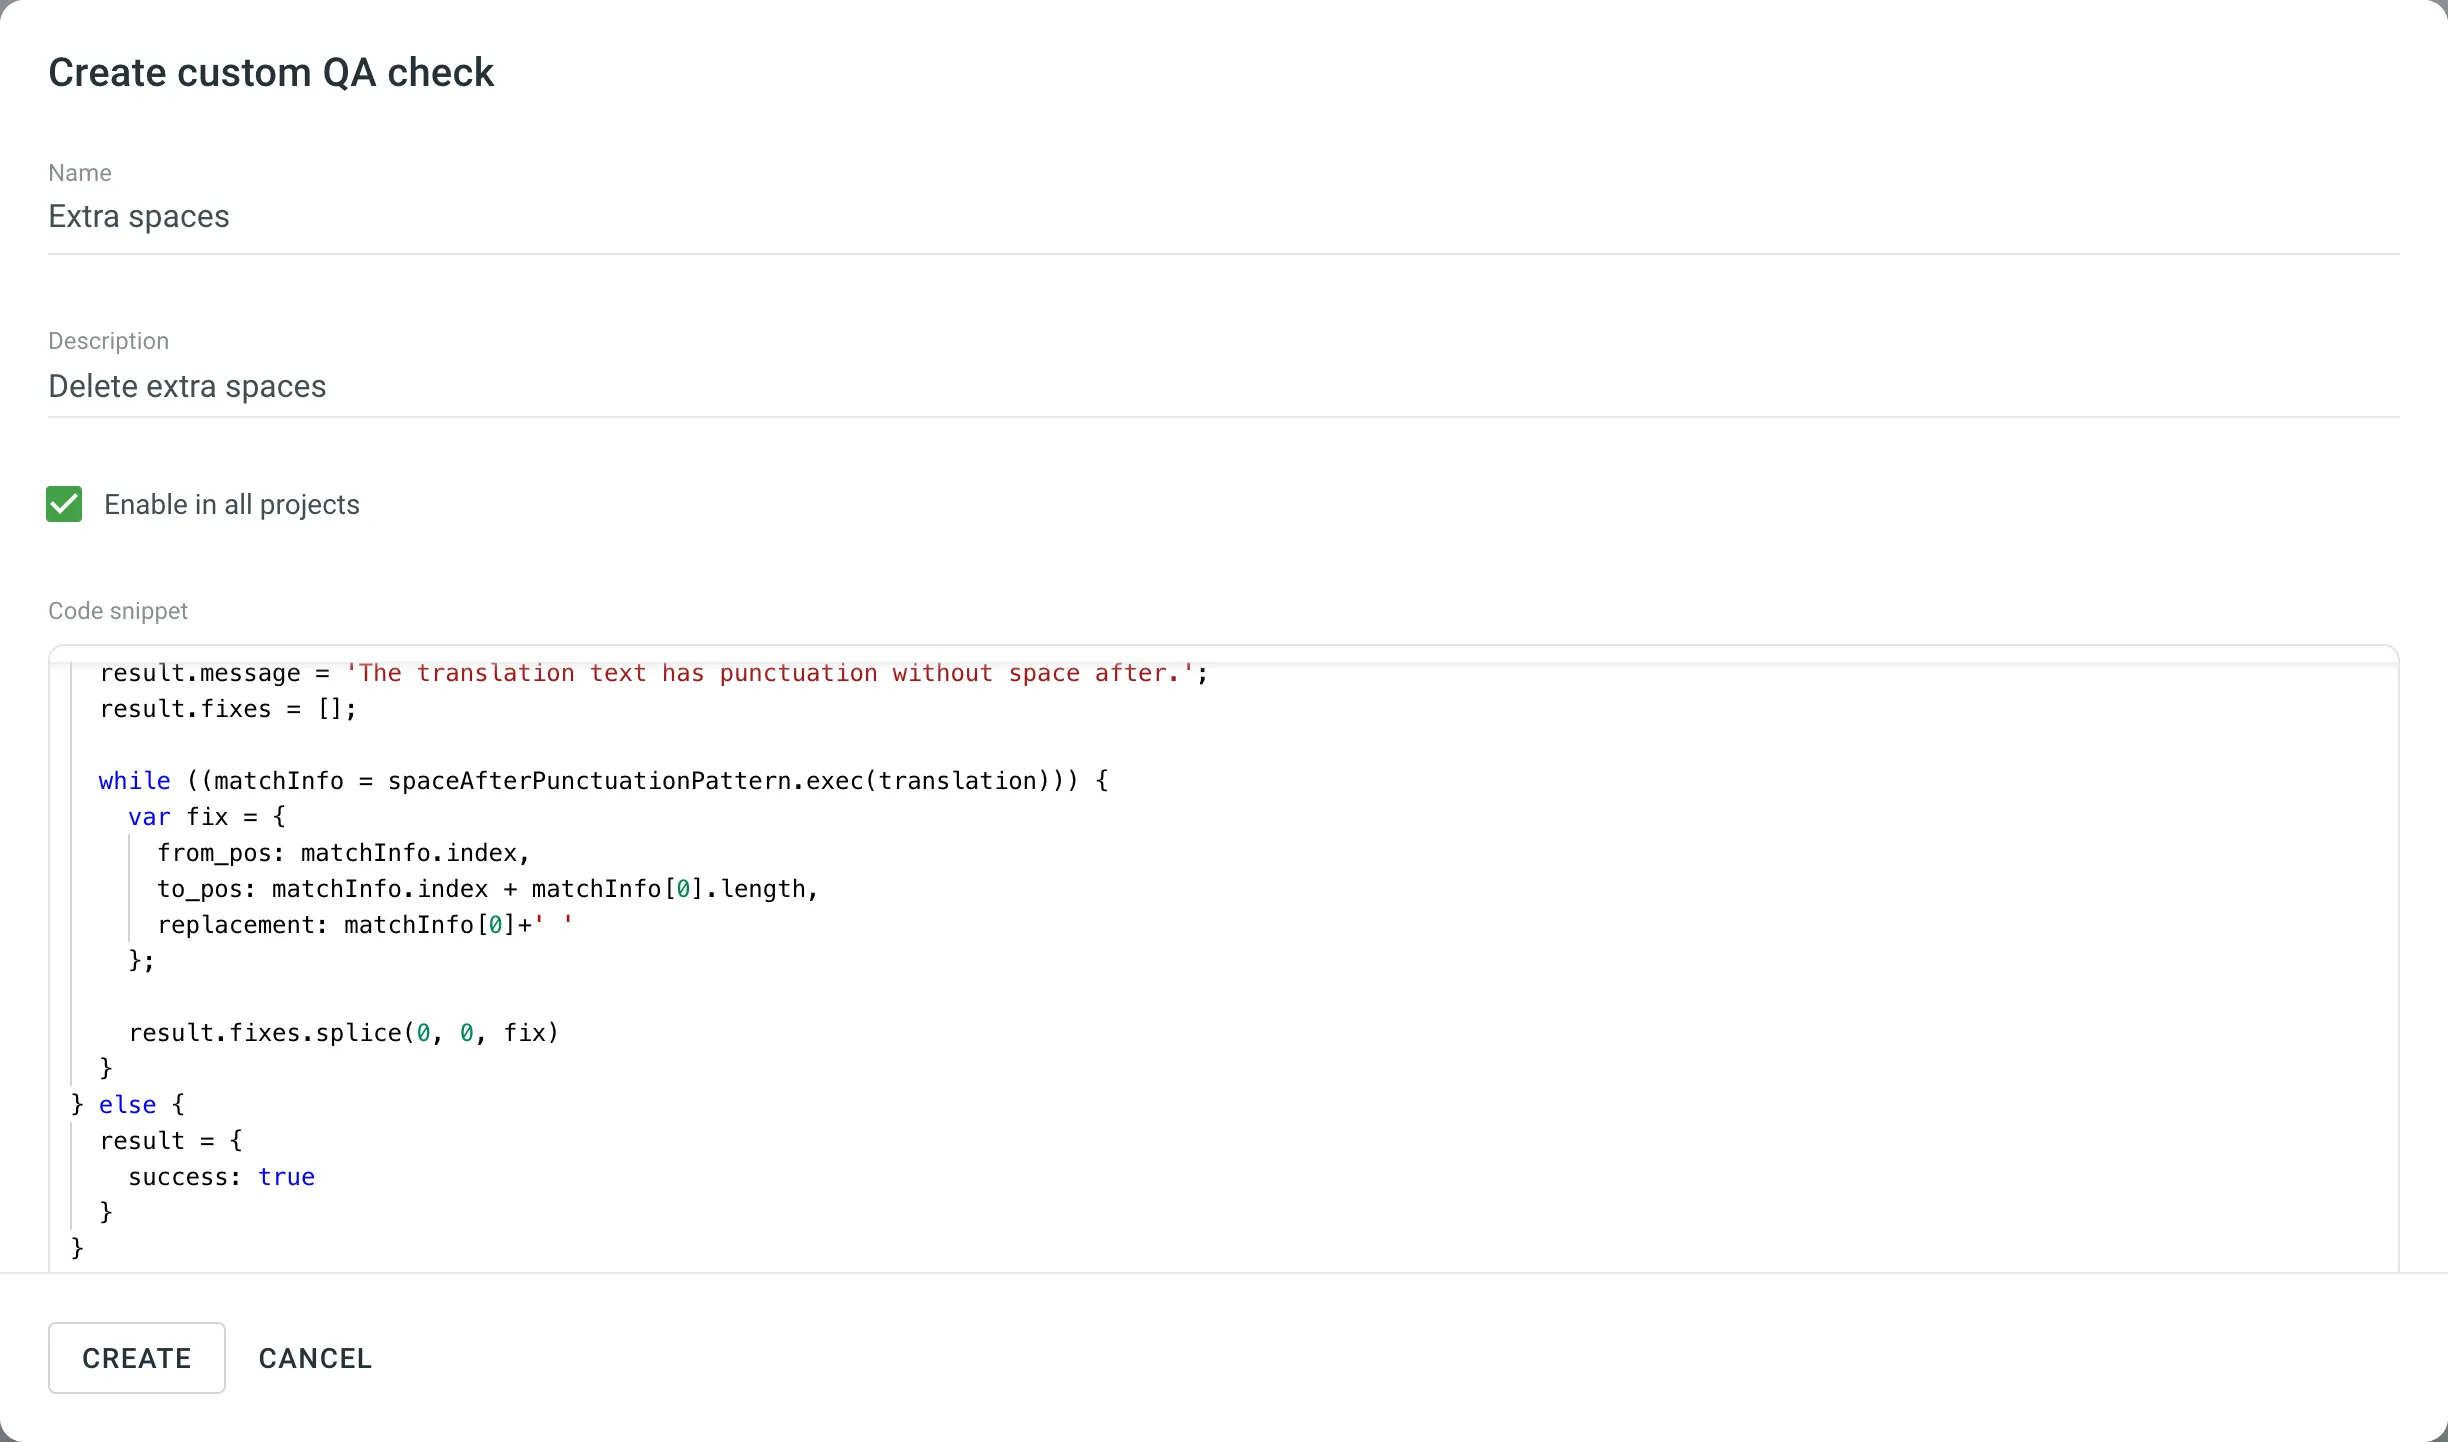 Alternatively, to add existing Custom QA Checks from the [Crowdin Store](https://store.crowdin.com/types/qa-check), follow these steps: 1. Go to **Organization Settings > Custom QA checks**. 2. Click **Add from store**. 3. Click next to the needed custom QA check. 4. Click **Create**. ### [Code Snippet](#code-snippet) [Section titled “Code Snippet”](#code-snippet) Custom QA Checks use JavaScript-based code snippets. These snippets are intended for users with basic JavaScript knowledge who want to create automated validation rules for translations. Each custom QA check works by evaluating a `crowdin` object, which contains the context and content of the translation currently being checked. Your snippet should analyze the translation and return whether it passes the check or requires fixing. #### [Parameters](#parameters) [Section titled “Parameters”](#parameters) The code snippet includes a `crowdin` object and a number of properties. To create the code snippet, use this object template as the input structure: ```text object crowdin { object file { string name, string fullName, string branch, string type } string sourceLanguage, string targetLanguage, object context { string context, ?int maxLength, ?string pluralForm, ?string identifier }, string contentType, string source, string translation } ``` #### [Request Example](#request-example) [Section titled “Request Example”](#request-example) The following keys are used in the request object: | Property | Description | | -------------------- | ------------------------------------------------------------------------------------------------------------------------------ | | `file.name` | Source file name | | `file.fullName` | Full path to the source file in the project (excluding branch if any) | | `file.branch` | Branch name the source file is stored in | | `file.type` | Source file type | | `sourceLanguage` | [Crowdin’s code](/developer/language-codes/) for the project source language | | `targetLanguage` | [Crowdin’s code](/developer/language-codes/) for the project target language | | `source` | Source text | | `translation` | Translated string | | `context.context` | Source string context | | `context.maxLength` | Maximum length of the translated string | | `context.pluralForm` | PluralForm indicates which plural form is being translated right now | | `context.identifier` | Source string identifier (key) | | `contentType` | String can include one of the 3 types: `text/plain`, `application/vnd.crowdin.text+plural`, `application/vnd.crowdin.text+icu` | Below is an example of a custom QA check code snippet request: ```json { "file": { "name": "strings.json", "fullName": "backend/strings.json", "branch": "master", "type": "json" }, "sourceLanguage": "en", "targetLanguage": "de", "context": { "context": "backend.string.example.plain", "maxLength": 10, "pluralForm": "one", "identifier": "6a1821e6499ebae94de4b880fd93b985" }, "contentType": "application/vnd.crowdin.text+plural", "source": '{"one":"Password", "other":"Passwords"}', "translation": "das Passwort " } ``` #### [Response](#response) [Section titled “Response”](#response) After running the code snippet, it should return a response indicating whether the custom QA check has passed successfully or failed. ##### [Passed QA Check Example](#passed-qa-check-example) [Section titled “Passed QA Check Example”](#passed-qa-check-example) ```json { "success": true } ``` ##### [Failed QA Check Example](#failed-qa-check-example) [Section titled “Failed QA Check Example”](#failed-qa-check-example) ```json { "success": false, "message": "The sentence starts with a space. Please remove 1 space at the beginning of the translation.", "fixes": [ { "from_pos": 0, "to_pos": 1, "replacement": "" } ] } ``` The `message` explains what the translator should fix. The `fixes` array provides instructions for automatically fixing the translation directly in the Crowdin Editor. * `from_pos` – The character position in the `translation` string where the replacement starts. * `to_pos` – The end character position. * `replacement` – The text that should replace the characters between `from_pos` and `to_pos`. ##### [Fixes Example](#fixes-example) [Section titled “Fixes Example”](#fixes-example) ```json { "from_pos": 0, "to_pos": 1, "replacement": "" } ``` ### [Limitations](#limitations) [Section titled “Limitations”](#limitations) Custom QA check code snippets have the following limitations: * The code runs in a completely sandboxed environment. Neither browser context nor Node.js context is available. * Standard JavaScript objects like `Date`, `Math`, and others are not available. * Execution time is limited to **100 ms**. If your code runs longer, the QA check will be stopped. Simplify your logic and test using the [Crowdin Script Editor](https://crowdin.github.io/crowdin-script-editor/). **Best Practices:** * Keep your code lightweight to avoid execution timeouts. * Use regular expressions for efficient pattern matching. * Include `fixes` to speed up the review process for translators. ## [External QA Checks](#external-qa-checks) [Section titled “External QA Checks”](#external-qa-checks) External QA Checks are Crowdin Apps that extend the built-in QA functionality. These checks run asynchronously and are ideal for more complex use cases that require network requests, external integrations, or advanced logic. **Use Cases:** * Validate translations against your style guide using AI. * Perform server-side rendering to measure text dimensions with custom fonts. * Integrate with third-party services to verify sensitive content. External QA Checks work independently of Crowdin’s synchronous checks and offer more flexibility by running as separate services. ### [Installing and Configuring External QA Checks](#installing-and-configuring-external-qa-checks) [Section titled “Installing and Configuring External QA Checks”](#installing-and-configuring-external-qa-checks) You can add External QA Checks from the [Crowdin Store](https://store.crowdin.com/types/qa-check) or develop your own apps through the [Crowdin Developer Portal](/developer/crowdin-apps-module-external-qa-check/). To install and configure an External QA Check: 1. Go to **Organization Settings > Custom QA checks**. 2. Scroll to the **External QA checks** section. 3. Click **Add from store**. 4. In the Crowdin Store, find the External QA Check app you want to add and click **Install**. 5. After installation, configure the app settings (if required). Each app may have different configuration steps depending on its functionality. 6. Click **Submit** to save the configuration. [Censor Guard QA ](https://store.crowdin.com/censor-guard-qa)Use this app to validate your translations for censorship. ## [Enabling Custom and External QA Checks in Projects](#enabling-custom-and-external-qa-checks-in-projects) [Section titled “Enabling Custom and External QA Checks in Projects”](#enabling-custom-and-external-qa-checks-in-projects) Once added, both Custom QA Checks and External QA Checks will appear in your project’s **Settings > Quality assurance** alongside Crowdin’s built-in QA checks. You can enable or disable them depending on your project requirements. 1. Open your project and go to **Settings > Quality assurance**. 2. Select the needed QA checks (Custom and External). Read more about [Quality Assurance settings](/enterprise/project-settings/qa-checks/).
# Custom Segmentation
> Define your own segmentation rules for each source file individually
Each time you upload XML, HTML, MD, or any other source files without a key-value structure, the predefined segmentation rules (SRX 2.0) are used for automatic content segmentation. Although, there might be situations when the default segmentation rules segment source files in contrast to the desired expectations. In this case, you can define your own segmentation rules for each source file individually using the [SRX 2.0 standard](https://www.gala-global.org/srx-20-april-7-2008). ## [Change Segmentation](#change-segmentation) [Section titled “Change Segmentation”](#change-segmentation) You can change segmentation in **Sources > Files**. 1. Open the project where you’d like to adjust the segmentation rules and go to **Sources > Files**. 2. Click (or right-click) on the needed file and select **Settings**. 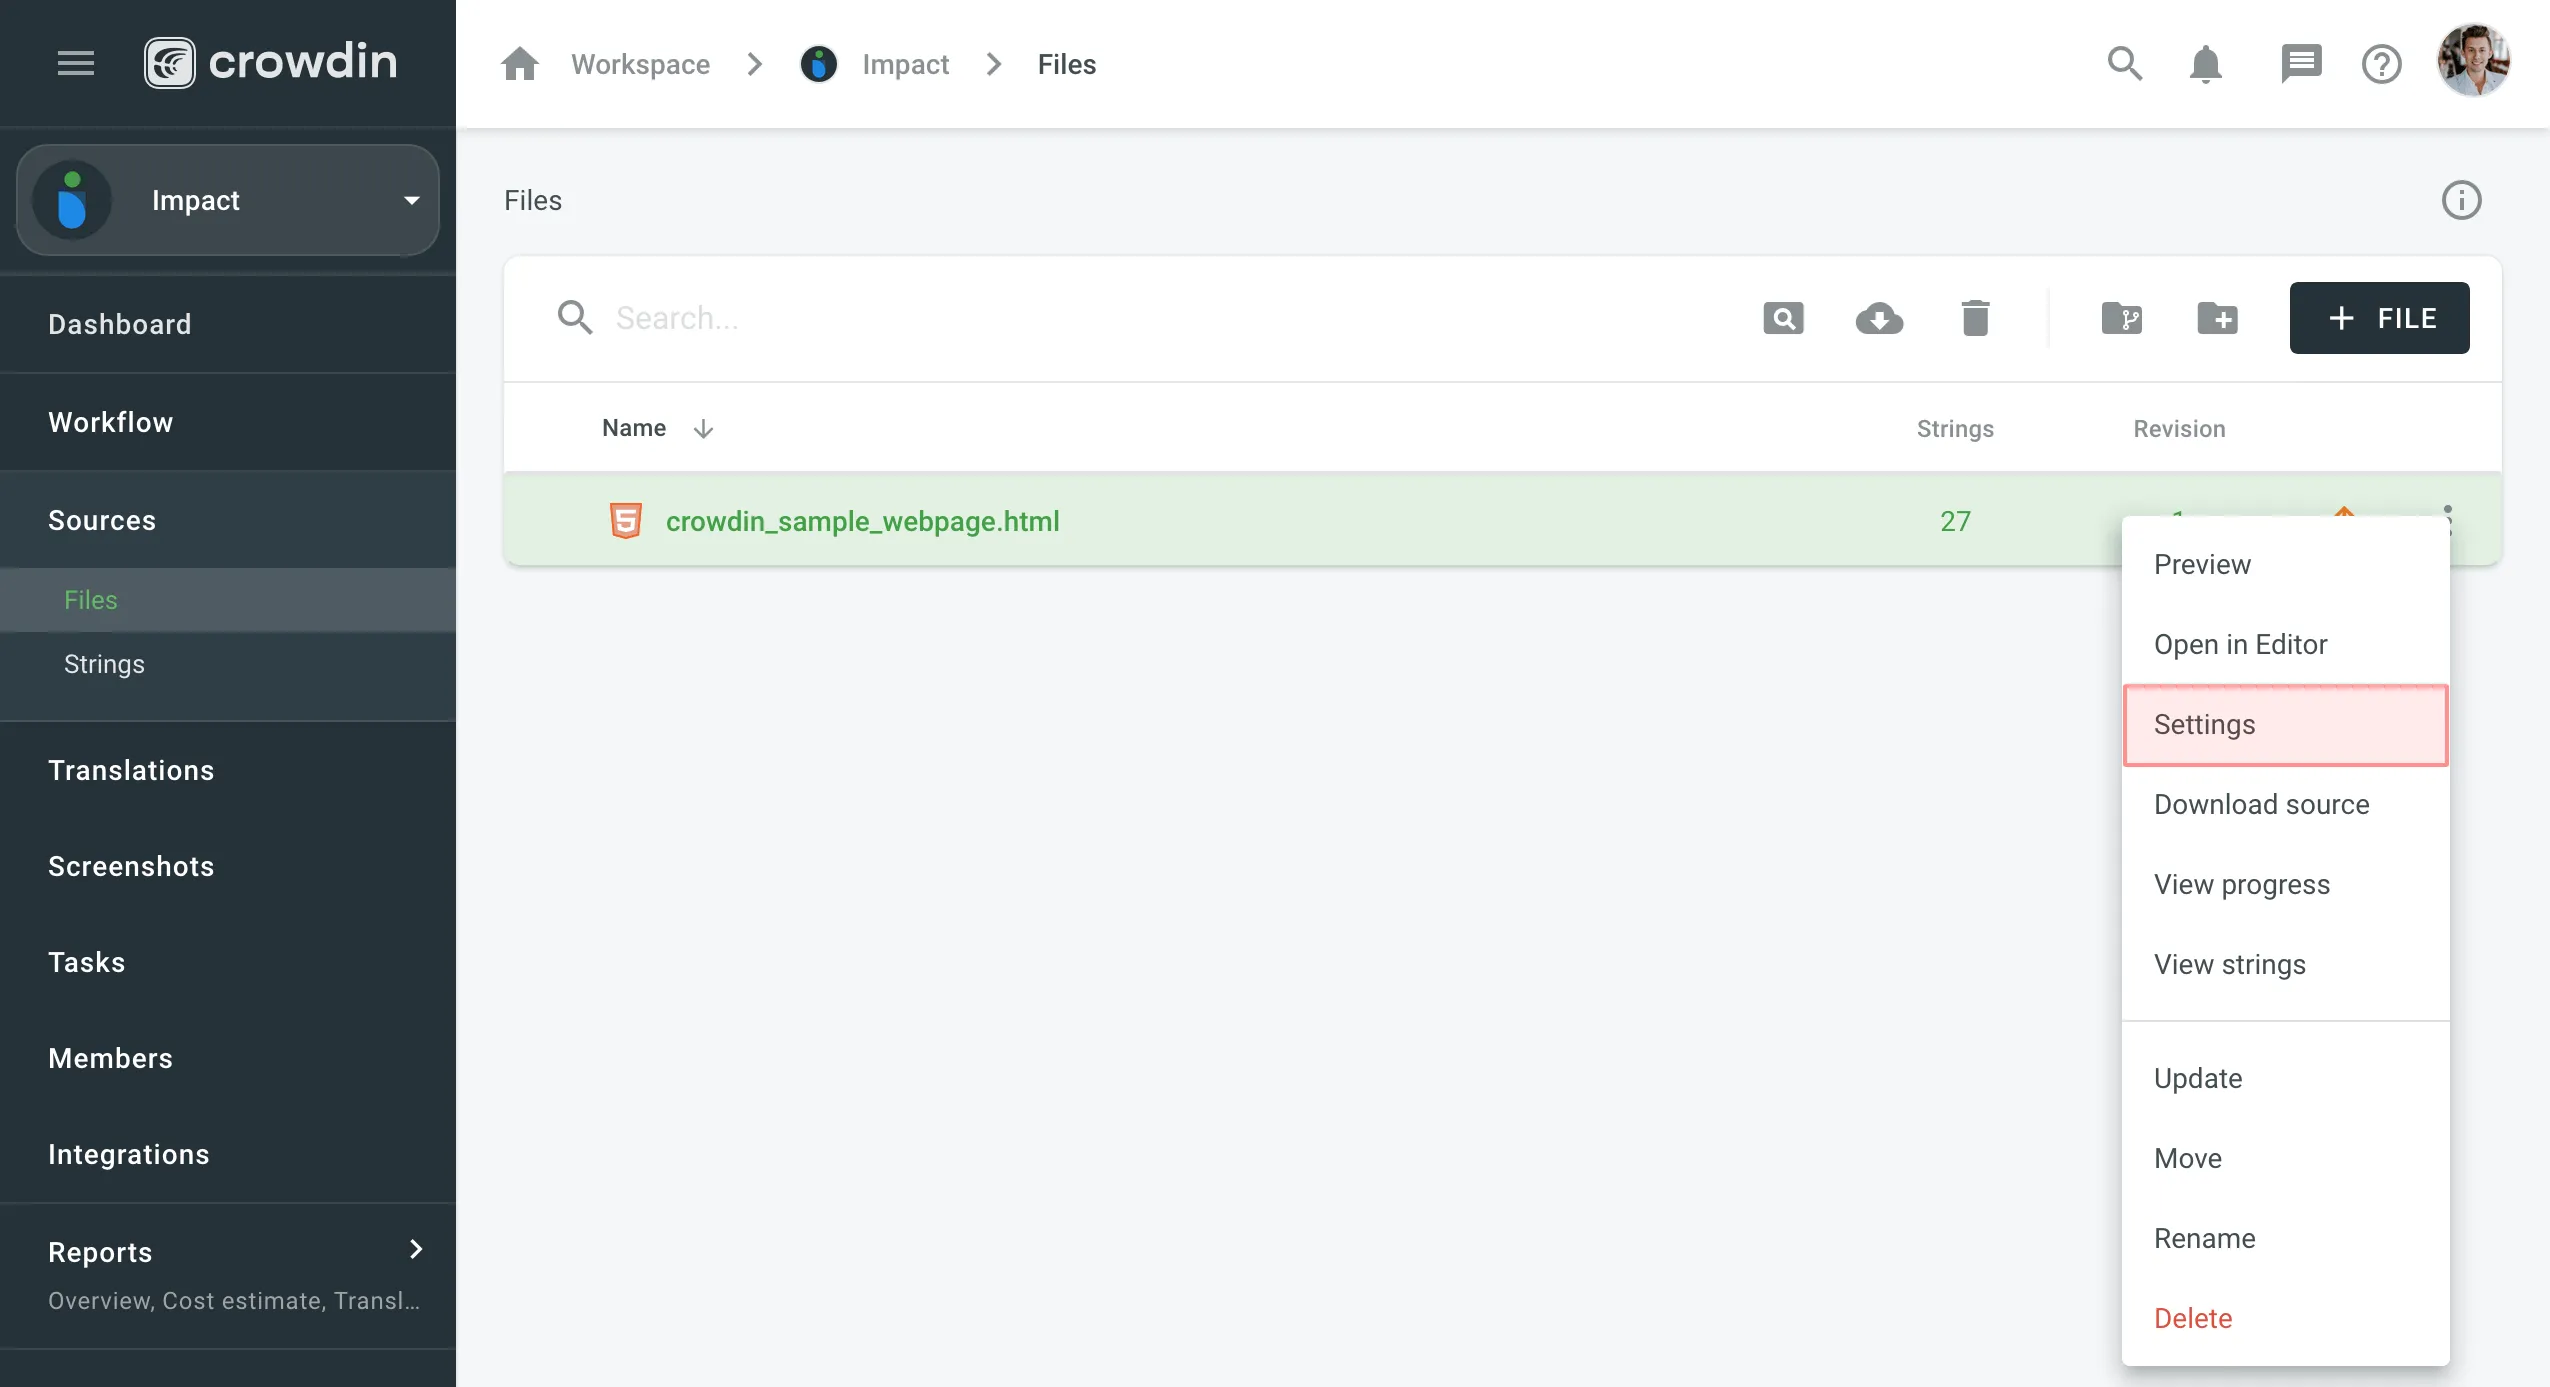 3. In the appeared dialog, switch to the **Parser configuration** tab. 4. In the **Excluded elements** field, specify all elements that should not be imported. 5. Select **Enable content segmentation** and **Use custom segmentation rules**. 6. Paste your SRX segmentation rules and click **Save**. 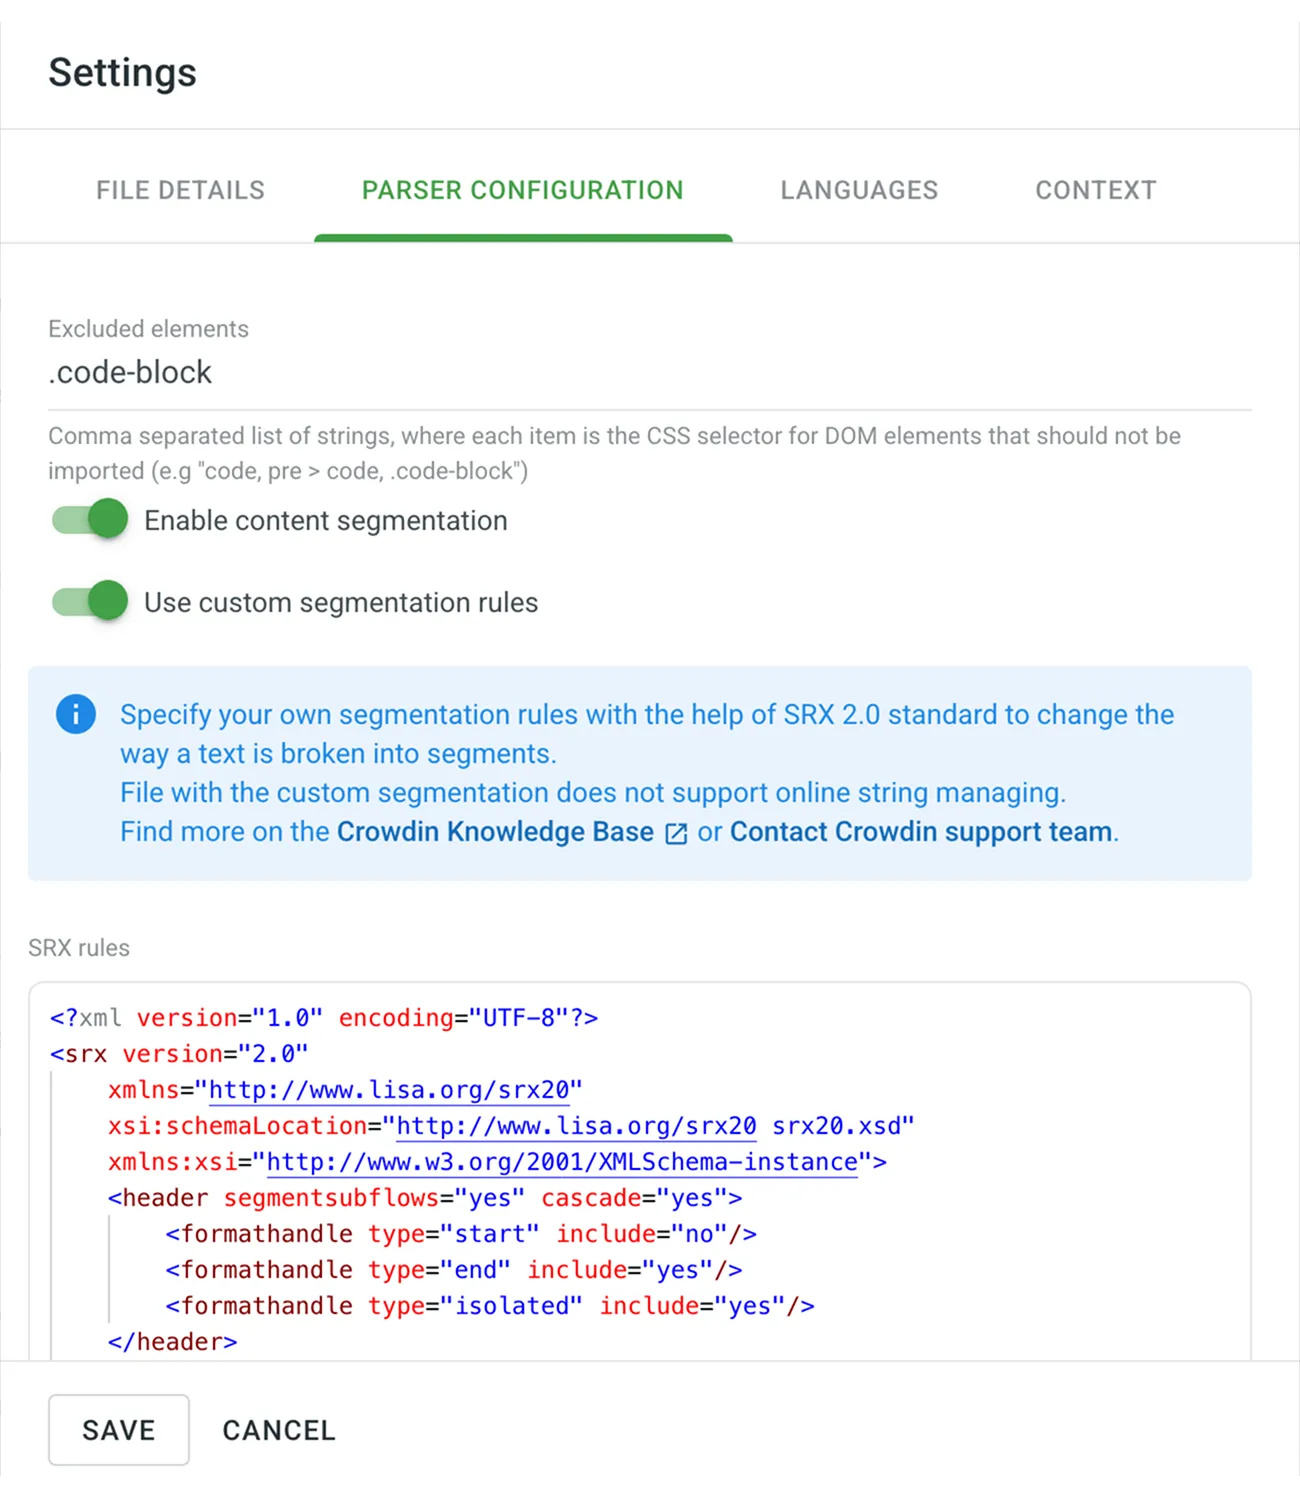 After you save your new segmentation rules, your source file will be automatically reimported and segmented according to these new rules. ## [Segmentation Examples](#segmentation-examples) [Section titled “Segmentation Examples”](#segmentation-examples) A typical SRX file looks similar to the following: ```xml ^\s*[0-9]+\.\s\n[\.\?!]+\s ``` ### [Change Sentence Separator for Asian Languages](#change-sentence-separator-for-asian-languages) [Section titled “Change Sentence Separator for Asian Languages”](#change-sentence-separator-for-asian-languages) Usually, the full stop is used as a sentence separator. Although, for some Asian languages, it’s not the case. For example, the typical sentence separator in Chinese is an ideographic full stop (`。`). For such cases, you may want to use the following ruleset: ```xml [\x3002]+ ``` ### [Break Text into Smaller Parts](#break-text-into-smaller-parts) [Section titled “Break Text into Smaller Parts”](#break-text-into-smaller-parts) In the following simple sentence, we’ll break down a case when segmenting one text piece into two (or more) strings is necessary. Text with default segmentation rules: `This is the first part of the sample sentence and this is the second part.` Text with new segmentation rules: `This is the first part of the sample sentence` `and this is the second part.` For this particular case, the following ruleset will break the initial sentence into two parts: ```xml sentence\u0020 ``` ## [Create Segmentation Rules with SRX Editors](#create-segmentation-rules-with-srx-editors) [Section titled “Create Segmentation Rules with SRX Editors”](#create-segmentation-rules-with-srx-editors) The SRX segmentation rules can be created and maintained with the help of tools like [Ratel](http://okapiframework.org/wiki/index.php?title=Ratel). It has a visual interface where you can generate segmentation rules from scratch or edit your existing ones. [Segmentation Rules Generator ](https://store.crowdin.com/segmentation)Create and test the new segmentation rules on your Crowdin projects. [SRX Playground ](https://store.crowdin.com/srx-playground)AI-powered SRX Rules Editor.
# Downloading Translations
> Learn how to download translations from your project
You can download translations from your Crowdin Enterprise project using and combining various options like the Web UI, Console Client (CLI), API, and integrations. ## [Project Translation Download](#project-translation-download) [Section titled “Project Translation Download”](#project-translation-download) To download translations for the whole project, follow these steps: 1. Open your project and select **Translations** on the left sidebar. 2. Click **Download as ZIP** to expand the respective section. 3. Click **Download**. 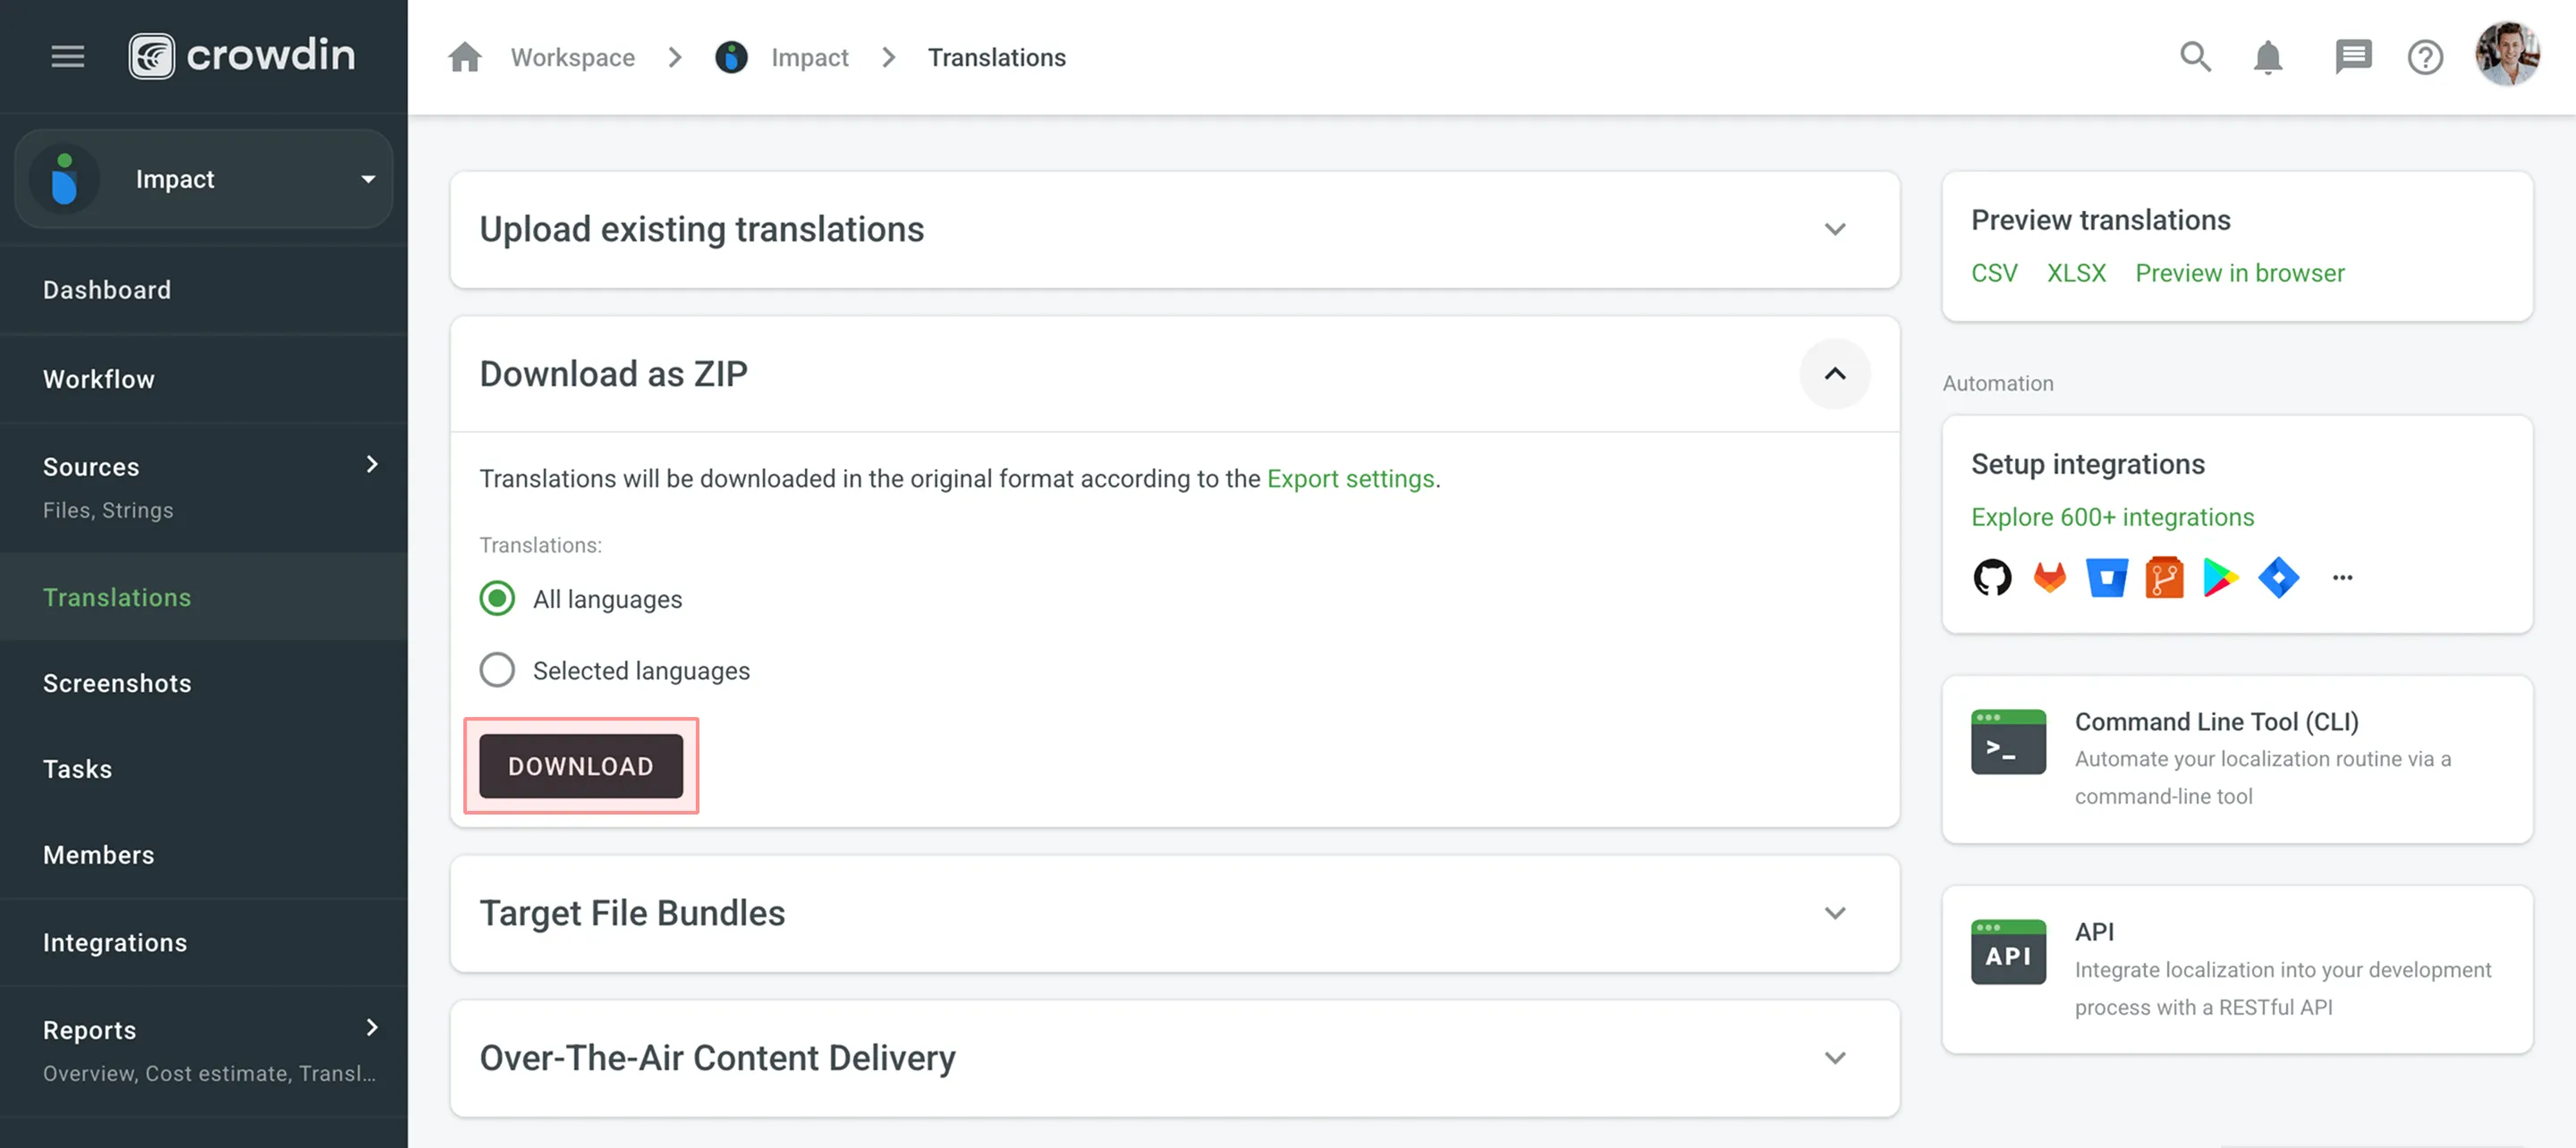 By default, the downloaded ZIP archive contains separate folders for each language. These folders are named with the corresponding [Language Codes](/developer/language-codes/). Limitations *Project*, *Language* and *File Translation Download* is only available for [file-based](/enterprise/creating-project/#project-types) projects. For string-based projects, use [Target File Bundles](#target-file-bundles). ## [Language Translation Download](#language-translation-download) [Section titled “Language Translation Download”](#language-translation-download) To download translations for a separate target language, follow these steps: 1. Open your project and select **Translations** on the left sidebar. 2. Click **Download as ZIP** to expand the respective section. 3. Select **Selected languages**. 4. Select the needed language from the drop-down menu. 5. Click **Download**. 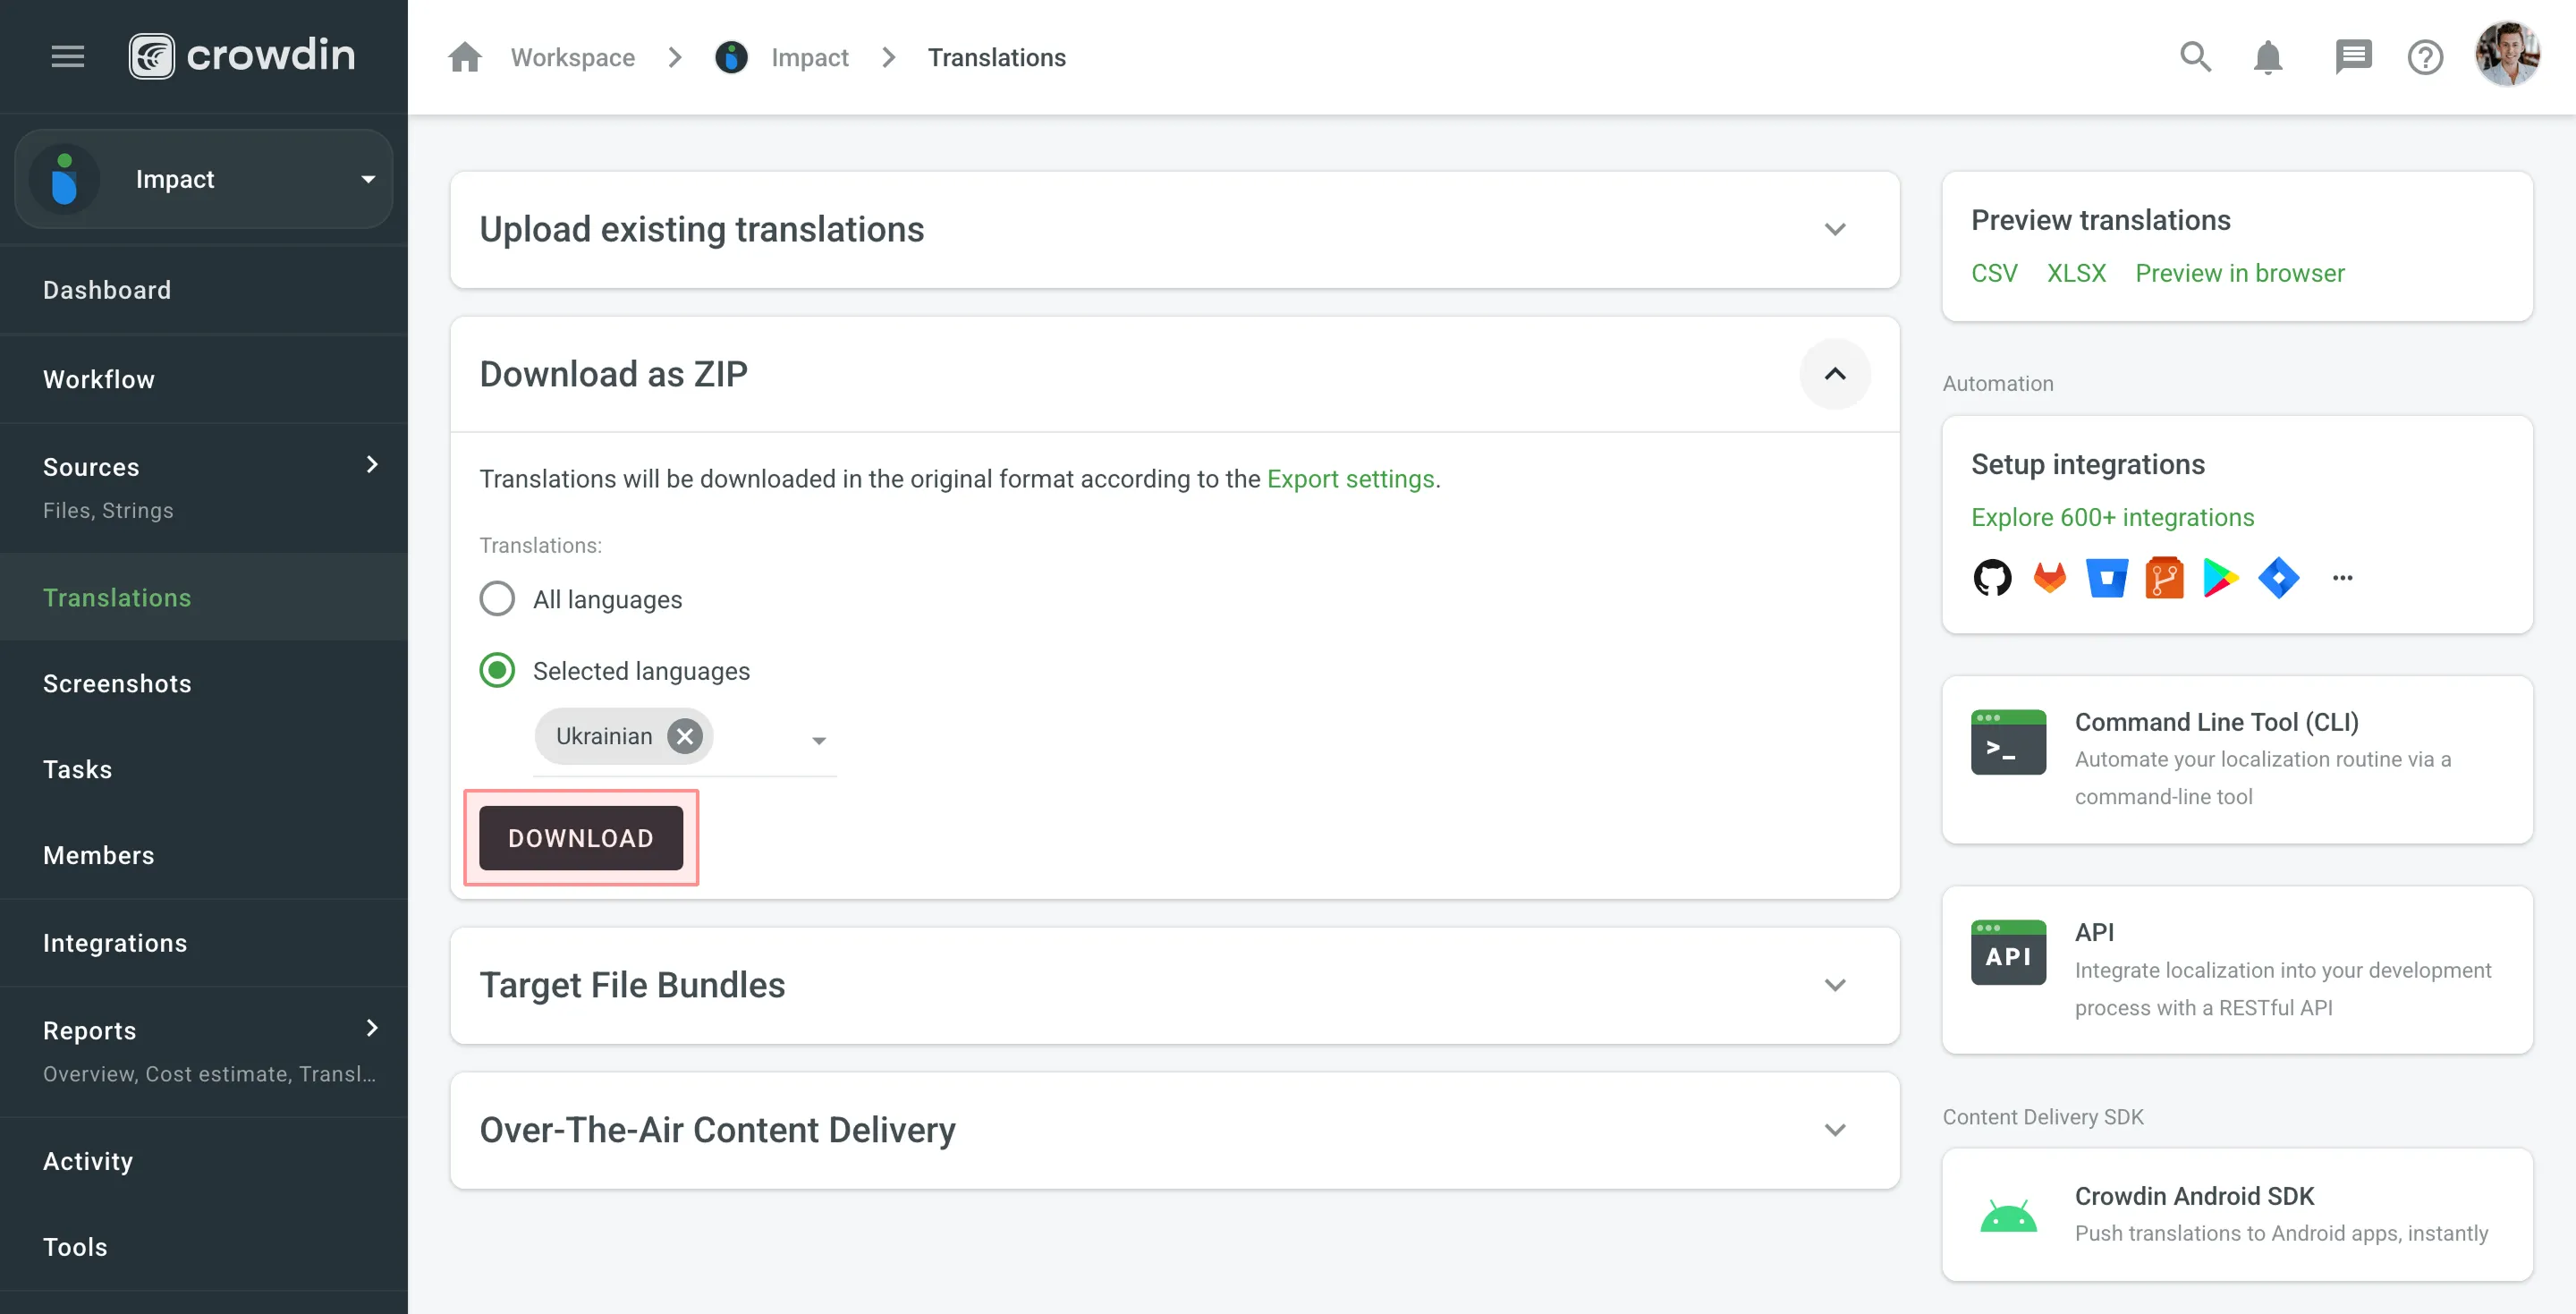 ## [File Translation Download](#file-translation-download) [Section titled “File Translation Download”](#file-translation-download) You can download translations for a separate file either on the language page or in the Editor. To download translations for a separate file on the language page, follow these steps: 1. Open your project and select the target language. 2. Click toward the needed file. 3. Select **Download**. 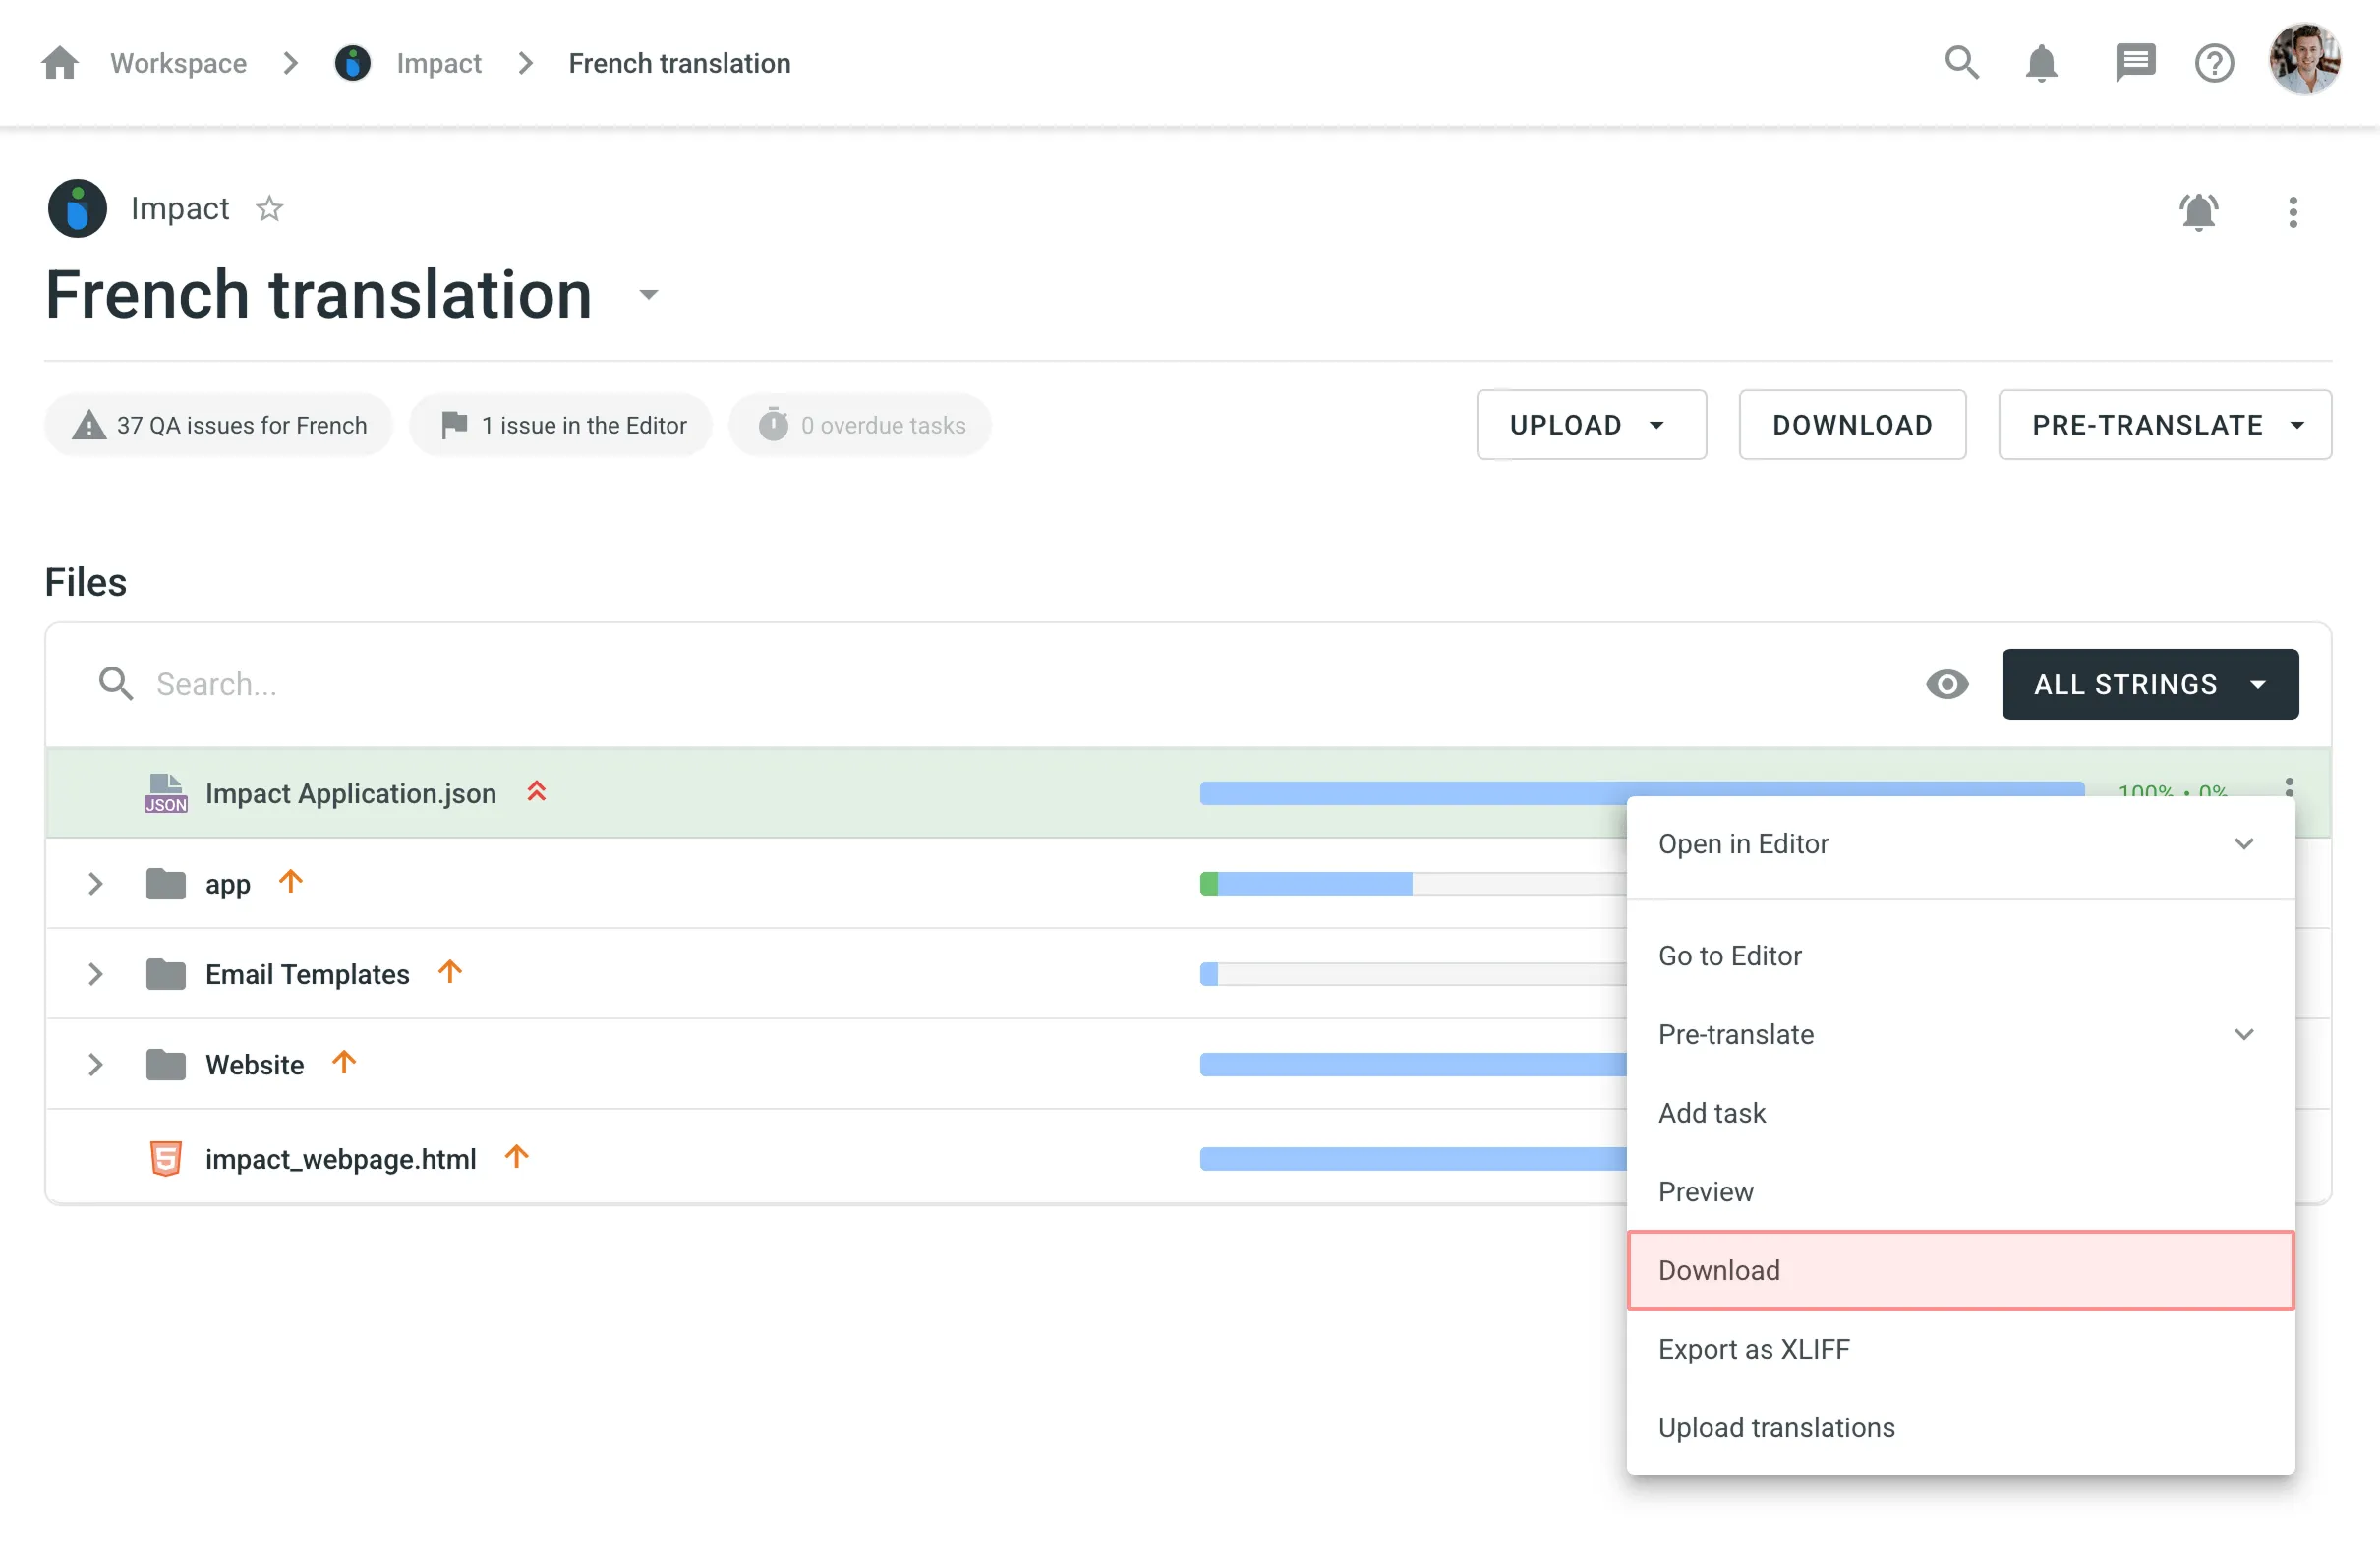 To download translations for a separate file in the [Editor](/enterprise/online-editor/), follow these steps: 1. Open your project and select the target language. 2. Click on the needed file to open it in the Editor. 3. Click on the Main menu in the upper-left corner. 4. Select **Download**. 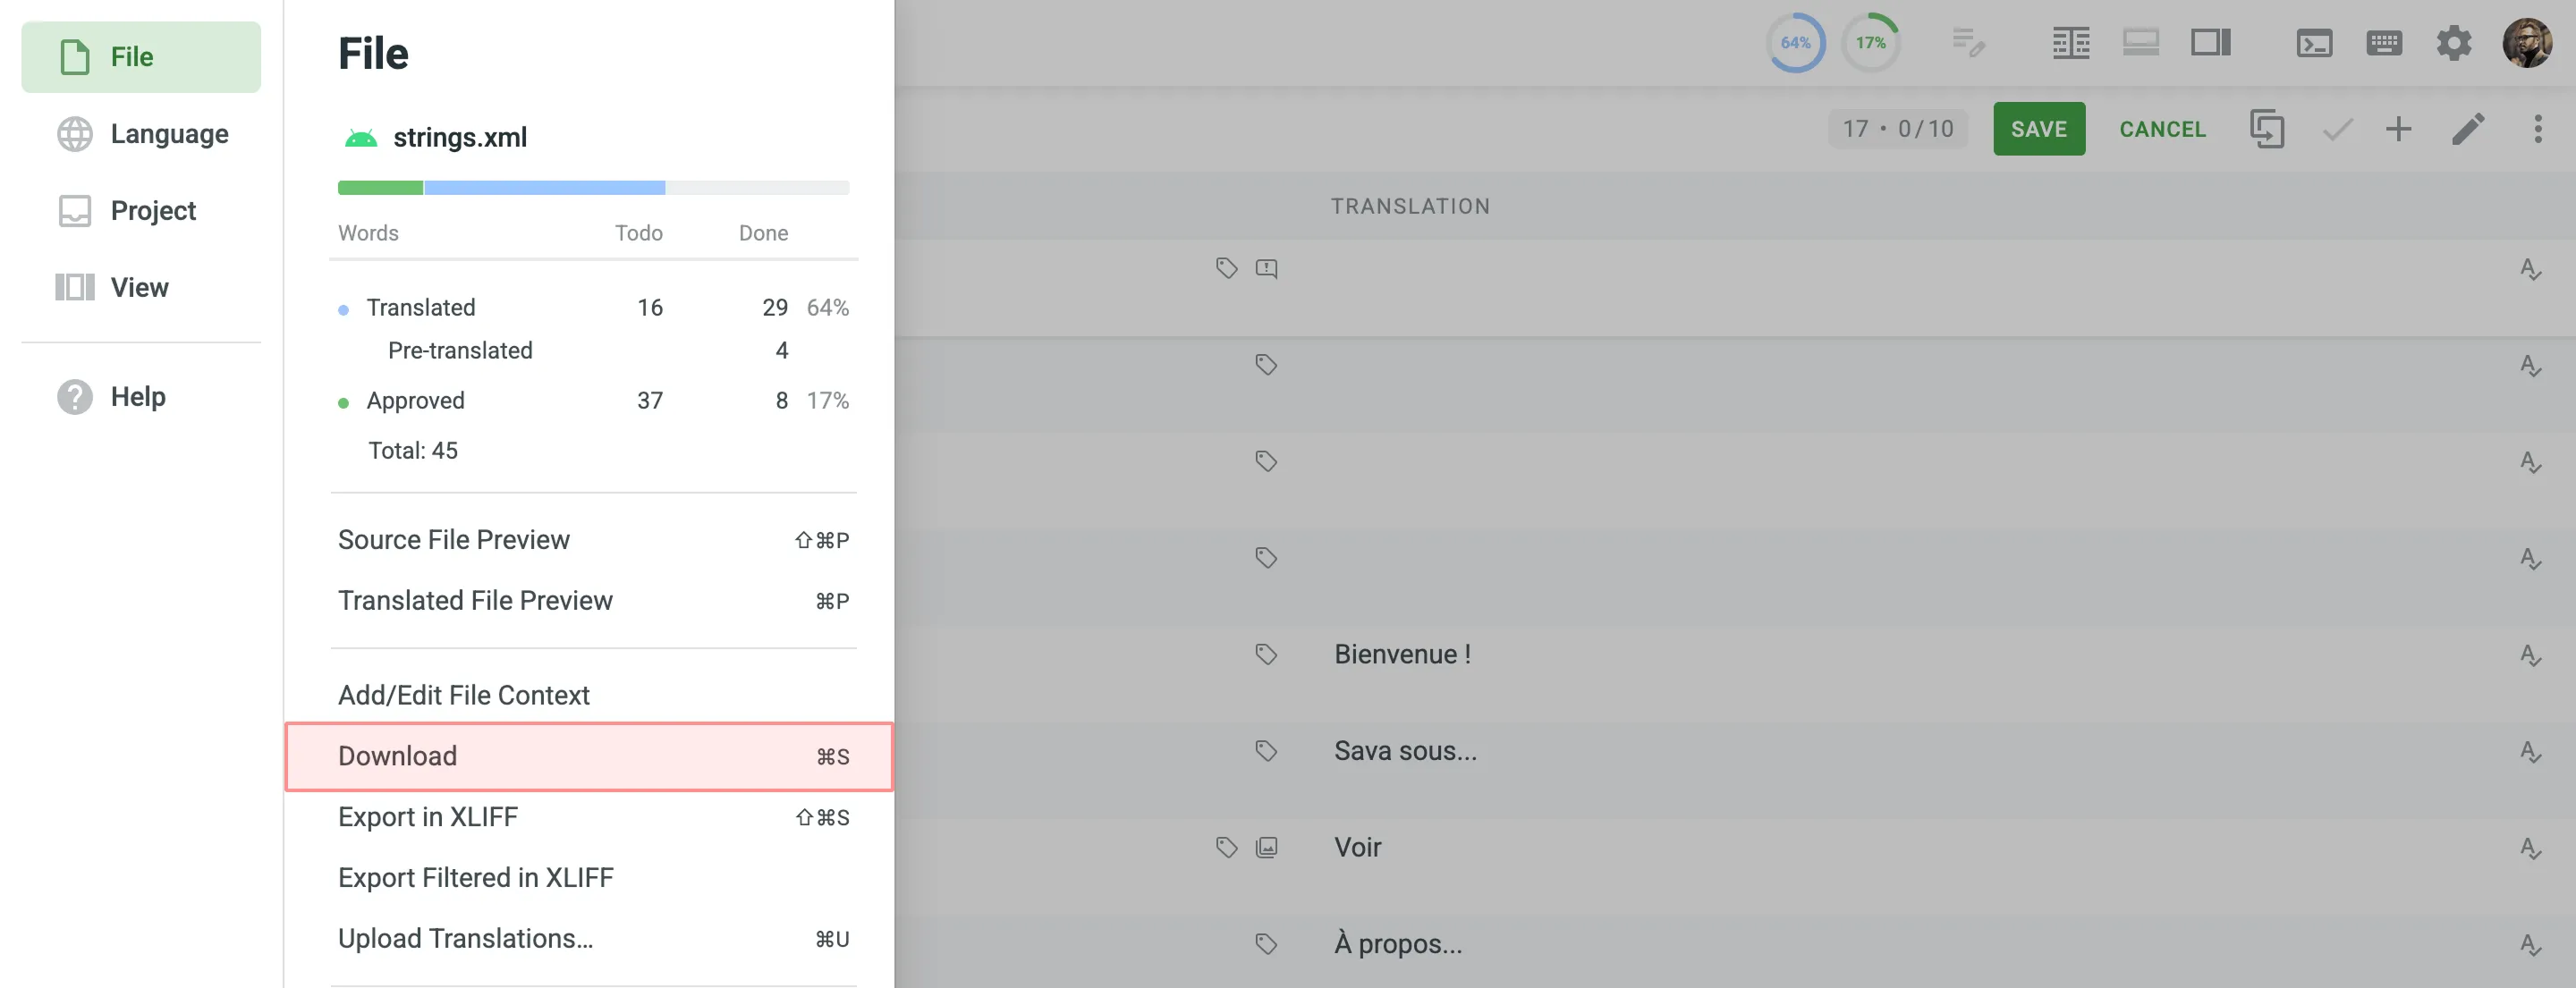 ## [Target File Bundles](#target-file-bundles) [Section titled “Target File Bundles”](#target-file-bundles) The Target File Bundles section allows you to manage bundles for exporting sets of strings in one of the selected formats. Read more about [configuring bundles](/enterprise/bundles/#managing-bundles-in-ui). ## [Over-The-Air Content Delivery](#over-the-air-content-delivery) [Section titled “Over-The-Air Content Delivery”](#over-the-air-content-delivery) The Over-The-Air Content Delivery section allows you to set up and manage instant translation delivery to your mobile (iOS, Android), server, web, or desktop apps via CDN. Read more about [Content Delivery](/enterprise/content-delivery/). ## [Preview Translations](#preview-translations) [Section titled “Preview Translations”](#preview-translations) To preview translations for a whole project, follow these steps: 1. Open your project and select **Translations** on the left sidebar. 2. Choose one of the available options in the **Preview translations** section: * **CSV** – download all project translations in a single CSV file. * **XLSX** – download all project translations in a single XLSX file. 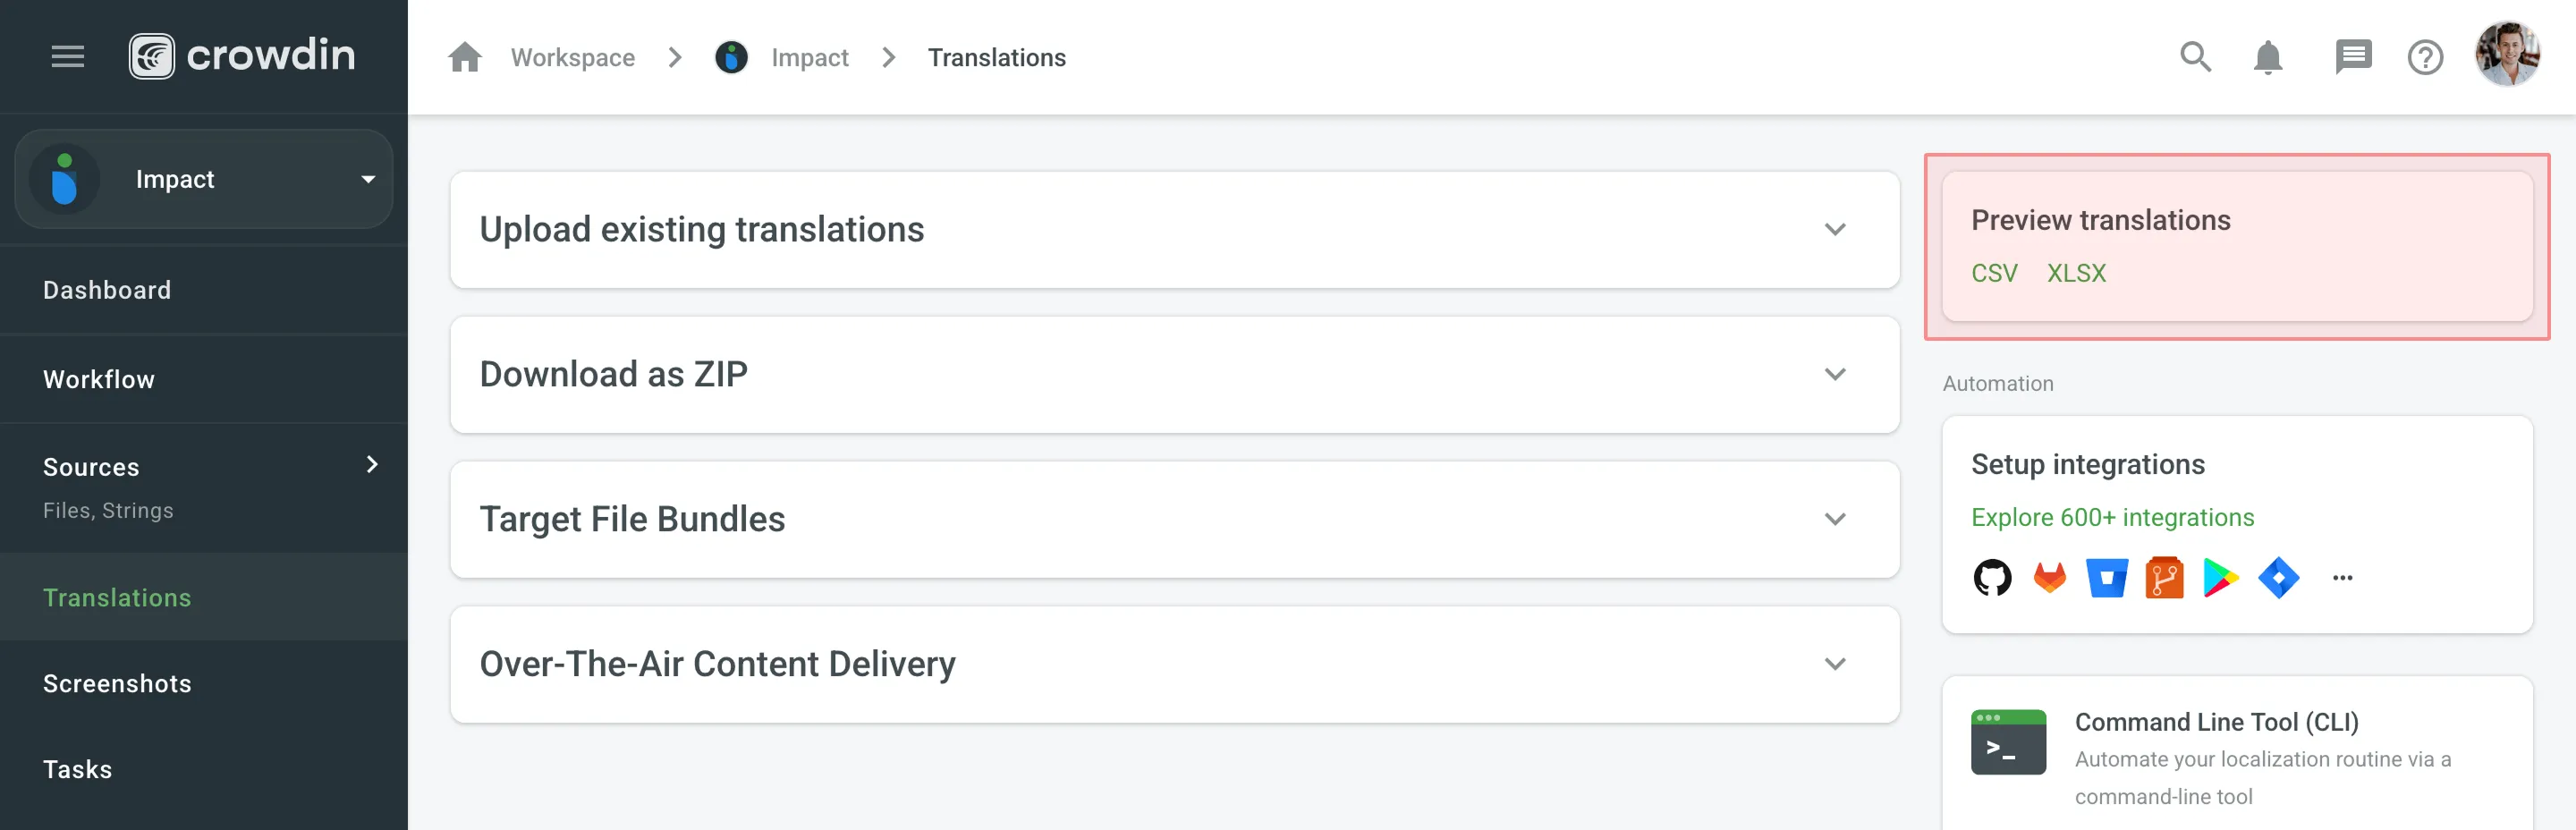 ## [See Also](#see-also) [Section titled “See Also”](#see-also) [Integrations ](/enterprise/integrations/)Seamlessly integrate localization into any phase of your product. [API ](/developer/api/)Learn how to use Crowdin's API to integrate localization into your process. [Developer Tools ](/developer/dev-tools/)Automate the localization process and integrate it into your development workflow.
# Expression Syntax Elements
> Learn about the different elements of the expression syntax
You can configure verbal expressions and custom placeholders using a shared set of expression syntax elements. These elements define how specific parts of a string should be matched, based on structure, character types, or formatting patterns. ## [Expression Elements](#expression-elements) [Section titled “Expression Elements”](#expression-elements) Use the elements below to configure verbal expressions and custom placeholders. | **Element** | **Aliases** | **Description** | **Usage examples** | | -------------- | ------------------------------ | --------------------------------------------------------------------------------------------------- | -------------------- | | `start` | `startofline`, `start of line` | mark expression with ^ | | | `end` | `end of`, `endofline` | mark the expression with $ | | | `then` | `find` | add a string to the expression | `then "abc"` | | `maybe` | | define a string that might appear once or not | `maybe "abc"` | | `word` | | match any word that contains characters from a-z, A-Z, 0-9, including the \_ (underscore) character | | | `anything` | | accept any string | | | `range` | | add a range to the expression | `range "a,z,0,9"` | | `something` | | accept any non-empty string | | | `anythingbut` | `anything but` | accept any string but the specified character | `anythingbut "abc"` | | `anyof` | `any`, `any of` | any of the listed characters | `anyof "abc"` | | `somethingbut` | `something but` | anything non-empty except for these characters | `somethingbut "abc"` | | `limit` | | add character limit | `limit "1,3"` | | `linebreak` | `line break, br` | match \r \n (might be used only with other elements) | | | `tab` | | match tabs \t (might be used only with other elements) | | | `multiple` | | adds the multiple modifier | | ## [Verbal Expressions](#verbal-expressions) [Section titled “Verbal Expressions”](#verbal-expressions) In the Editor, you can use verbal expressions in the [Advanced Filter](/enterprise/online-editor/#advanced-filter) to search for strings that match specific patterns, similar to regular expressions. You can use it to filter strings based on patterns like punctuation, character types, length, and more. For example, to find all strings that start with an uppercase letter and end with a period, use the following expression: ```graphql start "true", range "A,Z", anything, range "a,z,A,Z,0,9", limit "1,50", then ".", end "true" ``` This expression means: * `start "true"` – the string begins at the start * `range "A,Z"` – starts with a capital letter * `anything` – followed by any characters * `range "a,z,A,Z,0,9"` – allows letters and numbers * `limit "1,50"` – string length between 1 and 50 characters * `then "."` – ends with a period * `end "true"` – end of the string [Verbal Tester ](https://store.crowdin.com/verbal-tester)Create, check and edit verbal expressions in Crowdin project with Verbal Tester application [Try Verbal Expressions GPT ](https://chat.openai.com/g/g-NdFRRXHwm-crowdin-verbal-expressions-maker)Helps with Verbal Expressions development in Crowdin. ### [Verbal Expression Examples](#verbal-expression-examples) [Section titled “Verbal Expression Examples”](#verbal-expression-examples) Below are several examples of verbal expressions along with the types of strings they help match in your project. These are useful when you want to filter strings with specific content or structure. ##### [Start with Uppercase and End with a Period](#start-with-uppercase-and-end-with-a-period) [Section titled “Start with Uppercase and End with a Period”](#start-with-uppercase-and-end-with-a-period) String example: ```plaintext A test string. ``` Expression: ```graphql start "true", range "A,Z", anything, range "a,z,A,Z,0,9", limit "1,50", then ".", end "true" ``` ##### [Strings Containing URLs](#strings-containing-urls) [Section titled “Strings Containing URLs”](#strings-containing-urls) String example: ```plaintext Visit http://example.com or https://www.example.com ``` Expression: ```graphql then "http", maybe "s", then "://", maybe "www.", anythingbut " " ``` ##### [Strings with `%s` and `%d` Placeholders](#strings-with-s-and-d-placeholders) [Section titled “Strings with %s and %d Placeholders”](#strings-with-s-and-d-placeholders) String example: ```plaintext Welcome, %s! You have %d new messages. ``` Expression: ```graphql then "%", anyof "s,d" ``` ##### [Strings with Variables in Double Curly Brackets](#strings-with-variables-in-double-curly-brackets) [Section titled “Strings with Variables in Double Curly Brackets”](#strings-with-variables-in-double-curly-brackets) String example: ```plaintext Hello, {{user.name}}! ``` Expression: ```graphql then "{{", range "a,z", multiple, then ".", range "a,z", multiple, then "}}" ``` ##### [Strings with Variables in Double Curly Brackets (Including Uppercase Letters and Digits)](#strings-with-variables-in-double-curly-brackets-including-uppercase-letters-and-digits) [Section titled “Strings with Variables in Double Curly Brackets (Including Uppercase Letters and Digits)”](#strings-with-variables-in-double-curly-brackets-including-uppercase-letters-and-digits) String example: ```plaintext Hello, {{User123.name42}}! ``` Expression: ```graphql then "{{", range "a,z,A,Z,0,9", multiple, then ".", range "a,z,A,Z,0,9", multiple, then "}}" ``` ##### [Strings That Contain Floating Point Numbers](#strings-that-contain-floating-point-numbers) [Section titled “Strings That Contain Floating Point Numbers”](#strings-that-contain-floating-point-numbers) String example: ```plaintext The result is 3.14159 ``` Expression: ```graphql start, range "0,9", multiple, then ".", range "0,9", multiple, end ``` ##### [Strings That Start with Title Case (Two Capitalized Words)](#strings-that-start-with-title-case-two-capitalized-words) [Section titled “Strings That Start with Title Case (Two Capitalized Words)”](#strings-that-start-with-title-case-two-capitalized-words) String example: ```plaintext Quick Access is available now. ``` Expression: ```graphql start, range "A,Z", range "a,z", multiple, then " ", range "A,Z", range "a,z", multiple ``` ##### [Strings with Trailing Whitespace](#strings-with-trailing-whitespace) [Section titled “Strings with Trailing Whitespace”](#strings-with-trailing-whitespace) String example: ```plaintext This is a sentence with trailing space ``` Expression: ```graphql start "true", range "A,Z", anything, range "a,z,A,Z,0,9", then " ", end "true" ``` ##### [Strings Starting with a Hash Symbol (e.g., Hashtags or Anchors)](#strings-starting-with-a-hash-symbol-eg-hashtags-or-anchors) [Section titled “Strings Starting with a Hash Symbol (e.g., Hashtags or Anchors)”](#strings-starting-with-a-hash-symbol-eg-hashtags-or-anchors) String example: ```plaintext #GettingStarted ``` Expression: ```graphql start "true", then "#", something, end "true" ``` ##### [Strings Containing HTML Tags](#strings-containing-html-tags) [Section titled “Strings Containing HTML Tags”](#strings-containing-html-tags) String example: ```plaintext Click here to continue. ``` Expression: ```graphql then "<", something, then ">" ``` ##### [Strings Containing an Email Address Format](#strings-containing-an-email-address-format) [Section titled “Strings Containing an Email Address Format”](#strings-containing-an-email-address-format) String example: ```plaintext Please contact us at support@example.com ``` Expression: ```graphql then "@", somethingbut " " ``` ##### [Strings with Double Spaces (Possible Spacing Issue)](#strings-with-double-spaces-possible-spacing-issue) [Section titled “Strings with Double Spaces (Possible Spacing Issue)”](#strings-with-double-spaces-possible-spacing-issue) String example: ```plaintext This string has extra space. ``` Expression: ```graphql then " " ``` ##### [Strings Ending with a Colon](#strings-ending-with-a-colon) [Section titled “Strings Ending with a Colon”](#strings-ending-with-a-colon) String example: ```plaintext Enter your name: ``` Expression: ```graphql then ":", end "true" ``` ##### [Strings with a Currency Symbol Followed by Digits](#strings-with-a-currency-symbol-followed-by-digits) [Section titled “Strings with a Currency Symbol Followed by Digits”](#strings-with-a-currency-symbol-followed-by-digits) String example: ```plaintext Total: $29.99 ``` Expression: ```graphql then "$", range "0,9", multiple ``` ##### [Strings in camelCase Format](#strings-in-camelcase-format) [Section titled “Strings in camelCase Format”](#strings-in-camelcase-format) String example: ```plaintext lowerUpper ``` Expression: ```graphql start, range "a,z", multiple, range "A,Z", range "a,z", multiple, end ```
# Fields
> Set up custom properties to enhance your data management
Fields are custom properties that allow you to enhance work organization and data management in Crowdin Enterprise by adding additional helpful information, links, or data to various entities like your projects, user accounts, tasks, and more. Fields offer flexibility and customization to suit various use cases, whether marking critical projects, categorizing tasks, or adding contextual information to user accounts. This allows for enhanced clarity on work happening within a Crowdin Enterprise organization. Fields can be created and managed either via UI or API. Fields are also often created by Crowdin Apps. Usually, it’s best to preserve custom properties created by Crowdin Apps as they are. ## [Use Cases](#use-cases) [Section titled “Use Cases”](#use-cases) You can use fields in numerous scenarios. Here are a few examples: * **Project Prioritization** – mark critical projects with a custom checkbox field, allowing easy identification and prioritization. * **Task Categorization** – use custom labels or the select lists to categorize tasks based on specific criteria or attributes. * **User Customization** – add fields to user accounts to store additional information or preferences. * **Crowdin Apps Integration** – fields may serve as storage for app-specific information, facilitating integration with third-party applications. ## [Terminology](#terminology) [Section titled “Terminology”](#terminology) * **Field** – a customizable data entry point, allowing users to input specific information. * **Entity** – an object to which fields can be added (e.g., Project, Task, User, File, or String). * **Location** – the area within the UI where the field will be displayed. ## [Permissions](#permissions) [Section titled “Permissions”](#permissions) Fields can only be created and edited by the organization owner and admins either through UI or API. Once created, fields can be used by users with the appropriate roles in the organization. For example, a user who can create projects will be able to view and apply a field in the Create project dialog or in any other location available to the entity of the field. ## [Creating New Fields](#creating-new-fields) [Section titled “Creating New Fields”](#creating-new-fields) To create a new field, follow these steps: 1. Go to **Organization Settings > Fields**. 2. Click **New field**. 3. Set the field parameters: * *Name* – specify the field name that will appear in the UI. * *Slug* – specify the unique field identifier to be used in API calls. * *Description* – specify additional information that will be displayed as auxiliary text under the field. * *Type* – select the [type of field](#field-types). * *Entities* – select one or multiple [objects](#entities-and-locations) to which you want to apply the field. * *Location* – select the specific [pages or modals](#entities-and-locations) where the field will be displayed. 4. Click **Save**. 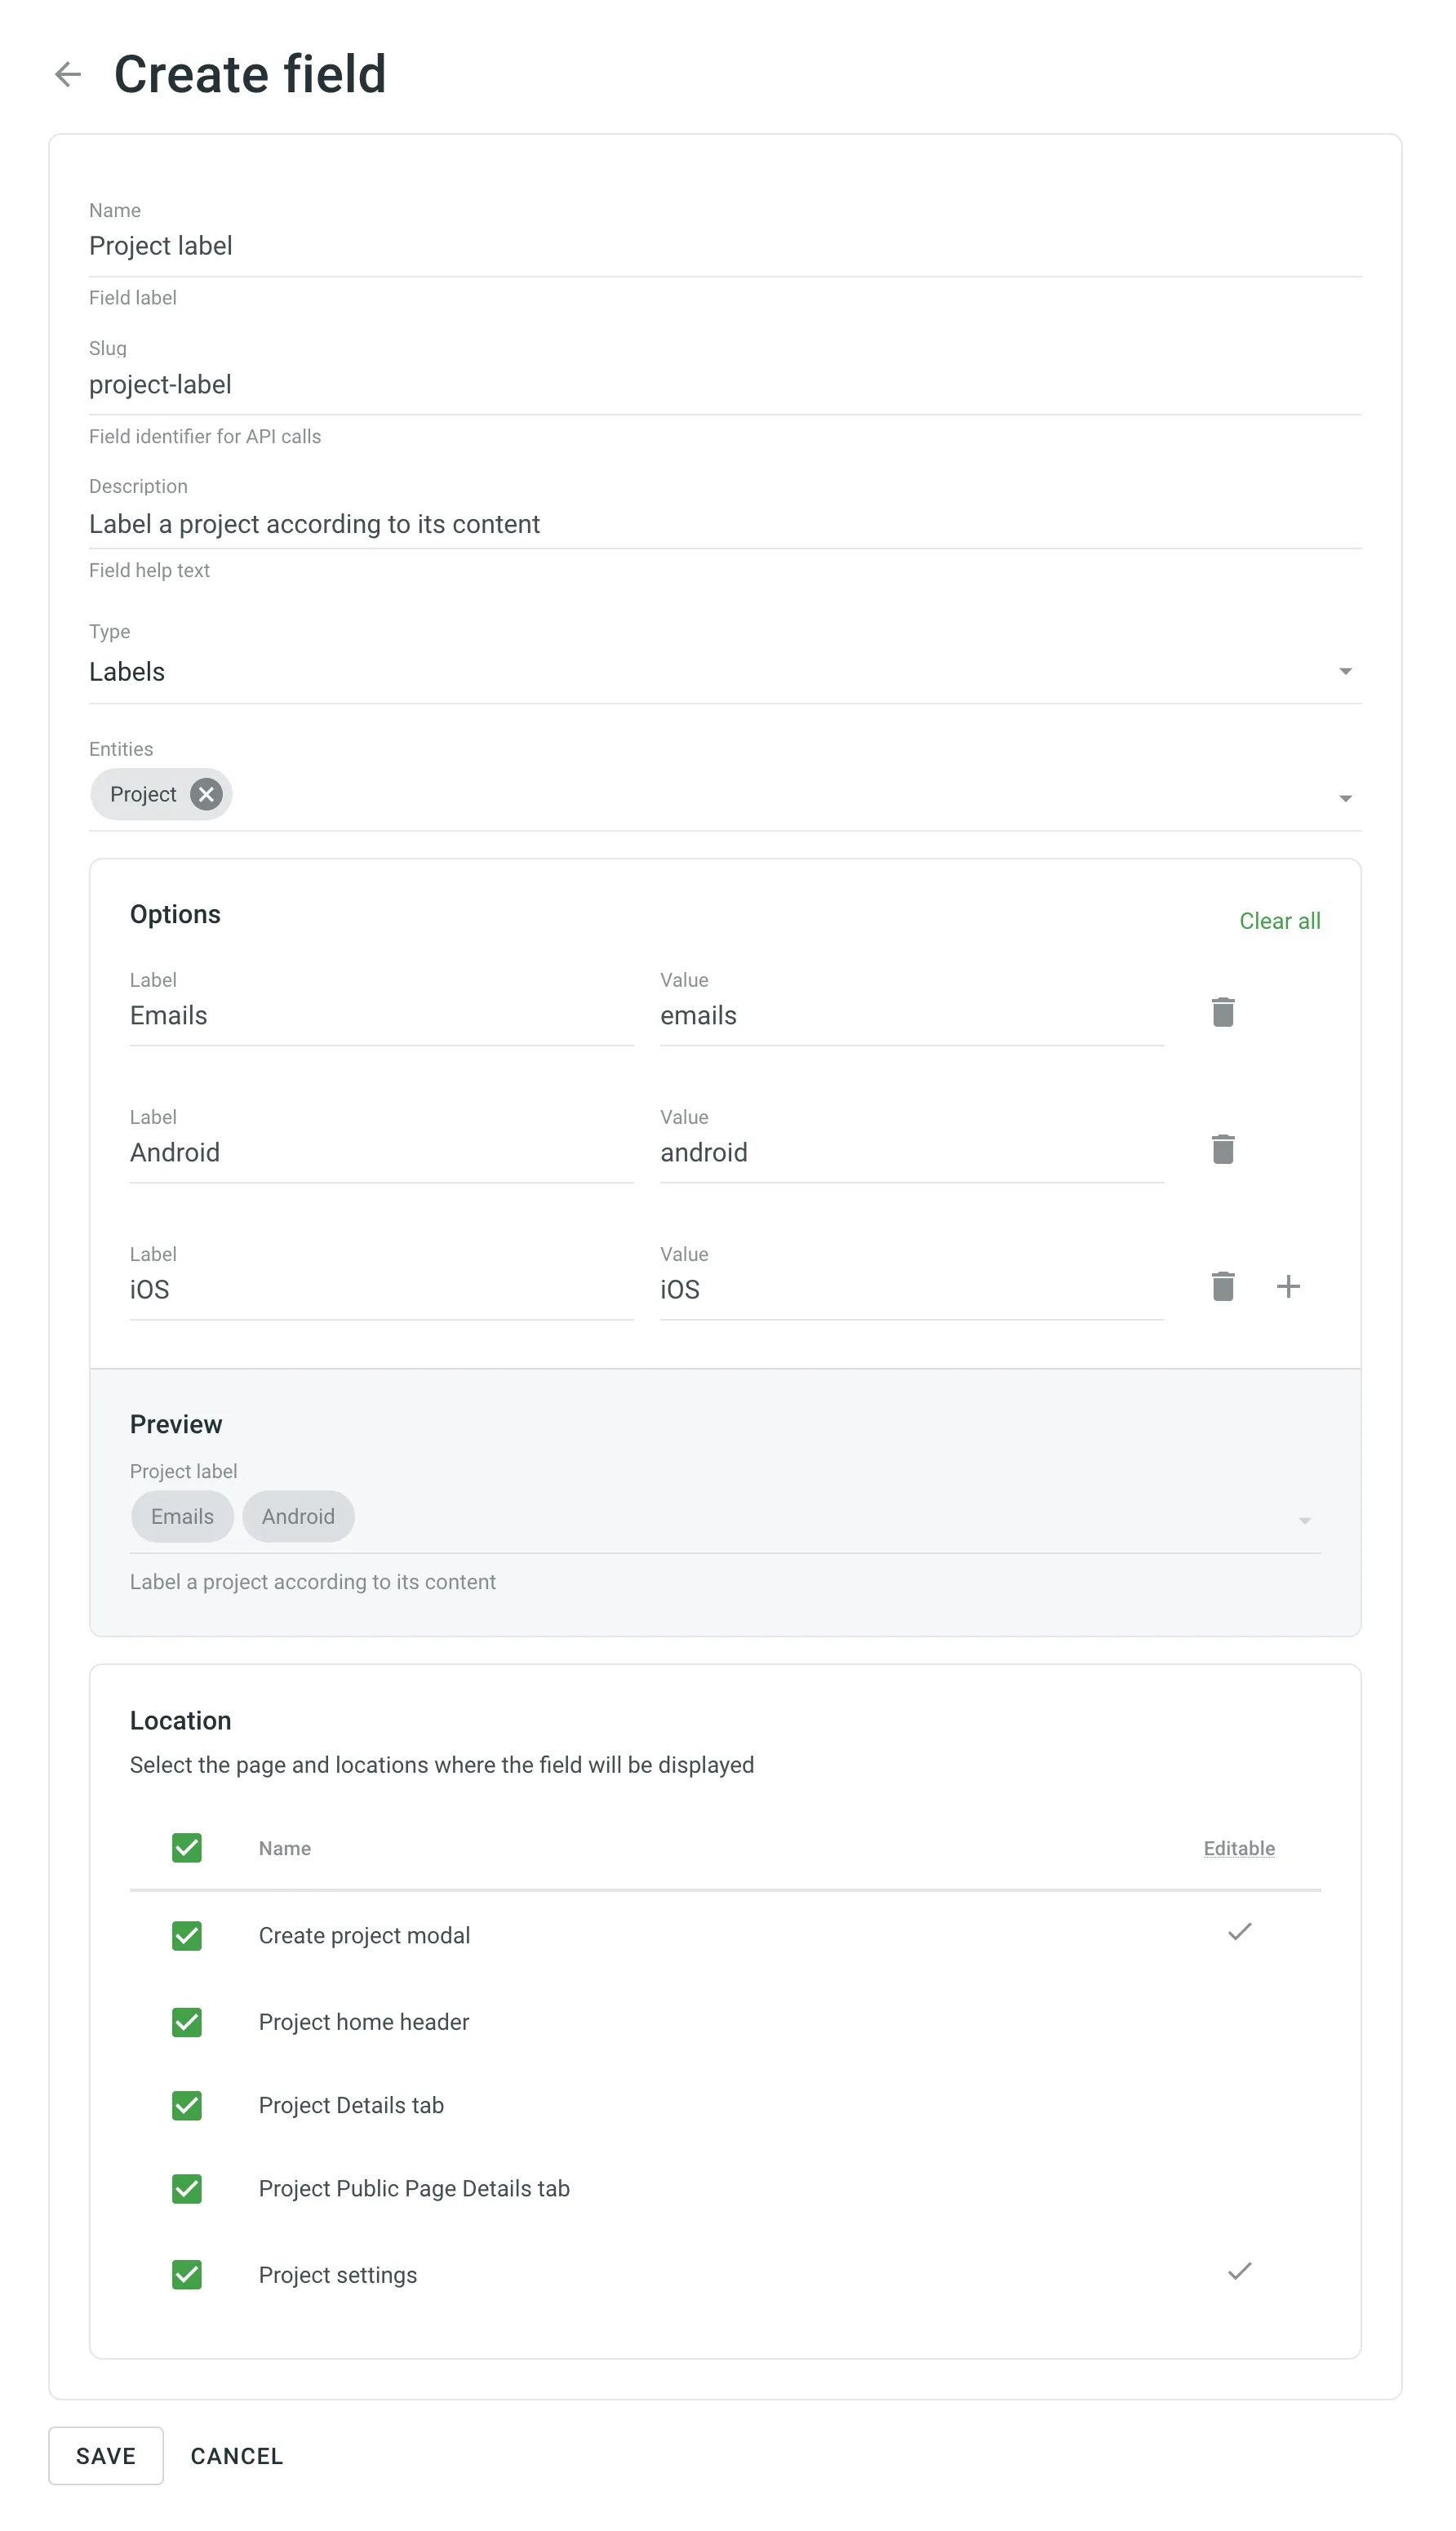 ## [Managing Fields via API](#managing-fields-via-api) [Section titled “Managing Fields via API”](#managing-fields-via-api) Fields can be created using API methods from the [Fields category](/developer/enterprise/api/v2/#tag/Fields). Once a field is created, you can use it with the preconfigured entities with the Patch and Get API methods: * [List Projects](/developer/enterprise/api/v2/#operation/api.projects.getMany) * [Edit Project](/developer/enterprise/api/v2/#operation/api.projects.patch) * [List Tasks](/developer/enterprise/api/v2/#operation/api.projects.tasks.getMany) * [Edit Task](/developer/enterprise/api/v2/#operation/api.projects.tasks.patch) * [List Users](/developer/enterprise/api/v2/#operation/api.users.getMany) * [Edit User](/developer/enterprise/api/v2/#operation/api.users.patch) * [List Files](/developer/enterprise/api/v2/#operation/api.projects.files.getMany) * [Edit File](/developer/enterprise/api/v2/#operation/api.projects.files.patch) * [List Strings](/developer/enterprise/api/v2/#operation/api.projects.strings.getMany) * [Edit String](/developer/enterprise/api/v2/#operation/api.projects.strings.patch) ## [Editing Field Values](#editing-field-values) [Section titled “Editing Field Values”](#editing-field-values) You can edit field values in two ways: via the UI or API. ### [Editing Field Values via UI](#editing-field-values-via-ui) [Section titled “Editing Field Values via UI”](#editing-field-values-via-ui) Once created, fields can be added to editable locations within the UI, allowing users to input or modify data as needed. ### [Editing Field Values via API](#editing-field-values-via-api) [Section titled “Editing Field Values via API”](#editing-field-values-via-api) Once a field is assigned to an entity, its value can be edited via API. For this, add a new parameter `field` to API calls that support fields. The parameter `field` should contain an object with the key as the field’s slug and the value as the field’s value for the specific entity (e.g., `{"fieldSlug": 2}`). ## [Field Types](#field-types) [Section titled “Field Types”](#field-types) Crowdin Enterprise supports various field types, each of which meets different data entry requirements: * **Radio Buttons** – Presents a list of options with single selection capability. During the creation, it necessary to configure a list of options. Each option has a value and a label. The value must be unique. In view mode, displays a selected option. * **Checkbox Field** – Accepts true/false values, often used for binary options. In view mode, displays an icon. * **Date Picker** – Allows users to select a date from a calendar widget. In view mode, displays date as a string. * **Date & Time Picker** – Similar to Date Picker but also includes time selection. In view mode, displays date and time as a string. * **Number Field** – Accepts numeric input within specified ranges. Optionally, you can add units to be displayed next to the numeric input. * **Labels** – Offers options for multiple selection. Each option has a unique value and label. Allows users to create new options. In view mode, displays selected options as chips. * **Select List (Single Selection)** – Offers options for single selection from predefined lists. * **Select List (Multiple Selections)** – Similar to Labels but doesn’t allow users to create new options. * **Text Field (Plain text only)** – Provides a single-line text input field. * **Textarea Field (Markdown enabled)** – Offers a multi-line text input field, supporting Markdown formatting. * **URL Field** – a text field designed for inputting URLs. Each field type can be customized according to your needs for specific use within Crowdin Enterprise. ## [Entities and Locations](#entities-and-locations) [Section titled “Entities and Locations”](#entities-and-locations) Below you can view the list of supported entities and their respective locations the fields can be added to. * **Project**: * Create project modal (Editable) * Project home header * Project Details tab * Project Public Page Details tab * Project settings (Editable) * **Task**: * Task Create/Edit page (Editable) * Task Details page * Task Board card * **User**: * User popover * User Details sidebar (Project Members page) * User Edit modal (User management page) (Editable) * **File**: * File Details sidebar * File Settings modal * **String**: * String details (Editor) * String Edit modal (project Strings tab and Editor) (Editable) ## [Fields in the UI](#fields-in-the-ui) [Section titled “Fields in the UI”](#fields-in-the-ui) Once the fields are assigned to the needed locations in the Crowdin Enterprise UI (e.g., Project), users will be able to see and/or interact with them if possible. 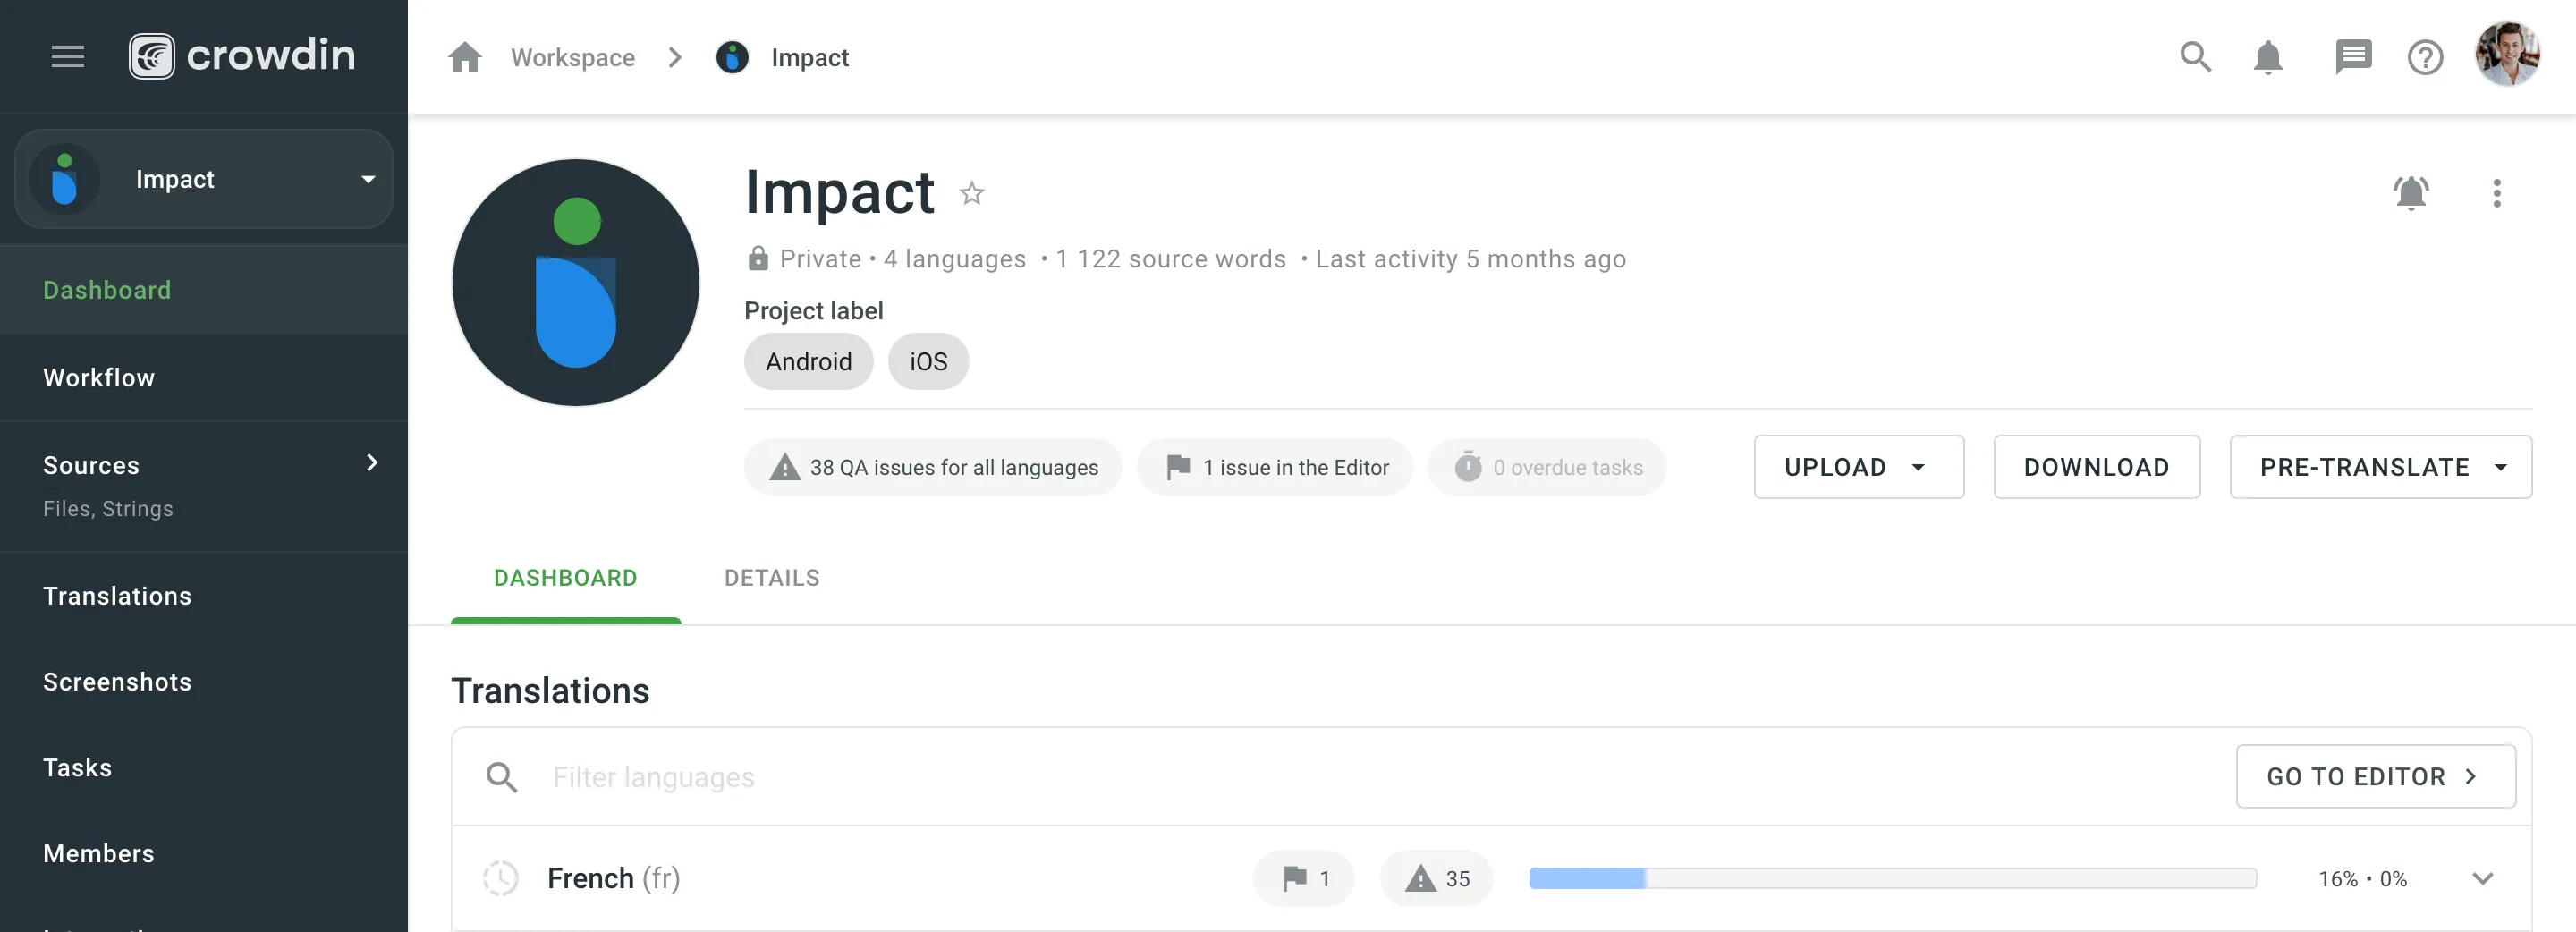
# Figma Plugin
> Start localizing at the design stage
With the Crowdin for Figma plugin, you can use texts from Crowdin Enterprise in your designs to save time for both designers and developers. These could include original or translated texts. If necessary, you can add new ones (e.g., dialog titles, button labels) and send them to translators in Crowdin Enterprise. ## [Use Cases](#use-cases) [Section titled “Use Cases”](#use-cases) * Quickly generate multilingual creative assets. * Translate mockups and test them in different languages before the programming starts. * Stop using ‘Lorem Ipsum’, add real texts from Crowdin Enterprise to your prototypes instead. Strings added from Crowdin Enterprise become linked to the text fields in Figma. * Create and upload source strings from your designs to your Crowdin Enterprise project. Created strings become linked to text fields in Figma. This way, developers could use uploaded strings, reducing time spent on development. * Preview translations and string keys in your designs. * Upload tagged screenshots to your Crowdin Enterprise project. ## [Installation](#installation) [Section titled “Installation”](#installation) 1. Sign in to Figma. 2. Open one of your design files or click **New design file**. 3. In the file menu, click **Plugins > Manage plugins…**. Alternatively, right-click the canvas and click **Plugins > Manage plugins**. 4. Use the *Search all plugins* field to find **Crowdin for Figma** plugin. 5. Click on **Crowdin for Figma** plugin and select **Save**. 6. Hover over the **Crowdin for Figma** plugin and click **Run**. ## [Configuration](#configuration) [Section titled “Configuration”](#configuration) ### [Setting up Credentials](#setting-up-credentials) [Section titled “Setting up Credentials”](#setting-up-credentials) To specify your Crowdin Enterprise credentials in Figma, follow these steps: 1. In the file menu, go to **Plugins > Saved plugins**. Alternatively, right-click the canvas and click **Plugins > Saved plugins**. 2. Click **Crowdin for Figma**. 3. Switch to **Settings**. 4. Provide your Personal Access Token. 5. Click **Connect**.  To generate a new token in Crowdin Enterprise, follow these steps: 1. Go to **Account Settings > Access tokens**, and click **New Token**. 2. Specify *Token Name*, select *Scopes*, and click **Create**. ### [Selecting a Project](#selecting-a-project) [Section titled “Selecting a Project”](#selecting-a-project) To select the Crowdin Enterprise project you’d like to work with, follow these steps: 1. Click the drop-down menu in **Settings > Crowdin Project**, and select a project from the list. 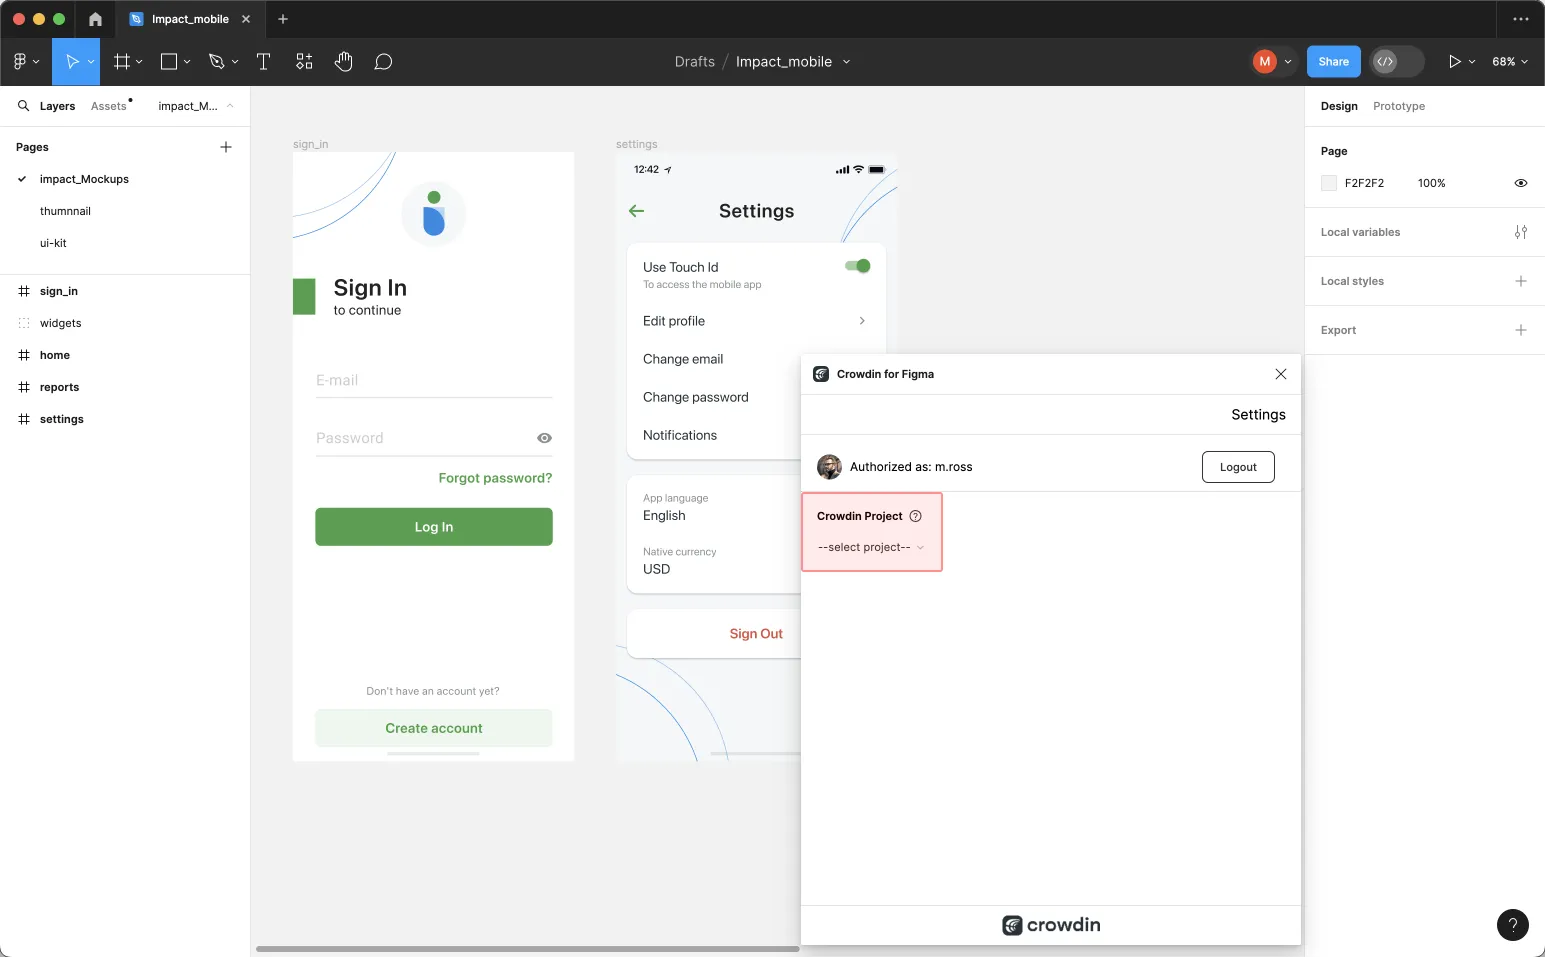 2. Select a **content type** you’re going to work with in this project and click **Save**. The selected option affects which mode of the Crowdin for Figma plugin will be available to a user. 3. *(Optional)* In the **Crowdin Branch** section, select the specific branch your content will be uploaded to. If your project uses version branches, you can either select an existing one or create a new one directly from Figma; otherwise, you can skip this step. * **To select an existing branch**: Choose the desired branch from the drop-down list. * **To create a new branch**: Click next to the branch field. In the **New Version Branch** dialog, enter a name and click **Create**. The new branch will be created in your Crowdin Enterprise project and automatically selected in the plugin.  [UI Localization ](#ui-localization) [Marketing Visuals Localization ](#marketing-visuals-localization) ## [UI Localization](#ui-localization) [Section titled “UI Localization”](#ui-localization) Use the *Strings* tab when localizing UI and working on dynamic pages with your development and marketing teams. In this tab, you can add source strings from Crowdin Enterprise to your designs in Figma in a click. After the texts are used in the designs, you can automatically upload tagged screenshots for translators’ reference back to Crowdin Enterprise. ### [Using Source Strings from Crowdin in Figma](#using-source-strings-from-crowdin-in-figma) [Section titled “Using Source Strings from Crowdin in Figma”](#using-source-strings-from-crowdin-in-figma) 1. Open the Crowdin plugin for Figma. 2. In the *Strings* tab, use the *Search* field to find the specific copy. You can search strings by source text, string identifier, or context. 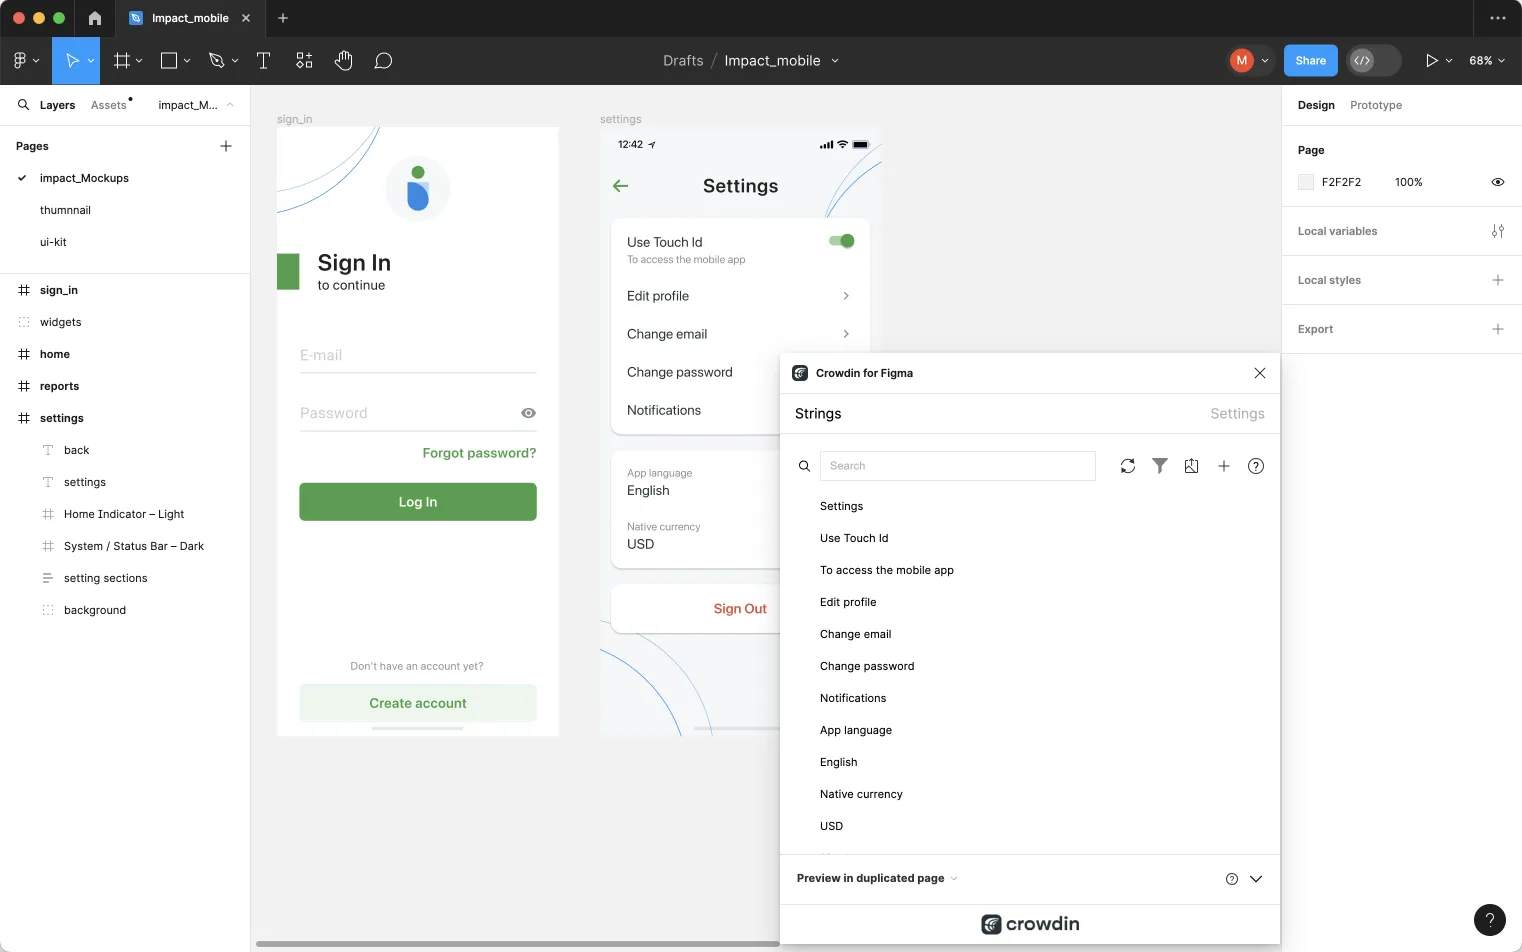 3. Select the text layer to which you want to add text and click the link icon next to the needed string.  After using the source strings from Crowdin Enterprise in your designs, they become linked with the text fields, and you can [preview translations](#previewing-strings) for these strings in Figma and [upload screenshots](#uploading-tagged-screenshots-to-crowdin) for them to your Crowdin Enterprise project. You can link a single Crowdin Enterprise string to one or multiple text fields in Figma. However, one text field can be linked only to a single Crowdin Enterprise string. If you link a text field with an existing connection to a new Crowdin Enterprise string, the previous connection will be terminated, and a new connection will be established. If you’d like to unlink a Crowdin Enterprise string from all text fields it was previously linked to, right-click on the link icon next to the needed string. ### [Adding Source Strings from Figma to Crowdin](#adding-source-strings-from-figma-to-crowdin) [Section titled “Adding Source Strings from Figma to Crowdin”](#adding-source-strings-from-figma-to-crowdin) You can add strings that are already used in the designs. 1. Open the Crowdin plugin for Figma. 2. To add the strings used in the designs, select the whole frame, multiple frames, or the needed strings on the frames. 3. In the *Strings* tab, click . 4. In the appeared dialog, fill in the required fields. You can filter the displayed strings if needed: * Select the **Skip hidden elements** filter option if some frames contain hidden elements that should not be added to Crowdin Enterprise. * Select the **Skip untranslated elements** filter option if some frames contain untranslated elements that should not be added to Crowdin Enterprise. 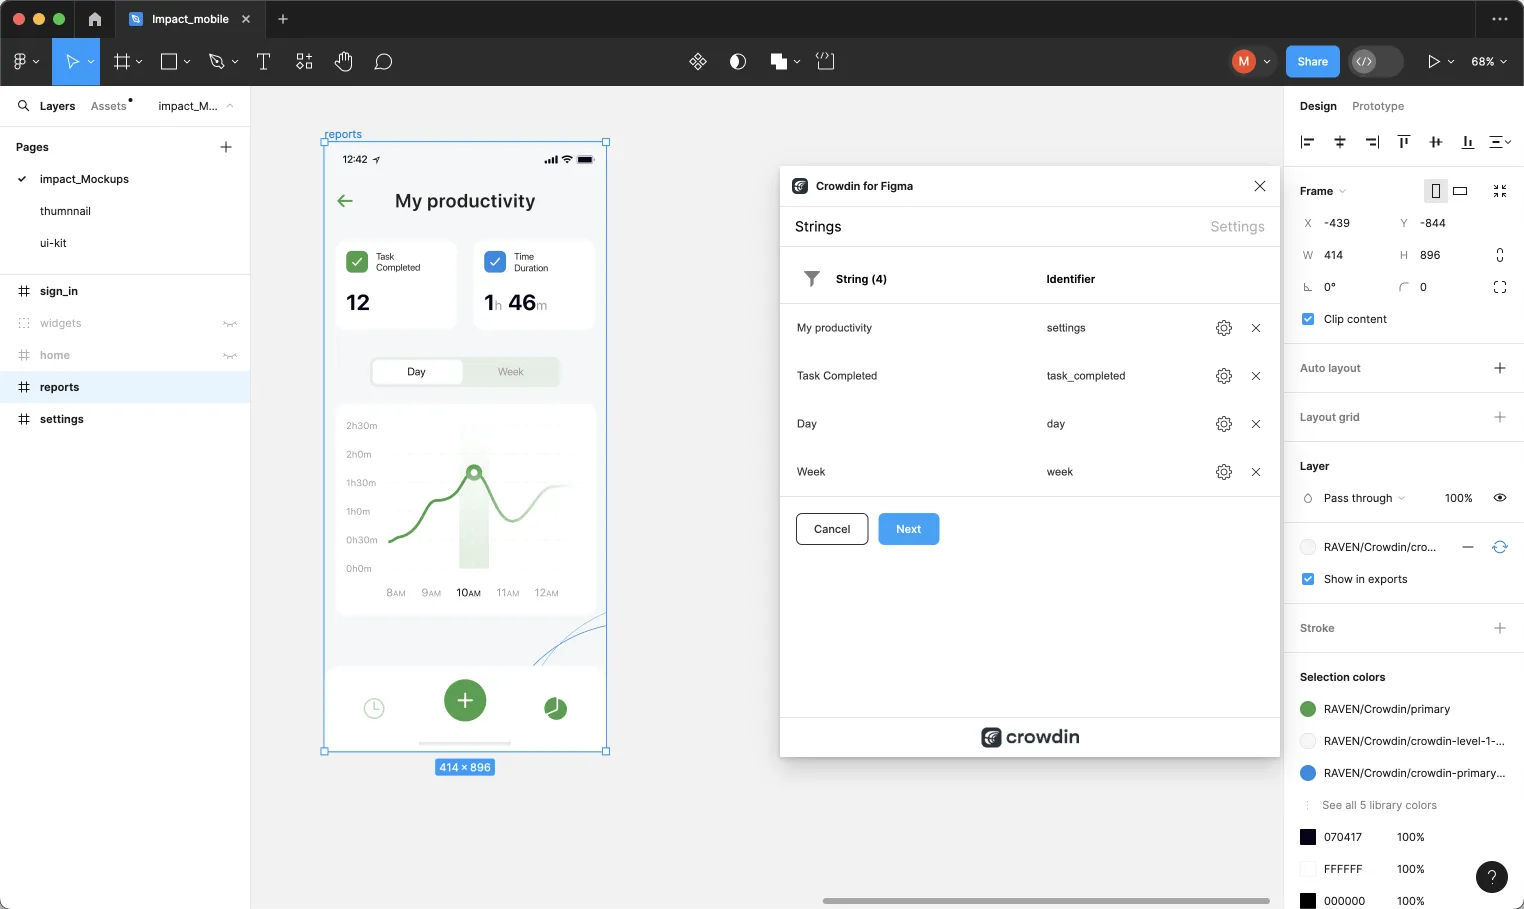 5. *(Optional)* To update the string context and set the max.length of the translated text, click toward the needed string. 6. Once all the needed strings are selected and configured, click **Next**. 7. In the next dialog page, select the preferred options: * **Auto-link existing strings** – automatically compare text to existing strings in Crowdin Enterprise. If there’s a match, the text element will be linked to the string in the Crowdin Enterprise project. * **Create missing keys** – only new text elements are added to Crowdin Enterprise. * *(Optional)* To add labels to the strings, alternately select them from the **Select Label** drop-down menu. * **Merge duplicates** – link identical text elements to a single new string in Crowdin Enterprise. The default behavior is to identify duplicates by comparing their source text. This is useful in the following cases: * When adding multiple text fields with the same text (e.g., several buttons with the label `Submit`), the plugin adds only one string to your Crowdin Enterprise project and links all duplicate text fields to it. * If your Crowdin Enterprise project already contains a string with the same text you’re adding from designs, the plugin links to the existing string instead of creating a new one. * To change the duplicate detection method, enable the **Detect duplicates by key** sub-option, which appears when *Merge duplicates* is active. This will make the plugin identify duplicates by their string identifiers (keys) rather than their text content. * [**Send screenshots**](#uploading-tagged-screenshots-to-crowdin). 8. Select the file in Crowdin Enterprise to which you want to add the strings. To add the same strings into multiple files in Crowdin Enterprise, alternately select the needed files from the **Select File** drop-down menu. 9. Click **Submit**. 10. Once the strings are added to Crowdin Enterprise, you’ll see a summary of the content sent. Added strings will be transferred to your Crowdin Enterprise project and also displayed in the **Strings** tab’s list. You can edit, hide, or delete the strings from the same list anytime. The respective changes will also be applied to the strings in your Crowdin Enterprise project. ### [Adding Source Strings with Plural Forms](#adding-source-strings-with-plural-forms) [Section titled “Adding Source Strings with Plural Forms”](#adding-source-strings-with-plural-forms) You can add strings with plural forms. 1. Open the Crowdin plugin for Figma. 2. To add the strings used in the designs, select the whole frame, multiple frames, or the needed strings on the frames. 3. In the *Strings* tab, click . 4. In the appeared dialog, fill in the required fields. You can filter the displayed strings if needed. 5. Click toward the needed string and click **Add plurals**. 6. In the appeared dialog, fill in the fields for each plural form and click **Save**. Depending on the source language of the connected Crowdin Enterprise project, there could be a different number of plural forms you should specify. 7. Once all the needed strings are selected and configured, click **Next**. 8. Select the preferred options and the file in Crowdin Enterprise you want to add the strings to, click **Submit**. Read more about [Plural Forms](/enterprise/online-editor/#plural-forms). ### [Configuring ICU Source String Placeholders](#configuring-icu-source-string-placeholders) [Section titled “Configuring ICU Source String Placeholders”](#configuring-icu-source-string-placeholders) When using ICU strings in your design, you can set the placeholders’ values, and after adding such strings to designs, they will be displayed in a formatted view with the preconfigured values. Once you [use](#using-source-strings-from-crowdin-in-figma) the needed ICU string from Crowdin Enterprise in your design, you can configure its placeholder values. 1. Open the Crowdin plugin for Figma. 2. In the *Strings* tab, use the *Search* field to find the specific copy. You can search strings by source text, string identifier, or context. 3. Click on the needed ICU string. 4. Click **Set placeholders**. 5. Type the needed values for ICU string placeholders. 6. Click **Submit** to save the entered placeholders. 7. Click **Submit** to update the source string text in designs. When [previewing translations](#previewing-strings) for ICU strings in Figma, they will also be displayed in a formatted view if the values were preconfigured beforehand. ### [Key Naming Pattern Settings](#key-naming-pattern-settings) [Section titled “Key Naming Pattern Settings”](#key-naming-pattern-settings) To simplify adding strings from Figma to the Crowdin Enterprise project, you can set up the desired key naming pattern for the source string identifiers in the plugin settings. The Crowdin plugin for Figma will suggest the string identifiers for new strings based on the selected pattern. While adding new source strings, you can always edit the suggested identifier to the preferred look. To select the key naming pattern, follow these steps: 1. Open the Crowdin plugin for Figma. 2. Switch to **Settings**. 3. In the *Key naming pattern* section, select the preferred option from the drop-down menu. Besides the existing patterns, you can configure your own pattern. To use a custom pattern, select the **Custom key naming pattern** option from the drop-down list and specify your pattern in the **Custom Key Naming Pattern** field. ### [Uploading Tagged Screenshots to Crowdin](#uploading-tagged-screenshots-to-crowdin) [Section titled “Uploading Tagged Screenshots to Crowdin”](#uploading-tagged-screenshots-to-crowdin) When [adding source strings used in the designs](#adding-source-strings-from-figma-to-crowdin), make sure to keep **Send screenshots** selected. As a result, the Crowdin plugin for Figma will upload screenshots along with the source strings. Also, you can update screenshots with an **Update screenshots** option while editing a Crowdin Enterprise string that is linked to the text fields in designs. Additionally, you can mass upload screenshots to Crowdin Enterprise for strings linked with text fields in designs. 1. Open the Crowdin plugin for Figma. 2. Select one or more frames with the linked strings. 3. In the *Strings* tab, click to upload screenshots for selected frames. Read more about [Screenshots](/enterprise/screenshots/). ### [Previewing Strings](#previewing-strings) [Section titled “Previewing Strings”](#previewing-strings) Preview translations from Crowdin Enterprise for the strings used in the designs in Figma. You can preview translations in the new frames or the original ones. When previewing translations in the new frames, you can populate them with the actual translations or with string keys for further use by developers. To preview strings populated with translations, follow these steps: 1. Open the Crowdin plugin for Figma. 2. In the *Strings* > *Preview Strings* section, select *Preview in duplicated page* or *Preview in the current page*. 3. Select *Create with language*. 4. Select the target language you want to preview translations for (optionally, you can select the preferred plural forms). You can also choose *All languages*. 5. Choose the content you want to preview in Figma. Select *All Frames* or *Selected Frames*.  To preview strings populated with key names, follow these steps: 1. Open the Crowdin plugin for Figma. 2. In the *Strings* > *Preview Strings* section, select *Preview in duplicated page*. 3. Select *Create with key names*. 4. Choose the content you want to preview in Figma. Select *All Frames* or *Selected Frames*.  ### [Filtering Strings](#filtering-strings) [Section titled “Filtering Strings”](#filtering-strings) You can filter strings in the *Strings* tab by various criteria, such as file or status. Click to open the filter settings. To view only the strings linked to specific text fields, follow these steps: 1. Select the needed text fields. 2. In the *Strings* tab, click **Filter strings**. 3. Select **Show strings linked to selected text elements**. In the same way, you can filter strings linked to text fields for the whole frame or multiple frames. ## [Marketing Visuals Localization](#marketing-visuals-localization) [Section titled “Marketing Visuals Localization”](#marketing-visuals-localization) Use the *Pages* tab to localize static pages, like brochures and banners. In this tab, you can send texts with context for translators to Crowdin Enterprise and upload translated copies back to Figma. Limitations The Pages tab and some other plugin settings may be unavailable when working with [string-based](/enterprise/creating-project/#string-based-project) projects. ### [Sending Texts for Translation to Crowdin](#sending-texts-for-translation-to-crowdin) [Section titled “Sending Texts for Translation to Crowdin”](#sending-texts-for-translation-to-crowdin) You can send text for translation either from selected or all frames from a Figma file. Translators will work with those texts in the list view and use designs as an additional context for even higher translation quality. In Crowdin Enterprise, a root folder *figma-plugin* will be created. It will contain a subfolder named after your Figma file with HTML files for each frame inside. If needed, you can disable content segmentation in the plugin **Settings** so the long texts will not be split into sentences. To send Figma designs for translation, follow these steps: 1. Open the necessary Figma file. 2. Go to **Plugins > Crowdin for Figma**. 3. In the *Pages* > *Figma to Crowdin* section, select the content you’d like to translate. Select *All Frames* or *Selected Frames*. 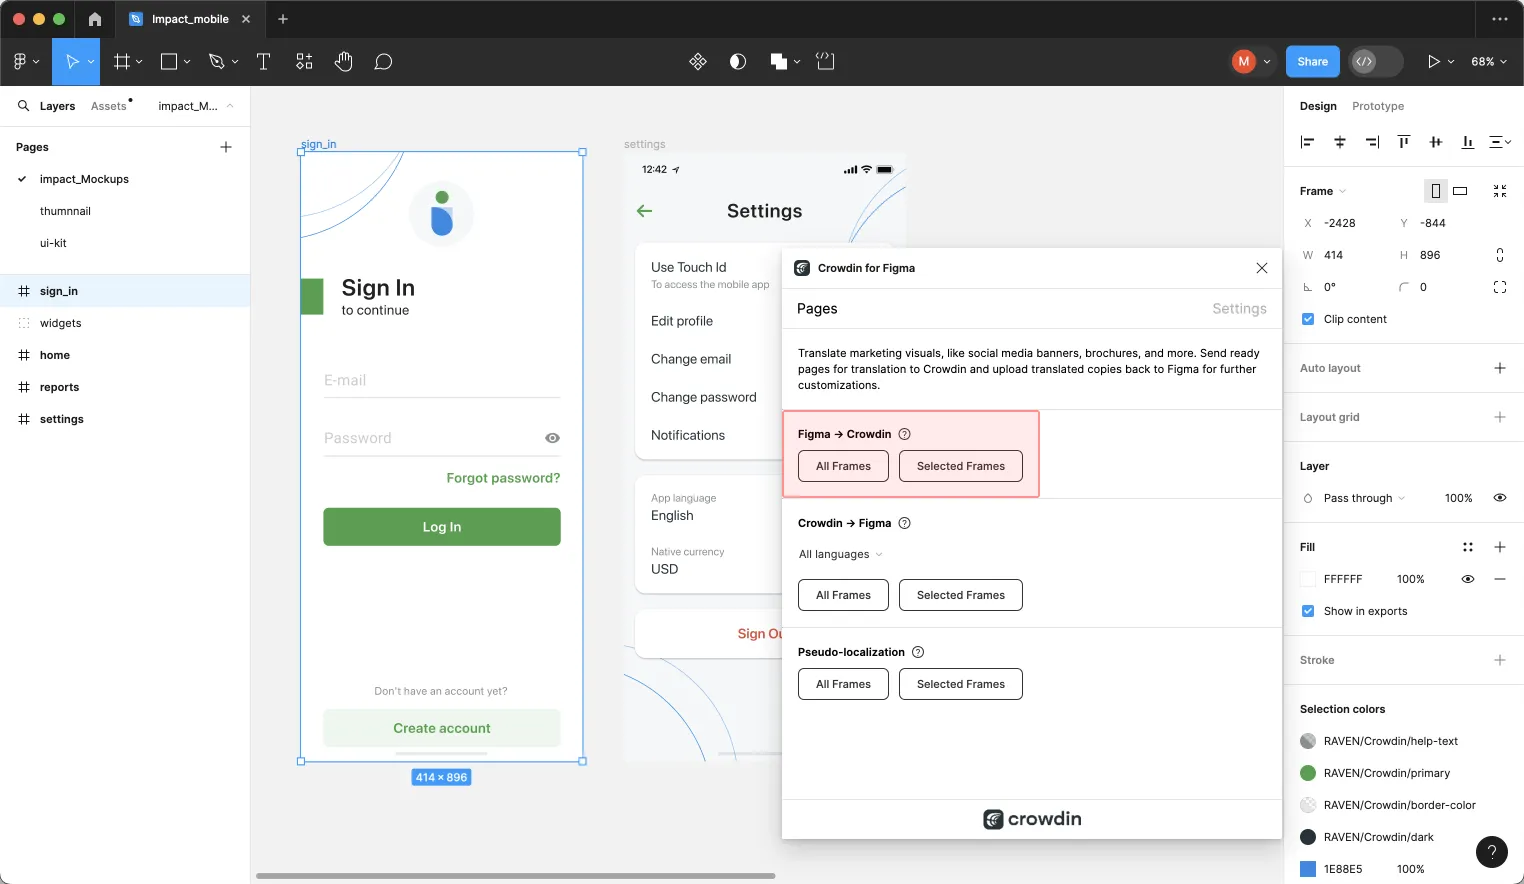 When the source files are uploaded to your Crowdin Enterprise project, you can invite contributors to translate and proofread them. Read more about [translation strategies](/enterprise/translation-strategies/). ### [Uploading Translations from Crowdin to Figma](#uploading-translations-from-crowdin-to-figma) [Section titled “Uploading Translations from Crowdin to Figma”](#uploading-translations-from-crowdin-to-figma) You can synchronize texts between Figma and Crowdin Enterprise project whenever you want to test the translated copy inside Figma or generate multilingual assets. To upload translated copies to Figma, follow these steps: 1. Open the necessary Figma file. 2. Go to **Plugins > Crowdin for Figma**. 3. In the *Pages* tab, *Crowdin to Figma* section, select the target language you want to upload translations for. You can also select *All languages*. 4. Select the content you want to preview in Figma. Select *All Frames* or *Selected Frames*. 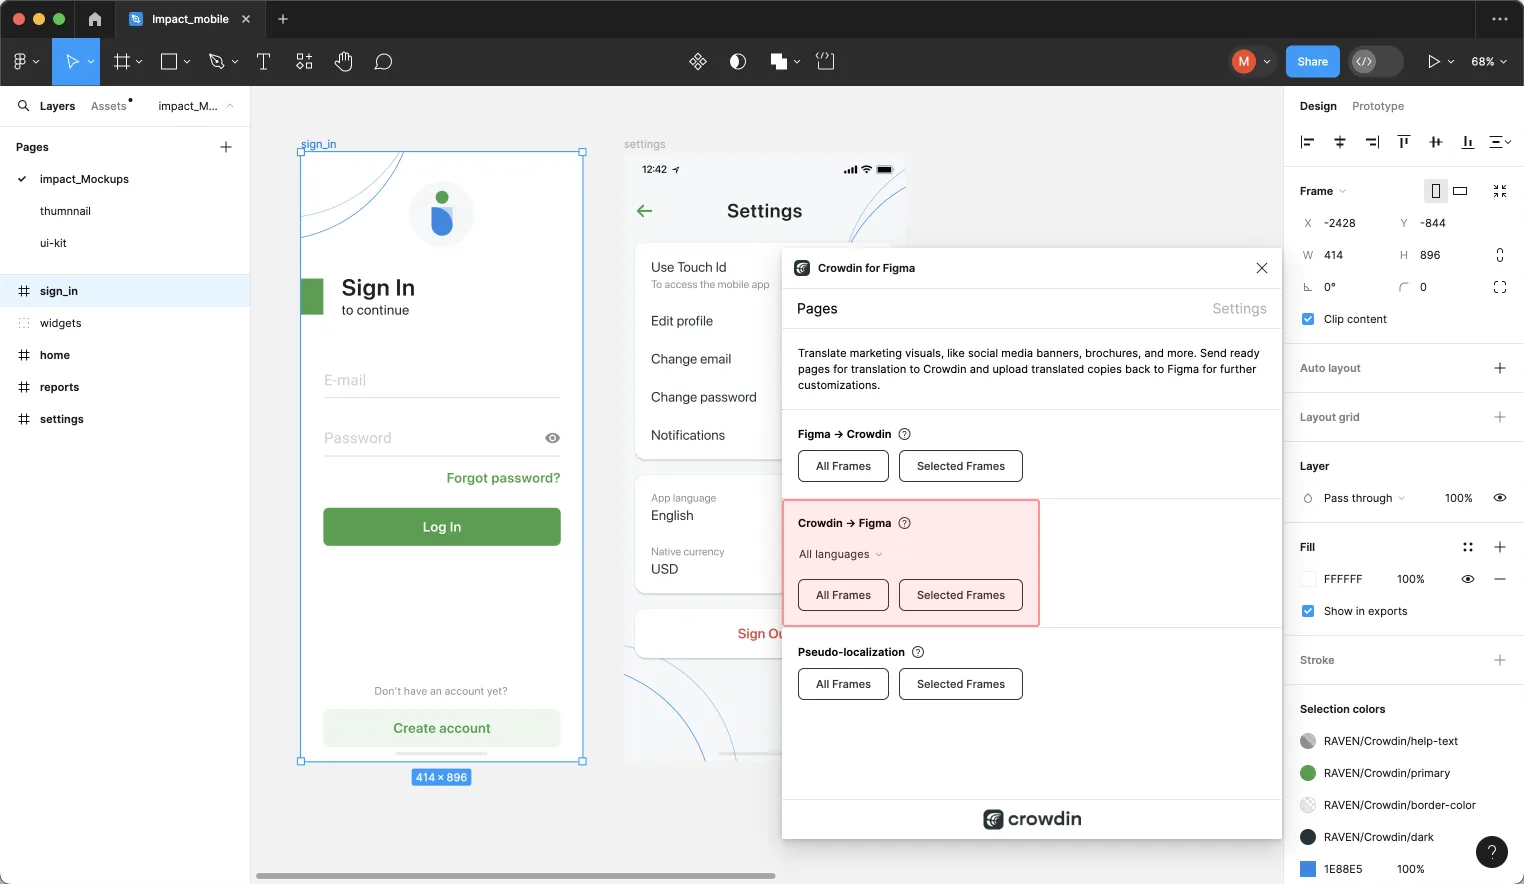 After uploading translations to Figma, the modified file will contain a separate frame with translations for each target language. The newly uploaded translated versions won’t override the ones you uploaded previously. You can always delete the translated copies you no longer need. If you’d like the newly uploaded translated versions to override the previously uploaded ones, open the plugin **Settings** and select **Override existing translations**. ## [Pseudo-localization](#pseudo-localization) [Section titled “Pseudo-localization”](#pseudo-localization) Even before translations are completed, you can test whether your application is ready to be localized using pseudo-localization. This feature allows you to simulate how the application’s UI will look with different languages to check whether the source strings should be modified before the project localization starts. Depending on the content you want to test, you can use the *Strings* or *Pages* tab in the Crowdin for Figma plugin. * Strings tab 1. Open the necessary Figma file. 2. Go to **Plugins > Crowdin for Figma**. 3. In the *Strings* > *Preview Strings* section, select *Preview in duplicated page*. 4. Select *Pseudo-localization*. 5. On the next dialog page, you can choose from predefined presets and configure the settings according to your preferences. 6. Click **Submit**. * Pages tab 1. Open the necessary Figma file. 2. Go to **Plugins > Crowdin for Figma**. 3. In the *Pages* > *Pseudo-localization* section, select the content you’d like to test with pseudo-localization. Select *All Frames* or *Selected Frames*. 4. On the next dialog page, you can choose from predefined presets and configure the settings according to your preferences. 5. Click **Submit**. Read more about [Pseudo-localization](/developer/pseudolocalization/) and its settings. ## [Crowdin for Figma Plugin in Dev Mode](#crowdin-for-figma-plugin-in-dev-mode) [Section titled “Crowdin for Figma Plugin in Dev Mode”](#crowdin-for-figma-plugin-in-dev-mode) Figma’s Dev Mode allows designers and developers to collaborate, ensuring accuracy in implementation and a smooth transition from design to code. Read more about [Figma Dev Mode](https://help.figma.com/hc/en-us/articles/15023124644247-Guide-to-Dev-Mode). The integration of Crowdin for Figma plugin with Dev Mode extends the functionality of both platforms, enhancing the localization process within the design environment. While Dev Mode in Figma has its limitations – it’s read-only, certain limitations apply to the Crowdin for Figma plugin’s capabilities: **What You Can Do**: * Access the *Strings* tab to view and manage strings. * Explore string details, including file, key, context, and labels. * Quickly copy string keys for efficient workflow. Features not available in Dev Mode: adding new strings to Crowdin Enterprise, linking strings, sending screenshots, previewing translations, editing, hiding, or deleting strings. ### [Using Crowdin for Figma Plugin in Dev Mode](#using-crowdin-for-figma-plugin-in-dev-mode) [Section titled “Using Crowdin for Figma Plugin in Dev Mode”](#using-crowdin-for-figma-plugin-in-dev-mode) Despite the limitations, the Crowdin for Figma plugin remains valuable in Dev Mode, offering developers a streamlined approach to text elements management. Here’s a typical use case: 1. Enter [Dev Mode](https://help.figma.com/hc/en-us/articles/15023124644247-Guide-to-Dev-Mode#01H8CR3K6VG21T3H9789QMV6CP). 2. In the right sidebar, switch to the *Plugins* tab. 3. Click on **Crowdin for Figma**. 4. In the *Strings* tab, click **Filter strings** and select **Show strings linked to selected text elements**. 5. Select the needed string on the frame and hover over the icon in the string list to view all needed information (i.e., key, context, file it’s stored in, labels) about this particular string. 6. *(Optional)* Click **Copy string key to clipboard** to further use it in code. ### [Compatibility with Figma for VS Code](#compatibility-with-figma-for-vs-code) [Section titled “Compatibility with Figma for VS Code”](#compatibility-with-figma-for-vs-code) Furthermore, the Crowdin for Figma plugin seamlessly integrates with Figma for VS Code, extending its functionality to developers using this environment. Read more about [Figma for VS Code](https://help.figma.com/hc/en-us/articles/15023121296151-Figma-for-VS-Code). ## [Troubleshooting](#troubleshooting) [Section titled “Troubleshooting”](#troubleshooting) ### [Screenshot Generation Issues in Large Figma Files](#screenshot-generation-issues-in-large-figma-files) [Section titled “Screenshot Generation Issues in Large Figma Files”](#screenshot-generation-issues-in-large-figma-files) When uploading strings with screenshots from large Figma files, users may experience slow performance or Figma freezing. This issue occurs when text elements are placed within a large top-level frame. When you add a string from Figma to Crowdin Enterprise, the plugin: 1. Identifies the top-level frame containing the text element. 2. Converts this frame into an image using the Figma API. 3. Uploads the image to Crowdin Enterprise as a screenshot. The plugin always searches for the highest-level frame in the hierarchy and stops when encountering a non-frame element (such as a section or group). If the top-level frame is too large, generating a screenshot can cause performance issues. For example: * `section` > `group` > **`frame`** > `text` → The plugin captures the screenshot from `frame`. * **`frame 1`** > `frame 2` > `frame 3` > `text` → The plugin captures the screenshot from `frame 1`. To prevent slowdowns, restructure your Figma file so that top-level frames contain only the relevant UI context. Instead of placing all UI elements in a single large frame, break them into smaller, logical sections. ### [Font Replacement When Linking Strings](#font-replacement-when-linking-strings) [Section titled “Font Replacement When Linking Strings”](#font-replacement-when-linking-strings) When working in Figma, fonts that are missing locally may cause unexpected changes after linking strings using the Crowdin for Figma plugin. This situation typically happens when: * The original design uses a font that is not installed in your local Figma environment. * Figma marks missing fonts with a special **A?** icon shown in the upper-left corner of the canvas and next to the font name in the **Typography** section of the right sidebar. * When you select a text element with a missing font, Figma displays a **Missing font** dialog offering to replace it. If you link a Crowdin string to such a text element, Figma will automatically substitute the missing font with a default available font (e.g., Roboto). This is expected behavior. The plugin attempts to preserve the original font, but when it’s not available in your local system, Figma replaces it to ensure the text remains visible and editable. This issue may not be immediately noticeable. Some users detect the font change only after uploading screenshots from Figma to Crowdin Enterprise, which can cause confusion. To avoid this: * Check for missing font indicators (**A?**) before linking strings. * Make sure the fonts used in the original design are installed and available in your Figma. * If necessary, coordinate with the designer to confirm the correct font setup.
# File Management
> Manage and configure source files in your project
You can manage all the project’s files via **Sources > Files**. Here you can manually upload files for localization using various [supported formats](/enterprise/supported-formats/). When the files are uploaded, you’ll be able to take a glance at how many *Strings* your files include and how many *Revisions* (changes) were done to each of them. If you want to configure an automatic files’ synchronization with your project, use the **Integrations** section. ## [Prioritizing Files](#prioritizing-files) [Section titled “Prioritizing Files”](#prioritizing-files) You can set a specific priority for each file by clicking an arrow icon next to the needed file. Then translators will be able to see files sorted according to their priority on the language page and in the Editor. Files might have the following priorities: * – low * – medium * – high ## [File Settings](#file-settings) [Section titled “File Settings”](#file-settings) To access the configurations of specific files, right-click on the necessary file or click next to it and then select **Settings**. ### [Title as it is shown to translators](#title-as-it-is-shown-to-translators) [Section titled “Title as it is shown to translators”](#title-as-it-is-shown-to-translators) Set more descriptive titles for the files to provide additional details for translators. Caution The file title is only shown in the Crowdin Enterprise UI and doesn’t rename the actual file. ### [File Export](#file-export) [Section titled “File Export”](#file-export) Define a file name or full path in the resulting archive, use the available placeholders to indicate the structure of exported content. For example, you want the source file `Overview.csv` with Ukrainian translation to be named `Overview.ukrainian.csv` before integrating it with the application. In this case, you’d need to set the *Resulting file after translations export* to the following: `Overview.%language%.csv`. By default, Crowdin Enterprise adds [Crowdin language codes](/developer/language-codes/) during the file export. To use custom ones for specific languages in the whole project, set up [Language Mapping](/enterprise/project-settings/languages/#language-mapping). 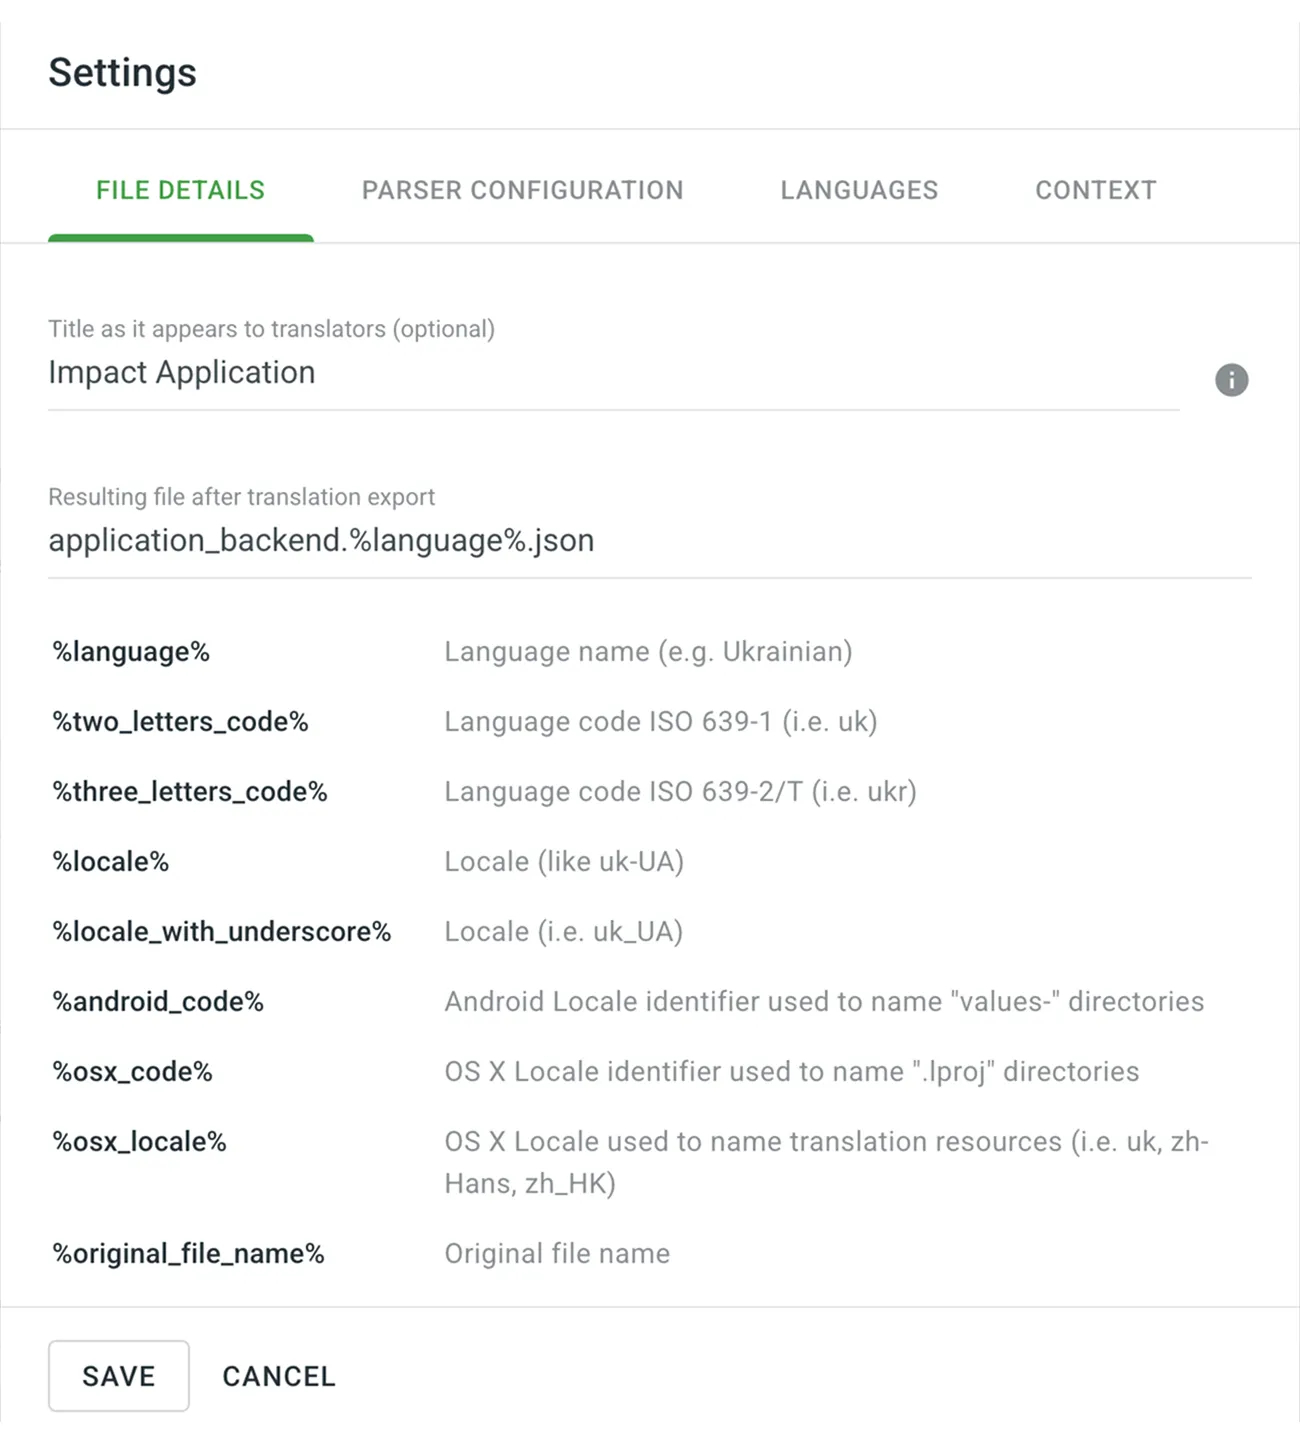 ### [Parser Configuration](#parser-configuration) [Section titled “Parser Configuration”](#parser-configuration) Some file formats allow you to configure import and export behavior. In this case, file’s Settings dialog will also contain the **Parser configuration** tab.  Read more about [Parser configuration](/enterprise/project-settings/parser-configuration/). ### [File Target Languages](#file-target-languages) [Section titled “File Target Languages”](#file-target-languages) By default, the source files are available for translation into all target languages of the project. Clear the checkboxes next to the languages your file shouldn’t be translated into, and click **Save**. 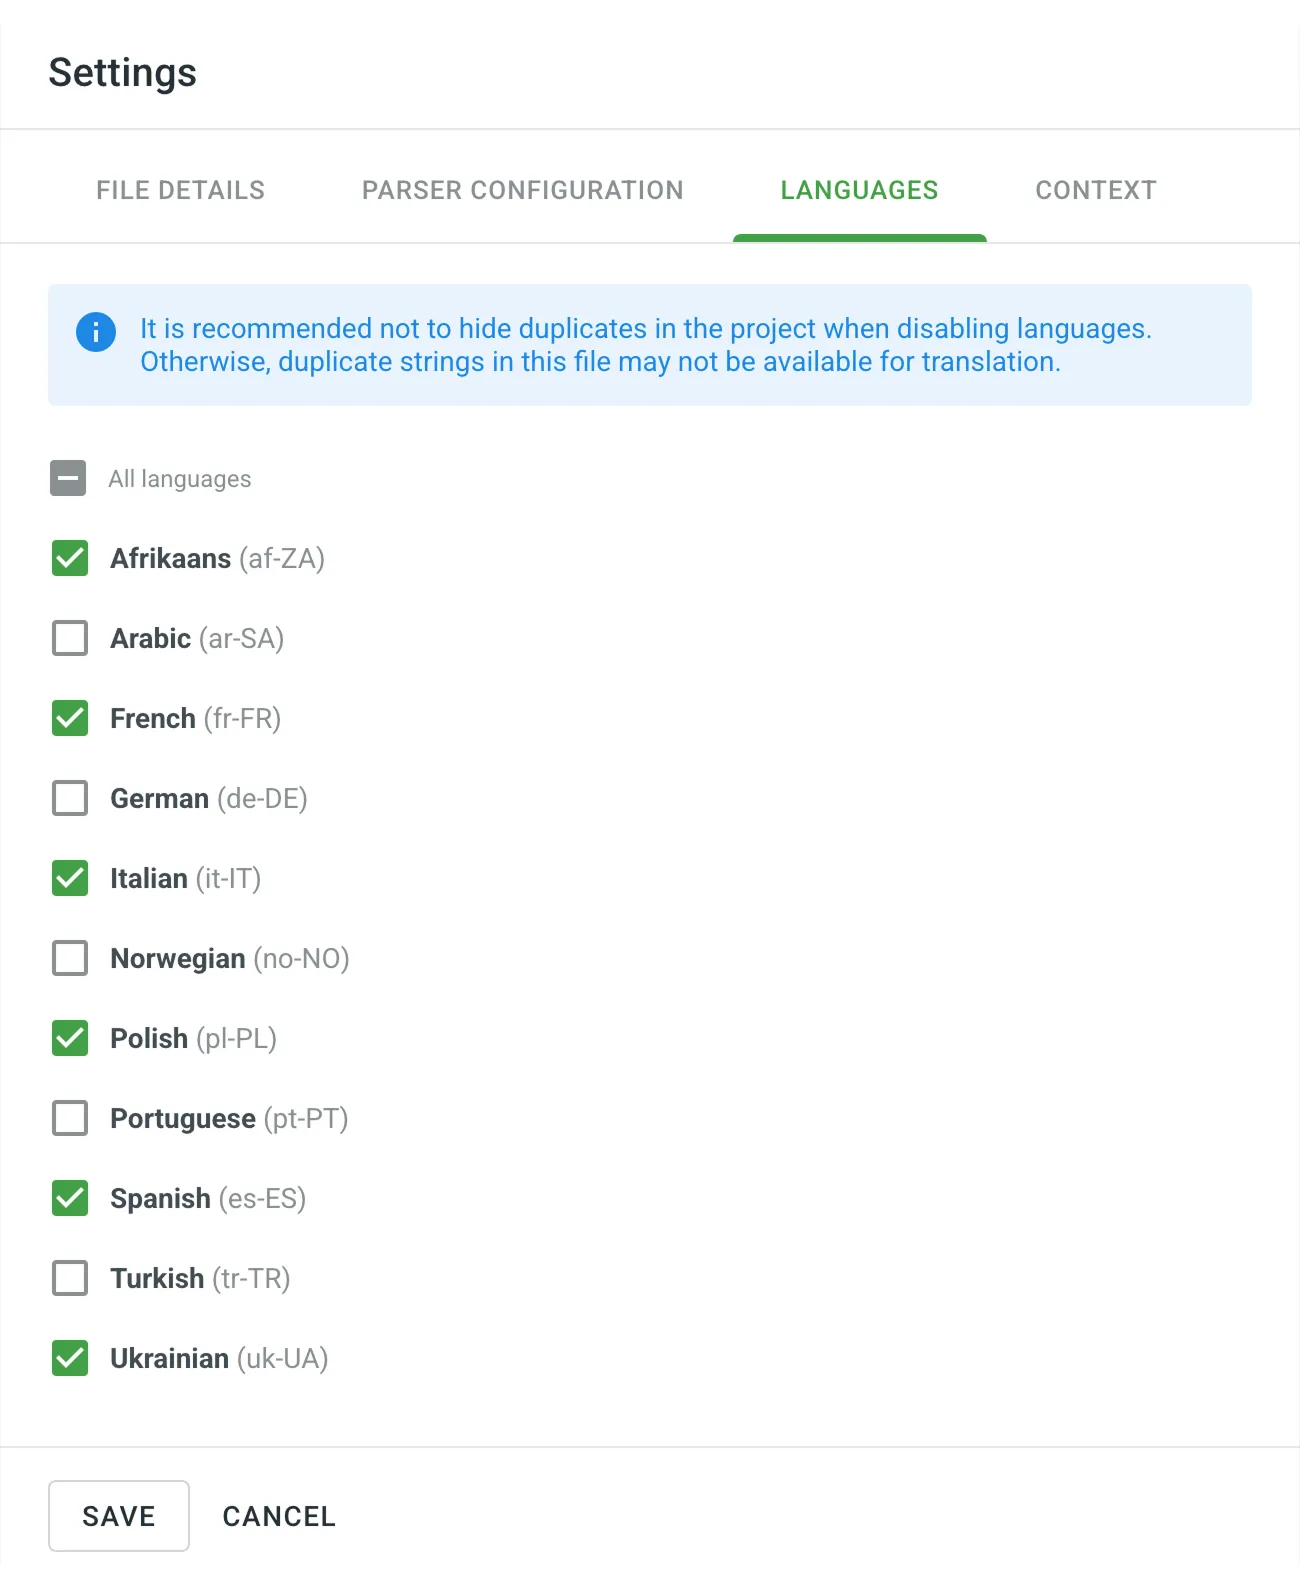 ### [File Context](#file-context) [Section titled “File Context”](#file-context) Add additional information or instructions to help translators better understand how to translate a file. File context can be added as plain text or Markdown in **File Settings > Context** or directly in the Editor. The provided context will be visible to translators in the Editor in the [File Context](/enterprise/online-editor/#file-context) tab. The icon appears next to files that have file context added, helping you quickly identify which files include helpful notes for translators. 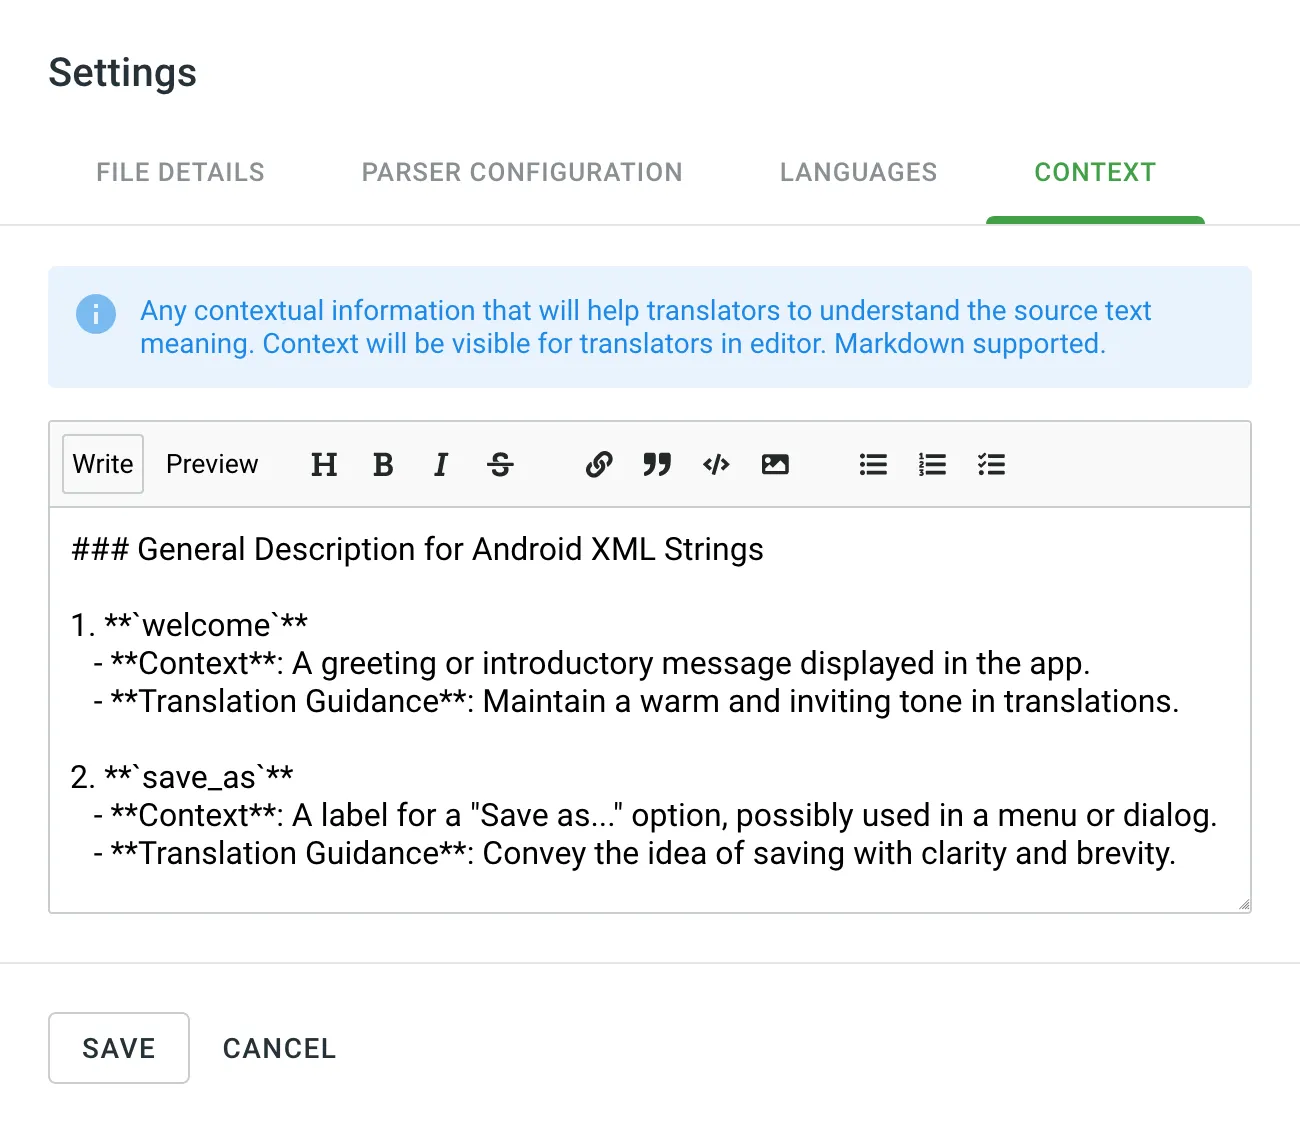 Limitations File Context is only available for [file-based](/enterprise/creating-project/#project-types) projects. ## [Pre-translating Files and Folders](#pre-translating-files-and-folders) [Section titled “Pre-translating Files and Folders”](#pre-translating-files-and-folders) To quickly run pre-translation for one or more files or folders, right-click on the necessary item or click next to it and select **Pre-translate**. Read more about [pre-translating selected files or folders](/enterprise/pre-translation/#pre-translating-files-and-folders-via-context-menu). ## [Viewing Strings](#viewing-strings) [Section titled “Viewing Strings”](#viewing-strings) To view all strings from a specific file, right-click on the file and select **View strings**. This opens the **Strings** section with a pre-applied filter that displays only the strings from the selected file. Read more about [String Management](/enterprise/string-management/). ## [Renaming Files](#renaming-files) [Section titled “Renaming Files”](#renaming-files) To change the file’s name, right-click on the necessary file or click next to it and select **Rename**. ## [Cost Estimate](#cost-estimate) [Section titled “Cost Estimate”](#cost-estimate) To estimate the cost of translation or proofreading for a specific file, right-click on the file and select **Cost Estimate**. Read more about [generating Cost Estimate report](/enterprise/project-reports/#generating-cost-estimate). ## [Creating a Task](#creating-a-task) [Section titled “Creating a Task”](#creating-a-task) To create a task for a specific file, right-click on the file and select **Add task**. This allows you to assign translation or proofreading work for just that file to selected contributors or translation vendors. Read more about [Project Tasks](/enterprise/tasks/). ## [Opening in Editor](#opening-in-editor) [Section titled “Opening in Editor”](#opening-in-editor) To open a file directly in the Editor, right-click on the file and select **Open in Editor**. This allows you to review translations and approvals, answer string comments, and more. ## [Checking Progress](#checking-progress) [Section titled “Checking Progress”](#checking-progress) You can check the translation and approval progress for a branch, folder, or file you need. Right-click on the needed branch, folder or file, and select the **View progress**. To see how many words are translated and approved for each language, hover over the progress bar. To open the selected file in the Editor, click on the needed language. To download translations for the chosen file, select the required languages in the **Details** tab in the right-hand side menu, and click . Optionally, you can select **Preserve folder hierarchy for export** to export translation files along with the folders they’re stored in Crowdin Enterprise. 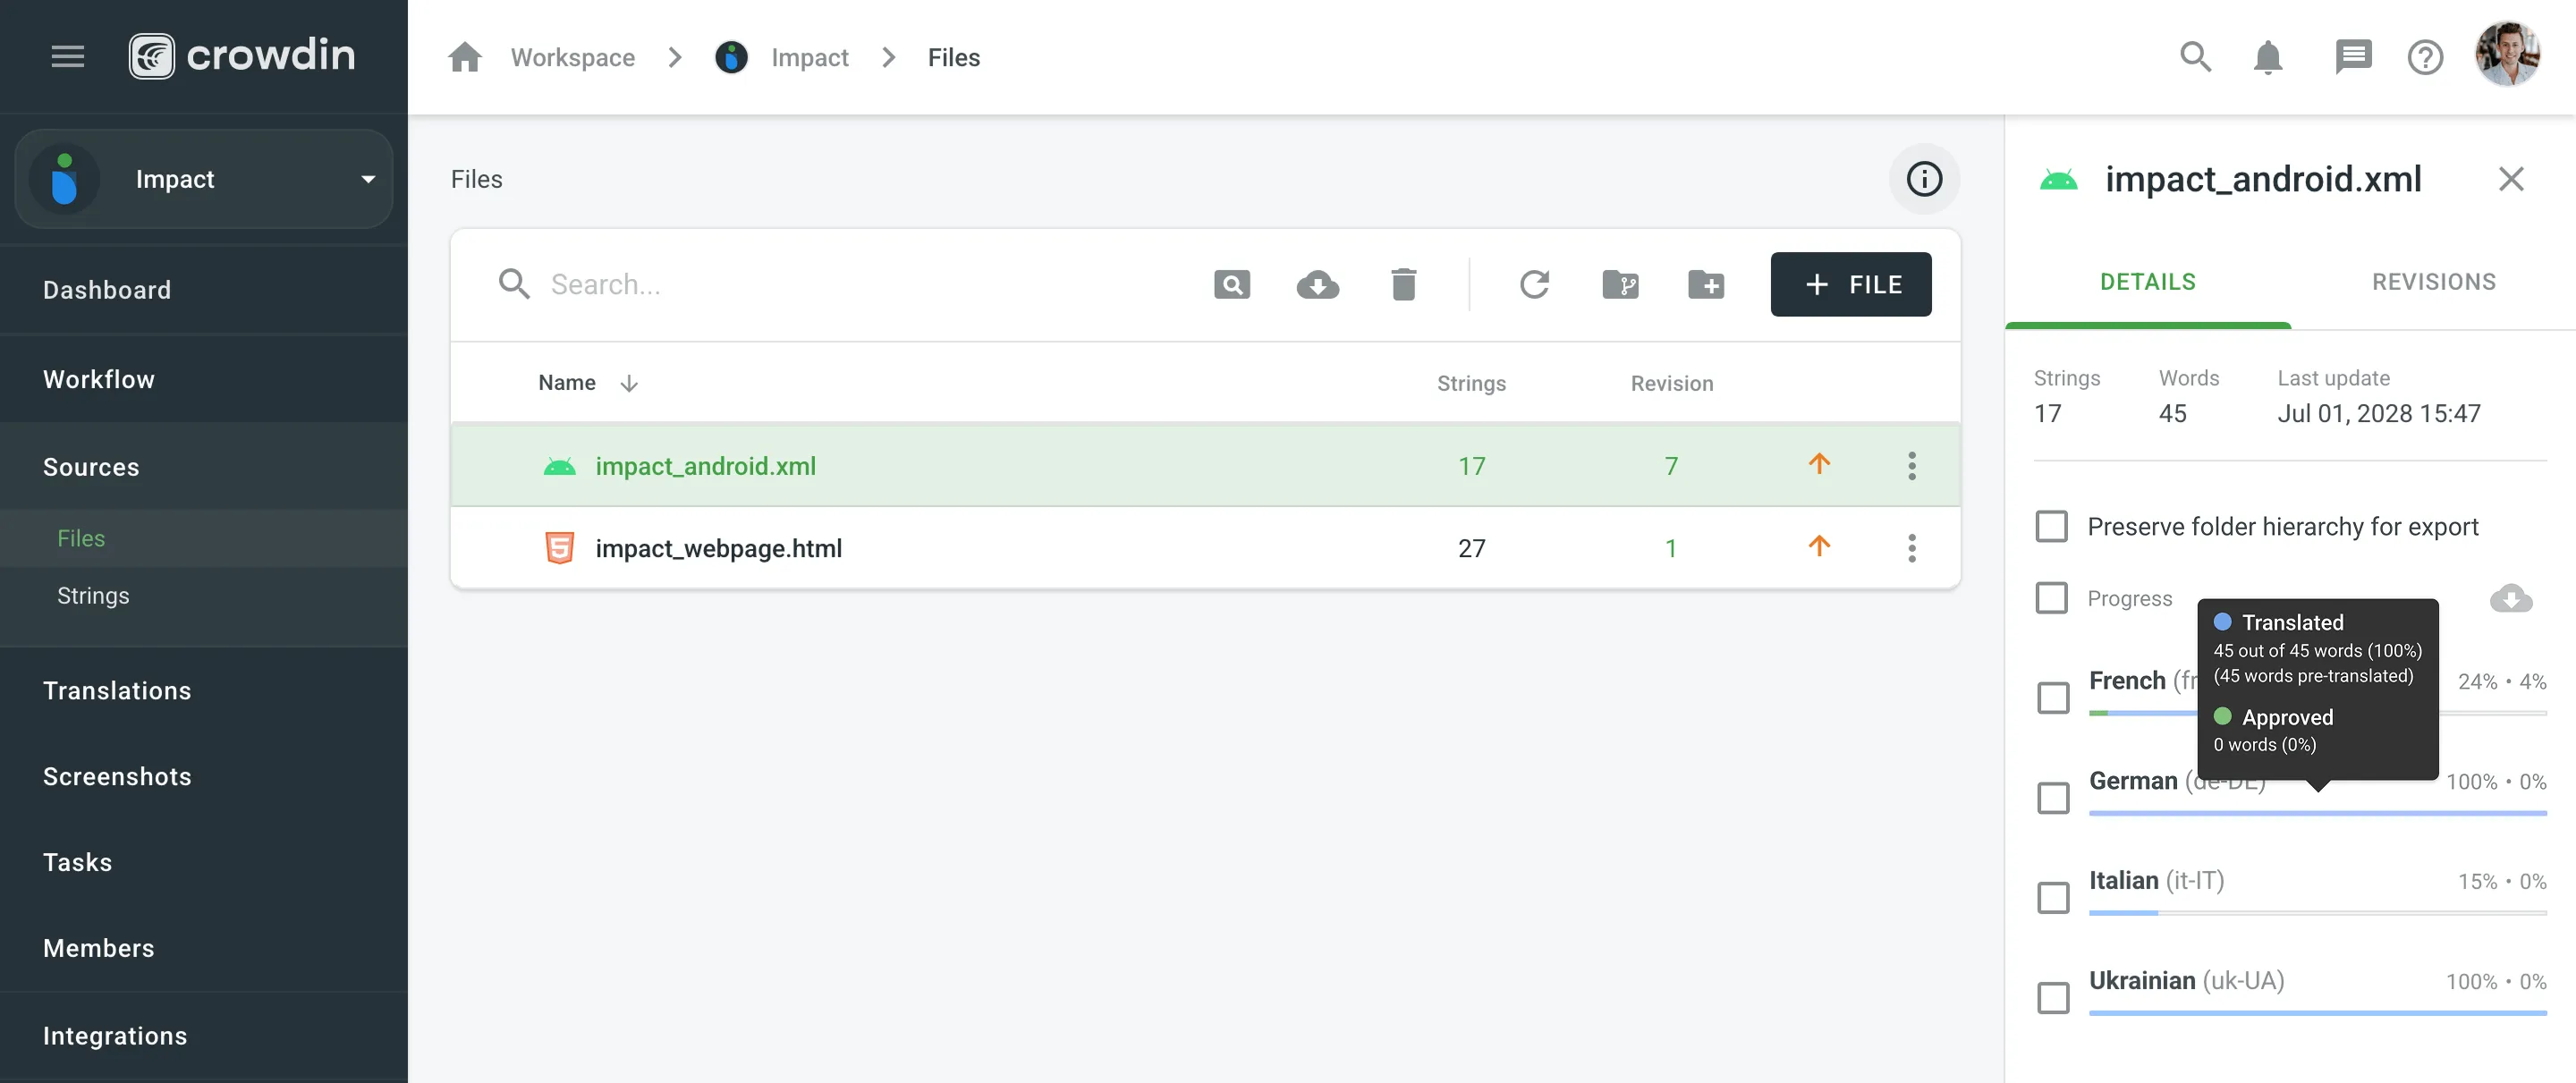 ## [Previewing Source Files](#previewing-source-files) [Section titled “Previewing Source Files”](#previewing-source-files) To preview the raw structure and content of a source file, right-click the file and select **Preview source**. This opens a read-only modal showing the file’s contents exactly as Crowdin received them. ## [Downloading Source Files](#downloading-source-files) [Section titled “Downloading Source Files”](#downloading-source-files) To download a source file stored in your Crowdin project, right-click on the file and select **Download source**. This can be useful for reviewing the original content outside Crowdin, sharing it with teammates, or making offline edits before reuploading. ## [Updating Source Files](#updating-source-files) [Section titled “Updating Source Files”](#updating-source-files) In case you have added some new strings to one of the source files, you’d want to update it to make newly added strings visible to translators. Right-click on the needed file, select **Update**, and then select the new file on your machine. If some of the source strings were modified, the system shows a dialog with a list of edited strings. You’ll be able to choose which existing translations you want to keep without changes (*Current strings* column) and whether you want to keep or remove approvals. The translations for other changed strings will be removed. 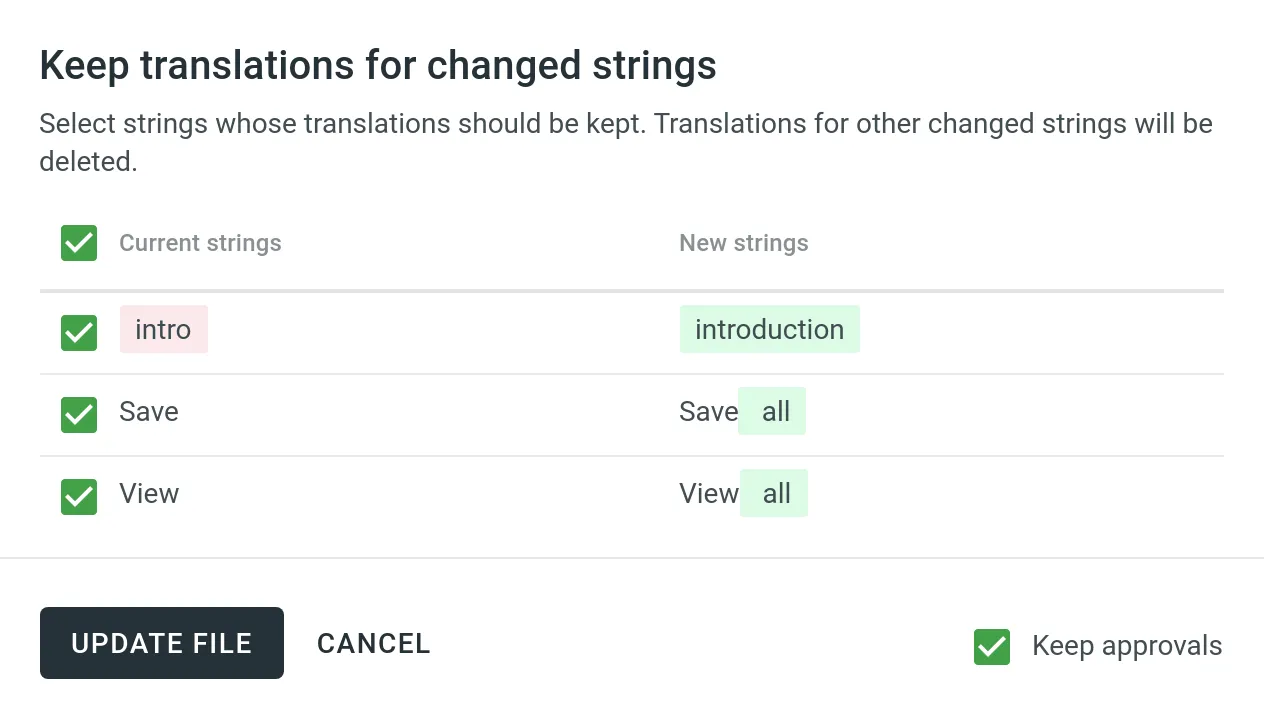 After updating files, Crowdin Enterprise may detect changes and display a blue dot next to the **Refresh** button in the upper-right corner of the **Files** section. Click this button to refresh the file list and display the most up-to-date information. ## [Restoring Previous Versions](#restoring-previous-versions) [Section titled “Restoring Previous Versions”](#restoring-previous-versions) Each time you update the source file, a new revision is created. To restore your file to the previous revision, click the number on the needed file in the *Revision* column. In the **Revisions** tab in the right sidebar, hover over the needed revision and click **Restore** next to it. 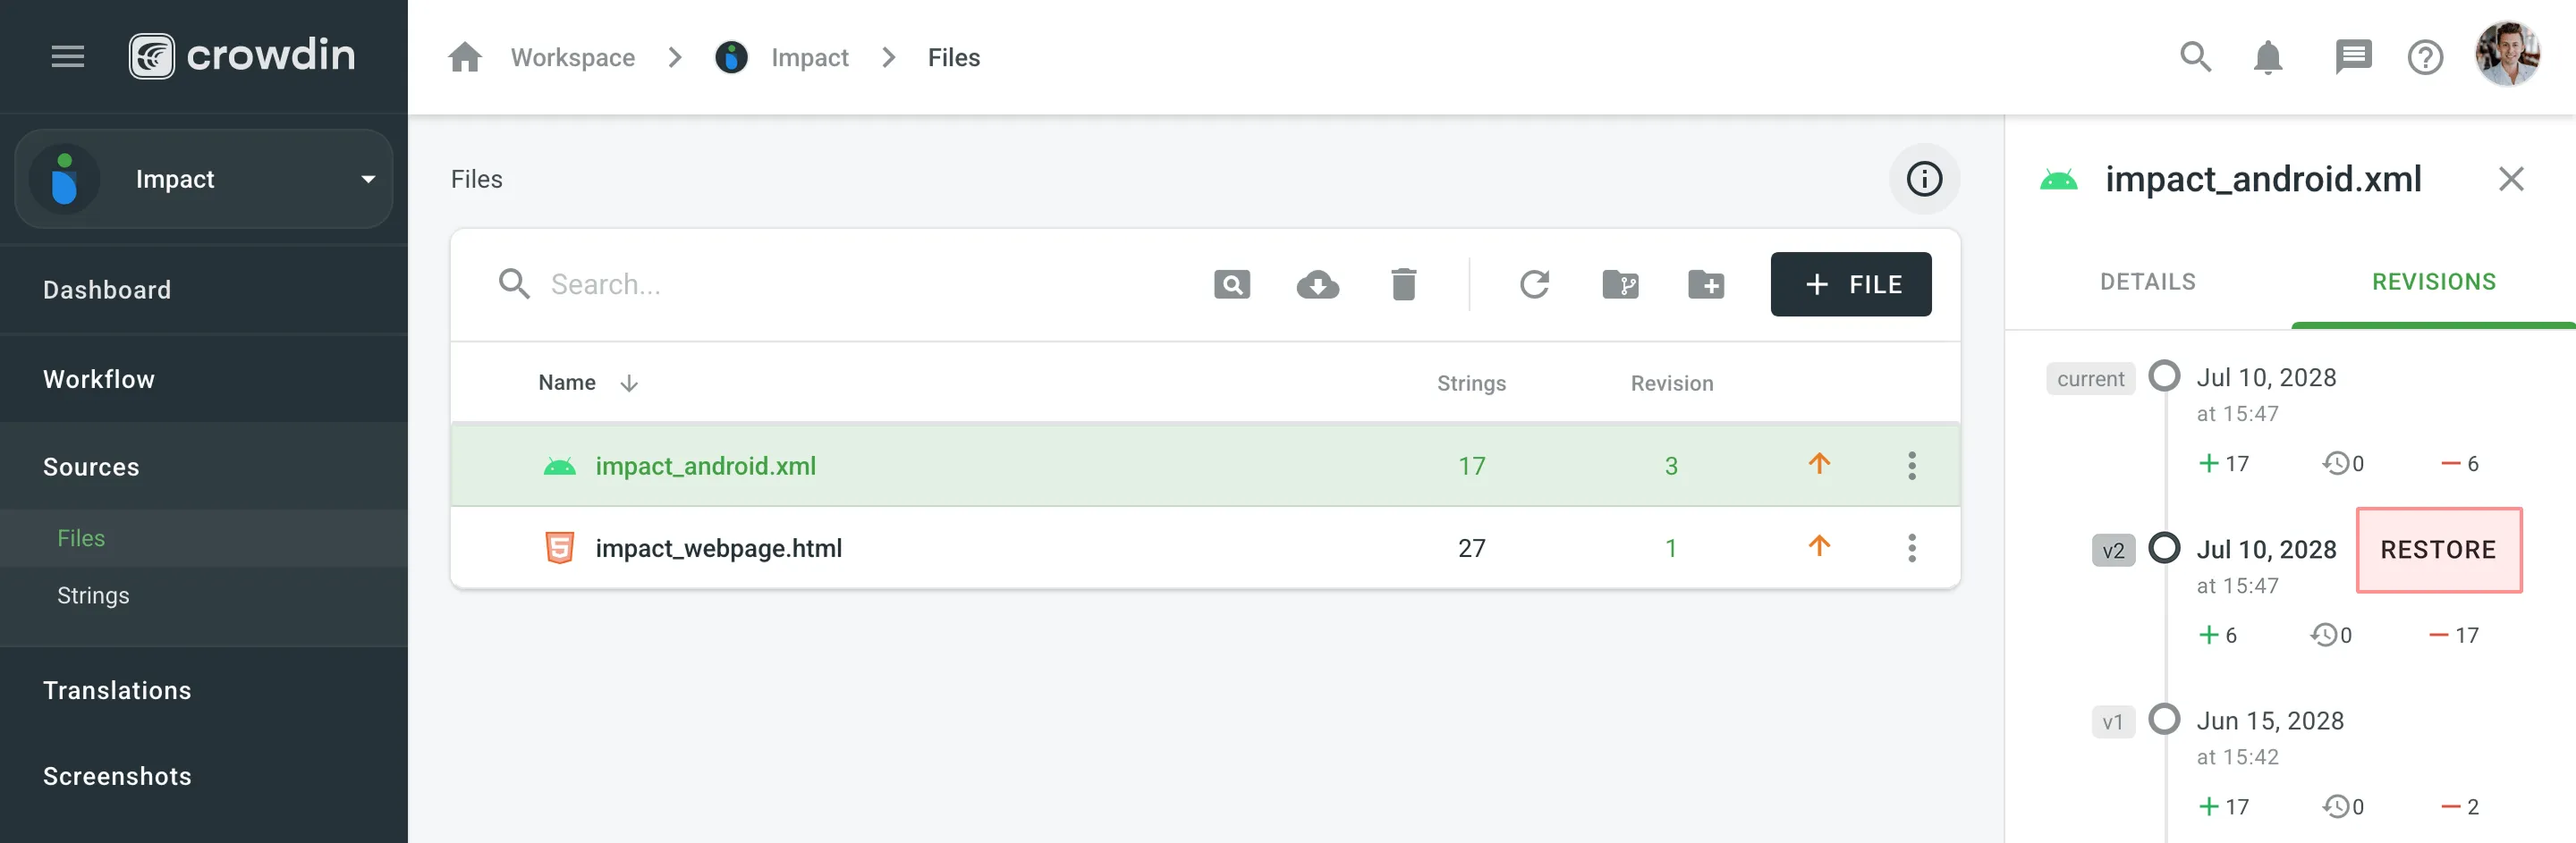 ## [Branches and Folders](#branches-and-folders) [Section titled “Branches and Folders”](#branches-and-folders) You can create folders and branches in **Sources > Files** with the following buttons: * – create folder * – create branch Folders represent your content structure, while branches help to manage different versions of the content. Usually, branches in Crowdin Enterprise are created automatically if you use GitHub, GitLab, or other VCS integration. Still, if you need to create branches manually, make sure to upload the master branch first, as all the others will be considered the feature branches. Duplicates might be managed in **Settings > Import > Source Strings** by choosing the corresponding option for *Duplicates*. Read more about [Version Management](/enterprise/version-management/). ## [Changing Scheme for CSV and XLSX Files](#changing-scheme-for-csv-and-xlsx-files) [Section titled “Changing Scheme for CSV and XLSX Files”](#changing-scheme-for-csv-and-xlsx-files) File formats like CSV and XLSX might require changing the initially configured scheme. Usually, it might be needed when you add a new target language to your Crowdin project. Read more about [changing the scheme for CSV and XLSX files](/enterprise/csv-xlsx-configuration/#changing-scheme-for-csv-and-xlsx-files).
# For Managers
> A guide to managing localization projects in Crowdin Enterprise
> Crowdin Enterprise is a cloud-based solution for streamlined localization management. Our technology solution allows you to localize your software, games, documentation, and other products. You can upload your translatable content and automate its updates, collaborate with your in-house translators, outsource translations, keep track of translation progress in real-time, and seamlessly integrate completed translations into your products. We’ve created this quick start guide to help you get the most out of your Crowdin Enterprise experience. This article will assist you in getting started with Crowdin Enterprise to grow your business, and we’ll provide some helpful resources you can use along the way. Ready to get started? ## [Create a Project](#create-a-project) [Section titled “Create a Project”](#create-a-project) Open your organization’s **Workspace**, hover over the **Create** button at the bottom right, and select **Project**.  Read more about [Creating a Project](/enterprise/creating-project/). Once you’ve created a project, you can add content to be translated. Each project has its own source content, resources, target languages, integrations, members, etc. In Crowdin Enterprise, most users create separate projects for different kinds of products or content. For example, you can create individual projects for your mobile application, website, desktop application, and documentation. This allows you to set up different workflows, as some projects can be translated by machine and post-edited by real people. Others may require multiple translation teams and additional proofreading steps. All your projects are created and managed within an organization. They are only available to members of the organization or to a vendor organization if you invite one. Read more about [Starting with an Organization](/enterprise/organization/). ## [Upload Content](#upload-content) [Section titled “Upload Content”](#upload-content) Once you’ve created the project, upload localizable files and resources, such as screenshots, translation memory, and glossary. ### [Upload Source Files for Localization](#upload-source-files-for-localization) [Section titled “Upload Source Files for Localization”](#upload-source-files-for-localization) You can upload localizable files in a way that works best for you: * Manually via the web interface (UI). * Integrate Crowdin Enterprise with the tools you already use: * Repo *(GitHub, GitLab, etc.)* * Marketing tools *(Contentful, Webflow, WPML, Hubspot, Marketo, etc.)* * Help center *(Help Scout, Zendesk, Intercom, etc.)* * Development tools *(VS Code, Android Studio, Google Play, etc.)* * Email automation *(MailChimp, SendPulse, ActiveCampaign, Mandrill, Moosend, etc.)* * Design tools *(Figma, Sketch, Adobe XD)*. * Use API or console client. 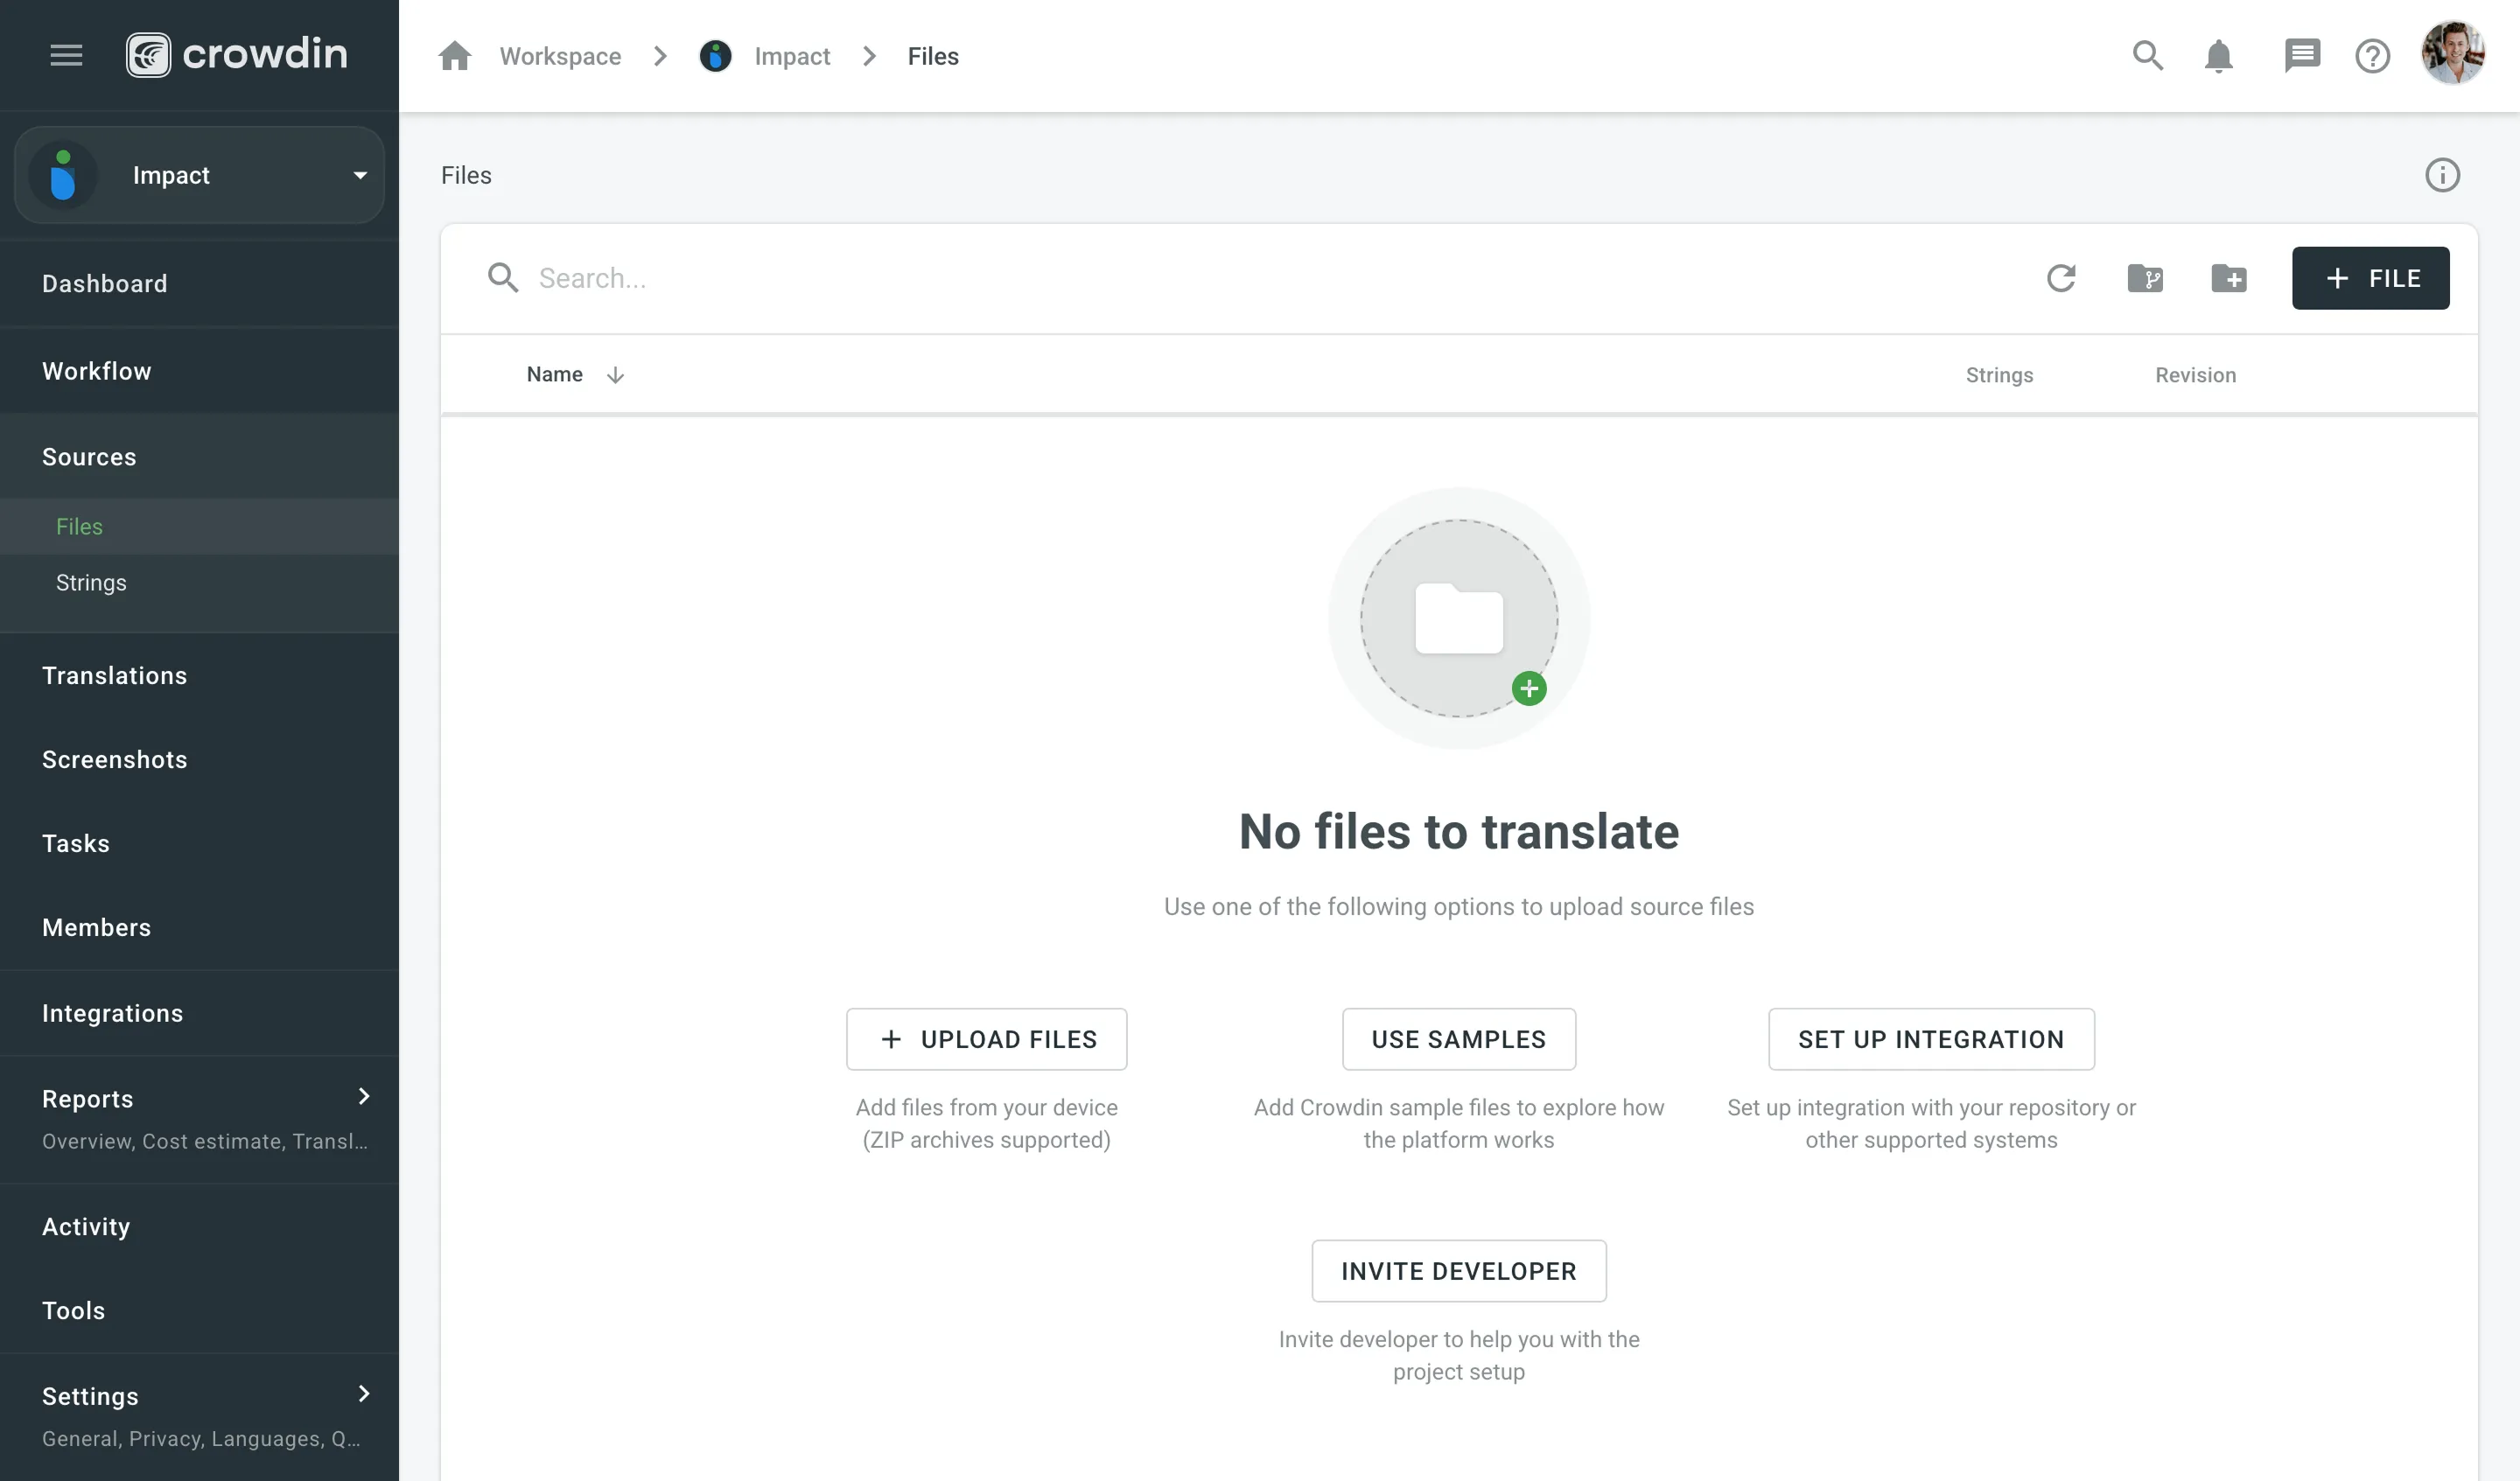 Read more about [Uploading Source Files](/enterprise/uploading-files/). To automatically sync files between your Crowdin Enterprise project and the tools of your choice, add and set up the respective integration. Once you add the integration, you can proceed to the setup. [Crowdin Store ](https://store.crowdin.com/)Explore 700+ integrations to streamline your localization process. ### [Upload Existing Translations](#upload-existing-translations) [Section titled “Upload Existing Translations”](#upload-existing-translations) If you already have some translations done outside Crowdin Enterprise, you can upload them to your Crowdin Enterprise project to keep everything in one place and continue working on translations. Read more about [Uploading Existing Translations](/enterprise/uploading-translations/). ### [Upload Localization Resources](#upload-localization-resources) [Section titled “Upload Localization Resources”](#upload-localization-resources) All resources, including TMs, Glossaries, and MT engines, can be added to your Workspace or directly to the project. Resources added to Workspace are available to all projects within your organization. Each project also has a default Translation Memory and Glossary that are created automatically. You can also switch to **Permission granularity mode**, where you can add different resources to each group as well. Resources added to a group will be available only to the projects in this group. Read more about [Groups](/enterprise/groups/) and [Permission Granularity Mode](/enterprise/permissions-granularity-mode/). #### [Translation Memory](#translation-memory) [Section titled “Translation Memory”](#translation-memory) With Translation Memory, you can leverage previous translations from your project. When the same or similar texts are used across your content, you can use the same translation and thus save your time. Pre-translate your project with a TM, and previous translations will be reused. Translators can also check how similar strings were translated earlier to keep translations consistent. Project Translation Memory (TM) is created automatically for each project. You can also upload your existing TMs in TMX, XLSX, and CSV file formats. Read more about [Translation Memory](/enterprise/translation-memory/). #### [Glossary](#glossary) [Section titled “Glossary”](#glossary) Use a Glossary to make sure your product terminology is translated correctly and used consistently across all languages. Project Glossary is created automatically for each project. You can also upload your existing Glossary TBX, XLSX, and CSV file formats. Read more about [Glossary](/enterprise/glossary/). ### [Upload Screenshots](#upload-screenshots) [Section titled “Upload Screenshots”](#upload-screenshots) Screenshots are another great way to provide additional context so translators can understand better how they should translate the source strings. To upload screenshots, open your project and go to the **Screenshots** section. Tag the source strings on the screenshots. This way, screenshots with tagged strings will appear under each string in the Editor’s Context and Translations section. 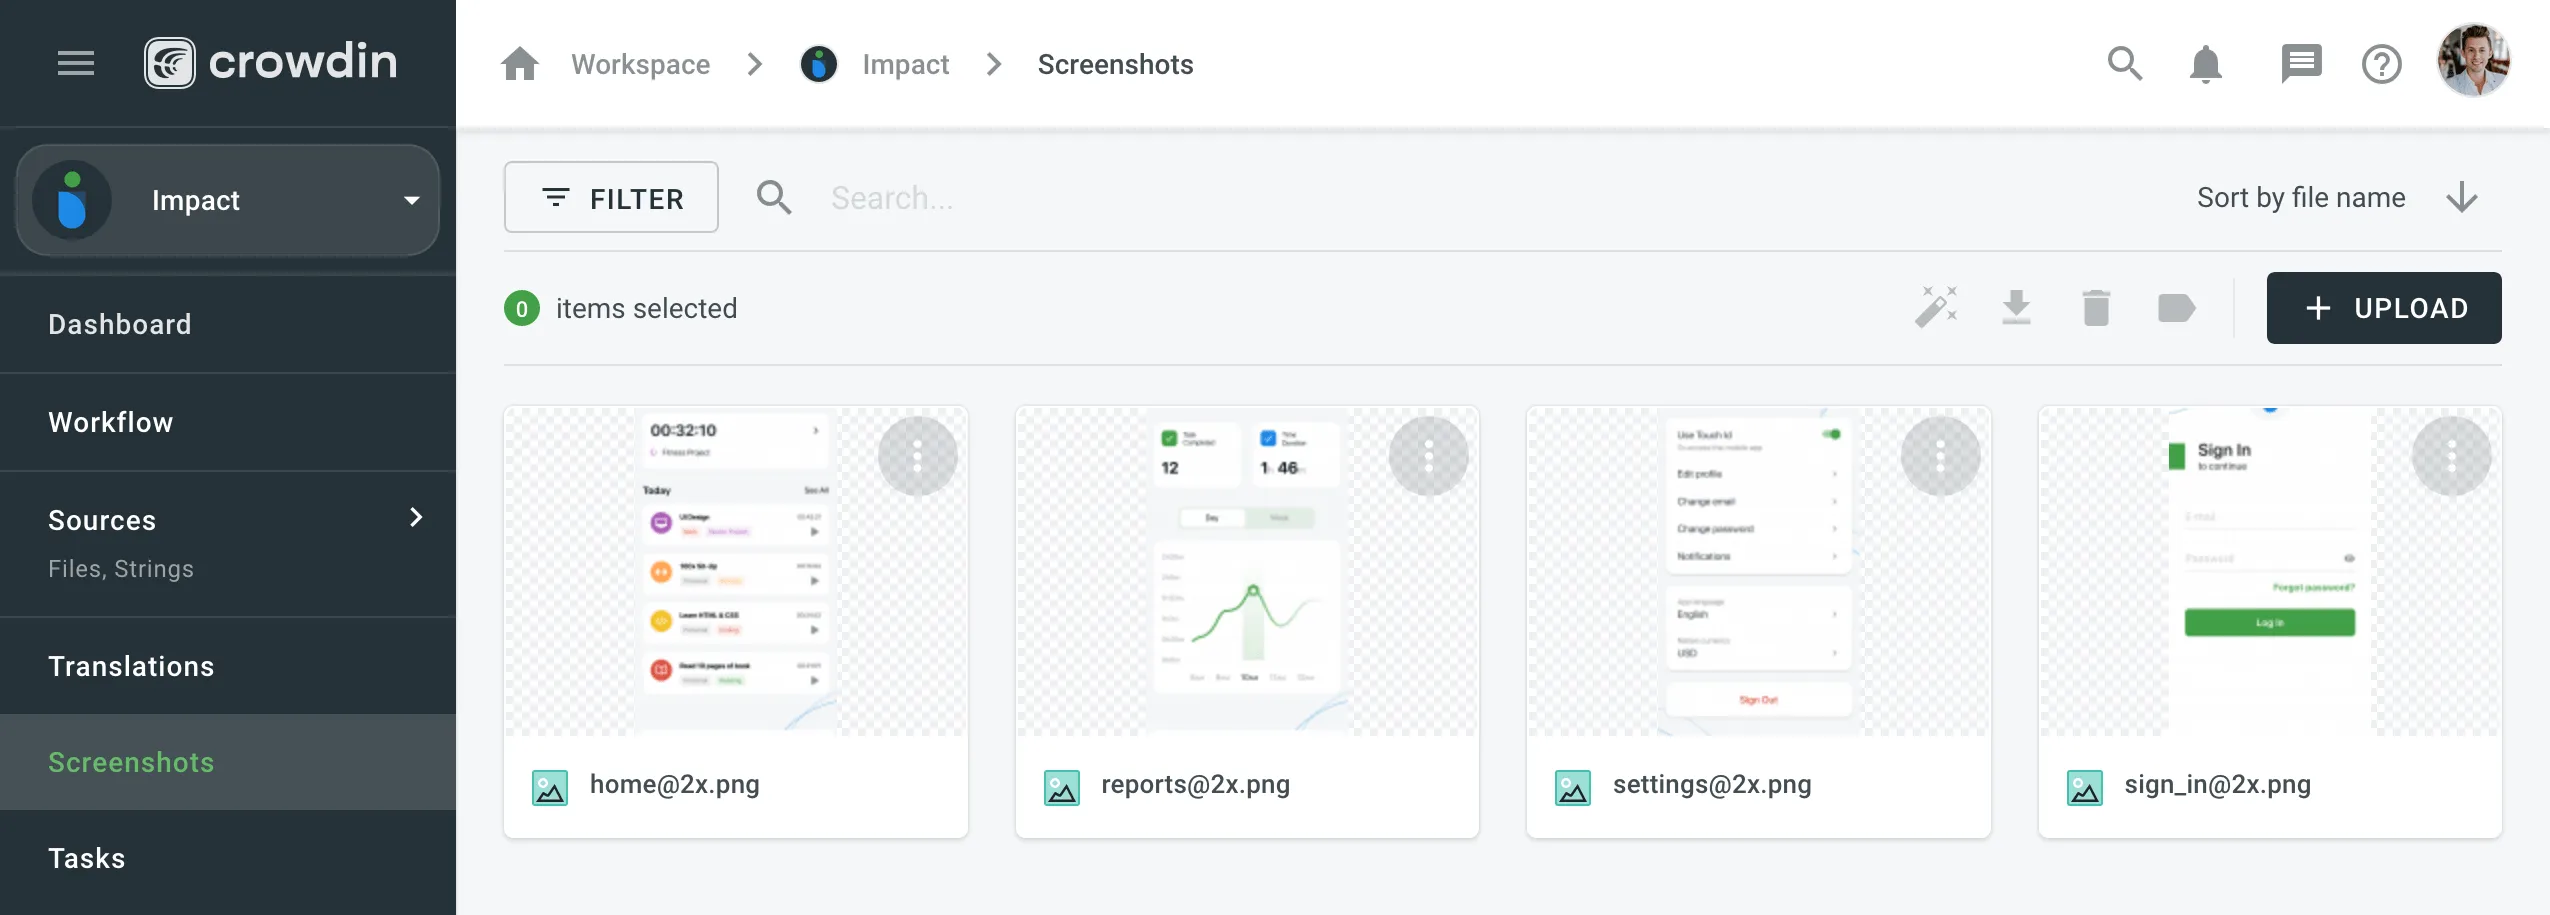 Read more about [Screenshots](/enterprise/screenshots/). ## [Pre-translate Your Project](#pre-translate-your-project) [Section titled “Pre-translate Your Project”](#pre-translate-your-project) To save time, you can pre-translate your Crowdin Enterprise project using [Translation Memory](/enterprise/translation-memory/), [Machine Translation](/enterprise/machine-translation/), or [AI](/enterprise/crowdin-ai/). Pre-translating your content means some strings will already be translated before translators begin their work. You can apply pre-translation manually or set up automatic pre-translation through the project workflow. [Projects without a workflow](/enterprise/creating-project/#projects-without-a-workflow) support manual pre-translation only. Read more about [Pre-translation](/enterprise/pre-translation/). ## [Invite People](#invite-people) [Section titled “Invite People”](#invite-people) Translate your projects with the right teams and technologies involved. You can invite your in-house translators, freelancers, translation agencies, and your community. In Crowdin Enterprise, you can invite people to your organization or directly to a specific project. Project members can be assigned contributor or manager roles. Also, you can invite managers directly to groups on the organizational level. Read more about [Roles](/enterprise/roles/). ### [User Management](#user-management) [Section titled “User Management”](#user-management) People invited into your organization will see an empty Workspace by default, except for Crowdsourcing projects, which are visible to all the organization members. To invite people to your organization, open your organization’s **Workspace** and select **Users** on the left sidebar. 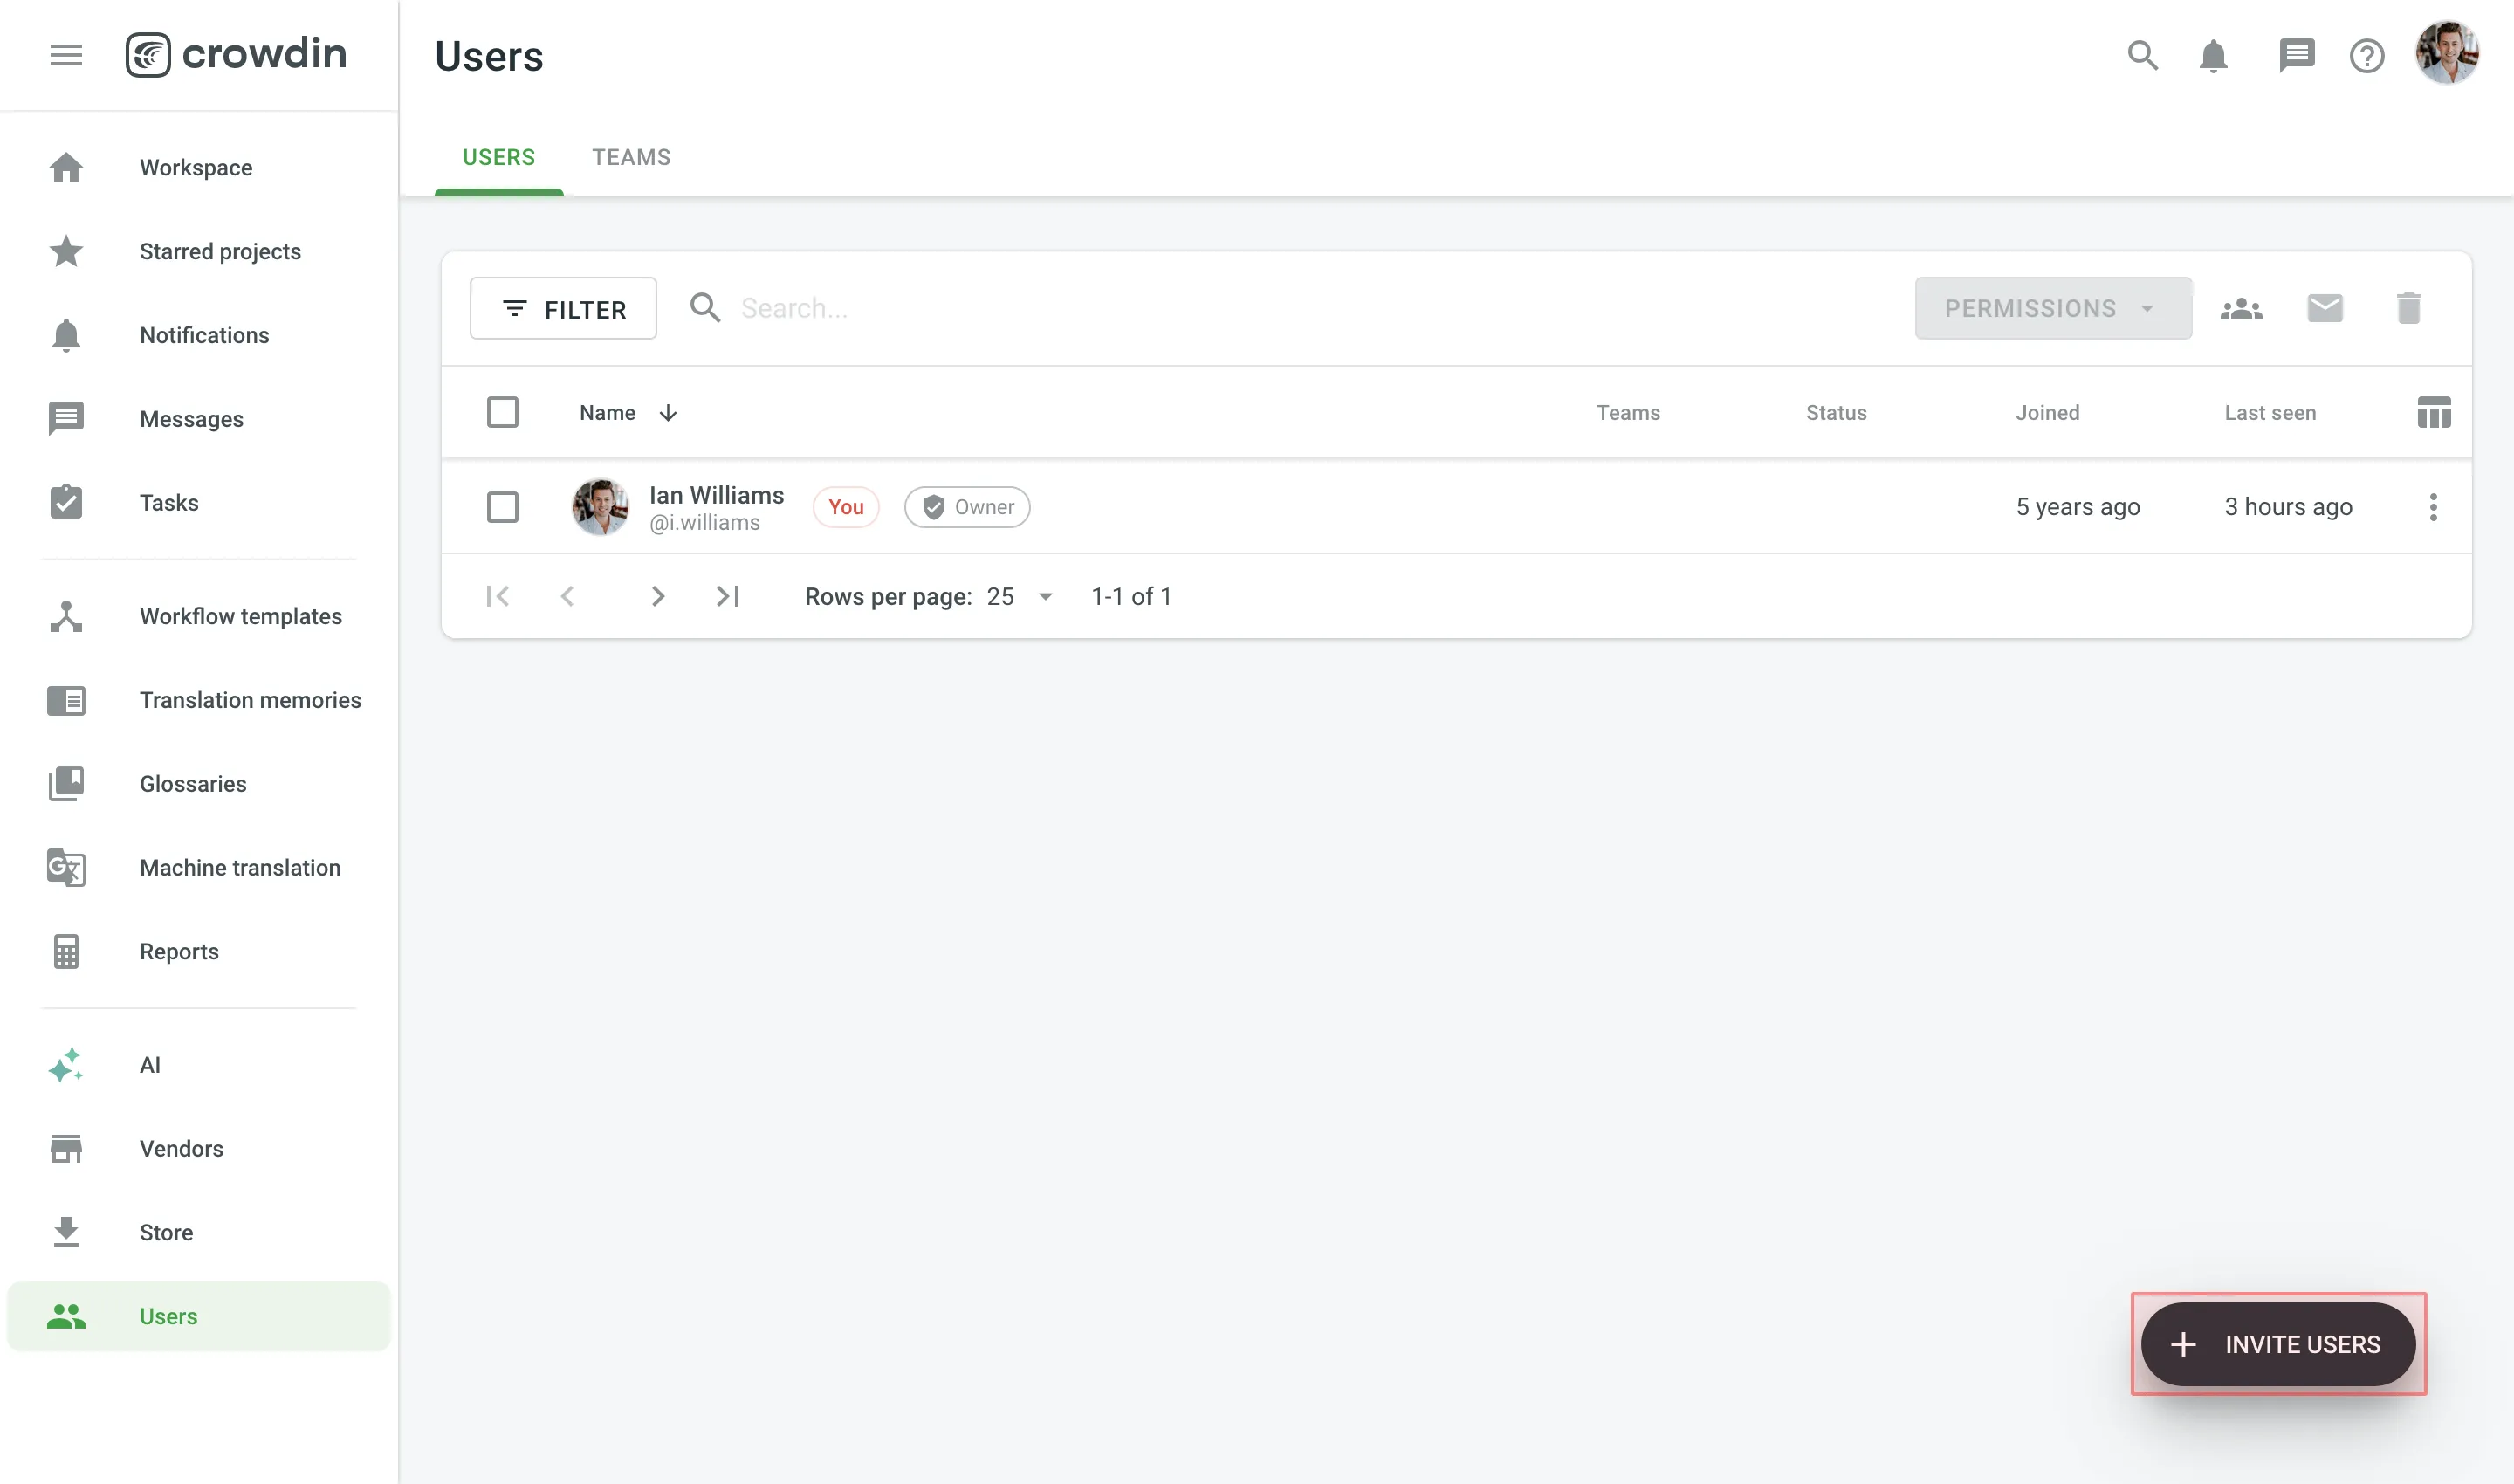 Read more about [Inviting People](/enterprise/inviting-people/). Once you invite people to your organization, you’ll be able to assign them to workflow steps, add to projects, give them admin or manager access, and more. ### [Inviting Existing Organization as Vendor](#inviting-existing-organization-as-vendor) [Section titled “Inviting Existing Organization as Vendor”](#inviting-existing-organization-as-vendor) To start cooperation with a Vendor organization, you first invite them to your organization and then assign to workflow steps. When you work with a vendor, you don’t see the specific people who did the translations. Instead, you see which vendor organization did them. Translation agencies can have their own Vendor organizations in Crowdin Enterprise. If the agency you cooperate with already has an organization, you can invite them; if not - they can also create an organization and then [contact our support](https://crowdin.com/contacts), so we can convert their organization to a Vendor. This way, you’ll be able to have more control over projects and resources you share, an ability to create complex workflows that would include translation and proofreading by vendor and more. Vendor organization receives a copy of your project in the **Incoming Projects** section. This organization should accept the incoming project to receive the workflow step you invite them to and can independently set their own workflows and invite their own contributors. To invite a Vendor to your organization, open your organization’s **Workspace** and select **Vendors** on the left sidebar. Read more about [Vendors](/enterprise/vendors/). ### [Crowdsourcing](#crowdsourcing) [Section titled “Crowdsourcing”](#crowdsourcing) Crowdsourcing is a localization practice that engages your community for a common goal – to translate your product on a volunteer basis into several languages. Cooperate with translators, proofreaders, and other enthusiasts on a volunteer basis and reward them for their efforts in a way that works for both of you. Read more about [Crowdsourcing](/enterprise/crowdsourcing/). ## [Configure Workflow](#configure-workflow) [Section titled “Configure Workflow”](#configure-workflow) Workflow is a combination of steps that content in your project goes through before it’s ready to be used in your product. You can create a workflow template that works best for you and then assign it to your projects. You’ll be able to edit your workflow inside the project, and it will not change the workflow template. You can use unlimited workflow steps (both in parallel or subsequently). To create a workflow template in your Workspace, open your organization’s **Workspace** and select **Workflow templates** on the left sidebar. 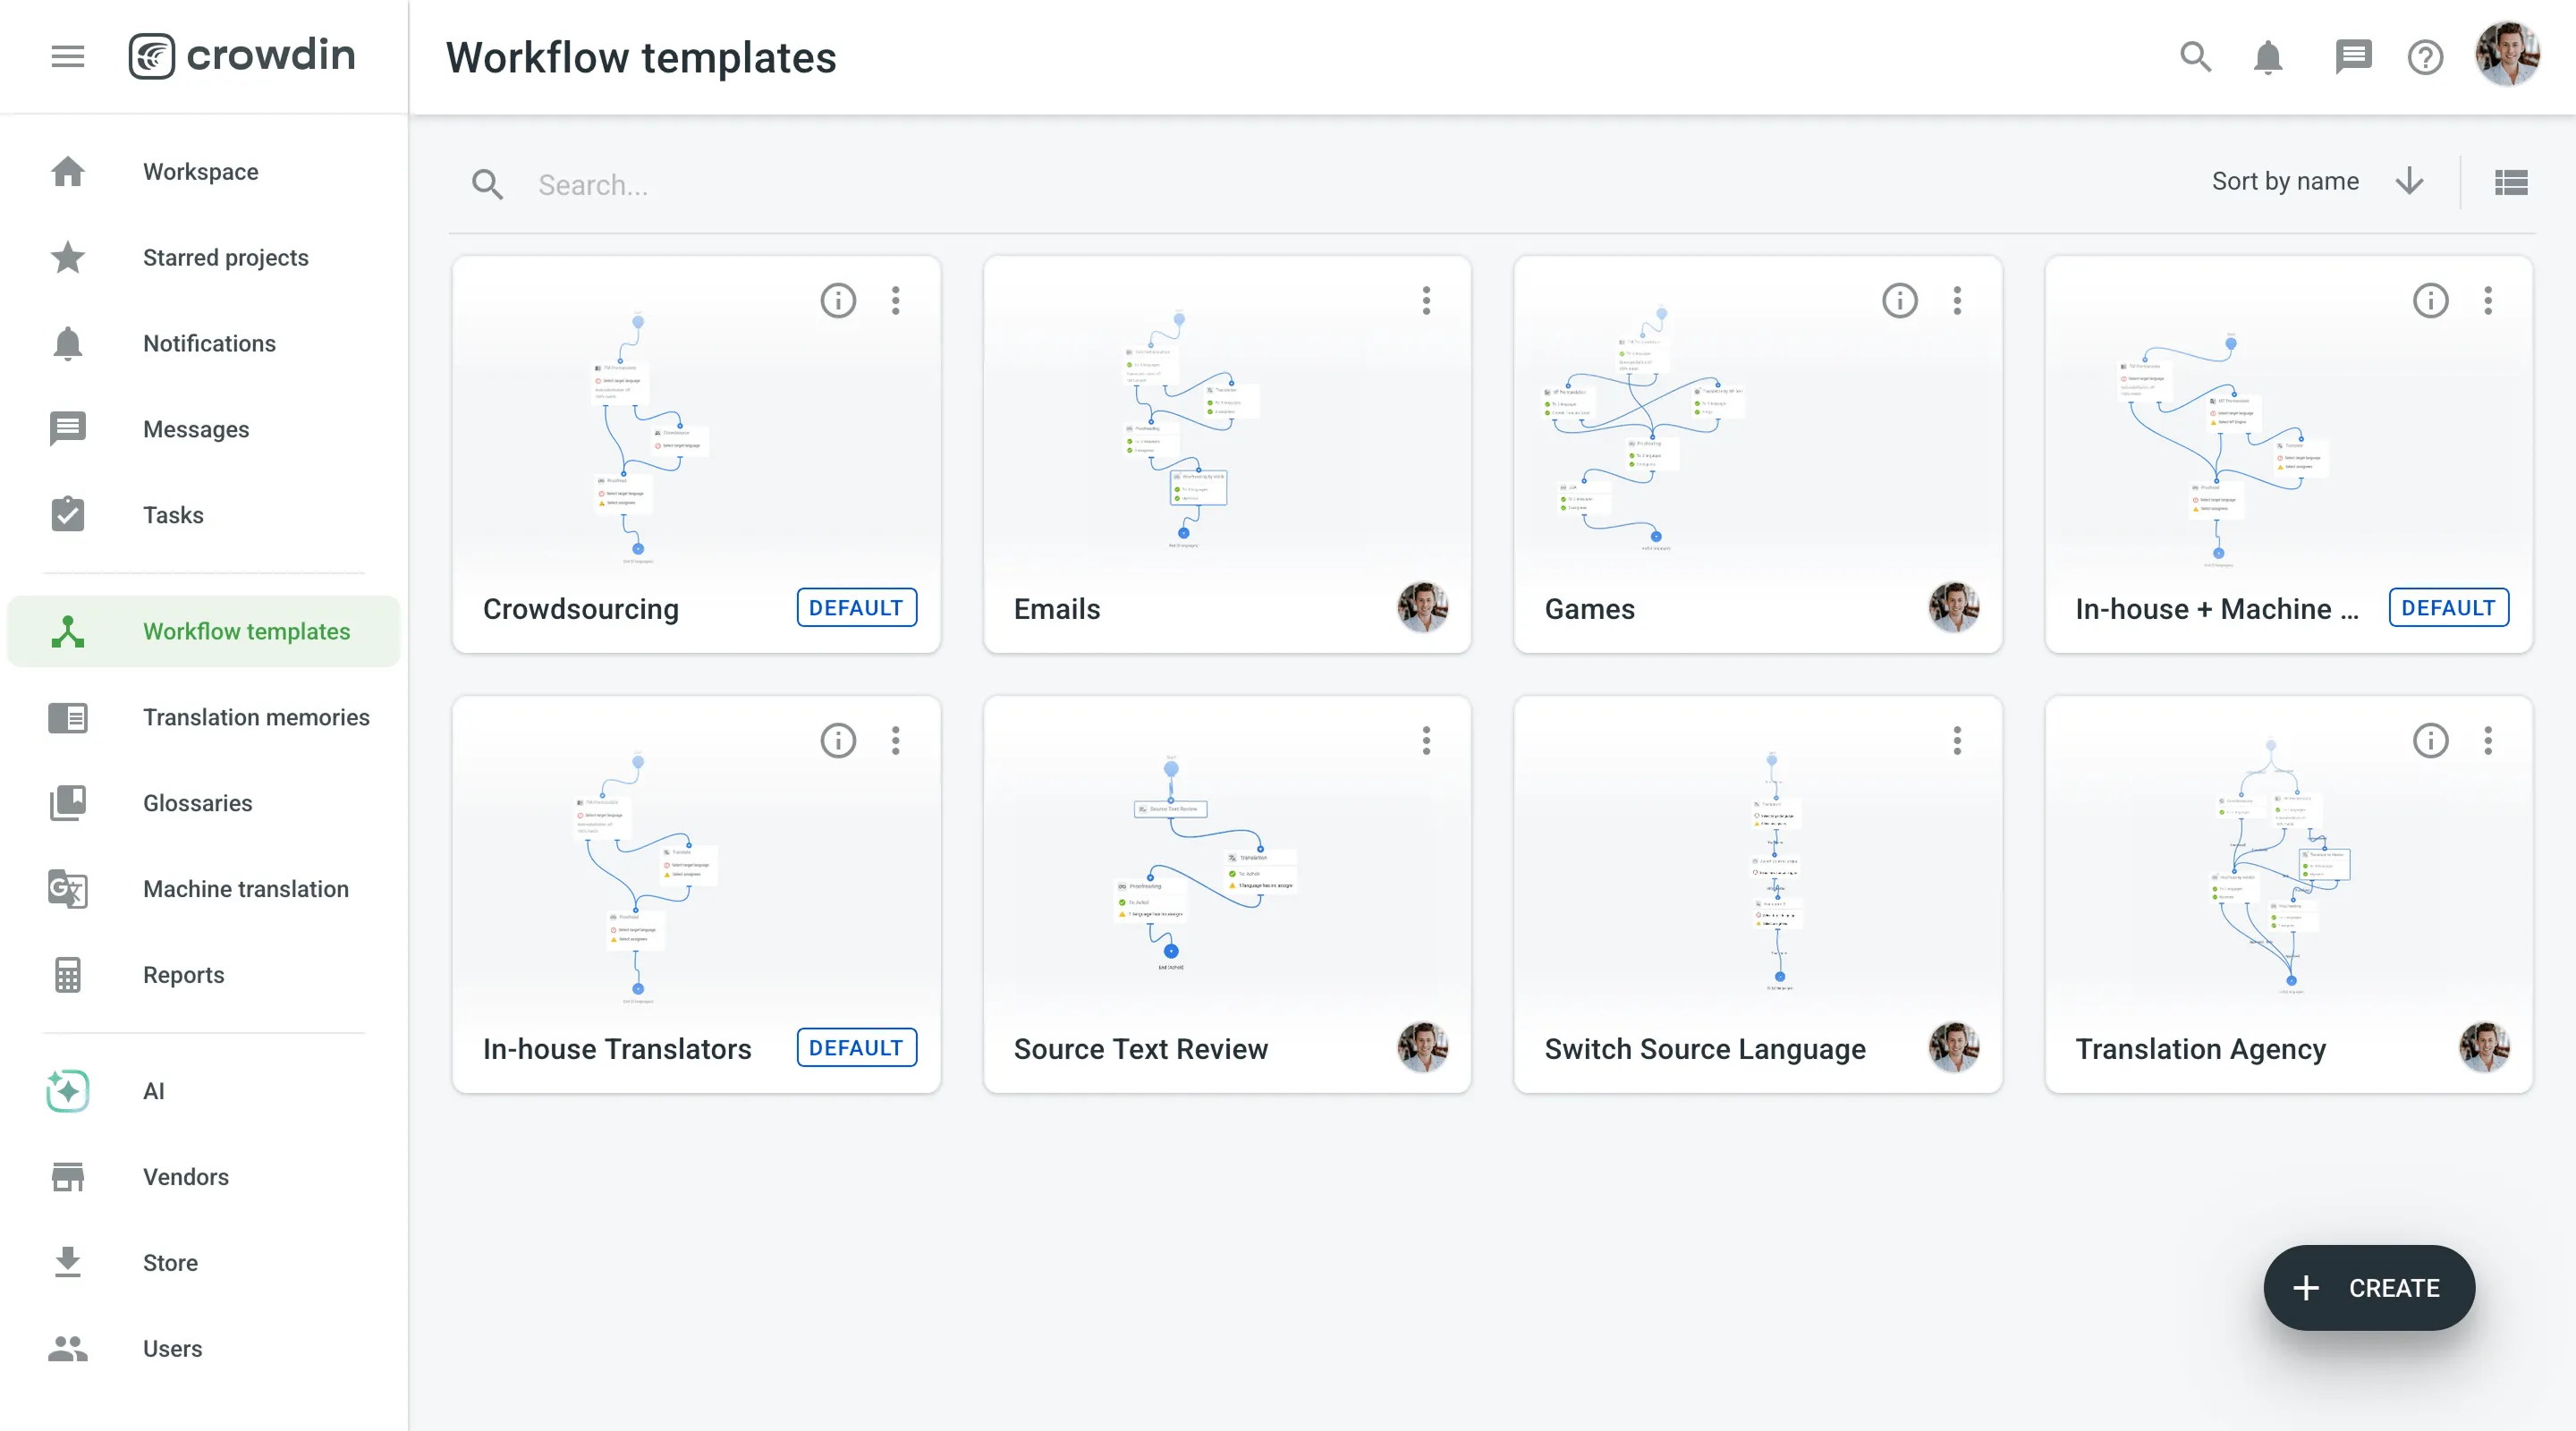 Read more about [Workflows](/enterprise/workflows/). ## [Generate Reports](#generate-reports) [Section titled “Generate Reports”](#generate-reports) Crowdin Enterprise provides project-level, group-level and organization-level reports to help you track progress, evaluate translation accuracy, estimate and count costs, and measure contributor activity. To access them, open the **Reports** section from the project, group, or organization view. The reports available to you depend on your [manager role](/enterprise/roles/#manager): * Project Managers – can view reports for their assigned projects. * Group Managers – can view reports for projects and groups they manage. * Workspace Managers – can view reports across the organization, including project, group, and organization-level reports. Available project-level reports include: * Overview * Cost Estimate * Translation Cost * Pre-translation Accuracy * Translator Accuracy * Top Members * Archive  Available group-level and organization-level reports include: * Overview * Translation Cost * Top Members * Archive 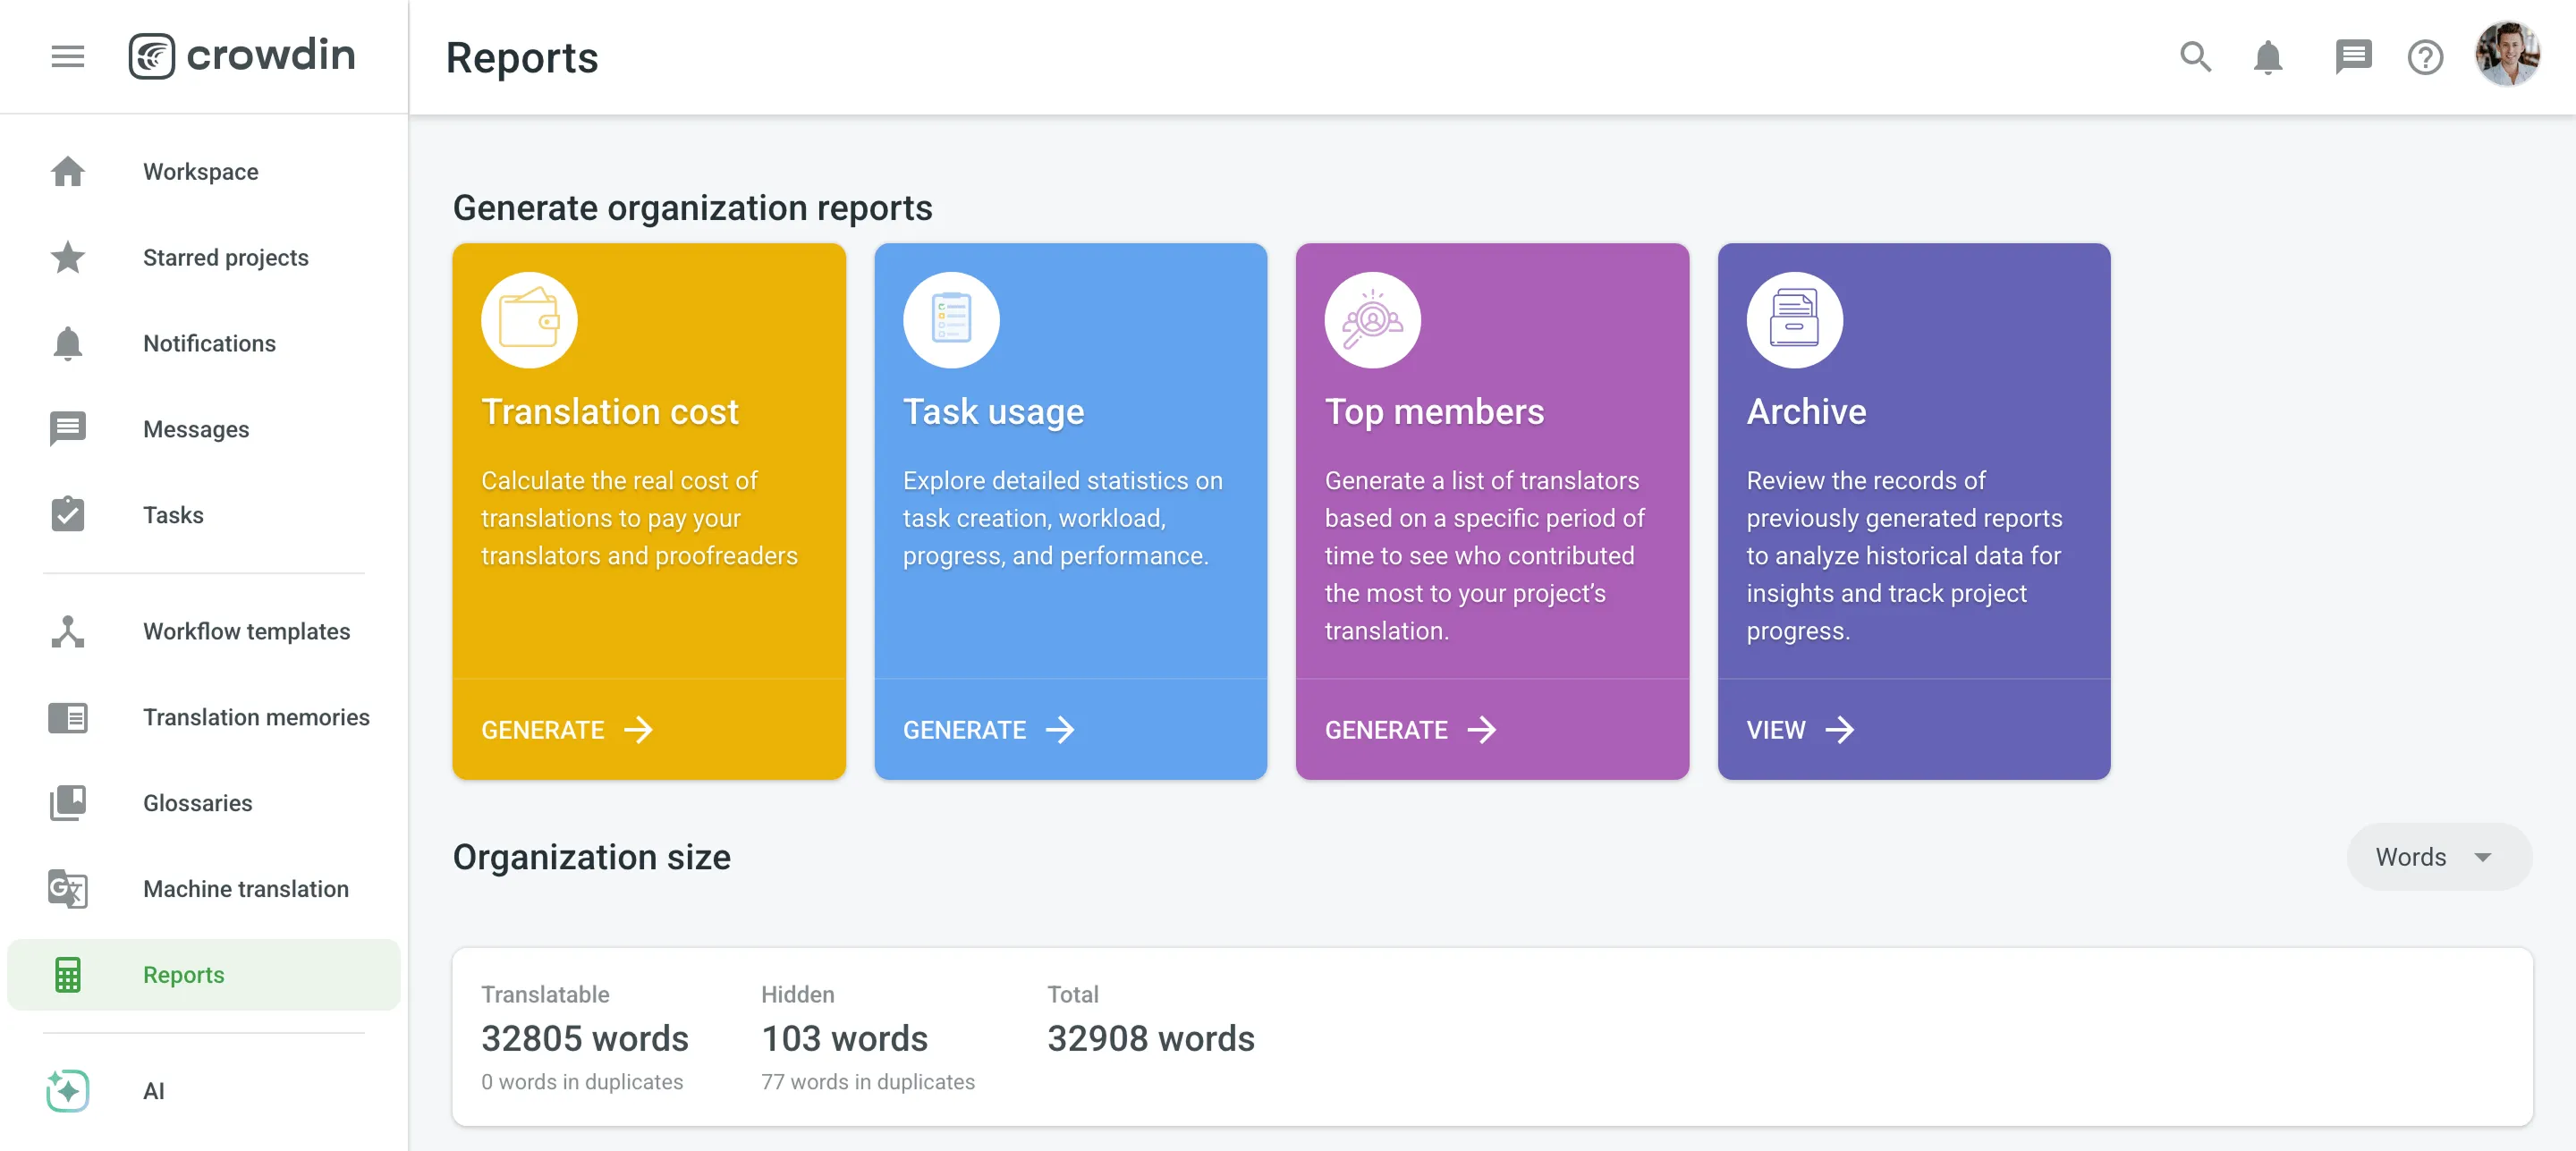 Read more about [Project Reports](/enterprise/project-reports/) and [Organization Reports](/enterprise/organization-reports/). ## [Download Translations](#download-translations) [Section titled “Download Translations”](#download-translations) You can download translations manually using the web interface (UI) or set up automated delivery using integrations (e.g., GitHub or other connected tools), the Crowdin Enterprise API, the console client (CLI), or Over-The-Air Content Delivery. Translations are downloaded according to the export settings configured in the project’s **Settings** section. Read more about [Downloading Translations](/enterprise/downloading-translations/). ## [Global Search](#global-search) [Section titled “Global Search”](#global-search) The Global Search feature enables you to locate content and resources across your entire organization efficiently. You can access Global Search from most pages in your Workspace, within projects (excluding the Editor), and other sections. Search results are displayed based on the role of the user performing the search. For example, a translator will only see resources assigned to them, such as source strings or projects, while an organization admin can access all resources they have permissions for across the organization. Recent search requests are stored so you can reuse or clear them as needed. 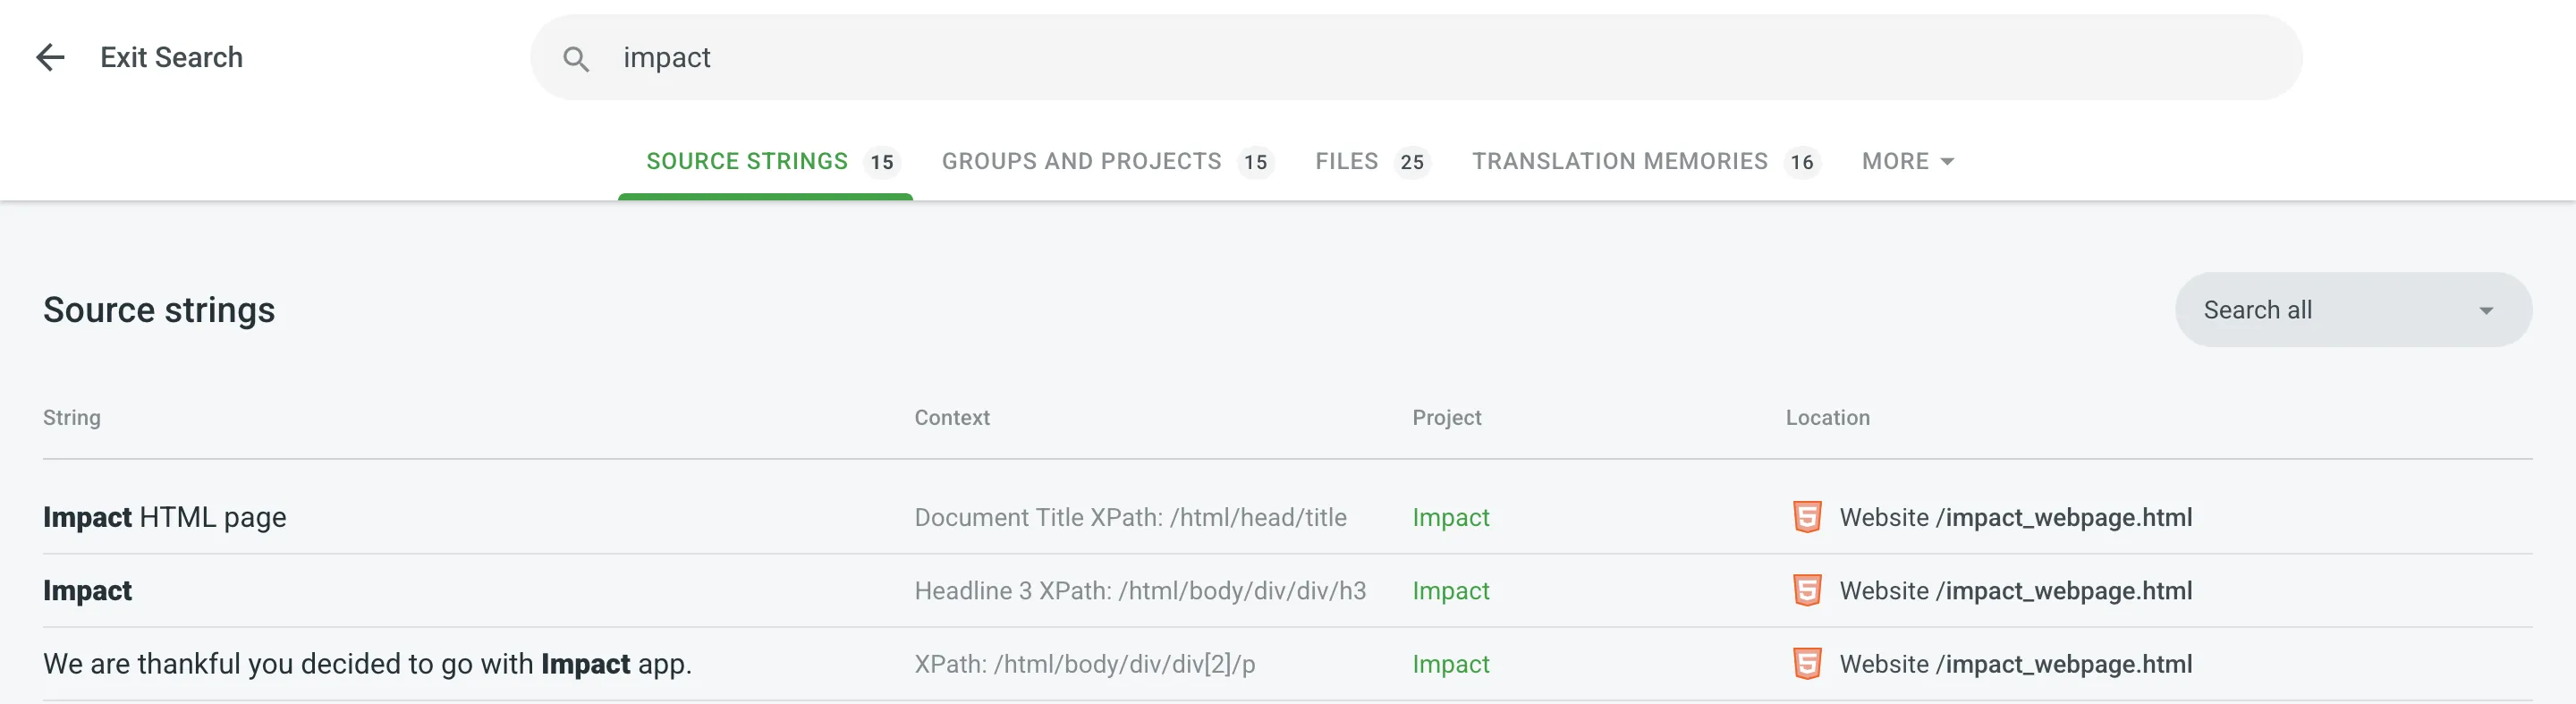 ### [Using Global Search](#using-global-search) [Section titled “Using Global Search”](#using-global-search) To search for content and resources within your organization, follow these steps: 1. Click in the upper-right corner of the Workspace or project page. 2. Enter keywords or phrases in the search bar. 3. You will be redirected to the Global Search results page automatically. 4. Switch between the tabs to view results categorized by different content types. 5. Click **Exit Search** to return to your Workspace. ### [Global Search Tabs](#global-search-tabs) [Section titled “Global Search Tabs”](#global-search-tabs) Search results are organized into tabs for better navigation, with the number of matches displayed next to each tab name. For easier navigation, matching terms in the results are highlighted in bold. To change the sort order of results within a tab, click the desired column header. Click once for ascending order and twice for descending order. #### [Source Strings](#source-strings) [Section titled “Source Strings”](#source-strings) Search for source text across multiple projects. In the **Source Strings** tab, you can view results with the following details: * String – The source text containing the match. * Context – Context of the source string. * Project – Name of the project where the string is located. * Location – File or folder structure within the project where the string is stored. Click on a source string to open it in the Editor in a new browser tab or click the project name to navigate to the project Dashboard. Filters available in this tab: * Search all – Search within all available fields. * Search in source text – Limit the search to source text only. * Search in source context – Limit the search to the source string’s context. #### [Groups and Projects](#groups-and-projects) [Section titled “Groups and Projects”](#groups-and-projects) Find organization groups or specific projects. The **Groups and Projects** tab is divided into two sections: Groups and Projects. Each section displays a list of matching search results with the following details: * Name – Name of the project or group. * Updated – Last update timestamp of the project or group. #### [Files](#files) [Section titled “Files”](#files) Locate files by name or type within your projects. In the **Files** tab, you can view search results the following details: * File – The file name containing the match. * Location – File or folder structure within the project. * Project – Name of the project where the file is stored. Click on a file to open it in the Editor in a new browser tab or click the project name to go to the project Dashboard. #### [Translation Memories](#translation-memories) [Section titled “Translation Memories”](#translation-memories) Search for specific translation memories. In the **Translation Memories** tab, you can view search results with the following details: * Name – Name of the translation memory. * Records – Number of entries in the translation memory. #### [Glossaries](#glossaries) [Section titled “Glossaries”](#glossaries) Search for specific glossaries. In the **Glossaries** tab, you can view search results with the following details: * Name – Name of the glossary. * Terms – Number of terms in the glossary. ## [Personalized Demo](#personalized-demo) [Section titled “Personalized Demo”](#personalized-demo) Have around 30 minutes and want one of our skilled Customer Success managers to walk you through your organization and help you implement best practices? Go ahead and [Schedule a demo](https://crowdin.com/demo-request) call to get a personalized tour and recommendations on how to best manage localization projects in your organization.
# For Translators
> Learn how to contribute to localization projects as a translator
> Crowdin is a localization management platform that helps companies translate their software. In this article, you will find information on how you can contribute to localization projects as a translator. You’ve been invited to join the Crowdin Enterprise project, but not sure where to start? Here’s everything you need to get started with translating and proofreading. This article will walk you through the basics of the translation process in Crowdin Enterprise. ## [Create an Account](#create-an-account) [Section titled “Create an Account”](#create-an-account) Each company in Crowdin Enterprise has a unique URL. A company that wants to invite you can either share the direct link to the project page or to the organization page with all the crowdsourcing projects they have. A project manager can also send an invitation directly to your email. Using this specific link, you need to create a new account in Crowdin Enterprise. To create an account (sign up), you can use your social media profiles (Google, Facebook, X), GitHub, or GitLab profiles. Once you have created an account, you can use your username and password to access the needed organization page in Crowdin Enterprise. If you decide to contribute to more than one organization, you will need separate Crowdin Enterprise accounts for each organization. [Signing Up by an Invitation ](/enterprise/organization/#signing-up-by-an-invitation) [Account Settings ](/enterprise/account-settings/) ## [Explore Your Workspace](#explore-your-workspace) [Section titled “Explore Your Workspace”](#explore-your-workspace) The Workspace is the first page you’ll see after a successful registration. You’ll have the proofreader or translator (or both) access to the project you’ve been assigned to work on. You can access each project from here. 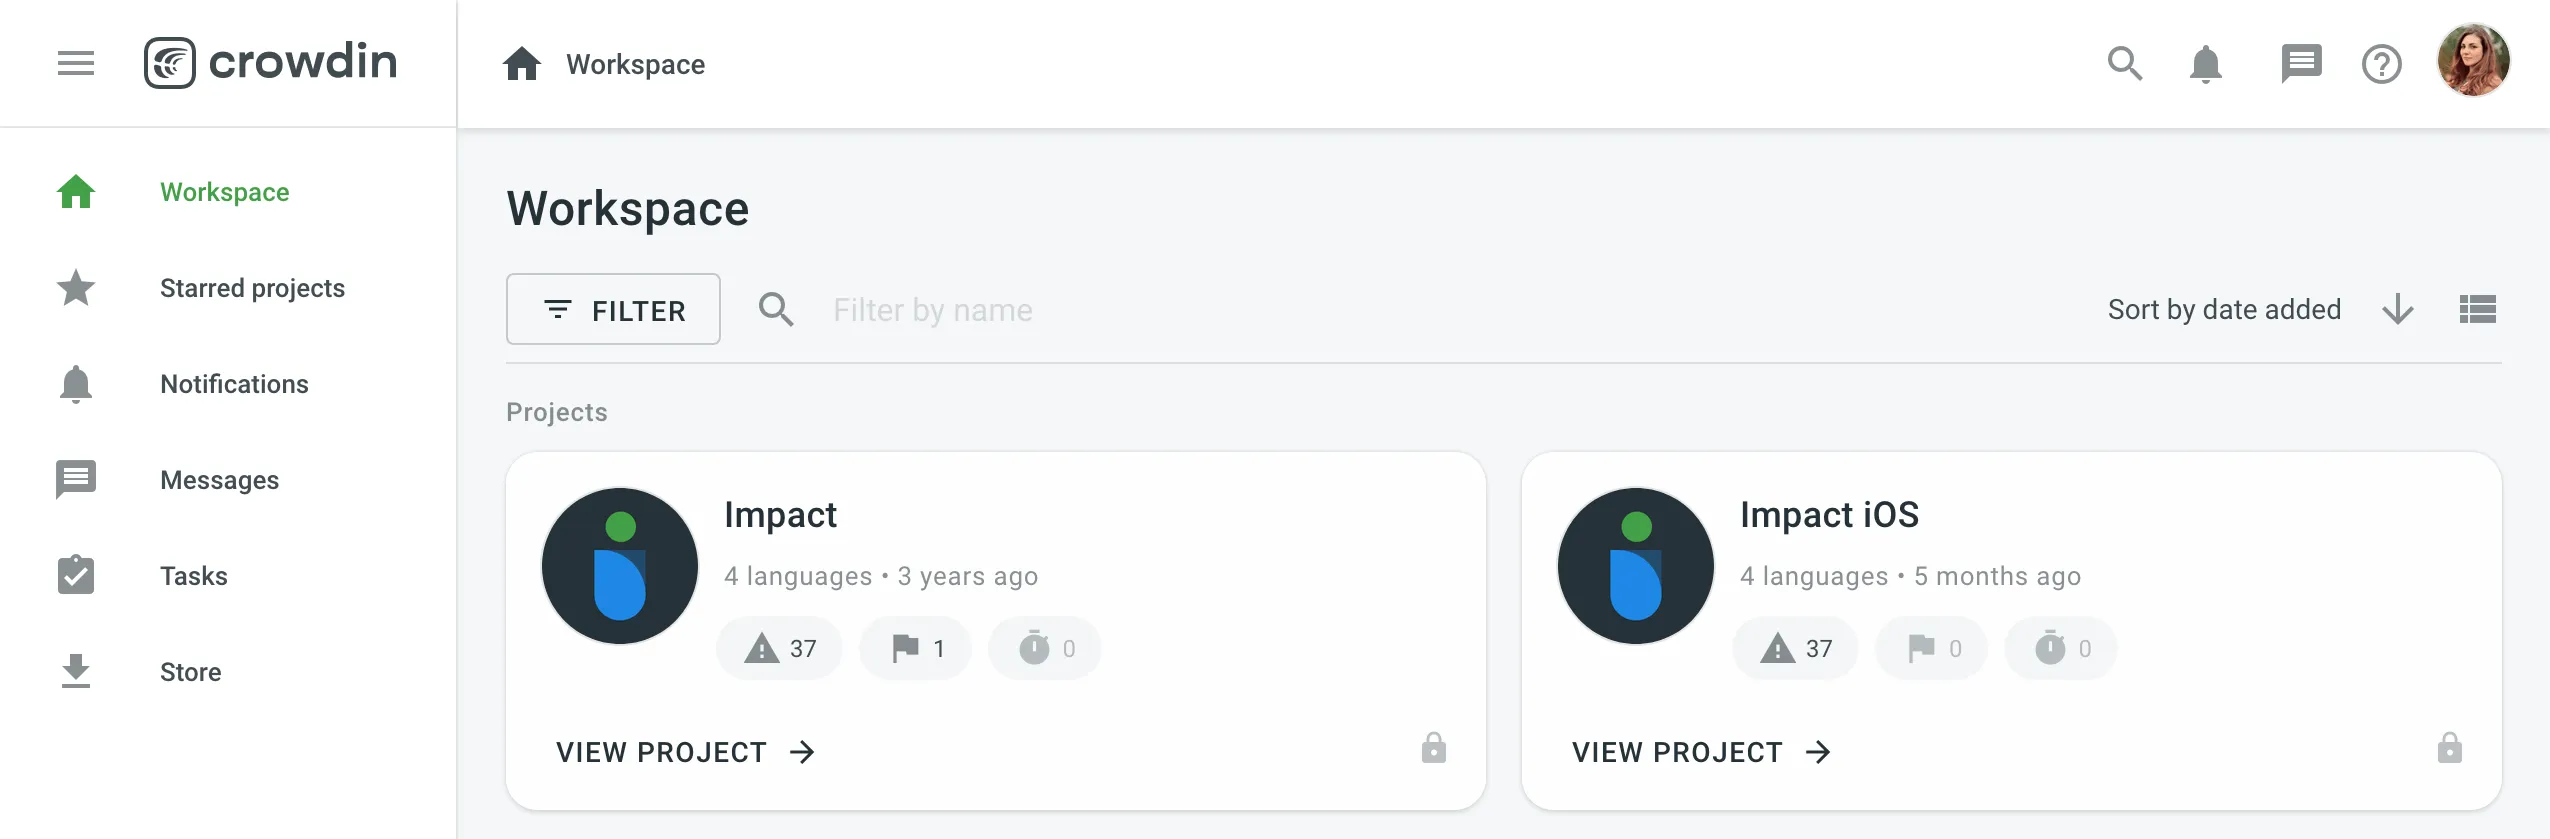 Using the left sidebar, you can access the following pages: * **Starred projects** – all your starred projects. Use it for quick access to the projects you open the most often. * **Notifications** – see all the key updates for the projects you are working on. For example, notifications about new strings added, new tasks created, etc. You can also choose to receive updates via email or Slack. Go to **Account Settings > Notifications** to change your notification preferences. * **Messages** – create one-to-one conversations or add as many project members to a conversation as needed. Any time you receive a message in one of the conversations, you can view it here. * **Tasks** – a list of tasks assigned to you. Use the filter for better navigation and archive the completed tasks. * **Store** – Crowdin Store offers 700+ apps you can install to extend Crowdin functionality. Explore Crowdin [apps for Translator Productivity](https://store.crowdin.com/categories/translator-productivity). [Notifications ](/enterprise/account-notifications/) [User Tasks ](/enterprise/user-tasks/) ## [Global Search](#global-search) [Section titled “Global Search”](#global-search) The Global Search feature helps you quickly find content and resources within the organization, such as source strings, groups and projects. Read more about [Global Search](/enterprise/for-managers/#global-search). ## [Project Page](#project-page) [Section titled “Project Page”](#project-page) Each project has its own Dashboard page where you can see some basic information about the project, such as the number of target languages and source words, the last activity, and a list of the languages you’ve been assigned to work with. For projects with workflow, you can click the expand icon next to the language to see the workflow steps assigned to you. You can select the workflow step and open all the strings you will be working with in that step in the Editor. 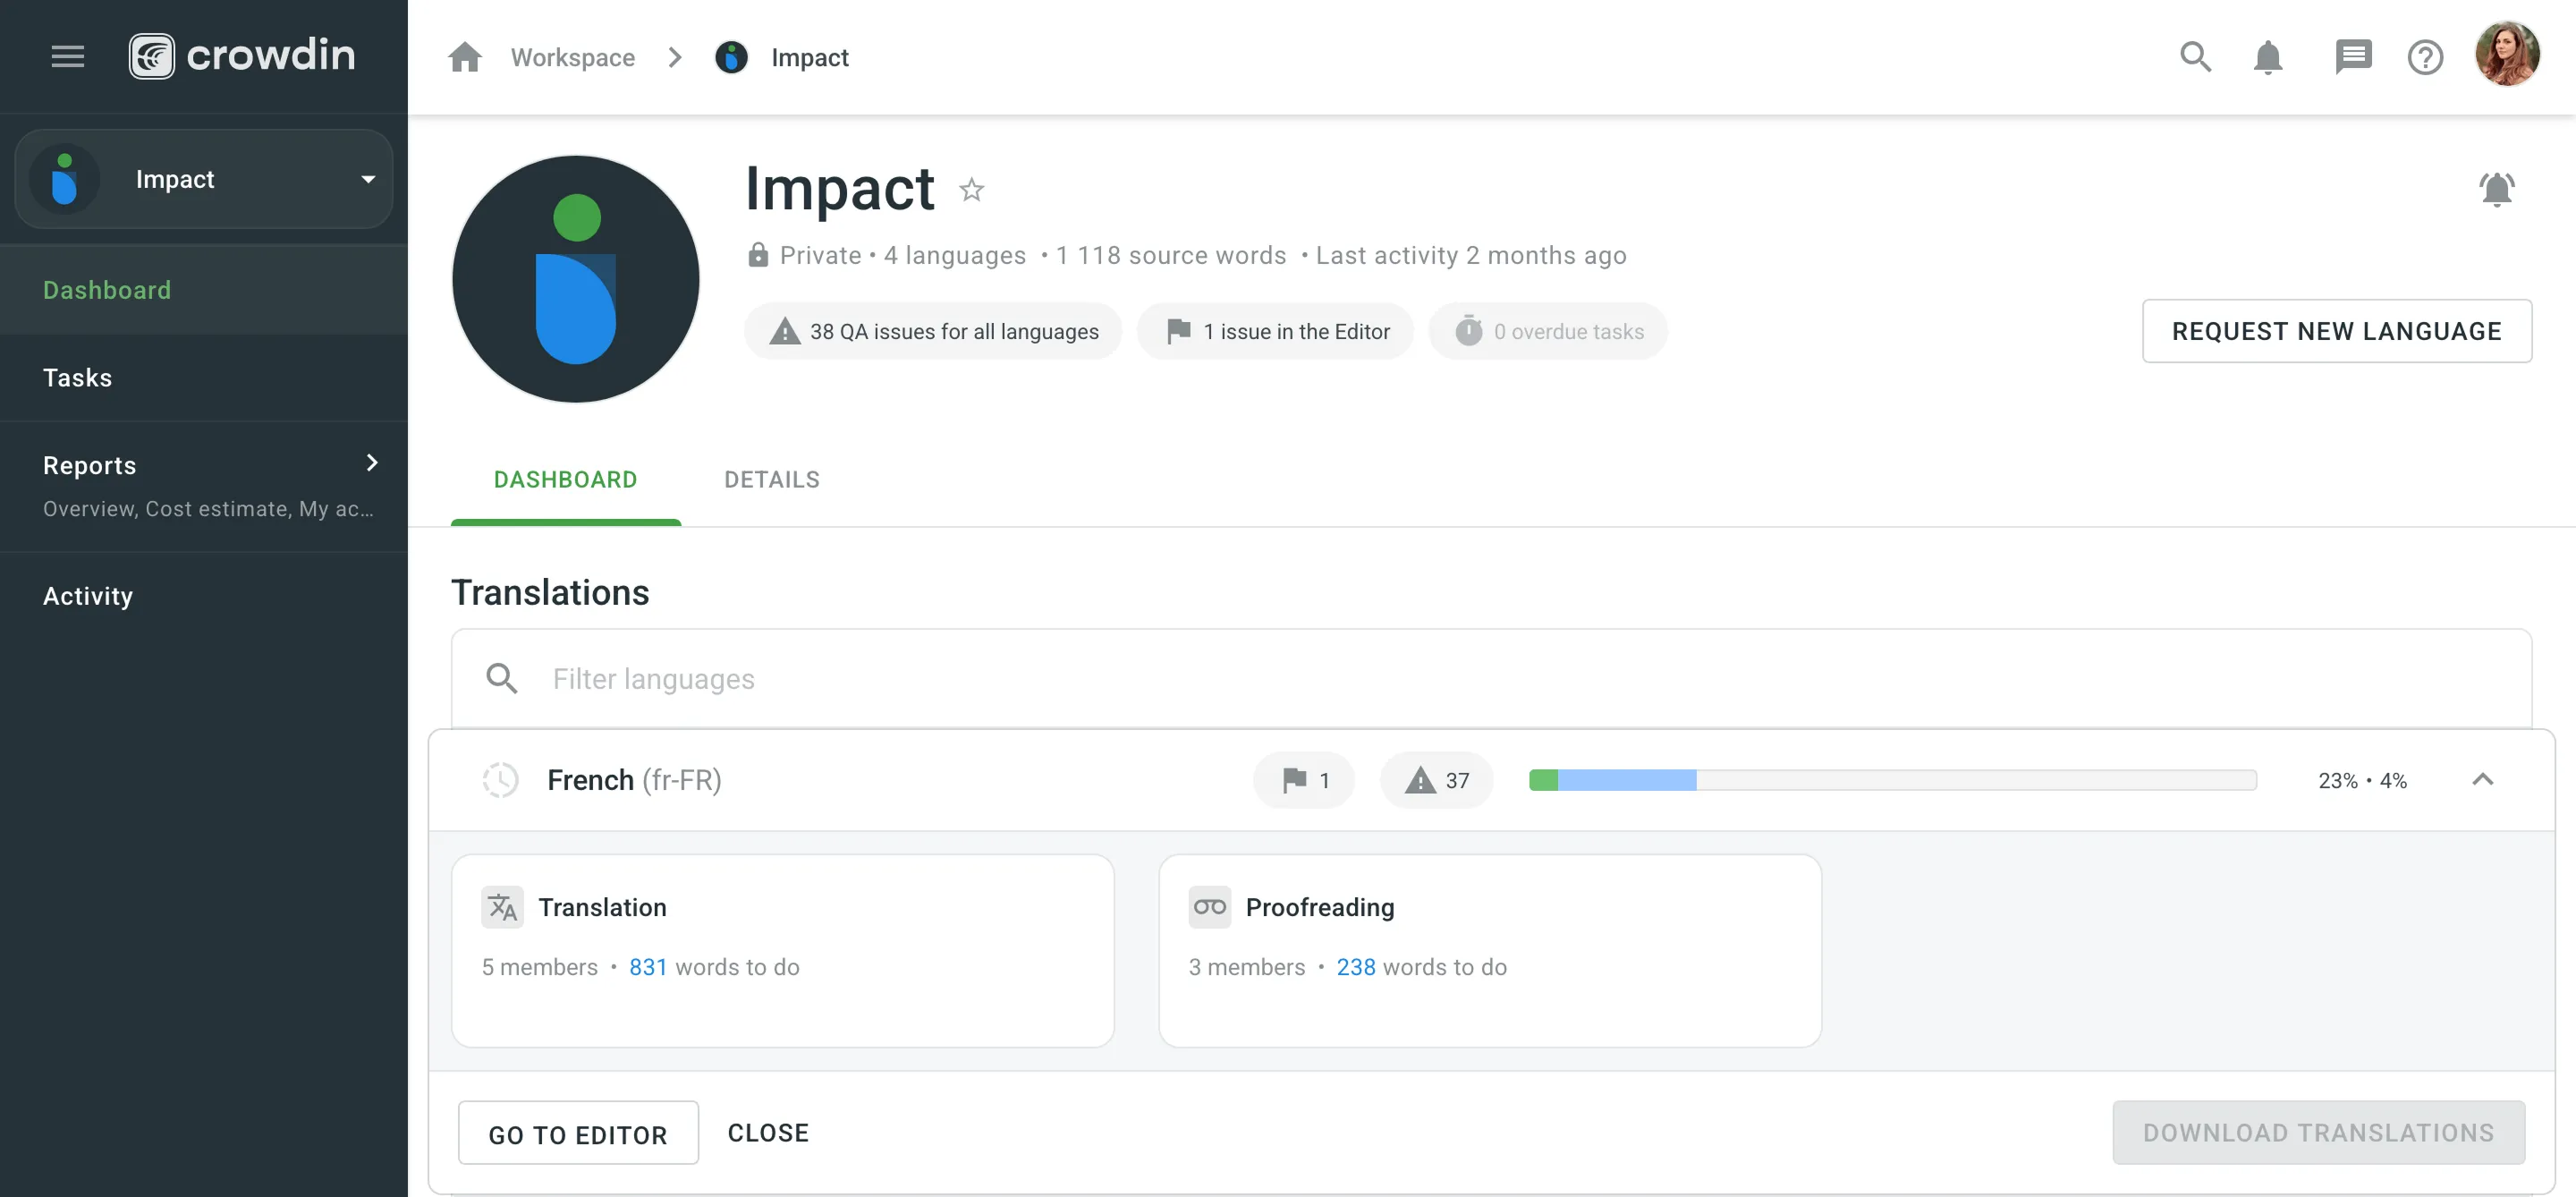 To access specific source files, click on the needed target language from the list and select the file. 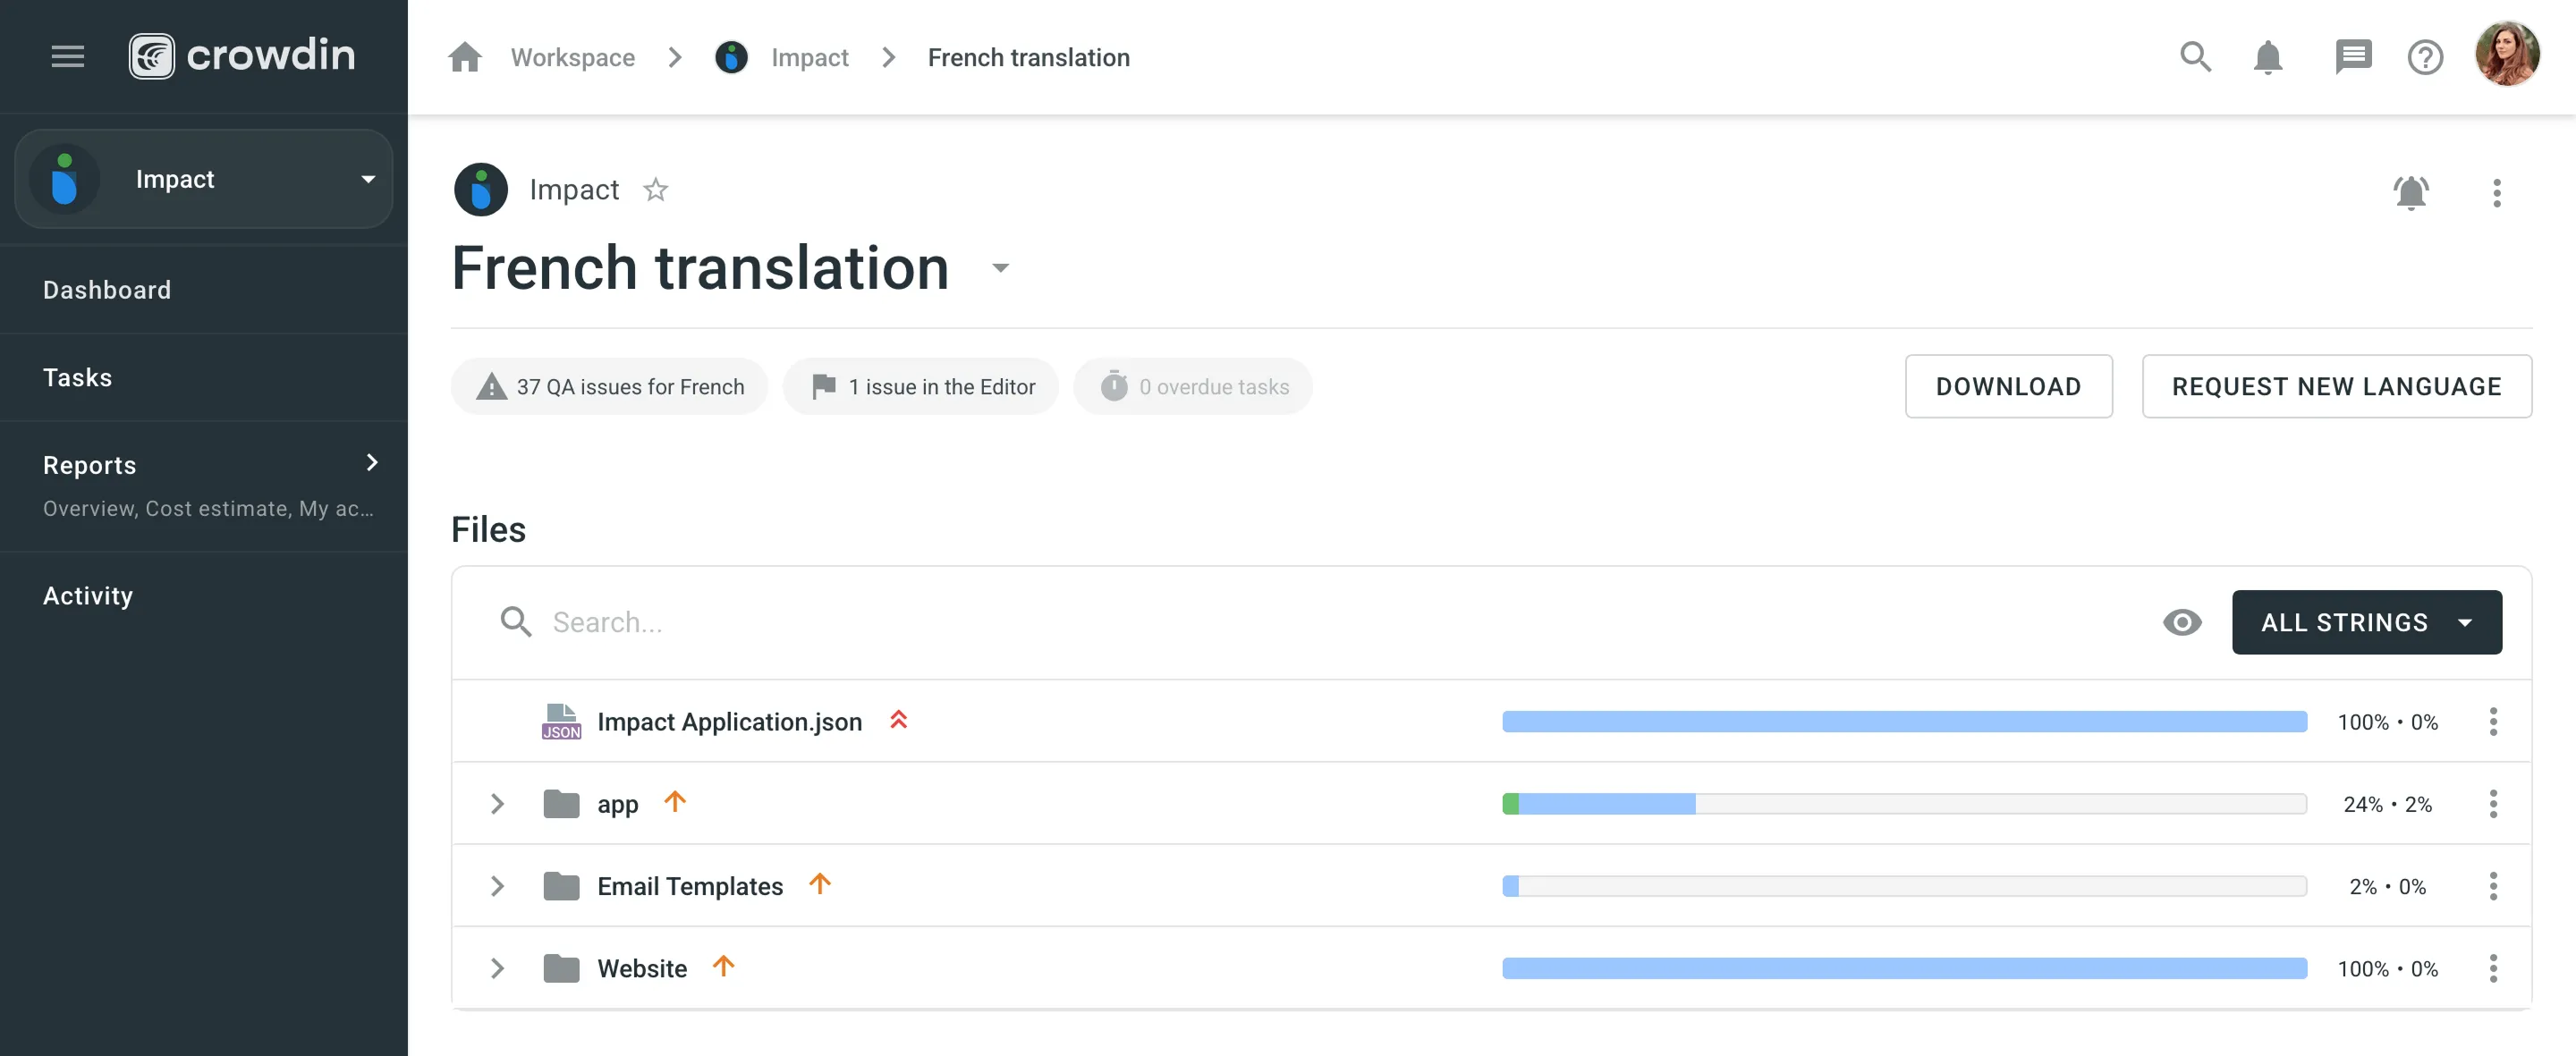 ### [Requesting a New Language](#requesting-a-new-language) [Section titled “Requesting a New Language”](#requesting-a-new-language) If a language you’d like to translate is not currently listed in the project, you can request its addition. This feature is available in all crowdsourced projects in Crowdin Enterprise. To request a language, follow these steps: 1. Open the project and go to the **Overview** tab. 2. Click **Request new language** in the **Details** section. 3. In the appeared modal, select the preferred language. 4. *(Optional)* Add a message to the project managers to be included with your request. 5. Click **Send**. The project managers will review your request and determine whether the language can be added. If another user has already submitted a request for the same language, you will receive a notification about the existing request. This notification will also appear if you submit multiple requests for the same language while the first request is still under review by the managers. ### [Contacting a Project Manager](#contacting-a-project-manager) [Section titled “Contacting a Project Manager”](#contacting-a-project-manager) If you have questions about the project’s content, need clarification on a specific task, or would like to be promoted to a proofreader role, you can contact the project manager. You might also reach out if you need additional resources, have feedback on translations, want to discuss project timelines, etc. To contact the project manager, open the project and click **Contact** next to their name in the **Details** section. You will be redirected to the [**Messages**](/enterprise/messages/) page with the project manager pre-selected as the recipient. If needed, you can also add other users to the conversation. Enter and send your message, and the conversation will be created, allowing you to begin communicating. You will be notified when the manager replies, and the discussion will continue in the same thread. ### [Intellectual Property Rights](#intellectual-property-rights) [Section titled “Intellectual Property Rights”](#intellectual-property-rights) Before contributing translations to a project, it’s important to understand the intellectual property terms. Projects may define how your translations will be used, shared, or licensed. If you’re contributing to open-source or community-driven projects, check if the project provides additional legal or licensing terms. When in doubt, contact the project manager for clarification. Read more about [Intellectual Property Rights](/intellectual-rights-for-translations/). ### [Reporting a Project](#reporting-a-project) [Section titled “Reporting a Project”](#reporting-a-project) If you come across a project in Crowdin Enterprise that contains inappropriate or unsafe content, you can report it. Reports are reviewed to ensure the project complies with [Crowdin’s Terms and Conditions](/terms/). The reporting option is available on the public pages of projects using [Crowdsourcing](/enterprise/crowdsourcing/). To report a project, follow these steps: 1. Open the public page of the project. 2. In the **Details** section, click **Report**. 3. In the appeared modal, select the type of issue you’re reporting. 4. *(Optional)* If you selected **Other**, add additional details in the text field. 5. Click **Submit**. After submitting the report, you’ll see a confirmation message. The Crowdin team will review your report and take action if necessary. ## [Working in the Editor](#working-in-the-editor) [Section titled “Working in the Editor”](#working-in-the-editor) The Editor is where translators and proofreaders work on translations online. The String List section displays strings from the selected file or all strings available in the assigned workflow step, with the active string highlighted. String context and details for the selected string appear in the String Details section. [Online Editor ](/enterprise/online-editor/) ### [Translation](#translation) [Section titled “Translation”](#translation) Collaborate with other project members, discuss any issues or questions in the Comments section, vote for the best translation variants, and take advantage of the project [Glossary](/enterprise/glossary/) and [Translation Memory](/enterprise/translation-memory/). Use the machine translations as a basis for your own suggestions. 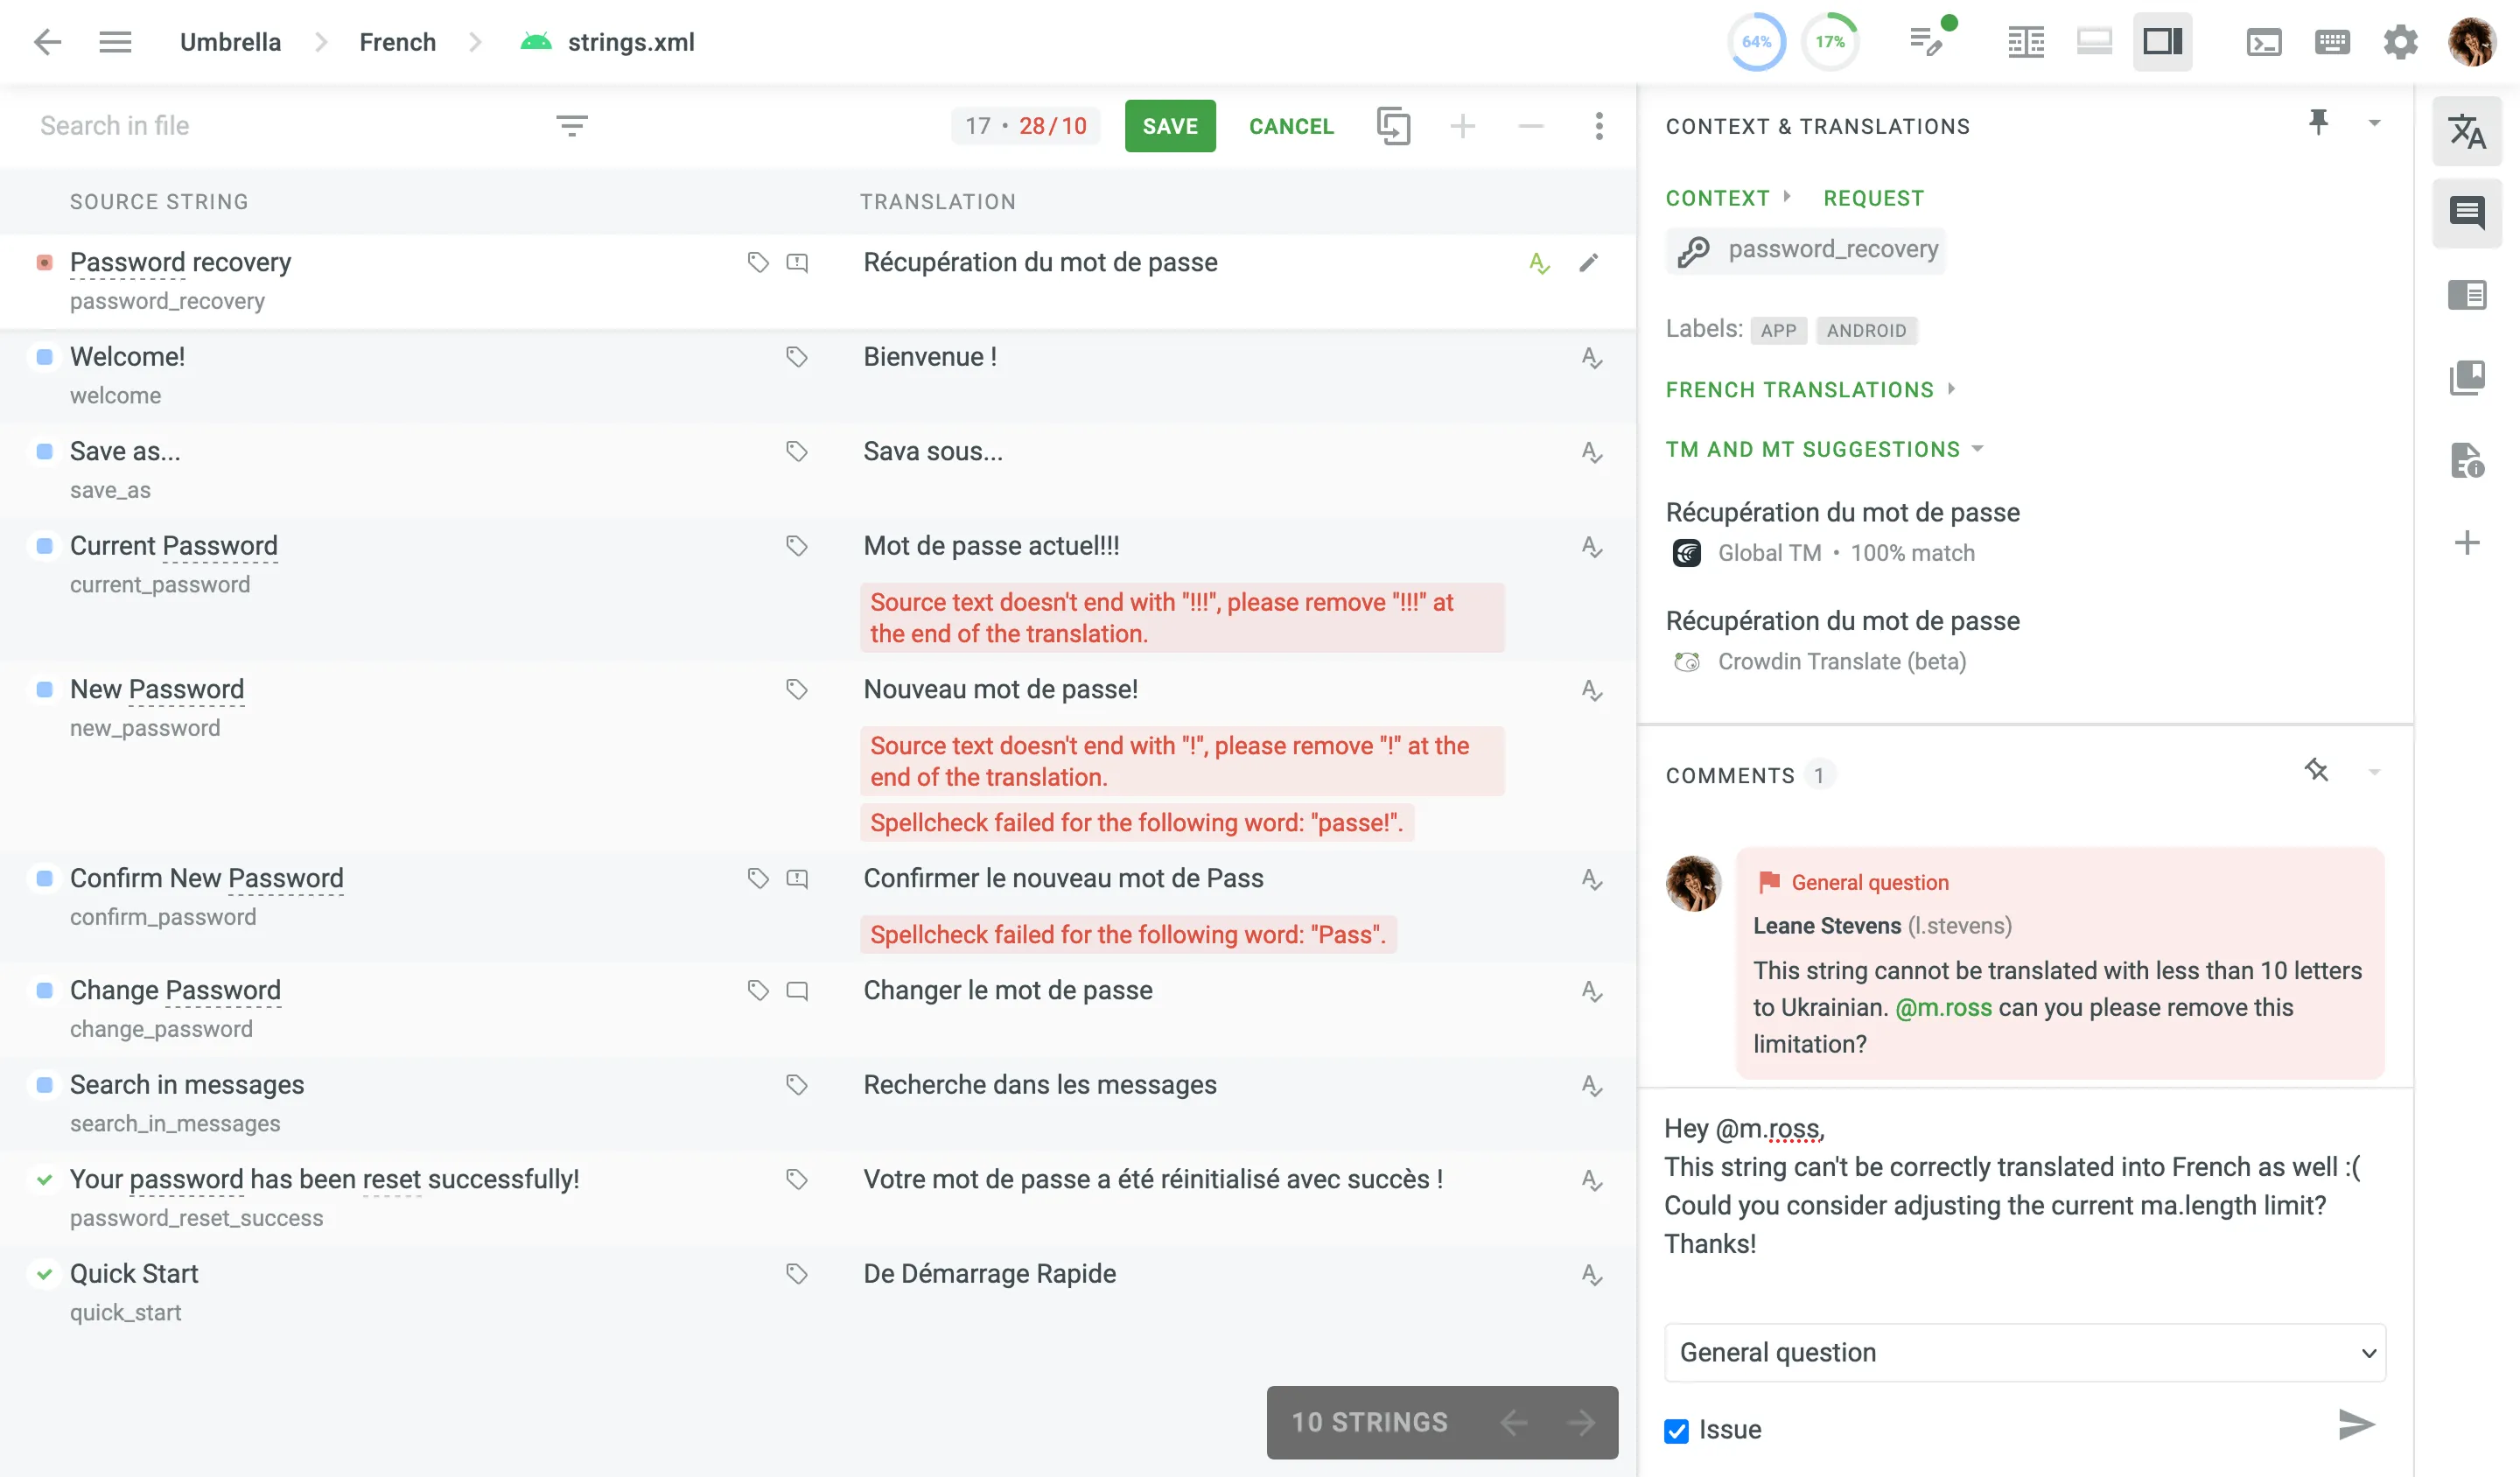 #### [String List](#string-list) [Section titled “String List”](#string-list) The **String List** is your primary workspace for managing translations. ##### [Layout and Status](#layout-and-status) [Section titled “Layout and Status”](#layout-and-status) * Source Text: On the left. * Translations: On the right. * Status icons indicate whether strings are untranslated, translated, or approved. Comments or issues are highlighted. ##### [Searching and Filtering](#searching-and-filtering) [Section titled “Searching and Filtering”](#searching-and-filtering) * Use the *Search in file* field to locate strings. * Apply Simple or Advanced Filters to sort and filter strings. ##### [QA Checks](#qa-checks) [Section titled “QA Checks”](#qa-checks) Pop-up messages may appear to alert you to potential issues, such as inconsistent punctuation, mismatched spaces, or missing variables. These checks help maintain translation quality. #### [AI Assistant](#ai-assistant) [Section titled “AI Assistant”](#ai-assistant) The AI Assistant in the Editor helps you work faster and more accurately by providing context-aware suggestions, rephrasing support, and other smart editing tools. You can use predefined actions like *Rephrase*, *Shorten*, *Translate All*, or [create your own prompt](/enterprise/online-editor/#ai) to interact with the Assistant directly. To access the AI Assistant, click on the AI Assistant tab in the right sidebar of the Editor. #### [Context and Translations](#context-and-translations) [Section titled “Context and Translations”](#context-and-translations) This section contains the resources that might be useful: * Context, labels, screenshots, and additional information to guide the work. * Translations by other project members * Translation Memory (TM) suggestions * Machine Translation (MT) suggestions * Translations to other languages In crowdsourcing projects, besides translating you can also participate by voting on suggestion submitted by other project members. If you see that there is already a correct suggestion, vote for it by clicking the *plus* sign if you like the translation, or the *minus* sign if you don’t think the translation is correct. Translations that receive the most positive votes will have a higher rating and will appear at the top of all available translations for the string. 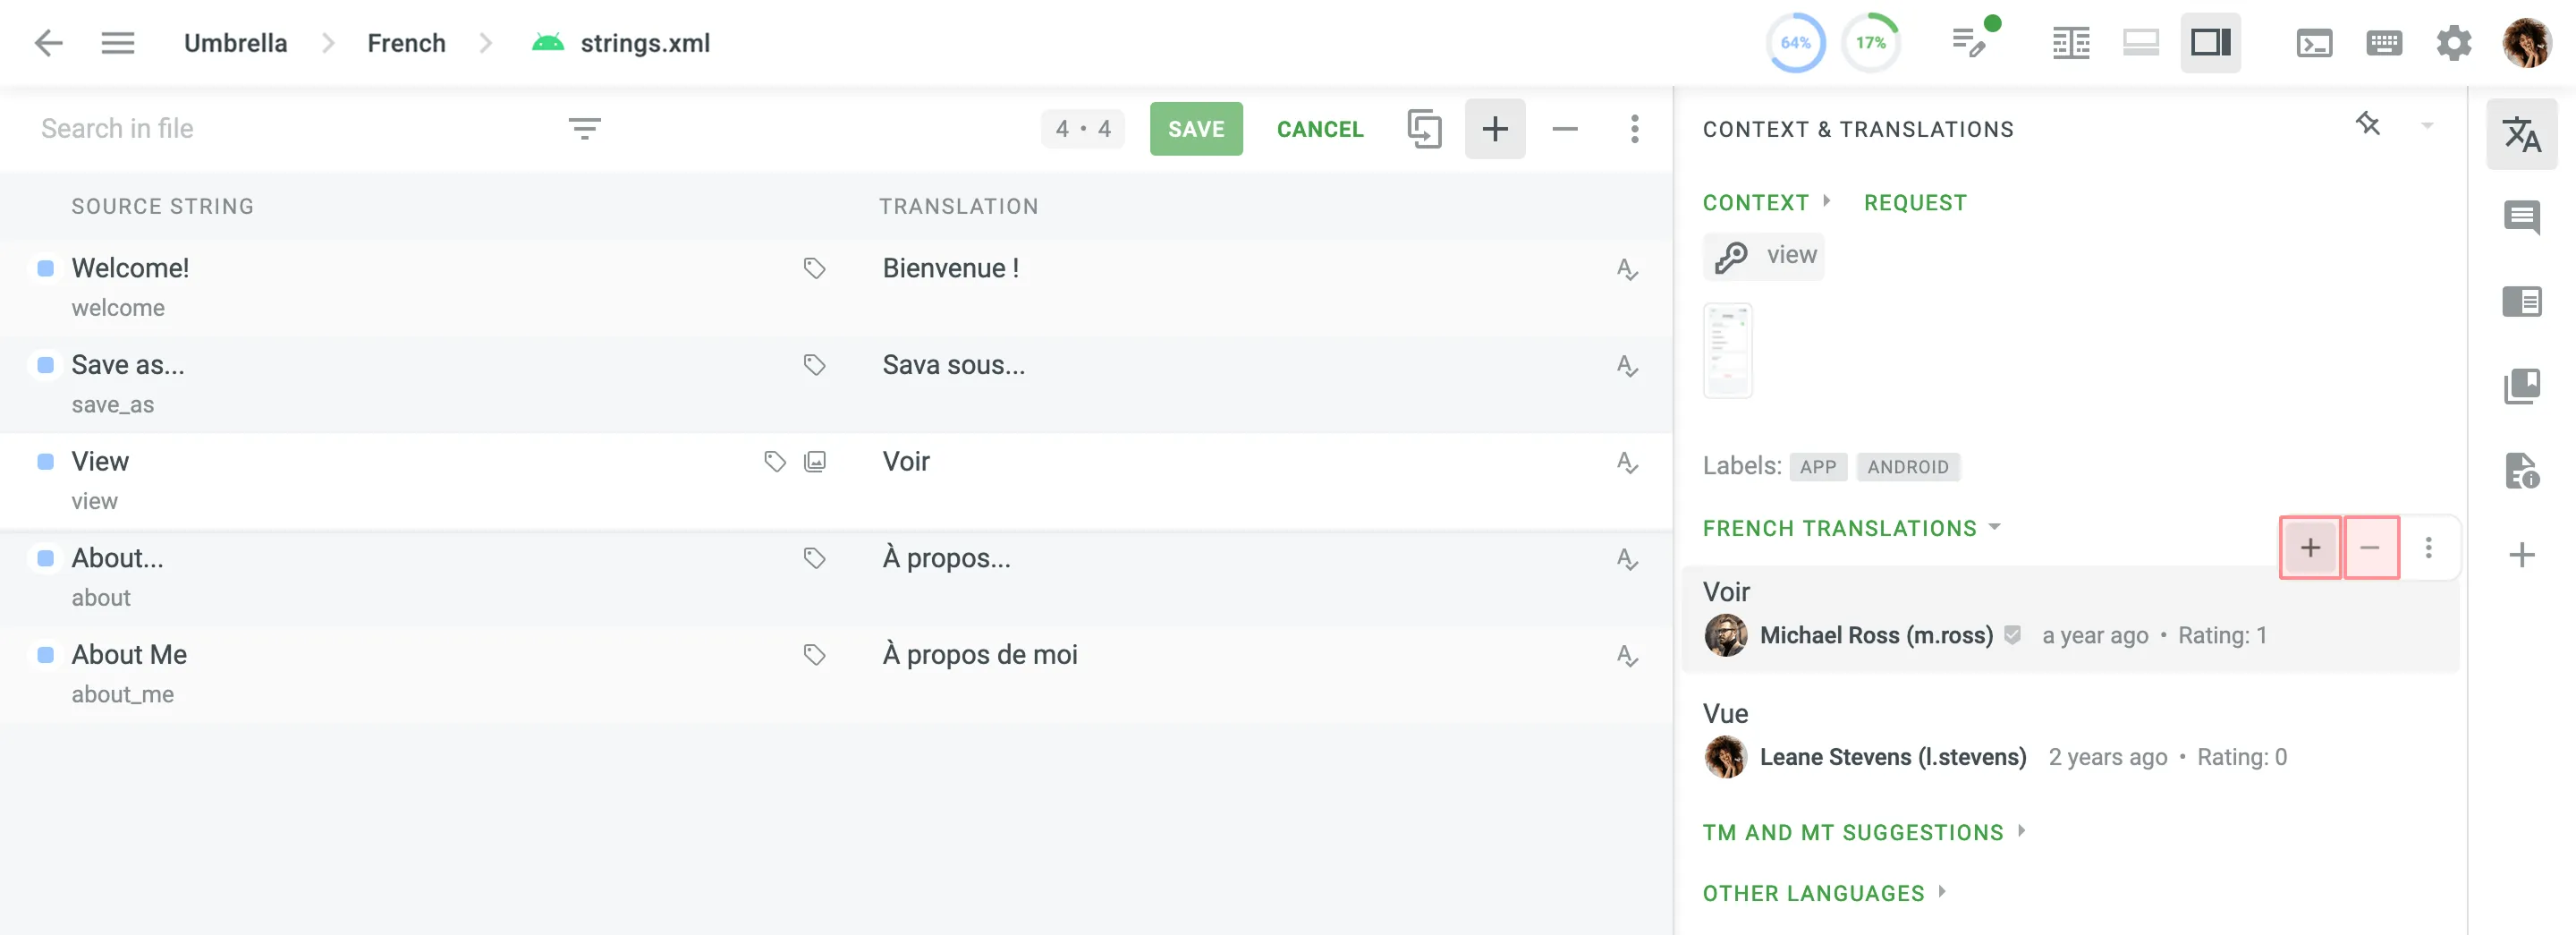 #### [Comments](#comments) [Section titled “Comments”](#comments) In the *Comments* section, you can discuss the meaning of the source string or other related questions with other project members. Use ”@” and a username to mention the specific person or [create an issue](/enterprise/issues/#for-translators) related to the string. ### [Main Menu](#main-menu) [Section titled “Main Menu”](#main-menu) The Main menu in the upper-left corner allows you to switch between files for translation, change translation languages, contact a manager, and configure the Editor view. 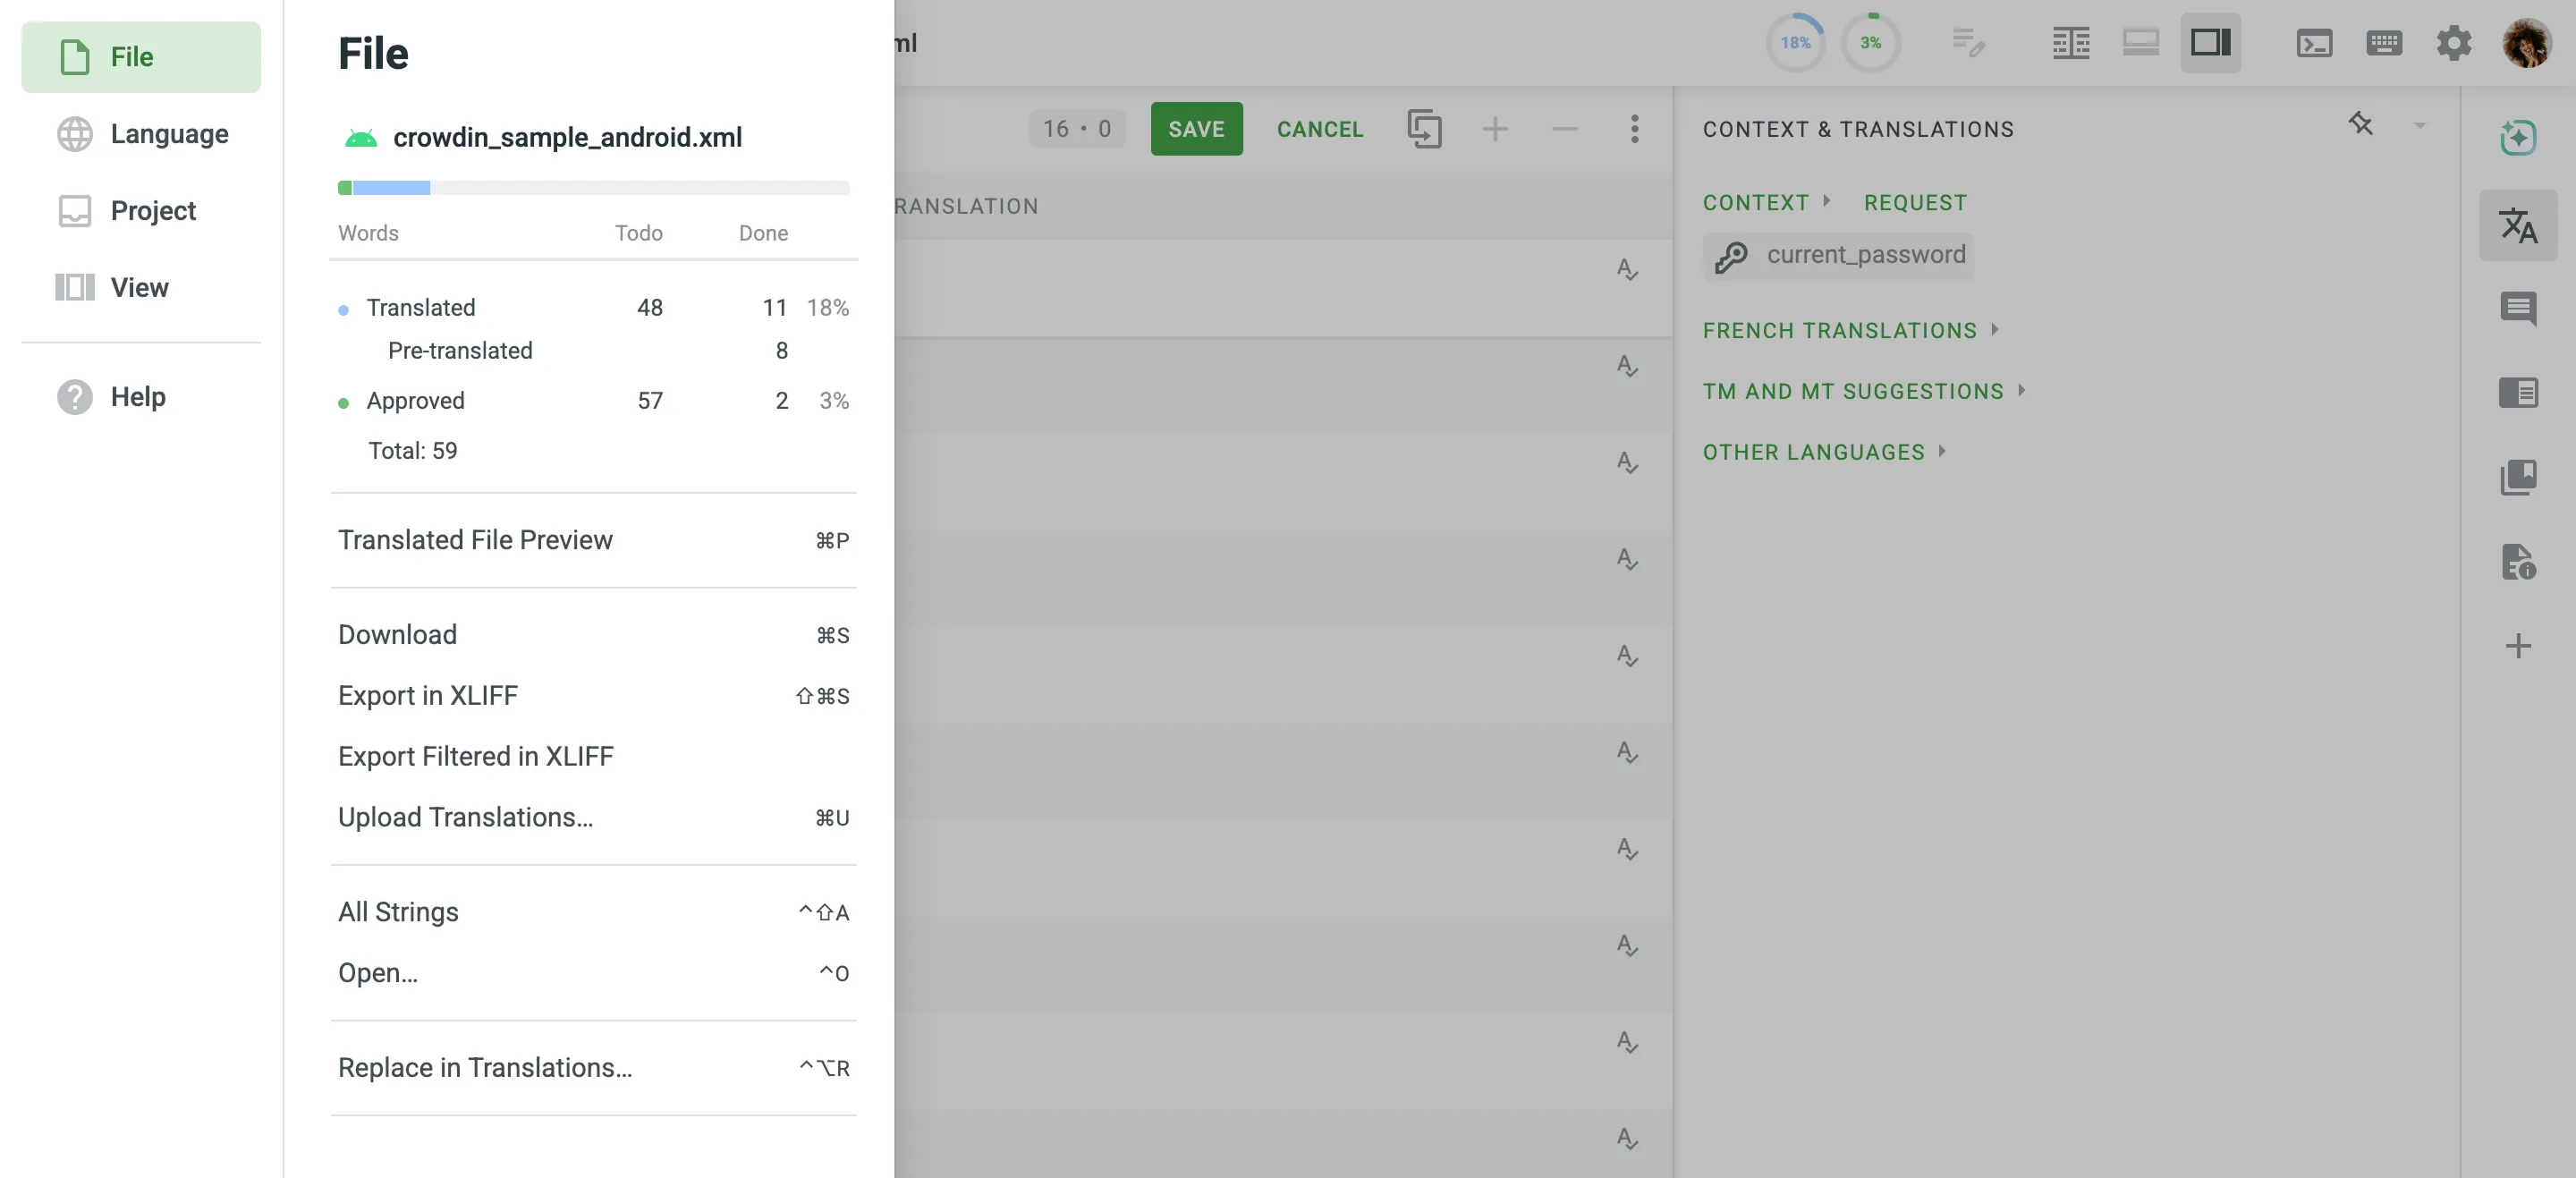 ### [Keyboard Shortcuts](#keyboard-shortcuts) [Section titled “Keyboard Shortcuts”](#keyboard-shortcuts) Click in the upper-right corner to see the list of available keyboard shortcuts. They can make your work in the Editor more efficient and fast. Most shortcuts can be customized. Click on the needed key combination and modify it using your keyboard. ### [Proofreading](#proofreading) [Section titled “Proofreading”](#proofreading) If you are assigned to proofread the translations, you’ll see the list of source strings and their translations that you can review, correct where needed, and approve. The strings with the QA checks issues will be highlighted in this mode. You’ll also see the strings that were translated with the help of Translation Memory or Machine Translation engine. ### [String Status at Workflow Steps](#string-status-at-workflow-steps) [Section titled “String Status at Workflow Steps”](#string-status-at-workflow-steps) In every project, strings move from one workflow step to the next. There are three statuses: *ToDo*, *Pending*, and *Done*. They are applied to each string depending on its status at the workflow step it’s currently at. For example, if you’re assigned to translate the string, once you save the translation, the string is marked as *Done* and then moves to the next step. The *Pending* status can be applied to the string in the following scenario: The source string is translated at the Translation workflow step and marked as *Done*. It then moves to the next workflow step, e.g., Proofreading, where it’s marked as *ToDo*. If the translation of the string is deleted at the Translation workflow step, the string remains at the Proofreading workflow step and is marked as *Pending* until the translation is added again at the Translation workflow step. Read more about [Workflows](/enterprise/workflows/) in Crowdin Enterprise. ## [Offline Translation](#offline-translation) [Section titled “Offline Translation”](#offline-translation) As an alternative to translating online in the Editor, you can download project files for [offline translation](/enterprise/offline-translation/) if the project manager has enabled public downloads. Use the XLIFF file format for offline translation, which is supported by most desktop localization tools.
# For Vendors
> Learn how to use Crowdin Enterprise as a translation vendor
A vendor is an organization that provides professional translation services. In Crowdin Enterprise, a translation vendor can create a separate organization. Within this organization, a vendor can: * Add incoming projects from clients to the vendor’s workspace. * Organize incoming client projects into groups and assign managers to each group. * Set up workflows for each separate project. * Invite in-house translators and assign people to the necessary workflow steps. * Generate reports and set flexible rates. The vendor receives a secure copy of the project workflow steps it was assigned to, along with translation resources from the assigned project, such as Translation Memory and Glossaries. The client won’t have access to the vendor’s organization. This means that the vendor’s projects, workflows, or users are only visible to the vendor. The client will only receive the strings translated or proofread on the vendor organization’s side. Also, the client won’t see the usernames of the translators or proofreaders. The strings will be marked as Translated or Approved by the vendor organization. ## [Vendor Organization Mode](#vendor-organization-mode) [Section titled “Vendor Organization Mode”](#vendor-organization-mode) To become a translation vendor in Crowdin Enterprise, [create an organization](/enterprise/organization/#creating-an-organization) and [contact Crowdin Support](https://crowdin.com/contacts) to switch your organization to Vendor mode. Once your organization is in Vendor mode, you’ll find the **Clients** and **Incoming Projects** sections on the left sidebar of your organization’s workspace. ### [Clients](#clients) [Section titled “Clients”](#clients) Clients are organizations to which you can provide translation services within shared projects. In the **Clients** section of your workspace, you’ll find a list of all the clients you collaborate with.  When a new organization wants to collaborate with you as a vendor, they will send you an invitation. This can be done in the **Vendors** section of the client’s workspace. Once a vendor organization accepts an invitation to collaborate, a client organization can assign this vendor to workflow steps like [Translation and Proofreading by Vendor](/enterprise/translation-proofreading-by-vendor/). The vendor can then add the assigned steps to their own workspace and organize the processes by setting up own workflows, assigning people to different steps, and utilizing their translation resources. Read more about [Clients](/enterprise/clients/). ## [User Management](#user-management) [Section titled “User Management”](#user-management) Users you invite to your organization will have different permissions based on their roles. Read more about [Organization Members](/enterprise/organization-members/). ### [Organization Admins](#organization-admins) [Section titled “Organization Admins”](#organization-admins) Admins have access to all the projects within the organization. They can accept vendor invitations, add incoming projects to the organization’s workspace, set up workflows, and assign people to the workflow steps. Give people admin access in the **Users** section. ### [Group and Project Managers](#group-and-project-managers) [Section titled “Group and Project Managers”](#group-and-project-managers) Group managers can access and manage the projects within a specific group. Project managers have the same permissions but only within a specific project. ### [Client Managers](#client-managers) [Section titled “Client Managers”](#client-managers) You can assign managers to each client within the vendor organization. Client managers coordinate the collaboration with this client and its incoming projects. Read more about [Client Managers](/enterprise/clients/#client-managers). ### [In-house Translators and Proofreaders](#in-house-translators-and-proofreaders) [Section titled “In-house Translators and Proofreaders”](#in-house-translators-and-proofreaders) You can invite all the translators and proofreaders you work with to your organization. They will be able to access these projects within your workspace, where they are assigned to workflow steps. You can assign people to workflow steps, languages and split strings between the project members assigned together to one step. Our useful [Getting Started for Translators](/enterprise/for-translators/) will help translators and proofreaders get started with Crowdin Enterprise. ### [Sub-vendors](#sub-vendors) [Section titled “Sub-vendors”](#sub-vendors) You can also assign vendors to the projects added to your workspace. To do this, you should create a workflow that includes Translation by Vendor or Proofreading by Vendor steps. This is helpful if you need help translating some rare or less common language pairs. The sub-vendor receives a copy of the project steps you assign to them. Read more about [Translation and Proofreading by Vendor](/enterprise/translation-proofreading-by-vendor/). ## [Workflows in Client Projects](#workflows-in-client-projects) [Section titled “Workflows in Client Projects”](#workflows-in-client-projects) The only limitation when creating a workflow for a customer project is that the source and target languages are already predefined. Within these two languages, you can choose any steps the strings should go through on your side. You can use workflow templates or create custom workflows for each project. Read more about [Workflows](/enterprise/workflows/). ## [Translation Resources](#translation-resources) [Section titled “Translation Resources”](#translation-resources) Translation Memories and Glossaries are automatically shared with a vendor when they are assigned to specific workflow steps by a client. The resources are available to the users assigned to translate or proofread strings in the project. To check the resources available for the project, open the needed project and go to **Resources**. Read more about [Translation Memory](/enterprise/translation-memory/) and [Glossary](/enterprise/glossary/). ## [Organization Rates](#organization-rates) [Section titled “Organization Rates”](#organization-rates) You can set up default and specific (custom) rates as a vendor. These are the rates you will charge the client for translation and proofreading performed by the members of your organization. Read more about [Organization Rates](/enterprise/clients/#organization-rates).
# GitHub Integration
> Synchronize files between your GitHub repository and Crowdin
The GitHub integration allows you to synchronize files between your GitHub repo and Crowdin Enterprise project. In file-based projects, there are two possible GitHub integration modes you can choose from: * **Source and translation files mode** – synchronize source and translation files between your GitHub repository and Crowdin project. * **Target file bundles mode** – generate and push translation files to your GitHub repository from the Crowdin Enterprise project in the selected format. In this mode, integration pushes translation files and doesn’t sync sources from your repo. In cases when you perform a source text review in your Crowdin Enterprise project and want to get updated source texts to your repo, you can add a source language as a target language, which will be pushed to your repo along with translations. In string-based projects, GitHub integration exclusively operates in the **Target file bundles mode**. Read more about [project types](/enterprise/creating-project/#project-types). All translated and approved files (or target file bundles) are automatically merged into the `l10n` branch of the GitHub repository. ## [Connecting GitHub Account](#connecting-github-account) [Section titled “Connecting GitHub Account”](#connecting-github-account) 1. Open your project and select **Integrations** on the left sidebar. 2. Click on **GitHub** in the Integrations list. 3. Click **Set Up Integration** and select **Source and translation files mode** or **Target file bundles mode** from the drop-down list to integrate via your GitHub account.  4. Then authorize the connection with Crowdin on the GitHub side: 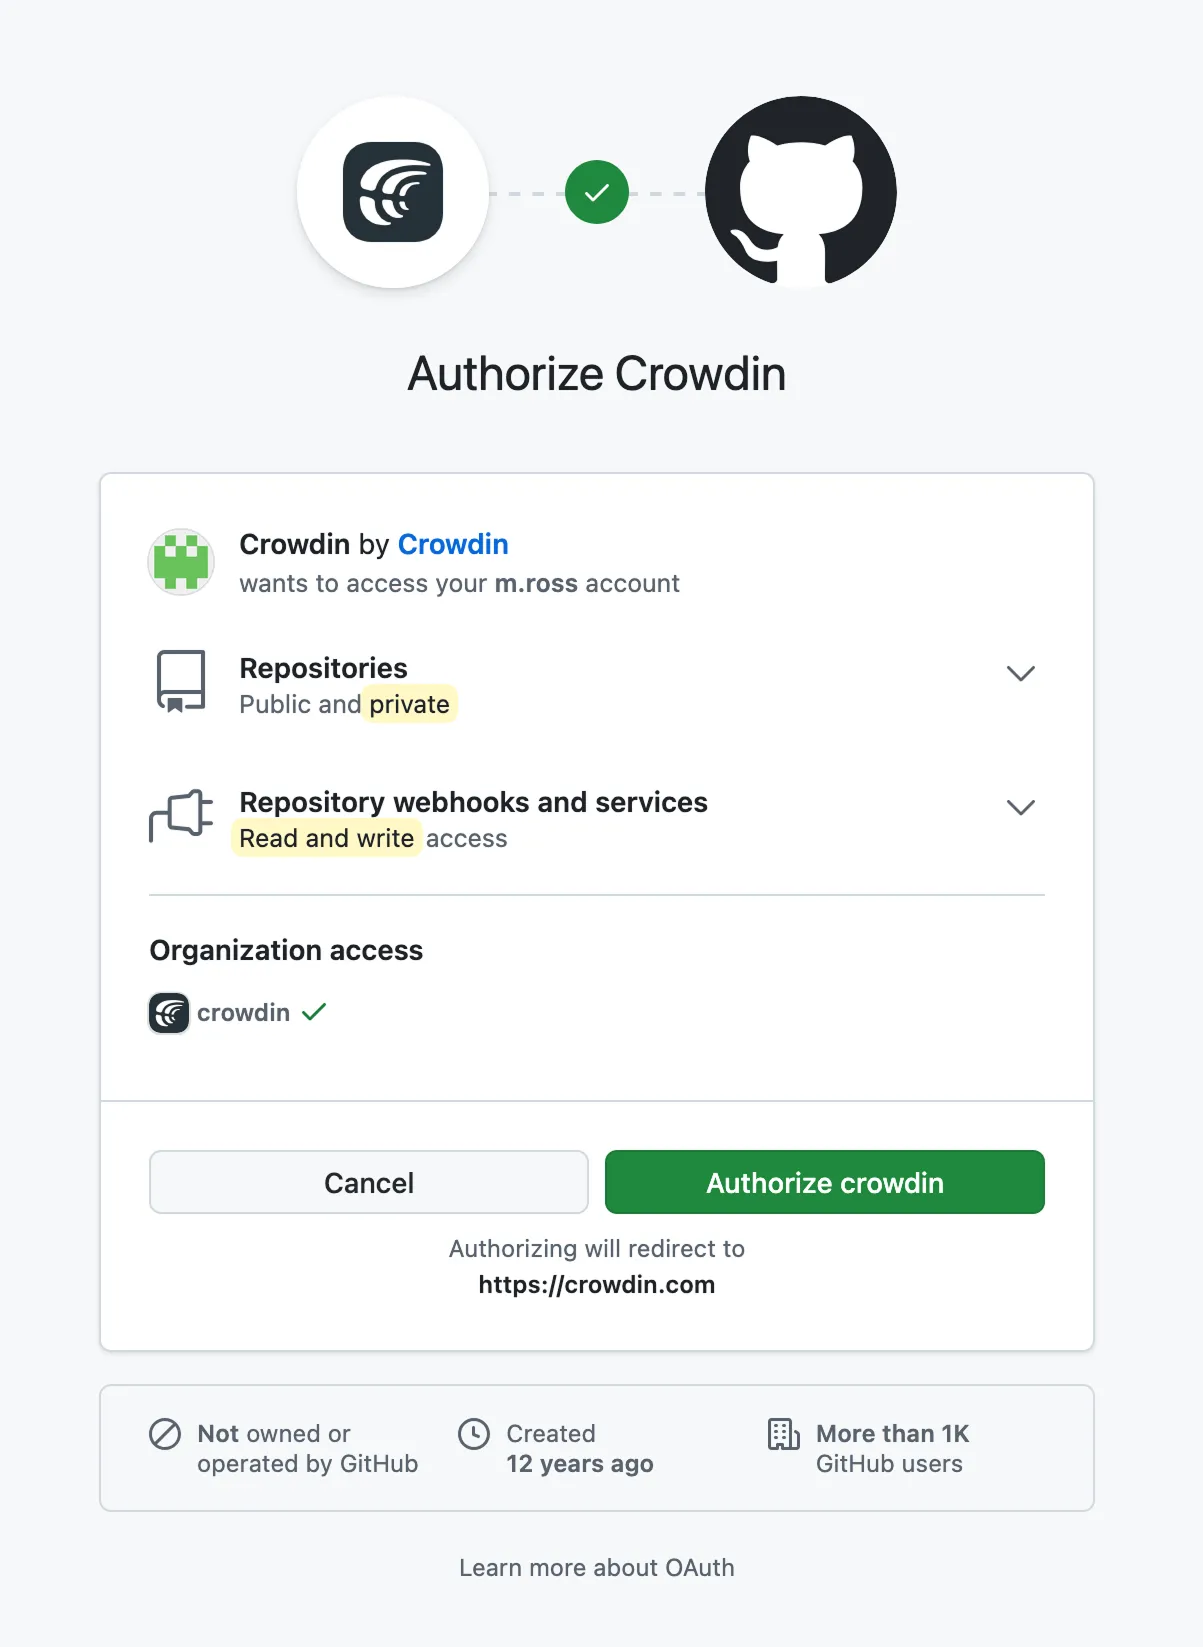 In case the repository you need is private, and you have limited or no access to it, please ask the repository owner to provide you with an [Access Token](https://help.github.com/articles/creating-an-access-token-for-command-line-use/#creating-a-token). Afterward, click **Use personal access token** and insert the token into the *Token* field and click **Set Up Integration**. ### [Selecting Repository](#selecting-repository) [Section titled “Selecting Repository”](#selecting-repository) In the appeared dialog, select your repository and branches that should be translated. * File-based project  It’s recommended to switch Duplicate Strings to **Show within a version branch**, so identical strings will be hidden between branches. If your source files contain strings with apparent identifiers (keys), it’s better to use a *strict* version of this option. In other cases, feel free to use a *regular* one. * String-based project  [Duplicate Strings ](/enterprise/project-settings/import/#duplicate-strings) [Version Management ](/enterprise/version-management/) When working with GitHub integration in the **Target File Bundles Mode**, the integration will send the completed translations from your Crowdin Enterprise project without pulling sources from your repo. So when selecting a repository and branches that should be translated, you specify where the integration should put the generated bundles with translations. Read more about [configuring target file bundles for VCS integration](/enterprise/bundles/#bundles-in-vcs-integrations). When you work with private integrations (e.g., integrations with self-hosted VCS), you need to add dedicated Crowdin IP addresses to the allowlist to ensure that it operates properly while staying secure. Read more about [IP Addresses](/developer/ip-addresses/#integrations). ### [Service Branches](#service-branches) [Section titled “Service Branches”](#service-branches) When translations are finished and your languages are ready to go live, Crowdin Enterprise sends the pull request with translations to your version control system. For every branch that is under localization, Crowdin Enterprise creates an additional service branch with translations. We don’t commit directly to the master branch so that you can verify translations first. By default, `l10n_` is added to the created service branch name. If necessary, you can easily change it. ### [Synchronization Settings](#synchronization-settings) [Section titled “Synchronization Settings”](#synchronization-settings) Configure the synchronization settings according to your needs and preferences. Limitations The *Import existing translations* and *Push Sources* options are only available for file-based projects. #### [Import Existing Translations](#import-existing-translations) [Section titled “Import Existing Translations”](#import-existing-translations) To import existing translations from your repo, select one of the following options: * **One-time translation import after the branch is connected** * **Always import new translations from the repository** By default, the first option is selected to import translations only once. Alternatively, you can clear both options if you don’t want to import translations from your repo. Click **Upload translations options** to access the following additional options: * **Allow target translation to match source** * **Approve added translations** #### [Push Sources](#push-sources) [Section titled “Push Sources”](#push-sources) By default, sources are not pushed to the repo with translations. Although, if you perform a source text review in your Crowdin Enterprise project and would like to push the changes made to your source files on Crowdin Enterprise back to your repo, click **Edit**, select *Push Sources* in the integration settings, and click **Save**. #### [Sync Schedule](#sync-schedule) [Section titled “Sync Schedule”](#sync-schedule) The synchronization is processed every hour automatically. If necessary, you can change the update interval in the integration settings. To configure the synchronization schedule – click **Edit**, scroll down to the *Sync Schedule*, set the preferred interval, and click **Save**. There are cases when it’s necessary to disable translations from being pushed to the repo temporarily. In this situation, click **Edit**, clear *Sync Schedule* in the integration settings, and click **Save**. When ready to sync translations with the repo, select the *Sync Schedule*, and click **Save**. Not depending on the synchronization settings, the source files’ changes on the repo will still be synced with Crowdin Enterprise continuously. ### [Branches to Sync Automatically](#branches-to-sync-automatically) [Section titled “Branches to Sync Automatically”](#branches-to-sync-automatically) When you set up the integration, you select existing repository branches to be added to the Crowdin Enterprise project. To add future branches from GitHub to Crowdin Enterprise automatically, create a pattern for the branch names in the integration settings. For example, you add a pattern \**feature* in the GitHub integration settings. In this case, the future branches that contain this word at the end of the title will be added to the project. To add a pattern for branch names, follow these steps: 1. Click **Edit** in the GitHub integration section. 2. In the appeared dialog, scroll down to the *Branches to Sync Automatically*. 3. In the *Branches to Sync Automatically* field, use wildcard selectors such as `*`, `?`, `[set]`, `\` and others to identify the necessary branches. 4. Click **Save**. ### [Default Configuration File Name](#default-configuration-file-name) [Section titled “Default Configuration File Name”](#default-configuration-file-name) `crowdin.yml` is the default file name that is used for automatically synchronized branches. To change the default settings, click **Edit**, specify the preferred name in the *Default configuration file name* field in the integration settings, and click **Save**. If you don’t specify your custom configuration file name for automatically synchronized branches, and the integration doesn’t find a configuration file with the default name `crowdin.yml` in the root of the branch, these branches will be marked in the integration settings with a red icon with an exclamation mark saying “Not Ready. Check the configuration”. ## [Selecting Content for Synchronization](#selecting-content-for-synchronization) [Section titled “Selecting Content for Synchronization”](#selecting-content-for-synchronization) To make integration work, you need to specify which source files should be translated and how Crowdin Enterprise should structure translated files in your repository. To make integration work in the Target file bundles mode, you need to select the required bundles that you want to push to your repository. There are two ways you can specify content for synchronization: * Configuring online * Configuring manually by creating a configuration file ### [Configuring Online](#configuring-online) [Section titled “Configuring Online”](#configuring-online) This procedure is the same for all integrations with version control systems (VCS). Check [Configuring VCS Integrations Online](/enterprise/configuring-vcs-integrations-online/) to get to know how to select content for synchronization online. ### [Creating Configuration File](#creating-configuration-file) [Section titled “Creating Configuration File”](#creating-configuration-file) The configuration file `crowdin.yml` should be stored in the GitHub repository along with each separate branch that you want to translate. It should have the same structure as required for CLI, but your project’s credentials should not be stored in the file’s header for security reasons. Read more about [creating a configuration file](/developer/configuration-file/). ## [Working with Multiple Repositories within One Project](#working-with-multiple-repositories-within-one-project) [Section titled “Working with Multiple Repositories within One Project”](#working-with-multiple-repositories-within-one-project) If you’re working with a multi-platform product that has versions for different operating systems, you may want to connect multiple repositories that contain source files for each operating system. In this case, localization resources (e.g., TMs, Glossaries) and translations could be used more efficiently, reducing the time needed for project localization. To add another repository, follow these steps: 1. Open your project and select **Integrations** on the left sidebar. 2. Click on **GitHub** in the Integrations list. 3. Click **Add Repository**. 4. Configure the integration with the new repository according to your needs and preferences. ## [Checking the Status of Synchronization](#checking-the-status-of-synchronization) [Section titled “Checking the Status of Synchronization”](#checking-the-status-of-synchronization) Once the integration is set up, all related information is stored in **Integrations > GitHub**. After the integration is connected, the settings can be updated only by the project member who configured it. All project managers except the person who configured the integration will see the **Edit** button disabled with the following message when hovering over it: `Integration was configured by {Full Name} ({username})`. By default, synchronization is processed every hour automatically. If you need to launch the synchronization immediately – click **Sync Now**.  Alternatively, if you need to sync only one branch separately, click on the needed branch and select **Sync branch**. ## [Uploading Translations from Repo](#uploading-translations-from-repo) [Section titled “Uploading Translations from Repo”](#uploading-translations-from-repo) By default, the translations stored on the repo are uploaded to Crowdin Enterprise during the first synchronization only. To upload translations to Crowdin Enterprise manually, click icon next to the **Sync Now** button, and click **Sync Translations to Crowdin Enterprise**. The integration will upload existing translations to your Crowdin Enterprise project. Limitations The *Sync Translations to Crowdin Enterprise* option is available for file-based projects only. ## [Q\&A](#qa) [Section titled “Q\&A”](#qa)
# GitLab Integration
> Synchronize files between your GitLab repository and Crowdin
The GitLab integration allows you to synchronize files between your GitLab repo and Crowdin Enterprise project. In file-based projects, there are two possible GitLab integration modes you can choose from: * **Source and translation files mode** – synchronize source and translation files between your GitLab repository and Crowdin Enterprise project. * **Target file bundles mode** – generate and push translation files to your GitLab repository from the Crowdin Enterprise project in the selected format. In this mode, integration pushes translation files and doesn’t sync sources from your repo. In cases when you perform a source text review in your Crowdin Enterprise project and want to get updated source texts to your repo, you can add a source language as a target language, which will be pushed to your repo along with translations. In string-based projects, GitLab integration exclusively operates in the **Target file bundles mode**. Read more about [project types](/enterprise/creating-project/#project-types). All translated and approved files (or target file bundles) are automatically merged into the `l10n` branch of the GitLab repository. ## [Connecting GitLab Account](#connecting-gitlab-account) [Section titled “Connecting GitLab Account”](#connecting-gitlab-account) 1. Open your project and select **Integrations** on the left sidebar. 2. Click on **GitLab** in the Integrations list. 3. Click **Set Up Integration** and select **Source and translation files mode** or **Target file bundles mode** from the drop-down list to integrate via your GitLab account.  4. Then authorize the connection with Crowdin on the GitLab side: 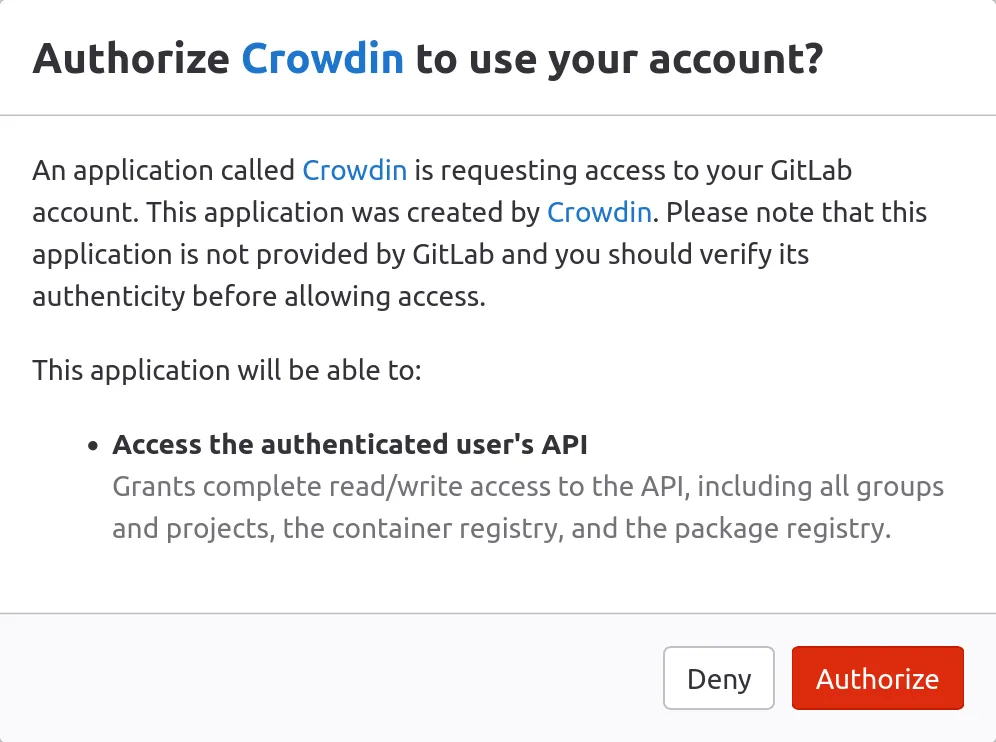 In case the repository you need is private, and you have limited or no access to it, please ask the repository owner to provide you with an access token. Afterward, click **Use personal access token** and insert the token into the *Token* field and click **Set Up Integration**. ### [Selecting Repository](#selecting-repository) [Section titled “Selecting Repository”](#selecting-repository) In the appeared dialog, select your repository and branches that should be translated. * File-based project  It’s recommended to switch Duplicate Strings to **Show within a version branch**, so identical strings will be hidden between branches. If your source files contain strings with apparent identifiers (keys), it’s better to use a *strict* version of this option. In other cases, feel free to use a *regular* one. * String-based project  [Duplicate Strings ](/enterprise/project-settings/import/#duplicate-strings) [Version Management ](/enterprise/version-management/) When working with GitLab integration in the **Target File Bundles Mode**, the integration will send the completed translations from your Crowdin Enterprise project without pulling sources from your repo. So when selecting a repository and branches that should be translated, you specify where the integration should put the generated bundles with translations. Read more about [configuring target file bundles for VCS integration](/enterprise/bundles/#bundles-in-vcs-integrations). When you work with private integrations (e.g., integrations with self-hosted VCS), you need to add dedicated Crowdin IP addresses to the allowlist to ensure that it operates properly while staying secure. Read more about [IP Addresses](/developer/ip-addresses/#integrations). ### [Service Branches](#service-branches) [Section titled “Service Branches”](#service-branches) When translations are finished and your languages are ready to go live, Crowdin Enterprise sends the merge request with translations to your version control system. For every branch that is under localization, Crowdin Enterprise creates an additional service branch with translations. We don’t commit directly to the master branch so that you can verify translations first. By default, `l10n_` is added to the created service branch name. If necessary, you can easily change it. ### [Synchronization Settings](#synchronization-settings) [Section titled “Synchronization Settings”](#synchronization-settings) Configure the synchronization settings according to your needs and preferences. Limitations The *Import existing translations* and *Push Sources* options are only available for file-based projects. #### [Import Existing Translations](#import-existing-translations) [Section titled “Import Existing Translations”](#import-existing-translations) To import existing translations from your repo, select one of the following options: * **One-time translation import after the branch is connected** * **Always import new translations from the repository** By default, the first option is selected to import translations only once. Alternatively, you can clear both options if you don’t want to import translations from your repo. Click **Upload translations options** to access the following additional options: * **Allow target translation to match source** * **Approve added translations** #### [Push Sources](#push-sources) [Section titled “Push Sources”](#push-sources) By default, sources are not pushed to the repo with translations. Although, if you perform a source text review in your Crowdin Enterprise project and would like to push the changes made to your source files on Crowdin Enterprise back to your repo, click **Edit**, select *Push Sources* in the integration settings, and click **Save**. #### [Sync Schedule](#sync-schedule) [Section titled “Sync Schedule”](#sync-schedule) The synchronization is processed every hour automatically. If necessary, you can change the update interval in the integration settings. To configure the synchronization schedule – click **Edit**, scroll down to the *Sync Schedule*, set the preferred interval, and click **Save**. There are cases when it’s necessary to disable translations from being pushed to the repo temporarily. In this situation, click **Edit**, clear *Sync Schedule* in the integration settings, and click **Save**. When ready to sync translations with the repo, select the *Sync Schedule*, and click **Save**. Not depending on the synchronization settings, the source files’ changes on the repo will still be synced with Crowdin Enterprise continuously. ### [Branches to Sync Automatically](#branches-to-sync-automatically) [Section titled “Branches to Sync Automatically”](#branches-to-sync-automatically) When you set up the integration, you select existing repository branches to be added to the Crowdin Enterprise project. To add future branches from GitLab to Crowdin Enterprise automatically, create a pattern for the branch names in the integration settings. For example, you add a pattern \**feature* in the GitLab integration settings. In this case, the future branches that contain this word at the end of the title will be added to the project. To add a pattern for branch names, follow these steps: 1. Click **Edit** in the GitLab integration section. 2. In the appeared dialog, scroll down to the *Branches to Sync Automatically*. 3. In the *Branches to Sync Automatically* field, use wildcard selectors such as `*`, `?`, `[set]`, `\` and others to identify the necessary branches. 4. Click **Save**. ### [Default Configuration File Name](#default-configuration-file-name) [Section titled “Default Configuration File Name”](#default-configuration-file-name) `crowdin.yml` is the default file name that is used for automatically synchronized branches. To change the default settings, click **Edit**, specify the preferred name in the *Default configuration file name* field in the integration settings, and click **Save**. If you don’t specify your custom configuration file name for automatically synchronized branches, and the integration doesn’t find a configuration file with the default name `crowdin.yml` in the root of the branch, these branches will be marked in the integration settings with a red icon with an exclamation mark saying “Not Ready. Check the configuration”. ## [Selecting Content for Synchronization](#selecting-content-for-synchronization) [Section titled “Selecting Content for Synchronization”](#selecting-content-for-synchronization) To make integration work, you need to specify which source files should be translated and how Crowdin Enterprise should structure translated files in your repository. To make integration work in the Target file bundles mode, you need to select the required bundles that you want to push to your repository. There are two ways you can specify content for synchronization: * Configuring online * Configuring manually by creating a configuration file ### [Configuring Online](#configuring-online) [Section titled “Configuring Online”](#configuring-online) This procedure is the same for all integrations with version control systems (VCS). Check [Configuring VCS Integrations Online](/enterprise/configuring-vcs-integrations-online/) to get to know how to select content for synchronization online. ### [Creating Configuration File](#creating-configuration-file) [Section titled “Creating Configuration File”](#creating-configuration-file) The configuration file `crowdin.yml` should be stored in the GitLab repository along with each separate branch that you want to translate. It should have the same structure as required for CLI, but your project’s credentials should not be stored in the file’s header for security reasons. Read more about [creating a configuration file](/developer/configuration-file/). ## [Working with Multiple Repositories within One Project](#working-with-multiple-repositories-within-one-project) [Section titled “Working with Multiple Repositories within One Project”](#working-with-multiple-repositories-within-one-project) If you’re working with a multi-platform product that has versions for different operating systems, you may want to connect multiple repositories that contain source files for each operating system. In this case, localization resources (e.g., TMs, Glossaries) and translations could be used more efficiently, reducing the time needed for project localization. To add another repository, follow these steps: 1. Open your project and select **Integrations** on the left sidebar. 2. Click on **GitLab** in the Integrations list. 3. Click **Add Repository**. 4. Configure the integration with the new repository according to your needs and preferences. ## [Checking the Status of Synchronization](#checking-the-status-of-synchronization) [Section titled “Checking the Status of Synchronization”](#checking-the-status-of-synchronization) Once the integration is set up, all related information is stored in **Integrations > GitLab**. After the integration is connected, the settings can be updated only by the project member who configured it. All project managers except the person who configured the integration will see the **Edit** button disabled with the following message when hovering over it: `Integration was configured by {Full Name} ({username})`. By default, synchronization is processed every hour automatically. If you need to launch the synchronization immediately – click **Sync Now**.  Alternatively, if you need to sync only one branch separately, click on the needed branch and select **Sync branch**. ## [Uploading Translations from Repo](#uploading-translations-from-repo) [Section titled “Uploading Translations from Repo”](#uploading-translations-from-repo) By default, the translations stored on the repo are uploaded to Crowdin Enterprise during the first synchronization only. To upload translations to Crowdin Enterprise manually, click icon next to the **Sync Now** button, and click **Sync Translations to Crowdin Enterprise**. The integration will upload existing translations to your Crowdin Enterprise project. Limitations The *Sync Translations to Crowdin Enterprise* option is available for file-based projects only. ## [Q\&A](#qa) [Section titled “Q\&A”](#qa)
# Glossary
> Learn how to create, manage, and share glossaries in Crowdin Enterprise
With a glossary, you can create, store, and manage all the project terminology in one place. The main aim of terminology is to explain some specific terms or the ones often used in the project to be translated properly and consistently. Each glossary term is displayed as an underlined word in the Editor. Hover over the underlined term to highlight it and see its translation, part of speech, and definition (if they are provided). 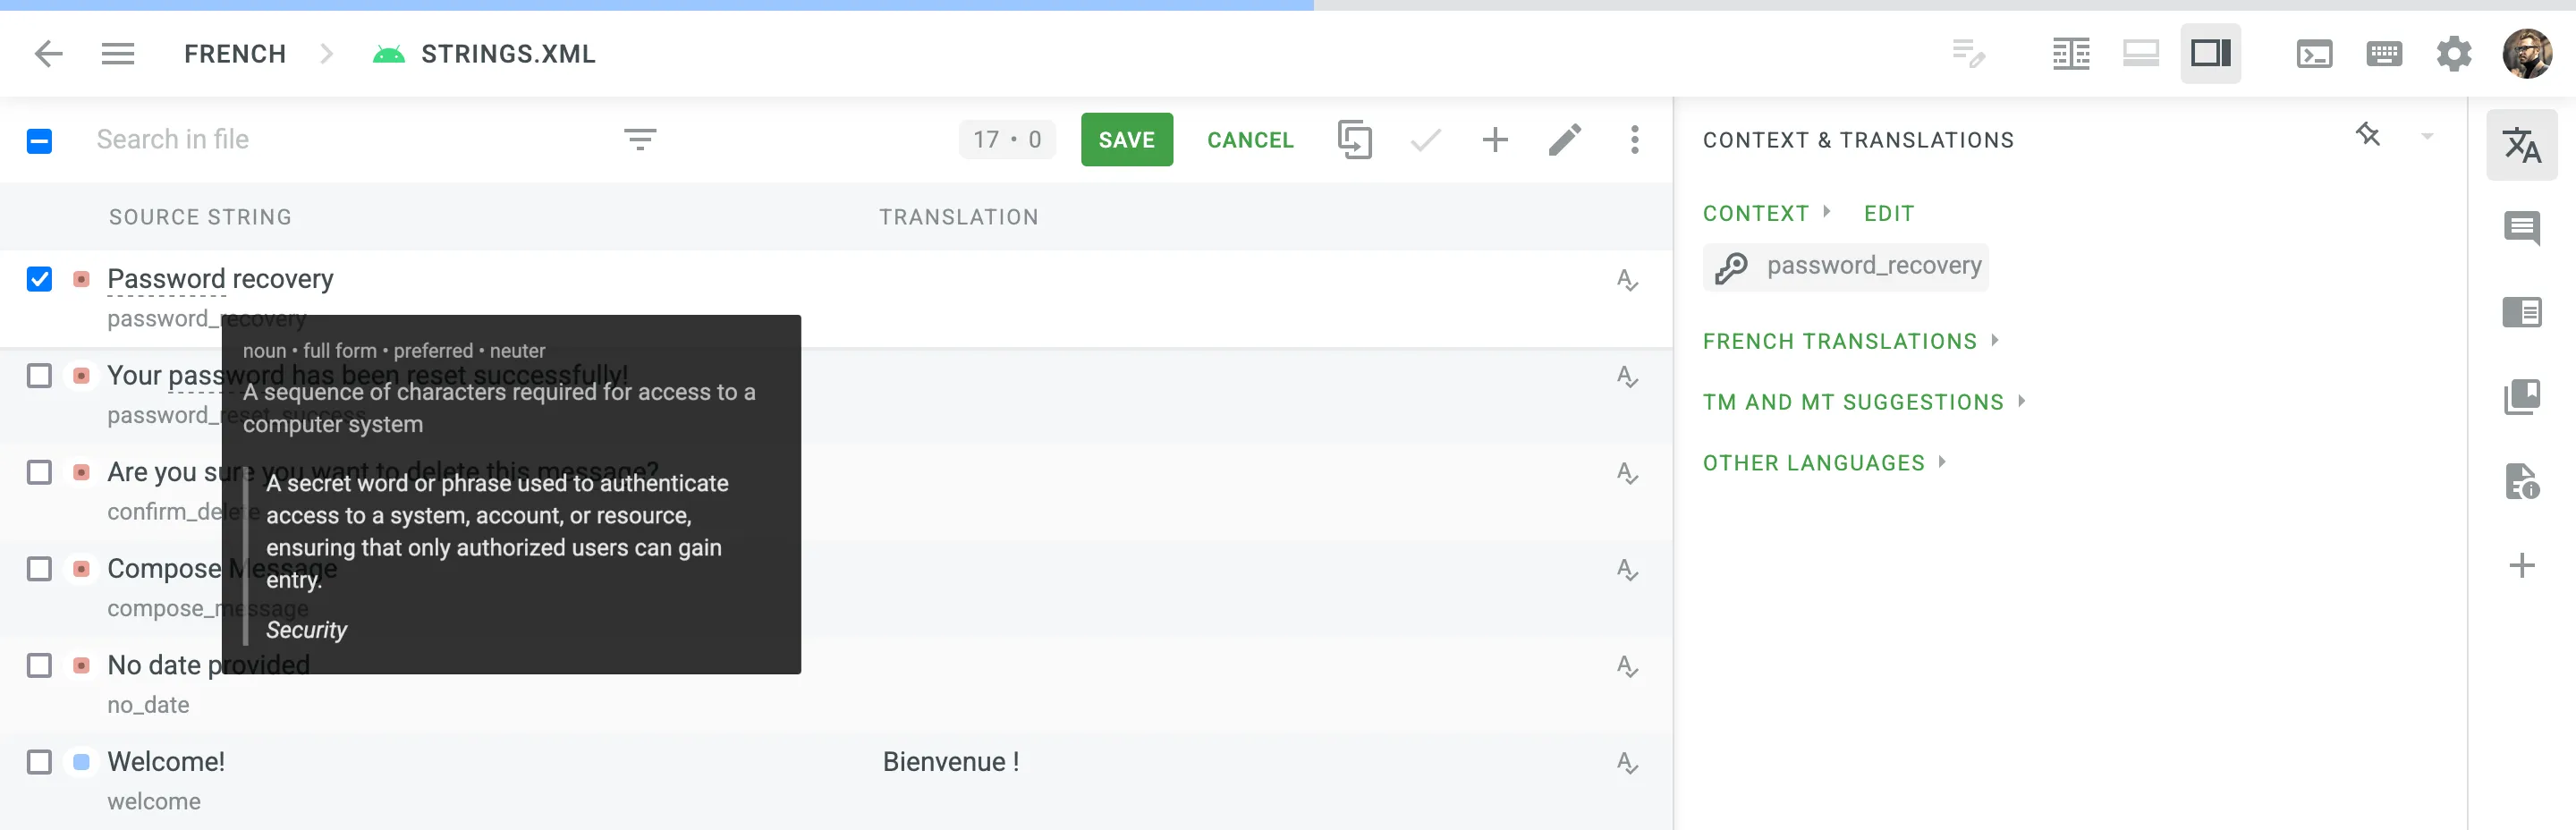 ## [Creating Glossary](#creating-glossary) [Section titled “Creating Glossary”](#creating-glossary) In addition to the project glossaries that are automatically created with each project, you can create separate glossaries and populate them with content by uploading your existing glossaries in TBX, XLSX, or CSV format. These glossaries can then be assigned to the relevant projects as needed. To create a glossary, follow these steps: 1. Open your organization’s **Workspace** and select **Glossaries** on the left sidebar. 2. At the bottom right, click **Create**. 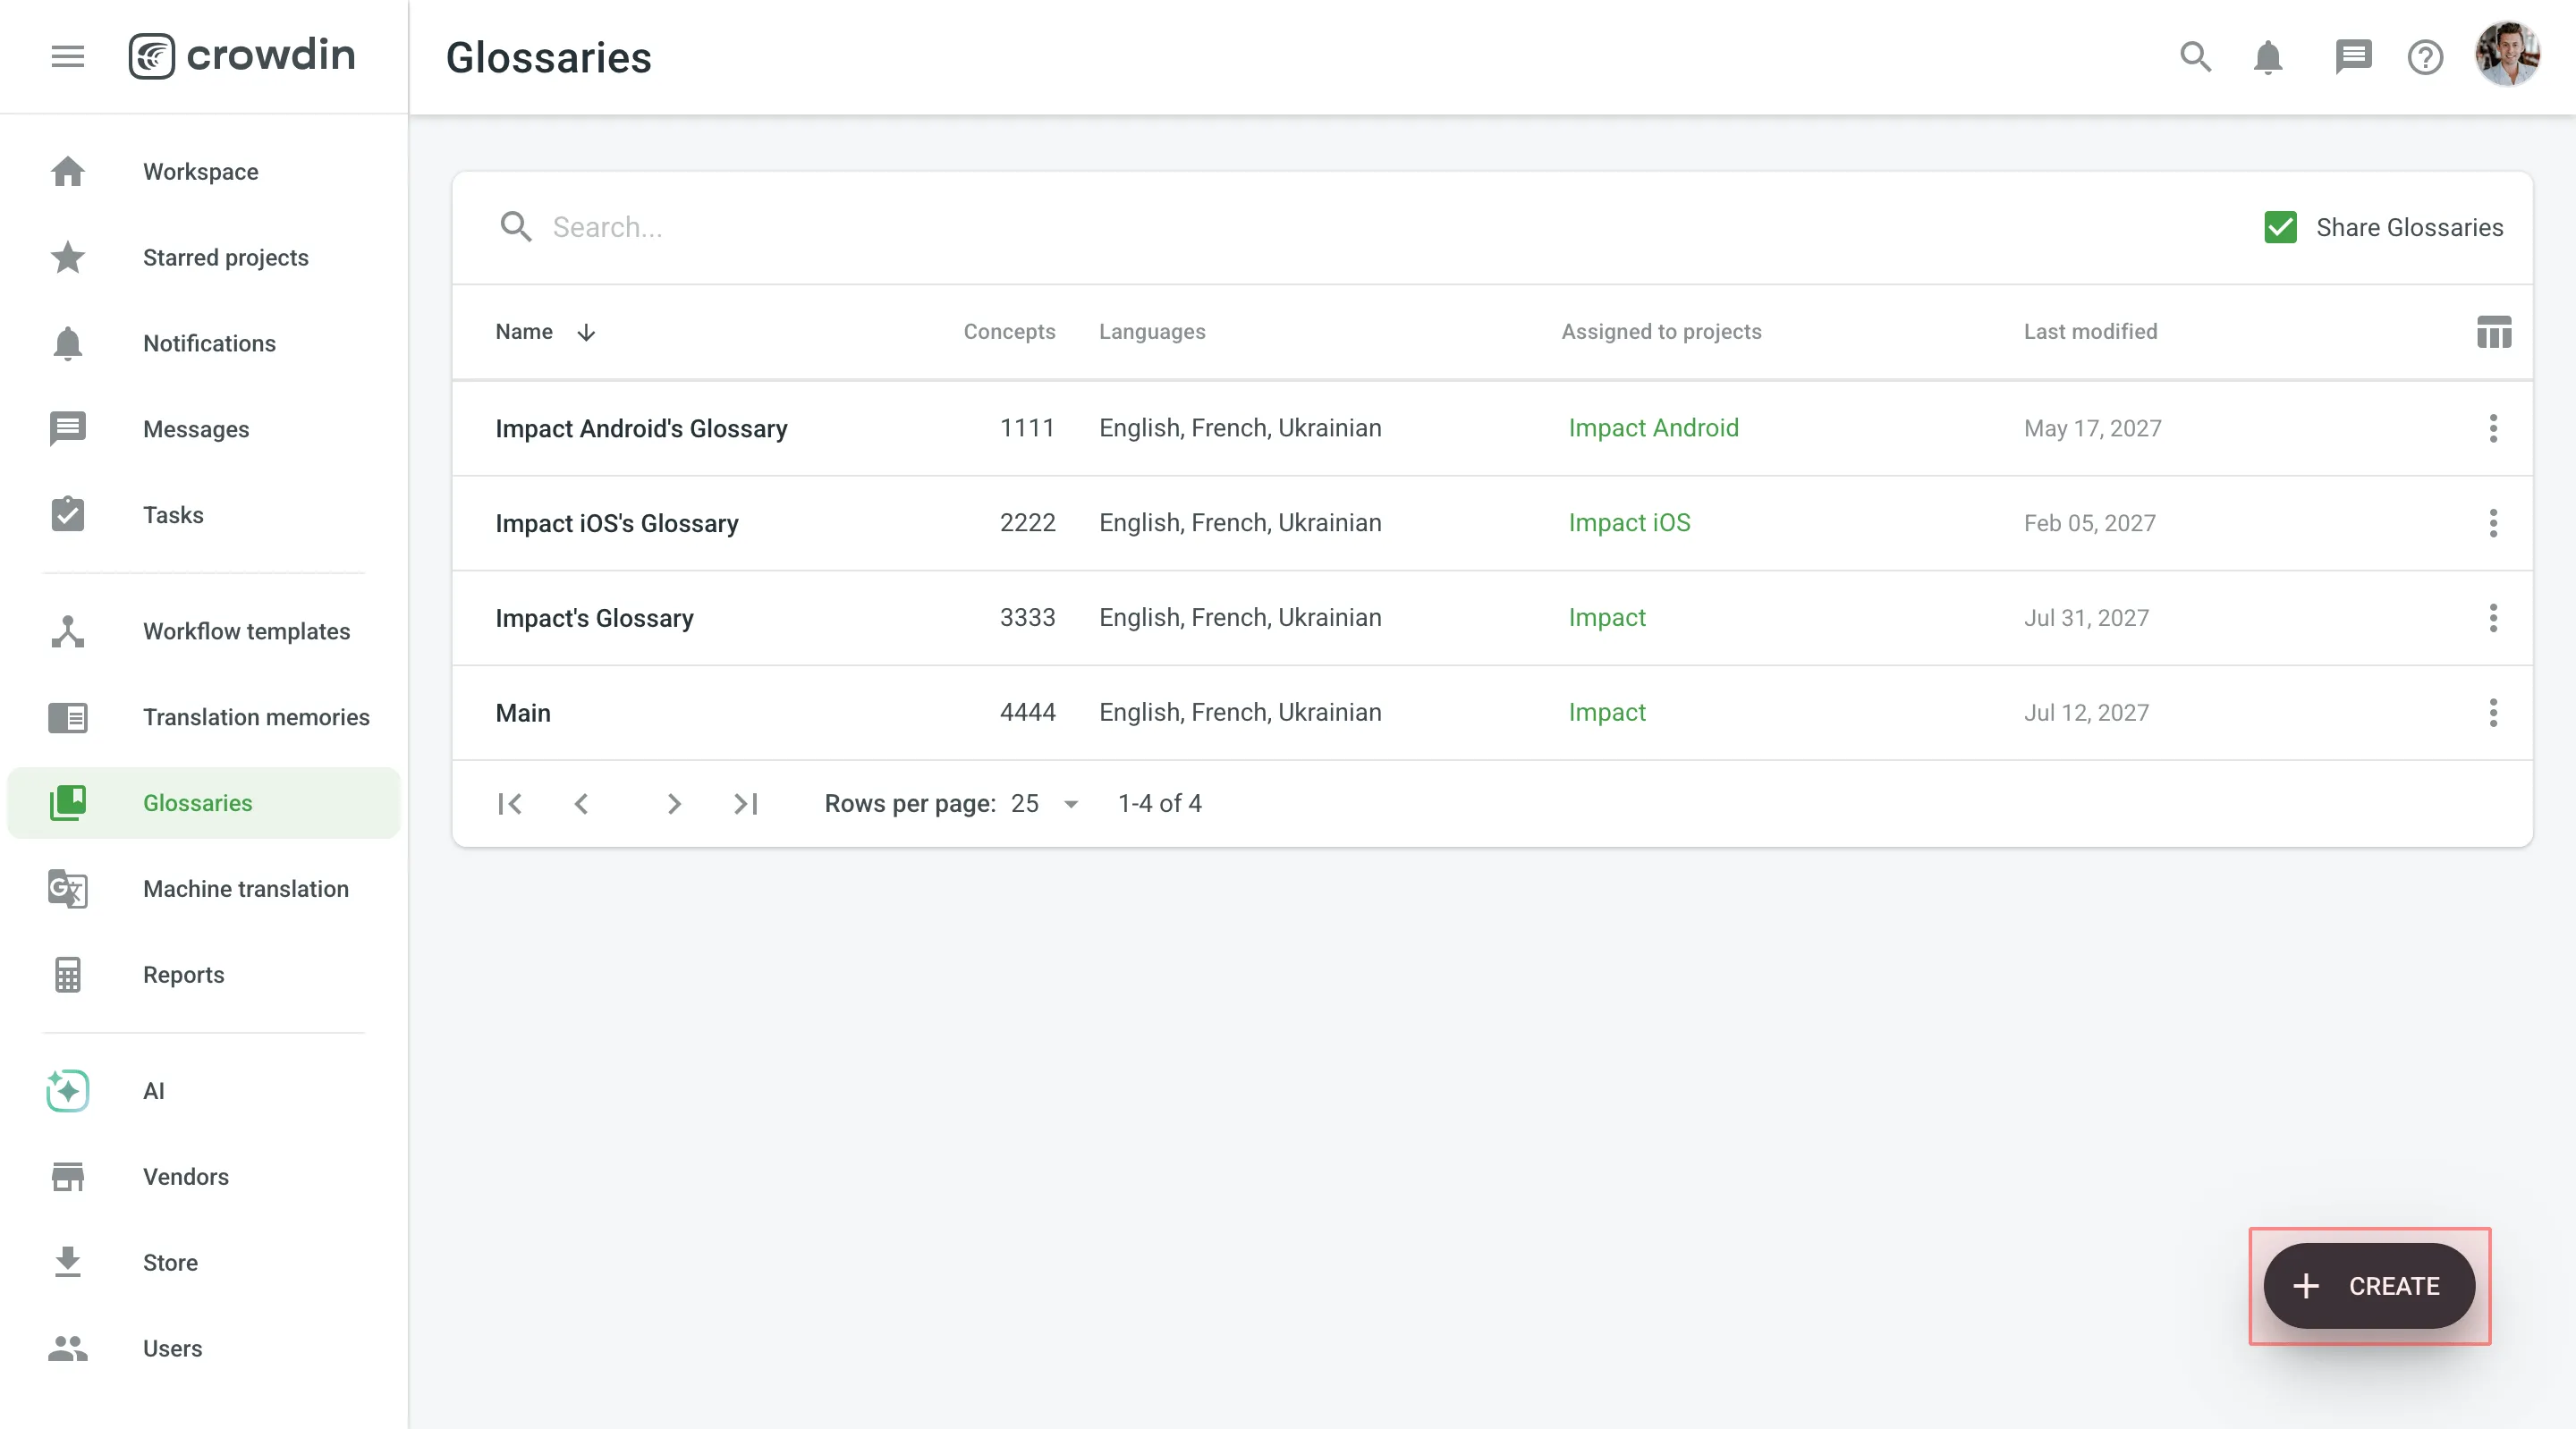 3. In the appeared dialog, name your glossary and select a default language that will be displayed first in the table of glossary records. 4. *(Optional)* Click **Select files** to upload your existing glossary. You can skip this step and upload a glossary later. 5. Click **Create**. 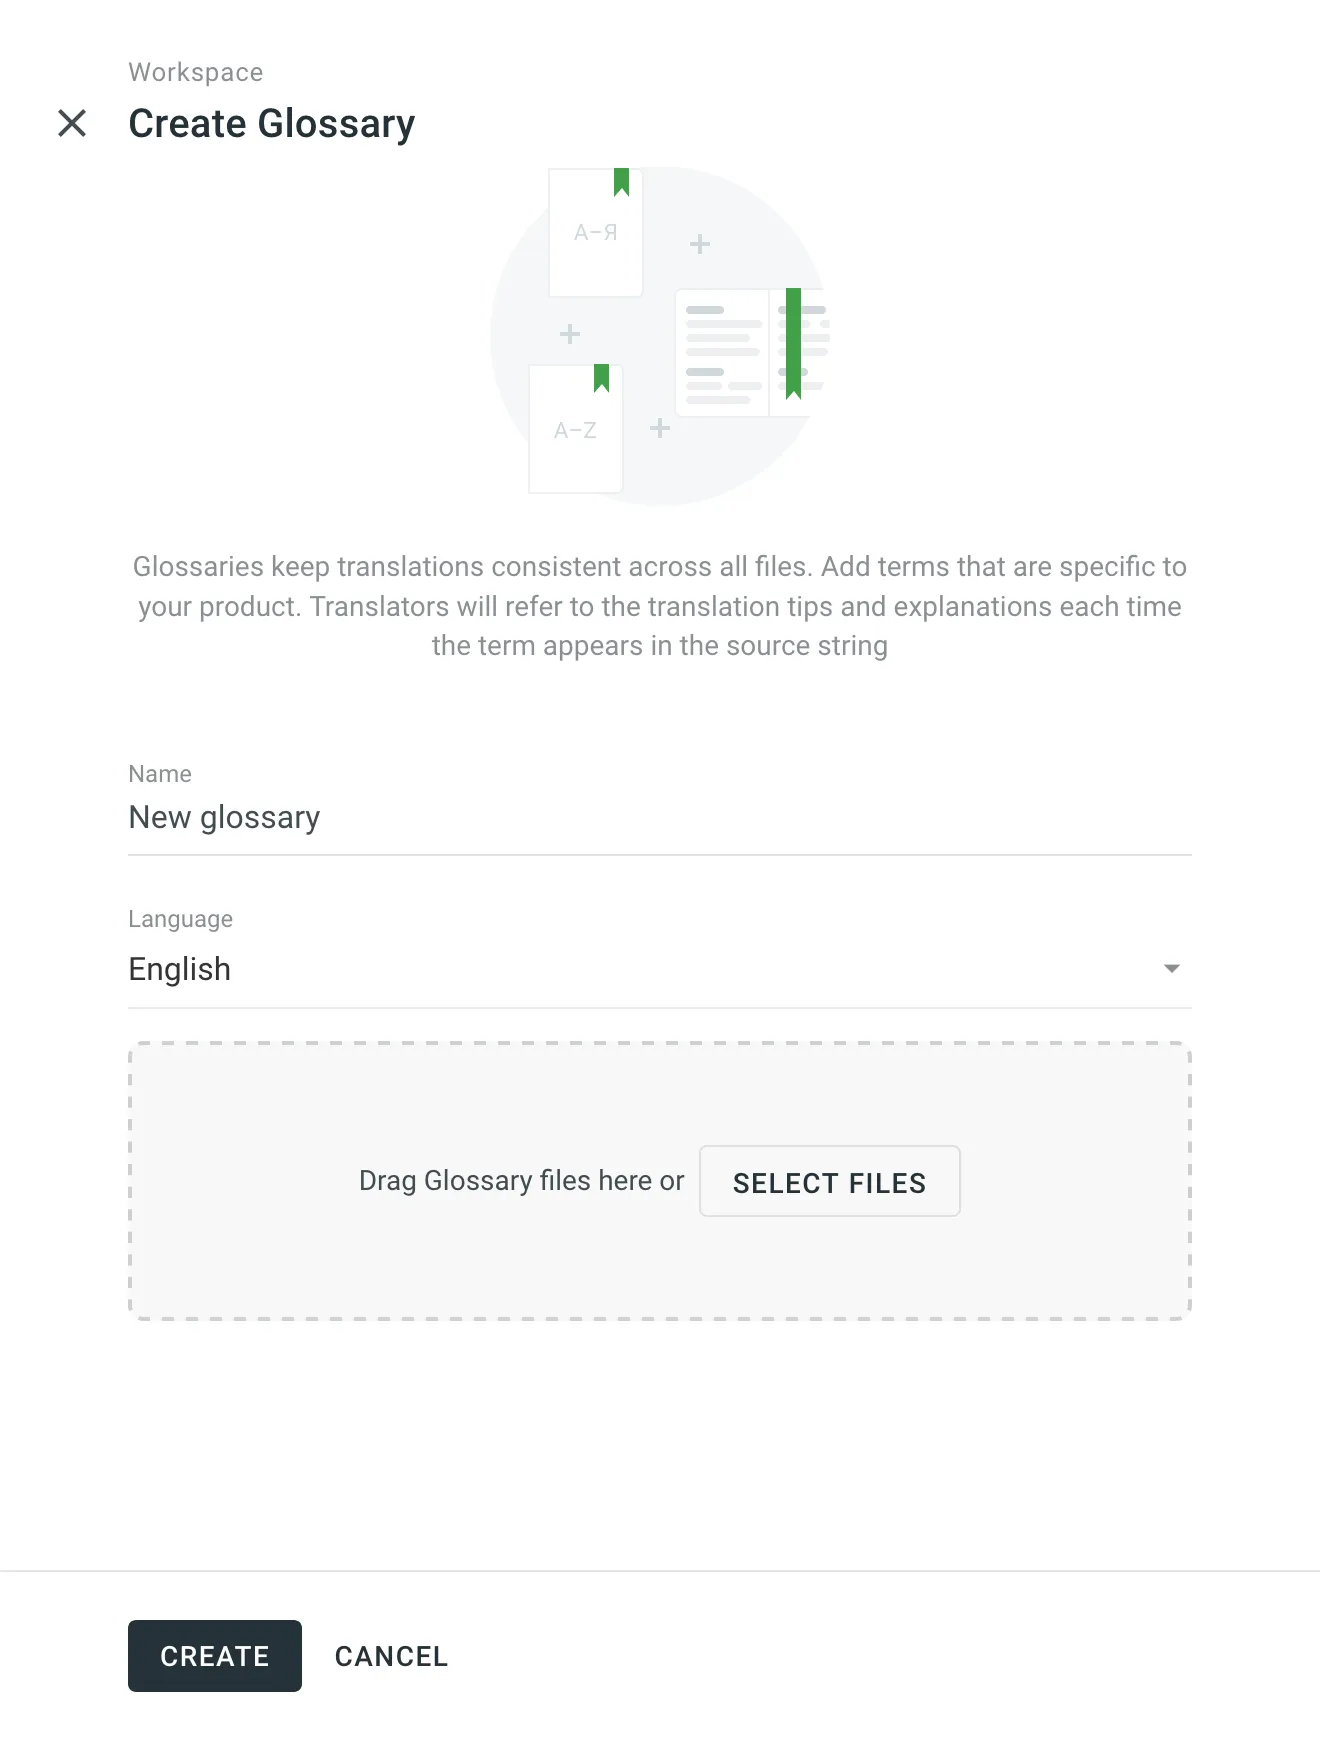 [Assigning Glossary ](/enterprise/project-settings/glossaries/#assigning-glossary) [Changing Default Glossary ](/enterprise/project-settings/glossaries/#changing-default-glossary) ## [Managing Glossary Concepts and Terms](#managing-glossary-concepts-and-terms) [Section titled “Managing Glossary Concepts and Terms”](#managing-glossary-concepts-and-terms) Depending on your project needs, you can use a simpler approach with one term per language or make your glossary more detailed and complete using the advanced functionality that glossary concepts can offer. ### [Creating Glossary Concepts and Terms](#creating-glossary-concepts-and-terms) [Section titled “Creating Glossary Concepts and Terms”](#creating-glossary-concepts-and-terms) Concept – the highest-level terminology element that contains concept-level data (e.g., concept definition, subject, etc.), including language-level (i.e., term language) and term-level data (e.g., term, the term’s part of speech, type, etc.). Simply put, a concept incorporates glossary terms and their variations with multiple translations and other relevant information. You can specify the following concept and term details when adding glossary concepts. Concept details: * Definition – concept definition. * Subject – a branch of knowledge the concept is related to. * Translatable – specifies whether the concept could be translated into other languages. * Note – short notes about a concept that might be helpful to translators. * URL – URL to the web page with relevant information about a concept. * Figure – URL to the relevant image. Term details: * Term – specific word or phrase that is being defined. * Language – specifies the language of the term. * Part of speech – e.g., noun, verb, adjective, etc. * Type – e.g., full form, acronym, abbreviation, etc. * Status – preferred, admitted, not recommended, obsolete, draft. * Gender – term gender. * Description – term description. * Note – short notes about a term that might be helpful to translators. * URL – URL to the web page with relevant information about a term. To add a new glossary concept, follow these steps: 1. Open your organization’s **Workspace** and select **Glossaries** on the left sidebar. Alternatively, open your project and go to **Settings > Glossaries**. 2. Click on the needed glossary. 3. Click **Add concept**. 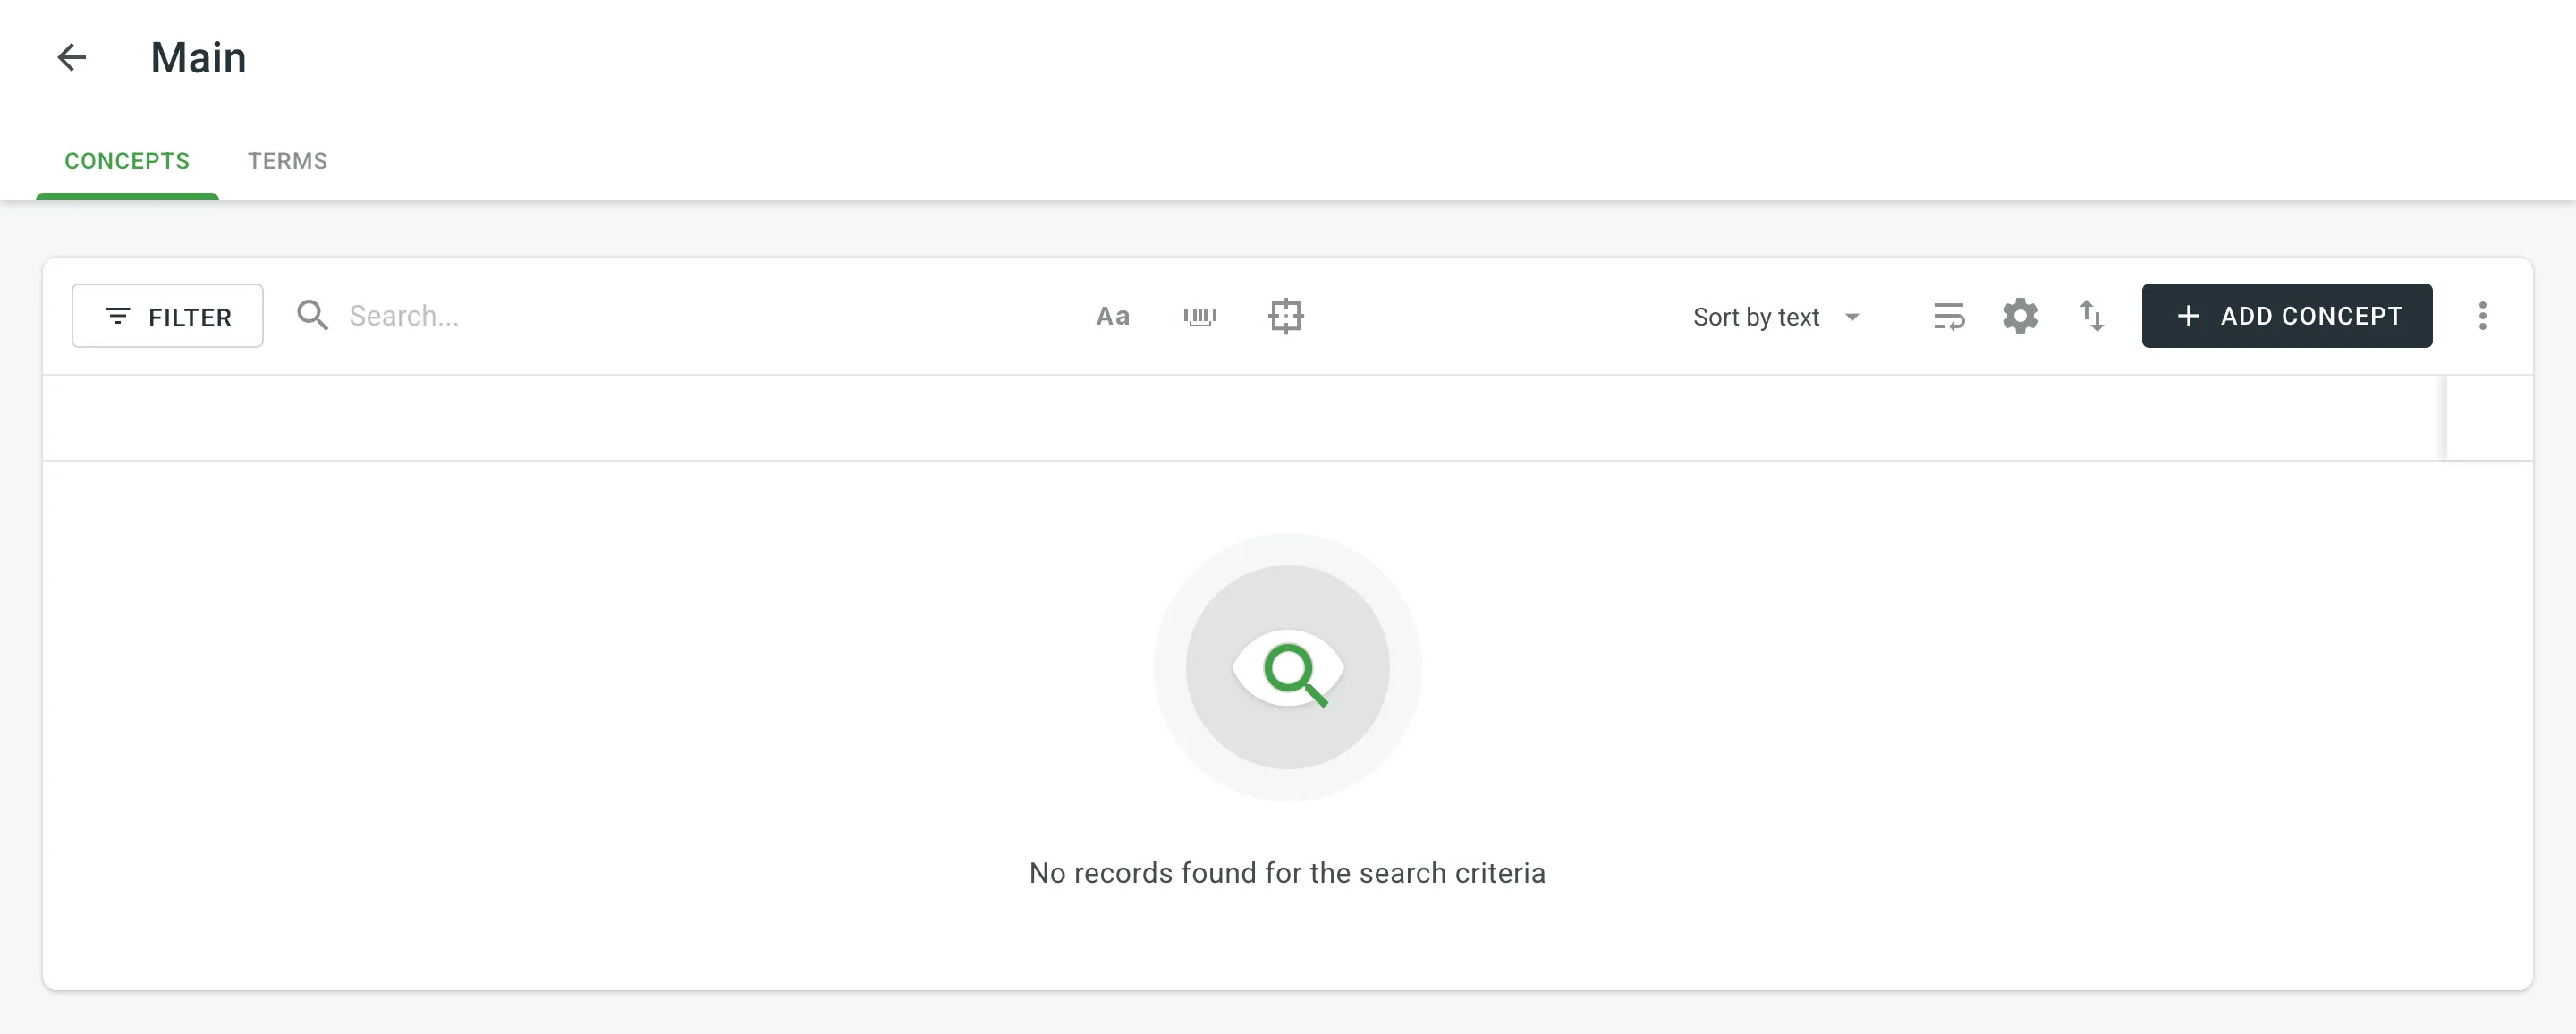 4. In the appeared dialog, select the language from the drop-down menu, and specify the term and all related details. Click to detect the part of speech automatically. 5. *(Optional)* Click **Add term** to add a term variation (e.g., acronym, short form, etc.) 6. Specify the concept details. 7. Click **Create**. 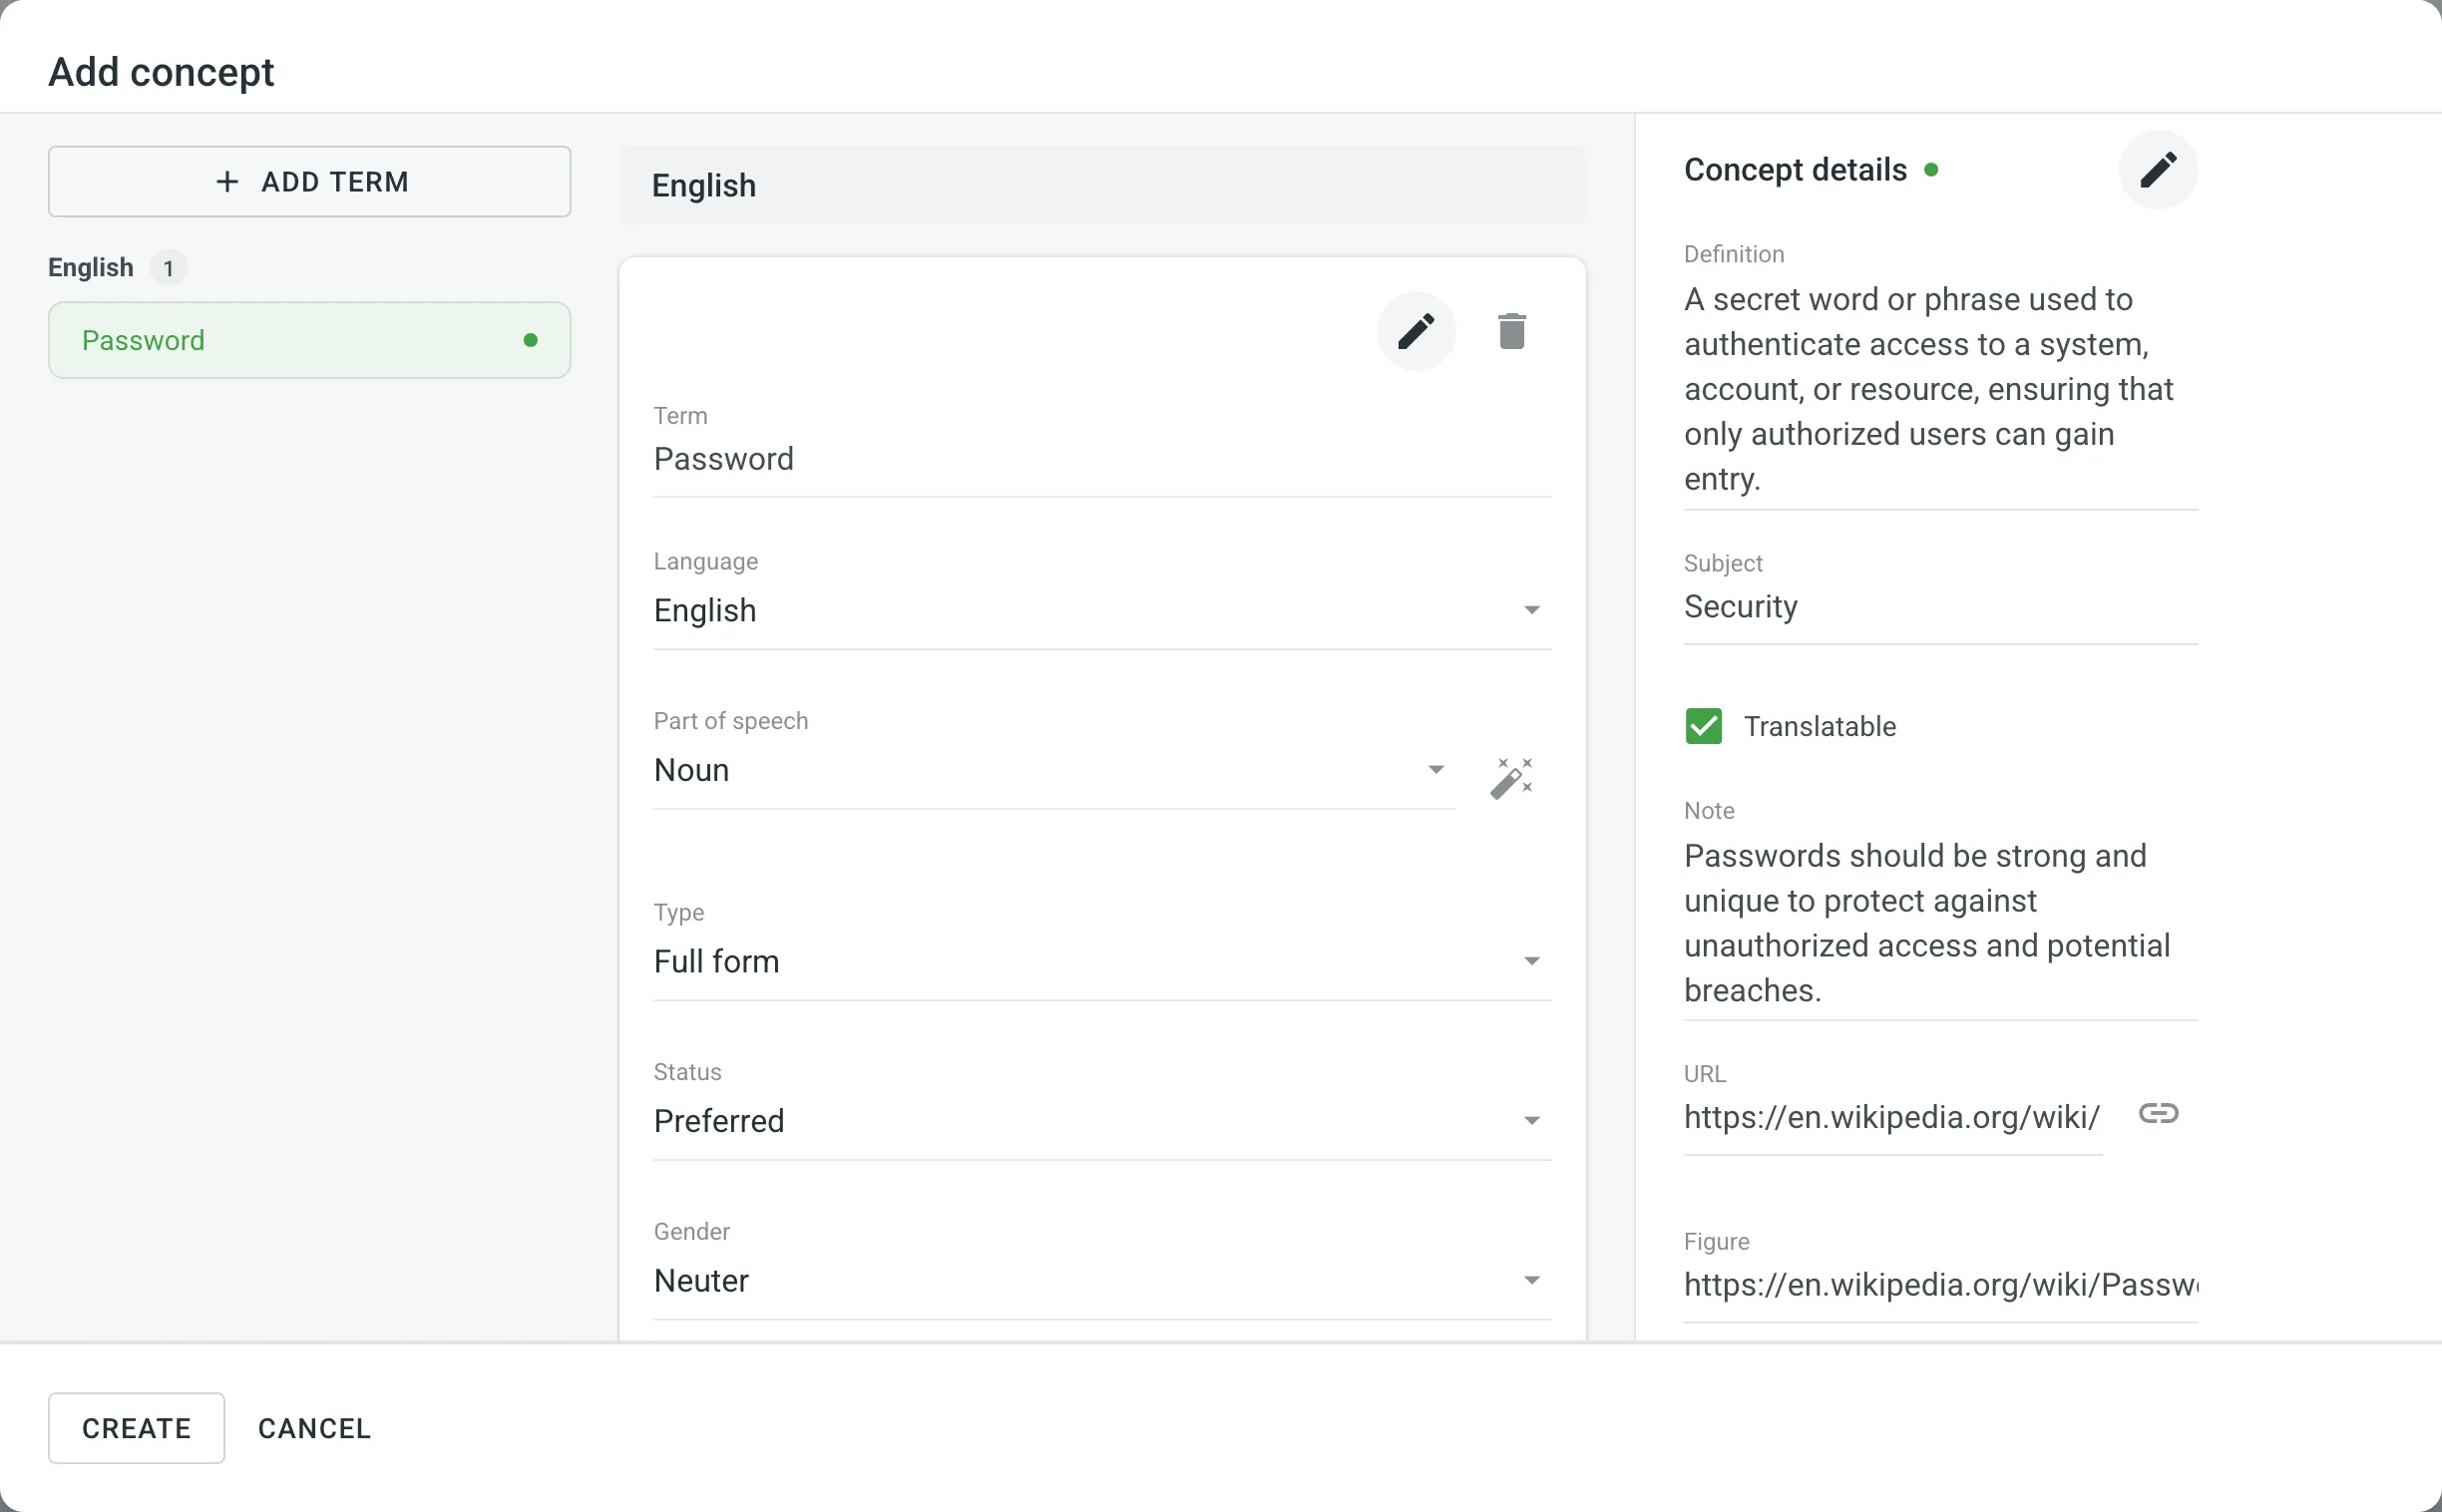 To add glossary concepts via the Editor, follow these steps: 1. In the Editor, select the needed word in the source string. 2. In the appeared menu, select **Create Term**. Alternatively, you can use the keyboard shortcut to add a concept (by default, `Ctrl` +`G` ). 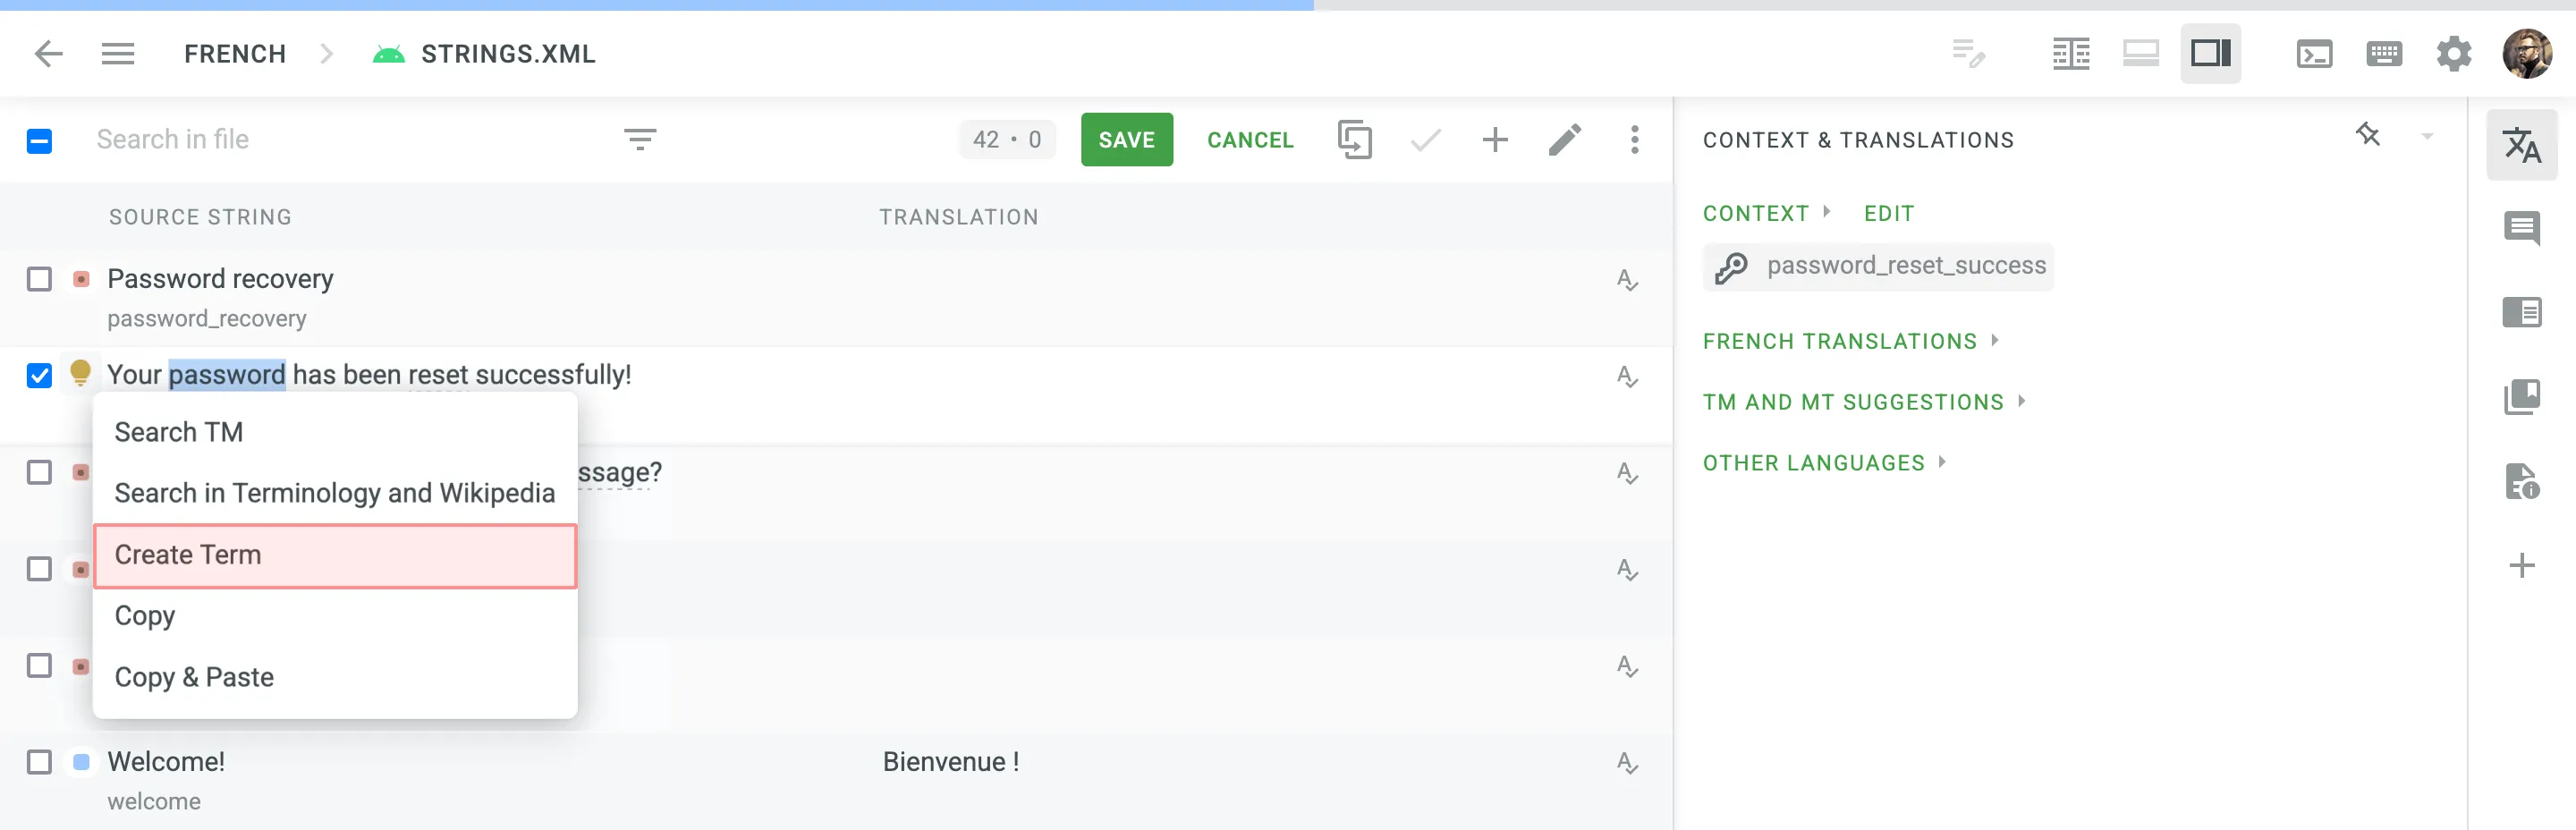 3. Follow the steps described in the section above. To allow translators and proofreaders to manage terms in the Editor, follow these steps: 1. Open your project and go to **Settings > Privacy**. 2. In the [**Glossary Access Settings**](/enterprise/project-settings/privacy/#glossary-access-settings) section, select the preferred access level for project members. You can choose to allow them to manage only draft terms. When a project member adds a draft term, project managers can filter terms by draft status, review them, and make necessary modifications or add glossary concept details. Alternatively, you can grant full access, allowing them to manage all glossary terms and concept details with the same level of control as the project owner and managers. Enhance terminology consistency across your project by setting up AI Alignment. This feature automatically generates draft glossary terms based on translations suggested by human translators, helping maintain preferred terminology. [AI Alignment ](/enterprise/crowdin-ai/#ai-alignment)Learn how to configure AI Alignment for consistent terminology management. ### [Viewing and Filtering Glossary Concepts and Terms](#viewing-and-filtering-glossary-concepts-and-terms) [Section titled “Viewing and Filtering Glossary Concepts and Terms”](#viewing-and-filtering-glossary-concepts-and-terms) Once you open a glossary, you can view and filter its glossary concepts and terms using either the Concepts or Terms pages. On the Concepts page, you can view glossary content grouped as concepts (one concept per row, each term displayed in a separate language column). 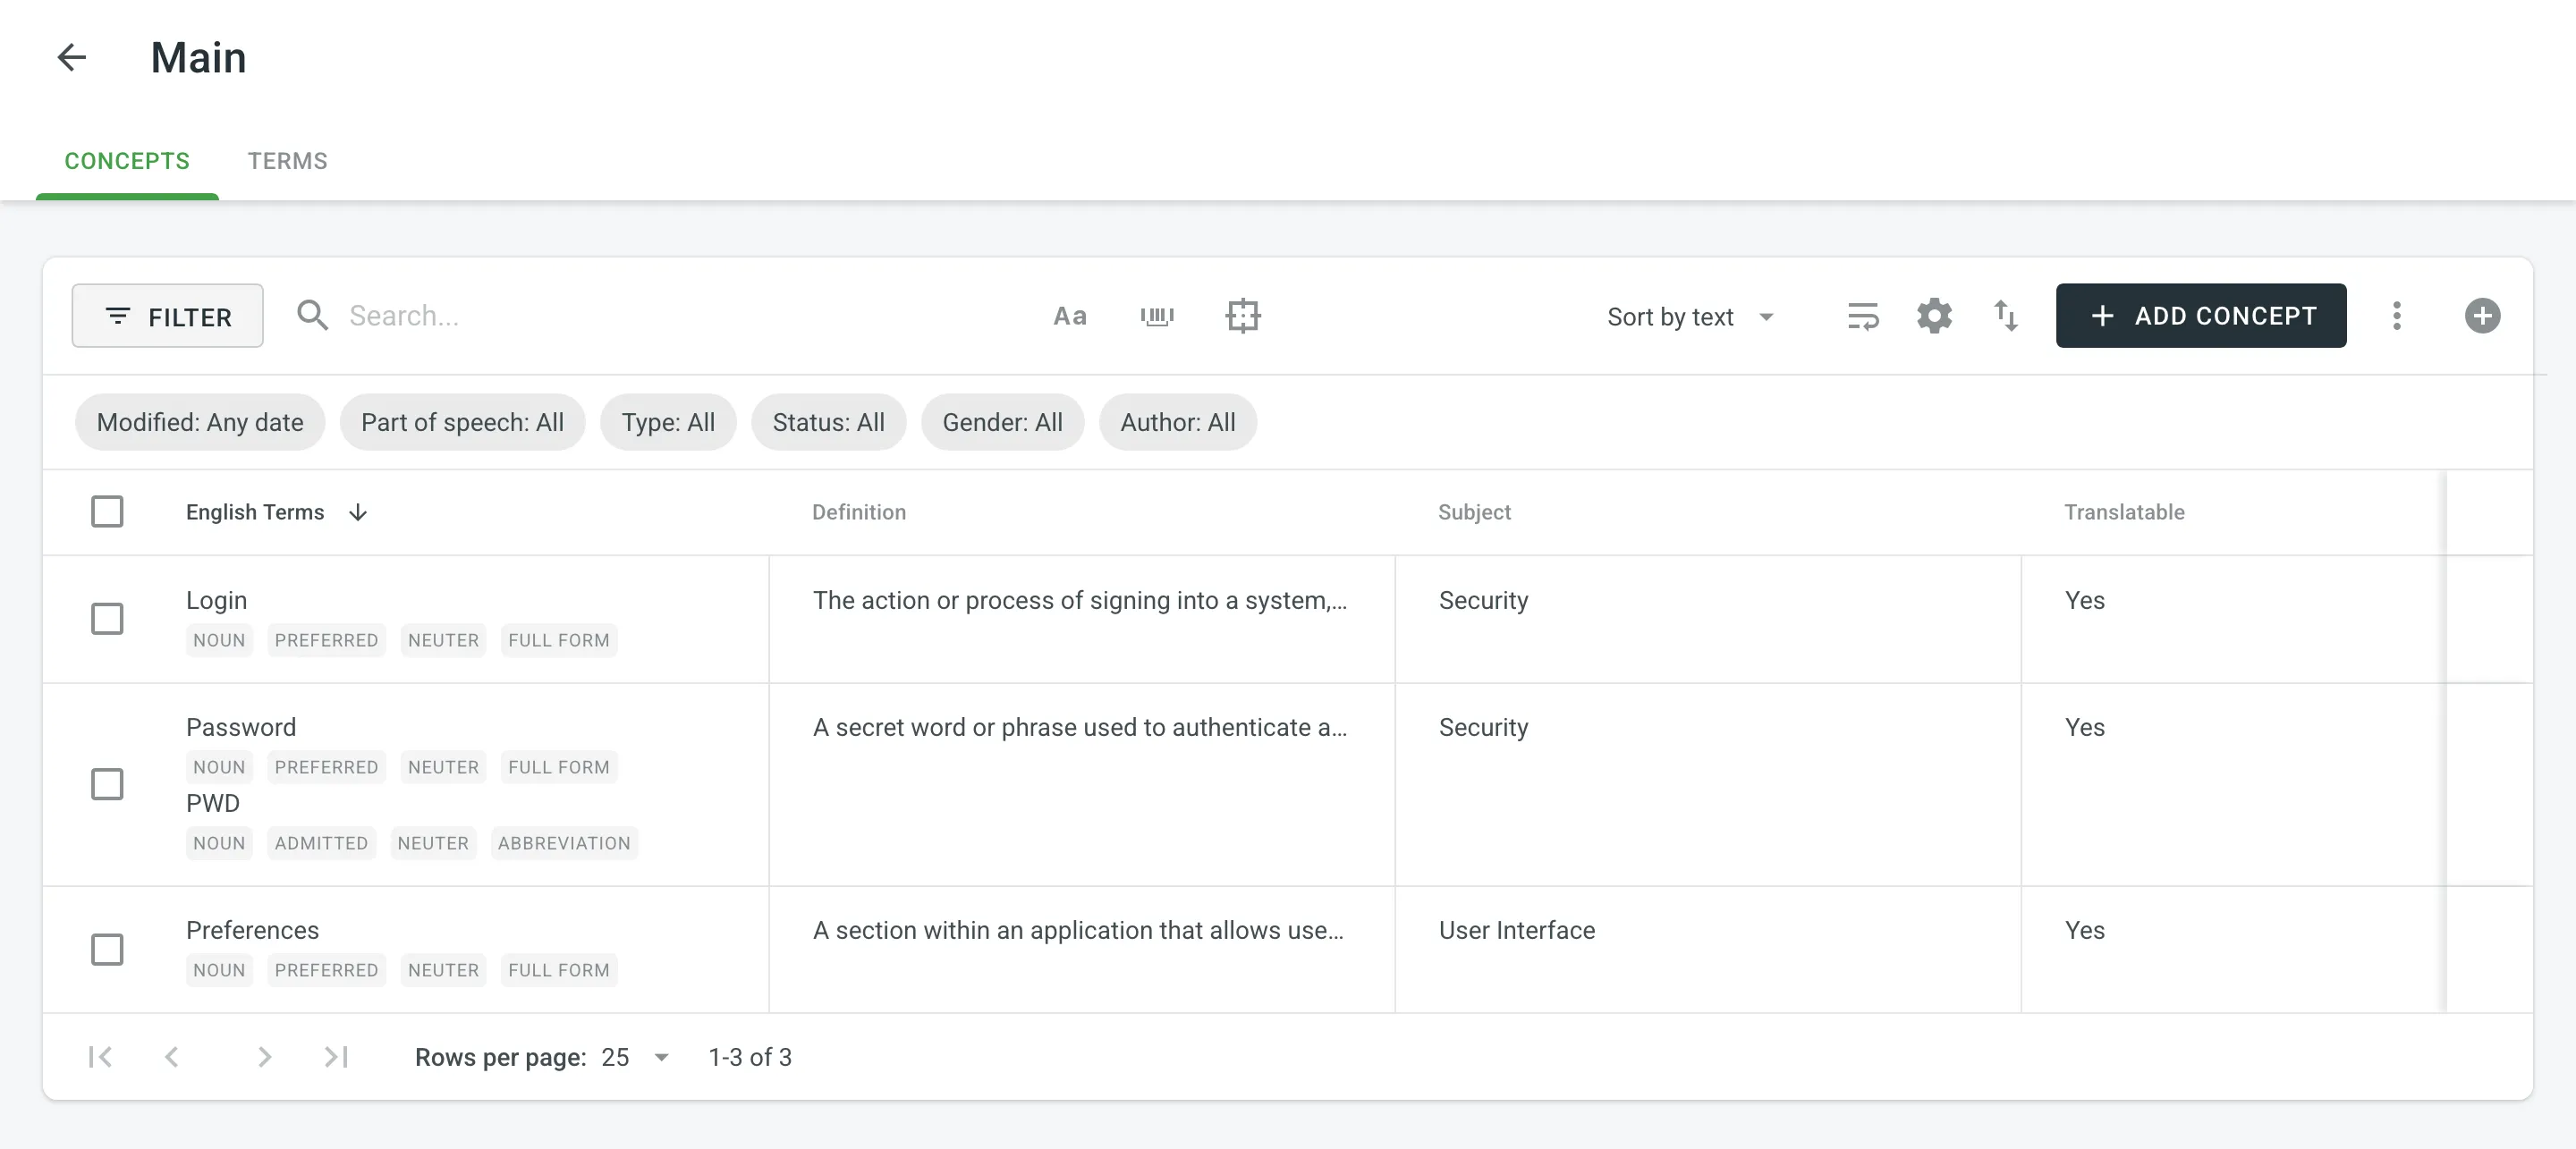 On the Terms page, you can view glossary content as individual terms (one term per row) with the following details: * Term – contains either source or target language text. * Language – specifies the language of the term. * Part of speech – specifies the part of speech of the term. * Type – specifies the type of the term. * Status – specifies the status of the term. * Gender – specifies the gender of the term. * Description (context) – specifies the description of the term. * Note – specifies the note of the term. * Concept subject – specifies the concept subject of the term. * Concept definition – specifies the concept definition of the term.  By default, all glossary concepts and terms are displayed in the Concepts and Terms pages. To filter the concepts or terms displayed, click and use the available filter options: * Languages (Specific to the Terms page): All languages, specific language. * Modified: All, Custom Range. * Part of speech: All, Adjective, Adposition, Adverb, Auxiliary, Coordinating conjunction, Determiner, Interjection, Noun, Numeral, Pronoun, Proper noun, Particle, Subordinating conjunction, Verb, Symbol, Other. * Type: All, Full form, Acronym, Abbreviation, Short form, Phrase, Variant. * Status: All, Preferred, Admitted, Not recommended, Obsolete, Draft. * Gender: All, Masculine, Feminine, Common, Neuter, Other. * Author: All, particular user. To search for a particular term, type your search phrase in the **Search** field. To refine the search results, you can use the following options: * Match case * Match whole phrase * Exact match To sort concepts or terms, click **Sort by** and select one of the available options: * Text * Date modified * Date created ### [Editing Glossary Concepts and Terms](#editing-glossary-concepts-and-terms) [Section titled “Editing Glossary Concepts and Terms”](#editing-glossary-concepts-and-terms) You can edit existing glossary concepts of a particular glossary. To edit a glossary concept, follow these steps: 1. Open your organization’s **Workspace** and select **Glossaries** on the left sidebar. Alternatively, open your project and go to **Settings > Glossaries**. 2. Click on the needed glossary. 3. Hover over a glossary concept and click to open it. 4. In the appeared dialog, make the necessary edits to the concept or terms and click **Save**. 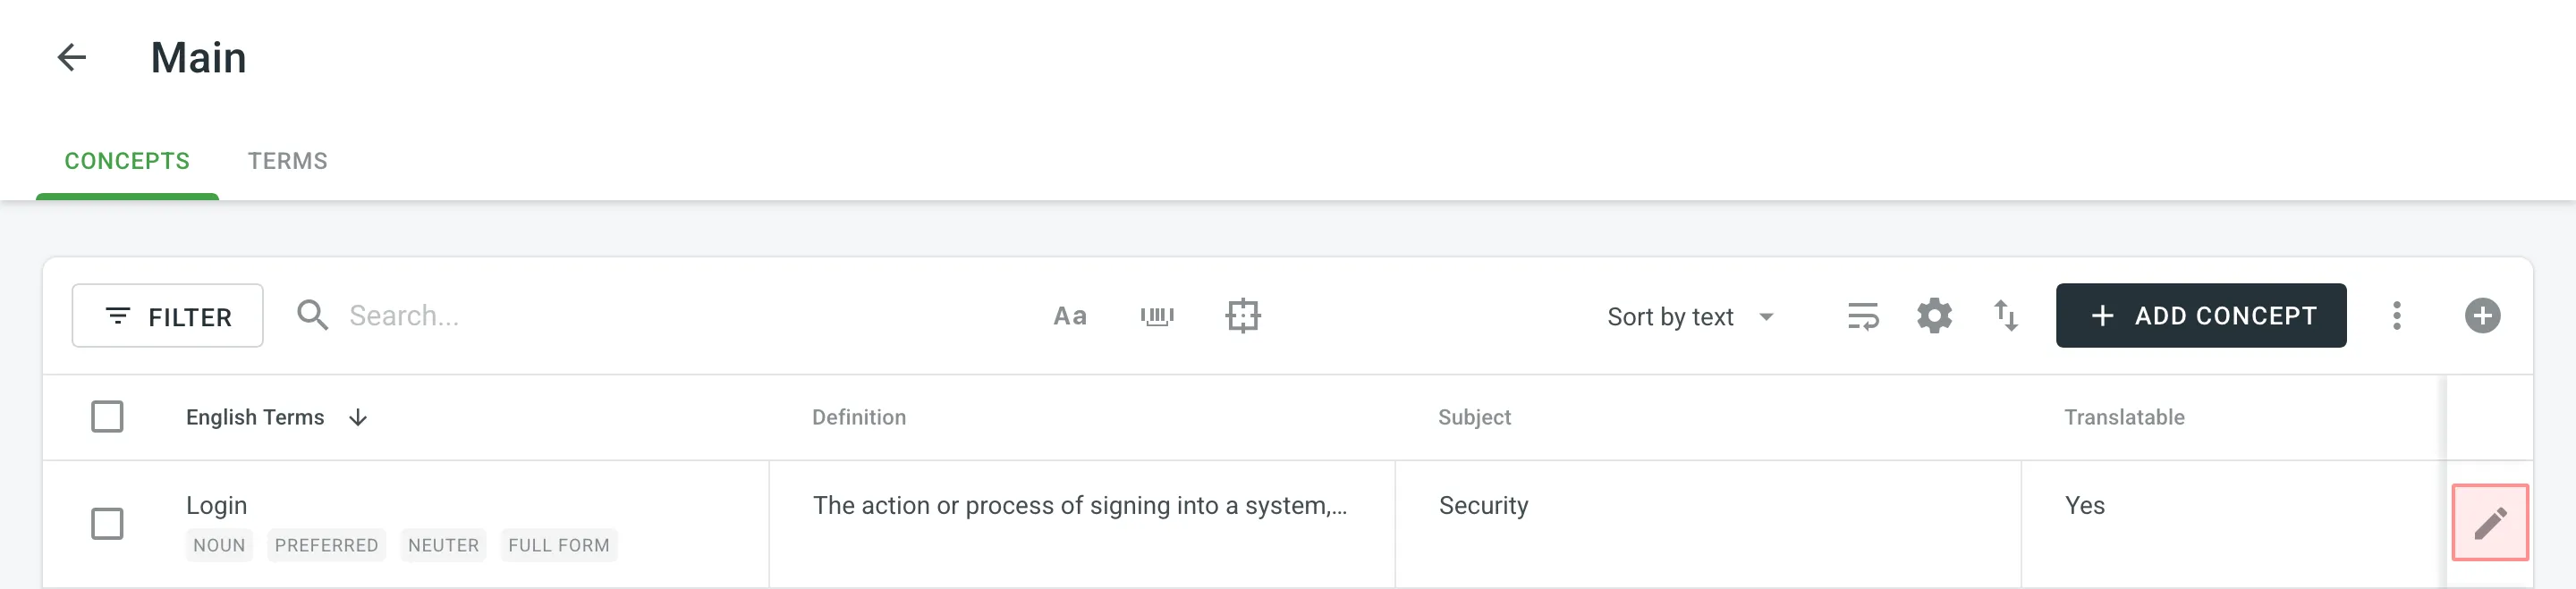 ### [Deleting Glossary Concepts](#deleting-glossary-concepts) [Section titled “Deleting Glossary Concepts”](#deleting-glossary-concepts) You can delete one, multiple, or all the glossary concepts at once. To delete all the concepts from the glossary, follow these steps: 1. Select the top checkbox above the concept list. 2. Confirm the selection of all concepts. 3. Click . 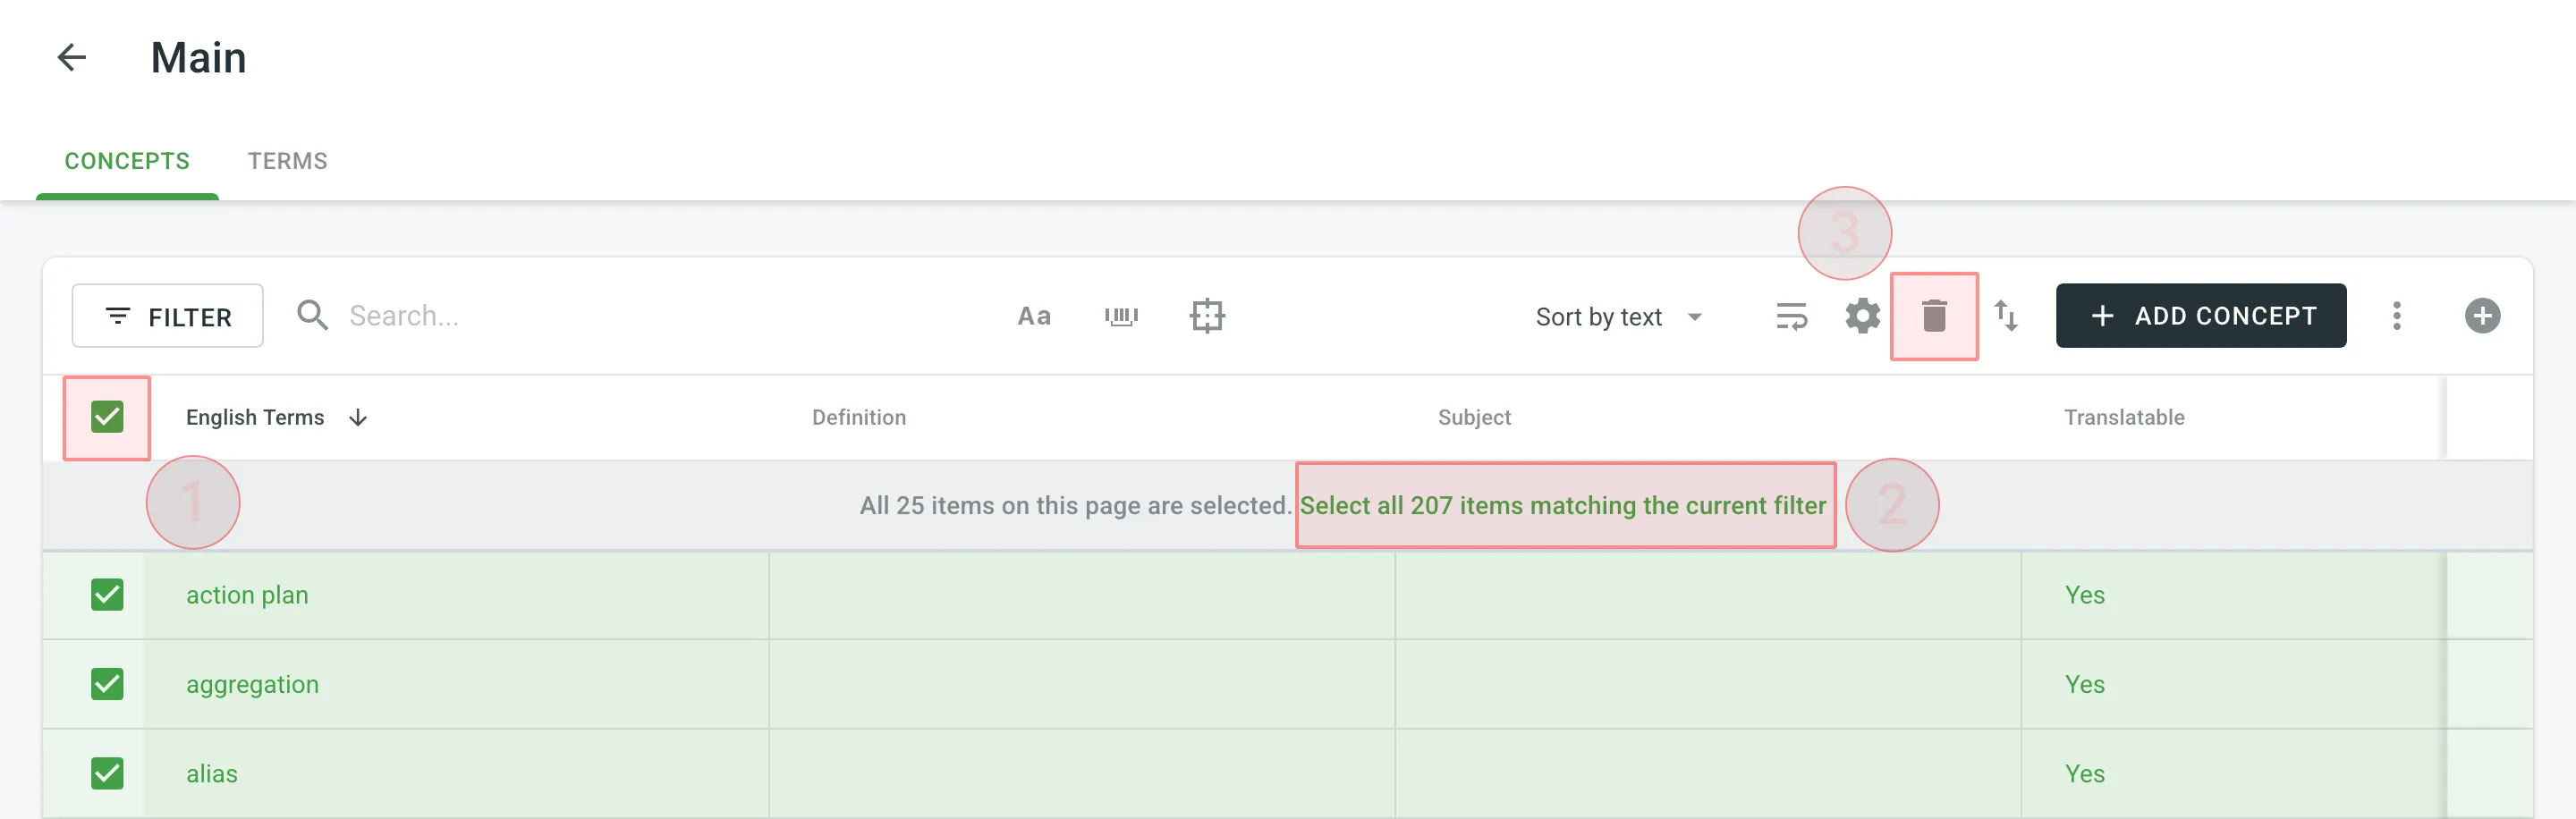 ## [Uploading and Downloading Glossary](#uploading-and-downloading-glossary) [Section titled “Uploading and Downloading Glossary”](#uploading-and-downloading-glossary) You can upload existing glossaries to Crowdin Enterprise or download your glossary content for backup, editing, or other purposes outside Crowdin Enterprise. Glossaries can be downloaded in full or with applied filters, which is useful when you want to export only a subset of glossary concepts that meet specific criteria (e.g., by subject, status, or language). To upload or download the glossary, follow these steps: 1. Open your organization’s **Workspace** and select **Glossaries** on the left sidebar. Alternatively, open your project and go to **Settings > Glossaries**. 2. Click on the needed glossary. 3. Click and select one of the following options: * **Upload** – uploads new glossary content. * **Download** – downloads the full glossary. * **Download filtered** – downloads only glossary concepts that match the applied filters or search criteria. 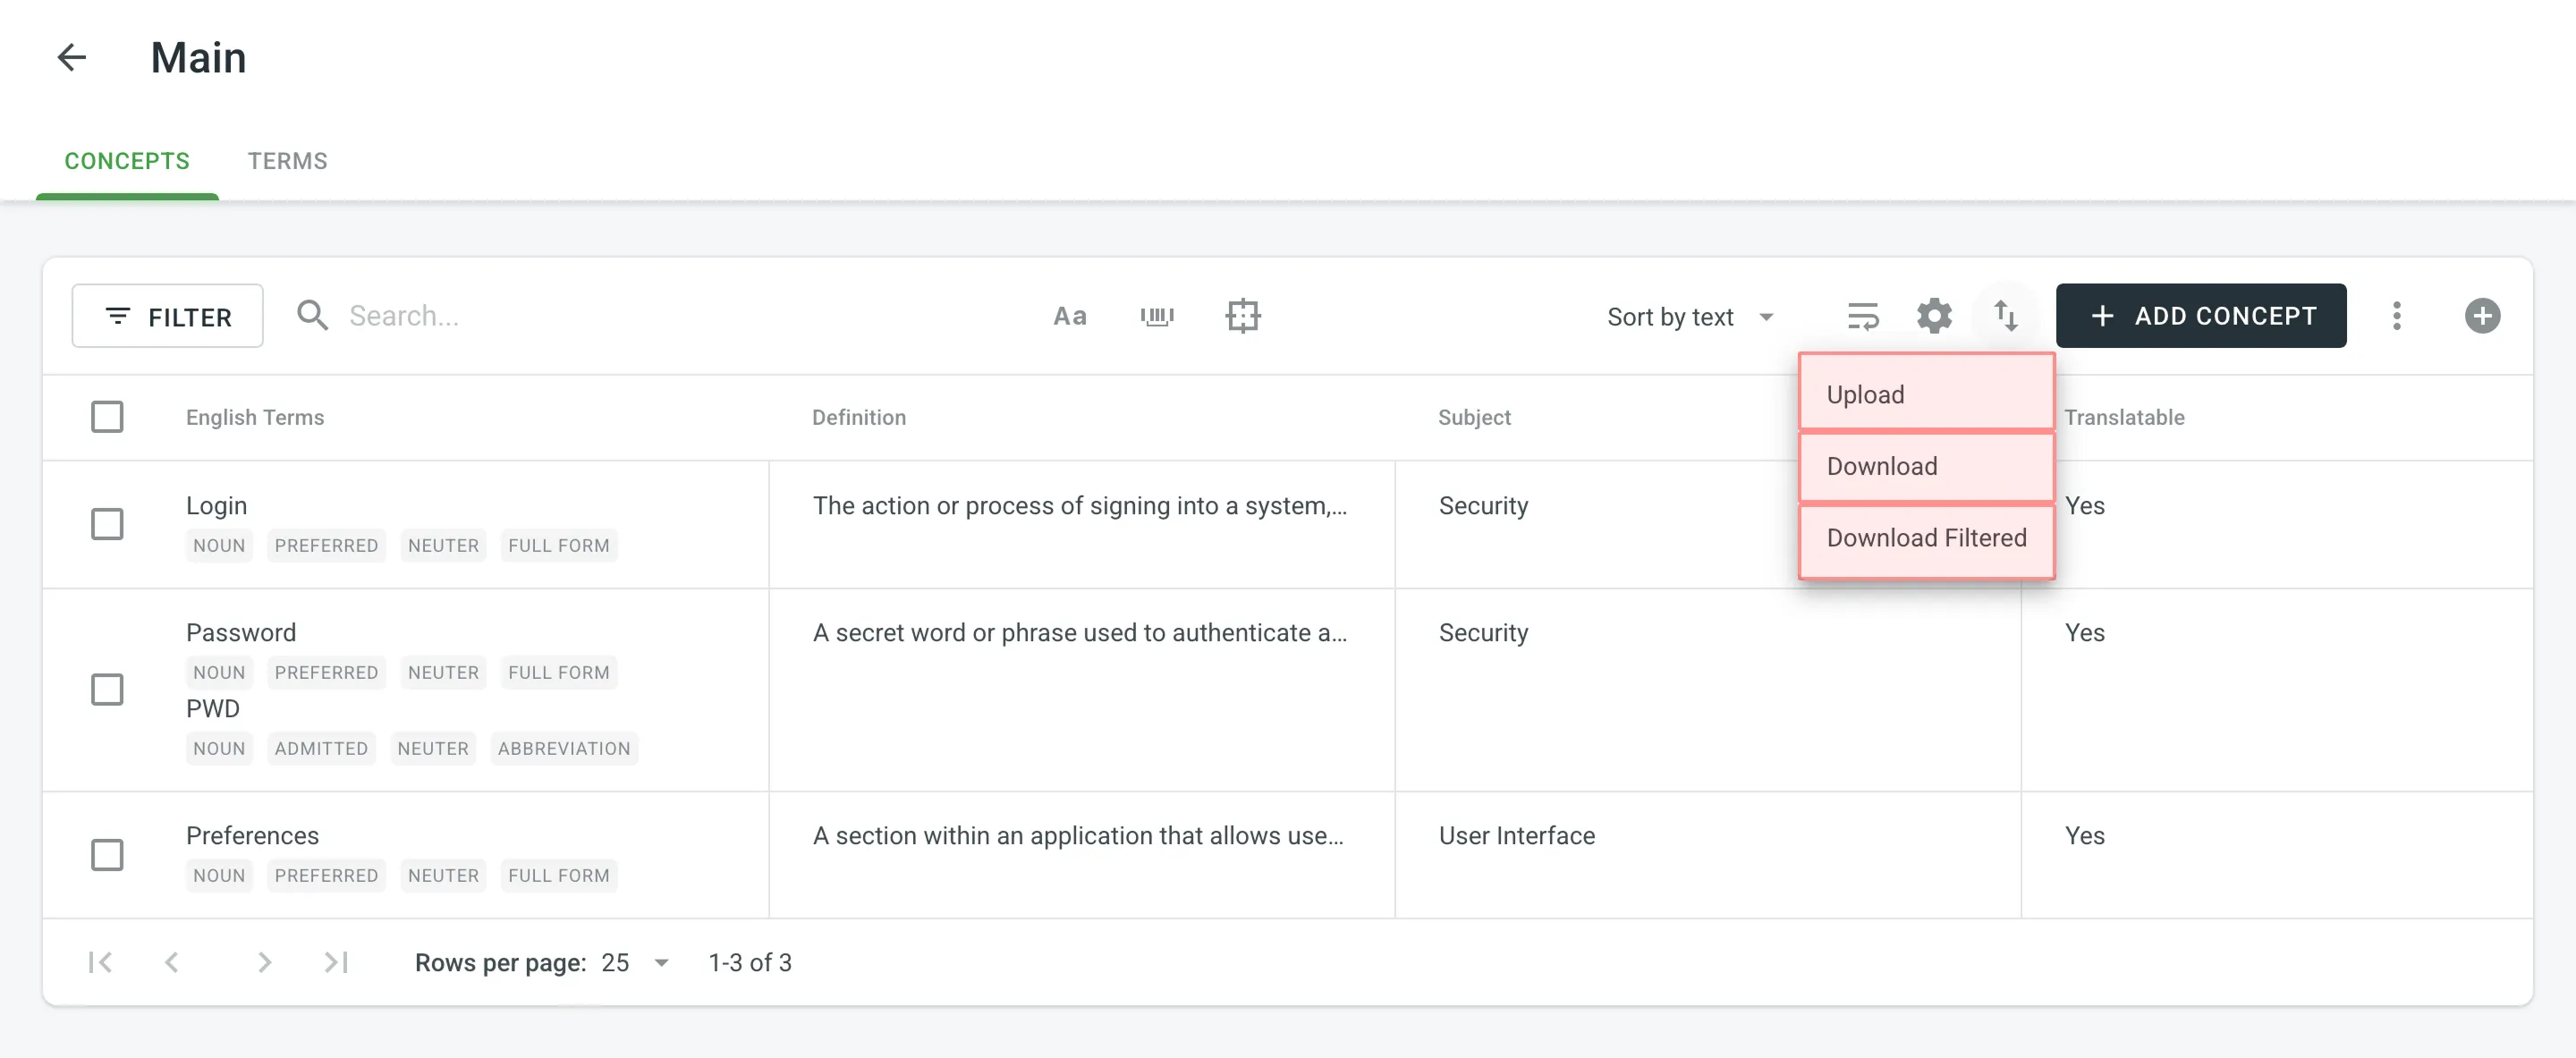 The owner, admins and managers can upload and download the glossary in the following file formats: TBX (v2), TBX (v3), CSV, XLSX. Limitations The maximum file size is 100 MB. If your file exceeds this limit, it is recommended to split it into several smaller files, and upload them one at a time. If you upload a glossary in CSV or XLS/XLSX file formats, select the language for each column and the column value (term, description, or part of speech) in the configuration dialog.  When downloading a glossary from Crowdin Enterprise, some browsers may add an XML extension to the downloaded file so that the file may be named *sample.tbx.xml*. To import such a file back to Crowdin Enterprise, rename it to *sample.tbx*. ### [Automatic Column Identification for Glossary in CSV and XLSX File Formats](#automatic-column-identification-for-glossary-in-csv-and-xlsx-file-formats) [Section titled “Automatic Column Identification for Glossary in CSV and XLSX File Formats”](#automatic-column-identification-for-glossary-in-csv-and-xlsx-file-formats) Once you upload your glossary file in CSV or XLSX formats, the system automatically detects the file scheme based on the column names specified in the first row. The identification is performed in a case-insensitive manner. Columns that weren’t detected automatically will be left as **Not used**/**Not chosen** for manual configuration. Automatic column identification is especially helpful when you upload glossary spreadsheets that contain many languages and additional columns (e.g., Status, Type, Gender, etc.). To get the most out of the automatic column detection, we recommend that you name the columns in your CSV or XLSX glossary files using the patterns described below: * Term details – `{column-type} [{crowdin-language-code}]` (e.g., `Term [en]`, `Description [en]`, `Part of Speech [en]`, etc.). * Concept details – `Concept {concept-details-type}` (e.g., `Concept Definition`, `Concept Subject`, `Concept Note`, etc.). To redetect the glossary file scheme, click **Detect Configuration**. ## [Sharing Glossaries](#sharing-glossaries) [Section titled “Sharing Glossaries”](#sharing-glossaries) To share your glossaries between all of the projects within the organization, follow these steps: 1. Open your organization’s **Workspace** and select **Glossaries** on the left sidebar. 2. Select **Share Glossaries**. 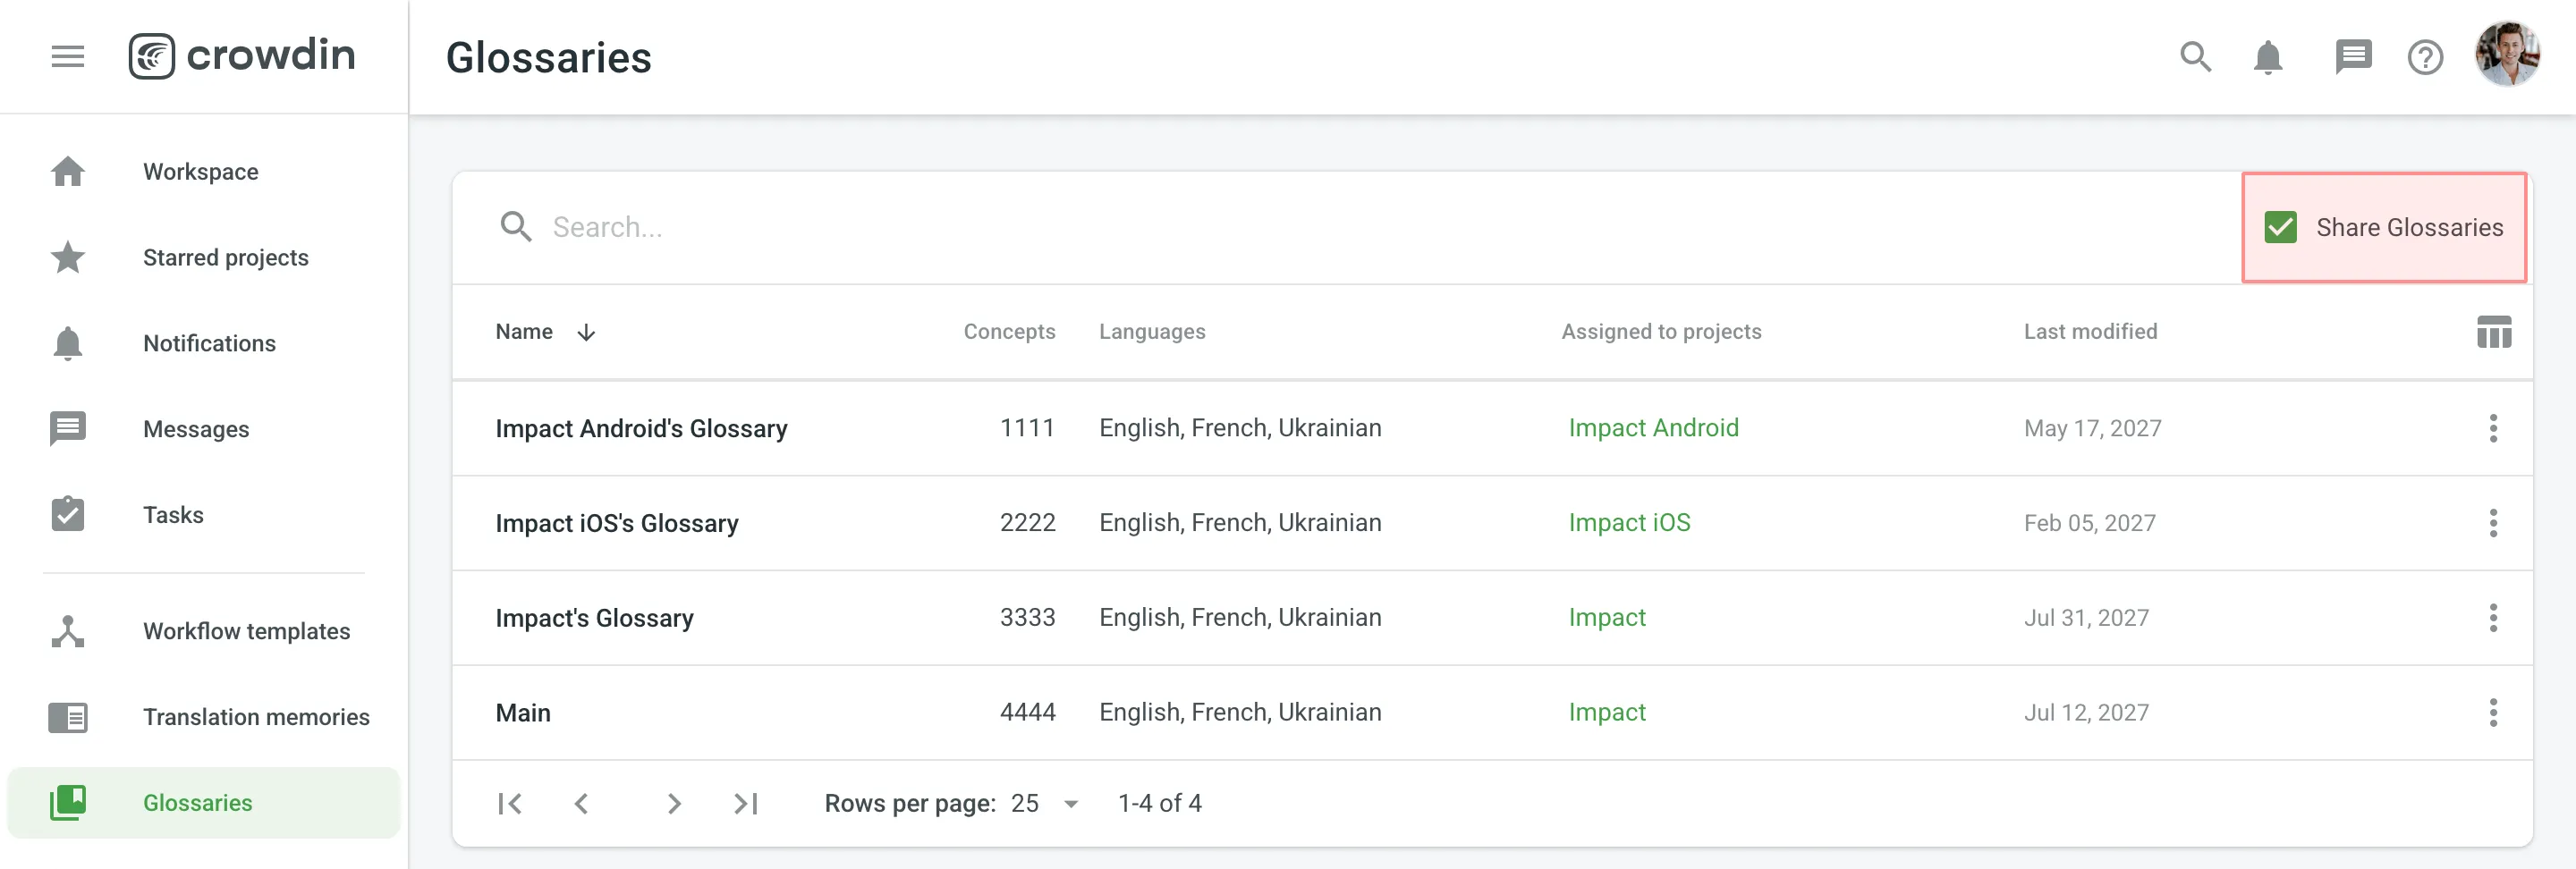 ## [Translating Glossary Terms](#translating-glossary-terms) [Section titled “Translating Glossary Terms”](#translating-glossary-terms) [Translate Glossary App ](https://store.crowdin.com/glossary-translate-app)The app allows you to translate your glossary terms directly in Crowdin. ## [Q\&A](#qa) [Section titled “Q\&A”](#qa)
# Google Play Integration
> Connect Google Play with Crowdin to localize your app's data
With Crowdin’s Google Play integration, you can speed up the process of your app’s data localization. Once the integration is enabled, all the texts from the store page are collected in one file and added to your project in Crowdin Enterprise. When translations are completed, it takes a few clicks to add them to your app’s page in the store. ## [Connecting Google Play with Crowdin Enterprise](#connecting-google-play-with-crowdin-enterprise) [Section titled “Connecting Google Play with Crowdin Enterprise”](#connecting-google-play-with-crowdin-enterprise) To connect Google Play with your project in Crowdin Enterprise, follow these steps: 1. Open your project and select **Integrations** on the left sidebar. 2. Click on **Google Play** in the Integrations List. 3. Enter the package name and click **Set Up Integration**. You can edit the package name if you entered it incorrectly and delete the integration if needed. The integration will collect the source texts into a file which will be placed in **Sources > Files**. By default, the file name is set to `google_play.xml`. ## [Publishing Translations](#publishing-translations) [Section titled “Publishing Translations”](#publishing-translations) To publish translations, follow these steps: 1. Open your project and go to **Integrations > Google Play**. 2. Click **Preview & Publish Translations**. 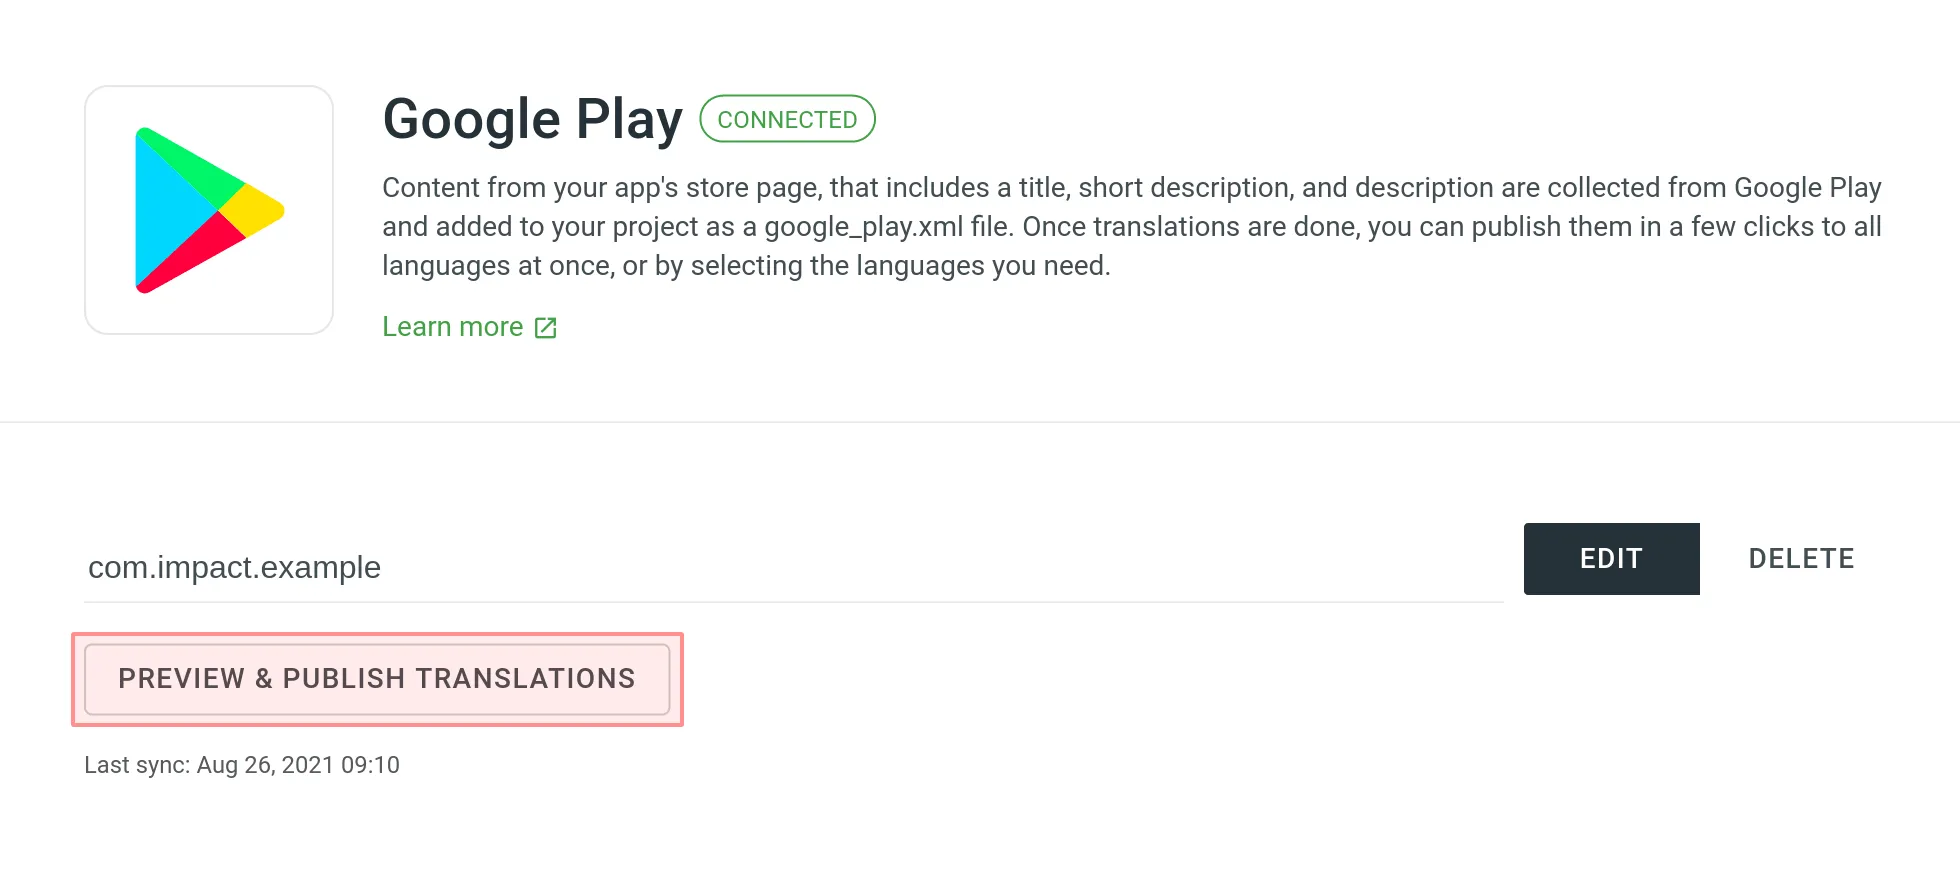 3. Available translations will appear accordingly to the configured [Export options](/enterprise/project-settings/export/). See whether all translations look good and clear the checkbox next to the languages you don’t want to publish. Click **Next** to proceed.  4. Upload a file with your [service account credentials](#creating-service-account-credentials) and click **Publish**. 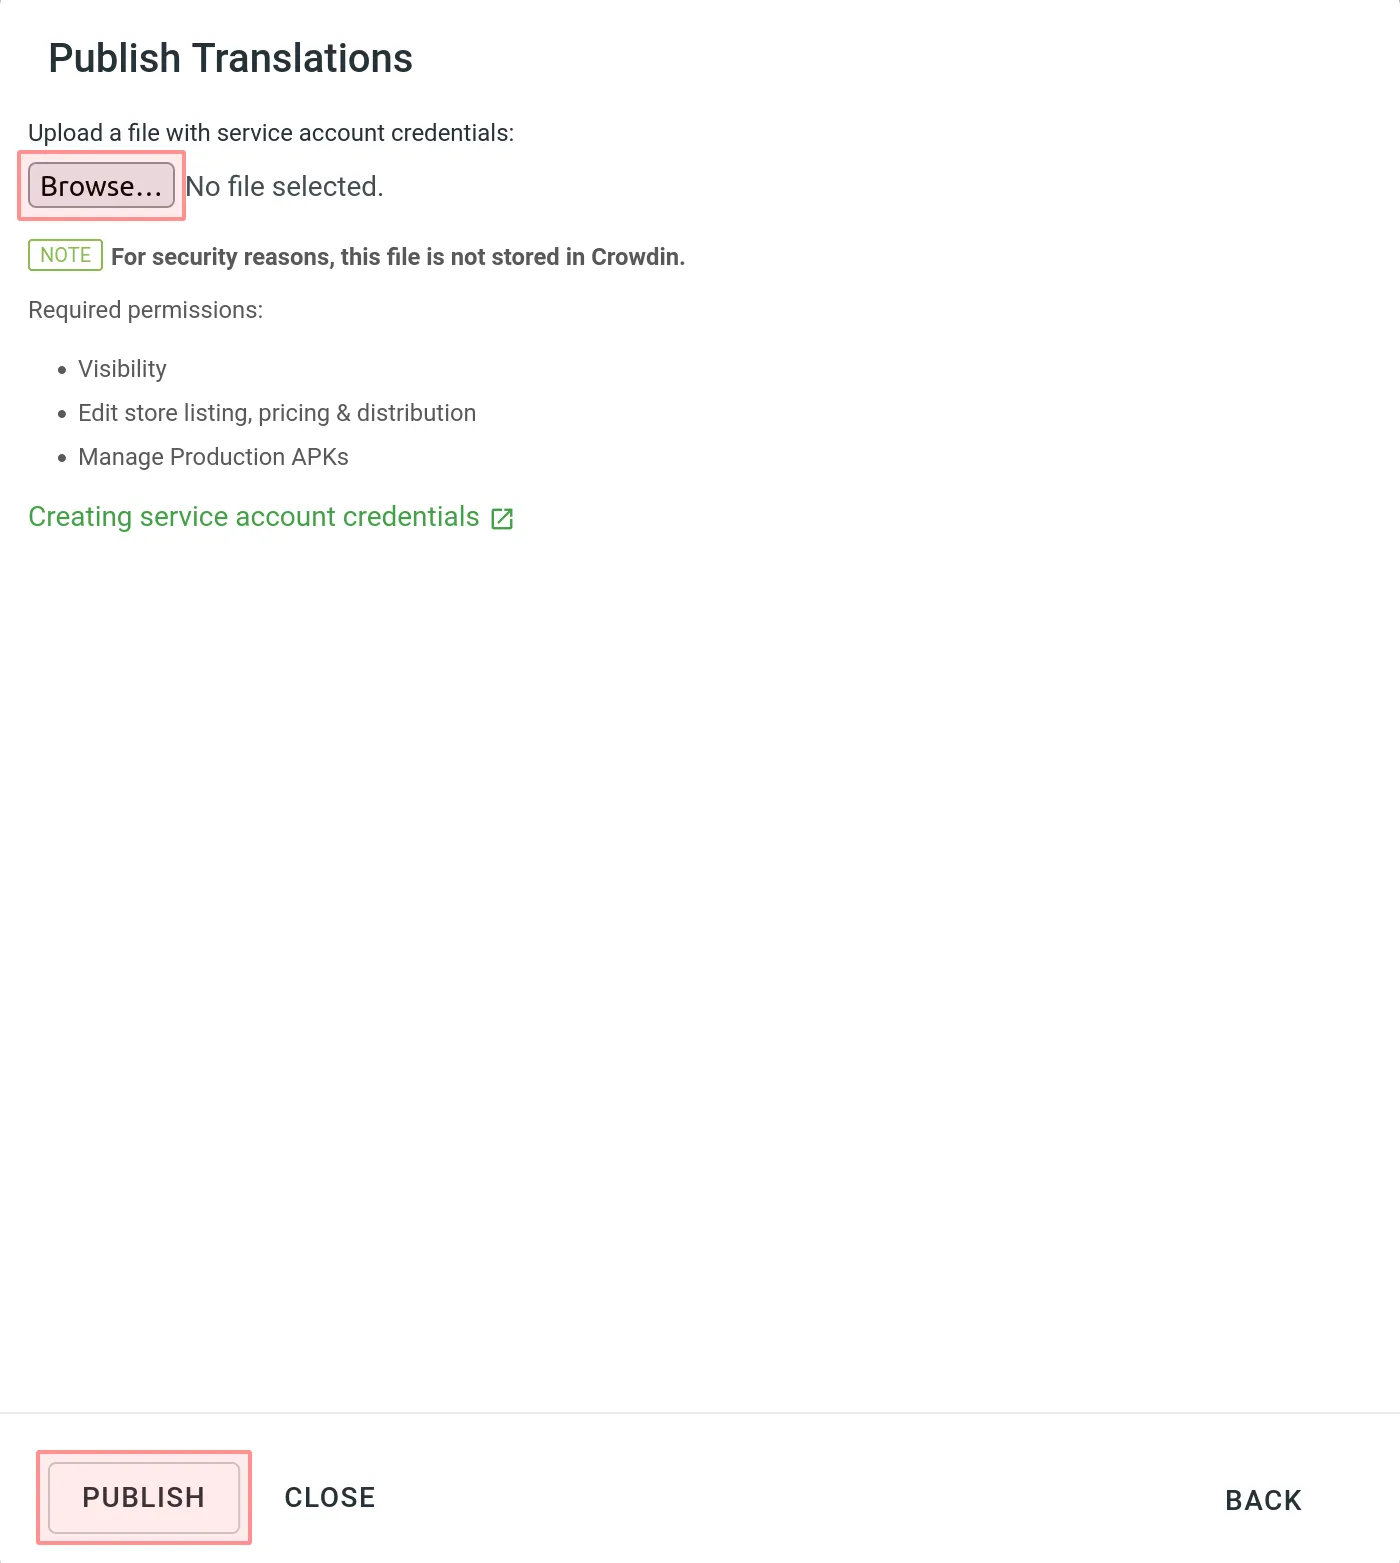 5. You can track the publishing progress in the next dialog. Once the translations are uploaded, click **Close**. 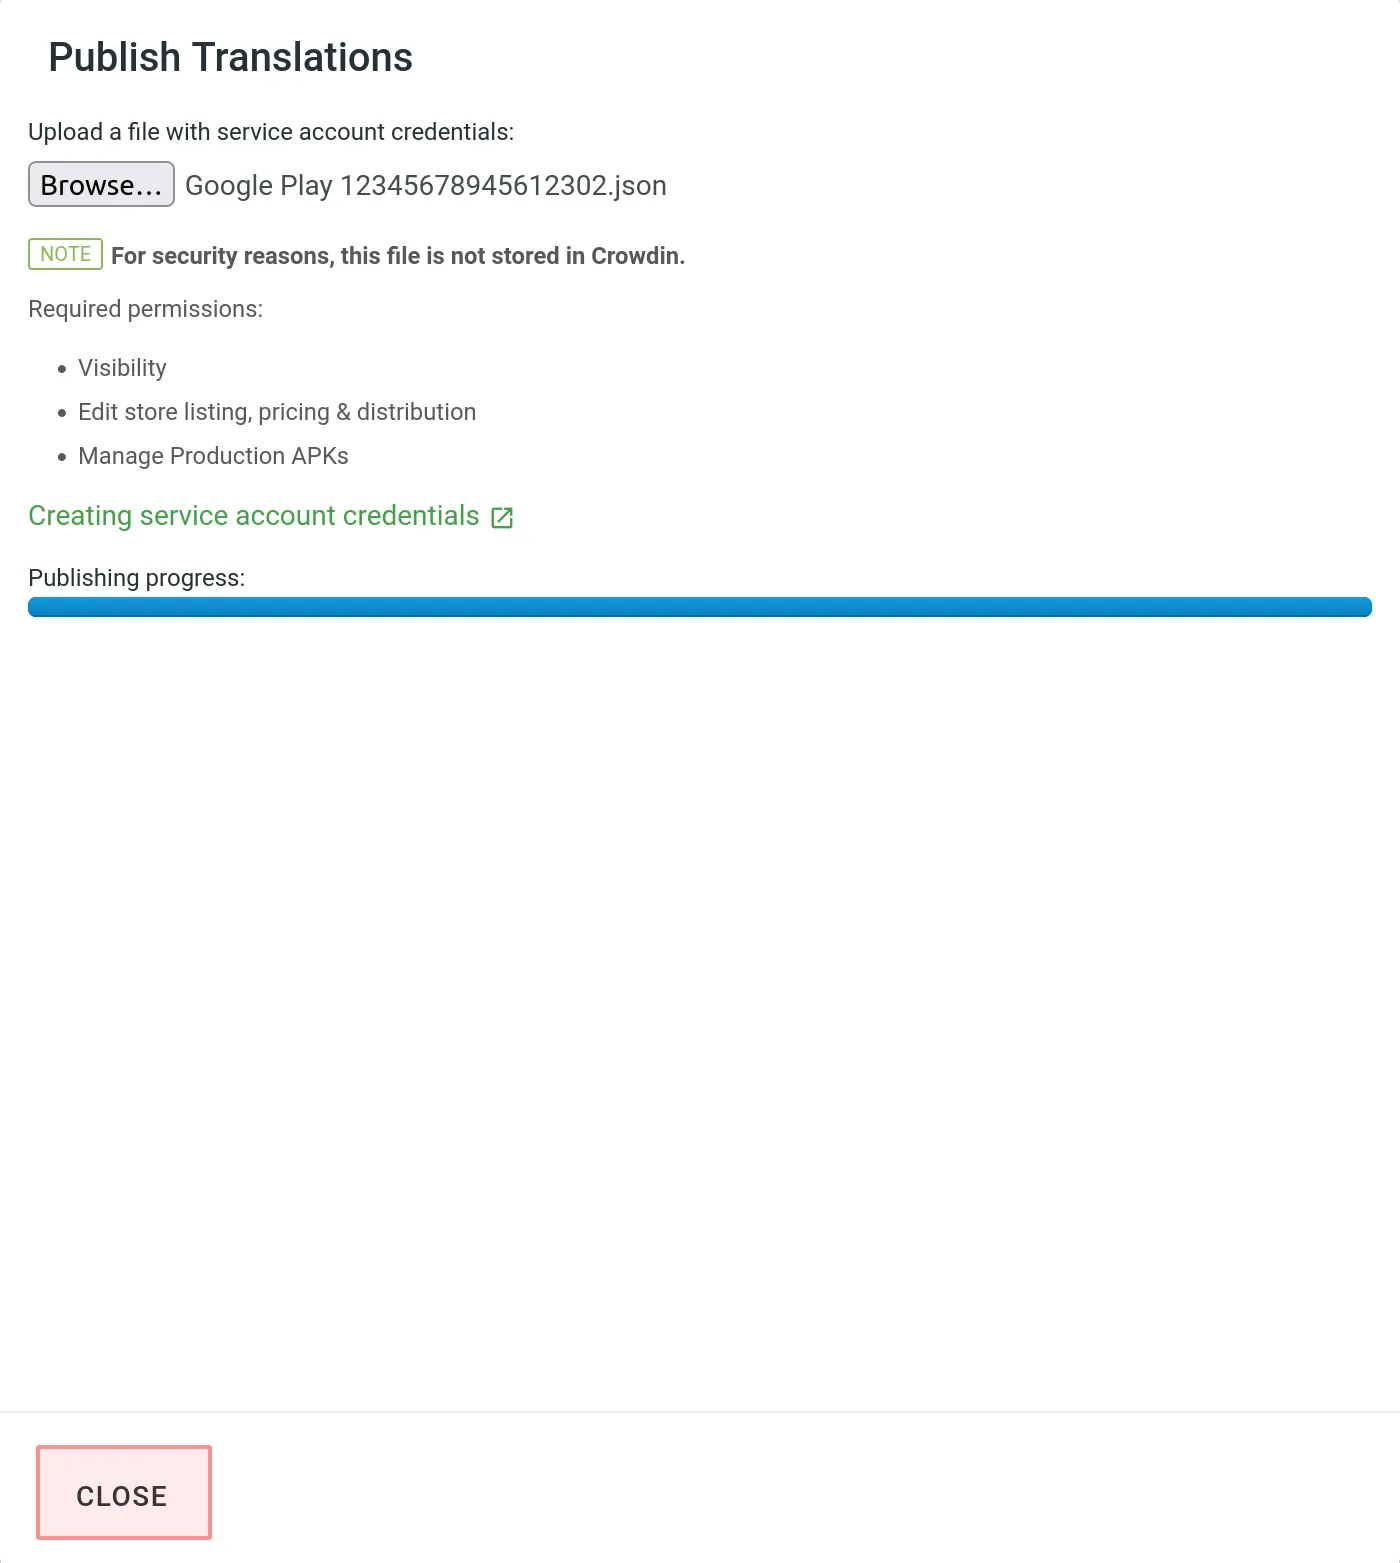 Limitations Google Play limits the number of times you can publish translations for the same language in one day. ## [Creating Service Account Credentials](#creating-service-account-credentials) [Section titled “Creating Service Account Credentials”](#creating-service-account-credentials) To publish translations from Crowdin Enterprise directly to your Google Play project, you need to configure access to your Google Play Console beforehand. To create and add your service account credentials, follow these steps: 1. Link Google Play Console with Google Cloud project: * Open the Google Play Console and go to **Setup >** [**API access**](https://play.google.com/console/u/0/developers/api-access). * Link an existing project or create a new one. 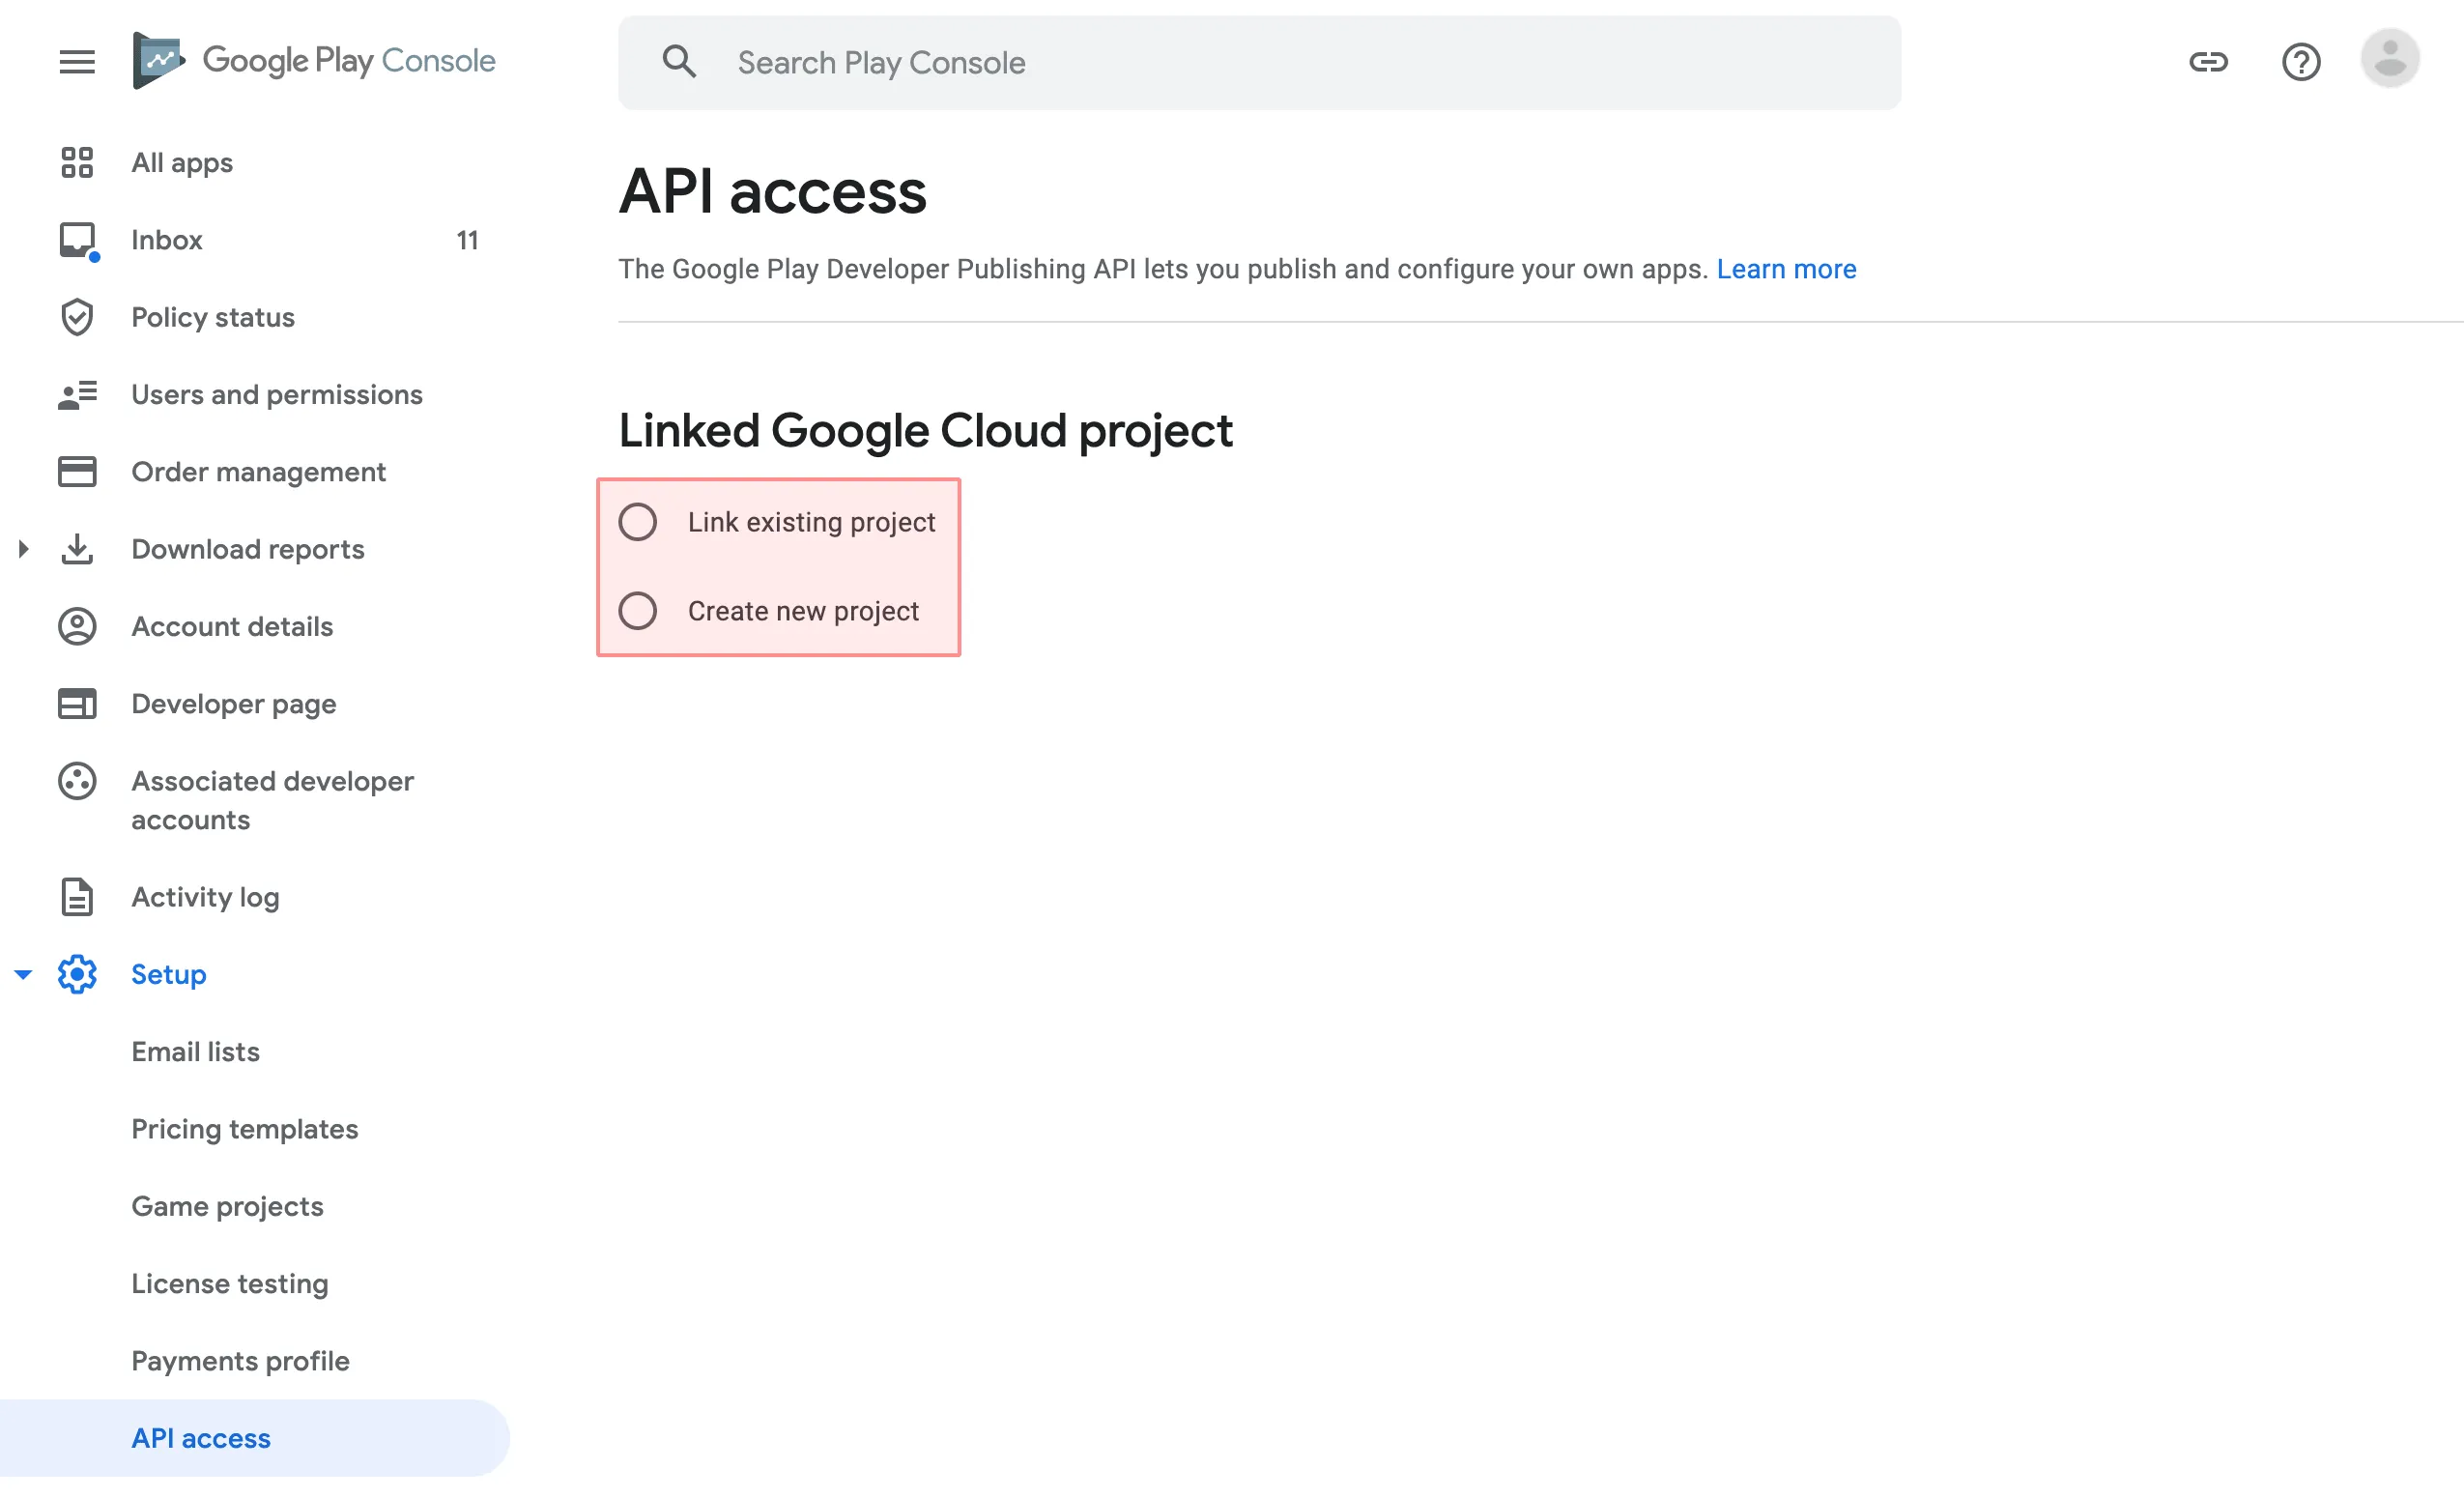 2. Generate service account credentials: * Go to [**Service accounts**](https://console.developers.google.com/iam-admin/serviceaccounts). If prompted, select one of the existing projects. 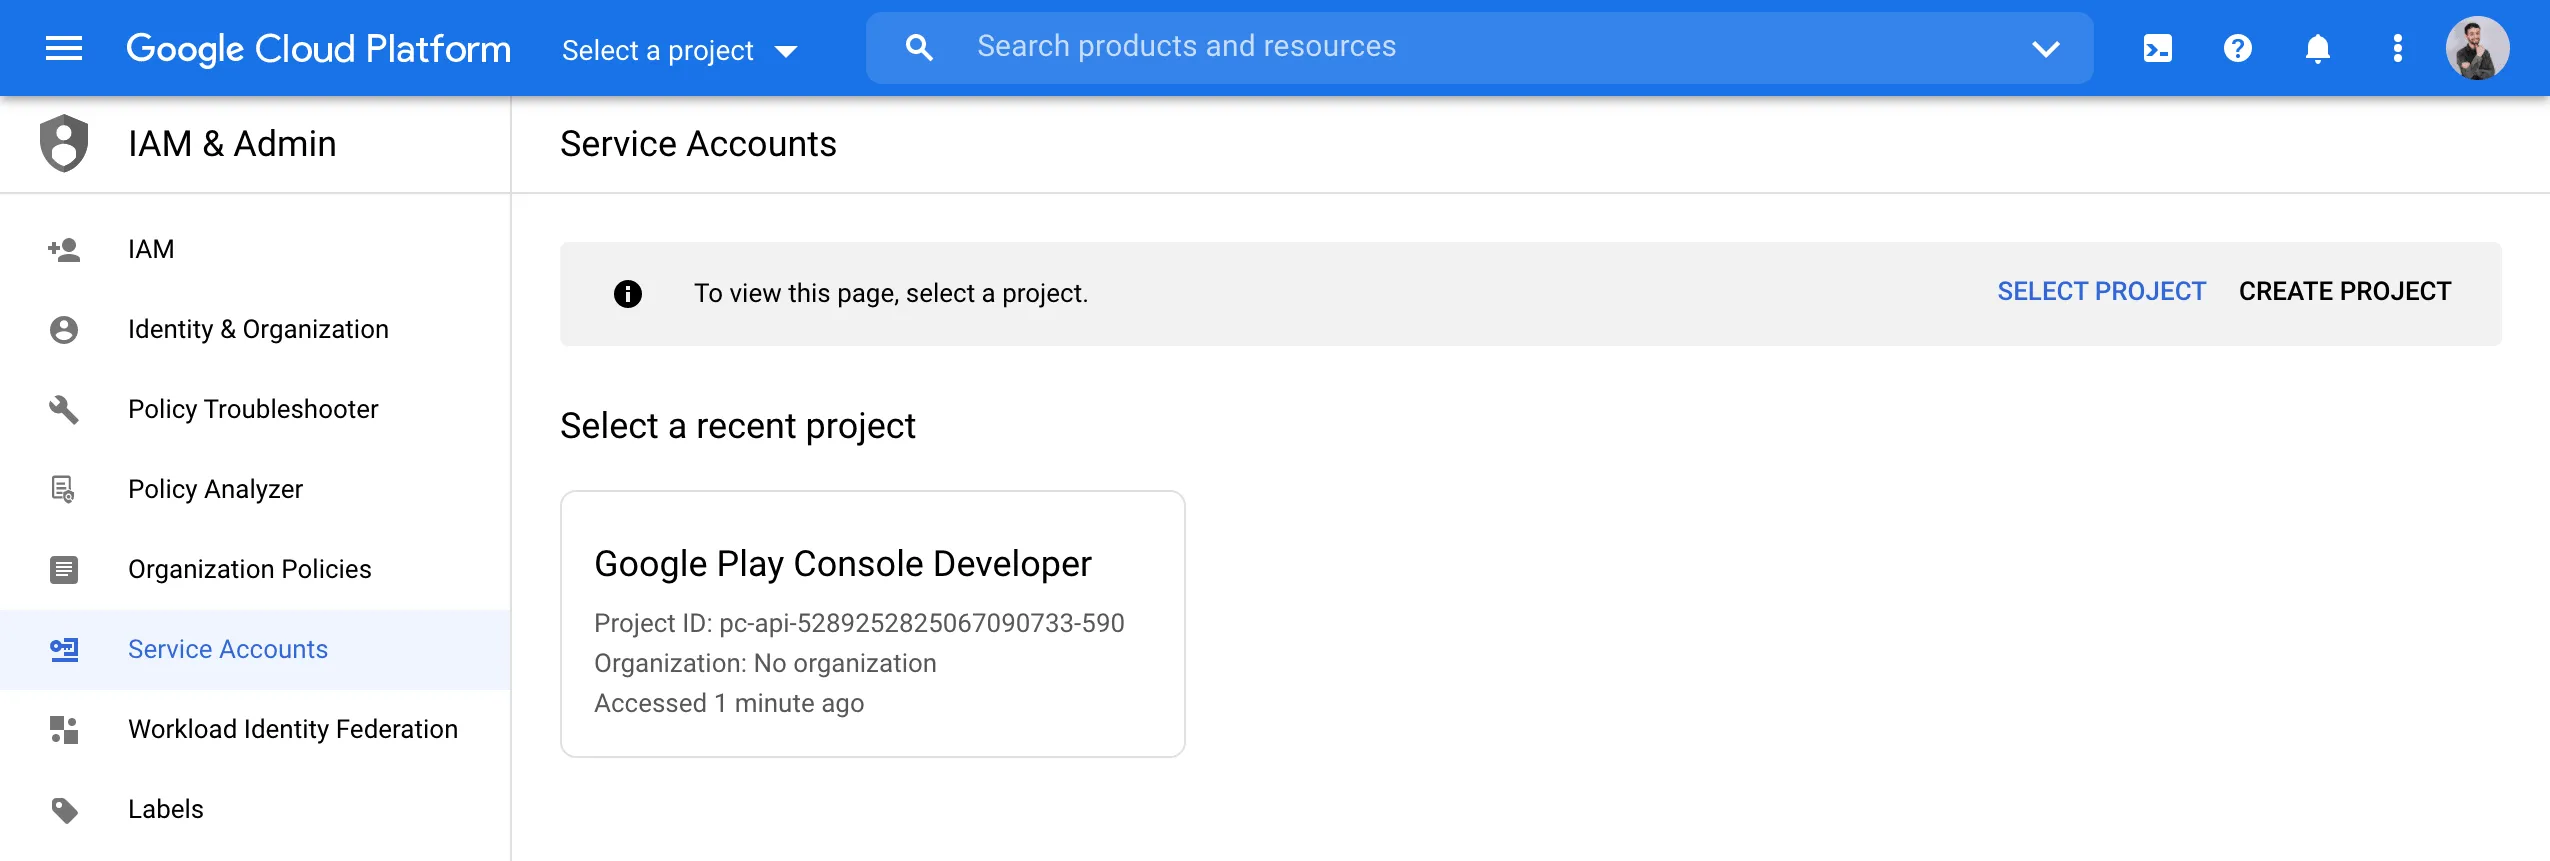 * Click **Create Service Account**. 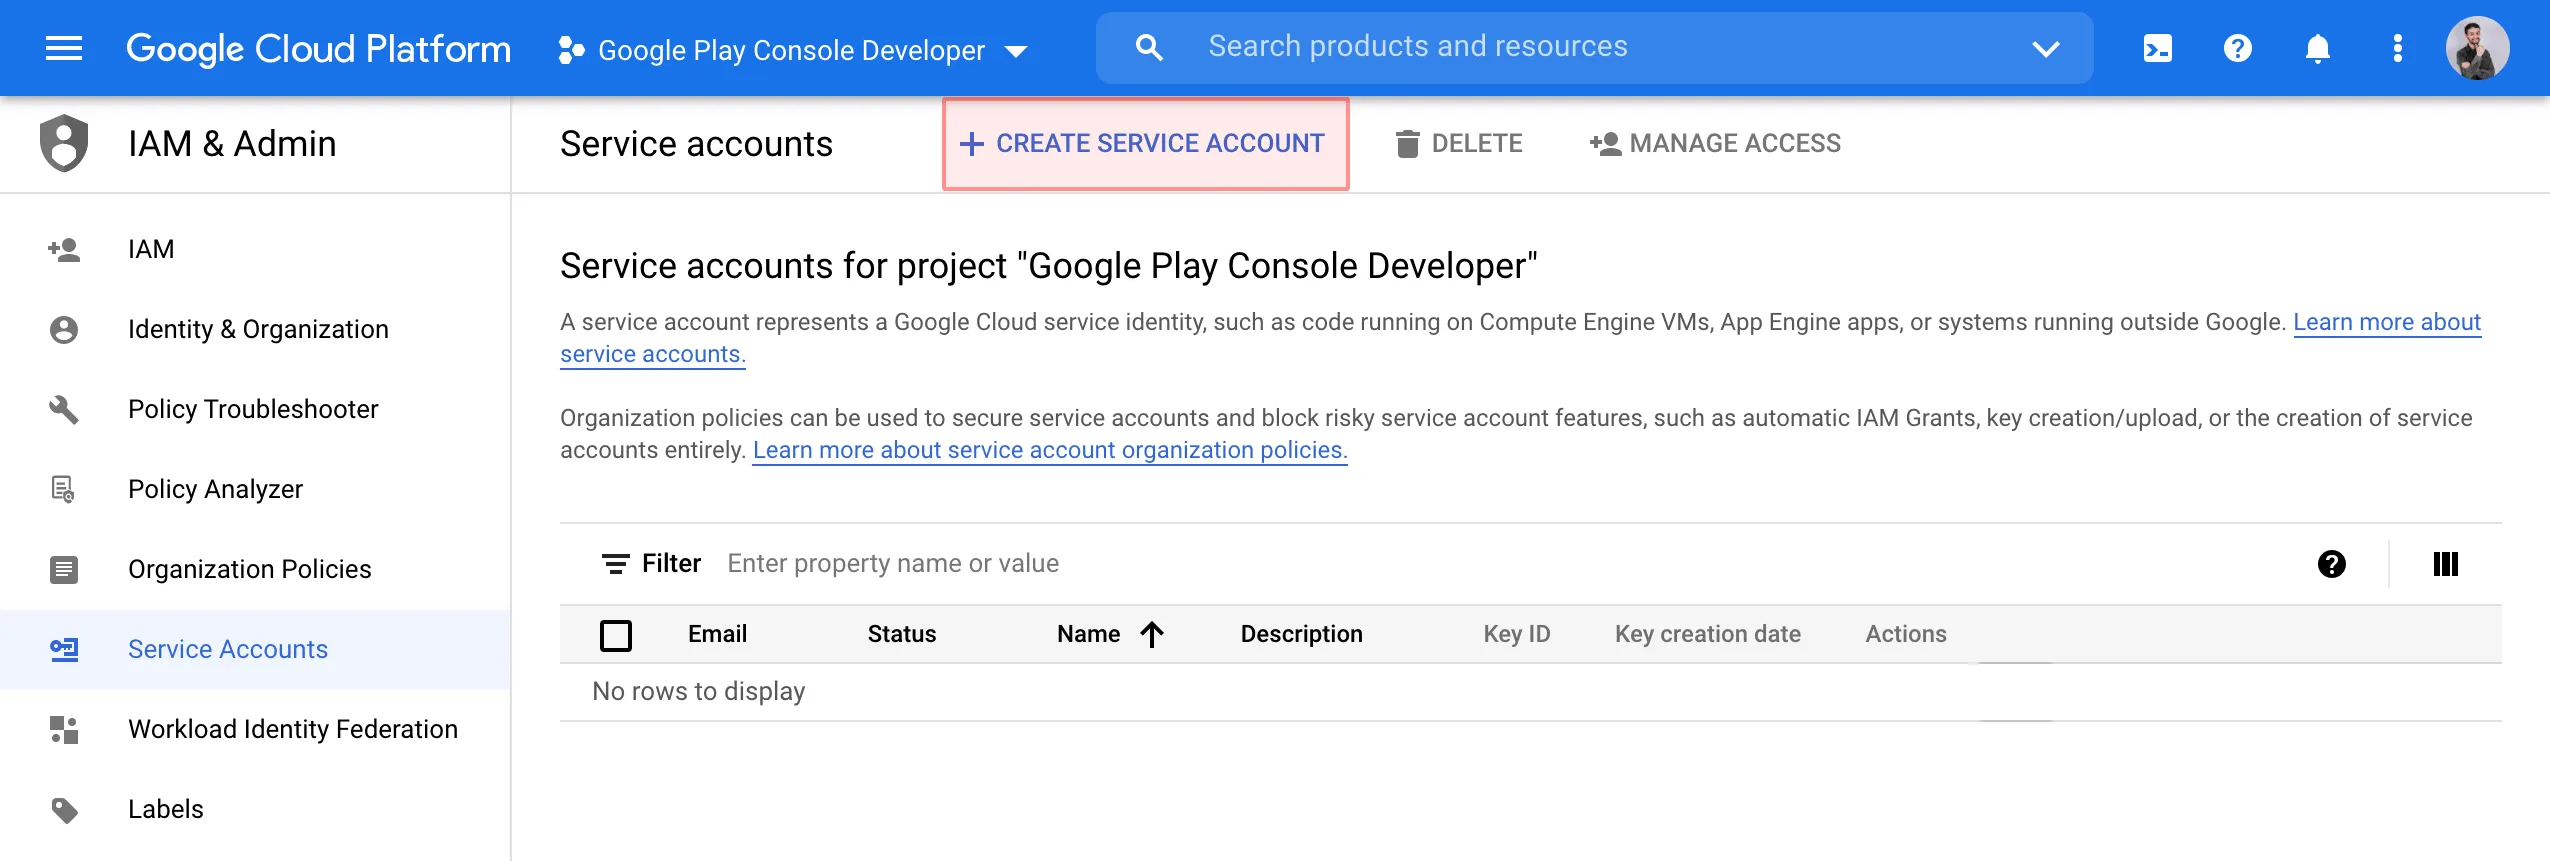 * Specify the service account name and click **Create and Continue**. 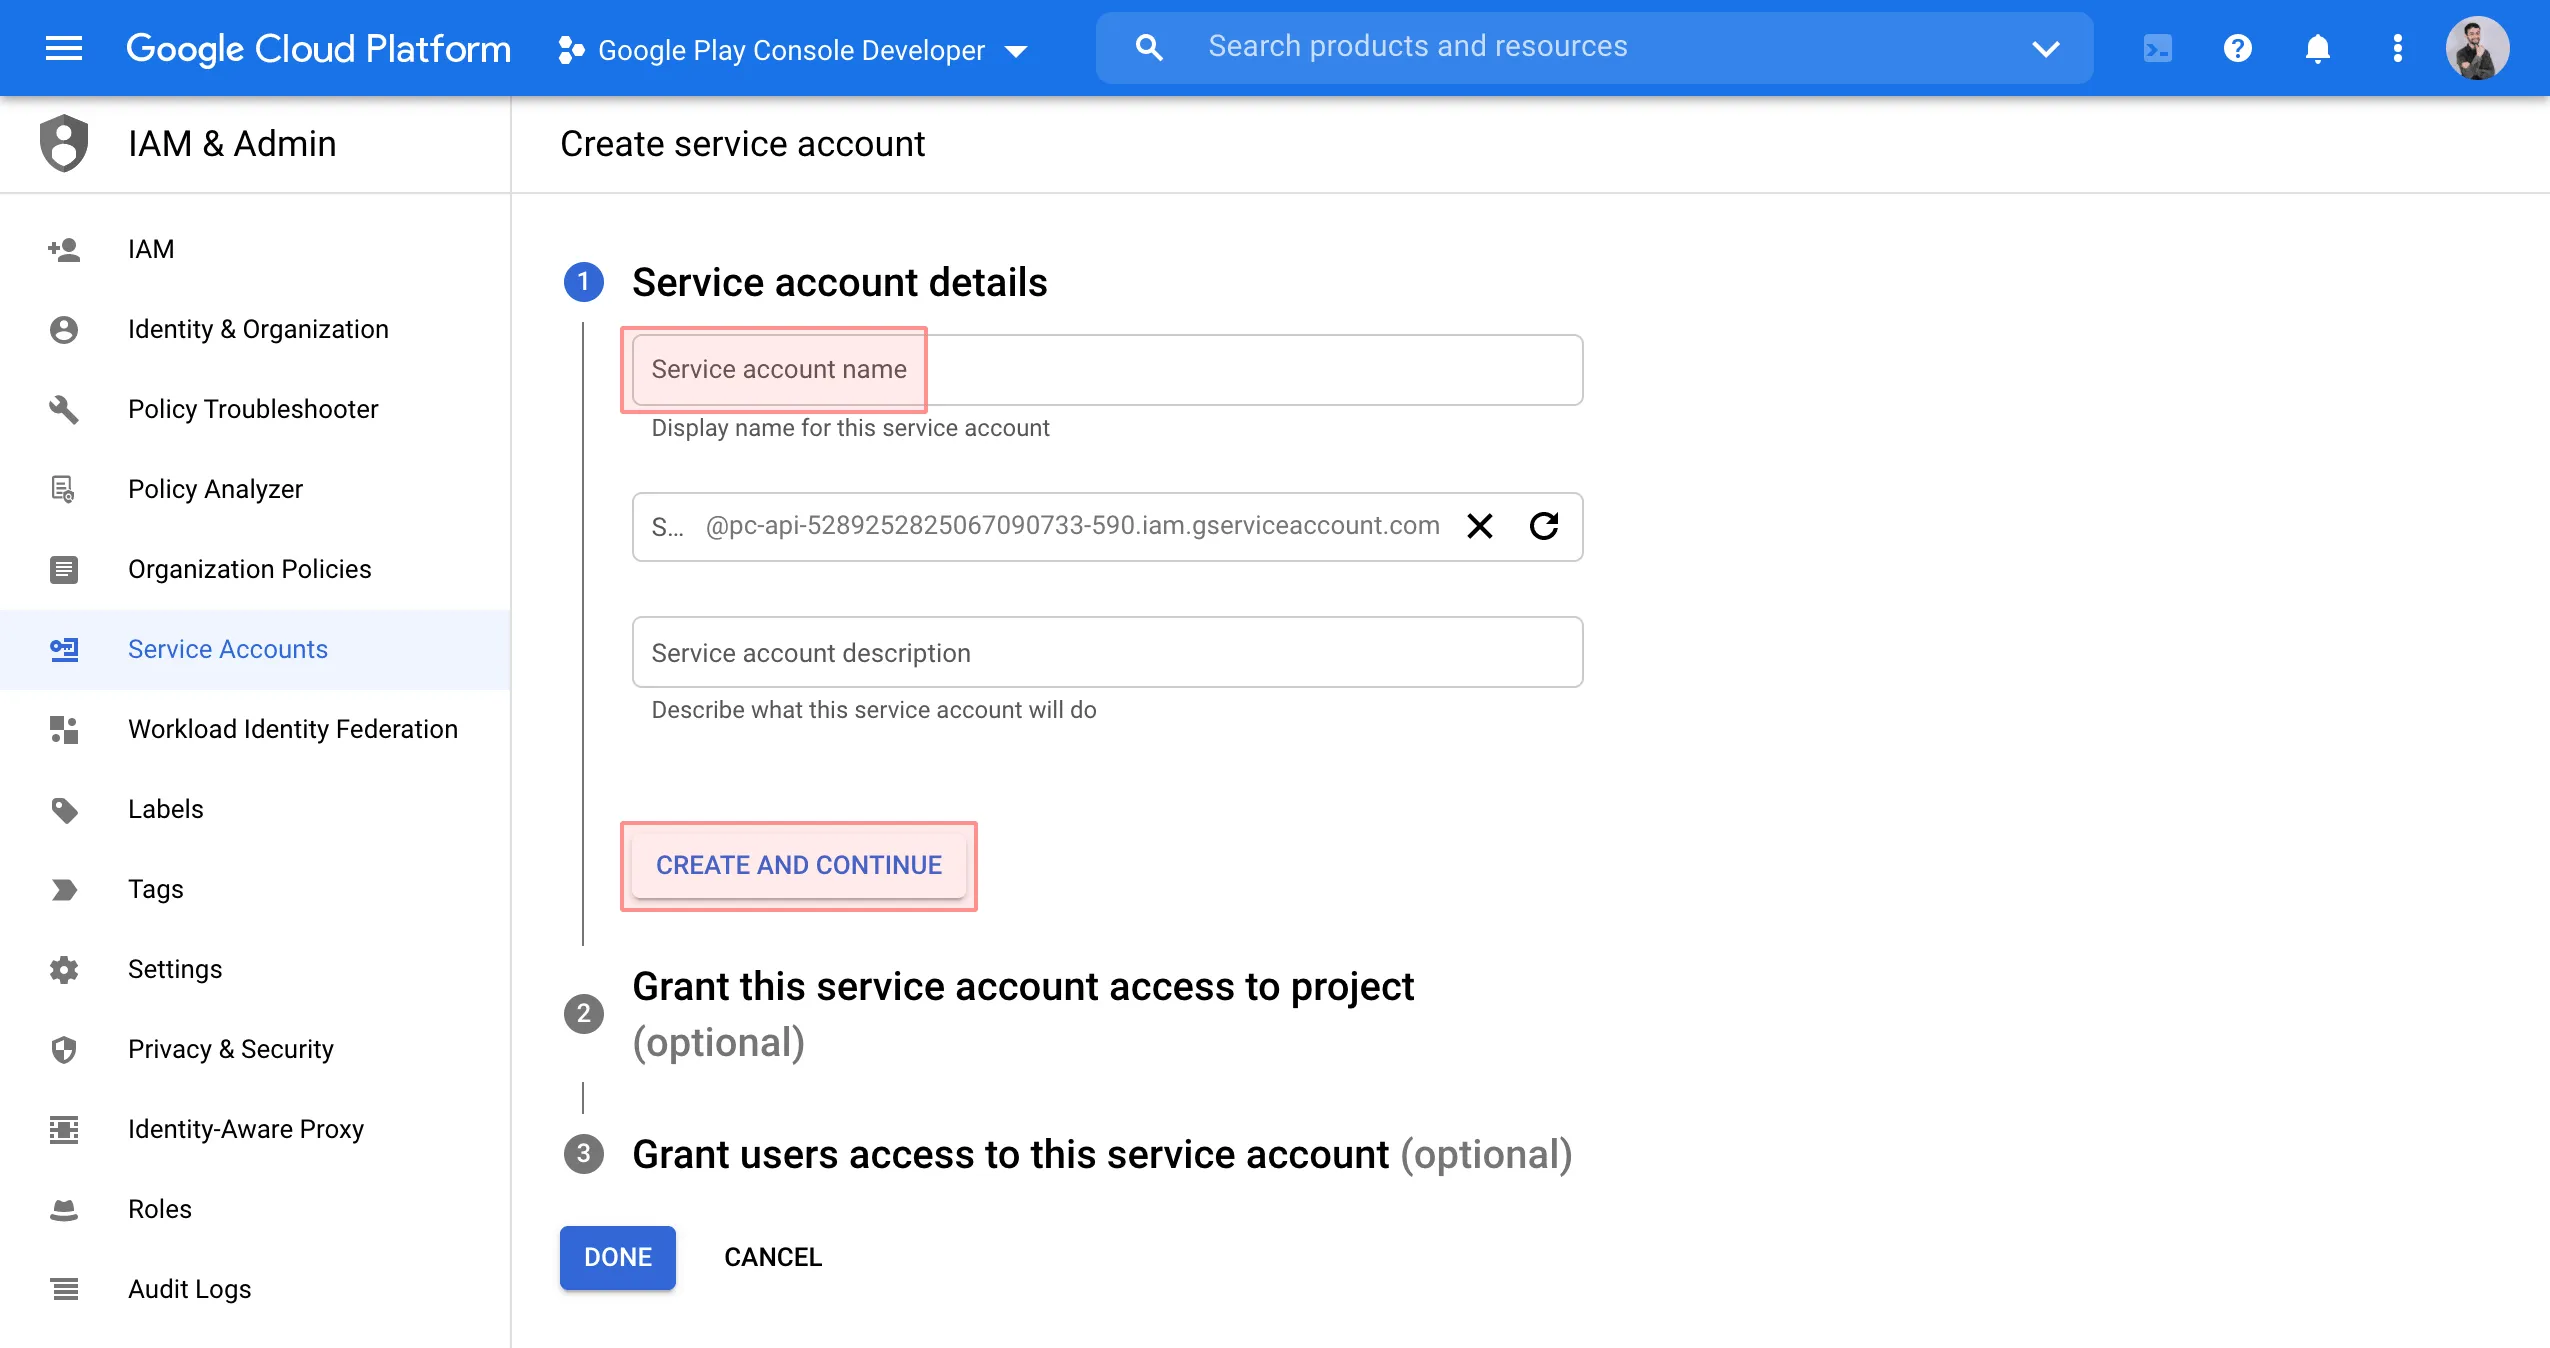 * From the **Role** list, select **Service Accounts > Service Account User** and click **Done**. 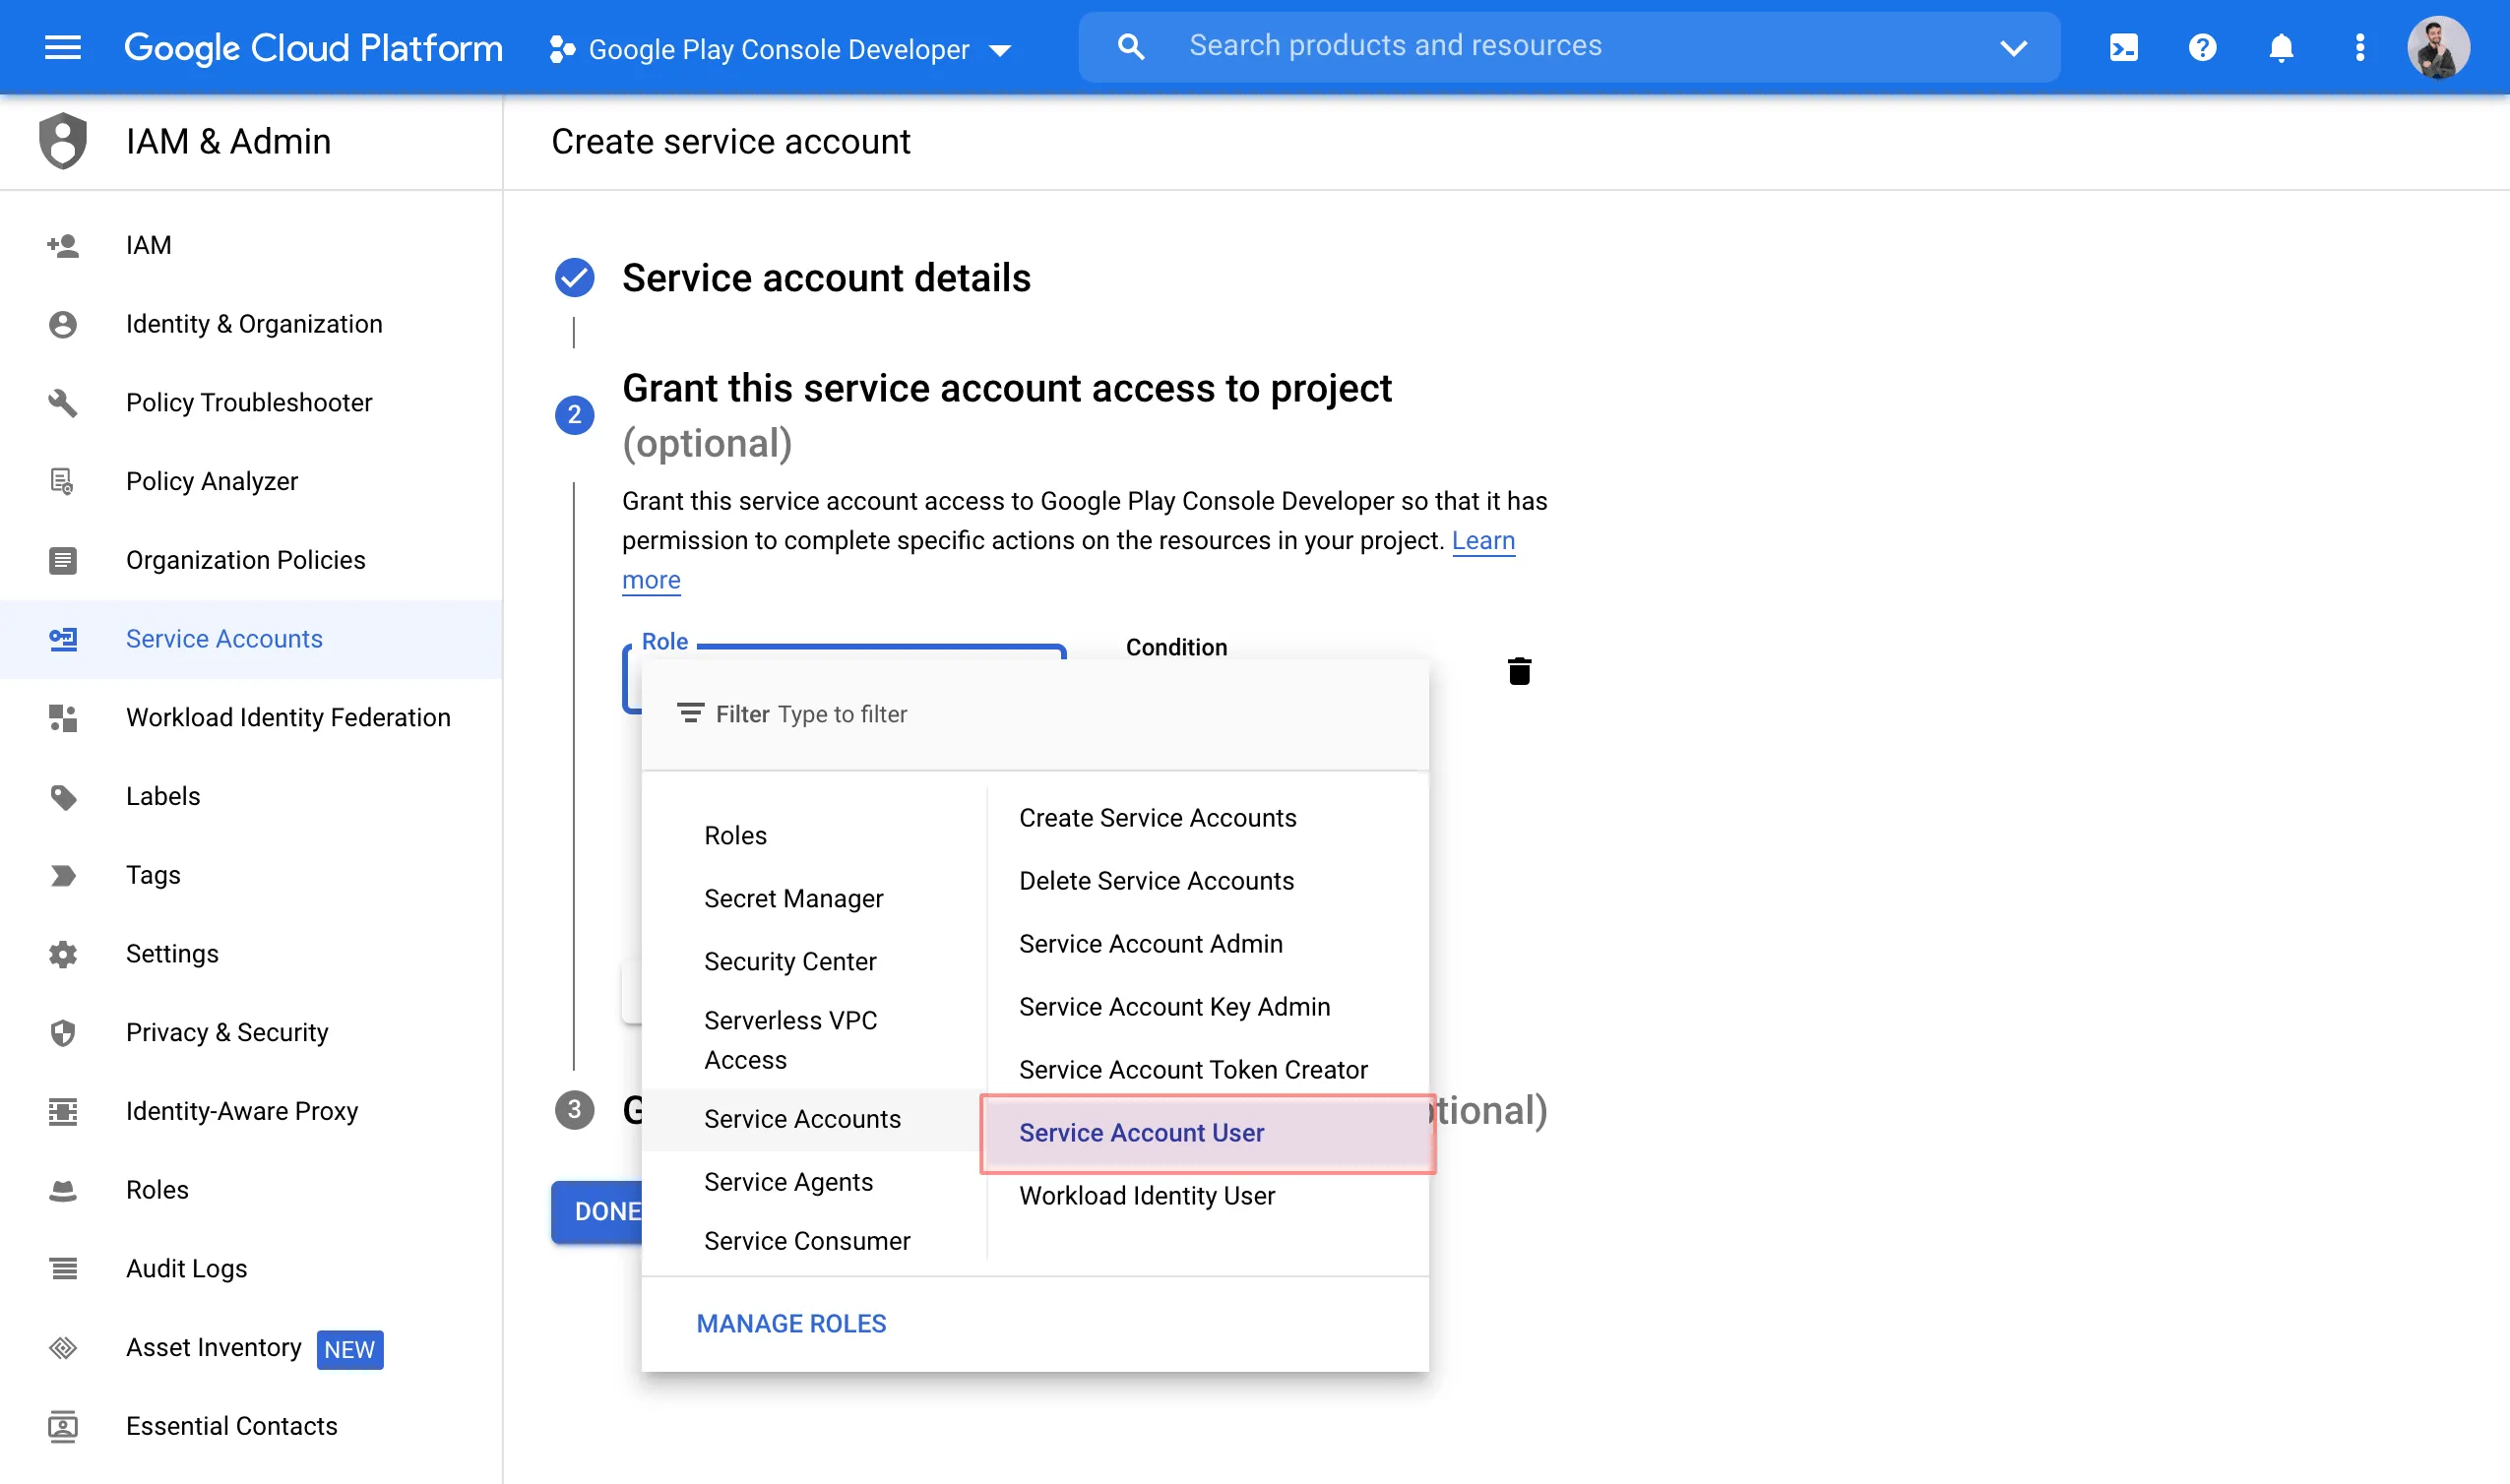 * Open the Actions menu on the created service account and select **Manage keys**. 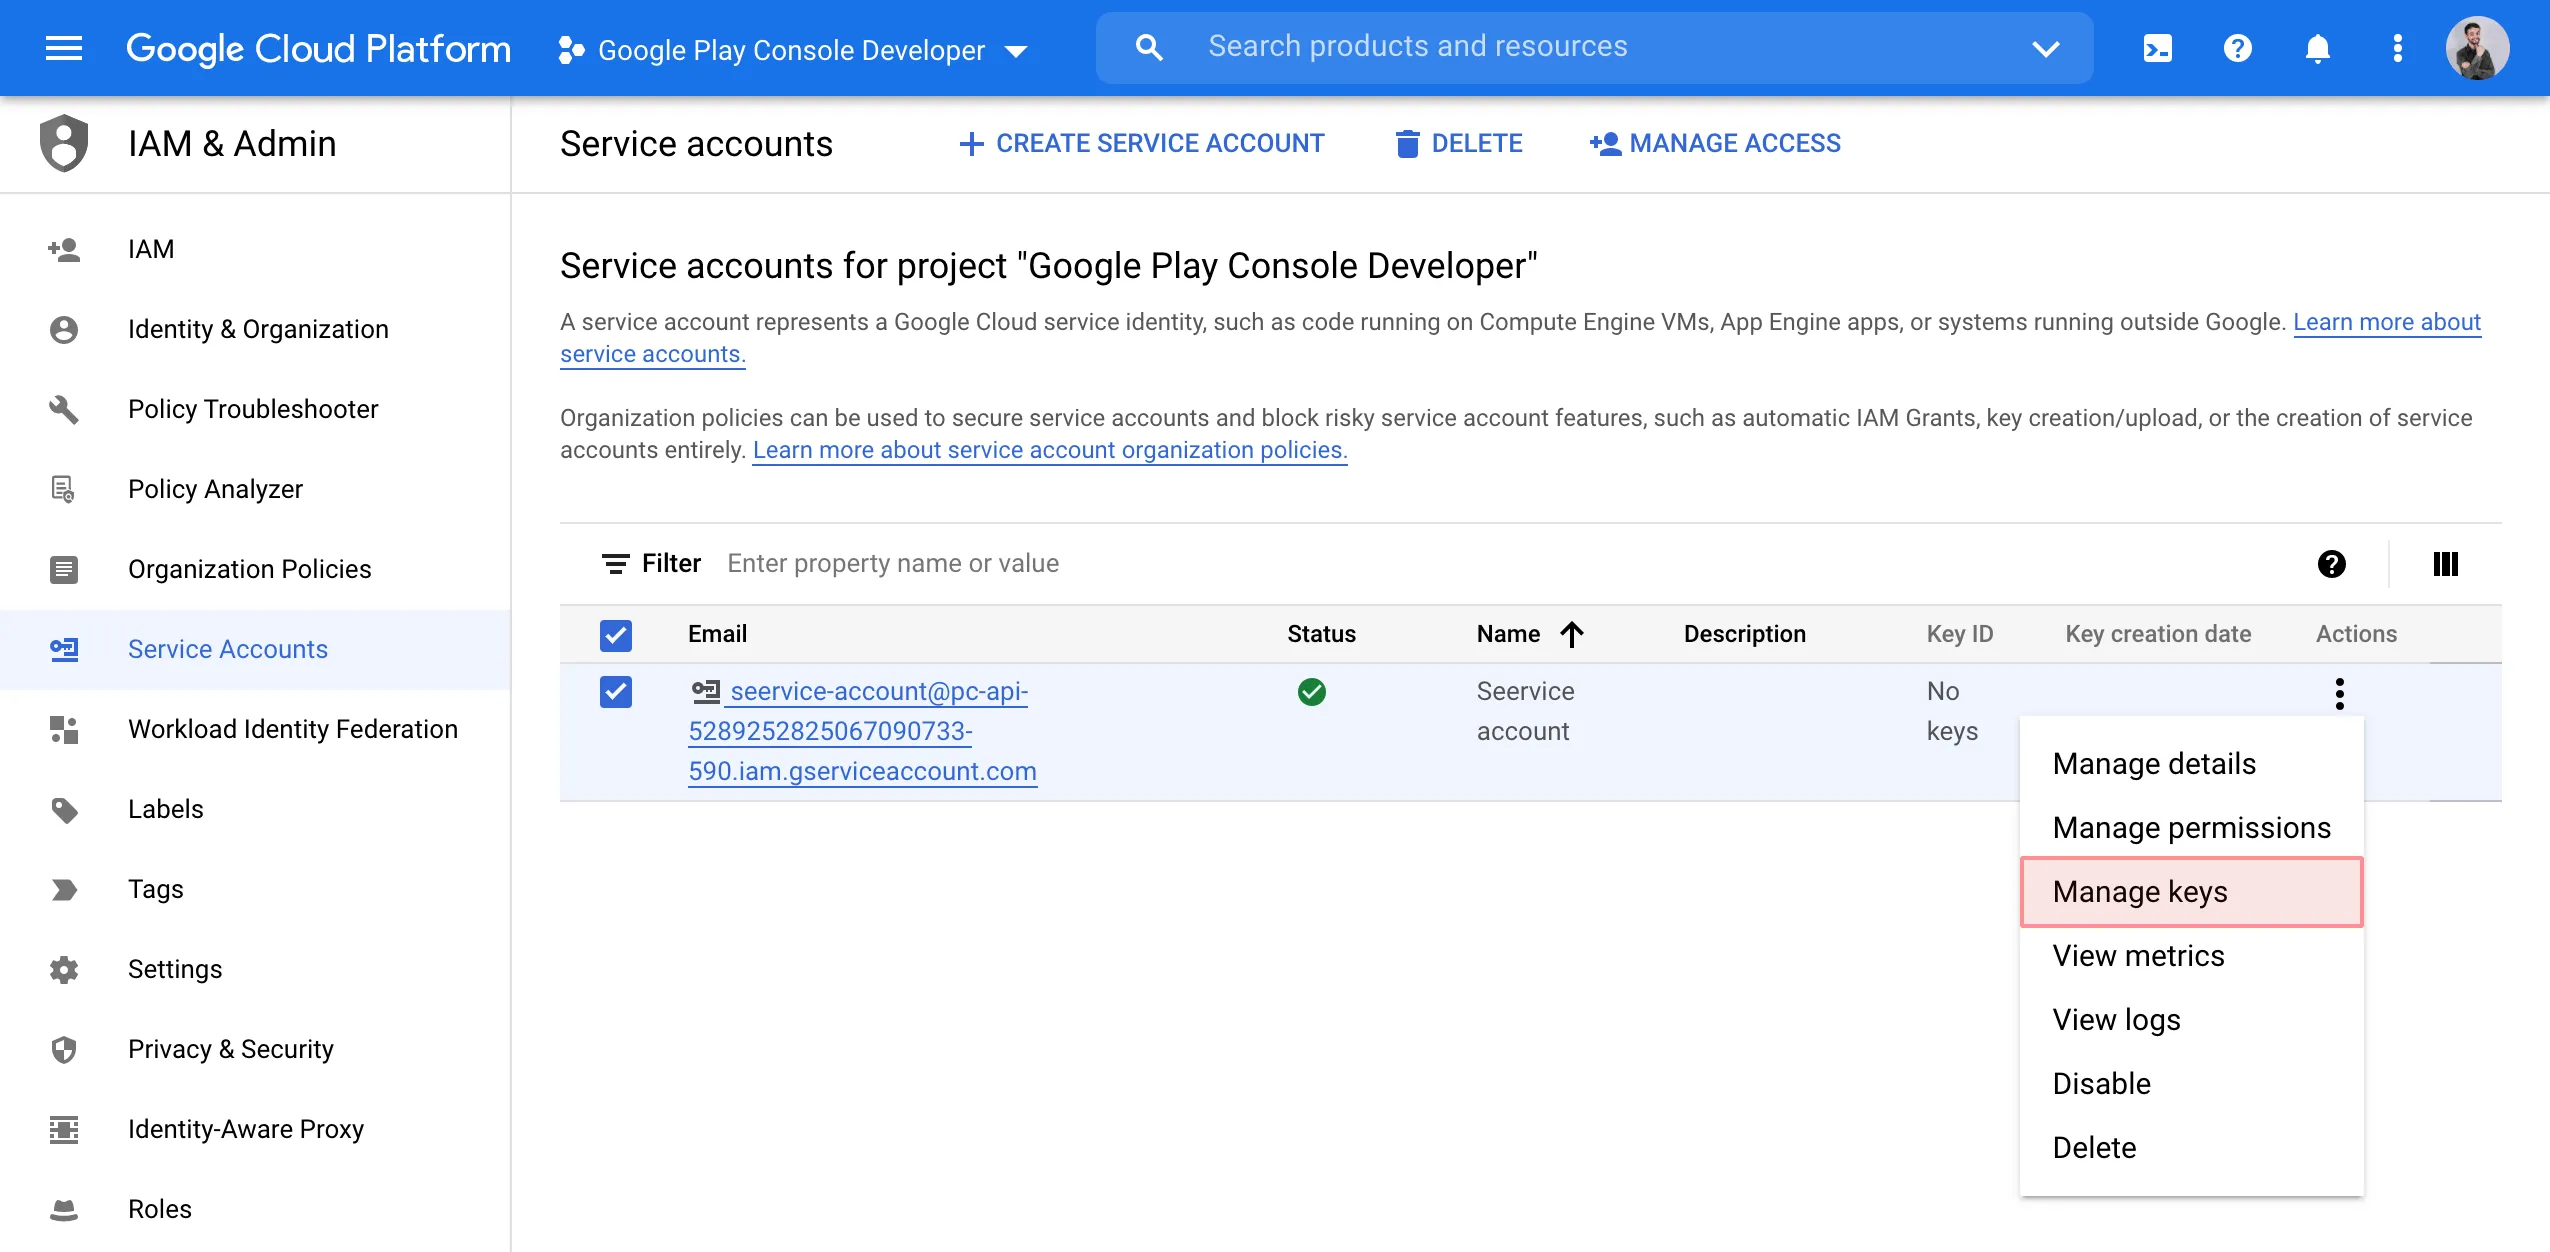 * In the **Keys** tab, click **Add key > Create new key**. 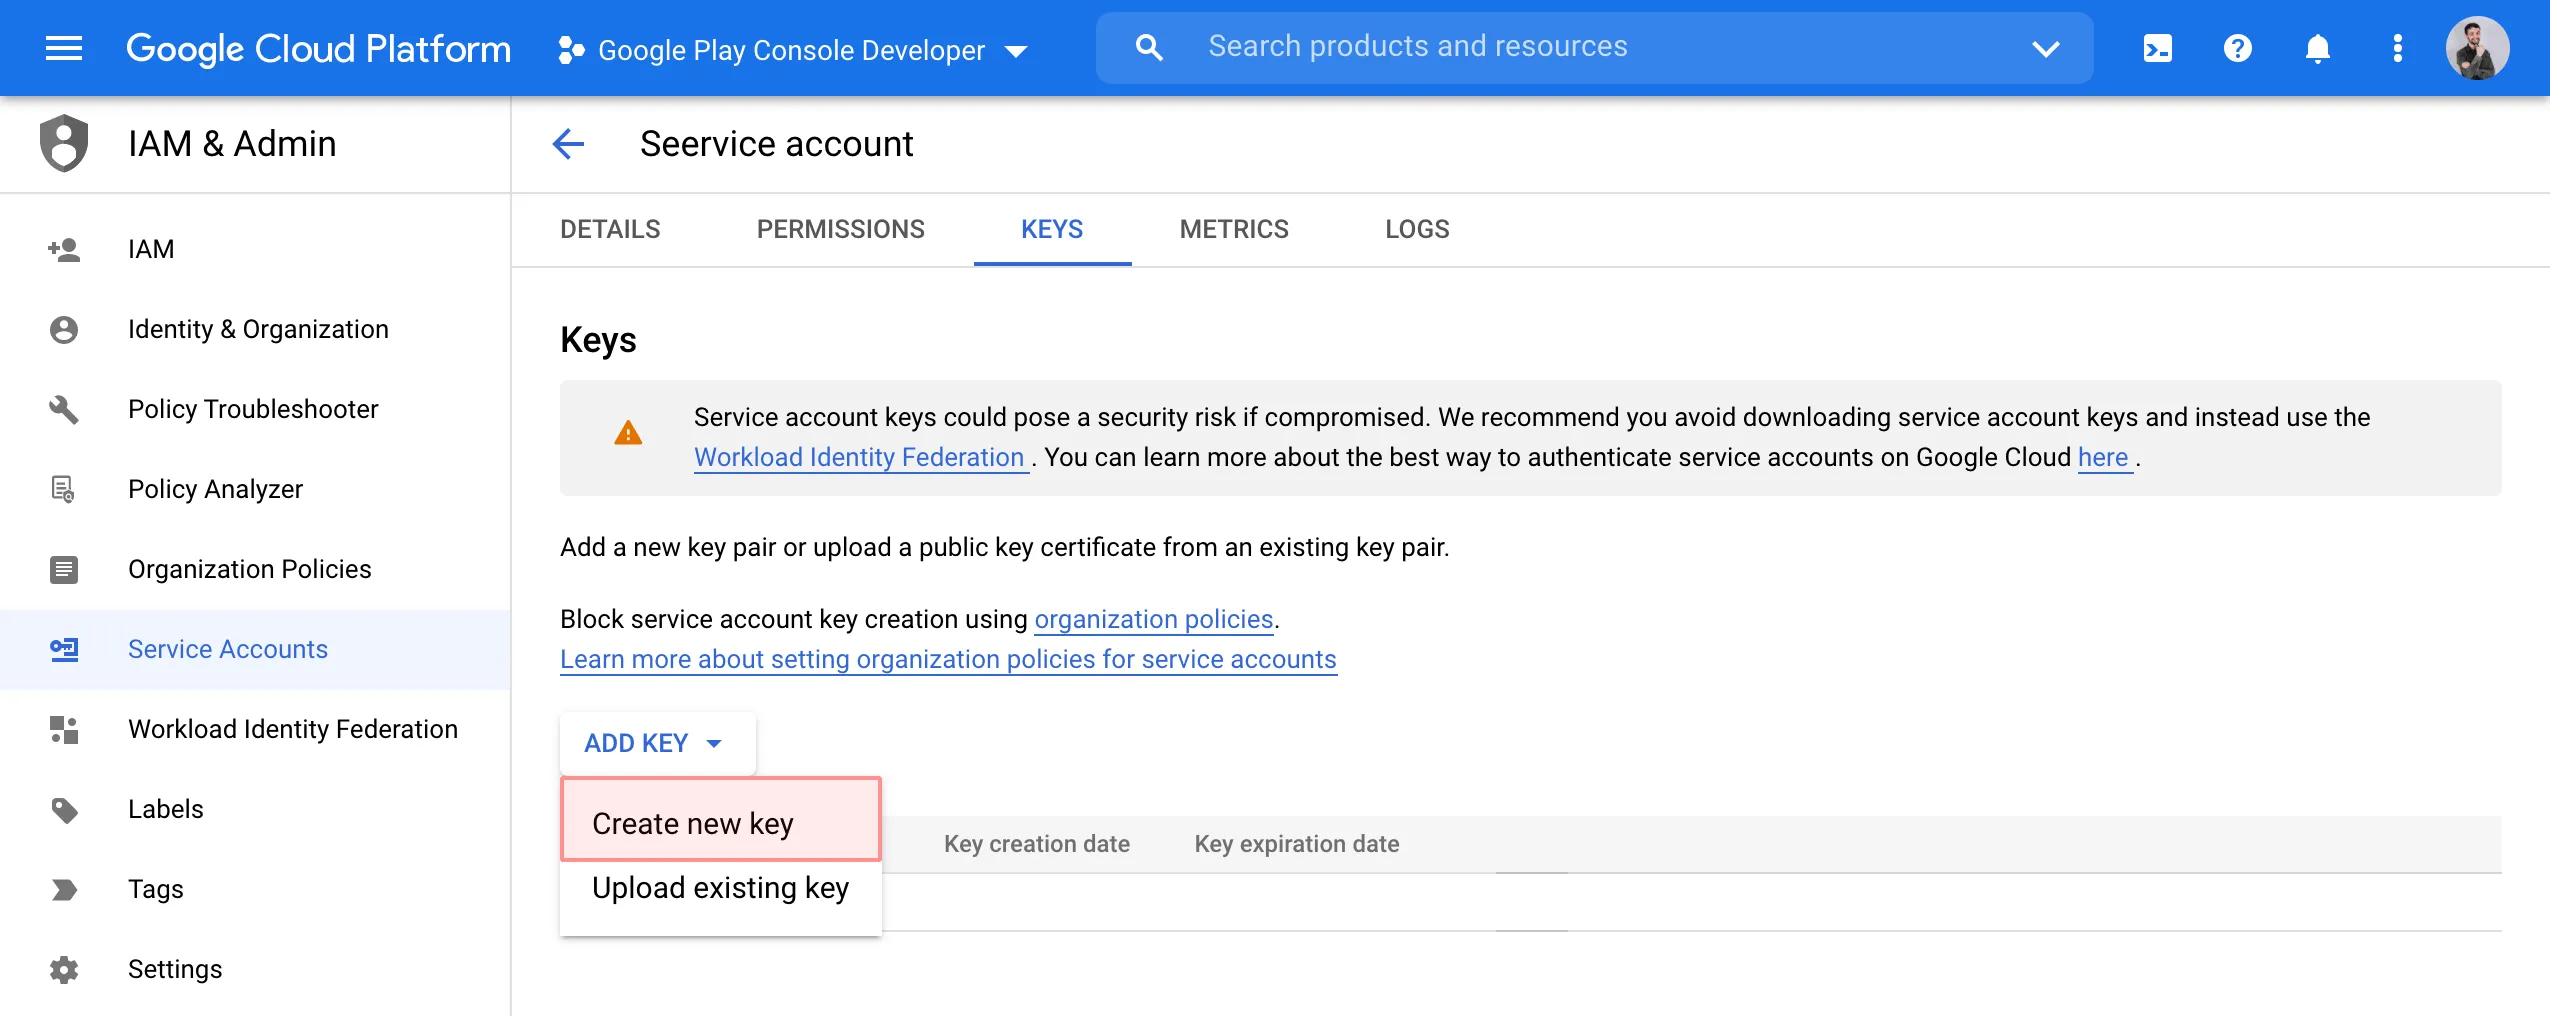 * Select **JSON** and click **Create**.  * A JSON file that contains your service account credentials will be downloaded to your machine. 3. Grant access to your service account: * In the Google Play Console, go to **Setup >** [**API access**](https://play.google.com/console/u/0/developers/api-access) and click **Grant access** on your service account. 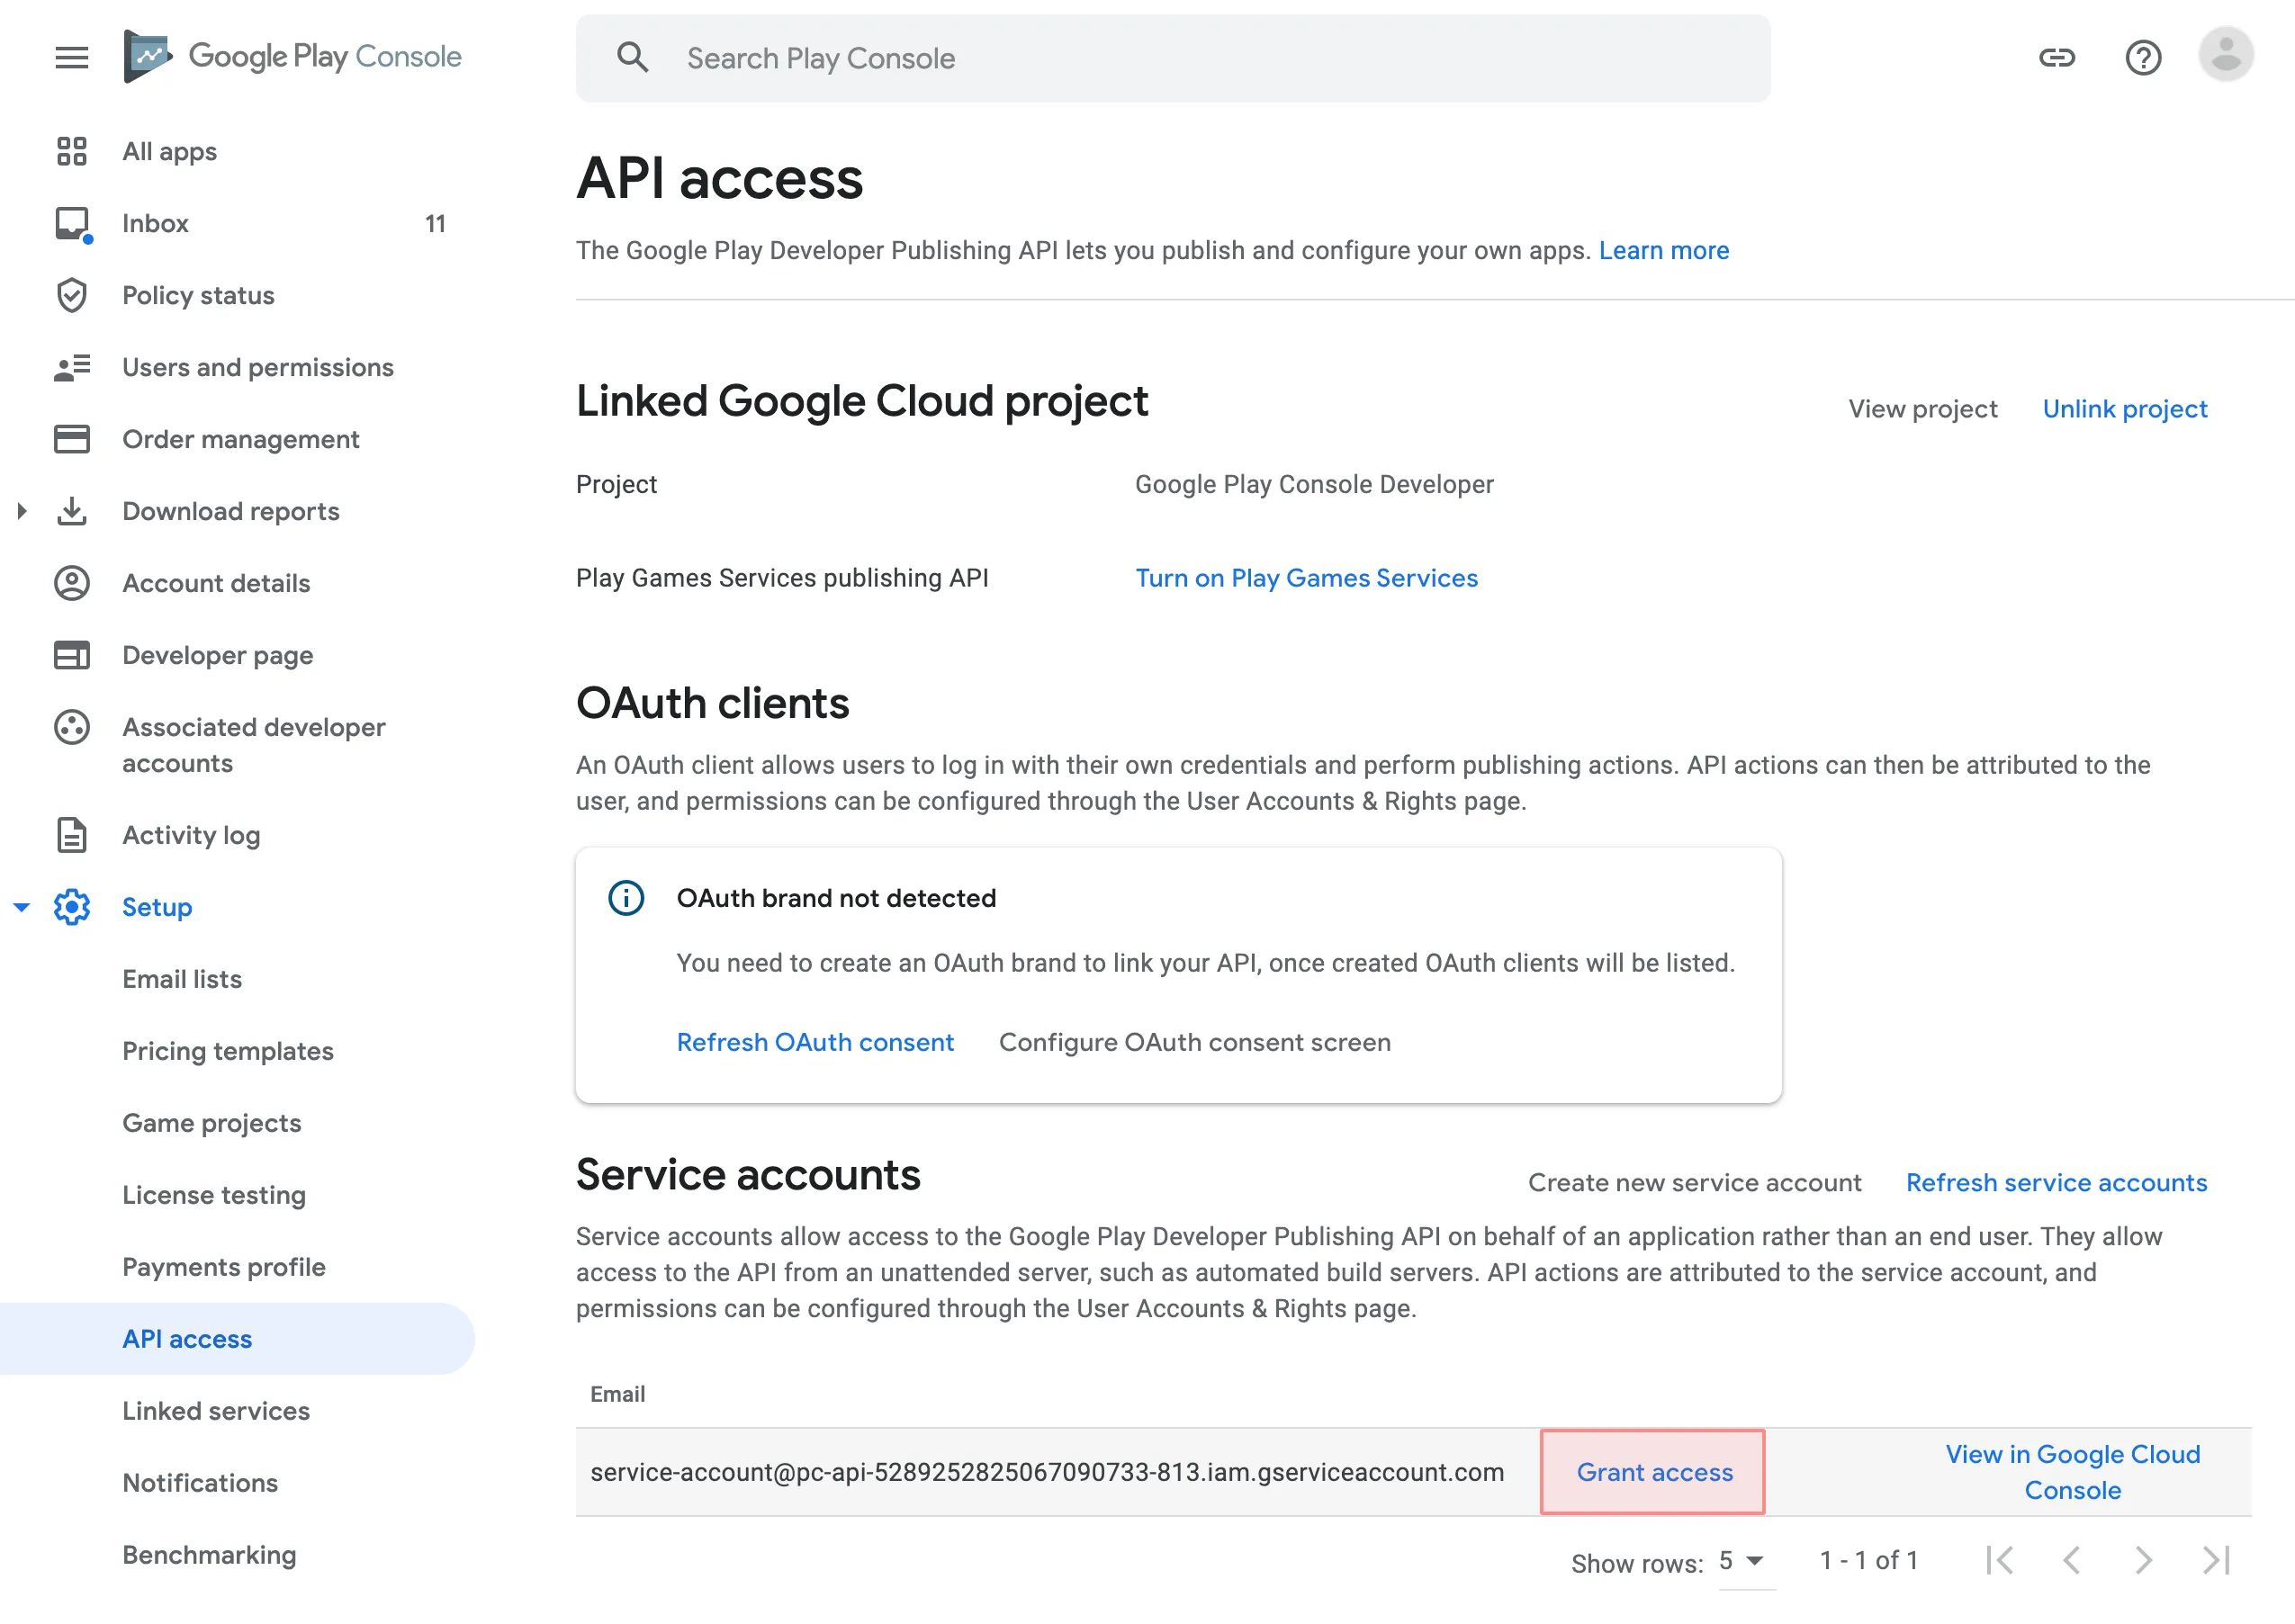 * In the **Account permissions** tab, select the following permissions: * View app information and download bulk reports (read-only) * Publish Play Games Services projects * Release to production, exclude devices, and use Play App Signing * Manage store presence 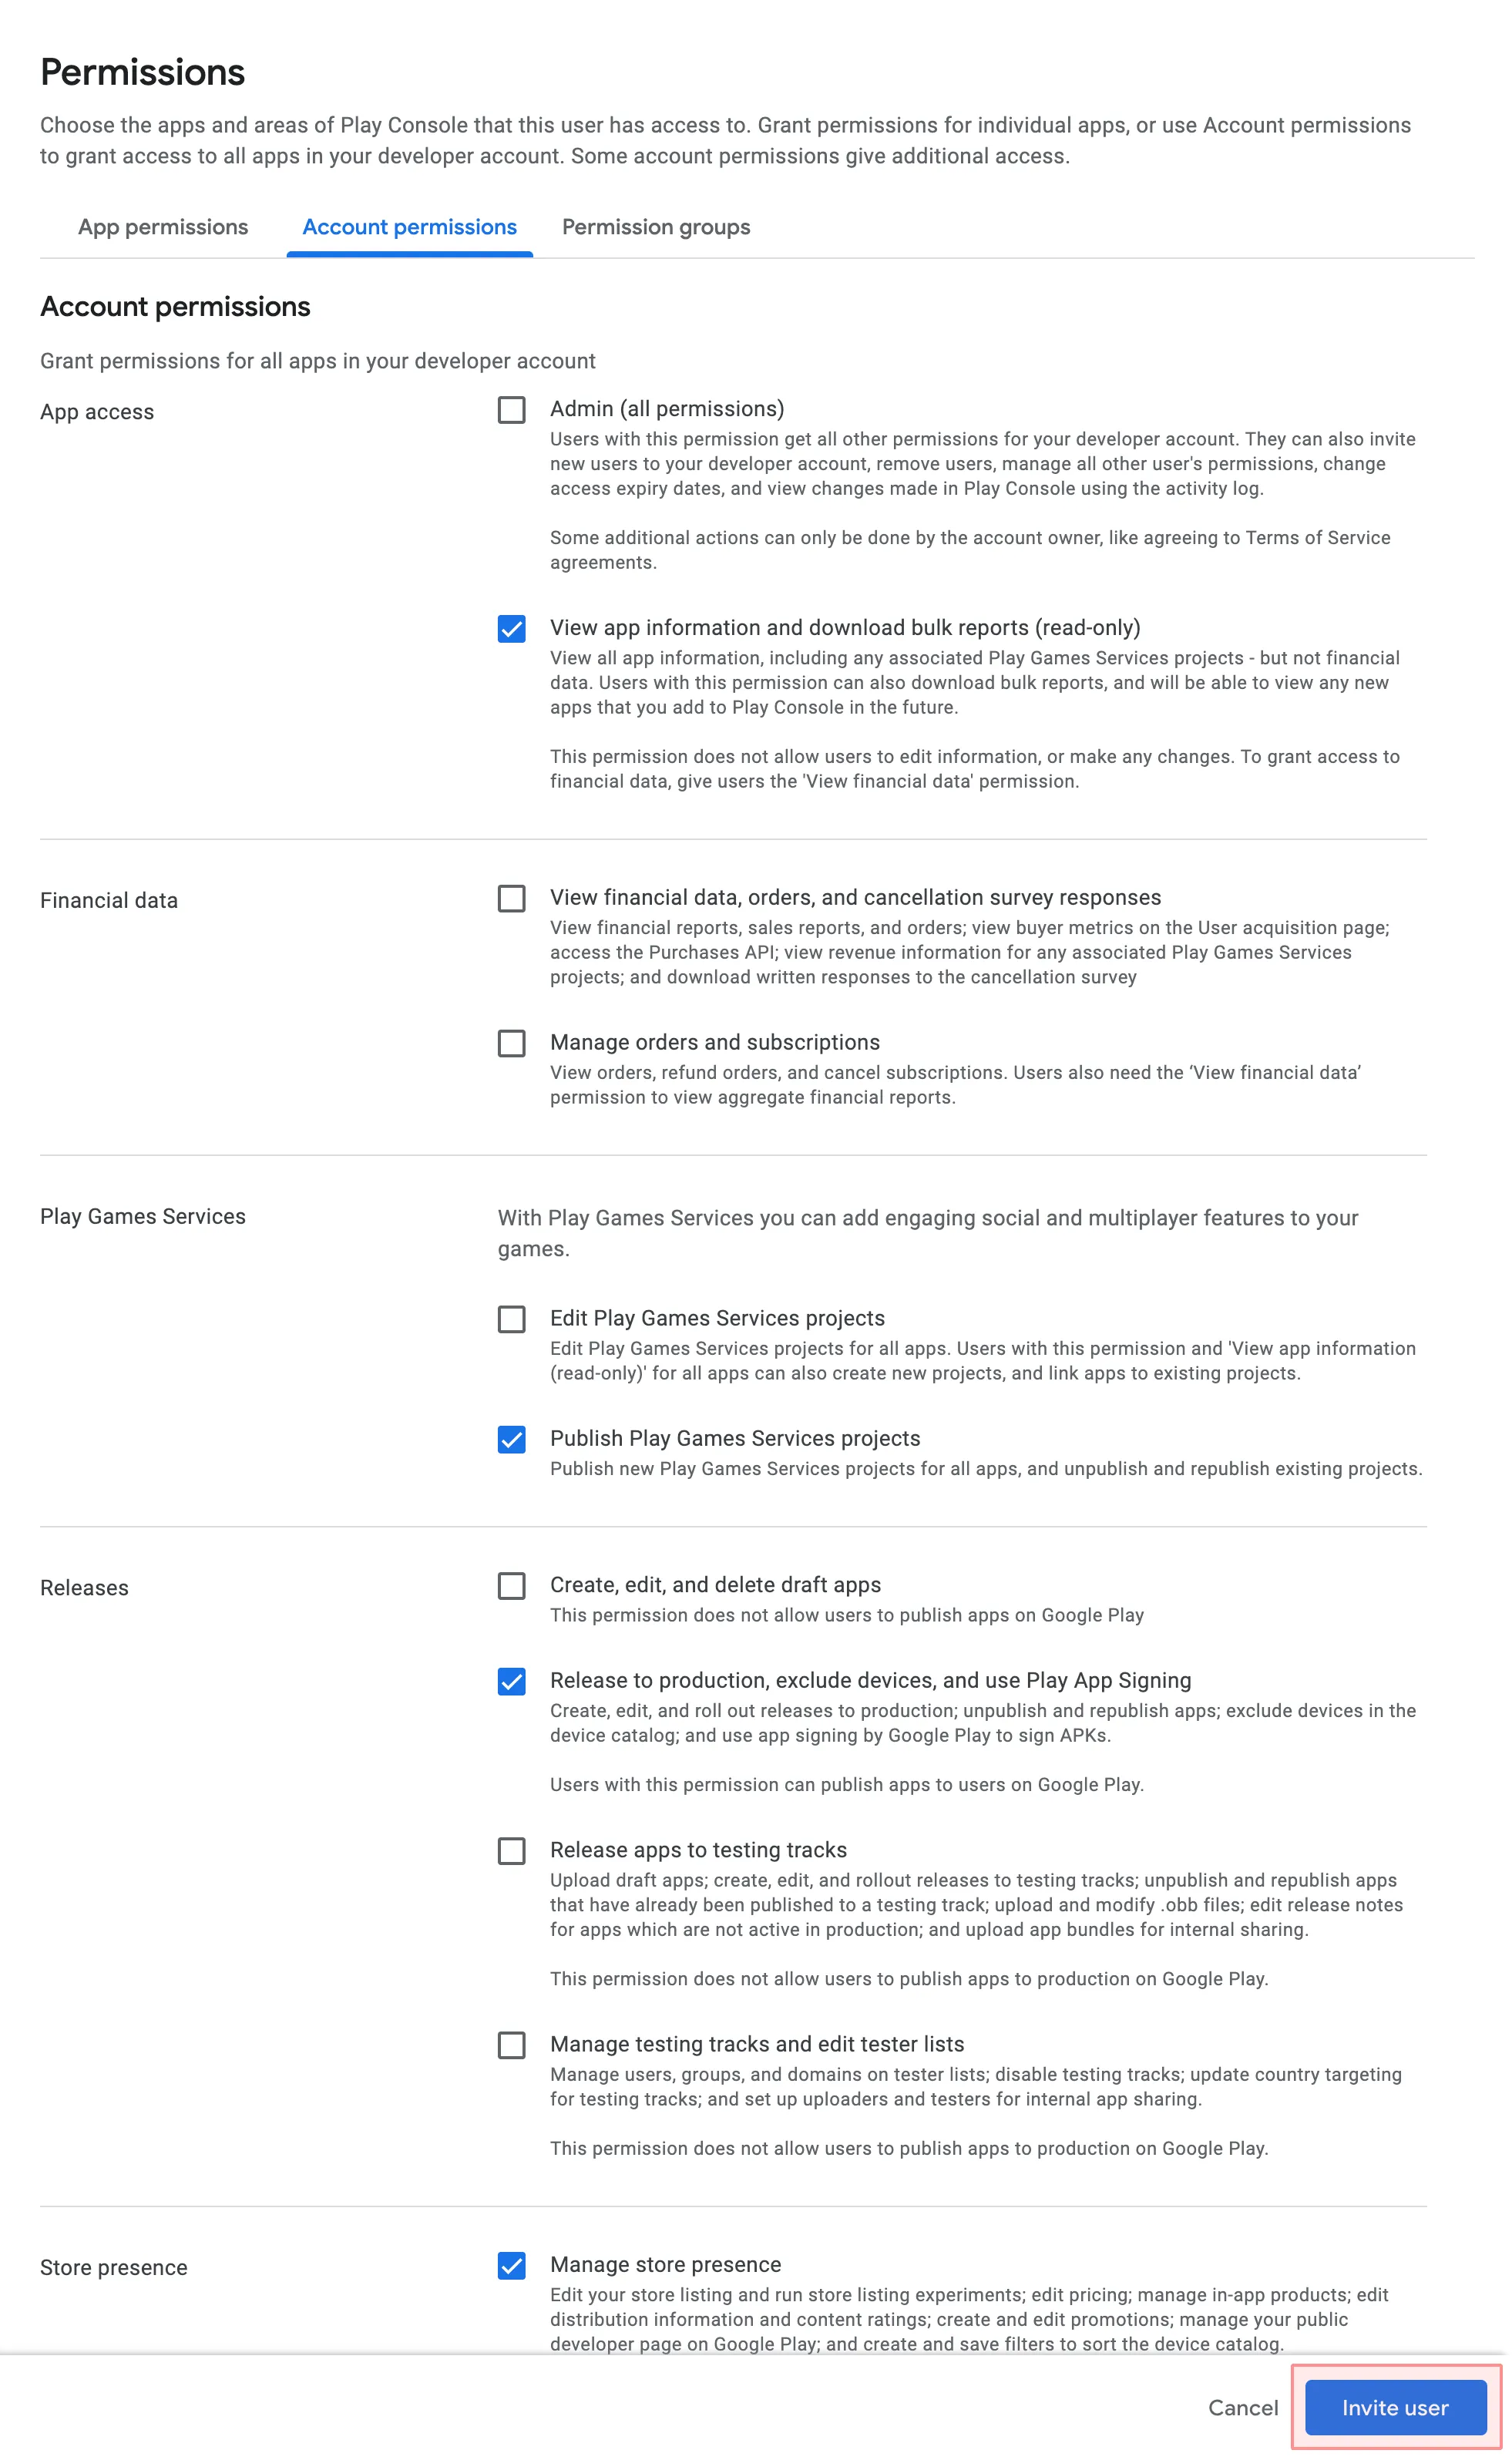 * Click **Invite user**. After it, you can use the file with your service account credentials to publish your translations from Crowdin Enterprise to Google Play.
# Groups
> Organize related projects under a group
Groups help you organize related projects into a clear hierarchy, similar to folders. You can nest groups into subgroups to structure your workspace and manage access more efficiently. ## [Use Cases](#use-cases) [Section titled “Use Cases”](#use-cases) Groups are useful for organizing and managing projects based on their type, purpose, or ownership. You can: * Organize projects by content type (e.g., documentation, marketing materials), product line (e.g., mobile apps, games), or department (e.g., development, support). * Assign managers to a group to give them access to all its projects at once. * Create and manage workflow templates specific to the group. * Share localization resources, such as translation memories, glossaries, or MT engines, within the group or subgroup. * For translation vendors, group incoming projects by client to simplify access and resource management. ## [Permission Granularity Mode](#permission-granularity-mode) [Section titled “Permission Granularity Mode”](#permission-granularity-mode) When your organization uses [Permission Granularity Mode](/enterprise/permissions-granularity-mode/), you can manage resources and permissions separately for each project group. This allows you to: * Create workflow templates specific to each group. * Manage translation memories and glossaries at the group level. * Connect MT engines for a specific group. * Assign managers to all projects within a group at once. ## [Shared Resources](#shared-resources) [Section titled “Shared Resources”](#shared-resources) Localization resources such as translation Memories, glossaries, MT engines, and workflows added at the organization level are available in all projects. If you add resources to a specific group or subgroup, they’ll be available only to the projects within that group or subgroup. [Glossary ](/enterprise/glossary/) [Translation Memory ](/enterprise/translation-memory/) [Machine Translation ](/enterprise/machine-translation/) [Workflows ](/enterprise/workflows/) ## [Manager Permissions](#manager-permissions) [Section titled “Manager Permissions”](#manager-permissions) Managers assigned to a group automatically inherit the same permissions for its subgroups and projects. Read more about [Manager Role](/enterprise/roles/#manager). ## [Navigation](#navigation) [Section titled “Navigation”](#navigation) To navigate between groups and subgroups, use the sidebar menu or click the folder icons directly. If the group hierarchy isn’t visible in the sidebar, click the **Workspace Explorer** button in the lower-left corner to open the list of groups. 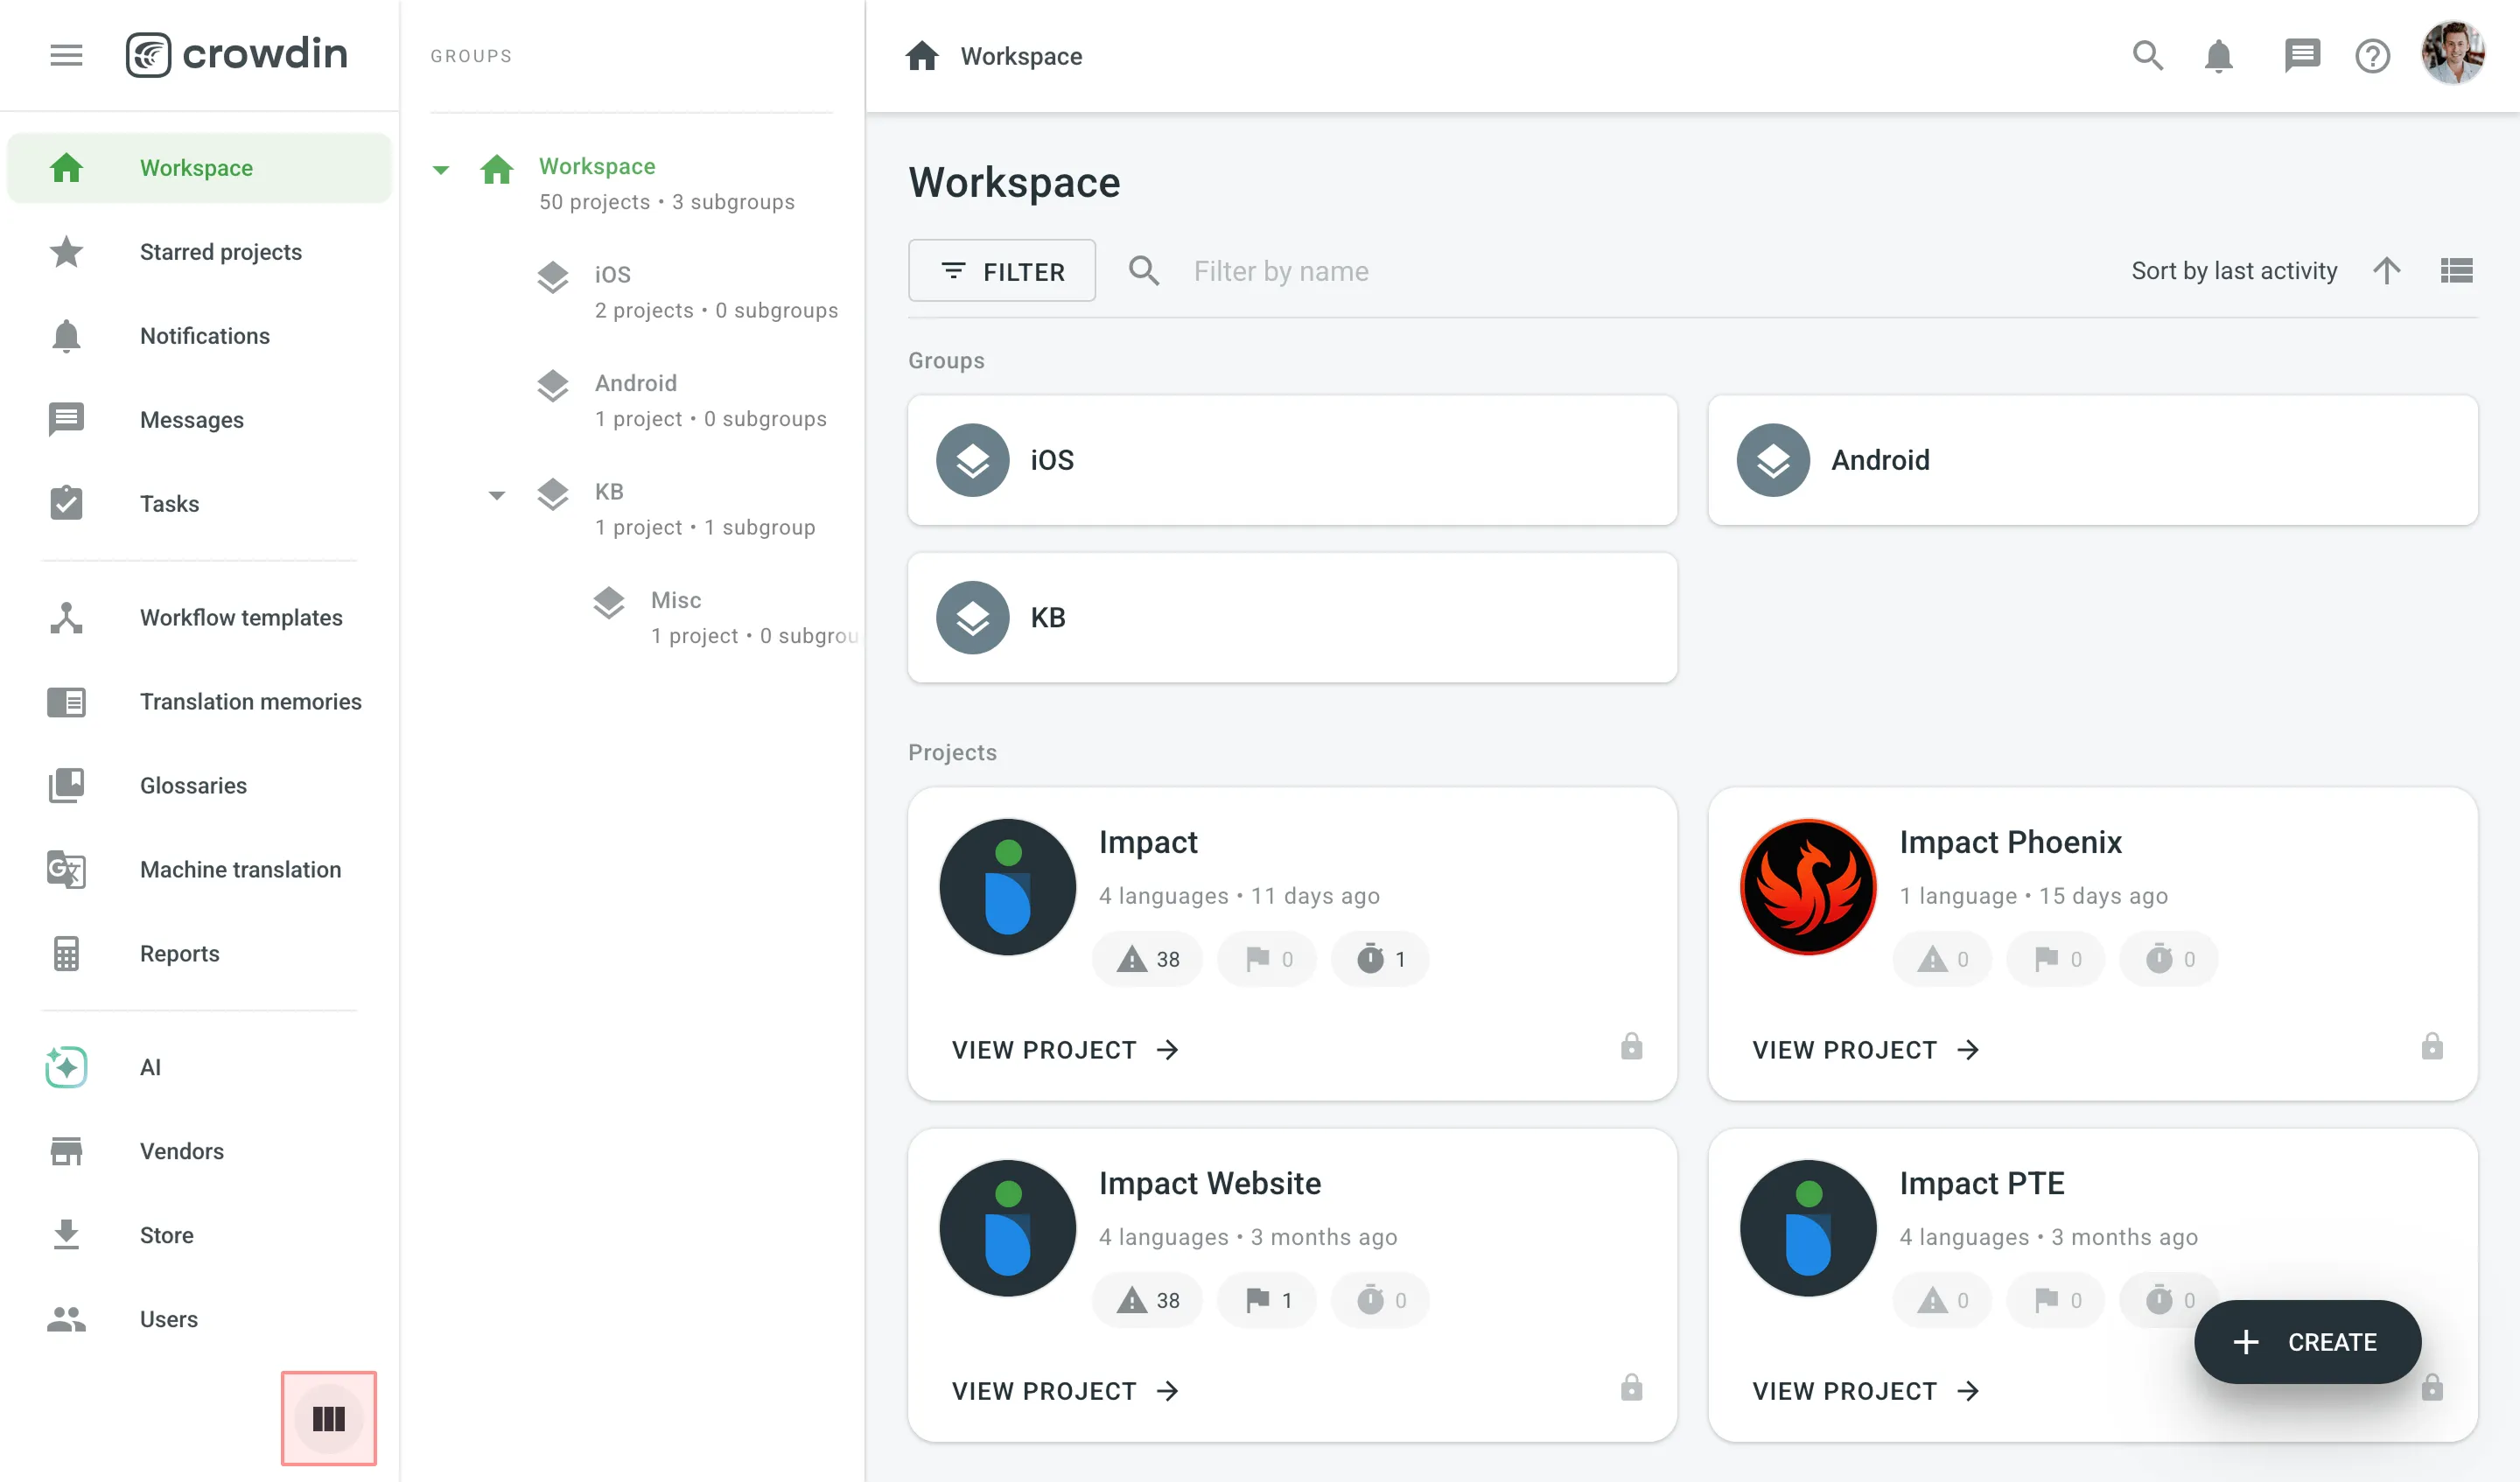 ## [Creating a Group](#creating-a-group) [Section titled “Creating a Group”](#creating-a-group) To create a group, follow these steps: 1. Open your organization’s **Workspace**, hover over the button at the lower-right corner, and select **Create a group** option. 2. Enter a name for your group to indicate what kind of projects it will contain. 3. Click **Create group**.  ## [Next Steps](#next-steps) [Section titled “Next Steps”](#next-steps) [Creating a Project ](/enterprise/creating-project/) [Inviting People ](/enterprise/inviting-people/)
# ICU Message Syntax
> Use ICU Message format to handle language-specific nuances
Crowdin Enterprise supports ICU Message syntax, which is used to help express the subtleties of language-specific spelling, grammar, and formatting in translations. Strings formatted in the ICU Message syntax can have different types of replacements called **arguments**. Each argument is enclosed in curly brackets and refers to a value in the input data. Arguments of the following types are supported in Crowdin Enterprise: number, date, time, select, and plural. ### [ICU Message Syntax in the Editor](#icu-message-syntax-in-the-editor) [Section titled “ICU Message Syntax in the Editor”](#icu-message-syntax-in-the-editor) ICU syntax arguments are always highlighted in the [Editor](/enterprise/online-editor/), so you know which part of the string shouldn’t be translated. Change the position of arguments in translation to follow the natural word order in the target language. There’s also a preview mode, that allows you to see how the translation will be displayed in the UI to make sure that all the translatable elements are translated. 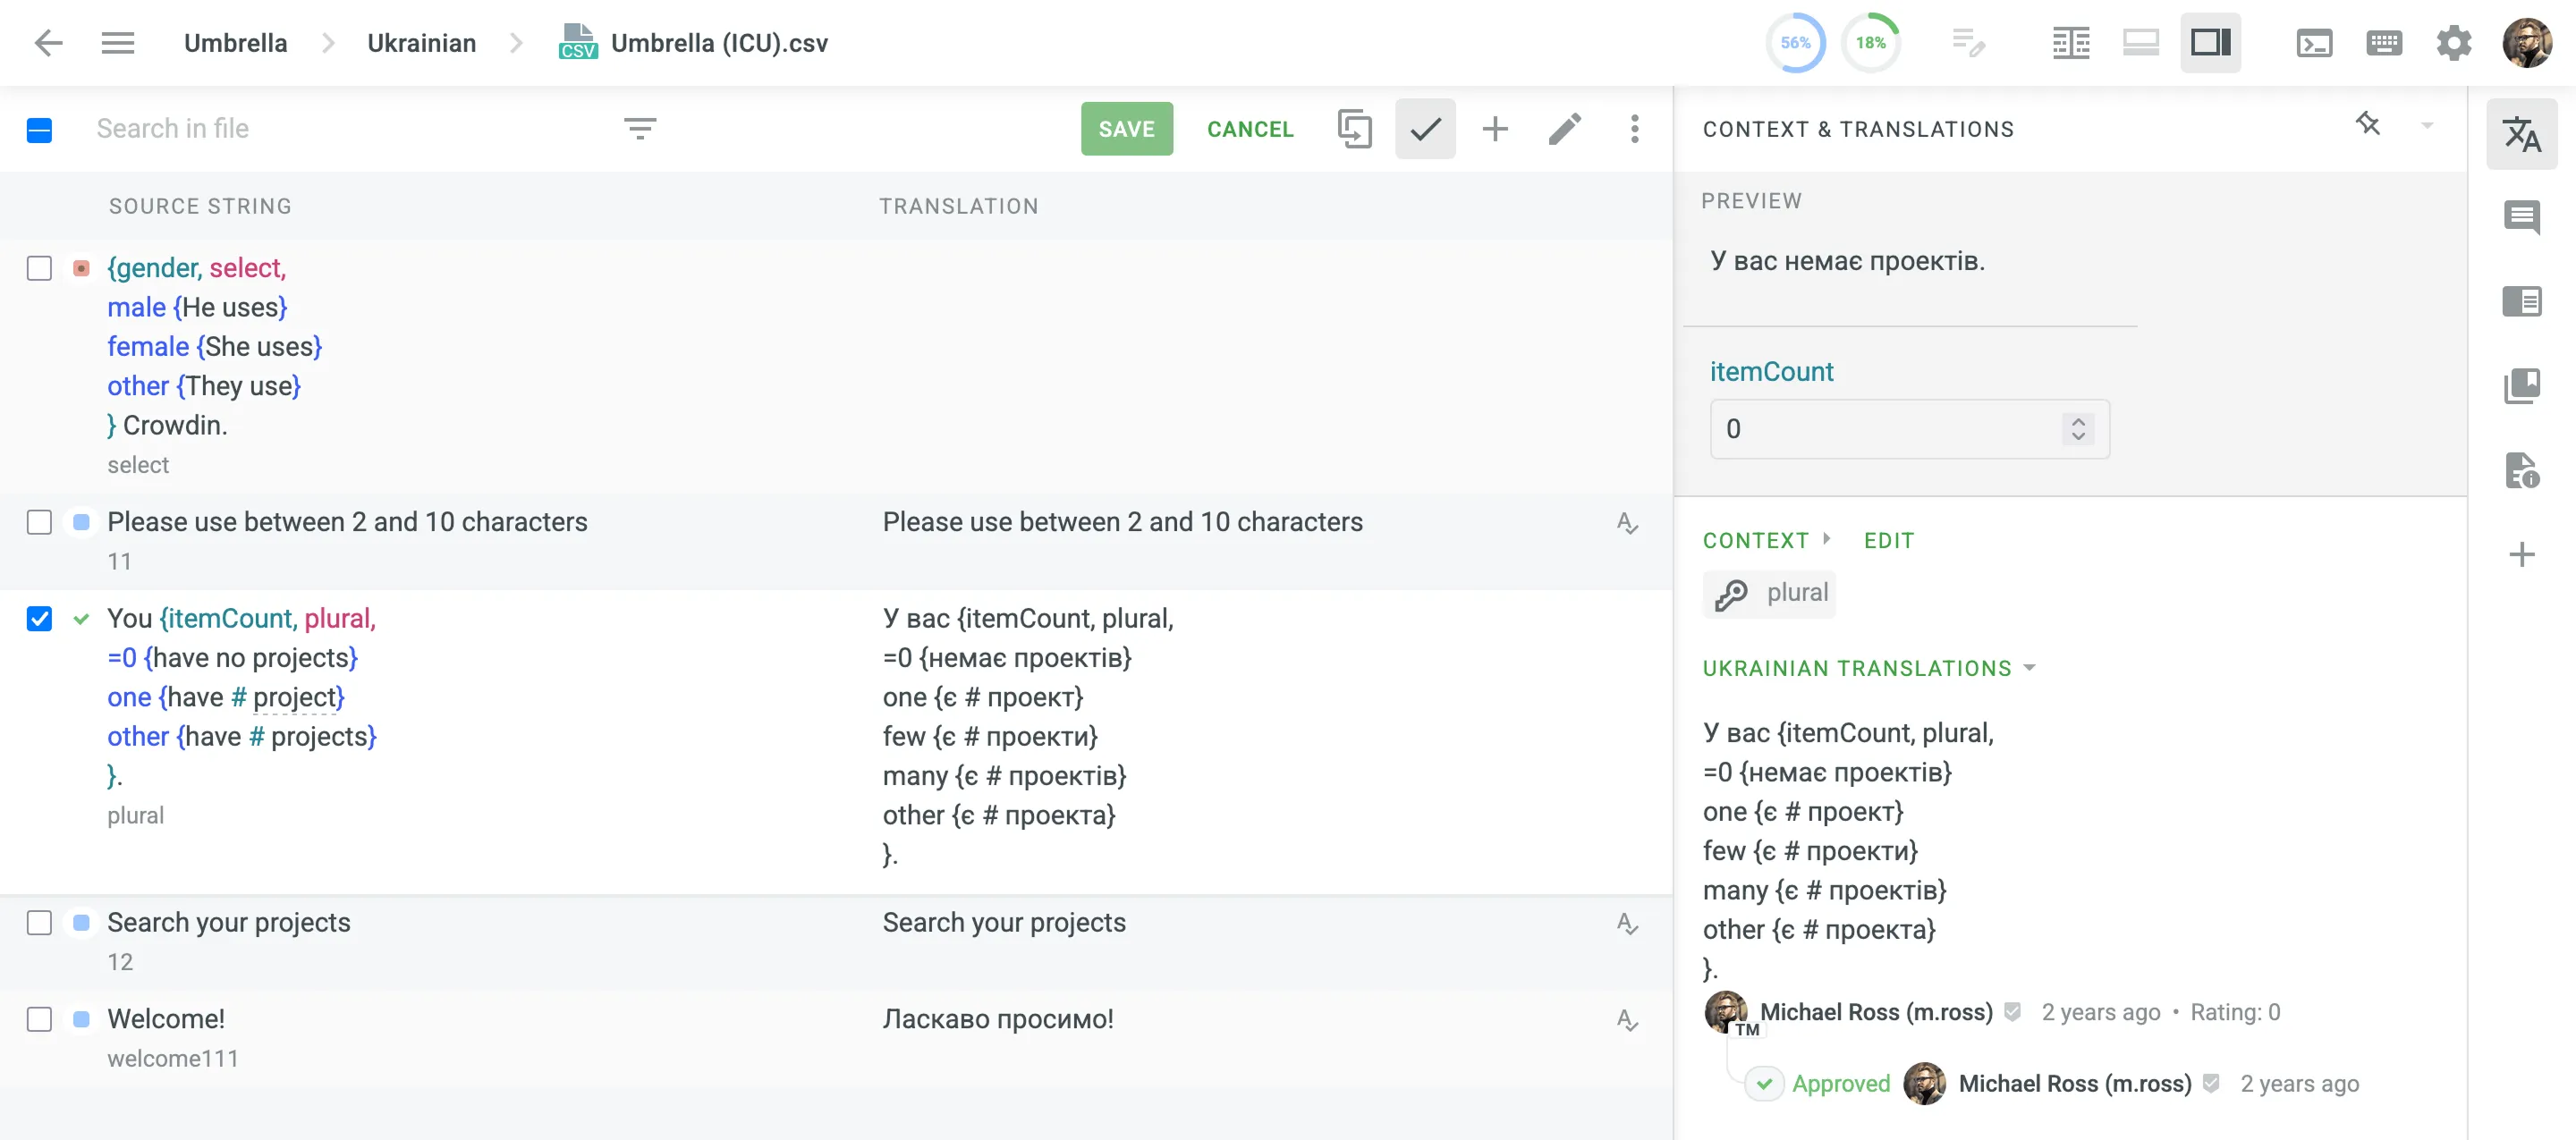 [The Ultimate Guide to ICU Message Format ](https://crowdin.com/blog/2022/04/13/icu-guide)This article will cover the ICU i18n and ICU message format basics, and how Crowdin handles it. ## [Plural](#plural) [Section titled “Plural”](#plural) Plural type is used to handle plural category variations, as each language has its own set of plural categories (for example, English has “one” and “other”, while Ukrainian has “one”, “few”, “many”, and “other”). ```json You {itemCount, plural, =0 {have no projects} one {have # project} other {have # projects} }. ``` The following short tags are used to determine the plural categories: * zero * one (singular) * two (dual) * few (paucal) * many (also used for fractions if they have a separate class) * other (required—general plural form—also used if the language only has a single form) In the Editor, you don’t have to manually add or delete plural categories to the translations you are making. Just click **Copy Source**, and the source string will be copied to the translation field with the number of plural categories right for the current target language. Read more about [Language Plural Rules](https://www.unicode.org/cldr/charts/latest/supplemental/language_plural_rules.html). ## [Select Ordinal](#select-ordinal) [Section titled “Select Ordinal”](#select-ordinal) The purpose of the select ordinal type is to choose output based on the ordinal pluralization rules (1st, 2nd, 3rd, etc.) of the current target language. It is very similar to the plural type, except the value is mapped to an ordinal plural category. ```json Congrats! It's your {year, selectordinal, one {#st} two {#nd} few {#rd} other {#th} } subscription anniversary! ``` ## [Select](#select) [Section titled “Select”](#select) Select type is mostly used to represent the right gender-based inflections in the message. ```json {gender, select, male {He uses} female {She uses} other {They use} } Crowdin. ``` ## [Number](#number) [Section titled “Number”](#number) The purpose of the number type is to display different number values such as percentage, currency, and decimal numbers independently of the locale conventions for those. This enables adjustment of the message output to the number formats used in different locales. [ICU Number Skeletons](https://unicode-org.github.io/icu/userguide/format_parse/numbers/skeletons.html) are also supported. ```json The app price is {price, number, ::currency/USD} with {discount, number, percent} discount. ``` ## [Date, Time](#date-time) [Section titled “Date, Time”](#date-time) Date and time types show date and time values according to the formats preferred in the specified locales. These types can also have a style – extra information on how the value will be formatted. The following four styles can be used: short, medium, long, and full. ```json Your meeting is scheduled for {dateValue, date, long} at {timeValue, time, short} AM. ``` ## [Syntax Errors](#syntax-errors) [Section titled “Syntax Errors”](#syntax-errors) Syntax error detection significantly reduces confusion when translating strings with ICU Message syntax, as the platform automatically detects potential translation errors. If a syntax error is found, you’ll see a notice with a suggestion of what needs to be fixed. 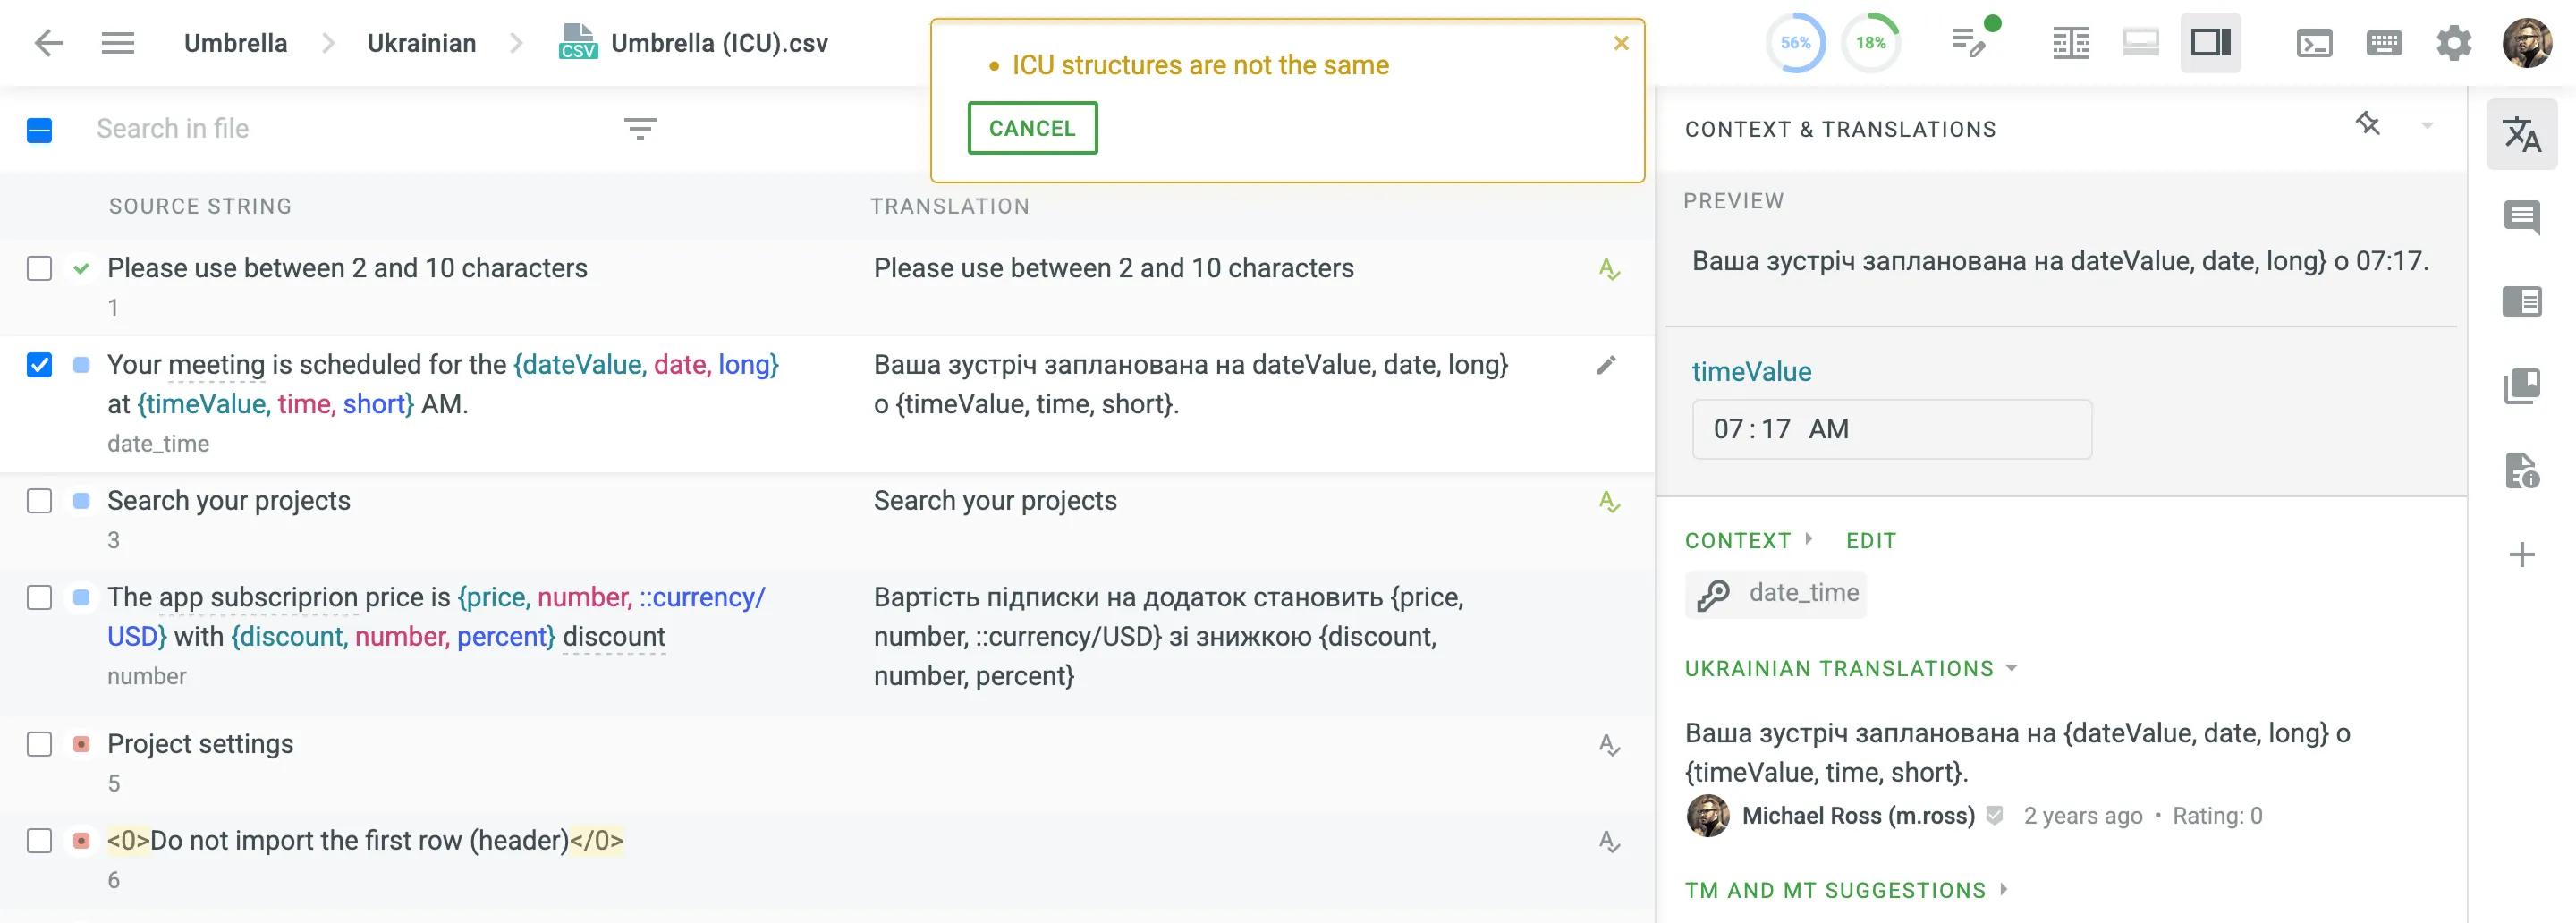
# Integrations
> Seamlessly integrate localization into any phase of your product
Seamlessly integrate localization into any phase of your development cycle. Crowdin Enterprise offers a wide range of integrations with the tools you already use. Automate your localization workflow and save time on manual tasks. [Crowdin Store ](https://store.crowdin.com/)Explore 700+ integrations to streamline your localization process. ## [VCS Integrations](#vcs-integrations) [Section titled “VCS Integrations”](#vcs-integrations) The key challenge engineers face is the lack of automation. Source content needs to be constantly extracted from the codebase and handed over to the translation team. Completed translations should then be integrated back into the codebase. Without an automated approach, this workflow becomes a repetitive and time-consuming exchange of files. With the automation provided by VCS Integrations, source strings are pulled automatically, ensuring they are always up-to-date for your translators. Completed translations are then pushed back to your repository as a request. [GitHub ](/enterprise/github-integration/) [GitLab ](/enterprise/gitlab-integration/) [Bitbucket ](/enterprise/bitbucket-integration/) [Azure Repos ](/enterprise/azure-repos-integration/) ## [Design](#design) [Section titled “Design”](#design) Quickly generate language-specific assets. Send content for translation with context for translators, while you’re working on the mock-ups or polishing prototypes. [Figma ](/enterprise/figma-plugin/) [Sketch ](/enterprise/sketch-plugin/) [Adobe XD ](/enterprise/adobe-xd-plugin/) [More ](https://store.crowdin.com/categories/design) ## [Starred Apps](#starred-apps) [Section titled “Starred Apps”](#starred-apps) You can star an app by clicking the icon next to its name, either from the app list or within the app itself, allowing you to mark apps for quick access. This feature is available for integrations and tools (excluding service-related items like Webhooks, Service Logs, etc.) and is accessible to project members with the Developer role or higher. Once you star an app, it gets pinned to the top of the relevant sections, such as **Integrations** or **Tools**. The app list is automatically sorted by starred items once you add your first favorite. Starred apps also appear as shortcut entries in the left sidebar, grouped under the section where they were starred (e.g., under **Integrations**). Clicking a shortcut opens the section that contains the app and automatically opens the app within that section. The section is highlighted as active, while the shortcut remains unhighlighted. Starring works on an individual account basis, meaning each project member will see their own starred apps in the **Integrations**, **Tools**, and project navigation, independent of other members’ selections. ## [Co-managing Crowdin Apps](#co-managing-crowdin-apps) [Section titled “Co-managing Crowdin Apps”](#co-managing-crowdin-apps) Multiple managers and developers can collaboratively manage the same Crowdin App within a project, simplifying teamwork and ensuring shared control over integrations. When an app is first configured in a project, the initial manager who logs in becomes its primary manager, with exclusive rights to log out from the app. All invited managers and developers share common app settings—meaning changes made by one manager are immediately visible to others. This approach facilitates efficient team collaboration, avoids duplication of efforts, and ensures consistent configuration across your localization workflow. ### [Inviting Another User to Manage an App](#inviting-another-user-to-manage-an-app) [Section titled “Inviting Another User to Manage an App”](#inviting-another-user-to-manage-an-app) To invite additional managers or developers to co-manage an app, follow these steps: 1. Open the app in your Crowdin project. 2. Click **Share** within the app interface. 3. Select existing project or organization members from the user list or enter the invitee’s email to invite them as a new project manager. You can invite users with the following roles: * Owner * Admins * Managers * Developers 4. Click **Save** to send the invitation. Once invited, users will gain full access to manage and configure the app (except logging out). ### [Requesting Access to Manage an App](#requesting-access-to-manage-an-app) [Section titled “Requesting Access to Manage an App”](#requesting-access-to-manage-an-app) If you open an app that has already been configured by another manager, you’ll see a message indicating that you don’t have access. The message also displays the name of the manager currently managing the app. To request access, follow these steps: 1. Click the primary manager’s name in the message. 2. You’ll be redirected to a private conversation with the manager in Crowdin. 3. Send a message requesting access to co-manage the app. 4. The primary manager can open the app, click **Share**, and invite you from the user list. As soon as you are invited, you’ll immediately gain access to manage and configure the app (except logging out). ### [Permissions and App Management Roles](#permissions-and-app-management-roles) [Section titled “Permissions and App Management Roles”](#permissions-and-app-management-roles) All managers co-managing an app have identical permissions within it, except only the primary manager—the first to configure the app—can log out from the app. Managers can also invite Developers, who will gain similar permissions but cannot further invite other users to manage the app. Admin and Owner roles can also be invited with full permissions. ## [See Also](#see-also) [Section titled “See Also”](#see-also) [Content Delivery ](/enterprise/content-delivery/) [Jira ](/enterprise/jira-integration/) [Google Play ](/enterprise/google-play-integration/) [Slack ](/enterprise/account-notifications/#slack-integration)
# Enterprise Introduction
> Get started with Crowdin Enterprise and learn about its core features
> These guides will help you get started with Crowdin Enterprise. Here you will find all the information you need about Crowdin Enterprise and how to use it. ## [What is Crowdin Enterprise?](#what-is-crowdin-enterprise) [Section titled “What is Crowdin Enterprise?”](#what-is-crowdin-enterprise) Crowdin Enterprise is a cloud-based solution for agile localization management. With Crowdin Enterprise, you can automate the updating of content for translation and finished translations, making it easy to create and maintain multilingual products. This includes mobile apps, cloud and desktop software, games, and all related content, such as help desks, websites, user guides, and automated emails. Easily manage localization for multiple products involving needed people and resources. Gain more control, flexibility, and customization over localization in your company with the features and integrations Crowdin Enterprise offers. ## [What is Agile Localization?](#what-is-agile-localization) [Section titled “What is Agile Localization?”](#what-is-agile-localization) Agile localization is an approach that helps you deal with frequently updated content that you want to make available to your customers worldwide. Once you’ve decided to localize your product, it’s important to keep it that way and ensure the new content is also multilingual. This typically includes new features, product updates, documentation, websites, and other user-facing content. While you’re creating new content, translators can work on translations, so you can get work done faster by working in parallel. The latest content can be available to translators nearly instantly and updated automatically. This way, they can start translating immediately in their own translation environment. At the same time, you can quickly receive finished translations via integrations and other automation tools. This approach makes it easy to track which content has been updated, requires translation, or is ready for production. So when the new feature is ready for release, translations won’t slow you down, as they are done in parallel. ## [Features](#features) [Section titled “Features”](#features) Crowdin Enterprise includes all the [features available in Crowdin](/introduction/#features), plus additional features that are only available in Crowdin Enterprise. Organizations An organization can be based on your company’s domain, and it’s a secure space that only invited people can access with specific permissions based on user roles. Each organization has its own workspace, user management, localization resources, organization settings, etc. As every organization has a workspace, all the projects are stored and easily managed from there. Groups Group managers and translation resources like Translation Memories, Glossaries, and Machine Translation engines by projects and project groups. Create several project groups and invite separate managers to each. Translation resources can be available organization-wide, to project groups, or to specific projects only. Workflows A workflow is a sequence of steps, such as translation or proofreading, that content in your project goes through. You can use unlimited workflow steps that can be connected both in parallel or subsequently. Customize your workflows and set up separate rules and permissions for each workflow step to automate the flow of content. Each step can have different target languages and assignees. Vendor organizations Any organization can invite another organization as a vendor. Translation by a vendor can be a part of your workflow, where the vendor organization receives limited access to your files and can help you with a specific part of your workflow, like translation or proofreading. SAML single sign-on Authenticate your team members or your product’s users into Crowdin with the account they already have in the system your company uses. Google Workspace OAuth Authenticate your team members via their existing Google Workspace accounts and have control over them. Custom authorization methods You can use the Crowdin Enterprise built-in authentication methods or choose one of the external services to verify the identity of your users. Custom QA checks Create your own QA checks that will check translations for things specific to your projects, like formatting, word spelling, and more. ## [Personalized Demo](#personalized-demo) [Section titled “Personalized Demo”](#personalized-demo) Have around 30 minutes and want one of our skilled Customer Success managers to walk you through your organization and help you implement best practices? Go ahead and [Schedule a demo](https://crowdin.com/demo-request) call to get a personalized tour and recommendations on how to best manage localization projects in your organization.
# Inviting People
> Learn how to invite people to your organization and project
This guide explains how to invite users either to your organization or directly to specific projects. You’ll learn how to assign appropriate roles and permissions depending on the invitation method and where to manage invited users. ## [Inviting People to the Organization](#inviting-people-to-the-organization) [Section titled “Inviting People to the Organization”](#inviting-people-to-the-organization) When inviting people to your organization, you can either grant them admin or workspace manager access right away or add them without workspace permissions and define their access later. Once added, users can be invited to specific projects or assigned to workflow steps. Note that crowdsourcing projects are automatically visible to all organization members. To invite users to your organization, follow these steps: 1. Open your organization’s **Workspace** and select **Users** on the left sidebar. 2. In the **Users** tab, click **Invite users** in the lower-right corner.  3. Specify the email addresses of the people you want to invite. 4. *(Optional)* Select **Admin** or **Workspace manager** to grant the invitees the required permissions. 5. *(Optional)* Enter a message text if necessary. 6. Click **Send invite**. 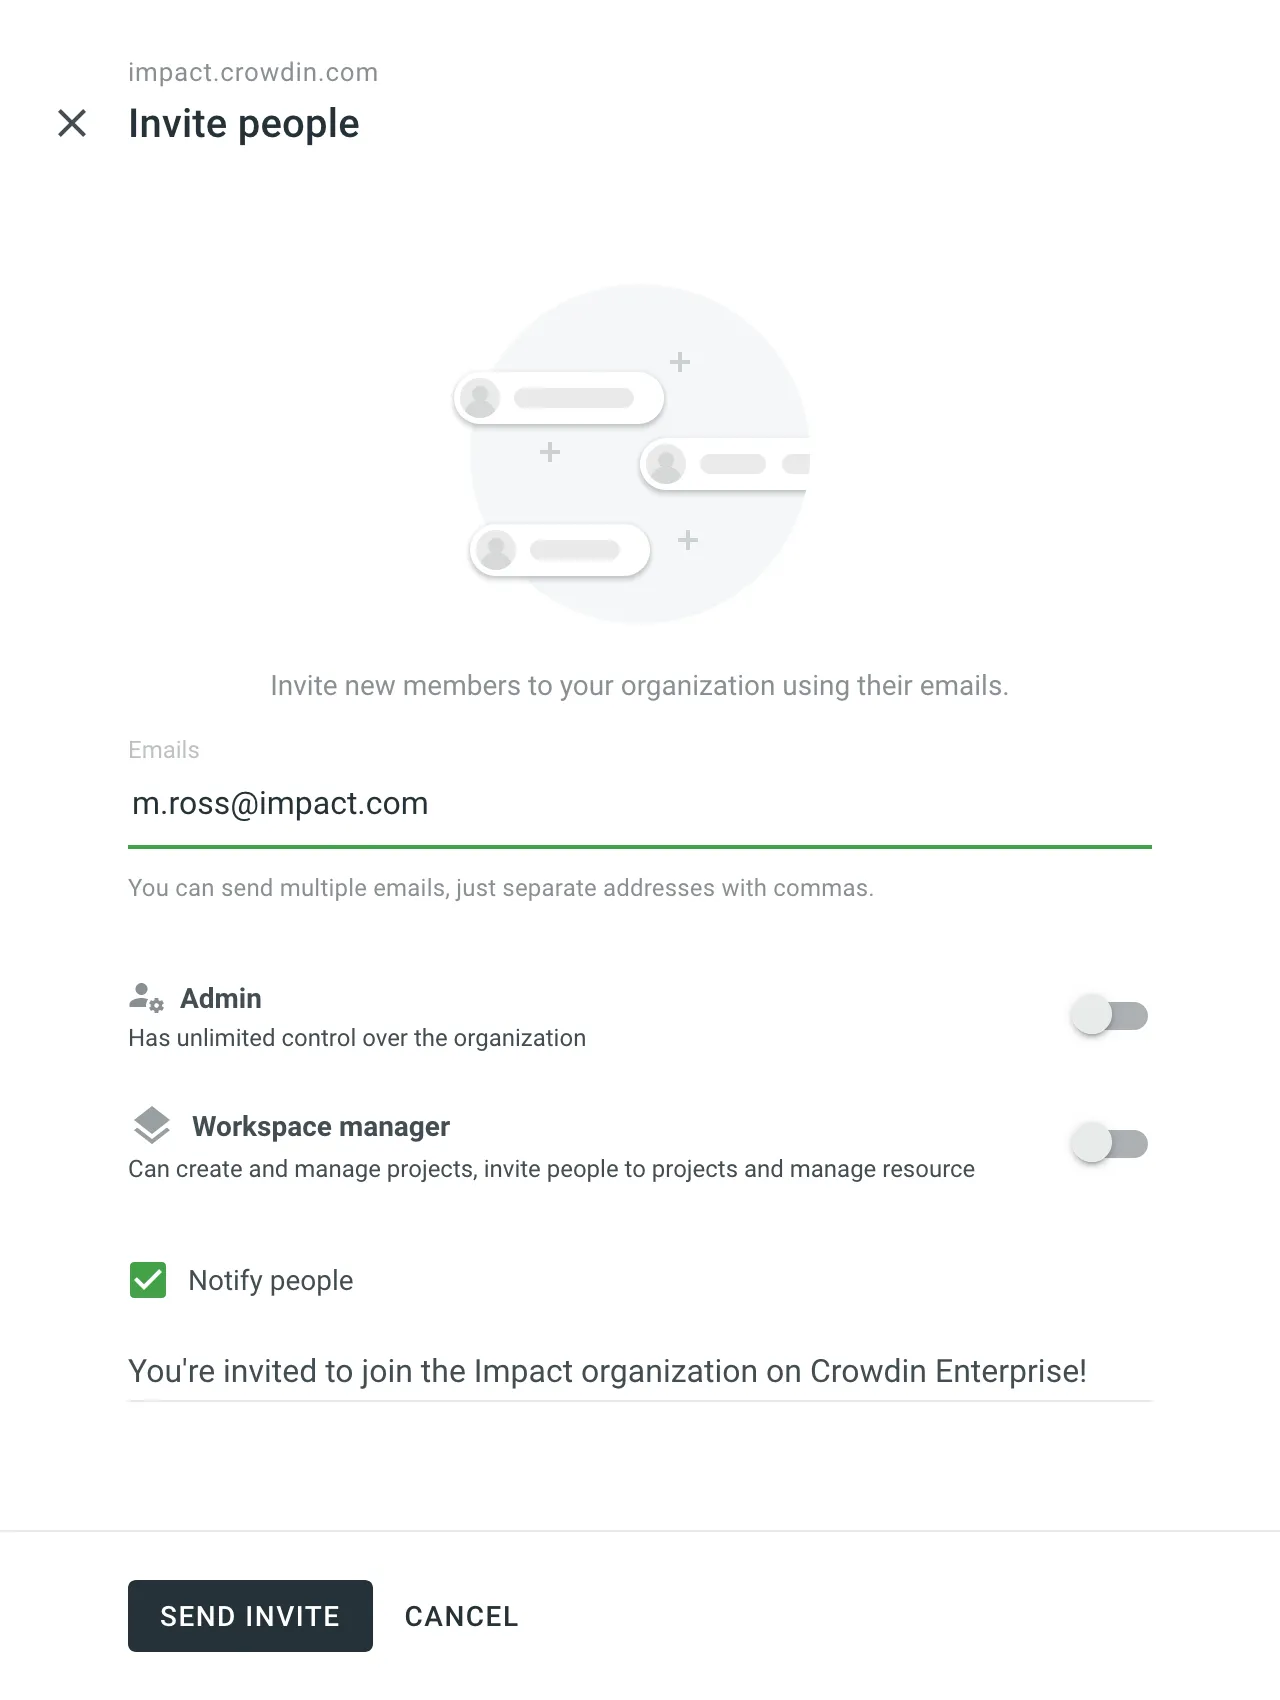 Once a user joins your organization, you can manage their permissions, track their contributions, update profile information, monitor their last activity, grant admin and workspace manager access, or block the user if necessary. ## [Inviting People to a Project](#inviting-people-to-a-project) [Section titled “Inviting People to a Project”](#inviting-people-to-a-project) You can invite people directly to a project and grant them the required permissions by assigning roles. If the invited person is not yet an organization member, they will be added to the organization automatically. [Roles ](/enterprise/roles/)Learn more about the roles and permissions in Crowdin Enterprise. To invite members to a specific project, follow these steps: 1. Open your project and select **Members** on the left sidebar. 2. Click **Invite People** in the upper-right corner. 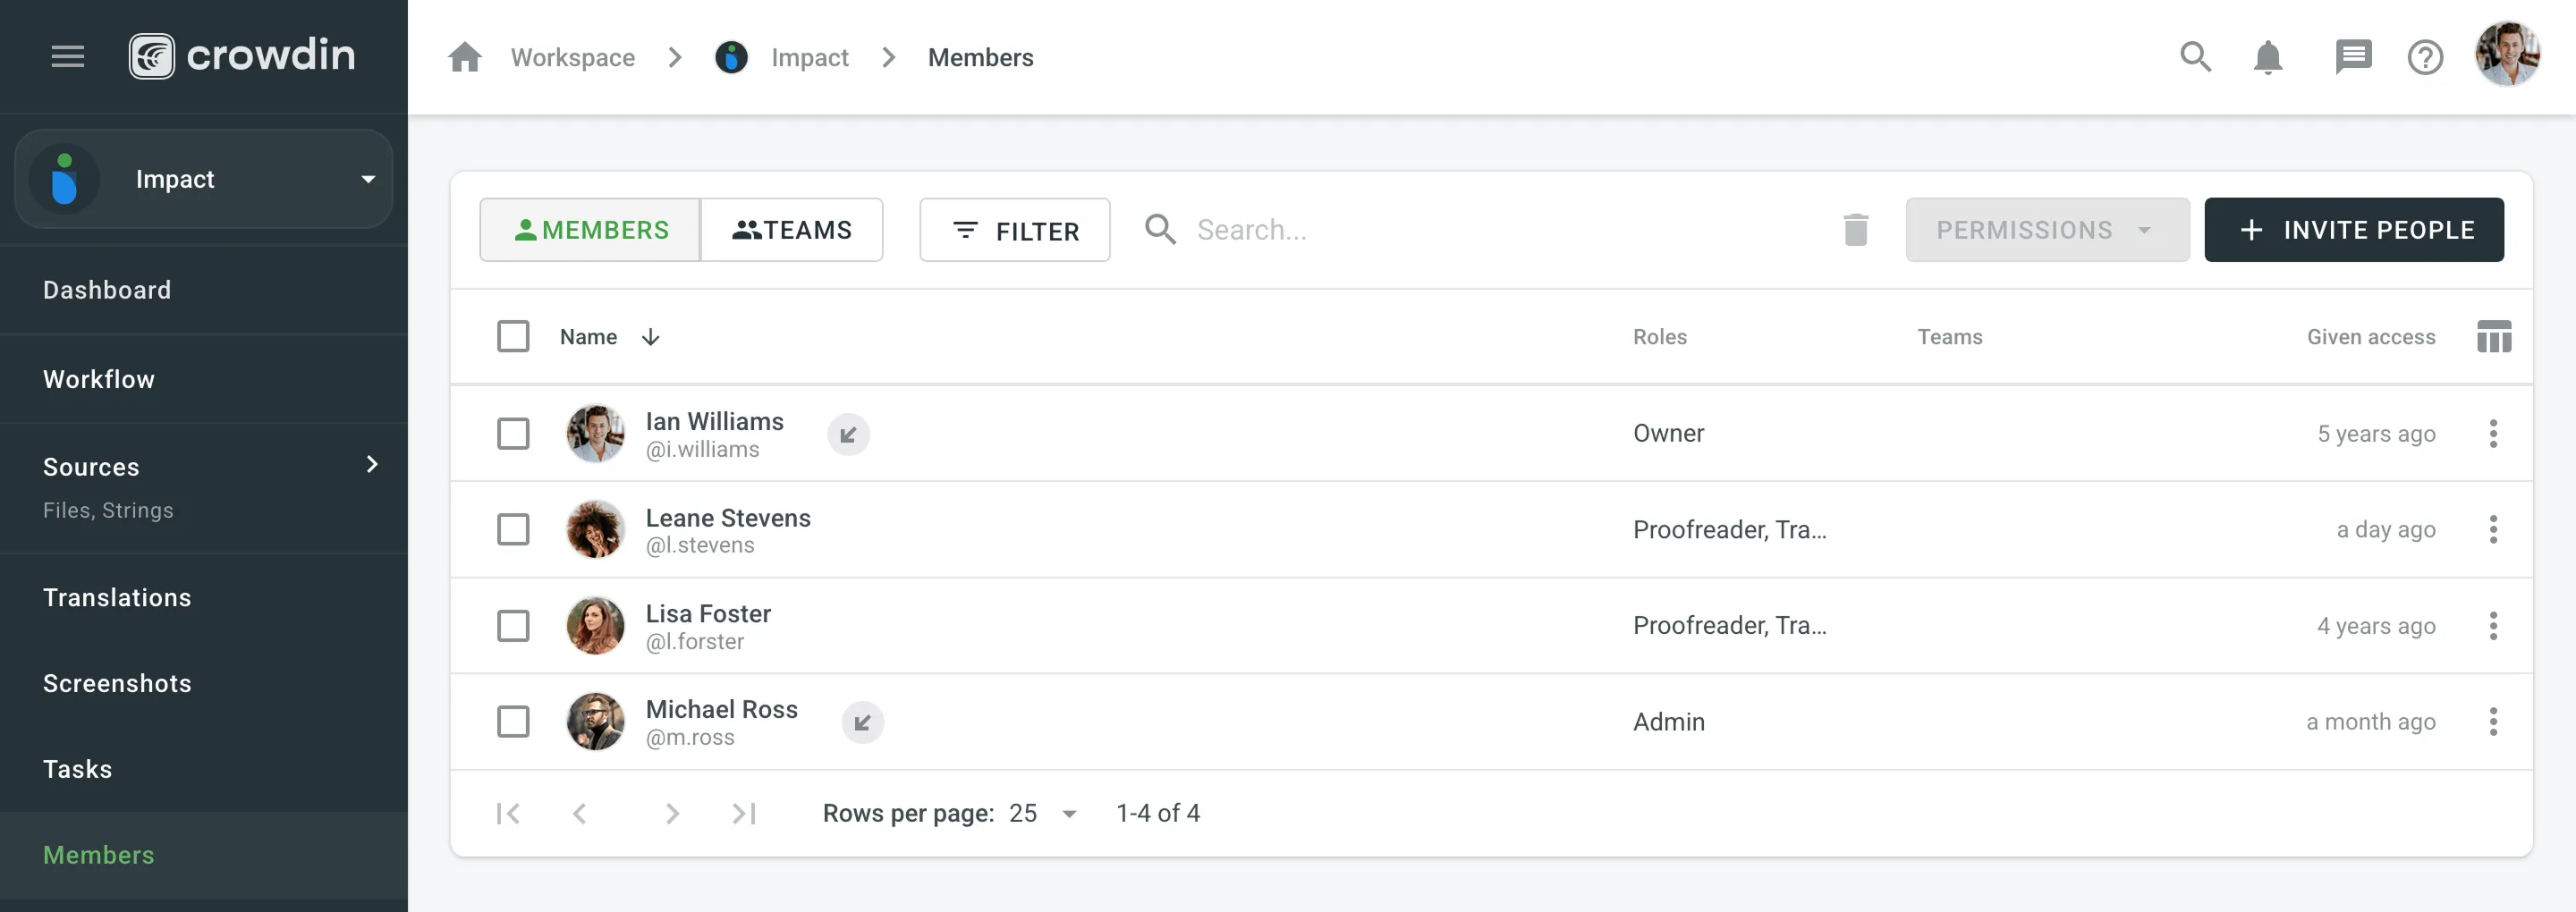 3. Select from current organization members or type the email address of the person you need to invite. You can also copy the shareable link and send it via email directly. 4. Define the [permissions](/enterprise/roles/) for an invitee. By default, **Access to all project languages** is enabled. Disable it if you want to grant access to specific languages or workflow steps. 5. Click **Invite**. 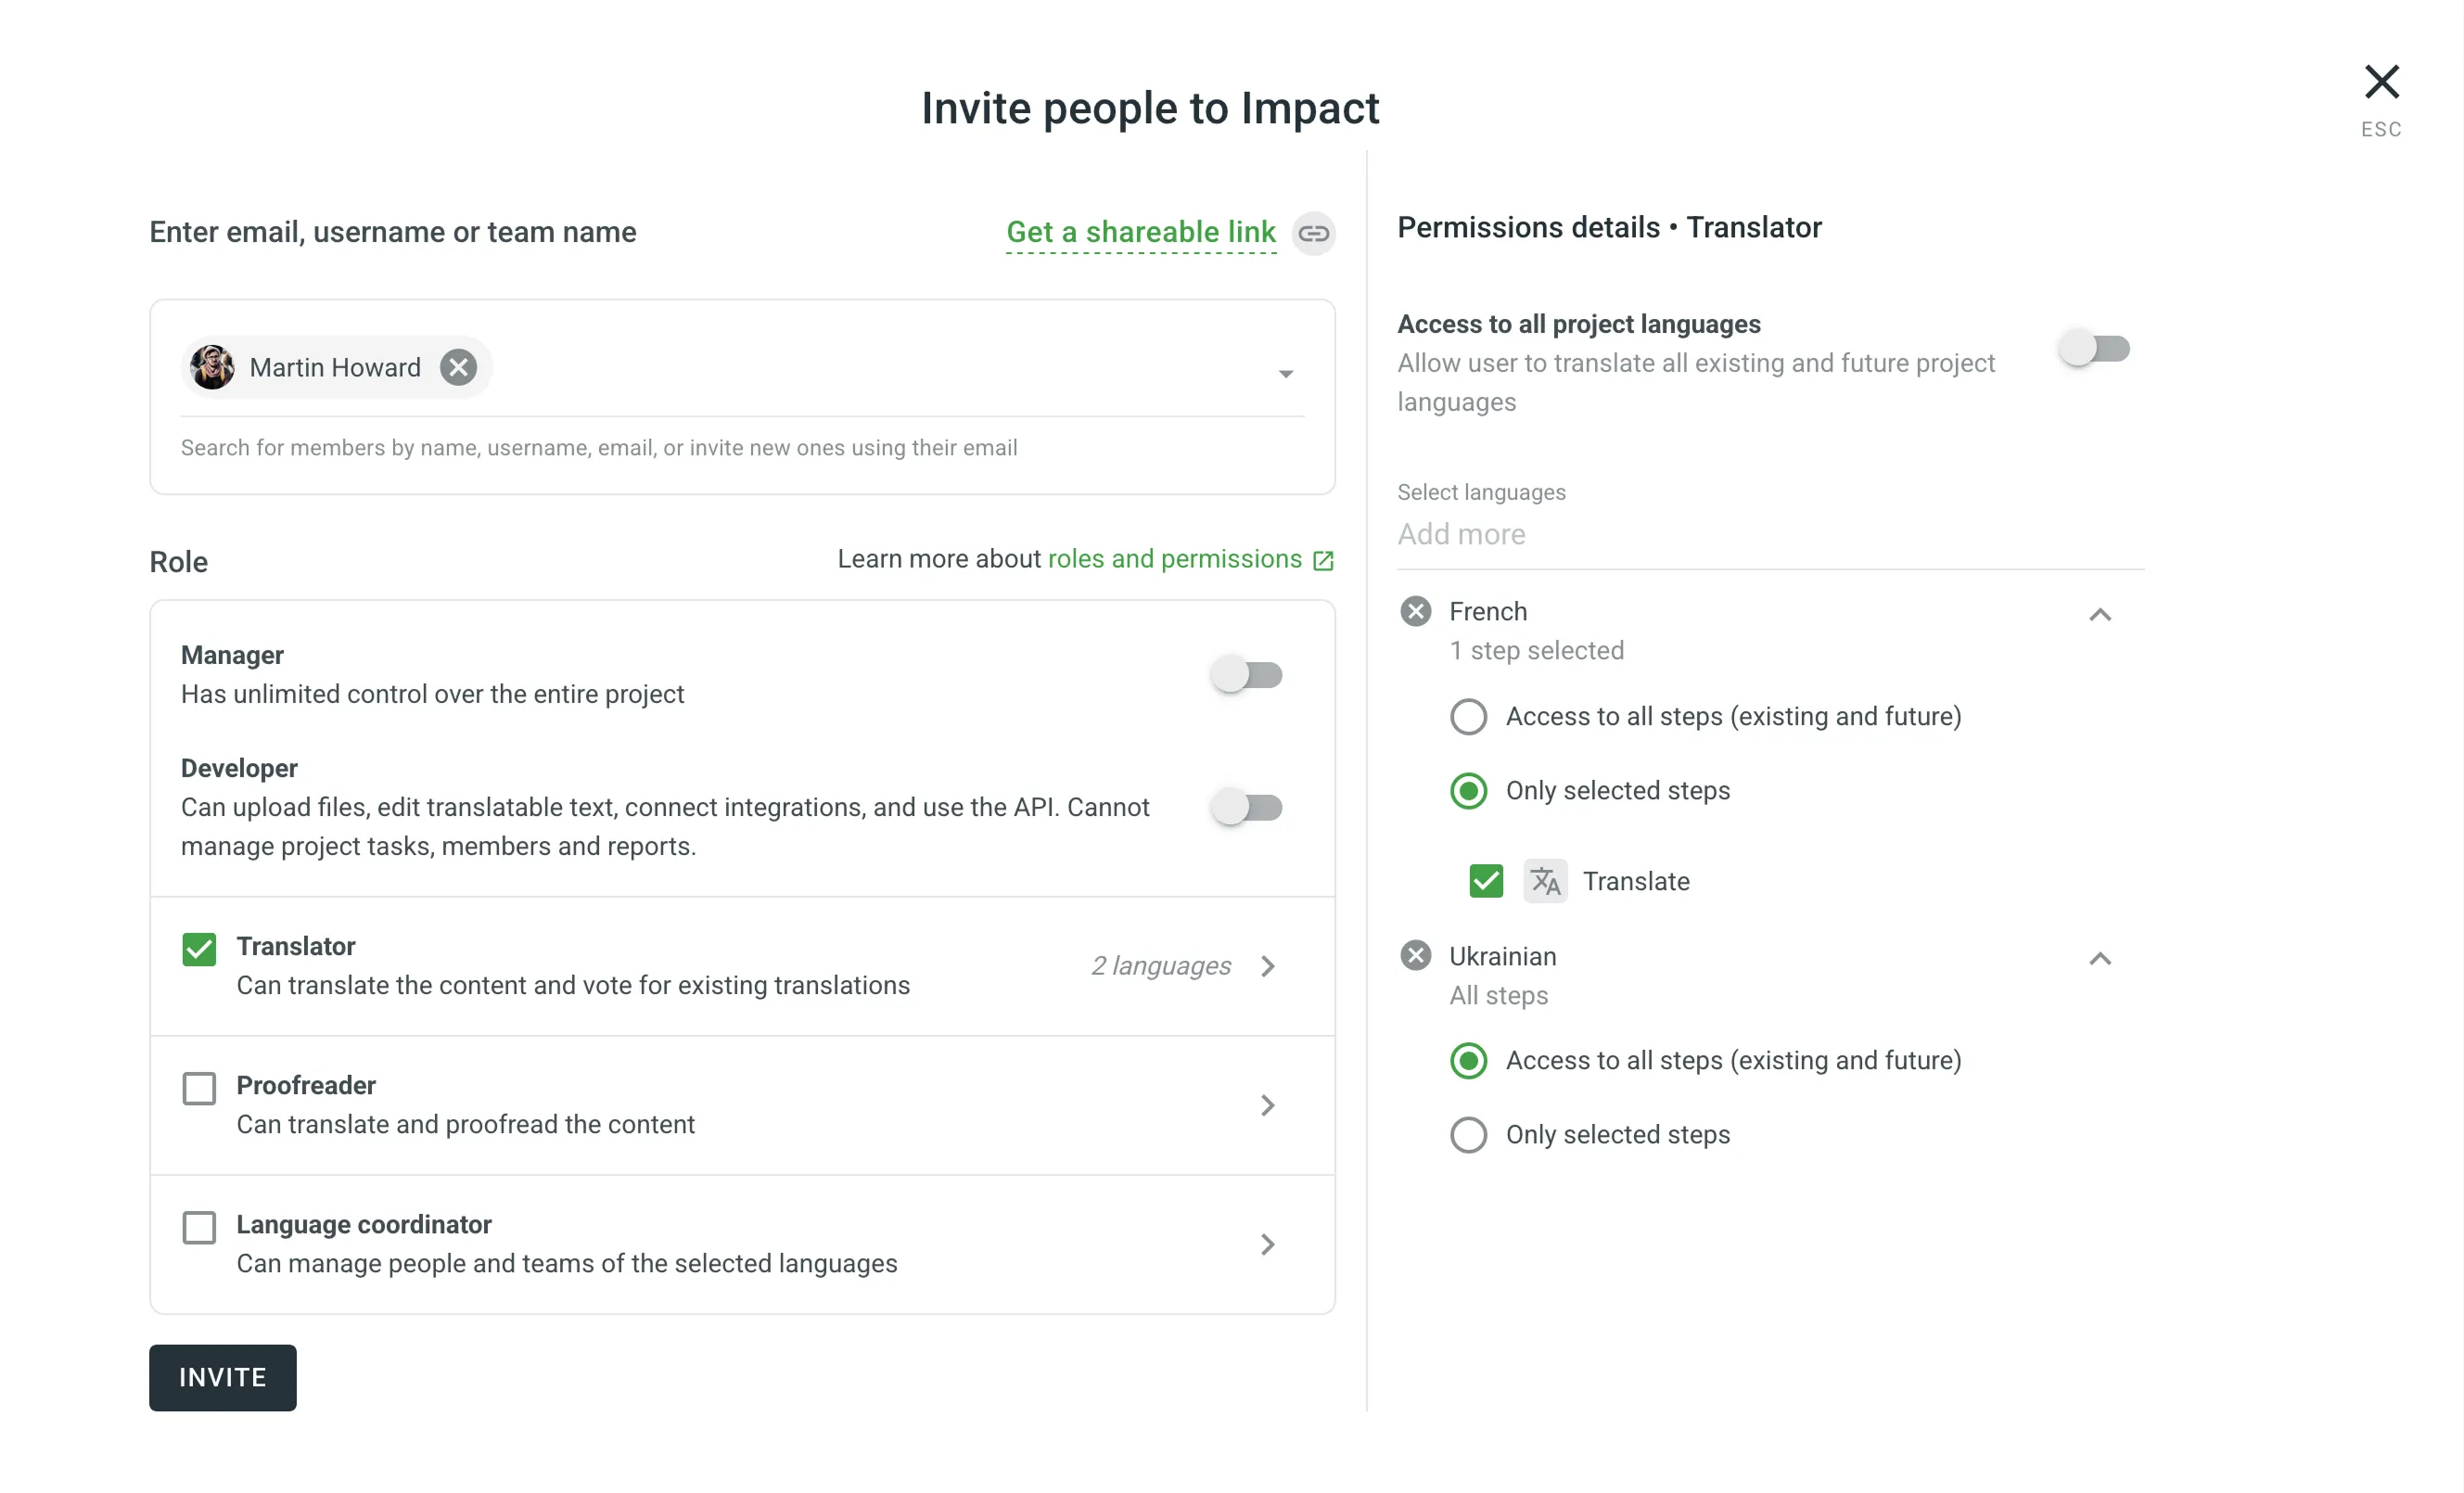 ## [See Also](#see-also) [Section titled “See Also”](#see-also) [Project Members ](/enterprise/project-members/)Manage project members and their roles in your project. [Roles ](/enterprise/roles/)Learn about the roles and permissions that users can have in Crowdin Enterprise.
# Issues
> Report and manage translation issues in the Editor
Issues help ensure translation quality by giving translators, managers, and developers a structured way to report and resolve problems with strings in the Editor. Translators use them to flag unclear source strings, incorrect translations, or missing context. Managers use them to ensure that feedback is addressed quickly and that translations stay accurate. Crowdin Enterprise provides issue tracking directly within the Editor, making it easy to report and resolve issues without interrupting the translation process. ## [For Translators](#for-translators) [Section titled “For Translators”](#for-translators) When working on translations in the Editor, you may occasionally come across unclear source strings, formatting questions, or existing translations that seem incorrect. In these cases, don’t guess-report the issue so it can be clarified or corrected. This section explains how to report issues effectively and shares best practices for contributing to high-quality translations. ### [Reporting Issues](#reporting-issues) [Section titled “Reporting Issues”](#reporting-issues) When you’re unsure how to translate a string or spot a mistake, it’s important to report the issue instead of guessing. To report an issue, follow these steps: 1. Open the **Comments** section. 2. Select the **Issue** checkbox. 3. Choose the issue type. 4. Add a comment explaining the problem. 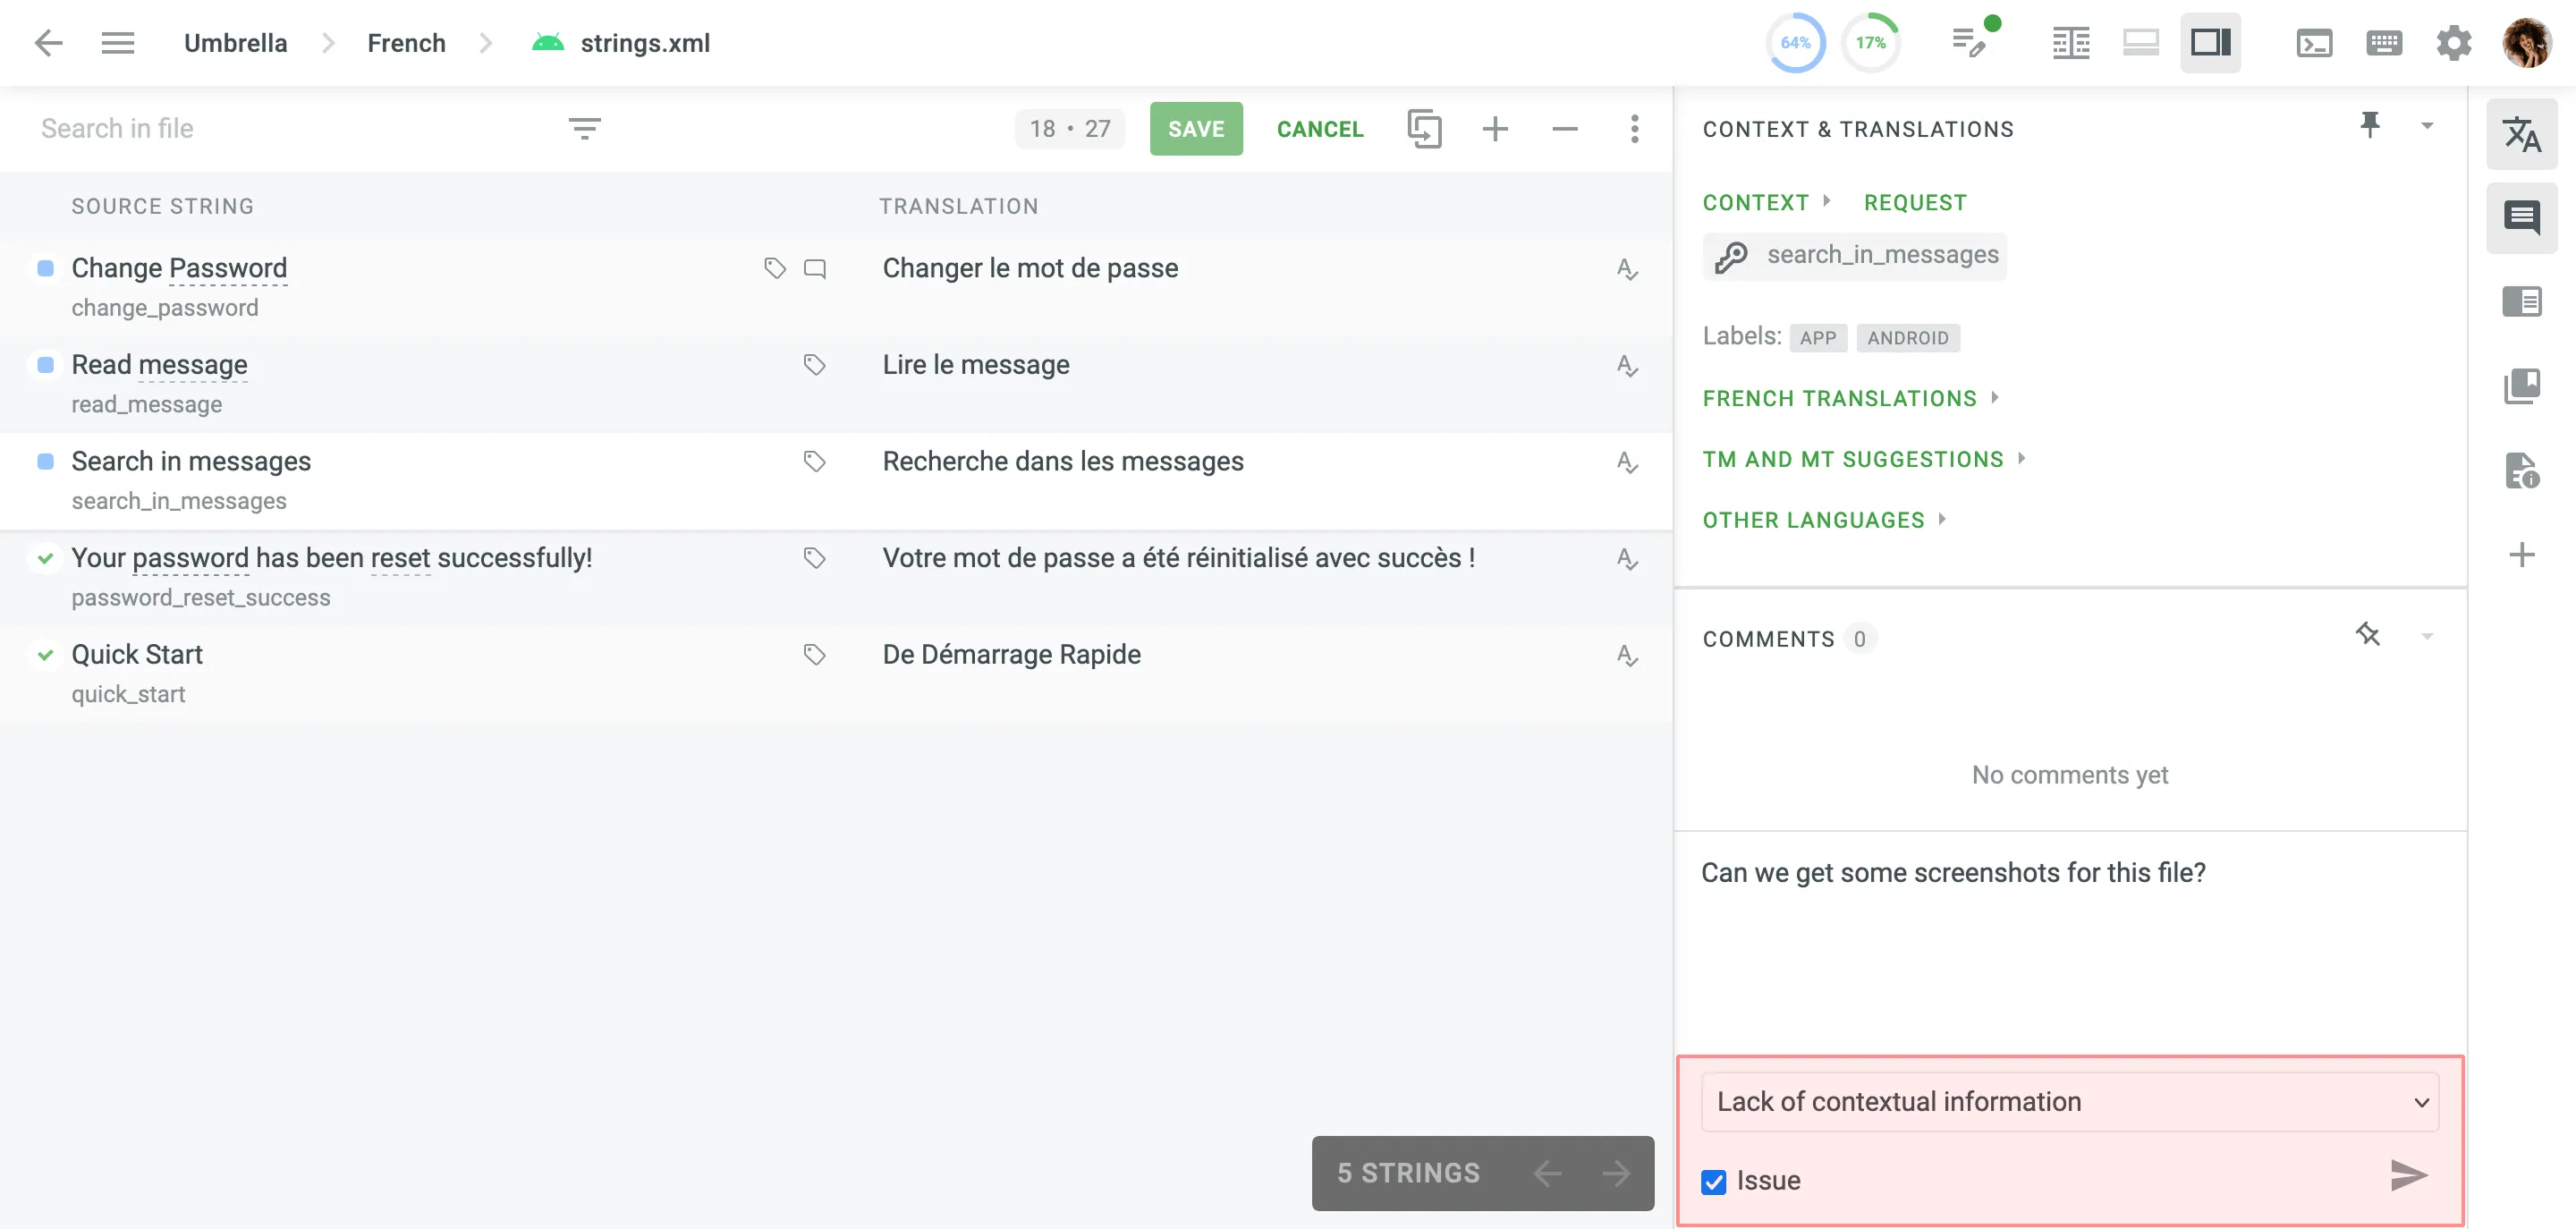 Available issue types include: * **General question** – Ask anything related to the string or its translations. * **Current translation is wrong** – The existing translation is incorrect. * **Lack of contextual information** – You need clarification to understand what the string means. * **Mistake in the source string** – There’s a typo or error in the original text. Once submitted, the issue becomes visible to project managers and is marked in the Editor with a icon. ### [Editing or Resolving Your Own Issues](#editing-or-resolving-your-own-issues) [Section titled “Editing or Resolving Your Own Issues”](#editing-or-resolving-your-own-issues) If you’ve reported an issue, you can edit, resolve, or delete it at any time. To manage your issues, follow these steps: 1. Hover over your comment in the **Comments** section. 2. Select **Edit**, **Resolve**, or **Delete**. 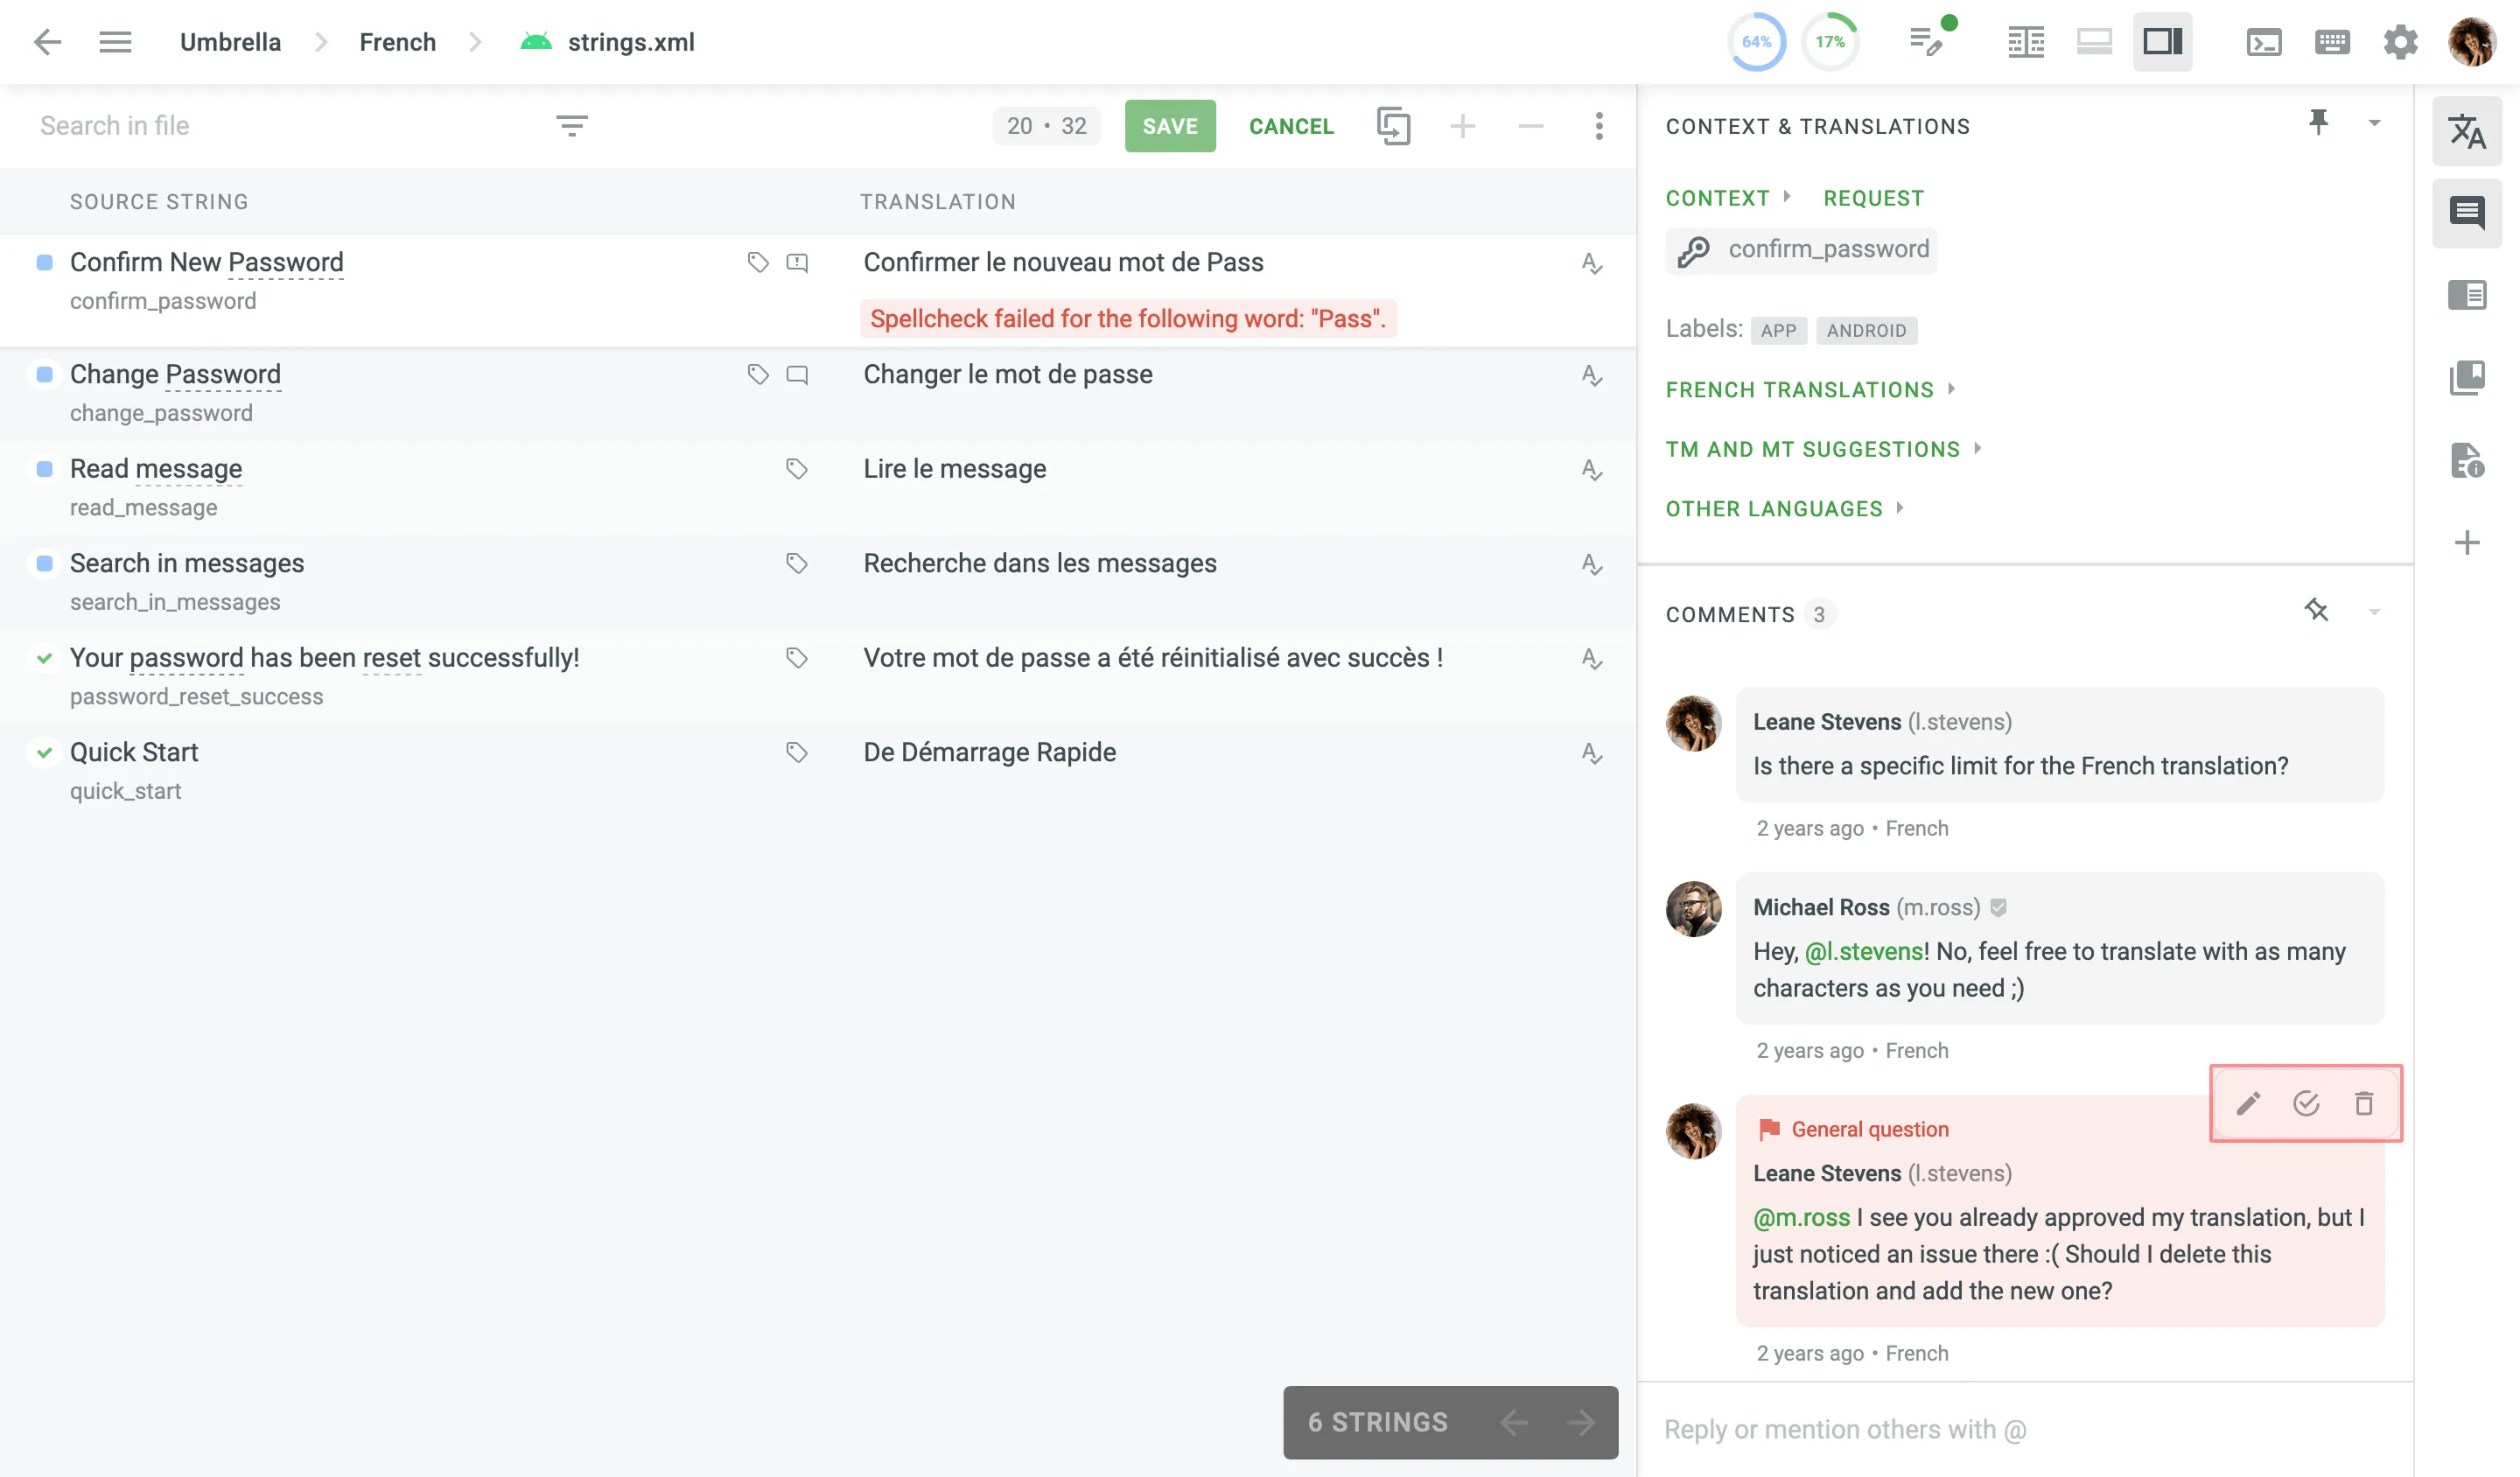 ### [Best Practices](#best-practices) [Section titled “Best Practices”](#best-practices) Clear, specific issues help project managers and developers respond quickly and improve translation quality across the project. If you’re ever unsure, even if there’s context or a screenshot, report the issue. It’s always better to ask than assume. * **Report uncertainty** – Don’t guess. If the meaning of a string isn’t clear, create an issue. * **Describe the problem clearly** – Give enough detail for managers to understand the context and provide a useful response. * **Choose the correct issue type** – This helps route your message to the right person and speeds up resolution. * **Avoid duplicates** – If a similar issue already exists, add a comment to continue the discussion instead of creating a new one. ## [For Managers](#for-managers) [Section titled “For Managers”](#for-managers) A clear process for handling reported issues helps ensure that translators receive timely support and that translation quality stays high. This section explains how to view and manage reported issues, outlines best practices for maintaining a responsive workflow, and offers suggestions for tools and integrations that can help scale the process. ### [Managing Issues](#managing-issues) [Section titled “Managing Issues”](#managing-issues) Project managers and proofreaders can view, filter, respond to, and resolve issues reported by translators. Whether you’re working directly in the Editor or managing large-scale feedback across projects, Crowdin Enterprise provides flexible tools to help you stay organized and respond efficiently. #### [Viewing and Filtering Issues](#viewing-and-filtering-issues) [Section titled “Viewing and Filtering Issues”](#viewing-and-filtering-issues) To see all strings with unresolved issues in the Editor, follow these steps: 1. Click to open the string filter. 2. Select **With Unresolved Issues**. 3. Select **All Languages** or **Current Language** to narrow results. 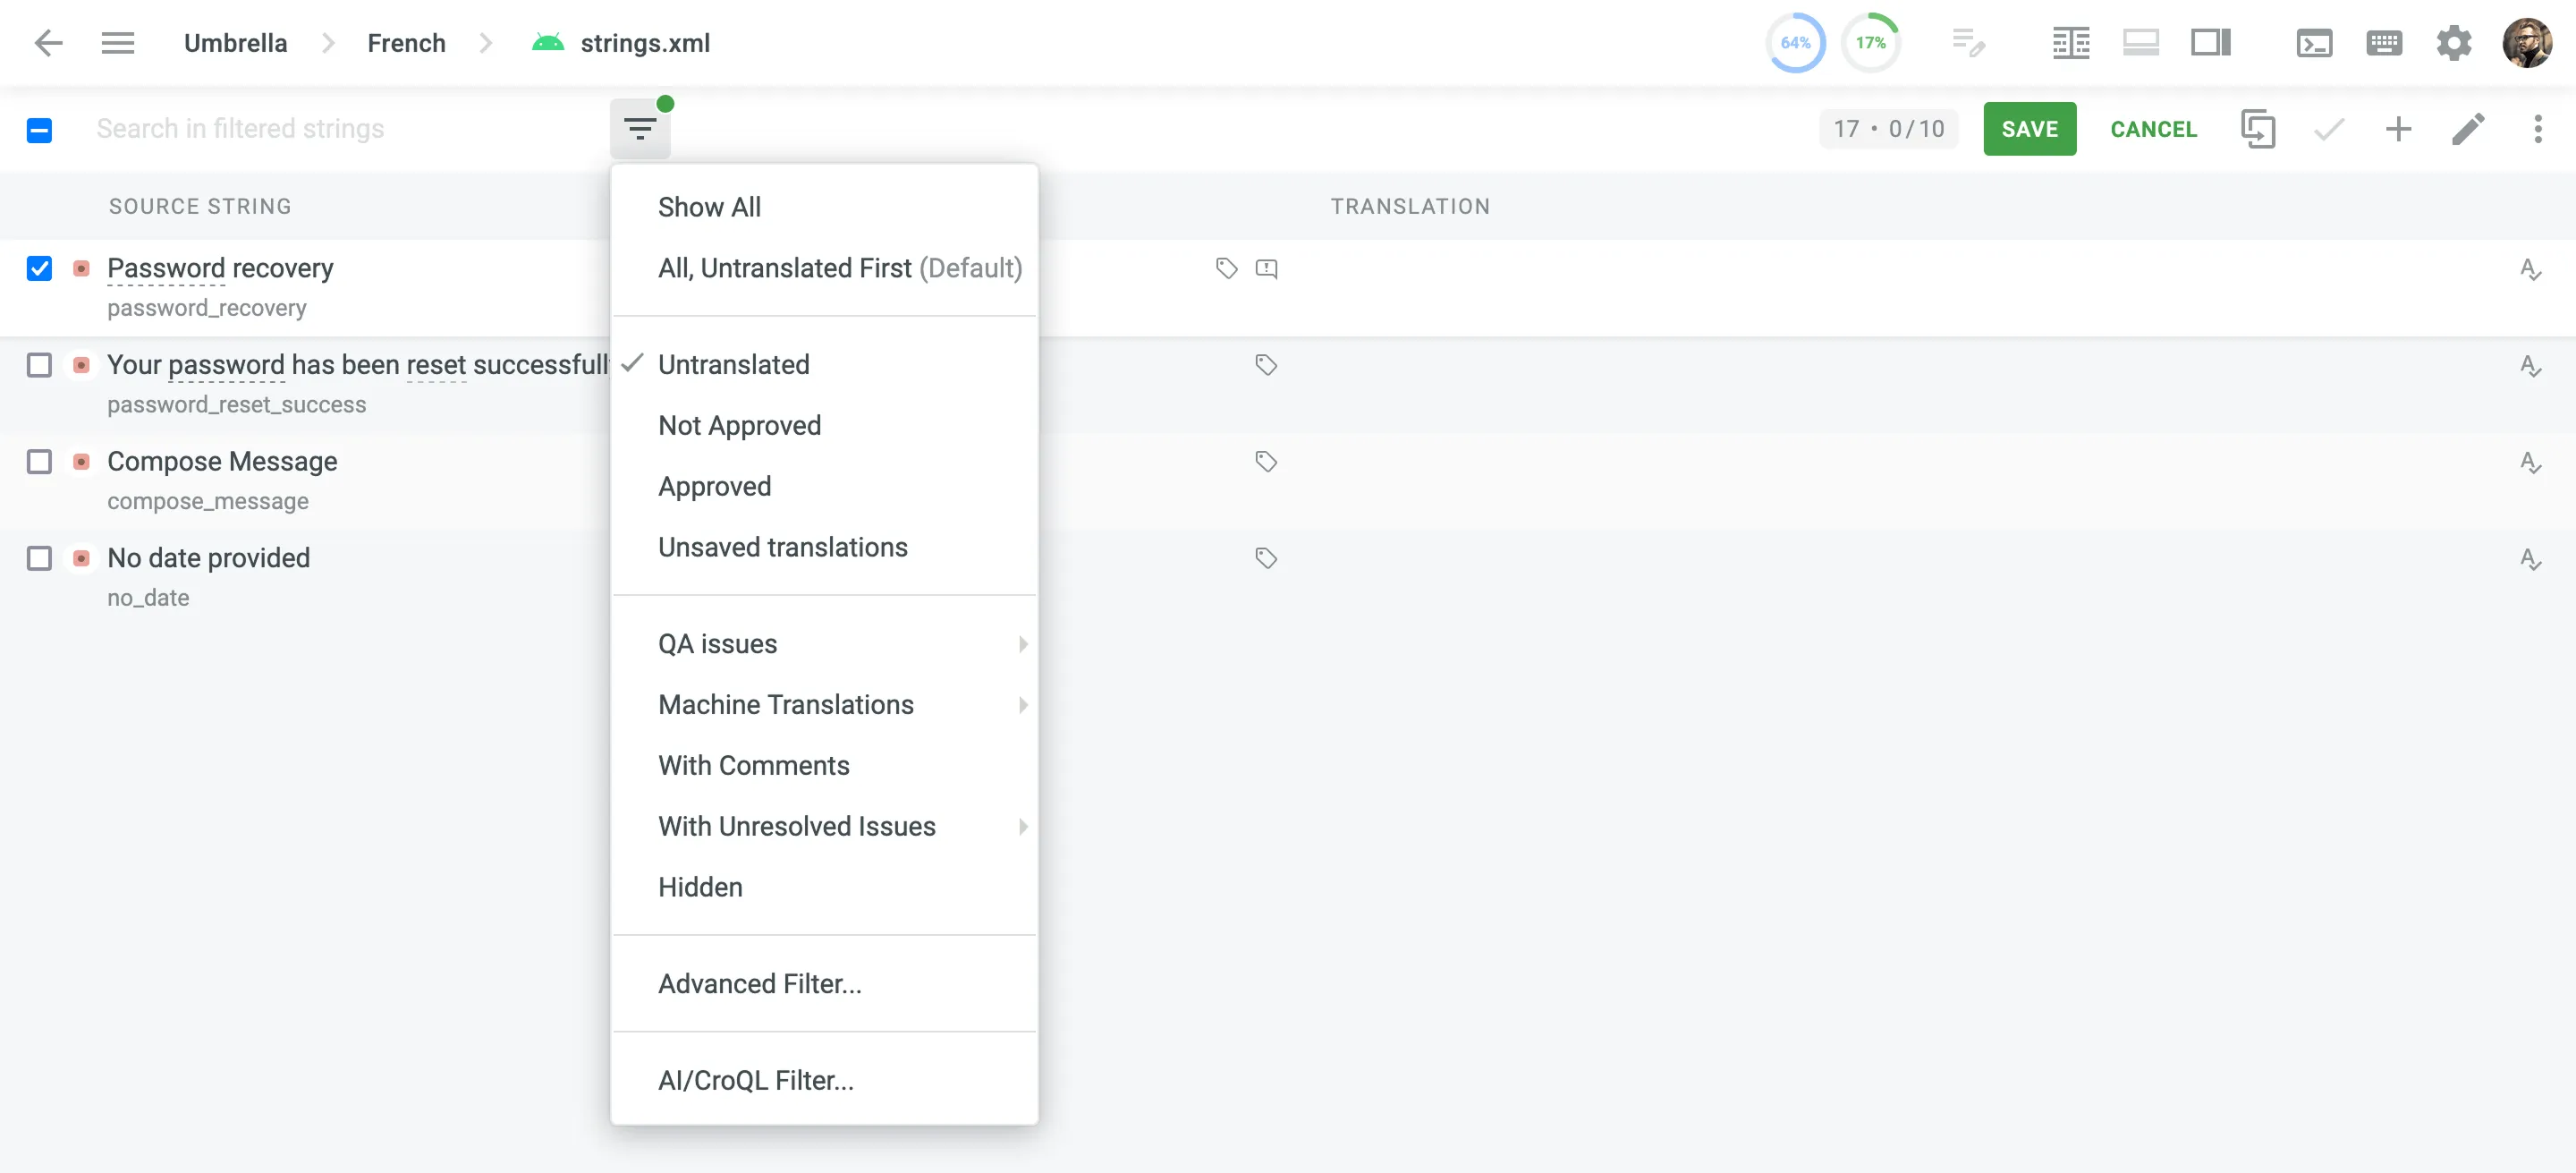 Strings with unresolved issues are marked with the icon. Filtering helps you prioritize which strings need attention first. To fine-tune the list of strings even further, you can use the [Advanced Filter](/online-editor/#advanced-filter). For example, to show only issues of a specific type or those reported by a certain project member. Read more about [Filtering Strings](/online-editor/#filtering-strings). #### [Responding and Resolving](#responding-and-resolving) [Section titled “Responding and Resolving”](#responding-and-resolving) You can respond to translator questions or feedback directly in the **Comments** section of the string. 1. Open the string with the reported issue. 2. Open the **Comments** section. 3. Click **Reply** on the reported issue, add your response, and press `Ctrl` +`Enter` or `⌘` +`Enter` or click **Send**. 4. Click **Resolve** once the issue has been addressed. 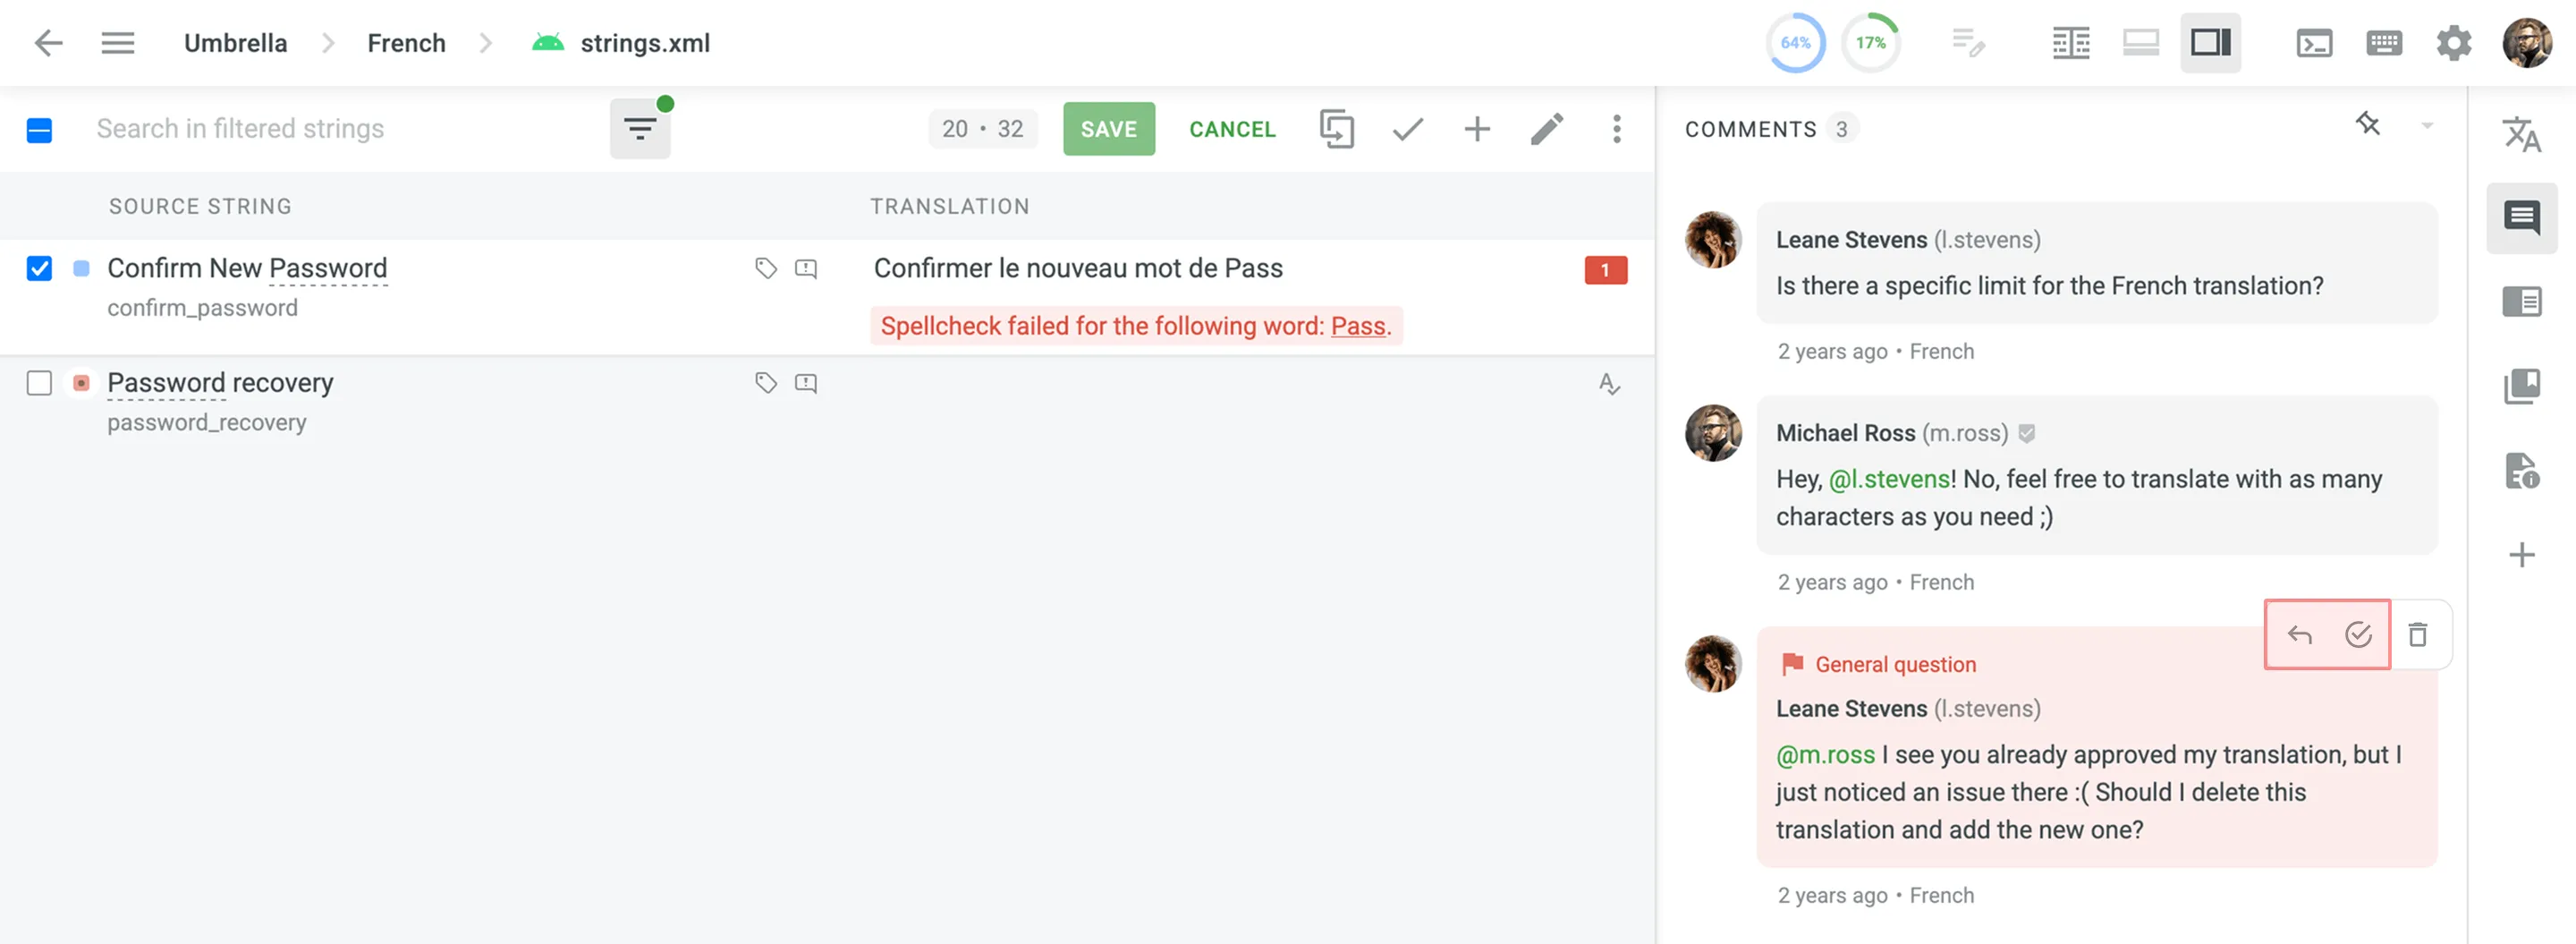 If needed, you can delete an issue. Hover over it to reveal the available options. ### [Best Practices](#best-practices-1) [Section titled “Best Practices”](#best-practices-1) Clear communication and consistent handling of issues help maintain translation quality and team trust. Here’s how to build an effective issue management workflow: * **Encourage a culture of asking questions** – Make it clear to translators that reporting issues is welcome and expected. It shows they care about accuracy-not that they’re slowing things down. * **Assign responsibility for responses** – Define who should handle different types of issues (e.g., source text problems, lack of context, UI-specific questions). This prevents confusion and speeds up replies. * **Aim for quick first responses** – Even a short “Looking into this” message lets translators know their feedback isn’t being ignored. * **Review issue trends regularly** – Frequent reports of the same type (e.g., unclear UI strings) can help you identify larger problems in your content or workflow. * **Close the loop** – Whenever possible, follow up in Crowdin Enterprise when an issue is resolved. It builds trust and shows that feedback matters. ### [Recommended Tools and Workflows](#recommended-tools-and-workflows) [Section titled “Recommended Tools and Workflows”](#recommended-tools-and-workflows) To handle issues more efficiently especially in large or complex projects you can extend Crowdin Enterprise’s functionality using integrations and automation: * Use the [Jira Integration](/jira-integration/) to automatically create and track reported issues in your development workflow. * Set up the [Slack Integration](/account-notifications/#slack-integration) to receive real-time notifications when translators report issues, so your team can respond promptly. * Use [Webhooks](/webhooks/) to trigger custom workflows when issues are created, updated, deleted, or restored in Crowdin Enterprise. * Build custom issue-handling automations using the [Crowdin API](/developer/api/), such as forwarding issues to internal tools or triggering email alerts. * Browse the [Crowdin Store](https://store.crowdin.com/) to find ready-to-use apps and integrations that support issue tracking and response workflows. [Issues Manager ](https://store.crowdin.com/issues-manager)Track, filter, and resolve issues across multiple projects from a single dashboard.
# Jira Integration
> Keep track of source string and translation issues reported in Crowdin
Integration with Atlassian Jira allows you to keep track of source string and translation issues reported by users working on the project translation in Crowdin. With current integration, the following issue types reported in Crowdin Enterprise are supported for the Jira dashboard: * General issues * Lack of context issues * Translation issues * Source string issues Each synchronized issue type will have the parent task in Jira named after it. Each issue reported in Crowdin Enterprise will create a sub-task in the corresponding parent task in Jira. Caution The integration disables email notifications for project issues in Crowdin Enterprise that are synchronized with Jira. Once all reported issues have been resolved and their respective sub-tasks closed in Jira, you can also close their parent Jira task representing one of the Crowdin Enterprise issue types. As translators report new issues in the Crowdin Enterprise project, the Jira integration will create new parent Jira task with its corresponding sub-tasks for each issue in the Crowdin Enterprise project. 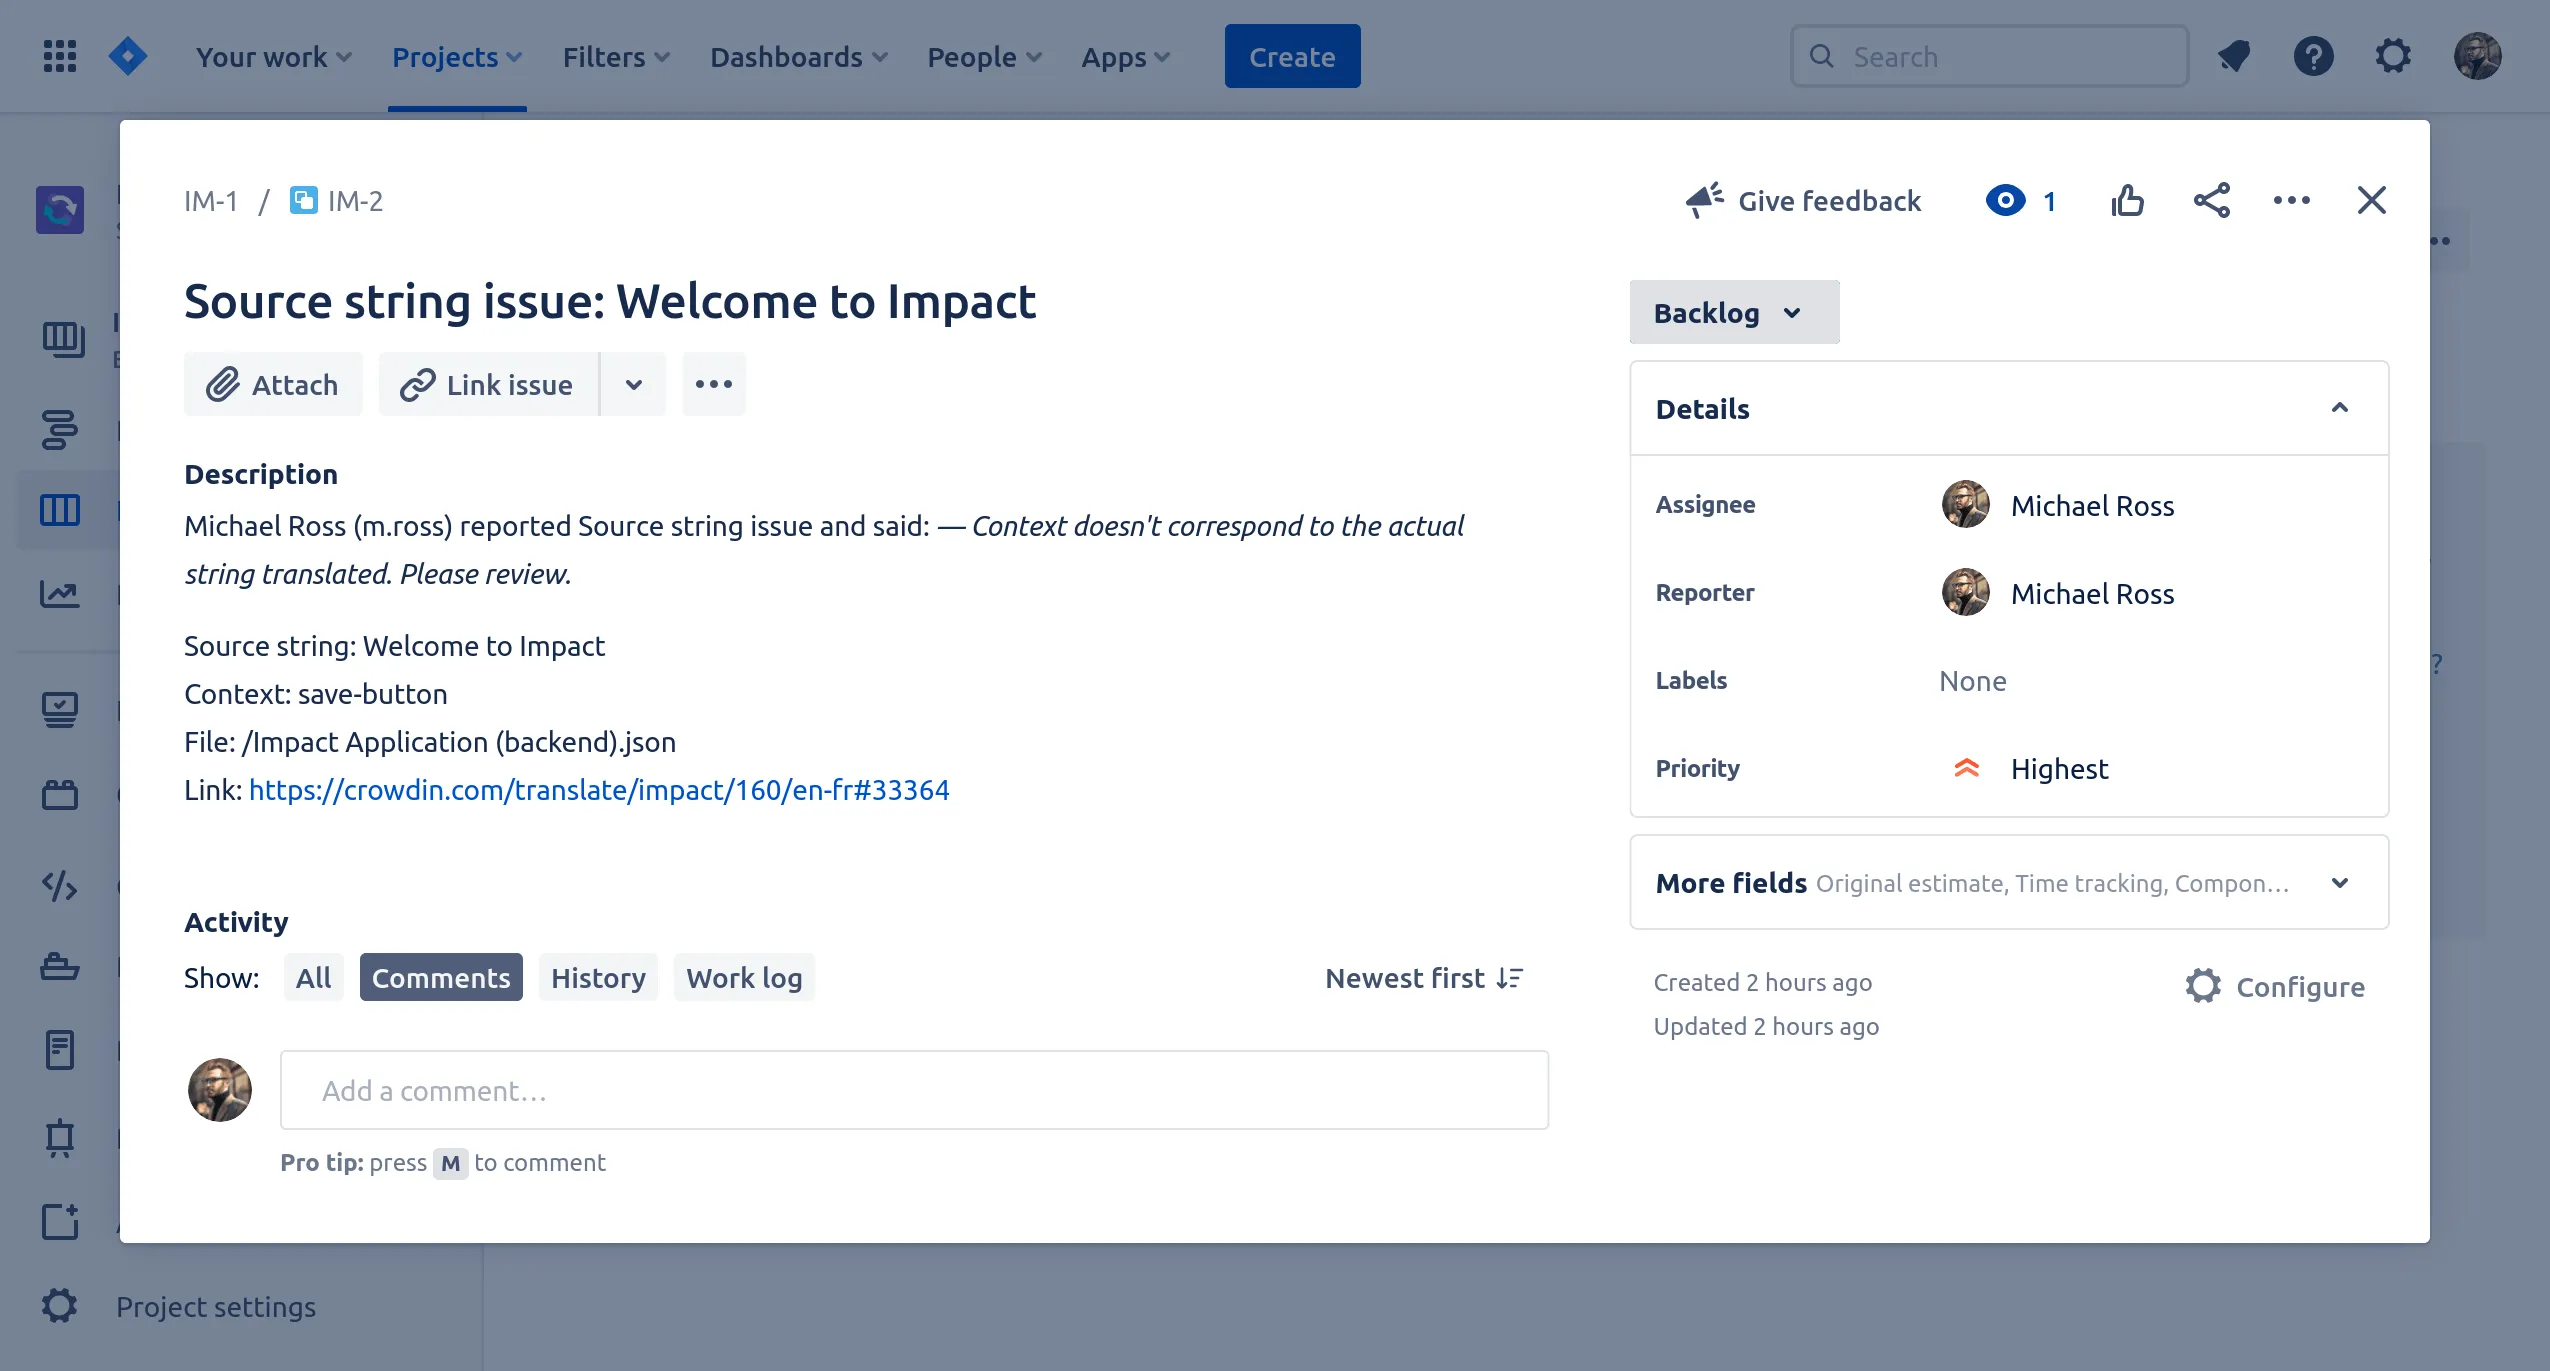 ## [Connecting Jira with Crowdin Enterprise](#connecting-jira-with-crowdin-enterprise) [Section titled “Connecting Jira with Crowdin Enterprise”](#connecting-jira-with-crowdin-enterprise) To connect Jira with your project in Crowdin Enterprise, follow these steps: 1. Open your project and select **Integrations** on the left sidebar. 2. Click on **Jira Software** in the Integrations list. 3. Enter the Base URL of your Jira project and click **Set Up Integration**. 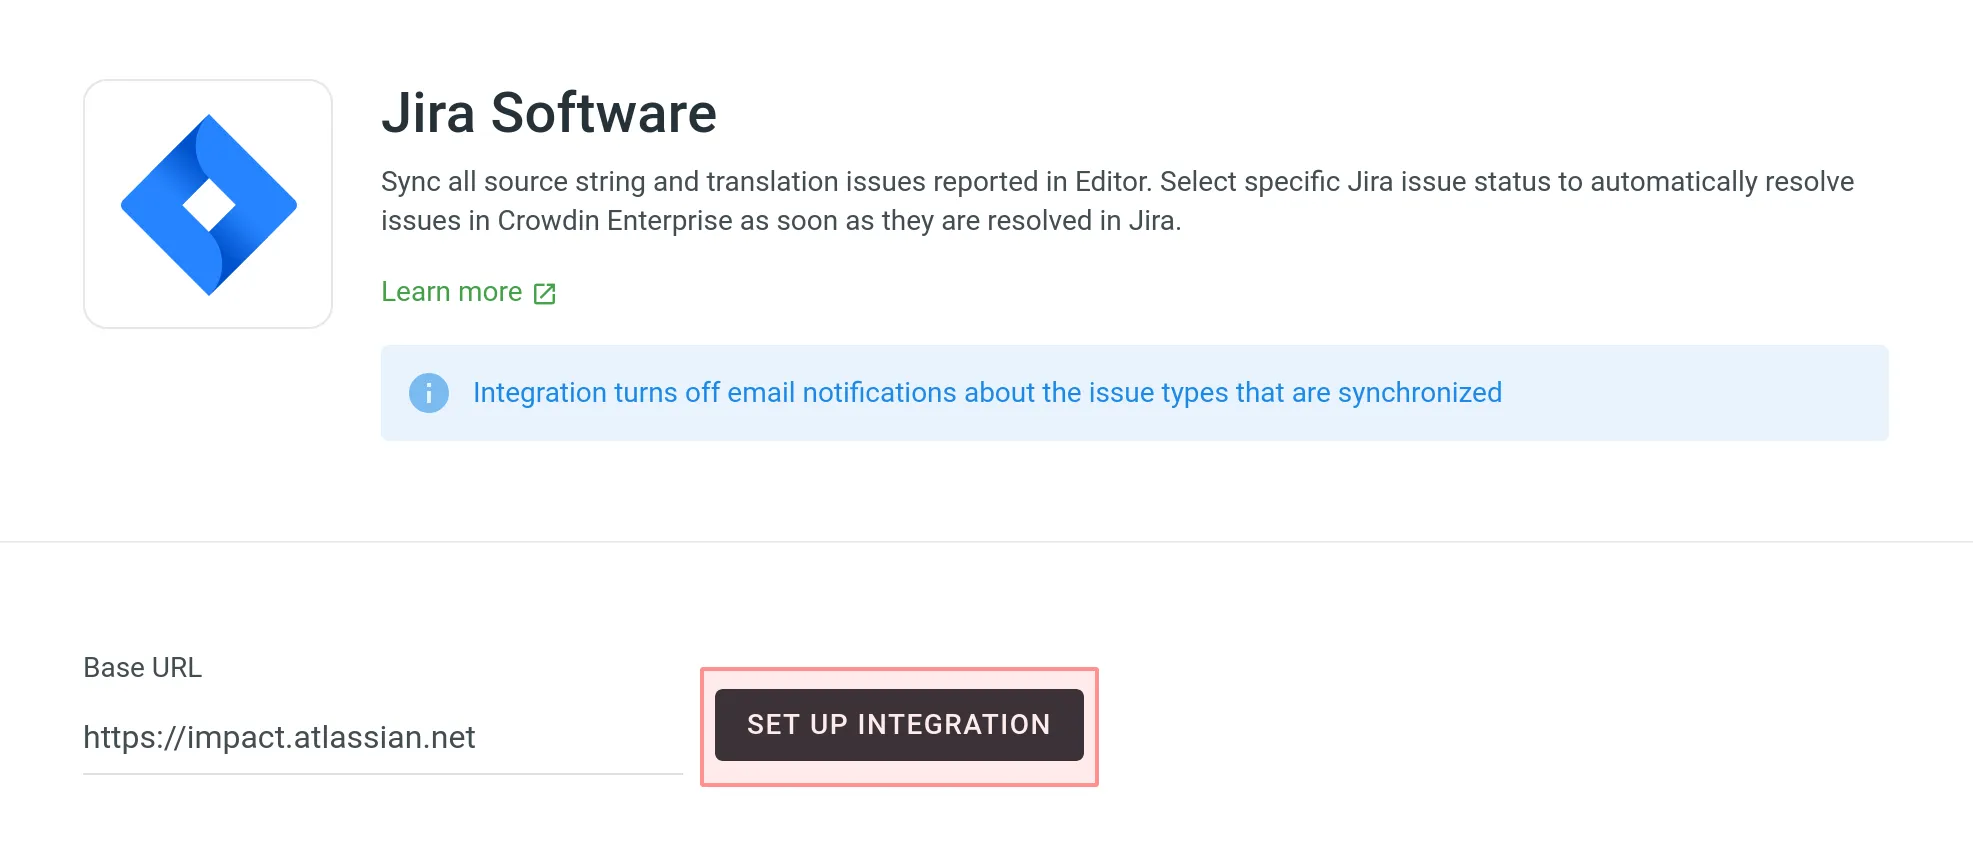 You’ll then access the **Providing Access to Your Jira Project** dialog. 4. Configure an **Application Link** in Jira: 1. Log in to Jira as a user with **Jira Administrator** permissions. 2. Go to **Jira settings > Products > Application links**. 3. Click **Create link**. 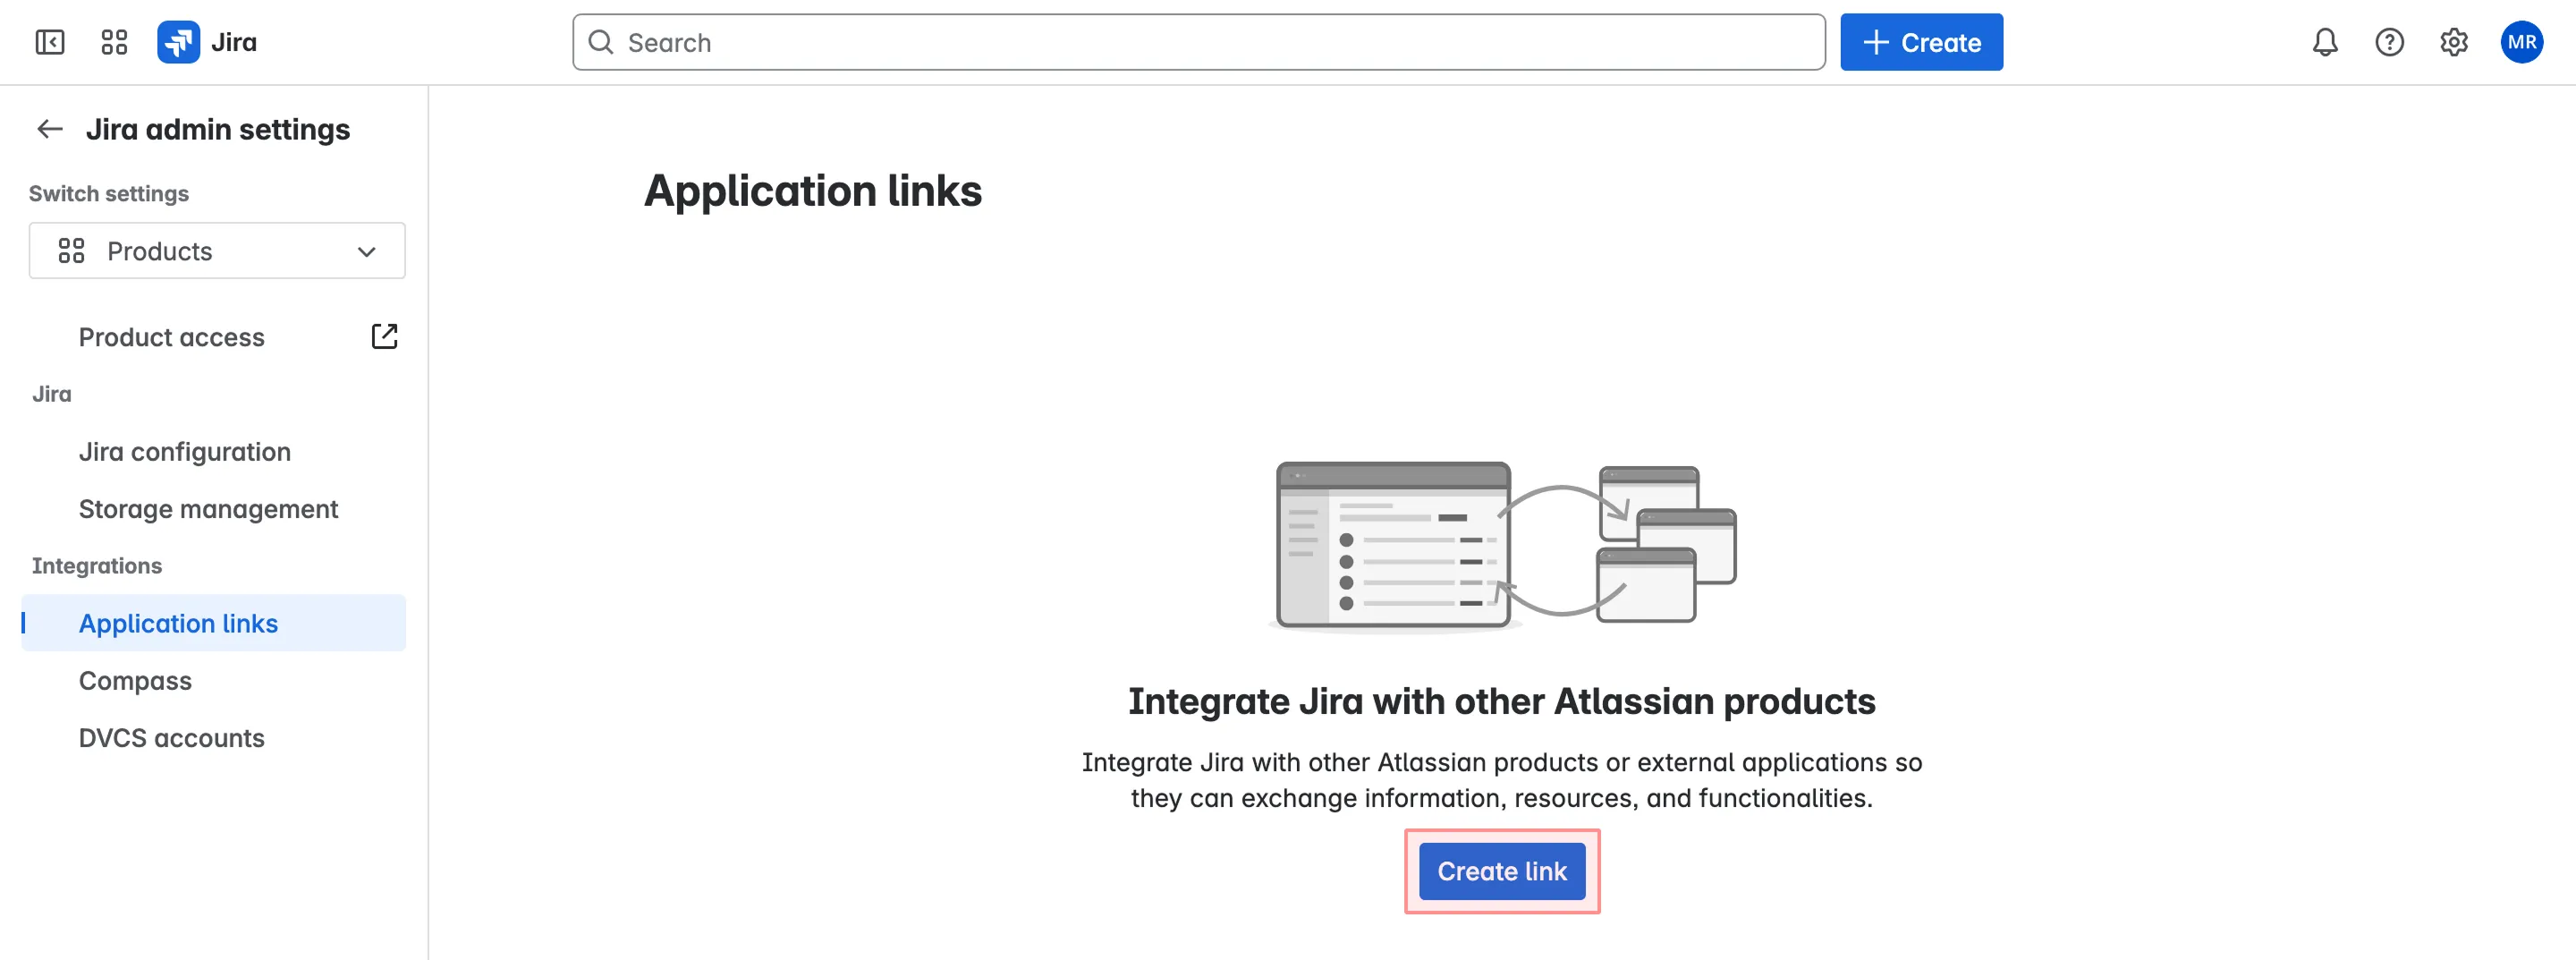 4. Select **Direct application link**, enter your Crowdin Enterprise URL, and click **Next**. 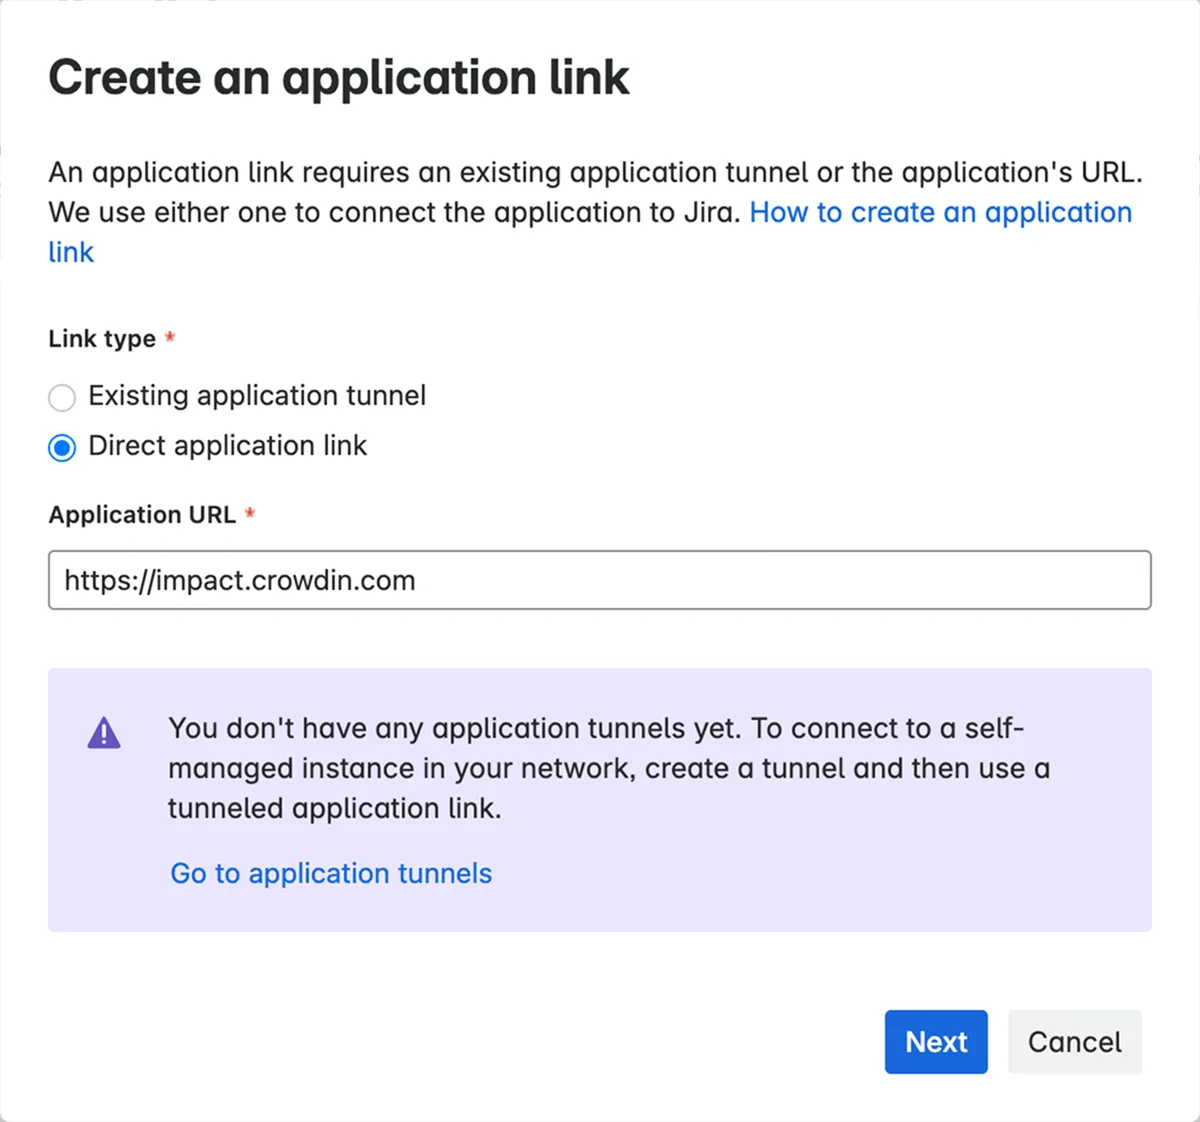 Due to Jira functionality, it sometimes does not receive the response from the entered URL. If you see the message below, check the provided URL to be correct and click **Continue**. 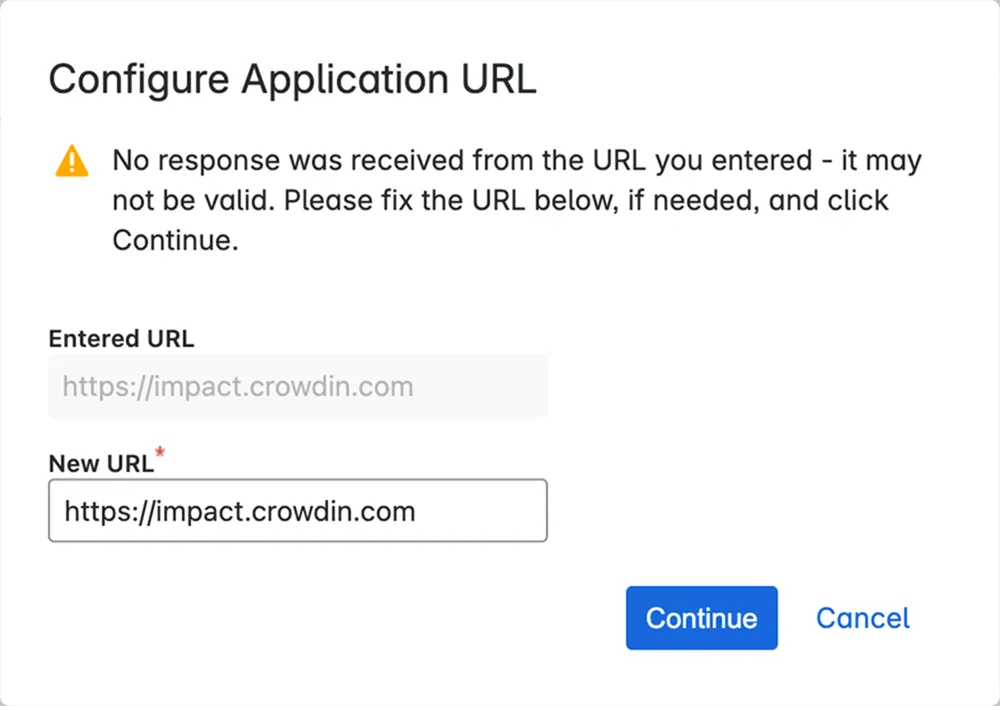 5. Fill in all the required fields in dialog windows and click **Continue** to finish configuring the link: * Application name: Crowdin Enterprise Integration * Application type: Generic Application * Select **Create incoming link** and click **Continue** 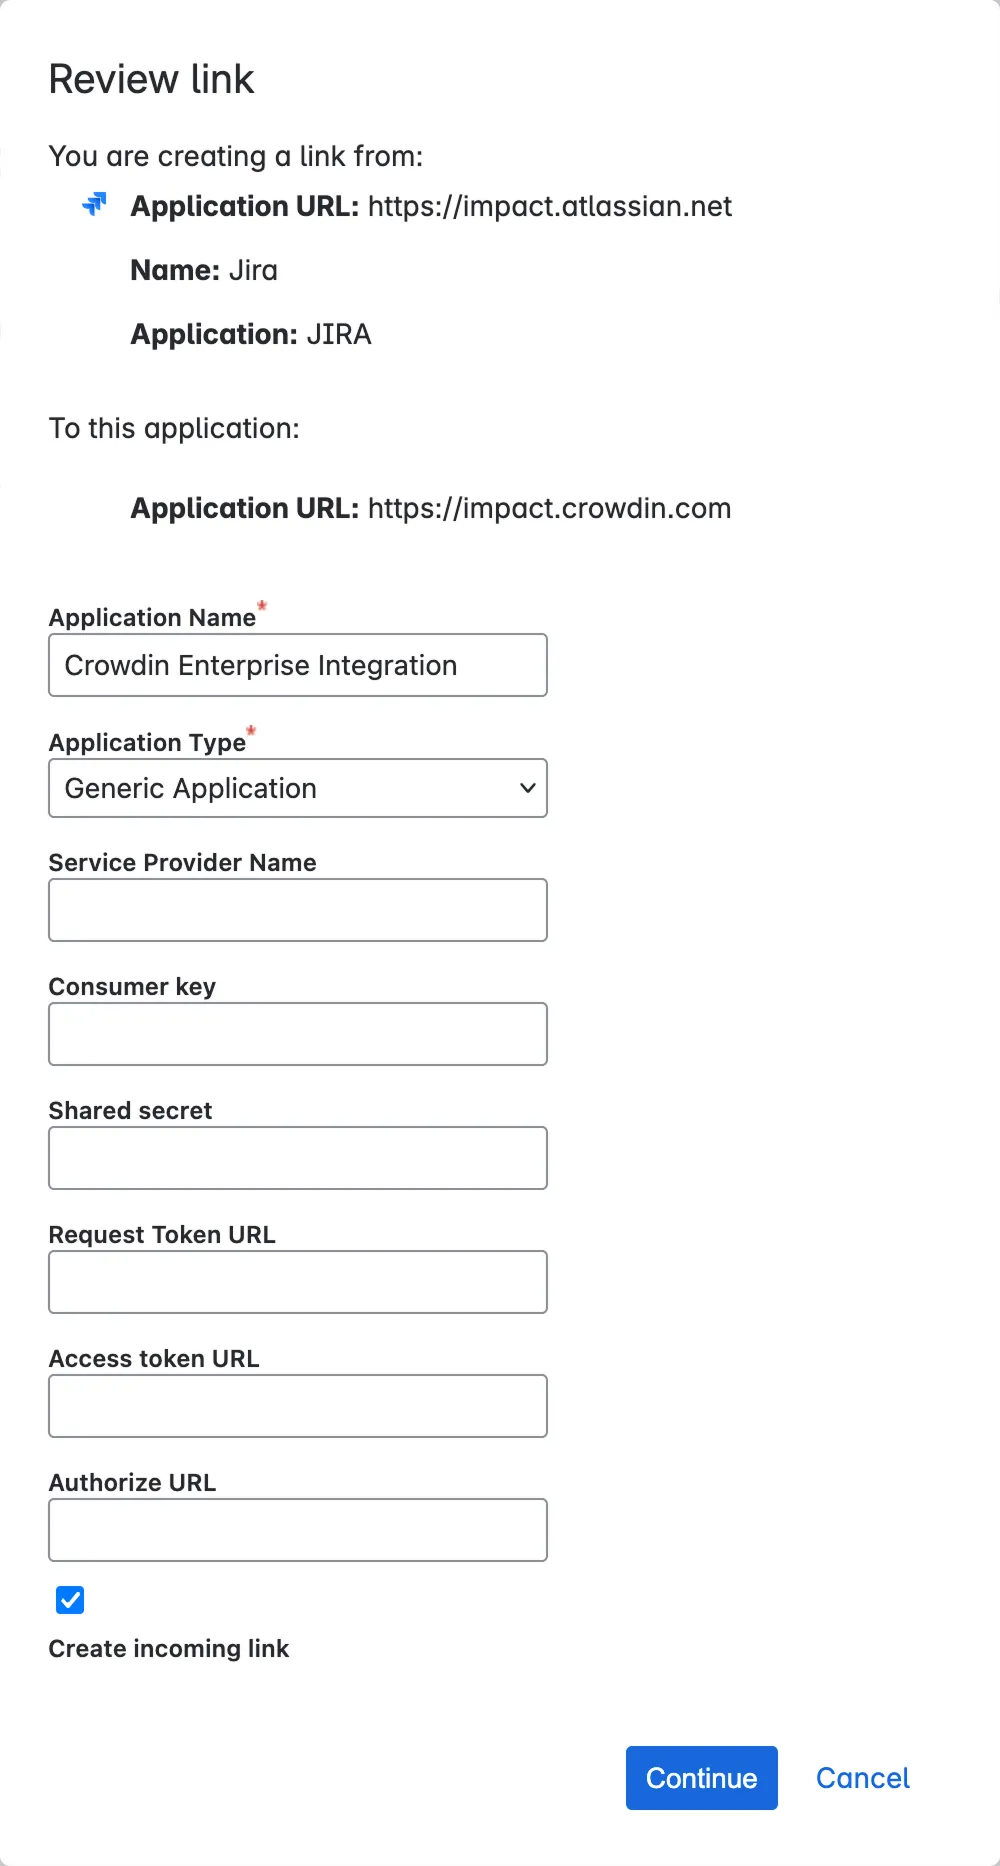 * Consumer Key: Crowdin Enterprise * Consumer Name: Crowdin Enterprise * Public Key: copy it from the **Providing Access to Your Jira Project** dialog in Crowdin Enterprise 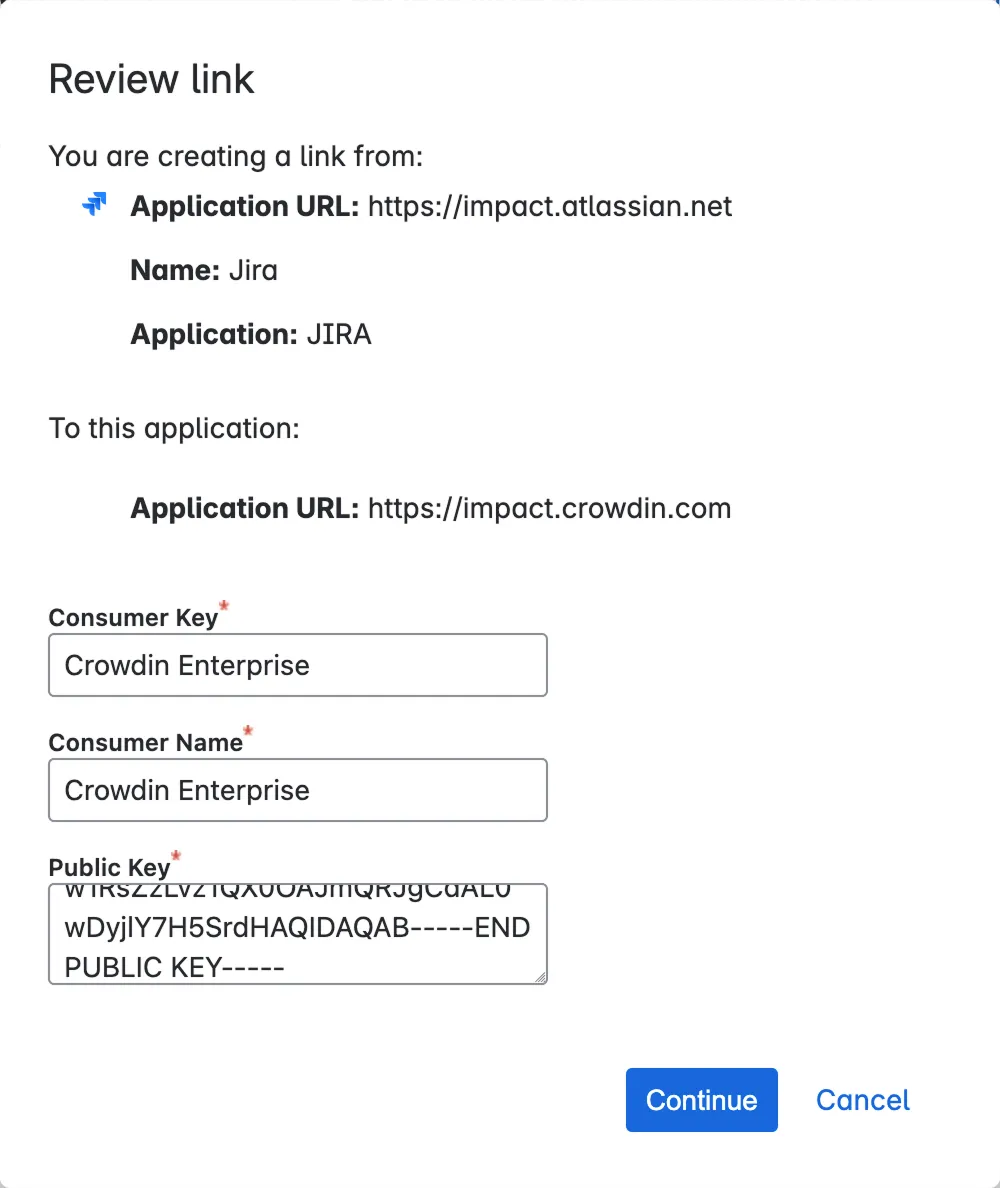 Click **Continue** to finalize the Application Link setup. 5. Go back to Crowdin Enterprise and click **Next** in the **Providing Access to Your Jira Project** dialog. 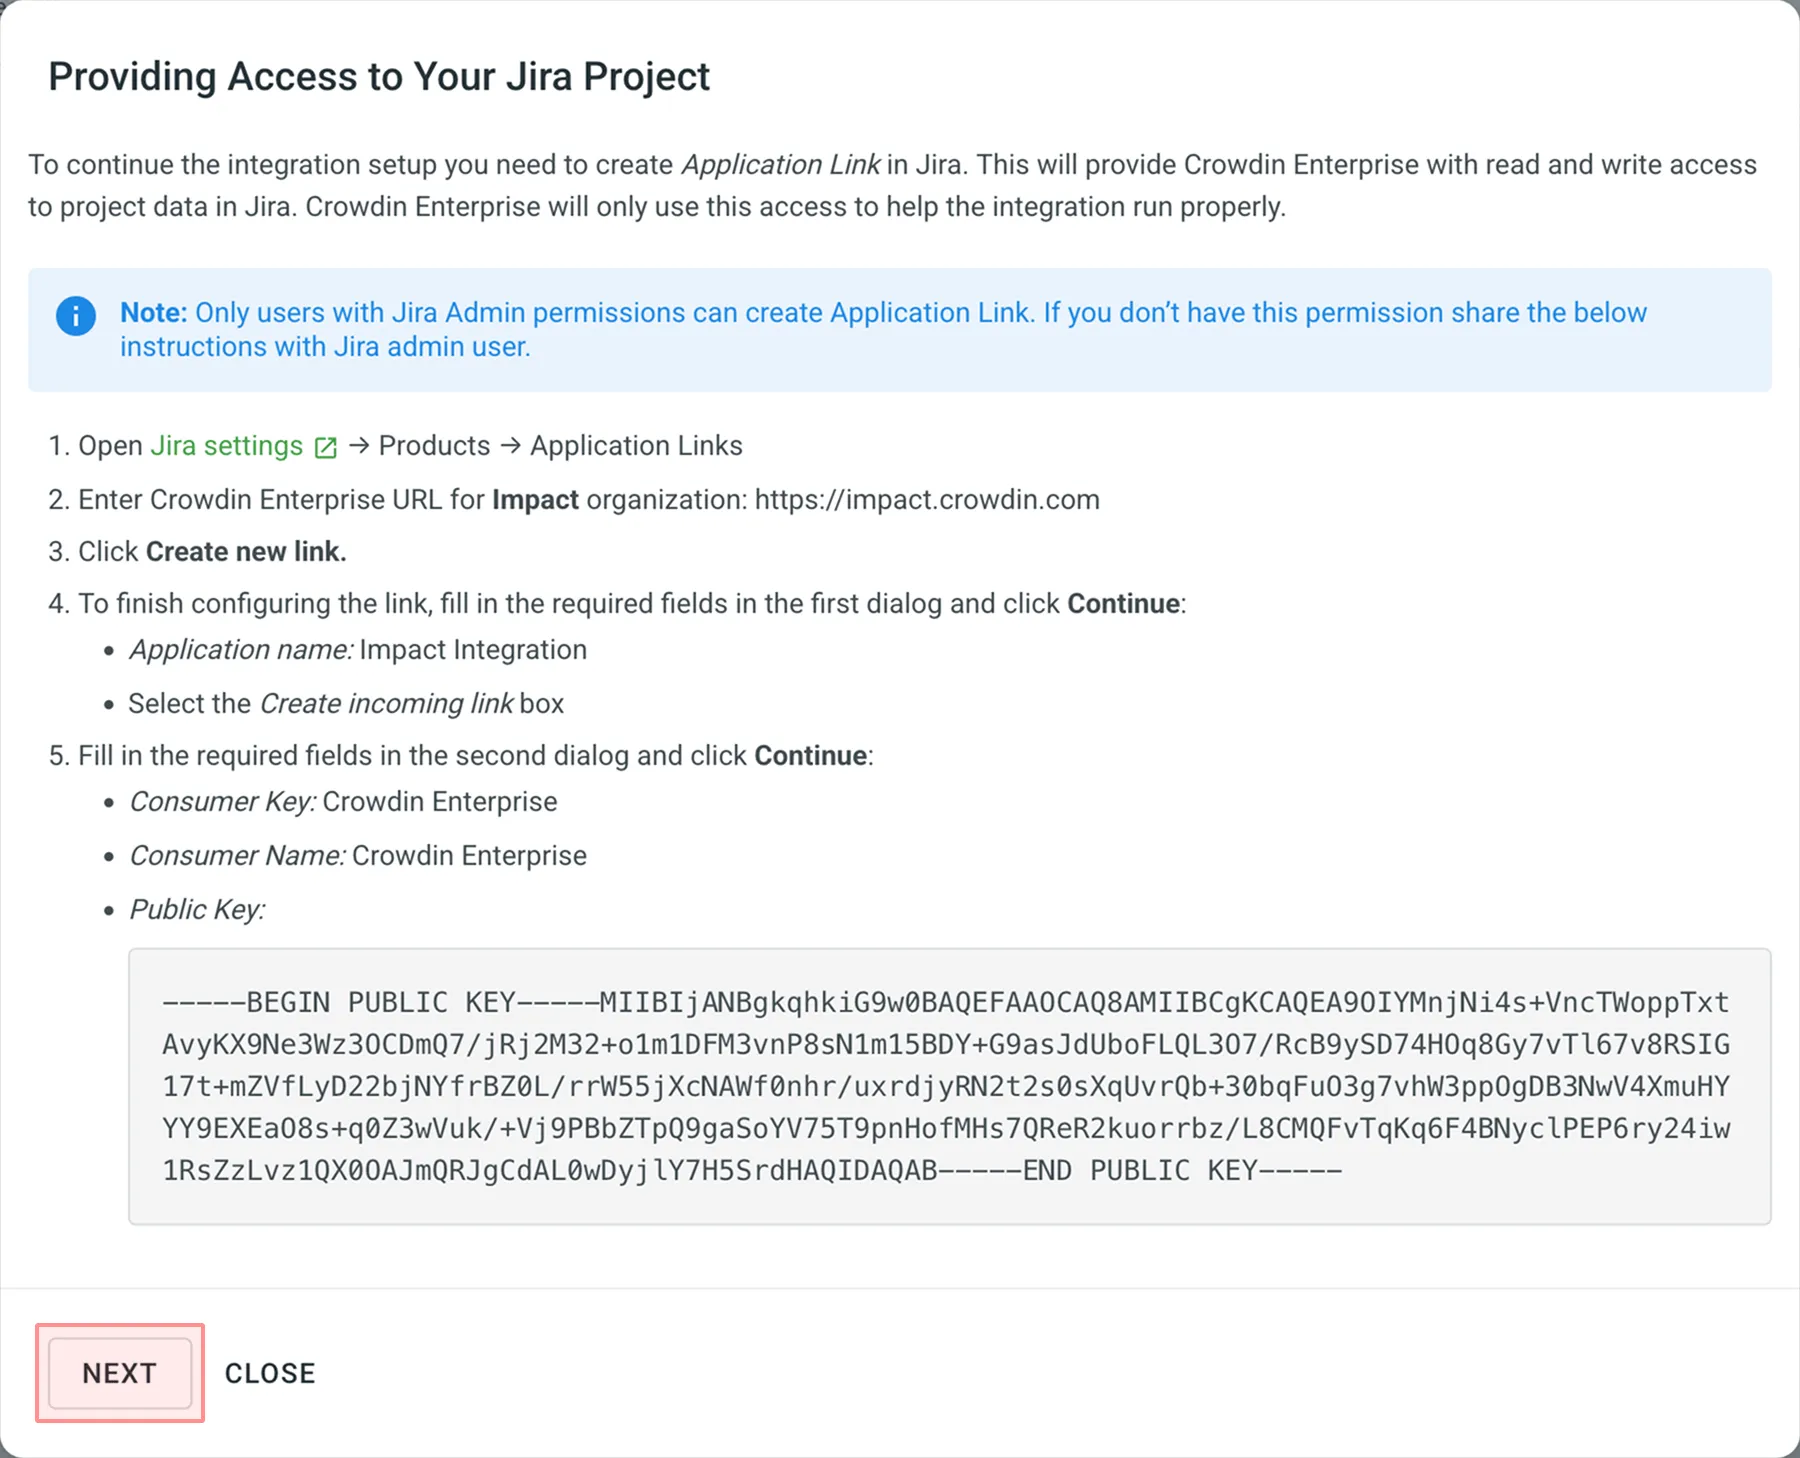 6. Allow read and write access to project data in Jira. Crowdin Enterprise will use this access to help the integration run correctly. 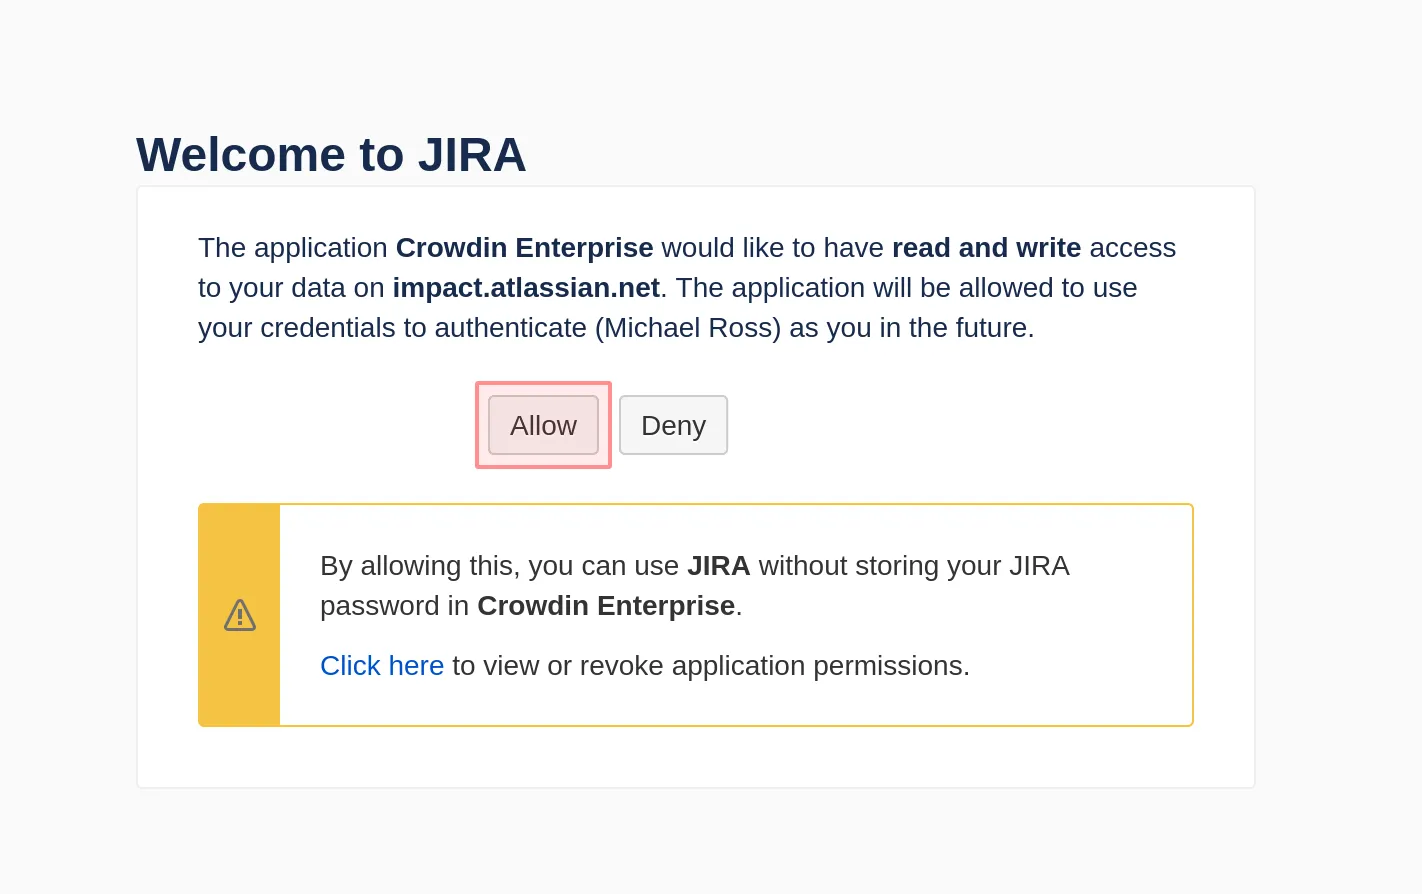 7. Choose the Jira project key, select types, and configure settings of Crowdin Enterprise issues that you’d like to be synchronized with your Jira project. Jira issue settings available are: * Type * Subtask Type * Priority * Assignee * Labels (Optional) * Status – used to select the Jira status value that will trigger the closure of a related string issue in the Crowdin Enterprise project. 8. Click **Save**. 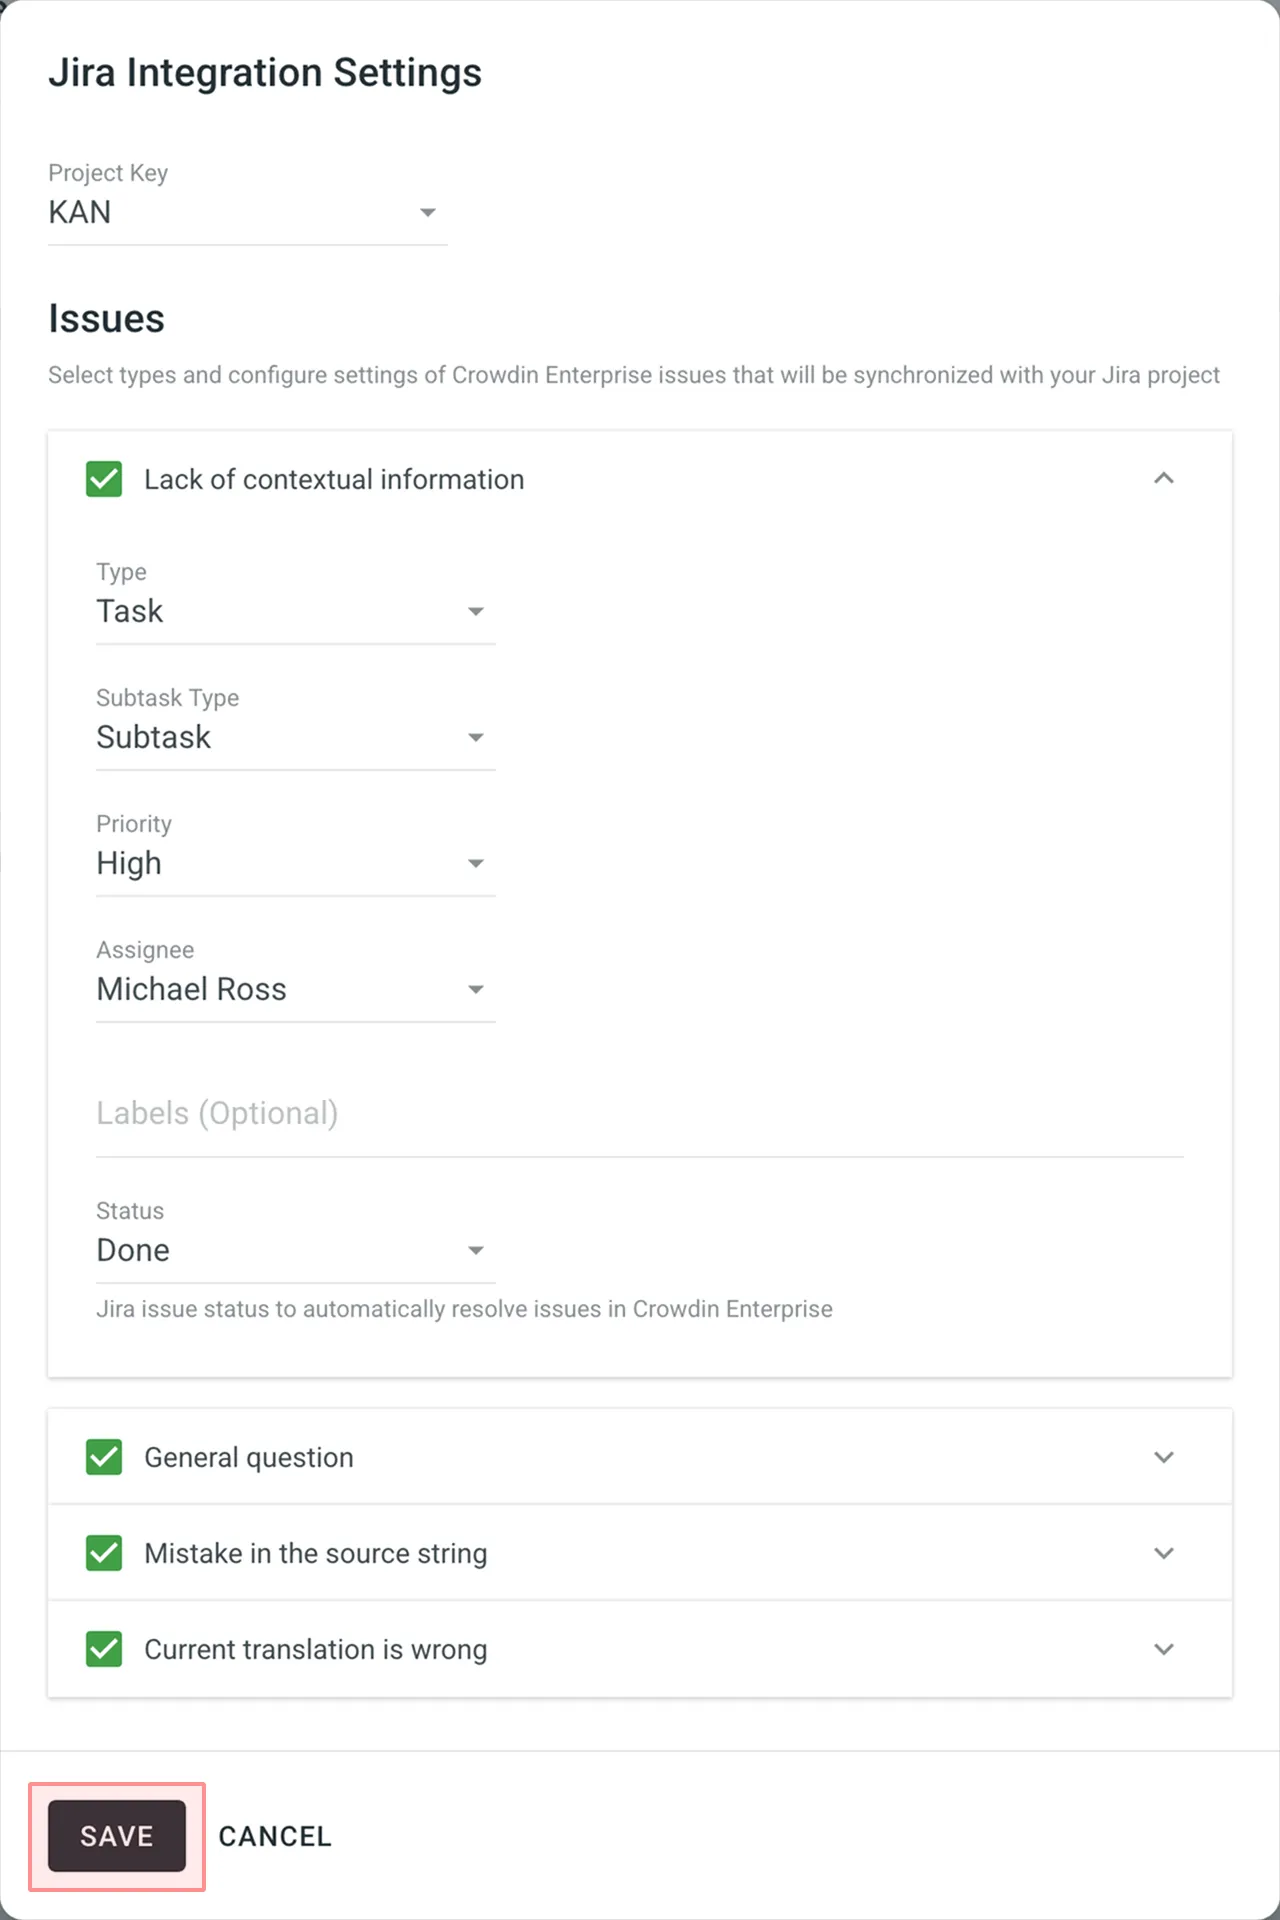 ## [Synchronizing Issues](#synchronizing-issues) [Section titled “Synchronizing Issues”](#synchronizing-issues) Once you set up the integration, you can synchronize already existing issues in Crowdin Enterprise (if any). A short message would tell you how many issues aren’t synchronized yet. To synchronize them, click **Sync Issues**. 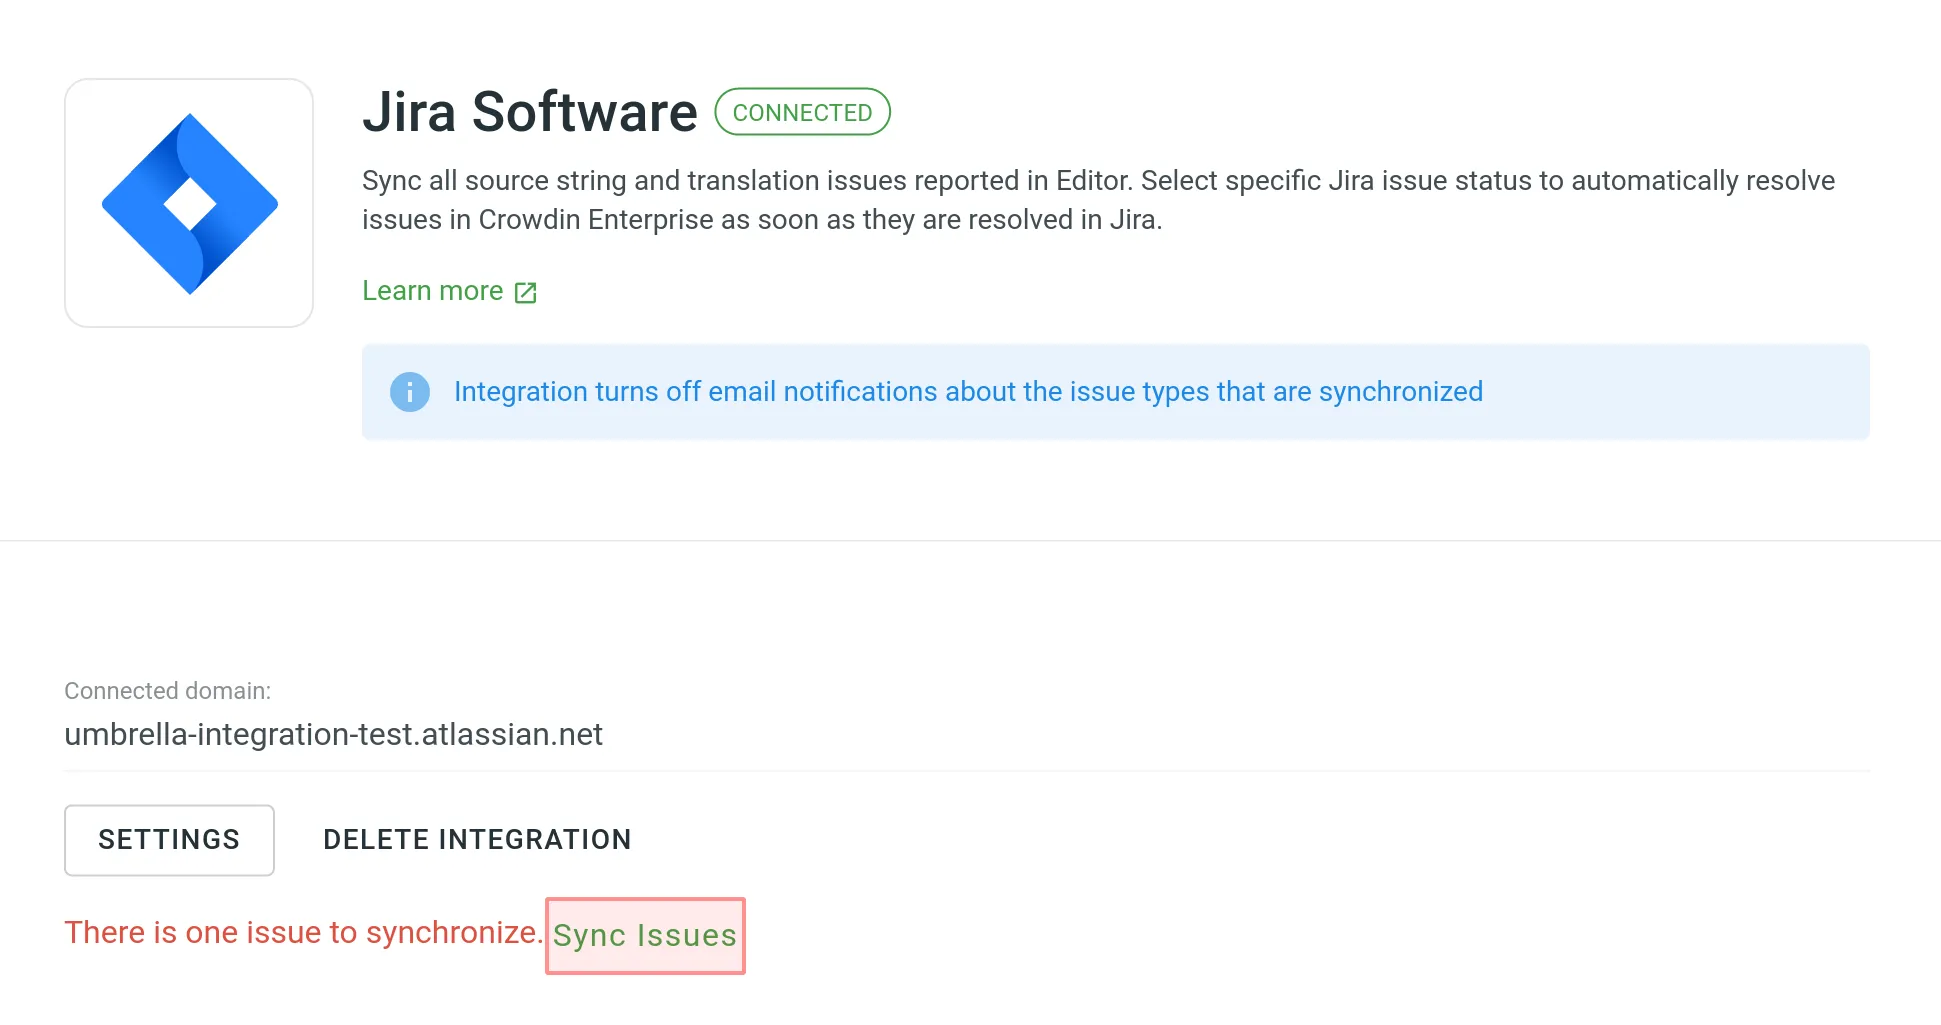 ## [Managing Jira Integration Settings](#managing-jira-integration-settings) [Section titled “Managing Jira Integration Settings”](#managing-jira-integration-settings) To change the integration settings, click **Settings** and apply the necessary changes. Updated settings will apply only to the newly synchronized issues. All the issues synchronized before will remain without any changes. ## [Deleting Integration](#deleting-integration) [Section titled “Deleting Integration”](#deleting-integration) To delete the integration, click **Delete Integration**.
# Machine Translation
> Learn how to configure machine translation engines in Crowdin Enterprise
Machine translation engines integrated with Crowdin Enterprise provide translation suggestions from services like Google Translate and AutoML Translation, Microsoft Translate, and others. MT suggestions are displayed in the Editor’s TM and MT Suggestions section in the order of the engines’ configuration dates. To prioritize a specific engine’s suggestions, configure that engine first. Also, you can perform [Pre-Translation](/enterprise/pre-translation/) using MT engines. 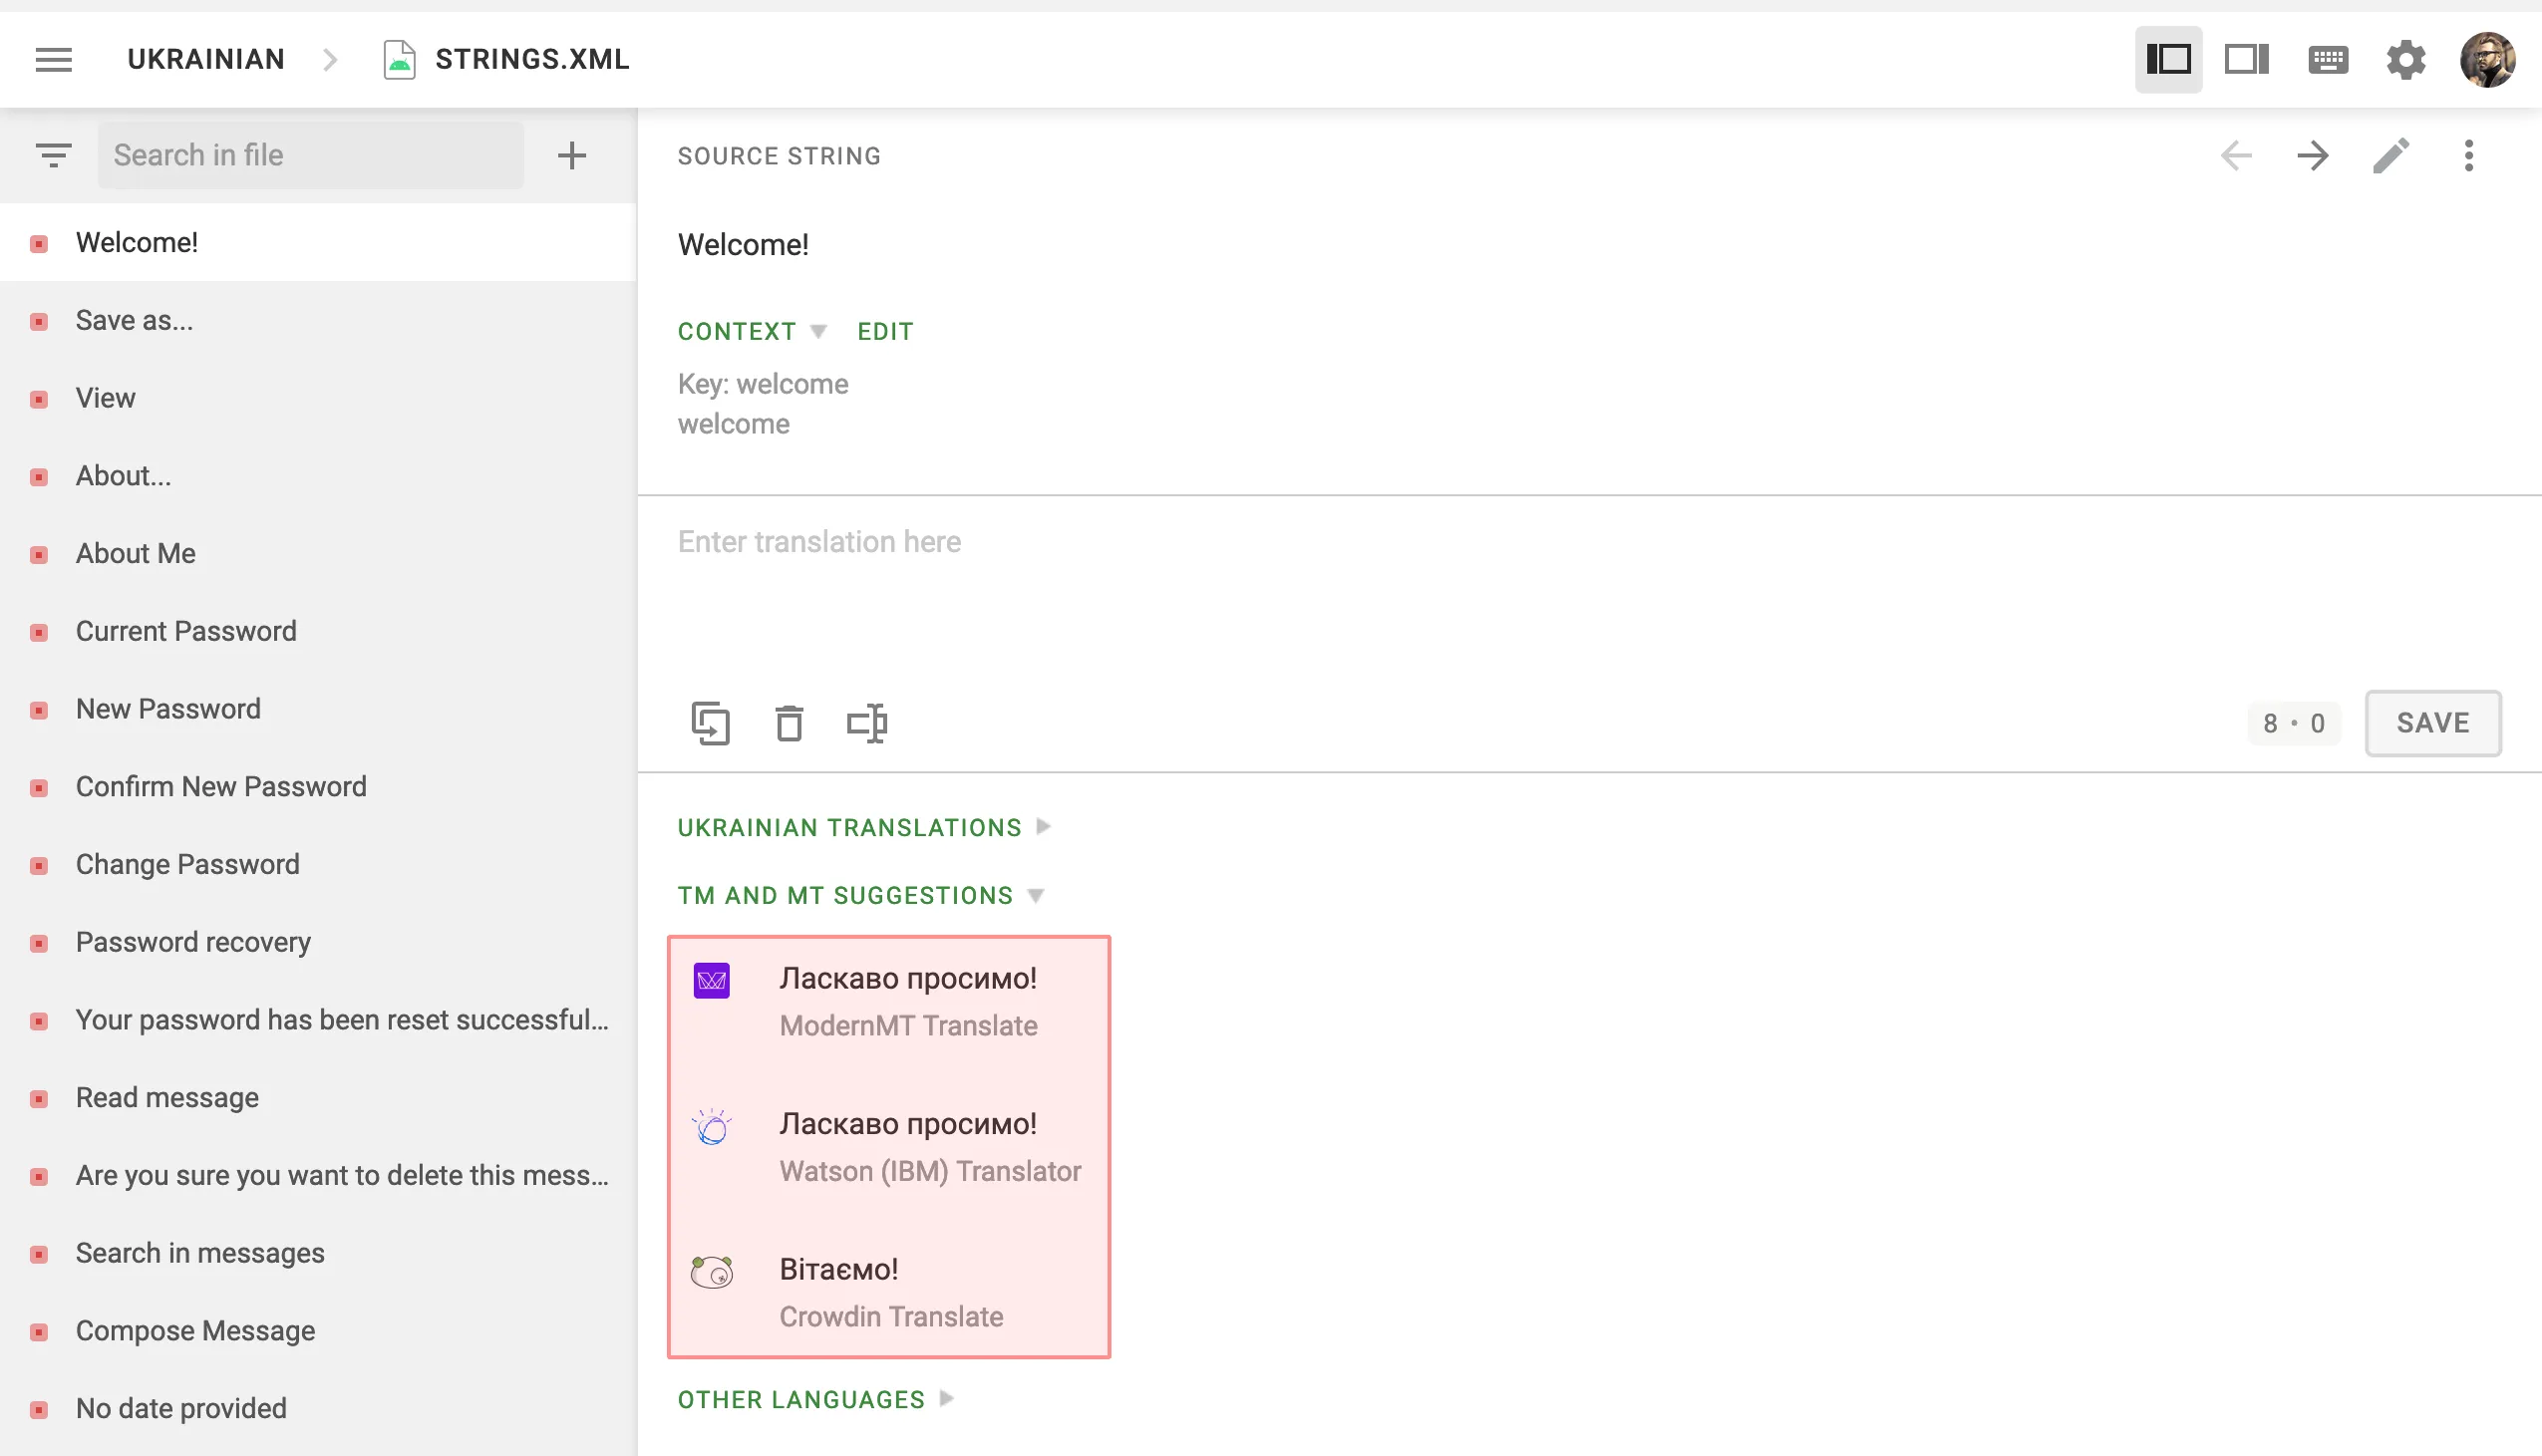 [Add More Machine Translation Engines ](https://store.crowdin.com/tags/machine-translation)Install more machine translation engines from the Crowdin Store. By default, machine translations are enabled for each project, but it is required to configure the translation engines before the project members can use them. If you want to disable this option for specific projects, clear **Show machine translation suggestions** in [Project Settings](/enterprise/project-settings/machine-translation/). To configure the machine translation engines, follow these steps: 1. Open your organization’s **Workspace** and select **Machine translation** on the left sidebar. 2. At the bottom right, click **Add MT Engine**. 3. In the appeared dialog, select an engine from the drop-down list. 4. *(Optional)* Edit the name of the MT Engine if needed. 5. Enter the requested credentials. 6. *(Optional)* Select applicable languages. Alternatively, leave empty for access to all languages. 7. *(Optional)* Select projects in which you want to use the MT engine. Alternatively, leave empty to enable it for all organization projects. 8. Click **Create**. ### [Microsoft Translator](#microsoft-translator) [Section titled “Microsoft Translator”](#microsoft-translator) Go to [Windows Azure](https://portal.azure.com/#blade/HubsExtension/BrowseAll) to access your Microsoft Translator API subscription key. Translator Text API offers a free tier with 2,000,000 translated characters. [How to sign up for the Microsoft Translator Text API ](https://docs.microsoft.com/en-us/azure/cognitive-services/translator/translator-text-how-to-signup) ### [DeepL Translator](#deepl-translator) [Section titled “DeepL Translator”](#deepl-translator) DeepL API is accessible only with the DeepL API Free and Pro subscription plans ([For developers](https://www.deepl.com/pro.html#developer) tab). Navigate to the [DeepL Pro Account page](https://www.deepl.com/pro-account.html) to get a unique Authentication Key. Please note that the DeepL API plan is the only plan that provides this feature. If you’re subscribed to a different subscription plan, you can switch to the DeepL API plan in your [personal account settings](https://www.deepl.com/pro-account.html). DeepL also provides a [simulator](https://www.deepl.com/docs-api/simulator) that allows you to check your Authentication Key in action. ### [ModernMT](#modernmt) [Section titled “ModernMT”](#modernmt) ModernMT Real time translation API is accessible with the Real time or Human-in-the-loop subscription plans. Navigate to the [ModernMT Dashboard](https://www.modernmt.com/dashboard/) to get your License key. If you’re subscribed to a different subscription plan, you can switch to the Real time or Human-in-the-loop plan via the [Manage Plan](https://www.modernmt.com/dashboard/manage-plan) page. ### [Amazon Translate](#amazon-translate) [Section titled “Amazon Translate”](#amazon-translate) The free version of Amazon Translate is available for 12 months. Afterward, you will need to pay for the number of characters translated. Crowdin uses Standard Text Translation type provided by Amazon Translate. Read more about [available Amazon Translate pricing options](https://aws.amazon.com/translate/pricing/). Read more about [obtaining your access key](https://docs.aws.amazon.com/general/latest/gr/aws-sec-cred-types.html#access-keys-and-secret-access-keys) needed for Amazon Translate integration. To use your [Custom Terminology](https://docs.aws.amazon.com/translate/latest/dg/how-custom-terminology.html), follow these steps: 1. Specify your AWS Region (e.g., us-east-2). 2. Select your Custom Terminology from the respective drop-down menu. ### [Google Translate](#google-translate) [Section titled “Google Translate”](#google-translate) To use Google Translate, you shall have a Google Cloud account with an active billing profile. Cloud Translation is priced monthly based on usage. [Learn more](https://cloud.google.com/translate/pricing). To obtain the API key necessary for integration, follow these steps: 1. Go to [Google Cloud Console](https://console.cloud.google.com/). Log in to the existing Google Cloud account or set up a new one. 2. Select an existing project or add a project using the **New Project**. 3. Go to [API & Services > Library](https://console.cloud.google.com/apis/library) and search for *Cloud Translation API*. 4. Click **Enable**. 5. Go to [API & Services > Credentials](https://console.cloud.google.com/apis/credentials/) and click **Create credentials > API key**. 6. Copy the API key and click **Close**. ### [Google Cloud AutoML Translation](#google-cloud-automl-translation) [Section titled “Google Cloud AutoML Translation”](#google-cloud-automl-translation) To use AutoML Translation, you shall have a Google Cloud account with an active billing profile. Google AutoML Translation is priced monthly based on how many characters you send for translation. [Learn more](https://cloud.google.com/translate/automl/pricing#translation_costs). To create a service account key and obtain the necessary credentials for integration, follow these steps: 1. Go to [Google Cloud Console](https://console.cloud.google.com/). Log in to the existing Google Cloud account or set up a new one. 2. Select an existing project or add a project using the **New Project**. 3. Go to [API & Services > Library](https://console.cloud.google.com/apis/library) and search for *Cloud AutoML API*. 4. Click **Enable**. 5. The next step is to create a service account private key pair. The service account is used by Crowdin. Applications use service accounts to make authorized API calls. To set up authentication and create your private key, follow these steps: 1. Go to [API & Services > Credentials](https://console.cloud.google.com/apis/credentials/). 2. Click **Create credentials > Service account**. 3. In the *Service account name* field, enter a name that describes what this service account will do. 4. Click **Create and continue**. 5. From the *Role list*, select *Project* > *Cloud Translation API Editor* and click **Continue**. 6. Click **Done**. 7. In the [API & Services > Credentials](https://console.cloud.google.com/apis/credentials/), click on the created service account. 8. Switch to the **Keys** tab. 9. Click **Add key > Create new key**. 10. Select **JSON** and click **Create**. A JSON file that contains your key will be downloaded to your computer. #### [Google Cloud AutoML Custom Glossary Configuration](#google-cloud-automl-custom-glossary-configuration) [Section titled “Google Cloud AutoML Custom Glossary Configuration”](#google-cloud-automl-custom-glossary-configuration) Google Cloud AutoML custom glossary allows you to translate your domain-specific terminology consistently. You can use only one Google Cloud AutoML custom model at once. If you have multiple custom models you’d like to use in your Crowdin Enterprise projects, create multiple instances of Google Cloud AutoML MT engine under your Crowdin Enterprise account, specifying the different models in the settings of each MT engine. During the pre-translation via MT, you can alternately use Google Cloud AutoML with the needed model. To configure your Google Cloud AutoML custom glossary, follow these steps: 1. Open your organization’s **Workspace** and select **Machine translation** on the left sidebar. 2. At the bottom right, click **Add MT Engine**. 3. In the appeared dialog, select **Google AutoML Translate** from the **Engine** drop-down list. 4. Click **Select file** and upload your JSON credentials. 5. *(Optional)* Specify your Custom Model. 6. Specify your Resource location (e.g., us-central1). 7. Select your Glossary from the respective drop-down list. 8. *(Optional)* Configure language mapping between Custom Model and Crowdin languages. 9. *(Optional)* Select applicable languages. Alternatively, leave empty for access to all languages. 10. *(Optional)* Select projects in which you want to use the MT engine. Alternatively, leave empty to enable it for all organization projects. 11. Click **Create**. 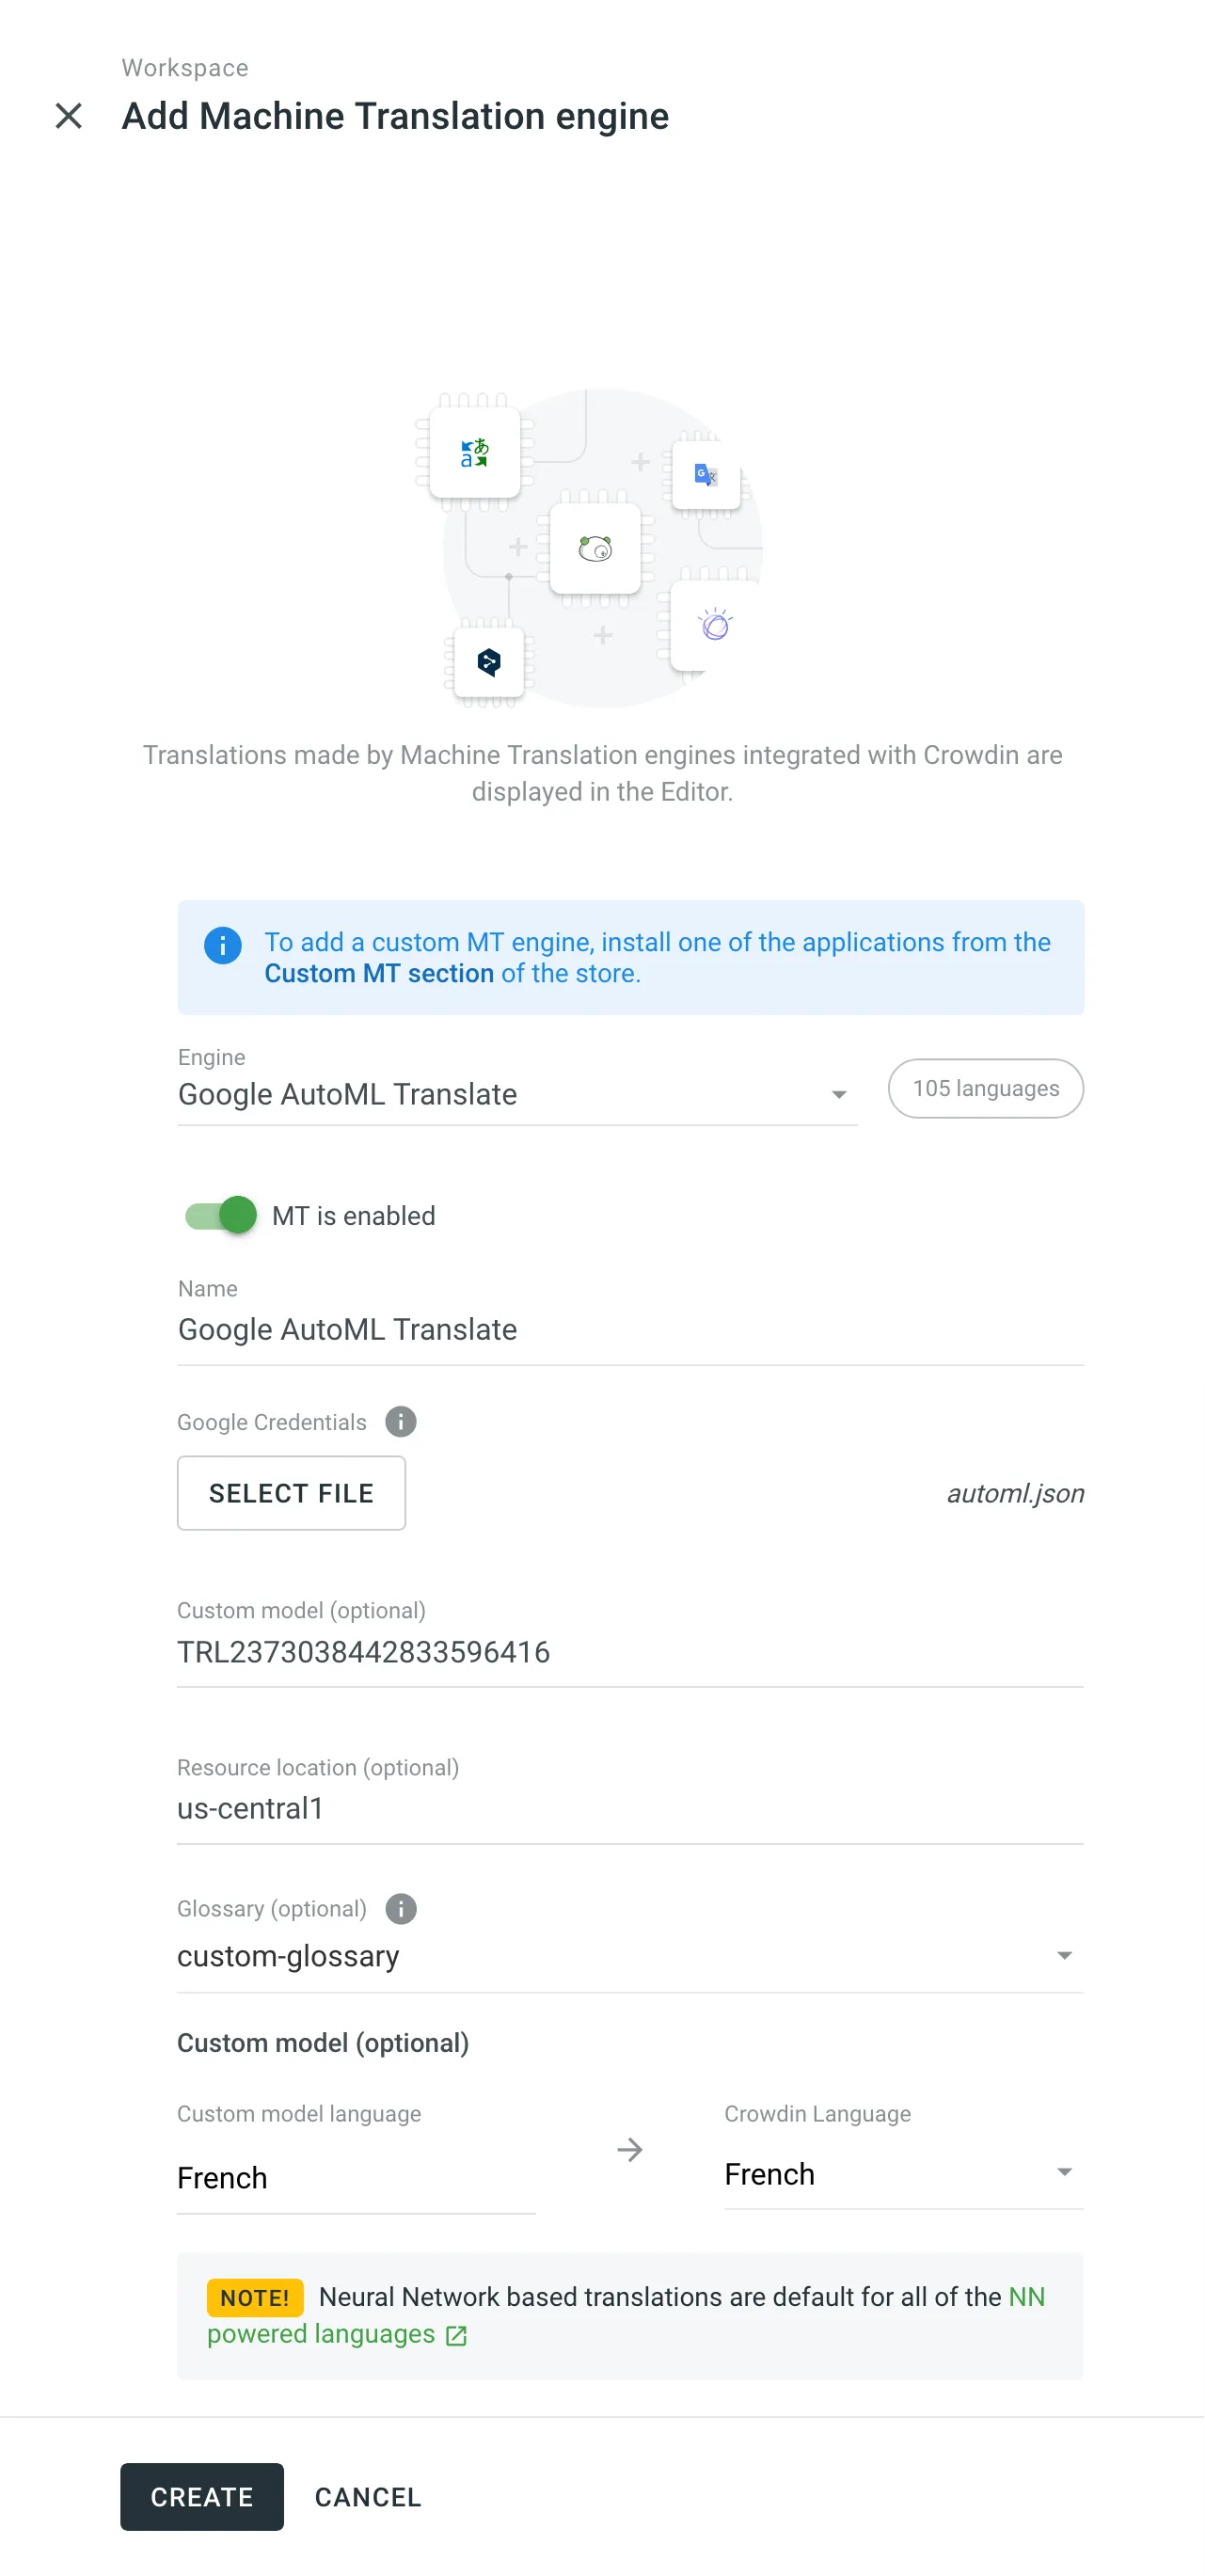 ## [MT Engine IDs](#mt-engine-ids) [Section titled “MT Engine IDs”](#mt-engine-ids) Once you specify your MT engine credentials, the system automatically assigns a unique MT engine ID. Later on, you can use these IDs in API requests for pre-translation via machine engines. You can find the MT engine ID in the organization’s **Workspace > Machine translation** page. Alternatively, you can also [get your MT engine IDs via API](/developer/enterprise/api/v2/#tag/Machine-Translation-Engines/operation/api.mts.getMany). ## [Clearing MT Engine Cache](#clearing-mt-engine-cache) [Section titled “Clearing MT Engine Cache”](#clearing-mt-engine-cache) When MT engines are updated with new features or models, cached translations in Crowdin Enterprise may no longer reflect the latest translation capabilities. To display updated translations in the Editor’s **TM and MT Suggestions** section, clear the MT engine cache. This can be especially useful if you’ve already viewed certain strings in the Editor, as Crowdin Enterprise stores cached MT suggestions for those strings. To clear the cache for your configured MT engine, follow these steps: 1. Open your organization’s **Workspace** and select **Machine translation** on the left sidebar. 2. Click (or right-click) on the needed MT engine in the list. 3. Click **Clear cache**. ## [See Also](#see-also) [Section titled “See Also”](#see-also) [Pre-Translation ](/enterprise/pre-translation/)Speed up the translation process and ease the work of translators. [Project Settings ](/enterprise/project-settings/machine-translation/)Configure machine translation settings for your project.
# Messages
> Communicate with translation project members
Use **Messages** to communicate with other members of your Crowdin Enterprise organization. Create one-to-one or group conversations, each with a subject to help you easily navigate between chats. 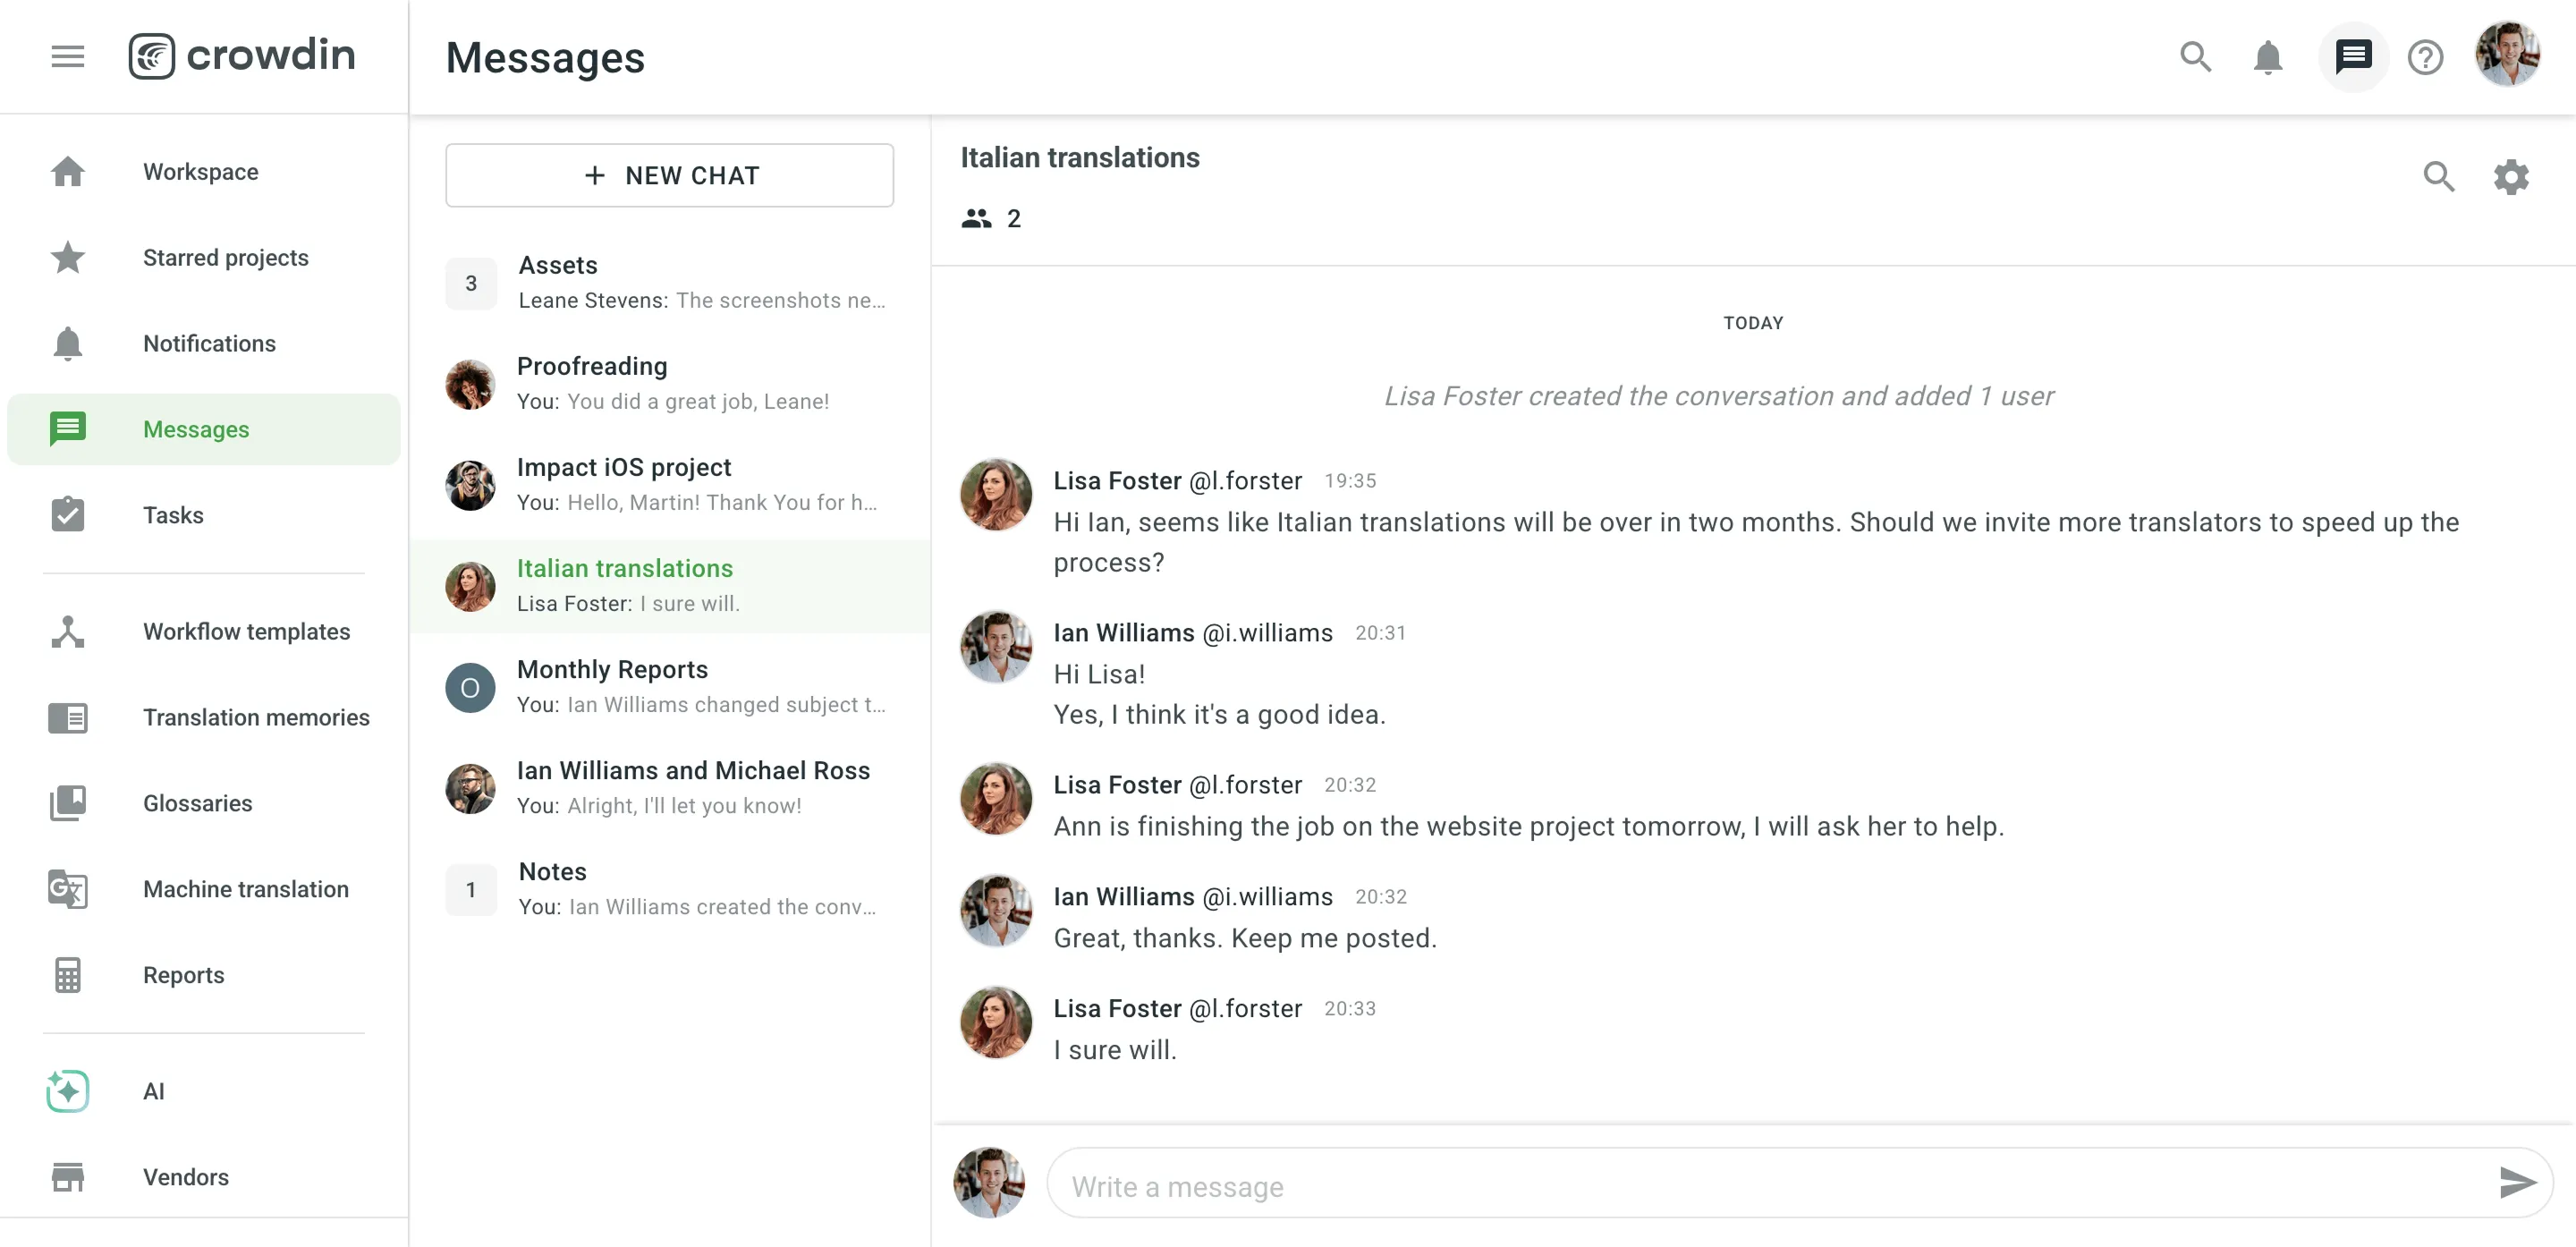 ## [Creating a New Conversation](#creating-a-new-conversation) [Section titled “Creating a New Conversation”](#creating-a-new-conversation) To create a new conversation, follow these steps: 1. Open your organization’s **Workspace** and select **Messages** on the left sidebar. 2. Click **New Chat**. 3. Search and select users by name, username, or email. 4. Click **Create**. 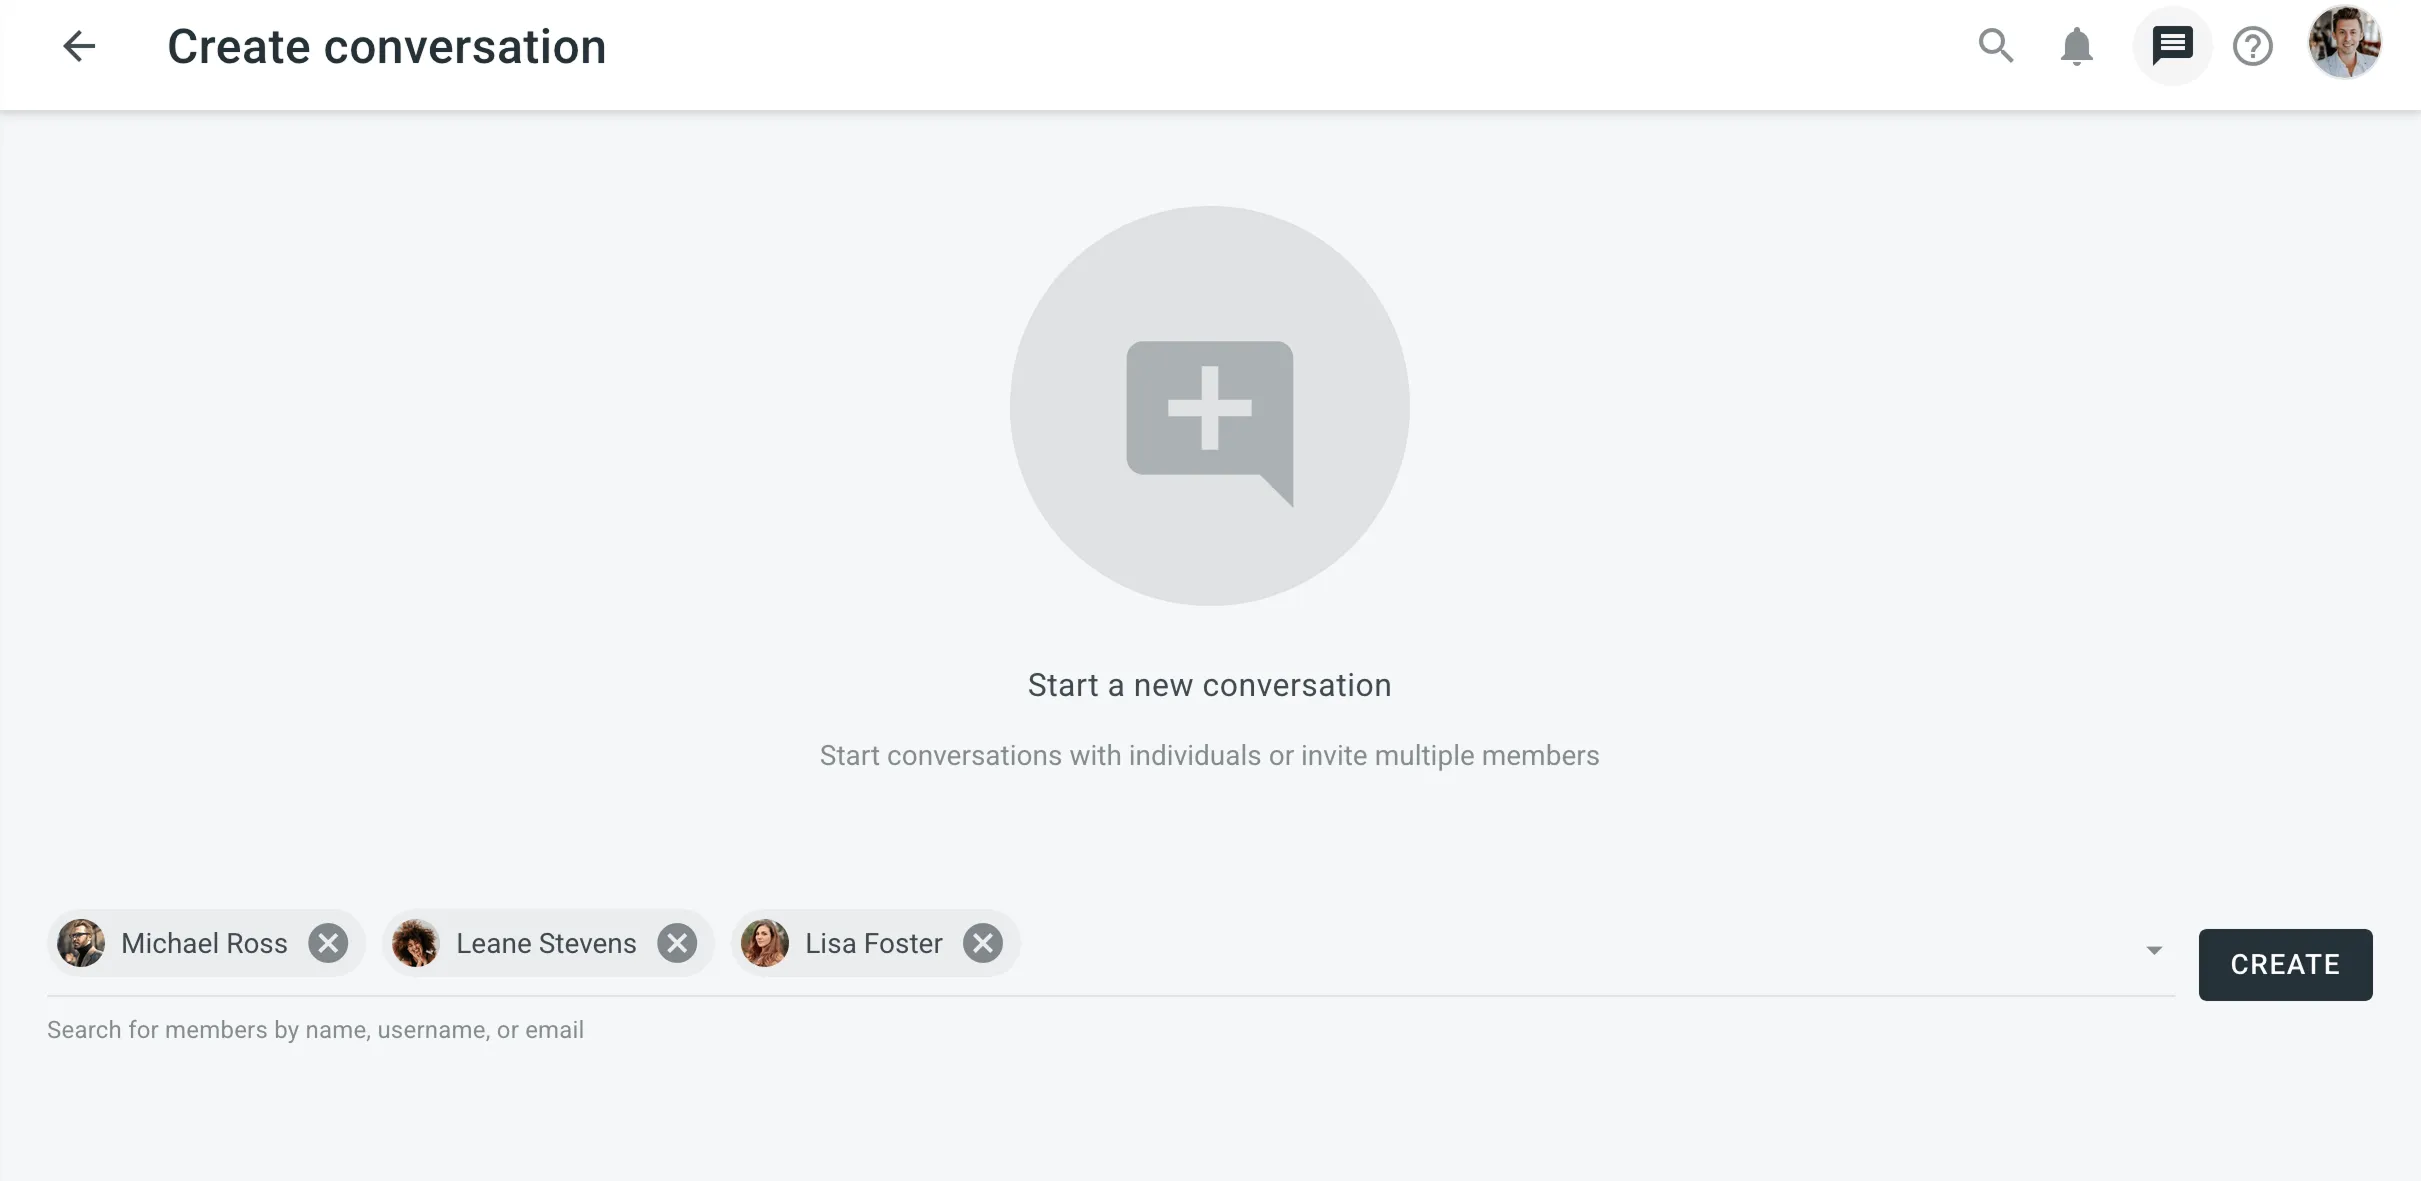 ## [Managing Conversations](#managing-conversations) [Section titled “Managing Conversations”](#managing-conversations) To manage a conversation, click and choose one of the following options: * *View members* – see all participants in the conversation. * *Rename conversation* – helps organize multiple conversations. By default, the subject includes participant names. * *Mute conversation* – stop receiving notifications about new messages. 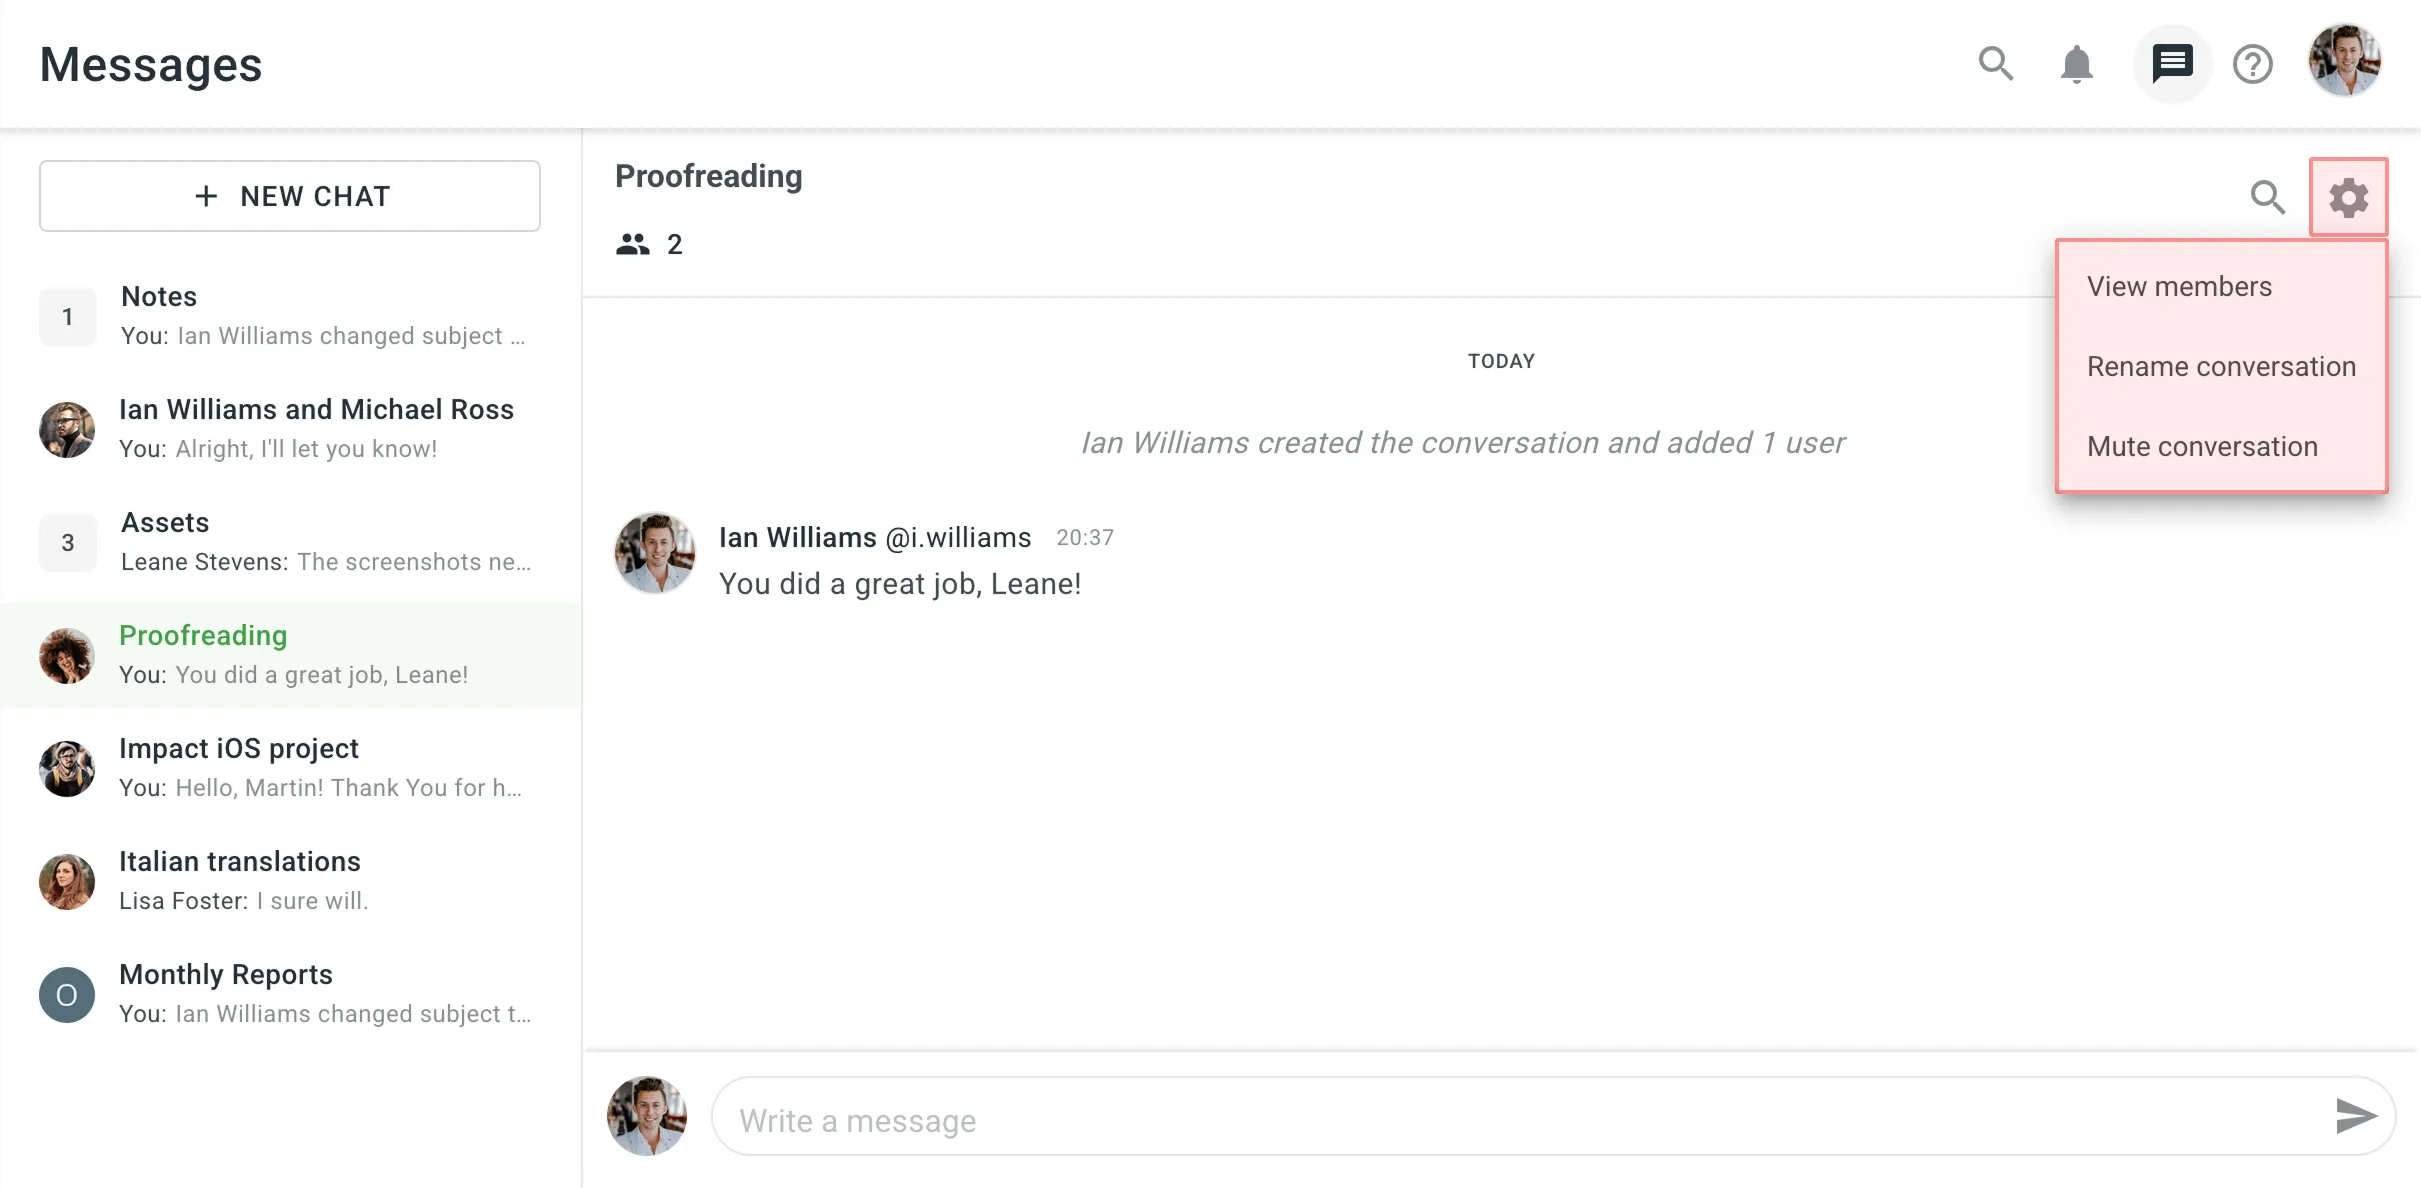 Limitations Deleting conversations or adding new users to an existing conversation is currently not supported. This functionality is planned for future updates. ## [Messages](#messages) [Section titled “Messages”](#messages) To manage a message, hover over it, click and select the needed option. The following actions are available: * *Share* – forward the message: * in the same conversation * to another existing conversation * to another user * *Mark Unread* – mark the message as unread to return to it later. The number of unread messages is shown next to the conversation subject. * *Edit* – available for your own messages. * *Delete* – available for your own messages. * *Report Spam* – available for messages from others.  ## [Unread Messages](#unread-messages) [Section titled “Unread Messages”](#unread-messages) Unread messages are indicated by a counter displayed: * next to each conversation’s subject, showing the number of unread messages in that conversation * at the top of the page next to the *Messages* icon, showing the total number of unread messages across all conversations
# Migrating to Crowdin Enterprise
> Migrate your projects with all related resources to Crowdin Enterprise
Crowdin Enterprise provides team cooperation features (e.g., inviting project members, defining permission levels, tasks, messages, etc.), workflow automation and customization, integrations and plugins, and many more features you would need for efficient project localization. The migration to Crowdin Enterprise is very simple and straightforward. For example, if your projects share most of the settings and configurations, you can create and configure one project and then, using the [Project Duplicator](https://store.crowdin.com/create-project-app) application, create all other projects based on the initial project settings, later changing some settings where needed. Depending on the project and resource number, the complete migration could be done in several hours. ## [Migrating to Crowdin Enterprise from Other Translation Tools](#from-other-tools) [Section titled “Migrating to Crowdin Enterprise from Other Translation Tools”](#from-other-tools) To start your migration, you can use the following step-by-step migration instructions. 1. **Download source files**.\ In most cases, you’ll have them on your machine/server, so this step is optional. 2. **Download translations**.\ Download all the latest translations you have at the moment of transition. 3. **Download TM and Glossary**.\ Download the translation memory and glossary so your translators can reuse them in your Crowdin Enterprise projects. [For Managers ](/enterprise/for-managers/)Read our quick guide for a seamless localization setup. ## [Migrating to Crowdin Enterprise from Crowdin](#from-crowdin) [Section titled “Migrating to Crowdin Enterprise from Crowdin”](#from-crowdin) If you’re currently using Crowdin and would like to switch to Crowdin Enterprise, you can migrate your Crowdin projects with all related data and resources to your new Crowdin Enterprise organization using the **Migration to Crowdin Enterprise** tool in your Crowdin Account Settings. You can migrate your Crowdin projects with all related data, TMs, and Glossaries to your Crowdin Enterprise organization and continue the localization process without losing the current progress. **Data you can migrate:** * Projects with related data * Source strings (for String-based projects) or source files (for File-based projects) * Project members – this includes the removed former members who performed any translation or proofreading activities and pending members who haven’t joined the projects. After migration, project members from both of these categories will appear as pending users in Crowdin Enterprise. * Translations * String comments * Screenshots * Labels * Custom processors (if any) * Translation Memories * Glossaries **Data not being migrated:** * Over-The-Air (OTA) Content Delivery settings * Project activities * Master and Duplicate string statuses for projects with branches – master strings and duplicates are migrated without preserving the original (Crowdin) status of which string is the duplicate and which is the master. This might result in a situation where a duplicate string in Crowdin becomes a master string in Crowdin Enterprise and vice versa. * Files from custom processing apps – these files either do not migrate or may migrate incorrectly. ### [Migration Settings](#migration-settings) [Section titled “Migration Settings”](#migration-settings) Before starting the migration, you need to select your Crowdin Enterprise organization, projects, and resources. To configure your migration settings, follow these steps: 1. Open **Account Settings** and go to the **Profile** tab. 2. In the **Migration to Crowdin Enterprise** section, click **Migrate Account** to start configuring your migration. ### [Organization Step](#organization-step) [Section titled “Organization Step”](#organization-step) On the first step of the migration, select a Crowdin Enterprise organization to which you will migrate your Crowdin account’s data. You can log into your existing Crowdin Enterprise organization or create a new organization from scratch. 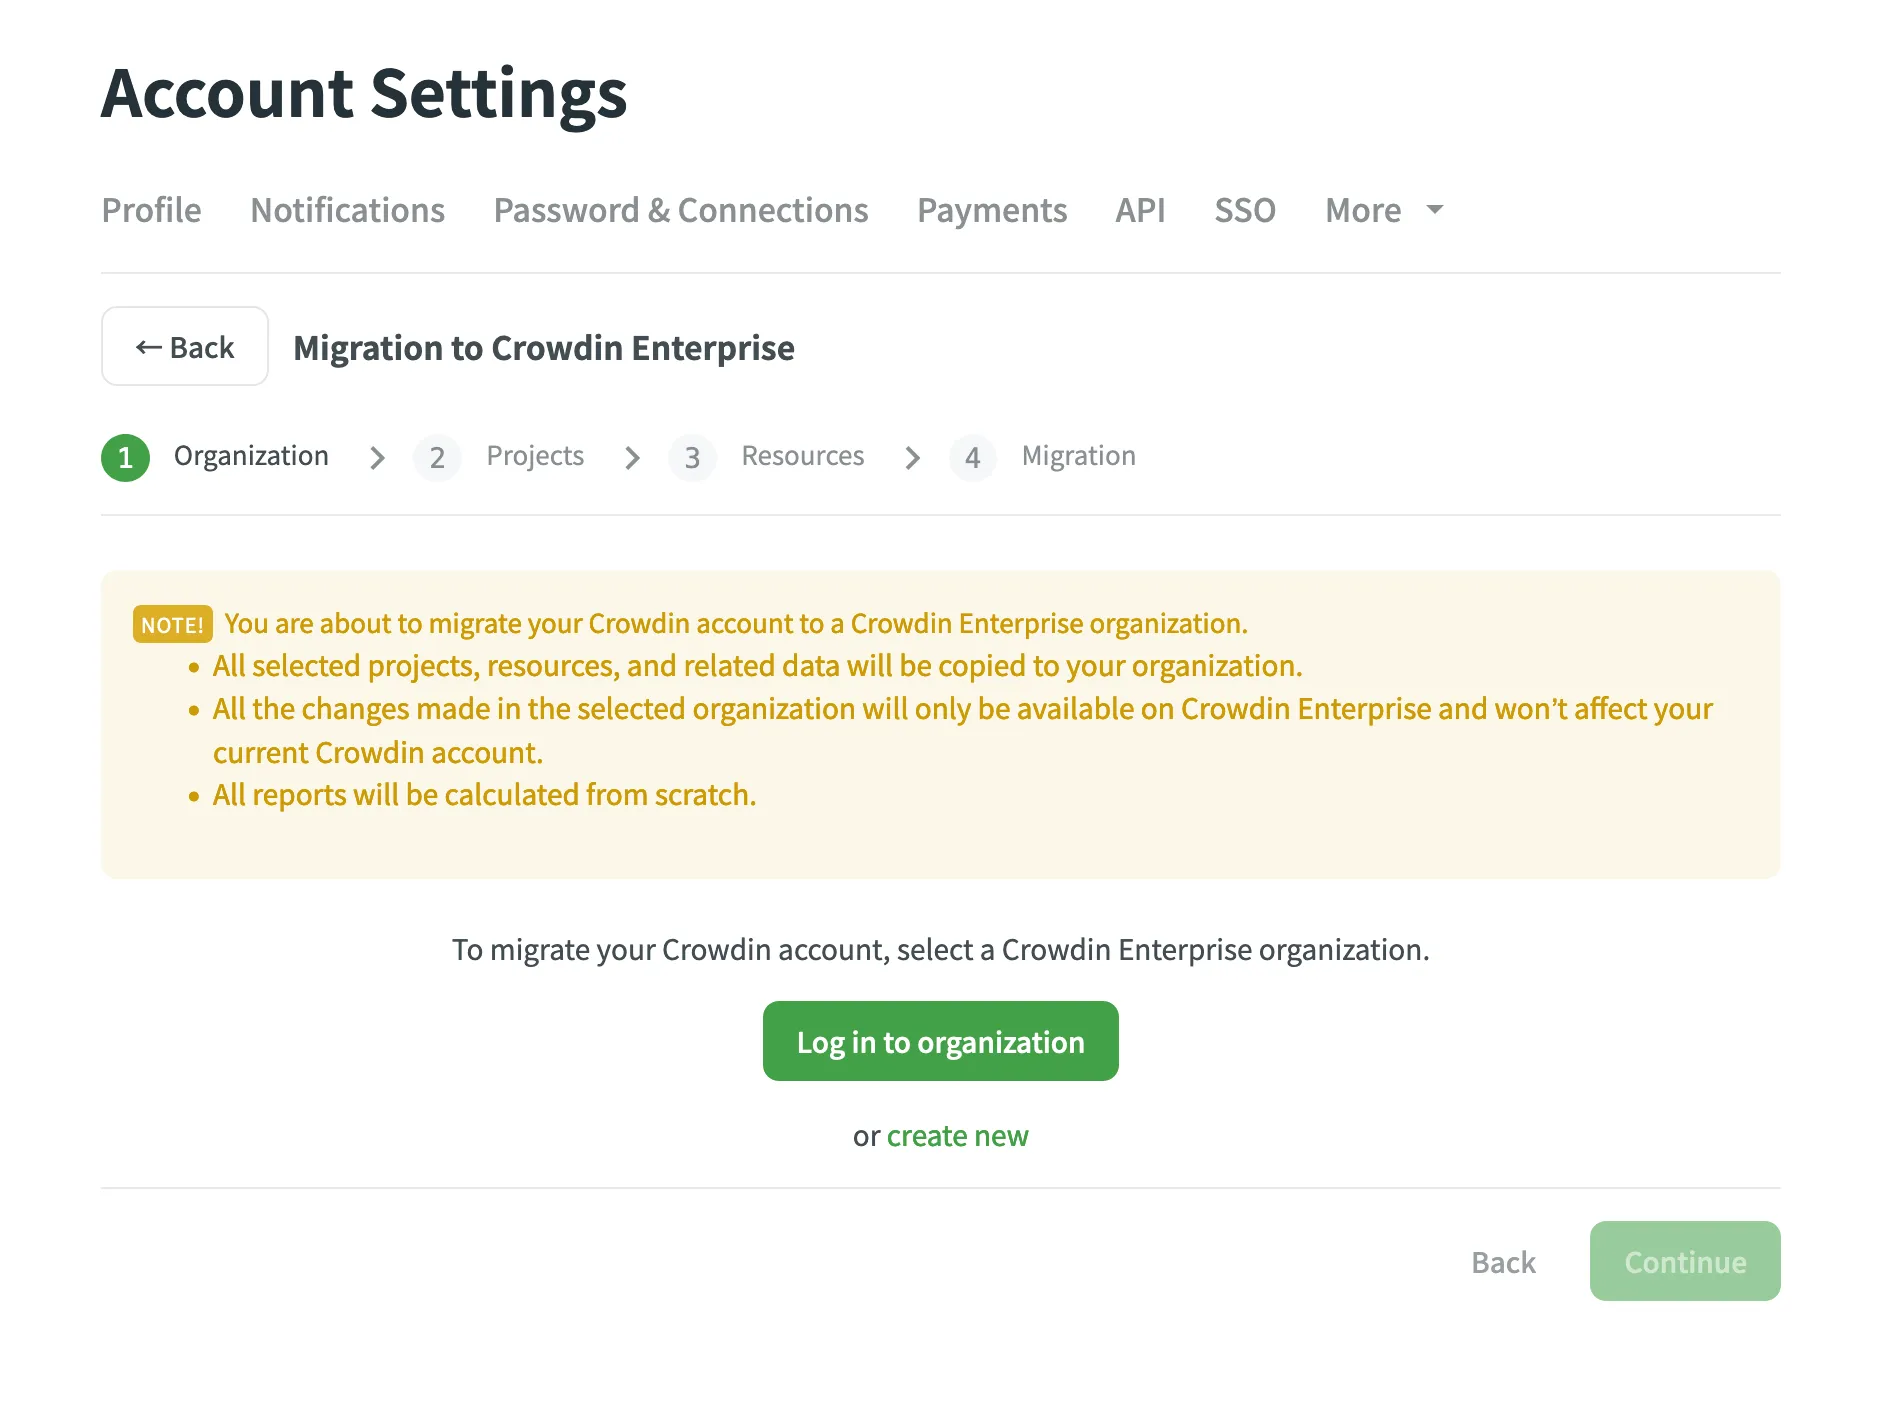 Once you’ve selected your Crowdin Enterprise organization, the system will ask you to authorize the **Migrate Crowdin account to Crowdin Enterprise** application and grant access to projects and groups within your organization. It’s necessary because the migrator app will create your projects and resources in Crowdin Enterprise on your behalf. 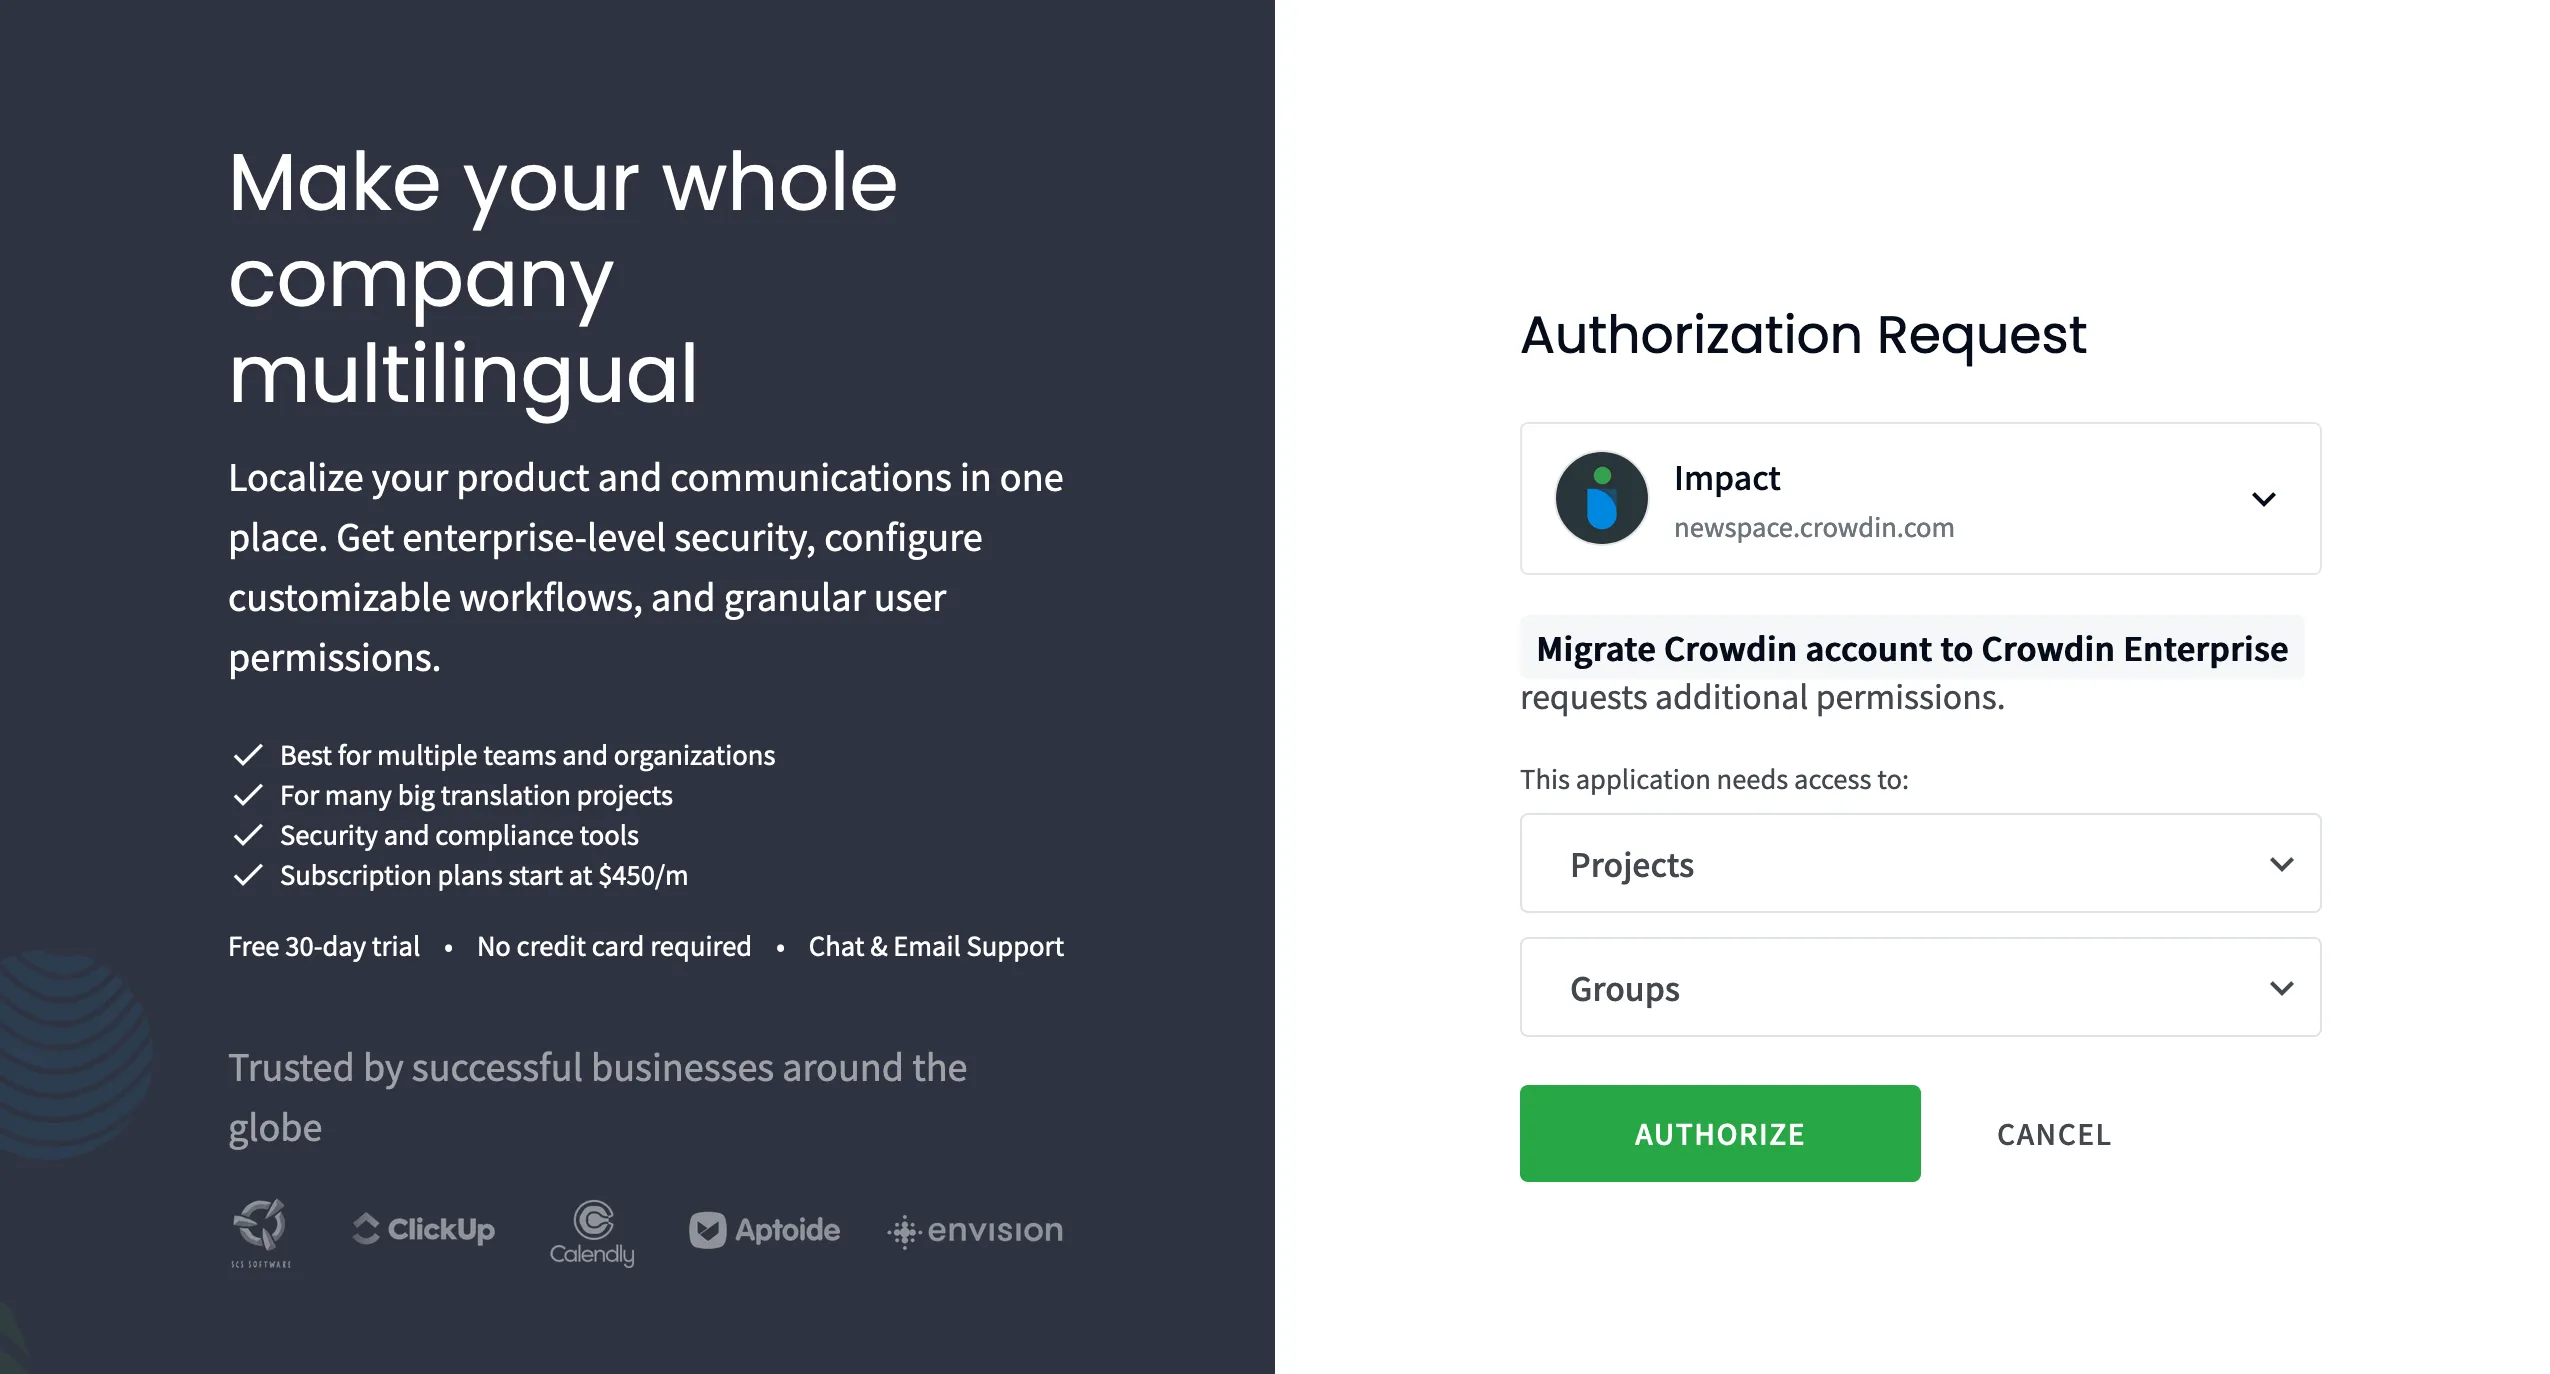 ### [Projects Step](#projects-step) [Section titled “Projects Step”](#projects-step) On the Projects step, you will see the list of your projects in Crowdin and your Crowdin Enterprise Workspace. Select the projects you’d like to migrate. By default, selected projects will be migrated to the organization’s Workspace. If needed, you can create separate groups for different projects.  ### [Resources Step](#resources-step) [Section titled “Resources Step”](#resources-step) On the Resources step, you will see the list of your Translation Memories and Glossaries. By default, resources related to the projects you selected in the previous step will be automatically selected. Select the additional ones you’d like to migrate. Then, click **Migrate** to start the migration process.  ### [Migration Step](#migration-step) [Section titled “Migration Step”](#migration-step) After you start the migration, you will be able to track its overall and detailed progress. Depending on the number of projects and resources, it might take from a few minutes to a few hours to migrate all the data. You will see the *Migration to Crowdin Enterprise is in progress* notification at the top of every page during the migration process. If needed, you can leave the **Account Settings** page. The migration will continue running in the background. 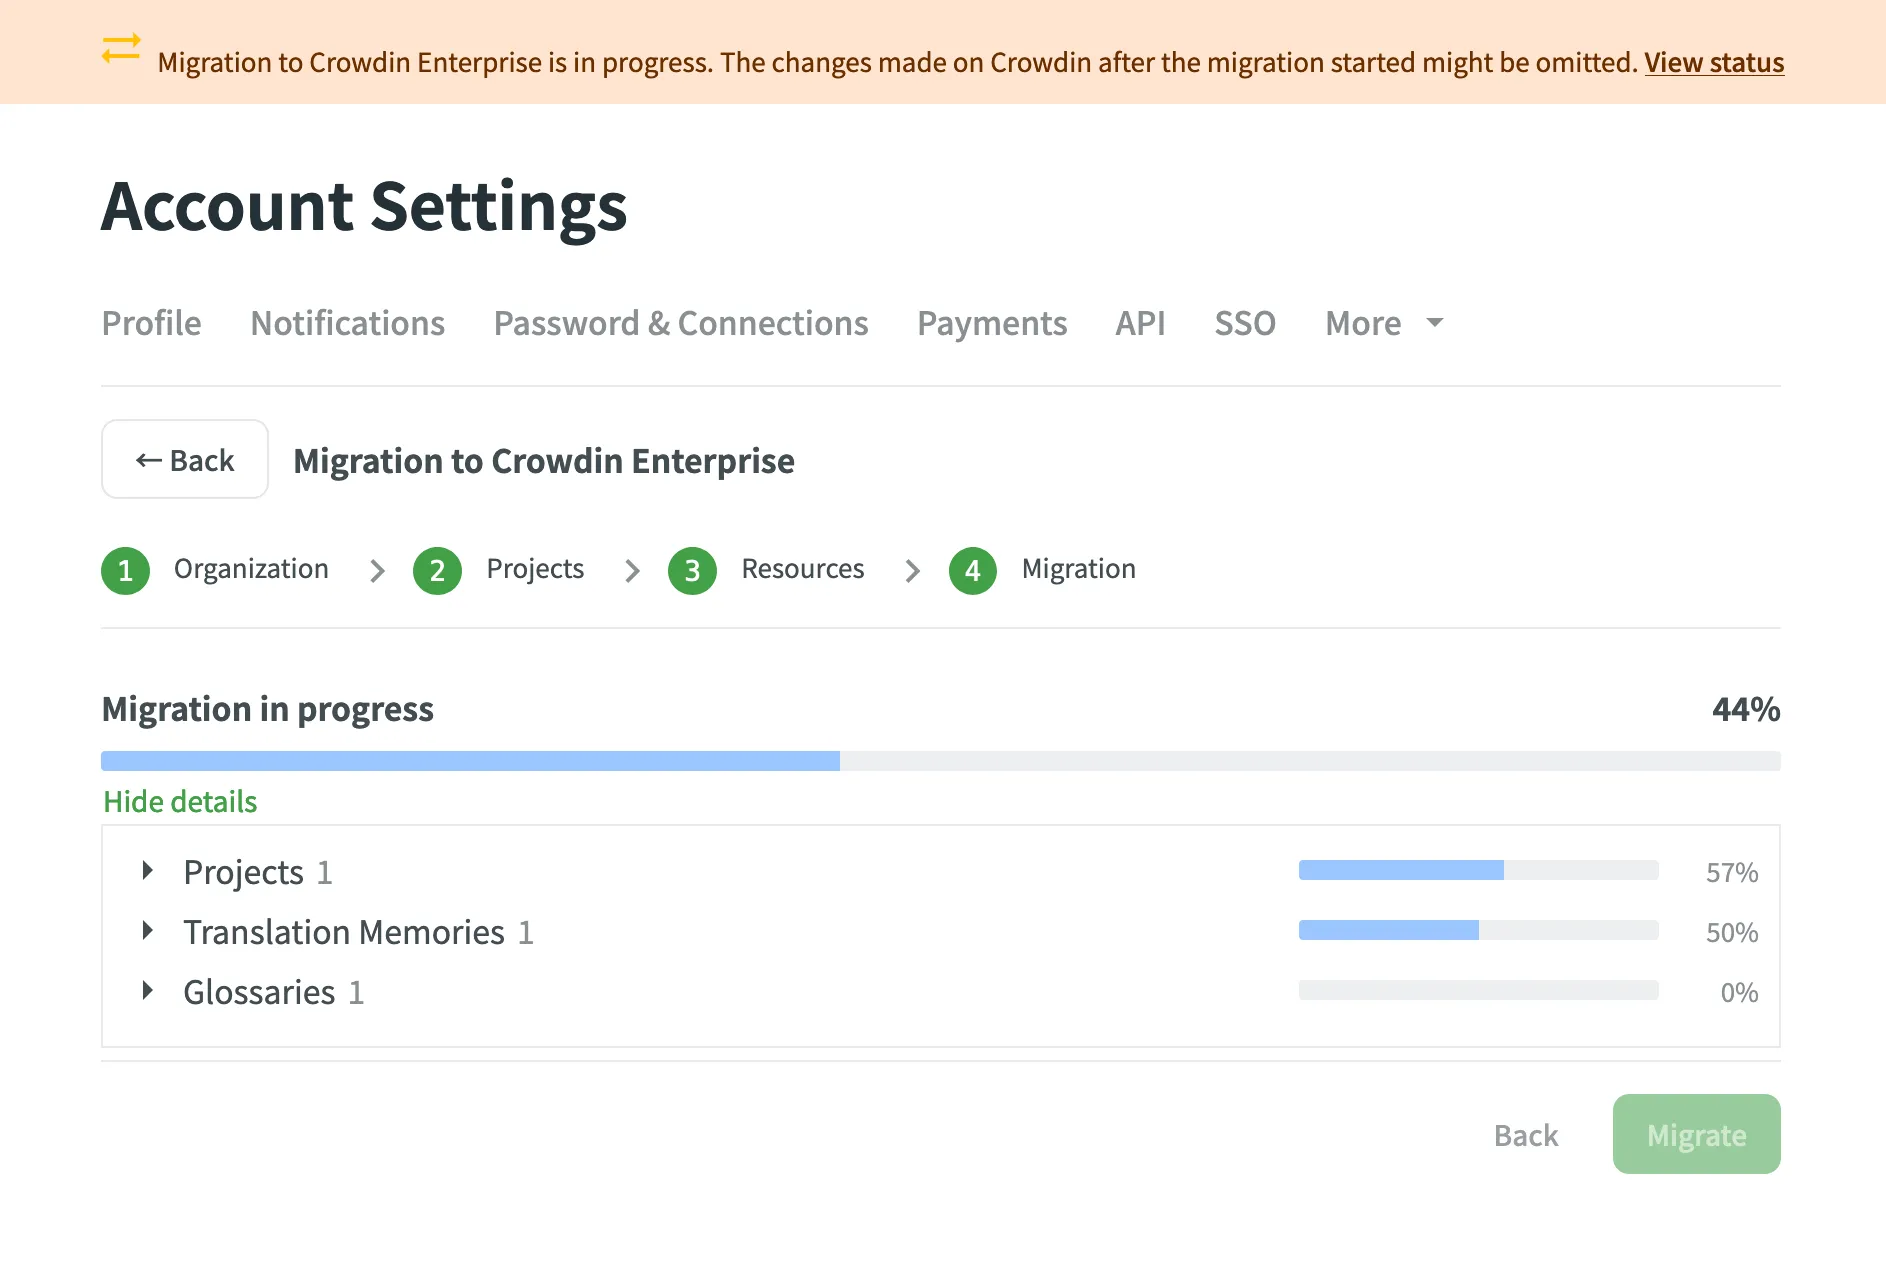 Caution The changes made on Crowdin after the migration started might not be migrated. When the migration is finished, you can go to your Crowdin Enterprise organization and continue translating your projects. 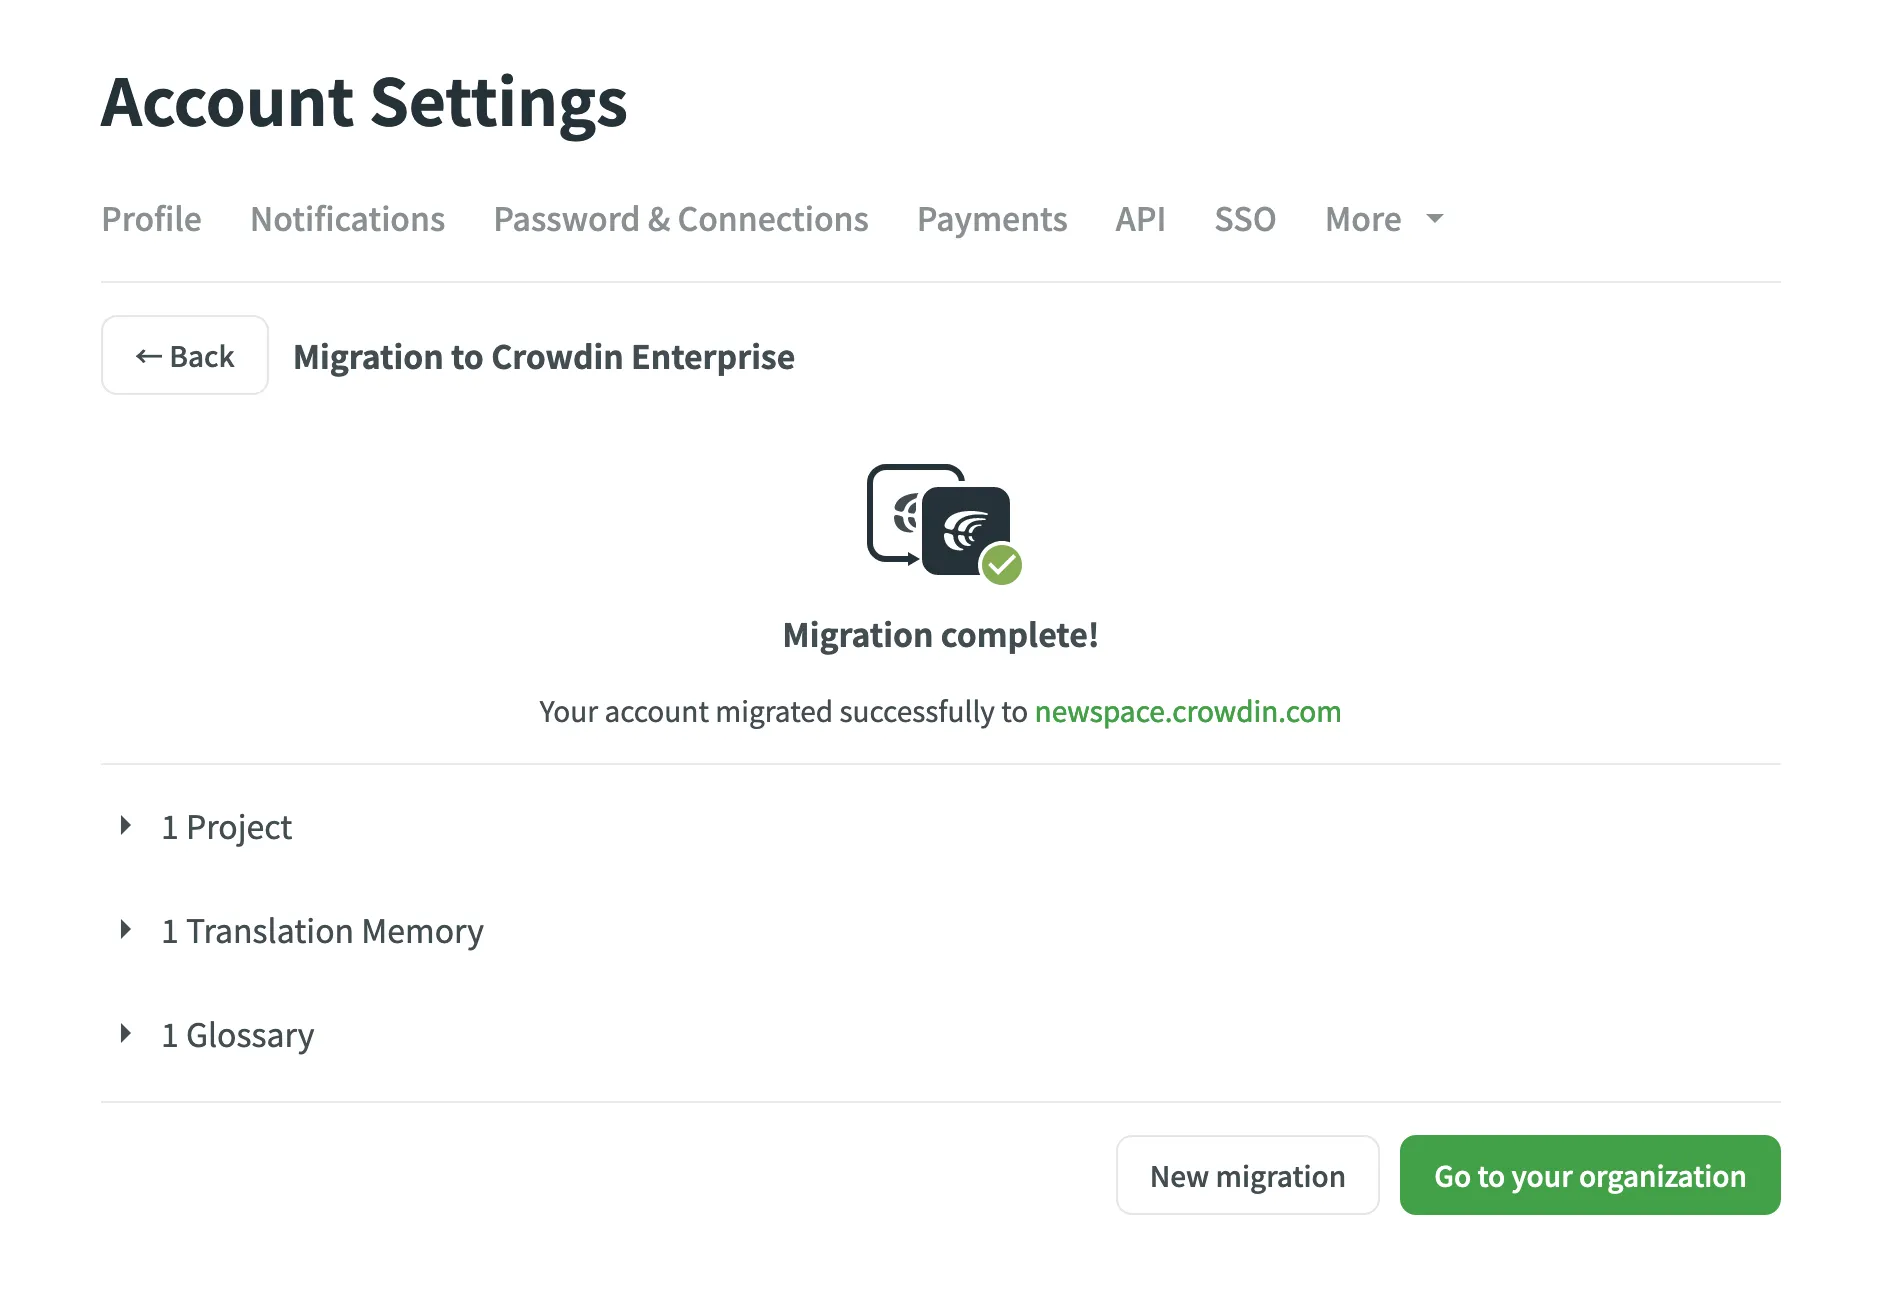 ## [What Are the Next Steps?](#what-are-the-next-steps) [Section titled “What Are the Next Steps?”](#what-are-the-next-steps) 1. **Inviting the translation team**.\ In Crowdin Enterprise you can choose your translation strategy based on the content you’re localizing. Choose one and combine several translation strategies: send a request to a translation vendor integrated with Crowdin Enterprise, bring a translation agency you already work with, invite your community, use pre-translation via Machine Translation or Translation Memory, etc. 2. **Integration with external services**.\ In Crowdin Enterprise, you can use system integrations (e.g., integrations with GitHub, GitLab, BitBucket, Azure Repos, etc.) to synchronize your source and translation files, install additional applications from the [Crowdin Store](https://store.crowdin.com/) to add new features and integrate with even more services. Even if there is no integration with some services/platforms you use, you can create your custom integration by developing Crowdin Apps. [Translation Strategies ](/enterprise/translation-strategies/) [Crowdin Apps ](/developer/crowdin-apps-about/) ## [Assistance from Our Team](#assistance-from-our-team) [Section titled “Assistance from Our Team”](#assistance-from-our-team) If you require any assistance during the migration process, our team is ready to help you with any step. For any guidance, feel free to [contact us](https://crowdin.com/contacts).
# Offline Translation
> Downloading and uploading files for offline translation
Offline translation allows you to work on project files outside Crowdin Enterprise using your preferred desktop CAT tools. Once translations are completed, you can upload them back to the project. This option is available only if downloads are enabled in the [Project Settings](/enterprise/project-settings/privacy/#translations) by the project manager. ## [Downloading Files](#downloading-files) [Section titled “Downloading Files”](#downloading-files) You can download each file separately (in original or XLIFF format), download filtered strings (in XLIFF format), or download all files for a specific language (in original or XLIFF format). It could be done via the Editor or the language page. [XLIFF File Format Details ](https://store.crowdin.com/xliff) ### [Downloading a Single File via Editor](#downloading-a-single-file-via-editor) [Section titled “Downloading a Single File via Editor”](#downloading-a-single-file-via-editor) To download a single file to translate offline, follow these steps: 1. Open the necessary file in the Editor. 2. Click the Main menu in the upper-left corner. 3. In the *File* menu, select **Download** or **Export in XLIFF**.  ### [Downloading a Single File via Language Page](#downloading-a-single-file-via-language-page) [Section titled “Downloading a Single File via Language Page”](#downloading-a-single-file-via-language-page) 1. Open your project and select a language. 2. Click next to the file you want to download. 3. Select **Download** or **Export as XLIFF**. 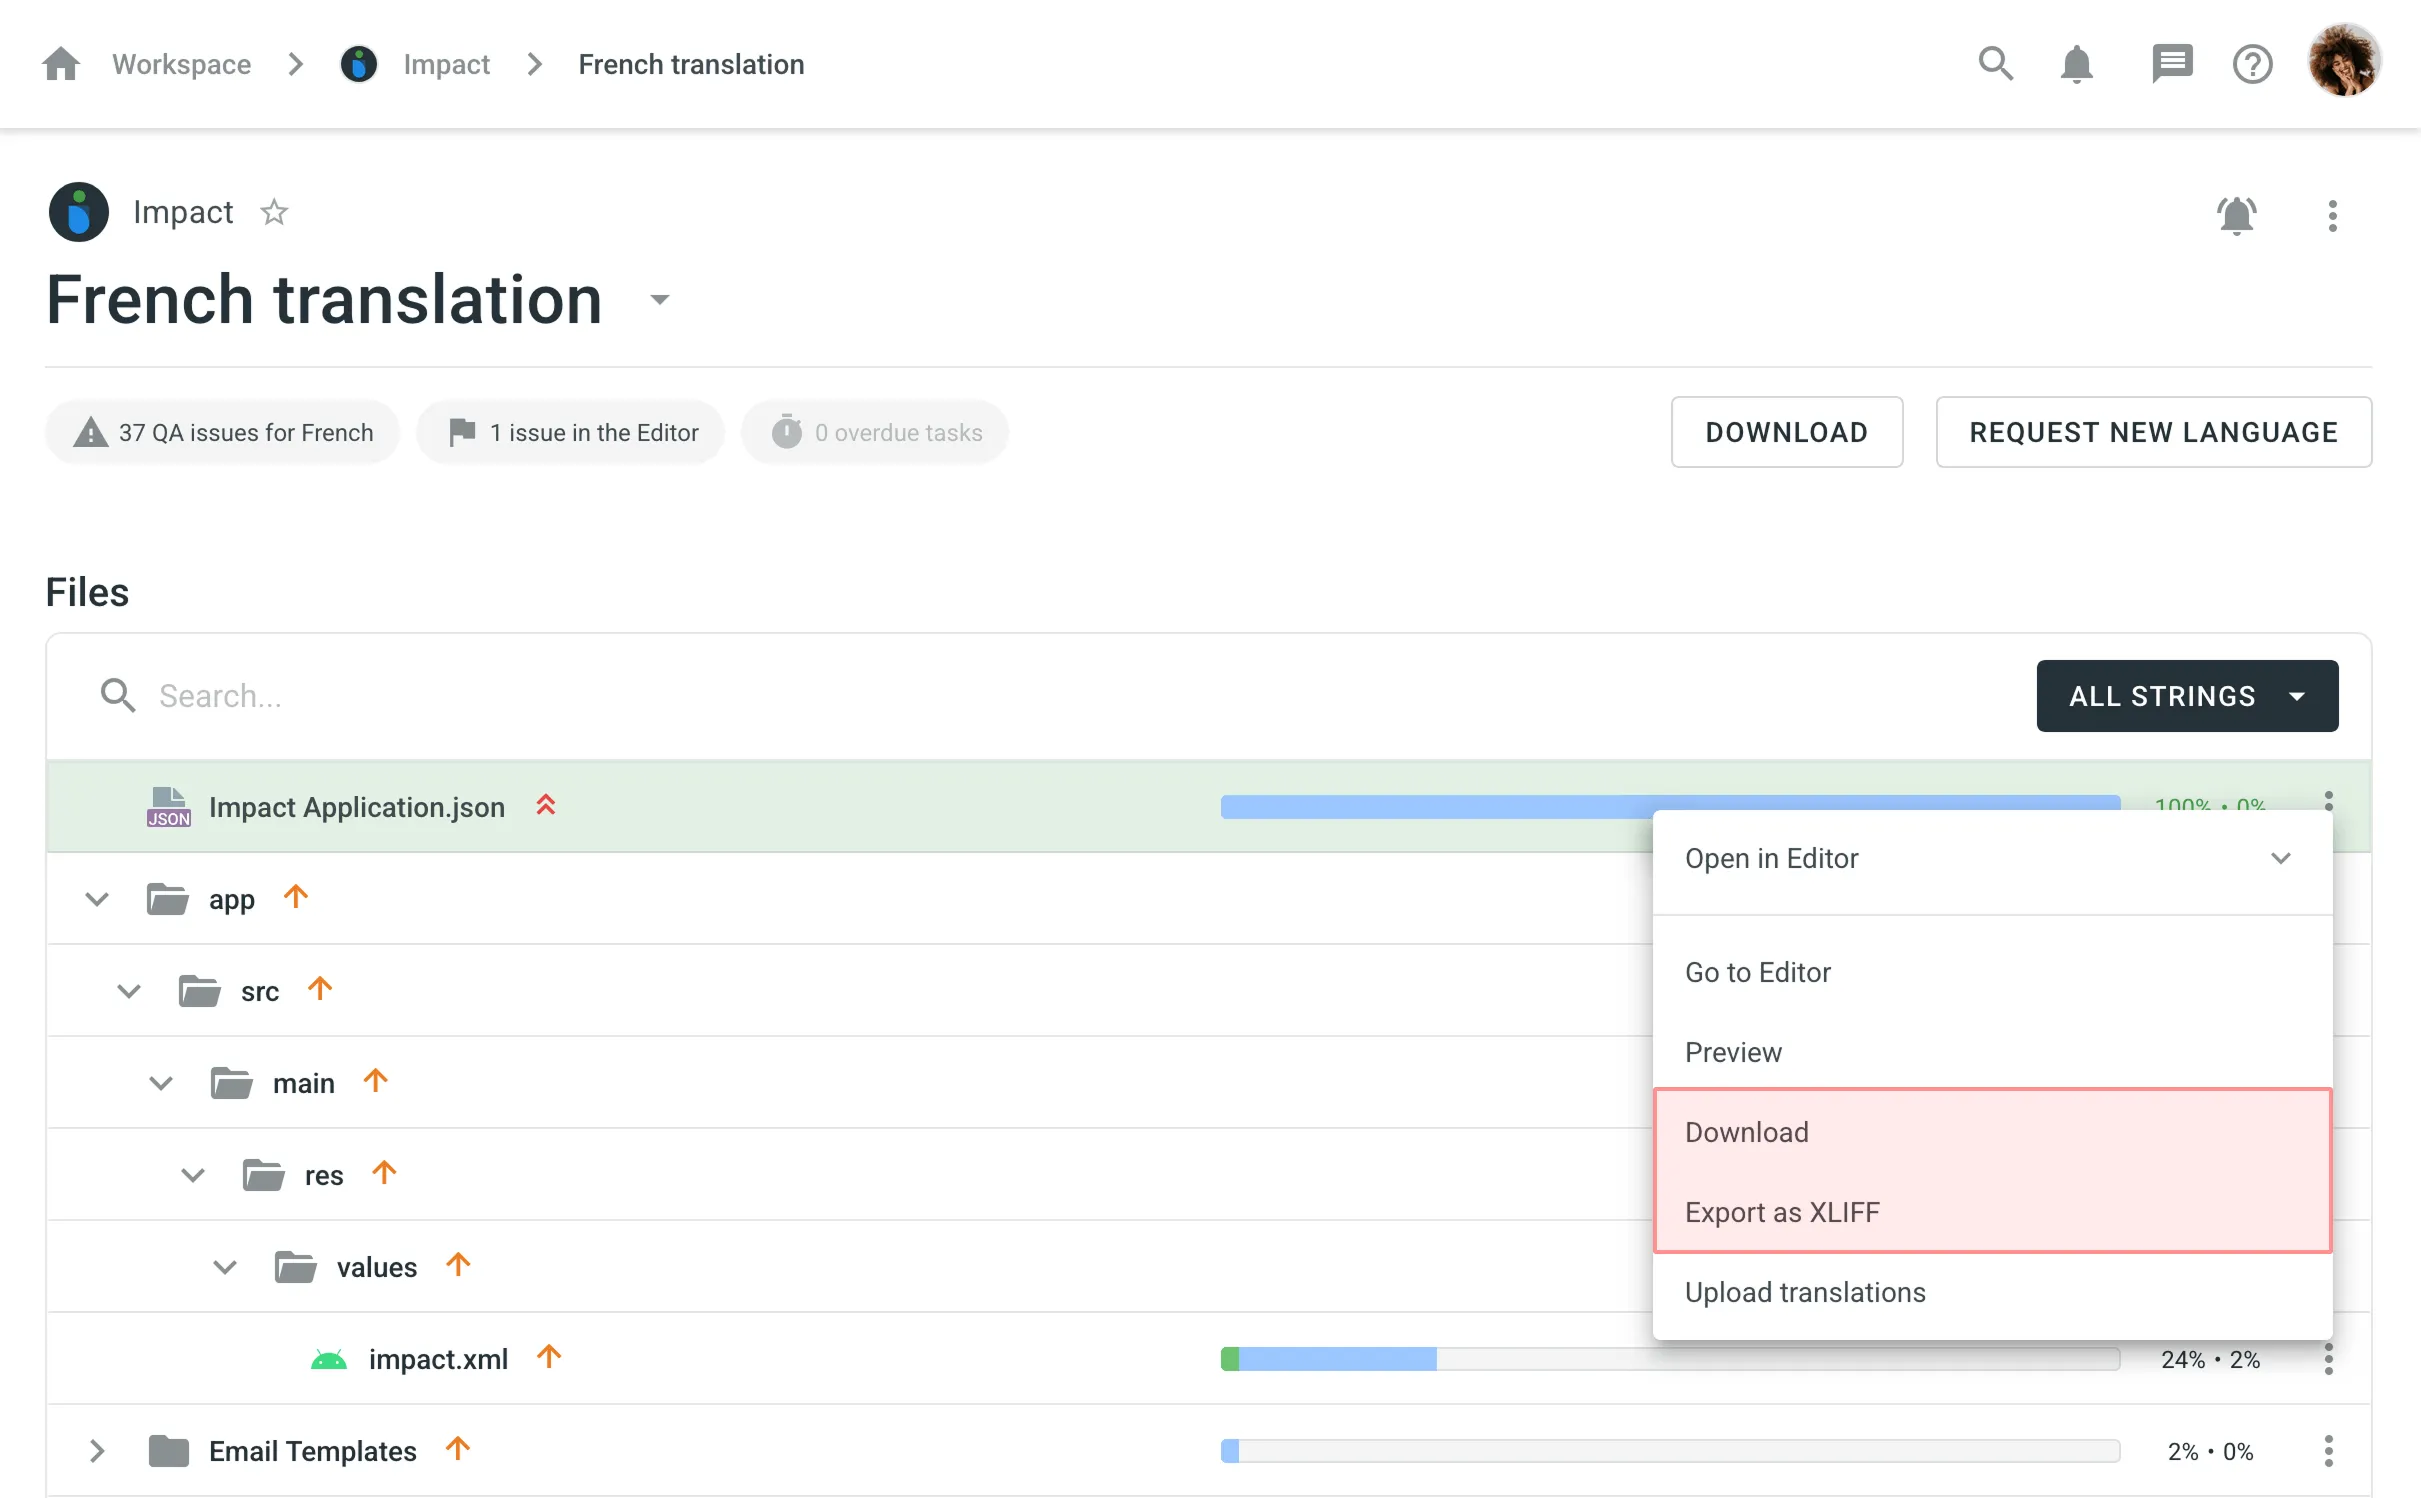 ### [Downloading All Files for a Specific Language](#downloading-all-files-for-a-specific-language) [Section titled “Downloading All Files for a Specific Language”](#downloading-all-files-for-a-specific-language) To download all the project files for a specific language, follow these steps: 1. Open your project and select a language. 2. Click **Download**. 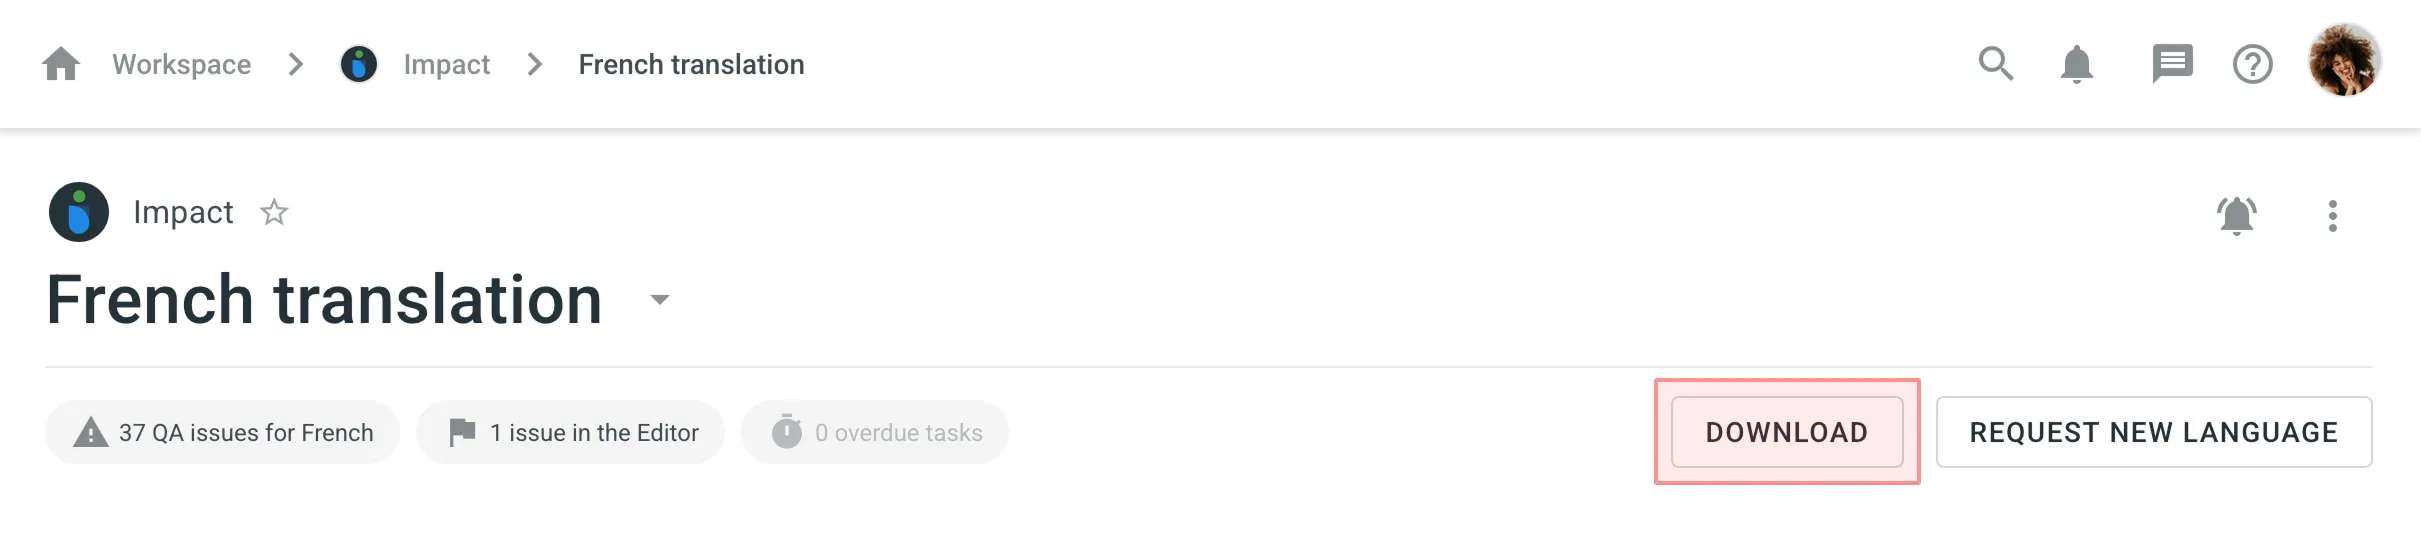 Using the **Download** option, you’ll get a ZIP archive with all the project files containing translations in the original format. This is useful if you want to test the localized version of your product. Alternatively, you can download all project files for a specific language as a single XLIFF file: 1. Open your project and select a language. 2. Click in the upper-right corner. 3. Select **Export as XLIFF**. 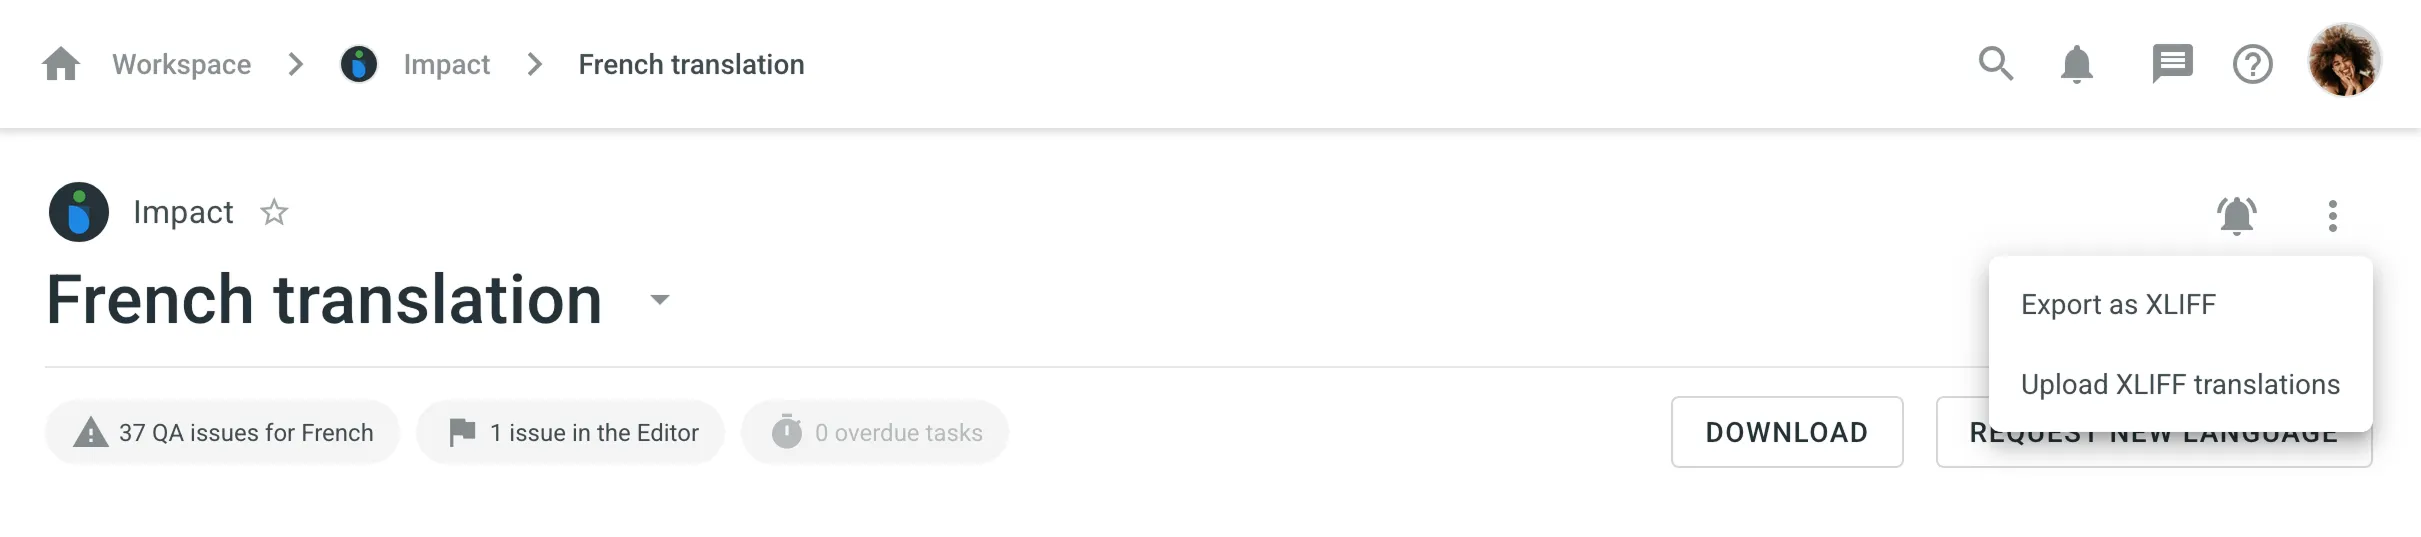 The **Export as XLIFF** option provides a single file containing all source strings and completed translations. This method is more convenient for offline translation in CAT tools, as it doesn’t require opening and exporting files individually. Most desktop localization tools support the XLIFF format. ### [Downloading Filtered Strings in XLIFF](#downloading-filtered-strings-in-xliff) [Section titled “Downloading Filtered Strings in XLIFF”](#downloading-filtered-strings-in-xliff) You can also export strings based on specific criteria. For example, you may want to export only untranslated strings, strings translated by a certain user, or strings with comments. To download filtered strings, follow these steps: 1. Open the necessary file in the Editor. 2. Apply filters based on your desired criteria. 3. Click the Main menu in the upper-left corner. 4. In the *File* menu, select **Export Filtered in XLIFF**. 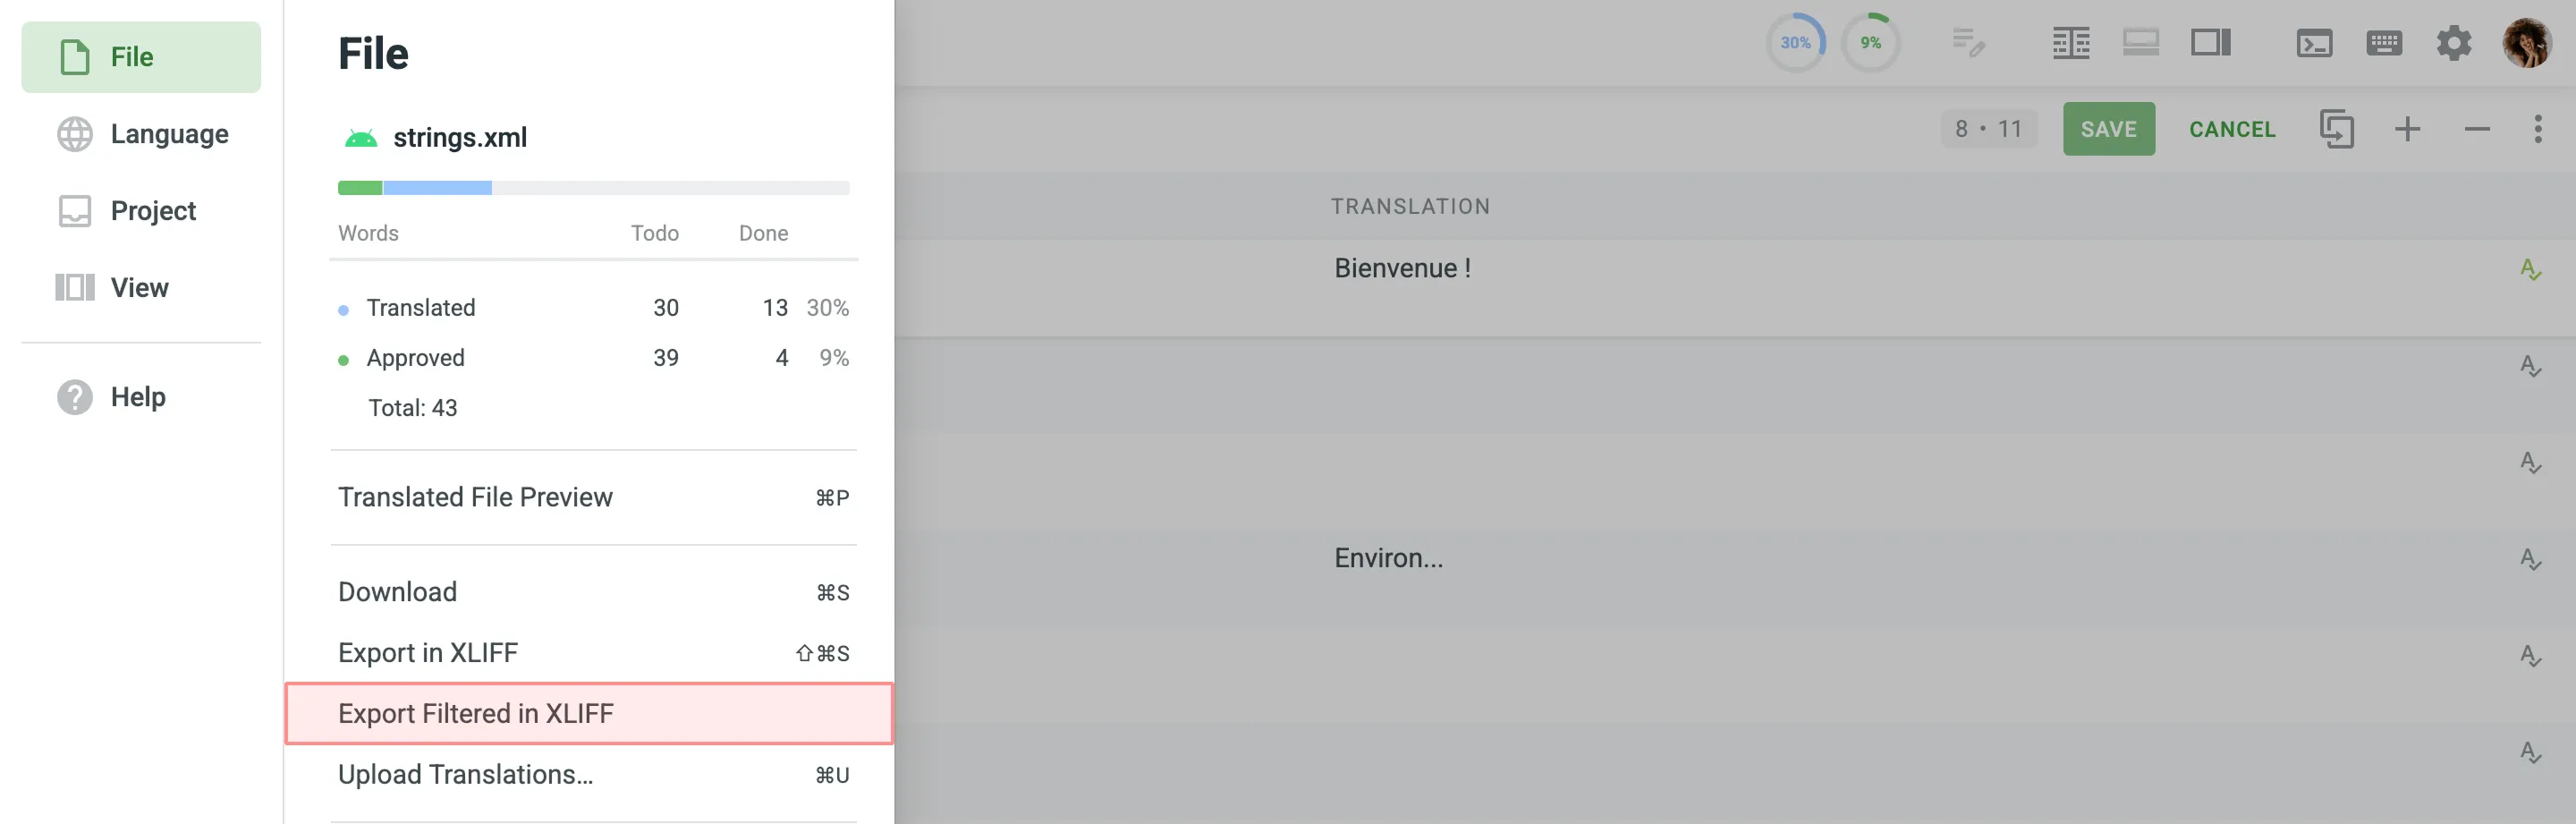 If you are in the [Multilingual (Grid)](/enterprise/online-editor/#multilingual-mode-grid) mode of the Editor, click the drop-down arrow next to a target language’s column and select **Export Filtered in XLIFF**. 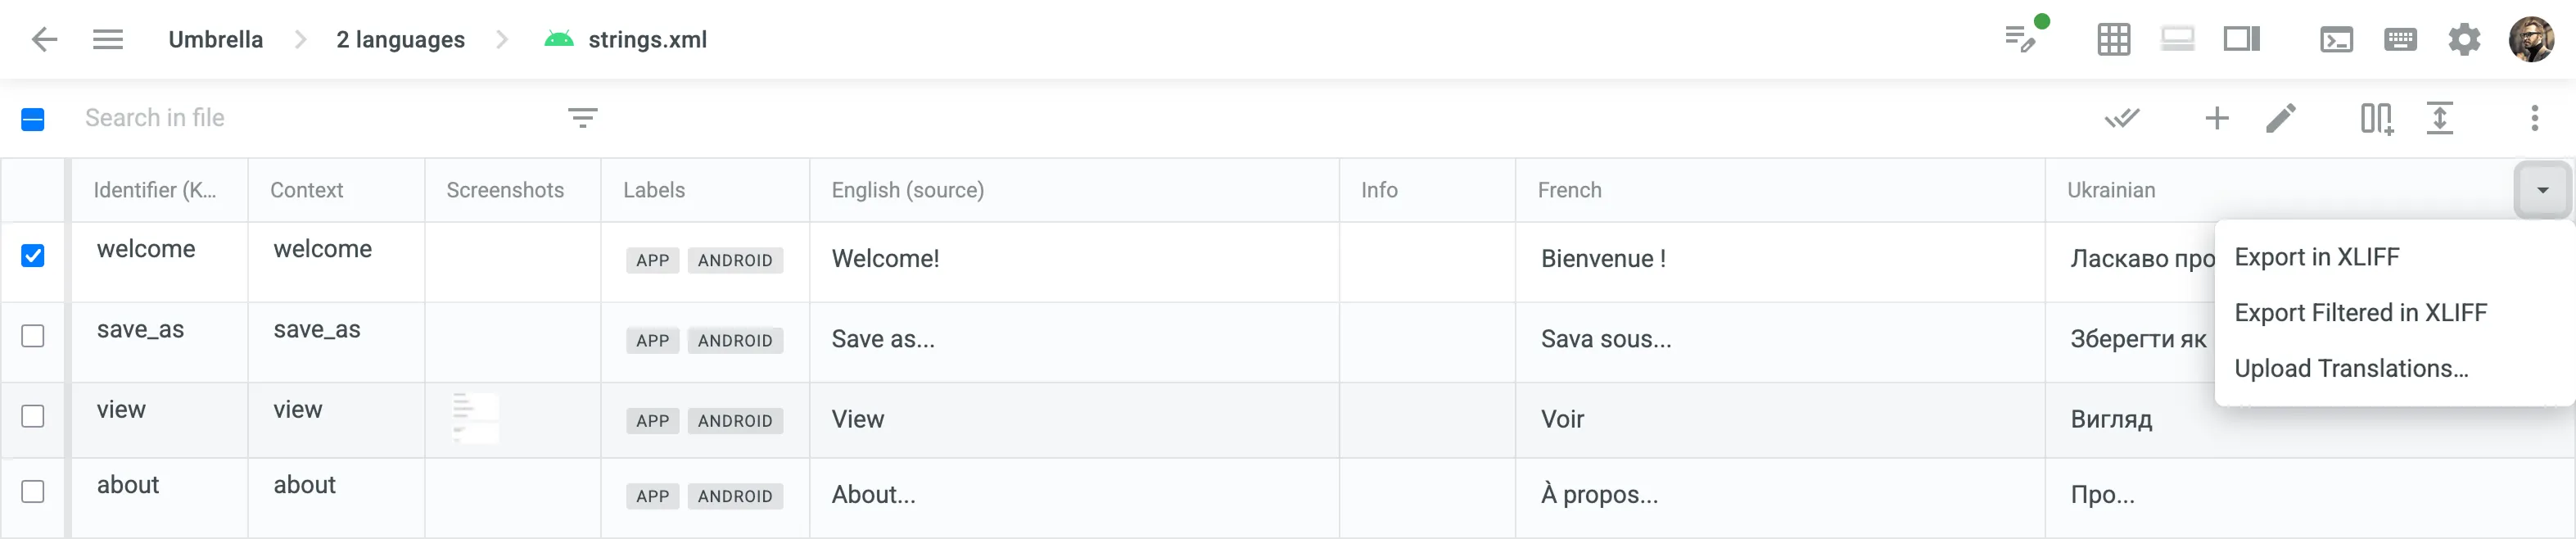 Read more about [Online Editor](/enterprise/online-editor/). ## [Uploading Translations](#uploading-translations) [Section titled “Uploading Translations”](#uploading-translations) After completing translations offline, you can upload them back to the project in the original or XLIFF format. Upload can be done via the Editor or the language page. ### [Uploading Translations via Editor](#uploading-translations-via-editor) [Section titled “Uploading Translations via Editor”](#uploading-translations-via-editor) To upload a file with translations, follow these steps: 1. Open the needed file in the Editor. 2. Click the Main menu in the upper-left corner. 3. In the *File* menu, select **Upload Translations**. 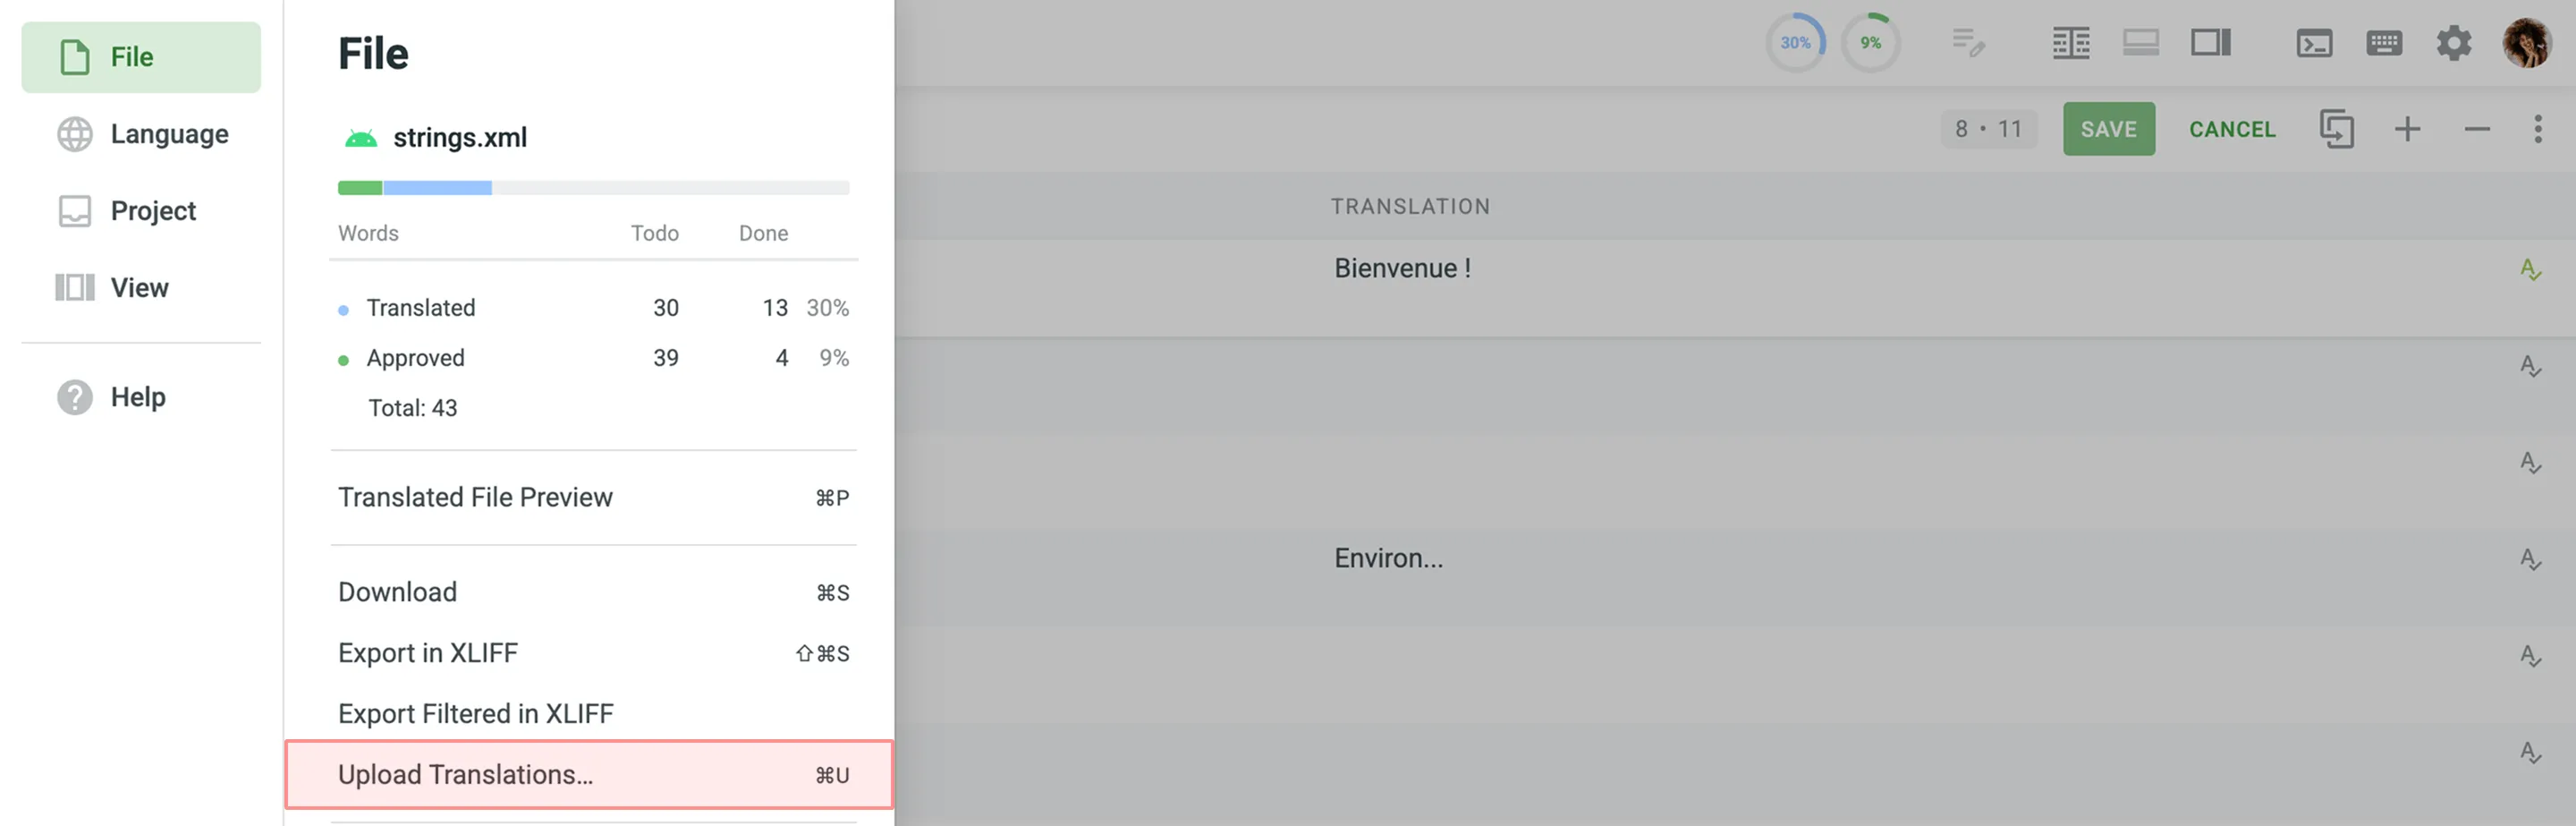 4. Adjust the [Advanced Import Settings](#advanced-import-settings) as needed. 5. Click **Select File** and choose the file with translations from your device. If you are in the [Multilingual (Grid)](/enterprise/online-editor/#multilingual-mode-grid) mode of the Editor, click the drop-down arrow next to a target language’s column and select **Upload Translations**.  Read more about [Online Editor](/enterprise/online-editor/). ### [Uploading Translations via Language Page](#uploading-translations-via-language-page) [Section titled “Uploading Translations via Language Page”](#uploading-translations-via-language-page) 1. Open your project and select a language. 2. Click next to the file you want to upload translations to. 3. Select **Upload Translations**. 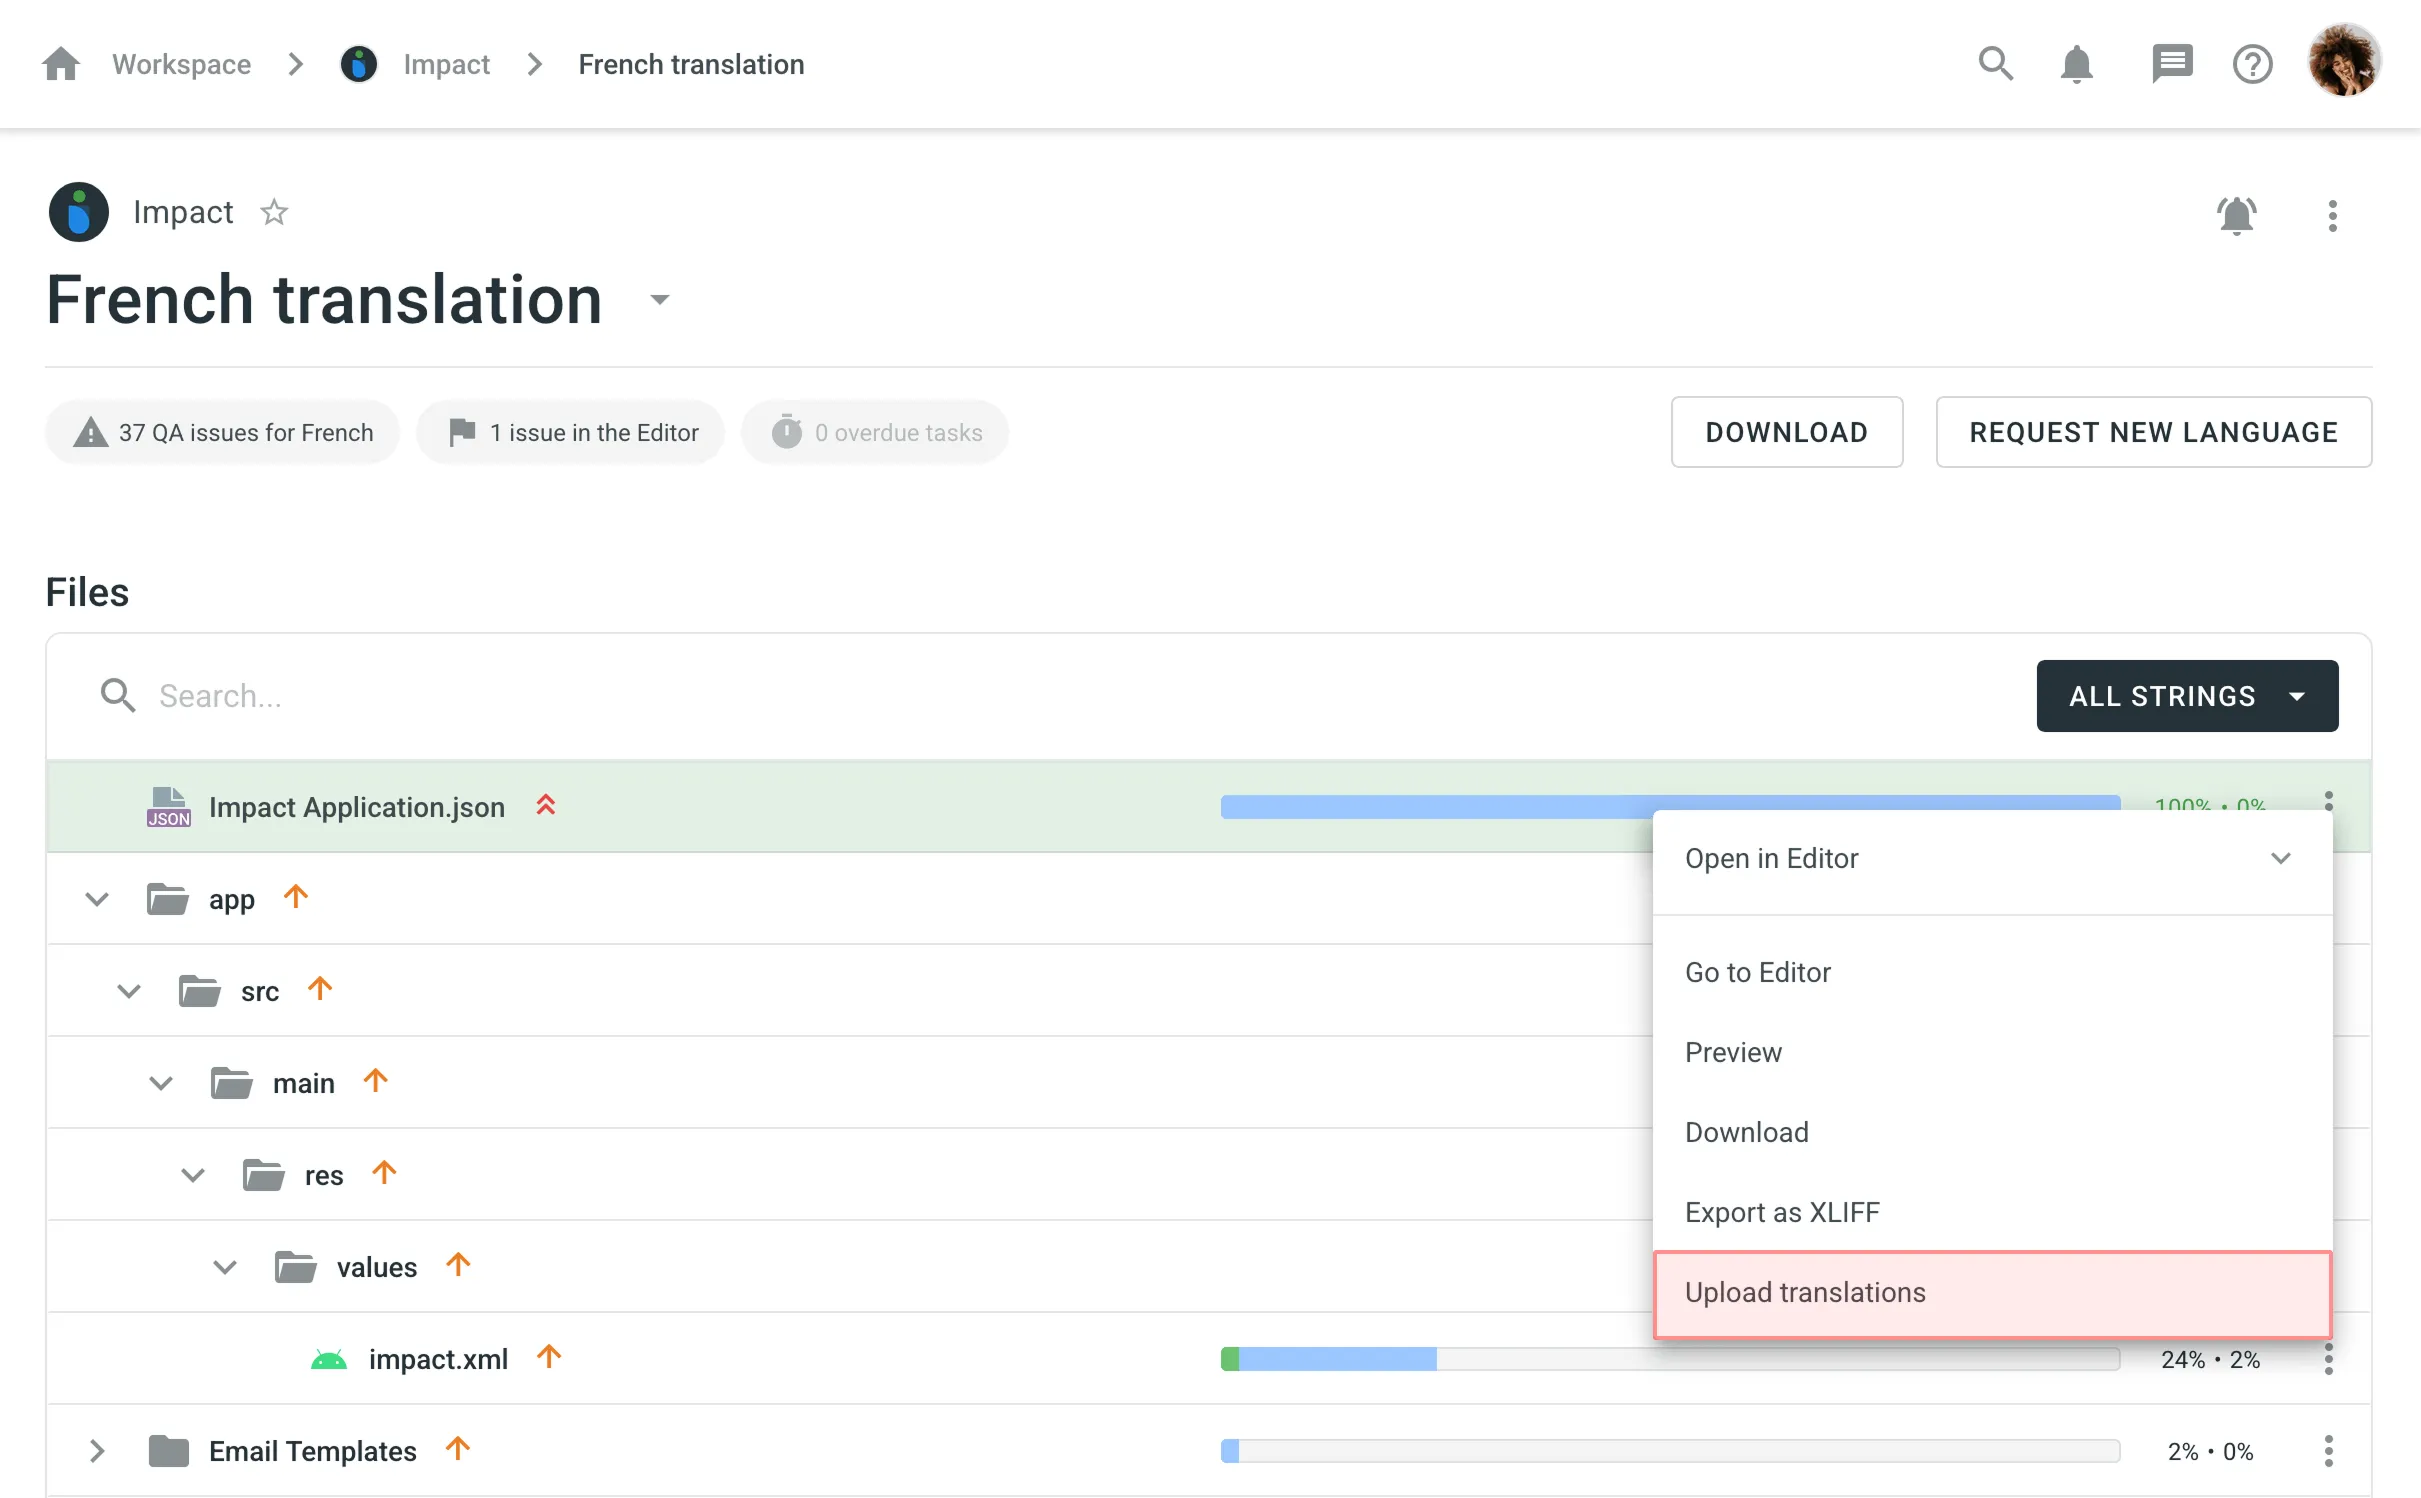 4. Adjust the [Advanced Import Settings](#advanced-import-settings) as needed. 5. Click **Select File** and choose the file with translations from your device. ### [Uploading XLIFF Translations](#uploading-xliff-translations) [Section titled “Uploading XLIFF Translations”](#uploading-xliff-translations) Once you’ve finished translating an XLIFF file exported from the project, you can upload the completed translations back to Crowdin Enterprise using the following steps: 1. Open your project and select a language. 2. Click in the upper-right corner. 3. Select **Upload XLIFF translations**.  4. Adjust the [Advanced Import Settings](#advanced-import-settings) as needed. 5. Click **Select File** and choose the XLIFF file with translations from your device. ### [Advanced Import Settings](#advanced-import-settings) [Section titled “Advanced Import Settings”](#advanced-import-settings) When uploading translations, you can adjust the following import options to control how the system handles the new content: * **Allow target translation to match source** – Enable this if the translation is intentionally the same as the source (e.g., for product names or code terms). * **Approve added translations** – Automatically approve the uploaded translations if you’re confident in their accuracy. * **Translate hidden strings** – Include strings that are hidden from the Editor but still require translation (e.g., for system use or placeholders).
# OpenID Connect
> Learn how to set up OpenID Connect for your organization
OpenID Connect (OIDC) is an authentication method built on the OAuth 2.0 protocol, allowing users to log in to Crowdin Enterprise through your organization’s identity provider (IDP). OIDC offers simplicity in configuration and user management while enhancing security and access control. It’s an ideal choice for organizations looking for streamlined authentication with a focus on ease of integration and scalability. ## [Configure your identity provider](#configure-your-identity-provider) [Section titled “Configure your identity provider”](#configure-your-identity-provider) To get started, you’ll need to set up a connection (or connector) for Crowdin Enterprise with your IDP (for example, [Okta](https://support.okta.com/help/s/article/create-an-oidc-web-app-in-dashboard), [Auth0](https://auth0.com/docs/get-started/auth0-overview/create-applications), and others). [Configure OpenID Connect for Okta ](#okta) [Configure OpenID Connect for Auth0 ](#auth0) ## [Set up OpenID Connect for Crowdin Enterprise](#set-up-openid-connect-for-crowdin-enterprise) [Section titled “Set up OpenID Connect for Crowdin Enterprise”](#set-up-openid-connect-for-crowdin-enterprise) Once you configured your identity provider, an Organization admin can enable the OpenID Connect in Crowdin Enterprise **Organization Settings**. 1. Click on your profile picture in the upper-right corner and select **Organization Settings**. 2. Switch to the **Authentication** section on the left sidebar and click on the **OpenID Connect** authentication method at the bottom of the page. 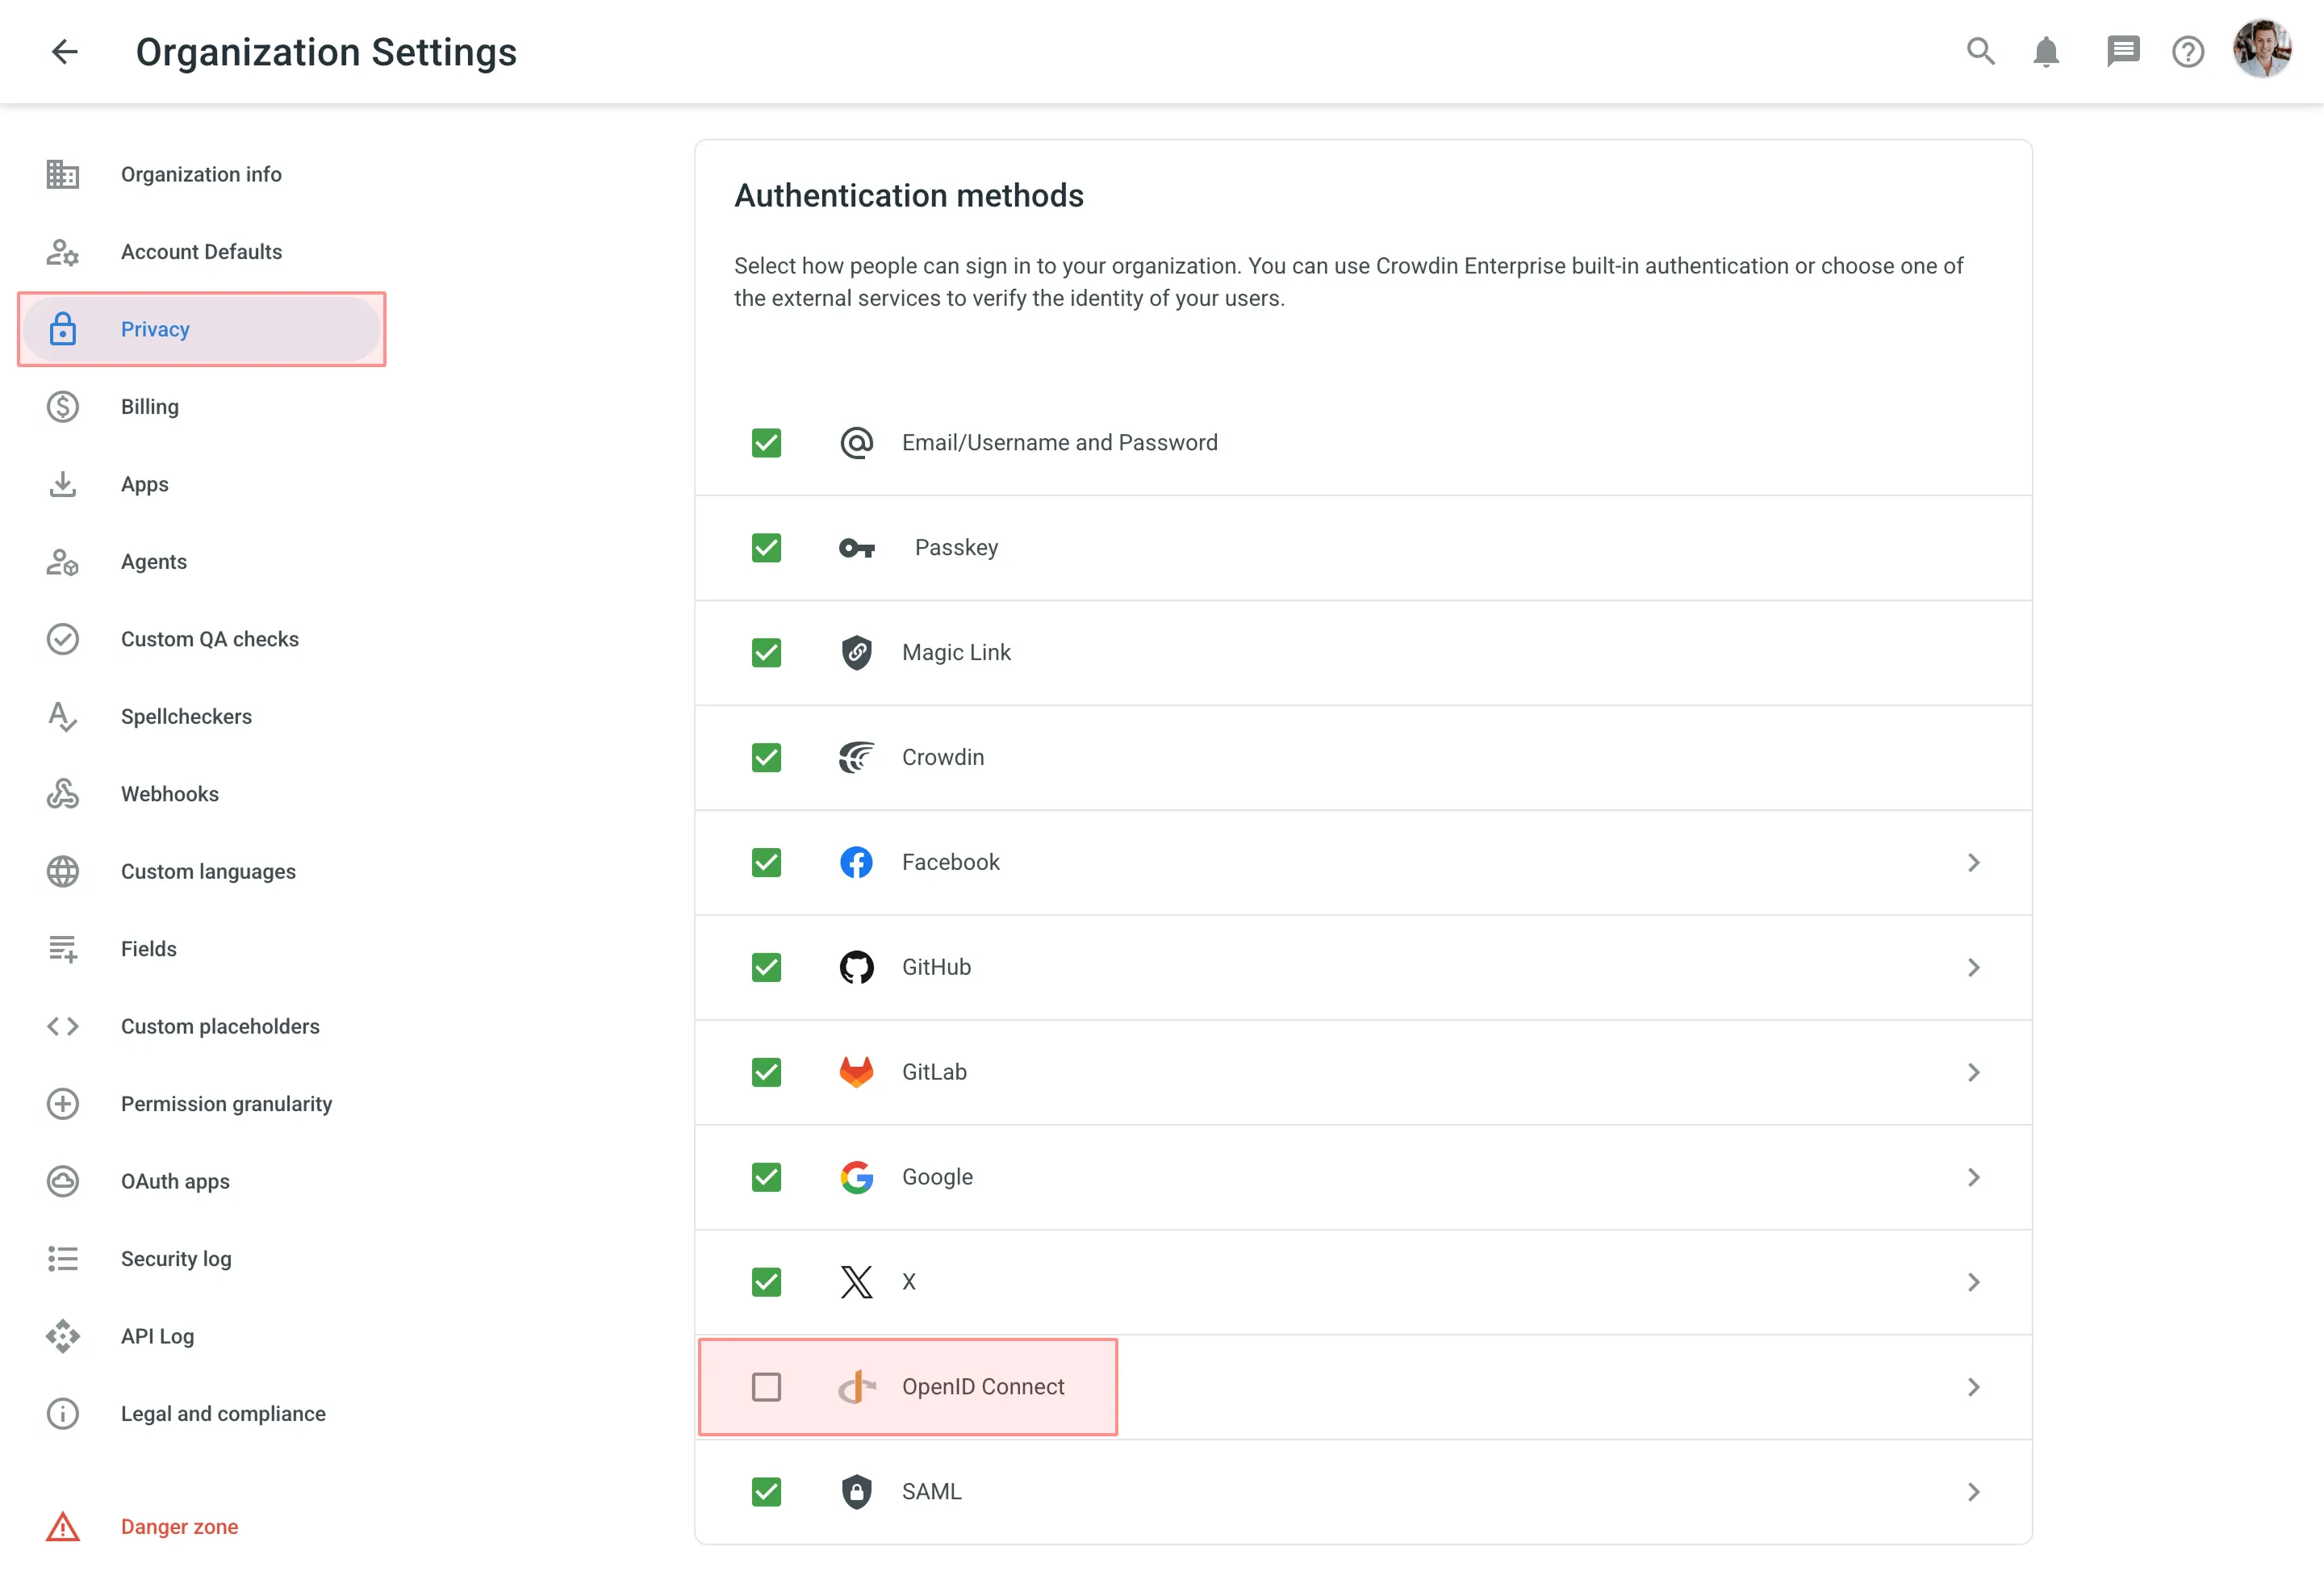 3. Paste your credentials from your IDP and click **Save**. 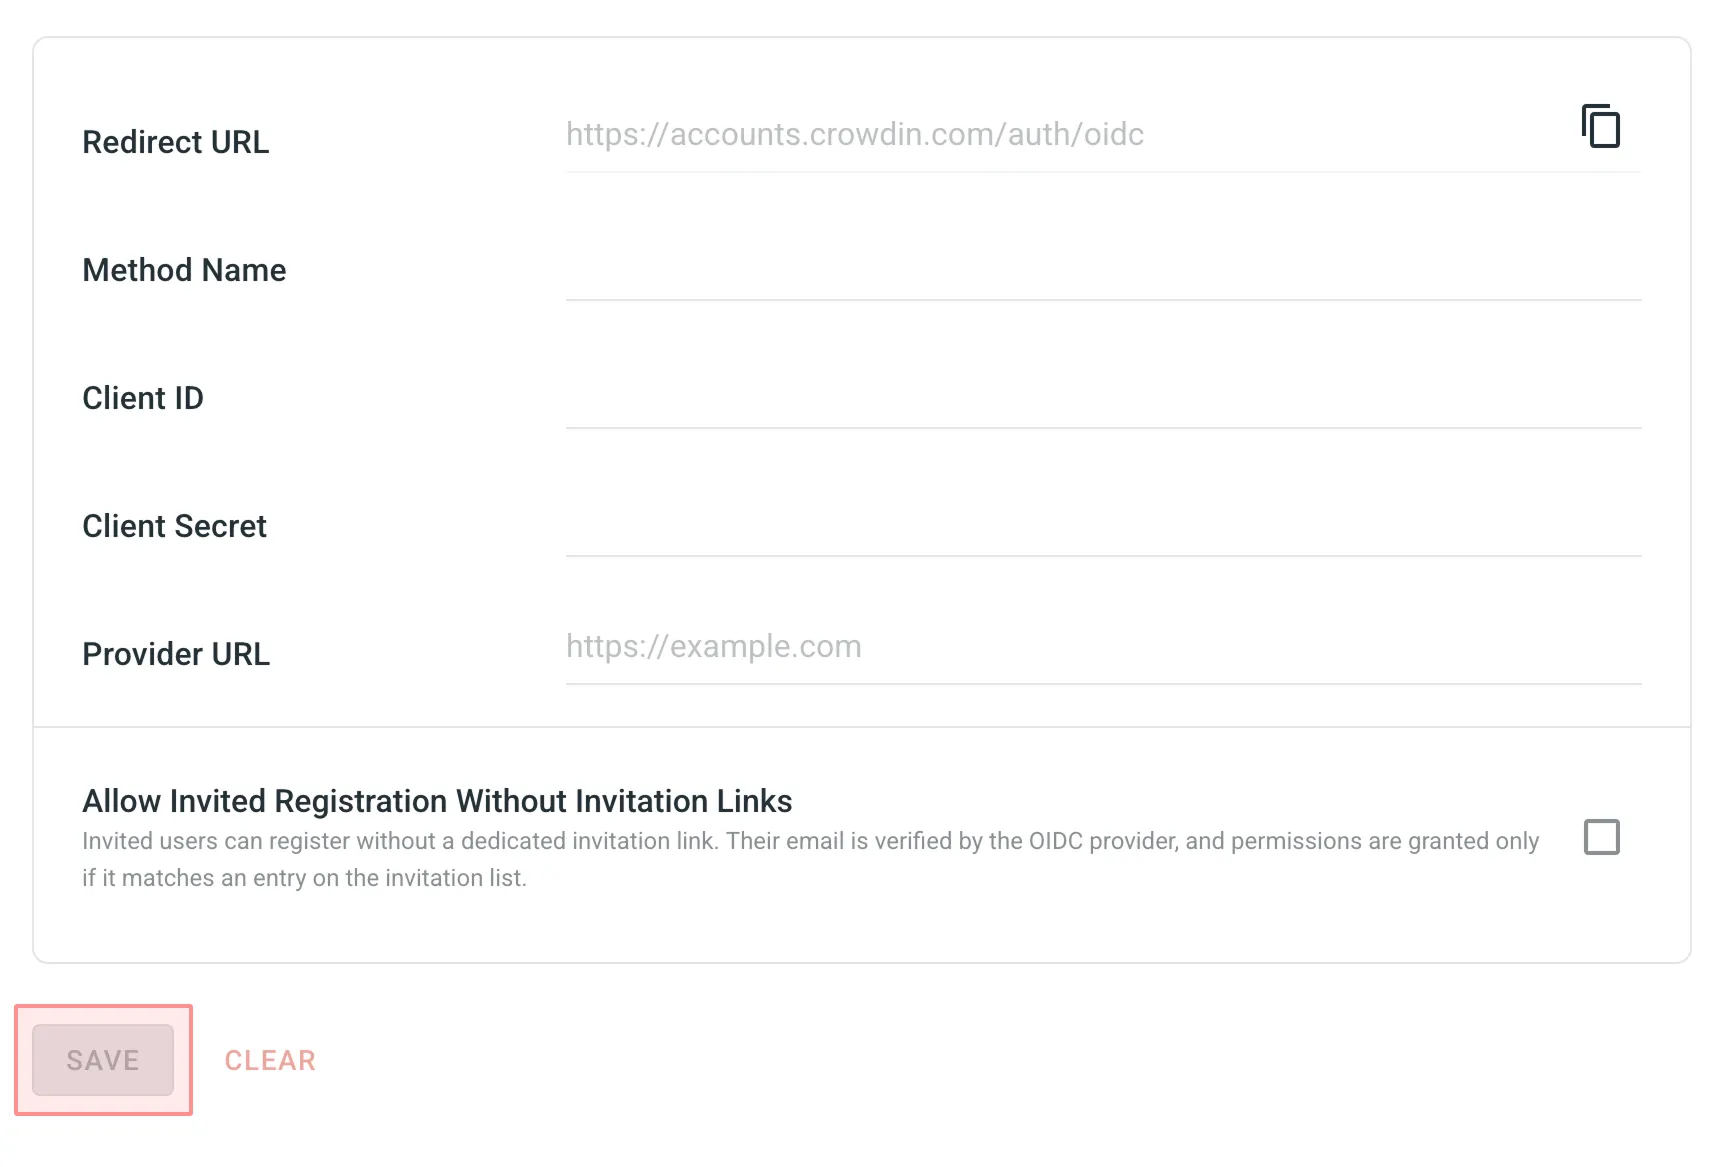 4. Go back to the **Authentication** page and enable the OpenID Connect authentication method. 5. As a result, on the login page, users will be able to use OpenID Connect for logging into your Crowdin Enterprise organization. ## [OpenID Connect Settings](#openid-connect-settings) [Section titled “OpenID Connect Settings”](#openid-connect-settings) The **OpenID Connect Auth Settings** page allows you to configure the details required for enabling OpenID Connect authentication within your Crowdin Enterprise organization. * **Redirect URL** – the URL where the user will be redirected after authentication. Crowdin Enterprise automatically generates this URL based on your organization’s domain, and it must be registered with your IDP. * **Method Name** – the name you assign for the OpenID Connect authentication method, which will appear on your Crowdin Enterprise login page. This helps users identify the authentication option when logging in. * **Client ID** – the unique identifier provided by your IDP during the OpenID Connect setup process. It distinguishes your Crowdin Enterprise application and enables secure communication with the IDP. * **Client Secret** – enter the Client Secret provided by your IDP, ensuring it is stored securely as it grants access to authenticate users. * **Provider URL** – enter your IDP’s authorization URL to enable communication between Crowdin Enterprise and the IDP. Refer to your IDP’s documentation for this URL. * **Allow Invited Registration Without Invitation Links** – invited users can register without a dedicated invitation link. The system automatically grants permissions only if the user’s email (validated by the OIDC provider) matches an entry on your invitation list. ## [What you get when OpenID Connect is enabled](#what-you-get-when-openid-connect-is-enabled) [Section titled “What you get when OpenID Connect is enabled”](#what-you-get-when-openid-connect-is-enabled) Once OpenID Connect (OIDC) is set up and enabled, any users already logged in will remain logged in. From that point on, users who choose OIDC as their login method will access your Crowdin Enterprise organization using their IDP credentials. If a user does not yet have an account in your Crowdin Enterprise organization, an account will be created automatically during their first login. ## [Configuring OpenID Connect for Okta](#okta) [Section titled “Configuring OpenID Connect for Okta”](#okta) To set up Crowdin Enterprise OpenID Connect in your Okta, follow the steps below. #### [Set up Crowdin Enterprise OpenID Connect App](#setup-okta) [Section titled “Set up Crowdin Enterprise OpenID Connect App”](#setup-okta) 1. Open the Okta Dashboard using an administrator account. 2. From the Dashboard page, go to **Applications**. 3. Click on the **Applications** submenu. 4. Click **Create App Integration**. 5. In the *Create a new app integration* dialog, set *Sign-in method* to *OIDC - OpenID Connect*, click **Next**. 6. Set *Application type* to *Web application*, click **Next**. 7. On the *New Web App Integration* page, set the following parameters: * Add an application name (for example *Crowdin Enterprise*) in the *General Settings* section. * *(Optional)* Upload a PNG, JPG, or GIF file to serve as a logo for your Crowdin Enterprise OpenID Connect app. You can find the Crowdin icon on the [Using the Crowdin Logo](/using-logo/) page. * Enter `https://accounts.crowdin.com/auth/oidc` in the *Sign-in redirect URIs* section. This is your Crowdin Enterprise **Redirect URL**, which you can always find in **Organization Settings > Authentication > OpenID Connect**. * In the **Assignments** section, you can choose who in your organization will be able to use the app or you can select **Skip group assignment for now** and return to [assigning users](#assign-users-okta) later. 8. Click **Save**. 9. After you finished setting up the app on the Okta’s side, you’ll be redirected to the app’s *General* tab. 10. In the *Client Credentials* and *Client Secrets* sections, you’ll see the credentials that need to be specified in your Crowdin Enterprise **Organization Settings > Authentication > OpenID Connect**. 11. Copy the *Client ID* and *Client Secret*. 12. Copy your [Okta domain](https://developer.okta.com/docs/guides/find-your-domain/main/). 13. In a separate browser tab or window, log in to your Crowdin Enterprise organization and go to **Organization Settings > Authentication**, and click on OpenID Connect at the bottom of the *Authentication methods* list. 14. Enter the information you copied from Okta (paste the *Client ID* into the *Client ID* field, *Client Secret* into the *Client Secret* field, and your Okta domain (e.g., `https://{organization-name}.okta.com`) into the *Provider URL* field). 15. *(Optional)* Specify your custom name for the OpenID Connect authentication method in the *Method Name* field. 16. Click **Save**. 17. Select the checkbox next to OpenID Connect in the *Authentication methods* list so that your users could use it as the desired authentication method to log in to your Crowdin Enterprise organization from the login page. #### [Assign Users](#assign-users-okta) [Section titled “Assign Users”](#assign-users-okta) In this section, you’ll enable users to use Okta OpenID Connect by granting access to your Crowdin Enterprise organization. 1. Open your Okta Dashboard using an administrator account and go to **Applications**. 2. Click on the **Applications** submenu. 3. Click on the drop-down menu on your new Crowdin Enterprise OpenID Connect app. 4. Select **Assign to Groups**. 5. In the *Assign Crowdin Enterprise OpenID Connect to Groups* dialog, click **Assign** on **Everyone** to enable Crowdin Enterprise OpenID Connect app to all users in your organization, click **Done**. Alternatively, you can assign separate groups or individual users. #### [Test OpenID Connect](#test-oidc-okta) [Section titled “Test OpenID Connect”](#test-oidc-okta) 1. On the Crowdin Enterprise [login page](https://accounts.crowdin.com/), select your organization and click **Log in**. 2. Click on **OpenID Connect**. You should be automatically redirected to the Okta login page. 3. Enter your login credentials. After your login credentials are authenticated, you’re automatically redirected to Crowdin Enterprise. ## [Configuring OpenID Connect for Auth0](#auth0) [Section titled “Configuring OpenID Connect for Auth0”](#auth0) To set up Crowdin Enterprise OpenID Connect in your Auth0, follow the steps below. #### [Set up Crowdin Enterprise OpenID Connect App](#setup-auth0) [Section titled “Set up Crowdin Enterprise OpenID Connect App”](#setup-auth0) 1. Open the Auth0 Management Dashboard using an administrator account. 2. From the *Dashboard*, go to *Applications*. 3. Click on the **Applications** submenu. 4. Click **+ Create Application** on the right. 5. In the **Name** field, specify an application name (for example *Crowdin Enterprise*), select the **Regular Web Applications** application type, click **Create**. 6. Switch to the **Settings** tab of your new application. 7. *(Optional)* Specify the URL for your Crowdin Enterprise OpenID Connect app. You can find the Crowdin icon on the [Using the Crowdin Logo](/using-logo/) page. 8. In the **Application URIs** section, enter `https://accounts.crowdin.com/auth/oidc` in the *Allowed Callbacks URLs* field. This is your Crowdin Enterprise **Redirect URL**, which you can always find in **Organization Settings > Authentication > OpenID Connect**. 9. Click **Save Changes**. 10. Scroll up to the **Basic Information** section, you’ll see the credentials that need to be specified in your Crowdin Enterprise **Organization Settings > Authentication > OpenID Connect**. 11. Copy the *Domain*, *Client ID*, and *Client Secret*. 12. In a separate browser tab or window, log in to your Crowdin Enterprise organization and go to **Organization Settings > Authentication**, and click on OpenID Connect at the bottom of the *Authentication methods* list. 13. Enter the information you copied from Auth0 (paste the *Client ID* into the *Client ID* field, *Client Secret* into the *Client Secret* field, and your Auth0 domain (e.g., `https://{organization-name}.auth0.com`) into the *Provider URL* field). 14. *(Optional)* Specify your custom name for the OpenID Connect authentication method in the *Method Name* field. 15. Click **Save**. 16. Select the checkbox next to OpenID Connect in the *Authentication methods* list so that your users could use it as the desired authentication method to log in to your Crowdin Enterprise organization from the login page. #### [Manage Access to Crowdin Enterprise OpenID Connect App](#manage-access-to-crowdin-enterprise-openid-connect-app) [Section titled “Manage Access to Crowdin Enterprise OpenID Connect App”](#manage-access-to-crowdin-enterprise-openid-connect-app) By default, all users associated with a single Auth0 tenant are shared between the tenant’s applications (and therefore have access to the applications). If necessary you can restrict some users’ access to the application using [rules](https://auth0.com/docs/rules). See [this rule as an example](https://github.com/auth0/rules/blob/aeaf93bc058408e260192d0941a688963449d6be/src/rules/simple-user-whitelist-for-app.js). #### [Test OpenID Connect](#test-oidc-auth0) [Section titled “Test OpenID Connect”](#test-oidc-auth0) 1. On the Crowdin Enterprise [login page](https://accounts.crowdin.com/), select your organization and click **Log in**. 2. Click on **OpenID Connect**. You should be automatically redirected to the Auth0 login page. 3. Enter your login credentials. After your login credentials are authenticated, you’re automatically redirected to Crowdin Enterprise.
# Overview
> Increase your productivity with the Crowdin Enterprise Editor
The Editor is the main place in Crowdin Enterprise where project members can work on translations. It allows users to suggest, vote on, review, and approve translations online. Using the Main menu in the upper-left corner, you can switch between files for translation, change translation languages, contact a manager, change the view, and access help materials. ## [Core Features](#core-features) [Section titled “Core Features”](#core-features) The Editor provides all the necessary tools for translators and proofreaders, including: * List of strings available for translation, which may vary in different [Editor modes](#editor-modes). * Context, labels, and additional information to guide the work. * String search and filtering options for efficient translation management. * [AI Assistant](/crowdin-ai/#using-ai-in-the-editor), [Translation Memory (TM)](/translation-memory/) suggestions, and [Machine Translation (MT)](/machine-translation/) suggestions. * [Glossary](/glossary/) terms to ensure consistency. * Comments section for collaboration and reporting issues.  ### [String List](#string-list) [Section titled “String List”](#string-list) This section displays the list of strings, with the active one highlighted. Strings are text elements that are either individual words, phrases, or sentences. Some strings might have replacement tokens (e.g., 0, 1, %1, etc.) or elements of the [ICU message syntax](/enterprise/icu-message-syntax/). Such items themselves should not be translated but are used by the website code to dynamically insert some information into strings. To work with such strings, you should copy the source string and translate only the real words. Strings can have the following statuses: * \- untranslated * \- partially translated (if some of the plural forms are not translated) * \- translated * \- partially approved (if some plural forms are not approved) * \- approved * \- hidden (visible only for project managers and proofreaders) There also might be the following icons besides strings: * \- the string has comments from contributors * \- the string has an unresolved issue * \- the string has labels #### [Suggesting Translations](#suggesting-translations) [Section titled “Suggesting Translations”](#suggesting-translations) To suggest a translation, select a string from the list and enter your suggestion in the field next to the original text. When you’re done, click **Save**. Your suggestion will be added to the string’s translation suggestions list, and you’ll automatically move on to the next string. 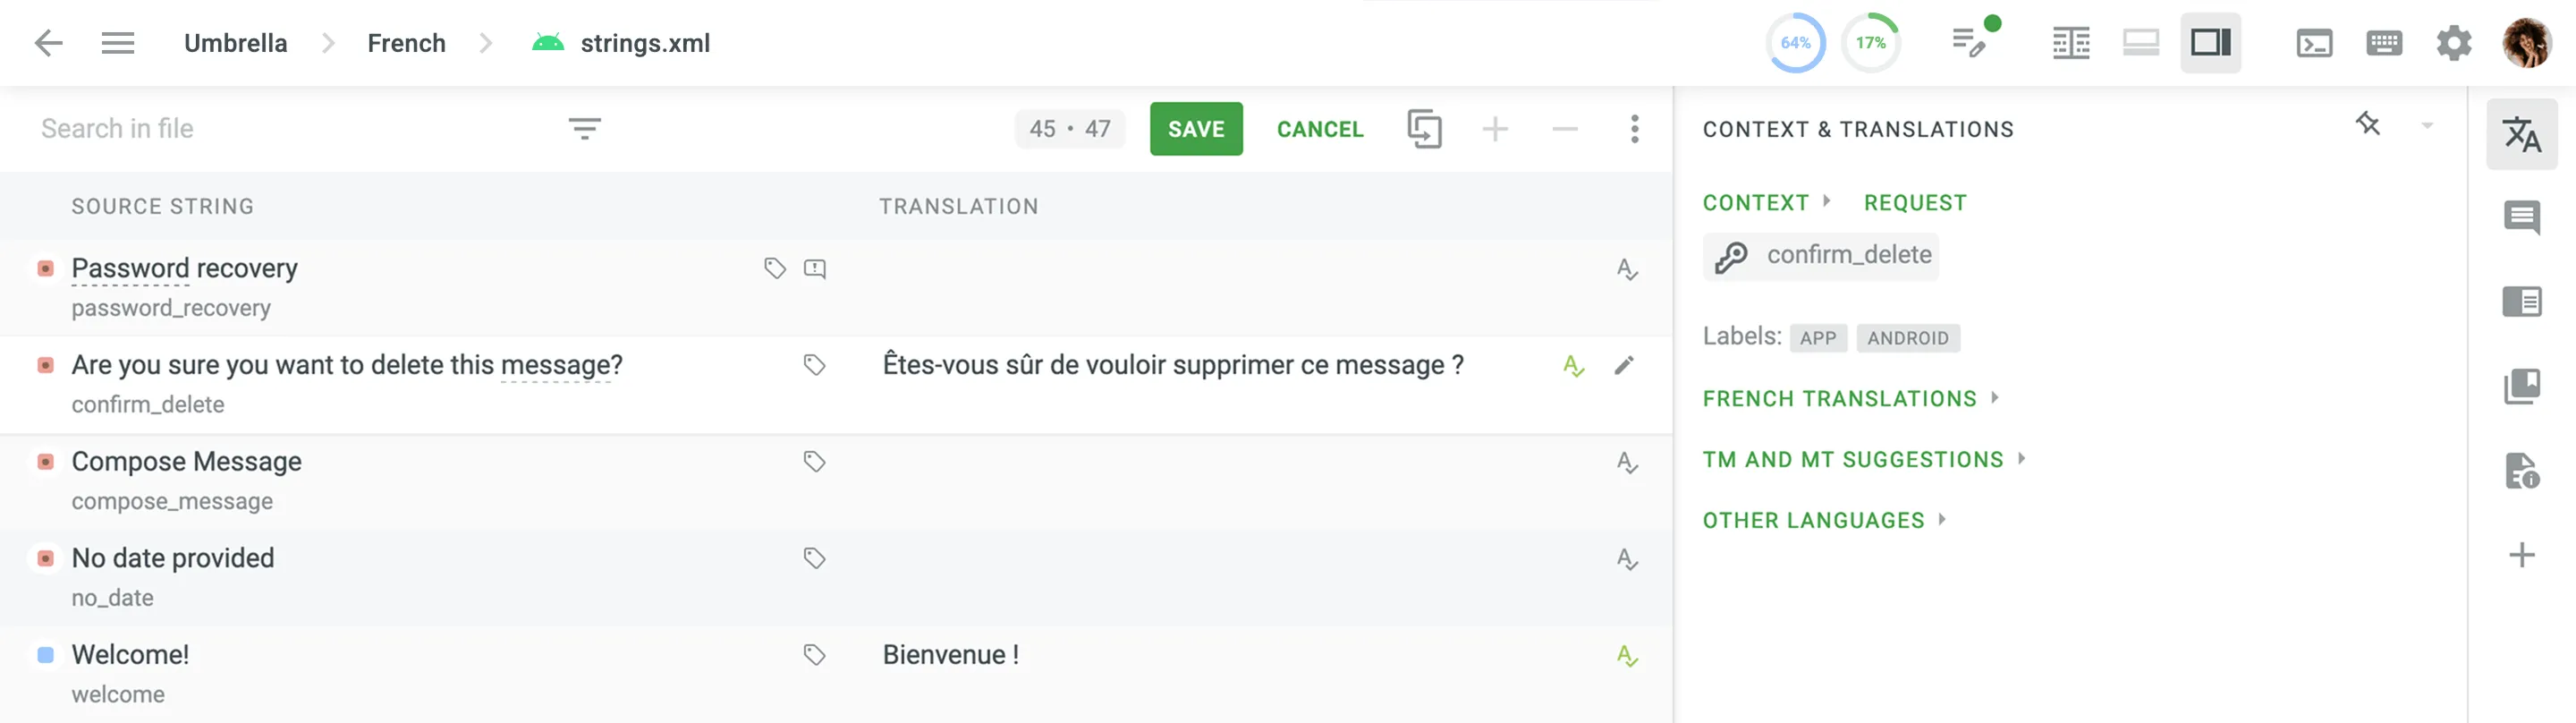 #### [Proofreading](#proofreading) [Section titled “Proofreading”](#proofreading) Review the translations to make sure they are ready for export, and click *Approve* icon next to the suggestion to approve each translation separately. To approve all or a couple of the strings at once, check the boxes on the left and then click **Approve**. 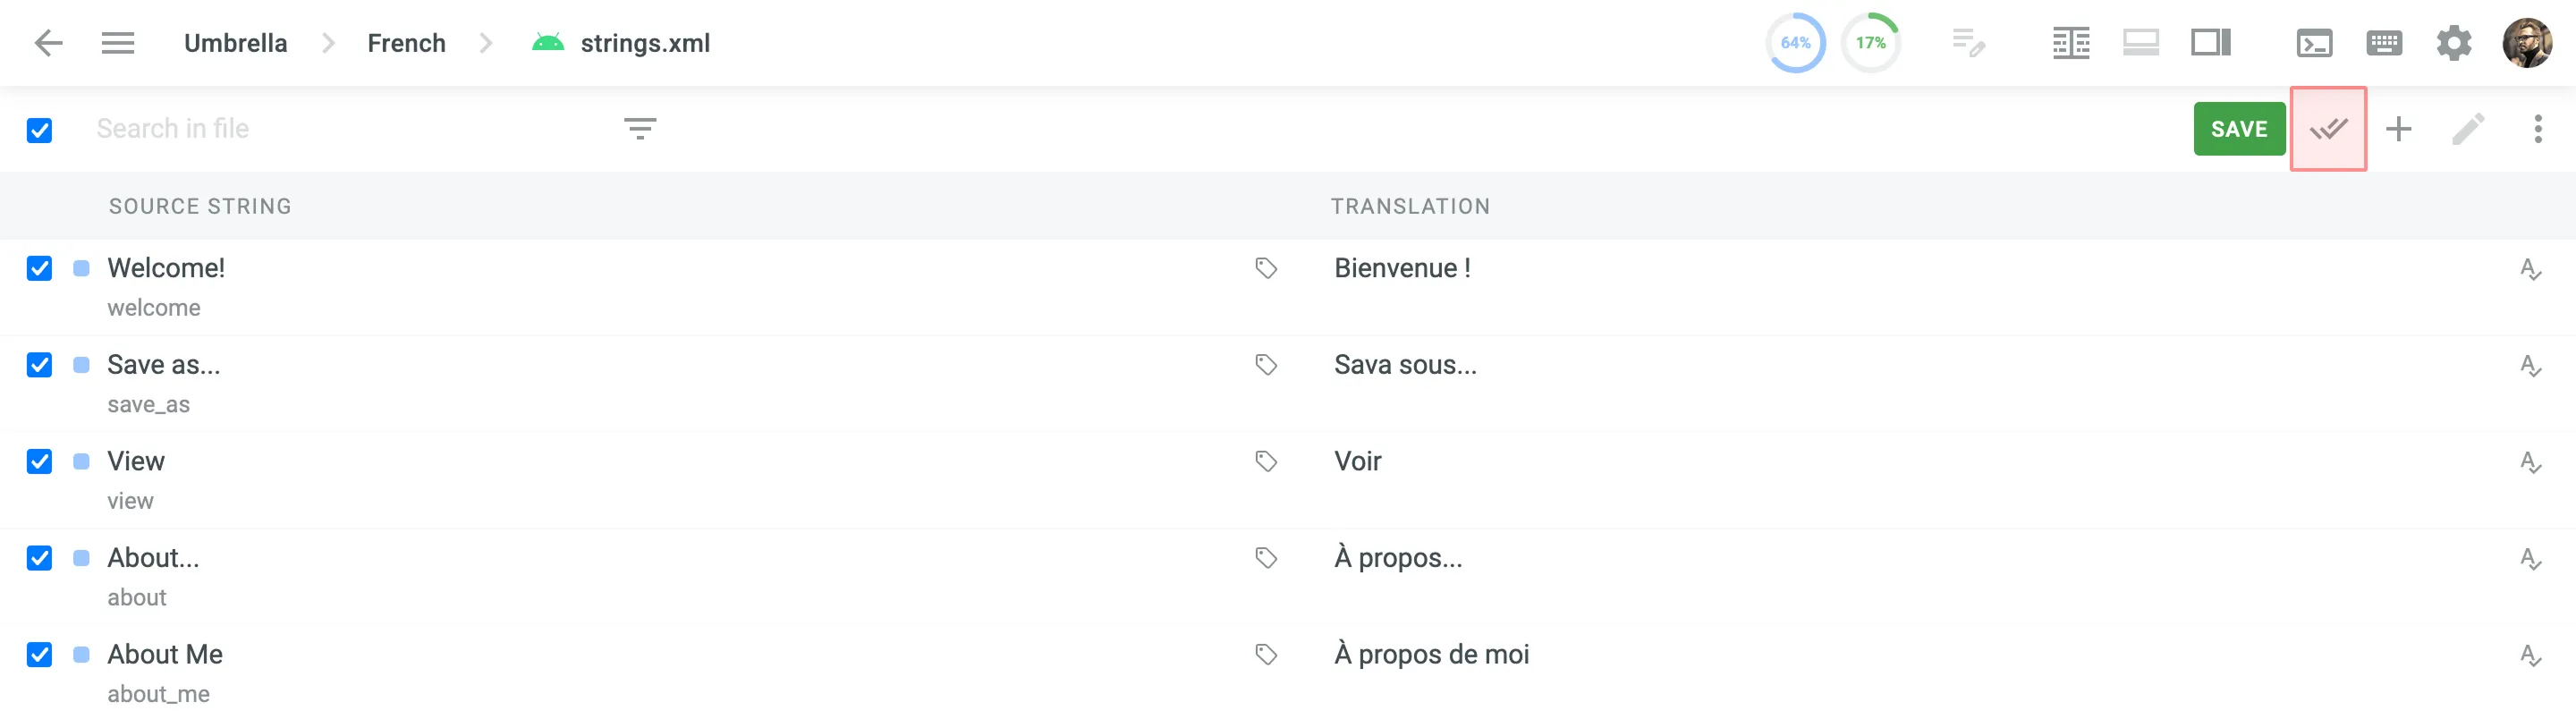 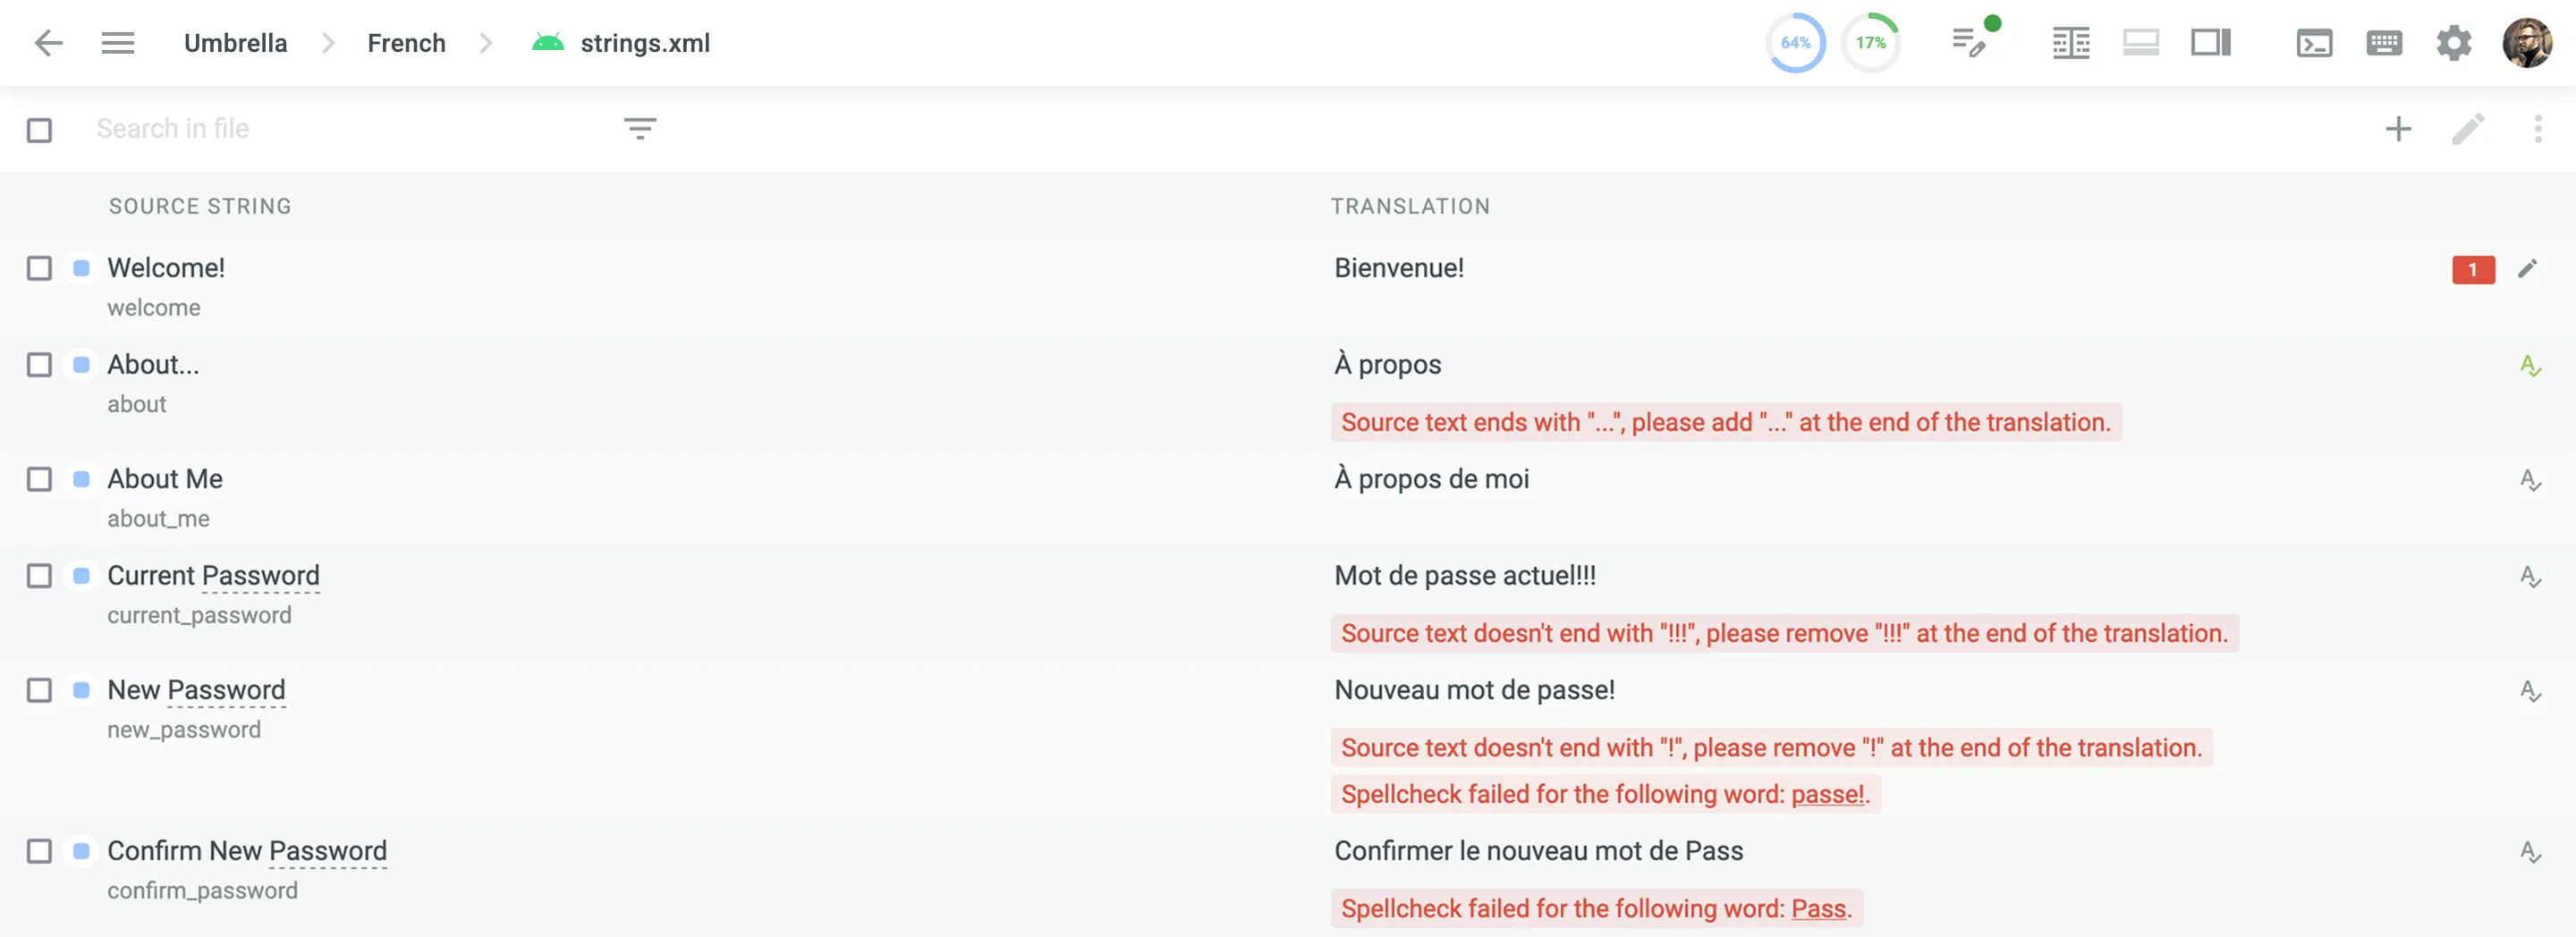 ##### [Managing Approvals](#managing-approvals) [Section titled “Managing Approvals”](#managing-approvals) Each translation can be approved either once or multiple times by multiple proofreaders and project members with manager permissions (or higher). Once a translation is approved at least once, it will be displayed as such on all workflow steps of a project. 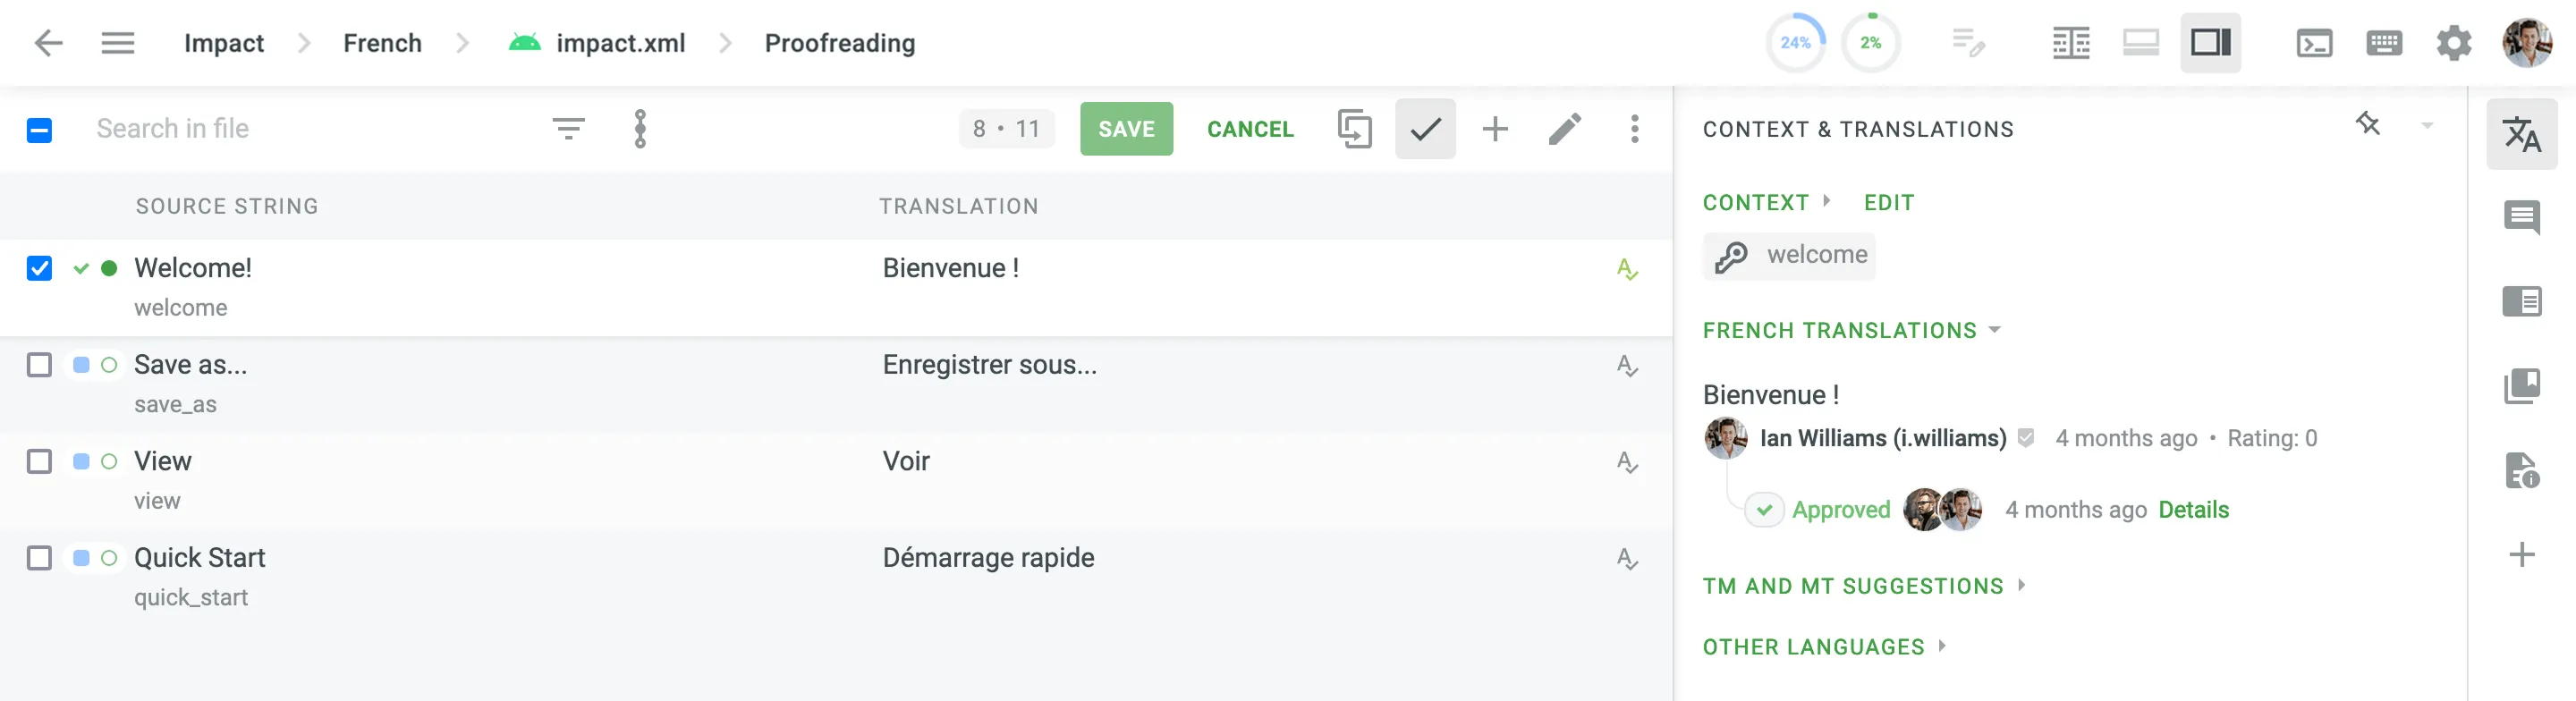 If necessary, a proofreader or project member with manager permissions (or higher) can edit the list of approvals for translations approved twice and more by removing approvals one by one or all at once. To edit the list of approvals, follow these steps: 1. Open the needed string in the Editor. 2. Click on the profile pictures of the proofreaders that approved a translation. 3. In the unfolded translation details, click next to the approval you want to remove. The translations with the highest number of approvals have the highest priority. They will be displayed at the top of the translation list in the Editor and used on translation download. When a string has more than one translation, the translation list is formed based on the following priority: 1. Translation with the highest number of approvals – Among translations approved multiple times, the translation with the highest number of approvals has a top priority. 2. Translation with the last added approval – Among translations approved only once, the translation with the last added approval has a top priority. 3. Most voted translation – Among translations that don’t have approvals, the translation with the highest number of votes has a top priority. 4. Last added translation – Among translations that don’t have approvals or votes, the last added translation has a top priority. #### [WYSIWYG File Preview](#wysiwyg-file-preview) [Section titled “WYSIWYG File Preview”](#wysiwyg-file-preview) When translating the content of an HTML, XML, TXT, DOCX, XLSX, HAML, Web XML, Markdown, MDX, DITA, Wiki, ADOC, Coffee, FTL, JS, TS, and FTLH file formats, you can toggle a bottom panel (for Side-by-side and Multilingual modes) to see a file preview (i.e., WYSIWYG). For Comfortable mode, the file preview is displayed by default when working with the formats mentioned above. The string status is indicated by the following colors: * Red - untranslated * Blue - translated * Light-green - approved * Gray - not for translation An active string is highlighted in yellow. 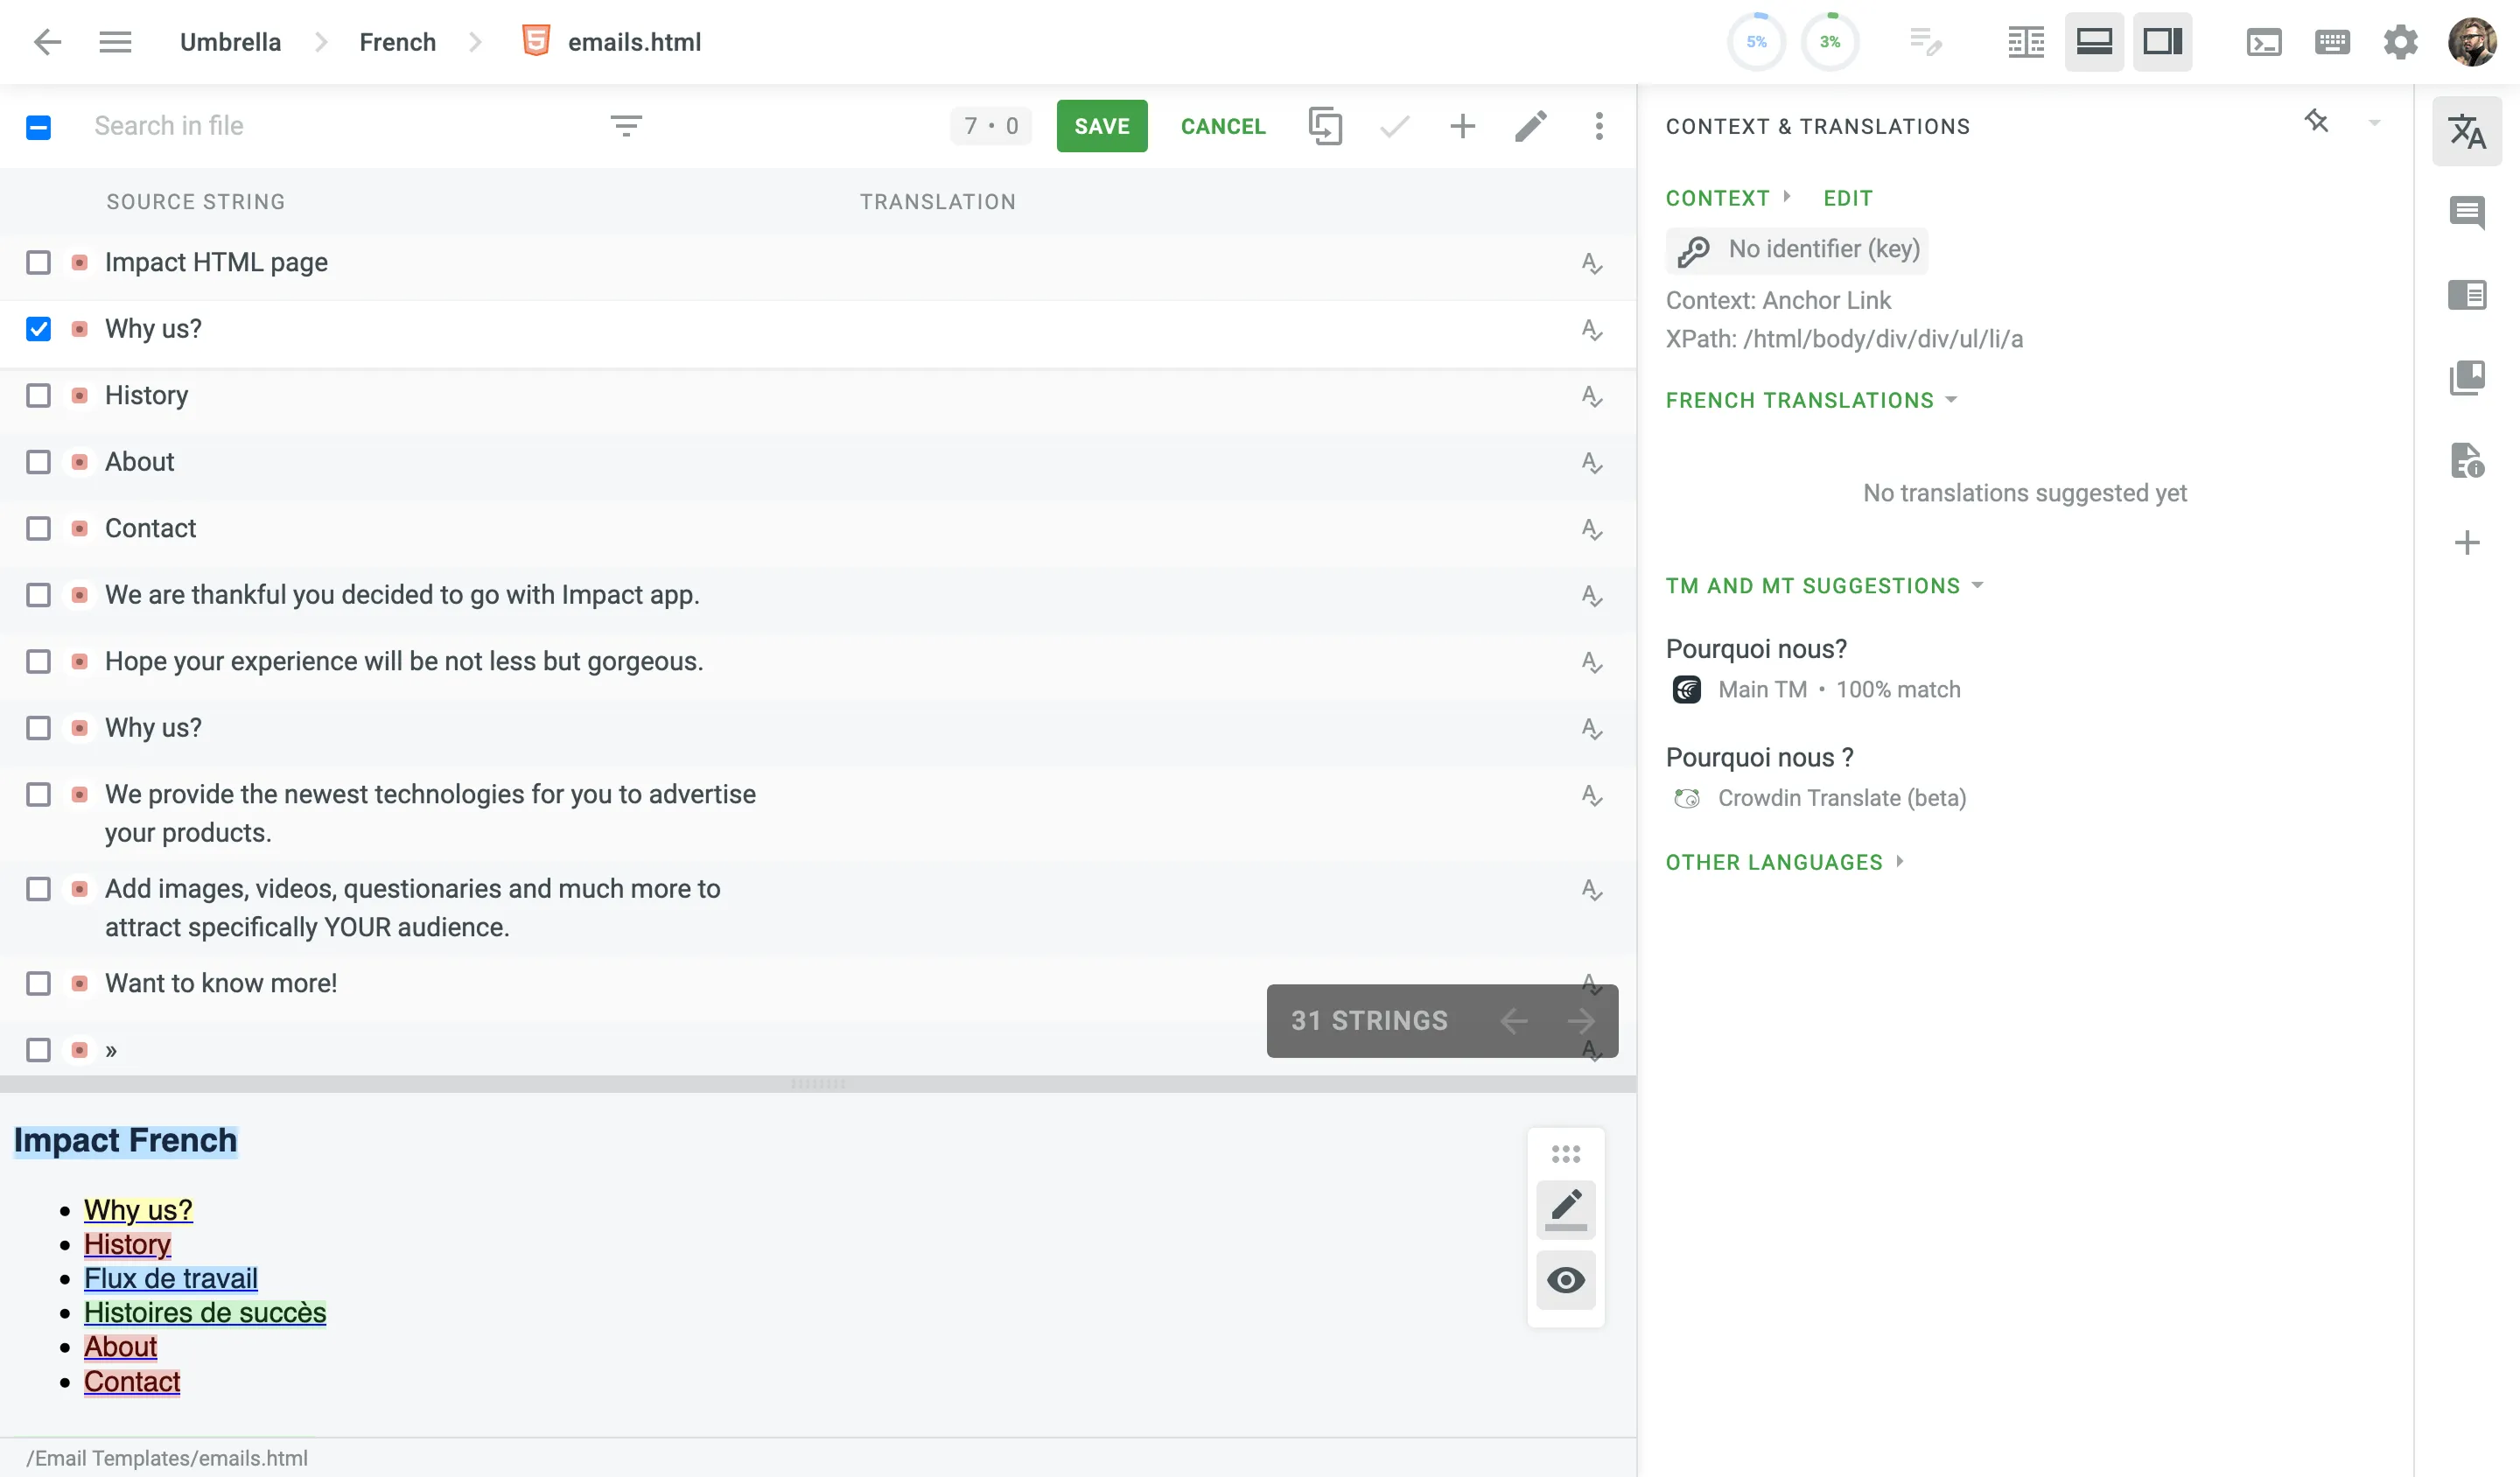 The following options are available to manage the above view: * \- *Load basic list view*. Use it to switch to a standard mode and see a list of strings (Comfortable mode only). * \- *Highlight untranslated, translated, and approved strings*. Use it to toggle the color highlighting of strings on and off. * \- *Show translation preview*. Use it to toggle the translation preview mode on and off. * \- *Scale Toggle*. Use it to toggle between a zoomed-in and zoomed-out view (Comfortable mode only). #### [String Search](#string-search) [Section titled “String Search”](#string-search) To find specific strings in the Editor, type your query into the search field at the top of the string list. Use the keyboard shortcut (by default, `Ctrl` +`F` or `⌘` +`F` ) to instantly focus on the search field. Depending on the content you open in the Editor, the search will apply to the currently open file, folder, or all strings in the project. To refine your search results, click the **Search filter** icon next to the search field. This will open a drop-down menu with the following filters and options: 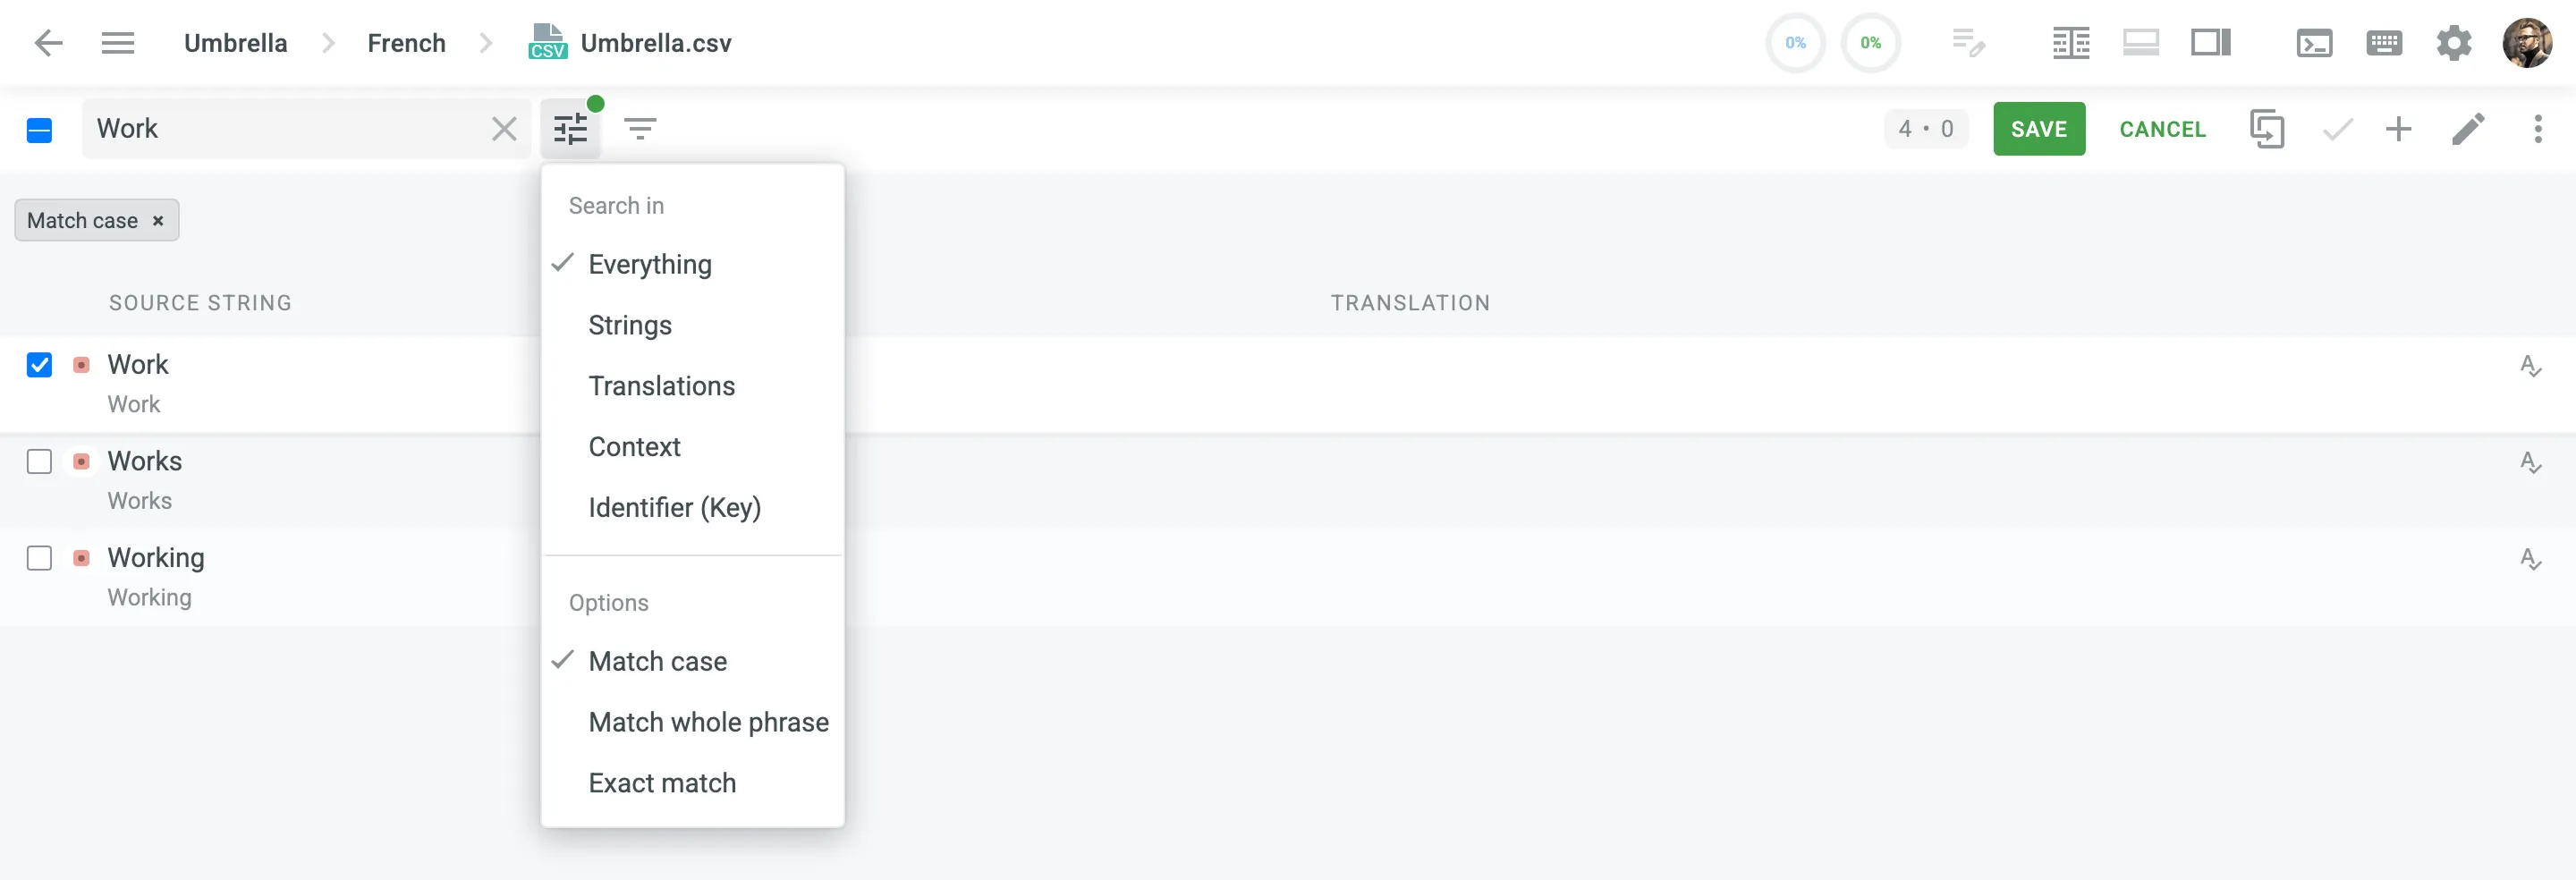 ##### [Search in](#search-in) [Section titled “Search in”](#search-in) Define the scope of your search by selecting one of the following criteria: * *Everything* – search through source texts, translations, context, and identifiers. * *Strings* – search through source texts only. * *Translations* – search through translations only. * *Context* – search through string context only. * *Identifier (Key)* – search through string identifiers only. ##### [Options](#options) [Section titled “Options”](#options) Refine your search further with these options: * *Match case* – finds only strings written in the same case. For example, a search for `Work` will find `Work`, `Works`, and `Working`, but not `work`. * *Match whole phrase* – finds strings that contain the search phrase in the exact order. For example, a search for `Machine Translation` will find `Machine Translation` or `machine translation`, but not `Translation Machine`. * *Exact match* – finds only strings that are identical to the search phrase. For example, a search for `Work` will find `Work` or `work`, but not `Works` or `Working`. You can combine *Match case* with either *Match whole phrase* or *Exact match*. Note that *Match whole phrase* and *Exact match* are mutually exclusive. The search phrase is limited to 128 characters. If you use a search phrase longer than 128 characters, it will be automatically truncated to the maximum allowed length. You can also find a specific string by its internal numeric identifier (a number automatically assigned by Crowdin). To do so, type the numeric ID (e.g., `34354`) into the search field without quotation marks to get an exact match. To search for the occurrences of the number in the text or context, enclose it in quotation marks (e.g., `"34354"`). #### [Filtering Strings](#filtering-strings) [Section titled “Filtering Strings”](#filtering-strings) To filter the strings displayed in the left sidebar, click and select the preferred filter option. Available filter options: * *Show All* – Show all strings from the open file/folder in their original order. * *All, Untranslated First* – Show all strings from the opened file/folder. Untranslated strings are displayed at the top of the list, followed by translated strings, and then approved ones are displayed at the bottom of the list. * *Untranslated* – Show only strings without any translations. * *Need to Be Voted* – Show already translated strings. * *Not Approved* – Show strings that are already translated but not yet approved by a proofreader. * *Approved* – Show only strings with approved translations. * *QA issues* – Show strings with no QA issues or with unresolved QA issues in the current language. * *Machine Translation* – Show strings that are translated by TM or MT suggestions without changes. Often these strings require additional review. * *With Comments* – Show strings that have comments. * *With Unresolved Issues* – Show strings with unresolved issues in the current language or all languages. * *Hidden* – Show strings that are hidden from translators. Strings can be hidden by project managers or automatically hidden by Crowdin Enterprise when they are marked as duplicates. * *Advanced Filter* – A filter that allows you to configure custom filtering and sorting parameters. * *AI/CroQL Filter* – An AI-powered filter that allows you to create custom queries using the [Crowdin Query Language (CroQL)](/developer/croql/) for enhanced string filtering. Permissions Some of the filter options may be available only to project members with manager permissions (or higher).  ##### [Workflow Steps Filter](#workflow-steps-filter) [Section titled “Workflow Steps Filter”](#workflow-steps-filter) In [projects with a workflow](/enterprise/creating-project/#projects-with-a-workflow), strings move from one workflow step to the next. There are three string statuses: *ToDo*, *Pending*, and *Done*. Use the icon to view strings with their corresponding workflow step statuses.  ##### [Verbal Expressions](#verbal-expressions) [Section titled “Verbal Expressions”](#verbal-expressions) Verbal expressions allow you to search for strings that match specific patterns, such as formatting, punctuation, or variable placement. This feature is available in the [Advanced Filter](#advanced-filter). Caution When you enable verbal expressions, you can’t use the regular string search at the same time. [Expression Syntax Elements ](/enterprise/expression-syntax-elements/)Learn how to build and use verbal expressions with practical examples. ### [Plural Forms](#plural-forms) [Section titled “Plural Forms”](#plural-forms) Some strings may have plural forms. Depending on the language, the number of plural forms may vary. For example, Chinese has one plural form, English has two plural forms, and other languages may have up to six plural forms. Crowdin Enterprise works with plural forms according to the CLDR Language Plural Rules. Read more about [CLDR Language Plural Rules](https://www.unicode.org/cldr/charts/latest/supplemental/language_plural_rules.html). If a string has multiple plural forms, all variants of the string are displayed in the section where you type in translations. Enter translations in the appropriate sections that display the plural forms of the target language. 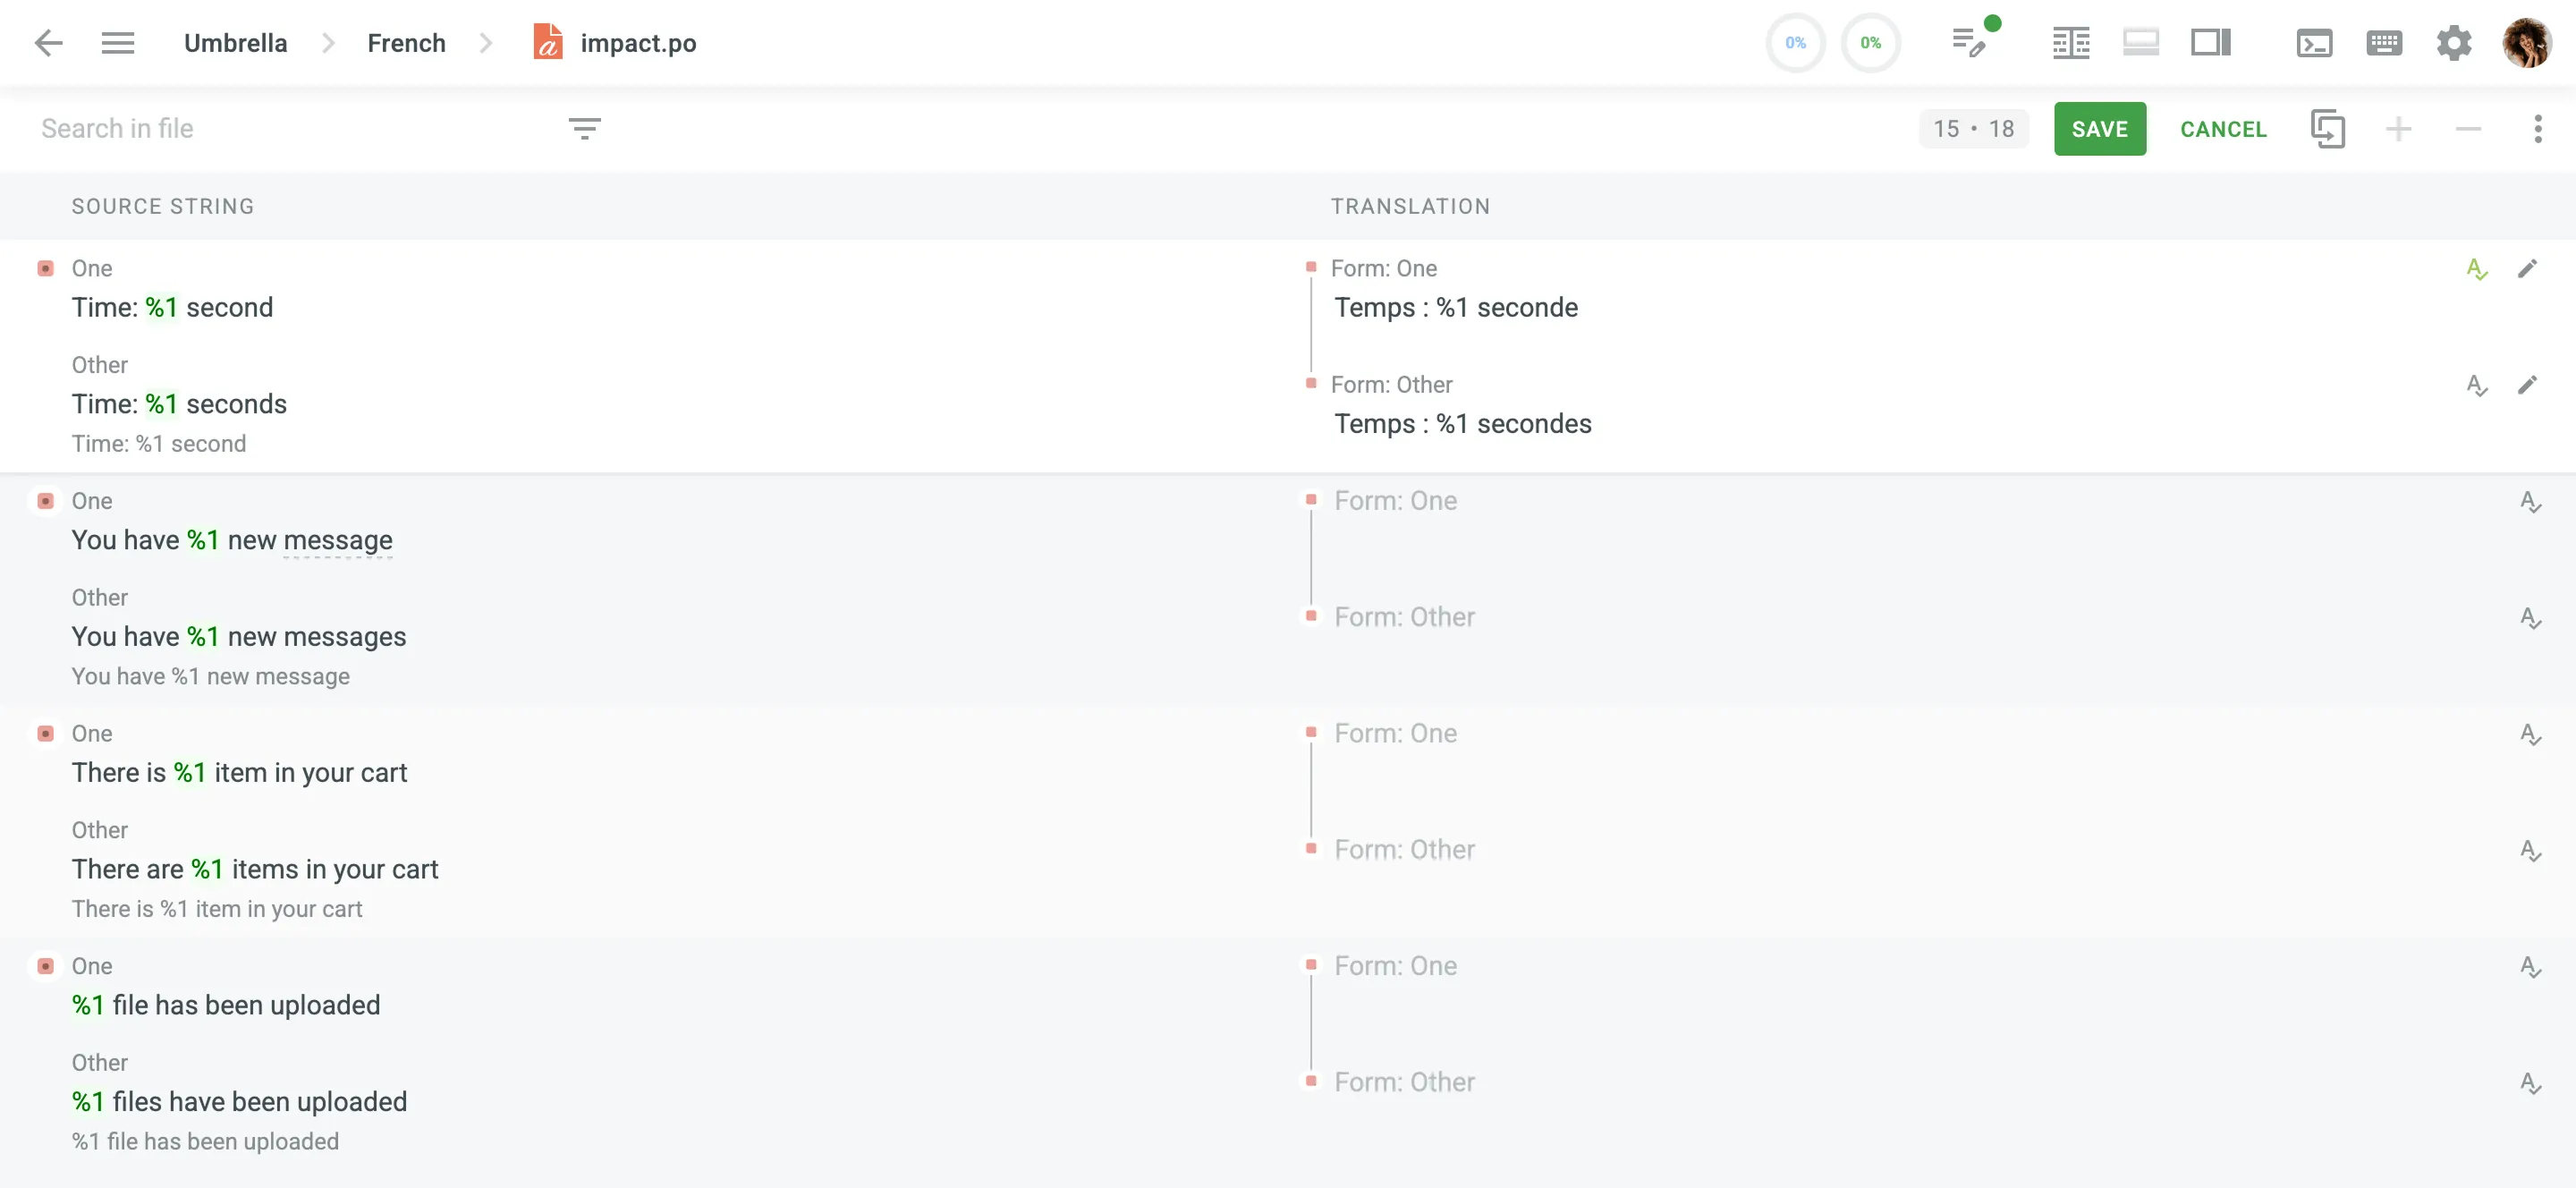 ### [QA Checks](#qa-checks) [Section titled “QA Checks”](#qa-checks) You might also get automatic Quality Assurance (QA) check pop-up messages to avoid some translation inaccuracy. For example, you can see notifications about inconsistency in punctuation, space mismatch, missing variables, and more. 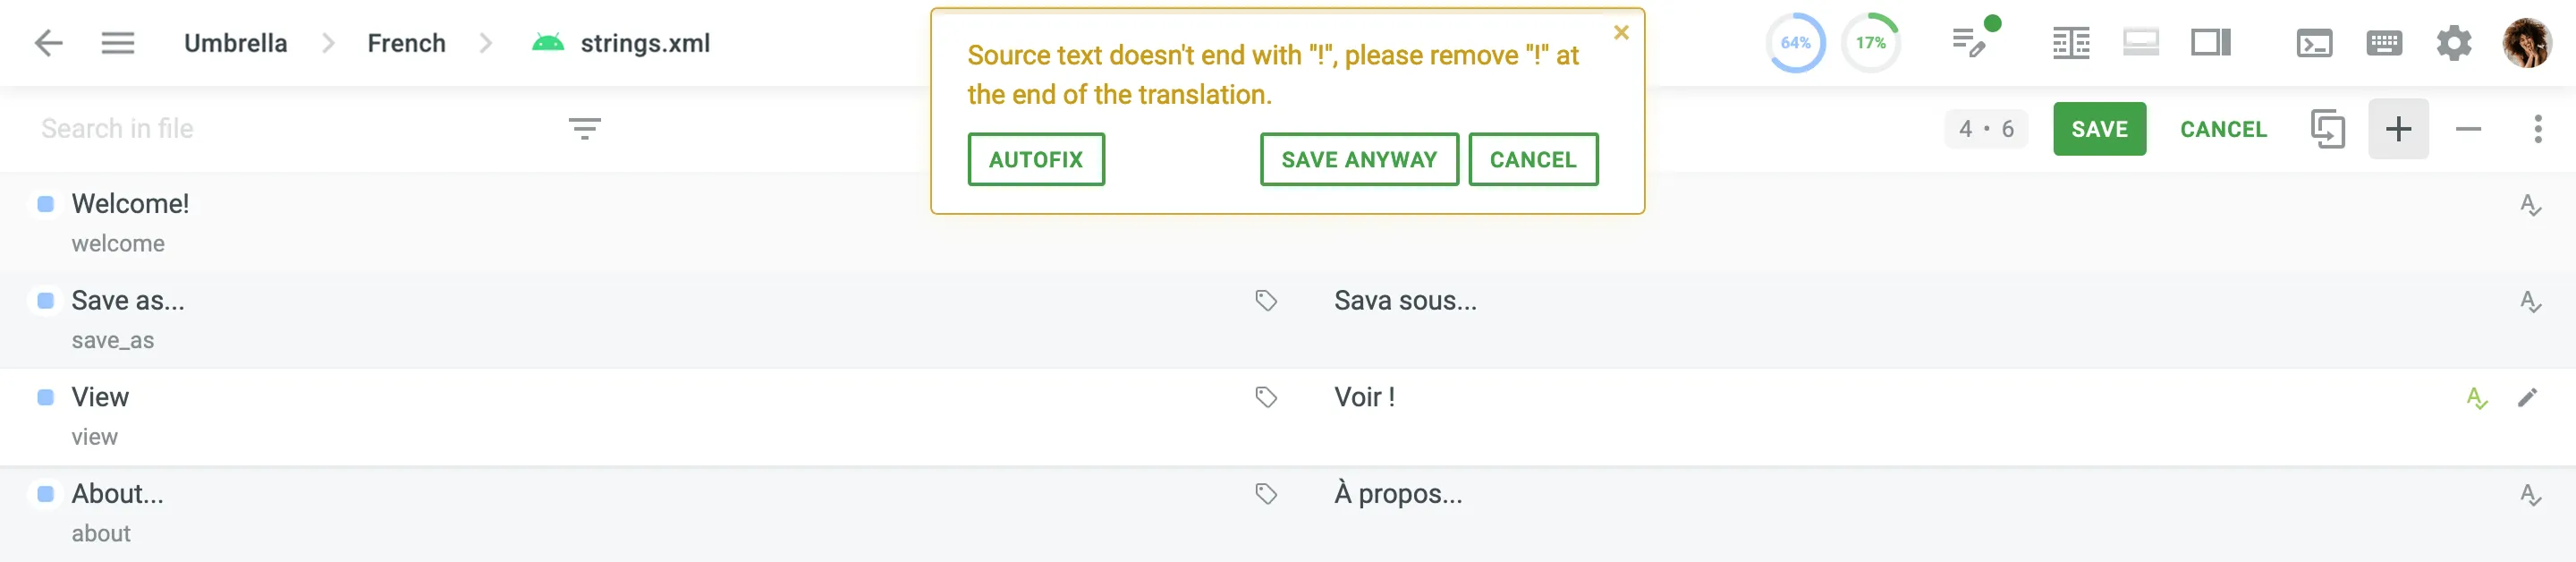 ### [String Menu](#string-menu) [Section titled “String Menu”](#string-menu) Clicking in the upper-right allows you to: * **Remove My Approvals/All Approvals** – Remove the approvals for a translation, reverting its status to unapproved. (Available for proofreaders or higher.) * **Remove Translation** – Clear translations for the selected strings along with the associated TM records. Duplicate translations from master strings remain unaffected. * **Hide/Make Visible** – Toggle the visibility of a string for translators. Hidden strings are accessible only to project managers or higher. * **Pre-translate** – Initiate [pre-translation](#pre-translation-in-the-editor) directly in the Editor using Translation Memory (TM), Machine Translation (MT), or AI. * **Copy String URL** – Access a specific string using its unique link or share it with colleagues. * **Copy Source Skeleton** – Copy untranslatable elements to the translation section. Useful when translating strings with ICU message syntax or HTML tags. * **Clear Selected Input** – Clear the translation field for the selected string. * **Translation History** – View all the modifications made to the string. * **View String In Context** – Display the string along with other strings surrounding it in the source file, helping you understand its context better. * **Labels** – Add or manage labels assigned to the string, helping to categorize or identify it for specific purposes. * **Max. Length** – View and edit the maximum character length allowed for the string translation. Clicking this option opens a modal with the following settings: * **Proportional to source texts** – Set the maximum length as a percentage of the source text length. Use the slider or manually enter a percentage (e.g., 100%, 150%, 200%) to define the limit. * **Fixed max. length** – Specify an absolute character limit for the string translation. * **Unlimited** – Allow translations of any length without restrictions. * **Delete String** – Permanently remove the string from the project. (Available to project members with manager permissions or higher.) Permissions Some of the string menu options may be available only to project members with manager permissions (or higher). In the translation window, you will also see the *Maximum length of translation* limit if it’s exceeded. 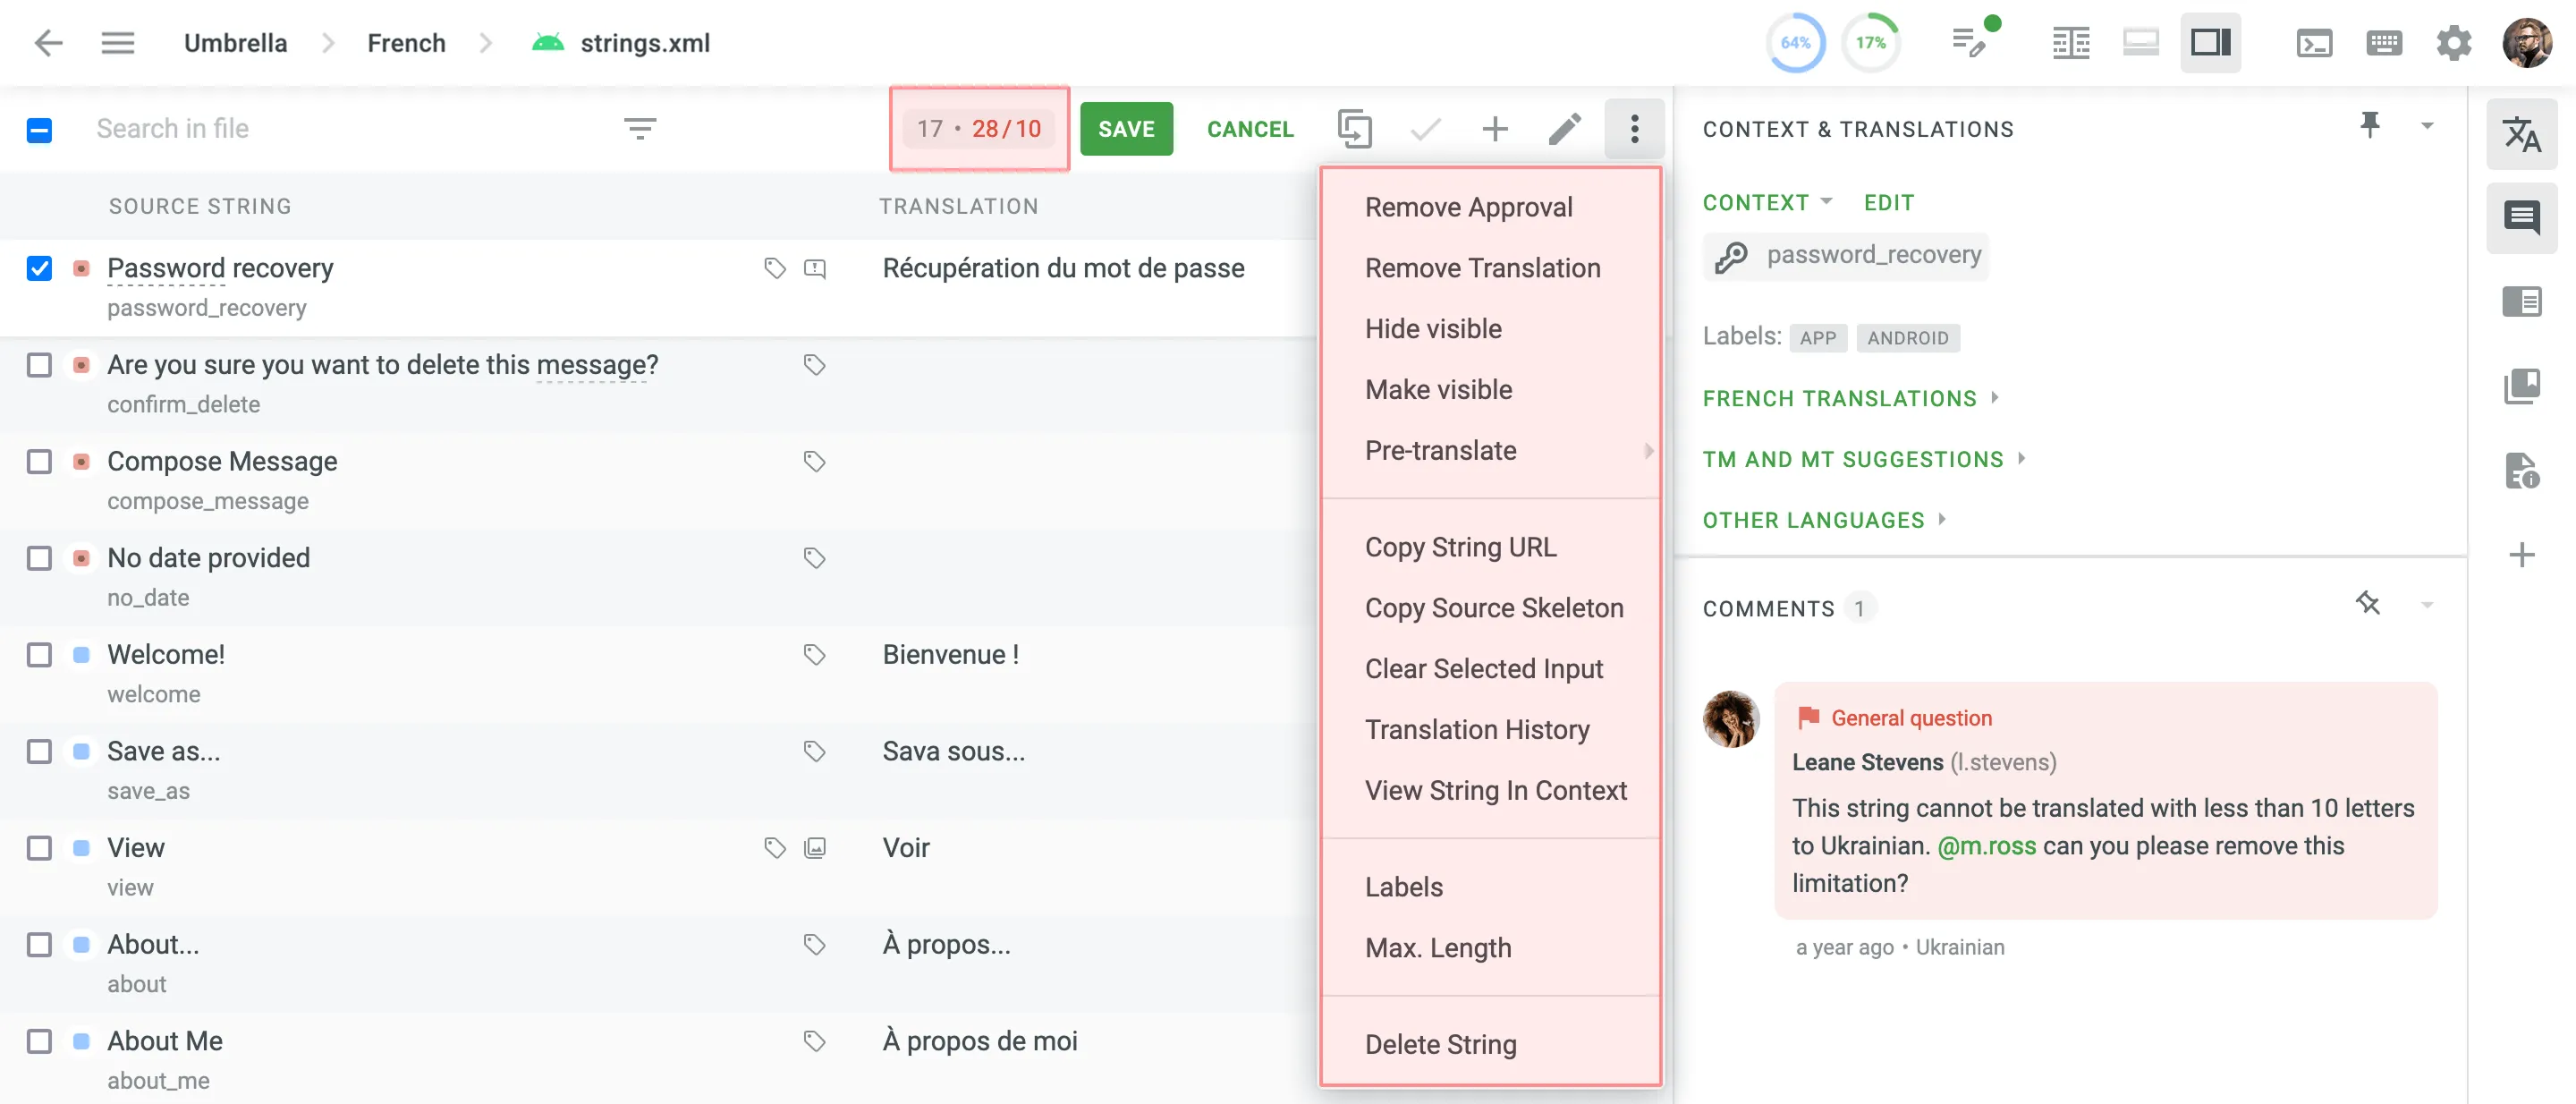 Additional action buttons available when translating a string: * \- *Copy Source*. Use it to keep the initial string structure while translating messages with replacement tokens or elements of ICU message syntax. * \- *Clear*. Use it when you need to clear the translation field quickly. Alternatively, use the *Clear Selected Input* option from the string menu. * \- *Text selection mode*. Use it when you want to copy a part of the translation from Translation Memory (TM) or Machine Translations (MT) (Comfortable mode only). ### [Context and Translations](#context-and-translations) [Section titled “Context and Translations”](#context-and-translations) This section contains the resources that might be useful: * Context, labels, screenshots, and additional information to guide the work. * Translations by other project members * Translation Memory (TM) suggestions * Machine Translation (MT) suggestions * Translations to other languages Click on one of the suggestions, and it will automatically appear in the translation field. Refer to it as a basis for your own suggestions. TM suggestions may include additional details such as the TM name, match percentage, creation date, and, if available, the name of the contributor who originally submitted the translation (displayed as full name and username, e.g., *by Michael Ross (m.ross)*). This information helps provide more context about the source and relevance of each suggestion. To quickly copy the TM or MT suggestion to the translation field and save it, click **Use and Save** on the desired suggestion. *Other Languages* section allows you to check the string translations into other target languages. This can be a useful tip for multilingual people and while translating dialects of a language. 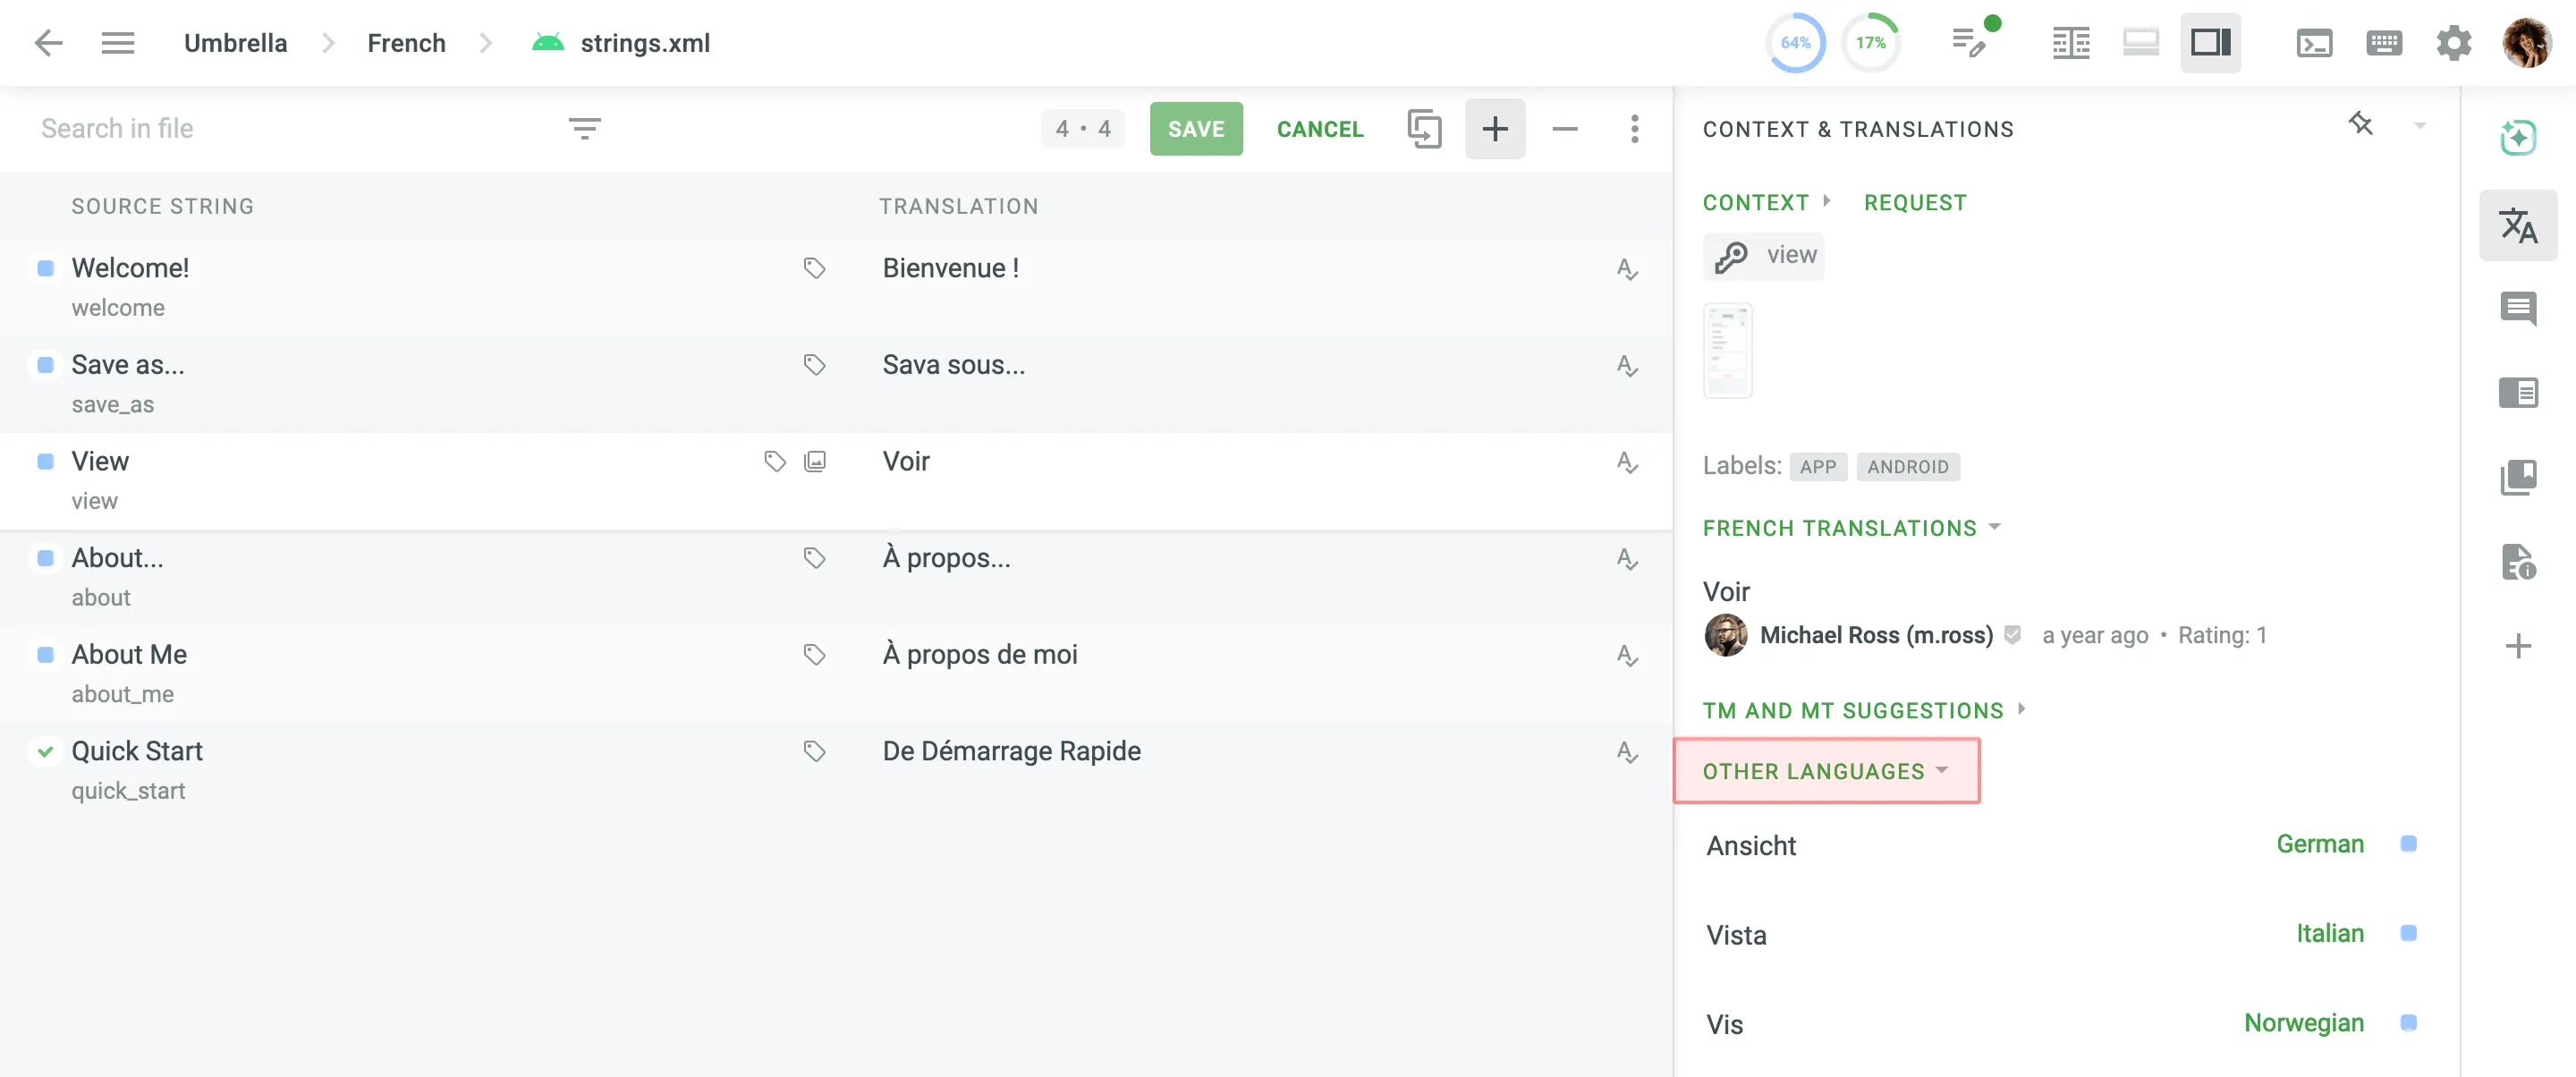 #### [Voting](#voting) [Section titled “Voting”](#voting) If you see that there is already a correct suggestion, vote for it by clicking the *plus* sign if you like the translation, or the *minus* sign if you don’t think the translation is correct. Translations that receive the most positive votes will have a higher rating and will appear at the top of all available translations for the string.  #### [Requesting Context](#requesting-context) [Section titled “Requesting Context”](#requesting-context) Within the **Context & Translations** section, you can find the context for each string, which may include technical details, a description of where the string appears in the product, or a screenshot showing its location in the user interface. If a string lacks context and its meaning is unclear, click **Request** to notify a project manager that additional explanation is needed. 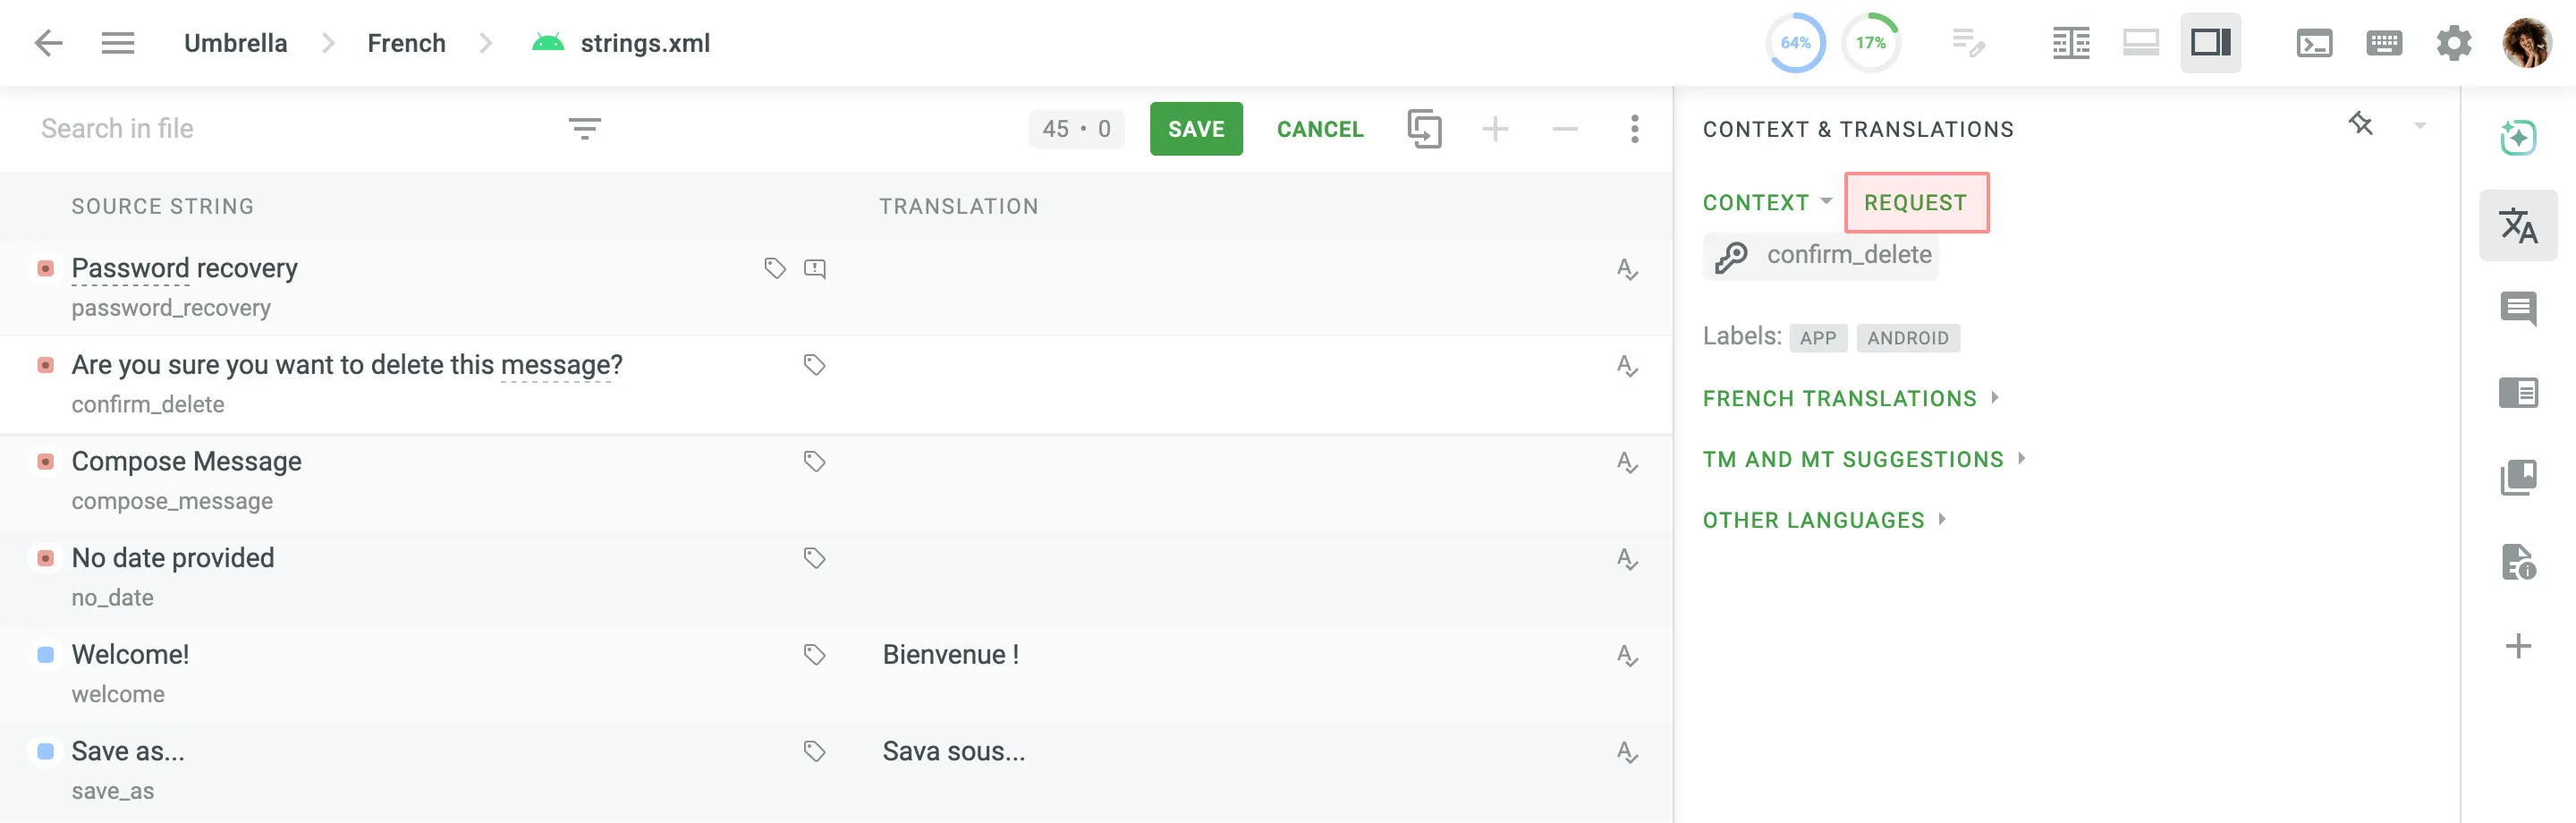 ### [Comments](#comments) [Section titled “Comments”](#comments) Using the *Comments* section, you can discuss the meaning of the source string or other related questions. It is recommended to use a source language of the project so other translators can understand it. Use ”@” and a username to direct your message to the specific person. To help you track new comments, a bubble indicator with the number of unread comments is displayed next to the *Comments* section icon in the right panel. This bubble appears when there are unread comments for the selected string and disappears once you open the section to read them. You can also use this section to report problems with source strings or translations, ask questions, or request additional context. 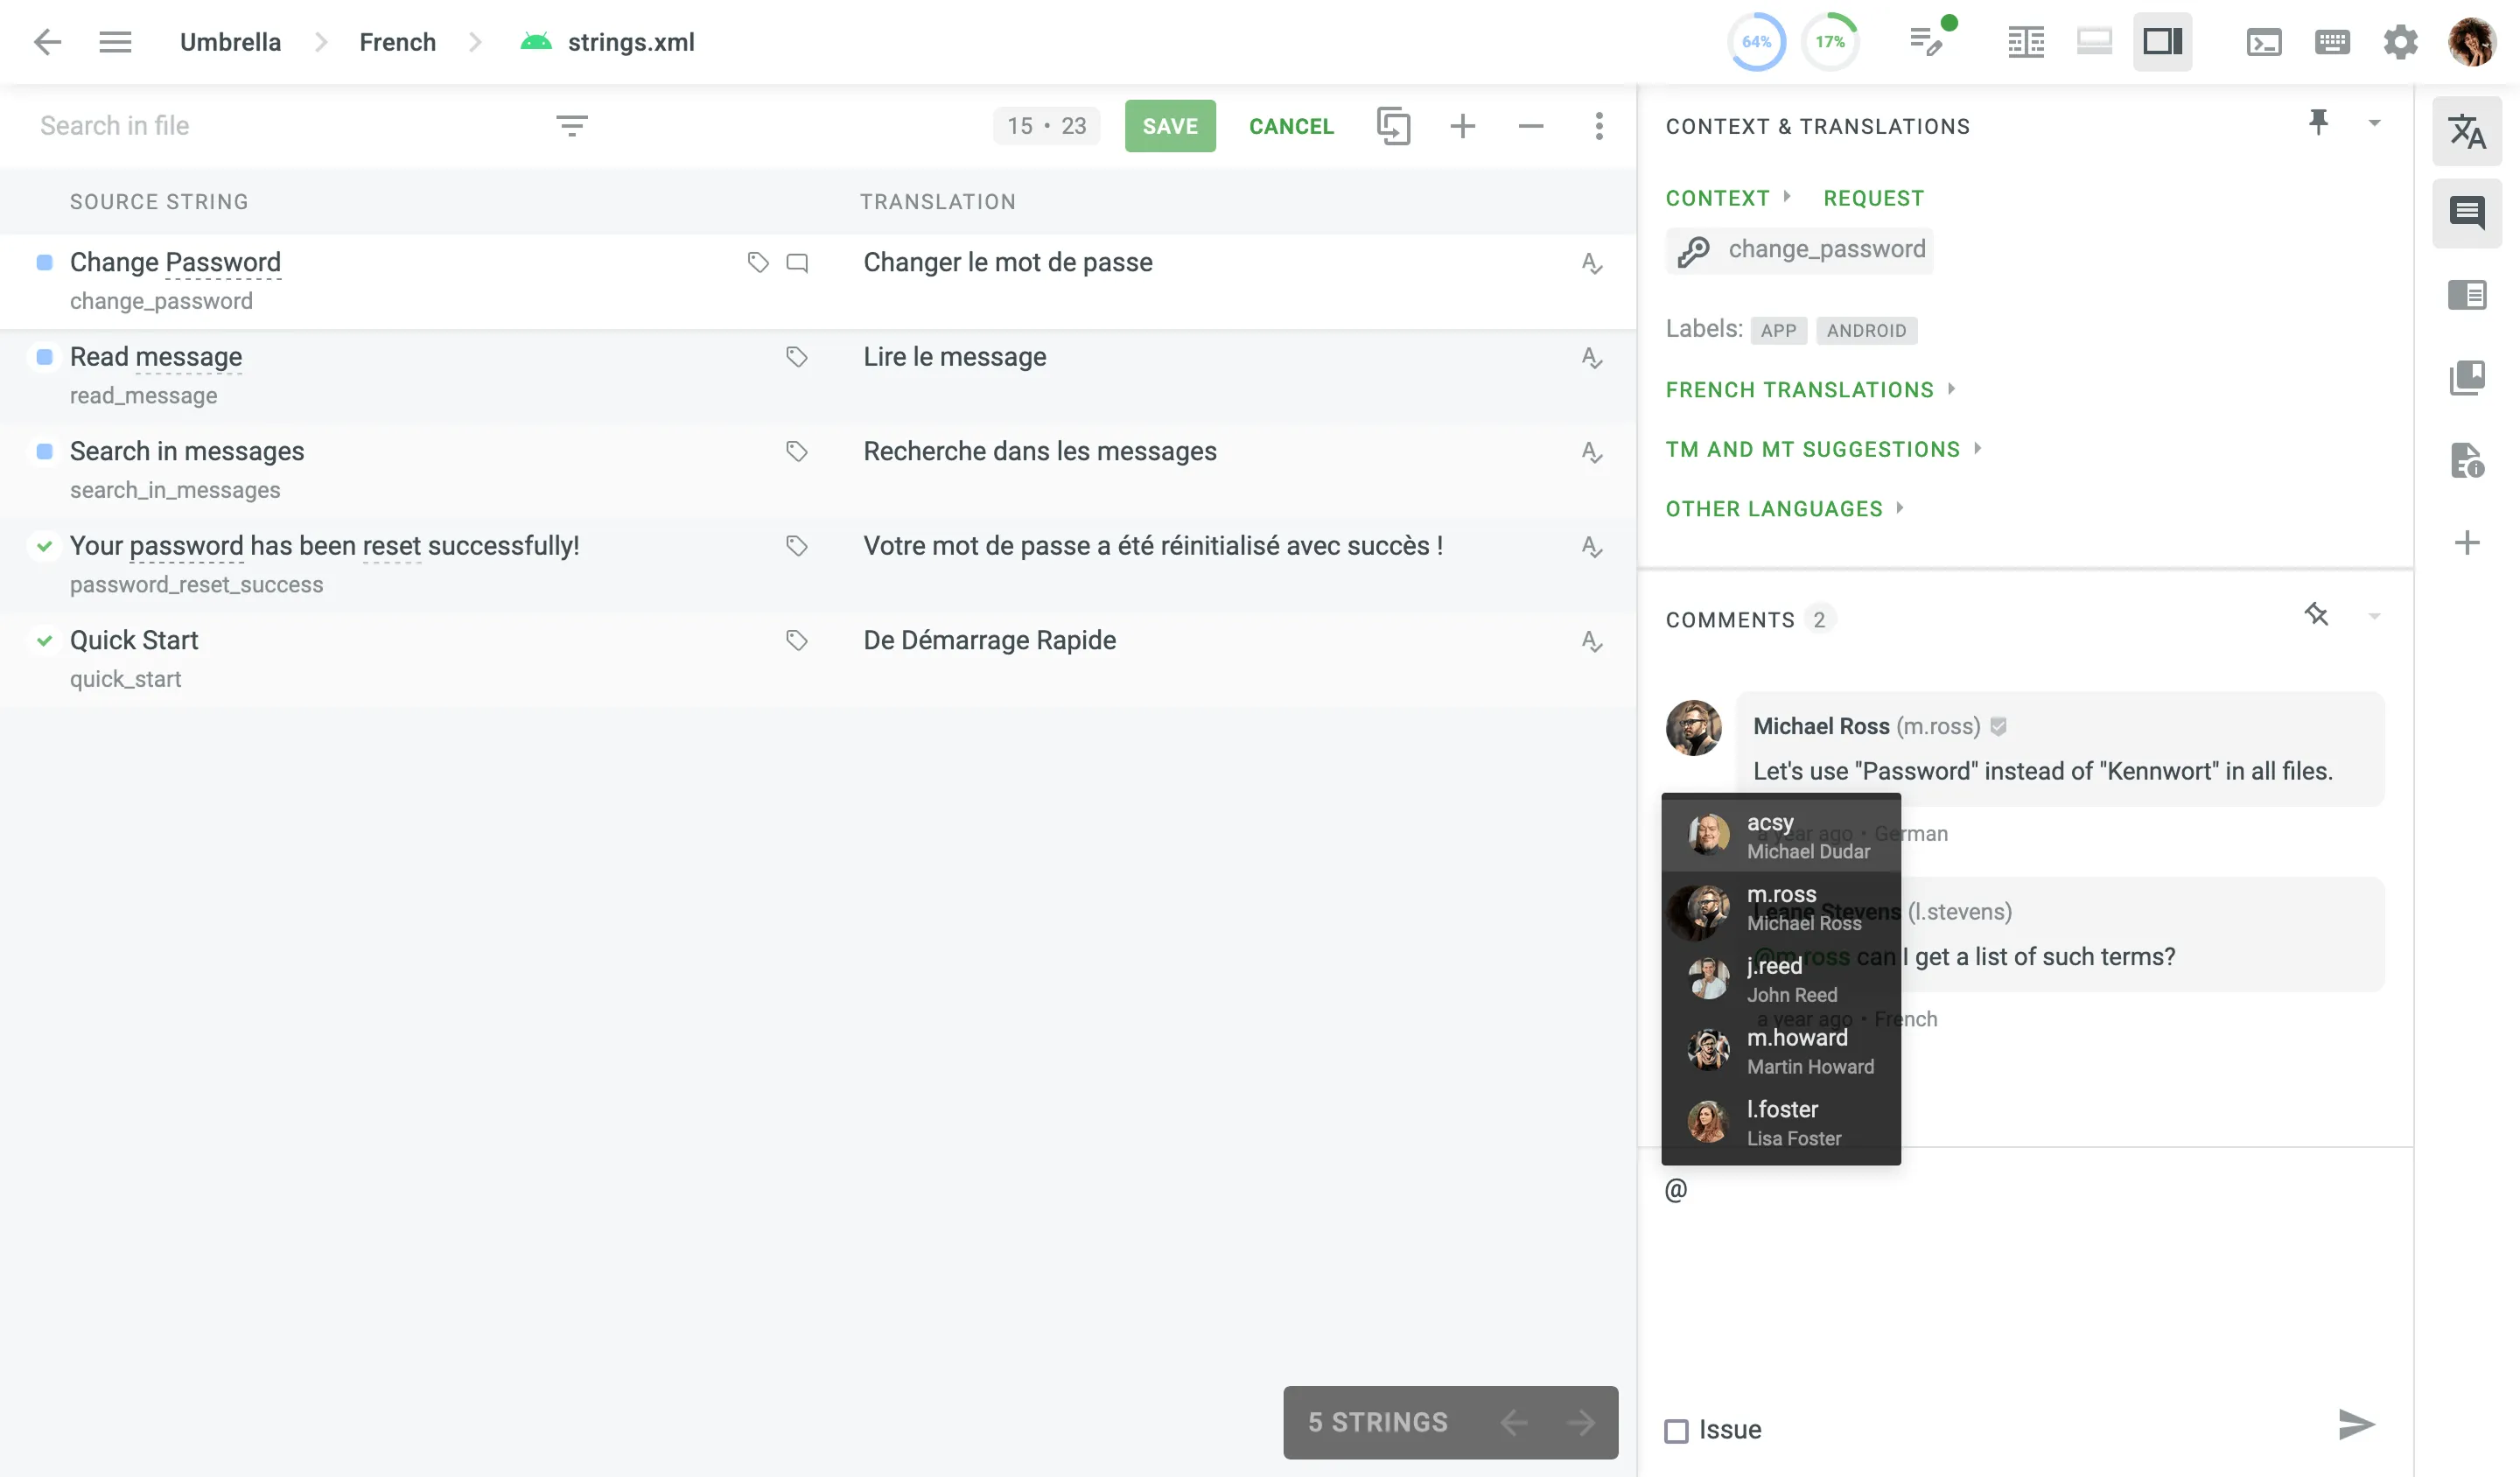 [Issues ](/enterprise/issues/)Learn how to report and manage translation issues in the Editor. #### [Exchanging Comments with External Organizations](#exchanging-comments-with-external-organizations) [Section titled “Exchanging Comments with External Organizations”](#exchanging-comments-with-external-organizations) If you need to discuss a string translation with people outside of your organization (e.g., with an assigned vendor team), you can select the **Shared** option when creating a comment in the Editor. The same way translators on the vendor side can mention your team to clarify some context or report typos in the source text. This option enables cross-organization communication and allows to resolve any issues that might require a prompt response. All the other comments created without an enabled **Shared** option will remain available only to the members of your organization. 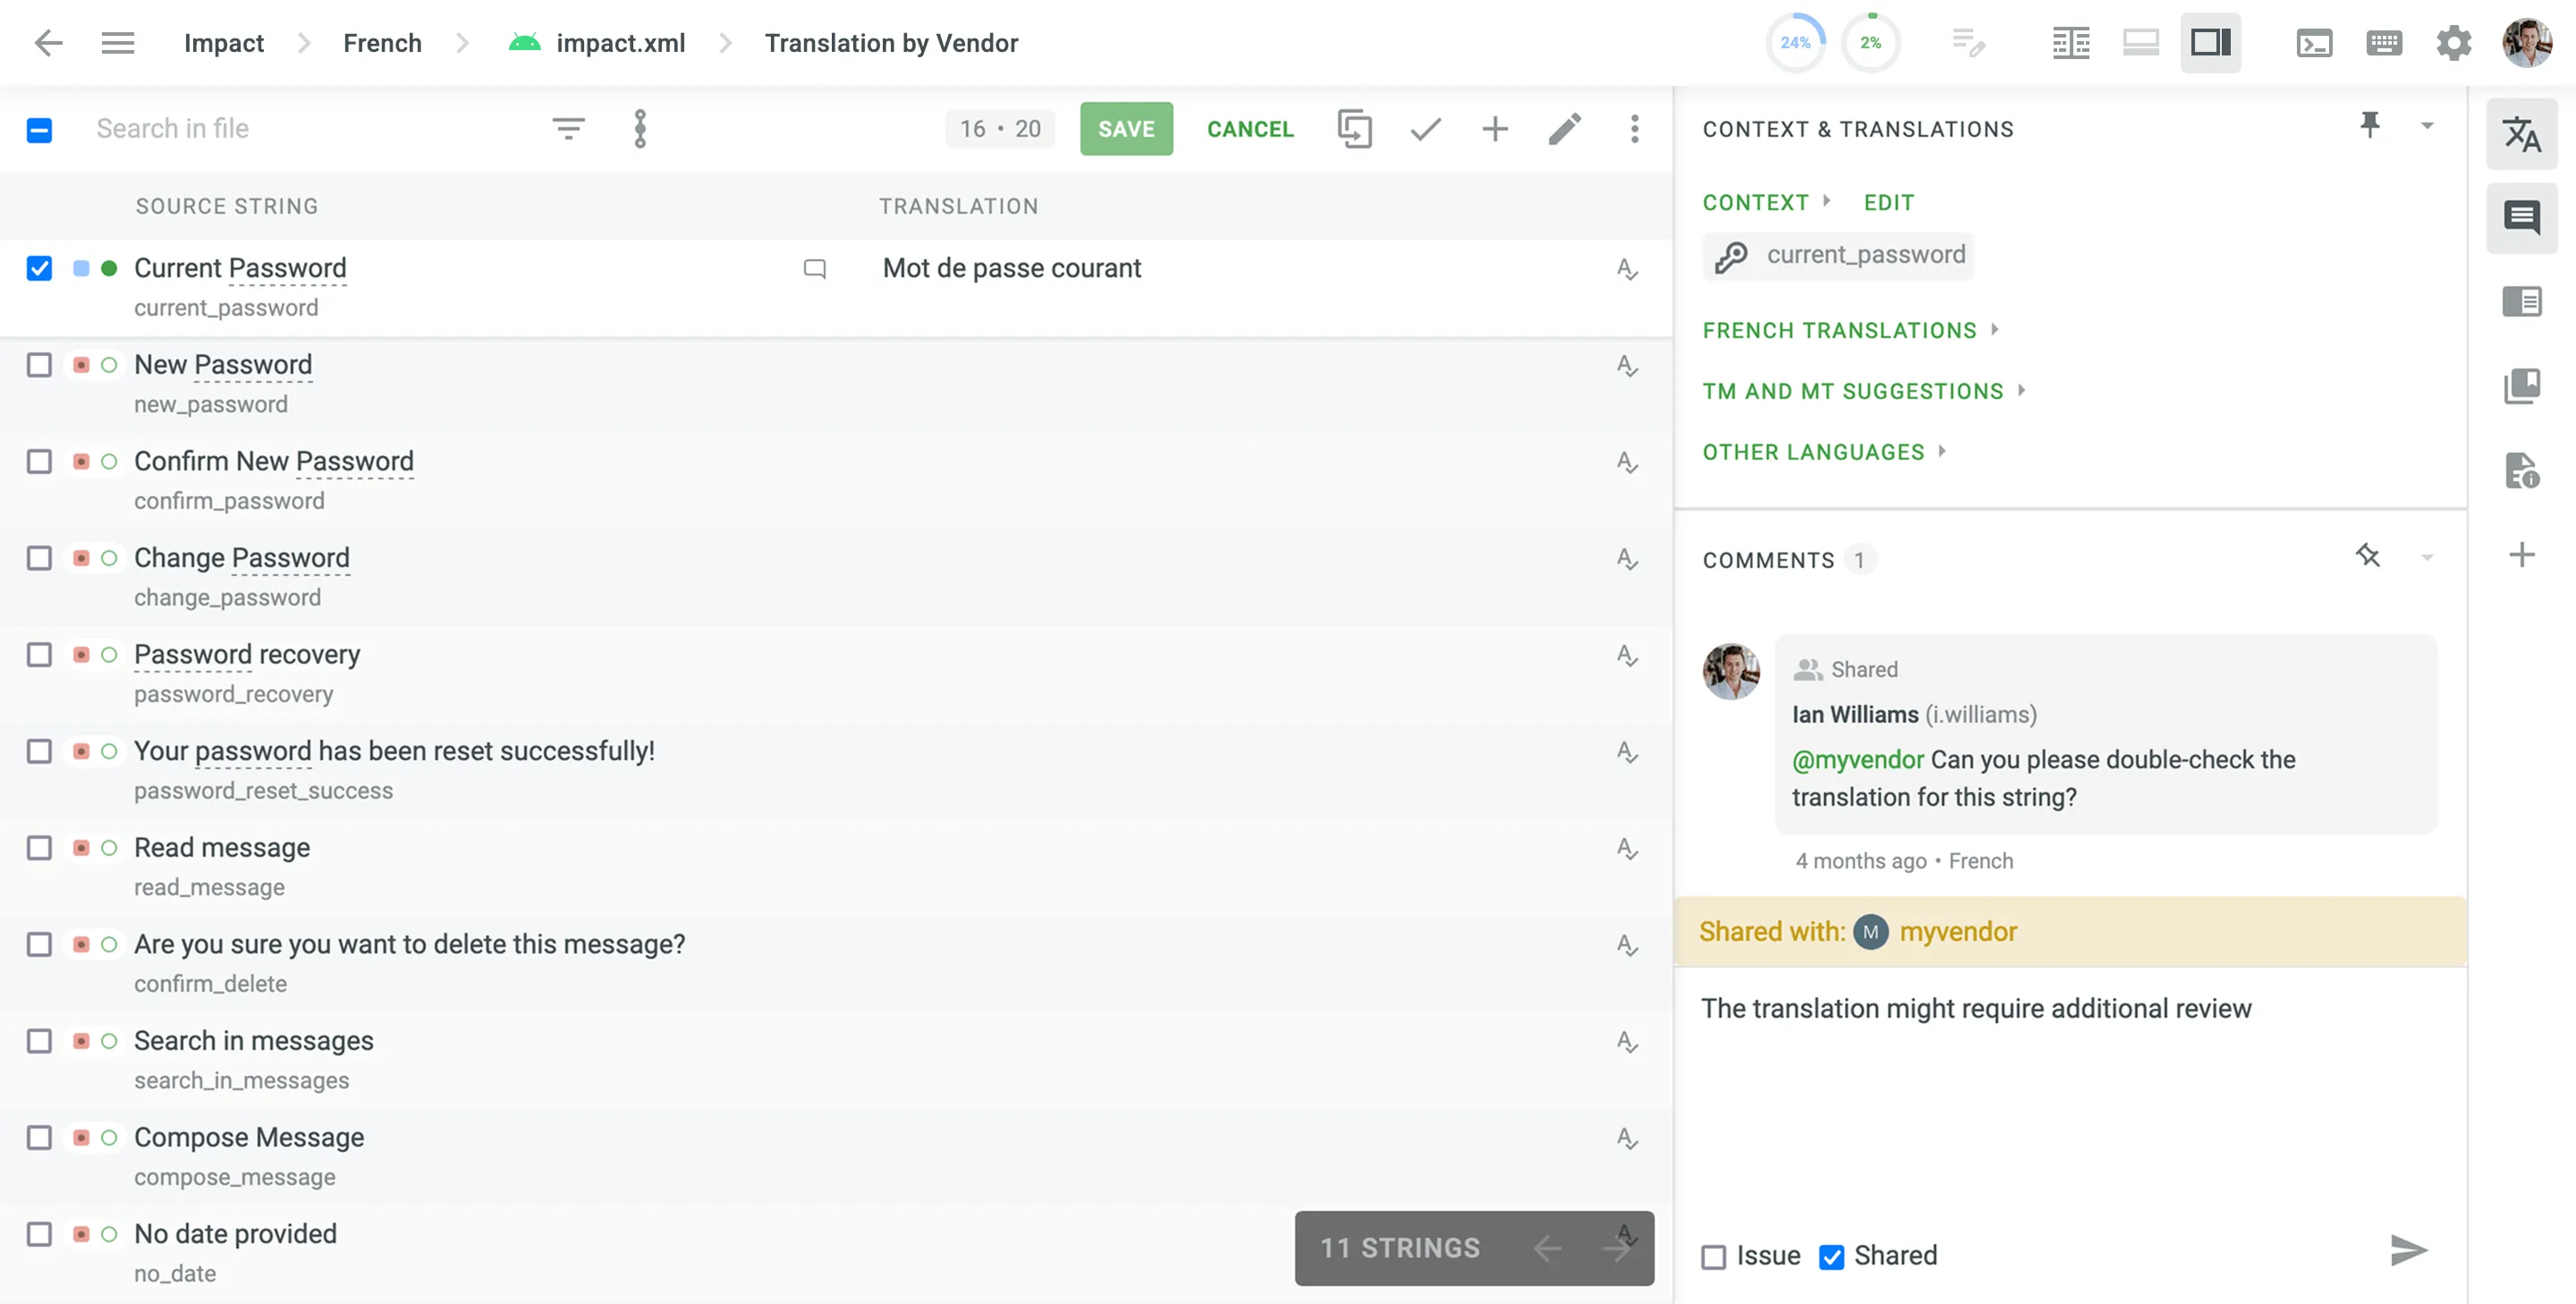 ### [Search TM](#search-tm) [Section titled “Search TM”](#search-tm) Using the *Search TM* section, you can check for all the available translations from [Translation Memory](/enterprise/translation-memory/), which is the vault of translations uploaded to the system by project managers. The Search TM section provides the following options: * Source – Search for matches in a source language. * Target – Search for matches in target languages. * Guess translation – Highlight probable translation of a search phrase. * Numeric equivalence – Match digits from a search phrase with any other digits. Additionally, to maximize your search results, you can use the following wildcards with your search phrase: Type an asterisk **(\*)** to find words where the end or beginning may be different. Example: any\* finds *any*, *anyway*, *anything* Example: \*way finds *way*, *anyway*, *highway* Type a plus sign **(+)** to find words where the end or beginning must be different. Example: any+ finds *anyway*, *anything*, *anywhere*, except *any* Example: +way finds *anyway*, *highway*, *someway*, except *way* Type a minus sign **(-)** to exclude words from your search. Example: Save -as Use quotation marks to find the exact combination of words. Example: “Save as” Each TM suggestion in the search results also includes details such as the TM name, creation date, and, if available, the name of the contributor who originally submitted the translation. 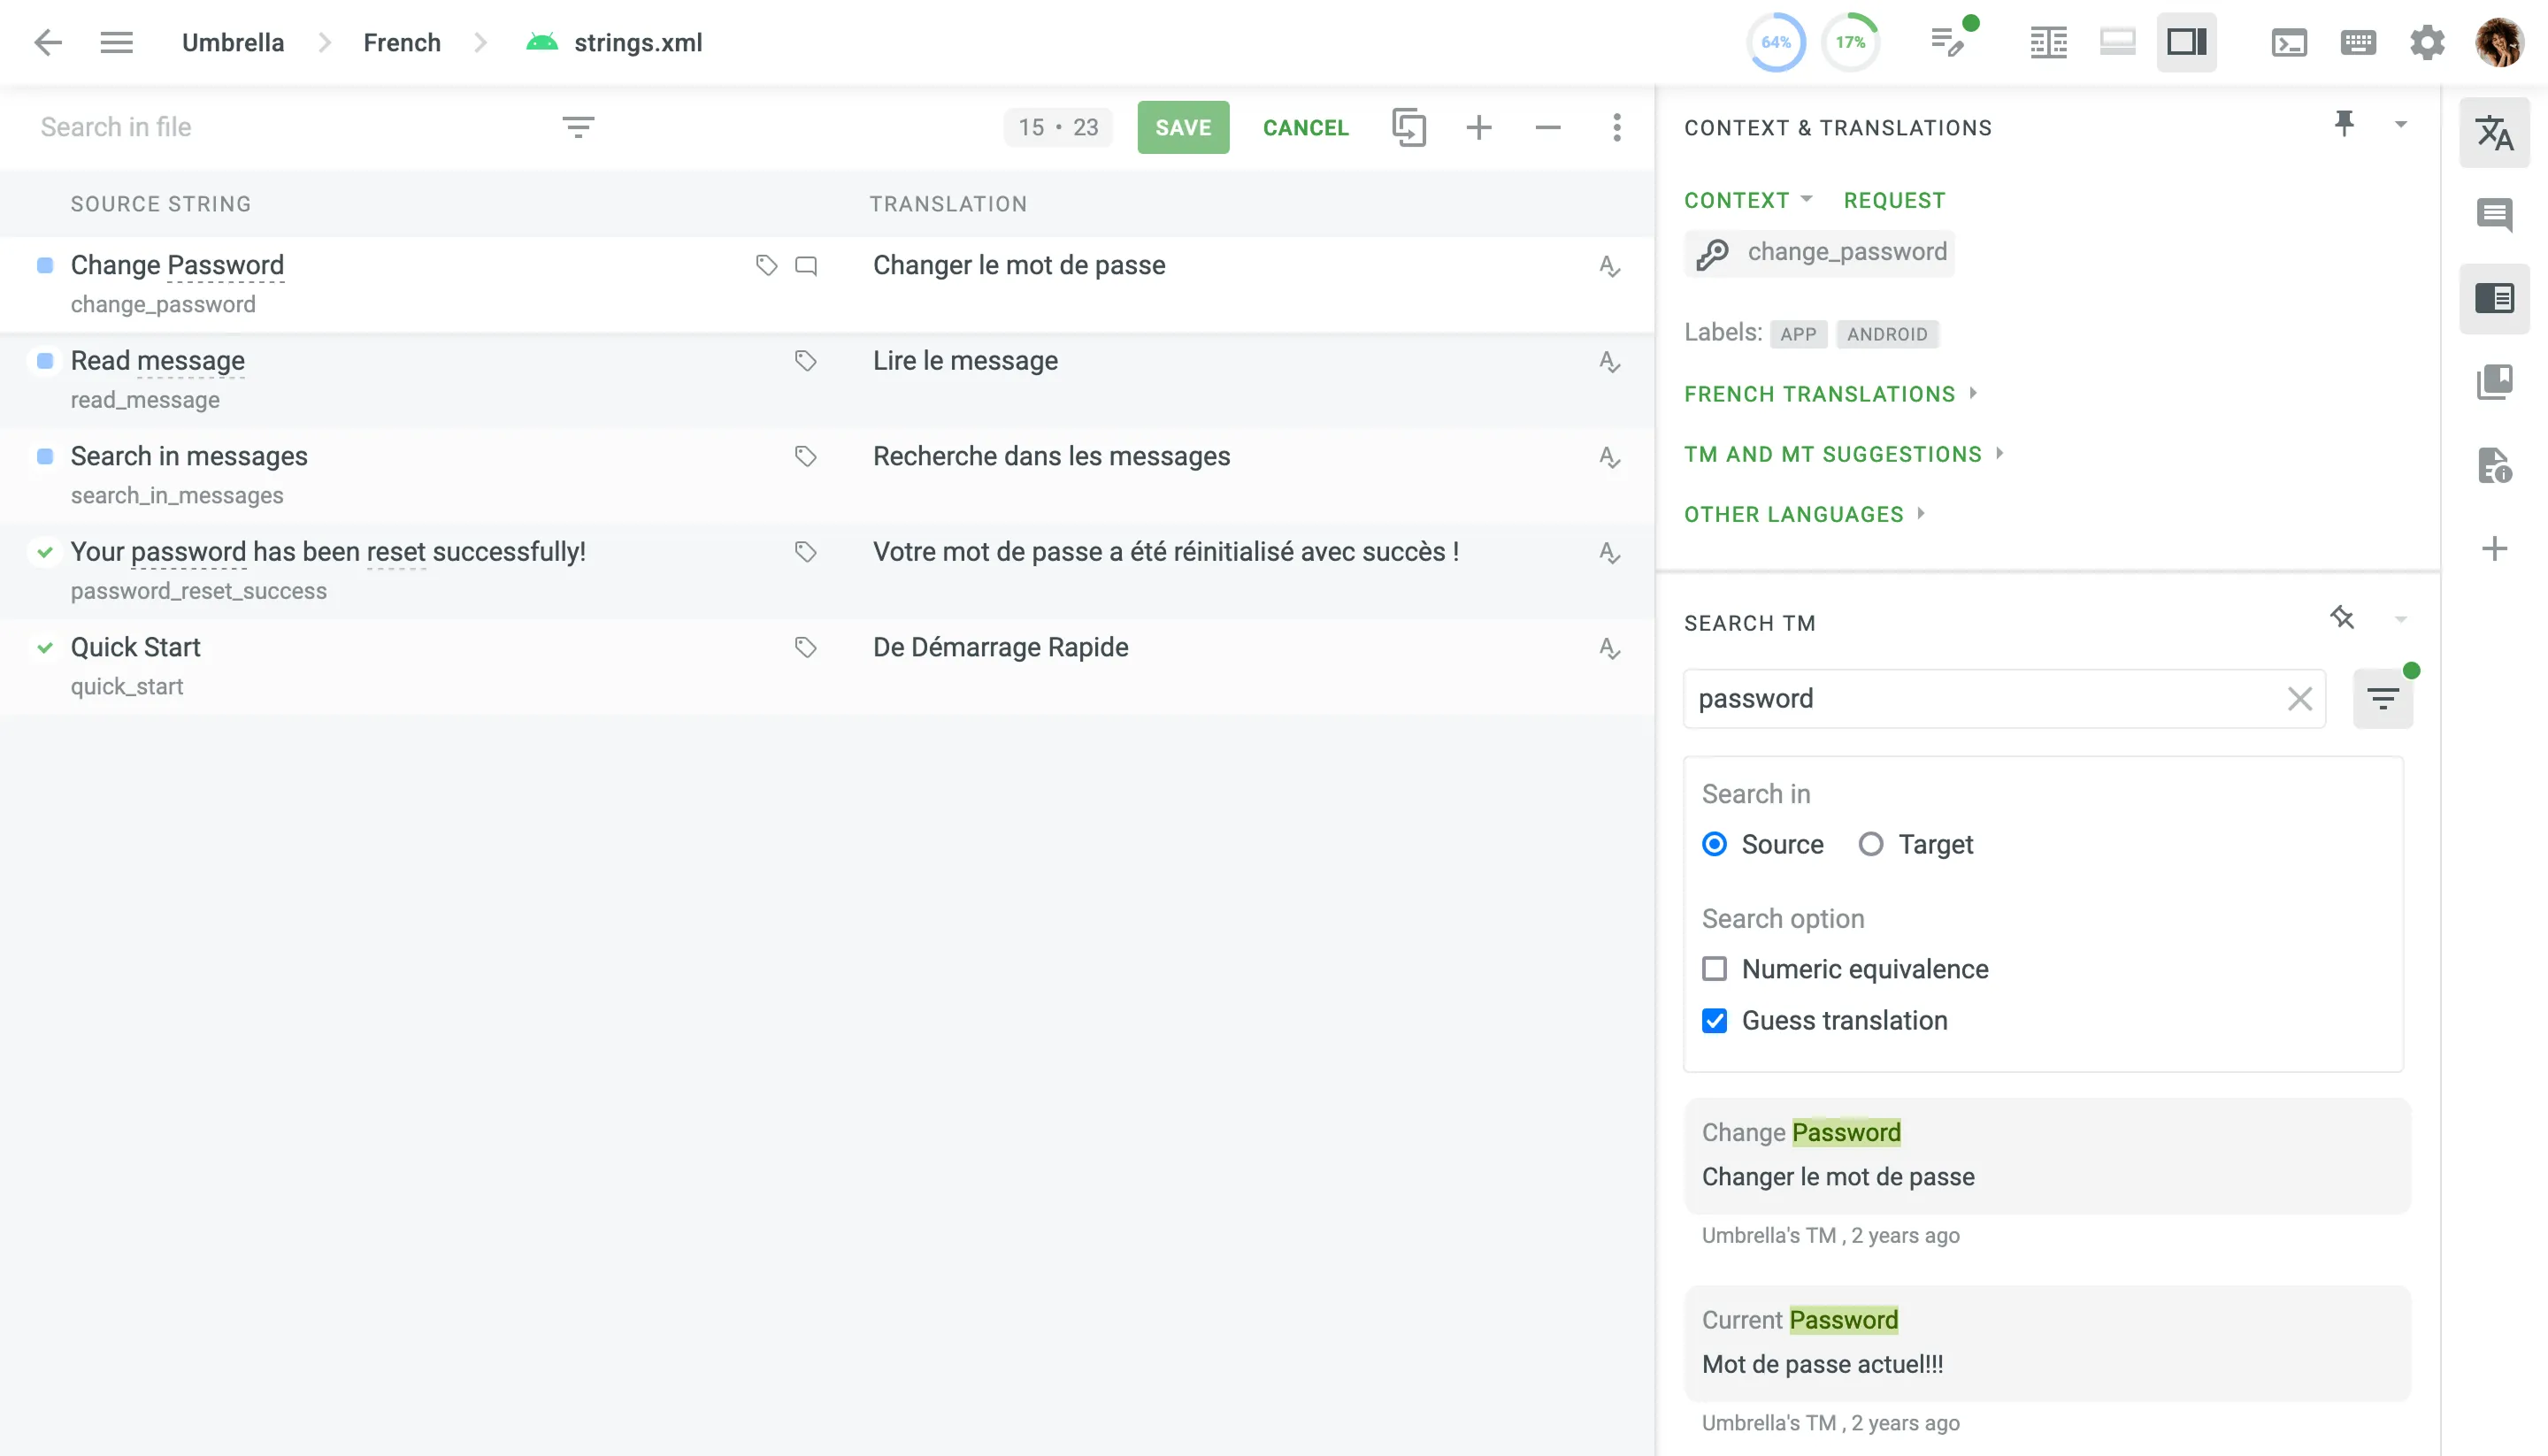 ### [Editing TM Suggestions in the Editor](#editing-tm-suggestions-in-the-editor) [Section titled “Editing TM Suggestions in the Editor”](#editing-tm-suggestions-in-the-editor) When working in the Editor, you can view the TM suggestions displayed in the TM and MT Suggestions section and in the right sidebar found through the Search TM section. There may be situations where TM suggestions contain inaccuracies or need to be updated. Project members with manager permissions (or higher) can edit or delete TM records directly in the Editor, both in the TM and MT Suggestions section and in the Search TM section, rather than having to go to the Translation Memories page in the Resources or Project Settings. This ensures that TM suggestions are updated safely and quickly, improving the overall quality of the TM. To edit the TM suggestion, follow these steps: 1. Click in the TM and MT Suggestions section or **Edit** in the Search TM section. 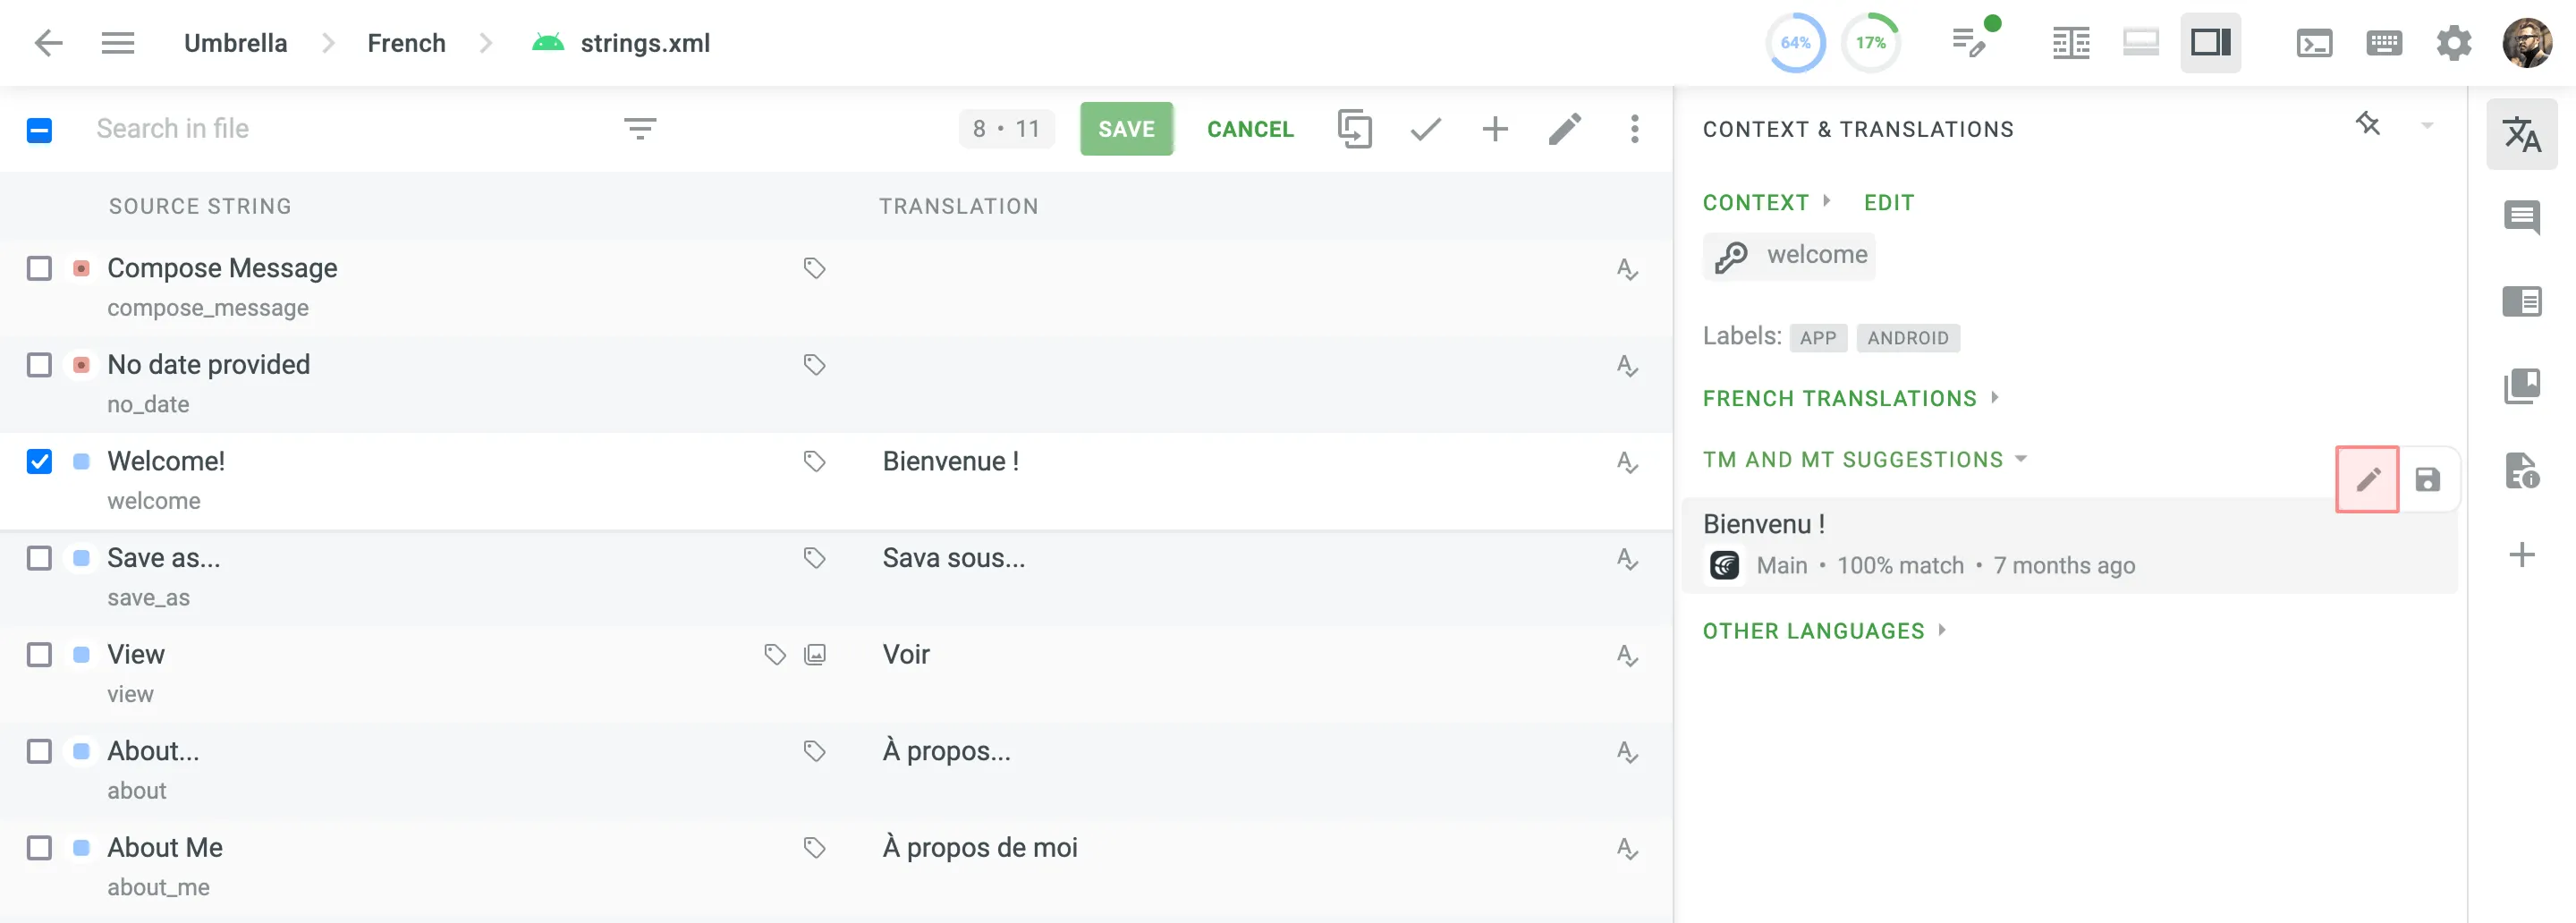 2. In the appeared dialog, make the necessary edits (i.e., modify or delete) to the TM suggestions for each language present in the TM segment. 3. To revert accidental deletions or unwanted changes, click **Undo** next to the TM suggestions or click **Cancel** to revert all modifications before saving. 4. Once the desired edits are completed, click **Save** to confirm and apply these changes to the TM segment. To completely delete a TM segment from the TM, delete all TM records across all languages and click **Save**. ### [Terms](#terms) [Section titled “Terms”](#terms) Underlined words or phrases in strings indicate project-specific terminology, which should be translated according to the provided term description. You can view detailed explanations by hovering over the underlined text or visiting the Terms section. The Terms section allows you to browse the project glossary (if available) and search for specific terms. If a term is not found in the glossary, Wikipedia explanations will be displayed as a reference. Some terms may already have translations, which help maintain consistency across the project. To reuse a translated term, simply click on the underlined text, and its translation will automatically appear in the translation field. 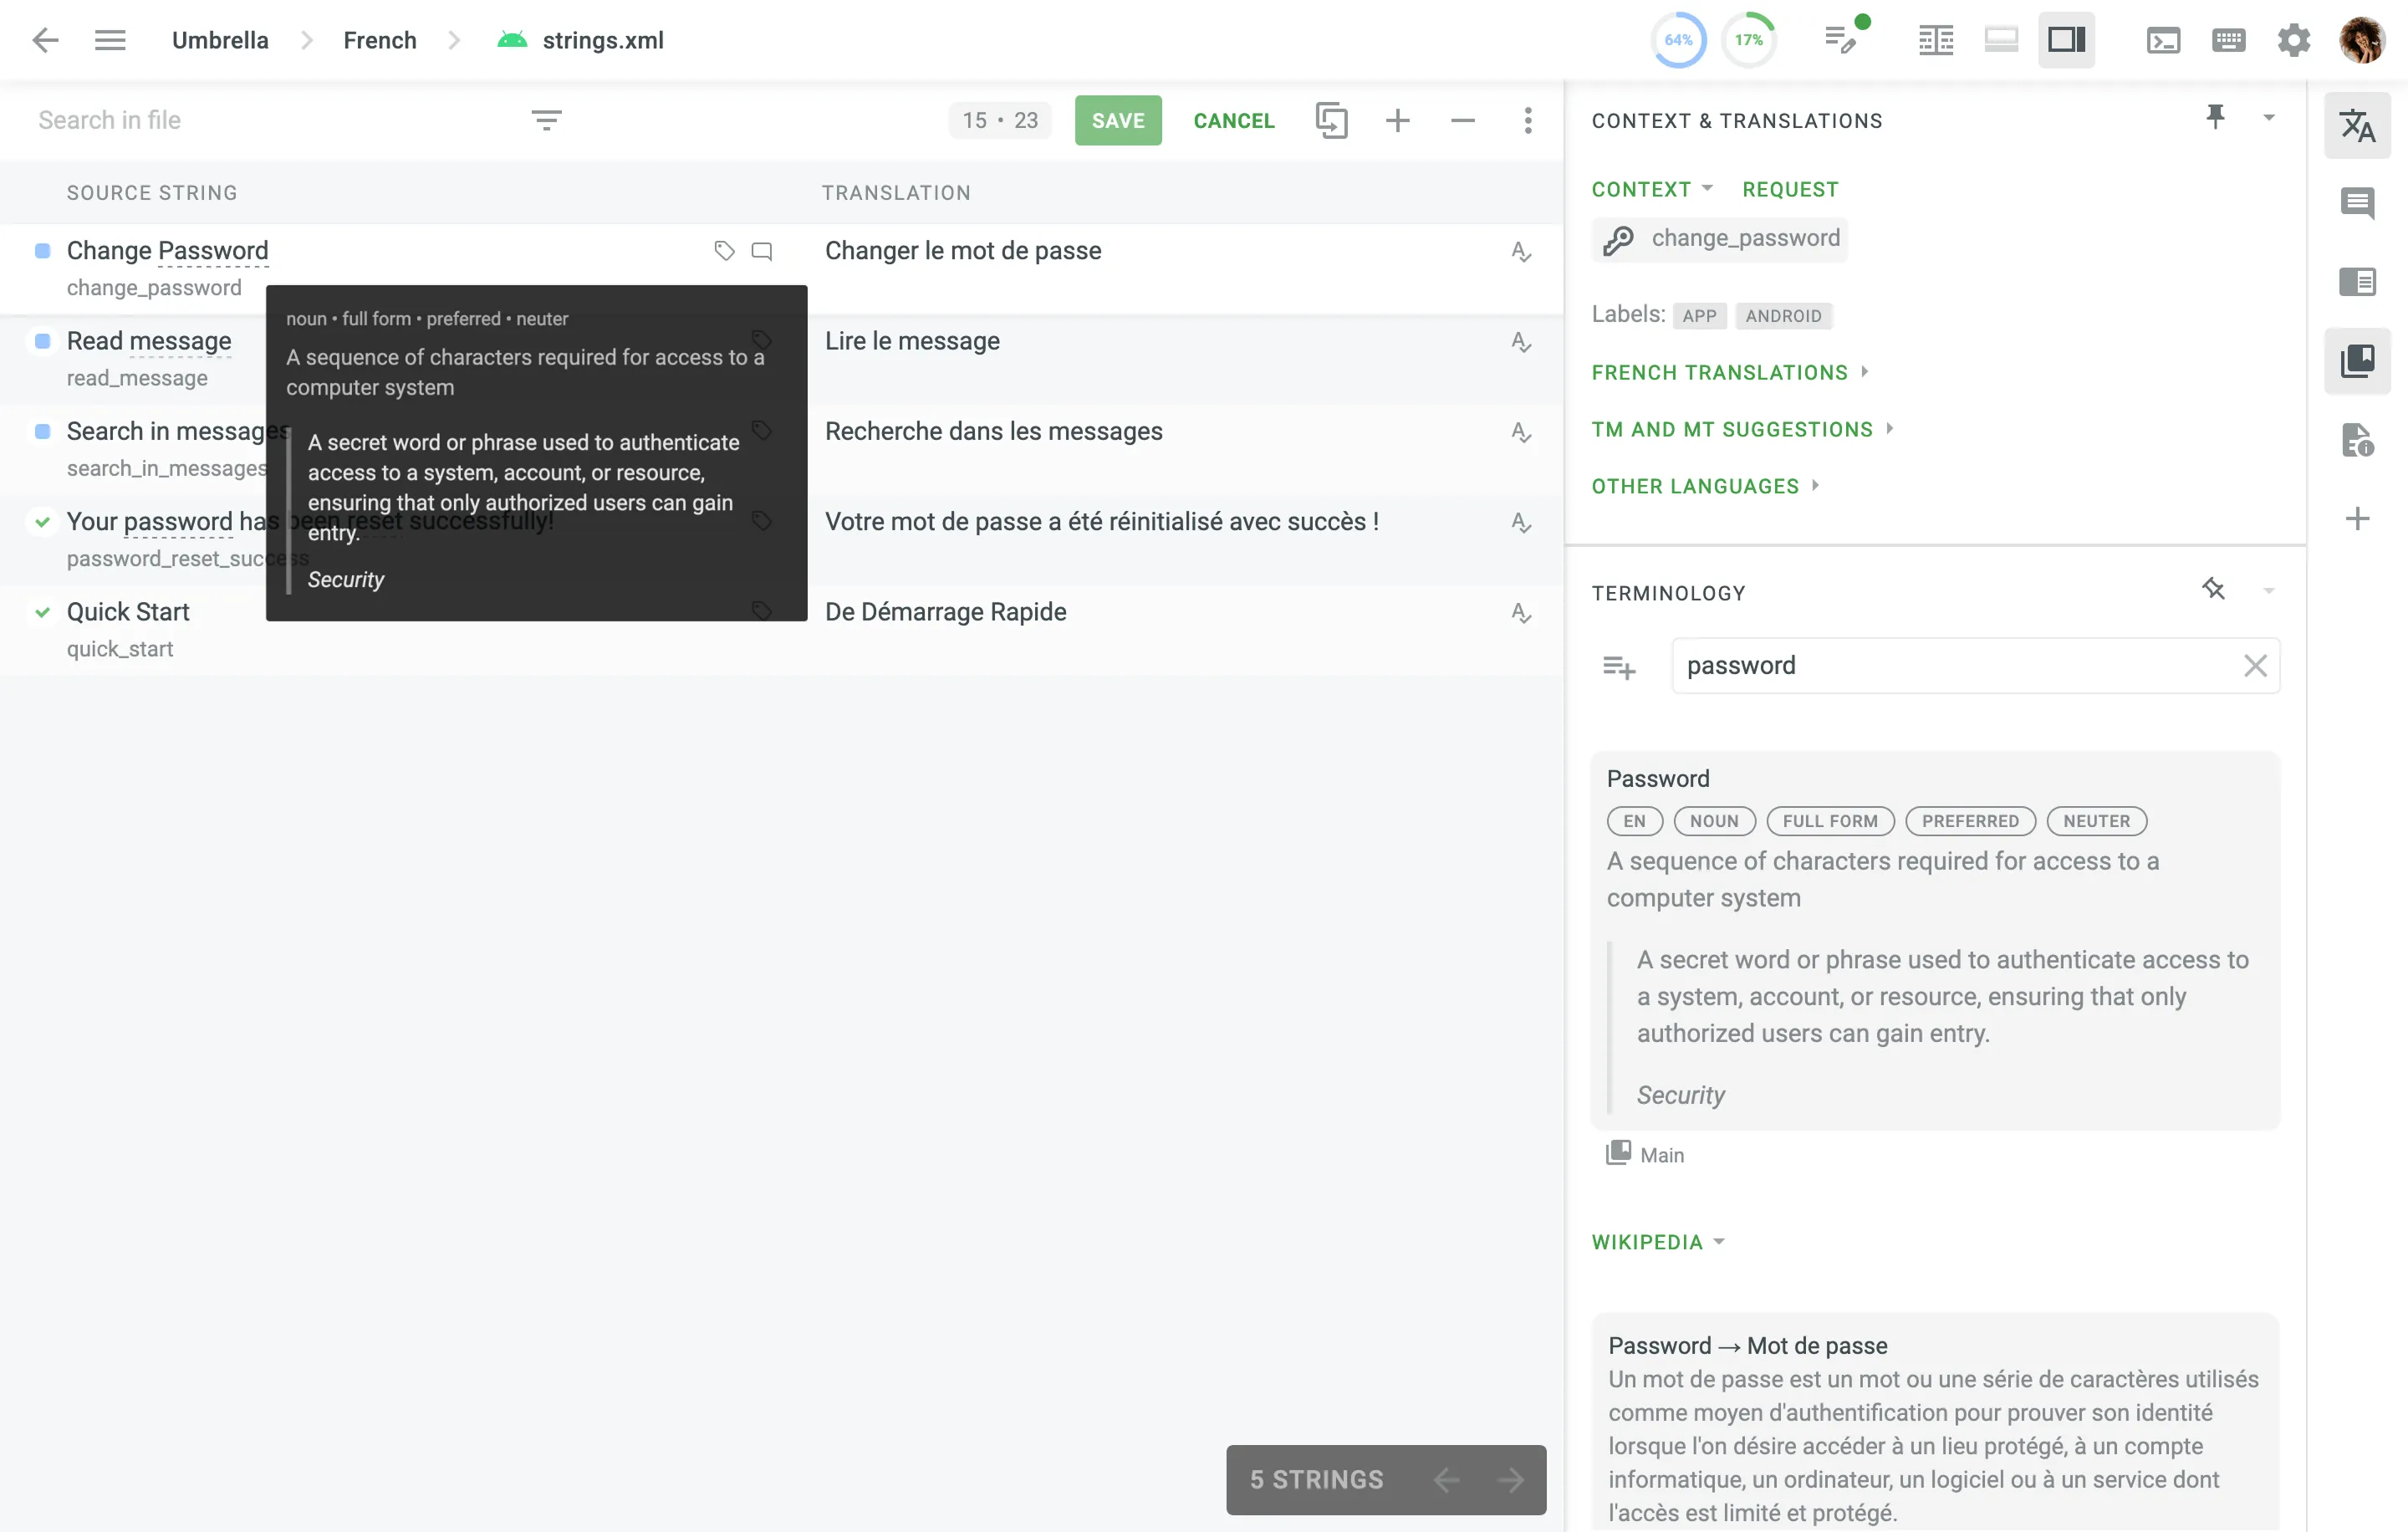 ### [File Context](#file-context) [Section titled “File Context”](#file-context) The *File Context* section allows you to provide translators with additional details to help them understand how to translate a specific file. File context can be added as plain text or Markdown, either directly in the Editor or through the [File Settings](/enterprise/file-management/#file-context) by the project members with manager permissions (or higher). For other project members, file context is read-only. To add file context in the Editor, follow these steps: 1. Click **Add File Context** in the File Context section. 2. Add the context or instructions for your translators. You can use either plain text or Markdown. 3. *(Optional)* Click **Preview** to see how the text will appear after saving. 4. Click **Save**. To edit file context, click the existing text in the File Context section, make your changes, and click **Save**. 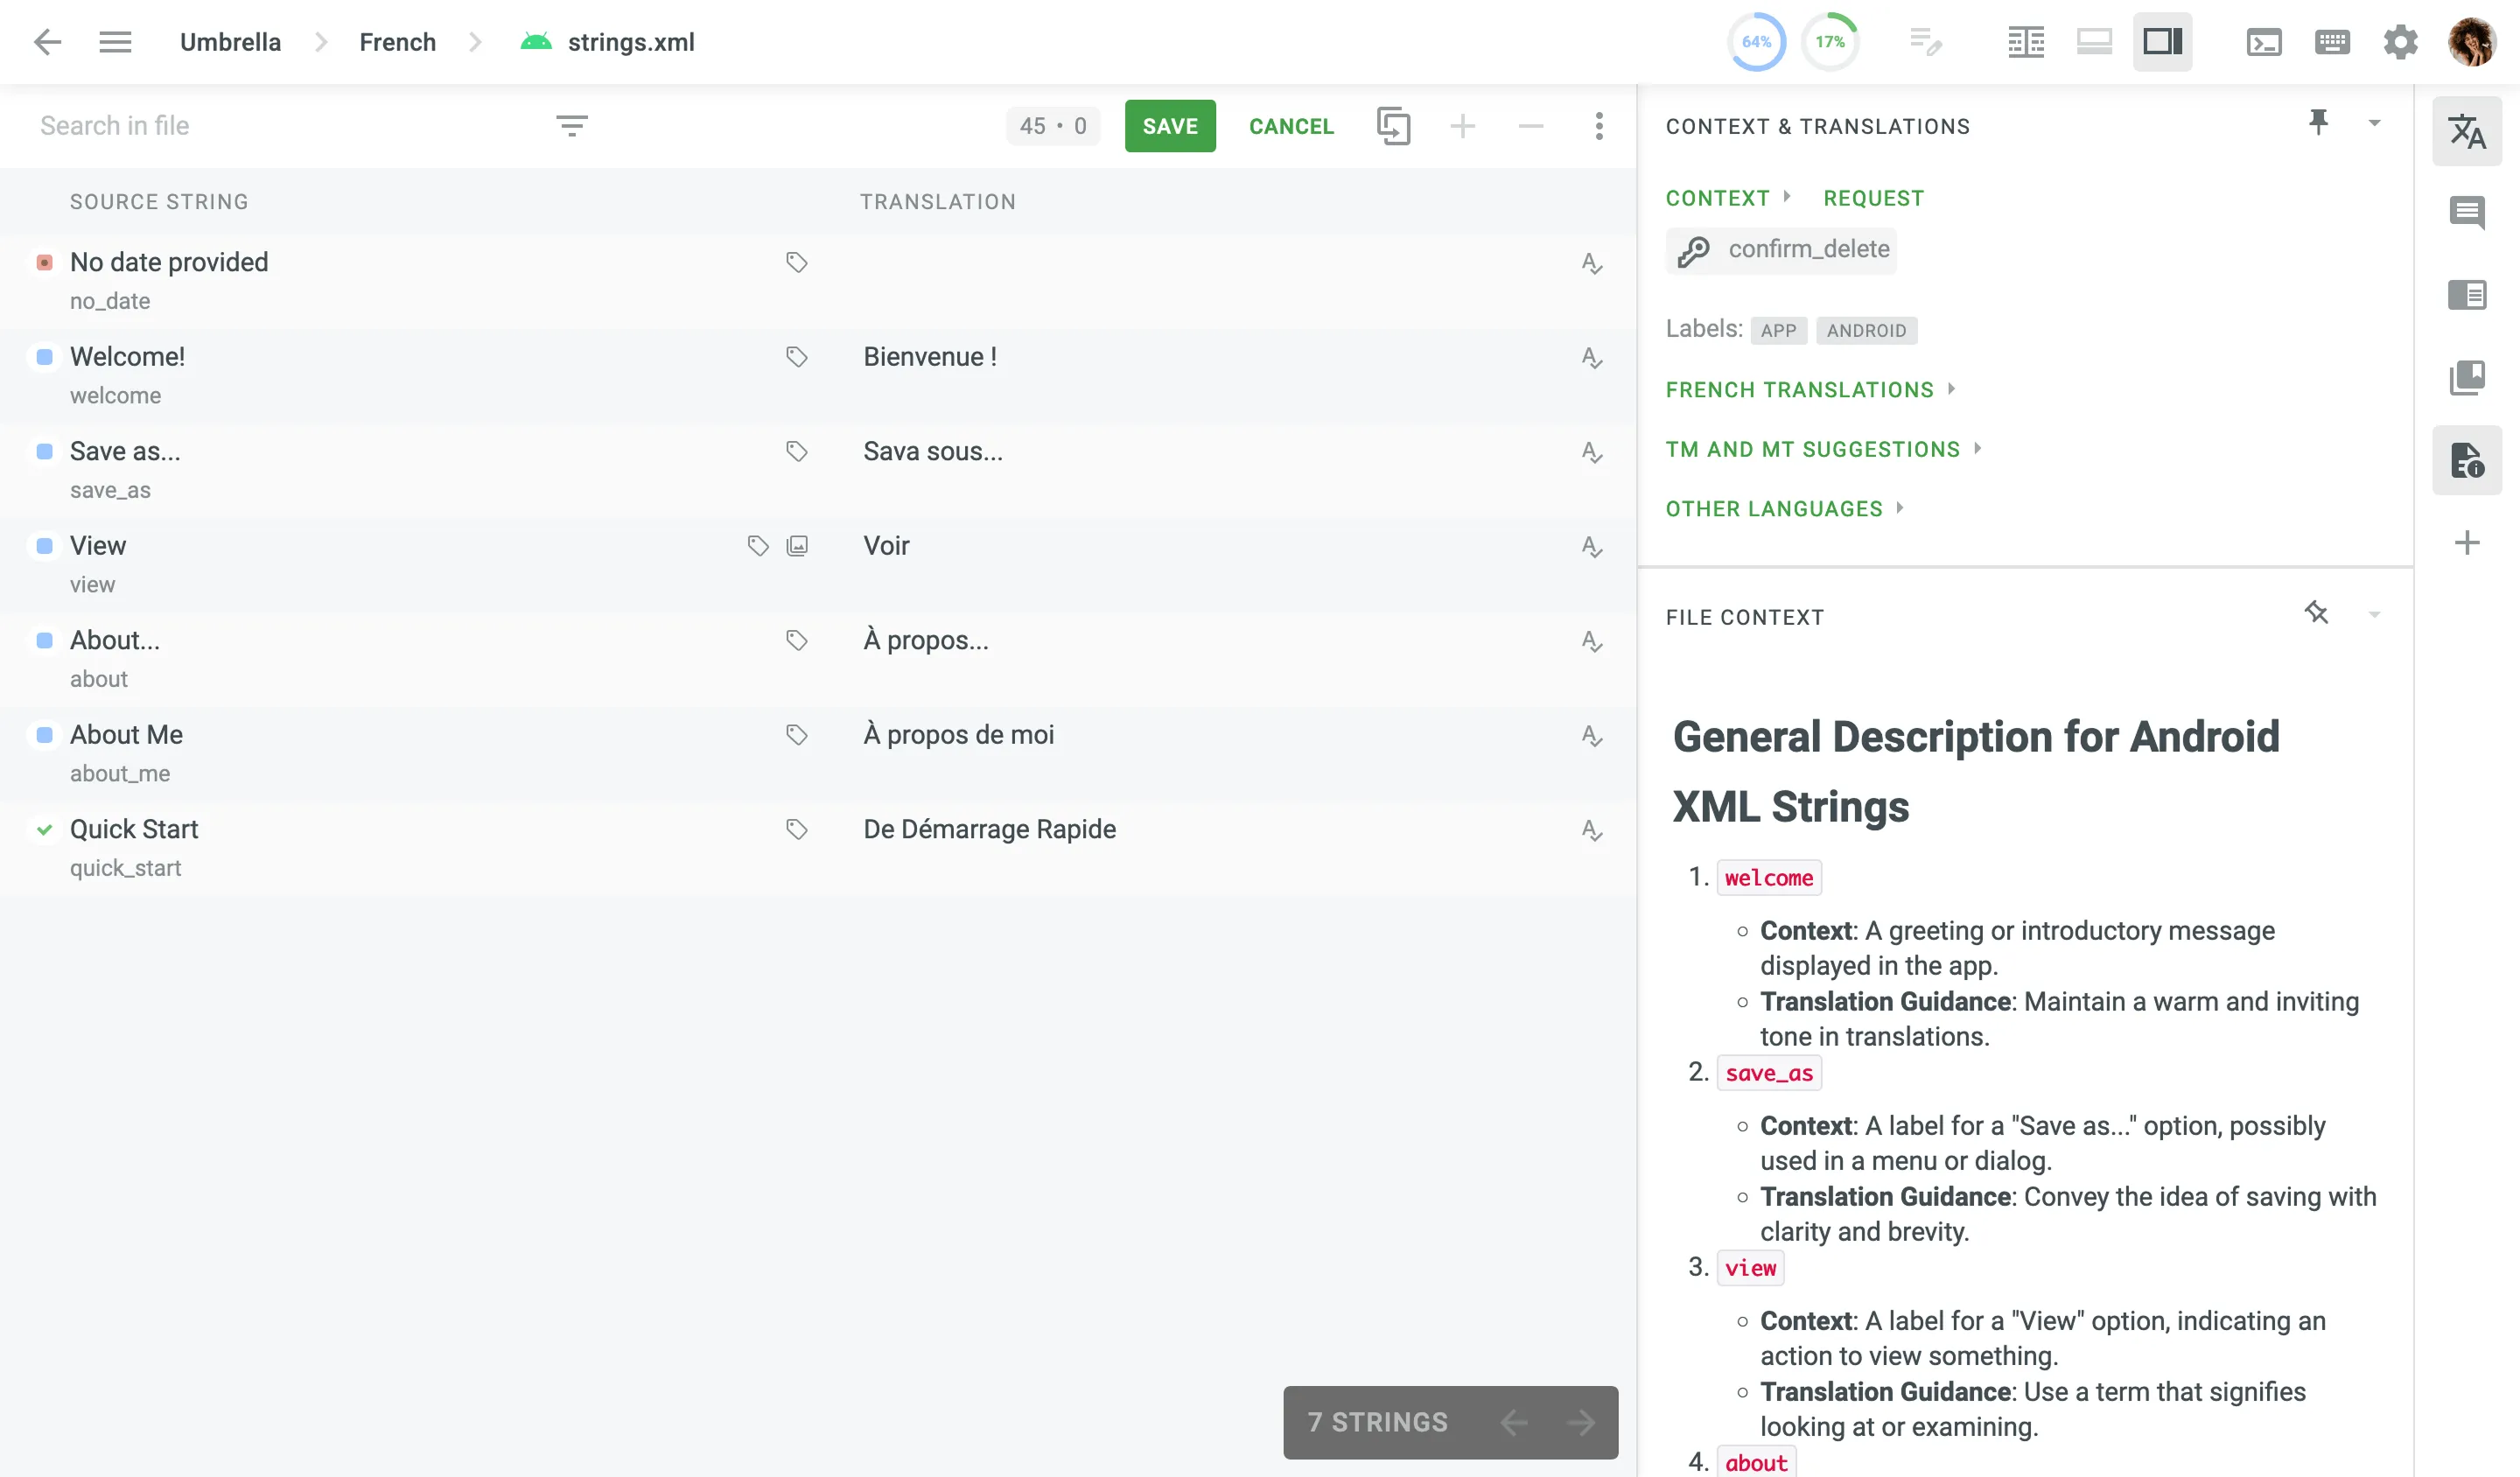 ## [Editor Modes](#editor-modes) [Section titled “Editor Modes”](#editor-modes) The Editor offers several viewing modes to accommodate different translation workflows. The available modes include **Side-by-Side**, **Comfortable**, **Multilingual**, and **Multilingual (Grid)**, each providing a unique layout for presenting and managing translations. The **Side-by-Side** mode is enabled by default, but you can easily switch as needed. You can switch between Editor modes using the following methods: * **Via Main menu** – click on the **Main menu** in the upper-left corner, select **View**, and choose the preferred mode. * **Via Editor View icon** – click the **Editor View** icon in the upper-right corner and choose the preferred mode. ### [Side-by-Side Mode](#side-by-side-mode) [Section titled “Side-by-Side Mode”](#side-by-side-mode) Side-by-Side mode, detailed in the [Core Features](#core-features) section, is ideal for managing multiple translations at once. Translators can work on several strings simultaneously or swiftly review and vote on existing translations. Managers and proofreaders can efficiently approve the best options all within the same view. ### [Comfortable Mode](#comfortable-mode) [Section titled “Comfortable Mode”](#comfortable-mode) Comfortable mode allows translators and proofreaders to focus on one string at a time, ensuring accuracy without distractions. It emphasizes the active string, making it easier to review context and related resources. This mode is ideal for handling complex translations or performing detailed proofreading, where precision and thoroughness are essential. The main working area with the source string at the top and the translation section below. To add a translation, you need to select a string from the left section, and it will appear in the middle-top *Source String* field. 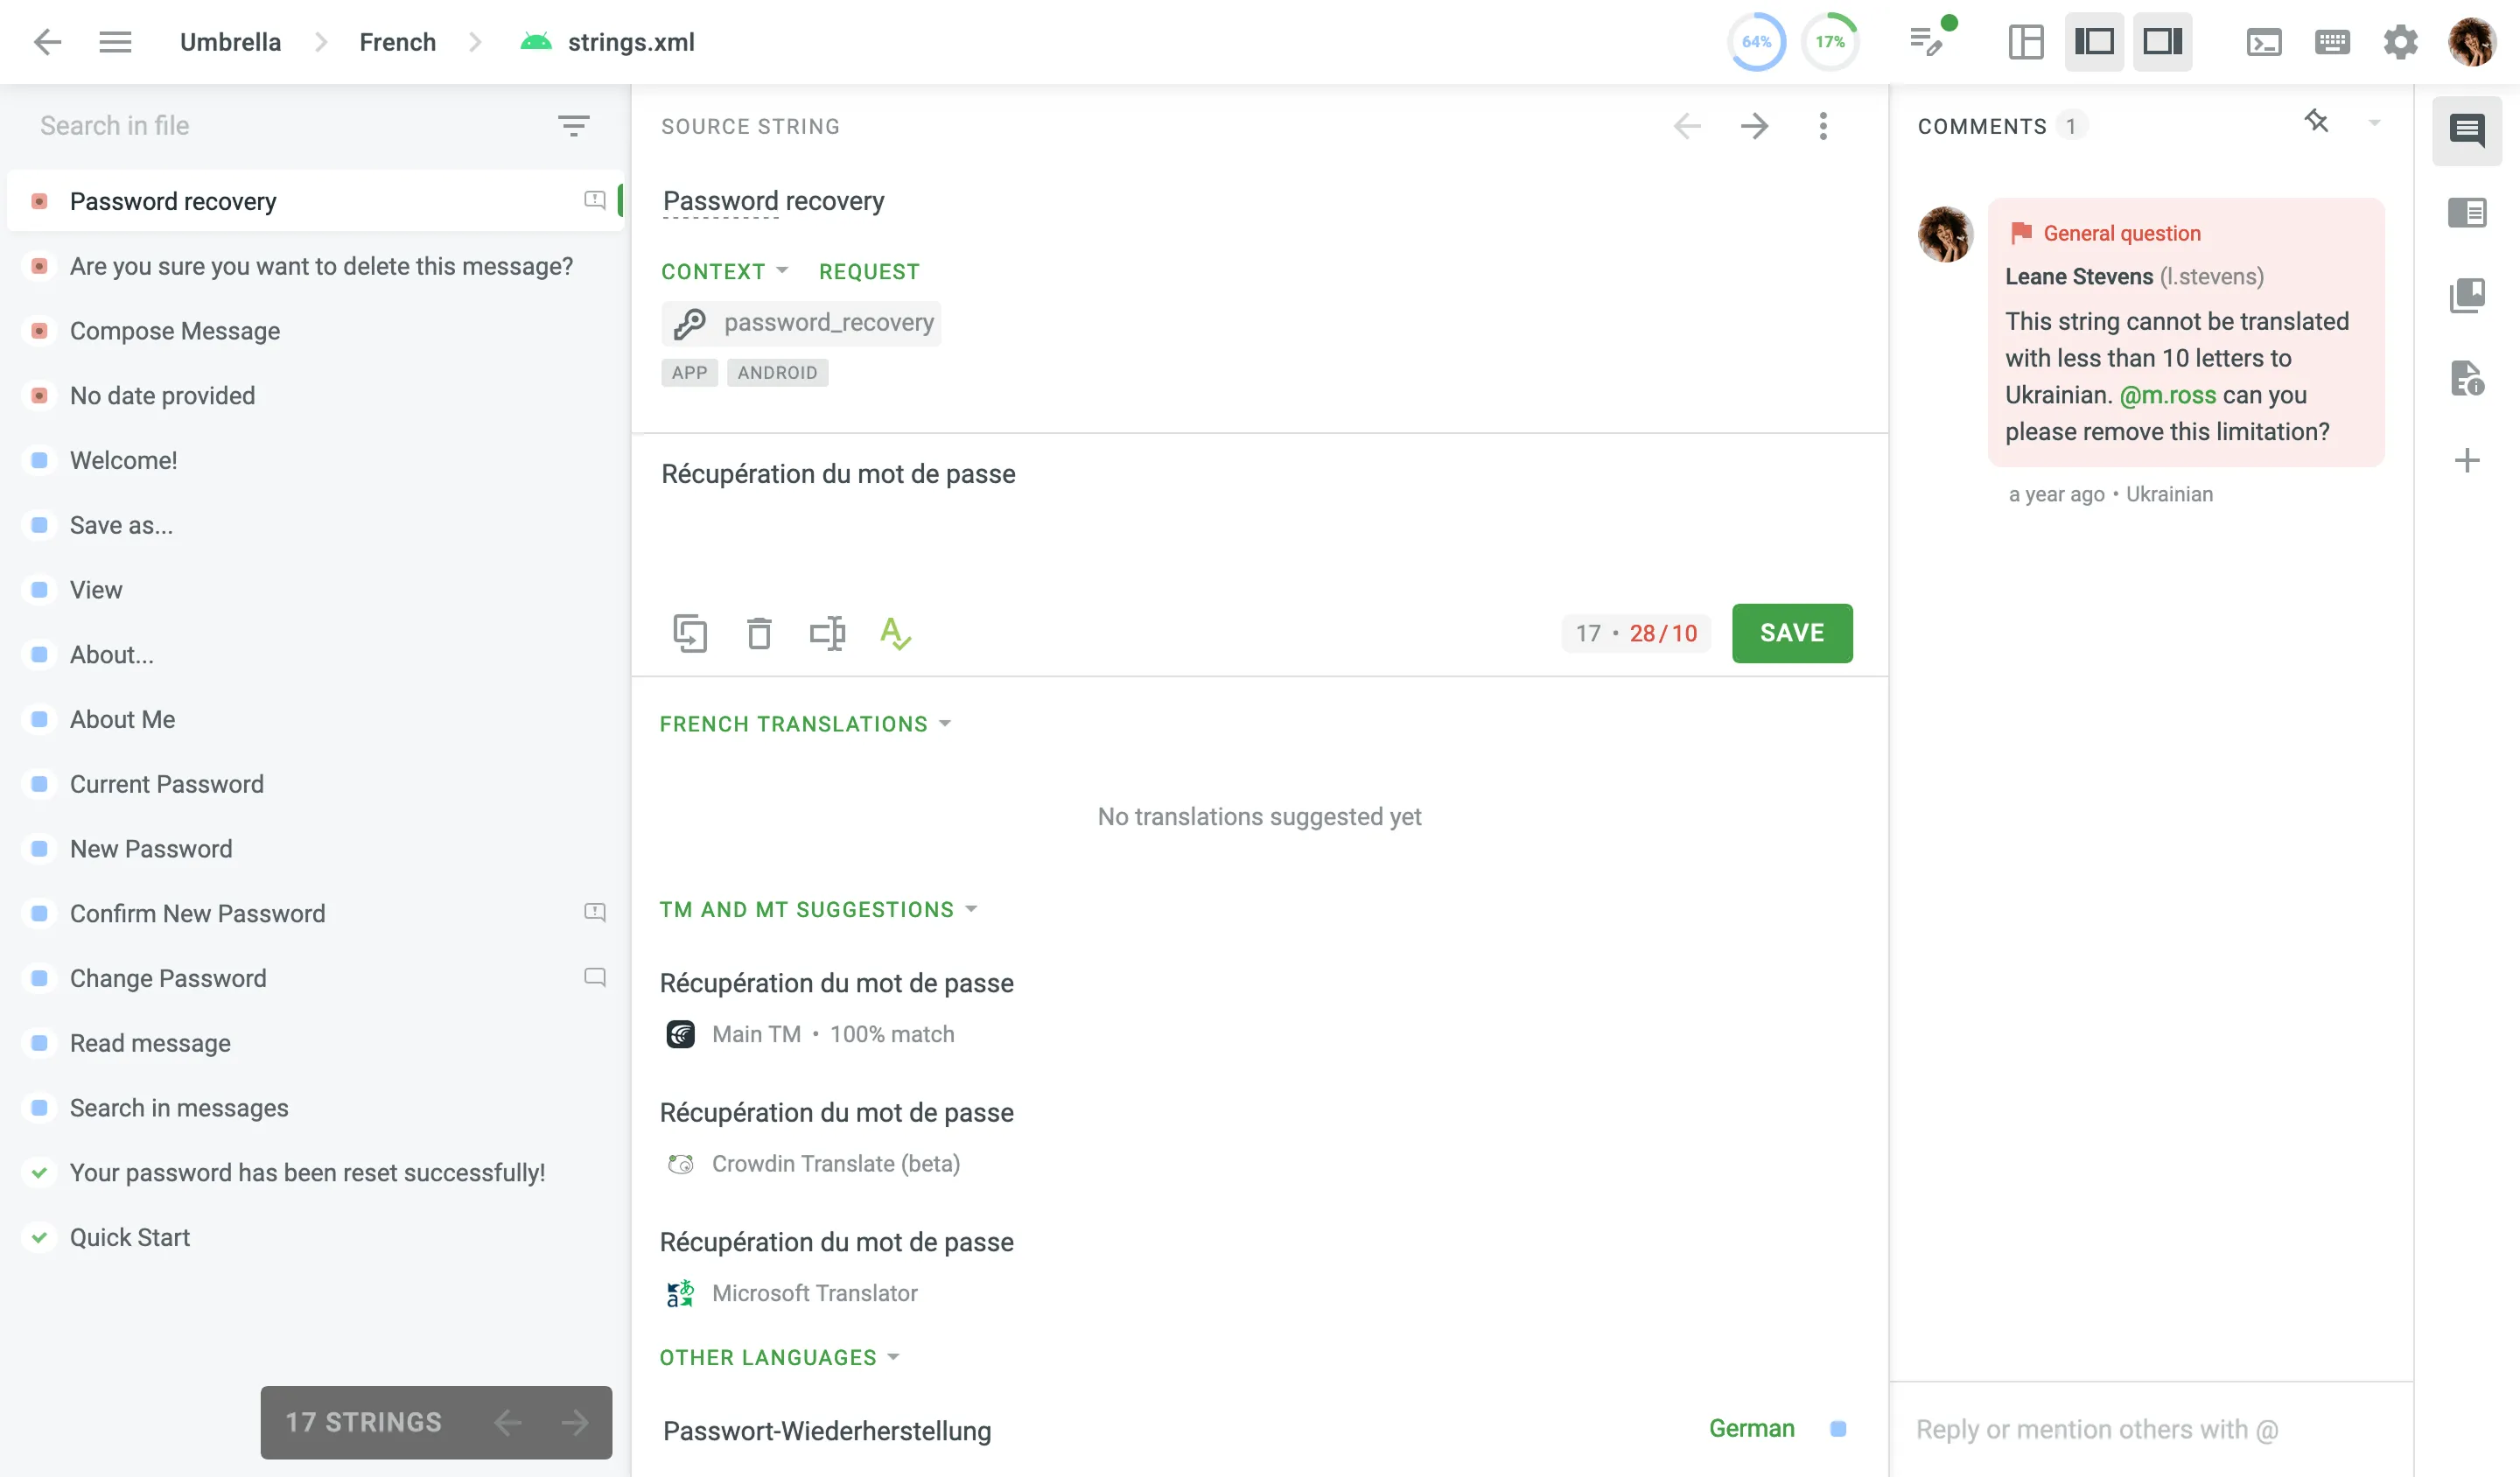 ### [Multilingual Mode](#multilingual-mode) [Section titled “Multilingual Mode”](#multilingual-mode) The multilingual mode provides similar features as the side-by-side mode and allows multilingual translators and proofreaders to work with multiple languages at the same time. You can select up to ten languages to work with simultaneously. The right panel shows the string’s translations of the language you’re entering a translation for or the one that was selected last.  Once you switch to the multilingual mode, select the languages you’d like to work with, and click **Apply**. To add new languages or remove some of the earlier selected ones, click on the Main menu in the upper-left corner, choose **Language**, alternatively click on the **Languages** in the upper-left corner, then do the necessary modifications to the language list and click **Apply**. ### [Multilingual Mode (Grid)](#multilingual-mode-grid) [Section titled “Multilingual Mode (Grid)”](#multilingual-mode-grid) In addition to the multilingual mode, there is a separate Multilingual (Grid) mode. It provides a spreadsheet-like layout where each language is shown in a separate column, allowing you to work with multiple languages in a compact tabular format. To adjust the order and visibility of columns displayed in this mode, and to pin specific columns, click **Sort Columns** in the upper-right corner and select the preferred ones. You can also reset the layout to the default column set by selecting **Reset To Default** at the bottom of the list. Additionally, to pin or hide individual columns, click the drop-down arrow next to a column title and choose the needed option. You can also switch between **Default View** and **Compact View** using the button in the upper-right corner. The compact option displays more rows by reducing vertical spacing. 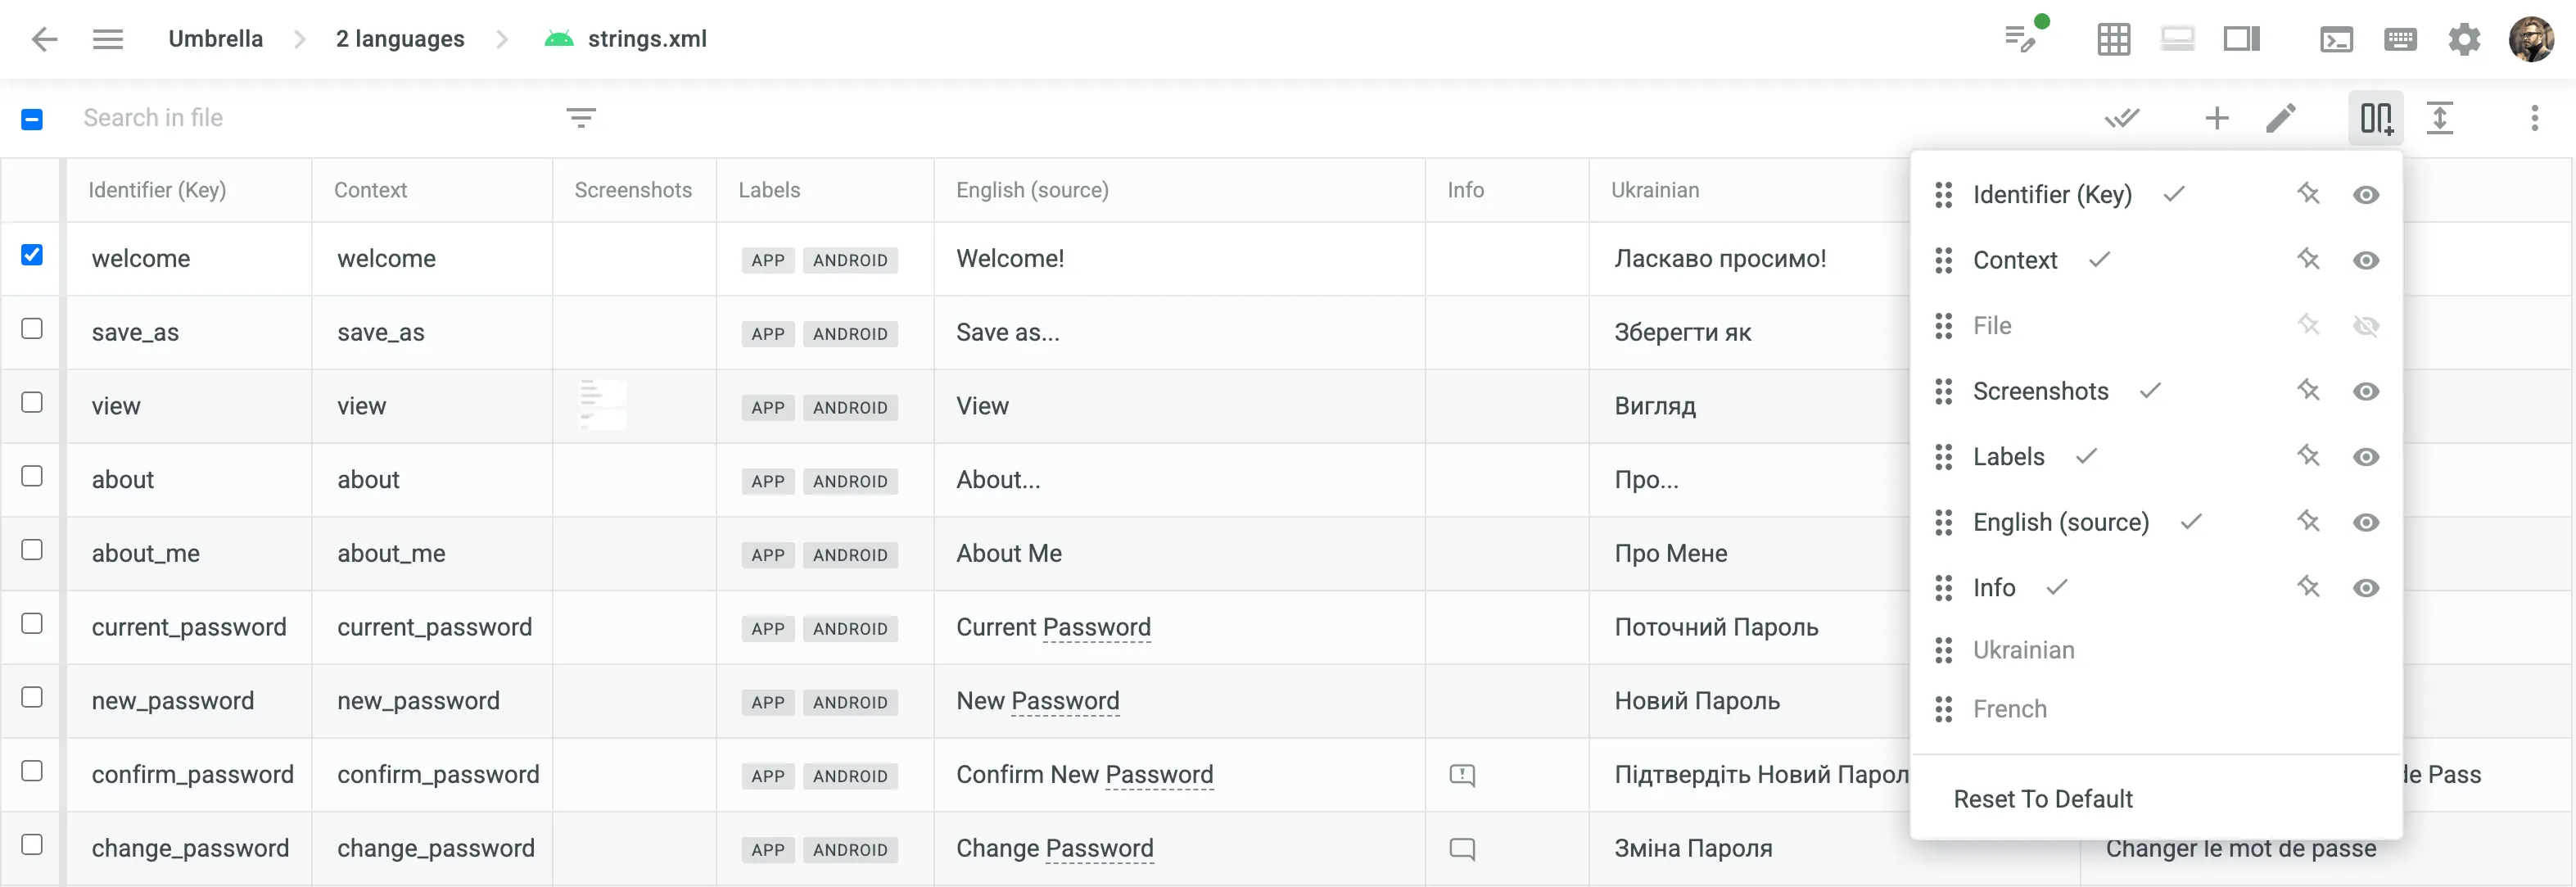 #### [For Proofreaders](#for-proofreaders) [Section titled “For Proofreaders”](#for-proofreaders) The proofreading process works mainly the same way as in side-by-side mode, except when approving or removing approvals for all or a couple of strings at once, the system performs the action for all languages selected for the multilingual mode. #### [Using Filter in Multilingual Mode](#using-filter-in-multilingual-mode) [Section titled “Using Filter in Multilingual Mode”](#using-filter-in-multilingual-mode) When using filter options in multilingual mode, the system will show strings that meet the selected criteria for at least one of the selected languages. This behavior applies to the following filter options: * Untranslated * Not Approved * Approved * QA issues * Machine Translations * Advanced Filter > Translations updated * Advanced Filter > Translations > Partially translated (plurals) * Advanced Filter > Translations > Same as source string * Advanced Filter > Votes ## [Translating RTL Languages](#translating-rtl-languages) [Section titled “Translating RTL Languages”](#translating-rtl-languages) When translating between LTR and RTL languages, some elements in the translation field in the Editor might not be displayed the same way as they will be once exported. To be sure that RTL translations will be displayed correctly in the exported file, we recommend making translations the following way: 1. Click under the source text (or `Alt` +`C` key combination). 2. Translate the source texts into the target language. 3. Leave variables, tags, etc., unchanged in the translation, even if they look wrong. They will be in the right positions in the exported file. 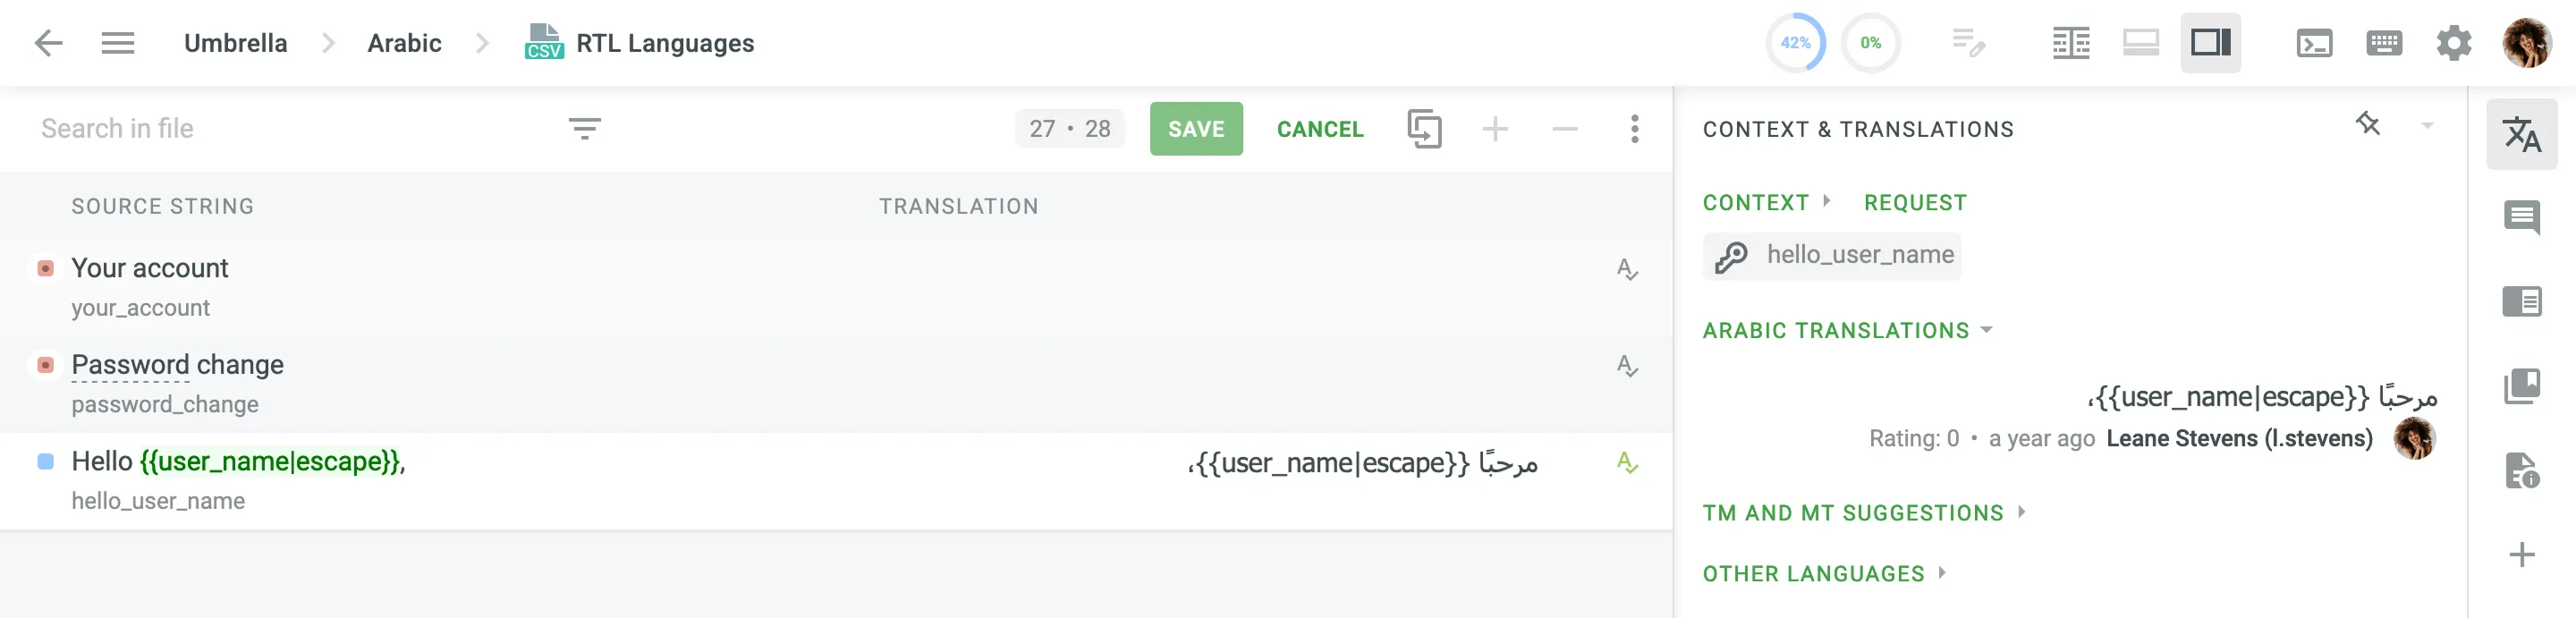 ## [Command Palette](#command-palette) [Section titled “Command Palette”](#command-palette) The Command Palette in the Editor is your hub for accessing various commands efficiently. It serves as a central location for all available commands, ensuring a seamless and intuitive experience. To open the Command Palette, click in the upper-right corner. 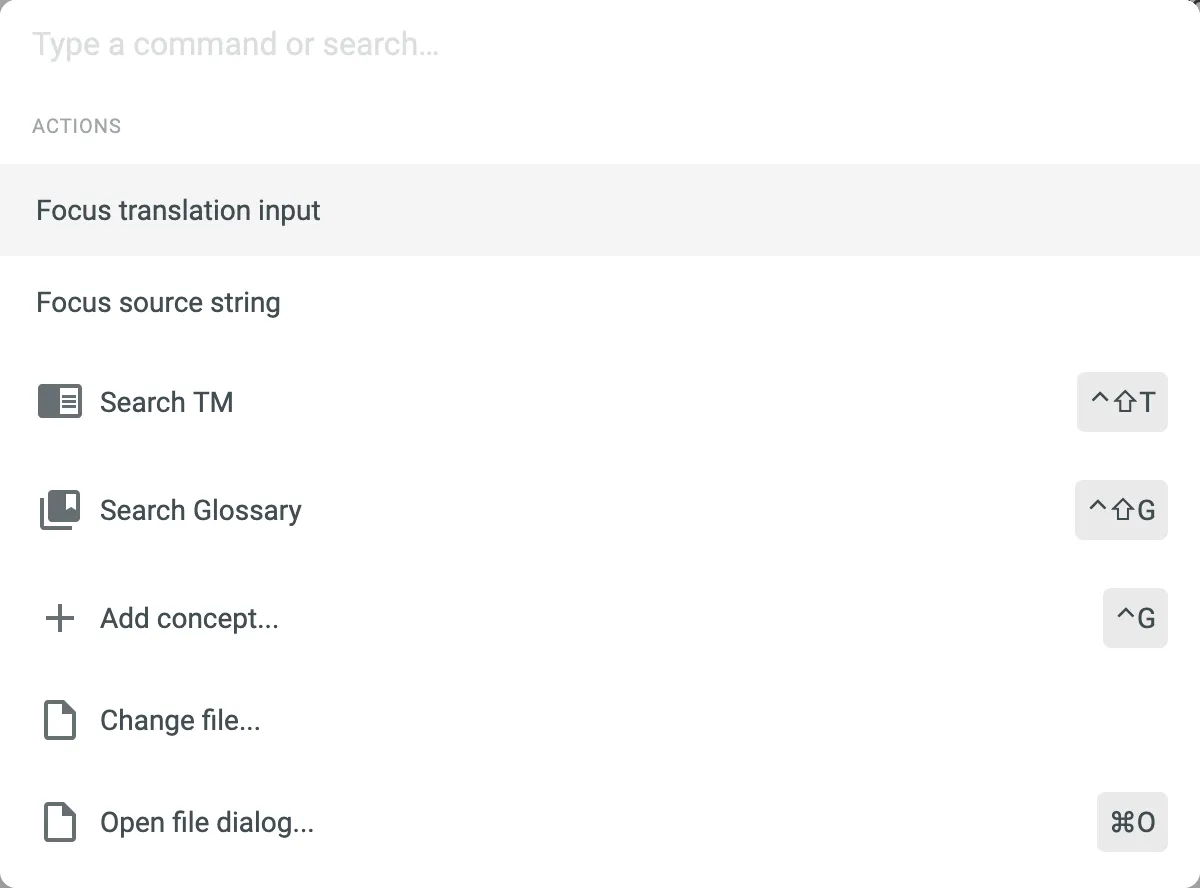 ## [Managing Unsaved Translations](#managing-unsaved-translations) [Section titled “Managing Unsaved Translations”](#managing-unsaved-translations) When you enter translations but haven’t saved them, a green indicator appears next to the **Unsaved Translations** icon. Hovering over or clicking displays a tooltip with the number of unsaved translations. This feature offers the following options: * Check the number of unsaved translations. * Save all unsaved translations with a single click. * View and manage all strings with unsaved translations. To view unsaved translations, click in the upper-right corner and select **View Strings**. Alternatively, click and select **Unsaved translations**. Once filtered, you can continue editing unsaved translations. If they are ready to be saved, click **Save All** to apply the changes. ## [Editor Settings](#editor-settings) [Section titled “Editor Settings”](#editor-settings) To open the Editor settings, click in the upper-right corner. The Editor settings are grouped into tabs that contain various options for configuring the Editor according to your preferences. ### [General](#general) [Section titled “General”](#general) * *Translation Memory Suggestions* – you can specify the minimum similarity match (in percentages) for translation memory suggestions shown under the translation field. * *QA issues* – if enabled, the pop-up messages with warnings will appear each time you try to save a translation with some inaccuracy (punctuation/tags/spaces mismatch, missing variables, etc.)  * *Auto-complete* – if enabled, the pop-up with translation prediction and automatic translation completion will appear while you type the translation. * *Auto-approve* – if enabled, the translations added by proofreaders or members with higher permissions are automatically approved. * *Automatically move to next string* – if enabled, you’ll be automatically moved to the next string after saving a new translation or approving an existing one. ### [AI](#ai) [Section titled “AI”](#ai) The AI tab allows to configure custom prompts and shortcuts for AI Assistant. This tab will appear in the Editor settings once the project owner configures AI provider and sets up the **AI in editor** prompt. Read more about [Using AI in the Editor](/crowdin-ai/#using-ai-in-the-editor). ### [Appearance](#appearance) [Section titled “Appearance”](#appearance) * *Default Editor View* – set the default view mode that will be used each time you open the Editor. * *Compact strings view* – if enabled, only the beginnings of the long strings will be shown in the string list. * *Translation Preview* – if enabled, a translation preview will be displayed for translated strings in the string list. * *HTML Tags Displaying* – you can choose **Show** or **Hide** option that applies to all HTML tags. If you choose **Auto**, tags will be hidden in HTML, Haml, XML, Web XML, Markdown, and DOCX files but shown in other file formats. When tags are hidden, you can expect the following: ```plaintext Sample ``` will be replaced with ```plaintext <0>Sample ``` * *Non-printable characters displaying* – if enabled, non-printable characters (e.g., space, tab character, line break, etc.) will be displayed in source texts and translations. * *Translation field highlighting* – if enabled, words with potential QA issues will be underlined in the translation field. * *Real-Time Spellcheck* – instantly view spelling issues as you type a translation. displayed next to the translation means that no spelling issues were found. Otherwise, you’ll see a red label with the number of spelling issues detected. Click it for more details. * *UI Language* – select your preferred language for the Crowdin Enterprise UI. The chosen language will be applied to the Editor and other parts of Crowdin Enterprise. Caution Currently, the *Real-Time Spellcheck* feature is available for specific languages only. For Crowdin Enterprise, this list also includes custom spellcheck languages if there are any custom spellchecks installed in the organization. ### [Themes](#themes) [Section titled “Themes”](#themes) Set the **Light** or **Dark** theme, or select **Auto** to allow the Editor to set the theme based on your device system settings. In addition to the default themes, you can also install custom themes from the Crowdin Store or create your own custom theme. [Explore Existing Themes ](https://store.crowdin.com/collections/themes)Browse the collection of available themes in the Crowdin Store. [Create Custom Themes ](/developer/editor-themes/)Learn how to create your own custom themes. ## [Helpful Tips](#helpful-tips) [Section titled “Helpful Tips”](#helpful-tips) ### [Keyboard Shortcuts](#keyboard-shortcuts) [Section titled “Keyboard Shortcuts”](#keyboard-shortcuts) Use keyboard shortcuts to take actions in the editor quickly. Check the list of keyboard shortcuts by clicking the *keyboard* icon in the upper-right corner. Most of the hotkeys can be customized to your personal preferences. Click on the necessary key combination, and modify it with the help of your keyboard. ### [Quick Access to Menu Sections](#quick-access-to-menu-sections) [Section titled “Quick Access to Menu Sections”](#quick-access-to-menu-sections) Easy access to most-used menu items in one click: * *Project* – click on the current project name (*Impact* in the below screenshot) * *Language* – click on the current language (*French* in the below screenshot) * *Files* – click on the current file name (*impact.xml* in the below screenshot) * *Editor Mode* (only in projects with a workflow) – click on the current step (*Translate* in the below screenshot)  ### [Translation Progress Indicators](#translation-progress-indicators) [Section titled “Translation Progress Indicators”](#translation-progress-indicators) Use translation and approval indicators to monitor the progress of the currently opened file or folder. These indicators display the proportion of content that is translated and approved, allowing you to quickly assess the current status. There are two types of indicators available in the Editor: * **Circular Progress Indicators** – Located in the upper-right corner of the toolbar, these show the percentage of translated and approved content for the file or folder you’re working on. * **Detailed Progress Breakdown** – Accessible via the **Main menu > File**, this provides information on the total word count, number of translated, pre-translated, and approved words, along with percentage completion for each. 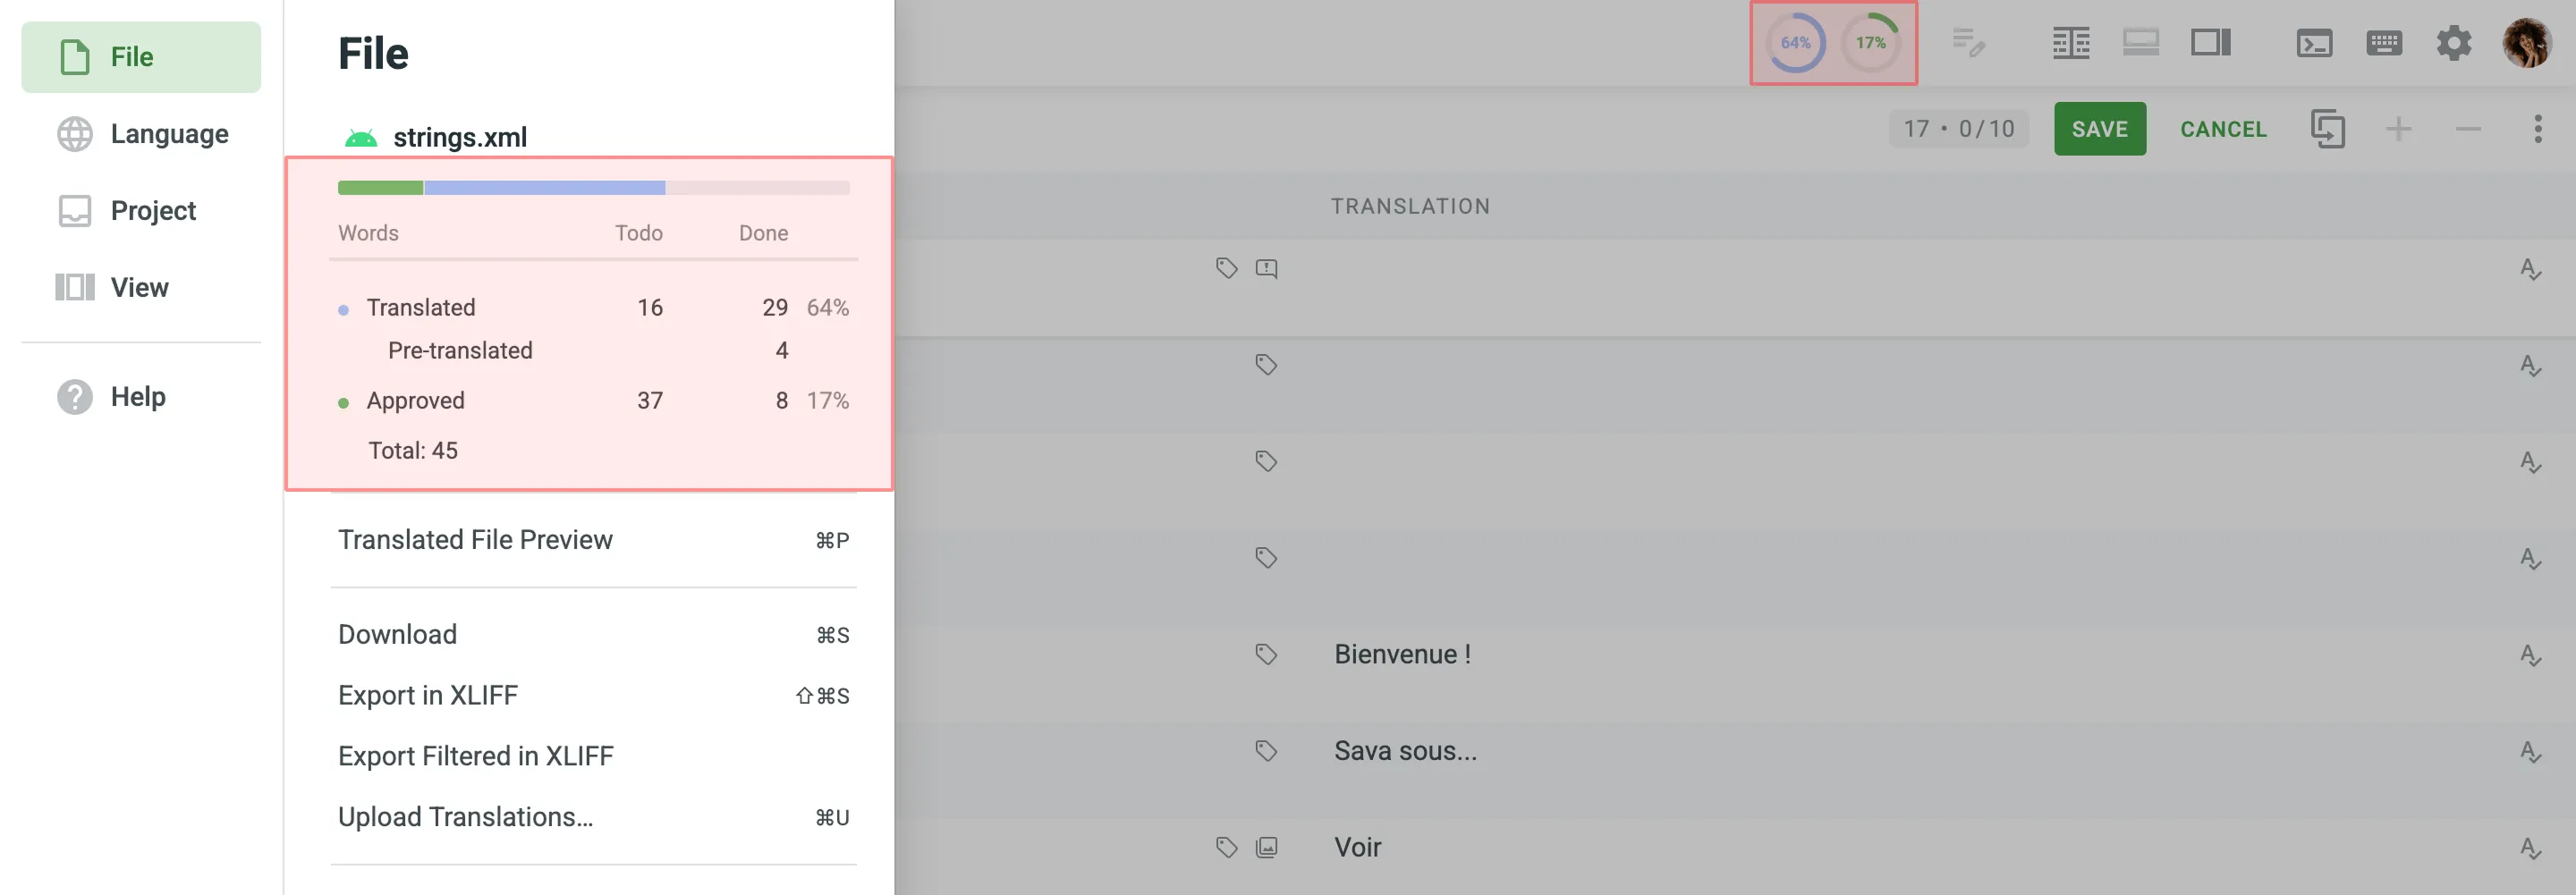 ### [Context Menu Options for Selected Words](#context-menu-options-for-selected-words) [Section titled “Context Menu Options for Selected Words”](#context-menu-options-for-selected-words) When you select a word or phrase in the source string or translation, the icon will appear. Clicking the icon opens a context menu with several useful options: * **Search TM** – Look for Translation Memory (TM) suggestions for the selected word or phrase. * **Search in Terminology and Wikipedia** – Find an explanation of the selected word or phrase in the project terminology or Wikipedia. * **Create Term** – Add the selected word or phrase to the project glossary as a new term. * **Transform** (only available for selected words in the translation) – Access a submenu with options to convert the selected text to lowercase or uppercase. * **Copy** – Copy the selected word or phrase to clipboard. * **Copy & Paste** – Copy the selected word or phrase and immediately paste it into the translation field. Permissions The *Create Term* option is available for project managers only. 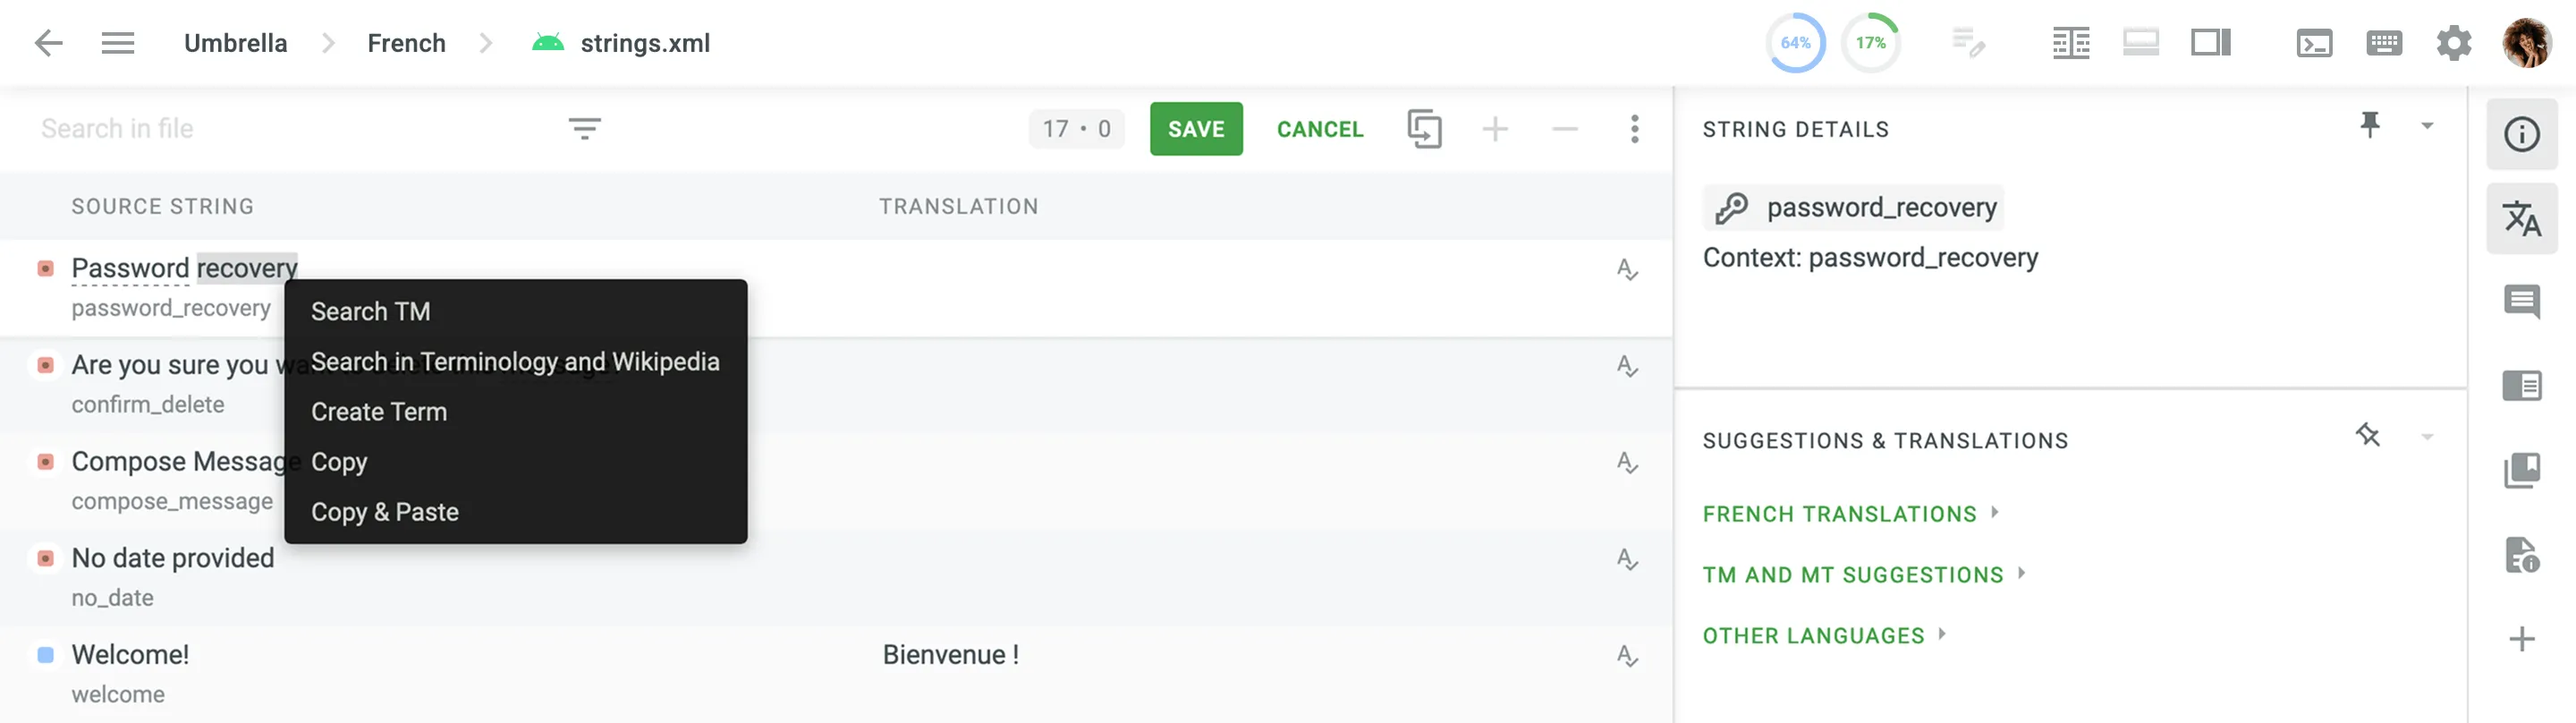 ### [Switching to Another File](#switching-to-another-file) [Section titled “Switching to Another File”](#switching-to-another-file) To translate strings from the other files, follow these steps: 1. Click on the Main menu or click on the current file name in the upper-left corner. 2. Choose **File > Open**. 3. Select the necessary file and click **Open**. Alternatively, just double-click on the necessary file. To see all strings of the project, click on the Main menu in the upper-left corner, and go to **File** > **All Strings**. Alternatively, click on the current file name in the upper-left corner > **All Strings**. To quickly find and reopen one of the files you recently worked on, click on the Main menu in the upper-left corner, go to **File** and select the needed file from the **Recent files** section. ### [Source and Translated File Preview](#source-and-translated-file-preview) [Section titled “Source and Translated File Preview”](#source-and-translated-file-preview) In addition to the [WYSIWYG file preview](#wysiwyg-file-preview), which shows files as they would appear when rendered, there are **Source File Preview** and **Translated File Preview** modes that allow users to view the raw content of both source and translated files directly within the Editor. These previews provide insight into the file’s structure, layout, and formatting, helping users ensure accurate translations within the correct context. This is particularly helpful for identifying discrepancies or formatting issues without leaving the Editor. While the **Translated File Preview** is available to all users, the **Source File Preview** is restricted to members with Developer permissions or higher. To open a file in either of these previews, click on the Main menu in the upper-left corner, go to **File**, and select the needed file preview mode. ### [Replace in Suggested Translations](#replace-in-suggested-translations) [Section titled “Replace in Suggested Translations”](#replace-in-suggested-translations) You can easily find and replace suggested translations using the *Replace in Translations* feature. To replace previously added translations with the new ones, follow these steps: 1. On the project *Dashboard* page, select the necessary language. 2. Click **All Strings** > **Translate** (or **All Strings** > **Go to Editor** for projects without a workflow) or choose a file for translation. 3. Click on the Main menu in the upper-left corner. 4. Go to **File** > **Replace in Translations**. 5. Enter the word, phrase, or sentence you want to substitute and the text to replace it with. Similarly to [string search](#string-search), you can use the *Match case* and *Exact match* options to refine the search results. 6. From the drop-down menu, specify the scope of your search, selecting between *File*, *All files*, or *Filtered strings* options. 7. Click **Find** to preview the strings that will be replaced. 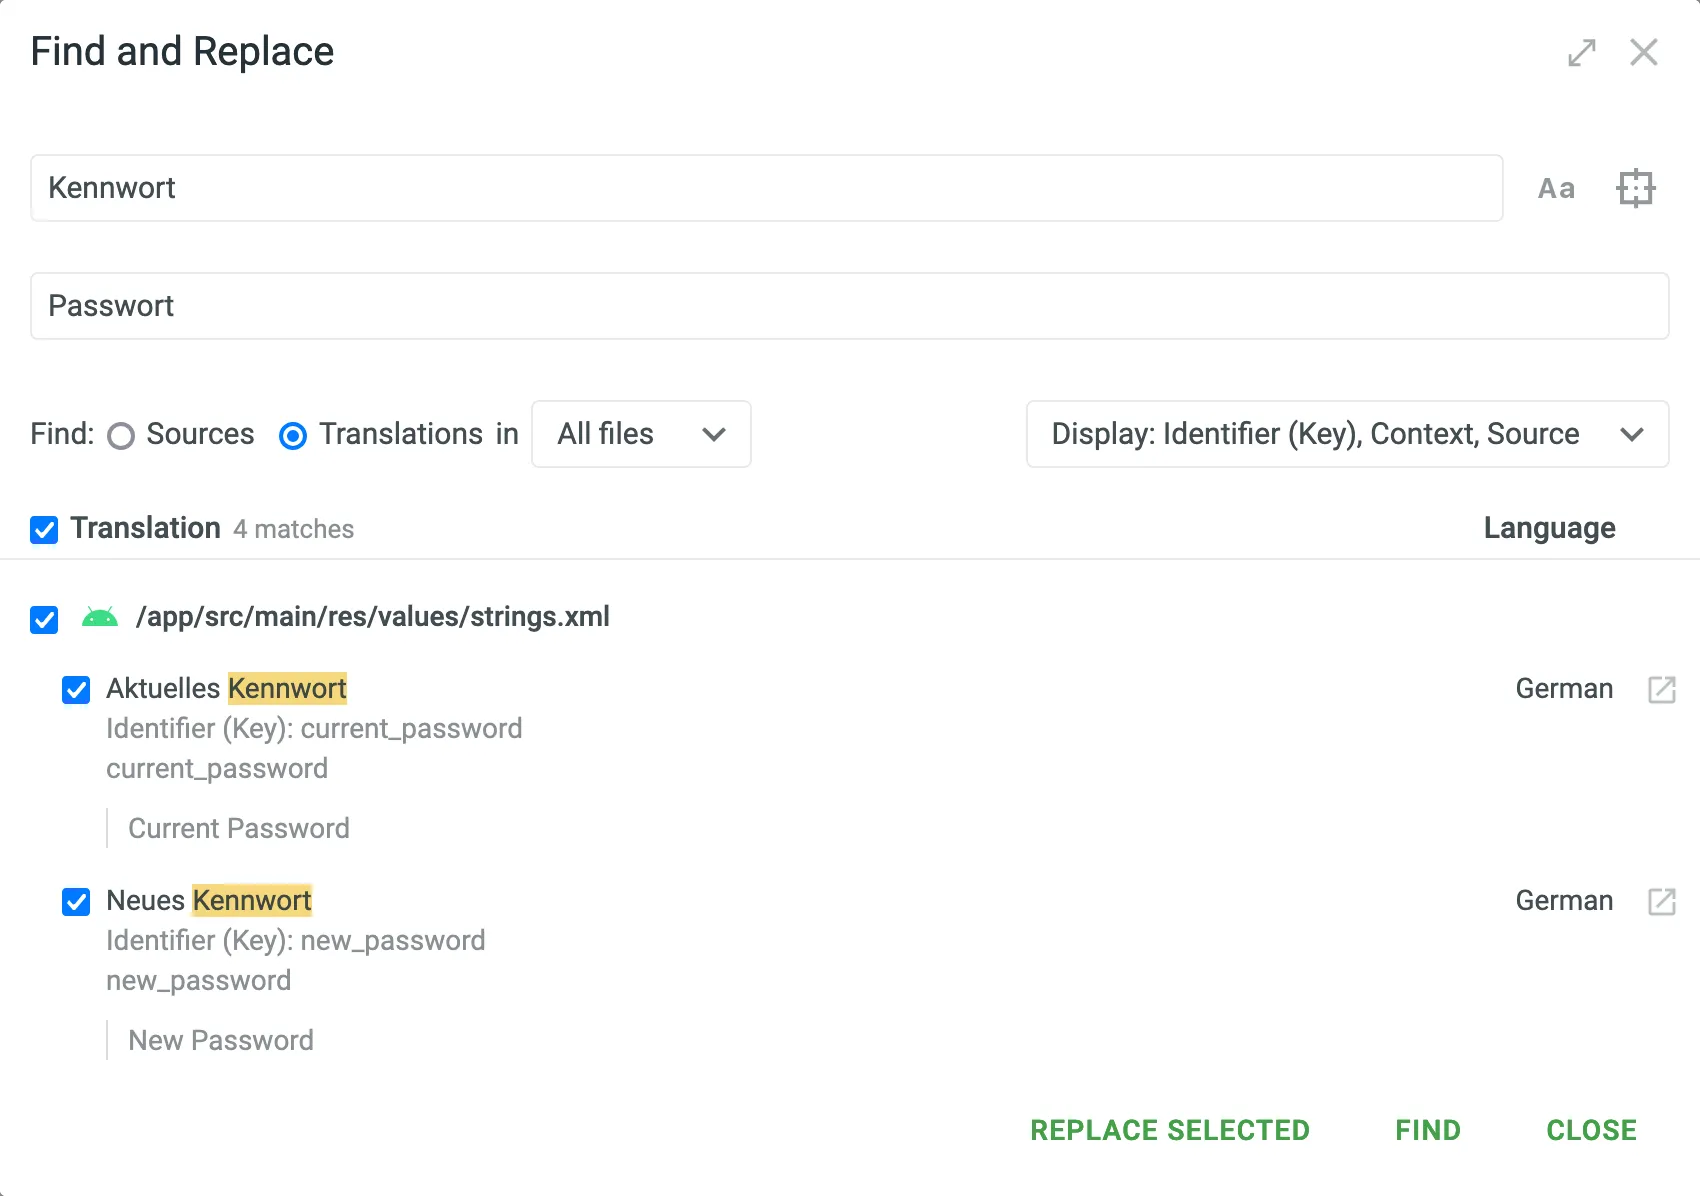 8. *(Optional)* Click the *Settings* drop-down menu on the right and select what information to display in the search results other than translations. You can choose between *Key*, *Context*, and *Source*. 9. Select the translations you want to replace and click **Replace Selected** to finish. While translators can perform replacements only in their own translations, project members with proofreader permissions (or higher) can modify all suggested translations. Authorship of translations is preserved. ### [Replace in Sources](#replace-in-sources) [Section titled “Replace in Sources”](#replace-in-sources) Project members with developer permissions (or higher) can find and replace source texts using the *Replace in Sources* feature. To replace source texts, follow these steps: 1. On the project *Dashboard* page, select the necessary language. 2. Click **Translate All** or choose a file for translation. 3. Click on the Main menu in the upper-left corner. 4. Go to **File** > **Replace in Sources**. 5. Enter the word, phrase, or sentence you want to substitute and the text to replace it with. Similarly to [string search](#string-search), you can use the *Match case* and *Exact match* options to refine the search results. 6. From the drop-down menu, specify the scope of your search, selecting between *File*, *All files*, or *Filtered strings* options. 7. Click **Find** to preview the strings that will be replaced.  8. *(Optional)* Click the *Settings* drop-down menu on the right and select what information to display in the search results other than strings. You can choose between *Key* and *Context*. 9. In the lower-left corner, click the drop-down menu and select the preferred behavior for the translations of the source strings to be replaced. You can choose between *Keep Translations*, *Remove Approvals*, or *Delete Translations*. 10. Select the source strings you want to replace and click **Replace Selected** to finish. ### [Pre-translation in the Editor](#pre-translation-in-the-editor) [Section titled “Pre-translation in the Editor”](#pre-translation-in-the-editor) The **Pre-translation** feature in the Editor allows you to apply translations to multiple strings directly within the Editor using Translation Memory (TM), Machine Translation (MT), or AI. This feature is available to project members with language coordinator permissions or higher. To apply Pre-translation in the Editor, follow these steps: 1. You can apply pre-translation in the Editor in two ways: * **Main menu** – click on the Main menu in the upper-left corner, go to **File** and select the preferred pre-translation method. * **String menu** (available in **Side-by-Side** and **Multilingual** modes) – click in the upper-right and select the preferred pre-translation method. 2. Configure the following pre-translation parameters: * **Scope** – select which strings to apply pre-translation to: * **Selected strings** (Specific to **Side-by-Side** and **Multilingual** modes) – applies only to strings manually selected in the Editor. * **Filtered strings** – applies to all strings matching the current filter. * **File** – applies to the currently opened file. * **All files** – applies to all strings across all files in the project, regardless of the file currently open in the Editor. * **Apply to untranslated strings only** – when selected, pre-translation will only be applied to strings that don’t have any translations. * **Allow duplicate translations** – adds translations even if they duplicate existing ones. Useful when comparing AI prompts or MT engines in the [Pre-translation Accuracy](/enterprise/project-reports/#pre-translation-accuracy) report, as it ensures that all translations are registered as new and included in accuracy calculations. * **Minimum match ratio** (Specific to pre-translation via TM) - select either **100%** or **Perfect match (101%)** as the minimum similarity required for TM matches. Read more about [TM Match Types](/enterprise/translation-memory/#tm-match-calculation). * **Skip approved translations** (Specific to pre-translation via TM and MT) – prevents overwriting strings that already have approved translations. * **Approve added translations** (Specific to pre-translation via TM) – allows you to auto-approve translations added through pre-translation. Options include: * **All** – approve all added translations. * **With perfect match** – approve only those with a 101% match. * **With perfect match (approved previously)** – approve perfect matches only if they were already approved before. * **All (skip auto-substituted translations)** – approve everything except translations improved by auto-substitution. * **Translation engine** (Specific to pre-translation via MT) – select the machine translation engine to use. * **AI prompt** (Specific to pre-translation via AI) – select the prompt that will guide the AI model’s behavior during pre-translation. 3. Click **Pre-Translation**. In Side-by-side and Comfortable modes, pre-translation is applied to the single language currently selected in the Editor. In Multilingual mode, translations are applied across all selected languages, as this mode allows working with multiple languages simultaneously. Read more about [Multilingual mode](#multilingual-mode). Use the **Queue** option in the String menu to track and manage all triggered pre-translation instances. Read more about [Pre-translation Queue](/enterprise/pre-translation/#pre-translation-queue). ### [Advanced Filter](#advanced-filter) [Section titled “Advanced Filter”](#advanced-filter) You can create a custom filter of strings by clicking the *Filter strings* icon and choosing *Advanced Filter*. Use this filter to define multiple parameters at once, such as: * strings added or updated within a specific period * translations updated * [labels](/enterprise/project-settings/labels/) * duplicates, comments, approvals, and more This helps locate the needed strings faster, especially in large projects. #### [Filtering by Labels](#filtering-by-labels) [Section titled “Filtering by Labels”](#filtering-by-labels) In the **Include by labels** and **Exclude by labels** fields, you can select one or more labels to refine your search. Additionally, choose how selected labels should be evaluated using the **Include match rule** and **Exclude match rule** settings: * **All selected labels** – returns only strings that match **all** selected labels (AND logic). * **Any selected label** – returns strings that match **at least one** of the selected labels (OR logic). This allows you to narrow or expand the filtered results depending on your needs. Here are a couple of examples of how this logic works in practice: * Include by labels example – to find strings tagged with both `ui` and `button`, select those labels and choose **All selected labels** as the match rule. * Exclude by labels example – to exclude all strings tagged either `marketing` or `deprecated`, select those labels and choose **Any selected label** as the match rule. 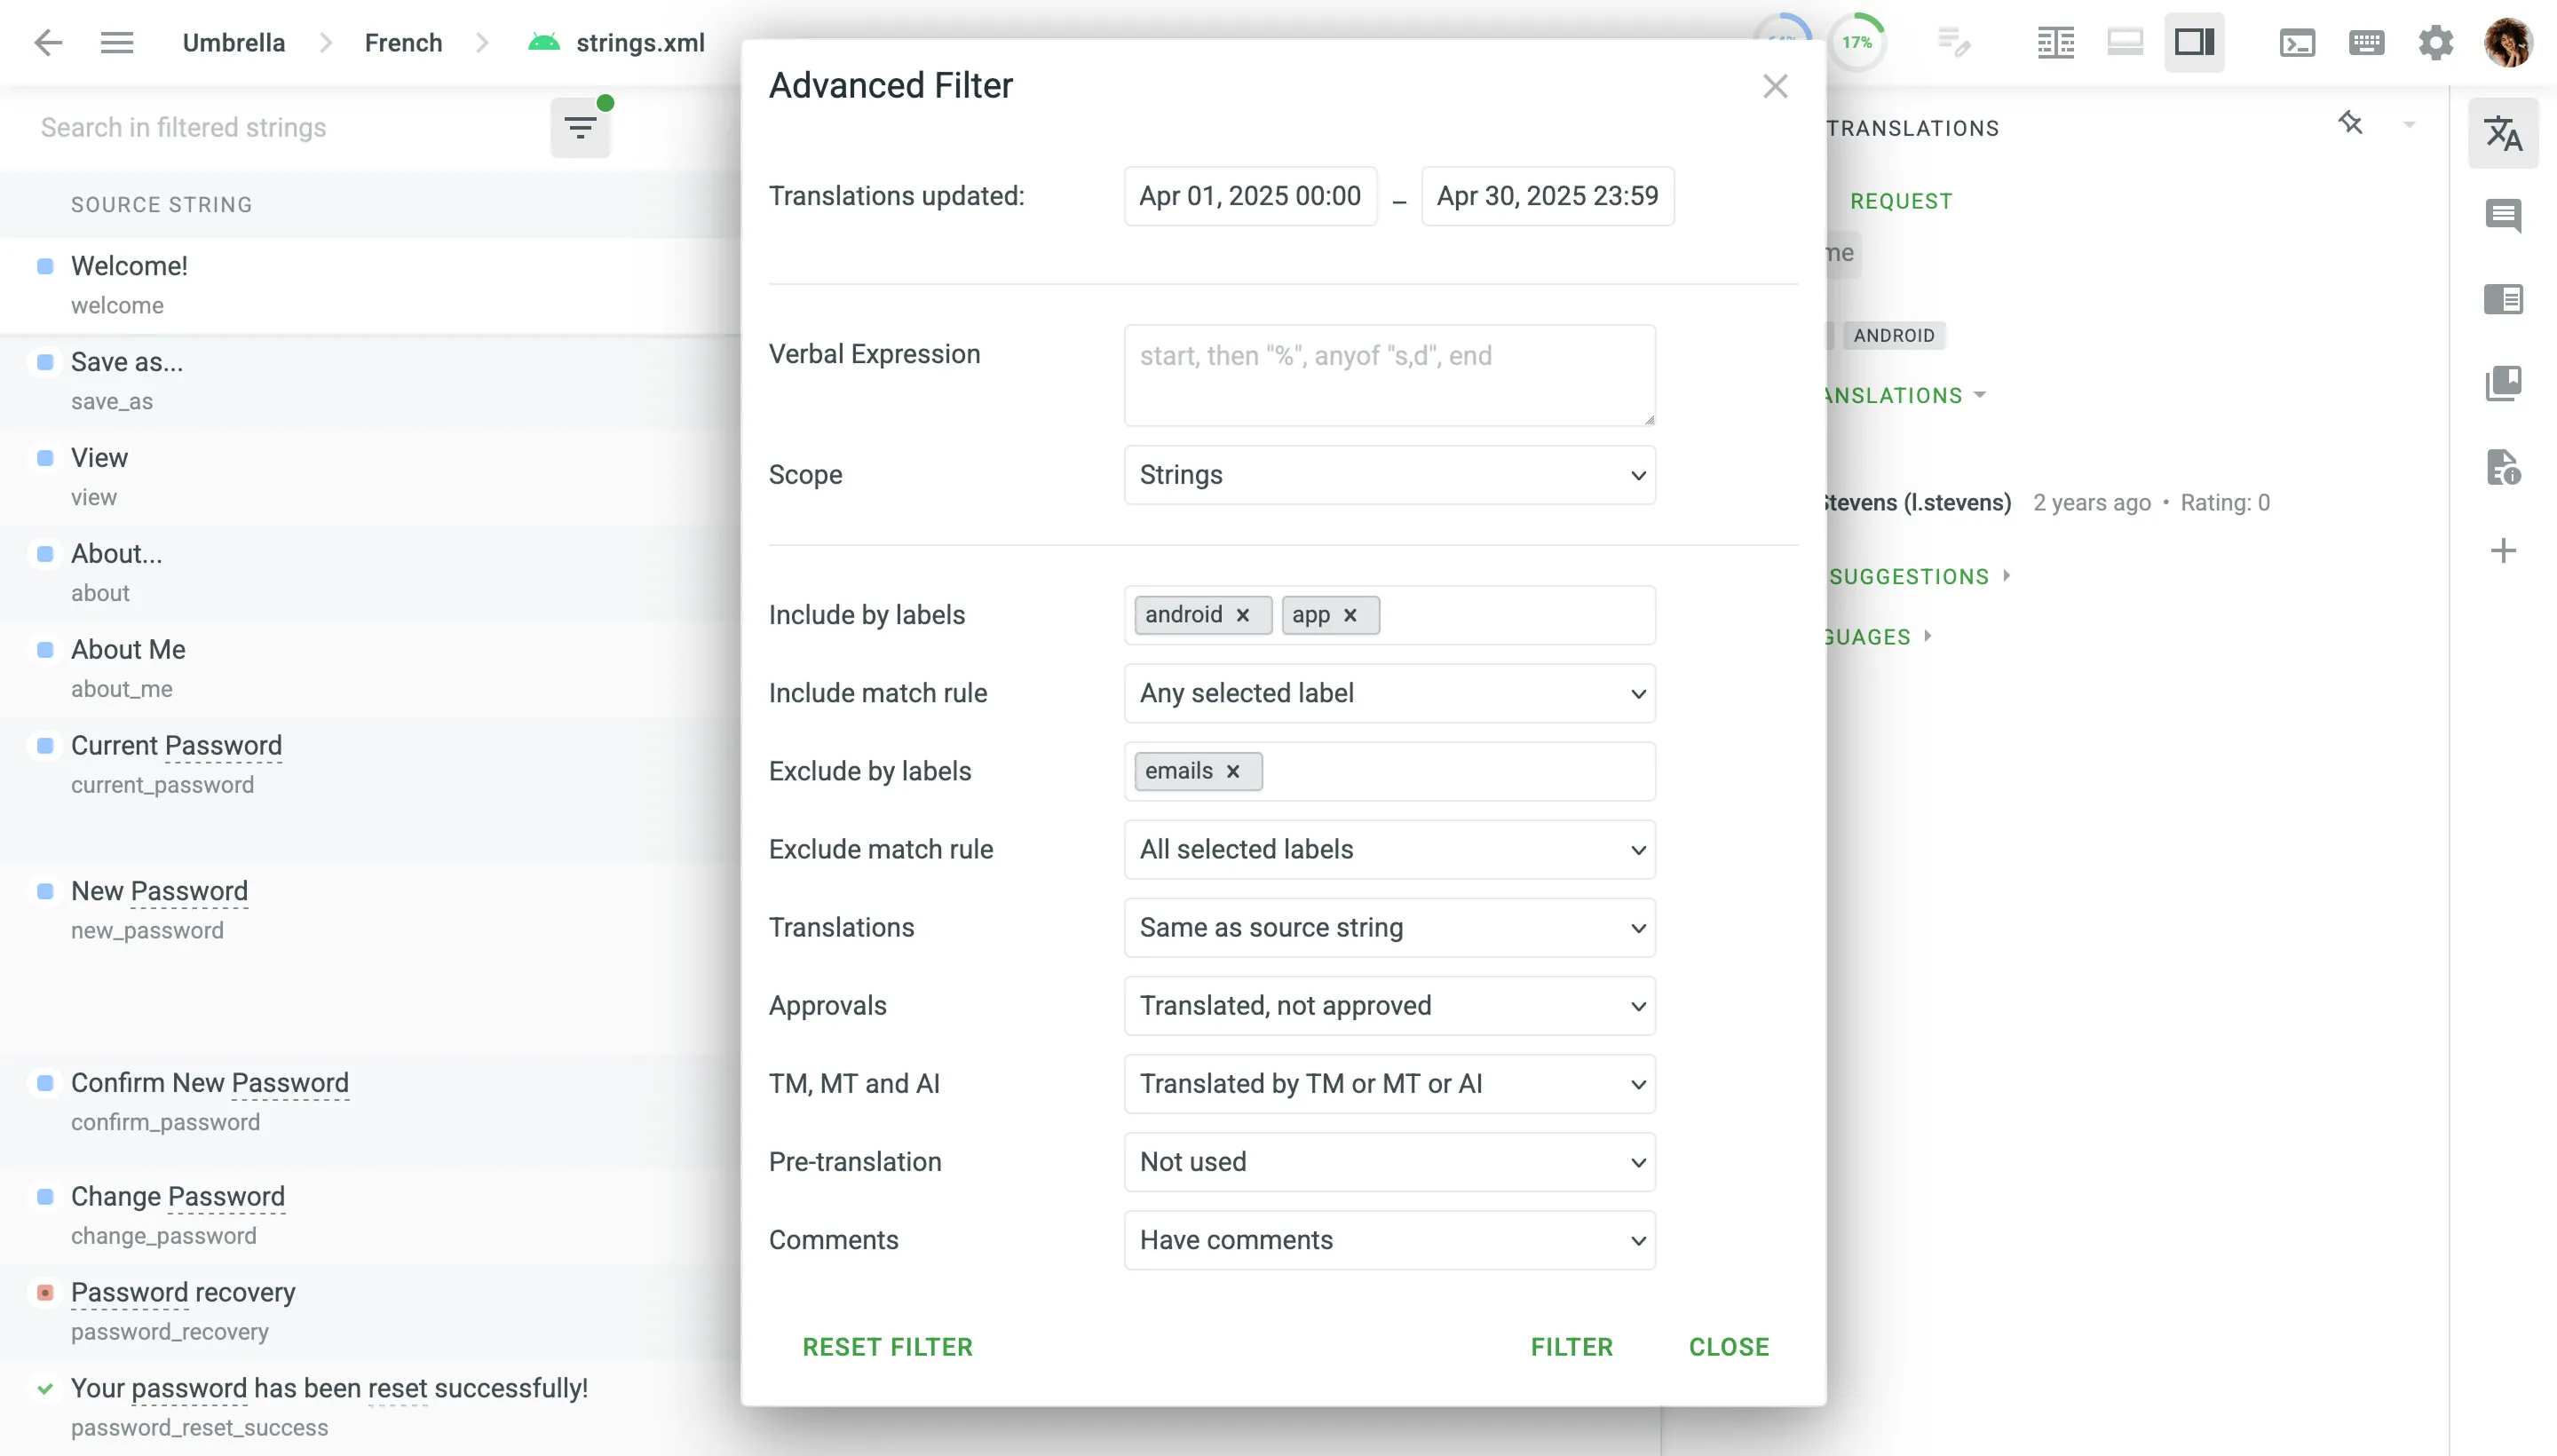 ### [AI/CroQL Filter](#aicroql-filter) [Section titled “AI/CroQL Filter”](#aicroql-filter) The AI/CroQL Filter allows you to filter strings similarly to the Advanced Filter but offers greater flexibility through the Crowdin Query Language (CroQL). #### [Generate CroQL with AI](#generate-croql-with-ai) [Section titled “Generate CroQL with AI”](#generate-croql-with-ai) In the **Generate CroQL with AI** field, you can write queries in plain text, which will then be transformed into a CroQL expression using AI. To get the best results possible, make sure your queries are clearly structured. For example, you can enter: *Return strings where there are translations by the user “username” into Ukrainian*. Once you specify your query, press `Enter` , and the AI will generate and populate the **CroQL expression** field with the corresponding CroQL expression. Alternatively, you can directly input a pre-prepared CroQL expression in the **CroQL expression** field. Click **Filter** to apply the specified filter to the strings in the Editor or click **Reset Filter** to clear the current filter settings. Read more about [Crowdin Query Language (CroQL)](/developer/croql/). ### [Pinning Sections](#pinning-sections) [Section titled “Pinning Sections”](#pinning-sections) In Side-by-Side or Multilingual modes, you can pin specific sections to keep them visible while navigating through other parts of the interface. This helps you access the pinned content quickly without losing sight of essential information. ### [Customizing Right Panel Section Order](#customizing-right-panel-section-order) [Section titled “Customizing Right Panel Section Order”](#customizing-right-panel-section-order) To personalize your workspace in the Editor, you can reorder the sections in the right panel (e.g., AI Assistant, Context and Translations, Comments, etc.) by dragging their icons. Click and hold the icon of the section you’d like to move, then drag it to a new position. The updated order will remain applied as you continue working in the Editor. ## [Tasks in the Editor](#tasks-in-the-editor) [Section titled “Tasks in the Editor”](#tasks-in-the-editor) Once a translator or proofreader has a task assigned, all the task details are accessible from the editor: The name of the task is displayed at the top of the toolbar. 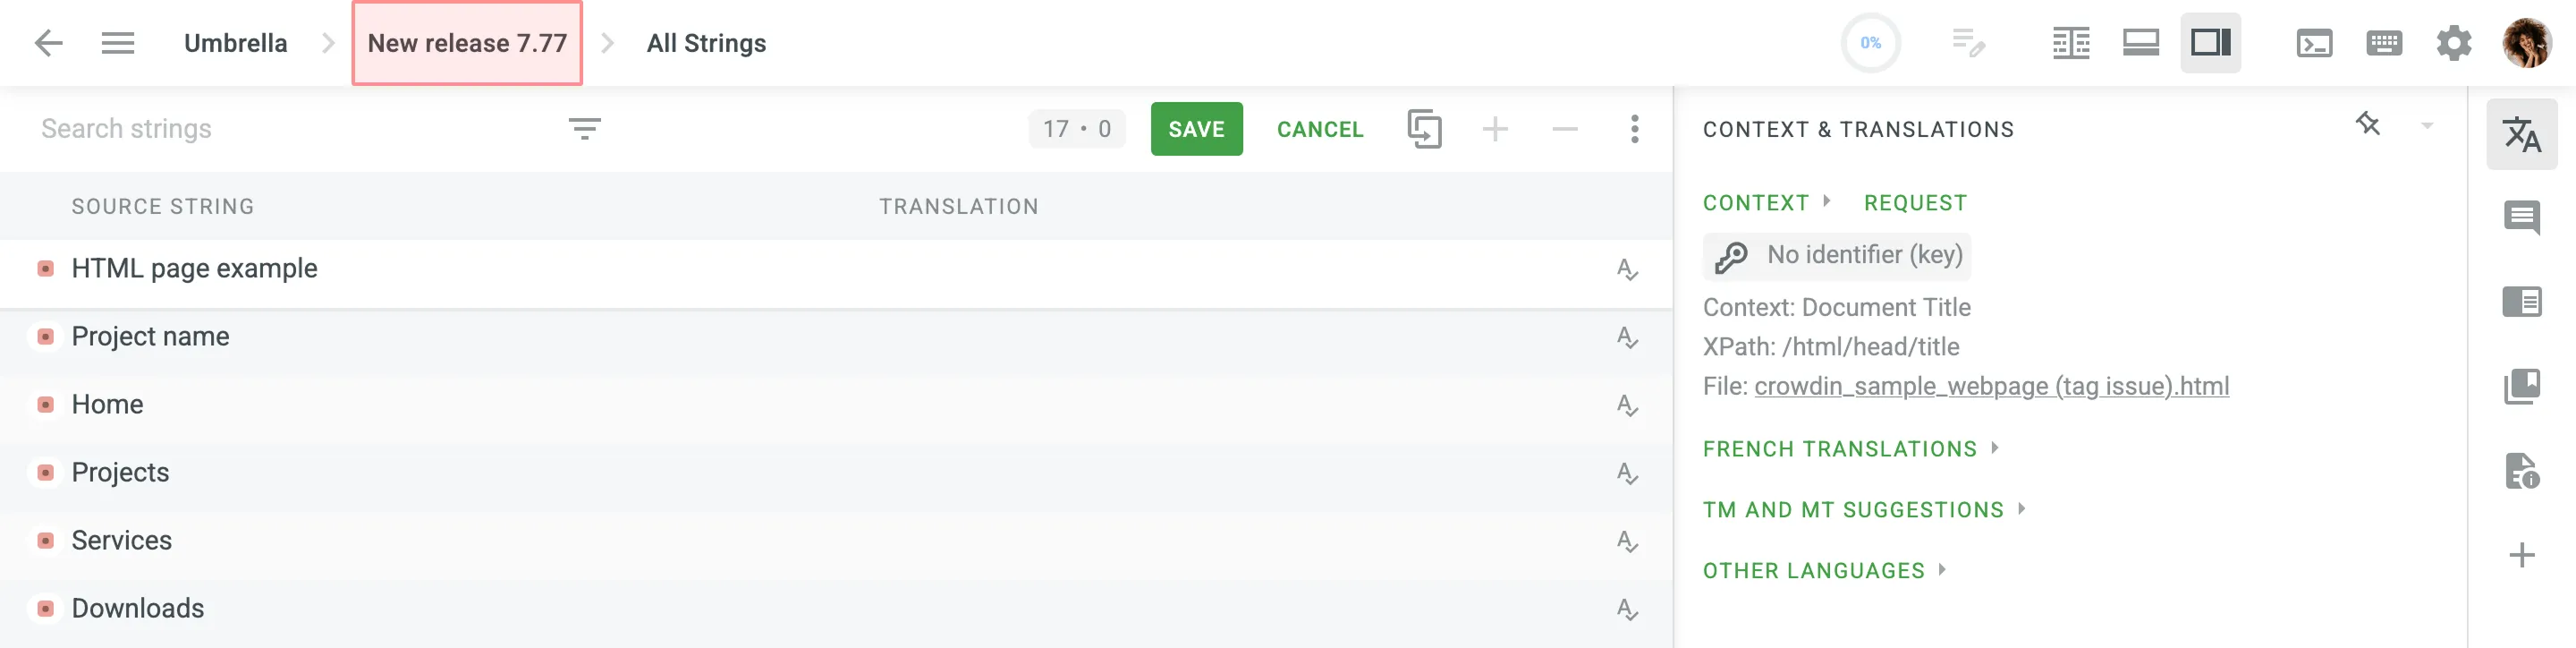 Filters and searches apply to a particular task only. Task details can be accessed by clicking the menu in the upper-left corner. The task menu consists of the following components and features: * name, due date, language, type of the task, and assignee * options to download and upload translations for the particular task * possibility to quit the particular task editor and show all project strings * [Replace in Translations](#replace-in-suggested-translations) option * [Replace in Sources](#replace-in-sources) option 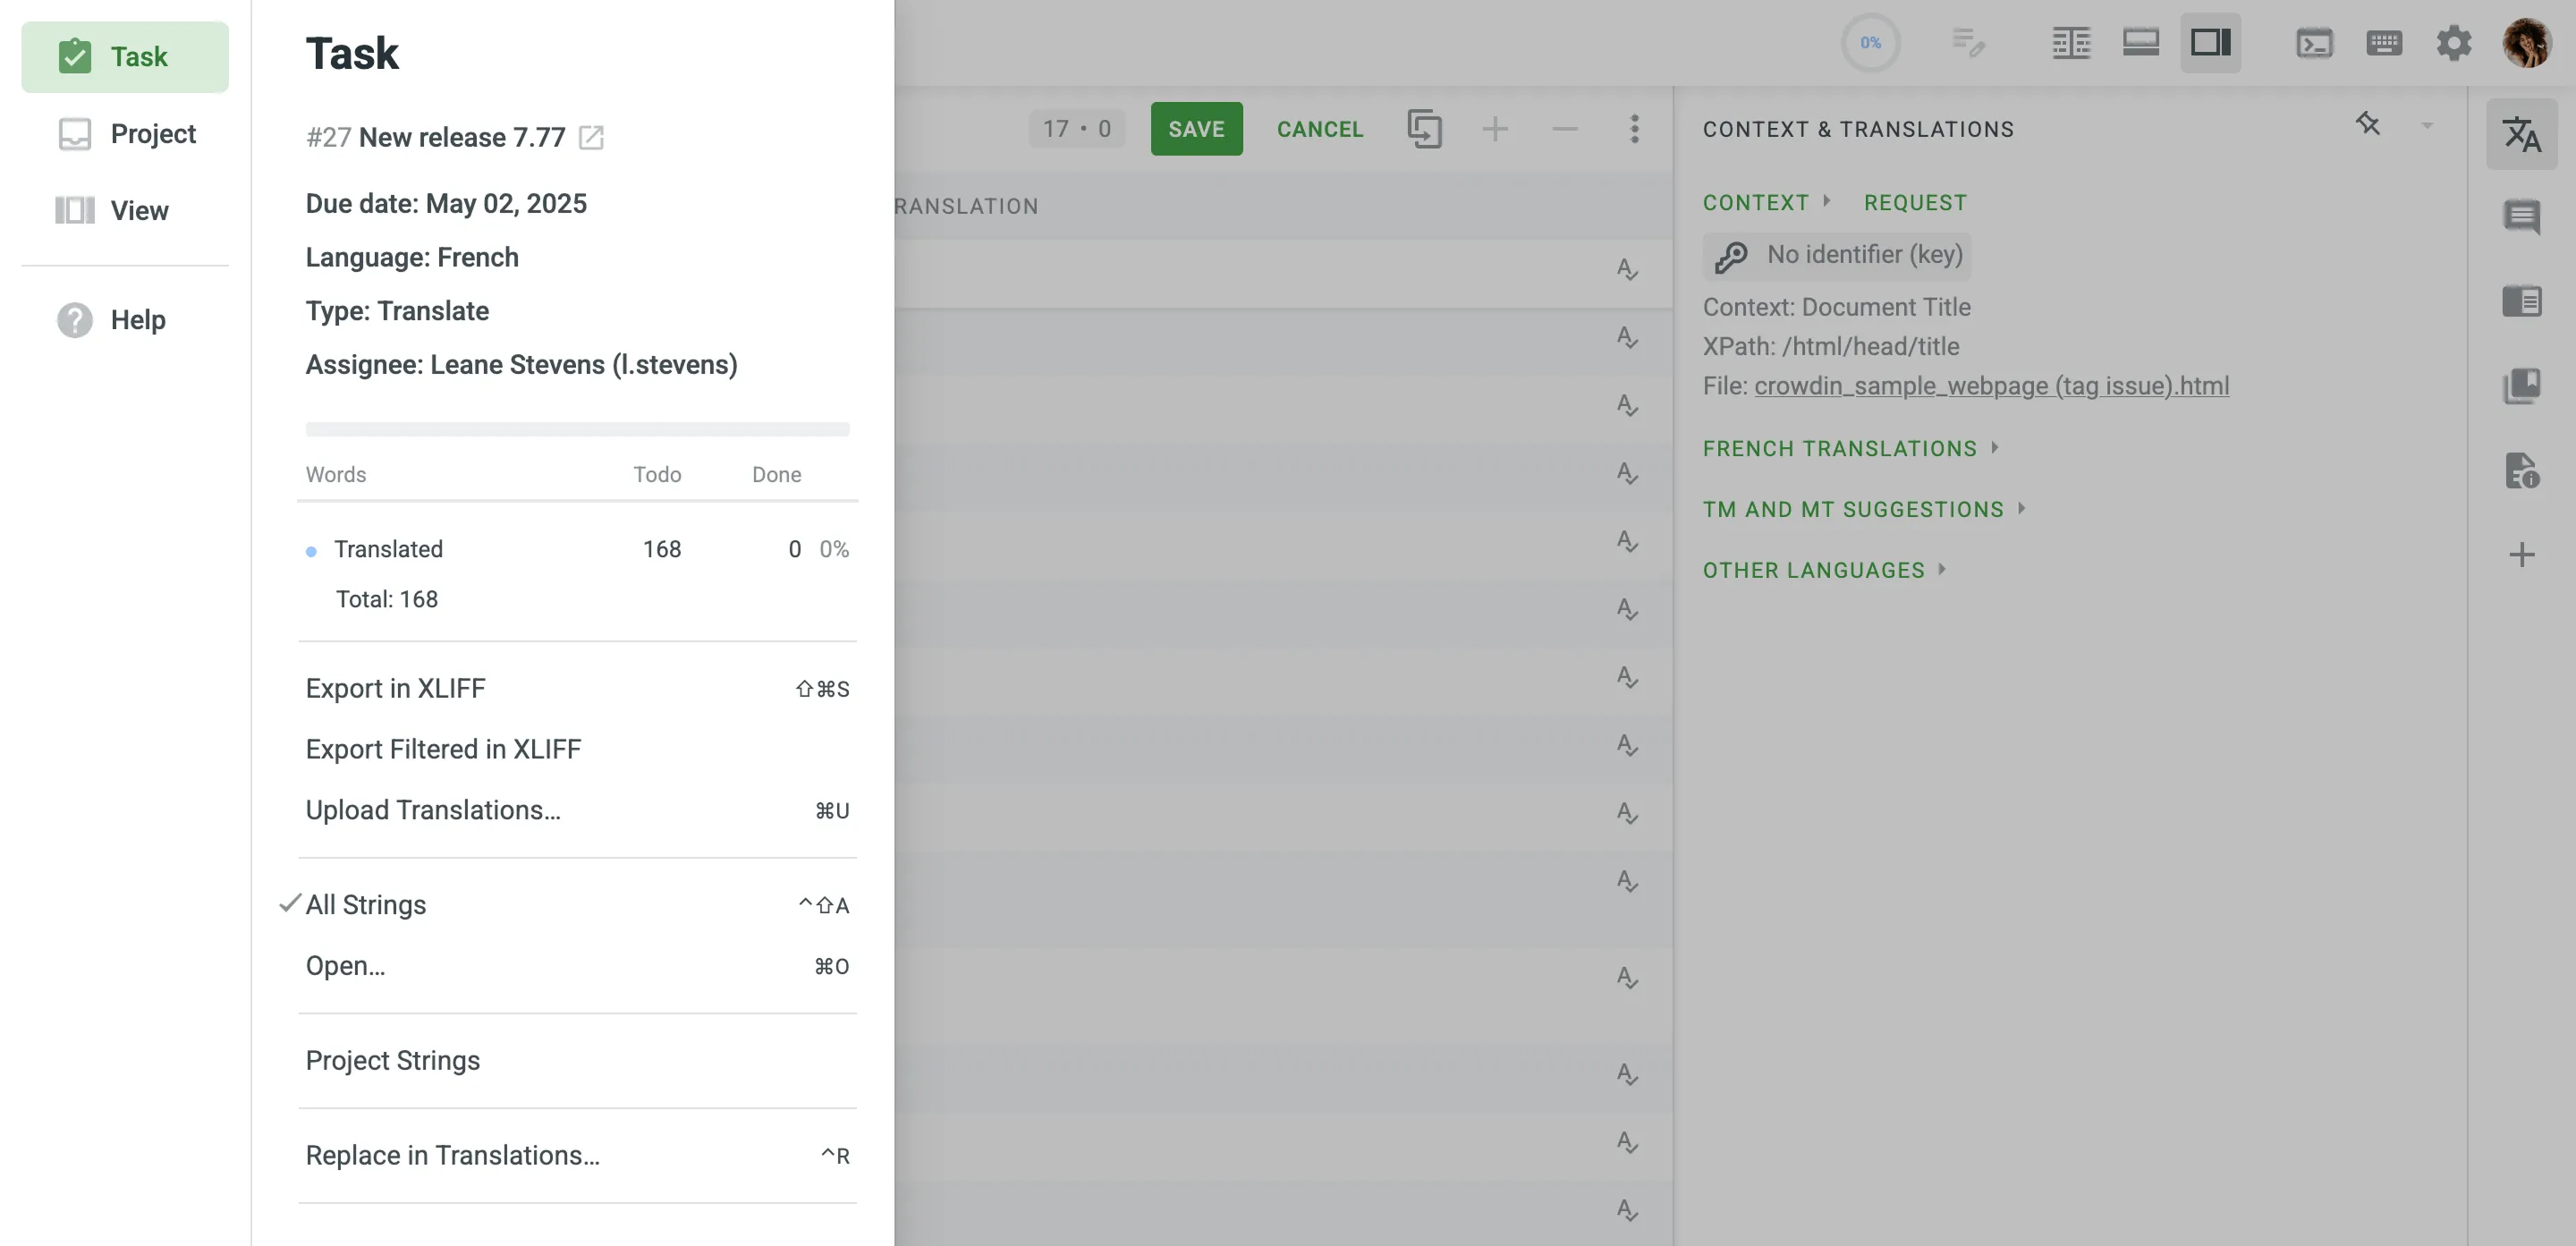
# Start with an Organization
> Learn how to create an organization, sign up and login to the workspace
An organization consolidates all company members involved in localization and contributors (translators, proofreaders, vendors, etc.) in one space. Within your organization, you can: * Create and manage projects individually or as part of groups. * Create workflow templates and apply them to individual projects and groups. * Grant admin access at different levels. * Assign translators, proofreaders, and vendors to specific workflow steps. * Use [built-in AI features](/enterprise/crowdin-ai/) to improve translation quality and productivity. * Extend functionality with apps and integrations from the [Crowdin Store](https://store.crowdin.com/). ## [Creating an Organization](#creating-an-organization) [Section titled “Creating an Organization”](#creating-an-organization) When you create an organization in Crowdin Enterprise, you also create your personal account and automatically become the organization owner. The owner has full access to organization-level settings, billing, user management, and more. Other users [join existing organizations by invitation](#signing-up-by-an-invitation) and become their members. To create your organization and sign up for your account, follow these steps: 1. Open the signup page. 2. Select your preferred data center (**US Data Center** or **EU Data Center**). This defines where your organization’s data (files, strings, and other resources) will be stored. 3. Enter your organization’s name. It will also be used in the URL (e.g., `organization-name.crowdin.com`). 4. Fill in all the fields with your account data and click **Create Organization**. 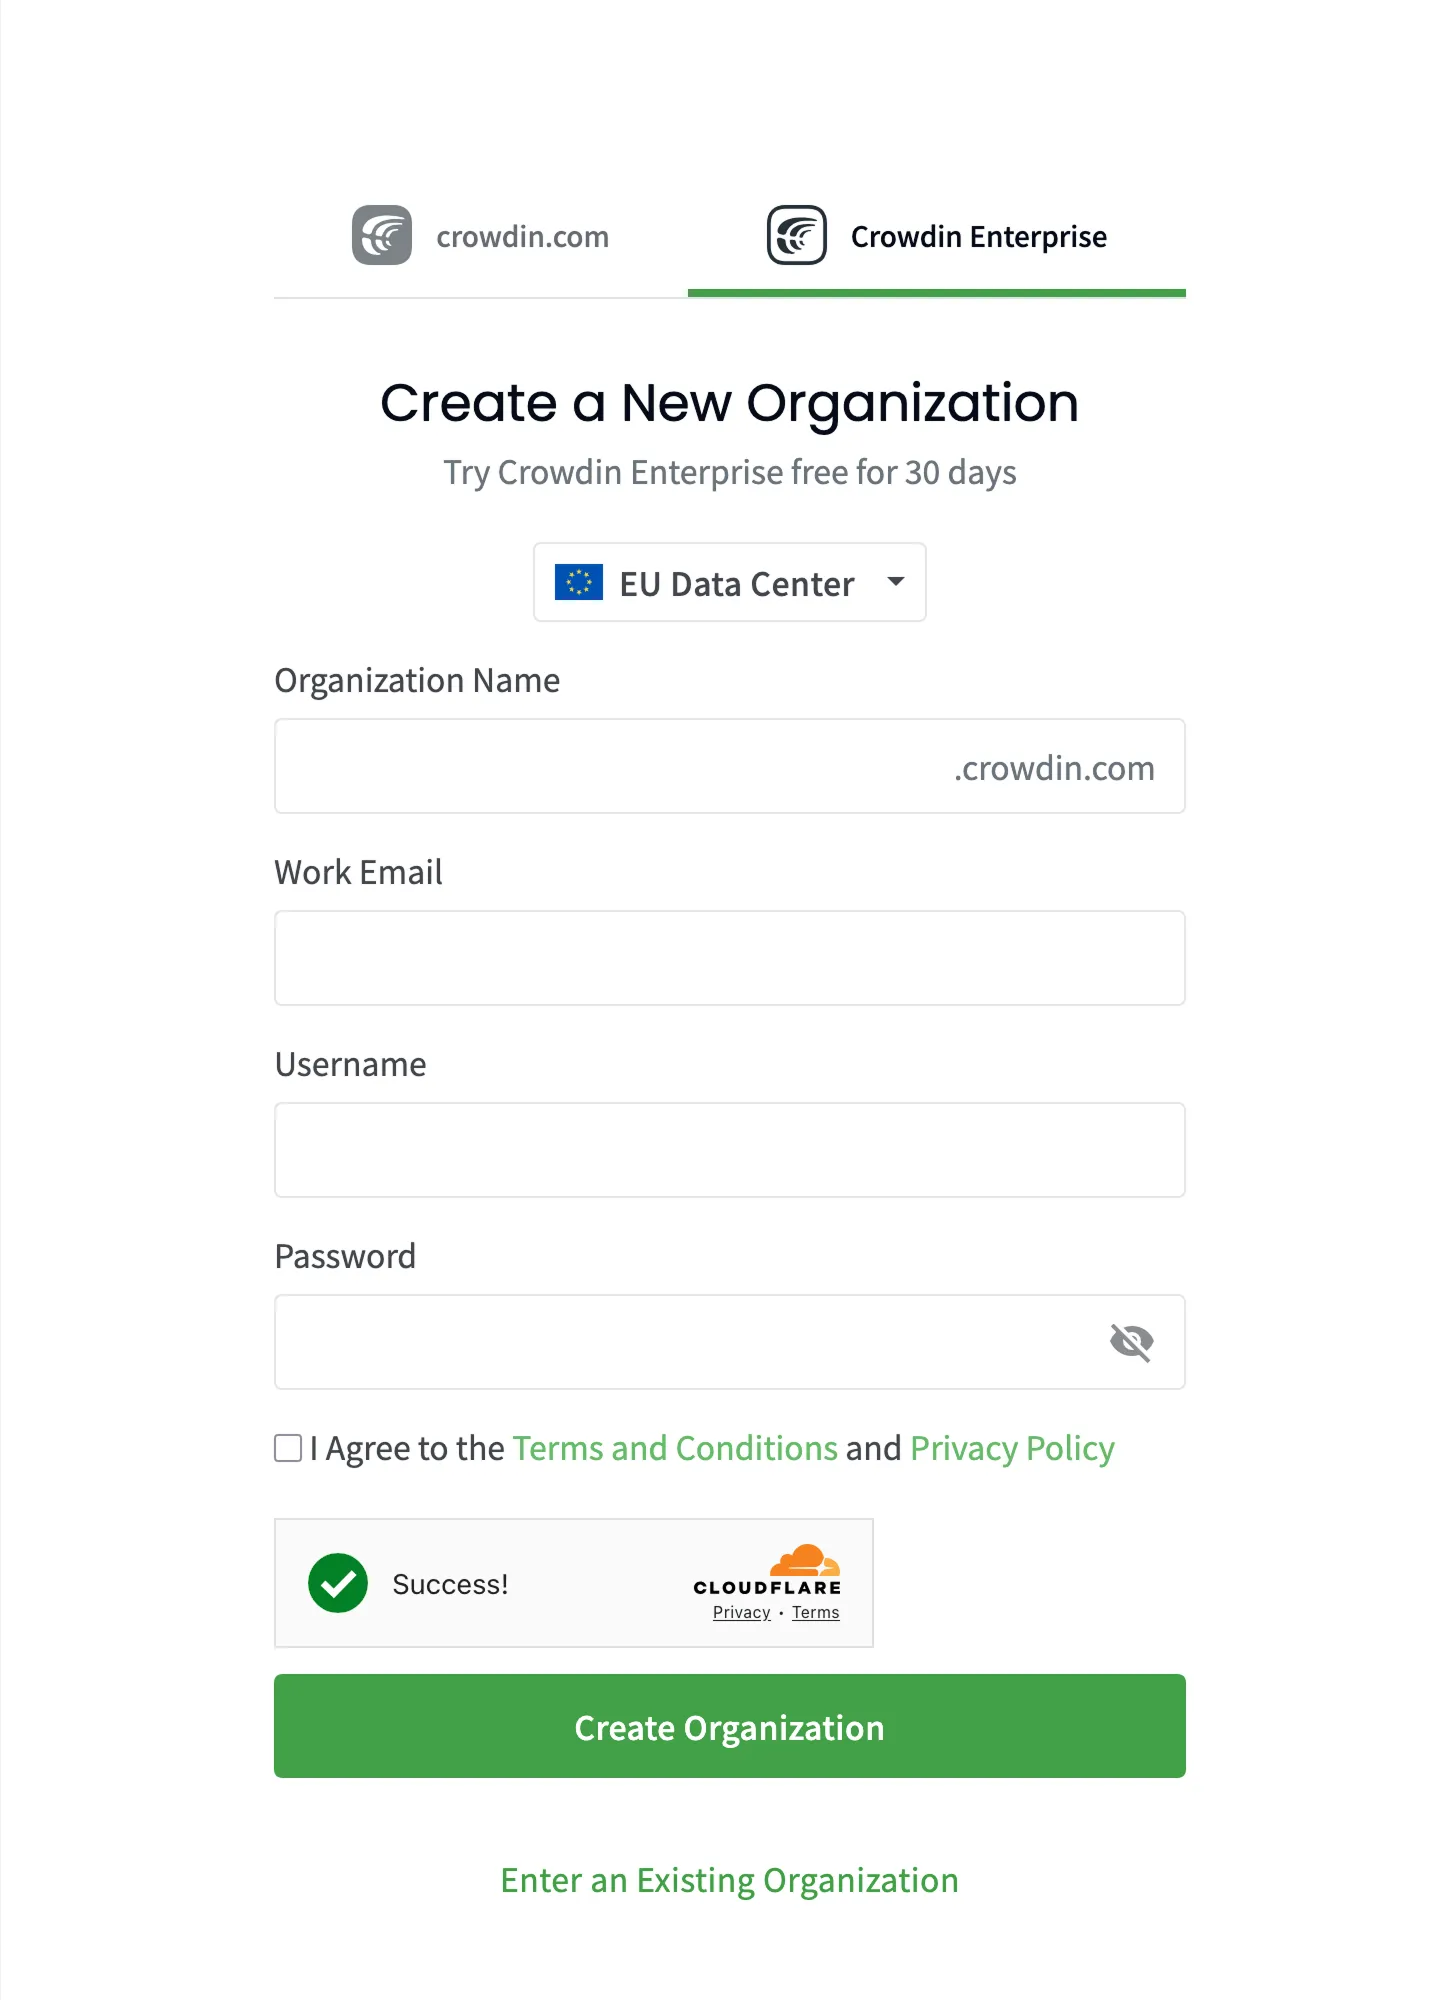 5. Go to your inbox, open the activation email, and click **Activate Organization**. Caution The organization name used in the URL cannot be changed. All other personal data can be changed in your [Account Settings](/enterprise/account-settings/). ## [Signing Up by an Invitation](#signing-up-by-an-invitation) [Section titled “Signing Up by an Invitation”](#signing-up-by-an-invitation) Join an organization to start working on localization projects together with your team. Once you receive an invitation, follow these steps to join an organization: 1. Open the invitation email and click **Accept Invitation**. 2. Create a username and password. 3. Click **Create Account**. 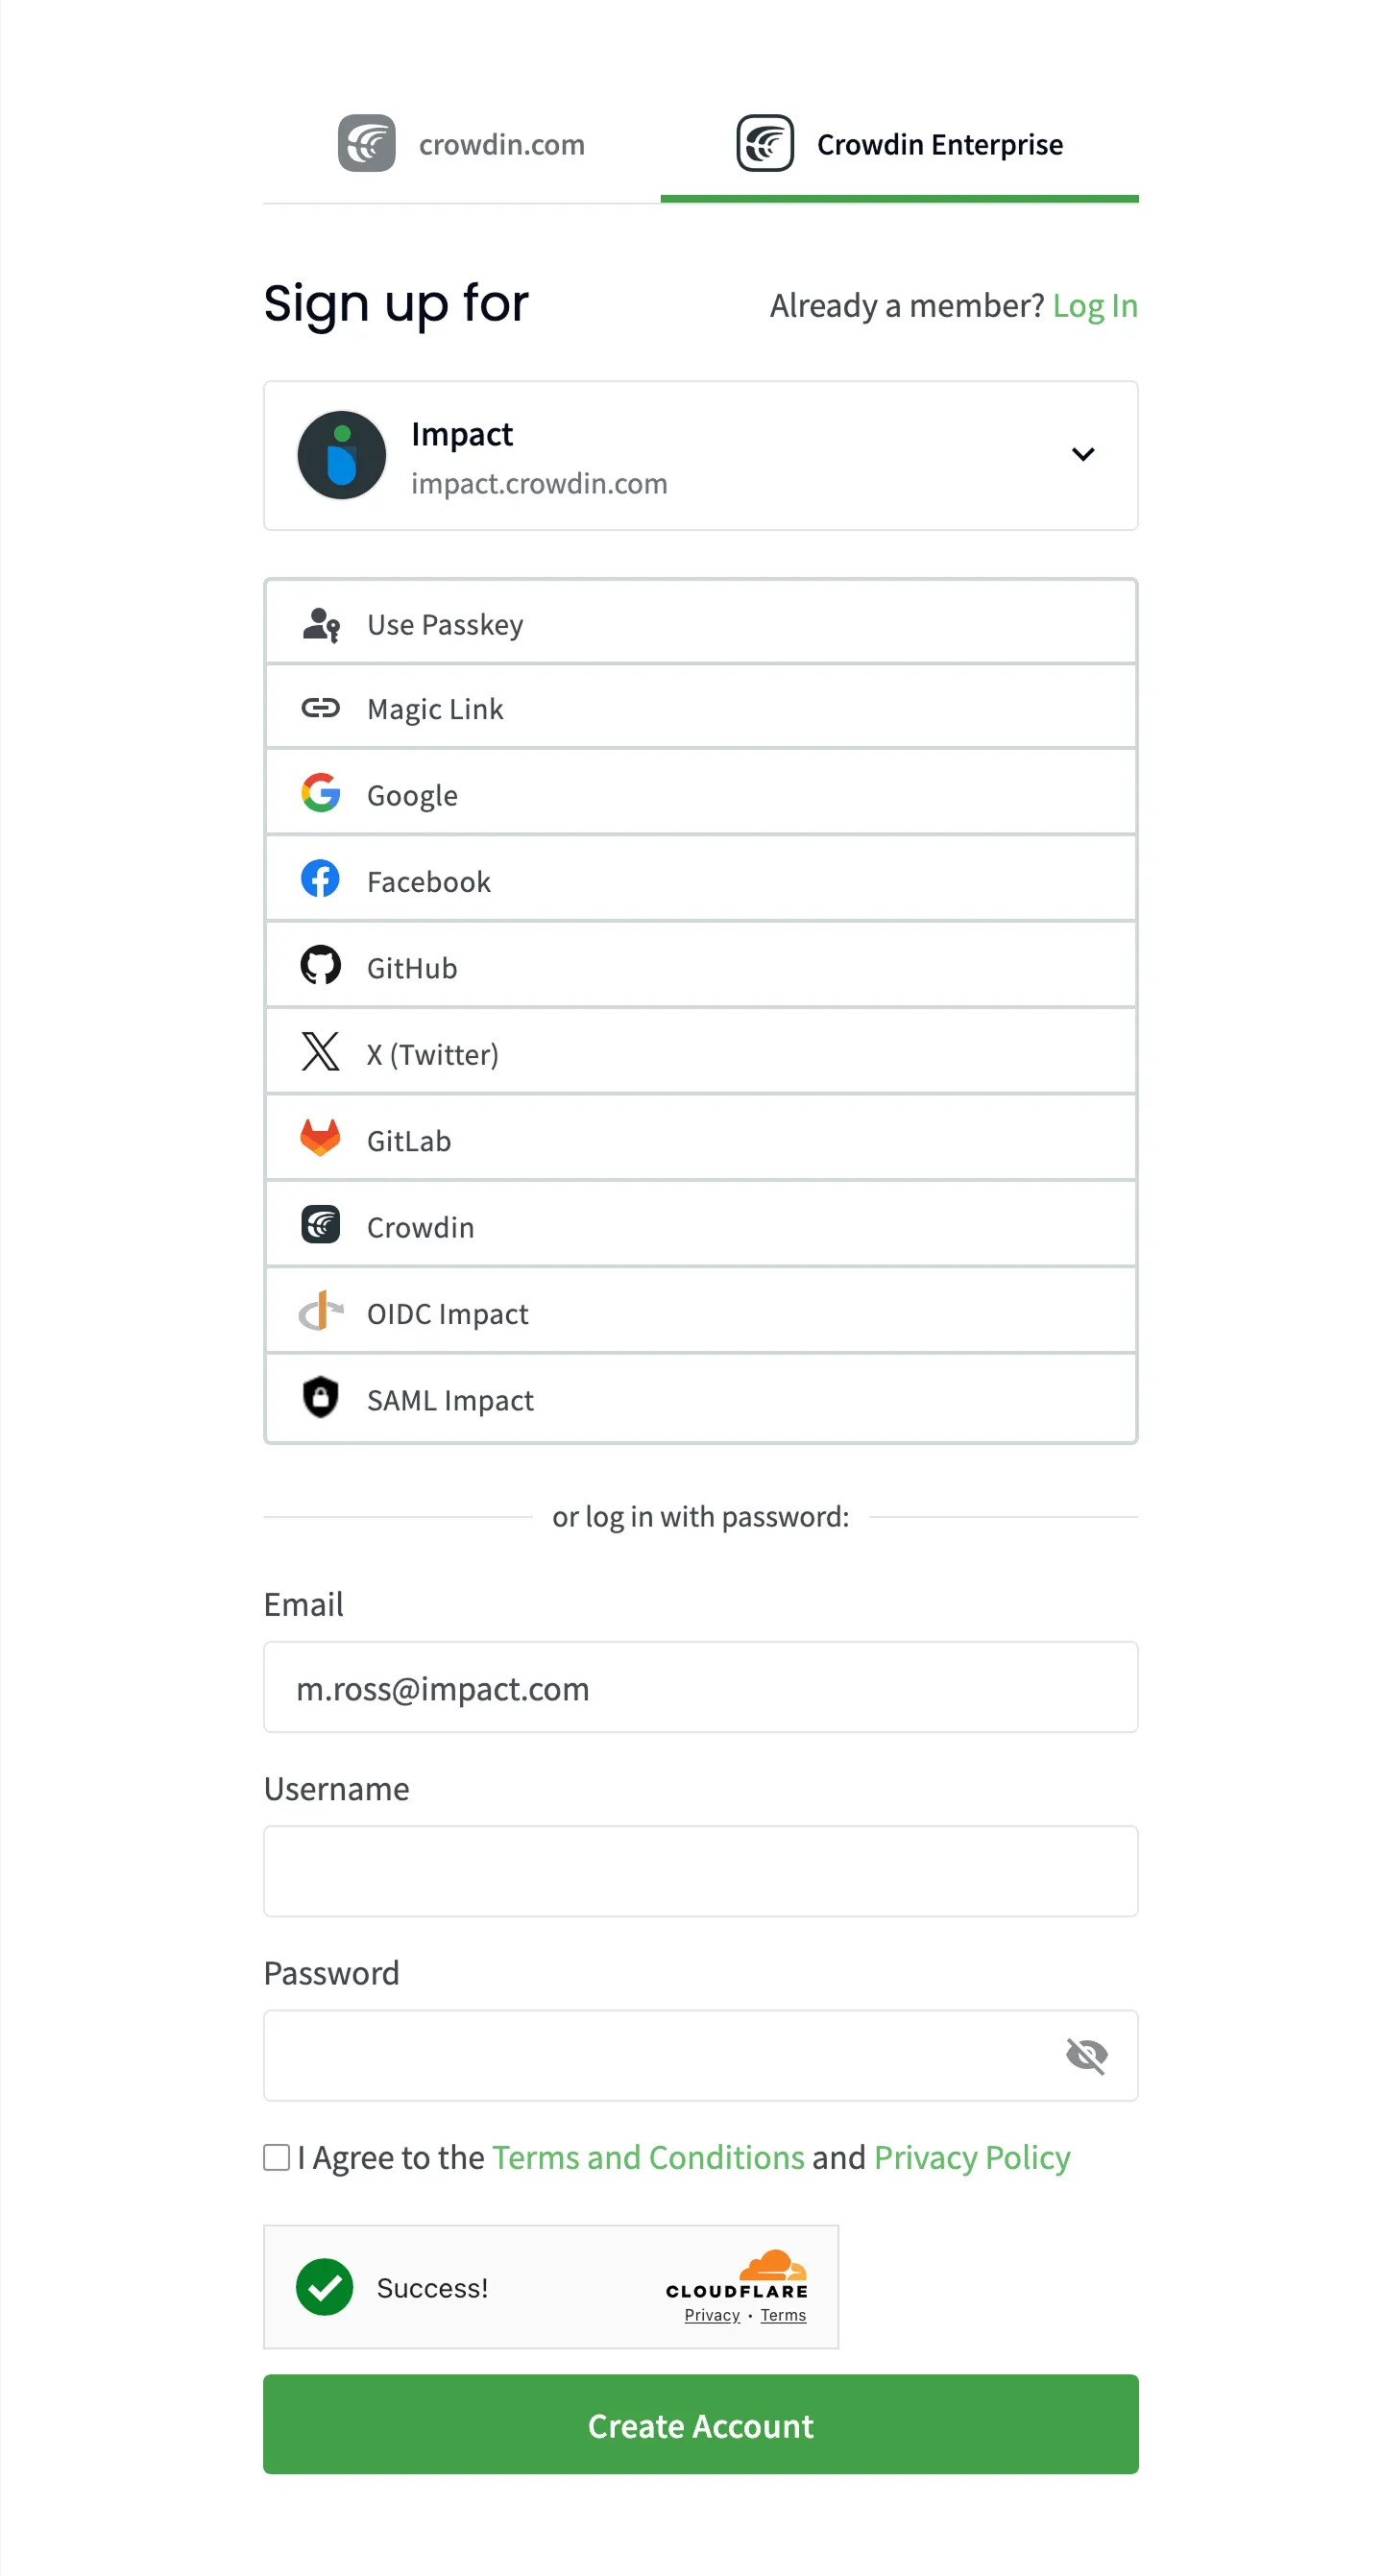 ## [Logging in to an Organization](#logging-in-to-an-organization) [Section titled “Logging in to an Organization”](#logging-in-to-an-organization) Once your organization is created and activated, follow these steps to log in: 1. Open the login page. 2. Enter your organization’s name and click **Continue**. 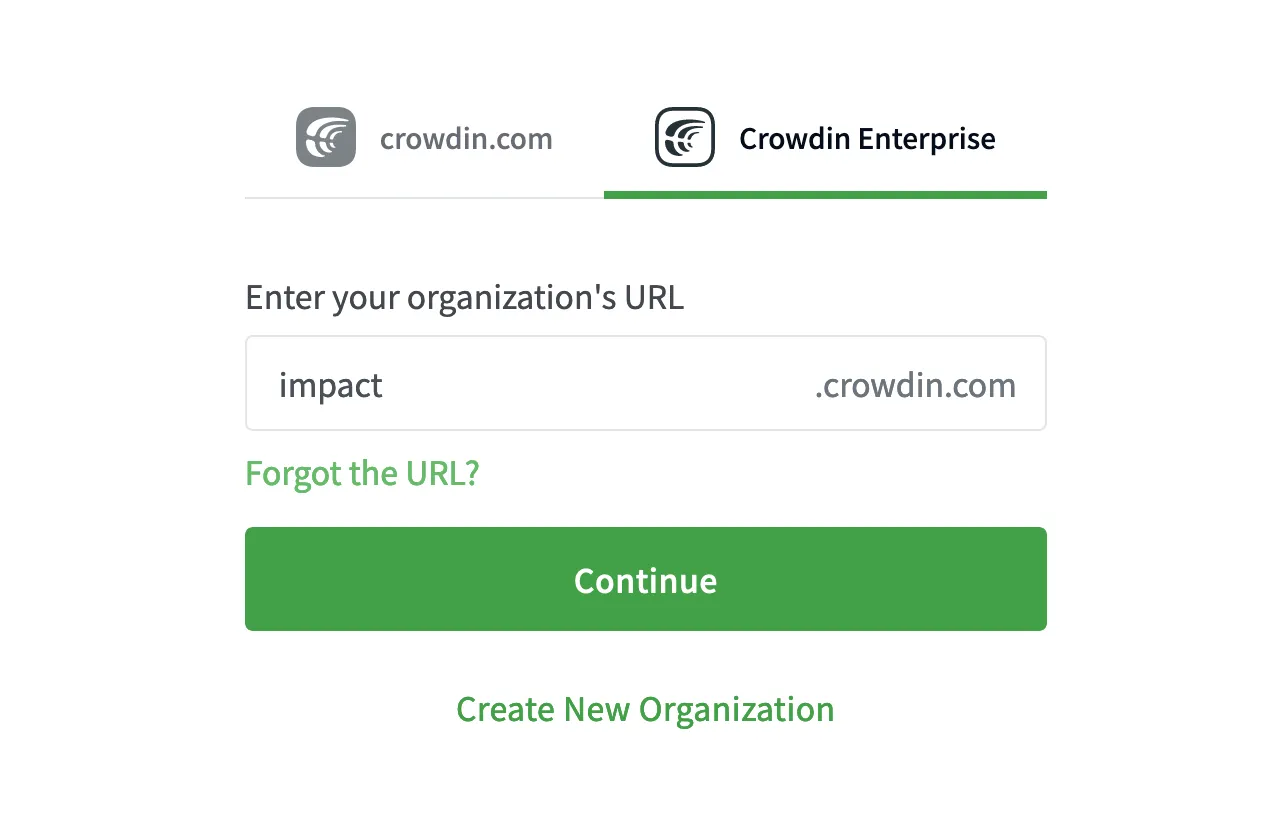 3. Enter your email or username and password. 4. Click **Log in**. ## [Find Your Organization URL](#find-your-organization-url) [Section titled “Find Your Organization URL”](#find-your-organization-url) Here’s the fastest way to locate the organizations you have access to: 1. Open the login page and select **Crowdin Enterprise**. 2. Click **Forgot the URL?**. 3. Add your email address. 4. Click **Confirm**. We’ll send you login links for the Crowdin Enterprise organizations associated with the address you enter.
# Organization Members
> Manage organization members and their roles in your project
Managing organization members in Crowdin Enterprise includes assigning project roles, granting admin or manager access, adding users to teams, contacting them, and more. ## [Viewing and Searching Users](#viewing-and-searching-users) [Section titled “Viewing and Searching Users”](#viewing-and-searching-users) Open your organization’s **Workspace** and select **Users** on the left sidebar to view and manage the list of organization members in the **Users** tab. The list displays each user’s name, team, status, joining date, and last activity. To filter users, click and use the available filter options: * Organization role: All, Admin, Manager, Vendor, Client. * Status: All, Active, Pending, Blocked. * Team: All, specific team. * Projects: All, specific project. * Project role: All, Manager, Developer, Translator, Proofreader, Language Coordinator, Member. * Languages: All, specific language. * Last seen: Any date, custom range. * 2FA: All, Two-factor authentication enabled, Two-factor authentication disabled. Use the **Search** field to find users by name or username. Click a column heading (e.g., **Name** or **Last seen**) once or twice to toggle ascending or descending order. 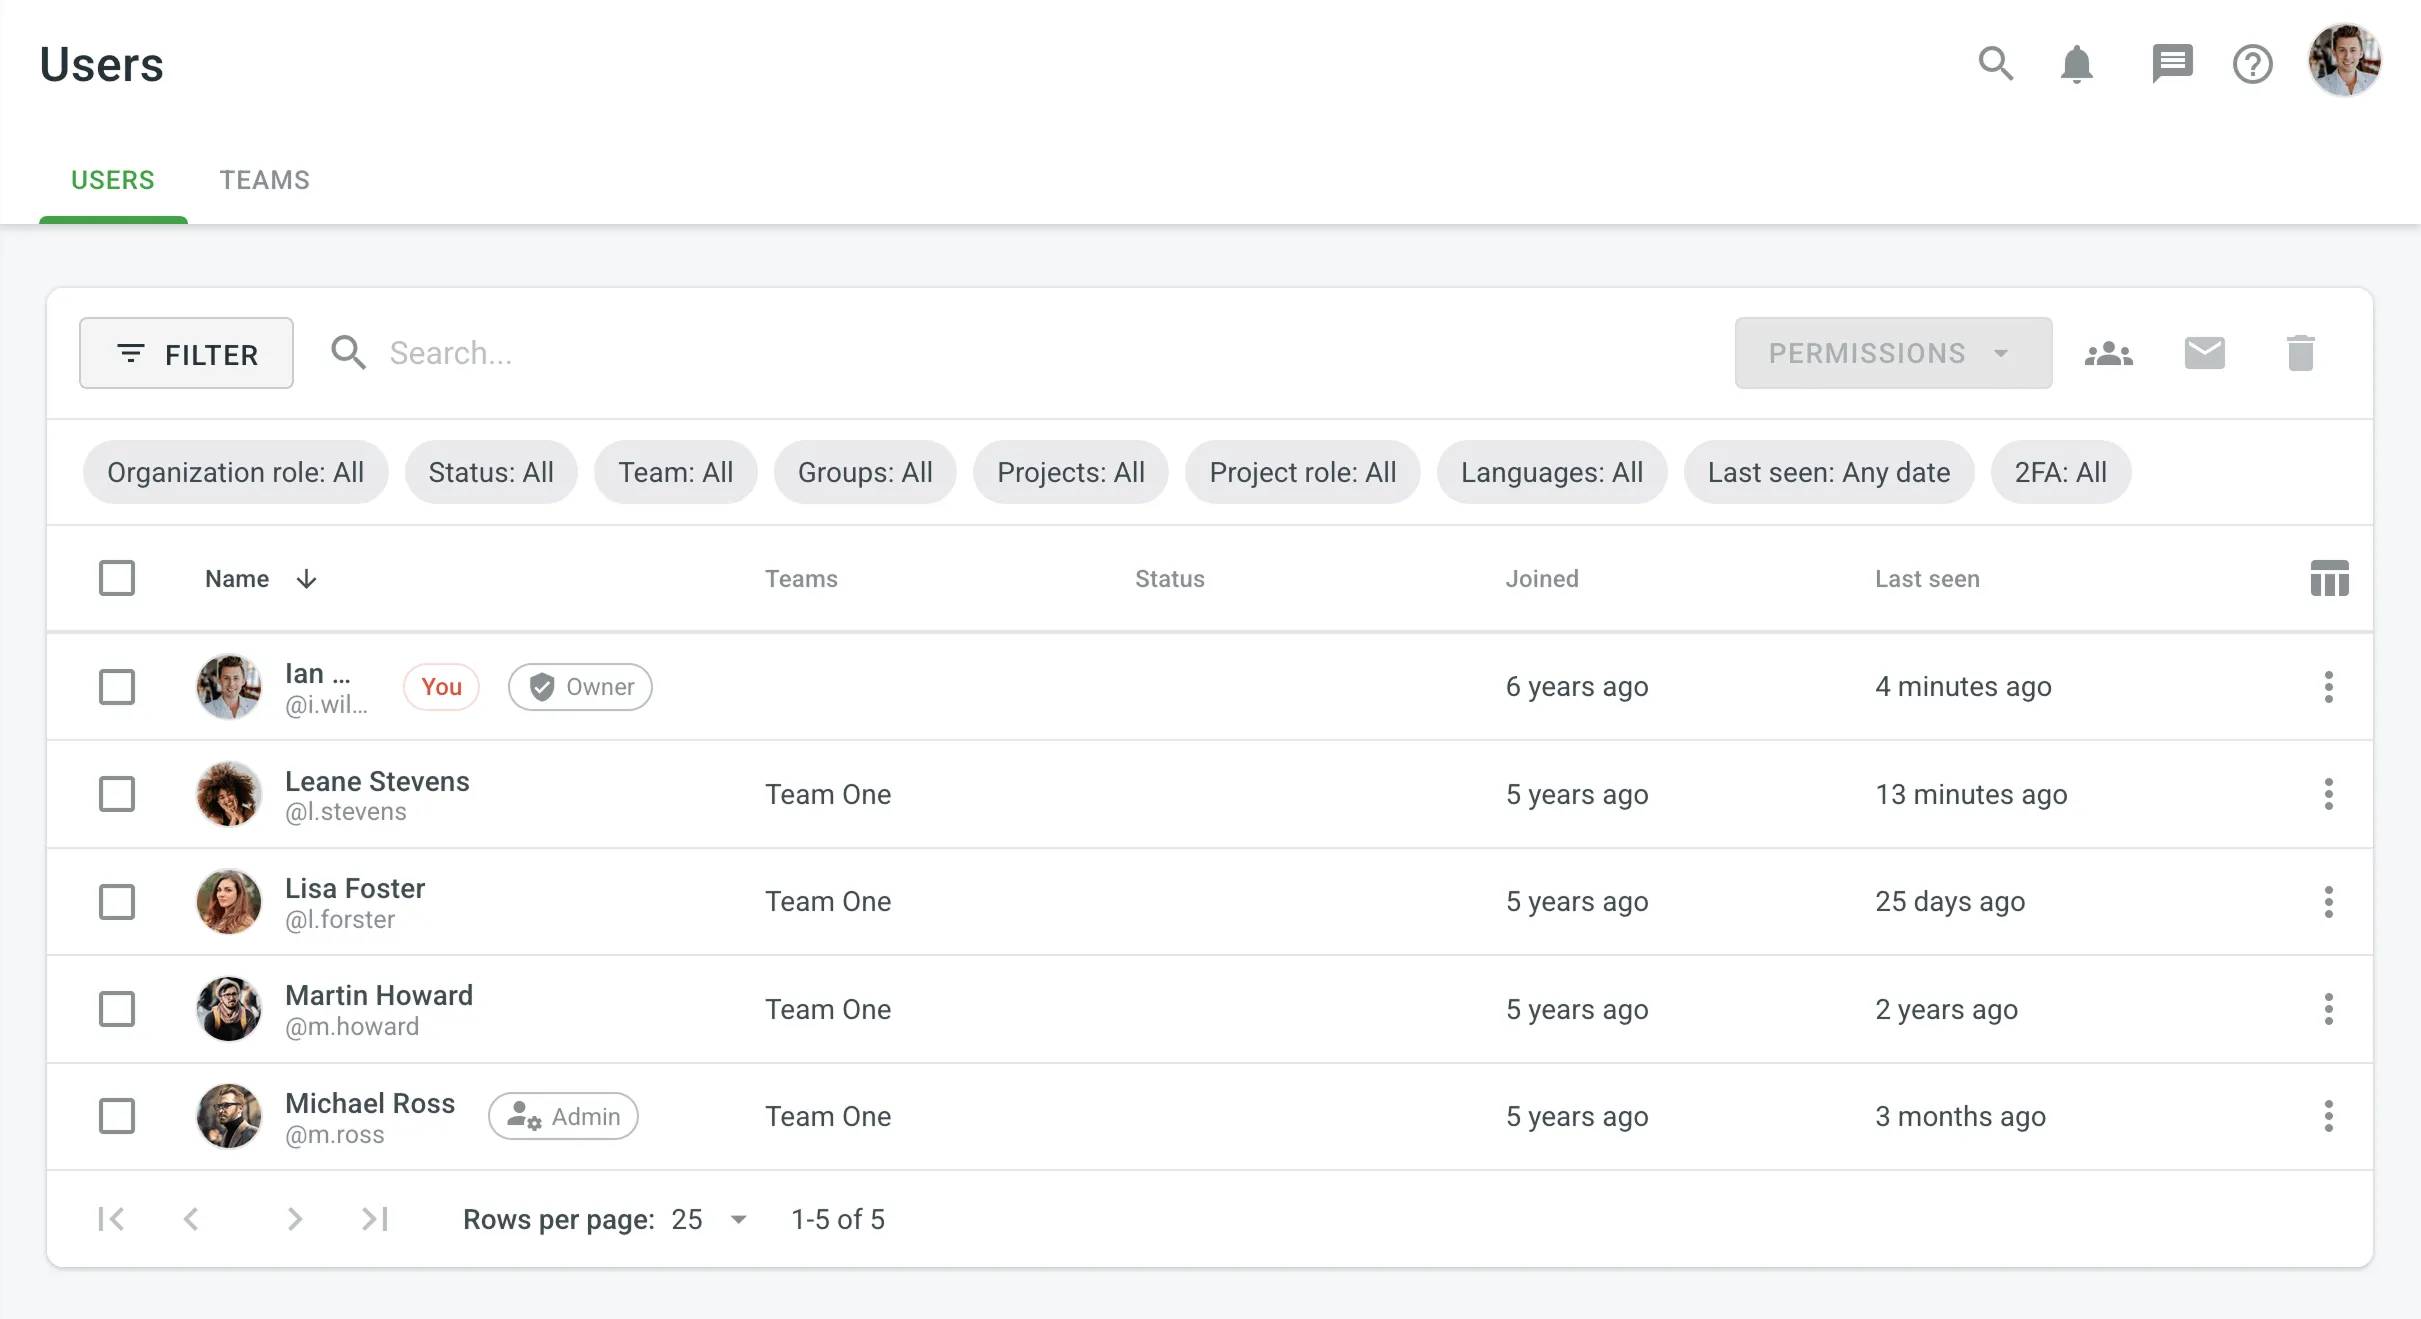 ## [Viewing User Profile](#viewing-user-profile) [Section titled “Viewing User Profile”](#viewing-user-profile) To view and manage user profiles, follow these steps: 1. Open your organization’s **Workspace** and select **Users** on the left sidebar. 2. Double-click on the user or right-click and select **Profile** from the menu. 3. In the user profile, you can perform various actions: * **Projects and Roles**: Add, edit, clear, or delete project permissions. * **Groups**: (only for [Permission granularity](/enterprise/permissions-granularity-mode/#permissions) mode) view and manage the groups which are managed by a user. * **Contribution**: View and delete the user’s contributions across the organization. * **Profile**: View and edit the user’s name, surname, pronouns, and time zone. * Use the left panel to contact the user, view basic information, permissions, team memberships, joining date, last activity, pronouns, and local time. 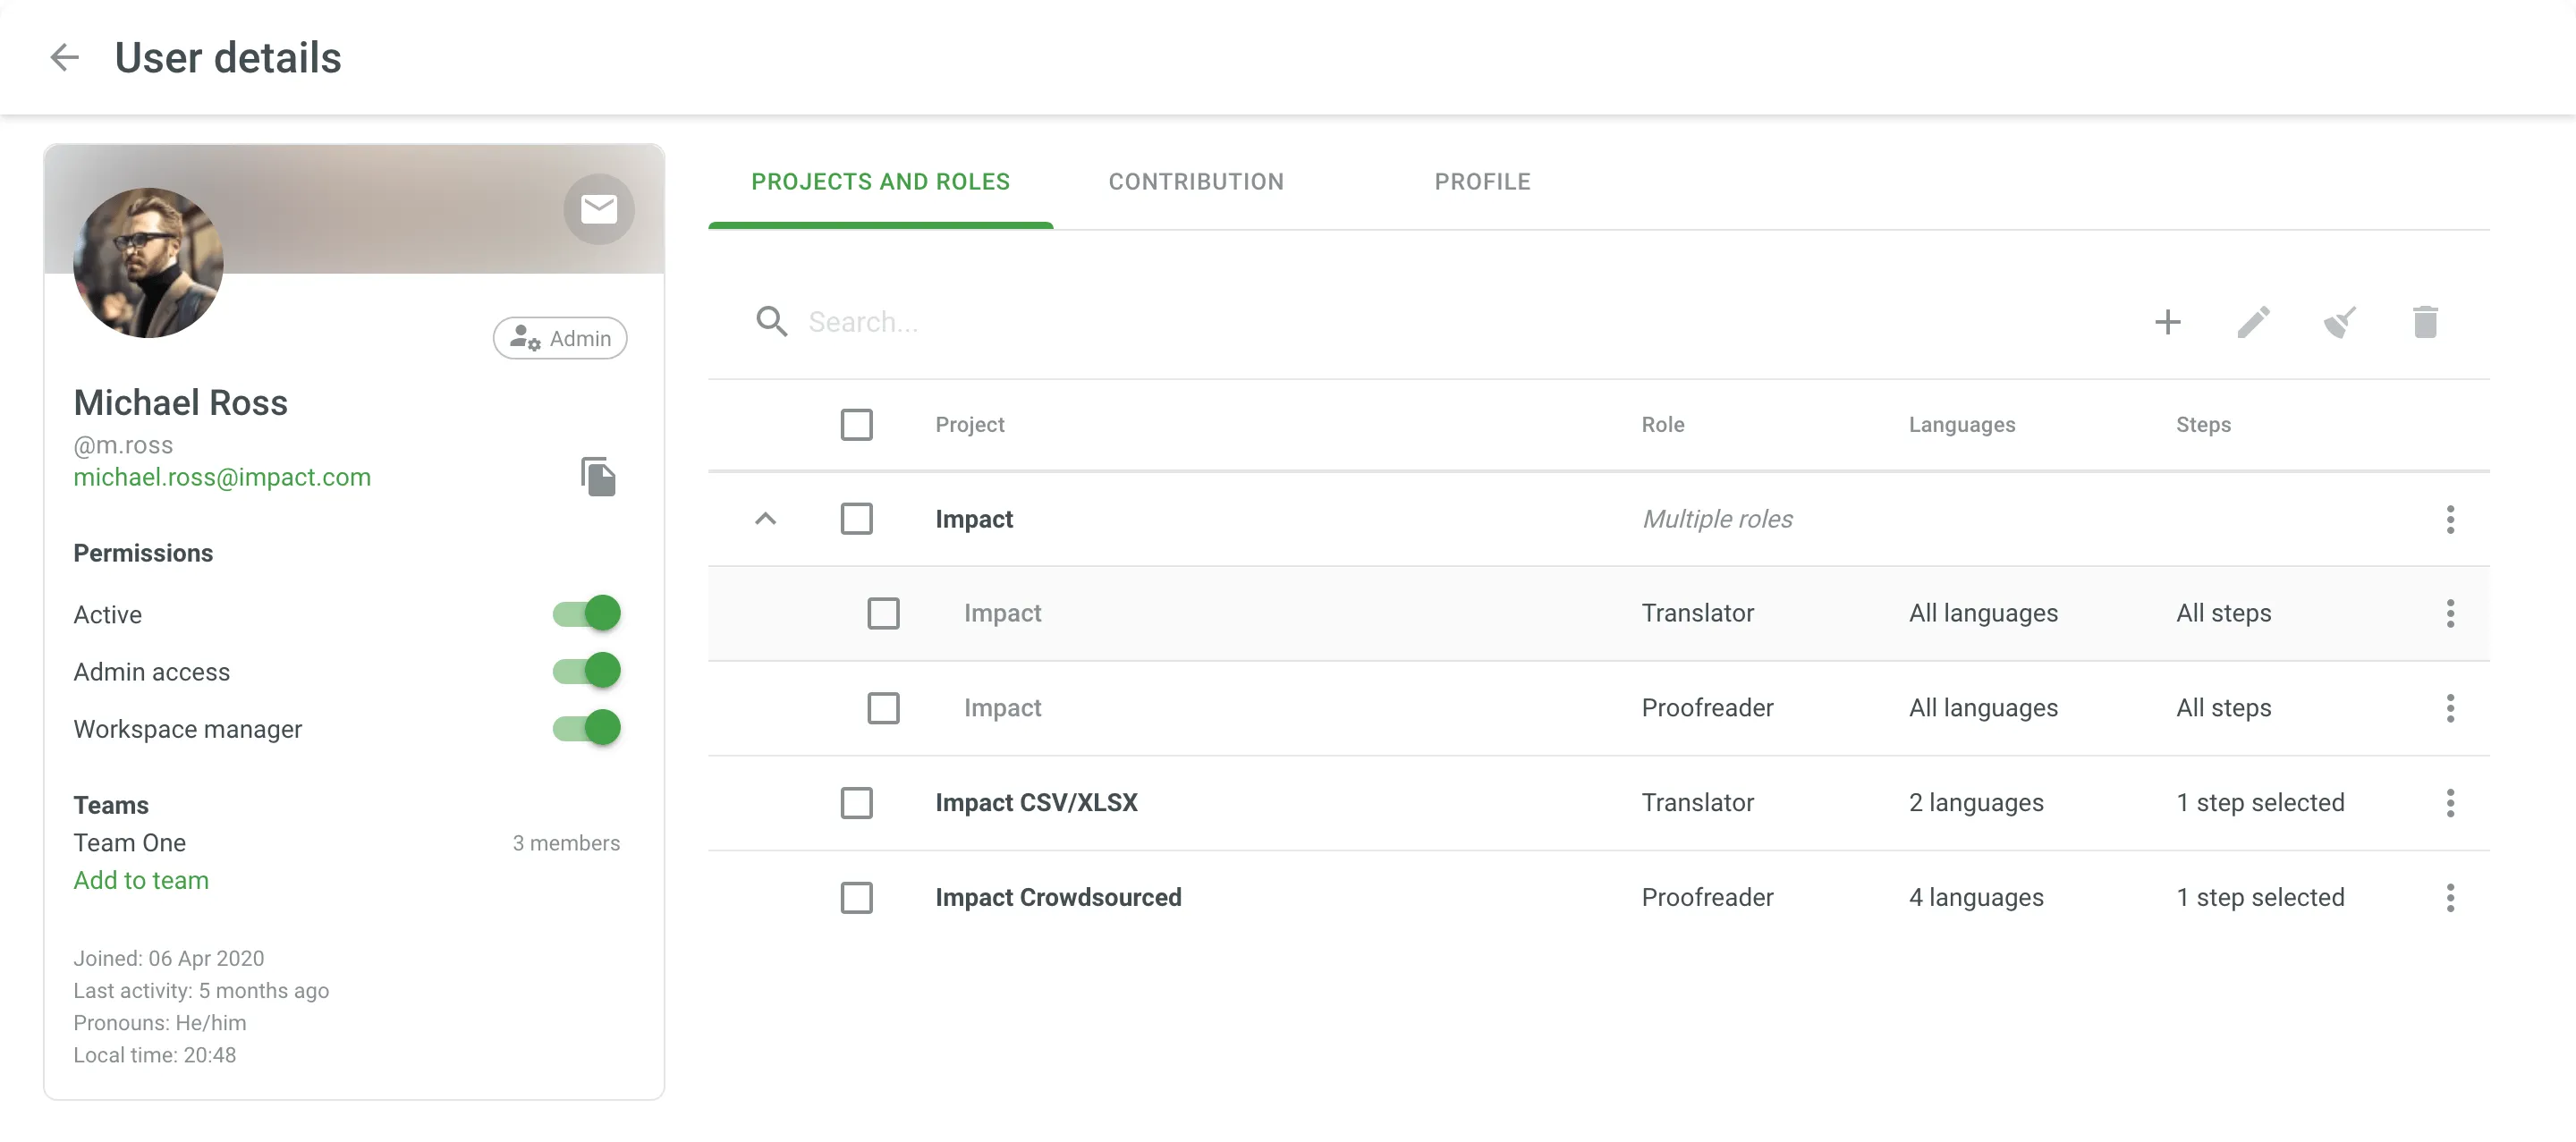 ## [Changing Permissions](#changing-permissions) [Section titled “Changing Permissions”](#changing-permissions) To change user permissions, follow these steps: 1. Open your organization’s **Workspace** and select **Users** on the left sidebar. 2. Select one or multiple users for which you want to change the permissions. 3. Click **Permissions** in the upper-right corner or right-click on the user and change **Permissions** from the menu. 4. Modify the permissions as needed: * Add or remove project permissions. You can manage permissions for multiple projects at once: assign the Manager and Developer roles when adding permissions, or remove permissions for any role. * Enable or disable admin access. * Block or unblock the user. ## [Adding to Team](#adding-to-team) [Section titled “Adding to Team”](#adding-to-team) To add users to a [team](/enterprise/teams/), follow these steps: 1. Open your organization’s **Workspace** and select **Users** on the left sidebar. 2. Select one or multiple users that you want to add to a team. 3. Click **Add to team** or right-click on the selected users and select **Add to team** from the menu. 4. Select the team to which you want to add the users. ## [Contacting Users](#contacting-users) [Section titled “Contacting Users”](#contacting-users) To contact users, follow these steps: 1. Open your organization’s **Workspace** and select **Users** on the left sidebar. 2. Select one or multiple users that you want to contact. 3. Click **Contact** or right-click on the selected users and select **Contact** from the menu. 4. Compose your message and send it. ## [Sending 2FA Reset Emails](#sending-2fa-reset-emails) [Section titled “Sending 2FA Reset Emails”](#sending-2fa-reset-emails) Organization admins can send two-factor authentication (2FA) reset emails to members. This allows users to reset their 2FA if they can’t access their authentication device. To send a 2FA reset email, follow these steps: 1. Open your organization’s **Workspace** and select **Users** on the left sidebar. 2. Right-click on the user you want to send the reset email to. 3. Select **Send 2FA reset email** from the menu. After you send the email, the user will receive a message with a link to reset their 2FA. The link is active for 15 minutes. ### [What Happens Next](#what-happens-next) [Section titled “What Happens Next”](#what-happens-next) Once the user clicks the **Reset two-factor authentication >** link in the email: 1. They’ll be redirected to a confirmation page. 2. On the confirmation page, they need to click **Confirm** to deactivate their current 2FA setup. 3. After confirmation, they can log in to their Crowdin Enterprise account without 2FA. 4. They can re-enable two-factor authentication later for enhanced security. ## [Deleting Users](#deleting-users) [Section titled “Deleting Users”](#deleting-users) To delete users from the organization, follow these steps: 1. Open your organization’s **Workspace** and select **Users** on the left sidebar. 2. Select one or multiple users that you want to delete. 3. Click or right-click on the selected users and select **Delete** from the menu. 4. Confirm the deletion.
# Organization Reports
> View your organization status and various available reports
To view the organization status along with existing translation issues, count the translation cost, keep track of the most active members, and view historical data of previously generated reports, open your organization’s **Workspace** and select **Reports** on the left sidebar.  ## [Organization Overview](#organization-overview) [Section titled “Organization Overview”](#organization-overview) Use this section to get a comprehensive summary of your organization’s health, monitor key activities, and track progress over selected time periods. In the upper-right corner, you can select a report unit (*words*, *strings*, *characters*, or *characters with spaces*) that will apply to all reports in this section. The comparisons shown in percentage are counted by comparing the chosen period of time to the same previous period of time (e.g., if you select a month, the current month is compared to the previous one). To download reports for further analysis or record-keeping, click **Export** and select the preferred format (CSV, XLSX, or JSON). In the reports that feature interactive graphs, you can hover over data points for more detailed information, such as daily or monthly totals for each category. The **Organization size** section displays the primary statistics for your organization’s volume: * *Translatable*: The total amount of text available for translation. * *Hidden*: The total amount of text in hidden strings. * *Total*: The total amount of text in the organization (*Translatable* + *Hidden*). Below the main statistics, the **Overview** section contains the following reports: ### [Activity Summary](#activity-summary) [Section titled “Activity Summary”](#activity-summary) This report tracks the overall translation and proofreading activity in the organization. You can filter the data by **Date Range** and **Language**. The report is split into two main parts: **Translation** and **Proofreading**. Each part displays the total work completed during the selected period with a percentage comparison to the previous period. You can expand the **Breakdown by Language** section in each part to view a table of the same metrics broken down by target language. #### [Translation](#translation) [Section titled “Translation”](#translation) This section shows the volume of translated text, broken down by the following key metrics: * *Total (end of period)* * *Human Translation* * *Translation Memory* * *Machine Translation* * *AI* The **Translation** graph below the metrics displays multiple lines simultaneously for each translation type. By hovering over the data points, you can view daily or monthly totals for each category. #### [Proofreading](#proofreading) [Section titled “Proofreading”](#proofreading) This section shows the volume of approved text and voting activity. The main metric displayed is *Approved* words. The **Proofreading** graph visualizes the approval and voting activity over time, showing two distinct lines: *Approved Words* and *Votes*. By hovering over the data points, you can view the daily or monthly totals for both approved texts and votes cast. ### [Source Content Updates](#source-content-updates) [Section titled “Source Content Updates”](#source-content-updates) This report tracks changes made to the source content over a selected time frame. You can filter the data by **Date Range**. The report displays the *Total (end of period)* volume of text, along with specific metrics for content that has been **Added**, **Deleted**, or **Modified**. The bar graph helps you visualize when the most significant content updates occurred. By hovering over the bars, you can see the specific changes that occurred each day or month. ### [QA Check Issues](#qa-check-issues) [Section titled “QA Check Issues”](#qa-check-issues) This report provides insights into the automated Quality Assurance (QA) checks, highlighting potential inconsistencies in translations. You can filter the data by **Date Range** and **Language**. Key metrics include: * *New (Period)*: The number of new QA issues found within the selected period. * *Total (end of period)*: The total number of unresolved QA issues at the end of the selected period. * *Per 1000 words*: The density of QA issues relative to the word count. This metric includes approved content and is only shown if the total word count is greater than 1000. * *Content with Issues*: The volume of text that contains QA issues, including approved content. * *Content with Issues Rate*: The percentage of text that has QA issues, including approved content. Below the metrics, the report also features several additional components: * **Breakdown by Language**: An expandable section that shows a table of the key metrics broken down by each target language. * **Issues Trend**: A line graph that monitors the total number of QA issues over time. You can hover over data points to see the total number of issues for a specific day. * **Issues by languages**: A heatmap-style table that visualizes the distribution of QA issue types (e.g., *Spelling mistakes*, *Consistent terminology*) across all target languages. You can hover over a cell to see the precise number of issues for that specific language and type. ## [Translation Cost](#translation-cost) [Section titled “Translation Cost”](#translation-cost) Use this report to calculate translation cost based on the completed job. You can generate a Translation Cost report based on the following filter parameters: * Group by: Member, language, or project. * Time period: All time, Today, Yesterday, Last 7 days, Last 30 days, Last month, or Custom range. * Projects: All projects or specific projects. * Language: All or specific target language. * Users: All users or specific users. ### [Generating a Report](#generating-translation-cost) [Section titled “Generating a Report”](#generating-translation-cost) To generate the Translation Cost report, follow these steps: 1. Select the preferred currency and the report unit (word, string, character, or characters (including spaces)). 2. Use the available filter parameters to specify the report data you’re interested in. 3. Set your [rates](#rates-translation-cost) for translations and approvals. 4. Click **Generate**. 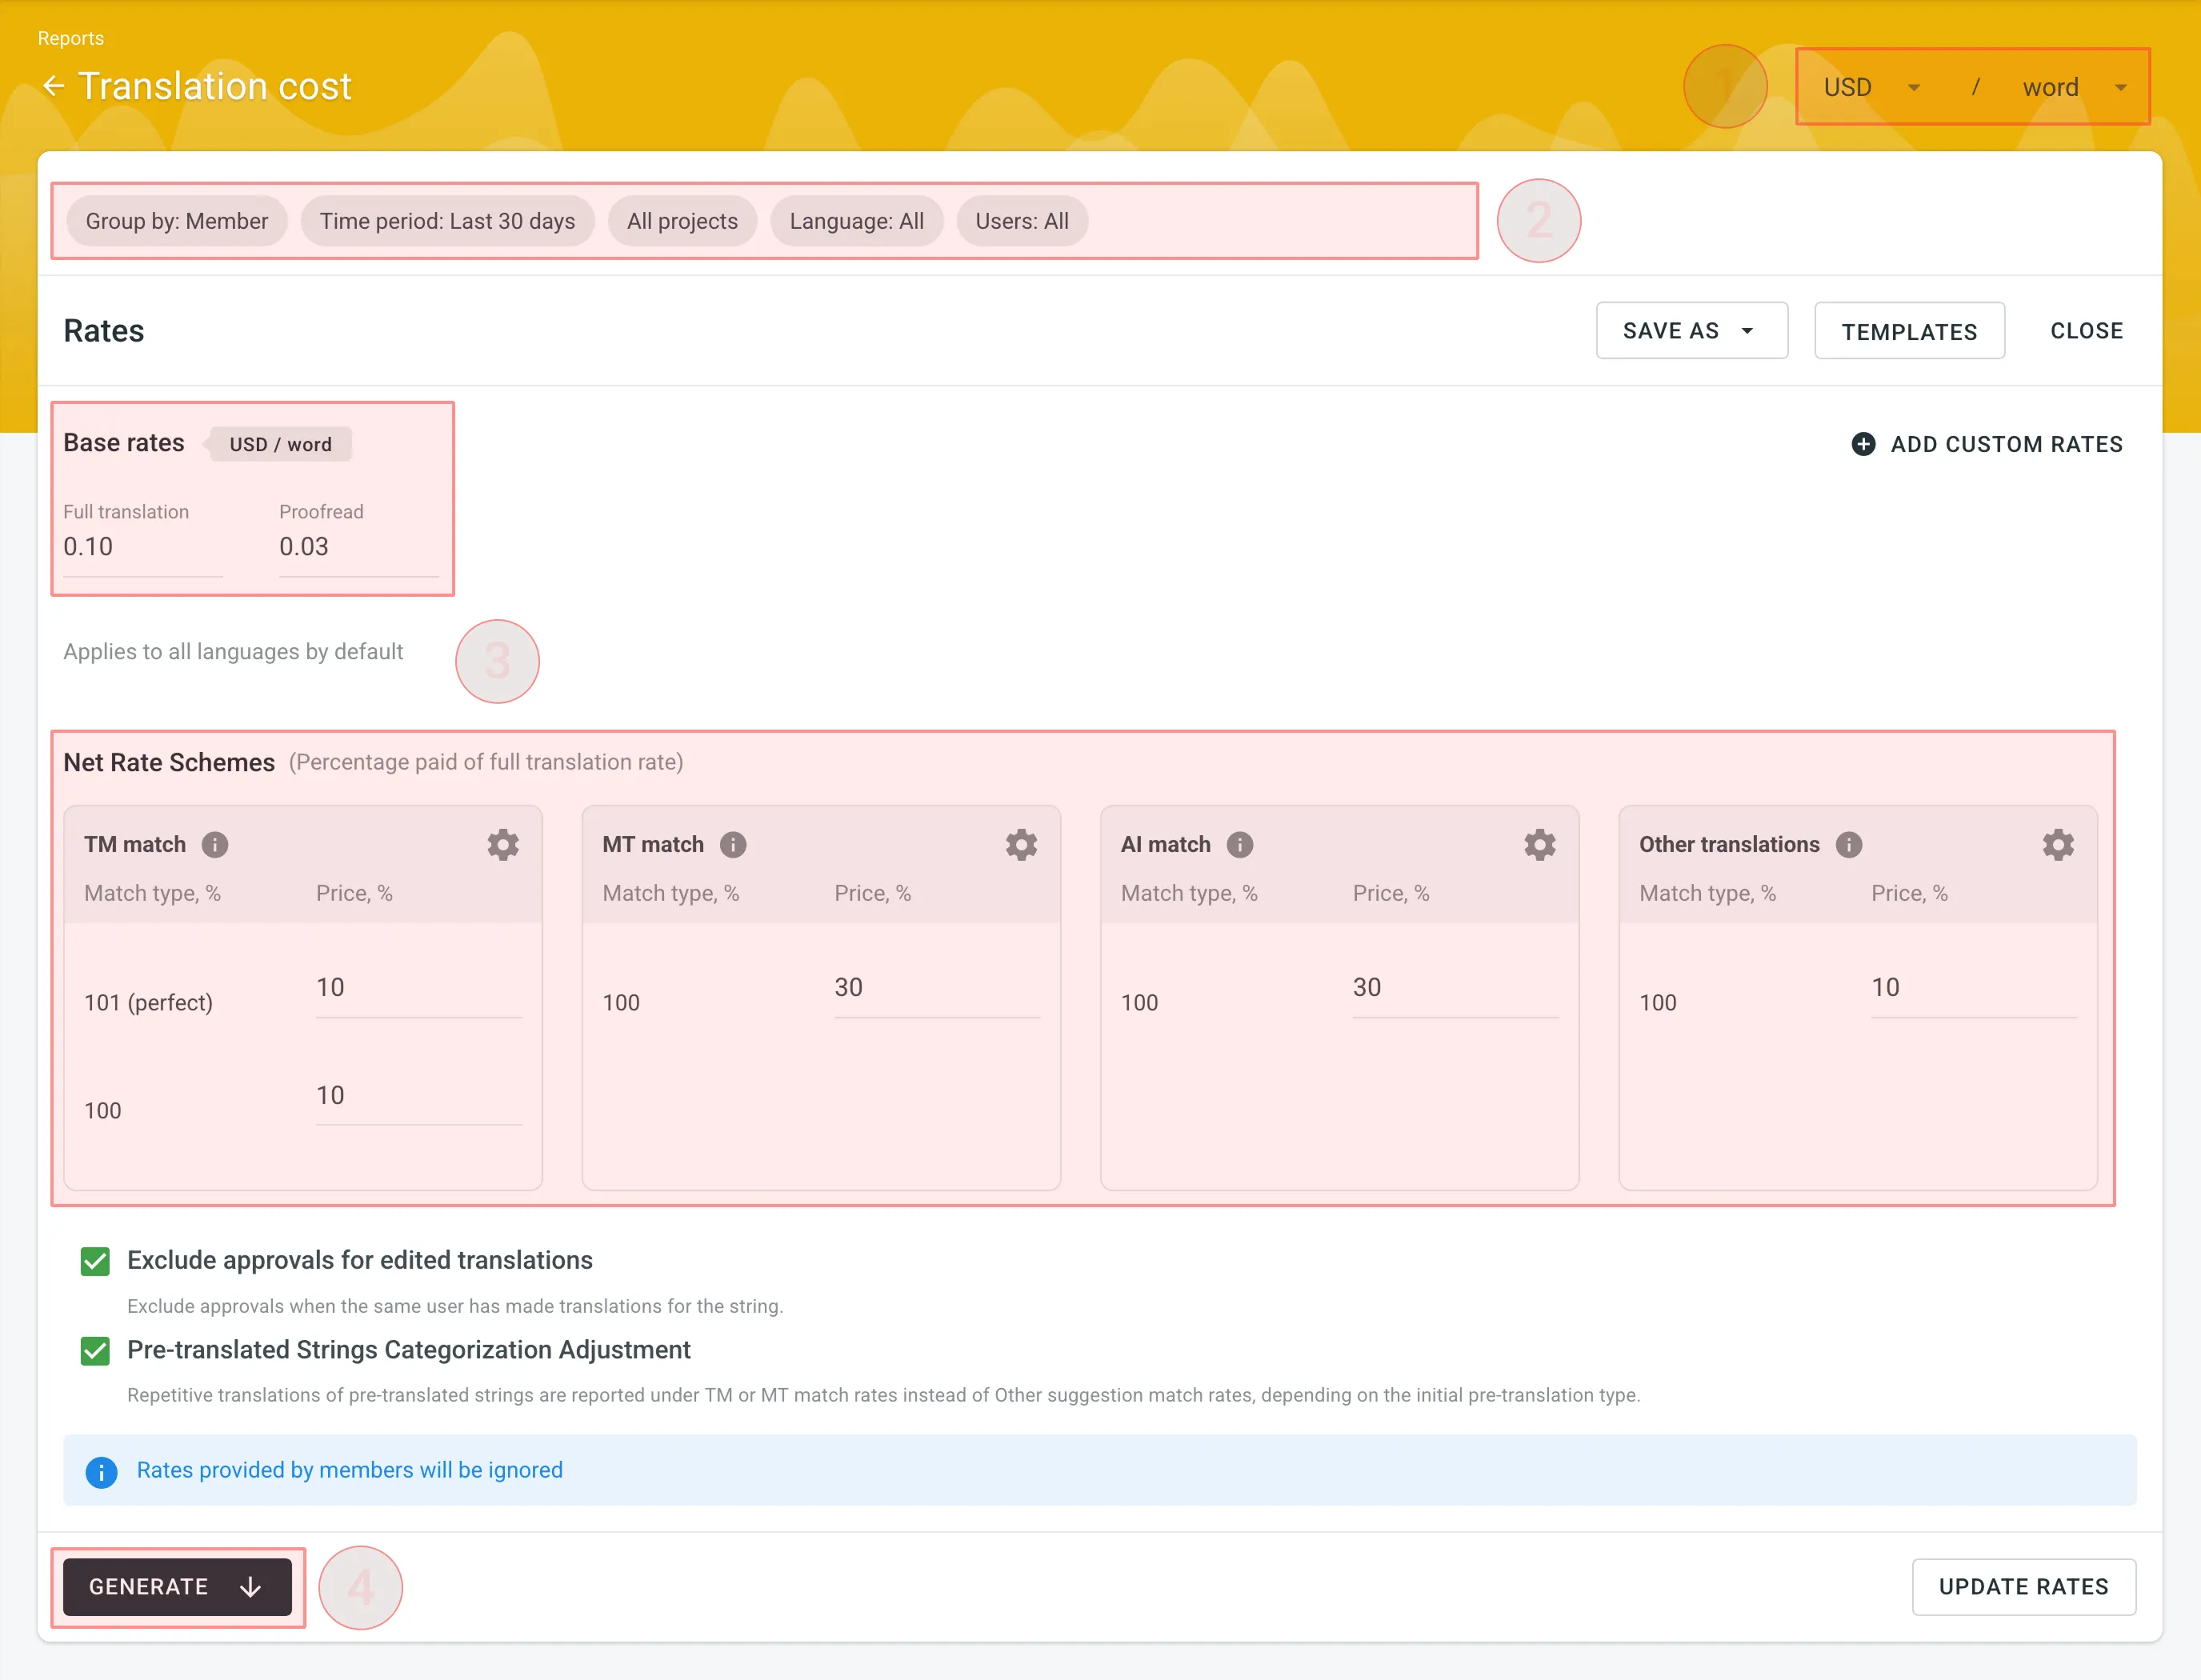 ### [Rates](#rates-translation-cost) [Section titled “Rates”](#rates-translation-cost) You can set the prices for Base rates (full translation, proofread) and configure Net Rate Schemes (percentage of the full translation rate paid for translation using TM suggestions, MT suggestions, and existing translations). #### [Base Rates](#base-rates-translation-cost) [Section titled “Base Rates”](#base-rates-translation-cost) In the Base Rates section, you can set rates for the following types of work: * **Full translation** – for each translation made by a person. * **Proofread** – for each approved translation. #### [Net Rate Schemes](#net-rate-schemes-translation-cost) [Section titled “Net Rate Schemes”](#net-rate-schemes-translation-cost) In the Net Rate Schemes section, in addition to the base rates, you can set the percentage of the full translation rate to be paid for translations made using TM suggestions, MT suggestions, and other translations of various Match types. By default, you can configure the percentage of the full translation rate for the following match type categories: **TM Match types:** * **101 (perfect)** – for translations made using Perfect match TM suggestions (source strings are identical to TM suggestion by text and context). * **100** – for translations made using 100% match TM suggestions (source strings are identical to TM suggestion only by text). **MT Match types:** * **100** – for translations made using 100% match MT suggestions (new suggested translations are identical to MT suggestion). **AI Match types:** * **100** – for translations made using 100% match AI suggestions (new suggested translations are identical to AI suggestion). **Other translations types:** * **100** – for translations made using existing translations (new suggested translations are identical to the existing translations). If a string has a combination of TM and MT suggestions and existing translations, the new translation is counted at the lowest Net Rate Scheme value. For example, if a string has a 101% (perfect) TM match suggestion (10% of the full translation rate) and a 100% MT match suggestion (5% of the full translation rate), the new translation added to this string will be counted at a 5% of the full translation rate. You can also add your own TM, MT, and Other translations match types, specifying the preferred percentage of text similarity and the percentage of the full translation rate to be paid for such a translation. To add your own match types, follow these steps: 1. Click in the Net Rate Schemes section. 2. Click on the appeared button. 3. Specify the match range and the percentage of the full translation rate. 4. Click to save the settings.  #### [Adding Custom Rates](#custom-rates-translation-cost) [Section titled “Adding Custom Rates”](#custom-rates-translation-cost) In addition to base rates that are applied to all languages and users by default, you can add custom rates for specific languages and users. To add custom rates, click **Add custom rates**. To select the languages and members for custom rates, click the drop-down menus, and select the ones you need. You can create as many custom rates as you need. 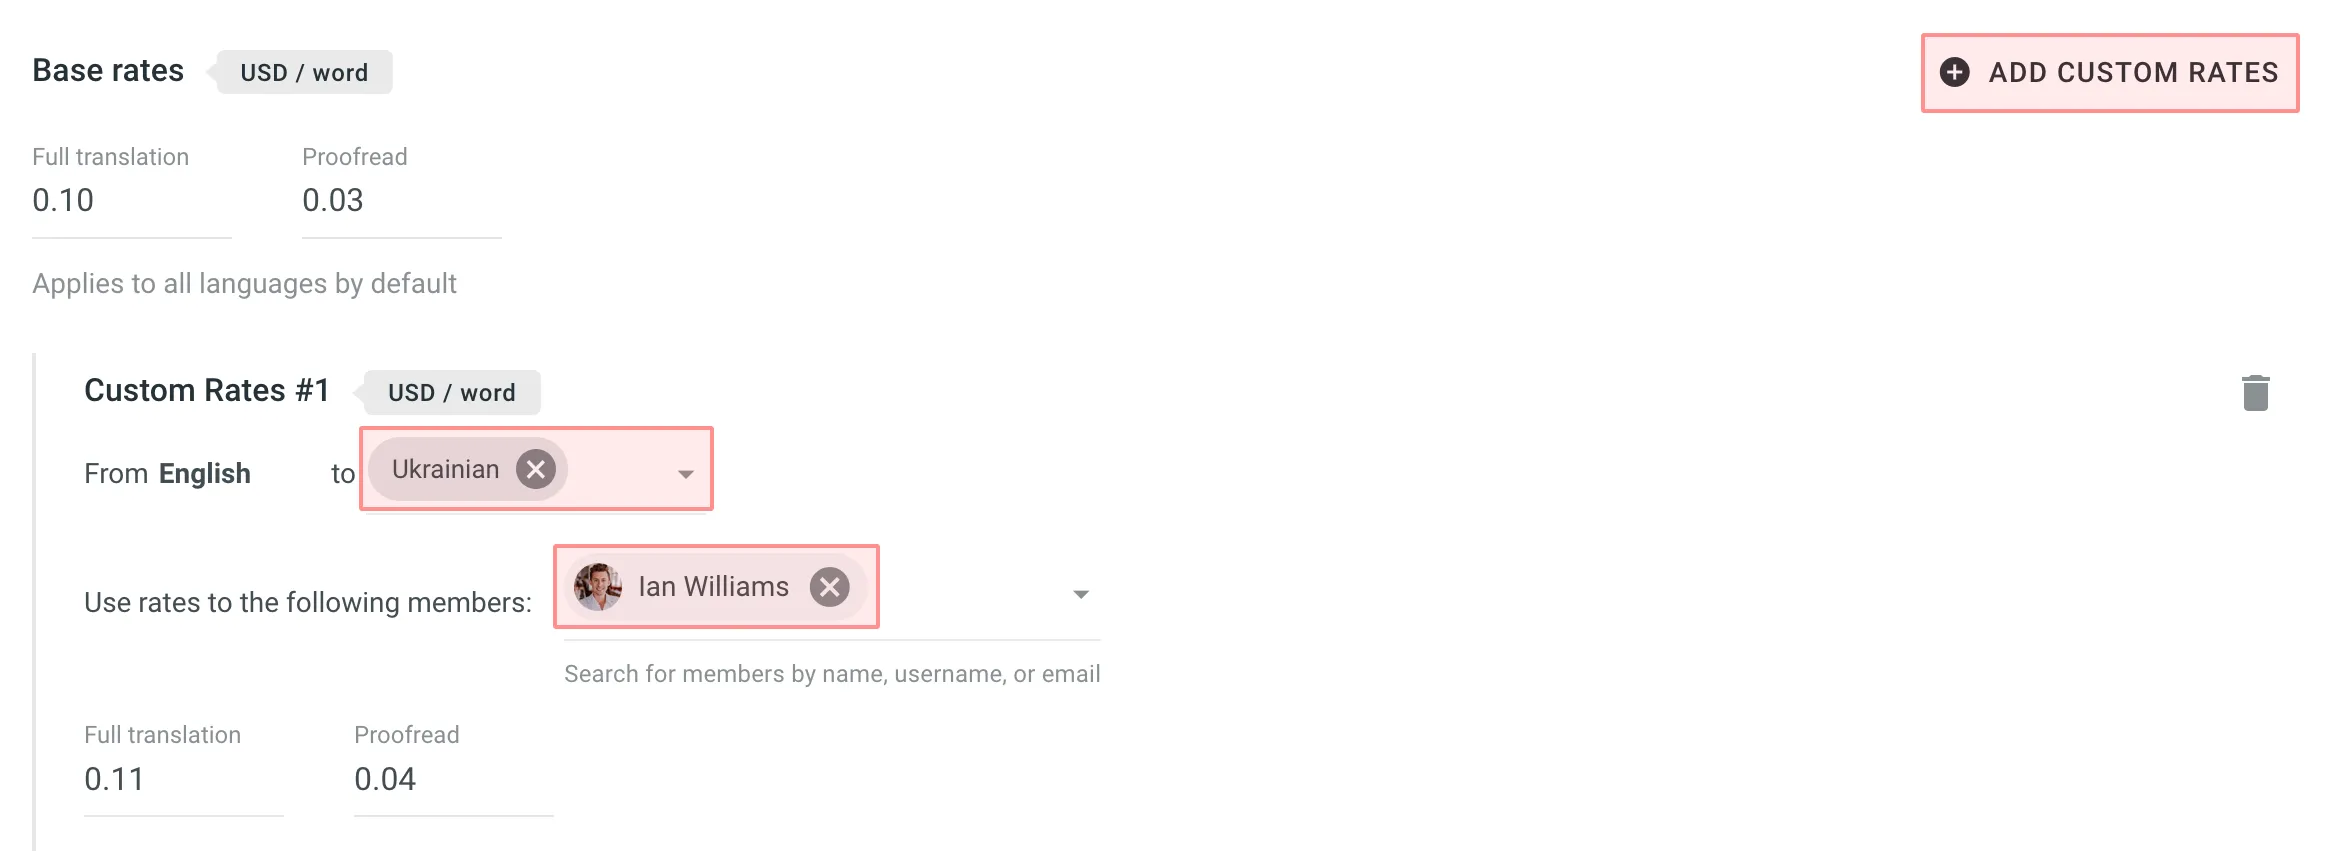 ### [Using Additional Translation Cost Options](#using-additional-translation-cost-options) [Section titled “Using Additional Translation Cost Options”](#using-additional-translation-cost-options) * **Exclude Approvals for Edited Translations:** select this option to exclude approvals when the same user has translated the string. This helps ensure that your cost reporting is more accurate by avoiding the duplication of approval costs. * **Pre-Translated Strings Categorization Adjustment:** select this option to have repetitive translations of pre-translated strings categorized under TM or MT match rates, rather than the default Other suggestion match rates. This is useful because post-editing translations from MT engines usually requires more effort than post-editing translations from human translators, leading to a more precise and fair measure of costs related to your translators. ### [Result Analysis](#result-analysis-translation-cost) [Section titled “Result Analysis”](#result-analysis-translation-cost) When the report is generated, you will see the following amounts: * **Total** – organization-level cost for all proofreading and translation activities (including all members and languages). It will be shown at the middle-top of the page. * **Totals** – general translation cost for every language or each member. Results are grouped by the parameter you choose. * **Subtotals** – separate translation cost for every language or each member. Results are grouped by the parameter you choose. To download the Translation Cost report, click **Export report** and select the preferred export format (CSV, XLSX, or JSON). ## [Task Usage](#task-usage) [Section titled “Task Usage”](#task-usage) Use this report to get a detailed overview of task management within your organization. It allows you to analyze workload distribution, compare creation and resolution rates, track team performance and efficiency, monitor task completion times, and review associated costs. The **Task Usage** report has the following global filters that are applied to all sub-reports by default: * **Time period**: *All time*, *Today*, *Yesterday*, *Last 7 days*, *Last 30 days*, *Last month*, or *Custom range*. * **Language**: *All* or a specific target language. * **Type**: *All types*, *Translate*, *Proofread*, *Translate by vendor*, or *Proofread by vendor*. * **Created by**: *All members* or a specific member. * **Projects**: *All projects* or specific projects. Each sub-report below has its own set of filters that are pre-populated from these global settings but can be individually adjusted. This allows you to start with a broad overview and then narrow the scope to specific data sets for each type of analysis. To download reports for further analysis or record-keeping, click **Export** and select the preferred format (CSV, XLSX, or JSON). In the reports that feature interactive graphs, you can hover over data points for more detailed information, such as daily or monthly totals for each category. ### [Workload](#workload) [Section titled “Workload”](#workload) This section helps you understand the volume and current status of tasks across your organization. You can generate a Workload report based on the following filter parameters: * **Group by**: *Language*, *Type*, or *User*. * **Time period**: *All time*, *Today*, *Yesterday*, *Last 7 days*, *Last 30 days*, *Last month*, or *Custom range*. * **Language**: *All* or a specific target language. * **Type**: *All types*, *Translate*, *Proofread*, *Translate by vendor*, or *Proofread by vendor*. * **Created by**: *All members* or a specific member. * **Assignee**: *All members* or a specific member. * **Projects**: *All projects* or specific projects. The primary metrics show a snapshot of your organization’s workload, including: * *Total tasks (period)*: The number of tasks found within the selected period. * *To Do*: The number of tasks that have not yet been started. * *In Progress*: The number of tasks that are currently being worked on. * *Done*: The number of tasks where all work has been completed but are not yet closed. * *Closed*: The number of tasks that have been completed and formally closed. * *Active tasks volume*: The total volume of content (e.g., words) in all tasks that are not in a *Closed* state. For a more granular view, you can expand the **Breakdown by languages** section to see a table of these metrics for each target language. ### [Created vs Resolved](#created-vs-resolved) [Section titled “Created vs Resolved”](#created-vs-resolved) This section helps you compare the rate of task creation against the rate of task resolution over time, which is useful for monitoring your team’s throughput and managing backlogs. You can generate a Created vs Resolved report based on the following filter parameters: * **Group by**: *Language* or *Type*. * **Time period**: *All time*, *Today*, *Yesterday*, *Last 7 days*, *Last 30 days*, *Last month*, or *Custom range*. * **Language**: *All* or a specific target language. * **Type**: *All types*, *Translate*, *Proofread*, *Translate by vendor*, or *Proofread by vendor*. * **Created by**: *All members* or a specific member. * **Projects**: *All projects* or specific projects. This section displays the following primary metrics: * *Created*: The total number of tasks created within the selected time period. * *Resolved*: The total number of tasks that were resolved (i.e., moved to a *Done* or *Closed* state) within the selected time period. Below the metrics, a line graph visualizes the cumulative number of created versus resolved tasks over time, allowing you to see trends at a glance. Additionally, you can expand the **Breakdown by languages** section to see the number of created and resolved tasks for each target language in a table format. ### [Task Performance](#task-performance) [Section titled “Task Performance”](#task-performance) This section helps you evaluate team performance and efficiency by tracking how tasks are completed in relation to their due dates. You can generate a Task Performance report based on the following filter parameters: * **Group by**: *Language* or *Type*. * **Time period**: *All time*, *Today*, *Yesterday*, *Last 7 days*, *Last 30 days*, *Last month*, or *Custom range*. * **Language**: *All* or a specific target language. * **Type**: *All types*, *Translate*, *Proofread*, *Translate by vendor*, or *Proofread by vendor*. * **Created by**: *All members* or a specific member. * **Assignee**: *All members* or a specific member. * **Projects**: *All projects* or specific projects. This section displays the following primary metrics: * *Total with Due Date*: The total number of tasks that have a due date set within the selected period. * *Total Open Overdue*: The number of tasks that are currently past their due date but are not yet closed. * *Closed Overdue*: The number of tasks that were completed and closed after their due date. * *Closed on Time*: The number of tasks that were completed and closed on or before their due date. Below the metrics, a stacked bar chart visualizes the performance over time, comparing the number of tasks *Closed Overdue* against those *Closed on Time*. For a more detailed view, you can expand the **Breakdown by languages** section to see a performance breakdown for each target language. ### [Task Completion Time](#task-completion-time) [Section titled “Task Completion Time”](#task-completion-time) This section provides detailed analytics on how long it takes for tasks to move from creation to completion, helping you identify potential bottlenecks in your workflow. You can generate a Task Completion Time report based on the following filter parameters: * **Group by**: *Language* or *Type*. * **Time period**: *All time*, *Today*, *Yesterday*, *Last 7 days*, *Last 30 days*, *Last month*, or *Custom range*. * **Language**: *All* or a specific target language. * **Type**: *All types*, *Translate*, *Proofread*, *Translate by vendor*, or *Proofread by vendor*. * **Created by**: *All members* or a specific member. * **Assignee**: *All members* or a specific member. * **Size (words)**: *Any*, or a custom range of words. * **Projects**: *All projects* or specific projects. This section displays the following primary metrics: * *Avg. completion time*: The average time taken for tasks to be completed from the moment of creation. * *Median*: The median time taken for task completion, representing the typical time for most tasks. * *80th percentile*: The time within which 80% of tasks are completed. This helps to understand the upper range of completion times while ignoring extreme outliers. * *Max. completion time*: The longest time taken to complete any single task in the selected set. * *Avg. waiting time*: The average time a task spends in a *To Do* state before work begins. The primary metrics are also available in the expandable **Breakdown by languages** section, which shows a detailed table of completion and waiting times for each target language. ### [Task Cost](#task-cost) [Section titled “Task Cost”](#task-cost) This section helps you review and analyze the financial costs associated with tasks in your organization. This report totals the costs for all tasks that have either a recorded Cost Estimate or Translation Cost. The actual cost from the Translation Cost report is always prioritized. To include a task’s financial data in this summary, you must first generate a cost or estimate report for that specific task. You can generate a Task Cost report based on the following filter parameters: * **Group by**: *Language* or *Type*. * **Time period**: *All time*, *Today*, *Yesterday*, *Last 7 days*, *Last 30 days*, *Last month*, or *Custom range*. * **Language**: *All* or a specific target language. * **Type**: *All types*, *Translate*, *Proofread*, *Translate by vendor*, or *Proofread by vendor*. * **Created by**: *All members* or a specific member. * **Projects**: *All projects* or specific projects. This section displays the following primary metrics. If multiple currencies are used in the tasks, the costs for each will be displayed separately. * *Task costs with estimates*: The total cost for all tasks within the filtered selection that have an associated estimate or actual cost. * *Task costs with estimates (active)*: The total cost for only the *active* tasks (those in a “To Do” or “In Progress” state) within the filtered selection. For a more detailed view, you can expand the **Breakdown by languages** section. This table shows the number of tasks and their associated costs for each language, also broken down by total versus active tasks. ## [Top Members](#top-members) [Section titled “Top Members”](#top-members) The Top Members report allows you to see who contributed the most to your organization’s translation. Default parameters: * *Text unit*: words * *Time period*: Last 30 days * *Sorted by*: translated text units. A member who translated the most is placed at the top of the list. * *Languages*: all languages * *Projects*: all projects The **You** label appears next to your own username in the report table, making it easier to identify your personal contribution. Re-sort the members by clicking on the needed parameter. For example, if you want to analyze members by their proofreading activity, click on the *Approved* parameter to redo sorting. 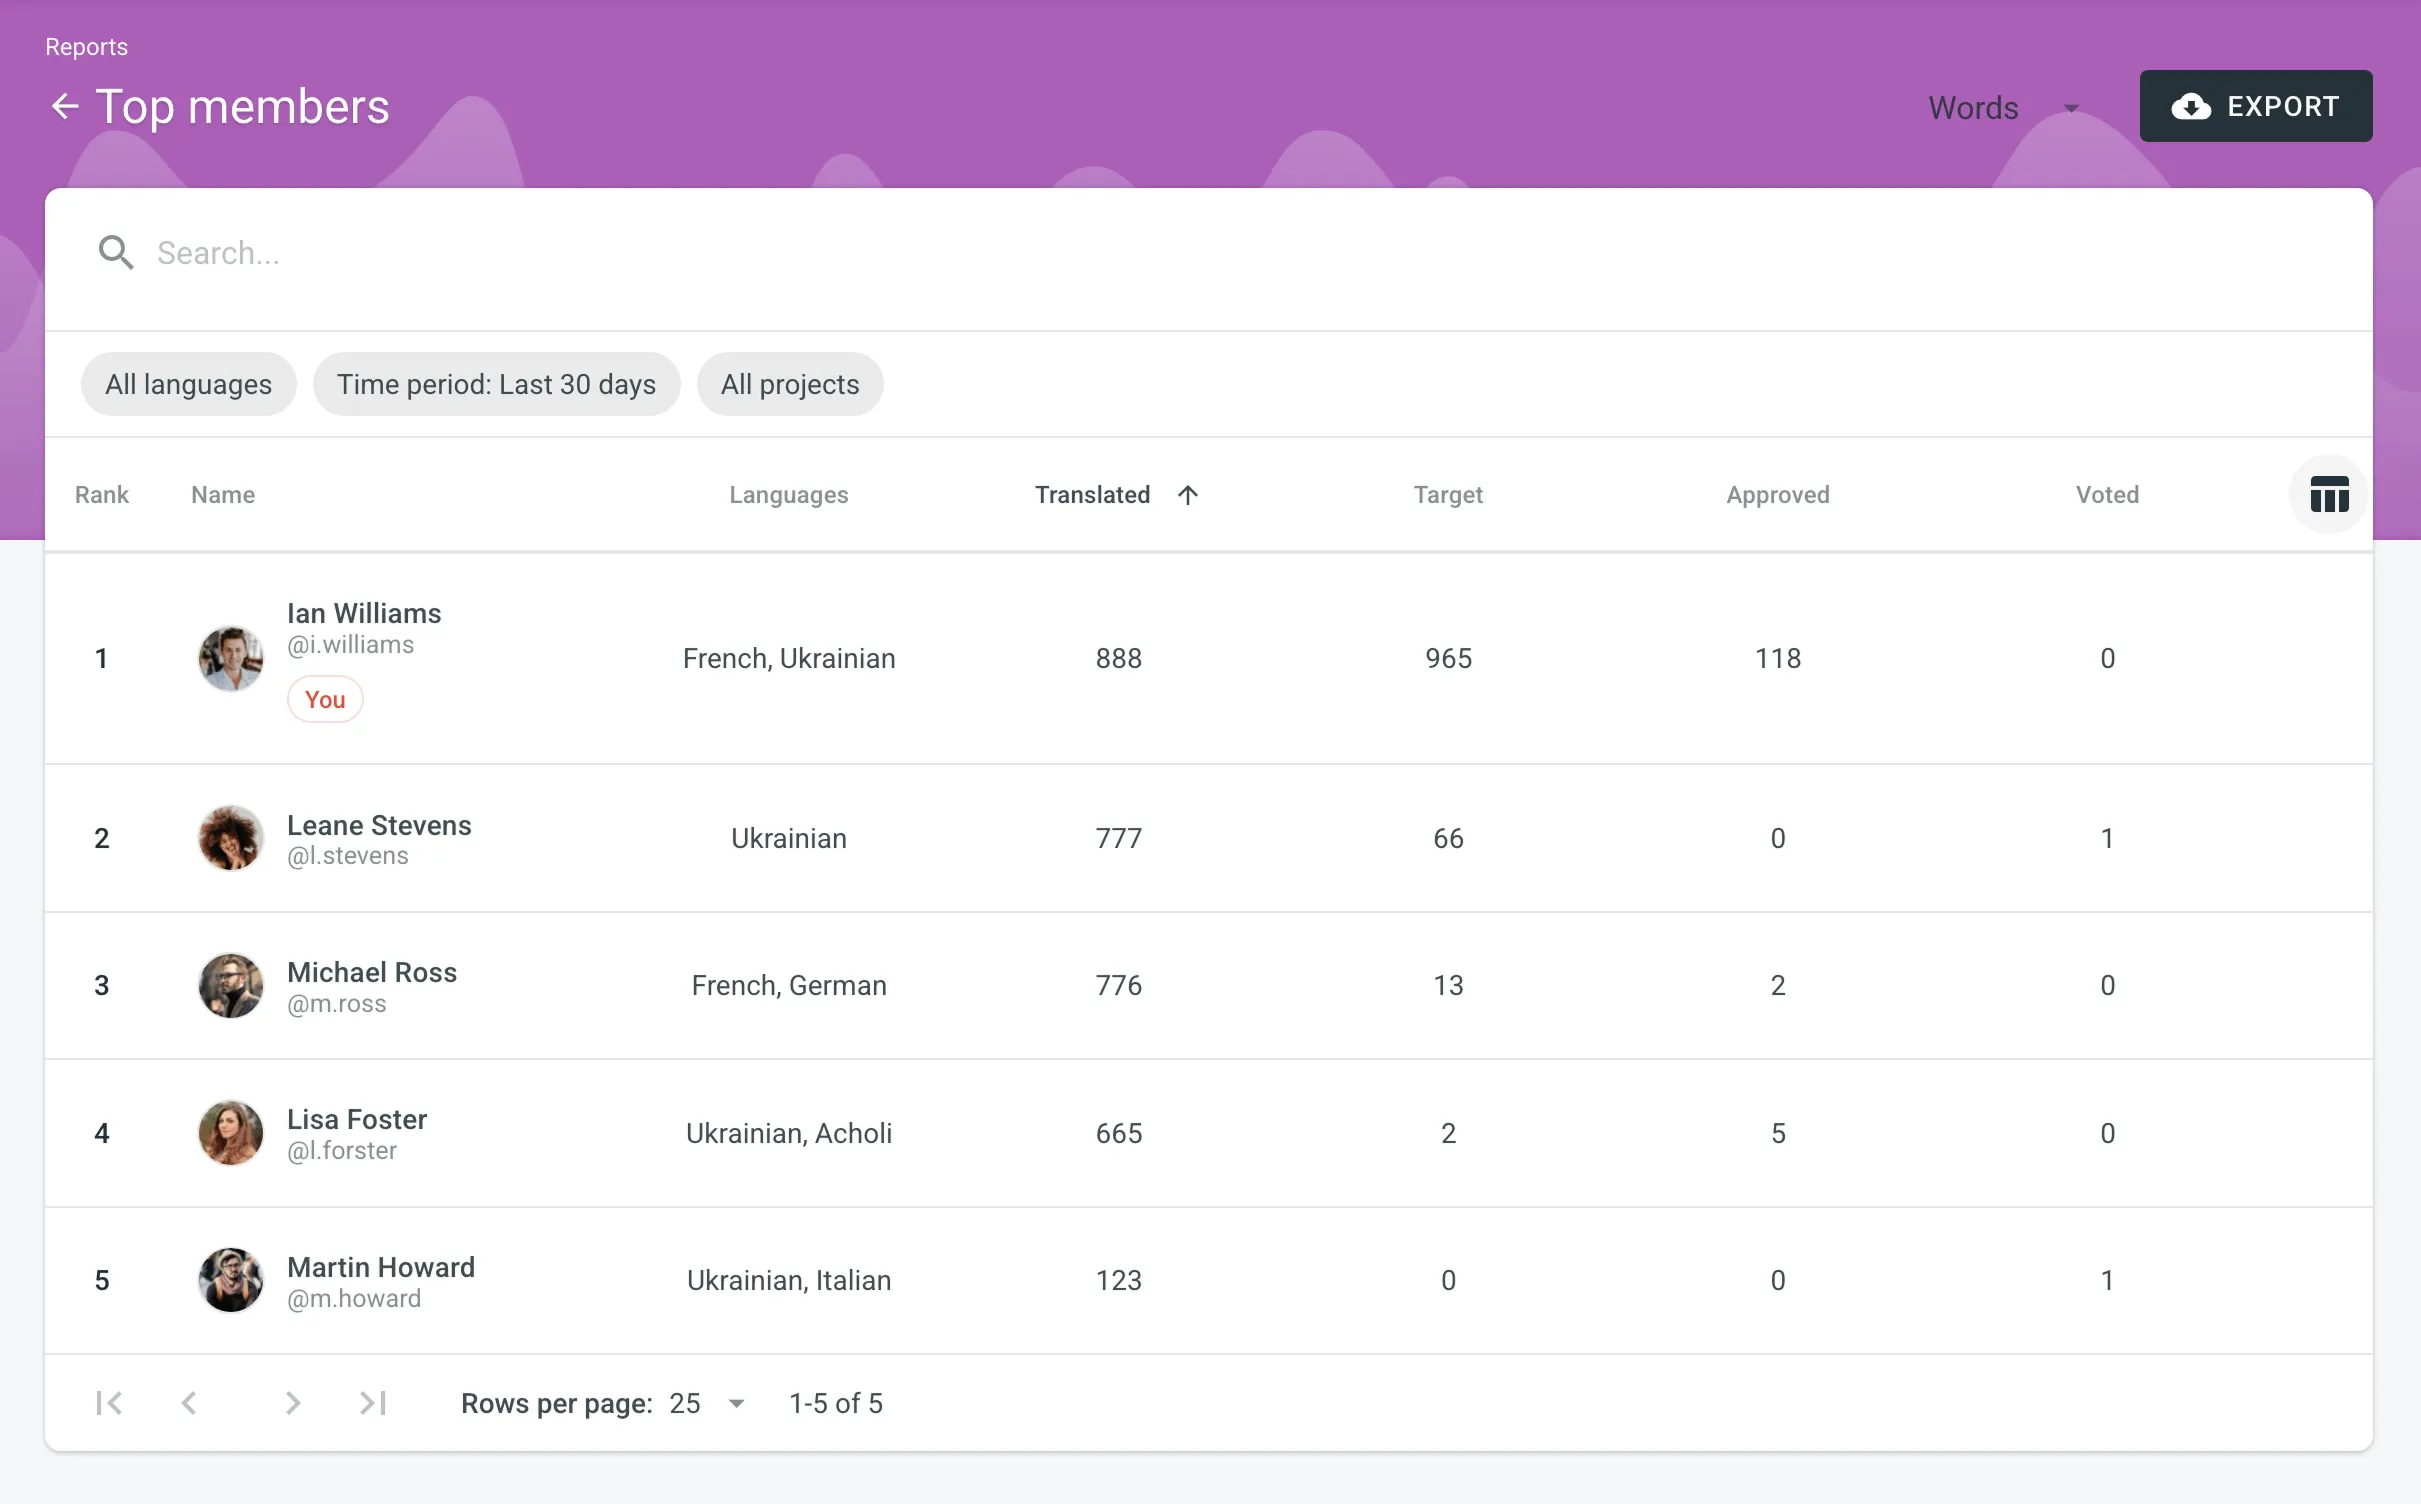 ### [Generating a Custom List of Top Members](#generating-a-custom-list-of-top-members) [Section titled “Generating a Custom List of Top Members”](#generating-a-custom-list-of-top-members) To generate a custom list of top members, follow these steps: 1. Select the preferred report unit (words, strings, characters with or without spaces). 2. Select the time period for which you want to see the activity of contributors. 3. To make a list of contributors for a specific language, select the language you need from the drop-down menu above the list. Alternatively, select **All languages**. 4. Select a specific project. Alternatively, select **All projects**. To find a specific member, use the search field. To open the member’s profile page, double-click on the name. The Top Members list includes the following columns: * *Rank* – contributor’s position in the list based on the currently selected sorting criteria (e.g., *Translated*, *Approved*, etc.). * *Name* – contributor’s first name, last name and username. * *Languages* – project languages. * *Translated* – the number of translated source content units. * *Target* – the number of translated content units in a target language.\ This parameter is not available for the *Strings* content unit because the number of source and translated strings is always the same. * *Approved* – the number of approved content units. * *Voted* – the number of votes a contributor made. * *”+” votes received* – the number of upvotes a contributor received for translations. * *”-” votes received* – the number of downvotes a contributor received for translations. * *Winning* – the number of approvals a contributor received for translations. * *Given access* – indicates when a member joined your organization. To customize the visibility of columns in the report, click at the upper-right side of the table and select the preferred ones. To download the Top Members report, click **Export** and select the preferred export format (CSV, XLSX, or JSON). ## [Archive](#archive) [Section titled “Archive”](#archive) The Archive section allows you to access the records of previously generated Translation cost reports, providing a convenient way to review historical data. This section also eliminates the need to wait for a report generation to complete. You can initiate a report generation and return to it later at your convenience. Within the Archive, you can review the report summary and, if necessary, download it in various supported file formats. An organization has its own independent archive section with previously generated reports available only to users with admin permissions (or higher). Reports generated by translators based on their contributions are not added to the archives. ### [Viewing Previously Generated Reports](#viewing-previously-generated-reports) [Section titled “Viewing Previously Generated Reports”](#viewing-previously-generated-reports) To view the summary of the previously generated reports (i.e., archive records), follow these steps: 1. Open your organization’s **Workspace** and select **Reports** on the left sidebar. 2. Click on **Archive**. 3. Click on the name of the needed archive record. 4. Once you open the archive report record, you can view all the needed data. 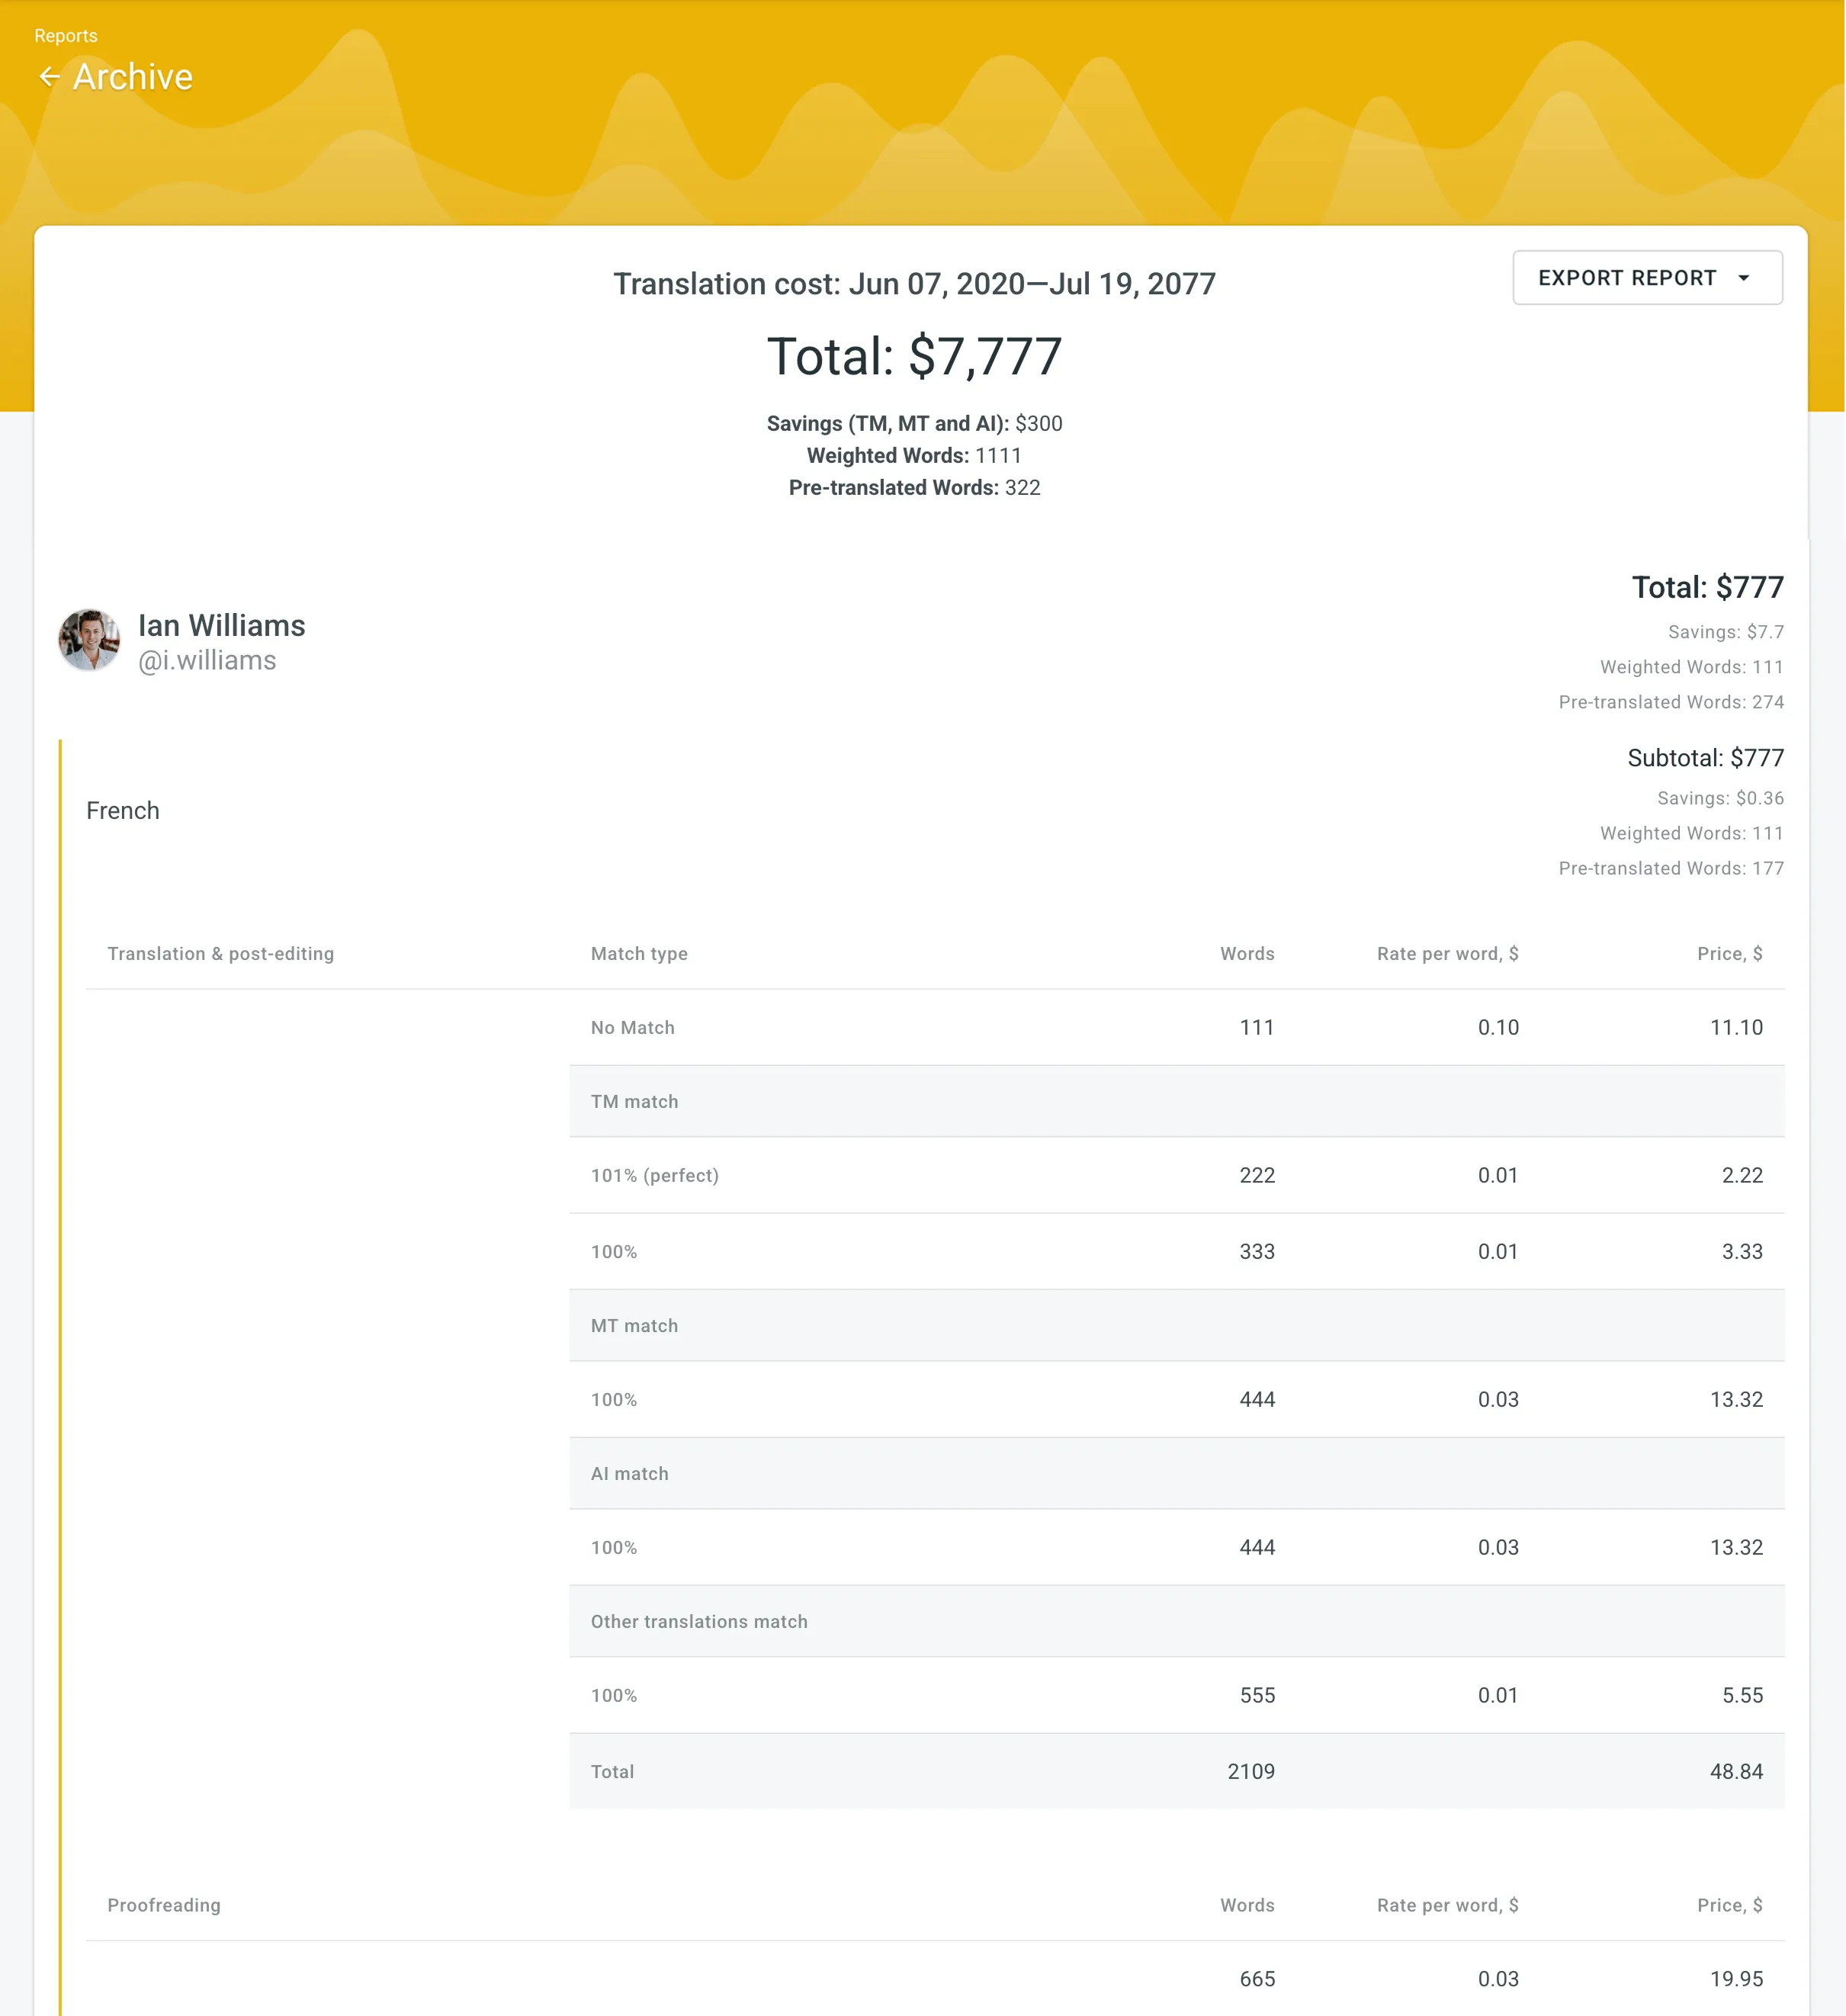 ### [Exporting Previously Generated Reports](#exporting-previously-generated-reports) [Section titled “Exporting Previously Generated Reports”](#exporting-previously-generated-reports) To export the previously generated reports, follow these steps: 1. Open your organization’s **Workspace** and select **Reports** on the left sidebar. 2. Click on **Archive**. 3. Click (or right-click) on the needed report in the list. 4. Click on the preferred file format to export. ### [Deleting Previously Generated Reports](#deleting-previously-generated-reports) [Section titled “Deleting Previously Generated Reports”](#deleting-previously-generated-reports) To delete the previously generated reports, follow these steps: 1. Open your organization’s **Workspace** and select **Reports** on the left sidebar. 2. Click on **Archive**. 3. Click (or right-click) on the needed report in the list. 4. Click **Delete**. ## [See Also](#see-also) [Section titled “See Also”](#see-also) [Project Reports ](/enterprise/project-reports/)View your project status and various localization reports. [Contributor Reports ](/enterprise/contributor-reports/)Estimate and count the price of your contribution to the project.
# Organization Settings
> Manage your Crowdin Enterprise organization settings
You can view and manage settings for your Crowdin Enterprise organization using the **Organization Settings** page. Manage organization info, authentication, and security settings, view billing history, install Crowdin apps, and more. You can also switch to Permission granularity mode to manage settings for each project group separately. To configure organization details, click on your profile picture in the upper-right corner and select **Organization Settings**.  ## [Organization Info](#organization-info) [Section titled “Organization Info”](#organization-info) Manage the essential details of your organization, including its name, logo, and public presence. You can update your organization’s name and upload a new logo, ensuring your organization’s branding is always current. ### [Public Organization](#public-organization) [Section titled “Public Organization”](#public-organization) In the **Public Organization** section, manage how your organization is presented to the public. Add a description, select the project view (List or Grid), and choose up to six featured projects to showcase. A public page is automatically created when you publish a project with the Crowdsourcing workflow step. If you are a [Vendor](/enterprise/for-vendors/), your organization info will be visible to your Clients, and you will also see their organization info. ### [Custom Domain](#custom-domain) [Section titled “Custom Domain”](#custom-domain) Configure a **Custom Domain** to host your Crowdin Enterprise organization on your own domain. This feature is particularly useful if you have crowdsourcing projects, as it can help attract more contributors to get involved in translating your projects. To set up a custom domain, create a CNAME record with your DNS provider that points to `org.cname.crowdin.com`. Ensure that you use this specific address without modifications, as the domain specified below will be automatically detected. Read more about [Crowdsourcing](/enterprise/crowdsourcing/). ## [Account Defaults](#account-defaults) [Section titled “Account Defaults”](#account-defaults) Configure the default settings for the Editor across your organization. Choose the default view mode (Side-by-Side, Comfortable, Multilingual, or Multilingual (Grid)) that best suits your workflow. You can lock this setting to enforce the selected view for all users, preventing any individual changes in their Editor settings. ## [Privacy](#privacy) [Section titled “Privacy”](#privacy) The **Privacy** section allows you to configure how users join and access your organization. You can fine-tune security settings and manage various authentication methods based on your preferences. With Security options, you can enhance your organization’s security by enabling features like two-factor authentication, which requires users to verify their identity through an additional step. Additionally, configure the IP allowlist to restrict access to only connections from approved IP addresses, helping maintain strict control over access to your organization’s resources. You can also manage authentication methods for user sign-ins. Use Crowdin Enterprise’s built-in options or choose from various external methods, including social logins via Google, Facebook, GitHub, GitLab, and X. For advanced security, enable Passkey for a passwordless experience or integrate with existing identity providers using OpenID Connect and [SAML](/enterprise/saml/). These options simplify the authentication process while ensuring robust security for your organization. Read more about [Privacy](/enterprise/privacy/). ## [Billing](#billing) [Section titled “Billing”](#billing) In the **Billing** section, you can manage your subscription plan, view payment history, and handle app subscriptions. You can upgrade or downgrade your plan based on your needs, and access detailed information about your organization’s usage and invoicing. ### [Subscription Plan](#subscription-plan) [Section titled “Subscription Plan”](#subscription-plan) Review your current subscription plan, which includes details such as the plan name, the date of the last plan change, and your current usage limits. You can also see how many managers and words are currently used out of the total allowed, as well as the status of additional features like permission granularity and IP allowlist. Read more about [Changing Subscription Plan](/enterprise/changing-subscription-plan/). ### [App Subscriptions](#app-subscriptions) [Section titled “App Subscriptions”](#app-subscriptions) Crowdin Store offers various apps that you can install to extend the functionality of Crowdin Enterprise, synchronize your content stored in a CMS, and more. Some of the apps are available for free, while others are paid. Read more about [App Subscriptions](/enterprise/app-subscriptions/). ### [View Payment History](#view-payment-history) [Section titled “View Payment History”](#view-payment-history) Access payment history and download invoices. Read more about [Payments and Invoices](/enterprise/payments-invoices/) and [Billing Settings](/enterprise/billing-settings/). ### [Crowdin Managed Services](#crowdin-managed-services) [Section titled “Crowdin Managed Services”](#crowdin-managed-services) Top up the balance for the Crowdin Managed Services (MT engines, AI models), set a balance warning threshold and view the usage statistics for each service. Read more about [Crowdin Managed Services](/enterprise/crowdin-managed-services/). ## [Apps](#apps) [Section titled “Apps”](#apps) In the **Apps** section, manage the Crowdin Apps installed in your organization. You can view and manage currently installed apps, search for specific ones, and use the **Edit** or **Uninstall** options by clicking on each app. Click **Install from store** to add apps developed by Crowdin and other developers from the Crowdin [Store](https://store.crowdin.com/). Alternatively, click **Install private app** to manually install custom apps of your own development. Read more about [Installing Crowdin Apps](/developer/crowdin-apps-installation/#installation-in-crowdin-enterprise). ## [Agents](#agents) [Section titled “Agents”](#agents) Manage agents for custom applications that interact with Crowdin Enterprise. Agents allow applications to perform specific actions on your behalf within the platform. You can add Agents from the [Crowdin Store](https://store.crowdin.com/tags/agent) and manage their permissions to projects and resources as needed. ## [Custom QA Checks](#custom-qa-checks) [Section titled “Custom QA Checks”](#custom-qa-checks) In the **Custom QA Checks** section, create, add, and manage QA checks tailored to your specific needs. These QA checks help verify translations against rules not covered by default checks. Manage your installed QA checks by viewing, updating, or deleting them as needed. [Create Custom QA Checks](/enterprise/custom-qa-checks/) from scratch using a JavaScript-based code snippet, or add pre-made ones from the [Crowdin Store](https://store.crowdin.com/types/qa-check). Additionally, install External QA checks as Crowdin Apps from the Crowdin Store to extend your organization’s QA capabilities. Once added, [assign these QA checks](/enterprise/project-settings/qa-checks/#configure-qa-checks) to your projects. ## [Spellcheckers](#spellcheckers) [Section titled “Spellcheckers”](#spellcheckers) Integrate custom spellcheckers to enhance translation quality by checking translations against specialized rules not covered by default settings. You can add spellcheckers from the [Crowdin Store](https://store.crowdin.com/tags/spellcheck) and manage their settings, including reviewing supported languages and real-time verification mode. ## [Webhooks](#webhooks) [Section titled “Webhooks”](#webhooks) In the **Webhooks** section, you can configure organization webhooks to receive notifications about key events that happen in your organization. Once set up, Crowdin Enterprise will send POST or GET requests with data to the specified webhook URL via HTTP when these events occur. You can create organization webhooks for the following event types: * Group created * Group deleted * Project created * Project deleted Read more about [Webhooks](/enterprise/webhooks/). Limitations You can configure up to 20 webhook endpoints for organization-level events. ## [Custom Languages](#custom-languages) [Section titled “Custom Languages”](#custom-languages) In the **Custom Languages** section, you can extend language support by adding custom languages not included by default. To add a custom language, follow these steps: 1. Click **Add Language** in the upper-right corner. 2. Specify a language name and choose the main language if a custom language is a dialect. 3. Define and fill in language codes. 4. Set text direction and select plural form. 5. Click **Create**. Once added, custom language codes will be automatically applied to the corresponding placeholders whenever used. You can also create custom codes for your custom languages using [Language Mapping](/enterprise/project-settings/languages/#language-mapping). ## [Fields](#fields) [Section titled “Fields”](#fields) Create the Fields to add additional helpful information, links, or data to various entities like your projects, user accounts, tasks, and more. Read more about [Fields](/enterprise/fields/). ## [Custom Placeholders](#custom-placeholders) [Section titled “Custom Placeholders”](#custom-placeholders) Create custom placeholders using supported [Expression Syntax Elements](/enterprise/expression-syntax-elements/), which you can assign to preferred projects. Read more about [Custom Placeholders](/enterprise/custom-placeholders/). ## [Permission Granularity](#permission-granularity) [Section titled “Permission Granularity”](#permission-granularity) Enable [Permission Granularity Mode](/enterprise/permissions-granularity-mode/) to manage project groups as separate units inside one Crowdin Enterprise account. You can then add projects to specific groups or subgroups. This mode allows working with workflow templates, translation memories, glossaries, and machine translations for each project group separately. When you assign group managers, they will have access to all project resources except the **Settings** and **Managers** sections. ## [OAuth Apps](#oauth-apps) [Section titled “OAuth Apps”](#oauth-apps) Create an OAuth app that can be used to make authorized requests to the Crowdin Enterprise API or as a Single Sign-On service. You can build custom integrations and give them access to use your account on your behalf. Only organization admins will be able to modify its credentials or delete an OAuth app to revoke its access. Some of the most common uses for this functionality include: * OAuth apps let you make authorized requests to [API](/developer/api/). * OAuth apps are often used as a Single Sign-On service. You can allow users to sign in your service with their Crowdin Enterprise accounts. See the [Authorizing OAuth Apps](/developer/authorizing-oauth-apps/) to learn how to authorize OAuth apps to access your Crowdin account. ### [Adding a New Application](#adding-a-new-application) [Section titled “Adding a New Application”](#adding-a-new-application) To add an OAuth app, follow these steps: 1. Click on your profile picture in the upper-right corner and select **Organization Settings**. 2. Switch to the **OAuth apps** section on the left sidebar and click **New App**. 3. On the *Create application* page, enter the following information: * **Application name** and **Application description** (optional) will be shown to users when they authorize the app with access to their Crowdin Enterprise accounts. * **Authorization callback URLs** are the URLs where users will be sent after they authorize with Crowdin Enterprise. You can add multiple URLs separated by a comma (no need to use quotation marks). * Select the access your app requires from the list of [Scopes](/developer/understanding-scopes/) available. 4. Click **Create Application**. ### [Modifying an OAuth App](#modifying-an-oauth-app) [Section titled “Modifying an OAuth App”](#modifying-an-oauth-app) After creating an OAuth application, organization admins can make changes to it. Go to **Organization Settings > OAuth apps** to see the list of OAuth apps added for your organization. To find a specific application, type its name or Client ID in the search field at the top of the list. Click the necessary app to be able to: * Update the application name, description, URLs, and scopes. * Delete the application. * Check how many organization users are using the app. * Access Client ID and Client Secret of the created application. * Reset Client Secret for the app. * Revoke all user tokens. ## [Security Log](#security-log) [Section titled “Security Log”](#security-log) Track important events that happen on the organizational level. Security log includes events such as logins, passwords, usernames, and email changes, etc. Click on the needed event to see the following details: Event type, Location, IP, Device, and Date. Use filters to find specific event types and users. ## [API Log](#api-log) [Section titled “API Log”](#api-log) Monitor and audit API activities within your organization using the API Log. This section provides a detailed record of API actions, categorized by results (Successful, Unsuccessful) and action types (e.g., Storages, Languages, Projects and Groups, etc.). The table includes columns for Date, Action, Response, and IP, offering useful insights when reviewing API activities. Use the search and filter options to quickly locate specific events and ensure transparency in API usage. ## [Legal and Compliance](#legal-and-compliance) [Section titled “Legal and Compliance”](#legal-and-compliance) View information about Crowdin’s policies, terms of service, and compliance standards, as well as Crowdin’s commitment to data security and privacy. ## [Danger Zone](#danger-zone) [Section titled “Danger Zone”](#danger-zone) You can transfer ownership or delete your organization from Crowdin Enterprise. Before deleting, you can export some of your organization’s data, including invoices. ### [Transfer Ownership](#transfer-ownership) [Section titled “Transfer Ownership”](#transfer-ownership) The organization ownership transfer action facilitates the seamless transition of administrative control from one user to another within the organization. This process includes initiating the transfer, designating a new owner, executing the transfer, and providing retained administrative access for the former owner. Before you transfer ownership: * Grant admin access to the user you want to assign ownership to. ### [Delete Organization](#delete-organization) [Section titled “Delete Organization”](#delete-organization) Deleting organization is permanent. It removes all the info associated with this organization. This means all the projects, organization accounts, localization resources, and other related data become irretrievable. Before you delete the organization: * Consider exporting your organization data (including TMs, glossaries, workflow templates). * Download the invoices and transaction history for each subscription. Danger If you delete your organization, you won’t be able to restore it.
# Payments and Invoices
> Learn how payments work in Crowdin and how to download invoices
Crowdin Enterprise subscription plans are billed annually. Annual subscriptions are paid upfront for the entire year. This payment is applied to your Crowdin Enterprise organization as a balance. Each month, Crowdin Enterprise deducts the corresponding amount from this balance. #### [Changing Your Subscription Plan](#changing-your-subscription-plan) [Section titled “Changing Your Subscription Plan”](#changing-your-subscription-plan) As the number of your managers and hosted words can change over time, you can upgrade or downgrade at any time. When you change your plan, the remaining balance from your previous subscription is prorated and applied to the new subscription cost at the start of the next billing cycle. For example: * If you purchased an annual Business plan and later downgrade to Team+, your balance will last longer than one year. * Conversely, if you upgrade from Team+ to Business, your balance may be depleted sooner. #### [Renewal of Subscriptions](#renewal-of-subscriptions) [Section titled “Renewal of Subscriptions”](#renewal-of-subscriptions) The renewal process depends on your chosen payment method: * **Subscriptions purchased via FastSpring (card payments)** automatically renew each year. Crowdin Enterprise sends email reminders two months and one month before your renewal date. FastSpring also sends a notification one day before your card is automatically charged for the renewal. * **Subscriptions purchased via other payment methods (e.g., invoice)** do **not** renew automatically. Crowdin Enterprise sends email reminders two months and one month before your subscription ends, prompting you to manually purchase a new subscription to continue using Crowdin Enterprise. ## [Downloading Invoices](#downloading-invoices) [Section titled “Downloading Invoices”](#downloading-invoices) Invoices represent completed transactions and can be downloaded directly from Crowdin Enterprise. To download invoices in Crowdin Enterprise, follow these steps: 1. Go to **Organization Settings > Billing**. 2. Click **View payment history**. 3. Choose the needed invoice from the list and click **Download**. 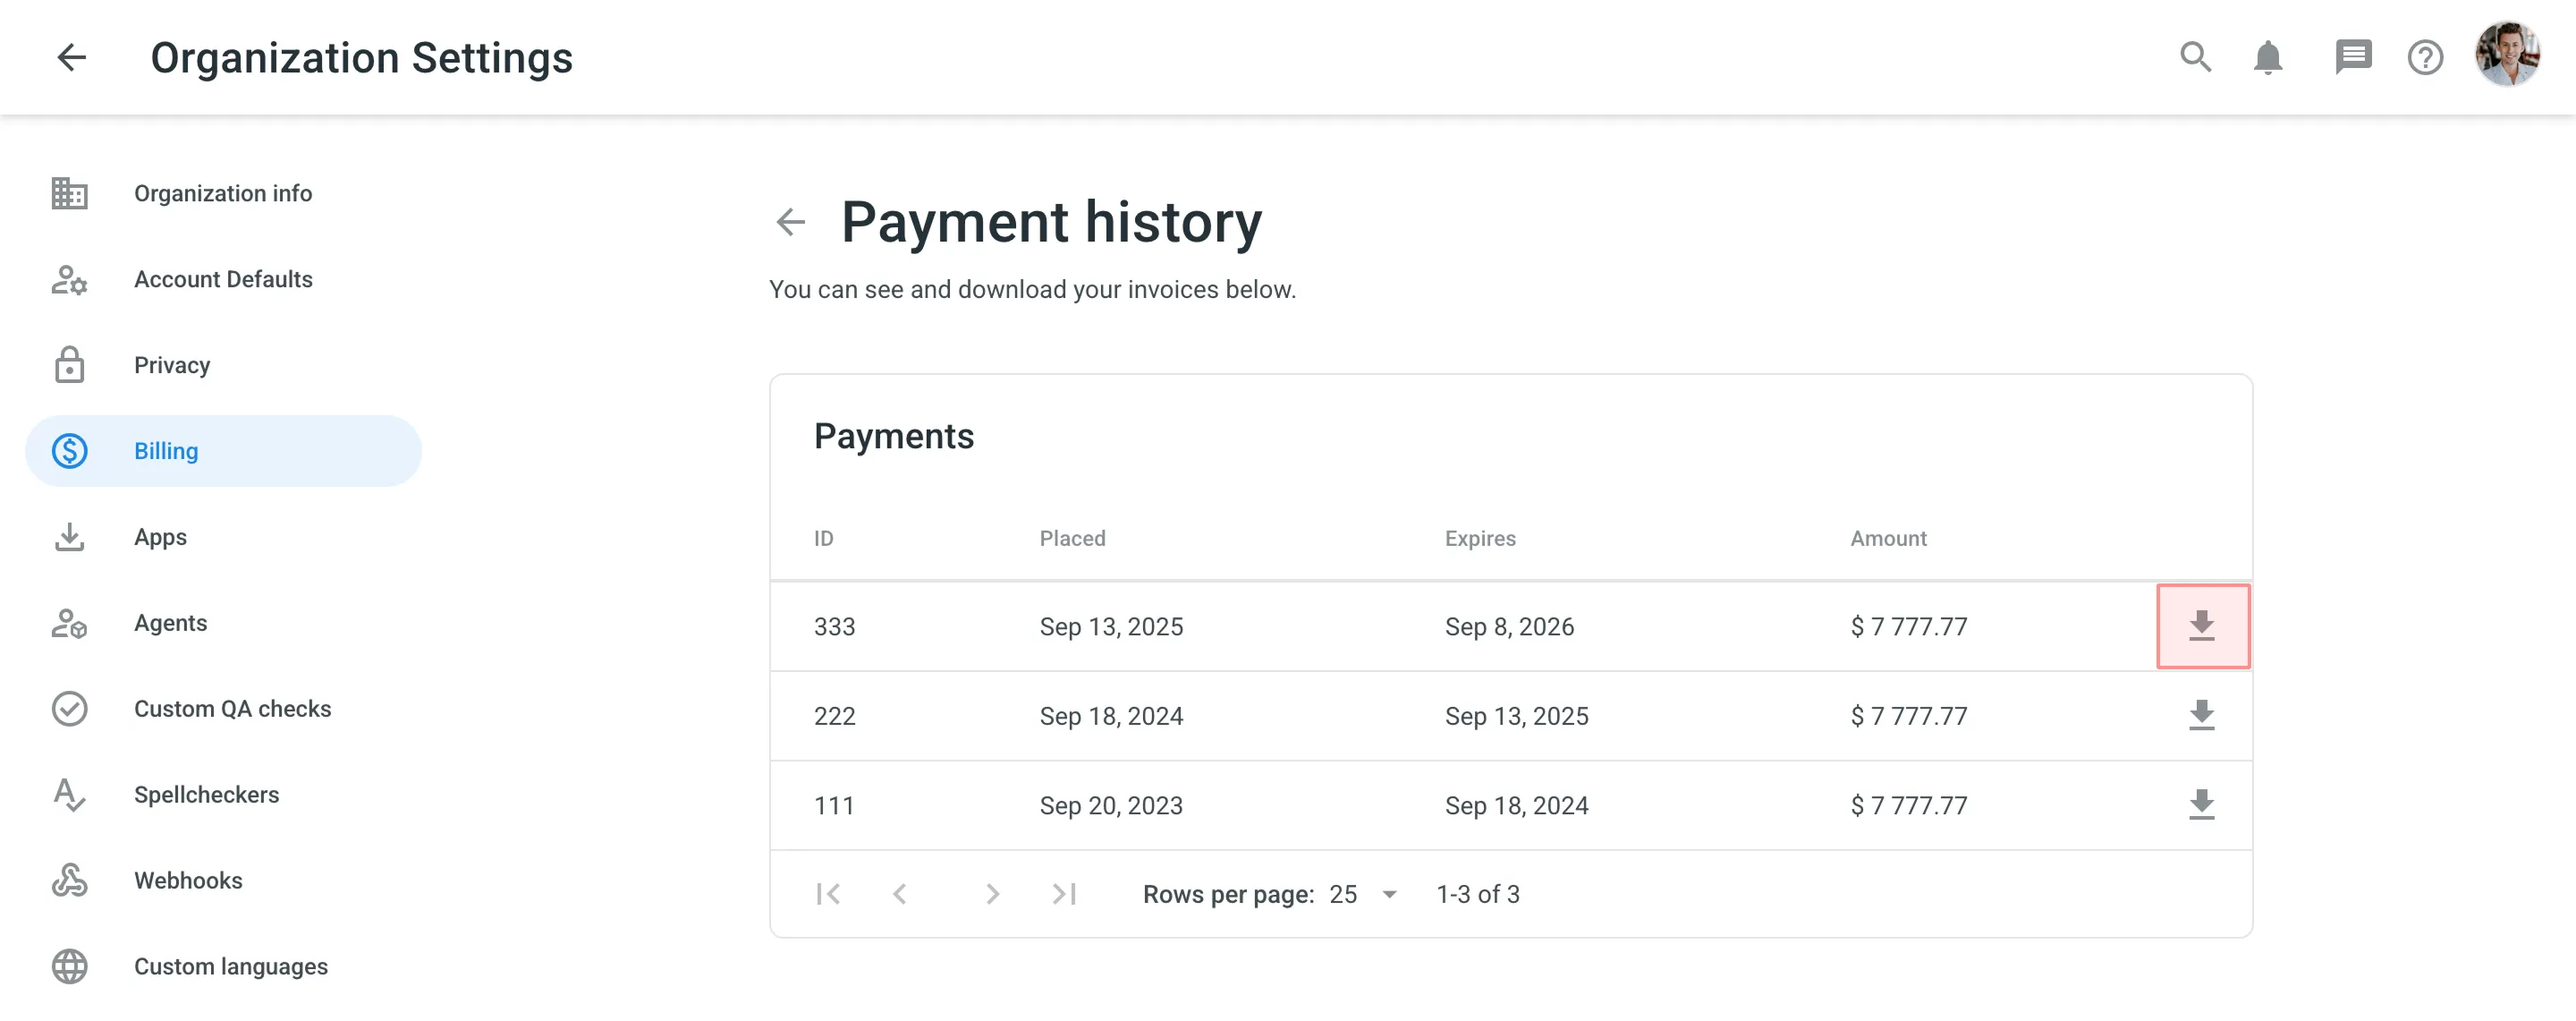 Also, you can download invoices via FastSpring, our payment processing partner. 1. Go to the [FastSpring Account Management page](https://crowdin.onfastspring.com/account). 2. To log in, specify the same email that was used to purchase your Crowdin Enterprise subscription. 3. Click **Continue**. If you have active Crowdin app subscriptions, they’ll appear in the downloaded invoice next to your primary Crowdin Enterprise subscription.  ## [See Also](#see-also) [Section titled “See Also”](#see-also) [Pricing page ](https://crowdin.com/pricing)Plans, Pricing, and Free Trial. [Changing Subscription Plan ](/enterprise/changing-subscription-plan/)Upgrade or downgrade your subscription plan. [App Subscriptions ](/enterprise/app-subscriptions/)Learn how to subscribe to paid apps in Crowdin Store. [Billing Settings ](/enterprise/billing-settings/)Update your billing information and payment method.
# Permission Granularity Mode
> Learn to granularly set permissions for your projects and resources
If your projects are organized in groups, you can either keep the resources (such as Translation Memories, Glossaries, and Machine Translation engines) at the workspace level or separate them between groups. Separating resources allows you to give the manager access to all projects within a group and access to the resources within. For this, you should switch to the **Permission granularity mode**. ## [Use Cases](#use-cases) [Section titled “Use Cases”](#use-cases) There are several reasons to switch to the Permission granularity mode: * It is easier to manage Translation Memories and Glossaries for the whole group at once. This works well for project groups with similar content, product types, or any other common criteria. * You will connect the necessary Machine Translation engines to the group, and they will be available in all its projects. * You will give the manager access to many projects in fewer steps. * Workflow templates, created at the group level, will be available for each project within a group. * Localization resources you upload to a group will be accessible only to members of that group. * You will be able to navigate to the necessary group and switch between the tabs with all resources and permissions you can manage. ## [Permissions](#permissions) [Section titled “Permissions”](#permissions) Give the manager access to all projects in the specific group with a single action. When you add managers to a group, they inherit membership and permission levels for all its subgroups and projects. To add a group manager, follow these steps: 1. Open your organization’s **Workspace** and select **Users** on the left sidebar. 2. Double-click on the user or right-click and select **Profile** from the menu. 3. In the user profile, switch to the **Groups** tab and select the groups a user should manage. 4. Click **Save**. 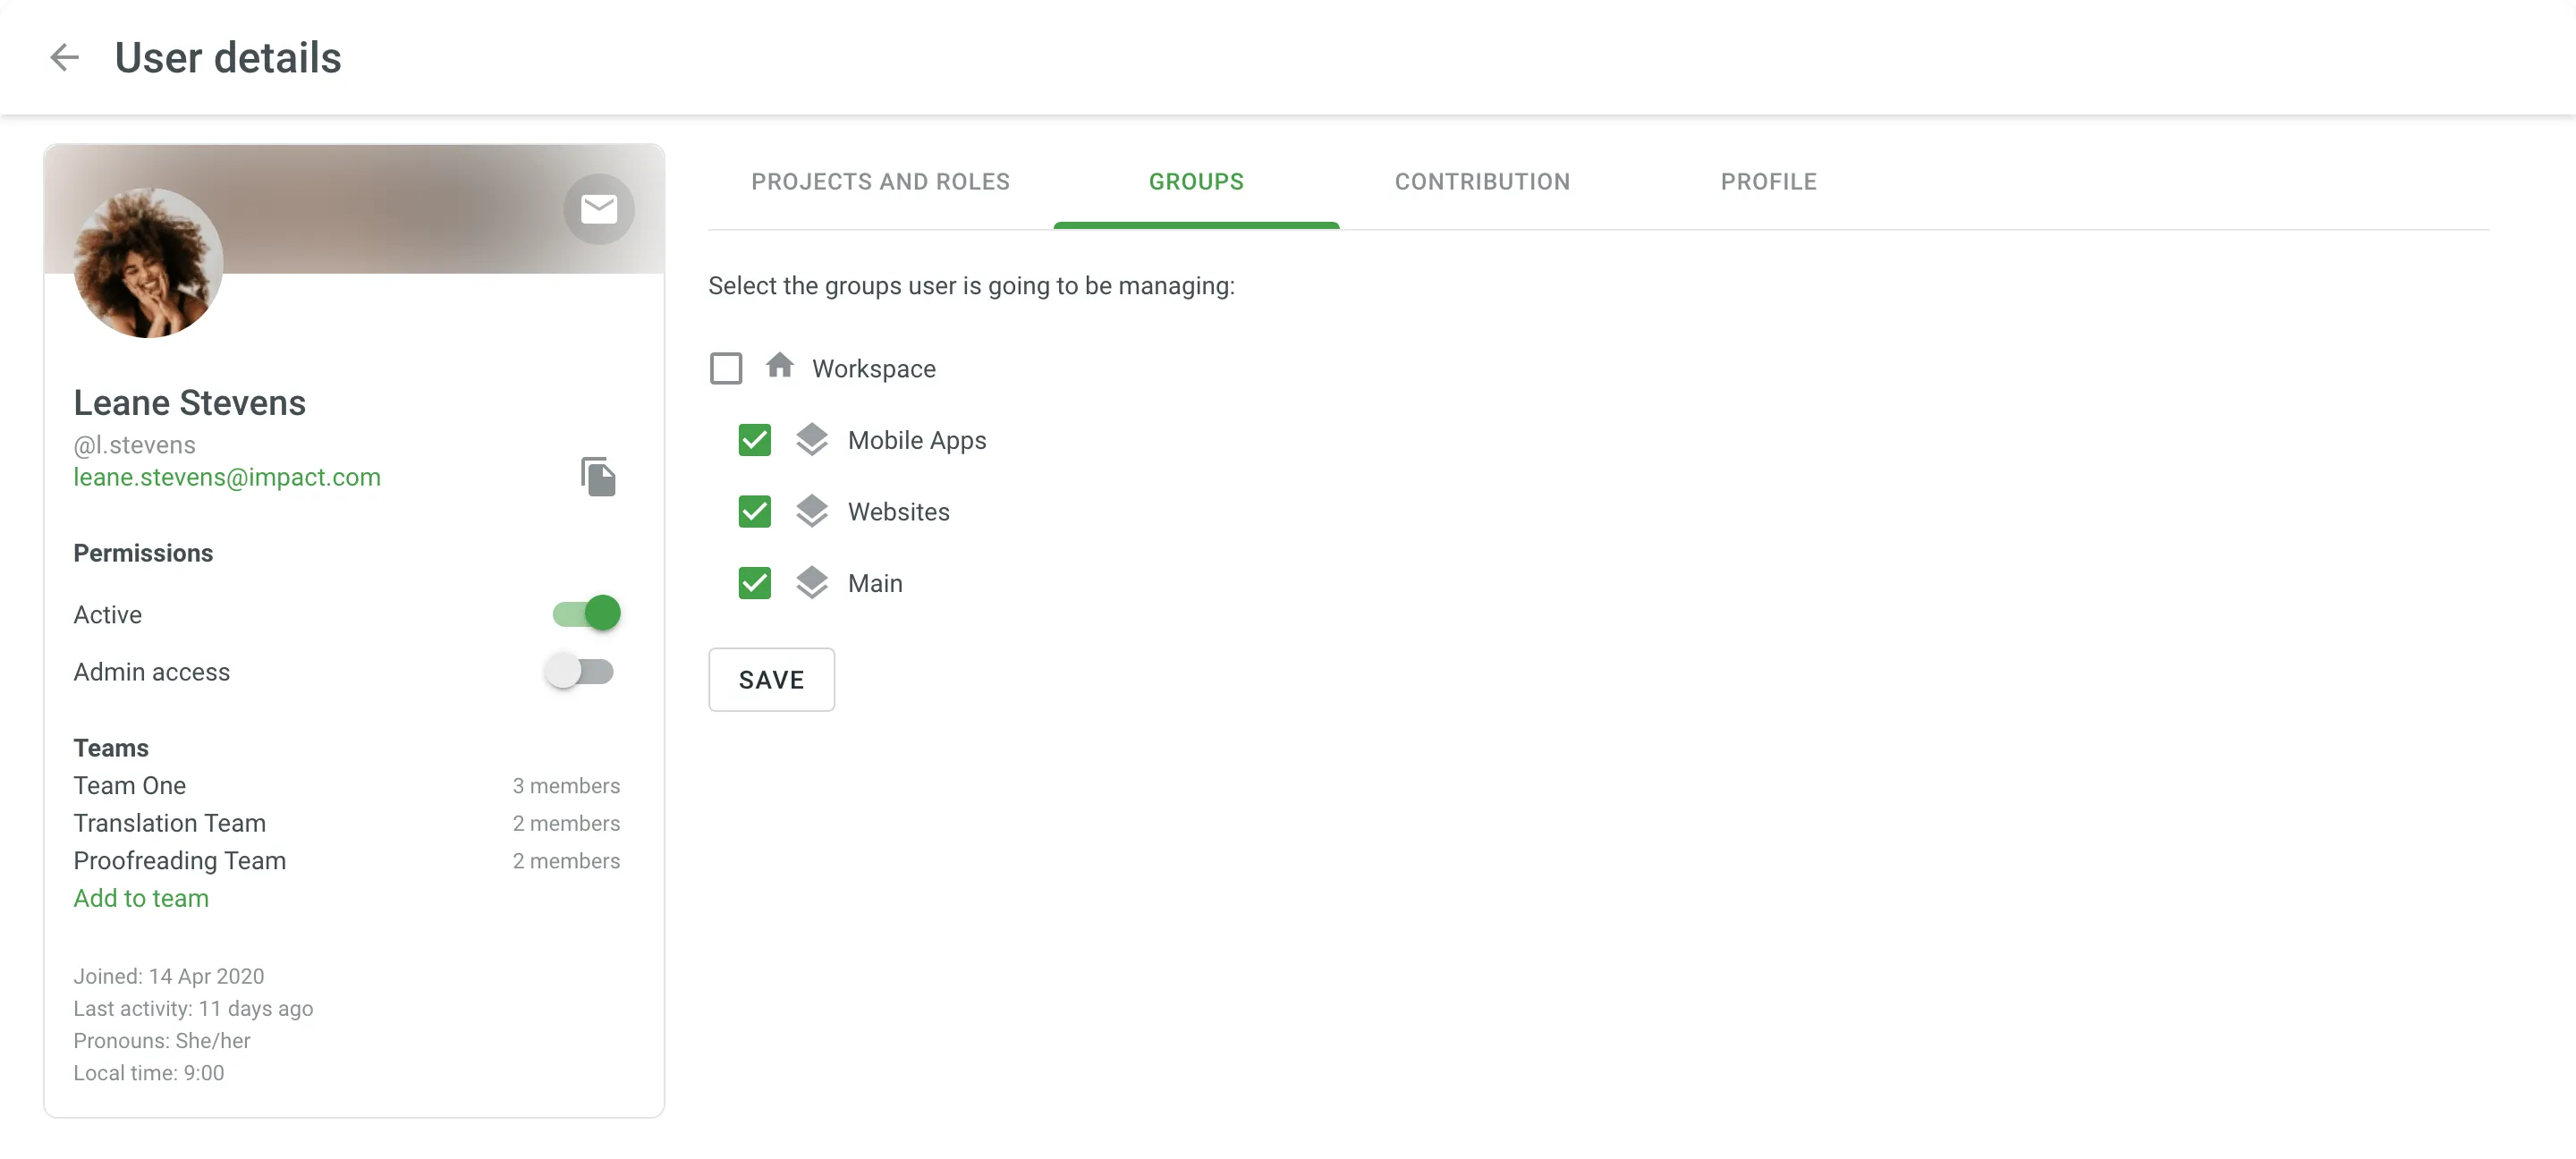 Read more about [Manager Role](/enterprise/roles/#manager). ## [Shared Localization Resources](#shared-localization-resources) [Section titled “Shared Localization Resources”](#shared-localization-resources) For each separate group, you can: * Add new workflow templates and edit existing ones * Manage Translation Memories and Glossaries * Connect Machine Translation engines When you open a group of projects from the workspace, switch between the tabs to access the necessary resources. [Glossary ](/enterprise/glossary/) [Translation Memory ](/enterprise/translation-memory/) [Machine Translation ](/enterprise/machine-translation/) [Workflows ](/enterprise/workflows/) ## [Enabling Permission Granularity Mode](#enabling-permission-granularity-mode) [Section titled “Enabling Permission Granularity Mode”](#enabling-permission-granularity-mode) Only organization owners and admins can switch the organization to the Permission granularity mode. To manage resources for project groups, follow these steps: 1. Click on your profile picture in the upper-right corner and select **Organization Settings**.  2. Switch to the **Permission granularity** section on the left sidebar and click **Enable Permission Granularity Mode**. Caution If you want to disable Permission granularity mode and switch back to simplified resource management, make sure to reassign group and subgroup managers to the respective projects in your workspace beforehand. All glossaries, TMs, and MTs will be automatically moved to the workspace level and become accessible for assignment to all organization projects. ## [See Also](#see-also) [Section titled “See Also”](#see-also) [Organization Settings ](/enterprise/organization-settings/)Manage your Crowdin Enterprise organization settings.
# Pre-Translation
> Speed up the translation process and ease the work of translators
Pre-translation helps speed up the translation process and ease the work of translators. It also allows you to save funds as part of translations can be automated. You can use and combine the following types of pre-translation: * **AI Pre-Translate** - uses AI Models to pre-translate the content. * **Machine Translation (MT) Pre-translate** – takes translations from supported machine translation engines (MTE) and applies them to the project content. You need to configure at least one of the translation engines to enable this feature. * **Translation Memory (TM) Pre-translate** – takes translations from the TM vault uploaded to the system and applies them to project content. [Crowdin AI ](/enterprise/crowdin-ai/)Read more about Crowdin AI and how to use it. [Machine Translation ](/enterprise/machine-translation/)Read more about Machine Translation and how to use it. [Translation Memory ](/enterprise/translation-memory/)Read more about Translation Memory and how to use it. ## [Manual Pre-translation](#manual-pre-translation) [Section titled “Manual Pre-translation”](#manual-pre-translation) To apply Pre-translation manually, follow these steps: 1. Open your project and select **Dashboard** on the left sidebar. 2. Click **Pre-translate** and select the preferred method (i.e., via Translation Memory, via Machine Translation, or AI). 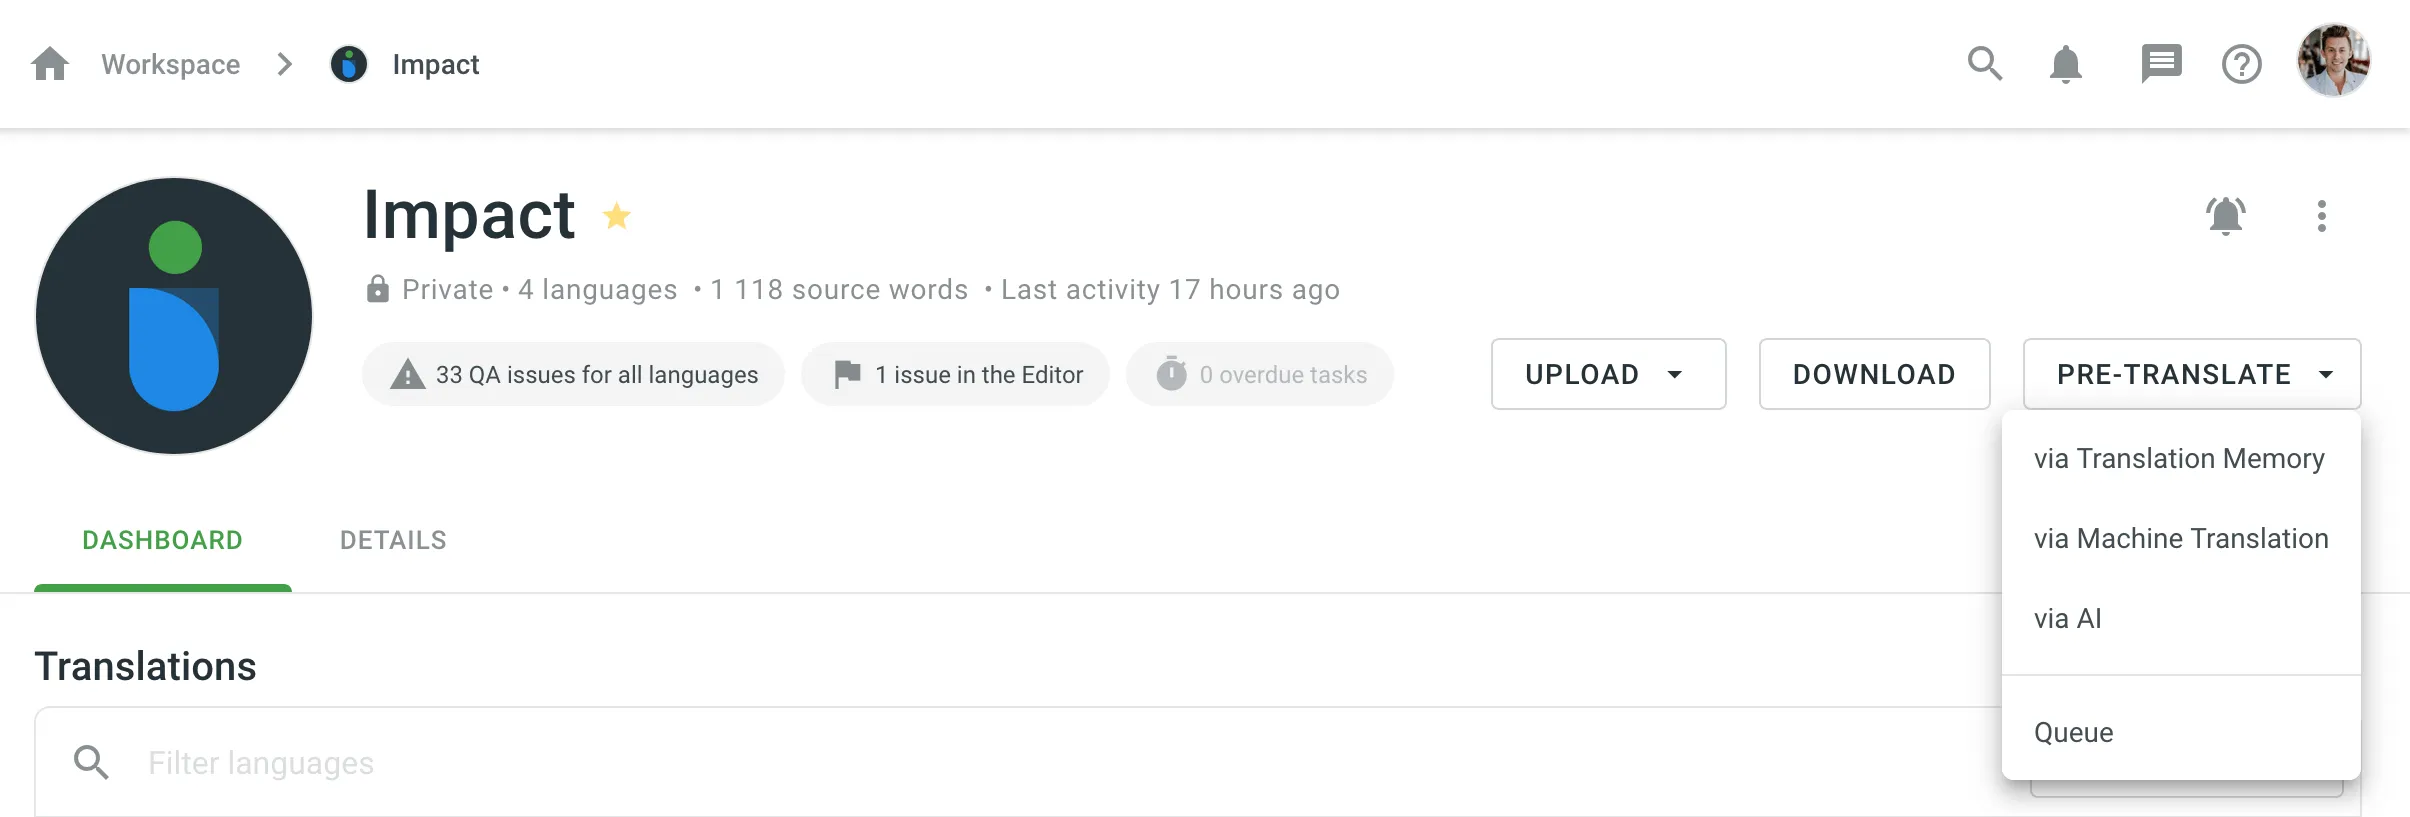 3. Configure the following pre-translation parameters: * **Target languages** – select the languages to pre-translate into. * **Files for pre-translation** – select the files or folders you want to pre-translate. * **Apply to untranslated strings only** – when selected, pre-translation will only be applied to strings that don’t have any translations. * **Allow duplicate translations** – adds translations even if they duplicate existing ones. Useful when comparing AI prompts or MT engines in the [Pre-translation Accuracy](/enterprise/project-reports/#pre-translation-accuracy) report, as it ensures that all translations are registered as new and included in accuracy calculations. * **Filter by labels / Exclude labels** – include or exclude specific strings based on their assigned labels. Read more about [Labels](/enterprise/string-management/#labels). * **Minimum match ratio** (Specific to pre-translation via TM) – set a similarity threshold between **40% and 100%**, or select **Perfect match (101%)**. Read more about [TM Match Types](/enterprise/translation-memory/#tm-match-calculation). * **Skip approved translations** (Specific to pre-translation via TM and MT) – prevents overwriting strings that already have approved translations. * **Approve added translations** (Specific to pre-translation via TM) – allows you to auto-approve translations added through pre-translation. Options include: * **All** – approve all added translations. * **With perfect match** – approve only those with a 101% match. * **With perfect match (approved previously)** – approve perfect matches only if they were already approved before. * **All (skip auto-substituted translations)** – approve everything except translations improved by auto-substitution. * **MT engine** (Specific to pre-translation via MT) – select the machine translation engine to use for pre-translation. * **AI prompt** (Specific to pre-translation via AI) – select or create the prompt that will guide the AI model’s behavior during pre-translation. 4. Click **Pre-translation**. ### [Pre-translating Files and Folders via Context Menu](#pre-translating-files-and-folders-via-context-menu) [Section titled “Pre-translating Files and Folders via Context Menu”](#pre-translating-files-and-folders-via-context-menu) In addition to running the pre-translation from the project’s **Dashboard**, you can quickly pre-translate selected files or folders directly from the language page or **Sources > Files** using the context menu. #### [From the Language Page](#from-the-language-page) [Section titled “From the Language Page”](#from-the-language-page) To pre-translate a single file or folder from the language page, follow these steps: 1. Open your project and select the target language. 2. Click (or right-click) on the needed file or folder and select **Pre-translate**. 3. Select the preferred pre-translation method: **via TM**, **via MT**, or **via AI**. 4. In the Pre-translate dialog, the language and file/folder will already be selected for pre-translation. Configure the rest of the pre-translation parameters as described in the [Manual Pre-translation](#manual-pre-translation) section. 5. Click **Pre-translation**. #### [From Sources > Files](#from-sources--files) [Section titled “From Sources > Files”](#from-sources--files) To pre-translate one or multiple files or folders from the **Sources > Files** section, follow these steps: 1. Open your project and go to **Sources > Files**. 2. Click (or right-click) on the needed file or folder, or select multiple items using `Ctrl` , `⌘` , or `Shift` and then click (or right-click). 3. Select **Pre-translate**, then select the preferred pre-translation method: **via TM**, **via MT**, or **via AI**. 4. In the Pre-translate dialog, the files or folders you selected in **Sources > Files** will already be selected for pre-translation. Configure the rest of the pre-translation parameters as described in the [Manual Pre-translation](#manual-pre-translation) section. 5. Click **Pre-translation**. ### [Pre-translation Queue](#pre-translation-queue) [Section titled “Pre-translation Queue”](#pre-translation-queue) The Pre-translation queue allows you to trigger multiple manual pre-translations via TM, MT, or AI, each with different settings. After initiating a pre-translation, each instance enters a queue with a status of **Pending**. Upon triggering a manual pre-translation, you will receive a notification indicating that the pre-translation has been added to the queue. To review all pre-translations currently in the queue, navigate to **Tools > Pre-translation queue** in your project. Alternatively, click **Pre-translation** in the project’s **Dashboard** and select **Queue** to be redirected directly to the **Tools > Pre-translation queue**. Each entry in the Pre-translation queue table includes the following details: * **Created at:** Displays the date and time when the pre-translation was initiated * **Type:** TM, MT (MT engine name), AI (AI prompt name) * **Status:** Pending, In progress, Completed, Canceled You can cancel any pre-translation that is still in the queue if needed. Additionally, for completed pre-translations, you can view a report detailing the target languages, number of translations added and skipped, file list, and more. ## [Automatic Pre-translation](#automatic-pre-translation) [Section titled “Automatic Pre-translation”](#automatic-pre-translation) When working with [projects with a workflow](/enterprise/creating-project/#projects-with-a-workflow), you can add AI Pre-translation, MT Pre-translation, or TM Pre-translation workflow steps to your project workflow to automate the Pre-translation of your content. Read more about [Workflows](/enterprise/workflows/). ## [Handling QA Issues During Pre-translation via AI](#handling-qa-issues-during-pre-translation-via-ai) [Section titled “Handling QA Issues During Pre-translation via AI”](#handling-qa-issues-during-pre-translation-via-ai) If the AI provider returns translations with QA issues during pre-translation, Crowdin Enterprise will collect the strings to which these faulty translations were applied and automatically reinitiate the pre-translation. The affected strings will be sent back to the AI provider along with details of the detected QA issues to ensure that the translations are corrected and meet quality standards. ## [Translation Memory Priority During Pre-translation via TM](#translation-memory-priority-during-pre-translation-via-tm) [Section titled “Translation Memory Priority During Pre-translation via TM”](#translation-memory-priority-during-pre-translation-via-tm) When using pre-translation via TM and the **Share Translation Memories** option is enabled, Crowdin Enterprise applies translations from translation memories based on a specific priority order. This priority ensures that translations come from the most relevant source, optimizing translation consistency and quality. The order of priority is as follows: 1. **Default TM**: Matches are first searched for in the project’s default TM. 2. **Assigned TMs**: If no match is found in the default TM, the system continues searching through any TMs assigned specifically to the project. 3. **Shared TMs**: If no match is found in the default or assigned TMs, translations are retrieved from shared TMs available to the project. This sequence allows Crowdin Enterprise to apply translations from the most relevant TM source first, ensuring that high-quality matches are prioritized when multiple TMs are available. ## [Q\&A](#qa) [Section titled “Q\&A”](#qa)
# Privacy
> Configure privacy settings for your organization
The **Privacy** page provides you with various authentication settings for your Crowdin Enterprise organization. You can set up how people can join your organization and what authentication methods could be used to log in. To configure your privacy settings, follow these steps: 1. Click on your profile picture in the upper-right corner and select **Organization Settings**.  2. Switch to the **Privacy** section on the left sidebar. ## [Security Options](#security-options) [Section titled “Security Options”](#security-options) Configure advanced security settings such as **Allow Signup**, **Admin-Managed Invitations**, **Two-Factor Authentication**, **Device Verification**, and **IP Allowlist**. #### [Allow Signup](#allow-signup) [Section titled “Allow Signup”](#allow-signup) Select whether people will be able to join the organization without prior invitation via email or a shareable link. After the registration, admins and project managers will be able to manage organization members’ permissions. #### [Admin-Managed Invitations](#admin-managed-invitations) [Section titled “Admin-Managed Invitations”](#admin-managed-invitations) Restrict the ability to invite new members to the organization to administrators only. When this option is enabled, project managers can still invite users who are already part of the organization to join their projects but won’t be able to add new users to the organization. This option is useful when you want to maintain stricter control over who joins your organization, especially in regulated environments or when managing access centrally through a small group of administrators. #### [Two-Factor Authentication](#two-factor-authentication) [Section titled “Two-Factor Authentication”](#two-factor-authentication) Two-factor authentication ensures an additional level of security for your Crowdin Enterprise organization. Once you enable it, all organization members will be asked to set up two-factor authentication for their accounts. From this point, on each login, along with a username and password, organization members will use an authentication code. #### [Device Verification](#device-verification) [Section titled “Device Verification”](#device-verification) Add an extra security step when users log in from a new device. Once enabled, Crowdin Enterprise will require device verification via email before granting access to your organization. This helps ensure that only authorized users can access your organization, even if their login credentials are compromised. Device verification is triggered when: * A user logs in from an unrecognized device. * A user clears their browser cookies or switches browsers. Device verification can be bypassed if: * [Two-factor authentication](#two-factor-authentication) (2FA) is enabled and configured for the user’s account. In this case, device verification is not enforced since 2FA already provides strong authentication. * Your organization uses external authentication through your own identity provider and doesn’t rely on email verification. #### [IP Allowlist](#ip-allowlist) [Section titled “IP Allowlist”](#ip-allowlist) Grant access to your Crowdin Enterprise organization only to connections from allowed IP addresses. With this feature, you can specify a list of IP addresses that can access your Crowdin Enterprise organization. For example, you can use IP Allowlist to grant access only to connections from your corporate network while blocking all other connections from IP addresses that don’t belong to your IP Allowlist. Once the IP Allowlist is enabled, Crowdin Enterprise starts filtering all connections both via UI and API. To start using the IP Allowlist, first form the list of IP addresses and ranges that should have access to your organization using CIDR notation. Read more about [CIDR notation](https://en.wikipedia.org/wiki/Classless_Inter-Domain_Routing#CIDR_notation). IP Allowlist can contain an unlimited number of IP addresses and ranges that can access your Crowdin Enterprise organization via UI and API. Once you collected all of the IP addresses and ranges that should be added to the IP Allowlist, [Contact Support Team](https://crowdin.com/contacts) to enable the IP Allowlist for your organization. If you need to edit or remove some records from your IP Allowlist, contact Support Team with the respective request. ## [Authentication Methods](#authentication-methods) [Section titled “Authentication Methods”](#authentication-methods) The Authentication methods section allows you to select how members can log into your Crowdin Enterprise organization. Hence, people still have time to set up other authentication methods. When you re-enable some of the earlier disabled authentication methods, they will immediately become available to the organization members. * *Email/Username and Password* – members can use their email or Crowdin Enterprise username along with a password to log in. * *Passkey* – members can log in using secure passkeys for passwordless authentication experience and enhanced account protection. * *Magic Link* – members can request a one-time authentication link that will be sent to their emails. * *Crowdin* – members can log in with their Crowdin account. * *Facebook* – members can log in with their Facebook account. * *GitHub* – members can log in with their GitHub account. * *GitLab* – members can log in with their GitLab account. * *Google* – members can log in with their Google account. * *X* – members can log in with their X account. * *Open ID Connect* – members can log in with their Open ID account. * *SAML* – members can log in with their IDP account. ## [Custom Auth Applications](#custom-auth-applications) [Section titled “Custom Auth Applications”](#custom-auth-applications) The Facebook, GitHub, GitLab, Google, and X SSO allow you to use the default preconfigured Crowdin Enterprise global auth application, or you can set up your own custom auth application. To configure your custom auth application, follow these steps: 1. Click on your profile picture in the upper-right corner and select **Organization Settings**. 2. Switch to the **Privacy** section on the left sidebar. 3. Scroll down to the Authentication methods section and click on the needed SSO you’d like to set up the custom auth application for. 4. Select **Custom auth application** and paste your credentials from your custom auth application and click **Save**. 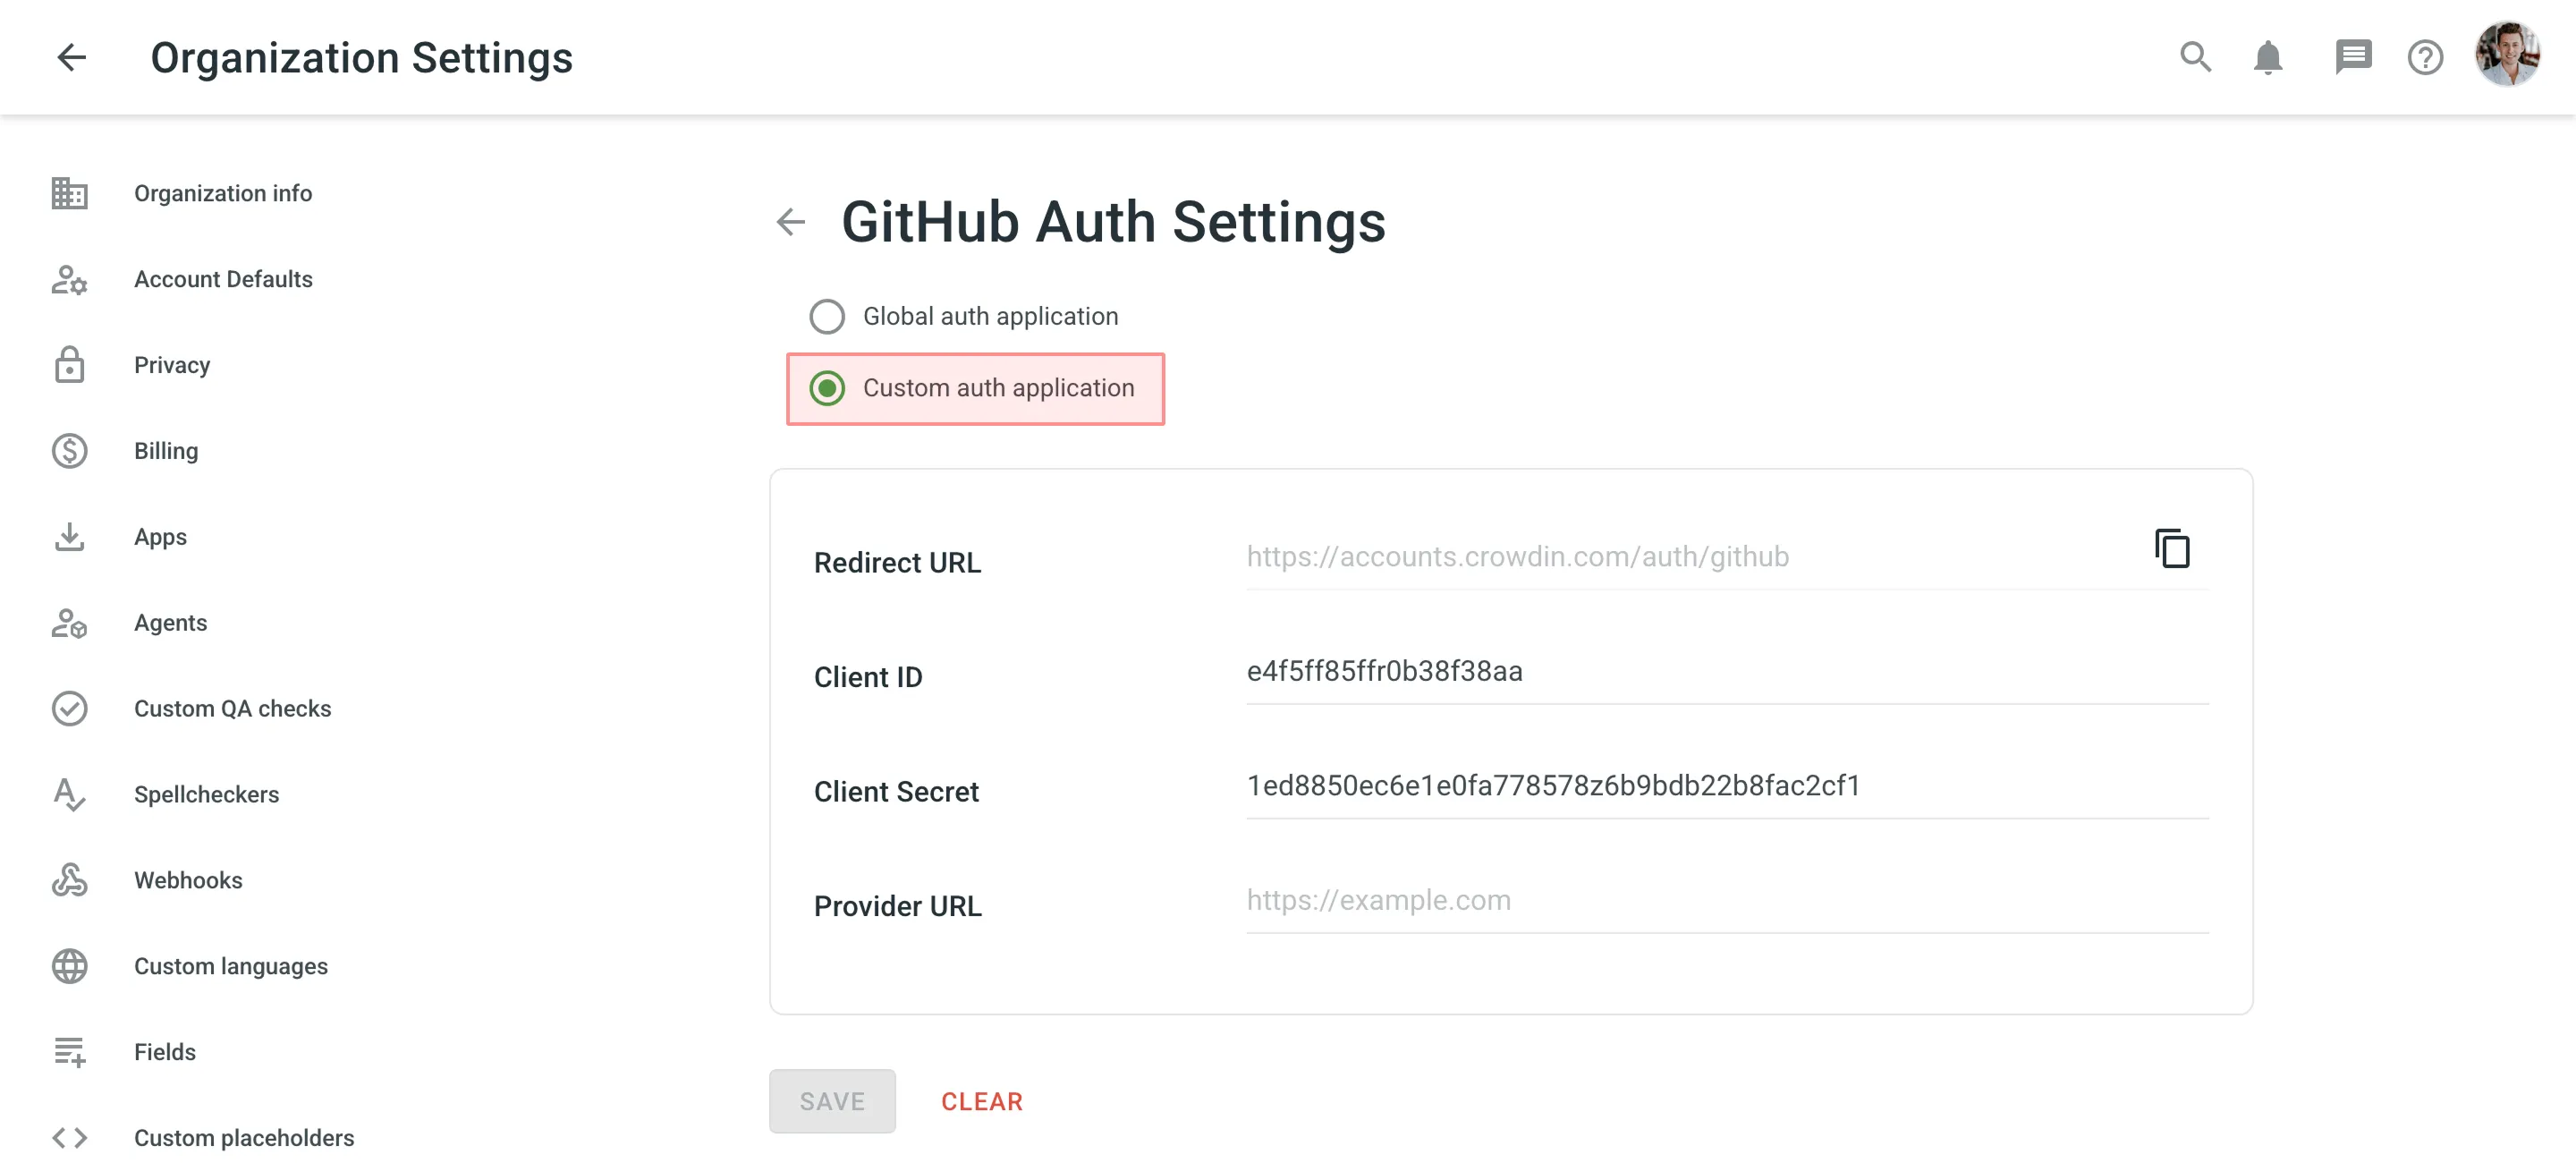 5. Copy the **Redirect URL** from the **Auth Settings** page and paste it into your custom auth application settings. Similar configuration flow is also applicable to the Open ID Connect authentication method. ## [See Also](#see-also) [Section titled “See Also”](#see-also) [SAML Single Sign-On ](/enterprise/saml/)Learn how to set up SAML SSO for your organization.
# Project Activity
> Track all the events that happen in the project
The Activity section lets you track all main events that happen in the project. For good readability, activity records are grouped by days, users, and activity types. ## [Filter Activity Records](#filter-activity-records) [Section titled “Filter Activity Records”](#filter-activity-records) By default, the project Activity section displays activity records for all activity types, all project languages, all users, and all time (newest activities first). You can filter activity records by the following activity types: * **All types** – Show all activity records. * **Update project settings** – Show records about project settings changes (e.g., updated target languages, updated export settings, etc.) * **Source phrase updates** – Show records about source files uploads, updates, and removals, updates to source texts and context, etc. * **Translation activity** – Show records about added and removed translations, votes, and approvals. * **Comments and issues** – Show records about added comments, created and resolved issues. You can also filter activity records by a specific language or all languages, a specific user or all users, and the desired time period (e.g., Today, Yesterday, Last 7 days, Last 30 days, All time, and Custom Range). 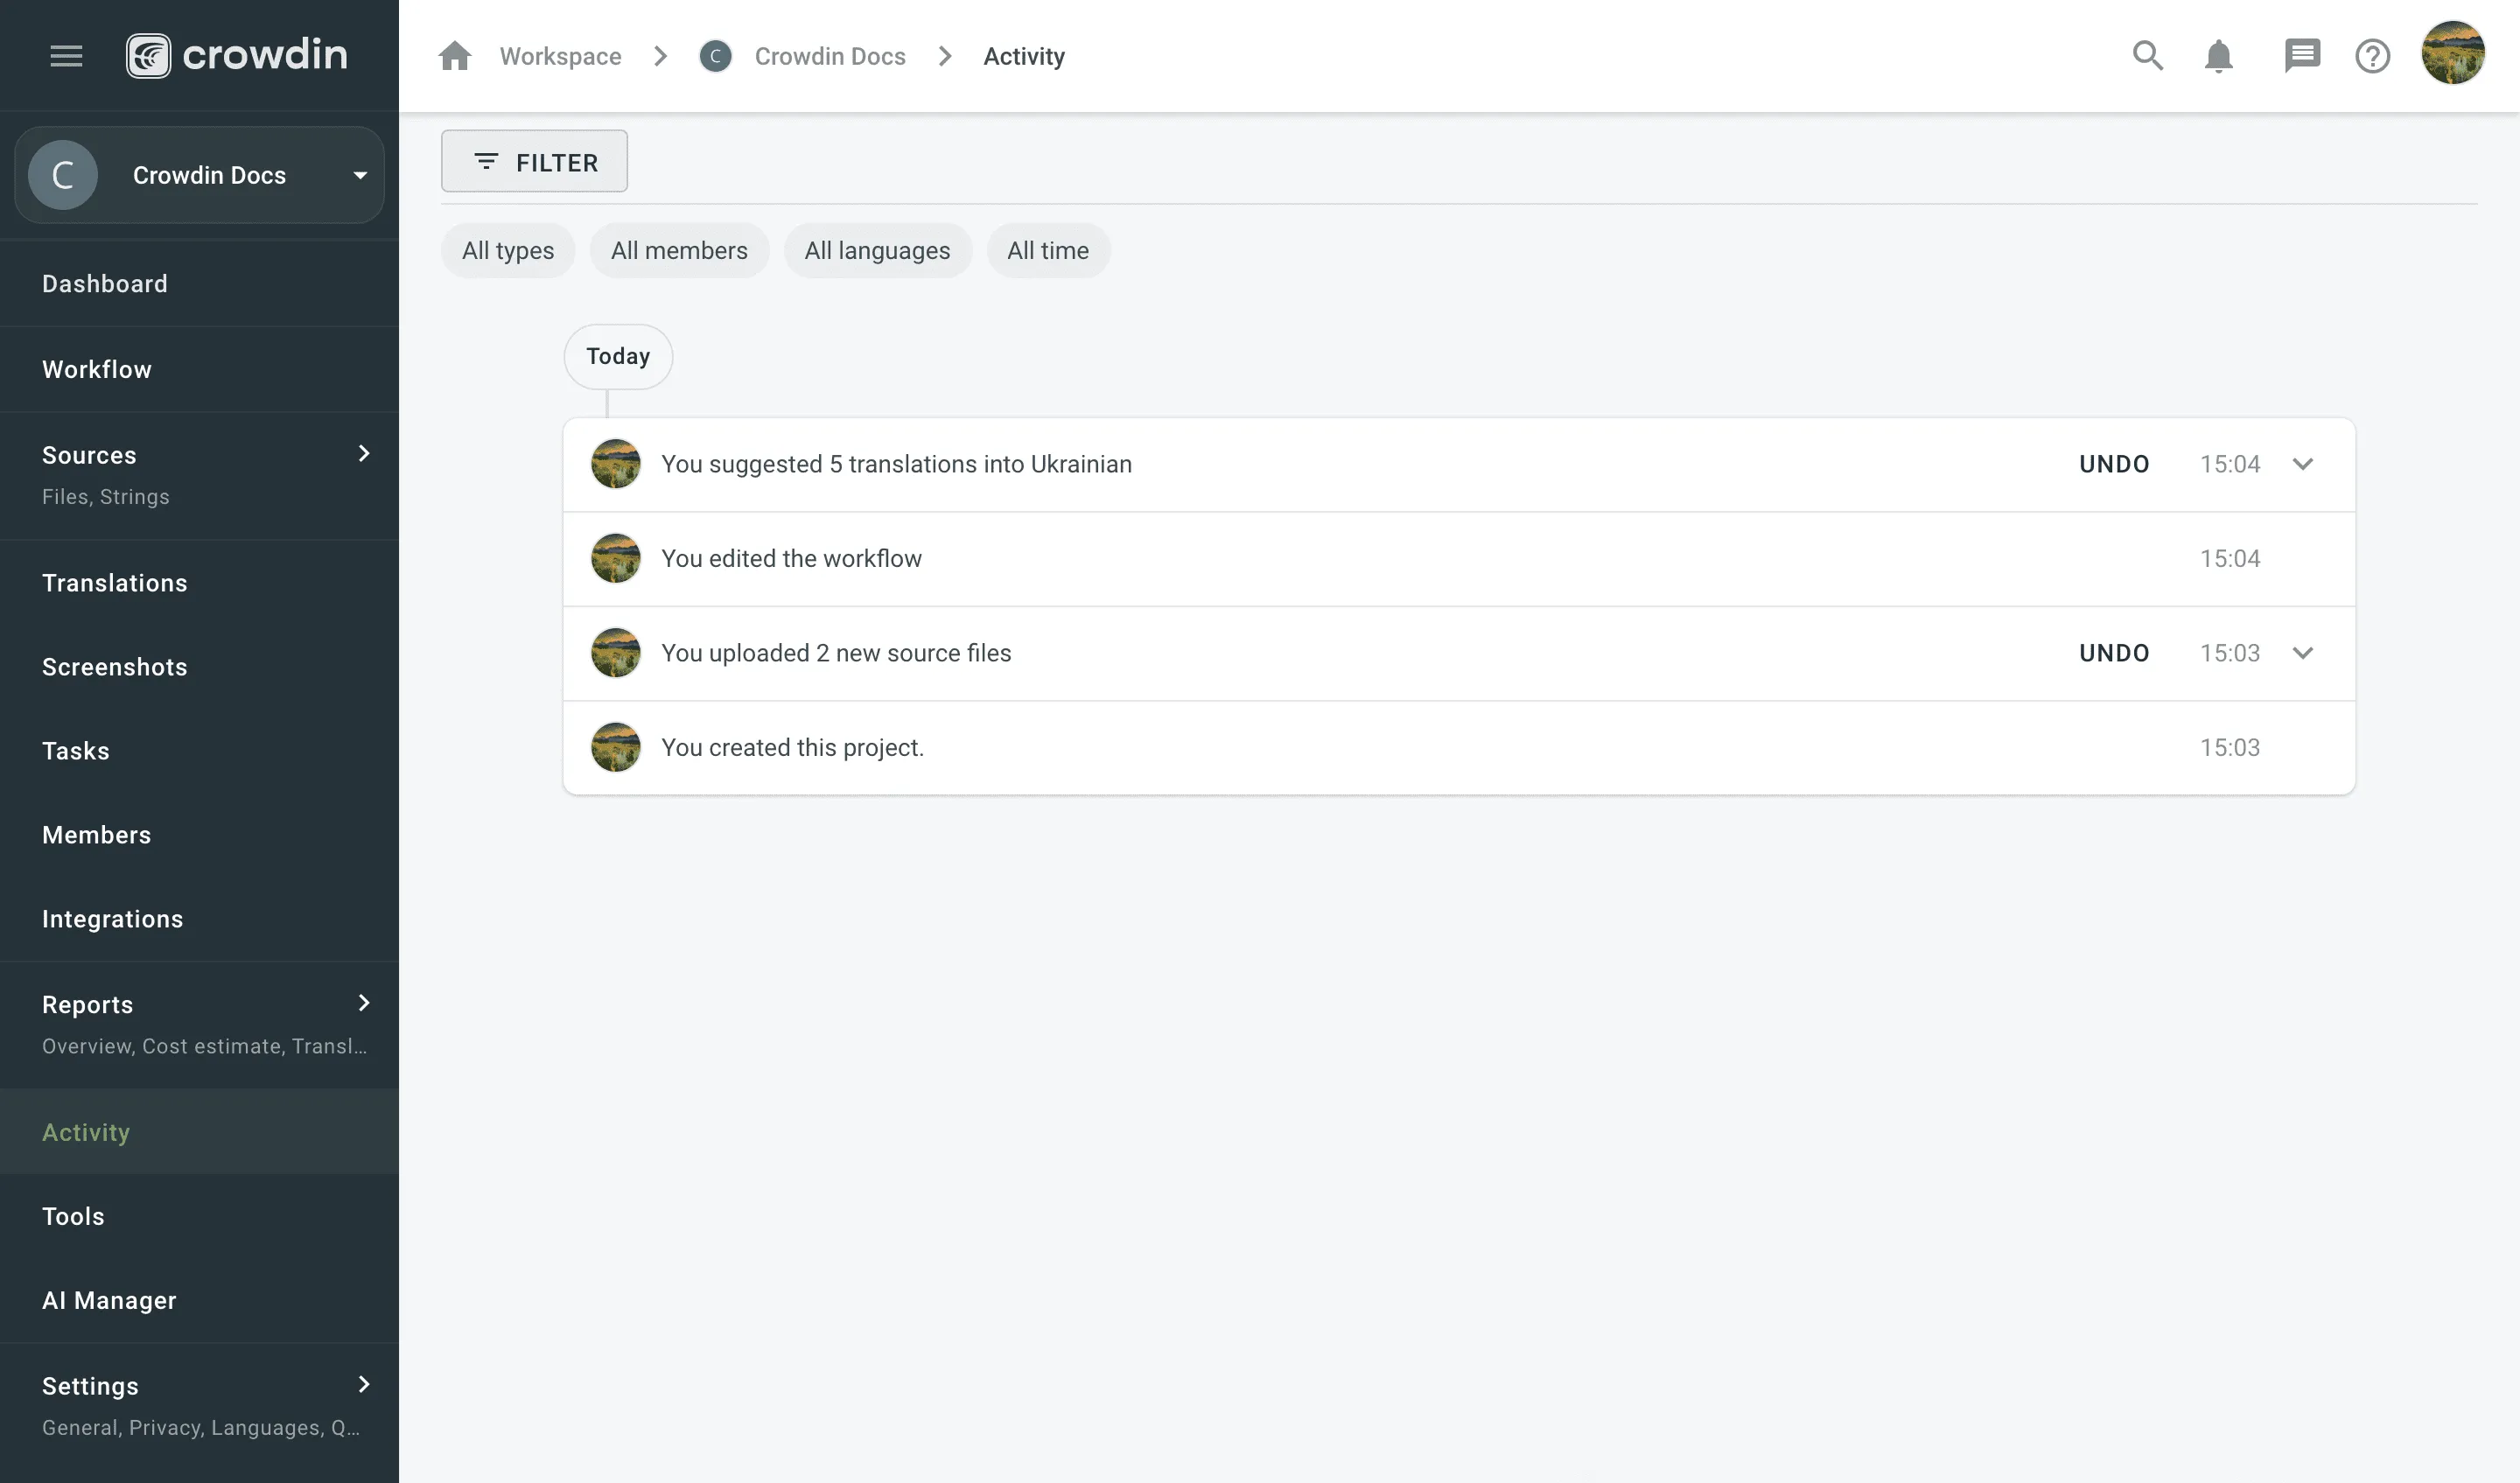 ## [Undo Activity Records](#undo-activity-records) [Section titled “Undo Activity Records”](#undo-activity-records) If some unwanted actions (e.g., wrong translations upload, mistaken source file deletion, etc.) happen in the project, the project owner and managers can cancel them in the Activity section by clicking UNDO next to the respective activity record. Proofreaders and translators can only cancel their own actions. Since activity records are grouped by types, you can either undo a whole group of activities or click and undo only some of them. 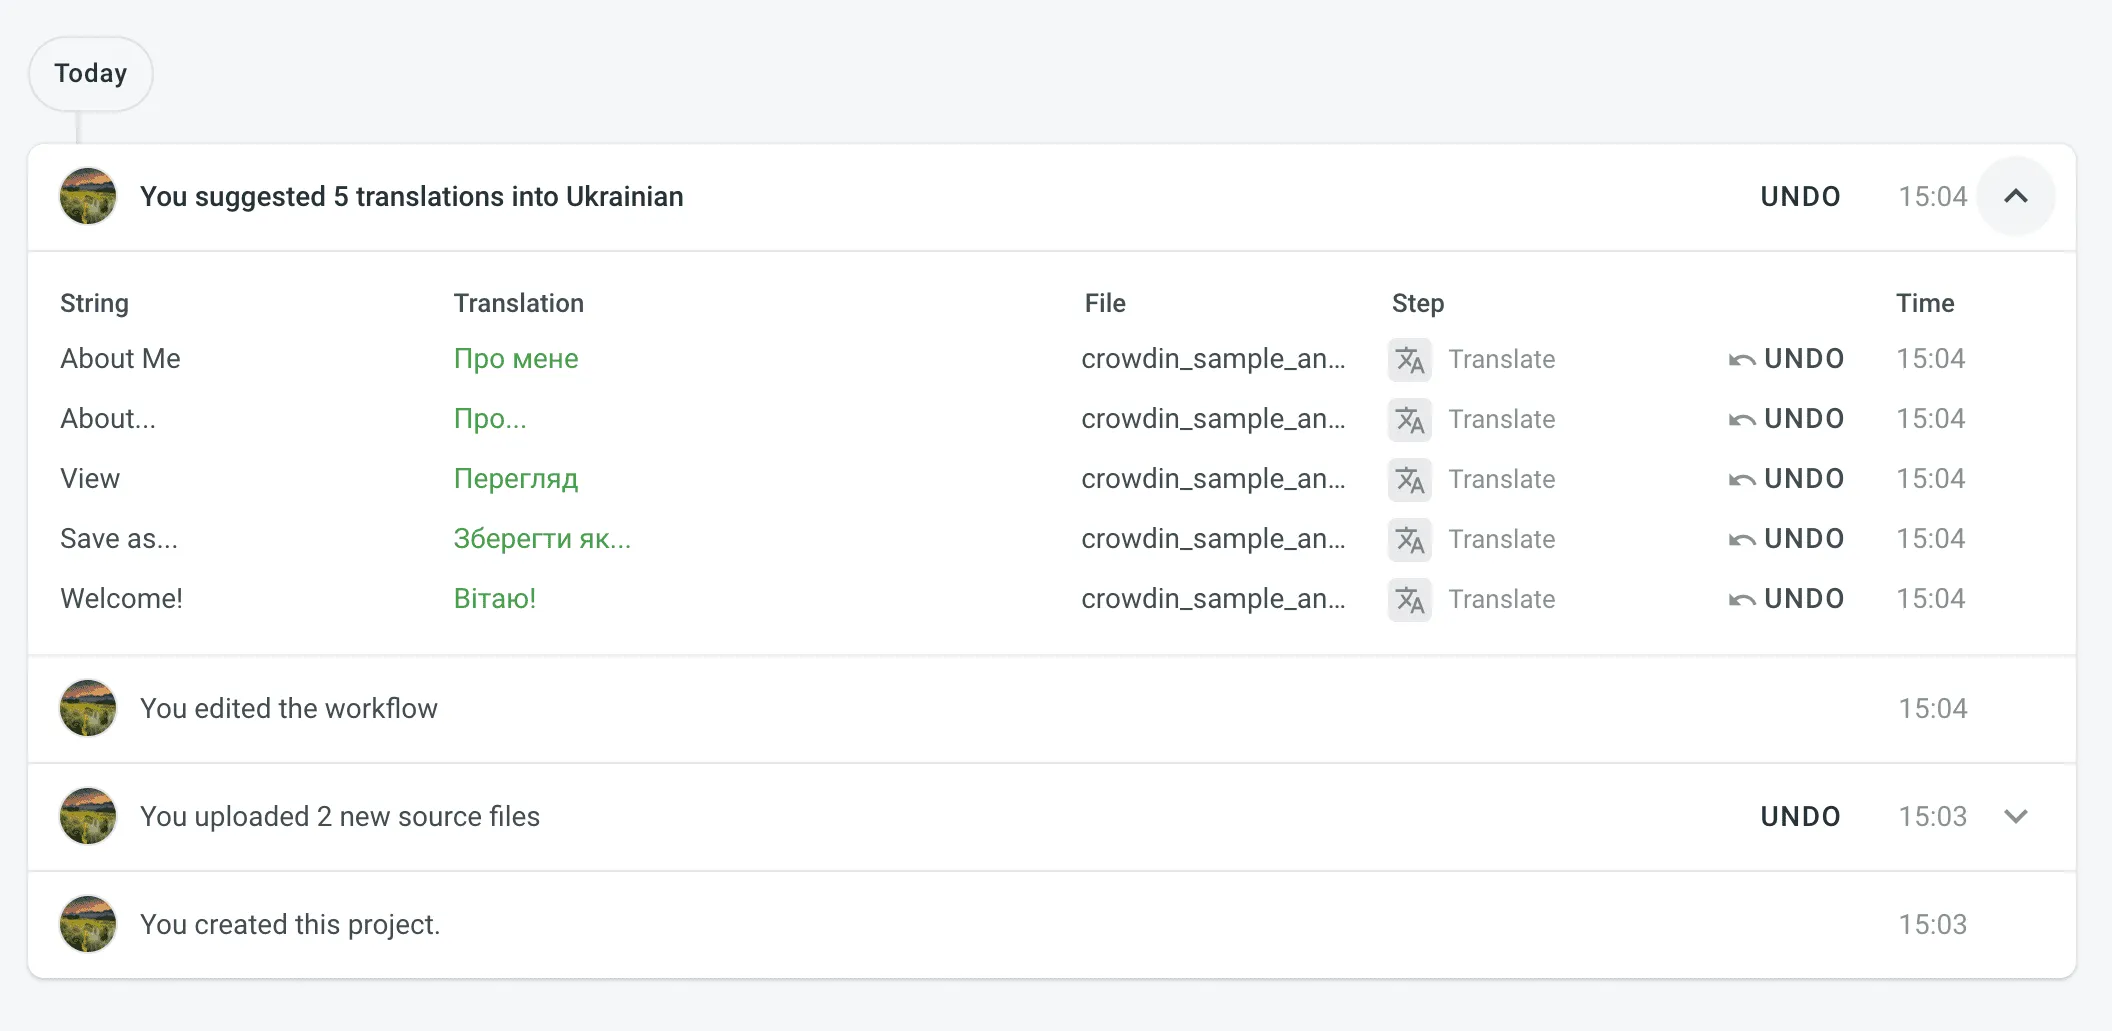 ## [View Updated File Diffs](#view-updated-file-diffs) [Section titled “View Updated File Diffs”](#view-updated-file-diffs) For updated project files, besides the number of added, deleted, and updated strings, you can view the actual strings added, deleted, or updated during the source file update and word quantity contained in the strings. To view the detailed diff for the file update, click **Diff** next to the needed activity record. For grouped project file update records, click to see all updated files in the group and then click **Diff** next to the needed file. 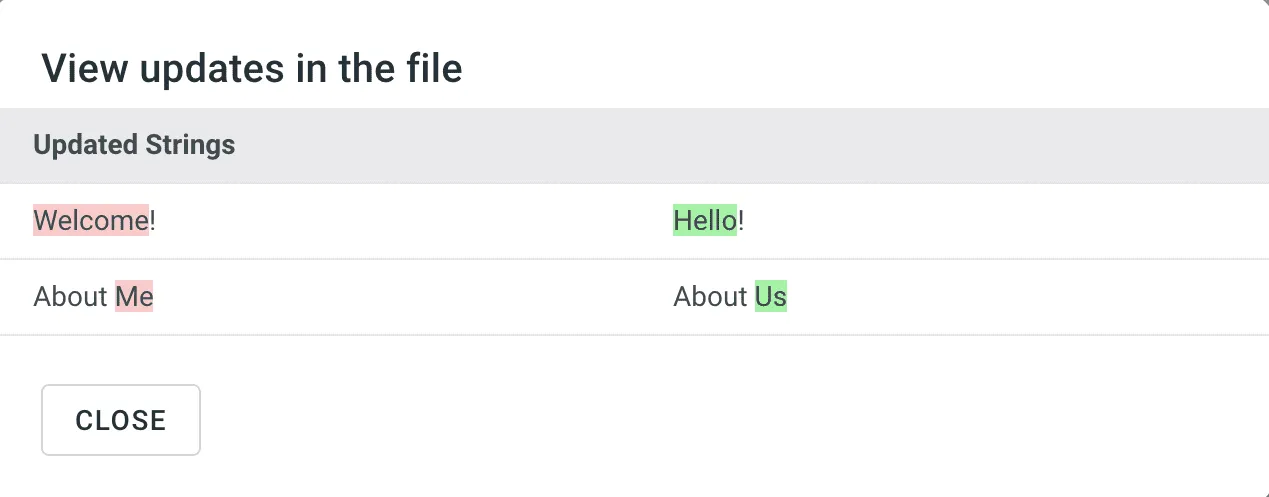
# Project Members
> Manage project members and their roles in your project
Roles define what project members can do based on their responsibilities and assigned languages. Project owners, admins, and managers can invite new members, assign roles, and manage their permissions. Language Coordinators can also manage members within their assigned languages, including inviting Translators and Proofreaders. ## [Viewing and Searching Project Members](#viewing-and-searching-project-members) [Section titled “Viewing and Searching Project Members”](#viewing-and-searching-project-members) Open your project and select **Members** on the left sidebar to view and manage the list of project members. The list displays each member’s name, role, team, and the date they were granted access to the project. The **Members** tab is selected by default. You can switch to the **Teams** tab to view and manage project teams instead. To filter members, click and use the available filter options: * Role: All, Developer, Translator, Proofreader, Language Coordinator, Member, Manager, Admin, Vendor, Client. * Language: All, specific language. * Workflow step: All, specific step. * Exclude inherited managers: No, Yes. * Last seen: All, Custom range. Use the **Search** field to find members by name or username. Click a column heading (e.g., **Name** or **Given access**) once or twice to toggle ascending or descending order.  ## [Viewing Member Details](#viewing-member-details) [Section titled “Viewing Member Details”](#viewing-member-details) To view and manage member roles and contributions, follow these steps: 1. Open your project and select **Members** on the left sidebar. 2. Double-click on the member or right-click and select **Details** from the menu. 3. In the appeared dialog, you can perform various actions: * **Roles**: Add, edit, clear, or delete project permissions. * **Contribution**: View and delete the member’s contributions. * Contact the member or navigate to their profile. 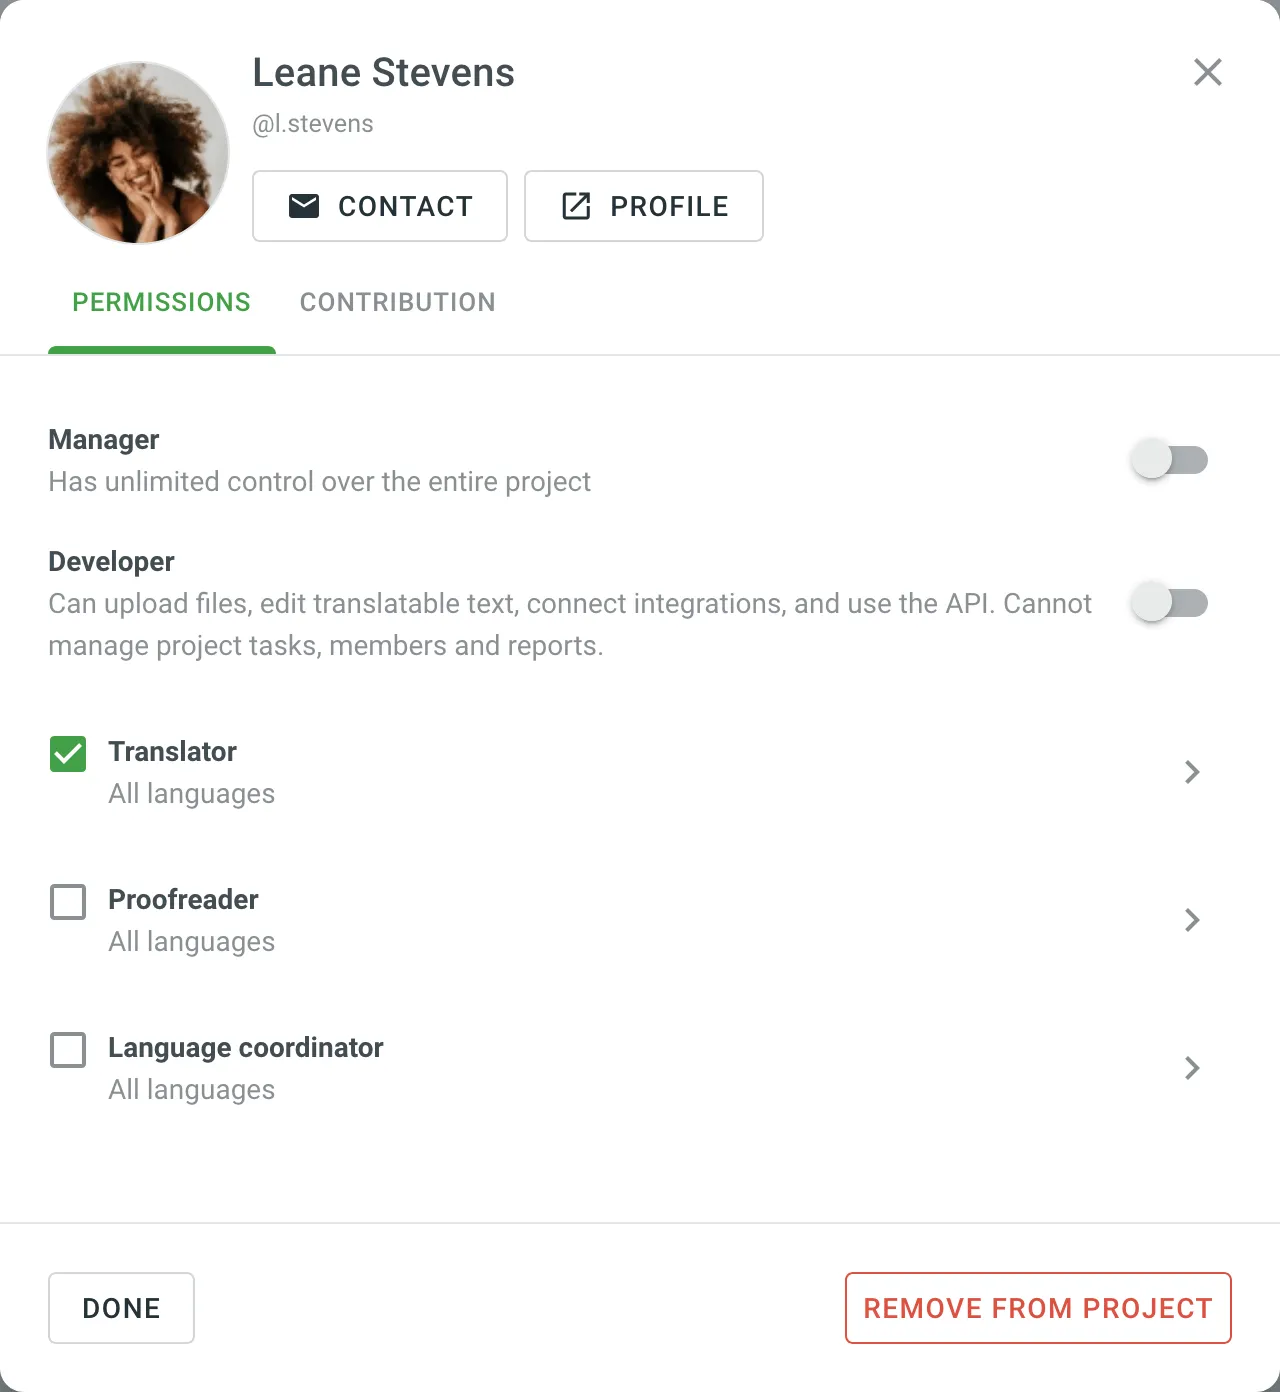 ## [Changing Project Member Permissions](#changing-project-member-permissions) [Section titled “Changing Project Member Permissions”](#changing-project-member-permissions) Once a user joins a project, you can add or remove their permissions within a project (e.g., change roles, access to languages, or workflow steps), similarly to the invitation process. For Translator, Proofreader, and Language Coordinator roles, if no specific languages or workflow steps are selected during the invitation, the member receives access to all target languages and steps by default. To change project member permissions, follow these steps: 1. Open your project and select **Members** on the left sidebar. 2. Select one or multiple members whose permissions you want to change. 3. Click **Permissions** in the upper-right corner. 4. Select either **Add project permissions** or **Remove project permissions**. 5. In the appeared dialog, configure the permissions you want to add or remove and confirm the changes. ## [Contacting Members](#contacting-members) [Section titled “Contacting Members”](#contacting-members) To contact members, follow these steps: 1. Open your project and select **Members** on the left sidebar. 2. Select one or multiple members that you want to contact. 3. Click **Contact** or right-click on the selected members and select **Contact** from the menu. 4. Compose your message and send it. ## [Deleting Members](#deleting-members) [Section titled “Deleting Members”](#deleting-members) To delete members from the project, follow these steps: 1. Open your project and select **Members** on the left sidebar. 2. Select one or multiple members that you want to delete. 3. Click or right-click on the selected members and select **Delete** from the menu. 4. Confirm the deletion. ## [See Also](#see-also) [Section titled “See Also”](#see-also) [Inviting People ](/enterprise/inviting-people/)Learn how to invite people to your translation project. [Roles ](/enterprise/roles/)Learn more about the roles and permissions in Crowdin.
# Project Reports
> View your project status and various localization reports
To view your project status along with existing issues, assess the effectiveness of pre-translation methods, estimate and count the translation cost, keep track of the most active members, and view historical data of previously generated reports, open your project and select **Reports** on the left sidebar.  ## [Project Overview](#project-overview) [Section titled “Project Overview”](#project-overview) Use this section to get a comprehensive summary of your project’s health, monitor key activities, and track progress over selected time periods. In the upper-right corner, you can select a report unit (*words*, *strings*, *characters*, or *characters with spaces*) that will apply to all reports in this section. The comparisons shown in percentage are counted by comparing the chosen period of time to the same previous period of time (e.g., if you select a month, the current month is compared to the previous one). To download reports for further analysis or record-keeping, click **Export** and select the preferred format (CSV, XLSX, or JSON). In the reports that feature interactive graphs, you can hover over data points for more detailed information, such as daily or monthly totals for each category. The **Project size** section displays the primary statistics for your project’s volume: * *Translatable*: The total amount of text available for translation. * *Hidden*: The total amount of text in hidden strings. * *Total*: The total amount of text in the project (*Translatable* + *Hidden*). * *Translation to*: The number of target languages in the project. Below the main statistics, the **Overview** section contains the following reports: ### [Activity Summary](#activity-summary) [Section titled “Activity Summary”](#activity-summary) This report tracks the overall translation and proofreading activity in the project. You can filter the data by **Date Range** and **Language**. The report is split into two main parts: **Translation** and **Proofreading**. Each part displays the total work completed during the selected period with a percentage comparison to the previous period. You can expand the **Breakdown by Language** section in each part to view a table of the same metrics broken down by target language. #### [Translation](#translation) [Section titled “Translation”](#translation) This section shows the volume of translated text, broken down by the following key metrics: * *Total (end of period)* * *Human Translation* * *Translation Memory* * *Machine Translation* * *AI* The **Translation** graph below the metrics displays multiple lines simultaneously for each translation type. By hovering over the data points, you can view daily or monthly totals for each category. #### [Proofreading](#proofreading) [Section titled “Proofreading”](#proofreading) This section shows the volume of approved text and voting activity. The main metric displayed is *Approved* words. The **Proofreading** graph visualizes the approval and voting activity over time, showing two distinct lines: *Approved Words* and *Votes*. By hovering over the data points, you can view the daily or monthly totals for both approved texts and votes cast. ### [Translation Savings Summary](#translation-savings-summary) [Section titled “Translation Savings Summary”](#translation-savings-summary) Use this report to review the savings achieved by using Translation Memory (TM), Machine Translation (MT), and AI-assisted translation. You can filter the data by **Date Range** and **Language**. The report displays the total savings as well as a breakdown by each method. By clicking the settings icon, you can switch between viewing the data as **Relative savings (%)** or **Savings in currency**. This graph shows the savings achieved through Translation Memory (TM), Machine Translation (MT), and AI-assisted translation. Savings are calculated for each string if it represents either an initial translation via the Editor or an approved pre-translation, possibly with edits. Savings are only counted once per string. The graph may be updated for previous days as strings become approved. The bar chart breaks down the savings by each translation method. Hovering over the bars provides detailed information on savings per method on a daily or monthly basis. For a more granular view, you can also expand the **Breakdown by Language** section to see a table of savings for each specific language. ### [Source Content Updates](#source-content-updates) [Section titled “Source Content Updates”](#source-content-updates) This report tracks changes made to the source content over a selected time frame. You can filter the data by **Date Range**. The report displays the **Total (end of period)** volume of text, along with specific metrics for content that has been **Added**, **Deleted**, or **Modified**. The bar graph helps you visualize when the most significant content updates occurred. By hovering over the bars, you can see the specific changes that occurred each day or month. ### [QA Check Issues](#qa-check-issues) [Section titled “QA Check Issues”](#qa-check-issues) This report provides insights into the automated Quality Assurance (QA) checks, highlighting potential inconsistencies in translations. You can filter the data by **Date Range** and **Language**. Key metrics include: * *New (Period)*: The number of new QA issues found within the selected period. * *Total (end of period)*: The total number of unresolved QA issues at the end of the selected period. * *Per 1000 words*: The density of QA issues relative to the word count. This metric includes approved content and is only shown if the total word count is greater than 1000. * *Content with Issues*: The volume of text that contains QA issues, including approved content. * *Content with Issues Rate*: The percentage of text that has QA issues, including approved content. Below the metrics, the report also features several additional components: * **Breakdown by Language**: An expandable section that shows a table of the key metrics broken down by each target language. * **Issues Trend**: A line graph that monitors the total number of QA issues over time. You can hover over data points to see the total number of issues for a specific day. * **Issues by languages**: A heatmap-style table that visualizes the distribution of QA issue types (e.g., *Spelling mistakes*, *Consistent terminology*) across all target languages. You can hover over a cell to see the precise number of issues for that specific language and type. ### [Reported Issues](#reported-issues) [Section titled “Reported Issues”](#reported-issues) This report tracks issues manually created by project members to report problems or ask questions. You can filter the data by **Date Range** and **Issue Type**. The main metrics show the *Total*, *Created*, and *Resolved* issues, each with a comparison to the previous period. This report consists of the following components: * **Issues by Type**: A table showing the total, created, and resolved counts for each issue category (e.g., *General question*, *Current translation is wrong*). * **Incorrect Translations by Language**: A table focusing on the *Current translation is wrong* issue type, breaking down the numbers by language. * **Cumulative Created vs Resolved Issues**: A line graph that visualizes the cumulative number of created versus resolved issues. * **Average Resolution Time by Issue Type**: A bar chart showing the average time in days it takes to resolve each type of issue. * **Top Reporters & Resolvers**: A leaderboard of members who have reported and resolved the most issues, with sortable columns for *Name*, *Issues Reported*, and *Issues Resolved*. ### [Project Members](#project-members) [Section titled “Project Members”](#project-members) This report helps you monitor the activity and changes among your project members, which can help managers assess the level of engagement. You can filter the data by **Date Range**. The report displays key metrics about your member base for the selected period, including: * *Total (end of period)*: The total number of members in the project. * *Active*: The number of members who were active during the period. * *New*: The number of newly joined members. * *Pending (end of period)*: The number of users with pending join requests (including both incoming and outgoing invitations). A graph below the metrics displays the trend of the total member count over time. ## [Cost Estimate](#cost-estimate) [Section titled “Cost Estimate”](#cost-estimate) Use this report to plan your budget and count the approximate cost of translations. Set the translation and approval rates to see the cost for untranslated and not approved strings in the project. You can generate a Cost Estimate report based on the following filter parameters: * Tasks: Not selected, All tasks, or a specific task. * Language: All or specific target language. * Strings Added: All time, Today, Yesterday, Last 7 days, Last 30 days, Last month, or Custom range. * Files: All or specific files. * Workflow step (Specific to [projects with a workflow](/enterprise/creating-project/#projects-with-a-workflow)): All or a specific workflow step. * Labels (Specific to [projects with labels](/enterprise/project-settings/labels/)): Not selected, Strings with selected labels, or Strigns without selected labels. ### [Generating a Report](#generating-cost-estimate) [Section titled “Generating a Report”](#generating-cost-estimate) To generate the Cost Estimate report, follow these steps: 1. Select the preferred currency and the report unit (word, string, character, or characters (including spaces)). 2. Use the available filter parameters to specify the report data you’re interested in. 3. Set your [rates](#rates-cost-estimate) for translations and approvals. 4. Click **Generate**. 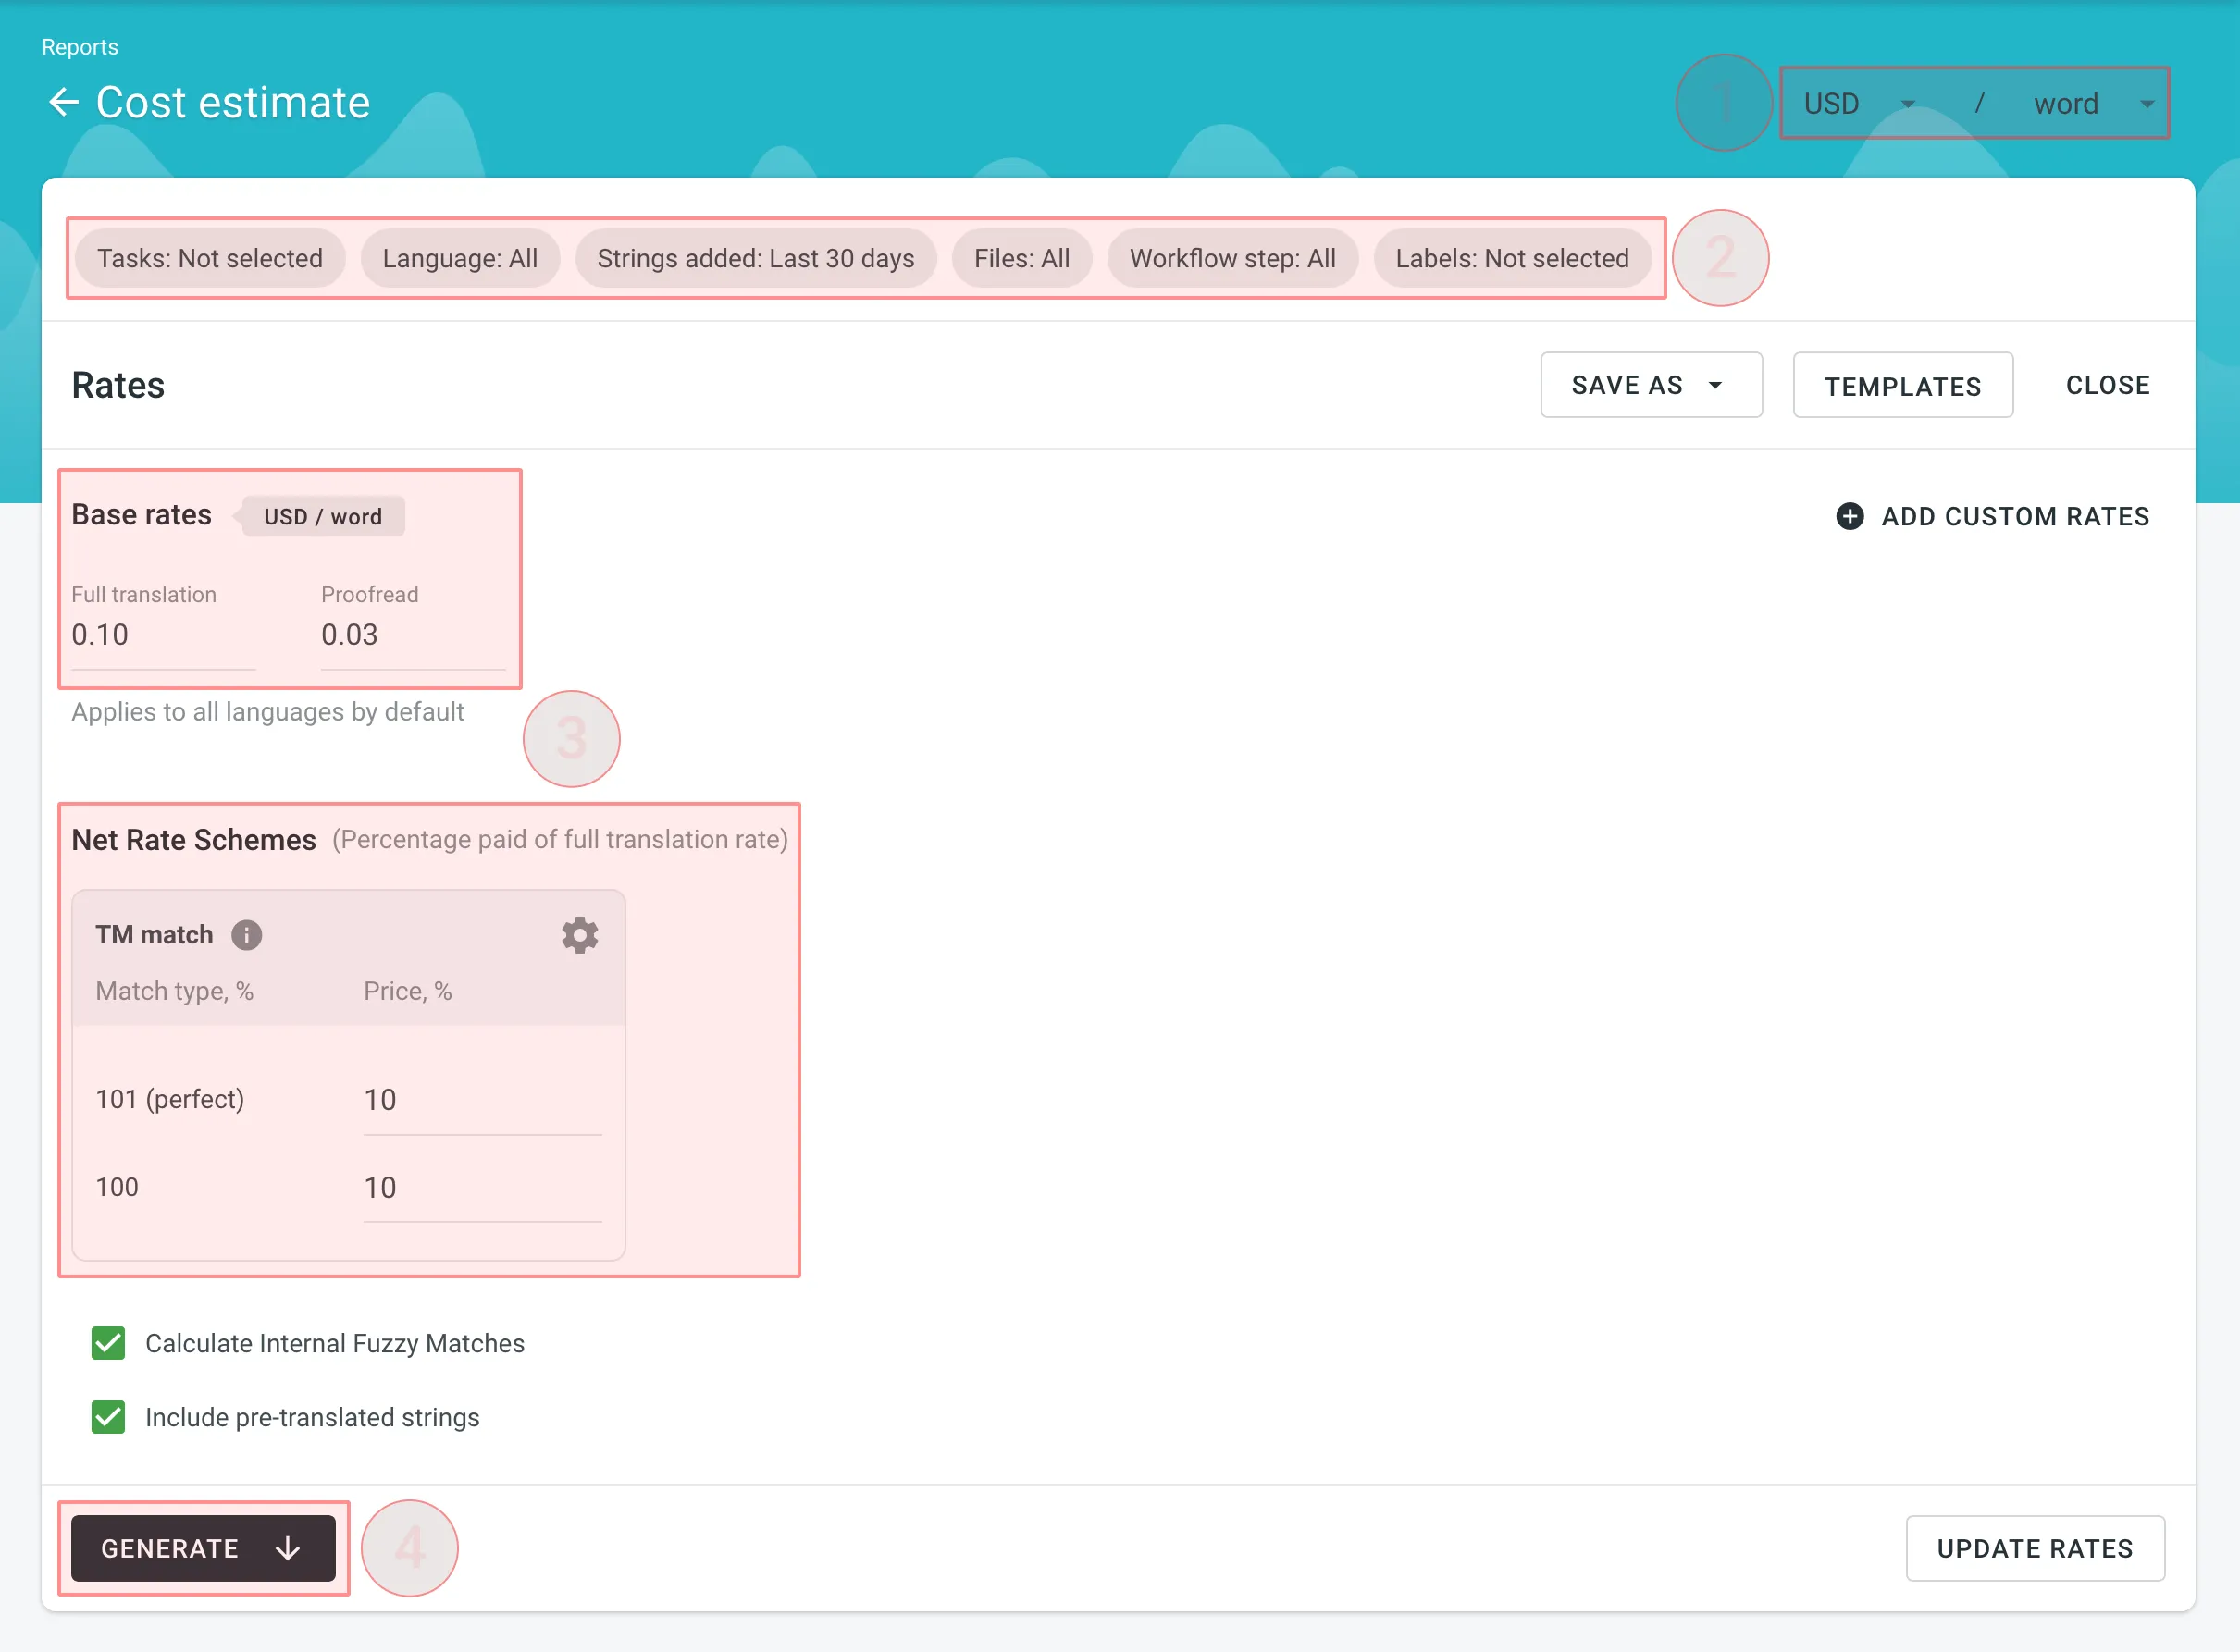 #### [Cost Estimate Queue](#queue-cost-estimate) [Section titled “Cost Estimate Queue”](#queue-cost-estimate) After you click **Generate**, the Cost Estimate report is added to a queue and processed in the background. This ensures that multiple reports generated by different users or with different filters don’t override one another. Each report is generated separately and appears in the **Reports > Archive** section once completed. When a report is added to the queue, a notification appears confirming that the report generation has been queued, with quick access to view the queue or close the message. While the report is being generated, a pop-up in the lower-right corner of the screen shows the queue status. The status updates automatically as the report progresses: * **Pending** – the report is waiting in the queue and has not started processing yet. * **In progress** – the report generation has started. A progress bar shows the current percentage. * **Completed** – the report has been generated successfully and can be accessed via the [Archive](#archive). * **Failed** – an error occurred during report generation. Each report runs independently, so you can safely generate multiple Cost Estimate reports with different filters without affecting those that might have been started earlier and are still in progress. ### [Rates](#rates-cost-estimate) [Section titled “Rates”](#rates-cost-estimate) You can set the prices for Base rates (full translation, proofread) and configure Net Rate Schemes (percentage of the full translation rate paid for translation using TM suggestions). #### [Base Rates](#base-rates-cost-estimate) [Section titled “Base Rates”](#base-rates-cost-estimate) In the Base Rates section, you can set rates for the following types of work: * **Full translation** – for each translation made by a person. * **Proofread** – for each approved translation. #### [Net Rate Schemes](#net-rate-schemes-cost-estimate) [Section titled “Net Rate Schemes”](#net-rate-schemes-cost-estimate) In the Net Rate Schemes section, in addition to the base rates, you can set the percentage of the full translation rate to be paid for translations made using TM suggestions of various TM Match types. By default, you can configure the percentage of the full translation rate for the following TM Match types: * **101 (perfect)** – for translations made using Perfect match TM suggestions (source strings are identical to TM suggestion by text and context). * **100** – for translations made using 100% match TM suggestions (source strings are identical to TM suggestion only by text). You can also add your own TM match types, specifying the preferred percentage of text similarity and the percentage of the full translation rate to be paid for such a translation. To add your own TM match types, follow these steps: 1. Click in the Net Rate Schemes section. 2. Click on the appeared button. 3. Specify the TM match range and the percentage of the full translation rate. 4. Click to save the settings.  #### [Adding Custom Rates](#custom-rates-cost-estimate) [Section titled “Adding Custom Rates”](#custom-rates-cost-estimate) In addition to base rates that are applied to all languages by default, you can add custom rates for specific languages. To add custom rates, click **Add custom rates**. To select the language or languages for custom rates, click the drop-down menu, and select the ones you need. You can create as many custom rates as you need.  #### [Rate Templates](#rate-templates) [Section titled “Rate Templates”](#rate-templates) If you plan to work with multiple rate configurations, save them as templates by clicking **Save as > New rates template**, then specify the template name and click **Save**. When saving a new template you can choose the template visibility using the following options: * **Share with all project members** – makes the template visible to all translators within the project. Regardless of the number of translators or their different rates, they all will have access to the template. It can include both general rates and custom rates for specific languages and translators, along with a net rate scheme. This transparency promotes clarity in pricing, allowing translators to review rates, generate reports on their translations, and calculate cost estimates. The key benefit is that translators understand the net rate scheme and can apply their base rate, even if it’s not included in the template. * **Share with managers within the organization** – makes the template global, visible only to managers across all projects of the organization. This option streamlines rate consistency across various projects. If neither of the options is selected, the template remains visible only to managers within the current project, limiting access to a select group of project members. These options provide flexibility in controlling who can view and use the rate template to accommodate different organizational preferences. Saved templates allow you to quickly switch between different configurations for report generation. Click **Templates** to view and manage your saved rate templates. ### [Include Pre-translated Strings](#include-pre-translated-strings) [Section titled “Include Pre-translated Strings”](#include-pre-translated-strings) Select **Include pre-translated strings** if you want to include pre-translated strings in a Cost Estimate report. By default, this option is selected. For example, you have an untranslated string `Validate your username` in your project. You generate a Cost Estimate report with the **Include pre-translated strings** option selected. This string will be included in the Cost Estimate. Then you pre-translate this string via TM or MT engine and once again generate a Cost Estimate report with the **Include pre-translated strings** option selected. This time, the pre-translated string `Validate your username` won’t be included in the Cost Estimate report. On the other hand, with the **Include pre-translated strings** option cleared, the string `Validate your username` will be included in the Cost Estimate report both times, when untranslated and when pre-translated via TM or MT engine. ### [Calculate Internal Fuzzy Matches](#calculate-internal-fuzzy-matches) [Section titled “Calculate Internal Fuzzy Matches”](#calculate-internal-fuzzy-matches) Internal Fuzzy Matches are partial (fuzzy) TM matches found among untranslated strings in your project that can potentially be added to the Translation Memory. For example, if the first string in a file is `Validate your username` and the last one is `Validate your username again`, there is an internal fuzzy match. To include fuzzy (99% and less) internal matches, as well as perfect (101%) and 100% matches, in your Cost Estimate report and get a more comprehensive prediction of how many strings can be added to the TM if translated in sequence, select **Calculate Internal Fuzzy Matches**. Note that these calculations are approximate because the actual translation order may differ. If you clear **Calculate Internal Fuzzy Matches**, the Cost Estimate report will only show perfect (101%) and 100% internal matches (repetitions), and will not include any fuzzy matches. ### [Result Analysis](#result-analysis-cost-estimate) [Section titled “Result Analysis”](#result-analysis-cost-estimate) When the Cost Estimate report is generated, it displays the following details: ##### [Cost Summary](#cost-summary) [Section titled “Cost Summary”](#cost-summary) * **Total** - General cost estimate for all languages (including translation, proofreading, and any TM savings). * **Subtotals** - Cost estimate for each target language: * **Translation** – Cost for strings requiring new or updated translations (no high–percentage match leverage). * **Proofreading** – Cost for reviewing translations. * **TM Savings** – Savings from existing translations (in TM or within the project). * **Weighted Words / Strings / Characters / Characters with Spaces** – Final word count for cost calculations after applying TM/internal match discounts. ##### [Categories](#categories) [Section titled “Categories”](#categories) Each row in the main table represents a match category or status: * **Total** – Summarizes all strings, words, and characters, as well as the weighted units after match discounts and percentage of the total. * **TM Match (total)** – Untranslated strings matching entries in Translation Memory, often split into: * **101% (perfect)** – Exact text and context match. * **100%** – Exact text match, but context differs. * **Repetitions (total)** or **Internal Match (total)** – Untranslated strings matching other strings within the project. Displaying depends on whether **Calculate Internal Fuzzy Matches** is enabled. Subcategories (e.g., 101%, 100%, and fuzzy) depend on your Net Rate Schemes. If an untranslated string has both a 101% TM match and a 100% internal match, it counts toward TM match. * **No Match** – Strings with no TM or internal matches, requiring translation from scratch. * **Not Approved** – Translated strings that still awaiting approval. * **Not Translated** – Completely untranslated strings requiring full translation. ##### [Columns](#columns) [Section titled “Columns”](#columns) * **Strings / Words / Characters / Characters with Spaces** – Basic volume metrics. * **Weighted Words / Strings / Characters / Characters with Spaces** – Shows the adjusted metric after factoring in repetitions and fuzzy matches, reflecting the actual translation effort. * **%** – Share of weighted units in each category. ##### [Folder/File Breakdown](#folderfile-breakdown) [Section titled “Folder/File Breakdown”](#folderfile-breakdown) After the main table, each language subtotal also includes a table showing data for each folder or file, indicating how many strings are **Not Approved**, **Not Translated**, match the **TM**, match **Internal**, or have **No Match**. This helps identify where to focus your translation efforts and budget. ##### [Export](#export) [Section titled “Export”](#export) To download the Cost Estimate report, click **Export** and select the preferred format (CSV, XLSX, or JSON) for further analysis or record-keeping. 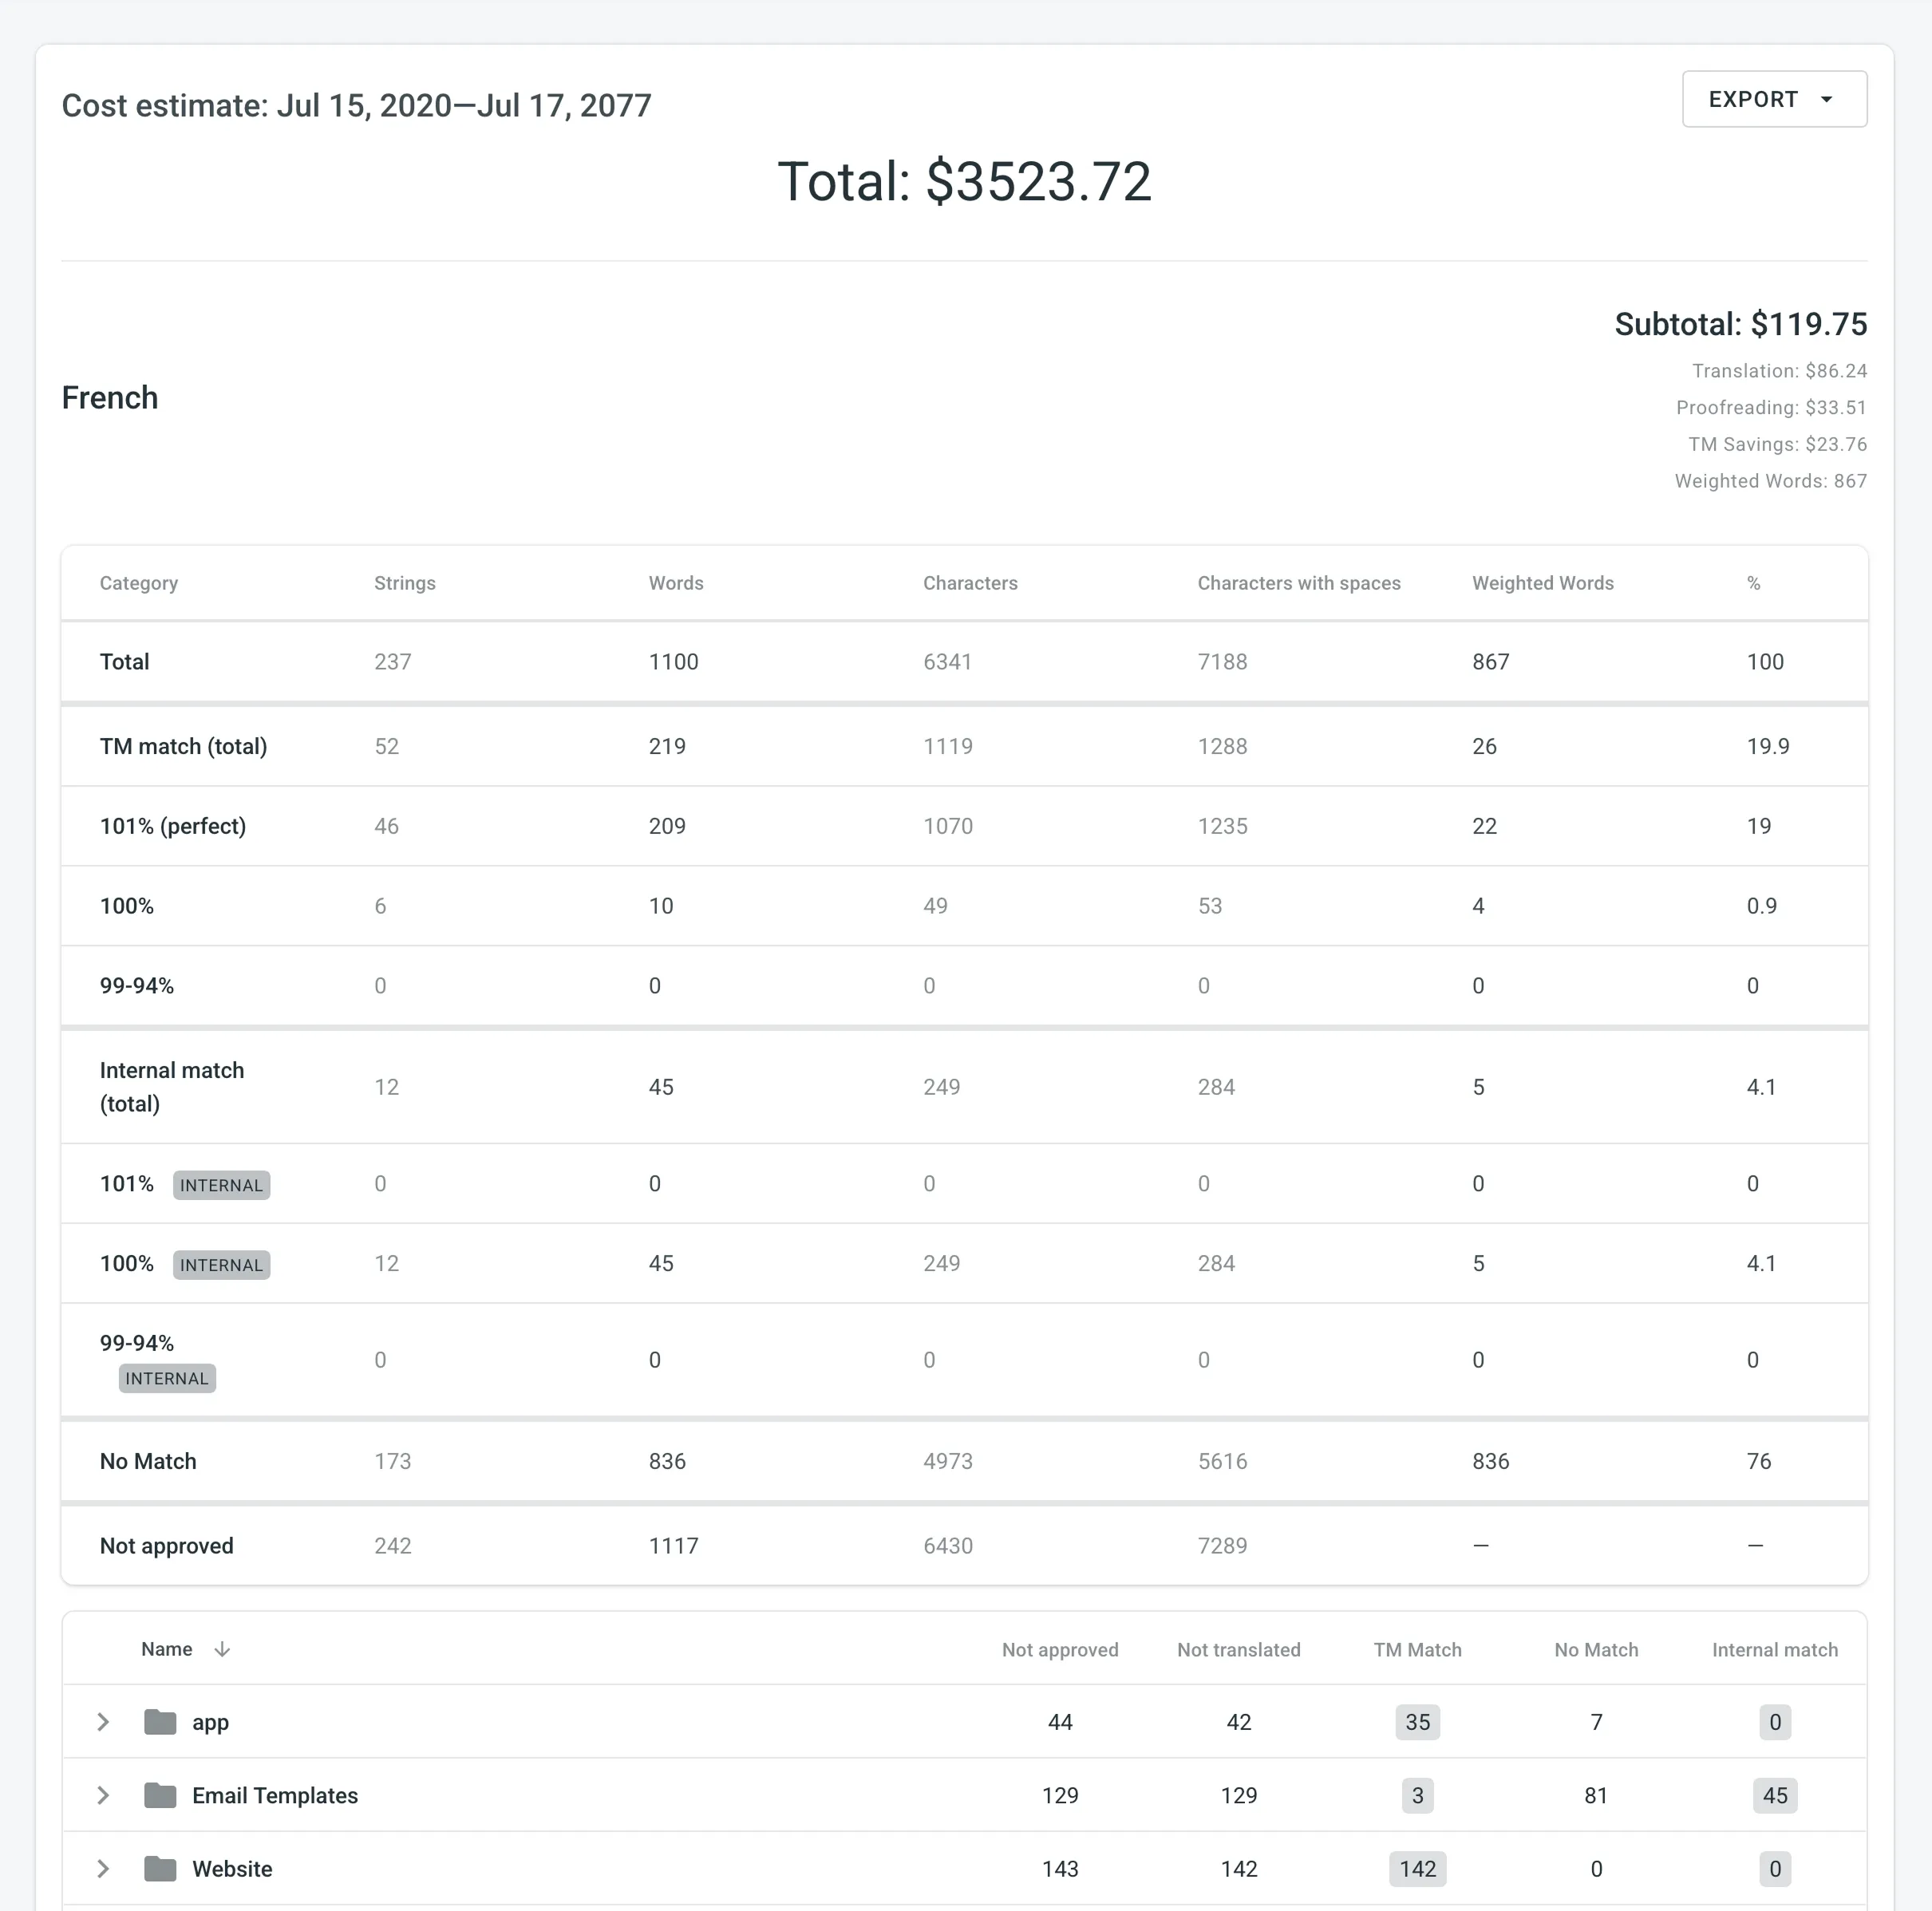 ## [Translation Cost](#translation-cost) [Section titled “Translation Cost”](#translation-cost) Use this report to calculate the actual translation cost based on the completed job. You can generate a Translation Cost report based on the following filter parameters: * Tasks: All Tasks or specific task. * Group by: Member or language. * Time period: All time, Today, Yesterday, Last 7 days, Last 30 days, Last month, or Custom range. * Workflow step (Specific to projects with a [workflow](/enterprise/creating-project/#projects-with-a-workflow)): All or specific workflow step. * Files: All files (including deleted files and strings) or Selected files (including deleted strings). * Branches (Specific to [string-based projects](/enterprise/creating-project/#string-based-project)): All branches or Selected branches. * Language: All or specific target language. * Users: All or specific users. * Labels (Specific to projects with [labels](/enterprise/project-settings/labels/)): Not selected, Strings with selected labels, or Strigns without selected labels. ### [Generating a Report](#generating-translation-cost) [Section titled “Generating a Report”](#generating-translation-cost) To generate the Translation Cost report, follow these steps: 1. Select the preferred currency and the report unit (word, string, character, or characters (including spaces)). 2. Use the available filter parameters to specify the report data you’re interested in. 3. Set your [rates](#rates-translation-cost) for translations and approvals. 4. Click **Generate**.  ### [Rates](#rates-translation-cost) [Section titled “Rates”](#rates-translation-cost) You can set the prices for Base rates (full translation, proofread) and configure Net Rate Schemes (percentage of the full translation rate paid for translation using TM suggestions, MT suggestions, and existing translations). #### [Base Rates](#base-rates-translation-cost) [Section titled “Base Rates”](#base-rates-translation-cost) In the Base Rates section, you can set rates for the following types of work: * **Full translation** – for each translation made by a person. * **Proofread** – for each approved translation. #### [Net Rate Schemes](#net-rate-schemes-translation-cost) [Section titled “Net Rate Schemes”](#net-rate-schemes-translation-cost) In the Net Rate Schemes section, in addition to the base rates, you can set the percentage of the full translation rate to be paid for translations made using TM suggestions, MT suggestions, and other translations of various Match types. By default, you can configure the percentage of the full translation rate for the following match type categories: **TM Match types:** * **101 (perfect)** – for translations made using Perfect match TM suggestions (source strings are identical to TM suggestion by text and context). * **100** – for translations made using 100% match TM suggestions (source strings are identical to TM suggestion only by text). **MT Match types:** * **100** – for translations made using 100% match MT suggestions (new suggested translations are identical to MT suggestion). **AI Match types:** * **100** – for translations made using 100% match AI suggestions (new suggested translations are identical to AI suggestion). **Other translations types:** * **100** – for translations made using existing translations (new suggested translations are identical to the existing translations). If a string has a combination of TM and MT suggestions and existing translations, the new translation is counted at the lowest Net Rate Scheme value. For example, if a string has a 101% (perfect) TM match suggestion (10% of the full translation rate) and a 100% MT match suggestion (5% of the full translation rate), the new translation added to this string will be counted at a 5% of the full translation rate. You can also add your own TM, MT, and Other translations match types, specifying the preferred percentage of text similarity and the percentage of the full translation rate to be paid for such a translation. To add your own match types, follow these steps: 1. Click in the Net Rate Schemes section. 2. Click on the appeared button. 3. Specify the match range and the percentage of the full translation rate. 4. Click to save the settings.  #### [Adding Custom Rates](#custom-rates-translation-cost) [Section titled “Adding Custom Rates”](#custom-rates-translation-cost) In addition to base rates that are applied to all languages and users by default, you can add custom rates for specific languages and users. To add custom rates, click **Add custom rates**. To select the languages and members for custom rates, click the drop-down menus, and select the ones you need. You can create as many custom rates as you need.  ### [Using Additional Translation Cost Options](#using-additional-translation-cost-options) [Section titled “Using Additional Translation Cost Options”](#using-additional-translation-cost-options) * **Exclude Approvals for Edited Translations:** select this option to exclude approvals when the same user has translated the string. This helps ensure that your cost reporting is more accurate by avoiding the duplication of approval costs. * **Pre-Translated Strings Categorization Adjustment:** select this option to have repetitive translations of pre-translated strings categorized under TM or MT match rates, rather than the default Other suggestion match rates. This is useful because post-editing translations from MT engines usually requires more effort than post-editing translations from human translators, leading to a more precise and fair measure of costs related to your translators. ### [Result Analysis](#result-analysis-translation-cost) [Section titled “Result Analysis”](#result-analysis-translation-cost) When the Translation Cost report is generated, it displays the following details: ##### [Cost Summary](#cost-summary-1) [Section titled “Cost Summary”](#cost-summary-1) * **Total** - General translation cost (including TM, MT, and AI savings, weighted words, and pre-translated words). * **User and Language Totals** - Below the general translation cost, the report shows totals for each user or language, depending on the selected **Group by** filter: * **Group by Member** - Shows each translator or proofreader general translation cost (including TM, MT, and AI savings, weighted words, and pre-translated words), along with language subtotals within. * **Group by Language** - Shows each target language general translation cost (including TM, MT, and AI savings, weighted words, and pre-translated words), along with translator or proofreader subtotals within. * **Subtotals** - Subtotal translation cost for each target language or user: * **Savings** - The amount saved with leveraged matches from TM, MT, or AI. * **Weighted Words / Strings / Characters / Characters with Spaces** – Shows the adjusted metric after applying repetitions and fuzzy matches, reflecting the actual translation effort. * **Pre-translated Words / Strings / Characters / Characters with Spaces** - Shows how many units were pre-translated. Within each user (or language) section, you’ll see a further breakdown of work types and match types in the tables: ##### [Translation & Post-Editing](#translation--post-editing) [Section titled “Translation & Post-Editing”](#translation--post-editing) Each row in the Translation & Post-Editing section represents a match category or total: * **No Match** – No leverage from TM, MT, or AI (full rate). * **TM Match** – Uses Translation Memory (with possible subcategories like **101% (perfect)** or **100%**). * **MT Match** – Uses Machine Translation (e.g., **100%**). * **AI Match** – Uses AI-based suggestions (e.g., **100%**). * **Other translations Match** – Leverage from existing translations added by other users. * **Total** – Summarizes all translated units under that user/language. ##### [Columns](#columns-1) [Section titled “Columns”](#columns-1) * **Strings / Words / Characters / Characters with Spaces** – Number of units handled at each match type. * **Rate per unit** – The price assigned per match type (based on your configured [Net Rate Schemes](#net-rate-schemes-translation-cost) and base rates). * **Price** – Total cost for the units × rate in that match category. ##### [Proofreading](#proofreading-1) [Section titled “Proofreading”](#proofreading-1) * **Words / Strings / Characters / Characters with Spaces** – Number of units that were proofread and approved. * **Rate per unit** – Proofreading rate. * **Price** – Total cost for proofread units (units × rate). ##### [Export](#export-1) [Section titled “Export”](#export-1) To download the Translation Cost report, click **Export** and select the preferred format (CSV, XLSX, or JSON) for further analysis or record-keeping. 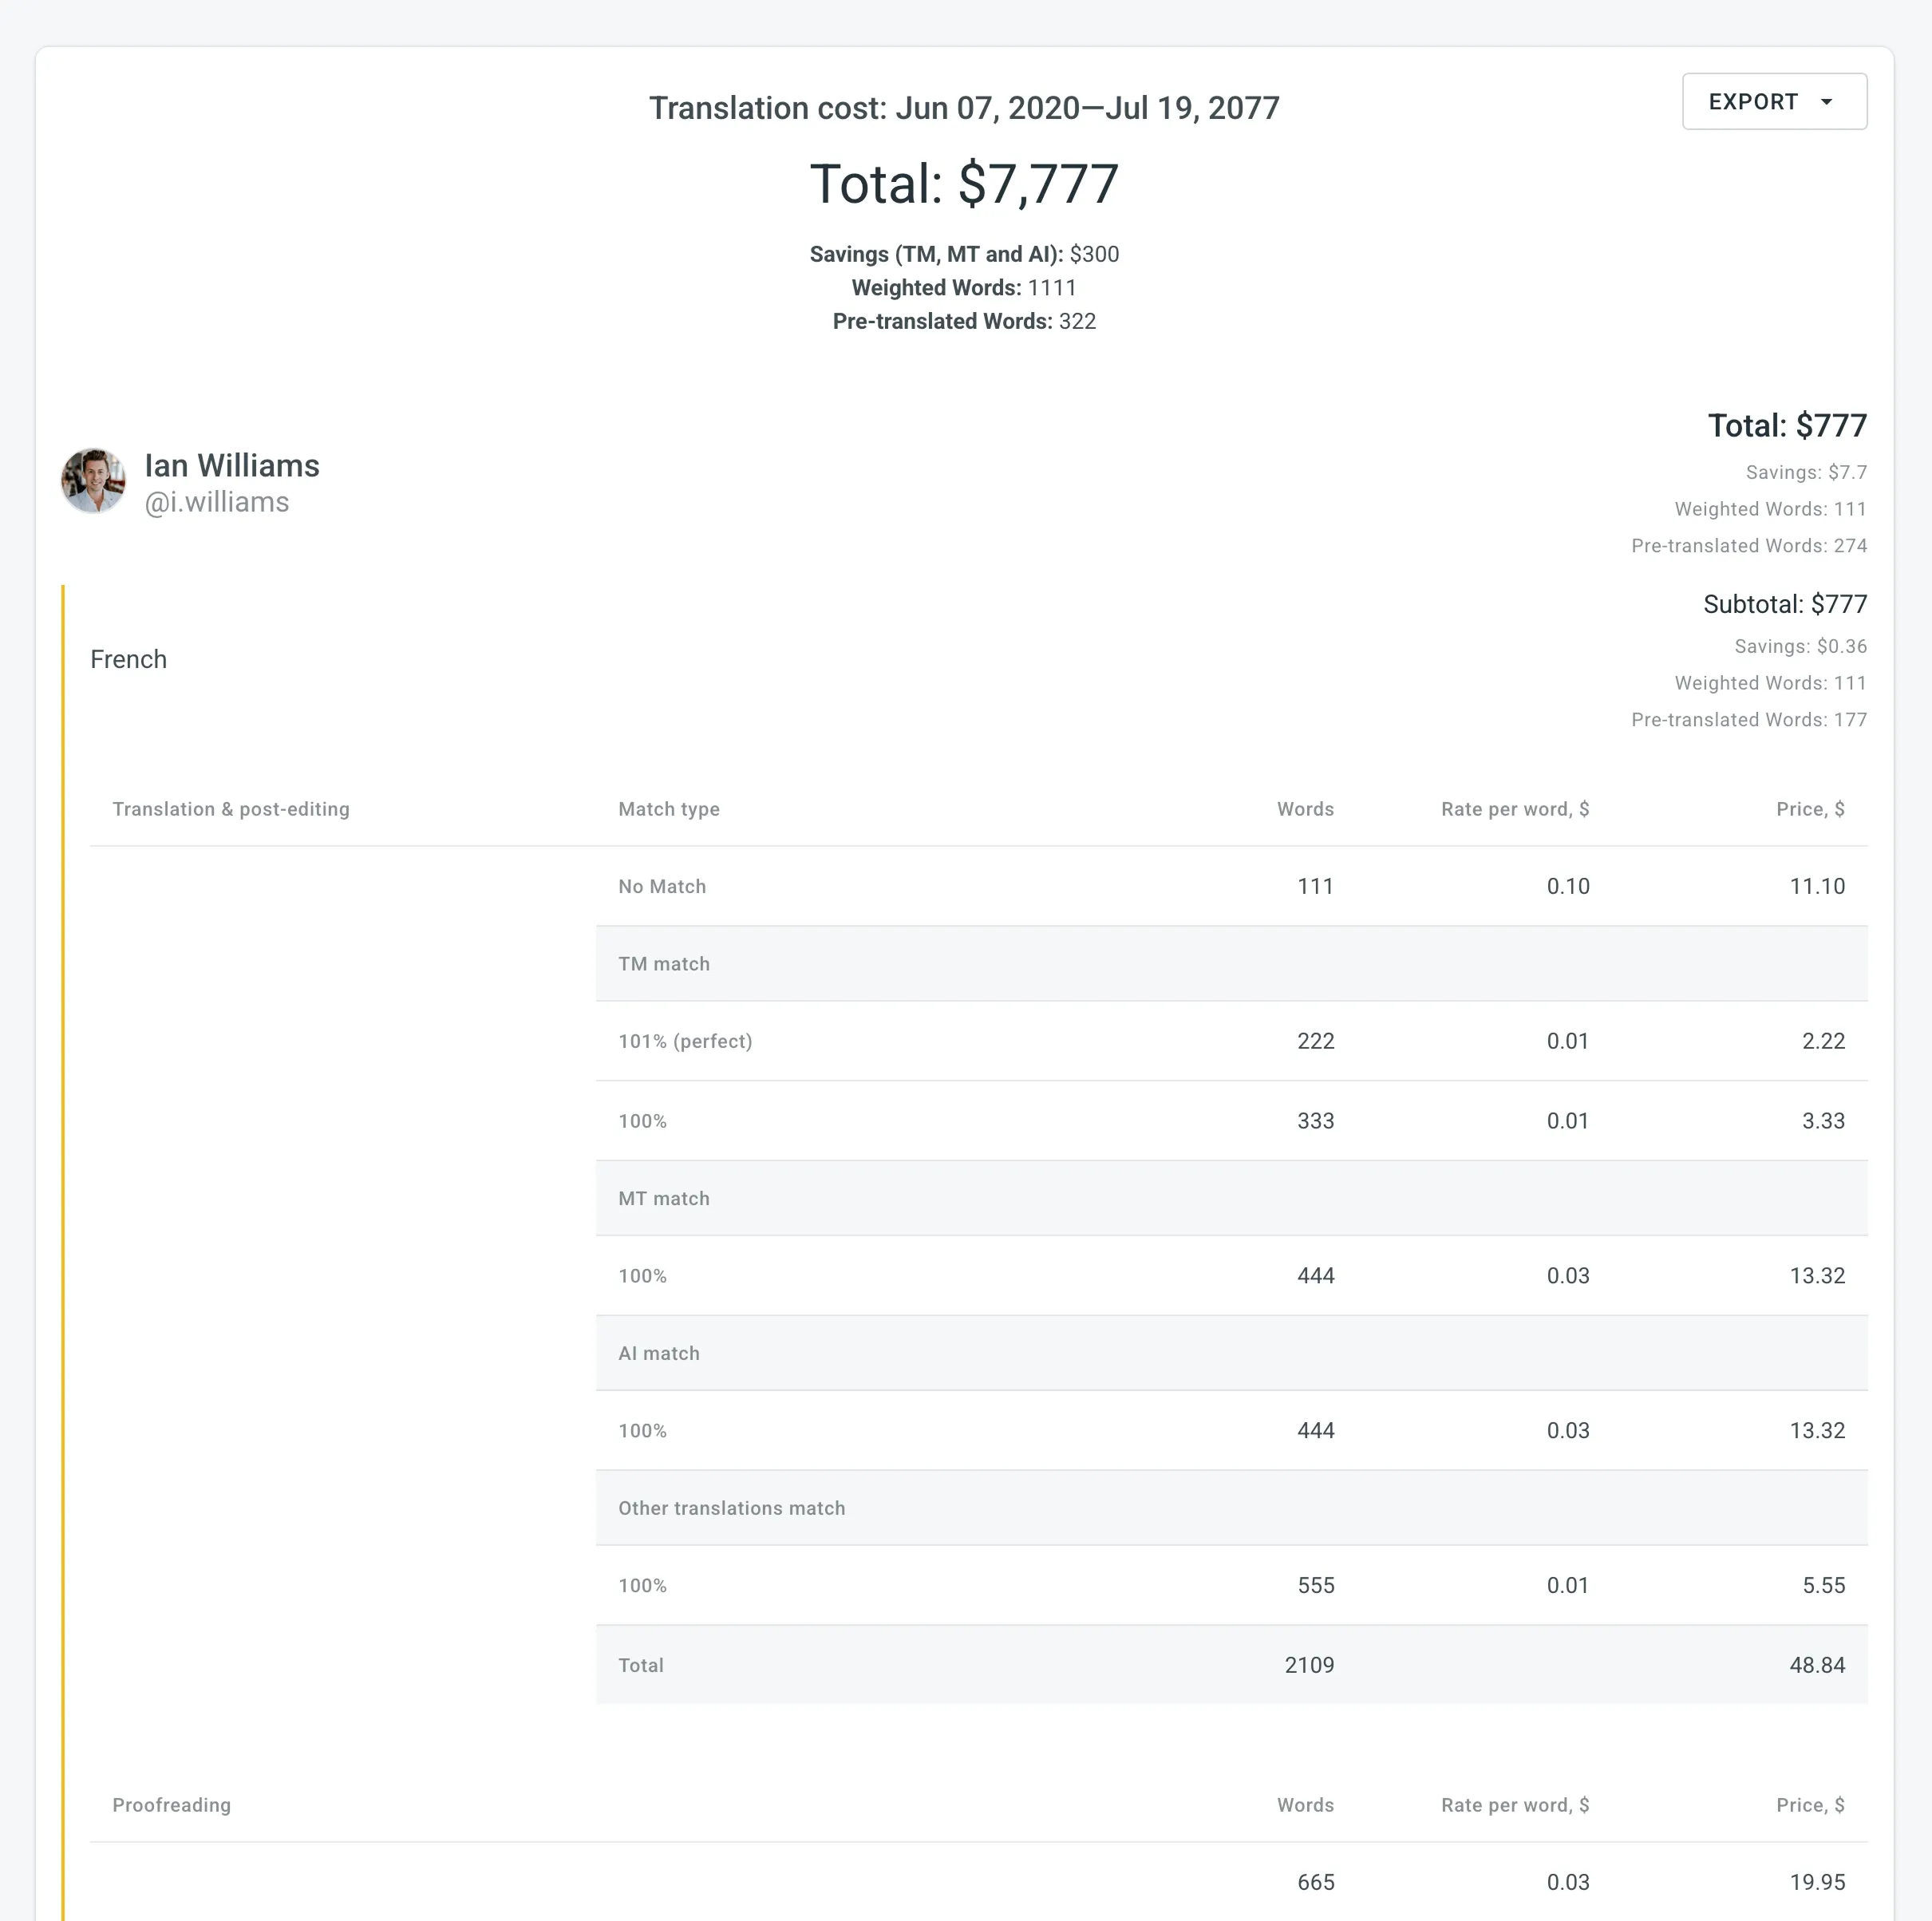 ## [Pre-translation Accuracy](#pre-translation-accuracy) [Section titled “Pre-translation Accuracy”](#pre-translation-accuracy) Use this report to evaluate the translation quality of pre-translation methods (via AI, MT, and TM) used in your project by analyzing the post-editing effort required for pre-translated strings before approval. It compares the initial pre-translated strings with the final approved translations after post-editing, categorizing data based on the edit distance and pre-translation method. This report allows you optimize your translation workflows and improve overall content quality by identifying the best-performing pre-translation methods. The edit distance metric is calculated at the character level, while the report mode selection (Strings, Words, Chars) only affects how results are displayed: * Strings – The entire string is placed in a category if its total edit distance falls within the range. * Words – All words in the string are placed in the category. * Chars – All characters in the string are placed in the category. ### [Report Scope](#report-scope) [Section titled “Report Scope”](#report-scope) * Includes only approved strings with at least one pre-translation. * If multiple pre-translations exist for a string, each is included with its edit distance. * Only the top translation is used for comparison if multiple approvals exist. ### [Use Case and Best Practices](#use-case-and-best-practices) [Section titled “Use Case and Best Practices”](#use-case-and-best-practices) **Typical Use Case:** 1. Launch Pre-translation – use different methods (via AI, MT, and TM) for a portion of your content. Alternatively, you can use one method (e.g., AI) and compare various prompts with different settings. 2. Invite a Proofreader – have the pre-translated content reviewed and approved by a proofreader. 3. Generate Report – use the Pre-translation Accuracy report to evaluate which pre-translation method performed best by requiring the least amount of post-editing. 4. Optimize Workflow – use the most effective pre-translation method for all your content. **Best Practices:** * **Regular Reviews** – regularly generate and review the report to stay informed about the performance of your pre-translation methods. * **Adjust Methods** – use the insights from the report to adjust your pre-translation methods. For example, if AI pre-translations require minimal edits, consider increasing their use. ### [Generating a Report](#generating-pre-translation-accuracy) [Section titled “Generating a Report”](#generating-pre-translation-accuracy) You can generate a Pre-translation Accuracy report based on the following filters: * **Task** – Not selected, All Tasks, or a specific task. * **Language** – All, or specific language. * **Strings added (Date range of when the strings were approved)** – All time, Today, Yesterday, Last 7 days, Last 30 days, Last month, or Custom range. Additionally, using the report’s **Settings**, you can adjust how post-editing information is displayed on the graphs: * **Total** – aggregates all post-editing data without breaking it into subcategories. * **Split into Categories by Edit Distance %** – offers a detailed view by categorizing units based on the extent of editing required. To generate the Pre-translation Accuracy report, follow these steps: 1. Select the preferred report unit (words, strings, characters with or without spaces). 2. Select the preferred way to group the histogram data (Day or Month). * When grouped by Day, the stacked histogram will have more bars, giving a more granular, day-by-day view. * When grouped by Month, the data is displayed in fewer, broader monthly segments. 3. *(Optional)* Select the task if you want to generate a report based on work done within all or specific tasks. Alternatively, leave it as **Not selected** to generate a report based on a wider content scope. 4. Select the preferred language. 5. Select the time range. 6. Click **Settings** and select one of the available options to configure how you want the post-editing information to be displayed. 7. Click **Generate**. ### [Result Analysis](#result-analysis-pre-translation-accuracy) [Section titled “Result Analysis”](#result-analysis-pre-translation-accuracy) When the report is generated, you will see the information grouped into pre-translation methods (via AI, MT, and TM): * Pre-translation via AI: * Total approved words, pre-translated by AI * Separate graphs for each prompt * Pre-translation via MT: * Total approved words, pre-translated by MT * Separate graphs for each MT engine * Pre-translation via TM: * Total approved words, pre-translated by TM In each section, the data is displayed as histograms and pie charts: * **Stacked Histogram** – visualizes the distribution of units approved with or without edits. It categorizes units based on the extent of post-editing, such as: * Approved with no post-edit * Post-edited with varying degrees of edit distance * **Quality Score Pie Chart** – provides an overall view of pre-translation quality based on post-editing effort, showing how many pre-translated words were good enough at the moment of approval. Includes the following metrics: * **Total** – total number of words included in the report. * **Edit rate** – percentage of translations that were edited before approval. * **Average edit distance** – average percentage of changes applied to translations. The quality score is calculated as a weighted average based on the edit distance. Translations approved without edits contribute fully (100 %) to the score. Partially edited translations contribute proportionally to the amount of unchanged content. For example, if a 10-word translation was edited by 10 %, 9 words (90 %) are counted as high quality. If a translation was approved without edits, all words (100 %) are counted. To download the Pre-translation Accuracy report, click **Export** and select the preferred export format (CSV, XLSX, or JSON). 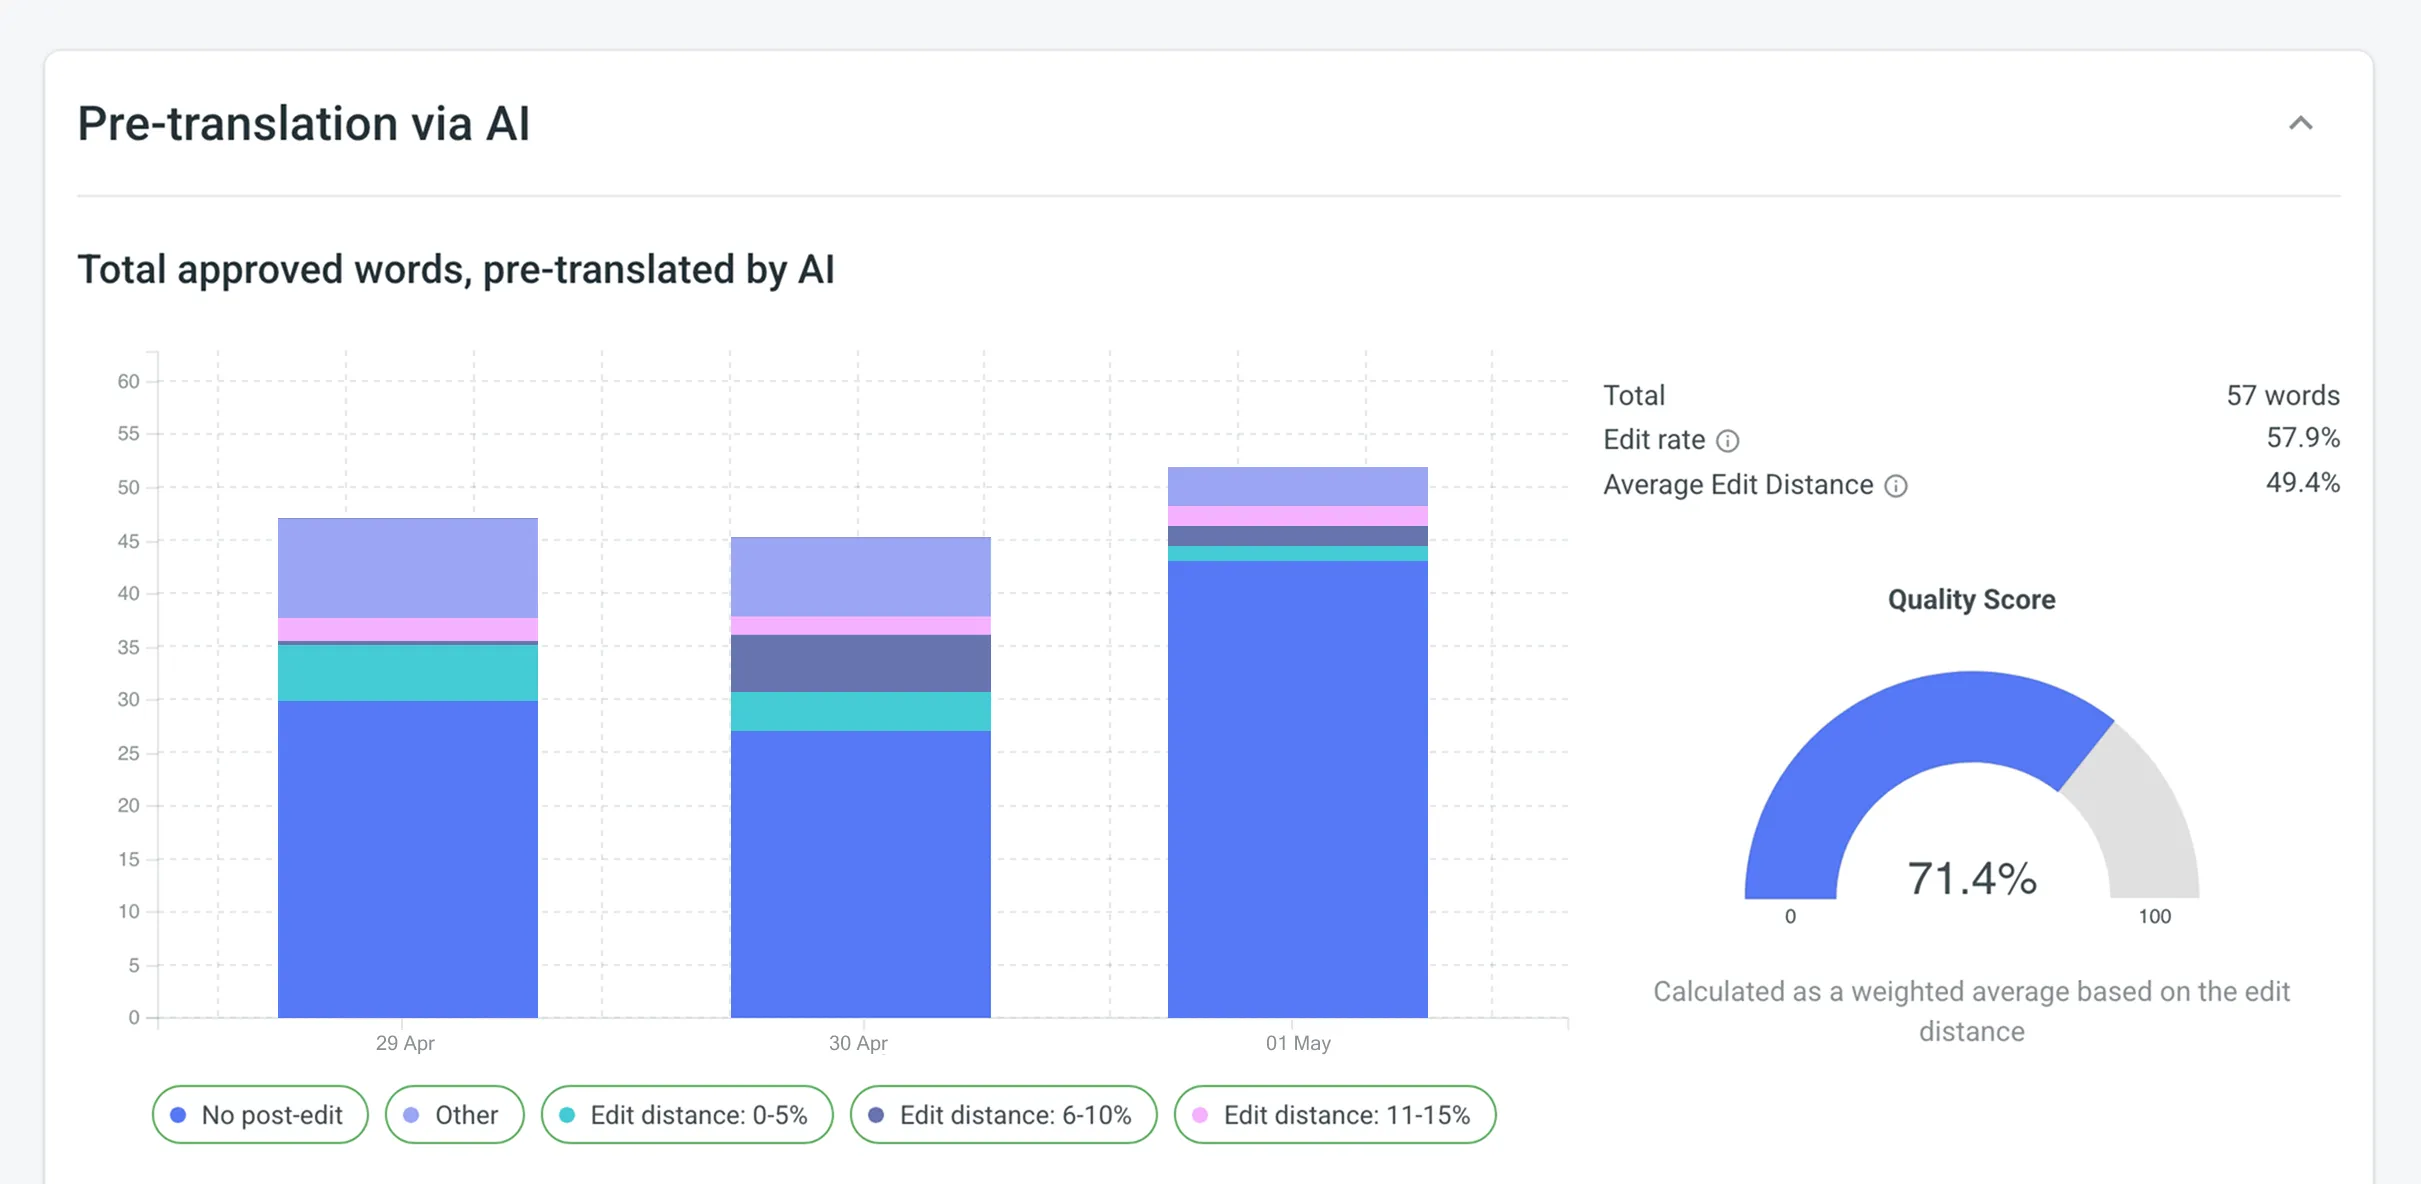 ## [Translator Accuracy](#translator-accuracy) [Section titled “Translator Accuracy”](#translator-accuracy) Use this report to evaluate the translation quality of individual translators in your project by analyzing the post-editing efforts required before their translations are approved. It compares each translator’s initial translation with the final approved version, categorizing the data based on edit distance. This allows you to identify top-performing translators and those who may need additional guidance or training. ### [Report Scope](#report-scope-1) [Section titled “Report Scope”](#report-scope-1) * Includes only approved strings with at least one translation submitted by a human translator. * If multiple translations exist for a string, each is included with its edit distance. * Only the top translation is used for comparison if multiple approvals exist. ### [Use Case and Best Practices](#use-case-and-best-practices-1) [Section titled “Use Case and Best Practices”](#use-case-and-best-practices-1) **Typical Use Case:** 1. Collect Translations – have your translators work on the project’s content. 2. Proofread and Approve – invite your proofreaders to review and approve the translated strings. 3. Generate Report – use the Translator Accuracy report to evaluate each translator’s work, based on how much post-editing was required. 4. Optimize Translation Team – identify top-performing translators (those with minimal post-edits) and provide targeted feedback or training where needed. **Best Practices:** * **Regular Reviews** – generate and review this report periodically to keep track of translator performance and spot trends in post-editing needs. * **Targeted Feedback** – use the insights to guide training or feedback sessions, focusing on specific areas where translators may need improvement. ### [Generating a Report](#generating-translator-accuracy) [Section titled “Generating a Report”](#generating-translator-accuracy) You can generate a Translator Accuracy report based on the following filters: * **Users** – All, or selected users. * **Language** – All, or specific language. * **Strings approved** – All time, Today, Yesterday, Last 7 days, Last 30 days, Last month, or Custom range. Additionally, using the report’s **Settings**, you can adjust how post-editing information is displayed: * **Total** – aggregates all post-editing data without breaking it into subcategories. * **Split into Categories by Edit Distance %** – provides a more granular view by grouping translations based on the extent of editing required. To generate the Translator Accuracy report, follow these steps: 1. Select the preferred report unit (words, strings, characters with or without spaces). 2. *(Optional)* Select one or more users if you want to generate the report for specific translators only. Otherwise, choose **All** to include everyone. 3. Select the preferred language or choose **All** if you want to include every target language. 4. Select the time range. 5. Click **Settings** and select one of the available options to configure how you want the post-editing information to be displayed. 6. Click **Generate**. ### [Result Analysis](#result-analysis-translator-accuracy) [Section titled “Result Analysis”](#result-analysis-translator-accuracy) When the report is generated, you will see the information grouped by language, and each translator is listed with their individual statistics: In each section, the data is displayed as pie charts: * **Pie Chart** – displays the proportion of units approved with or without edits. It categorizes units based on the extent of post-editing, such as: * No post-edit – displays that no further proofreader edits were made to the translator’s initial translation. * Post-edited with varying degrees of edit distance – displays one or more slices if you chose **Split into Categories by Edit Distance %**, each slice representing different ranges of edits applied to the translator’s work. If you selected **Total**, you’ll see just two slices: **No post-edit** and **Post-edited**. To download the Translator Accuracy report, click **Export** and select the preferred export format (CSV, XLSX, or JSON). 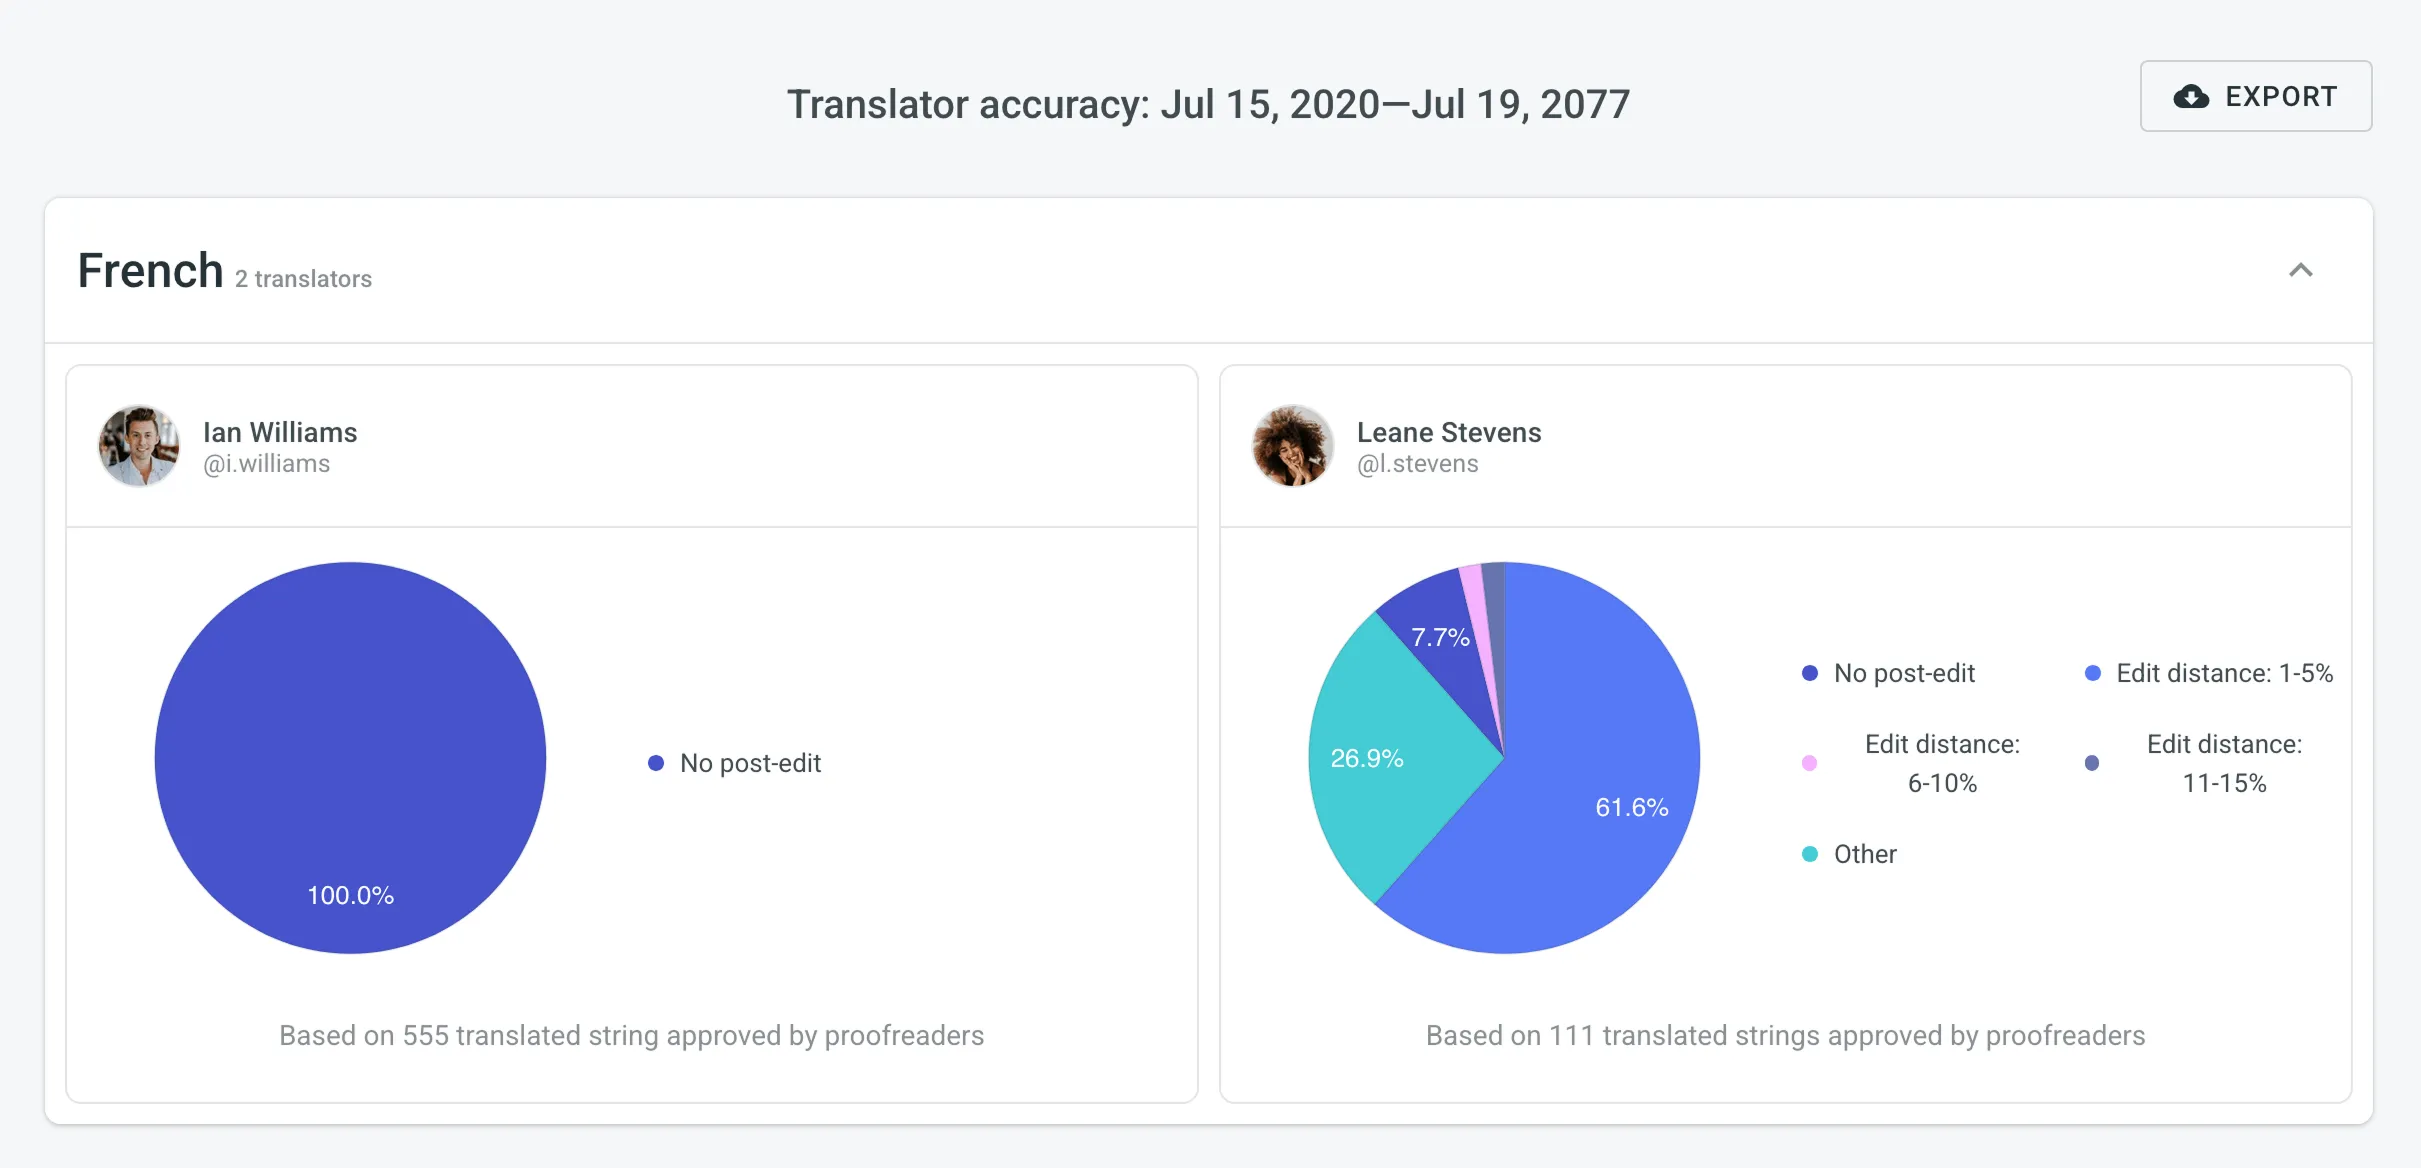 ## [Task Usage](#task-usage) [Section titled “Task Usage”](#task-usage) Use this report to get a detailed overview of task management within your project. It allows you to analyze workload distribution, compare creation and resolution rates, track team performance and efficiency, monitor task completion times, and review associated costs. The **Task Usage** report has the following global filters that are applied to all sub-reports by default: * **Time period**: *All time*, *Today*, *Yesterday*, *Last 7 days*, *Last 30 days*, *Last month*, or *Custom range*. * **Language**: *All* or a specific target language. * **Type**: *All types*, *Translate*, *Proofread*, *Translate by vendor*, or *Proofread by vendor*. * **Created by**: *All members* or a specific member. Each sub-report below has its own set of filters that are pre-populated from these global settings but can be individually adjusted. This allows you to start with a broad overview and then narrow the scope to specific data sets for each type of analysis. To download reports for further analysis or record-keeping, click **Export** and select the preferred format (CSV, XLSX, or JSON). In the reports that feature interactive graphs, you can hover over data points for more detailed information, such as daily or monthly totals for each category. ### [Workload](#workload) [Section titled “Workload”](#workload) This section helps you understand the volume and current status of tasks across your project. You can generate a Workload report based on the following filter parameters: * **Group by**: *Language*, *Type*, or *User*. * **Time period**: *All time*, *Today*, *Yesterday*, *Last 7 days*, *Last 30 days*, *Last month*, or *Custom range*. * **Language**: *All* or a specific target language. * **Type**: *All types*, *Translate*, *Proofread*, *Translate by vendor*, or *Proofread by vendor*. * **Created by**: *All members* or a specific member. * **Assignee**: *All members* or a specific member. The primary metrics show a snapshot of your project’s workload, including: * *Total tasks (period)*: The number of tasks found within the selected period. * *To Do*: The number of tasks that have not yet been started. * *In Progress*: The number of tasks that are currently being worked on. * *Done*: The number of tasks where all work has been completed but are not yet closed. * *Closed*: The number of tasks that have been completed and formally closed. * *Active tasks volume*: The total volume of content (e.g., words) in all tasks that are not in a *Closed* state. For a more granular view, you can expand the **Breakdown by languages** section to see a table of these metrics for each target language. ### [Created vs Resolved](#created-vs-resolved) [Section titled “Created vs Resolved”](#created-vs-resolved) This section helps you compare the rate of task creation against the rate of task resolution over time, which is useful for monitoring your team’s throughput and managing backlogs. You can generate a Created vs Resolved report based on the following filter parameters: * **Group by**: *Language* or *Type*. * **Time period**: *All time*, *Today*, *Yesterday*, *Last 7 days*, *Last 30 days*, *Last month*, or *Custom range*. * **Language**: *All* or a specific target language. * **Type**: *All types*, *Translate*, *Proofread*, *Translate by vendor*, or *Proofread by vendor*. * **Created by**: *All members* or a specific member. This section displays the following primary metrics: * *Created*: The total number of tasks created within the selected time period. * *Resolved*: The total number of tasks that were resolved (i.e., moved to a *Done* or *Closed* state) within the selected time period. Below the metrics, a line graph visualizes the cumulative number of created versus resolved tasks over time, allowing you to see trends at a glance. Additionally, you can expand the **Breakdown by languages** section to see the number of created and resolved tasks for each target language in a table format. ### [Task Performance](#task-performance) [Section titled “Task Performance”](#task-performance) This section helps you evaluate team performance and efficiency by tracking how tasks are completed in relation to their due dates. You can generate a Task Performance report based on the following filter parameters: * **Group by**: *Language* or *Type*. * **Time period**: *All time*, *Today*, *Yesterday*, *Last 7 days*, *Last 30 days*, *Last month*, or *Custom range*. * **Language**: *All* or a specific target language. * **Type**: *All types*, *Translate*, *Proofread*, *Translate by vendor*, or *Proofread by vendor*. * **Created by**: *All members* or a specific member. * **Assignee**: *All members* or a specific member. This section displays the following primary metrics: * *Total with Due Date*: The total number of tasks that have a due date set within the selected period. * *Total Open Overdue*: The number of tasks that are currently past their due date but are not yet closed. * *Closed Overdue*: The number of tasks that were completed and closed after their due date. * *Closed on Time*: The number of tasks that were completed and closed on or before their due date. Below the metrics, a stacked bar chart visualizes the performance over time, comparing the number of tasks *Closed Overdue* against those *Closed on Time*. For a more detailed view, you can expand the **Breakdown by languages** section to see a performance breakdown for each target language. ### [Task Completion Time](#task-completion-time) [Section titled “Task Completion Time”](#task-completion-time) This section provides detailed analytics on how long it takes for tasks to move from creation to completion, helping you identify potential bottlenecks in your workflow. You can generate a Task Completion Time report based on the following filter parameters: * **Group by**: *Language* or *Type*. * **Time period**: *All time*, *Today*, *Yesterday*, *Last 7 days*, *Last 30 days*, *Last month*, or *Custom range*. * **Language**: *All* or a specific target language. * **Type**: *All types*, *Translate*, *Proofread*, *Translate by vendor*, or *Proofread by vendor*. * **Created by**: *All members* or a specific member. * **Assignee**: *All members* or a specific member. * **Size (words)**: *Any*, or a custom range of words. This section displays the following primary metrics: * *Avg. completion time*: The average time taken for tasks to be completed from the moment of creation. * *Median*: The median time taken for task completion, representing the typical time for most tasks. * *80th percentile*: The time within which 80% of tasks are completed. This helps to understand the upper range of completion times while ignoring extreme outliers. * *Max. completion time*: The longest time taken to complete any single task in the selected set. * *Avg. waiting time*: The average time a task spends in a *To Do* state before work begins. The primary metrics are also available in the expandable **Breakdown by languages** section, which shows a detailed table of completion and waiting times for each target language. ### [Task Cost](#task-cost) [Section titled “Task Cost”](#task-cost) This section helps you review and analyze the financial costs associated with tasks in your project. This report totals the costs for all tasks that have either a recorded [Cost Estimate](#cost-estimate) or [Translation Cost](#translation-cost). The actual cost from the Translation Cost report is always prioritized. To include a task’s financial data in this summary, you must first generate a cost or estimate report for that specific task. You can generate a Task Cost report based on the following filter parameters: * **Group by**: *Language* or *Type*. * **Time period**: *All time*, *Today*, *Yesterday*, *Last 7 days*, *Last 30 days*, *Last month*, or *Custom range*. * **Language**: *All* or a specific target language. * **Type**: *All types*, *Translate*, *Proofread*, *Translate by vendor*, or *Proofread by vendor*. * **Created by**: *All members* or a specific member. This section displays the following primary metrics. If multiple currencies are used in the tasks, the costs for each will be displayed separately. * *Task costs with estimates*: The total cost for all tasks within the filtered selection that have an associated estimate or actual cost. * *Task costs with estimates (active)*: The total cost for only the *active* tasks (those in a “To Do” or “In Progress” state) within the filtered selection. For a more detailed view, you can expand the **Breakdown by languages** section. This table shows the number of tasks and their associated costs for each language, also broken down by total versus active tasks. ## [Contribution Raw Data Report](#contribution-raw-data-report) [Section titled “Contribution Raw Data Report”](#contribution-raw-data-report) In addition to the Translation Cost report, which is based on the Contribution Raw Data and grouped by languages, you can retrieve this detailed contribution raw data using the [Generate Report](/developer/enterprise/api/v2/#operation/api.projects.reports.post) (Contribution Raw Data schema) or via the [Raw Report Data](https://store.crowdin.com/raw-report) app available on the Crowdin Store. This allows you to generate your own custom report according to your specific requirements. The Contribution Raw Data report provides various columns depending on the selected mode (translations, approvals, or votes). Each column offers specific insights, for example `source string text hash`, which is useful for identifying changes in source strings despite having the same `stringId`. It’s important to note that multiple records can exist for the same `stringId` if the source hash or plural form varies. For repeated translations by the same user on the same source string, into the same target language, the same plural form, and if the source text has not changed, only the `translationId`, `targetUnits`, and `updatedAt` columns will update in the report statistics. Deleted translations are also included in the count. Understanding these columns can help you better interpret the raw data and optimize your localization process. View the available report columns and their mode applicability (i.e., translations, approvals, and votes) in the following table: | Name | Available in Report Mode | Description | | ---------------------- | ------------------------------ | ------------------------------------------------------------------------------------------------------------------------------------------------------------------------- | | `userId` | Translations, Approvals, Votes | **Type:** `integer`Numeric identifier of a user who added a translation. | | `languageId` | Translations, Approvals, Votes | **Type:** `string`Target language identifier ([Crowdin language code](/developer/language-codes/) (e.g., uk)). | | `stringId` | Translations, Approvals, Votes | **Type:** `integer`Numeric string identifier in Crowdin project. | | `translationId` | Translations, Approvals, Votes | **Type:** `integer`Numeric identifier of the translation in Crowdin project. | | `fileId` | Translations, Approvals, Votes | **Type:** `integer`Numeric file identifier in Crowdin project where the source string is stored. | | `filePath` | Translations, Approvals, Votes | **Type:** `string`Path to the file that contains the source string (e.g., /main/docs/index.md). | | `pluralForm` | Translations, Approvals, Votes | **Type:** `string`Translation plural form (each plural form is displayed as a separate record in the report). | | `sourceStringTextHash` | Translations, Approvals, Votes | **Type:** `string`Hash of the source string. | | `mtEngine` | Translations, Approvals, Votes | **Type:** `string`MT engine name from which a translation was provided. | | `mtId` | Translations, Approvals, Votes | **Type:** `integer`Numeric MT engine identifier. | | `tmName` | Translations, Approvals, Votes | **Type:** `string`Translation memory name from which a translation was provided. | | `tmId` | Translations, Approvals, Votes | **Type:** `integer`Numeric translation memory identifier. | | `preTranslated` | Translations, Approvals, Votes | **Type:** `string`Specifies if a translation was applied via pre-translation. | | `tmMatch` | Translations | **Type:** `integer`The highest match value of the translation with other TM suggestions, if any. | | `mtMatch` | Translations | **Type:** `integer`The highest match value of the translation with other MT suggestions, if any. | | `suggestionMatch` | Translations | **Type:** `integer`The highest match value of the translation with suggestions from other translators, if any. | | `sourceUnits` | Translations, Approvals, Votes | **Type:** `integer`Specifies the number of words in the source text (available only if `strings` unit type is not selected). | | `targetUnits` | Translations, Approvals, Votes | **Type:** `integer`Specifies the number of words in the translation (available only if `strings` unit type is not selected). | | `createdAt` | Translations, Approvals, Votes | **Type:** `datetime`Specifies the date when the string was initially translated. | | `updatedAt` | Translations, Approvals, Votes | **Type:** `datetime`Specifies the date when the last translation was added. | | `mark` | Votes | **Type:** `string`A vote mark that indicates how the translation rating has changed (e.g., if a translation has been voted up or down, or if the vote has been canceled). | ## [Top Members](#top-members) [Section titled “Top Members”](#top-members) The Top Members report allows you to see who contributed the most to your project’s translation. Default parameters: * *Text unit*: words * *Time period*: Last 30 days * *Sorted by*: translated text units. A member who translated the most is placed at the top of the list. * *Languages*: all languages * *Contributors*: all The **You** label appears next to your own username in the report table, making it easier to identify your personal contribution. Re-sort the members by clicking on the needed parameter. For example, if you want to analyze members by their proofreading activity, click on the *Approved* parameter to redo sorting.  ### [Generating a Custom List of Top Members](#generating-a-custom-list-of-top-members) [Section titled “Generating a Custom List of Top Members”](#generating-a-custom-list-of-top-members) To generate a custom list of top members, follow these steps: 1. Select the preferred report unit (words, strings, characters with or without spaces). 2. Select the time period for which you want to see the activity of contributors. 3. To make a list of contributors for a specific language, select the language you need from the drop-down menu above the list. Alternatively, select **All languages**. To find a specific member, use the search field. To open the member’s profile page, double-click on the name. The Top Members list includes the following columns: * *Rank* – contributor’s position in the list based on the currently selected sorting criteria (e.g., *Translated*, *Approved*, etc.). * *Name* – contributor’s first name, last name and username. * *Languages* – project languages. * *Translated* – the number of translated source content units. * *Target* – the number of translated content units in a target language.\ This parameter is not available for the *Strings* content unit because the number of source and translated strings is always the same. * *Approved* – the number of approved content units. * *Voted* – the number of votes a contributor made. * *”+” votes received* – the number of upvotes a contributor received for translations. * *”-” votes received* – the number of downvotes a contributor received for translations. * *Winning* – the number of approvals a contributor received for translations. * *Given access* – indicates when a member was granted access to a project. To customize the visibility of columns in the report, click at the upper-right side of the table and select the preferred ones. To download the Top Members report, click **Export** and select the preferred export format (CSV, XLSX, or JSON). ## [Archive](#archive) [Section titled “Archive”](#archive) The Archive section allows you to access the records of previously generated Cost estimate and Translation cost reports, providing a convenient way to review historical data. This section also eliminates the need to wait for a report generation to complete. You can initiate a report generation and return to it later at your convenience. Within the Archive, you can review the report summary and, if necessary, download it in various supported file formats. Each project within an organization has its own independent archive section with previously generated reports available only to project members with manager permissions (or higher). Reports generated by translators based on their contributions are not added to the archives. ### [Viewing Previously Generated Reports](#viewing-previously-generated-reports) [Section titled “Viewing Previously Generated Reports”](#viewing-previously-generated-reports) To view the summary of the previously generated reports (i.e., archive records), follow these steps: 1. Open your project and go to **Reports > Archive**. 2. Click on the name of the needed archive record. 3. Once you open the archive report record, you can view all the needed data.  ### [Exporting Previously Generated Reports](#exporting-previously-generated-reports) [Section titled “Exporting Previously Generated Reports”](#exporting-previously-generated-reports) To export the previously generated reports, follow these steps: 1. Open your project and go to **Reports > Archive**. 2. Click (or right-click) on the needed report in the list. 3. Click on the preferred file format to export. ### [Deleting Previously Generated Reports](#deleting-previously-generated-reports) [Section titled “Deleting Previously Generated Reports”](#deleting-previously-generated-reports) To delete the previously generated reports, follow these steps: 1. Open your project and go to **Reports > Archive**. 2. Click (or right-click) on the needed report in the list. 3. Click **Delete**. ## [See Also](#see-also) [Section titled “See Also”](#see-also) [Organization Reports ](/enterprise/organization-reports/)View your organization status and various available reports. [Contributor Reports ](/enterprise/contributor-reports/)Estimate and count the price of your contribution to the project.
# Project Settings
> Configure project settings according to your needs
You can configure project settings according to your needs in the **Settings** section. In the **General** section, you can change the project name, upload the project logo, add a short description, and transfer ownership. ## [Details](#details) [Section titled “Details”](#details) In the **Details** section, you can upload the project logo, change the project name, view the Project ID within your organization, and add a short description. 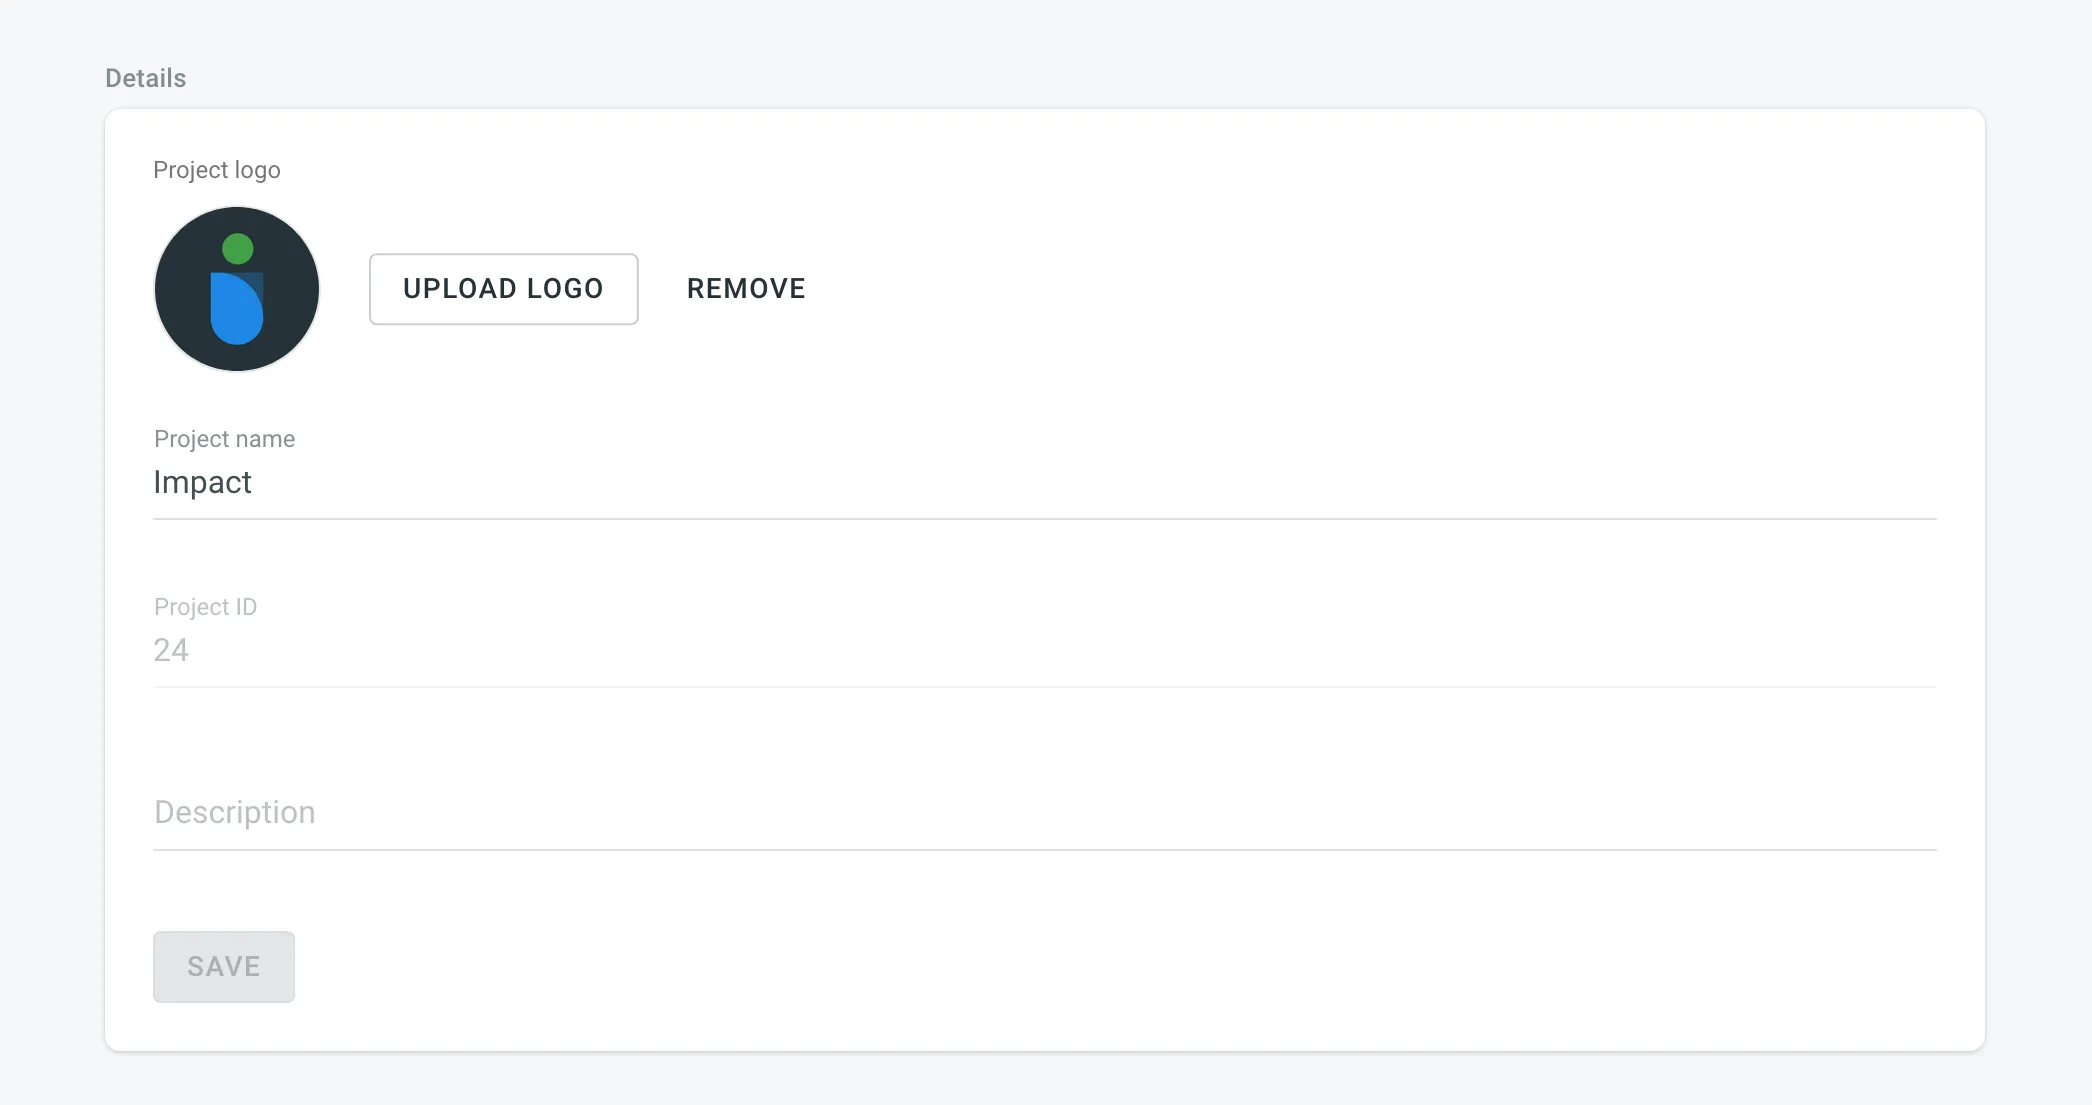 ## [Project Language Page View Beta](#project-language-page-view) [Section titled “Project Language Page View ”Beta](#project-language-page-view) This section allows you to choose how translators interact with the content on your project’s language page. * **Show files only** – this option is useful if your project focuses on file-based translation without the need for visual context. It’s an easy setup for projects where the text is self-explanatory or where screenshots aren’t necessary. * **Show files and tagged screenshots** – displaying both files and tagged screenshots allows translators to reference visual context alongside the text. This option is useful for projects where the meaning of the text can be influenced by its visual environment, improving translation accuracy. * **Show screenshots only** – select this option if every string in your project is associated with a screenshot. By providing visual context for all text, you can significantly improve the quality of translations. This method is considered best practice, especially for projects with complex interfaces or where visual elements are crucial for understanding. However, it requires effort to maintain the accuracy and relevance of the screenshots. ## [Transfer Ownership](#transfer-ownership) [Section titled “Transfer Ownership”](#transfer-ownership) Originally, you own any project you create in Crowdin Enterprise. You can transfer your project ownership to any other user in the Organization you belong to. Click **Transfer** and select the needed user to transfer ownership. Danger The new project owner will have access to all project resources and can remove the project. ## [Delete Project](#delete-project) [Section titled “Delete Project”](#delete-project) This option is accessible to project managers, project owner, parent group managers, and organization admins. You can delete the Crowdin Enterprise project with all the translations and related localization resources. Click **Delete** and type the project name to confirm the deletion. Danger Deleting the project will permanently delete all the resources associated with the project, including uploaded files, translations, approvals, etc. **Deleted projects can’t be restored!**
# AI Settings
> Configure and manage AI prompts in your project settings
In the project’s **Settings > AI** section, you can configure and manage AI prompts and select prompts to be used in the Editor for features like AI Assistant, AI Suggestions, AI Alignment, and AI-powered QA Check. By default, the prompts to be used in the Editor are applied from the organization’s AI settings. If default AI settings in the project owner’s account are not configured to apply automatically to all projects, it’s necessary to select the appropriate AI prompts in the project’s settings to activate the AI Assistant, AI Suggestions, AI Alignment, and AI-powered QA Check features. Otherwise, these features will remain inactive. The AI prompts configured in the project settings will also be added to the list of AI prompts of the organization. AI Prompt Types: * Pre-Translate * AI in Editor * AI Alignment * QA Check * Custom type [Configuring AI Prompts ](/enterprise/crowdin-ai/#configuring-ai-prompts) Before the AI Prompts can be configured in the project settings, it’s also necessary for the organization owner or admins to [configure the AI Providers](/enterprise/crowdin-ai/#configuring-ai-providers). 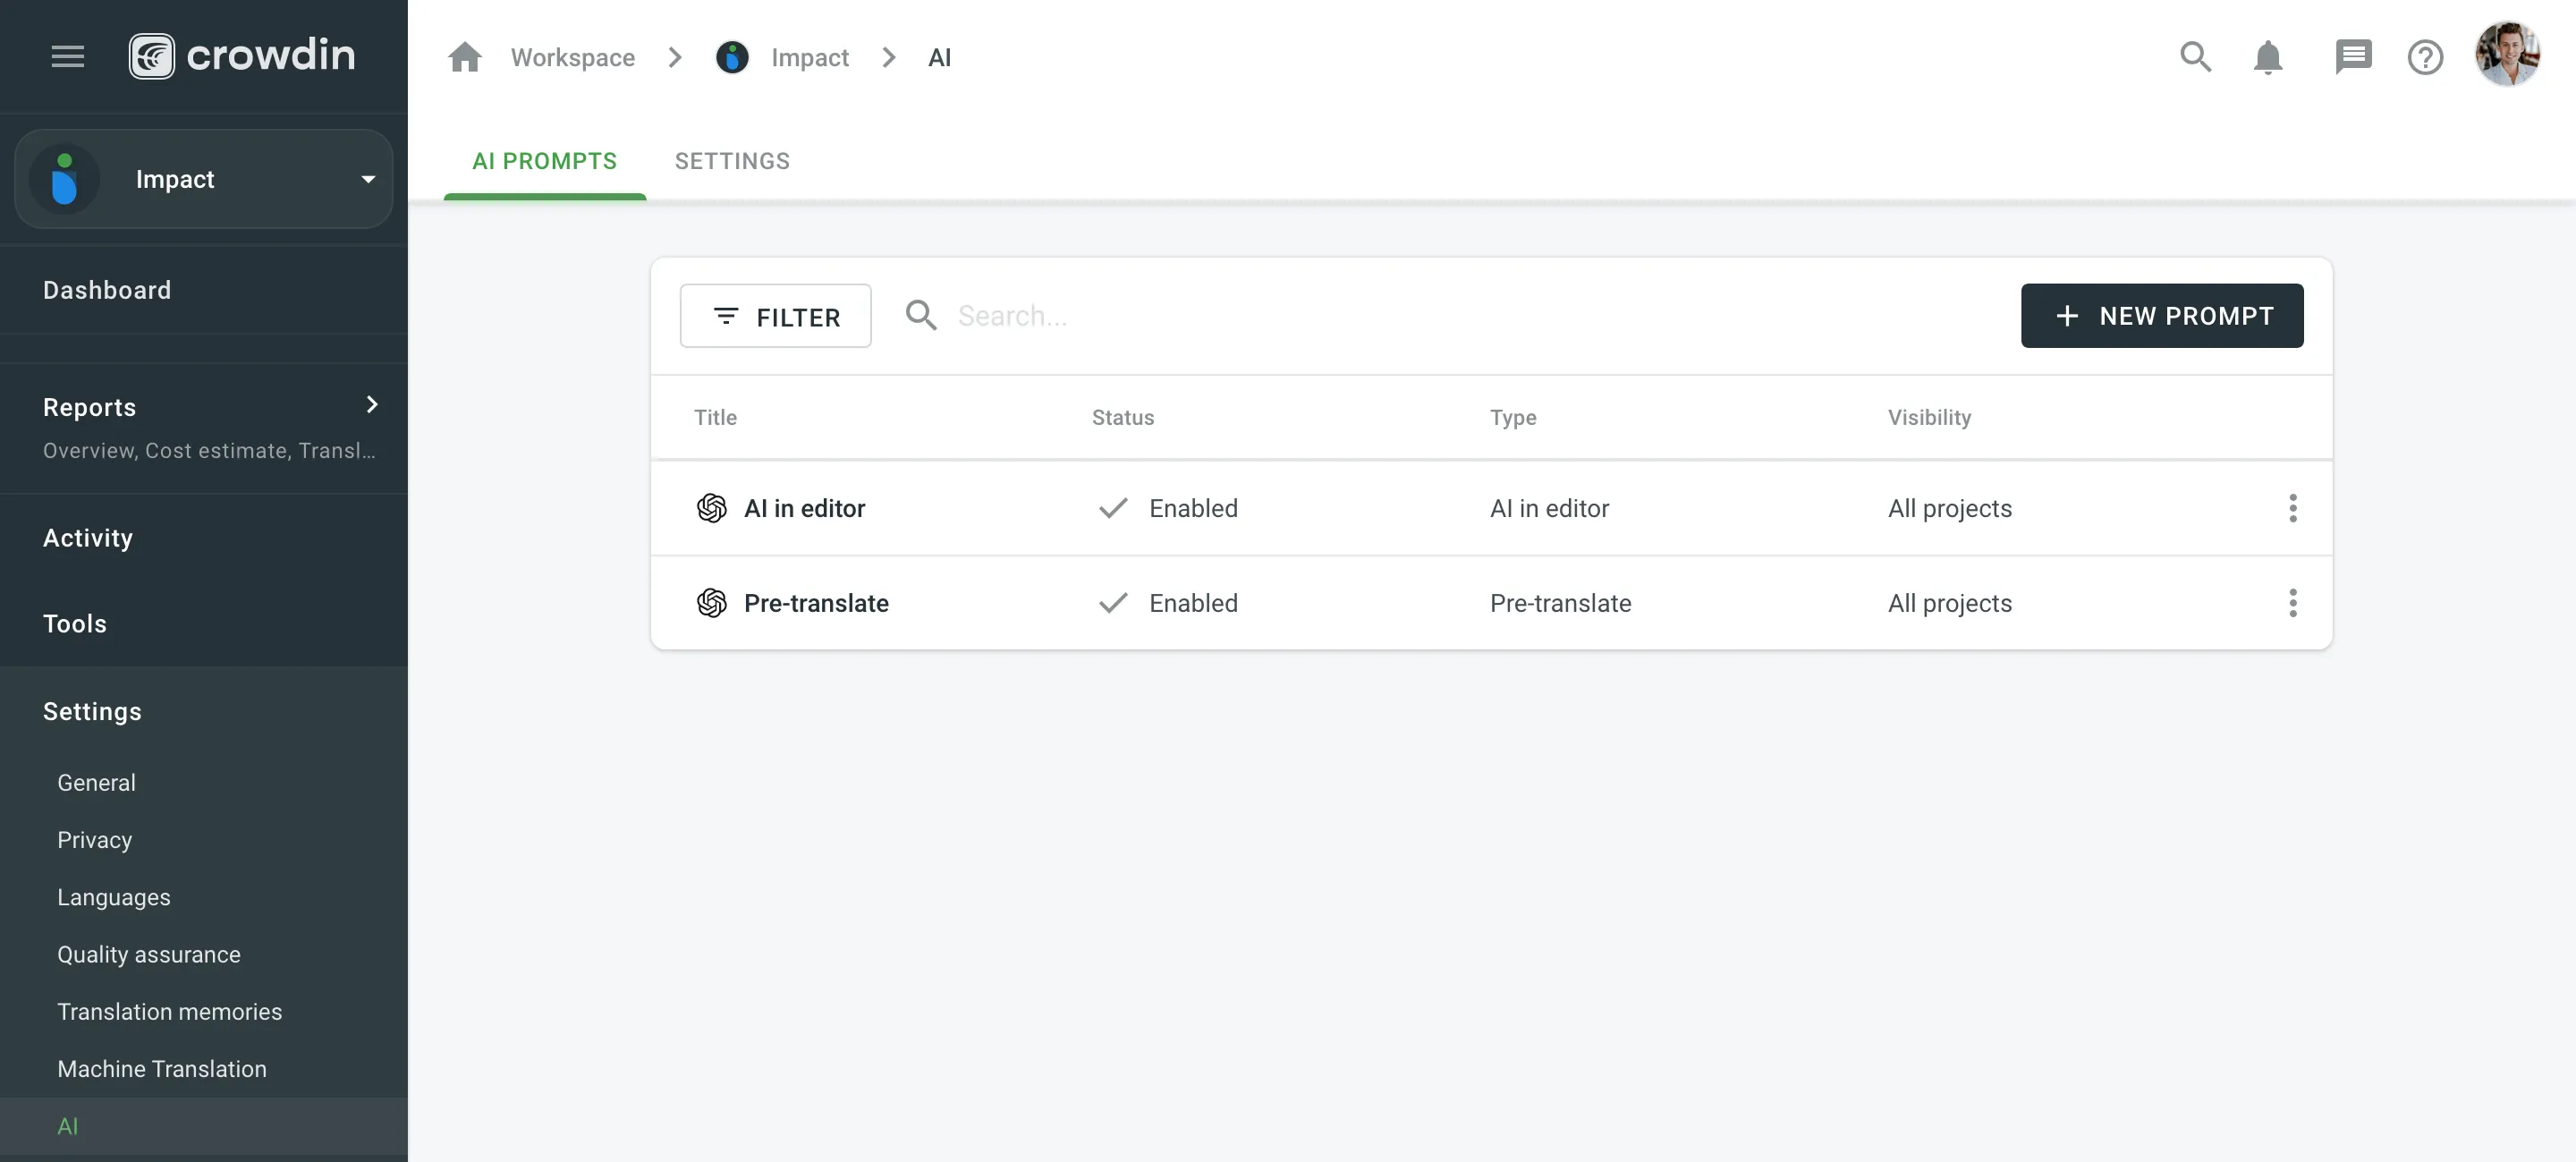 ## [Selecting AI Prompts](#selecting-ai-prompts) [Section titled “Selecting AI Prompts”](#selecting-ai-prompts) To select the AI prompts to be used in the Editor, follow these steps: 1. Open your project and go to **Settings > AI**. 2. Click on the **Settings** tab. 3. Select the AI prompts from the drop-down menus for AI Assistant in editor, AI Suggestion in editor, AI Alignment, and QA Check. 4. Click **Save**. Read more about [Crowdin AI](/enterprise/crowdin-ai/).
# Export Settings
> Configure the translations export behavior
In the **Export** section of the Project Settings, you can configure the translations export behavior. There are several options available to customize the export settings according to your needs including advanced options for each specific language. ## [Translations Export Settings](#translations-export-settings) [Section titled “Translations Export Settings”](#translations-export-settings) By default, when exporting translations, Crowdin Enterprise fills untranslated strings with source text to avoid exporting empty files. You can change this behavior by using the options below. ### [Export strings with at least 1 translation](#export-strings-with-at-least-1-translation) [Section titled “Export strings with at least 1 translation”](#export-strings-with-at-least-1-translation) Choose if you want to export all translated strings without approval. ### [Export translations with a specific number of approvals](#export-translations-with-a-specific-number-of-approvals) [Section titled “Export translations with a specific number of approvals”](#export-translations-with-a-specific-number-of-approvals) Choose if you want to export only strings with approved translations. Make sure the number of required approvals set isn’t higher than the actual number of proofreading steps in your project workflow. Caution Number of required approvals cannot be higher than number of proofreading steps present in the project workflow. ### [Export strings that passed workflow](#export-strings-that-passed-workflow) [Section titled “Export strings that passed workflow”](#export-strings-that-passed-workflow) Strings that reached the End step will be included in the exported files. Read more about [Workflows](/enterprise/workflows/). ### [Automatically fill in regional dialects](#automatically-fill-in-regional-dialects) [Section titled “Automatically fill in regional dialects”](#automatically-fill-in-regional-dialects) Useful when the project is translated into the language dialects (e.g., Spanish, Argentina). On export, translations from Spanish will be automatically copied to untranslated strings in Spanish, Argentina. ### [Skip untranslated strings](#skip-untranslated-strings) [Section titled “Skip untranslated strings”](#skip-untranslated-strings) Only translated strings will be included in the exported translation files. This option works in three different ways, depending on the file format. This option is not applied to text-formatted documents since missing texts can make downloaded files unreadable. Others are exported with empty values. And for the third file category, untranslated strings are entirely removed from the exported translation files. | Option not applied | Untranslated strings exported with empty values | Untranslated strings removed | | ---------------------------------------------------------------------------------------------------- | ----------------------------------------------------------------------------------------------------------------------------------------------- | ----------------------------------------------------------------------------------------------------------------------------------------------------------------------------------------------------------------------------------------------------------------------------------------- | | DOCX, IDML, DITA, ADOC, MD, MediaWiki, TXT, HAML, HTML, assets, FM MD, FM HTML, Contentful JSON, SVG | JSON (with nested structure), PHP, XLSX, CSV, FJS, RC, XAML, XML, Web XML, TypeScript, JS, TOML, QT TS, i18next JSON, gettext PO, FLSNP, Coffee | Android XML, macOS/iOS Strings, Stringsdict, Chrome JSON, JSON (without nested structure), YAML, XLIFF, XLIFF 2.0, ARB, DTD, RRC, GO JSON, Flex, Joomla INI, Maxthon, Java Properties, Play Properties, Java Properties XML, RES JSON, RESW, RESX, SBV, STR, STF, VTT, WXL, VDF, FBT JSON | ### [Skip untranslated files](#skip-untranslated-files) [Section titled “Skip untranslated files”](#skip-untranslated-files) Only 100% translated files will be included in the exported translation archive. ### [Save context information in the files](#save-context-information-in-the-files) [Section titled “Save context information in the files”](#save-context-information-in-the-files) The context and max.length added in Crowdin Enterprise will be visible in the downloaded files. This option only applies to CSV, Android XML, iOS strings, and RESX formats. Limitations This option only partially applies to iOS strings and RESX formats (i.e., only the context added in Crowdin Enterprise will be visible in the downloaded files). ## [Advanced Export Options](#advanced-export-options) [Section titled “Advanced Export Options”](#advanced-export-options) You can configure individual export settings for each specific language in your project by clicking on **Advanced Options**. In this section, you can configure the following settings for each target language in your project: * [Export strings with at least 1 translation](#export-strings-with-at-least-1-translation). * [Export translations with a specific number of approvals](#export-translations-with-a-specific-number-of-approvals). * [Export strings that passed workflow](#export-strings-that-passed-workflow).
# File Processor Settings
> Customize processing for supported file formats
File processors allow you to customize processing for supported file formats. It can be useful if you want to edit the file content before it’s imported by Crowdin Enterprise. The File Processors are implemented as Crowdin Apps. You can create your own File Processor or use the existing ones. 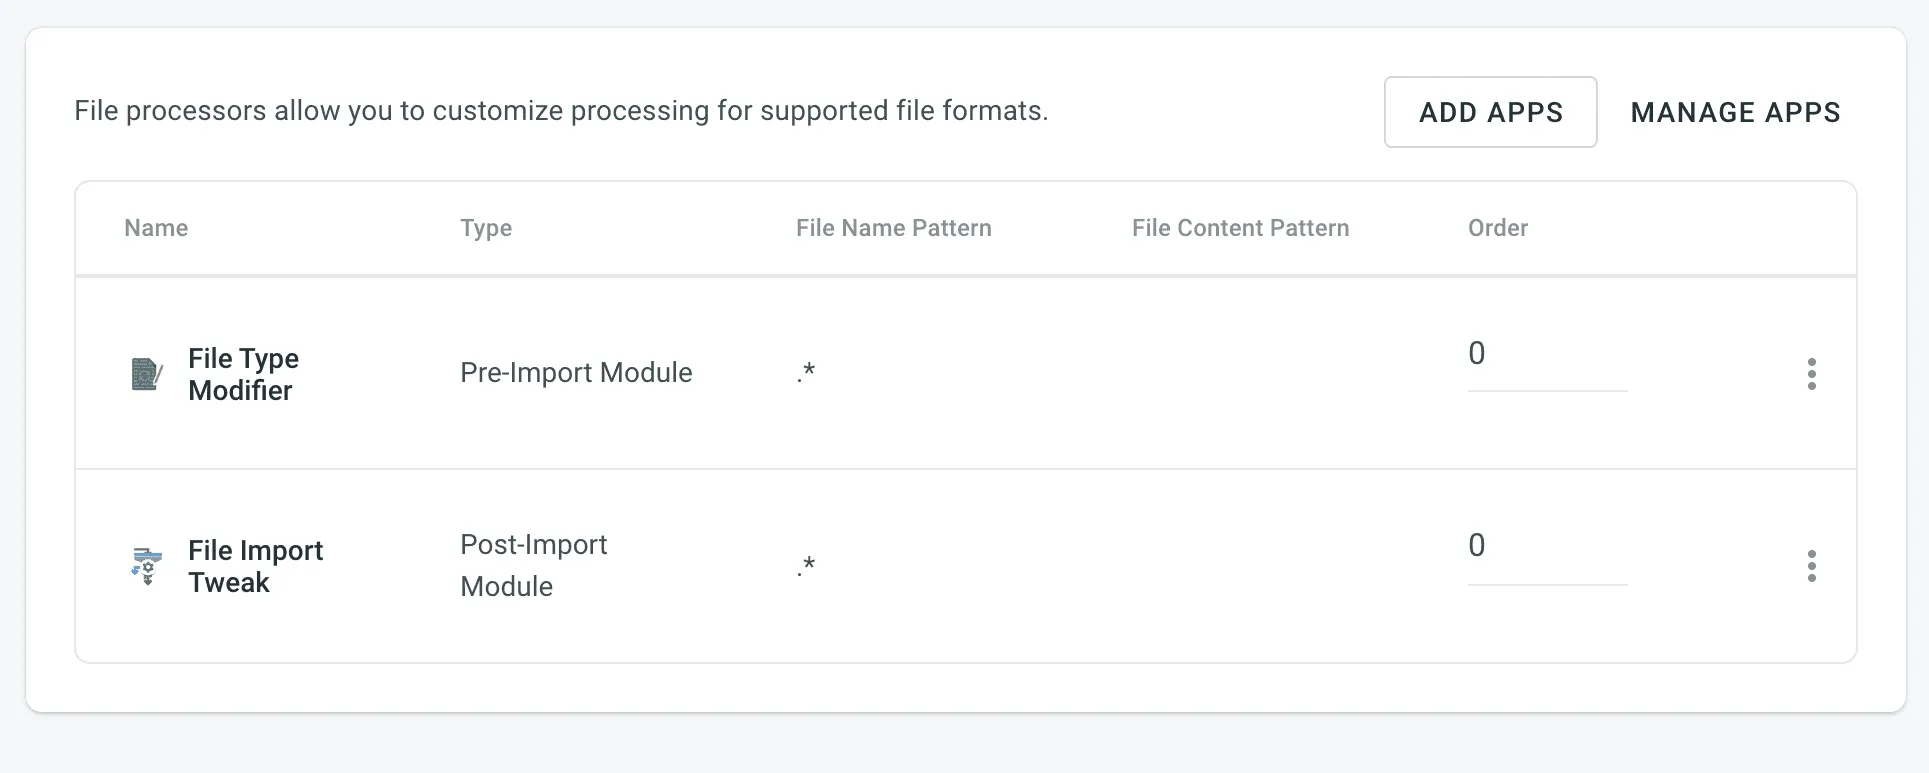 [Explore File Processors in Store ](https://store.crowdin.com/tags/file-processors) [Create a File Processor ](/developer/crowdin-apps-modules-file-processing/) ## [Managing File Processors](#managing-file-processors) [Section titled “Managing File Processors”](#managing-file-processors) To manage File Processors, go to the **File Processors** section of your project settings. ### [Configuring the Processing Order](#configuring-the-processing-order) [Section titled “Configuring the Processing Order”](#configuring-the-processing-order) The processing order of File Processors determines how modules of the same type are executed in your project. The order value sets the priority, starting with 0 (highest priority) and increasing incrementally. The sequence you set can significantly impact the outcome. For example, if you are translating a CSV file and have installed two apps with `file-post-export` modules: * The first module escapes HTML tags in strings, transforming `` into `\<\/h1\>`. * The second module checks if all closing tags are present and adds them if they are missing. The processing order of these modules will lead to different results: * If the HTML tag escaping module runs first, followed by the tag verification module, the output might be: * `
` * If the order is reversed, with the tag verification module running first, the output will be: * `
Hello World!` => `
Hello World!
` => `\Hello World!\<\/h1\>` Caution When multiple file-processing modules of the same type (e.g., `file-post-export`) share identical order value, unexpected behavior may occur. In such cases, the system selects which module to execute first based on the installation date of file-processing apps, potentially disrupting the intended processing sequence. Therefore, it is recommended to adjust the identical order values to ensure that files are processed in the desired sequence. ### [Editing File Processor settings](#editing-file-processor-settings) [Section titled “Editing File Processor settings”](#editing-file-processor-settings) To Edit the File Processor settings, follow these steps: 1. Open your project and go to **Settings > File Processors**. 2. Click toward the needed processor and select **Edit**. 3. Make the necessary changes and click **Submit**. The processor settings may vary depending on the processor you are using.
# Glossary Settings
> Configure and manage glossaries for your project
With a glossary, you can create, store, and manage all the project terminology in one place. The main aim of terminology is to explain some specific terms or the ones often used in the project to be translated properly and consistently. Read more about [Glossary](/enterprise/glossary/). ## [Assigning Glossary](#assigning-glossary) [Section titled “Assigning Glossary”](#assigning-glossary) To assign a glossary to your project, in the **Glossaries** section, select the needed glossaries from the list. 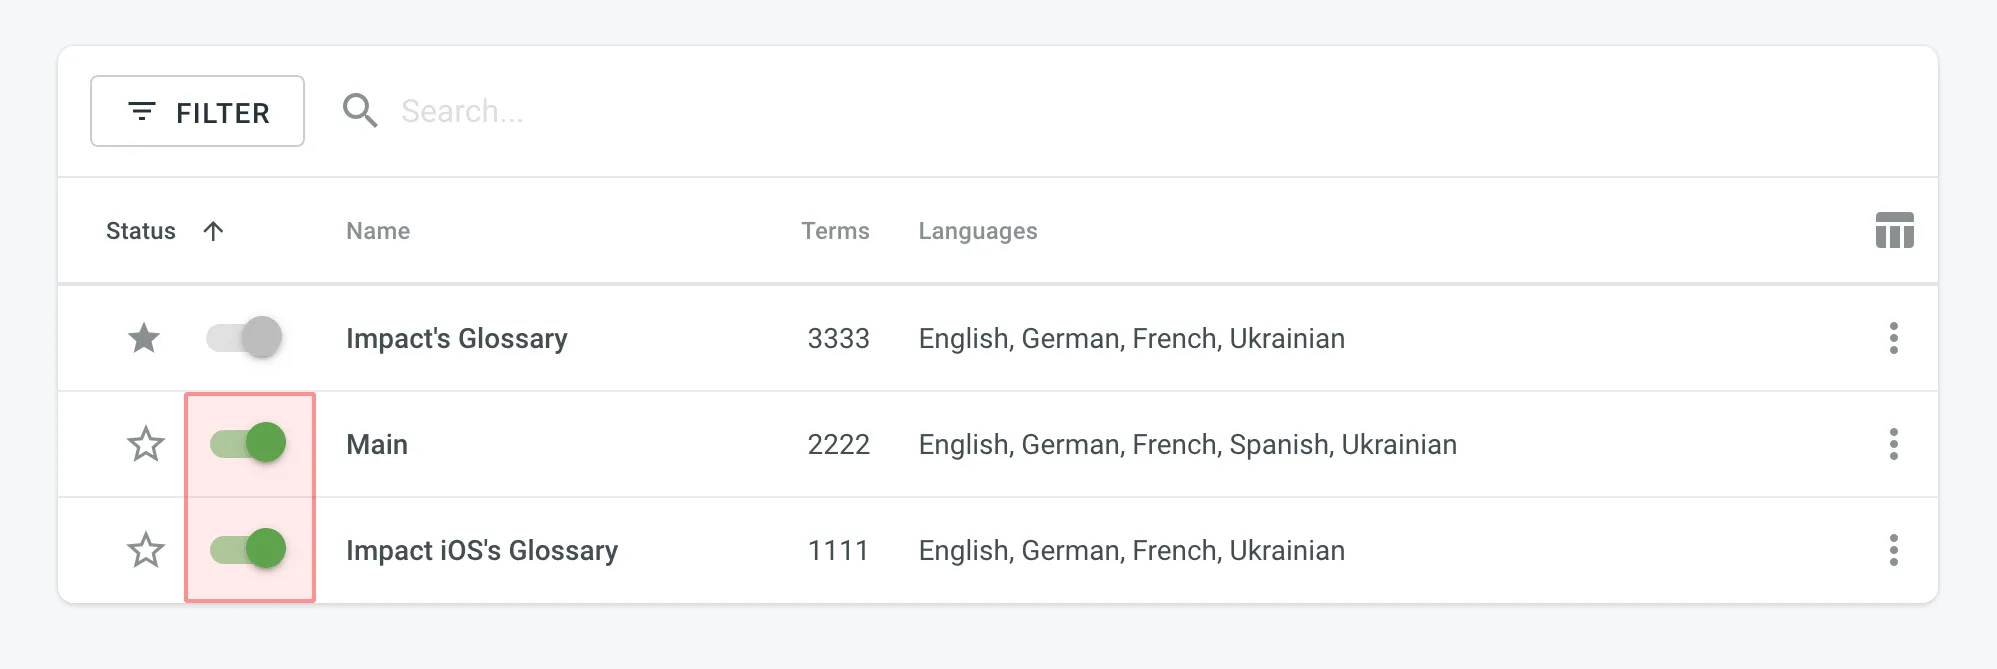 ## [Changing Default Glossary](#changing-default-glossary) [Section titled “Changing Default Glossary”](#changing-default-glossary) To change your project’s default glossary, in the **Glossaries** section, click the icon next to the needed glossary in the list.
# Import Settings
> Configure how placeholders, duplicates, and word counts are handled
In the **Import** section of the Project Settings, you can configure how Crowdin should handle placeholders, duplicate strings, and word counts in your project. ## [Source Strings](#source-strings) [Section titled “Source Strings”](#source-strings) Improve the translation consistency and streamline your workflow by unifying placeholders and handling duplicate strings. ### [Unify Placeholders](#unify-placeholders) [Section titled “Unify Placeholders”](#unify-placeholders) Enable the transformation of the placeholders to the unified format to improve the work with TM suggestions. On export, the placeholders in translations are transformed back to the original format. If your project contains iOS strings, iOS XLIFF, and Android XML files, you can enable the **Unify placeholders** option, and the system will transform placeholders into a unified look. For example, Crowdin Enterprise will make the Android string `Hello, %s!`, and the iOS string `Hello, %@!` look in the Editor this way: `Hello, [%s]!`. This option is beneficial when you work with TM since TM suggestions from iOS strings, iOS XLIFF, and Android XML will be completely interchangeable. Crowdin Enterprise will transform the translation placeholders back to the original format on export. This option only applies to iOS strings, iOS XLIFF, and Android XML formats. ### [Duplicate Strings](#duplicate-strings) [Section titled “Duplicate Strings”](#duplicate-strings) You can save time by translating all duplicates with the same translation and hiding these instances from translators. This can affect accuracy. Crowdin’s localization process is based on translating source strings to the defined target languages. Source strings are uploaded to the system in localization files. Each unique source string first uploaded or added (for CSV and other formats supporting [string editing](/enterprise/string-management/#string-editing)) in Crowdin is considered a master string. All other strings that are identical to the master string but were uploaded or created later are considered duplicate strings. #### [Duplicate Strings Management](#duplicate-strings-management) [Section titled “Duplicate Strings Management”](#duplicate-strings-management) If your project contains duplicated strings, you can choose how the system should treat them using the following options: * **Show** – translators will translate each instance (string) separately. Duplicate strings won’t be hidden. * **Show, but auto-translate them** – duplicate strings will be automatically translated but remain visible to translators. Once the master string is translated, its translation is automatically shared with all duplicates. Translators can review and re-translate each duplicate with their own translation as needed. If a unique translation is provided for a specific duplicate, it will override the shared translation for that string alone, allowing for precise context-specific translations without affecting the other duplicates. If a translator removes a duplicate’s unique translation, it will be automatically translated with a translation from a master string. * **Show within a version branch (regular detection)** – duplicates will be hidden only between [version branches](/enterprise/version-management/). * **Show within a version branch (strict detection)** – duplicates will be hidden only between version branches. * **Hide (regular detection)** – all duplicates will share the same translation. * **Hide (strict detection)** – all duplicates will share the same translation. Regular duplicate detection – when comparing strings, Crowdin considers only source texts. Strict duplicate detection – when comparing strings, Crowdin considers both string identifiers (keys) and source texts. #### [Show all duplicates](#show-all-duplicates) [Section titled “Show all duplicates”](#show-all-duplicates) When this option is selected, all duplicate strings will be visible to translators. Each duplicate will require a separate translation. 💡 **Use case**: works perfectly for projects where the same words might have various meanings depending on the context. #### [Show, but auto-translate duplicates](#show-but-auto-translate-duplicates) [Section titled “Show, but auto-translate duplicates”](#show-but-auto-translate-duplicates) When this option is selected, all duplicate strings are shown and automatically translated. Once the master string is translated, its translation is automatically shared among all duplicates. This allows translators to review and re-translate duplicate strings if necessary. 💡 **Use case**: works excellently if you want to save time but still require automatic translations to be reviewed. To better illustrate how the **Show, but auto-translate them** option works, consider the following five-string JSON file: two strings are unique, and three strings have identical source text. ```json { "hello": "Hello", "welcome": "Welcome!", "save1": "Save", "save2": "Save", "save3": "Save" } ``` Upon importing this file, the system marks the first of these identical strings (`"save1": "Save"`) as the master string with the “Master” marking, while the subsequent two identical strings (`"save2": "Save"` and `"save3": "Save"`) are labeled as duplicates of this master string with the “Duplicate” marking. Once you set the Duplicate strings option to **Show, but auto-translate them**, the system keeps all five strings visible to translators and for the master string and its two duplicates, automatic translation propagation is enabled. This means that translations are automatically shared from the master string to its duplicates. Let’s consider the following scenarios: * *Master string is translated first* – the system immediately propagates the translation of the master string to its duplicates. As a result, all three identical strings (the master string and its two duplicates) are displayed with translations. However, translators can review and re-translate each duplicate with their own translation as needed. If a unique translation is provided for a specific duplicate, it will override the shared translation for that string alone, allowing for precise context-specific translations without affecting the other duplicates. If a translator removes a duplicate’s unique translation, it will be automatically translated with a translation from a master string. * *One of the duplicates is translated first* – the system does not propagate the translation of the duplicate to the master string or the other duplicate. Consequently, one duplicate string is displayed with a translation, while the master string and the other duplicate remain untranslated. #### [Show within a version branch. Duplicates will be hidden only between version branches](#show-within-a-version-branch-duplicates-will-be-hidden-only-between-version-branches) [Section titled “Show within a version branch. Duplicates will be hidden only between version branches”](#show-within-a-version-branch-duplicates-will-be-hidden-only-between-version-branches) When this option is selected, only the master strings that were originally uploaded to the system will be available for translation. All duplicate strings will automatically get the translations of the original strings and will be hidden in all version branches. This option is available in two versions: regular duplicate detection, strict duplicate detection. If your source files contain strings with apparent identifiers (keys), it’s better to use a *strict* version of this option. In other cases, feel free to use a *regular* one. Here are a few things to keep in mind: * The system always checks the path to the string throughout the branches. For example, even if the strings are the same in different version branches (`branch1` and `branch2`), but their paths are different (branch1 - `/localization/android.xml` and branch2 - `/localization/apps/android.xml`), they won’t be recognized as duplicates. * This option works only for the strings located in the files that have the same format. For example, if there is the same string in `android.xml` and `ios.strings` files, it won’t be recognized as a duplicate. 💡 **Use case**: works perfectly for continuous projects with various version branches. Allows translators to work with unique strings in separate branches. #### [Hide all duplicates](#hide-all-duplicates) [Section titled “Hide all duplicates”](#hide-all-duplicates) When this option is selected, the system spots the duplicate strings in all files. Only the master strings that were originally uploaded are visible and should be translated. The hidden duplicate strings will automatically share the translations from the corresponding master strings. This option is available in two versions: regular duplicate detection, strict duplicate detection. If your source files contain strings with apparent identifiers (keys), it’s better to use a *strict* version of this option. In other cases, feel free to use a *regular* one. 💡 **Use case**: works great for projects with narrow scopes where all duplicates share the same context. ## [Word count](#word-count) [Section titled “Word count”](#word-count) You can set the preferred way Crowdin Enterprise should count words in your project. Specifically, it applies to whether HTML tags should be counted as regular words or not. By default, Crowdin Enterprise considers HTML tags as regular words for most of the supported formats, excluding the following ones: HTML, Front Matter HTML, HAML, MD, Front Matter MD, XML, WEBXML, IDML, XLIFF, XLIFF 2.0, ADOC, DOCX, DITA. * **Auto (default)** – HTML tags will be counted as regular words or skipped depending on the source file format. * **Count tags** – all HTML tags will be counted as regular words. * **Skip tags** – all HTML tags won’t be counted. More information about Crowdin [Word Counter](/enterprise/word-counter/). ## [Assign custom placeholder](#assign-custom-placeholder) [Section titled “Assign custom placeholder”](#assign-custom-placeholder) To assign the created custom placeholder to a project, follow these steps: 1. Open your project and go to **Settings > Import**. 2. Click **Assign Custom placeholder**. 3. In the appeared dialog, select a placeholder from the **Placeholder** drop-down list and specify the desired order of placeholder execution (useful when you’d like to use multiple custom placeholders within one project), select whether you’d like your custom placeholders to be executed before the default placeholders, whether to allow your project participants to save translations without a placeholder, assign to all or specified formats. 4. Click **Save**. 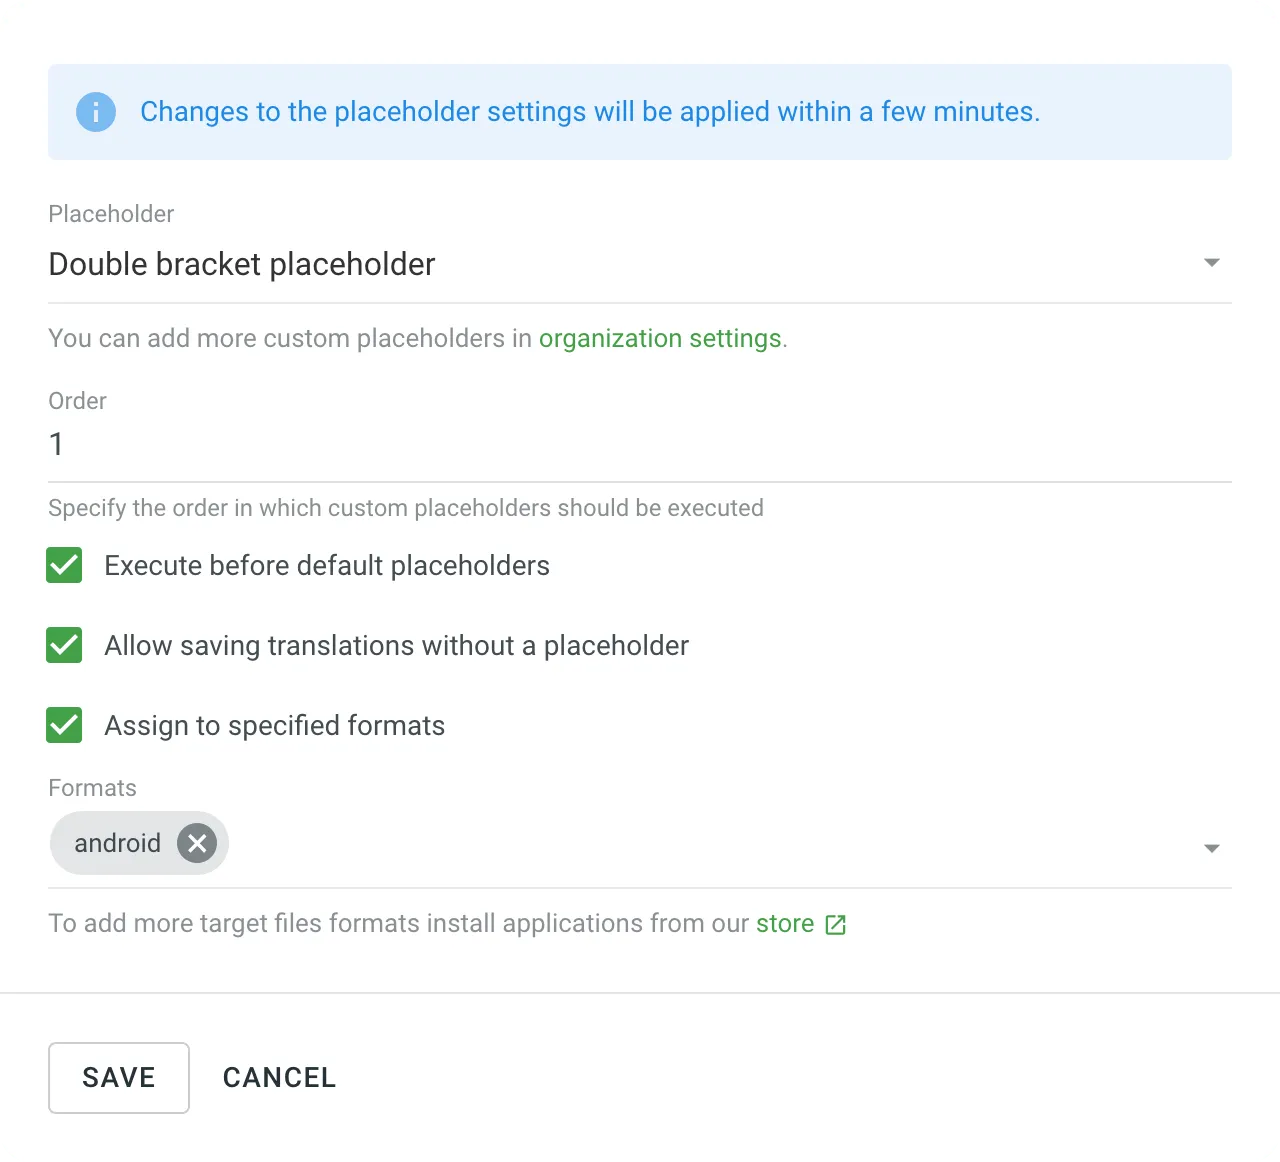 Read more about [Custom Placeholders](/enterprise/custom-placeholders/).
# Label Settings
> Use labels in your project to easily organize your resources
Use labels in your project to easily organize resources (e.g., screenshots, strings, etc.) by specific topics. Once you add labels, you can filter items by those labels. If you already use labels for your source strings, you can use the same labels for screenshots. ## [Managing Project Labels](#managing-project-labels) [Section titled “Managing Project Labels”](#managing-project-labels) To create, edit, or remove project labels, follow these steps: 1. Open your project **Settings** and navigate to the **Labels** section. 2. In the appeared screen, add new labels and edit or remove existing ones. 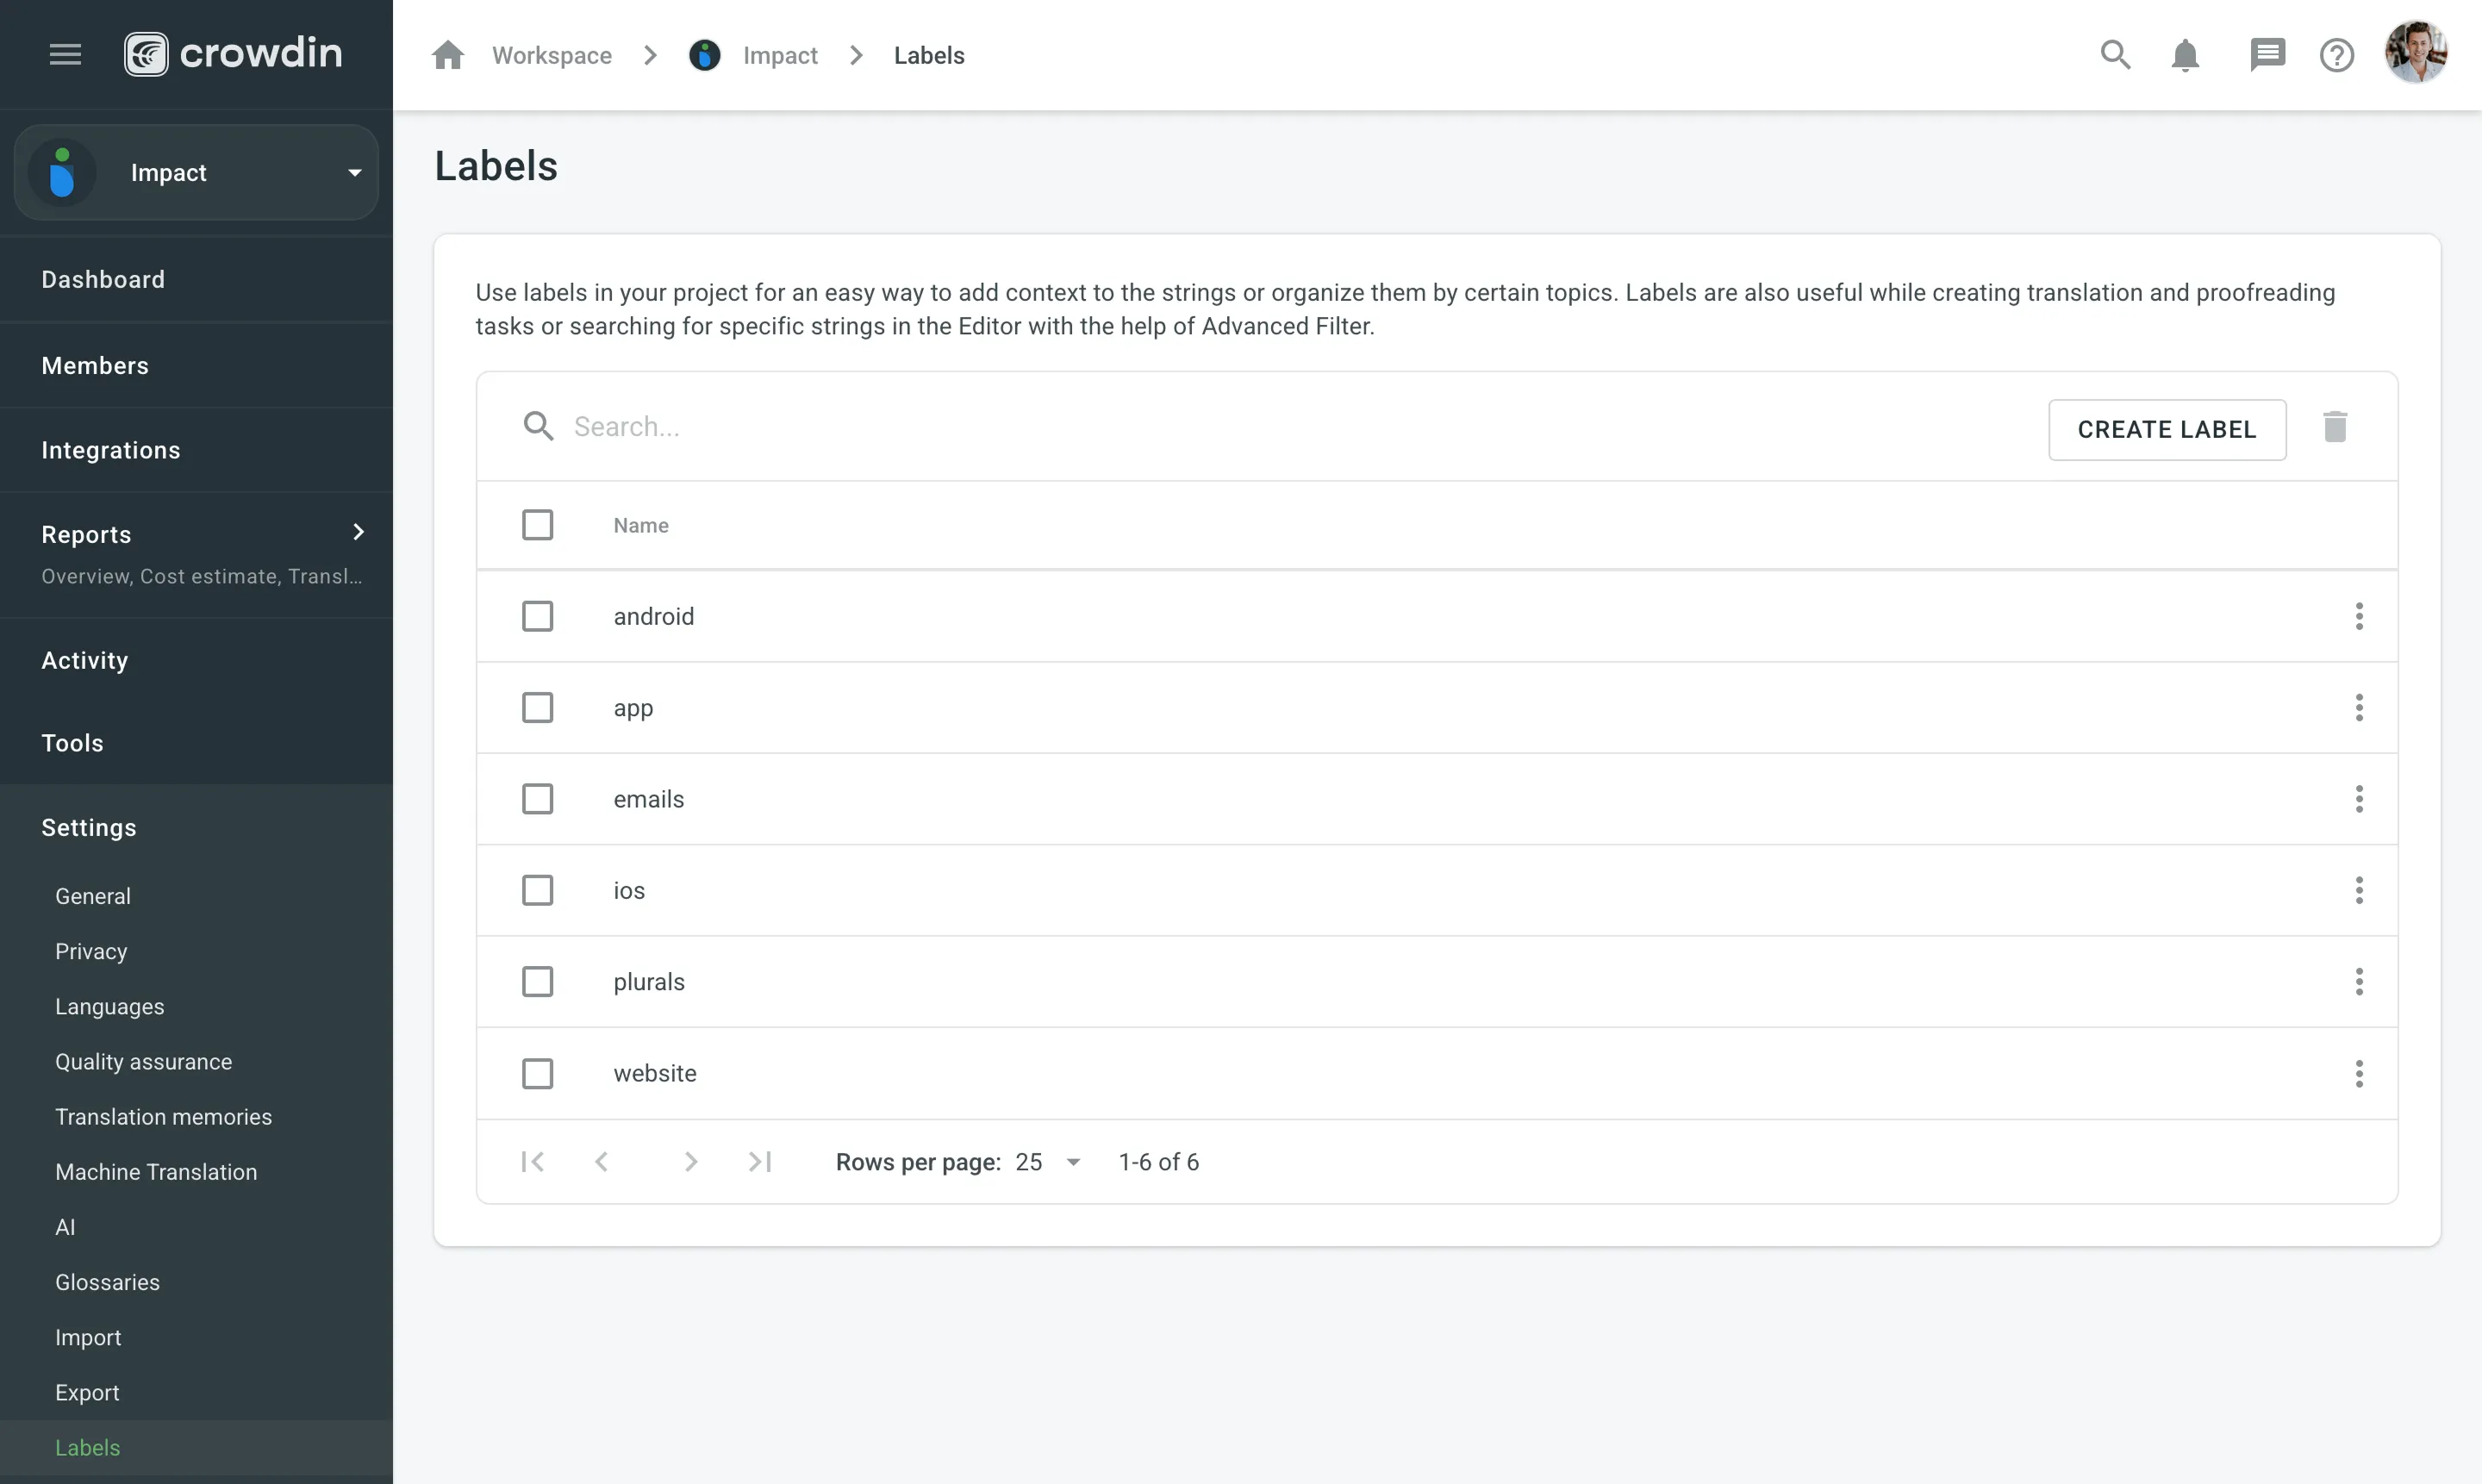 To edit or remove a label, click (or right-click) on the label you want to edit or remove and select the appropriate action. Use the **Search** field above the label list to quickly find specific labels. Caution Labels are case insensitive (e.g., `Label` and `label` are treated as identical). ## [See Also](#see-also) [Section titled “See Also”](#see-also) [Adding Labels to Strings ](/enterprise/string-management/#labels) [Adding Labels to Screenshots ](/enterprise/screenshots/#labels)
# Language Settings
> Manage your project source and target languages
In the **Languages** section, you can manage your project source and target languages and configure language mapping to use custom language codes. ## [Source Language](#source-language) [Section titled “Source Language”](#source-language) The source language is the language you’re translating from. If you want to change the source language for your project, select a new language from the drop-down list and click **Save**. Here are a few points you should be aware of when changing the project’s source language: * Please note that there might be a plural form mismatch for imported strings depending on the new source language. For example, some plural forms might not be displayed in the Editor, or some plural form translations might be used in other ones on translation export. We recommend updating the source files if the new source language has different plural forms than the initial one. * If you had an opened browser tab with the Editor during the source language update, you might need to refresh it for changes to take effect and continue translating from the new source language. ## [Target Languages](#target-languages) [Section titled “Target Languages”](#target-languages) The **Target Languages** section allows you to add or remove target languages in your project. You can update your target languages anytime. To add or remove target languages in your project, follow these steps: 1. Open your project and go to **Settings > Languages**. 2. In the **Target Languages** section, you can make the following changes: * Select the languages you want to add to the project in the left panel. * Click on the languages you want to remove from the project in the right panel. 3. Click **Update**. 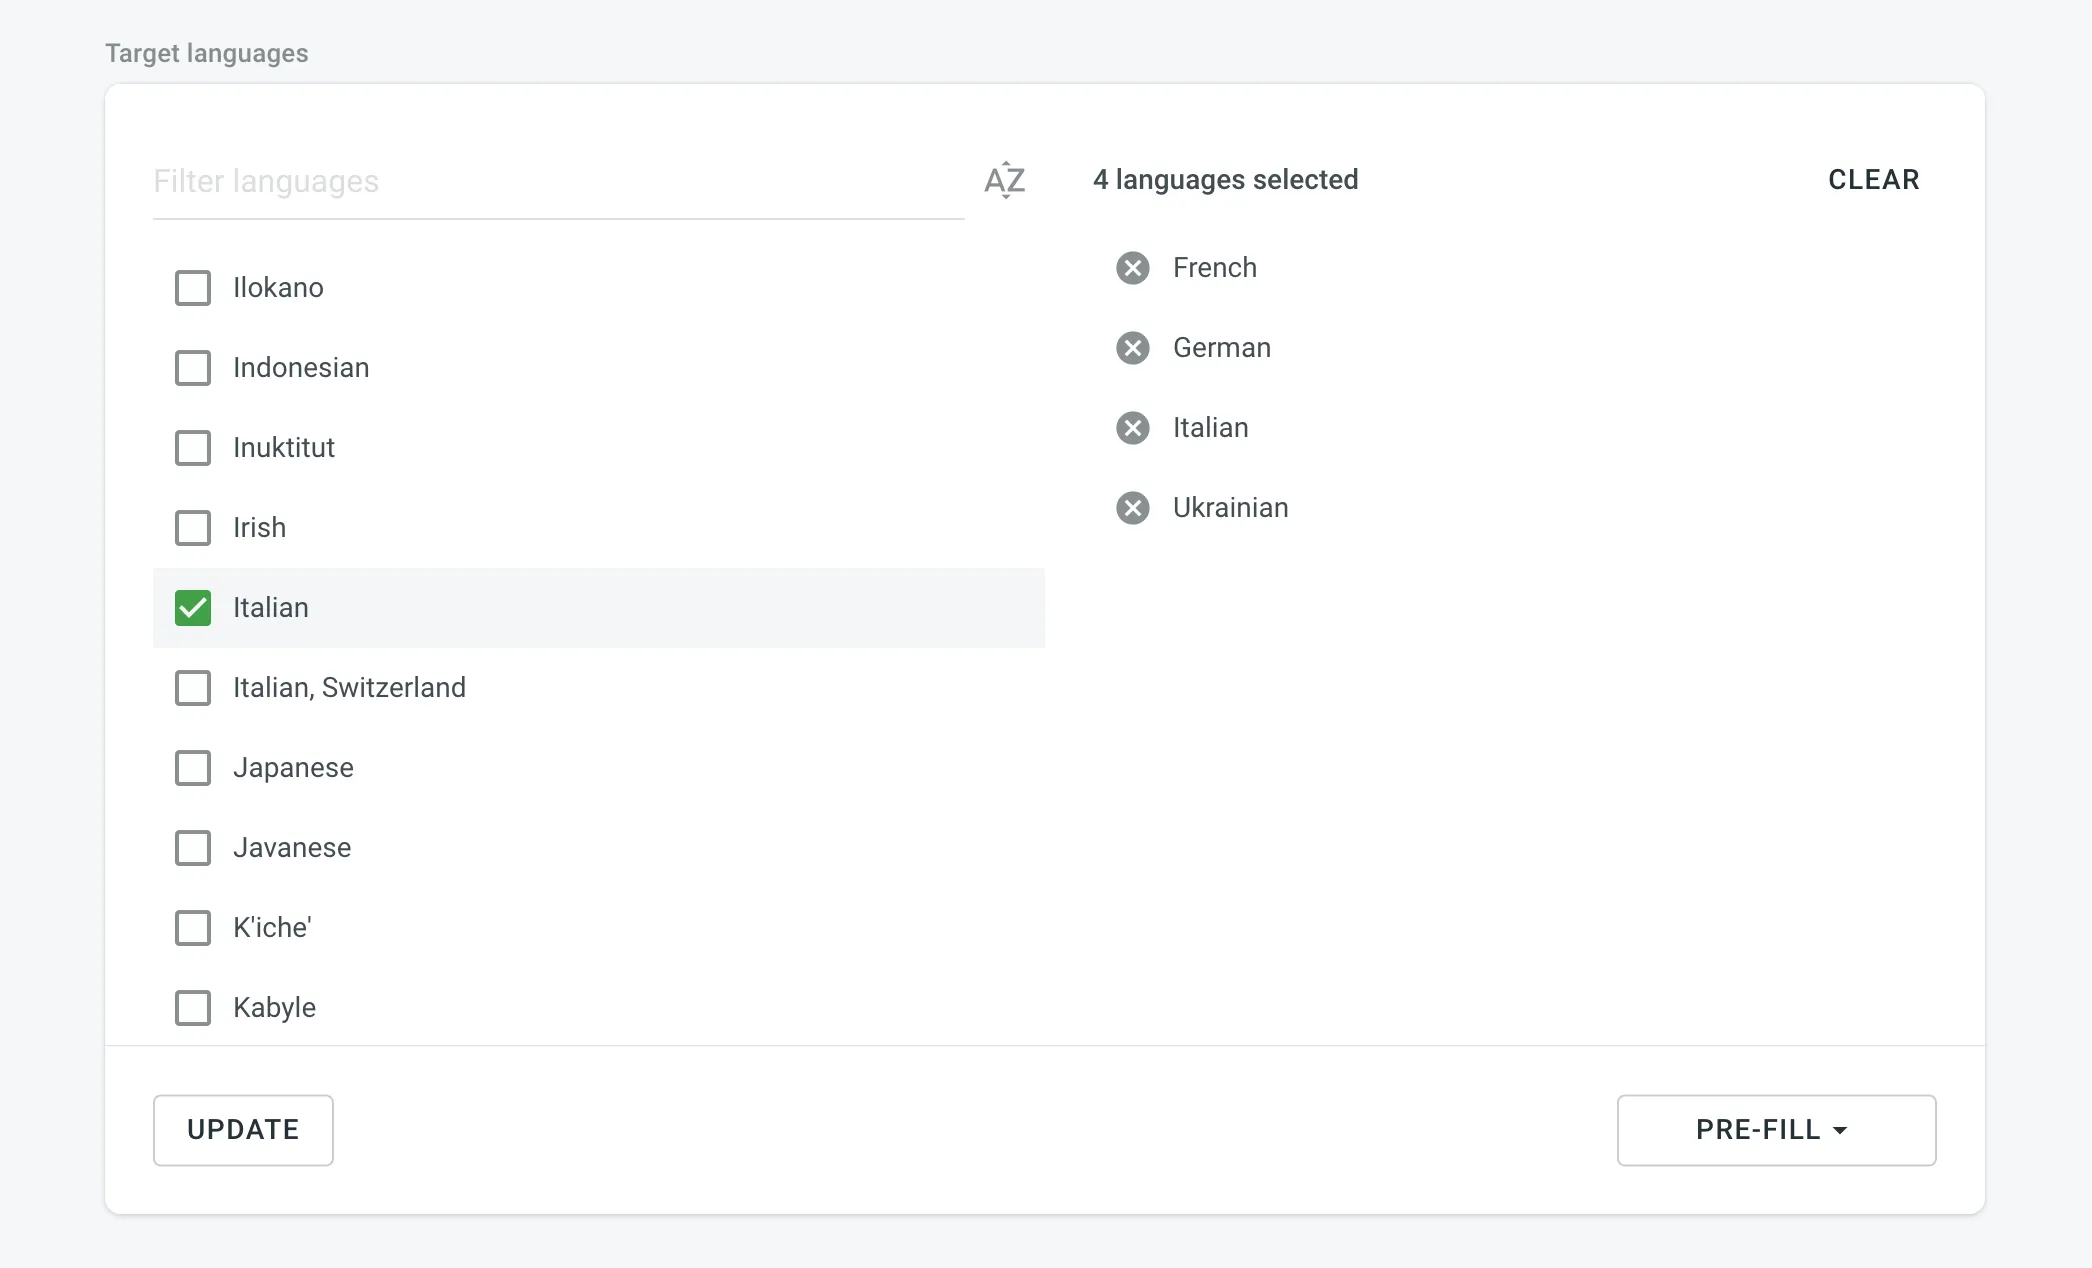 ## [Language Mapping](#language-mapping) [Section titled “Language Mapping”](#language-mapping) Add custom language codes and use them for translation files export. This will keep the structure of exported files consistent. For example, in the screenshot below two custom codes are set for French and German languages. If any of custom placeholders (3 letters codes) is used during [file export](/enterprise/file-management/#file-export) the file name will include these specific language codes (fra, ger). 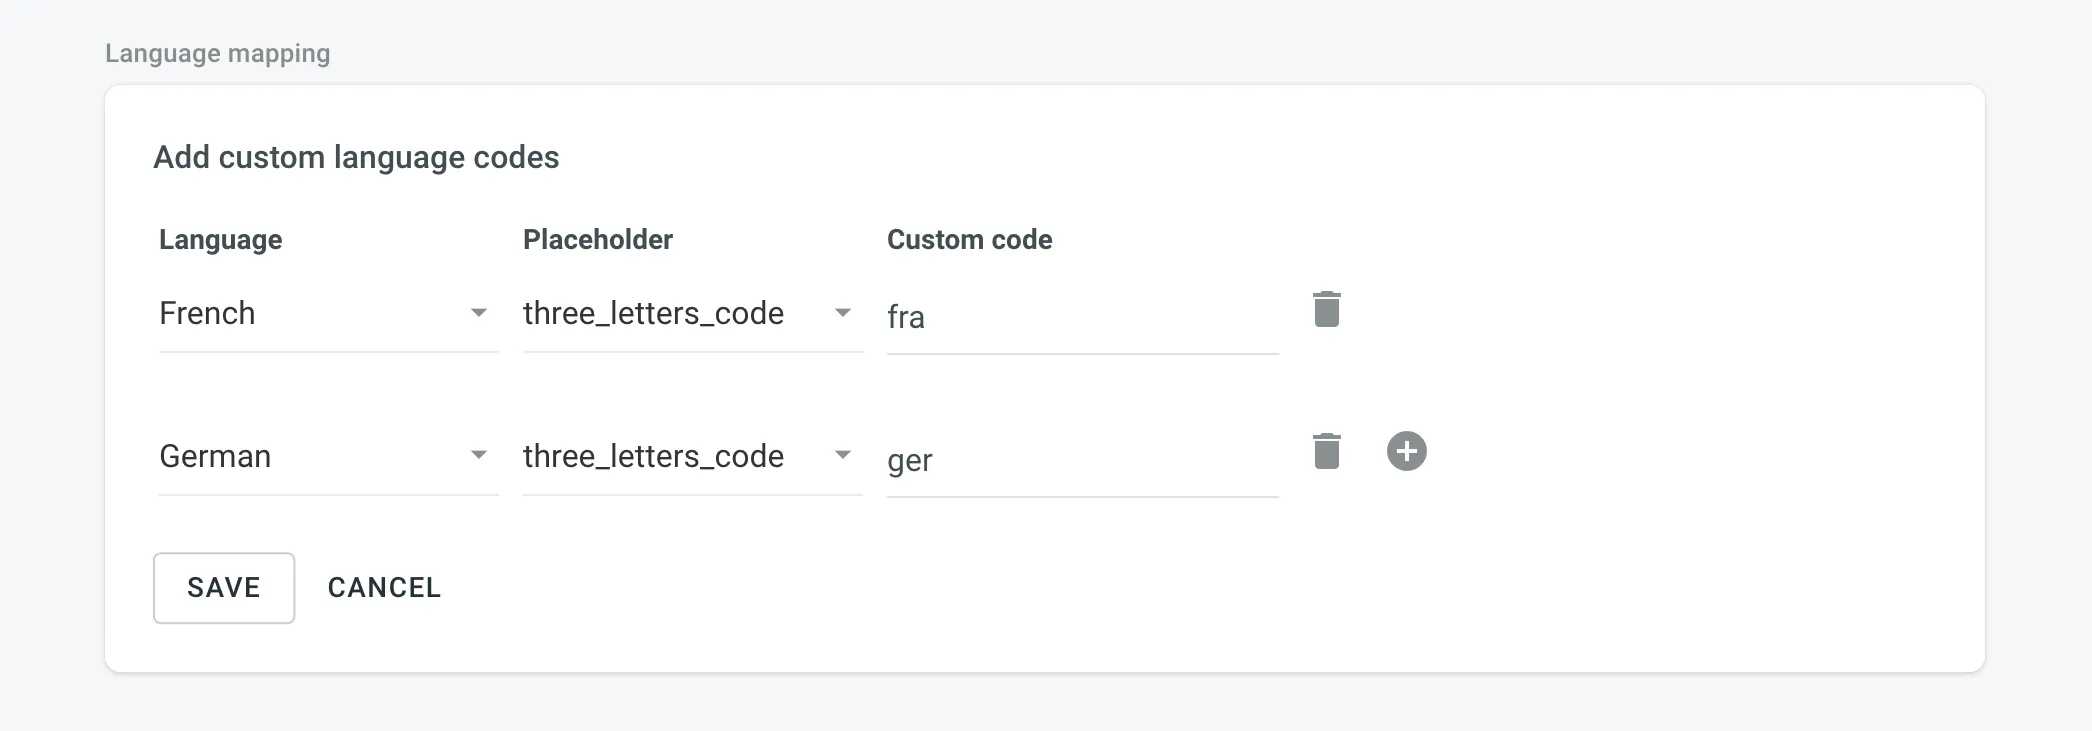 ## [Adding Custom Languages](#adding-custom-languages) [Section titled “Adding Custom Languages”](#adding-custom-languages) Custom languages are managed at the Organization level. See the [Organization Settings](/enterprise/organization-settings/) section for more information. ## [See Also](#see-also) [Section titled “See Also”](#see-also) [Supported Languages ](/developer/language-codes/)Explore the list of languages supported by Crowdin Enterprise.
# Machine Translation Settings
> Configure machine translation settings for your project
In the **Machine Translation** section, you can manage the following settings: * **Show machine translation suggestions** – enable MT suggestions from machine translation engines such as Microsoft Translator, Google Translate, and others to be displayed in the Editor. ## [See Also](#see-also) [Section titled “See Also”](#see-also) [MT Engines ](https://store.crowdin.com/categories/machine-translation)Explore the list of supported machine translation engines and learn how to configure them. [Machine Translation ](/enterprise/machine-translation/)Learn how to configure machine translation engines. [Pre-Translation ](/enterprise/pre-translation/)Speed up the translation process and ease the work of translators.
# Parser Configuration Settings
> Configure import and export behavior for supported file formats
By default, Crowdin Enterprise uses a predefined set of import and export parameters for each supported file format. The Parser configuration feature lets you change the default import and export behavior predefined for file formats supported by Crowdin Enterprise. Parser configuration in a specific project is applied only to files stored in this project. You can set the parser configuration for all files of a certain format or single files. Once you save the parser configuration for some file format, you can upload source files to your project, and Crowdin Enterprise will apply your settings accordingly. You can configure import and export behavior for the following formats: Java Properties, Generic XML, DITA, AsciiDoc, Plain text, MadCap Flare, HTML, Office documents, Adobe FrameMaker, Adobe InDesign, Markdown, and MediaWiki. 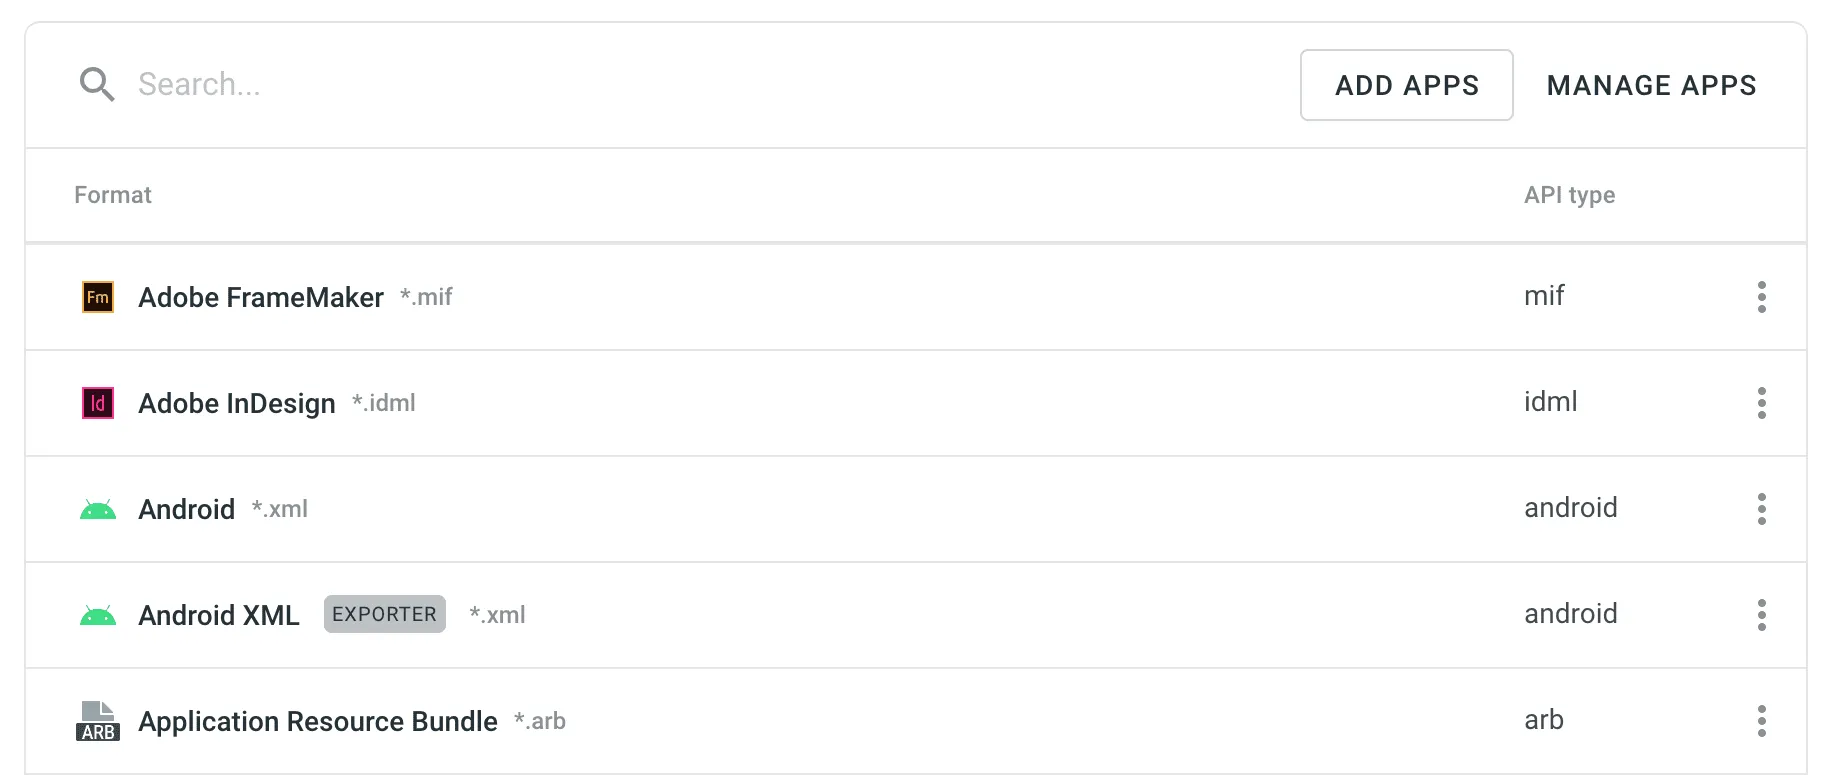 Caution Some parser settings may be unavailable in [string-based](/enterprise/creating-project/#string-based-project) projects. ## [Parser Configuration Parameters](#parser-configuration-parameters) [Section titled “Parser Configuration Parameters”](#parser-configuration-parameters) Some parameters are common to all formats, while others are format-specific. In the table below, you can see the available parser parameters and formats they could be configured for. | Parameter | Description | Format | | --------------------------------- | -------------------------------------------------------------------------------------------------------------------------------------------------------------------------------------------------------------------------------------------------------------------------------------------------------------------------------------------------------------------------------------------------- | ------------------------------------------------------------------------------------------------------------------------------------ | | Content segmentation | On import, the source file’s content will be split into shorter text segments using predefined segmentation rules (SRX 2.0). | Generic XML, DITA, AsciiDoc, MadCap Flare, HTML, Office documents, Adobe FrameMaker, Adobe InDesign, Markdown | | Custom segmentation rules | Defines your own segmentation rules.Read more about [Custom Segmentation](/custom-segmentation/). | Generic XML, DITA, AsciiDoc, Plain text, MadCap Flare, HTML, Office documents, Adobe FrameMaker, Adobe InDesign, Markdown, MediaWiki | | Excluded elements | Defines a list of CSS style selectors for elements that should not be available for translation (e.g., code, pre > code, .code-block). Applicable only to block elements. Inline elements are ignored. | HTML, HTML with Front Matter | | Excluded front matter elements | Defines a list of front matter elements that should not be available for translation (e.g., keywords, “internal.description”, tags). The path elements should be delimited by a period. The keys containing a period must be enclosed in quotation marks. | HTML with Front Matter, MDX | | Exclude code blocks | Defines whether to import code blocks. Applicable only to code blocks. Inline elements with code are ignored. | MDX | | Translate content | Texts stored inside the tags will be available for translation. | Generic XML | | Translate attributes | Tag attributes will be available for translation. | Generic XML | | Translatable elements | Defines the specific nodes and attributes to be available for translation. | Generic XML | | Escape single quote | Defines the behavior regarding a single quote escaping in exported translations. Available options:- Do not escape single quote - Escape single quote by backslash (`It's okay`⇒`It\'s okay`) - Escape single quote by another single quote (`It's okay`⇒`It''s okay`) - Escape single quote by another single quote only in strings containing variables `{0}` (`{0} it's okay`⇒`{0} it''s okay`) | Java Properties | | Escape special characters | Any special characters (i.e., `=`, `:`, `!`, `#`) will be escaped by a backslash `\` in exported translations. | Java Properties | | Clean tags aggressively | Additional formatting tags related to text spacing will be removed on import. Useful when translating Office documents converted from other formats (e.g., PDF, etc.), and the conversion introduced lots of unnecessary formatting tags. | Office documents | | Translate hyperlink URLs | Hyperlink URLs will be available for translation. | Office documents | | Translate hidden text | The hidden text will be available for translation. | Office documents | | Translate hidden rows and columns | The hidden rows and columns will be available for translation. | Office documents | | Import hidden slides | The hidden slides will be available for translation. | Office documents | | Import notes | The slide notes will be available for translation. | Office documents | ## [Parser Configuration for All Project Files of a Specific Format](#parser-configuration-for-all-project-files-of-a-specific-format) [Section titled “Parser Configuration for All Project Files of a Specific Format”](#parser-configuration-for-all-project-files-of-a-specific-format) To set the preferred parser configuration for all files of a specific format, follow these steps: 1. Open your project and go to **Settings > Parser configuration**. 2. Choose the needed file format and click Edit. 3. Set the preferred settings. 4. Click **Save**. To add a new file format, click **Add Apps** and install the required format. ## [Parser Configuration for a Single File](#parser-configuration-for-a-single-file) [Section titled “Parser Configuration for a Single File”](#parser-configuration-for-a-single-file) In some cases, you might need to set the parser configuration not for all files of some file format but just for a single file. To set the parser configuration for a single file, follow these steps: 1. Open your project and go to **Sources > Files**. 2. Double-click on the needed file. 3. In the appeared dialog, switch to the **Parser configuration** tab. 4. Set the preferred settings. 5. Click **Save**. Once you save the file parser configuration, Crowdin Enterprise will reimport this file and apply your settings. Read more about [file management](/enterprise/file-management/) in Crowdin Enterprise.
# Privacy Settings
> Configure the content visibility and notifications
In the **Privacy** section of the Project Settings, you can manage the visibility of your project and its contents. You can also configure the notifications sent to project participants. ## [Translations](#translations) [Section titled “Translations”](#translations) * **Allow Offline Translation** – allow translators to download source files to their machines for offline translation and upload translations back into the project. The project owner and managers can always download sources and upload translations, not depending on the option status. * **Allow proofreaders to access hidden strings** – allow proofreaders to work with hidden strings. Members with manager permissions or higher can always work with hidden strings, not depending on the option status. * **Task-based access control** – allow project members to work with tasks they are assigned to, even if they do not have full access to the language in the project. ## [Glossary Access Settings](#glossary-access-settings) [Section titled “Glossary Access Settings”](#glossary-access-settings) Control the level of access that project members have over glossary terms. Members with manager permissions or higher always have full control over glossary terms, regardless of these settings. Configure the preferred glossary access level with the following options: * **Read only** – allow members to view existing glossary terms without the possibility to modify them. This option provides access for reference only. * **Manage drafts** – allow members to view, add, edit, and delete draft glossary terms, and view approved terms. This option allows members to contribute to drafts without altering approved terms. * **Full access** – allow members to view, add, edit, and delete glossary terms, as well as edit concept details. This option provides members with full control over glossary terms and their details. ## [Task Cross-Review New](#task-cross-review) [Section titled “Task Cross-Review ”New](#task-cross-review) Require approval from selected managers or the owner before contributors can start working on a task. This feature adds an additional review step, helping maintain accountability and oversight in task workflows. Read more about [Task Cross-Review](/enterprise/tasks/#task-cross-review). ### [Configuring Task Cross-Review](#configuring-task-cross-review) [Section titled “Configuring Task Cross-Review”](#configuring-task-cross-review) To enable and configure Task Cross-Review, follow these steps: 1. Enable the **Task Cross-Review** option in the **Tasks** section. 2. Select at least one manager responsible for approving tasks. You can search for managers by name, username, or email. 3. Click **Save** to apply the changes. New tasks created after enabling **Task Cross-Review** will require approval, while existing tasks remain unaffected. ## [Notifications](#notifications) [Section titled “Notifications”](#notifications) Project notifications are disabled by default. Enable the necessary notifications for an agile translation process. Such approach helps to avoid creating additional tasks for every contributor. * **Notify translators about new strings** – translators will receive an email notification about newly added content for translation each time after the update. The **Receive emails** option should be activated in the translator’s profile. * **Notify project managers and developers about new strings** – project managers will receive an email notification about newly added content for translation each time after the update. * **Notify project managers and developers about language translation/proofreading completion** – project managers will receive the notification when some target language (all source files) is fully translated or fully proofread.
# Quality Assurance Settings
> Configure QA checks to ensure the quality of translations
The main aim of quality assurance (QA) checks is to help you efficiently handle different language-specific aspects in translations and ensure they are formatted the same way as the source strings and will fit the UI just as well. Some typical QA check issues include missed commas, extra spaces, or typos. With QA checks, issues that should be fixed will be highlighted on the Proofread workflow step. QA checks help to detect some common mistakes easily and quickly. It’s recommended to review and resolve all QA check issues before building your project and downloading translations. 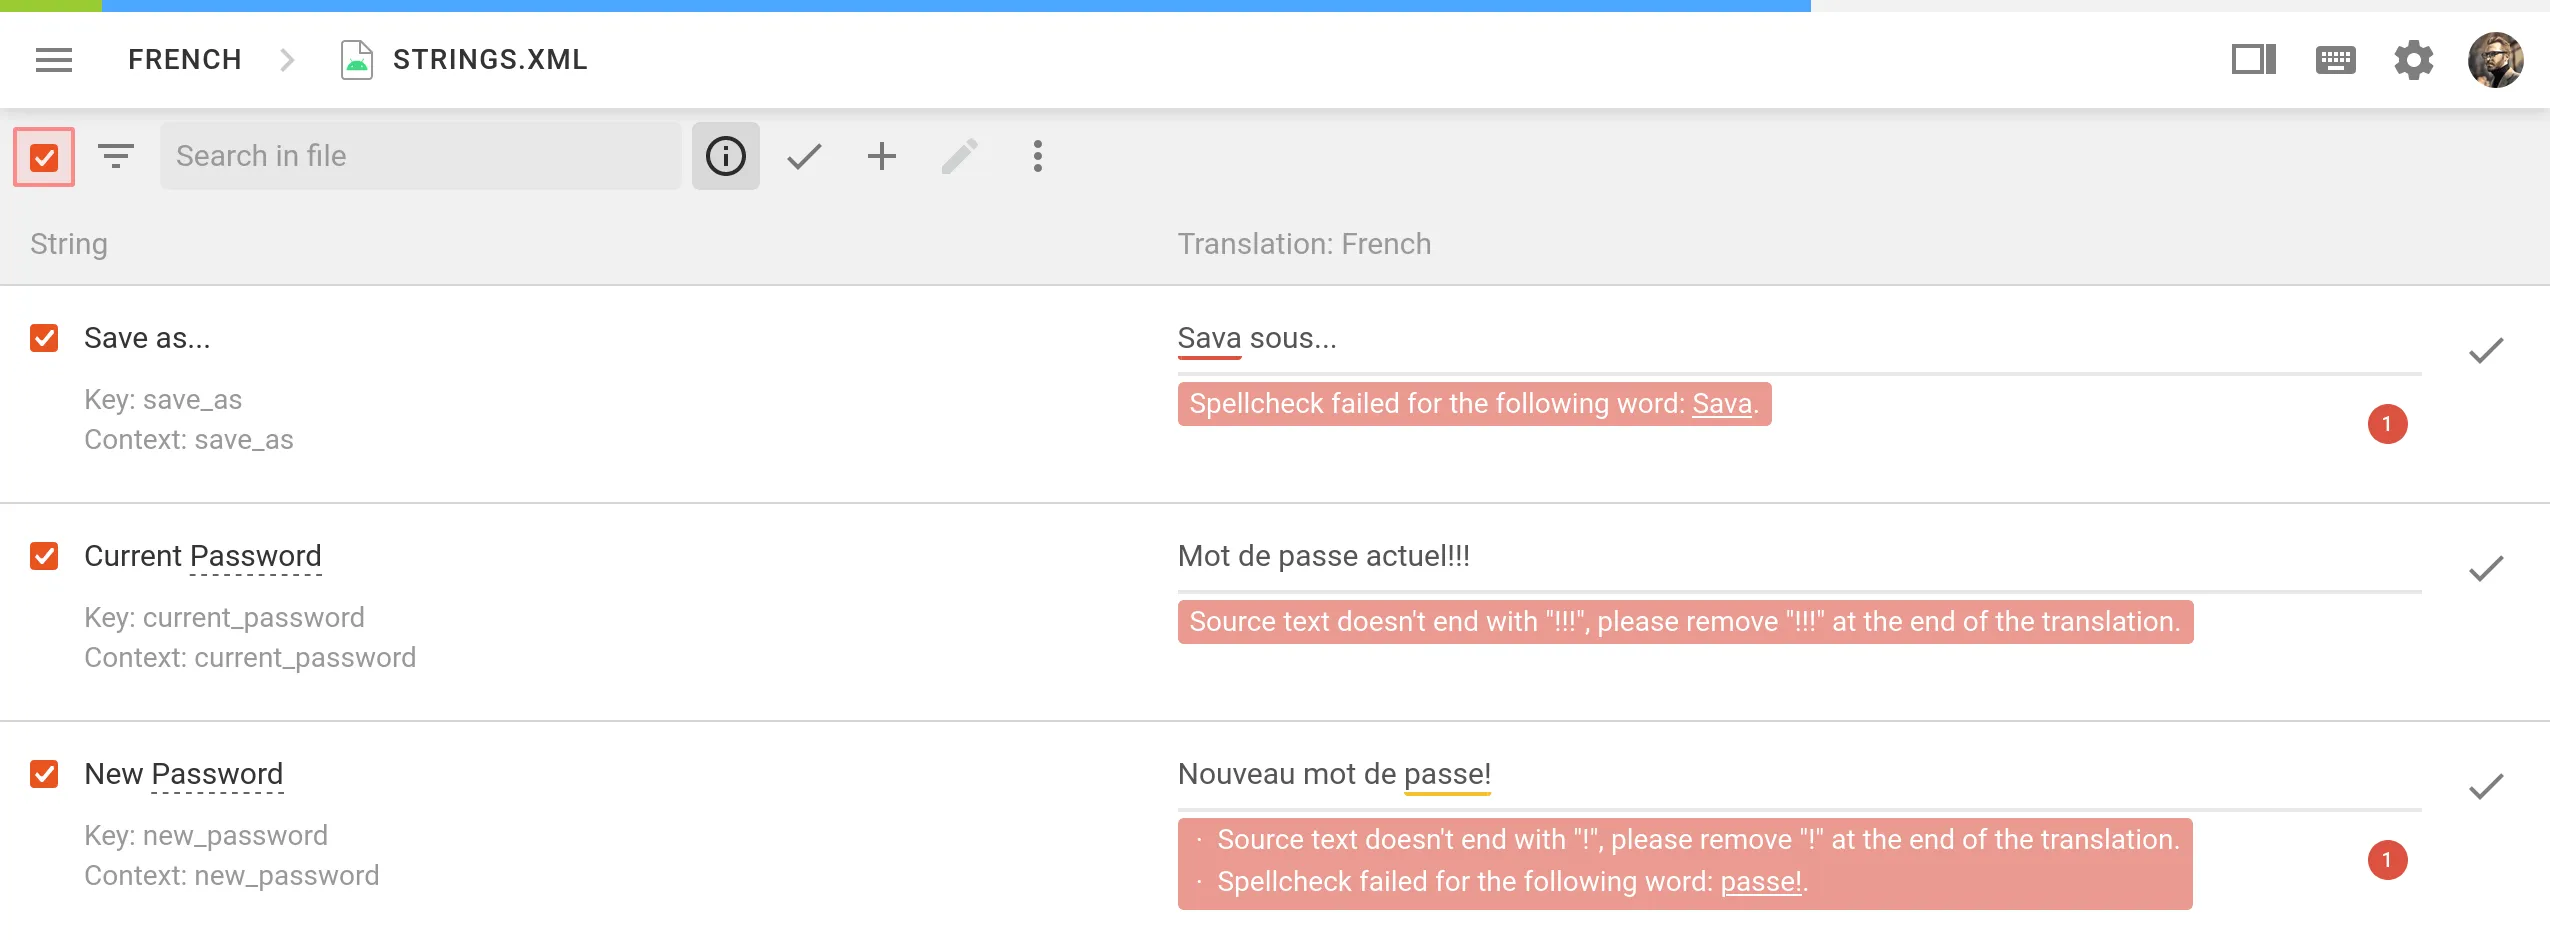 In the **Quality Assurance** section, you can manage the types of QA issues to be highlighted in the Editor during the translation process. ## [Configure QA Checks](#configure-qa-checks) [Section titled “Configure QA Checks”](#configure-qa-checks) By default, QA checks are enabled. To select the needed QA checks in your project, follow these steps: 1. Open your project and go to **Settings > Quality assurance**. 2. Select the QA check types according to your preferences. 3. For each selected QA check type, choose whether it should be possible to save translations with QA issues by selecting one of two options: **Error** and **Warning**. **Warning** – translators are notified about QA issues with suggestions for fixes, but they can still save the translation using the **Save anyway** button. **Error** – translators are notified about QA issues with suggestions for fixes, and they cannot save the translation until all issues are resolved. 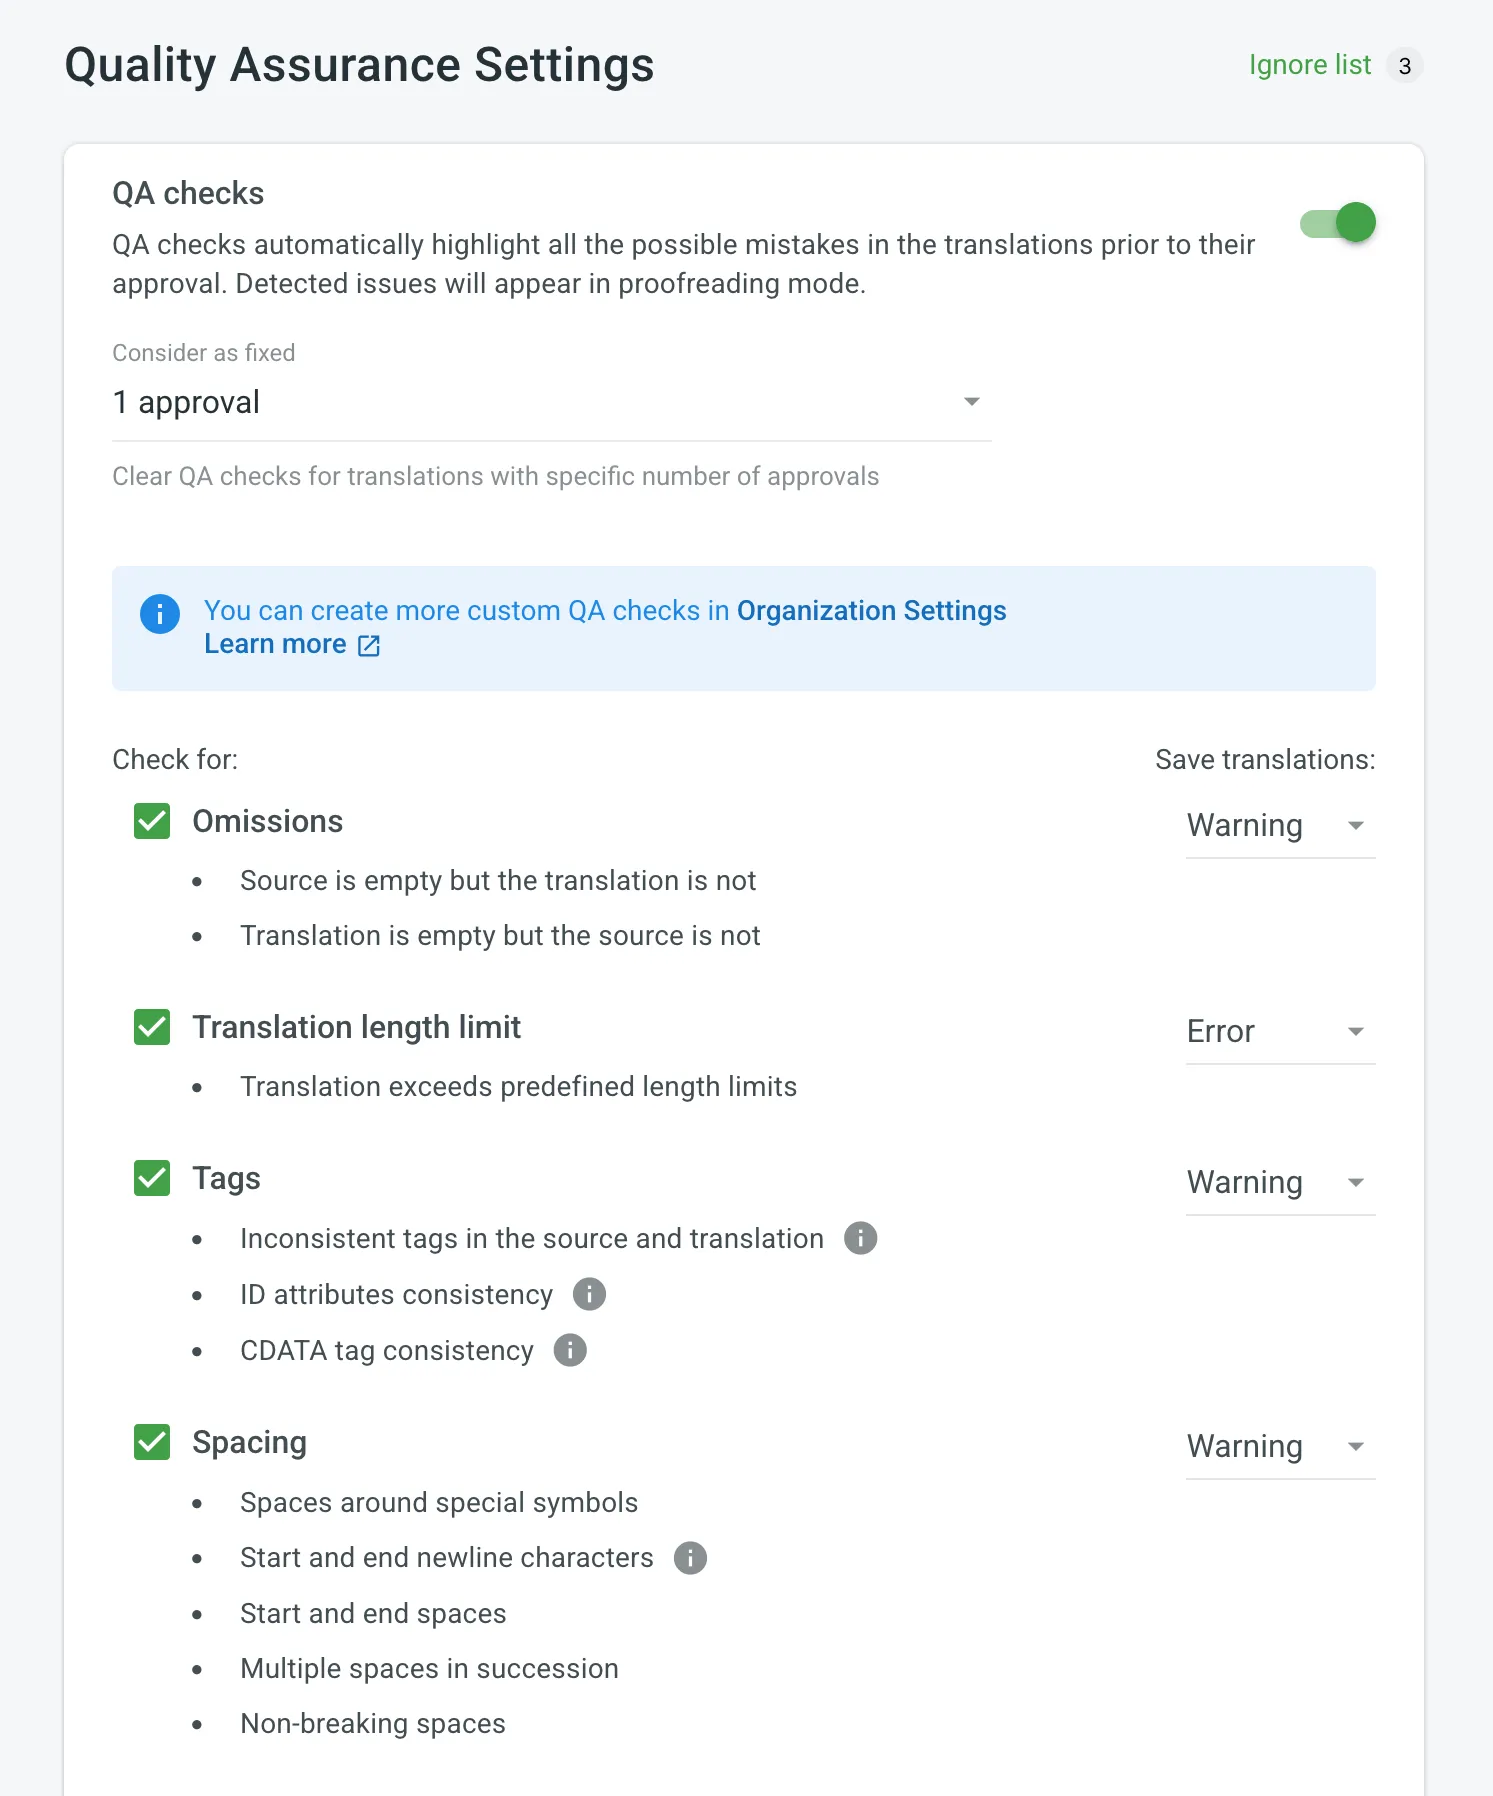 Use the **Consider as fixed** option to define how many approvals a translation must have before its QA issues are automatically treated as resolved. When a translation reaches the specified number of approvals, Crowdin Enterprise clears any flagged QA issues for that string. Once enabled, QA checks will work in the background and scan the translations for potential QA issues. [Custom Quality Assurance Checks ](/enterprise/custom-qa-checks/)Learn how to create custom QA checks. ## [Spell Checker Ignore List](#spell-checker-ignore-list) [Section titled “Spell Checker Ignore List”](#spell-checker-ignore-list) If your project contains some uncommon words that are not recognized by the Spell checker, you can add them to the Ignore list to exclude them from being checked. 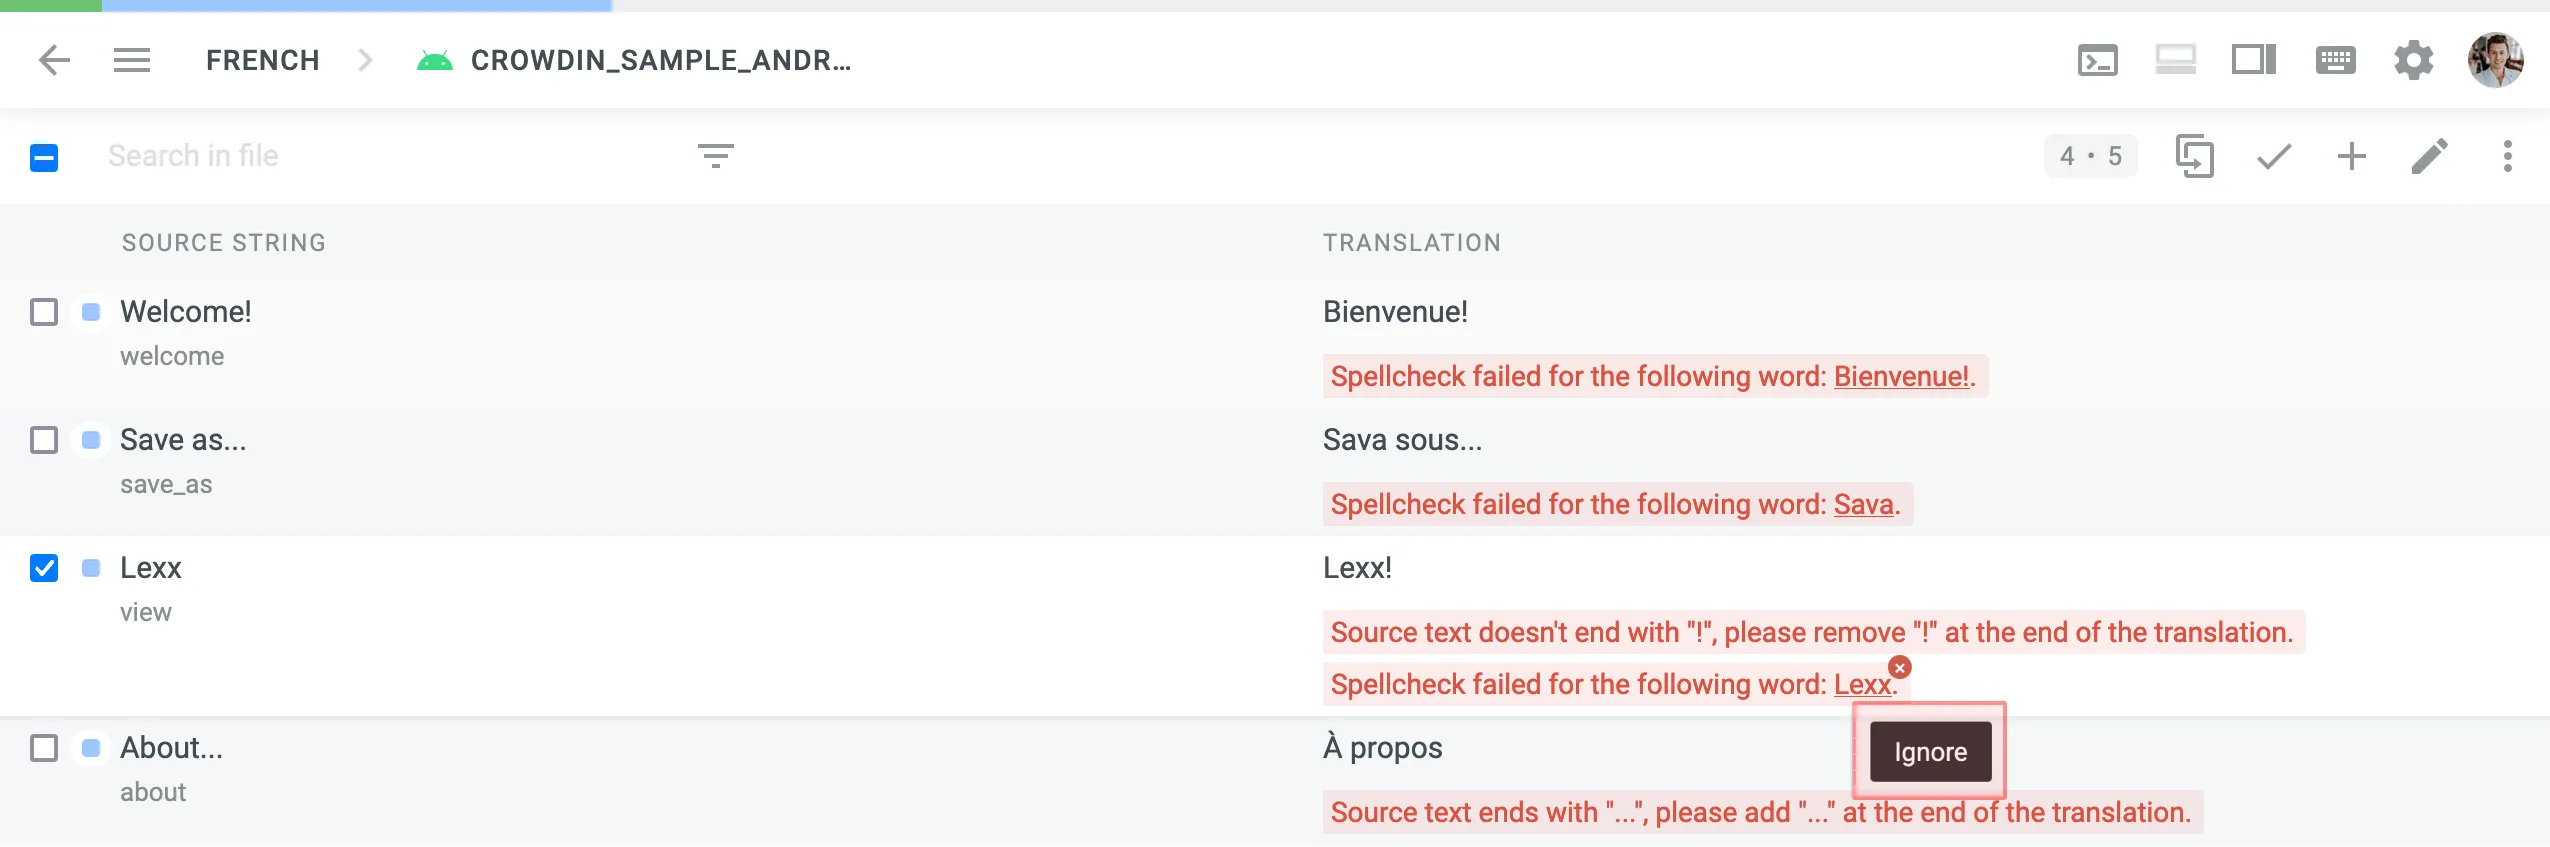 To review the words added to the Ignore list for the Spell checker, follow these steps: 1. Open your project and go to **Settings > Quality assurance**. 2. Click *Ignore list* on the top right side. In the opened window you can see the list of words added to the ignore list. You can filter or remove them from the list if necessary. ## [QA Check Parameters](#qa-check-parameters) [Section titled “QA Check Parameters”](#qa-check-parameters) **Omissions** – strings that lack or have excessive translations. * Source is empty but the translation is not * Translation is empty but the source is not **Translation length limit** – translations that are longer than the limit of characters you set. **Tags** – strings that use HTML might lack some opening or closing tags in translations. * Inconsistent tags in the source and translation * ID attributes consistency * CDATA tag consistency **Spacing** – multiple spaces in a row, missing spaces. * Spaces around special symbols * Start and end newline characters * Start and end spaces * Multiple spaces in succession * Non-breaking spaces **Variables** – placeholders used in a translation match placeholders used in the source string. * Common variables * Python, Java, .NET, C/C++, Ruby on Rails, Twig, PHP, Freemaker variable placeholders * Custom variables (per request) **Punctuation** – punctuation mistakes or differences in the punctuation marks. * Inconsistent punctuation in source and translation * Spacing before and after punctuation marks **Character case** – the lower or upper case that used differently in source and translated strings. * Initial capitalization * Unexpected multiple capitalized characters in succession **Special characters** – new paragraphs, currency signs, and other special characters that used differently in translated strings. * Bracket consistency * Markup language entities * Quotes and quote escapes **Open translation issues by project members** – show reported translation issues on the Proofread workflow step. **Spelling mistakes** – underline misspelled words. Limitations Currently available for specific languages only. **ICU Markup syntax check** – the correct usage of the ICU message syntax in translations. **Consistent terminology** – checks whether the source words are translated accordingly to the respective glossary terms. Limitations Currently available for English, German, Spanish, French, Italian, Dutch, Norwegian, Norwegian Bokmal, Polish, Russian, Swedish, Ukrainian, Japanese, Korean, Chinese Simplified, and Turkish. **Duplicate** – translations that duplicate already existing translations. **FTL Markup syntax check** – the correct usage of the FTL syntax in translations. **Android Markup syntax check** – the correct usage of the Android syntax in translations. **Numbers mismatch** – checks for inconsistencies or missing numbers between the source and translations. **AI-powered check** – uses AI to detect translation issues, improving accuracy and ensuring translations meet project-specific quality standards. Requires configuring an AI prompt with defined evaluation criteria. Read more about [Configuring AI-powered check](/enterprise/crowdin-ai/#setting-up-ai-qa-check).
# Translation Memory Settings
> Configure and assign Translation Memories for your project
The project TM is automatically created for each project. By default, every approved or last added translation is saved to the project TM. This behavior can be customized to save only approved translations. * **Auto-substitution** – the feature substitutes the non-translatable elements (such as tags, HTML entities, placeholders, numbers, and more) in TM translation suggestions with the ones used in the source text. The feature improves the TM suggestions applied during pre-translation and those shown as translation suggestions in the Editor. Improved suggestions are included in the Translation Costs report, and improvable ones are included in the Costs Estimation report. * **TM Suggestions for Dialects** – the feature allows you to enable the displaying and use of TM suggestions from the primary language for dialects if no dialect-specific suggestions are available. * **Save only approved suggestion to Translation Memory** – when selected, translations are saved to the project default TM only after they are approved. This option is especially useful for crowdsourced projects where you want to ensure only reviewed translations are stored in the TM. * **TM Match Context Type** – the feature allows you to choose what should be considered as string context when suggesting Perfect (101%) match Translation Memory (TM) suggestions. You can choose between the following options: * Key and Context – when selected, the system considers both the key and context of strings for suggesting Perfect match TM suggestions. This mode is particularly useful for key-value file formats. * Auto – when selected, the system automatically applies the most suitable context consideration mode based on your file format. * Previous and next segment – when selected, the system considers the segments immediately preceding and following the current segment for context. Most applicable to HTML-based and other formats without a defined key-value structure. Read more about [TM Auto-Substitution](/enterprise/translation-memory/#tm-auto-substitution). ## [Penalties](#penalties) [Section titled “Penalties”](#penalties) In the **Penalties** section, you can configure penalties that decrease the match percentage of TM suggestions based on specific conditions. This feature helps when you want to fine-tune the relevance of TM suggestions to your specific requirements. 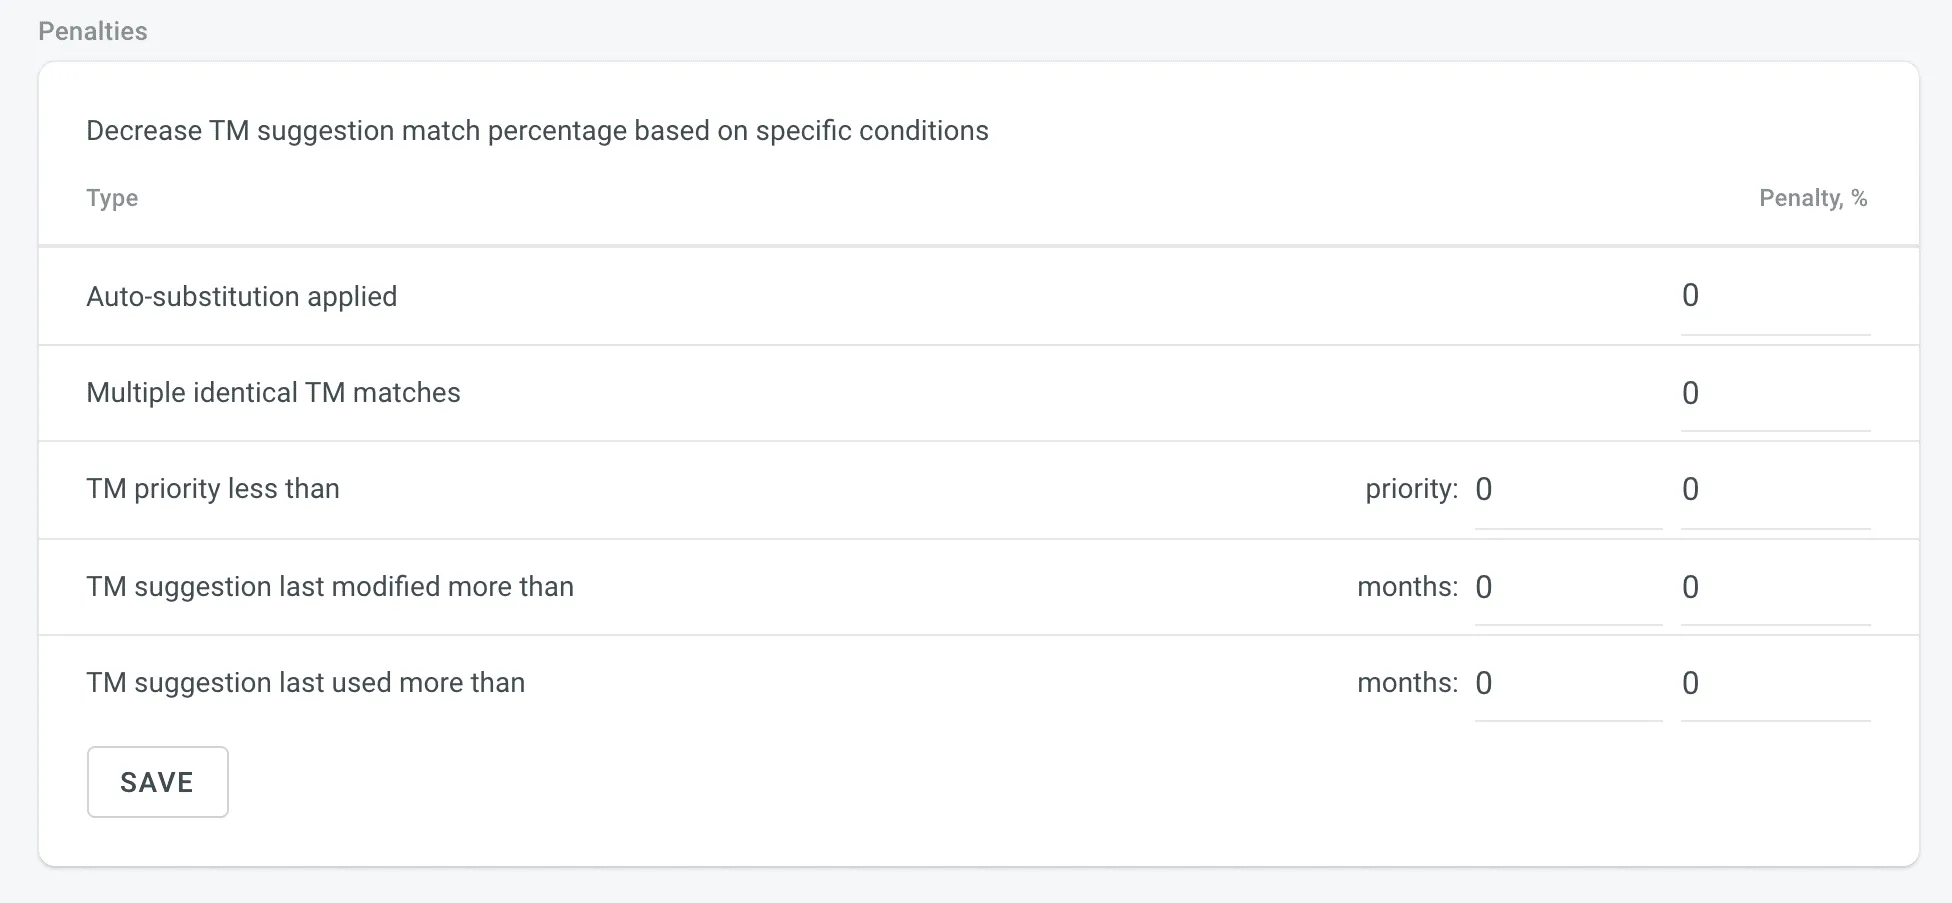 You can configure the penalties using the following options: * **Auto-substitution Applied** – penalize TM suggestions to which an auto-substitution was applied. * **Multiple Identical TM Matches** – penalize TM suggestions where multiple identical TM matches are found. * **TM Priority Less Than** – penalize TM suggestions that originate from a TM with a priority lower than a specified value. Besides a penalty value, you can also set the preferred TM priority threshold. * **TM Suggestion Last Modified More Than** – penalize TM suggestions that were last modified more than a specified number of months ago. Besides a penalty value, you can also set the threshold in months. * **TM Suggestion Last Used More Than** – penalize TM suggestions that were last used more than a specified number of months ago. Besides a penalty value, you can also set the threshold in months. ## [Assigning TM](#assigning-tm) [Section titled “Assigning TM”](#assigning-tm) To assign a TM to your project, in the **Assigned Translation Memories** section, select the needed TMs from the list. 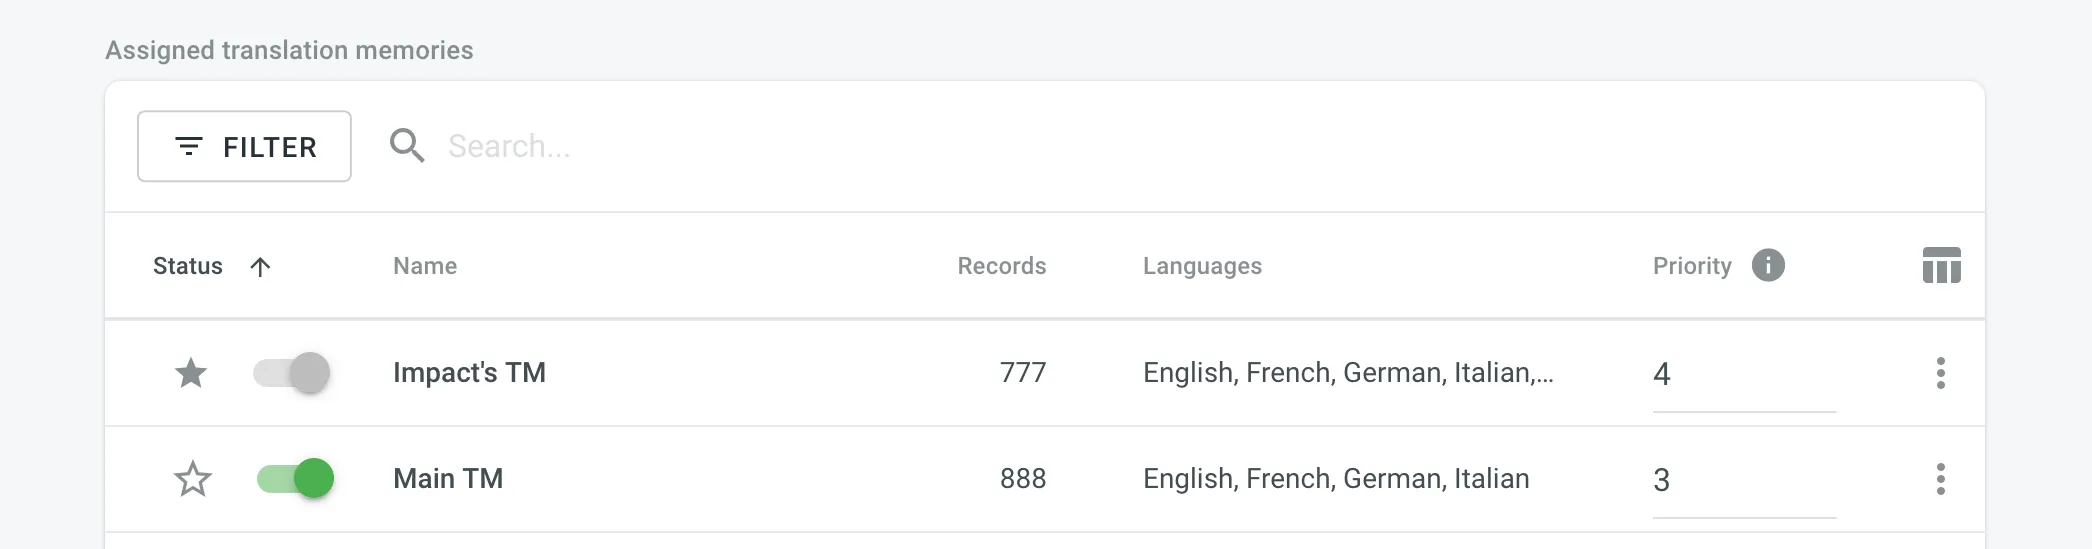 ## [Prioritizing TM](#prioritizing-tm) [Section titled “Prioritizing TM”](#prioritizing-tm) When you assign a few TMs to the project, you can set the needed priority for each of them. As a result, TM suggestions from the TM with the higher priority will be displayed in the first place. The default TM priority value is set to 1. A higher number has a higher priority (for example, 5 has a higher priority than 1). For example, if you assigned four TMs to your project, you can set the priority of 4 to the most important TM, the one that should be used in the first place. And respectively set lower priorities to other TMs. To set the priority for TMs, in the **Assigned Translation Memories** section, set the preferred priority for assigned TMs from the respective drop-down list. 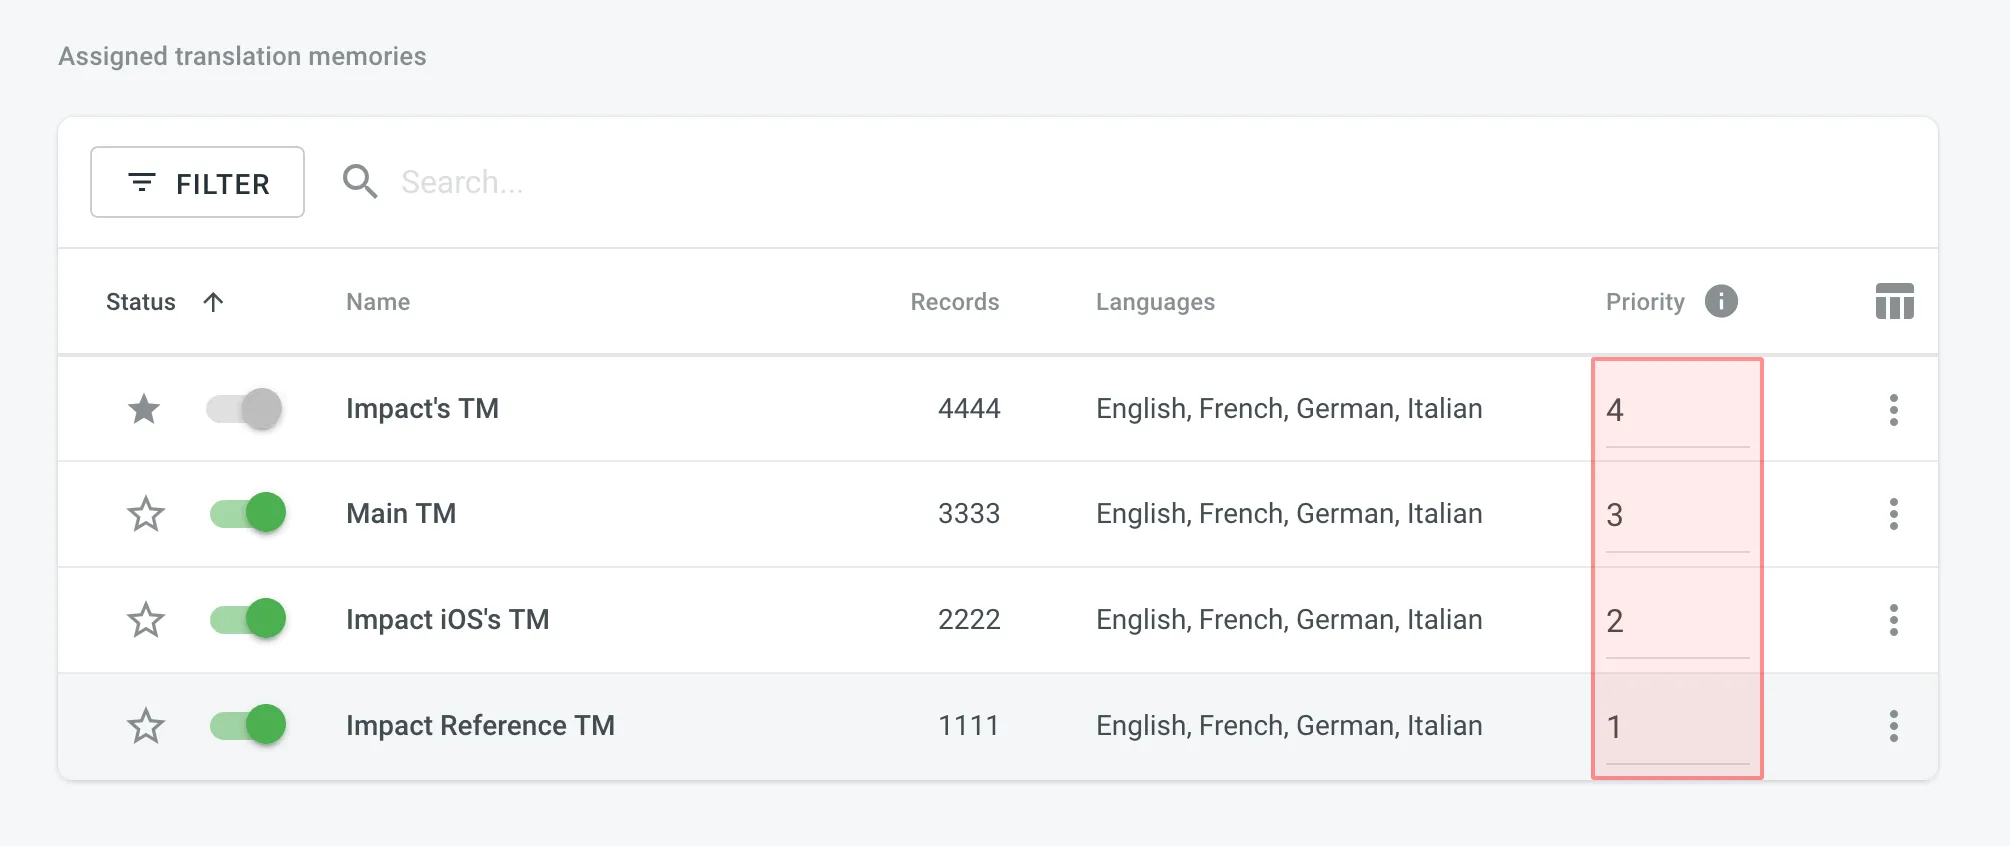 ## [Changing Default TM](#changing-default-tm) [Section titled “Changing Default TM”](#changing-default-tm) To change your project’s default TM, in the **Assigned Translation Memories** section, click the icon next to the needed TM in the list.
# Roles
> Learn about the roles and permissions that users can have in Crowdin Enterprise
Roles in Crowdin Enterprise define the level of access and control users have within the platform. By assigning roles, you can manage user permissions across the Editor, project settings, and organization settings. Below you can find descriptions of each role and its associated permissions. ## [Owner](#owner) [Section titled “Owner”](#owner) Owner is the user who created the organization and has complete control over it. The owner can invite users to the organization and manage their access, configure organization settings, manage vendors, create projects and groups, work with source and translation files, set up integrations, and more. ## [Admin](#admin) [Section titled “Admin”](#admin) Admin has similar rights to the organization owner, with full access to the organization, including inviting and managing users, configuring organization settings, and creating and managing projects and groups. Admin can’t delete the organization or transfer ownership. **Use case:** Suitable for trusted team members who need full access to manage the organization, its projects, and settings, without the ability to delete the organization. ## [Manager](#manager) [Section titled “Manager”](#manager) Manager has a more focused scope of control that depends on their assignment at various levels. Based on the [Permission granularity](/enterprise/permissions-granularity-mode/#permissions) settings, Managers can be assigned at the organization, group, subgroup, or project levels. They inherit access to all child entities within their assigned parent entity (i.e., organization, group, or subgroup). Managers can’t manage vendors, invite or manage users at the organization level, or configure organization settings. ### [Workspace Manager](#workspace-manager) [Section titled “Workspace Manager”](#workspace-manager) Workspace Manager can create and manage projects across the entire organization (including inviting people to projects and managing resources). They also have access to all groups and subgroups. **Use case:** Suitable for users responsible for maintaining consistency across multiple projects in the organization. If permission granularity is disabled, Workspace Manager can be assigned using the **Workspace manager** toggle in the **User details**. If enabled, the organization’s workspace is treated as a root group, and the role is granted by assigning the user to manage the root group from the **Groups** tab in the **User details**. ### [Group Manager](#group-manager) [Section titled “Group Manager”](#group-manager) Group Manager can create and manage projects within a specific group (including inviting people to projects and managing resources). They also inherit manager access to all subgroups within the assigned group. **Use case:** Suitable for users responsible for managing a group of projects and ensuring consistency within that group. Group managers can be assigned only when permission granularity is enabled. In that case, organization owners and admins can assign users to manage specific groups or subgroups from the **Groups** tab in the **User details**. ### [Project Manager](#project-manager) [Section titled “Project Manager”](#project-manager) Project Managers are responsible for the management of individual projects. Within those projects, they can manage project members, tasks, and resources, etc., but do not have access to settings or resources outside of their assigned projects. **Use case:** Suitable for users who need to focus only on managing specific projects without broader organizational responsibilities. ### [Developer](#developer) [Section titled “Developer”](#developer) Developer can upload source files, edit translatable text, connect integrations, and access the API. They don’t have permissions to manage project members, tasks, or reports. **Use case:** Suitable for users handling the technical aspects of localization, such as file management, integration setup, or automation. ### [Language Coordinator](#language-coordinator) [Section titled “Language Coordinator”](#language-coordinator) Language Coordinator can manage certain project features only for their assigned languages. They can translate and approve strings, manage project members and teams, generate project reports, create tasks, and pre-translate content. Language Coordinators cannot access other project settings such as source files, integrations, or project configurations. **Use case:** Suitable for users coordinating translations across specific project languages. ## [Contributor](#contributor) [Section titled “Contributor”](#contributor) Contributor is a general term for both Translators and Proofreaders who primarily work in the Editor. They can view projects, tasks, and workflow steps they are assigned to, access the Editor on corresponding workflow steps, generate personal translation reports, and communicate with other project members. ### [Proofreader](#proofreader) [Section titled “Proofreader”](#proofreader) Proofreader can translate and approve strings within assigned projects. They do not have access to project settings or management functions. **Use case:** Suitable for users focused on finalizing translations and ensuring quality. ### [Translator](#translator) [Section titled “Translator”](#translator) Translator can add translations and vote on suggestions made by others. They do not have the ability to approve translations or access project settings. **Use case:** Suitable for users responsible for providing translations without additional management responsibilities. ## [Vendor](#vendor) [Section titled “Vendor”](#vendor) Vendors are separate organizations that provide professional translation services. After you invite a vendor to your project, their organization receives a copy of the assigned workflow step in the *Incoming Projects* section of their workspace. This setup is commonly used when outsourcing translations to external teams while keeping the workflow and quality control within Crowdin Enterprise.
# SAML single sign-on
> Learn how to set up SAML SSO for your organization
SAML single sign-on (SSO) gives users access to Crowdin Enterprise through an identity provider (IDP) of your choice. The benefits of SAML authentication include: * **Standardization:** SAML is a standard format that allows seamless interoperability between systems, independent of implementation. * **Improved user experience:** Users can access Crowdin Enterprise using your organization’s identity provider without additional authentication, allowing them to use only one set of login details. * **Increased security:** SAML is a security standard for logging into applications, which provides a single point of authentication, keeping user credentials within the firewall boundary. ## [Configure your identity provider](#configure-your-identity-provider) [Section titled “Configure your identity provider”](#configure-your-identity-provider) To get started, you’ll need to set up a connection (or connector) for Crowdin Enterprise with your IDP (for example, [Auth0](https://auth0.com/docs/protocols/saml/saml-idp-generic#2-configure-auth0-as-idp), [Google Workspace (SAML)](https://support.google.com/a/answer/6087519?hl=en), [Okta](https://developer.okta.com/docs/guides/saml-application-setup/overview/), and others). [Configure SAML for Google Workspace ](#google-workspace) [Configure SAML for Microsoft Azure ](#microsoft-azure) [Configure SAML for Okta ](#okta) [Configure SAML for OneLogin ](#onelogin) [Configure SAML for Auth0 ](#auth0) ## [Set up SAML SSO for Crowdin Enterprise](#set-up-saml-sso-for-crowdin-enterprise) [Section titled “Set up SAML SSO for Crowdin Enterprise”](#set-up-saml-sso-for-crowdin-enterprise) Once you configured your identity provider, an Organization admin can enable the SAML SSO feature in Crowdin Enterprise **Organization Settings**. 1. Click on your profile picture in the upper-right corner and select **Organization Settings**. 2. Switch to the **Authentication** section on the left sidebar and click on the **SAML** authentication method at the bottom of the page. 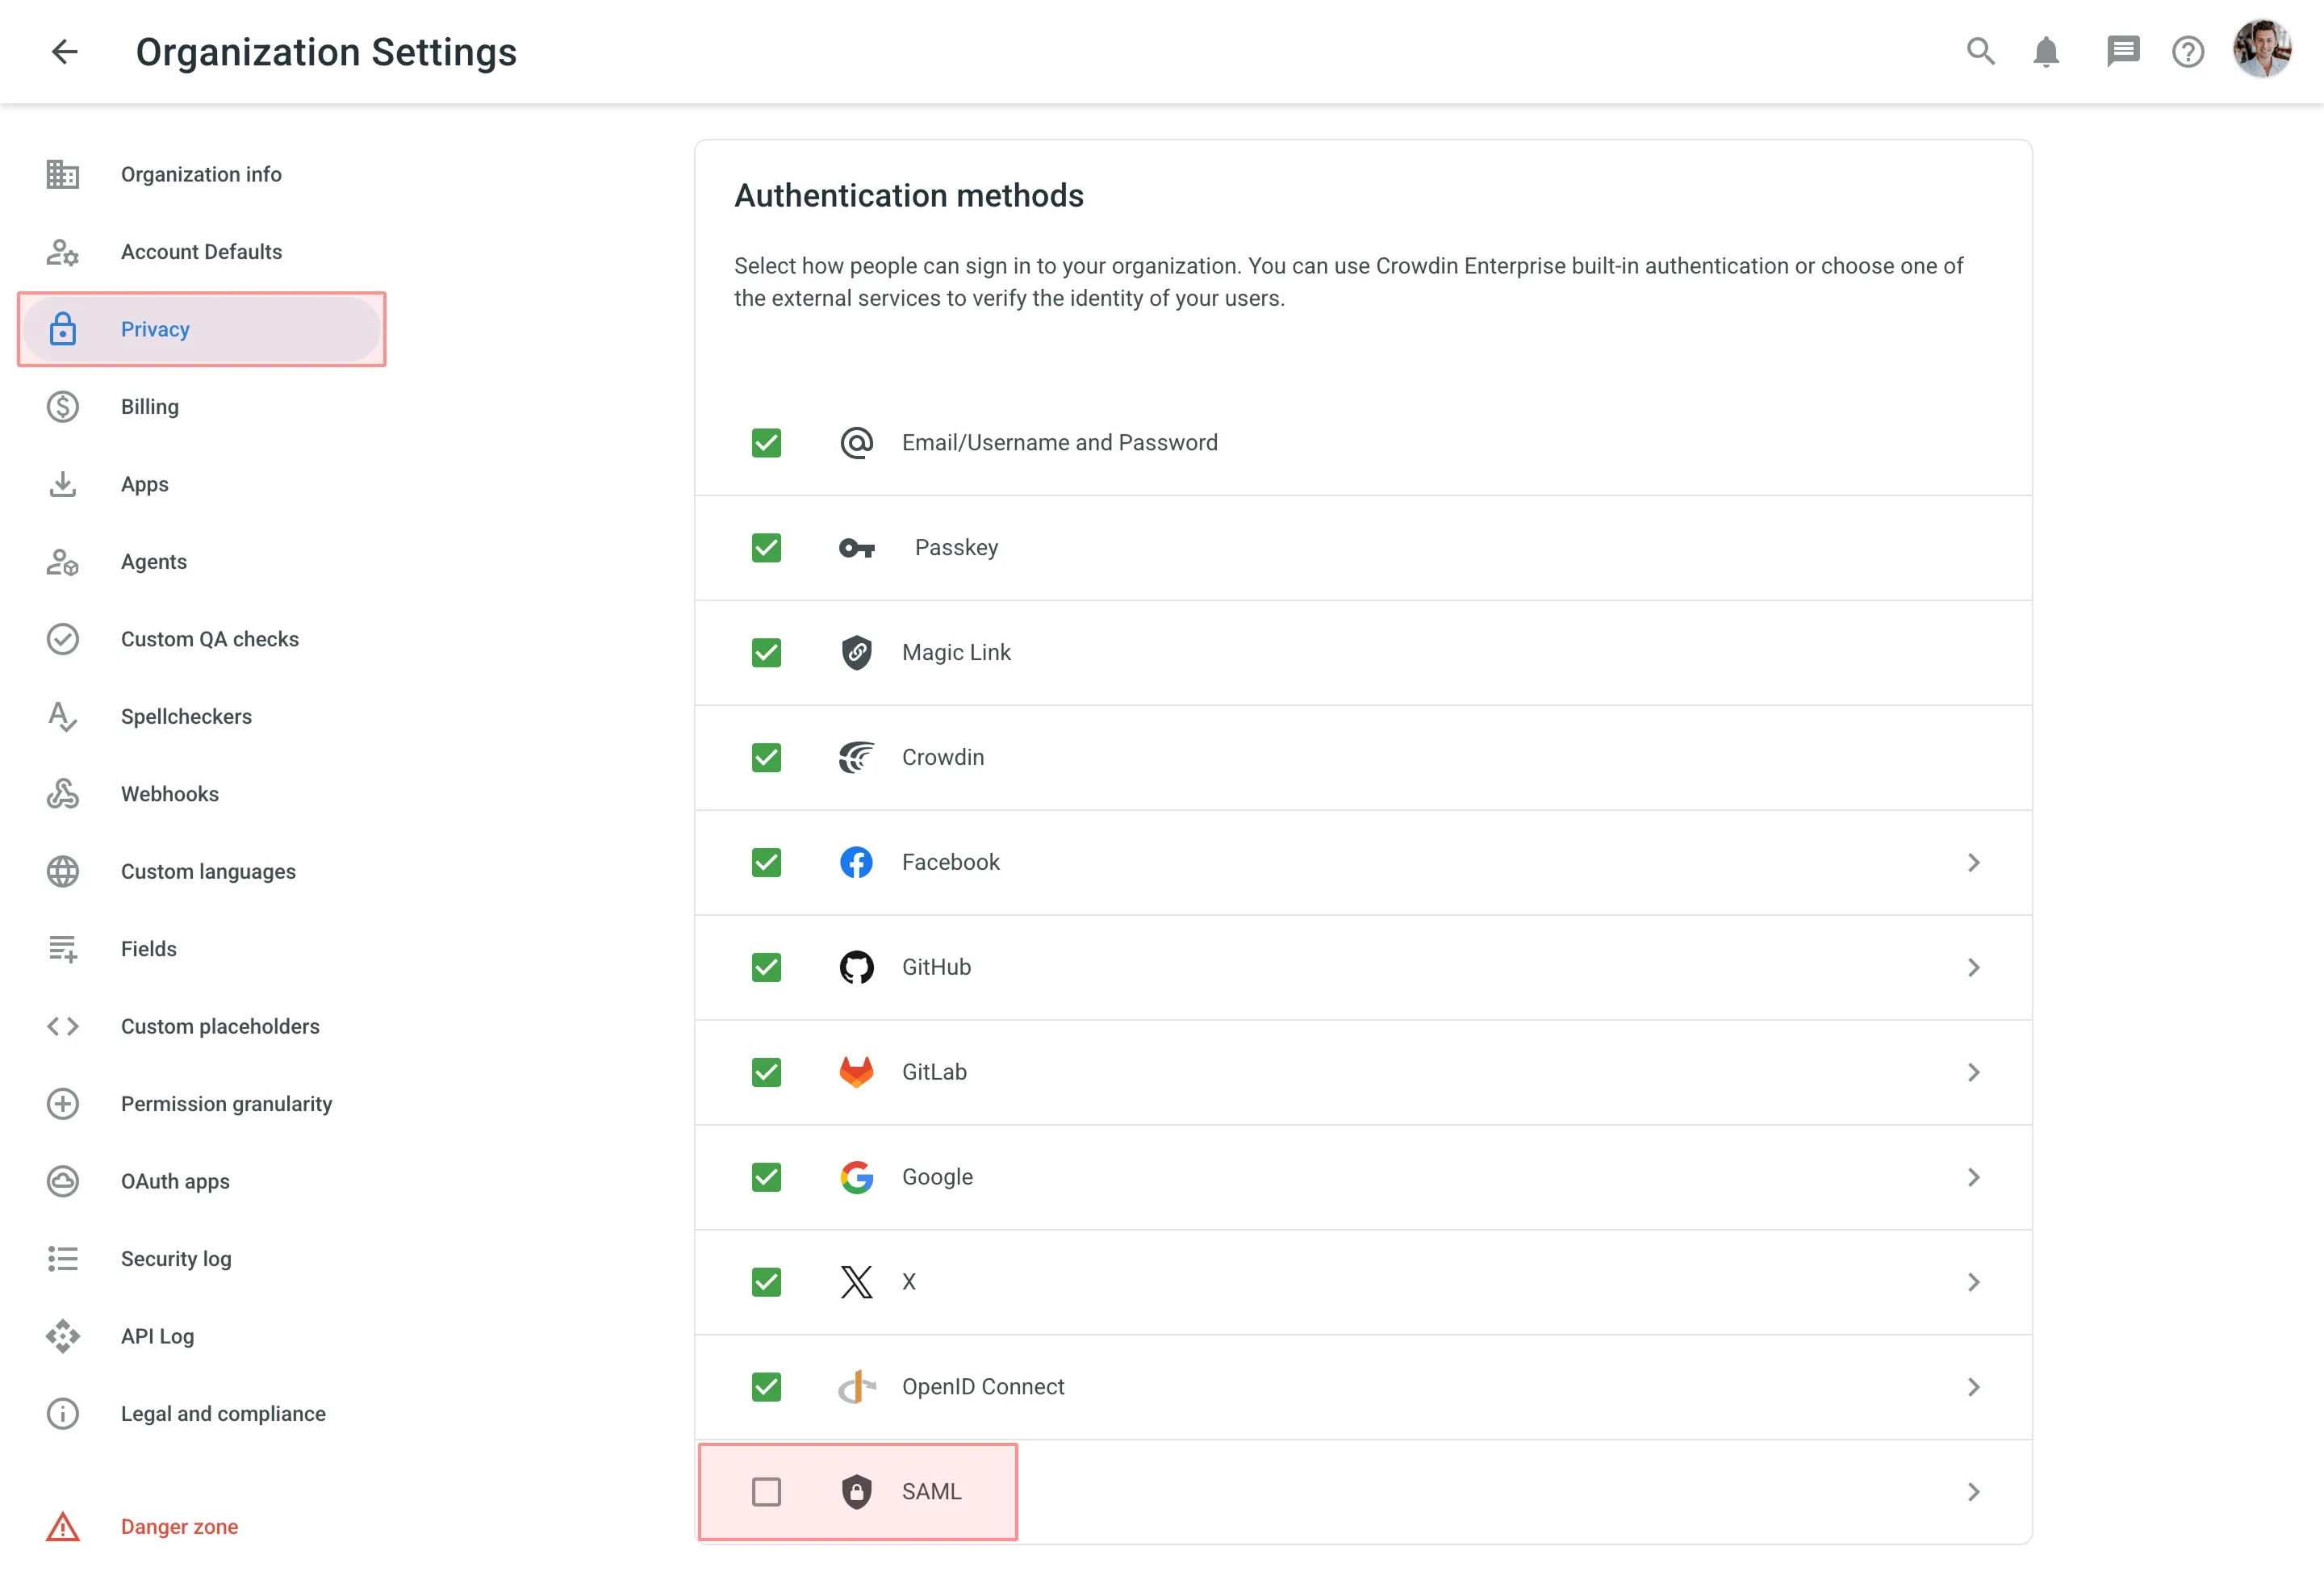 3. Paste your credentials from your IDP and click **Save**. 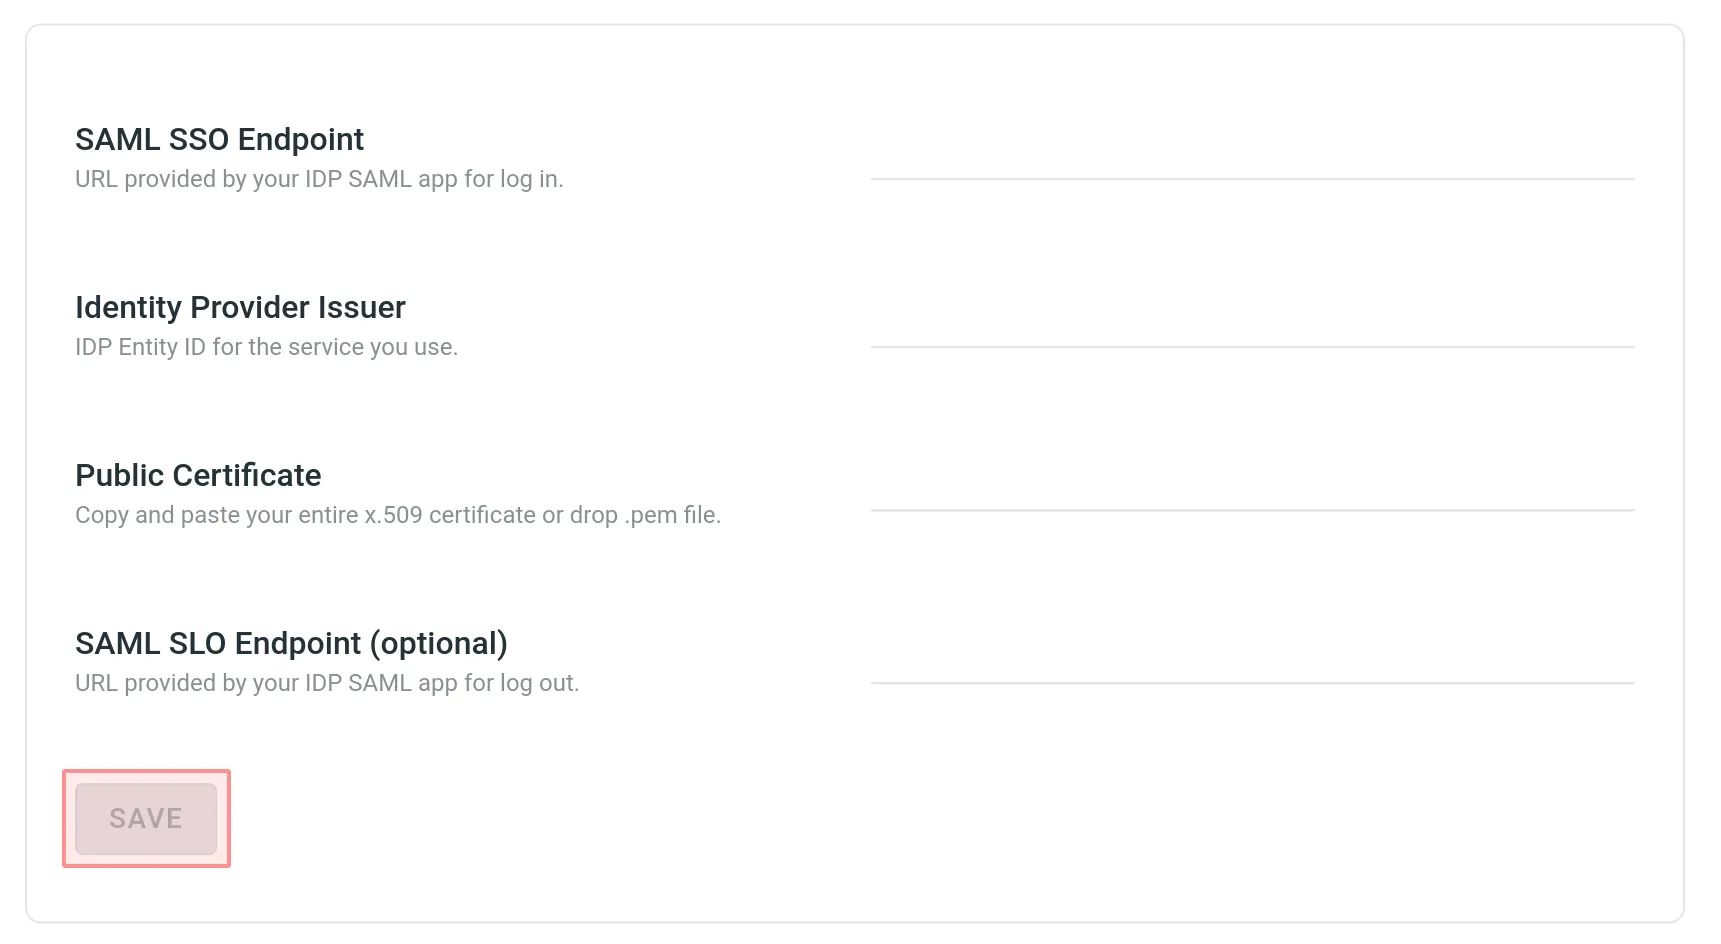 4. Take the credentials from the **SAML Single Sign-On** page and paste them into the IDP settings. 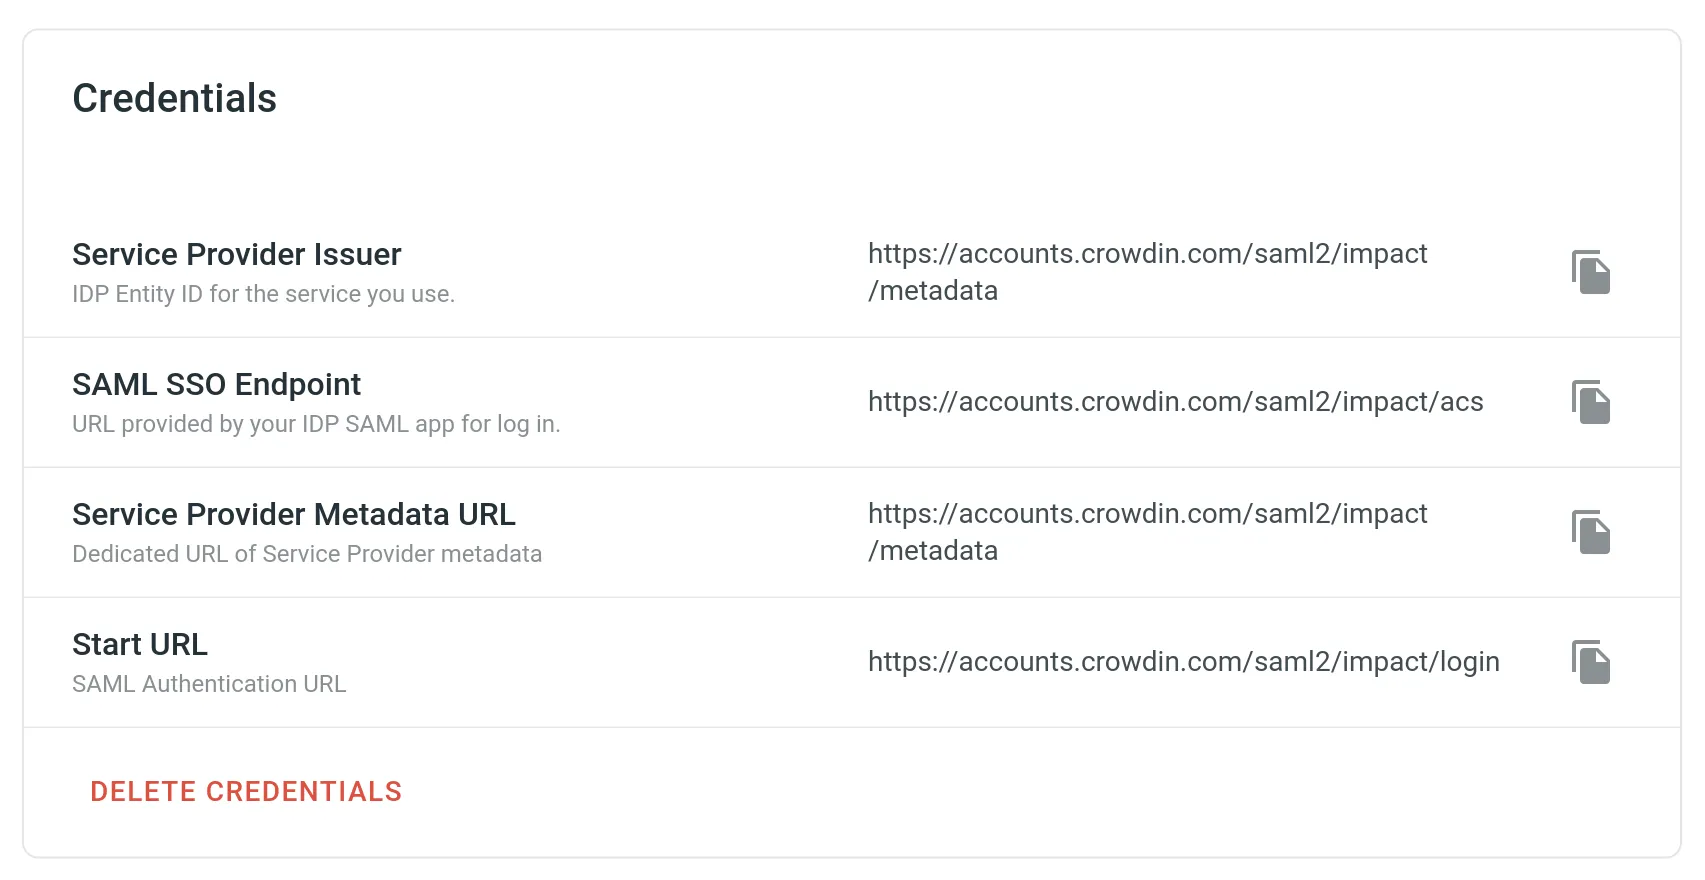 5. Set the preferred configurations in the [Settings](#saml-settings) and [Advanced options](#saml-advanced-options) sections depending on the configurations on the IDP side and click **Save**. 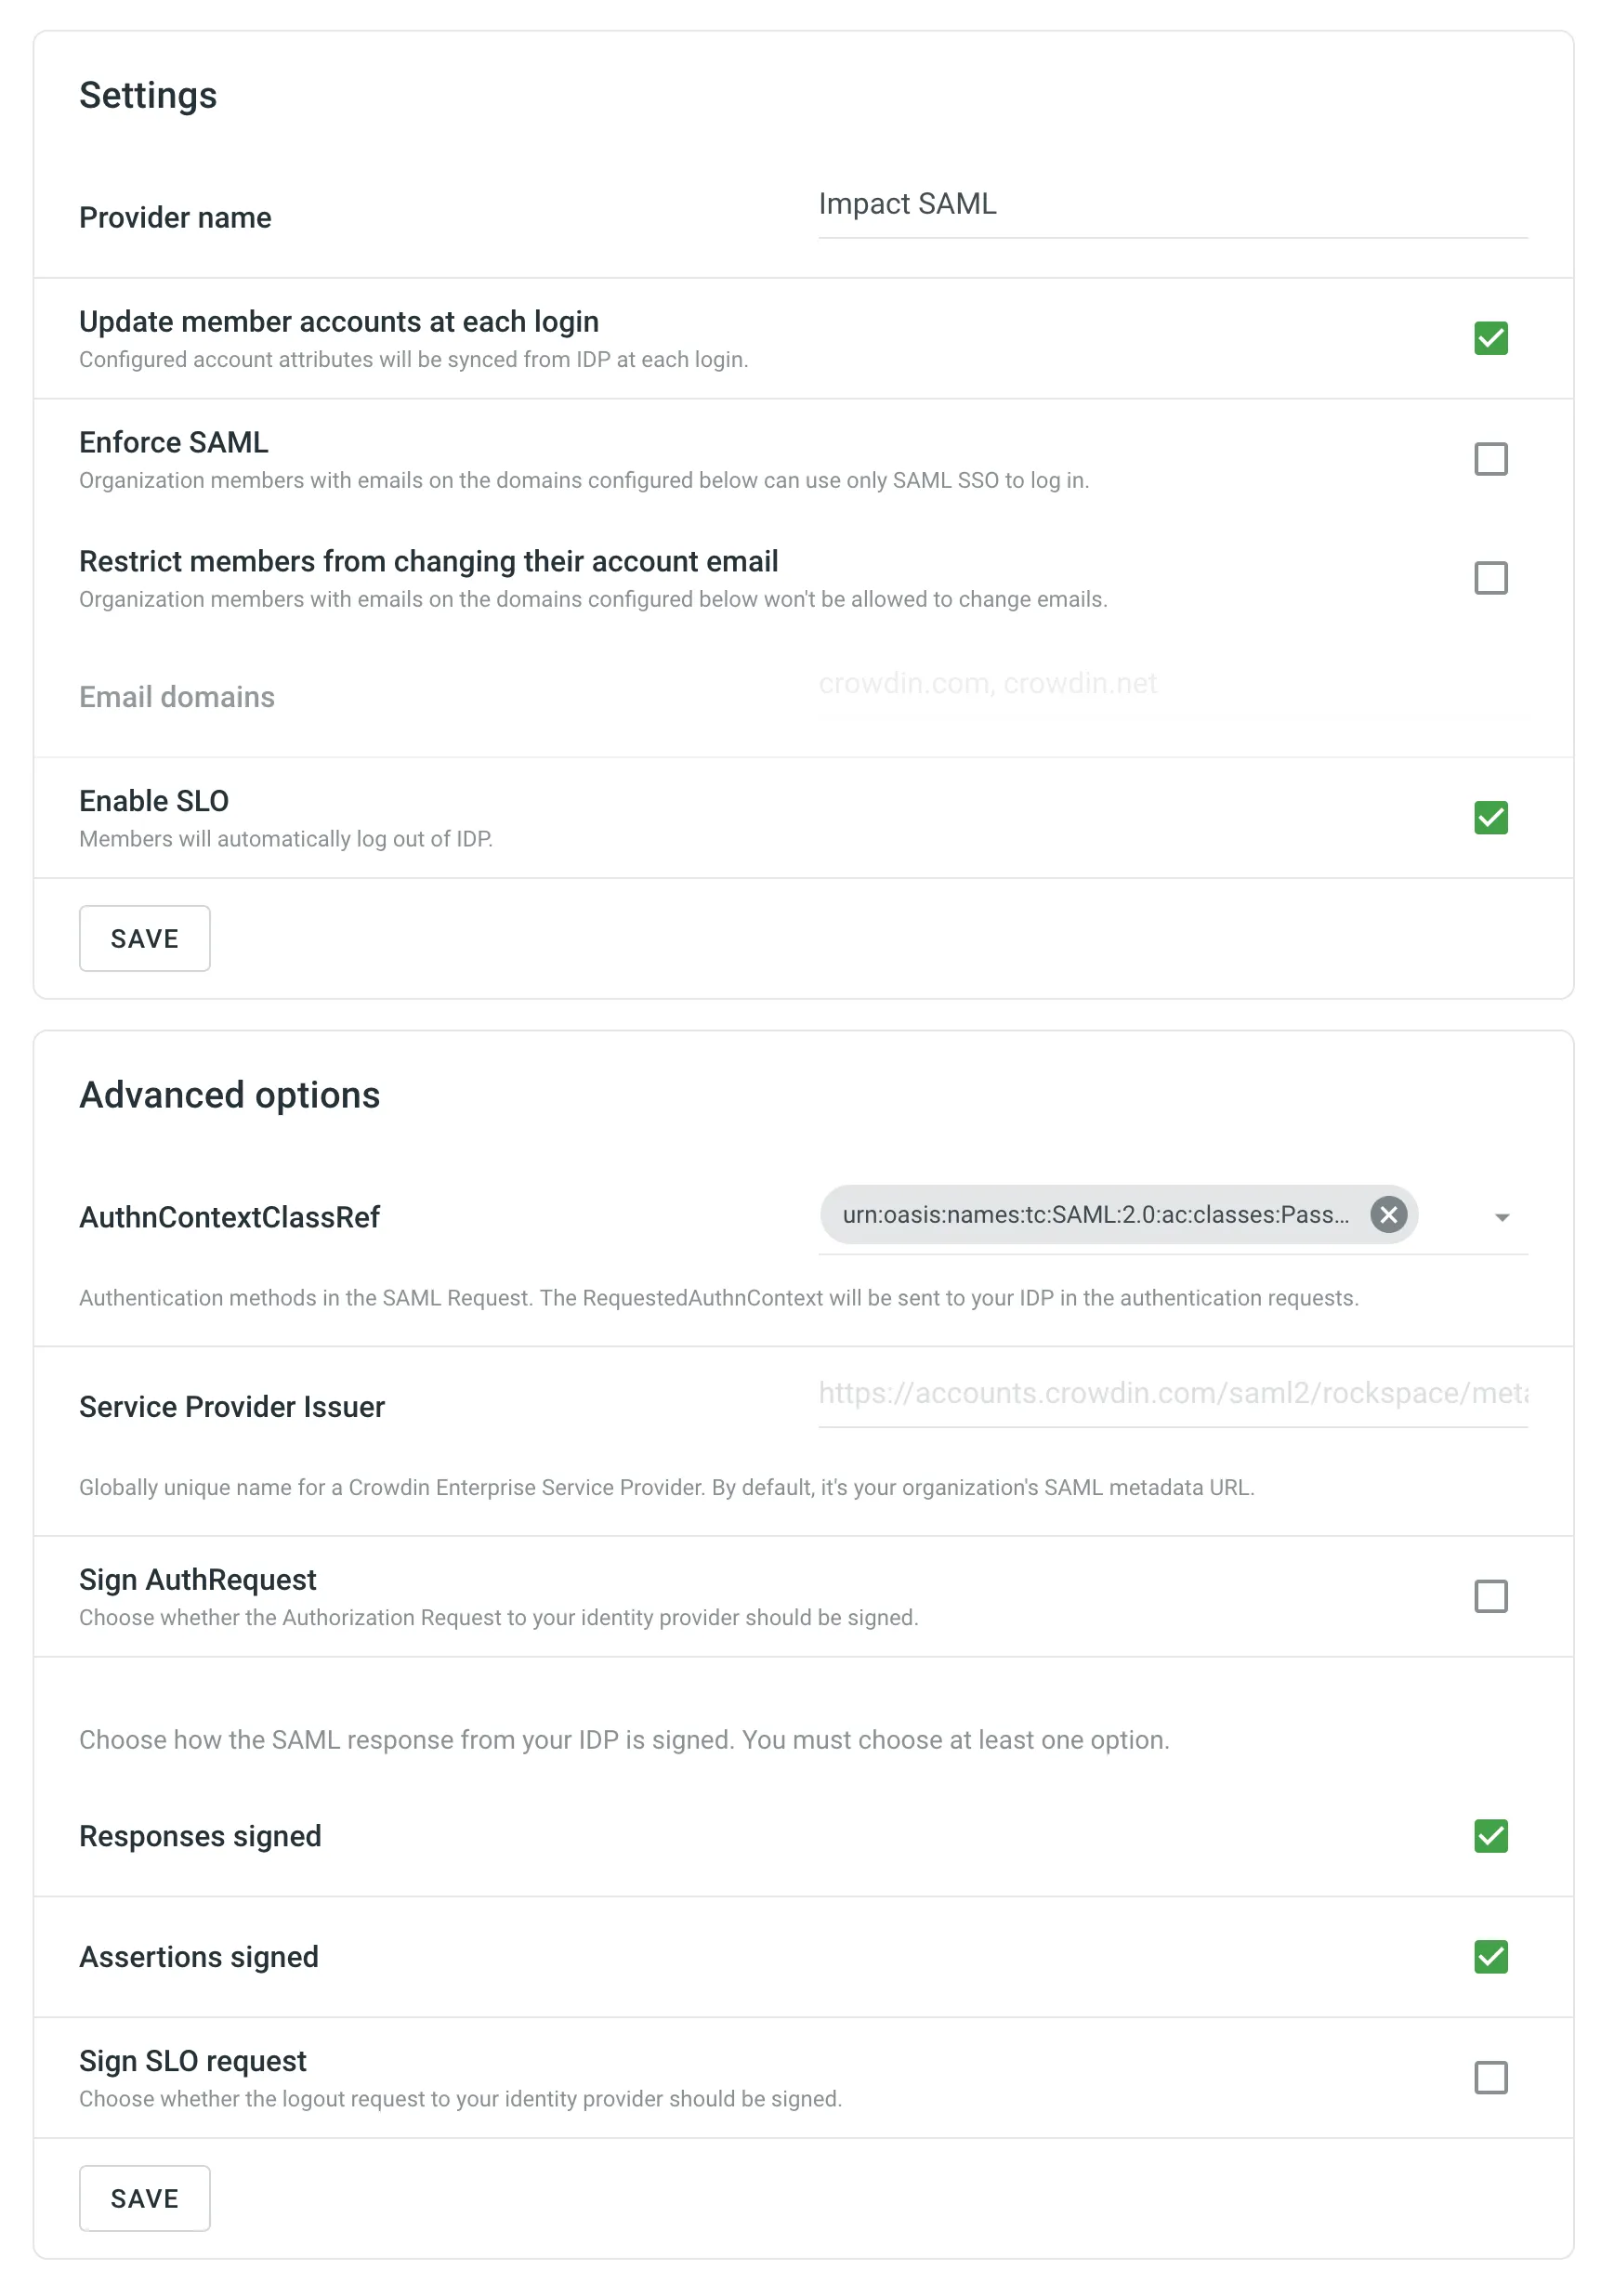 6. Go back to the **Authentication** page and enable the SAML authentication method. 7. As a result, on the login page, users will be able to use SAML for logging into your Crowdin Enterprise organization. ## [SAML Settings](#saml-settings) [Section titled “SAML Settings”](#saml-settings) The SAML **Settings** section provides you with different options that let you fine-tune your SAML behavior. * **Provider name** – the name of the SAML authentication method that will be displayed on your Crowdin Enterprise login page. * **Update member accounts at each login** – select whether you’d like the configured account attributes to be synced from IDP at each login of the organization member. These attributes are synced from IDP during the account creation. * **Enforce SAML** – select whether organization members with emails on the domains configured in the **Email domains** can use only SAML SSO to log in. * **Restrict members to change their account email** – select whether you’d like to restrict members to change their Crowdin Enterprise emails. * **Email domains** – email domains related to organization members that use SAML SSO to log in. * **Enable SLO** – select whether organization members should be logged out of IDP when logging out of your Crowdin Enterprise organization. ## [SAML Advanced Options](#saml-advanced-options) [Section titled “SAML Advanced Options”](#saml-advanced-options) * **AuthnContextClassRef** – authentication method used in SAML request. By default, it’s authentication via username and password over a protected session. * **Service Provider Issuer** – globally unique name for a Crowdin Enterprise Service Provider. By default, it’s your organization’s SAML metadata URL. * **Sign AuthRequest** – select whether to sign the authorization request to your IDP. The following options allow you to choose how the SAML response from your IDP is signed. Use at least one option. * **Responses signed** - Indicates a requirement for the SAML Responses received by Crowdin Enterprise to be signed. * **Assertions signed** - Indicates a requirement for the SAML Assertions received by Crowdin Enterprise to be signed. * **Sign SLO request** - Indicates a requirement for the Single Logout (SLO) requests sent to your identity provider to be signed. ## [Mapping SAML Attributes](#mapping-saml-attributes) [Section titled “Mapping SAML Attributes”](#mapping-saml-attributes) You can map attributes in the IDP response to user attributes used in Crowdin Enterprise. See the available attributes in the following table. | Parameter | Details | | ----------- | --------------------------------------------------------------------------------- | | `firstName` | **Type:** `string` **Description:** The first name of the user stored on the IDP. | | `lastName` | **Type:** `string` **Description:** The last name of the user stored on the IDP. | | `timeZone` | **Type:** `string` **Description:** The timezone of the user. | | `avatar` | **Type:** `string` **Description:** The absolute URL to user’s profile picture. | ## [What you get when SAML SSO is enabled](#what-you-get-when-saml-sso-is-enabled) [Section titled “What you get when SAML SSO is enabled”](#what-you-get-when-saml-sso-is-enabled) Any users already logged in after you’ve set up and enabled the SAML SSO will remain logged in. Further on, users that chose SAML as their login method will log into your Crowdin Enterprise organization with their IDP account. If there is no account for some user in your organization, an account will be created automatically during the login process into your Crowdin Enterprise organization. ## [Configuring SAML SSO for Google Workspace](#google-workspace) [Section titled “Configuring SAML SSO for Google Workspace”](#google-workspace) To set up Crowdin Enterprise SAML SSO in your Google Workspace, follow the steps below. #### [Set up Crowdin Enterprise SAML app](#setup-google) [Section titled “Set up Crowdin Enterprise SAML app”](#setup-google) 1. Open the Google Admin console using an administrator account. 2. From the Admin console *Home* page, go to **Apps > SAML apps**. 3. Click **Add** at the bottom right. 4. Click **Set up my own custom app**. The *Google IdP Information* window opens and the *SSO URL* and *Entity ID* fields automatically populate. 5. Copy the *SSO URL*, *Entity ID*, and download the certificate. 6. In a separate browser tab or window, log in to your Crowdin Enterprise Organization, open the *Organization Settings* > *Authentication* page, and click on SAML at the bottom of the *Authentication methods* list. 7. Enter the information you copied in Step 5 (paste the *SSO URL* in the *SAML SSO Endpoint* field, *Entity ID* in the *Identity Provider Issuer* field, and drag and drop your certificate file to the *Public Certificate* field), click **Save** and then return to the Google Admin console. 8. Click **Next**. 9. In the *Basic information* window, add an application name (for example *Crowdin Enterprise*) and optionally add a description. 10. *(Optional)* Upload a PNG or GIF file to serve as an icon for your Crowdin Enterprise SSO app. The icon image should be 256 pixels square. You can find the Crowdin icon on the [Using the Crowdin Logo](/using-logo/) page. 11. Click **Next**. 12. In the *Service Provider Details* window, you need to enter an *ACS URL*, *Entity ID*, leave the *Start URL* empty, leave the *Signed Response* box cleared, and set the *Name ID Format* to *PERSISTENT*. 13. Switch to your Crowdin Enterprise *Organization Settings* > *Authentication* > SAML where all the values for Step 12 could be found. 14. Copy and paste the *SAML SSO Endpoint* in the *ACS URL* field, *Service Provider Issuer* in the *Entity ID* field in your Google Admin console, clear the *Responses signed* option, and click **Save**. 15. Select SAML in the *Authentication methods* list so that your users could use it as the desired authentication method to log in to your Crowdin Enterprise organization from the login page. 16. Switch to your Google Admin console and click **Next**. 17. Click **Finish** on the *Attribute Mapping* page. 18. In the *Setting up SSO for Crowdin Enterprise* window, click **OK**. #### [Enable Crowdin Enterprise SAML app](#enable-google) [Section titled “Enable Crowdin Enterprise SAML app”](#enable-google) 1. From the Admin console *Home* page, go to **Apps > SAML apps**. 2. Select your new Crowdin Enterprise SAML app. 3. At the top right of the gray box, click **Edit Service** . 4. To turn service on or off for everyone in your organization, click **On for everyone** or **Off for everyone**, and then click **Save**. 5. To turn service on or off only for users in an organizational unit: * On the left, select the organizational unit. * Select **On** or **Off** and then click **Save**. Read more about the [organizational structure of Google Workspace](https://support.google.com/a/answer/4352075). 6. To turn service on for a set of users across or within organizational units, select an access group. For details, go to [turn on a service for a group](https://support.google.com/a/answer/9050643). 7. Ensure that the email addresses your users use to log in to the SAML app match the email addresses they use to log in to your Google domain. #### [Test SSO](#test-sso-google) [Section titled “Test SSO”](#test-sso-google) 1. Open the single sign-on URL for your new Crowdin Enterprise SAML app by clicking on the Crowdin Enterprise in the Google apps menu. Crowdin Enterprise could be found in the app list along with Google Drive, Gmail, and others. You should be automatically redirected to the Google login page. 2. Enter your login credentials. After your login credentials are authenticated, you’re automatically redirected to Crowdin Enterprise. ## [Configuring SAML SSO for Microsoft Azure](#microsoft-azure) [Section titled “Configuring SAML SSO for Microsoft Azure”](#microsoft-azure) To set up Crowdin Enterprise SAML SSO in your Microsoft Azure, follow the steps below. #### [Add Confluence SAML SSO by Microsoft from the Gallery](#add-confluence-saml-sso-by-microsoft-from-the-gallery) [Section titled “Add Confluence SAML SSO by Microsoft from the Gallery”](#add-confluence-saml-sso-by-microsoft-from-the-gallery) 1. Open the [Azure portal](https://portal.azure.com/) using an administrator account. 2. On the left navigation panel, select the *Microsoft Entra ID* service. 3. Click on the *Manage* section and select *Enterprise applications* from the list. You’ll be redirected to *Enterprise applications > All applications*. 4. To add a new application, click New application. 5. In the *Search application* field, type **Confluence SAML SSO by Microsoft**. 6. Select **Confluence SAML SSO by Microsoft** from the results panel and then click **Create**. Wait a few seconds while the app is being added. #### [Configure Microsoft Entra ID SSO](#configure-microsoft-entra-id-sso) [Section titled “Configure Microsoft Entra ID SSO”](#configure-microsoft-entra-id-sso) ##### [Configurations on the Azure Portal](#configurations-on-the-azure-portal) [Section titled “Configurations on the Azure Portal”](#configurations-on-the-azure-portal) Follow these steps to set up Microsoft Entra ID SSO in the Azure portal: 1. As soon as the application is added, you’ll be redirected to its *Overview* page. On the **Confluence SAML SSO by Microsoft** application *Overview* page, find the *Manage* section and select *Single sign-on*. 2. On the *Select a single sign-on method* page, select **SAML**. 3. You are now on the *Set up single sign-on with SAML* page. The following configurations will be happening in the different sections of this page. ###### [Basic SAML Configuration](#basic-saml-configuration) [Section titled “Basic SAML Configuration”](#basic-saml-configuration) 1. Click on the *Basic SAML Configuration* section. 2. Enter your Crowdin Enterprise service provider details here and click **Save**. * *Identifier (Entity ID)*: `https://accounts.crowdin.com/saml2/{your-organization-name}/metadata` * *Reply URL (Assertion Consumer Service URL)*: `https://accounts.crowdin.com/saml2/{your-organization-name}/acs` * *Sign on URL*: `https://accounts.crowdin.com/saml2/{your-organization-name}/login` ###### [Attributes & Claims](#attributes--claims) [Section titled “Attributes & Claims”](#attributes--claims) 1. Click on the *Attributes & Claims* section. 2. Click on the claim in the *Required claim* section. 3. On the *Manage claim* page, select **Persistent** for the *Name identifier format* and select **user.mail** for the *Source attribute*, click **Save**. ###### [SAML Certificates](#saml-certificates) [Section titled “SAML Certificates”](#saml-certificates) 1. Click on the *SAML Certificates* section. 2. Select **Sign SAML response and assertion** for the *Signing Option* and click **Save**. 3. Click **Download** toward the *Certificate (Base64)* from the *SAML Certificates* section. ###### [Set up Confluence SAML SSO by Microsoft](#set-up-confluence-saml-sso-by-microsoft) [Section titled “Set up Confluence SAML SSO by Microsoft”](#set-up-confluence-saml-sso-by-microsoft) 1. Go to the *Set up Confluence SAML SSO by Microsoft* section. 2. Copy the *Login URL*, *Microsoft Entra Identifier*, *Logout URL*. ##### [Configurations in Crowdin Enterprise](#configurations-in-crowdin-enterprise) [Section titled “Configurations in Crowdin Enterprise”](#configurations-in-crowdin-enterprise) 1. In a separate browser tab or window, log in to your Crowdin Enterprise Organization, open the *Organization Settings* > *Authentication* page, and click on SAML at the bottom of the *Authentication methods* list. 2. Enter the information you copied in the Azure portal and click **Save**. * Paste the *Login URL* in the *SAML SSO Endpoint* field. * Paste *Microsoft Entra Identifier* in the *Identity Provider Issuer* field. * Paste *Logout URL* in the *SAML SLO Endpoint* field. * Drag and drop your certificate file to the *Public Certificate* field. 3. You’ll be redirected back to the *Organization Settings* > *Authentication* page. Select the checkbox next to the SAML in the bottom of the *Authentication methods* list so that your users could use it as the desired authentication method to log in to your Crowdin Enterprise organization from the login page. ##### [Authentication Method Settings](#authentication-method-settings) [Section titled “Authentication Method Settings”](#authentication-method-settings) Depending on the authentication method you use in the Azure portal, in some cases, it might be necessary to change the default value for the `AuthnContextClassRef` parameter on the *SAML Single Sign-On* page in Crowdin Enterprise. To allow all possible authentication methods, change `AuthnContextClassRef` parameter to the `unspecified` value. #### [Assign Users](#assign-users-azure) [Section titled “Assign Users”](#assign-users-azure) In this section, you’ll enable users to use Azure single sign-on by granting access to your Crowdin Enterprise Organization. 1. In the Azure portal, select Enterprise Applications, and then select All applications. 2. In the applications list, select **Confluence SAML SSO by Microsoft**. 3. In the app’s overview page, find the *Manage* section, and select *Users and groups*. 4. Click **Add user/group**, then on the *Add Assignment* pane, click *None Selected* under *Users and groups*. 5. In the *Users and groups* dialog, select your own account from the *Users* list to be able to test the SAML SSO, then click the **Select** button at the bottom of the screen, then click **Assign**. In the same way, you’ll be able to assign more users anytime. #### [Test SSO](#test-sso-azure) [Section titled “Test SSO”](#test-sso-azure) 1. On the **Confluence SAML SSO by Microsoft** application *Overview* page, find the *Manage* section and select *Single sign-on*. 2. Scroll down to the *Test single sign-on with Confluence SAML SSO by Microsoft* section and click **Test**. 3. On the right-side pane, click **Sign in as current user**. After your login credentials are authenticated, you’re automatically redirected to Crowdin Enterprise. ## [Configuring SAML SSO for Okta](#okta) [Section titled “Configuring SAML SSO for Okta”](#okta) To set up Crowdin Enterprise SAML SSO in your Okta, follow the steps below. #### [Set up Crowdin Enterprise SAML App](#setup-okta) [Section titled “Set up Crowdin Enterprise SAML App”](#setup-okta) 1. Open the Okta Dashboard using an administrator account. 2. From the Dashboard page, go to **Applications**. 3. Click **Add Application**. 4. Click **Create New App**. 5. In the *Create a New Application Integration* dialog, set *Platform* to *Web* and *Sign on method* to *SAML 2.0*, click **Create**. 6. On the *Create SAML Integration* page, add an application name (for example *Crowdin Enterprise*) on the *General Settings* step. 7. *(Optional)* Upload a PNG, JPG, or GIF file to serve as a logo for your Crowdin Enterprise SSO app. The image should have dimensions less than 1400x400px and be less than 100k in size. You can find the Crowdin icon on the [Using the Crowdin Logo](/using-logo/) page. 8. Keep the *App visibility* options cleared, click **Next**. 9. On the *Configure SAML* step > *SAML Settings* section, you need to enter *Single sign on URL*, *Audience URI (SP Entity ID)*, leave the *Default RelayState* empty, set the *Name ID Format* to *Persistent*, *Application username* to *Email*, click **Next**.*Single sign on URL*: `https://accounts.crowdin.com/saml2/{your-organization-name}/acs`\ *Audience URI (SP Entity ID)*: `https://accounts.crowdin.com/saml2/{your-organization-name}/metadata` 10. On the *Feedback* step, select the **I’m an Okta customer adding an internal app** option, click **Finish**. 11. After you finished setting up the app on the Okta’s side, you’ll be redirected to the app’s *Sign On* tab. In the *Settings* section, click **View SAML setup instructions**. 12. In the new browser tab, you’ll see the credentials that need to be specified in your Crowdin Enterprise *Organization Settings* > *Authentication* page > SAML. 13. Copy the *Identity Provider Single Sign-On URL*, *Identity Provider Issuer*, and download the certificate. 14. In a separate browser tab or window, log in to your Crowdin Enterprise Organization, open the *Organization Settings* > *Authentication* page, and click on SAML at the bottom of the *Authentication methods* list. 15. Enter the information you copied in Step 13 (paste the *Identity Provider Single Sign-On URL* in the *SAML SSO Endpoint* field, *Identity Provider Issuer* in the *Identity Provider Issuer* field, and drag and drop your certificate file to the *Public Certificate* field), click **Save**. 16. Select the checkbox next to SAML in the *Authentication methods* list so that your users could use it as the desired authentication method to log in to your Crowdin Enterprise organization from the login page. #### [Assign Users](#assign-users-okta) [Section titled “Assign Users”](#assign-users-okta) In this section, you’ll enable users to use Okta single sign-on by granting access to your Crowdin Enterprise Organization. 1. Open your Okta Dashboard using an administrator account and go to **Applications**. 2. Click on your new Crowdin Enterprise SAML app. 3. Switch to the *Assignments* tab, click **Assign**, and select **Assign to Groups**. 4. In the *Assign Crowdin Enterprise to Groups* dialog, click **Assign** on **Everyone** to enable Crowdin Enterprise SAML app to all users in your organization, click **Done**. Alternatively, you can assign separate groups or individual users. #### [Test SSO](#test-sso-okta) [Section titled “Test SSO”](#test-sso-okta) 1. On the Crowdin Enterprise [login page](https://accounts.crowdin.com/), select your organization and click **Log in**. 2. Click on **SAML**. You should be automatically redirected to the Okta login page. 3. Enter your login credentials. After your login credentials are authenticated, you’re automatically redirected to Crowdin Enterprise. ## [Configuring SAML SSO for OneLogin](#onelogin) [Section titled “Configuring SAML SSO for OneLogin”](#onelogin) To set up Crowdin Enterprise SAML SSO in your OneLogin, follow the steps below. #### [Add OneLogin SAML Test (IdP) from the App Catalog](#add-onelogin-saml-test-idp-from-the-app-catalog) [Section titled “Add OneLogin SAML Test (IdP) from the App Catalog”](#add-onelogin-saml-test-idp-from-the-app-catalog) 1. Open the OneLogin Admin Console using an administrator account. 2. From the Admin Console page, go to *Applications*. 3. To add a new application, click **Add App**. 4. On the *Find Applications* page, type **OneLogin SAML Test (IdP)** in the search box. 5. Select **OneLogin SAML Test (IdP)** from the search results list. Wait a few seconds while the app is being added. 6. Update or rename the *Display Name* (for example to *Crowdin Enterprise*). 7. (Optional) Replace default app icons with a PNG or SVG file for your Crowdin Enterprise SSO app. You can find the Crowdin icon on the [Using the Crowdin Logo](/using-logo/) page, click **Save**. 8. You are now in the *Info* tab. Click the *Configuration* tab. Enter your Crowdin Enterprise service provider details here and click **Save** to proceed.*SAML Consumer URL*: `https://accounts.crowdin.com/saml2/{your-organization-name}/acs`\ *SAML Audience*: `https://accounts.crowdin.com/saml2/{your-organization-name}/metadata`\ *SAML Recipient*: `https://accounts.crowdin.com/saml2/{your-organization-name}/acs`\ *SAML Single Logout URL*: `https://accounts.crowdin.com/saml2/{your-organization-name}/slo`\ *ACS URL Validator*: `^https:\/\/accounts\.crowdin\.com\/saml2\/{your-organization-name}\/acs$` 9. Navigate to the *SSO* tab in OneLogin and copy the *Issuer URL*, *SAML 2.0 Endpoint (HTTP)*, and X.509 Certificate. To copy the X.509 certificate, click **View Details**. 10. In a separate browser tab or window, log in to your Crowdin Enterprise Organization, open the *Organization Settings* > *Authentication* page, at the bottom of the *Authentication methods* list click on SAML. 11. Enter the information you copied in Step 8 (paste the *Issuer URL* in the *Identity Provider Issuer* field, *SAML 2.0 Endpoint (HTTP)* in the *SAML SSO Endpoint* field, and X.509 certificate to the *Public Certificate* field), click **Save**. 12. Select the checkbox next to SAML in the *Authentication methods* list so that your users could use it as the desired authentication method to log in to your Crowdin Enterprise organization from the login page. #### [Assign Users](#assign-users-onelogin) [Section titled “Assign Users”](#assign-users-onelogin) In this section, you’ll grant users access to your new Crowdin Enterprise SAML SSO app. 1. Open the OneLogin Admin Console using an administrator account. 2. From the Admin Console page, go to *Applications*. 3. Click on your new Crowdin Enterprise SAML SSO app. 4. Navigate to the *Access* tab and specify the roles that should have access to this app. If you don’t have the necessary role you can add a new role via *Users* > *Roles* specifying access to the needed apps. You can assign users to a new role via *Users* page. #### [Test SSO](#test-sso-onelogin) [Section titled “Test SSO”](#test-sso-onelogin) 1. On the Crowdin Enterprise [login page](https://accounts.crowdin.com/), select your organization and click **Log in**. 2. Click on **SAML**. You should be automatically redirected to the OneLogin login page. 3. Enter your login credentials. After your login credentials are authenticated, you’re automatically redirected to Crowdin Enterprise. ## [Configuring SAML SSO for Auth0](#auth0) [Section titled “Configuring SAML SSO for Auth0”](#auth0) To set up Crowdin Enterprise SAML SSO in your Auth0, follow the steps below. #### [Set up Crowdin Enterprise SAML App](#setup-auth0) [Section titled “Set up Crowdin Enterprise SAML App”](#setup-auth0) 1. Open the Auth0 Management Dashboard using an administrator account. 2. From the *Dashboard*, go to *Applications*. 3. Click **+ CREATE APPLICATION** on the right. 4. In the **Name** field, specify an application name (for example *Crowdin Enterprise*), select the **Regular Web Applications** application type, click **CREATE**. 5. Go back to *Dashboard* > *Applications*. 6. Find the row for the application you just created, and click on the Settings icon to the right of the application name. 7. *(Optional)* Specify the URL for your Crowdin Enterprise SSO app logo in the **Application Logo** field. You can find the Crowdin icon on the [Using the Crowdin Logo](/using-logo/) page. 8. Switch to the **Addons** tab. 9. Click on **SAML2 WEB APP**. 10. In the appeared dialog, specify the **Application Callback URL**.*Application Callback URL*: `https://accounts.crowdin.com/saml2/{your-organization-name}/acs` 11. In the **Settings** paste the following snippet ```json { "nameIdentifierProbes": [ "http://schemas.xmlsoap.org/ws/2005/05/identity/claims/emailaddress" ] } ``` This way the **NameID** would be set to the user email address. 12. Scroll down and click **ENABLE**. 13. Scroll up and switch to the **Usage** tab. 14. In the **Usage** tab, you’ll see the credentials that need to be specified in your Crowdin Enterprise *Organization Settings* > *Authentication* page > SAML. 15. Copy the *Issuer*, *Identity Provider Login URL*, and download the certificate. 16. In a separate browser tab or window, log in to your Crowdin Enterprise Organization, open the *Organization Settings* > *Authentication* page, and click on SAML at the bottom of the *Authentication methods* list. 17. Enter the information you copied in Step 14 (paste the *Issuer* in the *Identity Provider Issuer* field, *Identity Provider Login URL* in the *SAML SSO Endpoint* field, and drag and drop your certificate file to the *Public Certificate* field), click **Save**. 18. Select the checkbox next to SAML in the *Authentication methods* list so that your users could use it as the desired authentication method to log in to your Crowdin Enterprise organization from the login page. #### [Manage Access to Crowdin Enterprise SAML App](#manage-access-to-crowdin-enterprise-saml-app) [Section titled “Manage Access to Crowdin Enterprise SAML App”](#manage-access-to-crowdin-enterprise-saml-app) By default, all users associated with a single Auth0 tenant are shared between the tenant’s applications (and therefore have access to the applications). If necessary you can restrict some users’ access to the application using [rules](https://auth0.com/docs/rules). See [this rule as an example](https://github.com/auth0/rules/blob/aeaf93bc058408e260192d0941a688963449d6be/src/rules/simple-user-whitelist-for-app.js). #### [Test SSO](#test-sso-auth0) [Section titled “Test SSO”](#test-sso-auth0) 1. On the Crowdin Enterprise [login page](https://accounts.crowdin.com/), select your organization and click **Log in**. 2. Click on **SAML**. You should be automatically redirected to the Auth0 login page. 3. Enter your login credentials. After your login credentials are authenticated, you’re automatically redirected to Crowdin Enterprise.
# Screenshots
> Provide translators with additional context for the source strings
Screenshots are a great way to provide translators with additional context for the source strings in your project and, as a result, get more relevant and consistent translations. With screenshots, your team can see which strings are used together on the same page, whether short texts stand for titles, buttons, etc. Tag source strings to the screenshots to display them to translators in the Editor in the context section below the source string. 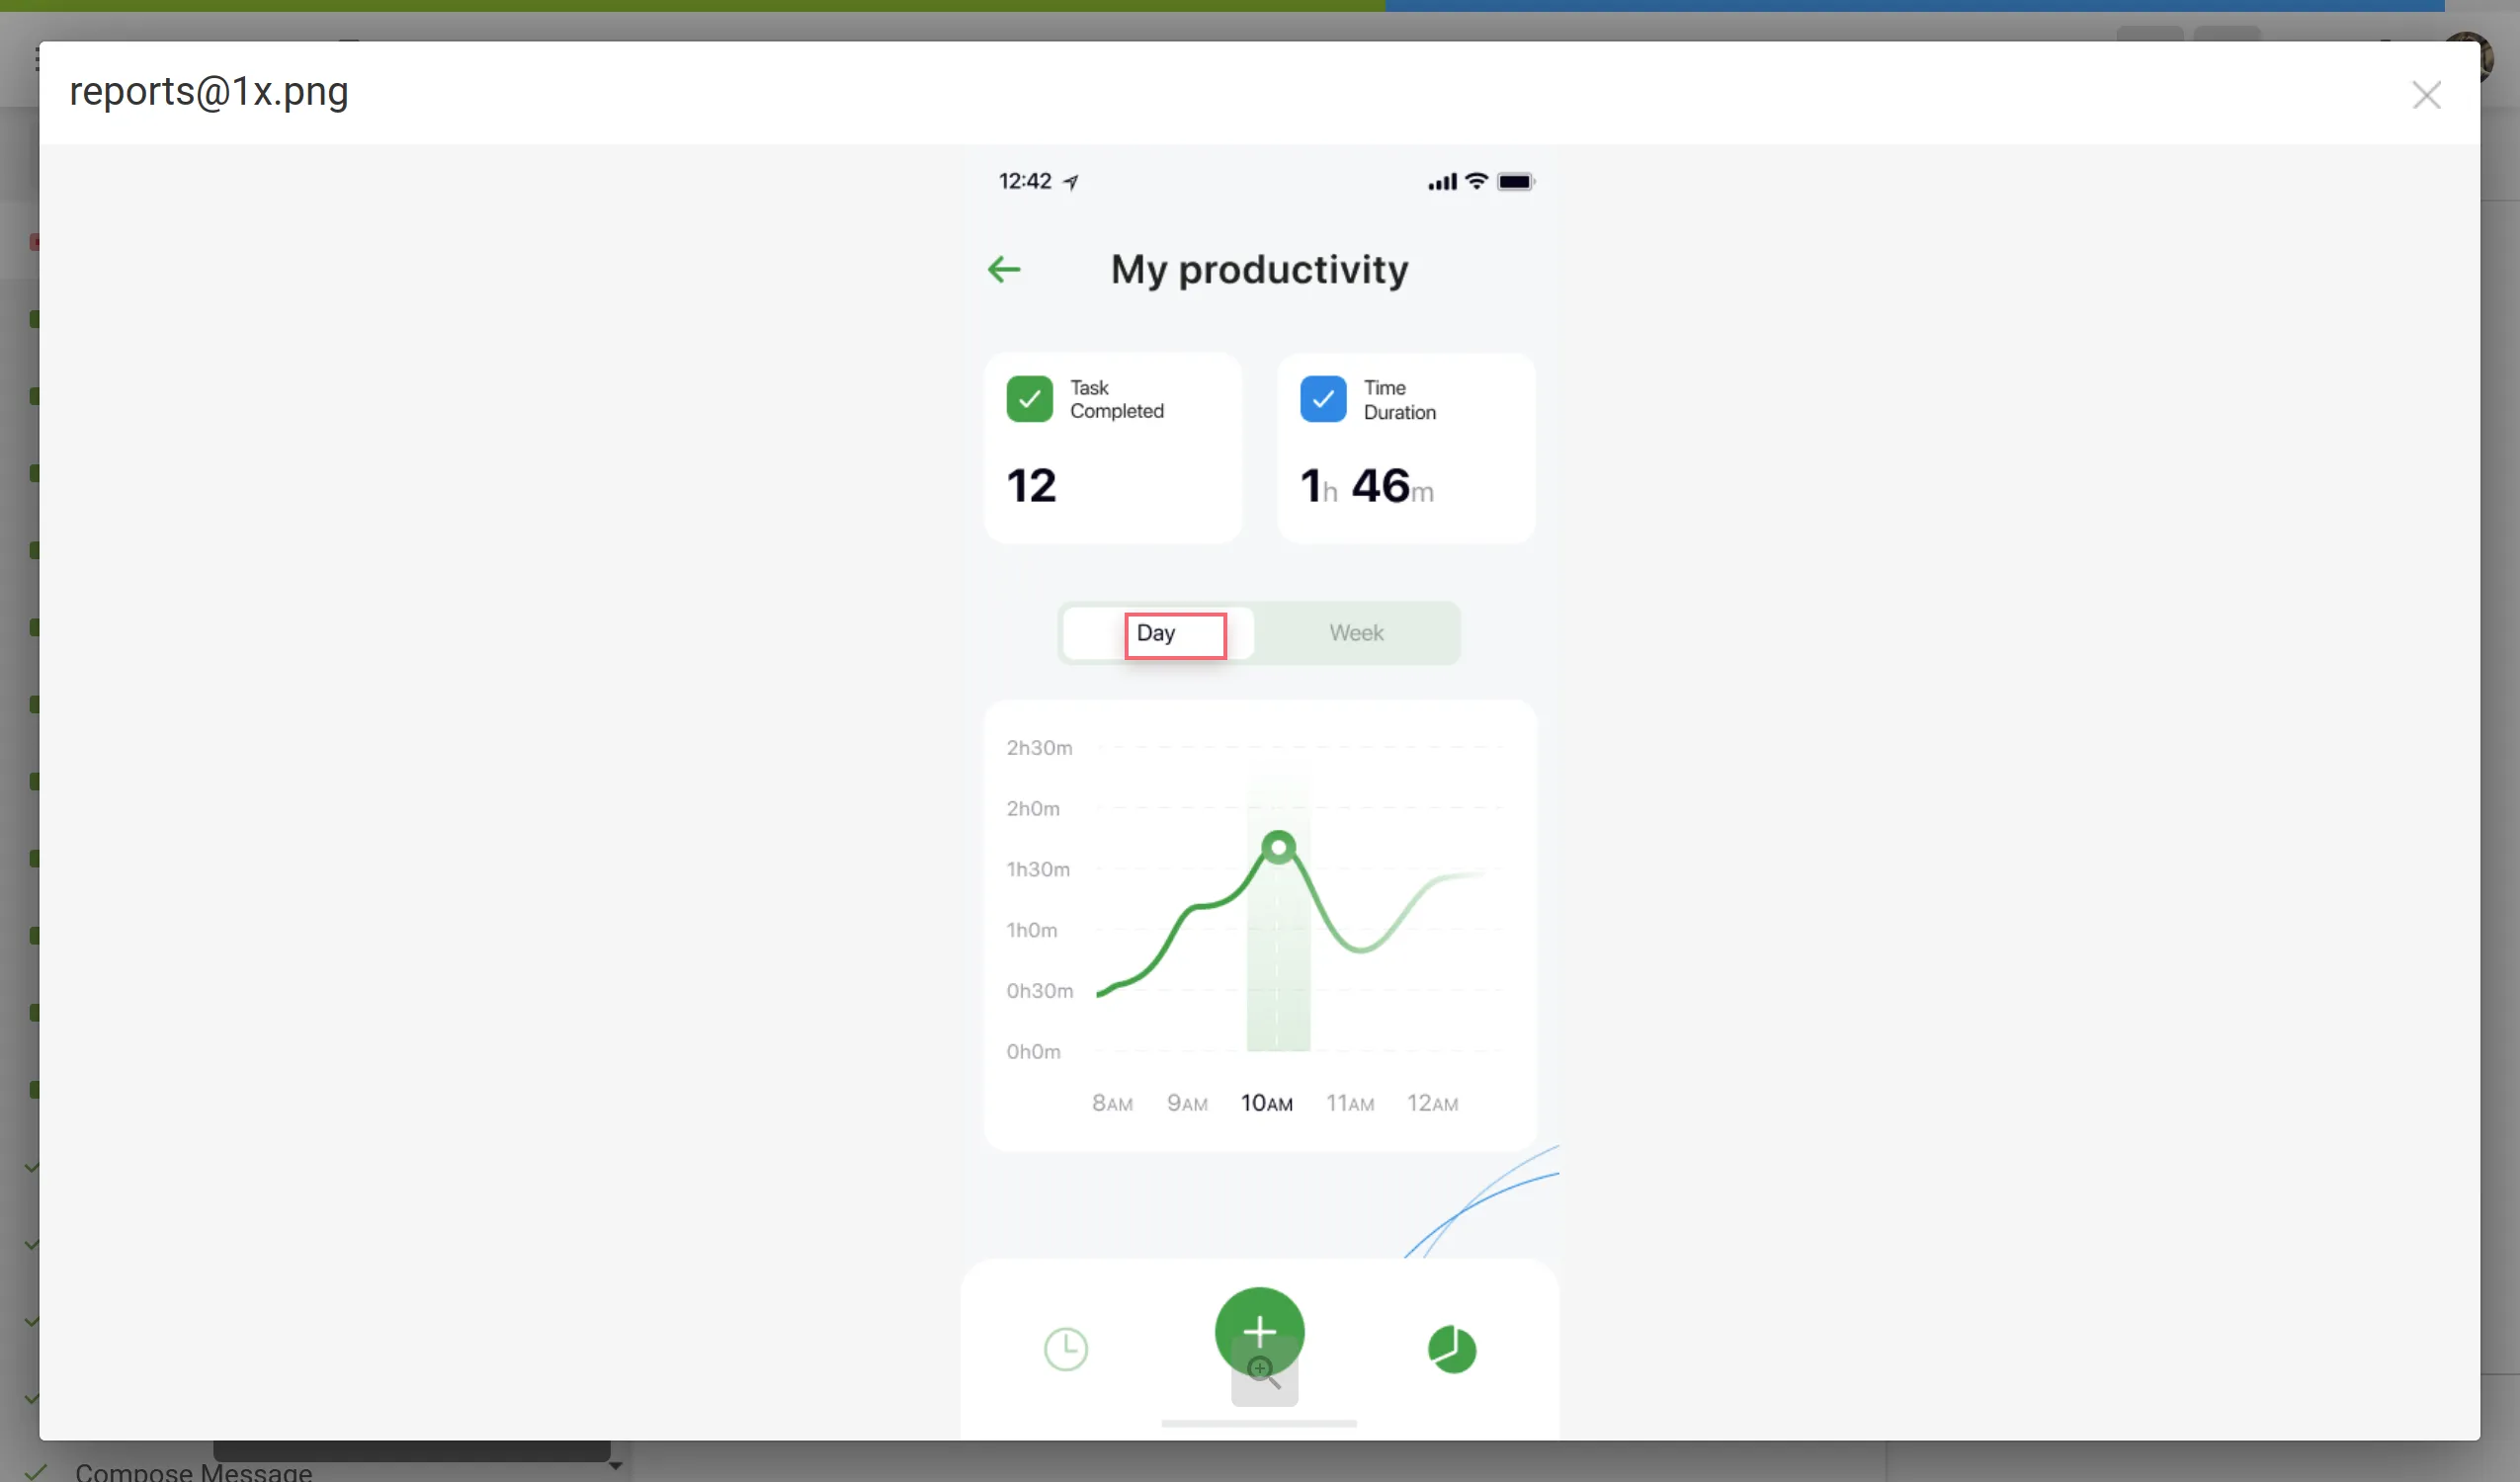 ## [Upload Screenshots](#upload-screenshots) [Section titled “Upload Screenshots”](#upload-screenshots) To upload screenshots into your project, follow these steps: 1. Open your project and select **Screenshots** on the left sidebar. 2. Drag images from your machine, or click **Upload**.  ## [Tag Strings](#tag-strings) [Section titled “Tag Strings”](#tag-strings) To show translators where certain strings are located in the UI tag strings on the screenshots. In Crowdin Enterprise, you can tag strings using the following methods: * Auto tag * Text recognition * Drag and drop ### [Tag Strings Automatically](#tag-strings-automatically) [Section titled “Tag Strings Automatically”](#tag-strings-automatically) Texts within an image will be detected automatically. Then the matching strings will be searched in the project according to the selected filter. As a result, the ones found will be tagged on the screenshot. 1. Open the screenshot with a double click or right-click on the screenshot and select **Edit**. 2. Click . 3. Once the strings are added, click **Save**. 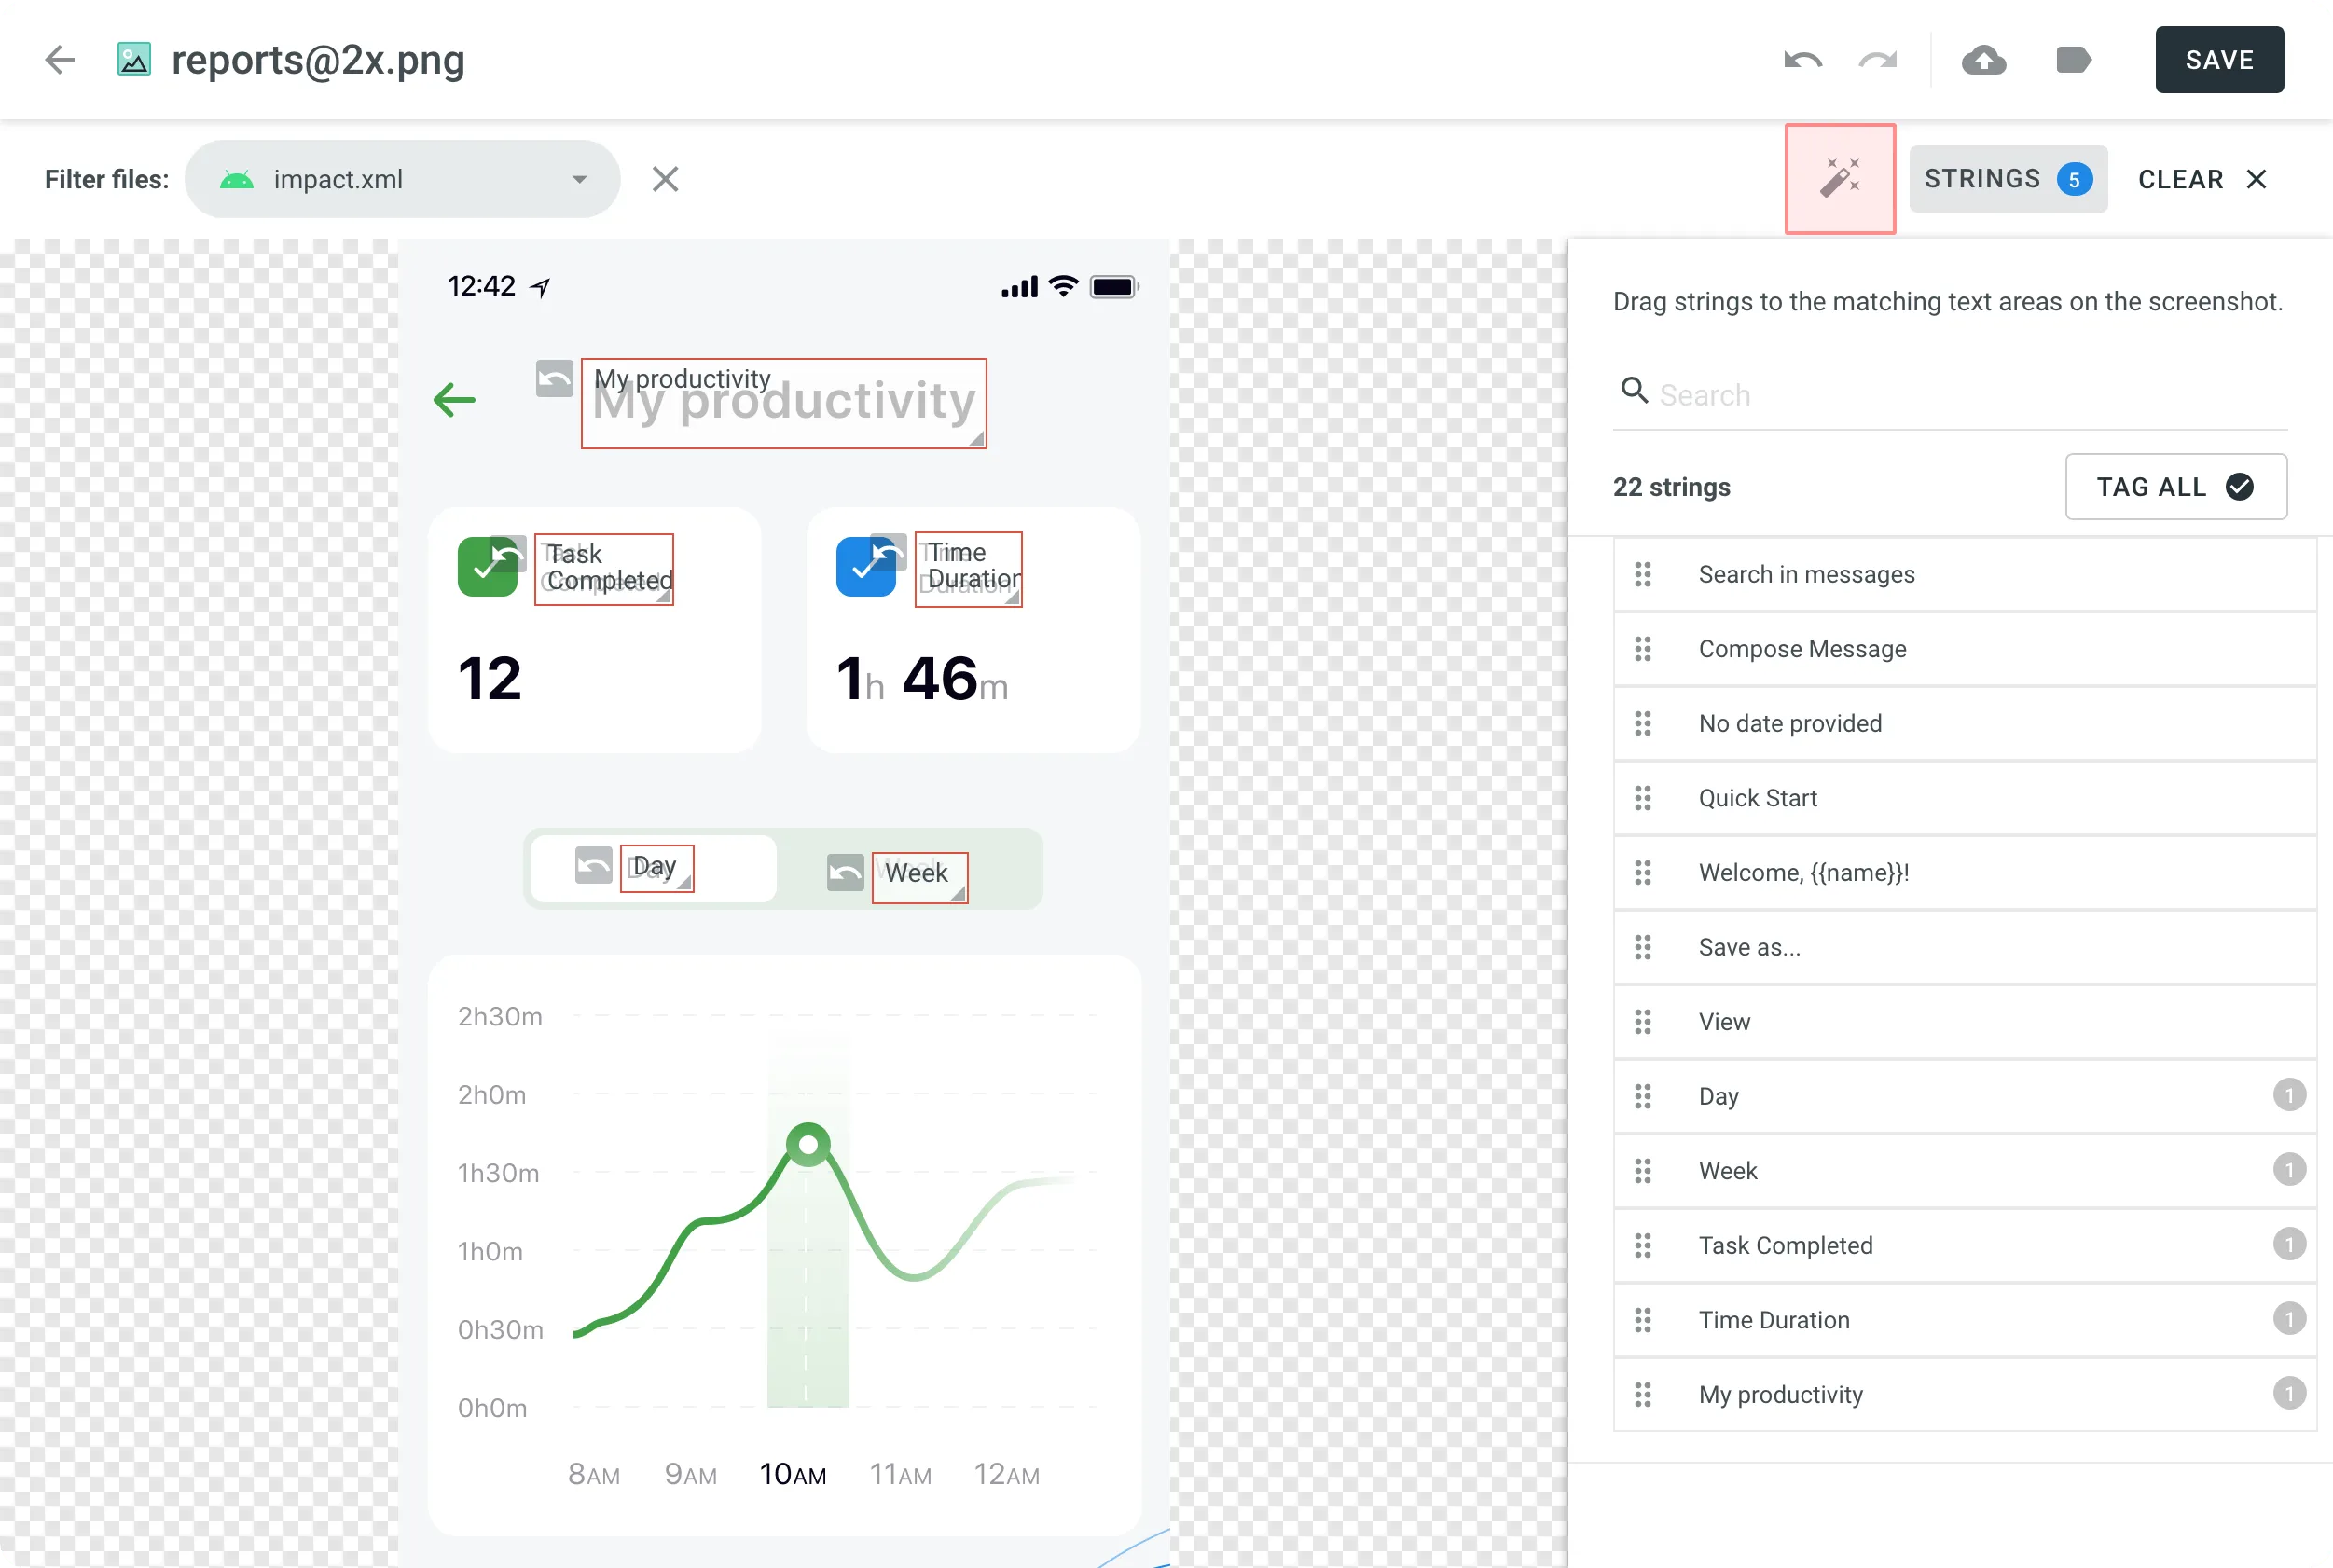 To tag strings automatically on a single screenshot without opening it: 1. Right-click on the needed screenshot. 2. Select **Auto tag**. You can also tag strings automatically on multiple screenshots at once: 1. Select multiple screenshots by holding `Ctrl` or `Shift` . 2. Click . If you use In-Context, you might find helpful its integrated feature for taking screenshots of the website pages. [Adding Screenshots via In-Context ](/developer/in-context-localization/#adding-screenshots-via-in-context)In-Context Localization is a feature that allows you to preview your website or application in Crowdin and translate strings directly in the context. ### [Tag Strings with Text Recognition](#tag-strings-with-text-recognition) [Section titled “Tag Strings with Text Recognition”](#tag-strings-with-text-recognition) The system will search for a string that matches the text you select among all the strings in your project. If several similar strings are found, you will see all of them and be able to select the best-matching one. 1. Open the screenshot with a double click or right-click on the screenshot and select **Edit**. 2. Highlight the text on the screenshot. 3. Once finished tagging all the strings, click **Save**.  ### [Tag Strings Manually](#tag-strings-manually) [Section titled “Tag Strings Manually”](#tag-strings-manually) Drag the listed strings to the text on the screenshot manually. 1. Open the screenshot with a double click or right-click on the screenshot and select **Edit**. 2. Sort and filter the listed strings. You can select all or specific files and search strings by text or context. 3. Drag the needed string from the list in the right panel to the corresponding text on the screenshot. Alternatively, click on the strings to tag them in the screenshot without specifying the exact place where they should appear. 4. *(Optional)* To view additional string details or edit them: * Click the button above the string list to show more details (file name and string context). * Hover over a string and click the to open the **Edit String** dialog. You can: * Update the identifier. * Update the source text. * Add or update the context. * Add or update the labels. * Set the **Max. length of the translated text**. * Click **Save** after making the changes. 5. Click **Save** when you finish tagging. Read more about [String Editing](/enterprise/string-management/#string-editing). To tag all the strings from the selected file to your screenshot, follow these steps: 1. Select the file you need. 2. Click **Tag All** > **Save**. ### [Drag and Scroll Screenshots](#drag-and-scroll-screenshots) [Section titled “Drag and Scroll Screenshots”](#drag-and-scroll-screenshots) When tagging high-resolution screenshots, you can hold `Ctrl` to drag and scroll the screenshot with a mouse revealing the remaining part. ### [Removing Tagged Strings from Screenshot](#removing-tagged-strings-from-screenshot) [Section titled “Removing Tagged Strings from Screenshot”](#removing-tagged-strings-from-screenshot) If you need to remove all the strings tagged on the screenshot, click **Clear**. ## [Labels](#labels) [Section titled “Labels”](#labels) Use labels in your project for an easy way to organize screenshots by certain topics. Once you add labels to your screenshots, you can filter them by added labels. If you already use labels for your source strings, you can also use the same labels for screenshots. [Managing Project Labels ](/enterprise/project-settings/labels/)Learn how to make your Crowdin Enterprise project labels. ### [Adding Labels to Screenshots](#adding-labels-to-screenshots) [Section titled “Adding Labels to Screenshots”](#adding-labels-to-screenshots) There are a few possible ways you can add labels to the screenshots. ##### [Add labels to one screenshot at a time](#add-labels-to-one-screenshot-at-a-time) [Section titled “Add labels to one screenshot at a time”](#add-labels-to-one-screenshot-at-a-time) 1. Open the screenshot with a double-click. 2. Click . 3. Select needed labels in the **Labels** field. 4. Click **Save**. 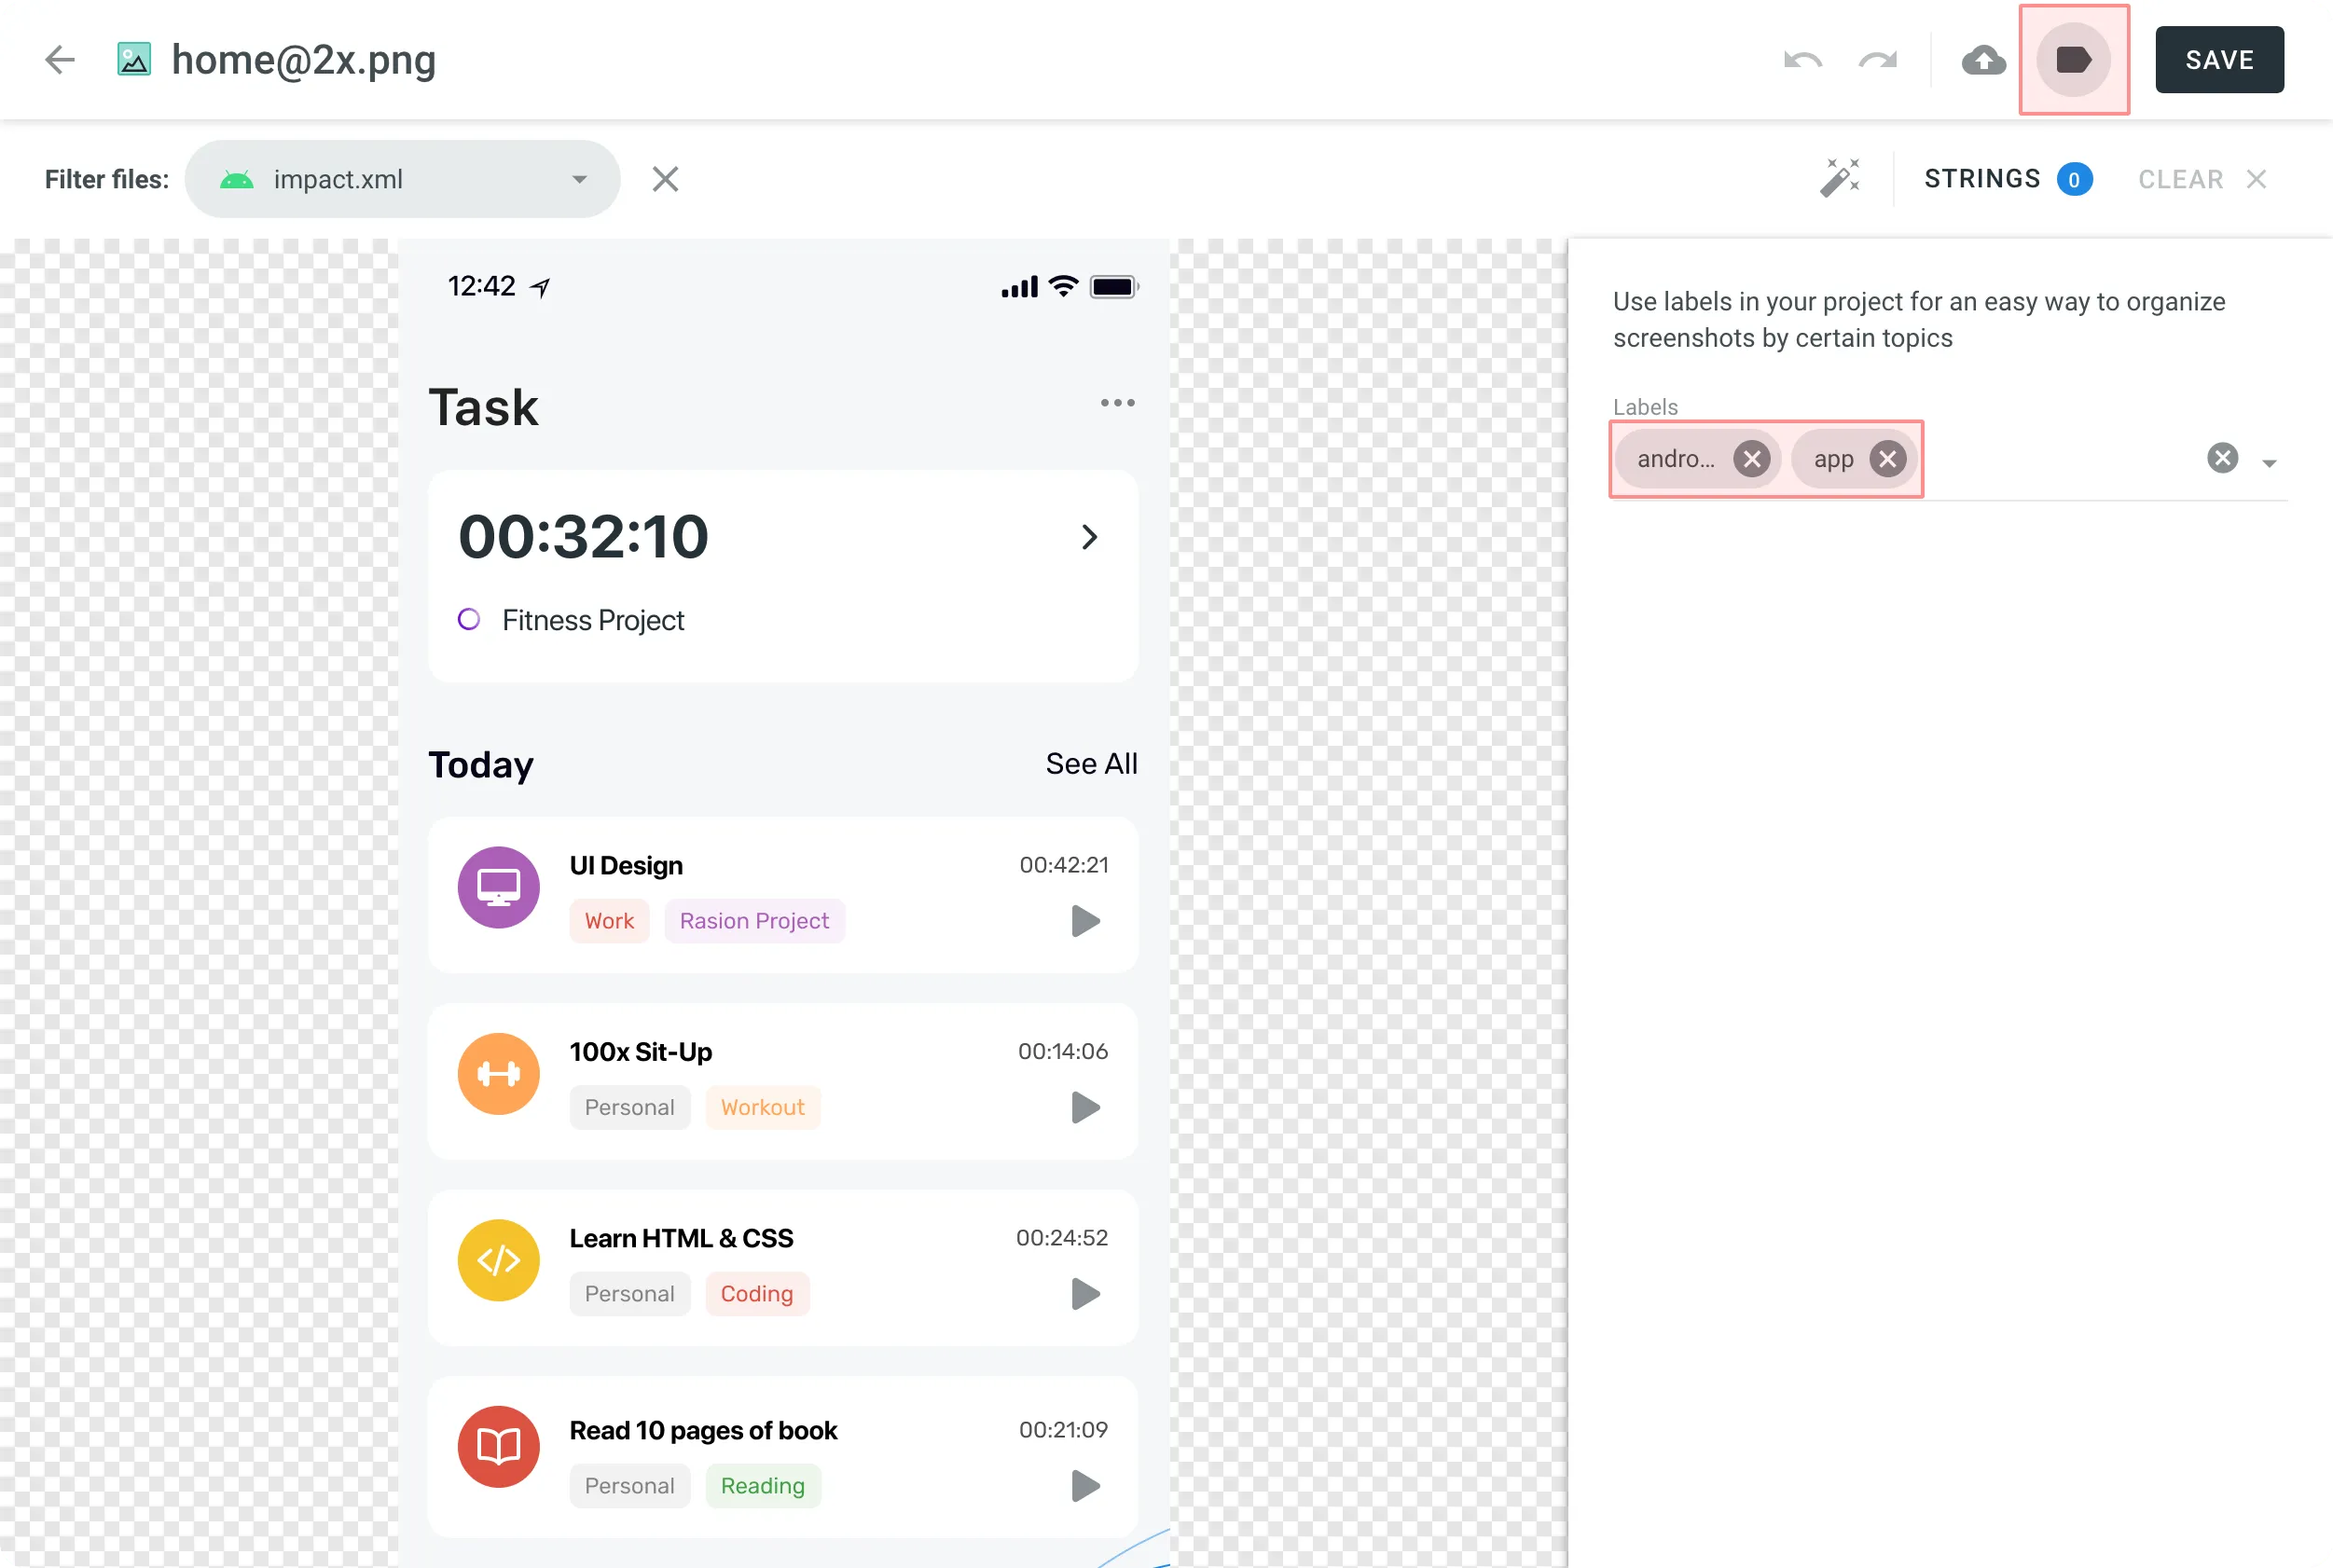 ##### [Add labels to multiple screenshots](#add-labels-to-multiple-screenshots) [Section titled “Add labels to multiple screenshots”](#add-labels-to-multiple-screenshots) 1. Select multiple screenshots you want to add the same labels to holding `Ctrl` or `Shift` . 2. Click . 3. Select needed labels in the list. 4. Click **Apply**. 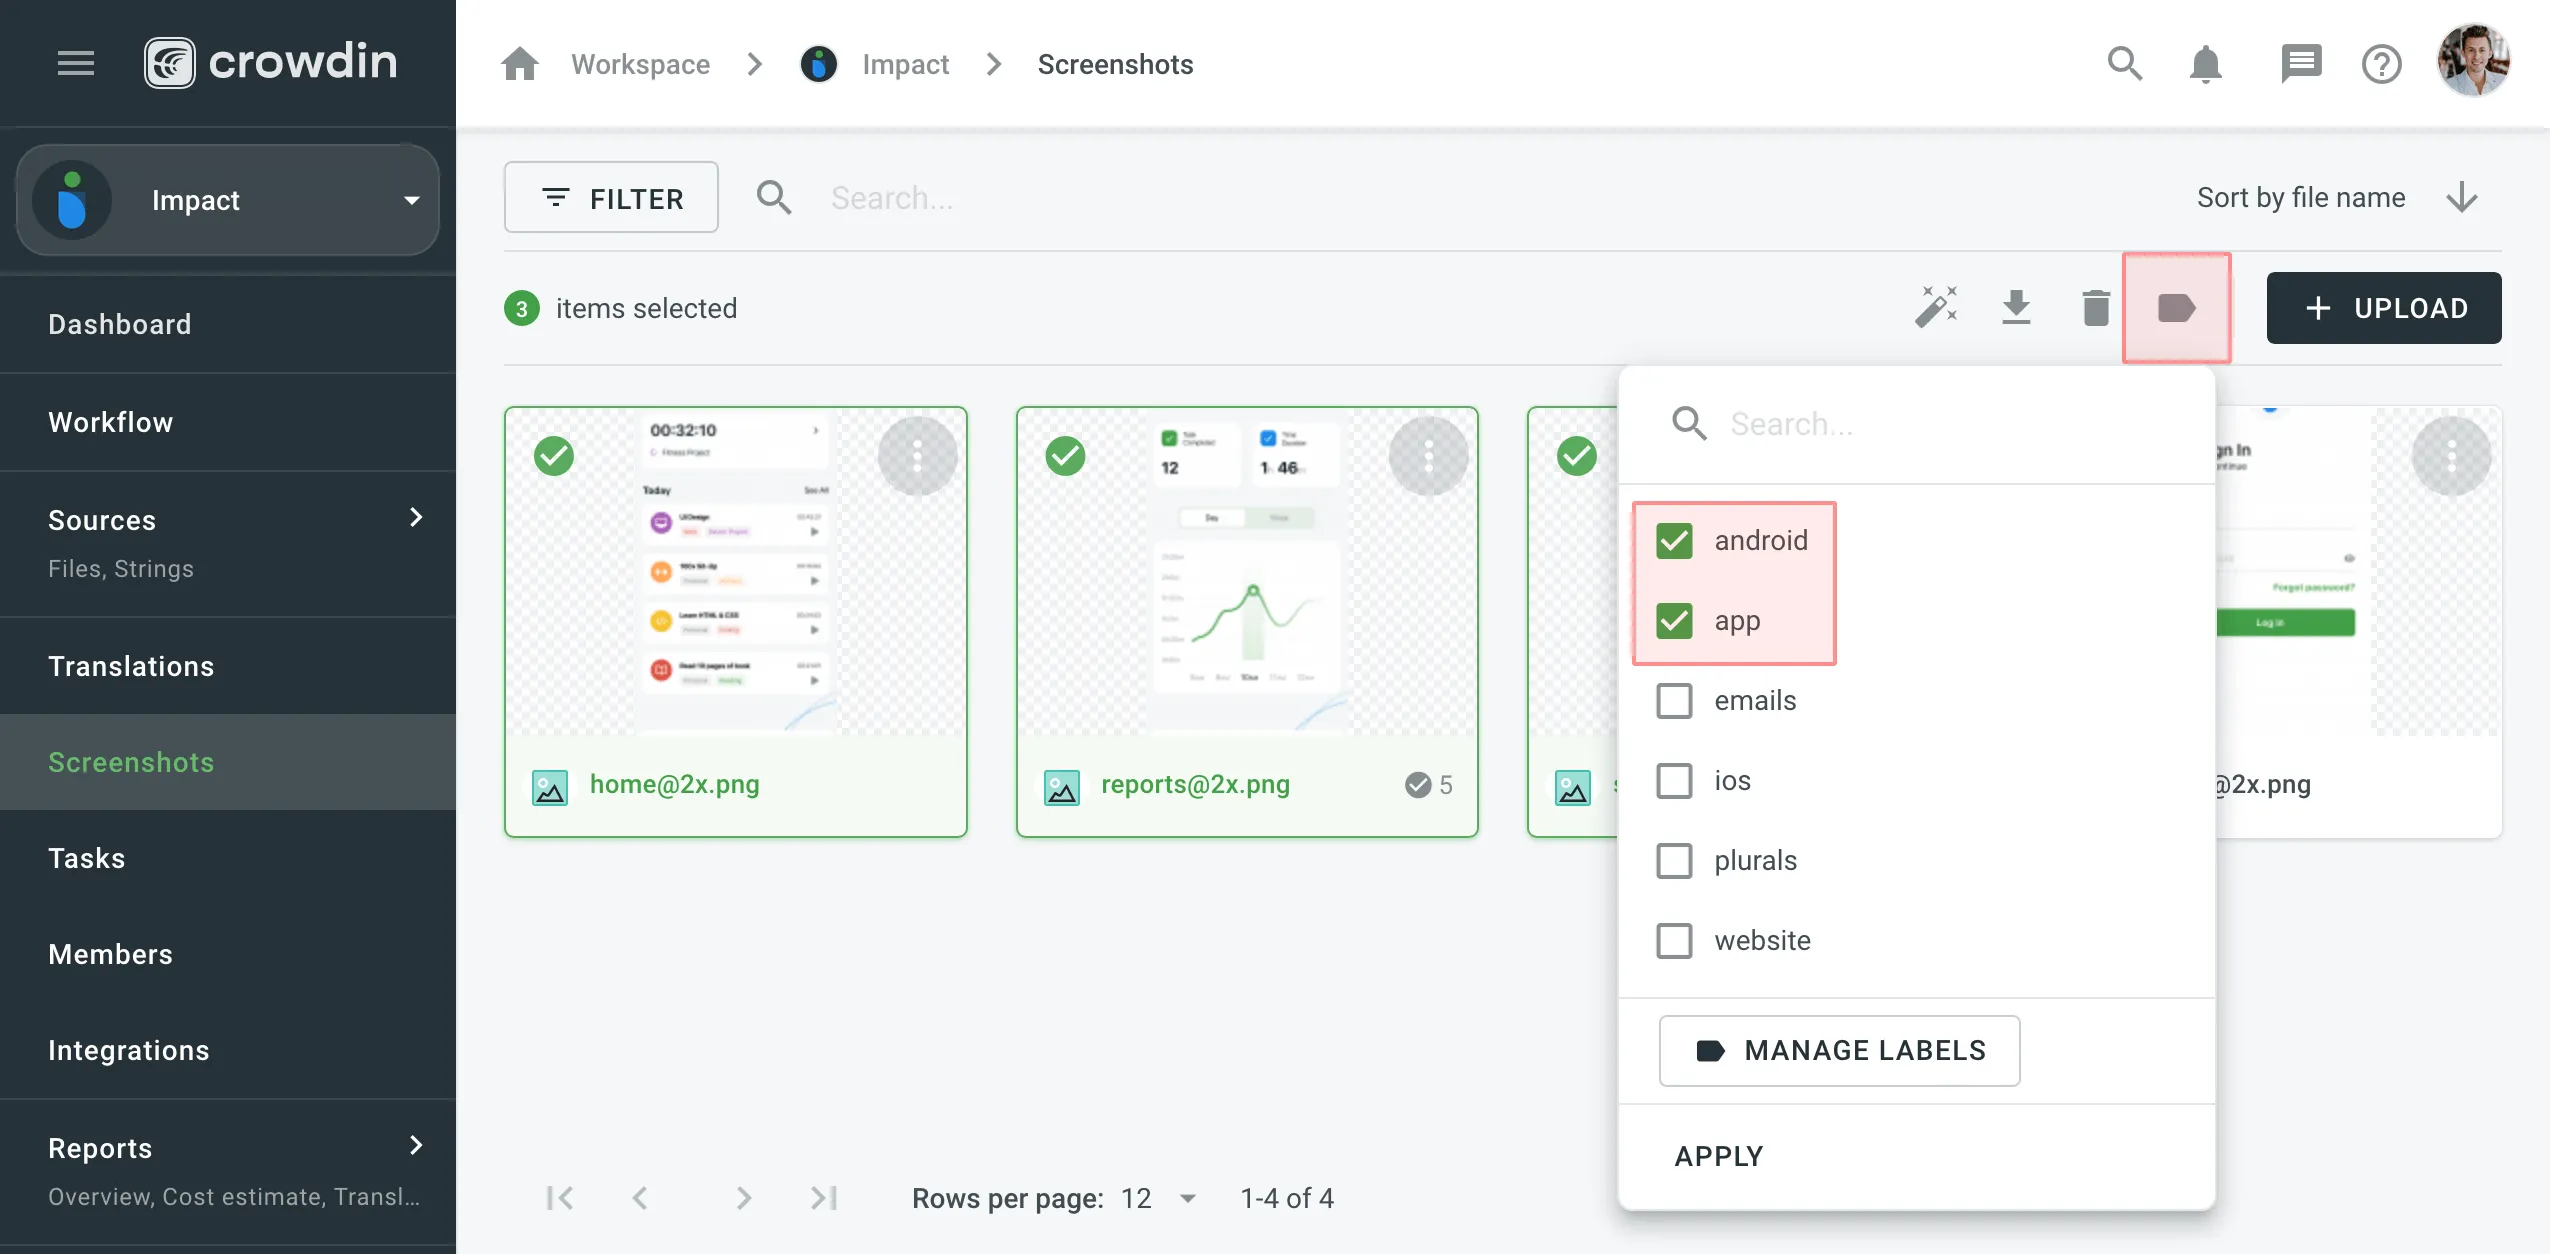 ## [Update Screenshots](#update-screenshots) [Section titled “Update Screenshots”](#update-screenshots) You can upload a new screenshot that will replace the current one. The already tagged strings that are relevant would remain tagged. If the text on the screenshot changed its location, strings would remain tagged but on the new locations. To update the screenshot, follow these steps: 1. Open the screenshot with a double click or right-click on the screenshot and select **Edit**. 2. Click and select a new screenshot from your machine or use Drag\&Drop. 3. Click **Save**. ## [Rename Screenshots](#rename-screenshots) [Section titled “Rename Screenshots”](#rename-screenshots) To rename a screenshot, follow these steps: 1. Right-click on the needed screenshot and select **Rename**. 2. Specify a new name. 3. Click **Save**. ## [Download Screenshots](#download-screenshots) [Section titled “Download Screenshots”](#download-screenshots) You can download screenshots and reuse them in other projects or elsewhere. To download screenshots, follow these steps: 1. Select one or multiple screenshots holding `Ctrl` or `Shift` . 2. Click **Download**. Alternatively, right-click on the needed screenshot and select **Download**. ## [Delete Screenshots](#delete-screenshots) [Section titled “Delete Screenshots”](#delete-screenshots) To delete a screenshot, follow these steps: 1. Select one or multiple screenshots holding `Ctrl` or `Shift` . 2. Click **Delete**.
# Sketch Plugin
> Start localizing at the design stage
With the Crowdin plugin for Sketch, you can use texts from Crowdin Enterprise in your designs to save time for both designers and developers. These could include original or translated texts. If necessary, you can add new ones (e.g., dialog titles, button labels) and send them to translators in Crowdin Enterprise. ## [Use Cases](#use-cases) [Section titled “Use Cases”](#use-cases) * Quickly generate multilingual creative assets. * Translate mockups and test them in different languages before the programming starts. * Stop using ‘Lorem Ipsum’, add real texts from Crowdin Enterprise to your prototypes instead. * Create and upload source strings from your designs to your Crowdin Enterprise project. This way, uploaded strings could be used by developers, which reduces time spent on development. * Upload tagged screenshots to your Crowdin Enterprise project. ## [Installation](#installation) [Section titled “Installation”](#installation) You can [download the latest release](https://github.com/crowdin/sketch-crowdin) from our GitHub repository. 1. Download the installation file. 2. Unzip it. 3. Double-click on the *sketch-crowdin.sketchplugin* file for auto installation. Crowdin plugin for Sketch can also be installed with [Sketch Runner](https://sketchrunner.com/). ## [Configuration](#configuration) [Section titled “Configuration”](#configuration) ### [Setting up Credentials](#setting-up-credentials) [Section titled “Setting up Credentials”](#setting-up-credentials) To specify your Crowdin Enterprise credentials in Sketch, follow these steps: 1. Click **Plugins > Crowdin**. 2. Switch to **Settings**. 3. Provide your Personal Access Token. 4. Specify your organization domain name. 5. Click **Connect to Crowdin**. 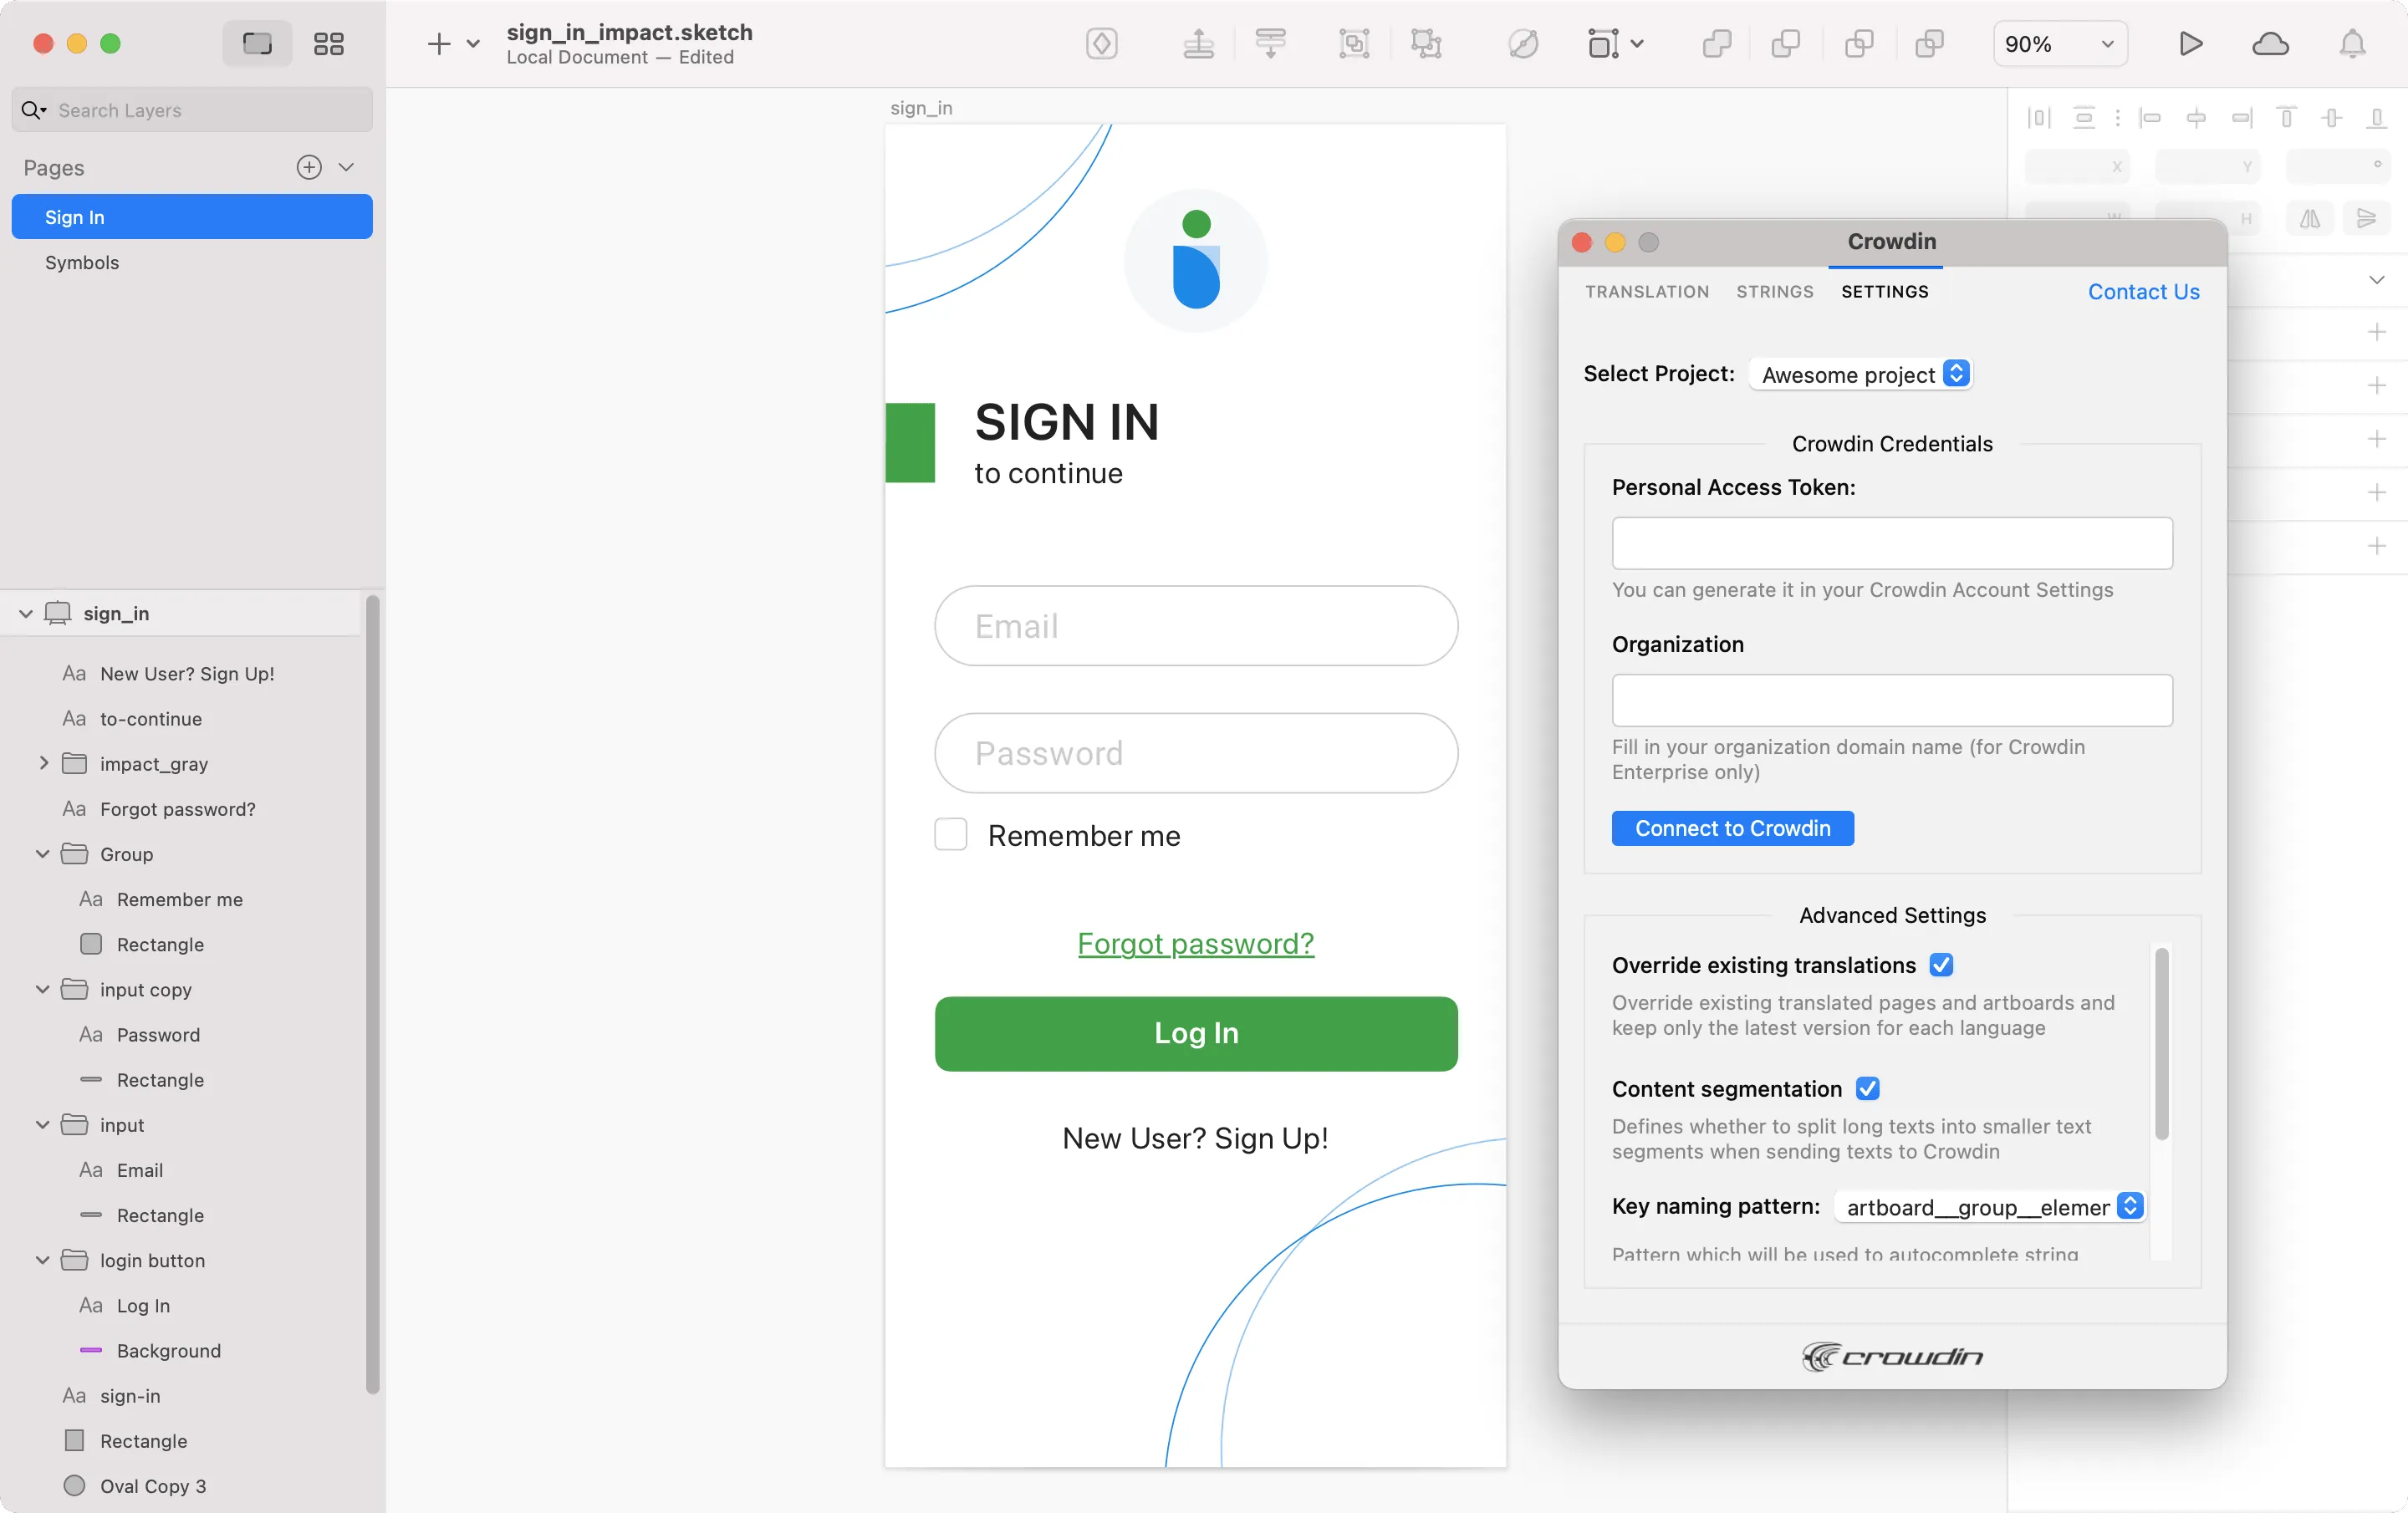 To generate a new token in Crowdin Enterprise, follow these steps: 1. Go to **Account Settings > Access tokens**, and click **New Token**. 2. Specify *Token Name* select *Scopes* and *Projects*, click **Create**. ### [Selecting a Project](#selecting-a-project) [Section titled “Selecting a Project”](#selecting-a-project) To select the Crowdin Enterprise project you’d like to work with, click the **Select Project** drop-down menu in **Settings**, and select a project from the list. Later on, you can use the same drop-down menu to switch to another project if needed. Additionally, you can select the specific branch your content will be uploaded to. 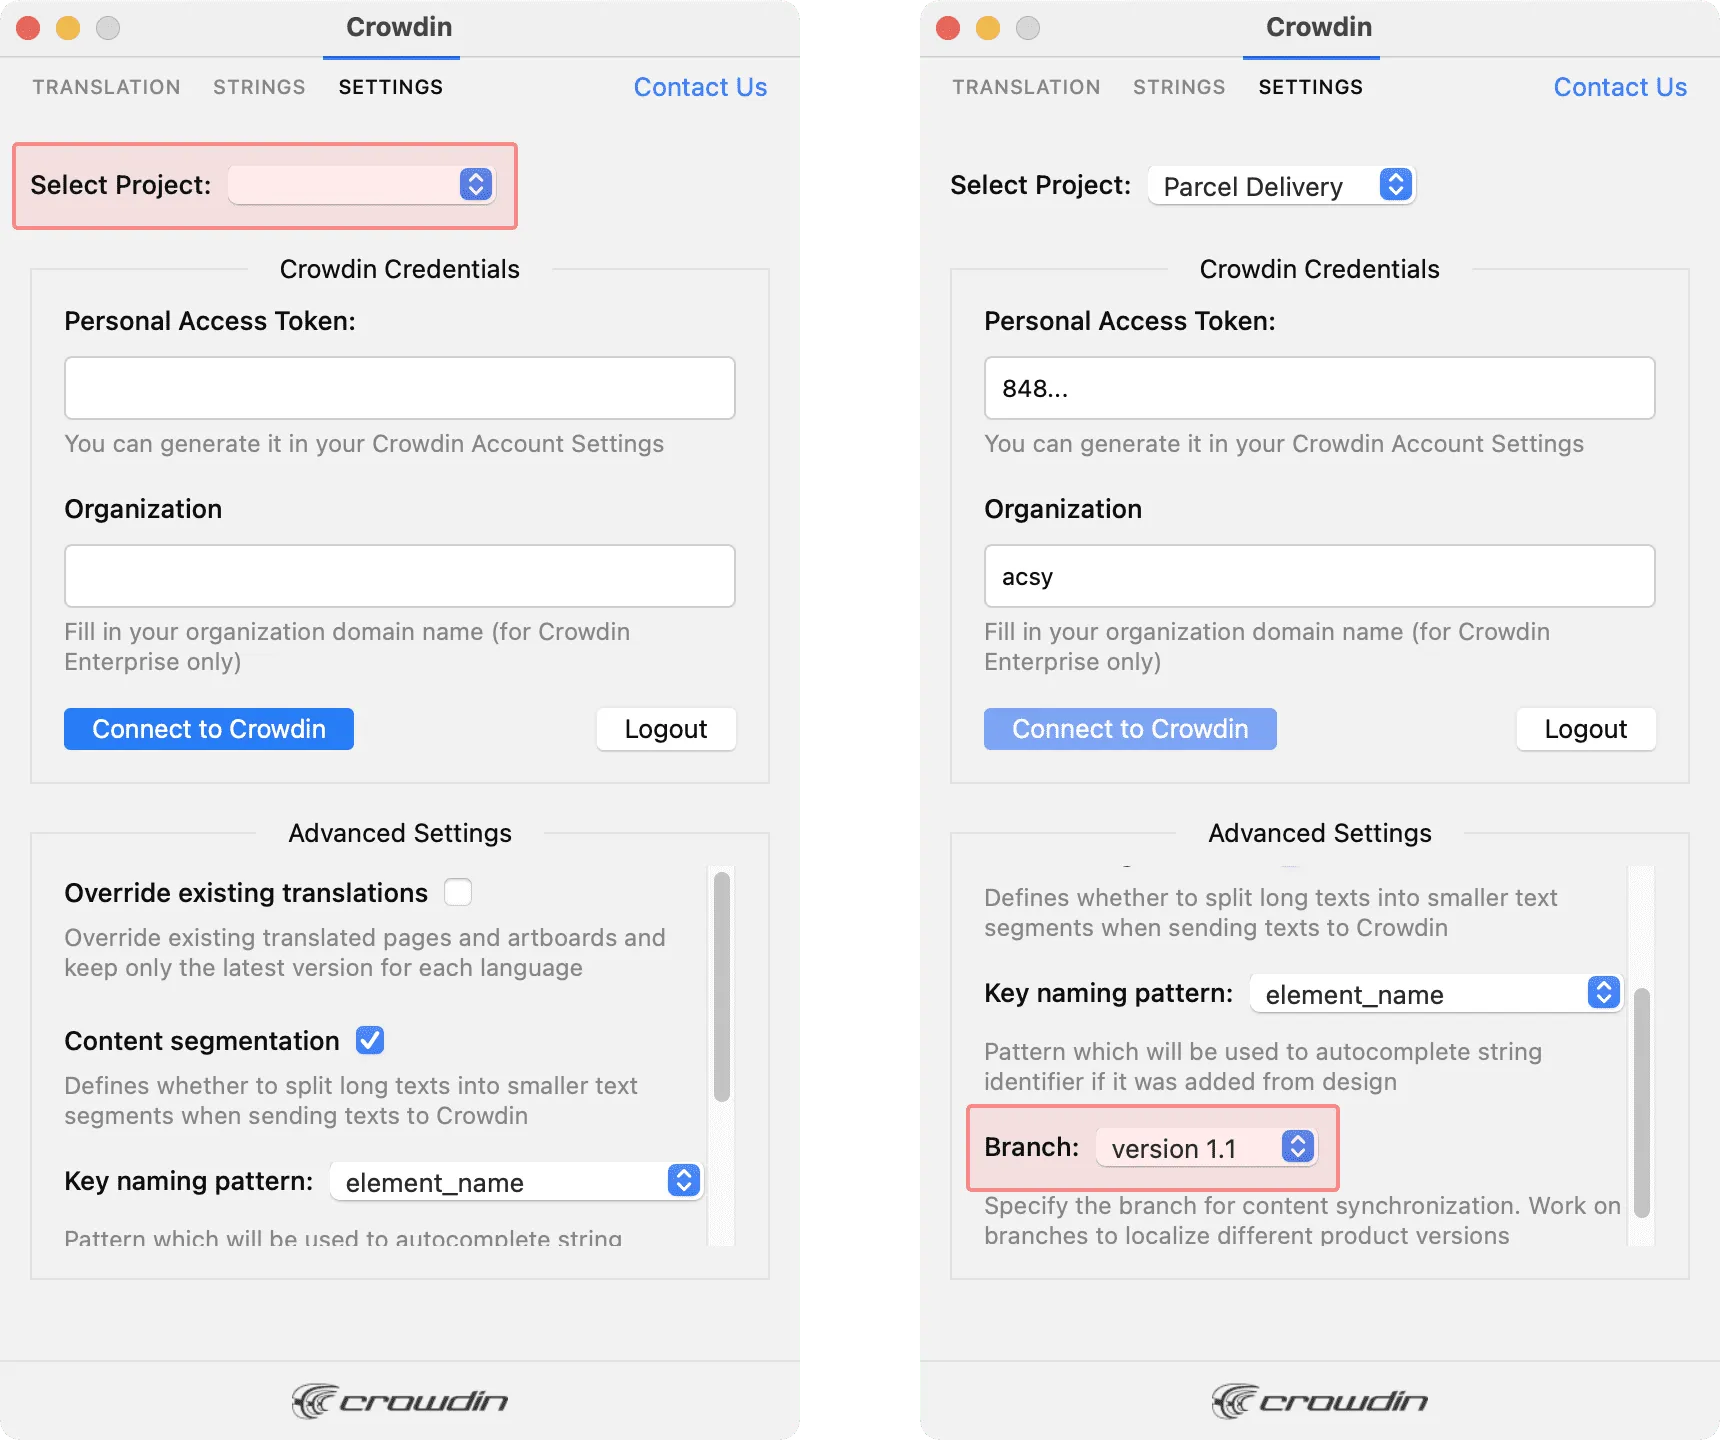 ## [UI Localization](#ui-localization) [Section titled “UI Localization”](#ui-localization) Use the *Strings* tab when localizing UI and working on dynamic pages with your development and marketing teams. In this tab, you can add source strings from Crowdin Enterprise to your designs in Sketch in a click. After the texts are used in the designs, you can automatically upload tagged screenshots for translators’ reference back to Crowdin Enterprise. ### [Using Source Strings from Crowdin in Sketch](#using-source-strings-from-crowdin-in-sketch) [Section titled “Using Source Strings from Crowdin in Sketch”](#using-source-strings-from-crowdin-in-sketch) 1. Open the Crowdin plugin for Sketch. 2. In the *Strings* tab, use the *Search* field to find the specific copy. You can search strings by source text, string identifier, or context. 3. Select the text layer you want to add text to and click on the needed string. 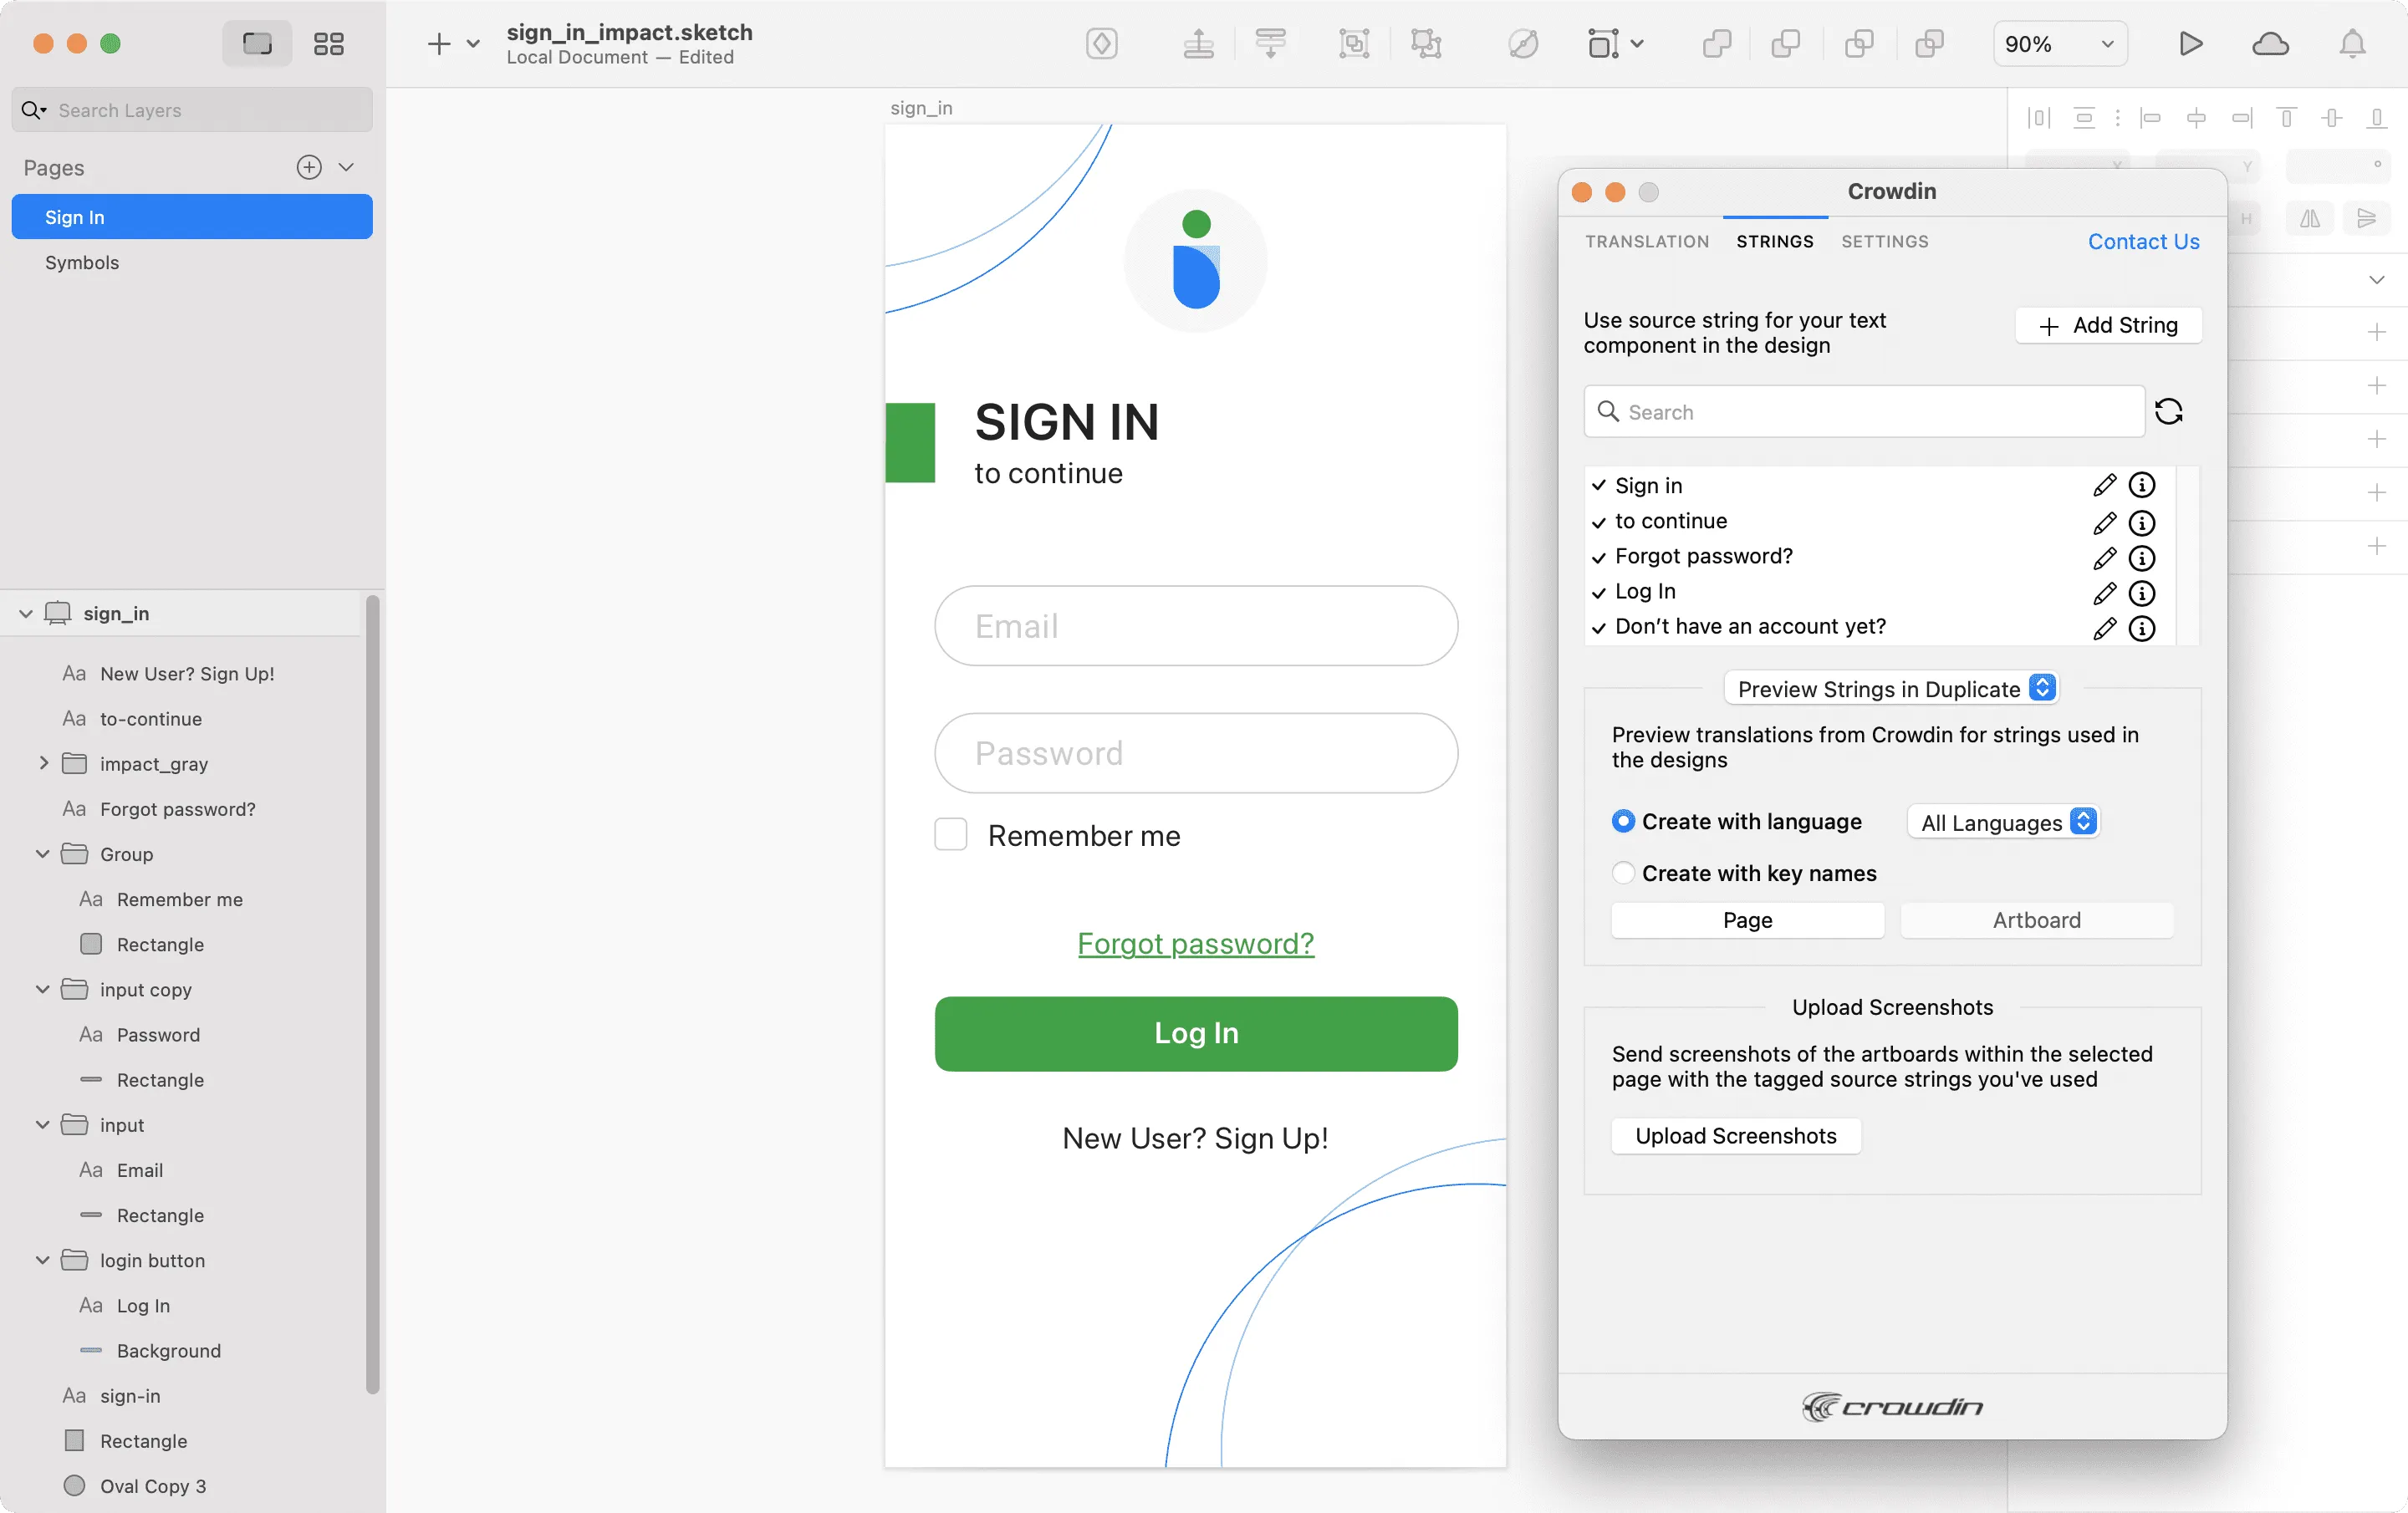 After using the source strings from Crowdin Enterprise in your designs, you can [preview translations](#previewing-strings) for these strings in Sketch and [upload screenshots](#uploading-tagged-screenshots-to-crowdin) for them to your Crowdin Enterprise project. ### [Adding Source Strings from Sketch to Crowdin](#adding-source-strings-from-sketch-to-crowdin) [Section titled “Adding Source Strings from Sketch to Crowdin”](#adding-source-strings-from-sketch-to-crowdin) You can add the strings that are already used in the designs or create and add completely new strings. 1. Open the Crowdin plugin for Sketch. 2. To add the strings used in the designs, select the whole artboard, multiple artboards, or the needed strings on the artboards. Alternatively, skip this step if you want to add a new string. 3. In the *Strings* tab, click **Add String**. 4. In the appeared dialog, fill in the required fields. 5. (Optional) To add labels to the strings, alternately select them from the **Label** drop-down menu and click **Save**. 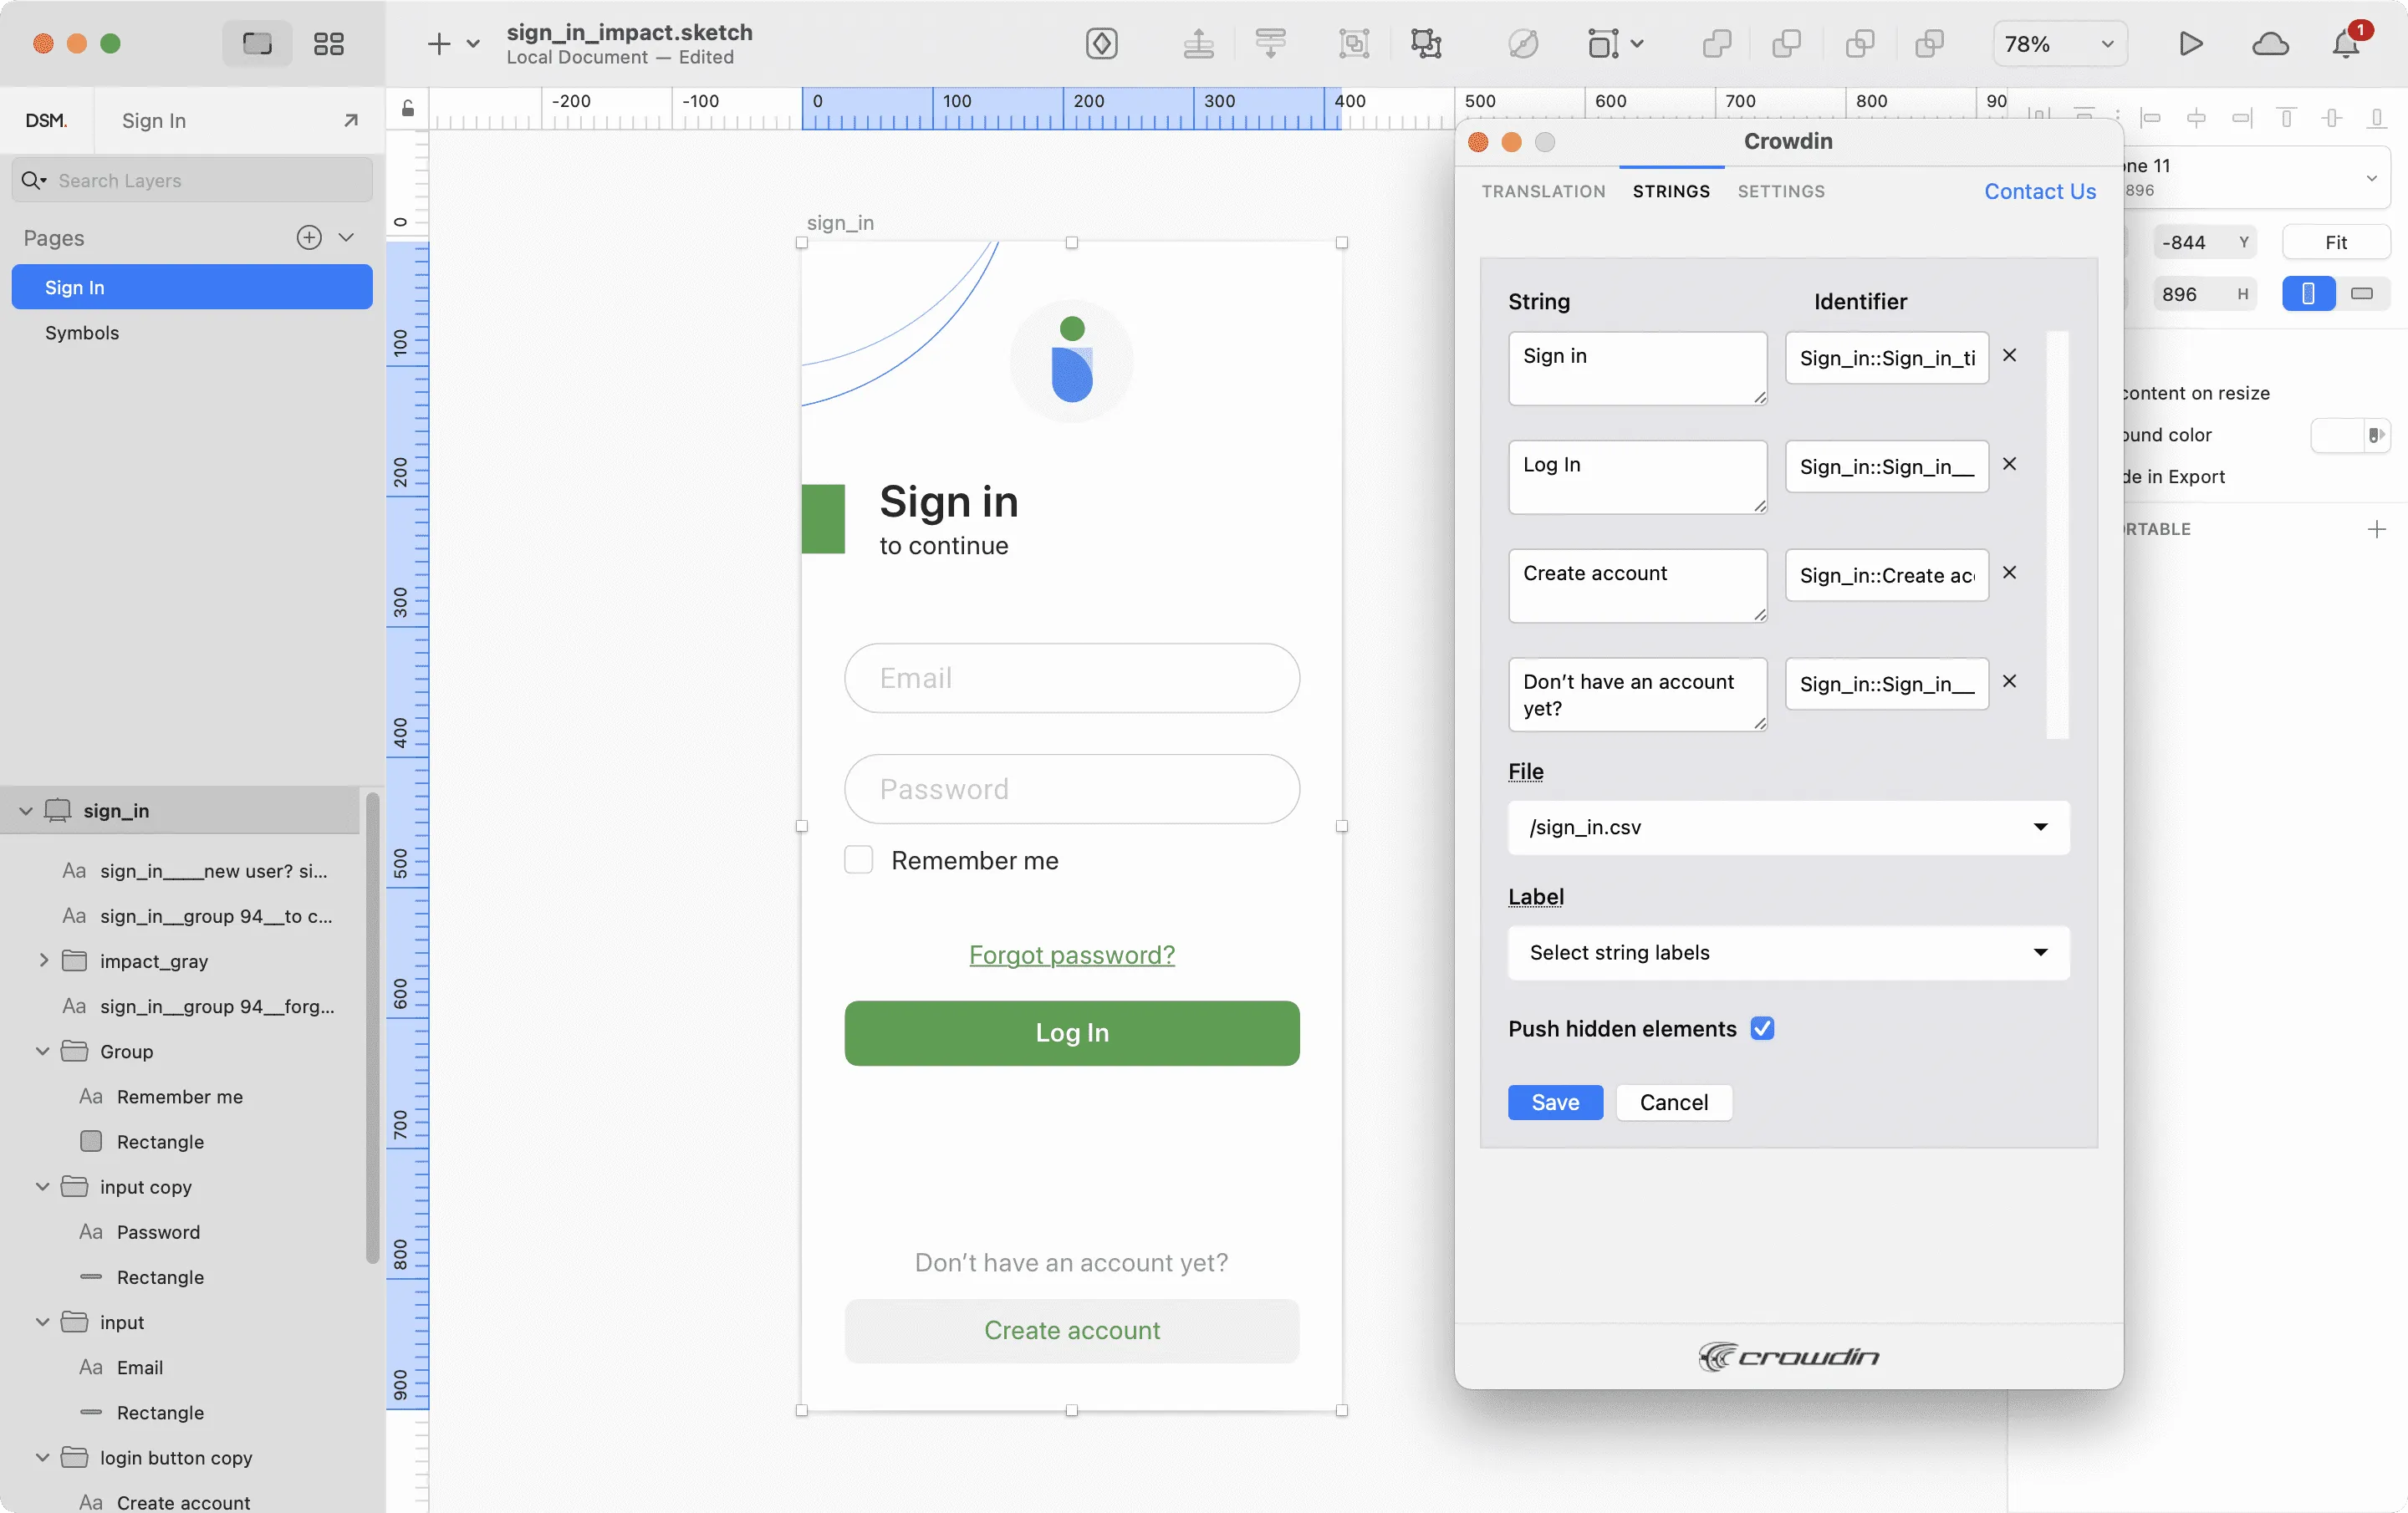 To add the same strings into multiple files in Crowdin Enterprise, alternately select the needed files from the **File** drop-down menu. If some artboards contain hidden elements that should not be added to Crowdin Enterprise, clear the **Push hidden elements** option. Added strings will be transferred to your Crowdin Enterprise project and also will be displayed in the list of the **Strings** tab. You can edit or delete the strings from the same list anytime. The respective changes will also be applied to the strings in your Crowdin Enterprise project. ### [Key Naming Pattern Settings](#key-naming-pattern-settings) [Section titled “Key Naming Pattern Settings”](#key-naming-pattern-settings) To simplify adding strings from Sketch to the Crowdin Enterprise project, you can set up the desired key naming pattern for the source string identifiers in the plugin settings. The Crowdin plugin for Sketch will suggest the string identifiers for new strings based on the selected pattern. While adding new source strings, you can always edit the suggested identifier to the preferred look. To select the key naming pattern, follow these steps: 1. Open the Crowdin plugin for Sketch. 2. Switch to **Settings**. 3. In the *Key naming pattern* section, select the preferred option from the drop-down menu. ### [Uploading Tagged Screenshots to Crowdin](#uploading-tagged-screenshots-to-crowdin) [Section titled “Uploading Tagged Screenshots to Crowdin”](#uploading-tagged-screenshots-to-crowdin) 1. Open the Crowdin plugin for Sketch. 2. In the *Strings* tab, use texts from the Crowdin Enterprise project in your designs. Click **Upload Screenshots** to upload screenshots of the artboards that include the used texts. 3. To update screenshots on Crowdin Enterprise, click **Upload Screenshots** again. 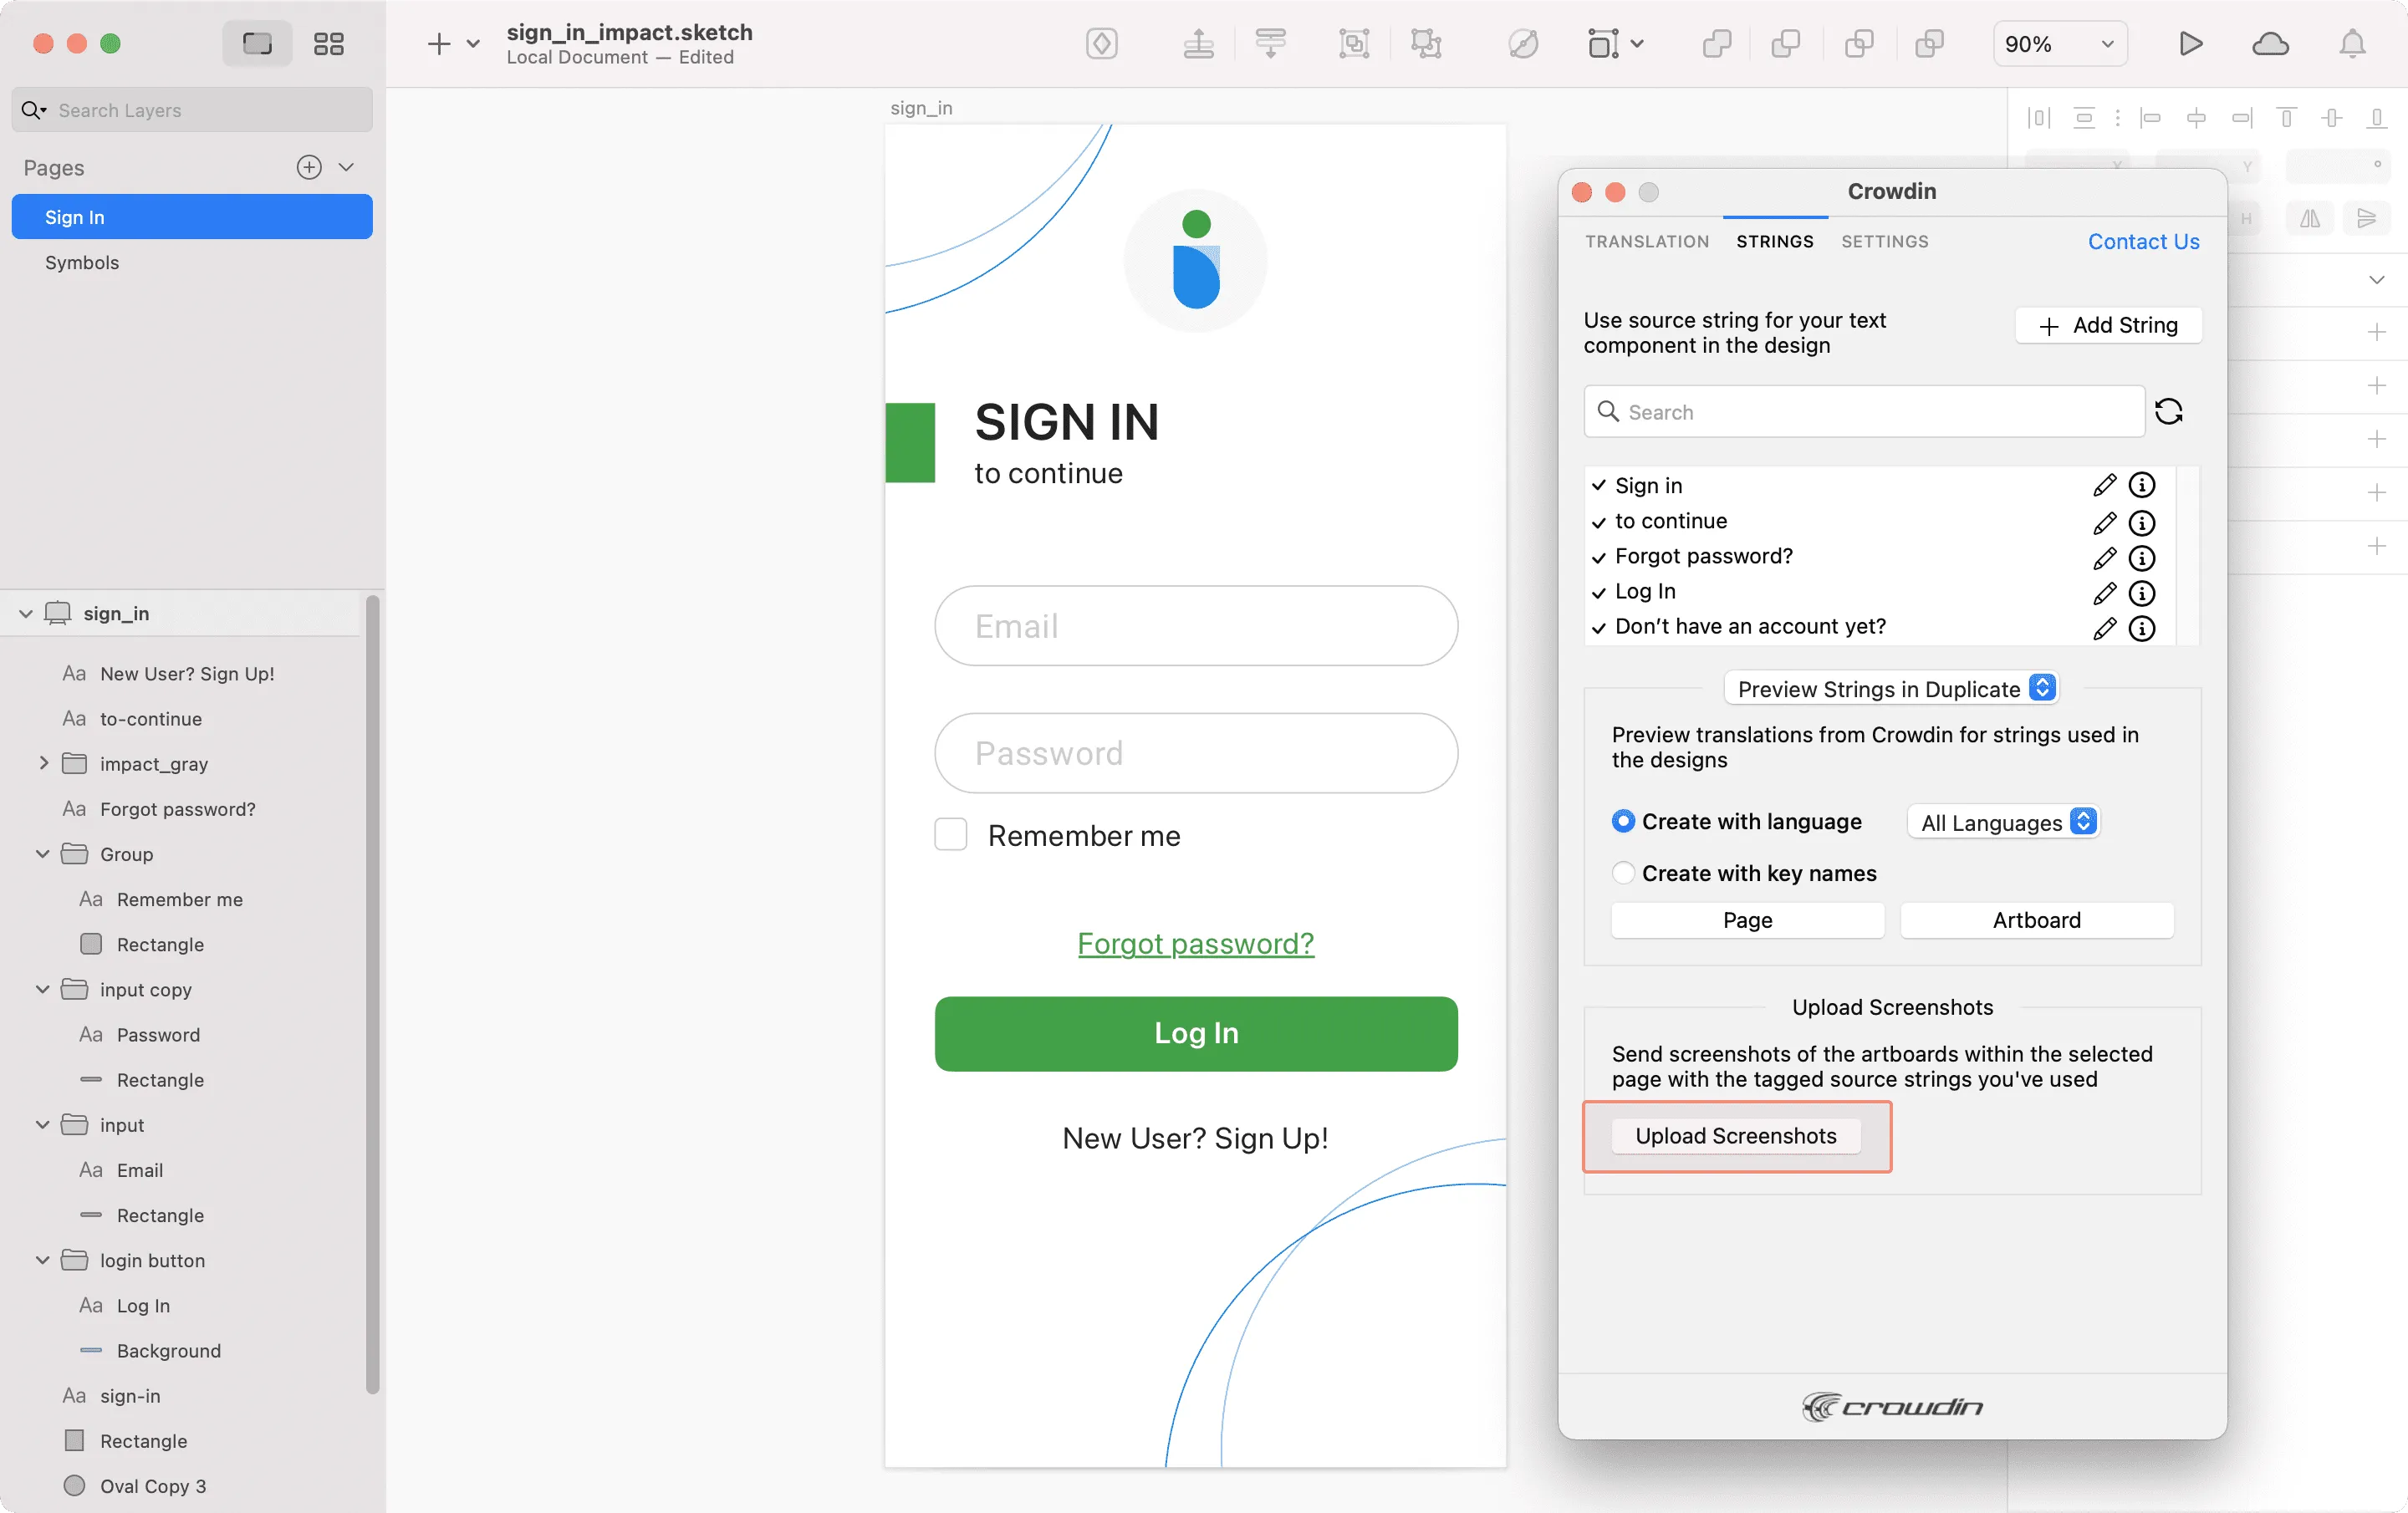 Read more about [Screenshots](/enterprise/screenshots/). ### [Previewing Strings](#previewing-strings) [Section titled “Previewing Strings”](#previewing-strings) Preview translations from Crowdin Enterprise for the strings used in the designs in Sketch. You can preview translations in the new frames or the original ones. When previewing translations in the new frames, you can populate them with the actual translations or with string keys for further use by developers. To preview strings populated with translations, follow these steps: 1. Open the Crowdin plugin for Sketch. 2. In the *Strings* tab, *Preview Strings* section, select *Preview in duplicated artboards* or *Preview in the current artboards*. 3. Select *Create with language*. 4. Select the target language you want to preview translations for. You can also choose *All languages*. 5. Choose the content you want to preview in Sketch. Select *Page* or *Artboard*. 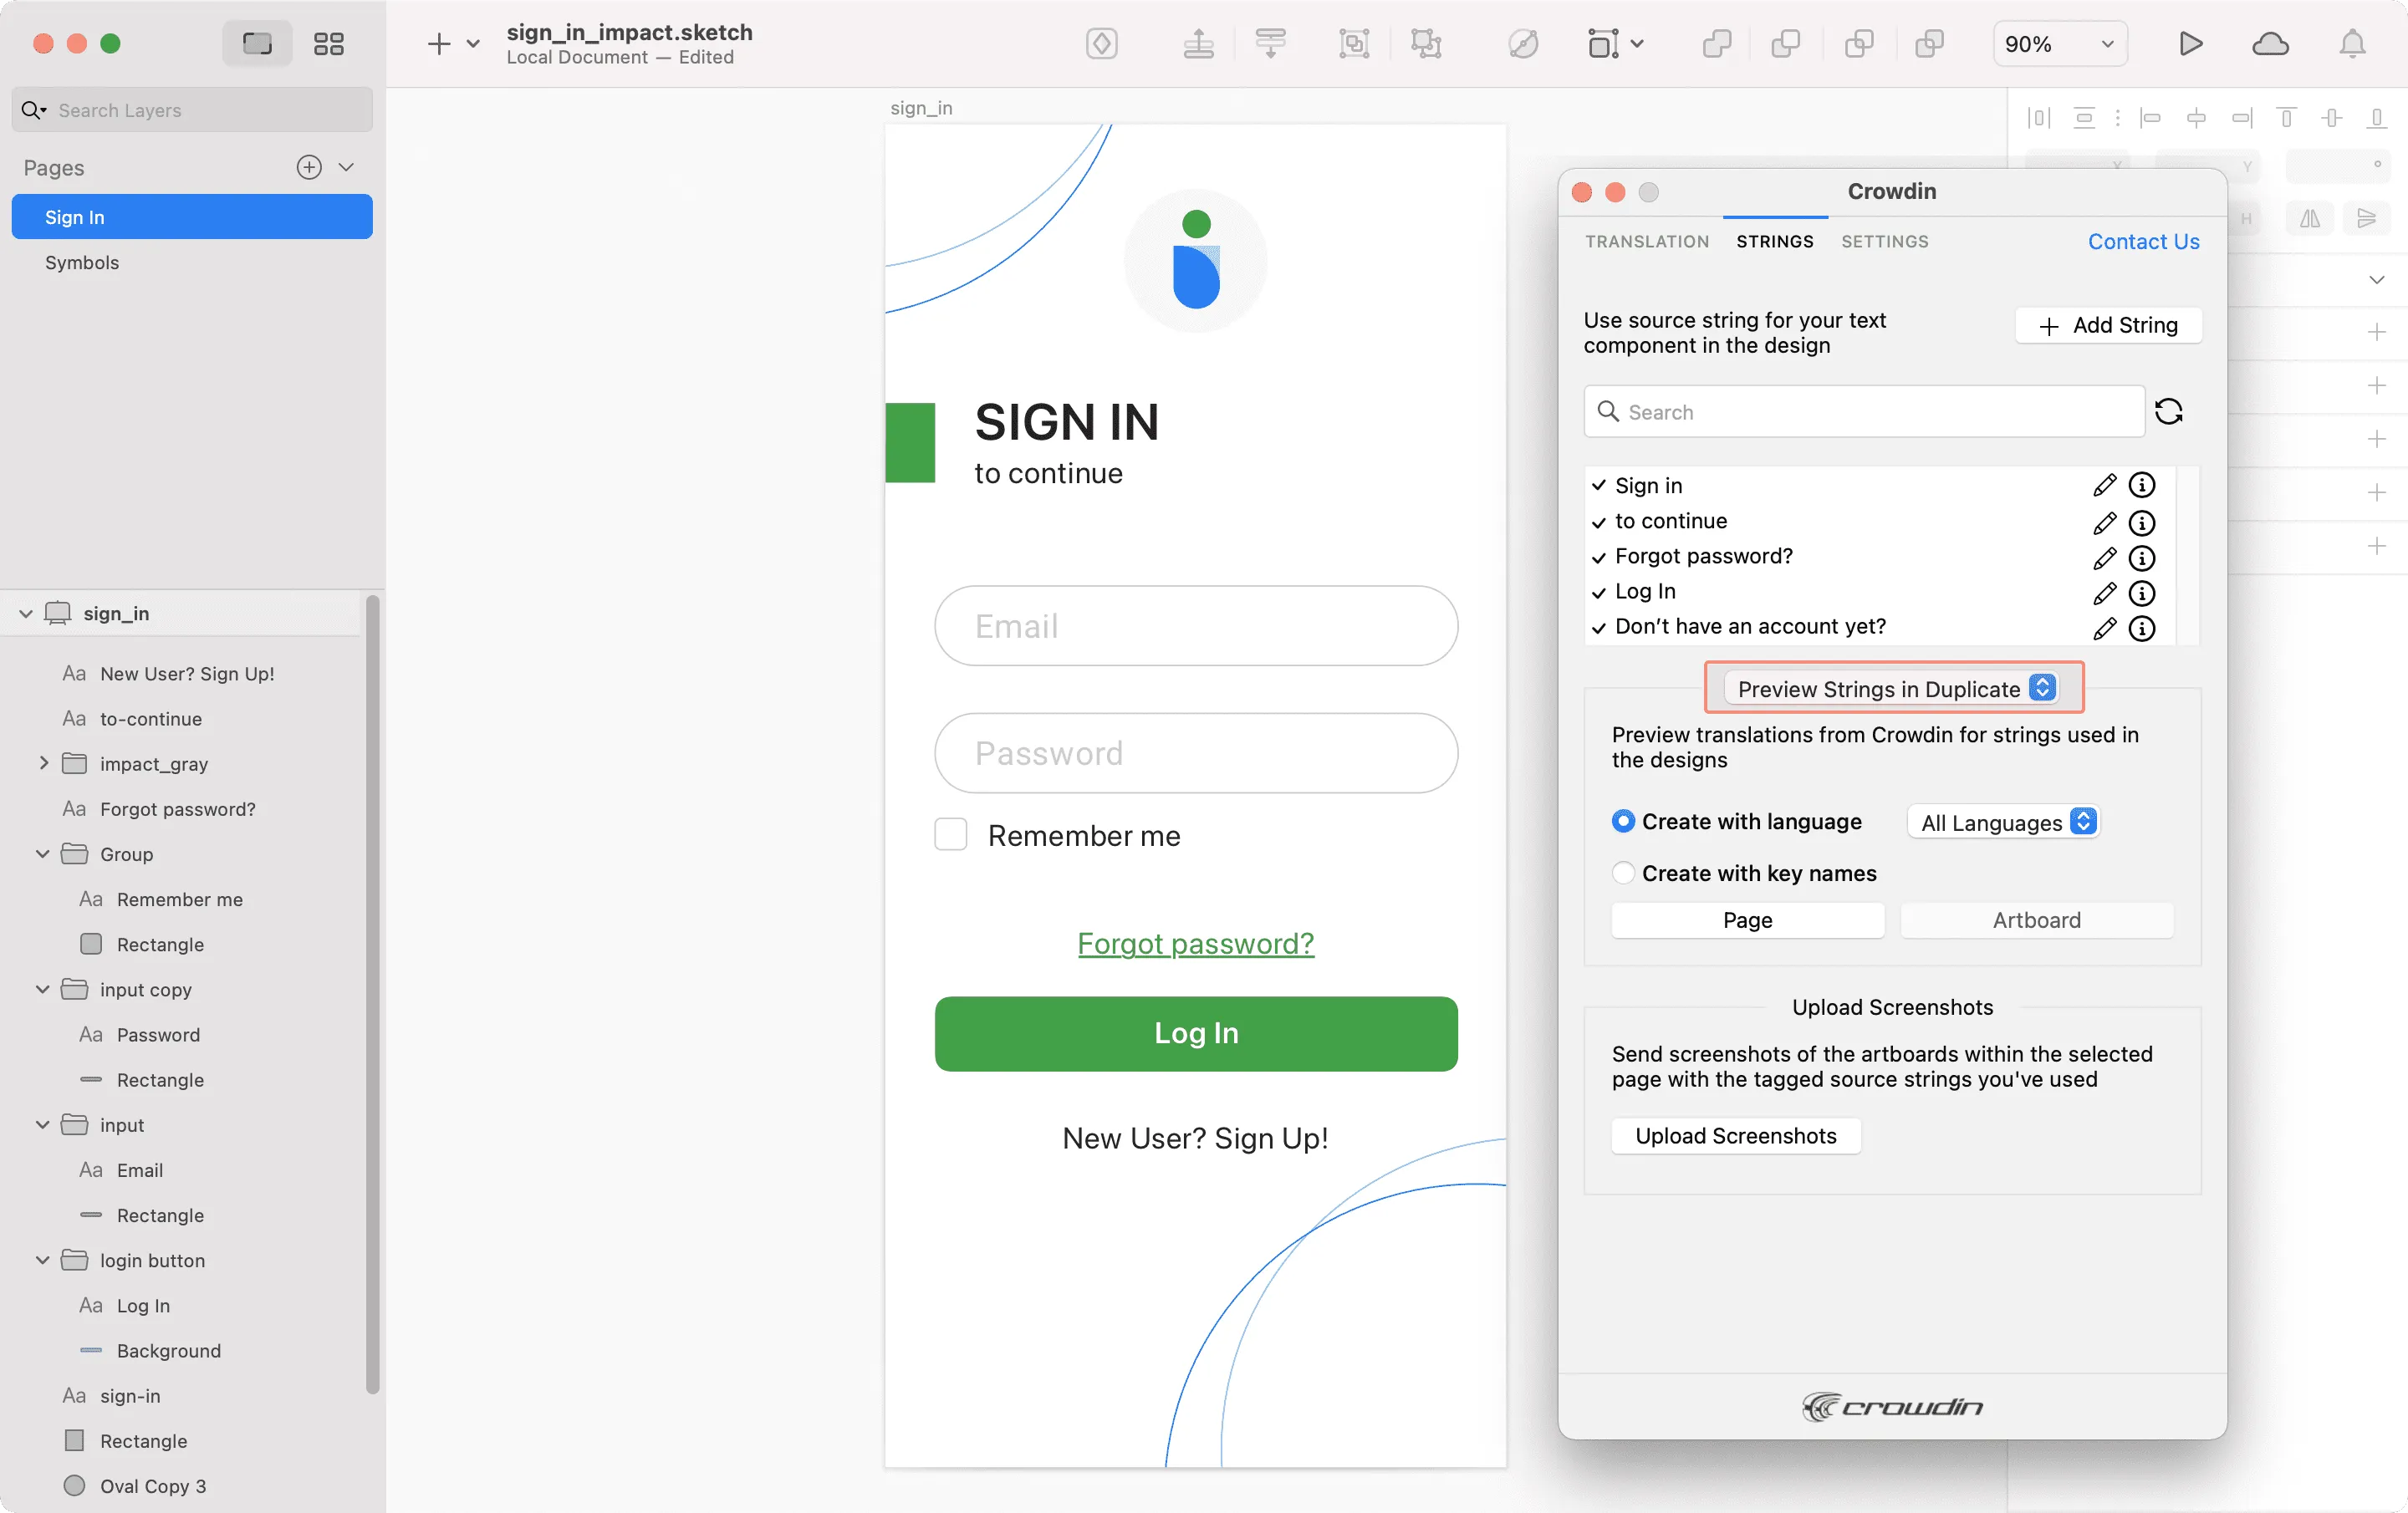 To preview strings populated with key names, follow these steps: 1. Open the Crowdin plugin for Sketch. 2. In the *Strings* tab, *Preview Strings* section, select *Preview in duplicated artboards*. 3. Select *Create with key names*. 4. Choose the content you want to preview in Sketch. Select *Page* or *Artboard*.  ## [Marketing Visuals Localization](#marketing-visuals-localization) [Section titled “Marketing Visuals Localization”](#marketing-visuals-localization) Use the *Translation* tab to localize static pages, like brochures and banners. In this tab, you can send texts with context for translators to Crowdin Enterprise and upload translated copies back to Sketch. ### [Sending Texts for Translation to Crowdin](#sending-texts-for-translation-to-crowdin) [Section titled “Sending Texts for Translation to Crowdin”](#sending-texts-for-translation-to-crowdin) You can send text for translation either from selected or all artboards from a Sketch file. Translators will work with those texts in the list view and use designs as an additional context for even higher translation quality. In Crowdin Enterprise, a root folder *Sketch plugin* will be created. It will contain a subfolder named after your Sketch file with HTML files for each artboard inside. If needed, you can disable content segmentation in the plugin **Settings** so the long texts will not be split into sentences. To send Sketch designs for translation, follow these steps: 1. Open the necessary Sketch file. 2. Go to **Plugins > Crowdin**. 3. In the *Translation* tab, *Send Texts* section, select content you’d like to translate. Select *Page* or *Artboard*. 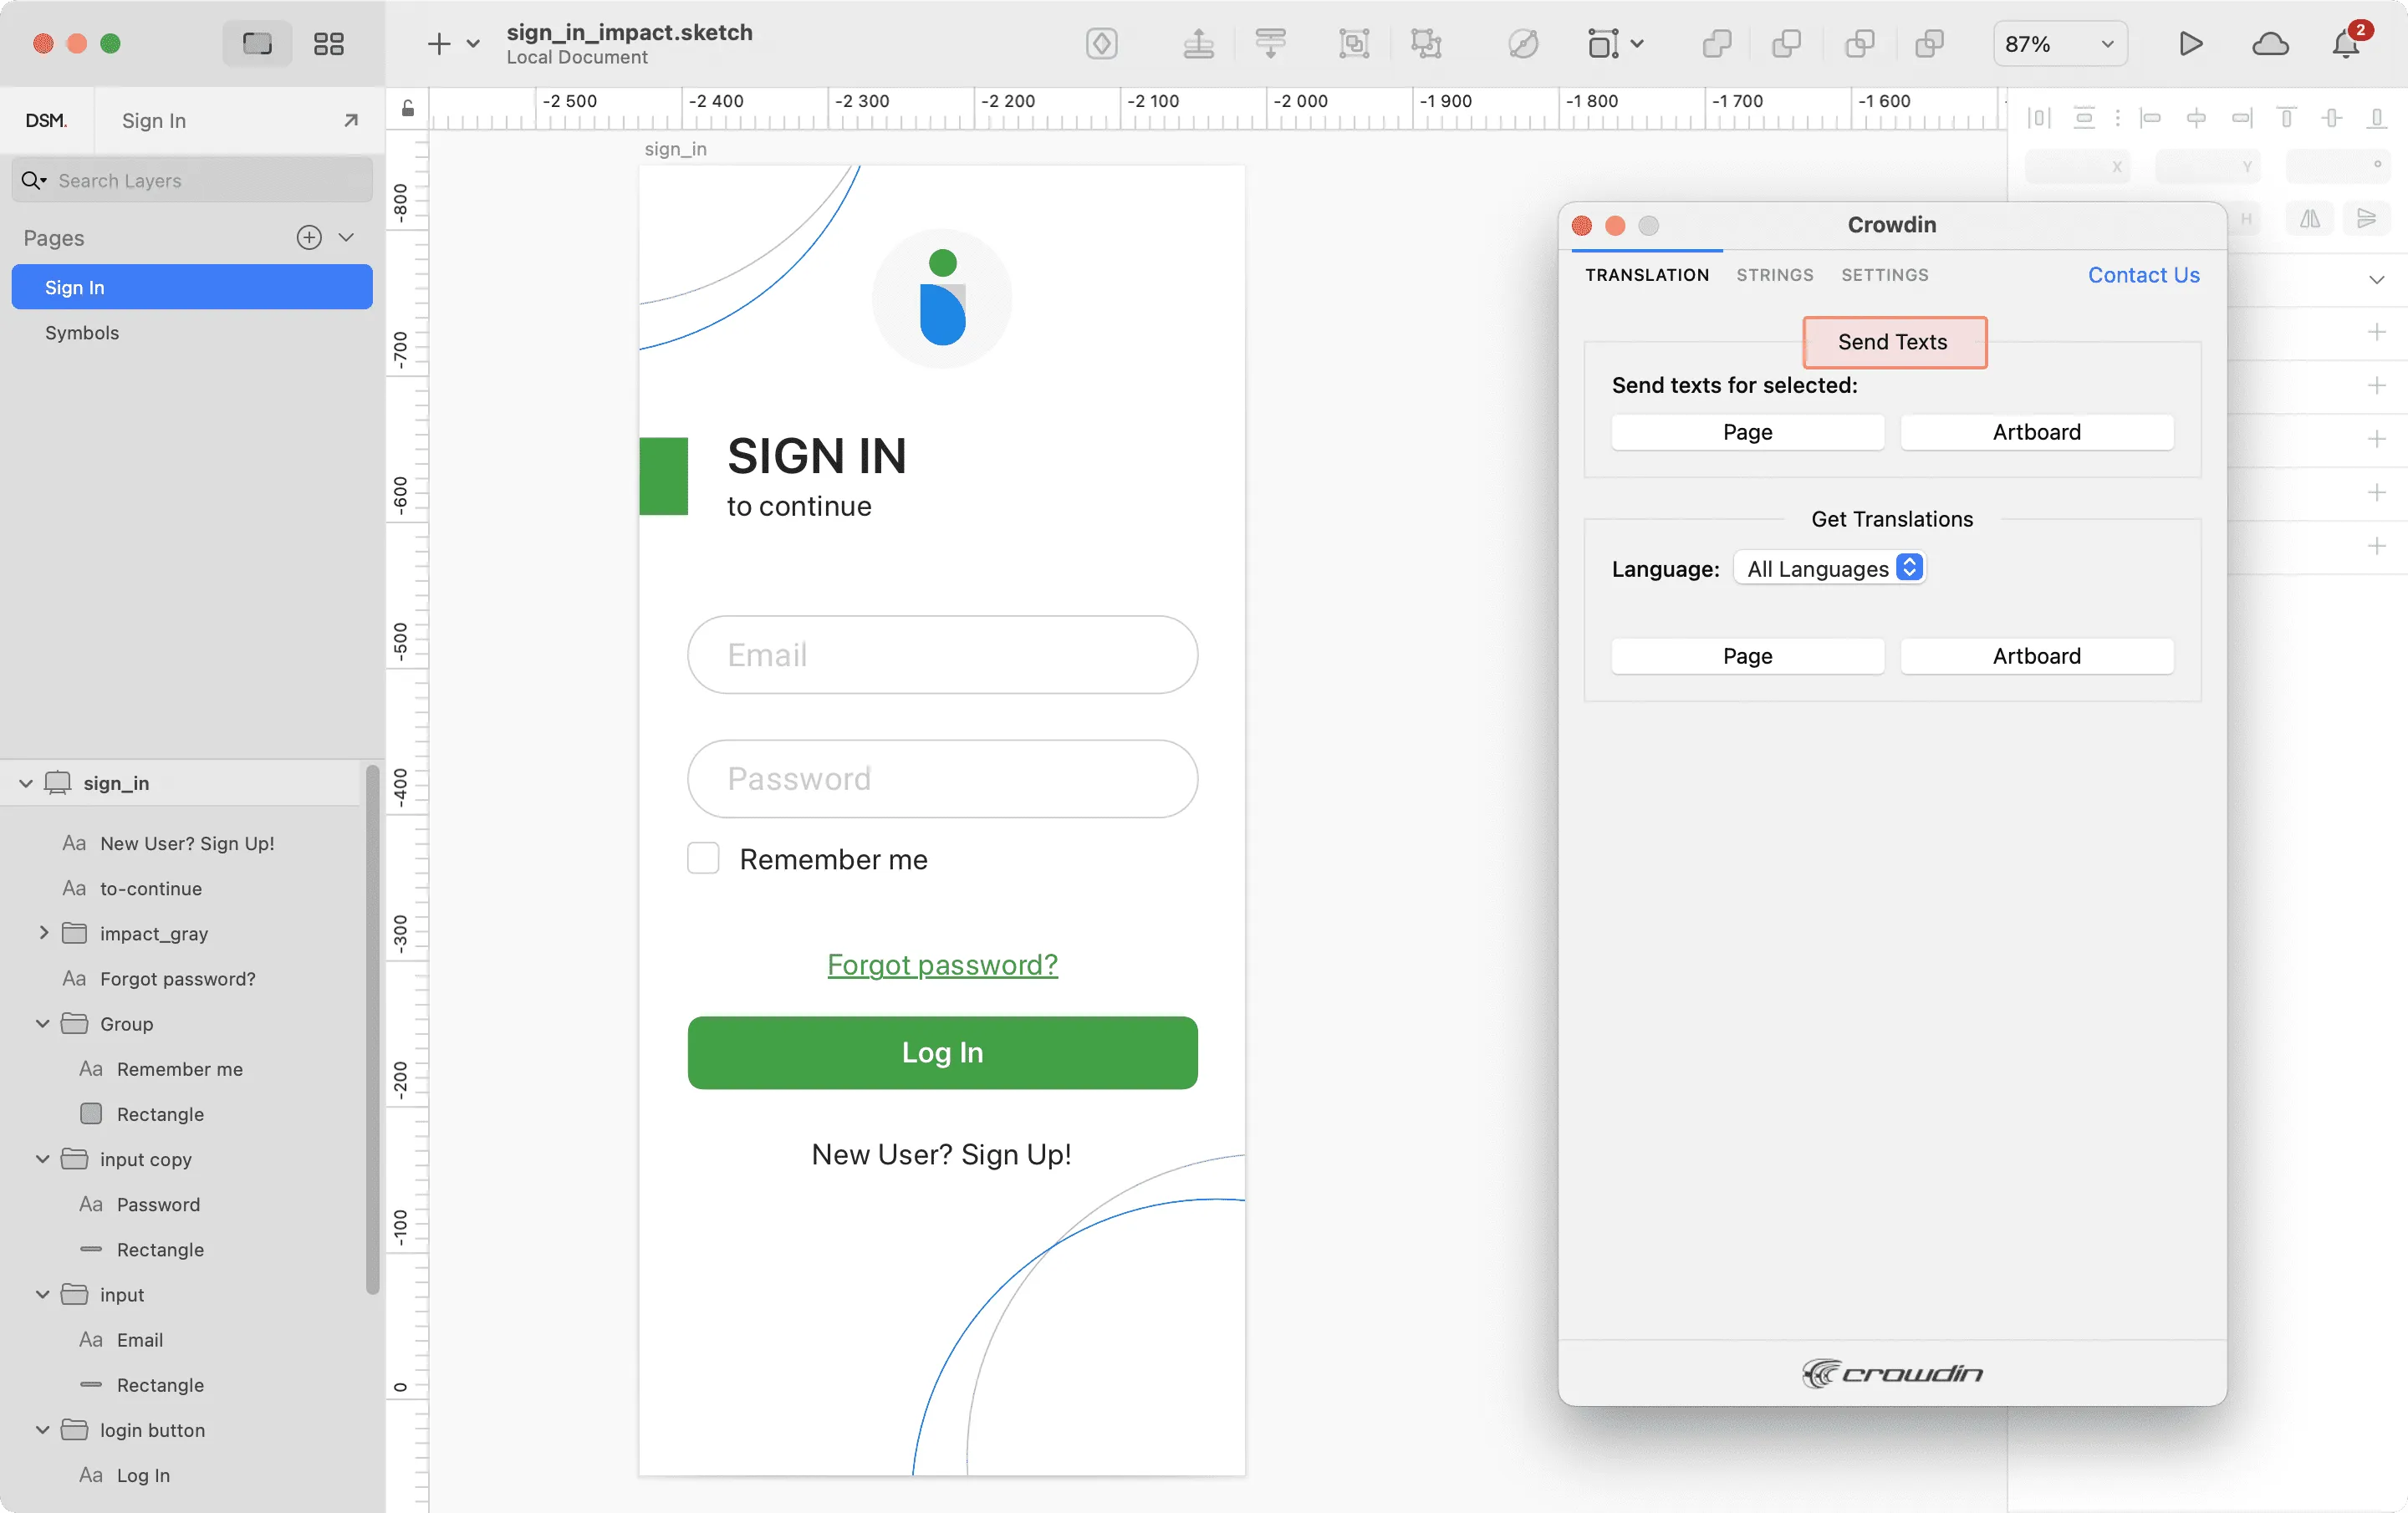 When the source files are uploaded to your Crowdin Enterprise project, you can invite contributors to translate and proofread them. Read more about [translation strategies](/enterprise/translation-strategies/). ### [Uploading Translations from Crowdin to Sketch](#uploading-translations-from-crowdin-to-sketch) [Section titled “Uploading Translations from Crowdin to Sketch”](#uploading-translations-from-crowdin-to-sketch) You can synchronize texts between Sketch and Crowdin Enterprise projects whenever you want to test the translated copy inside Sketch or generate multilingual assets. To upload translated copies to Sketch, follow these steps: 1. Open the necessary Sketch file. 2. Go to **Plugins > Crowdin**. 3. In the *Translation* tab, *Get Translations* section, select the target language you want to upload translations for. You can also Select *All languages*. 4. Select the content you want to preview in Sketch. Select *Page* or *Artboard*. 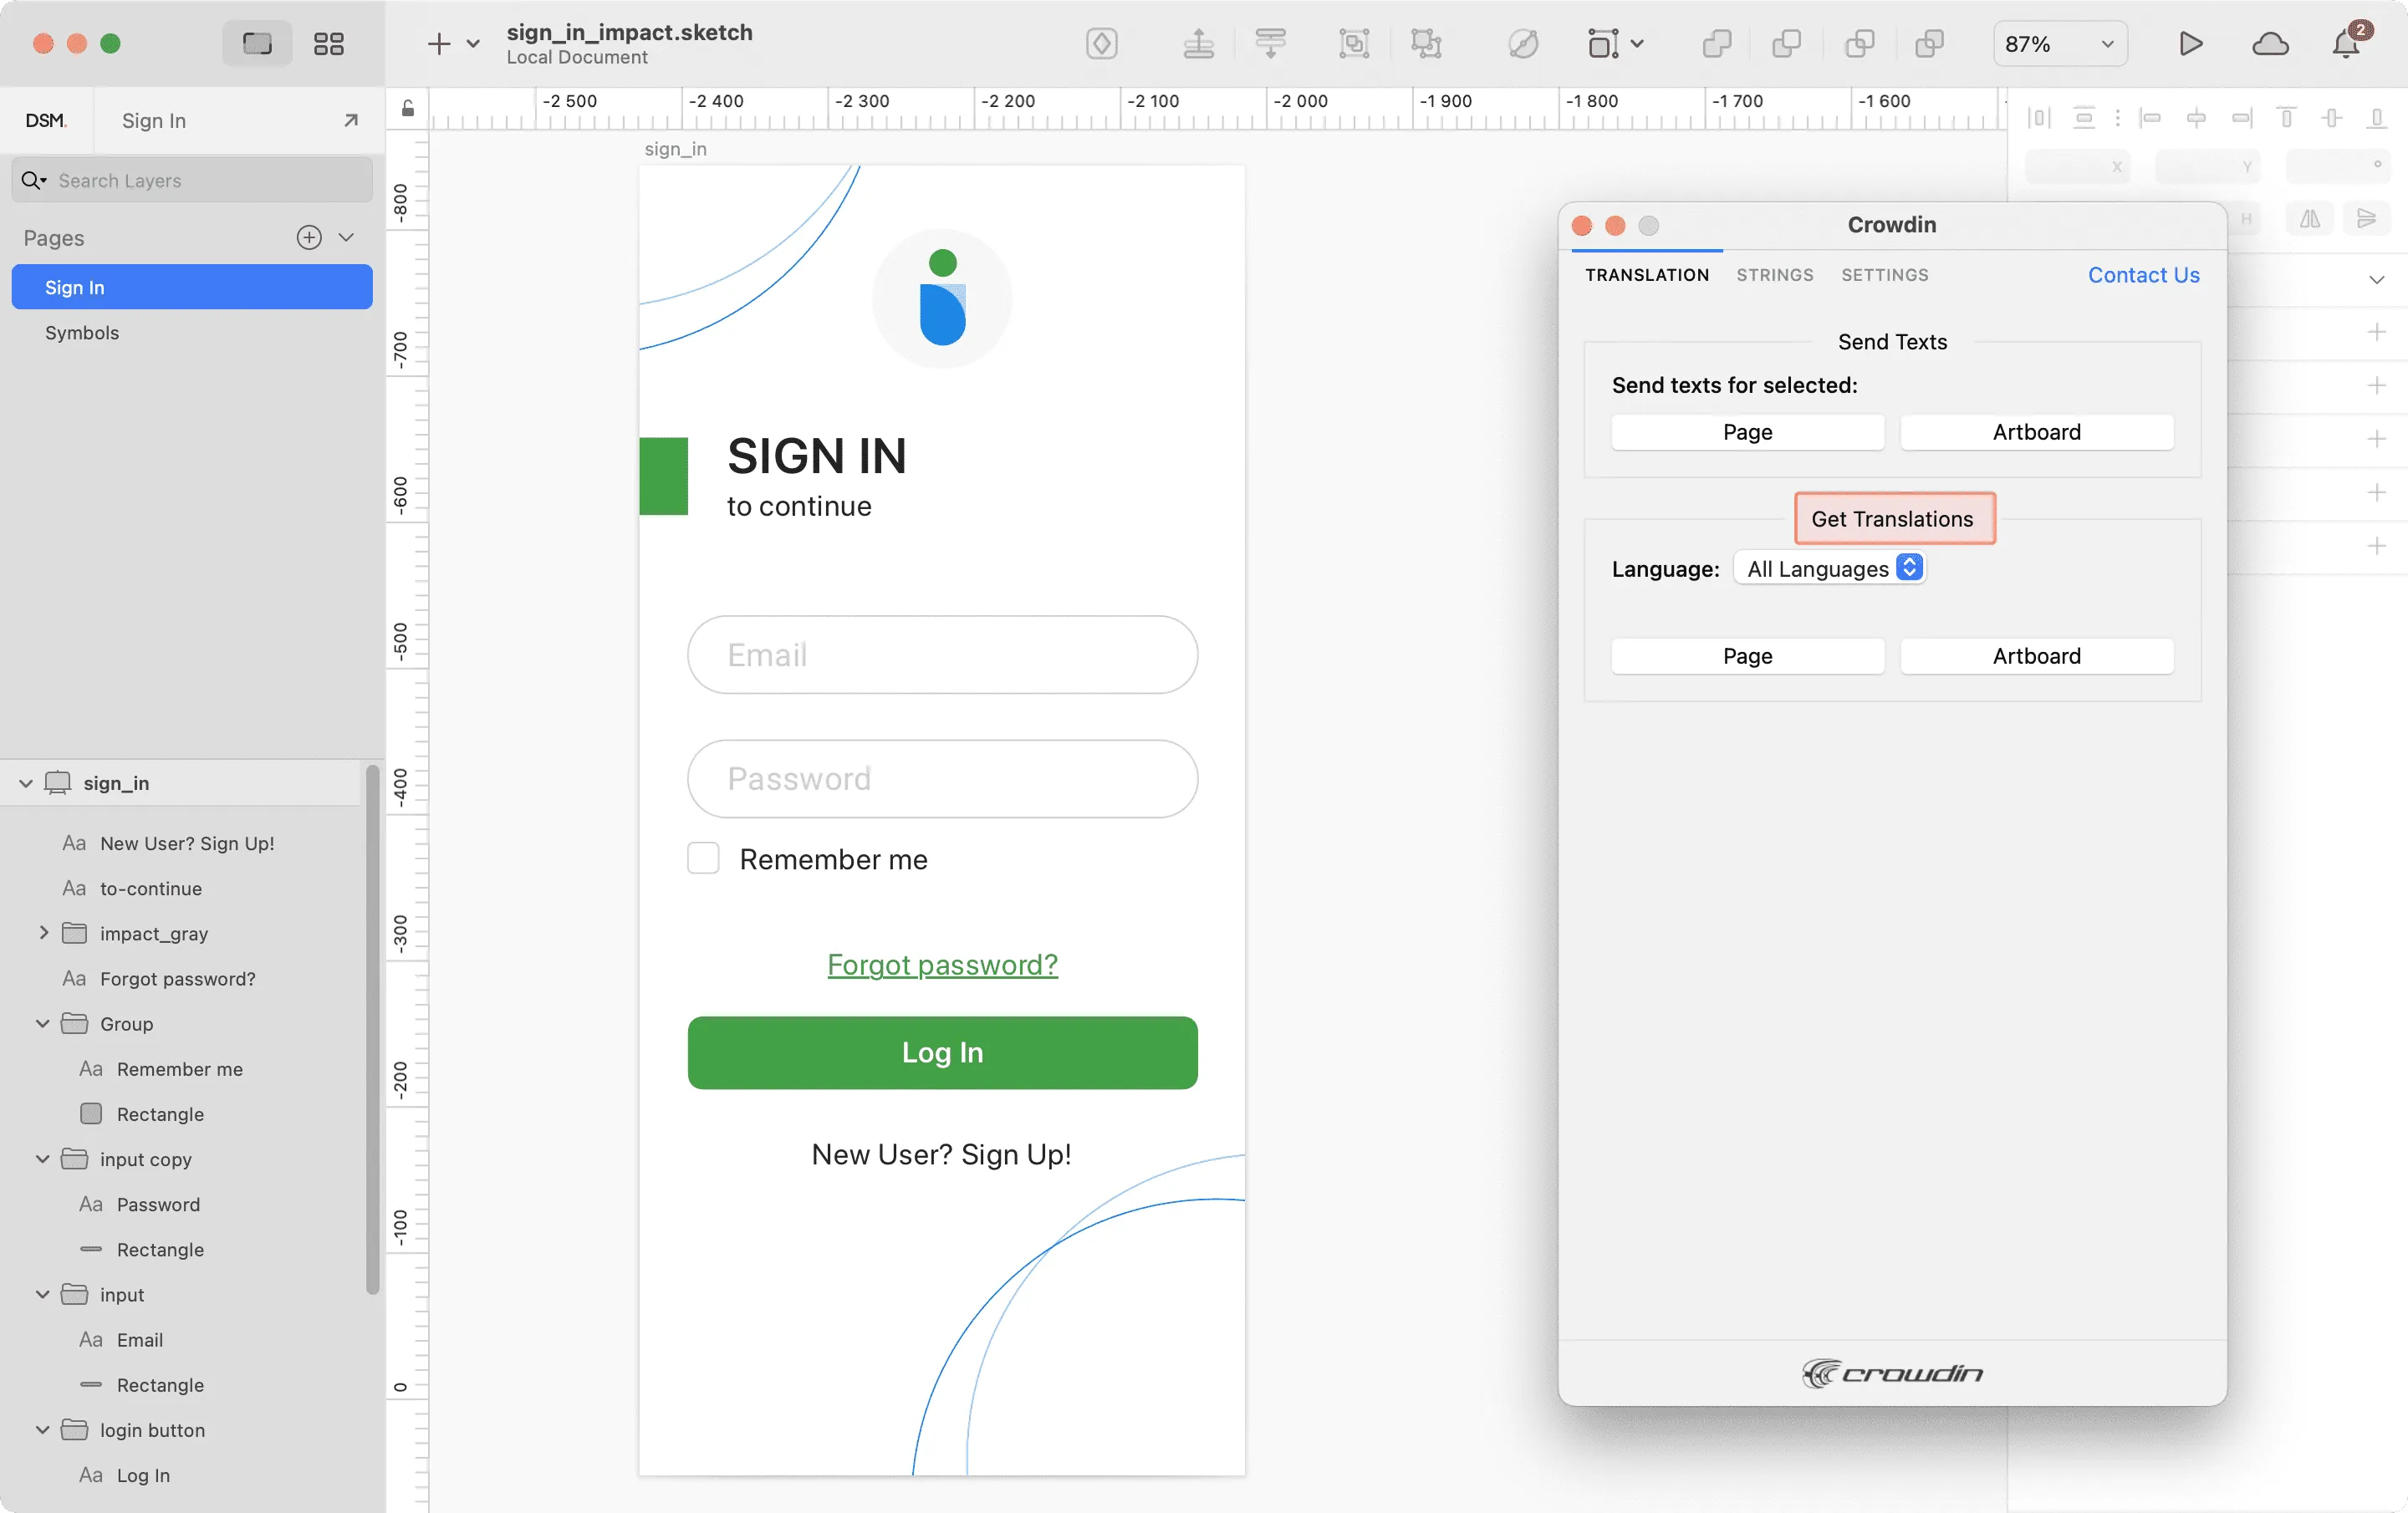 After uploading translations to Sketch, the modified file will contain a separate artboard with translations for each target language. The newly uploaded translated versions won’t override the ones you uploaded previously. You can always delete the translated copies you no longer need. If you’d like the newly uploaded translated versions to override the previously uploaded ones, open the plugin **Settings** and select **Override existing translations**.
# Source Text Review
> Review and correct source texts before the start of translation
Source Text Review is a workflow step used to review and correct source texts for grammar, consistency, formatting, and style before translation begins. This step is particularly useful when your [translation strategy](/enterprise/translation-strategies/) involves hired professional translators, as reviewed and corrected source texts help prevent unnecessary translation costs and improve the overall quality. [Workflow Overview ](/enterprise/workflows/) ## [Adding Source Text Review Step to Your Workflow](#adding-source-text-review-step-to-your-workflow) [Section titled “Adding Source Text Review Step to Your Workflow”](#adding-source-text-review-step-to-your-workflow) Source Text Review is available as a workflow step that can be added in the Workflow Editor or in the Workflow template editor. Once added, the step becomes available to all managers working on the project. 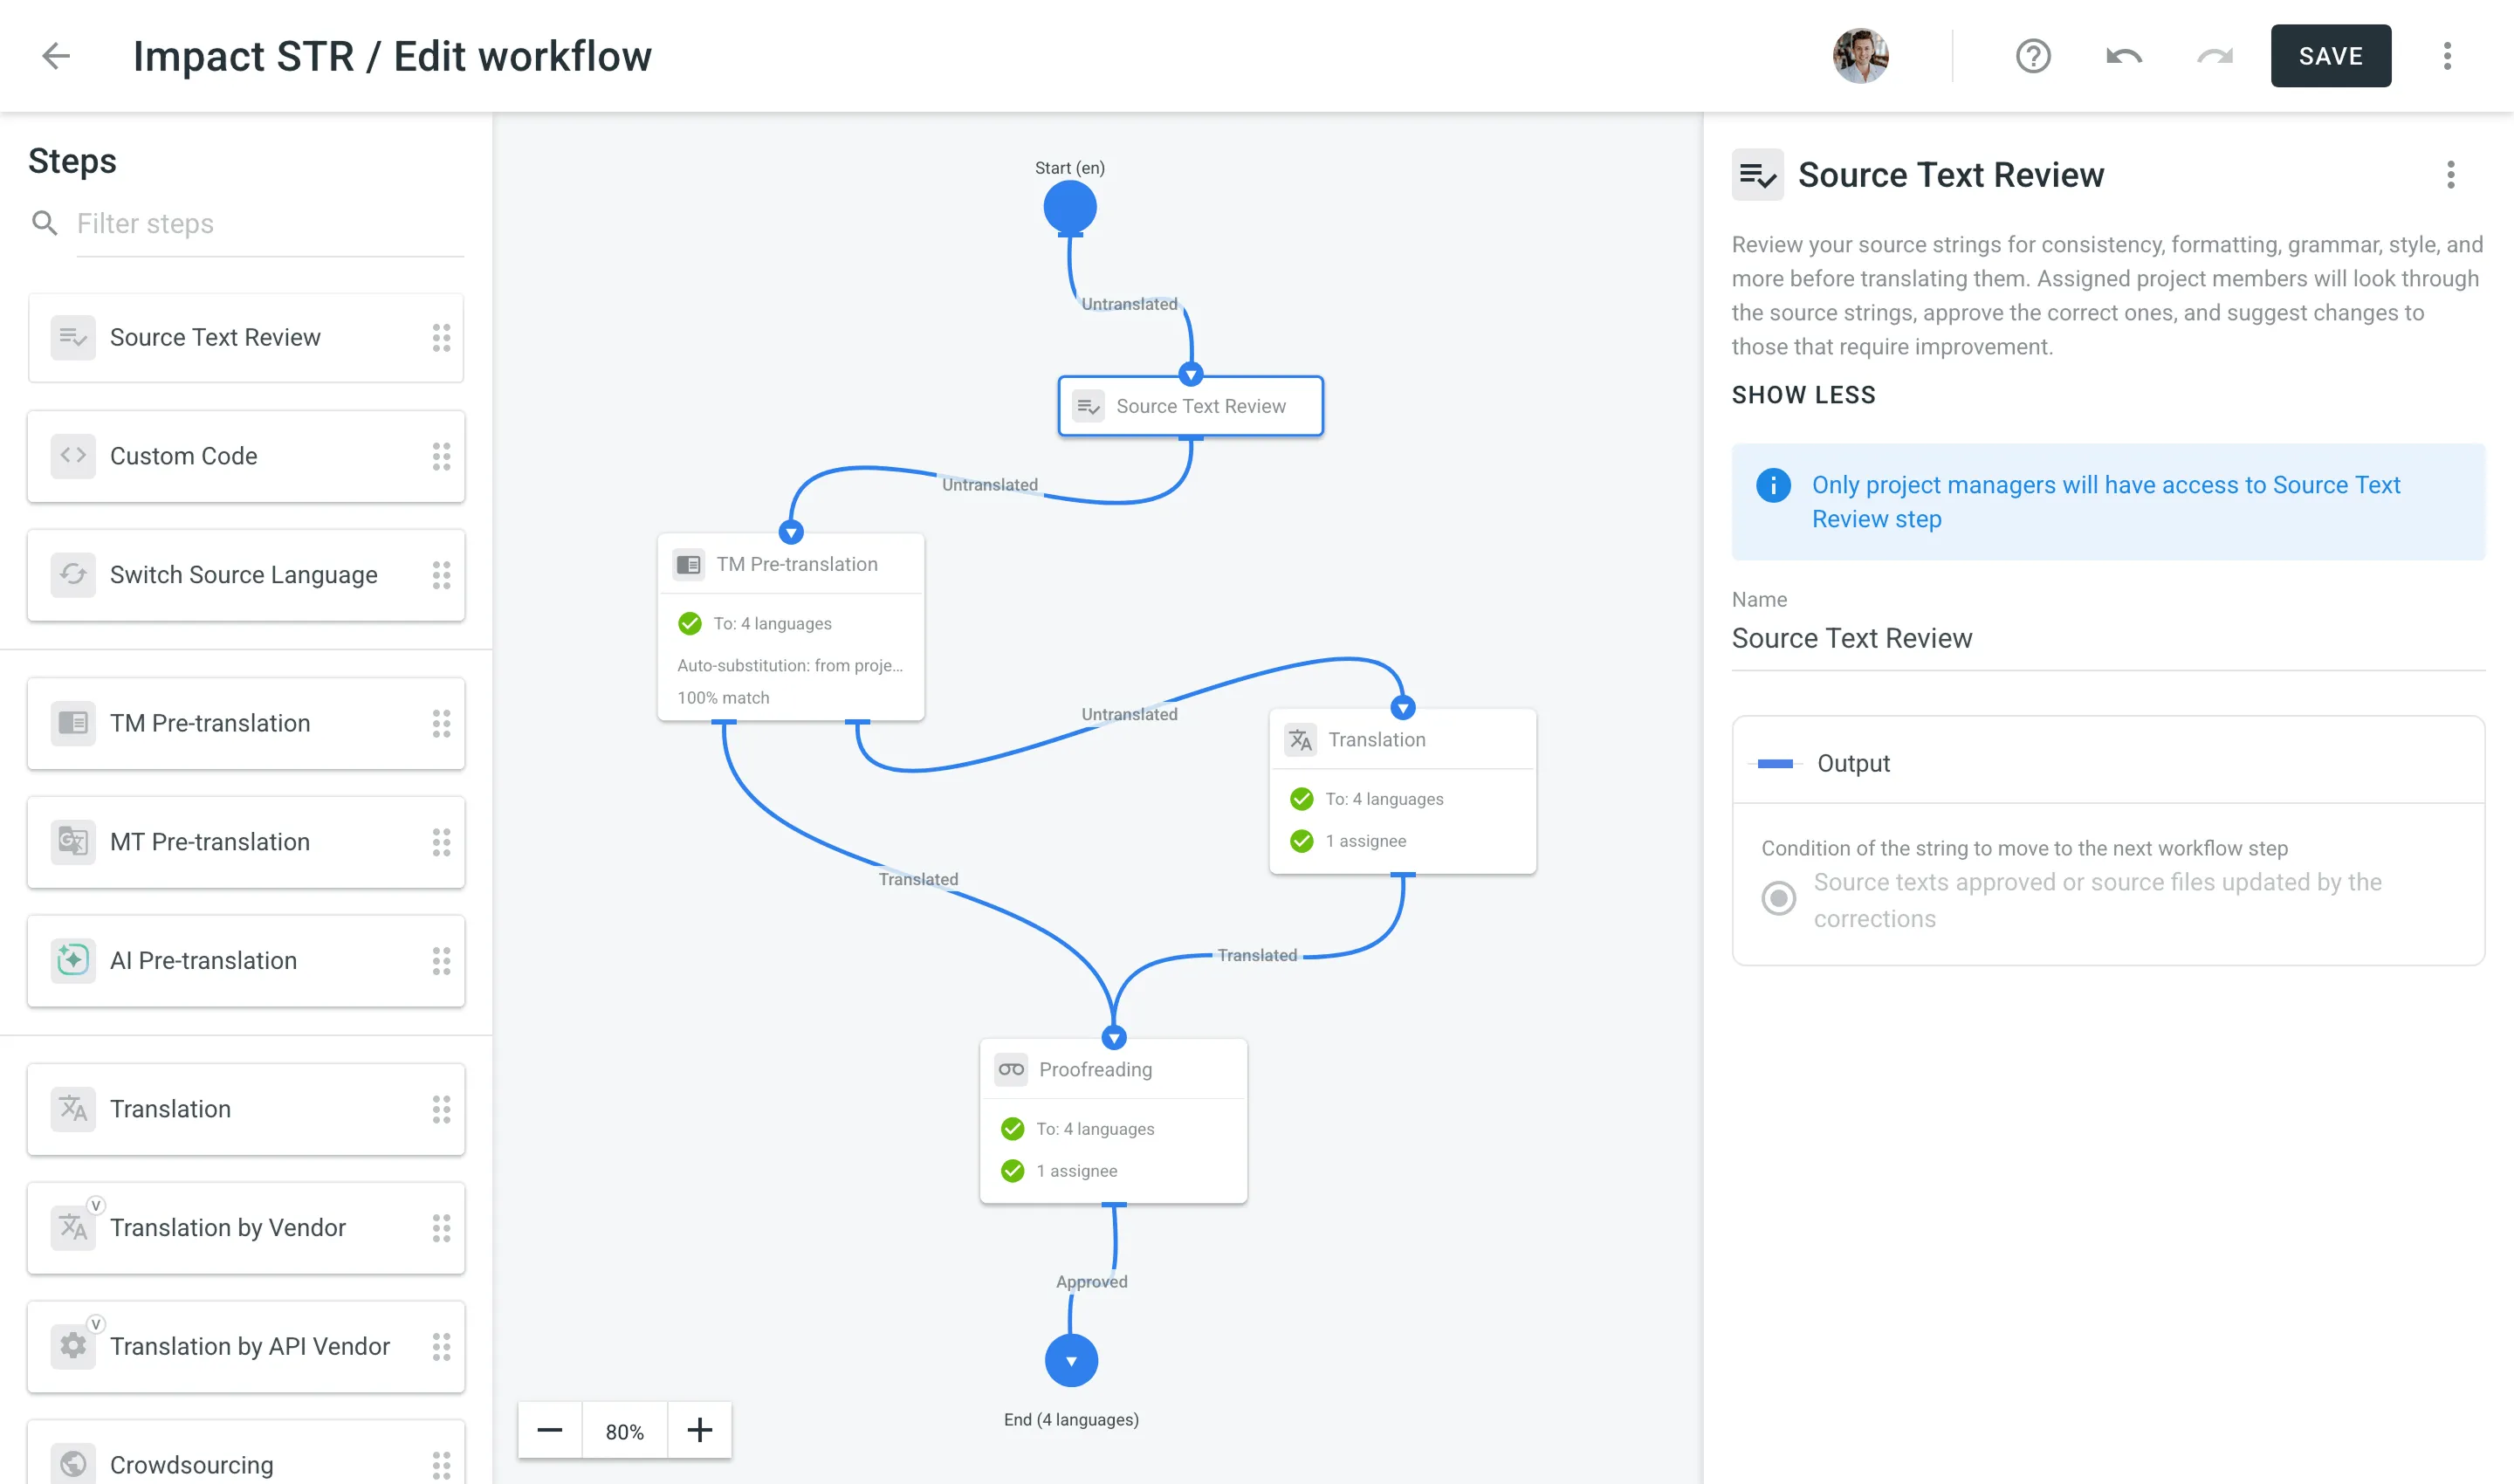 ## [Reviewing Source Texts in Your Project](#reviewing-source-texts-in-your-project) [Section titled “Reviewing Source Texts in Your Project”](#reviewing-source-texts-in-your-project) Once you add the Source Text Review step to your project’s workflow, a corresponding section appears on the project’s **Dashboard** page. Click **Review** to open the Editor in Review mode. 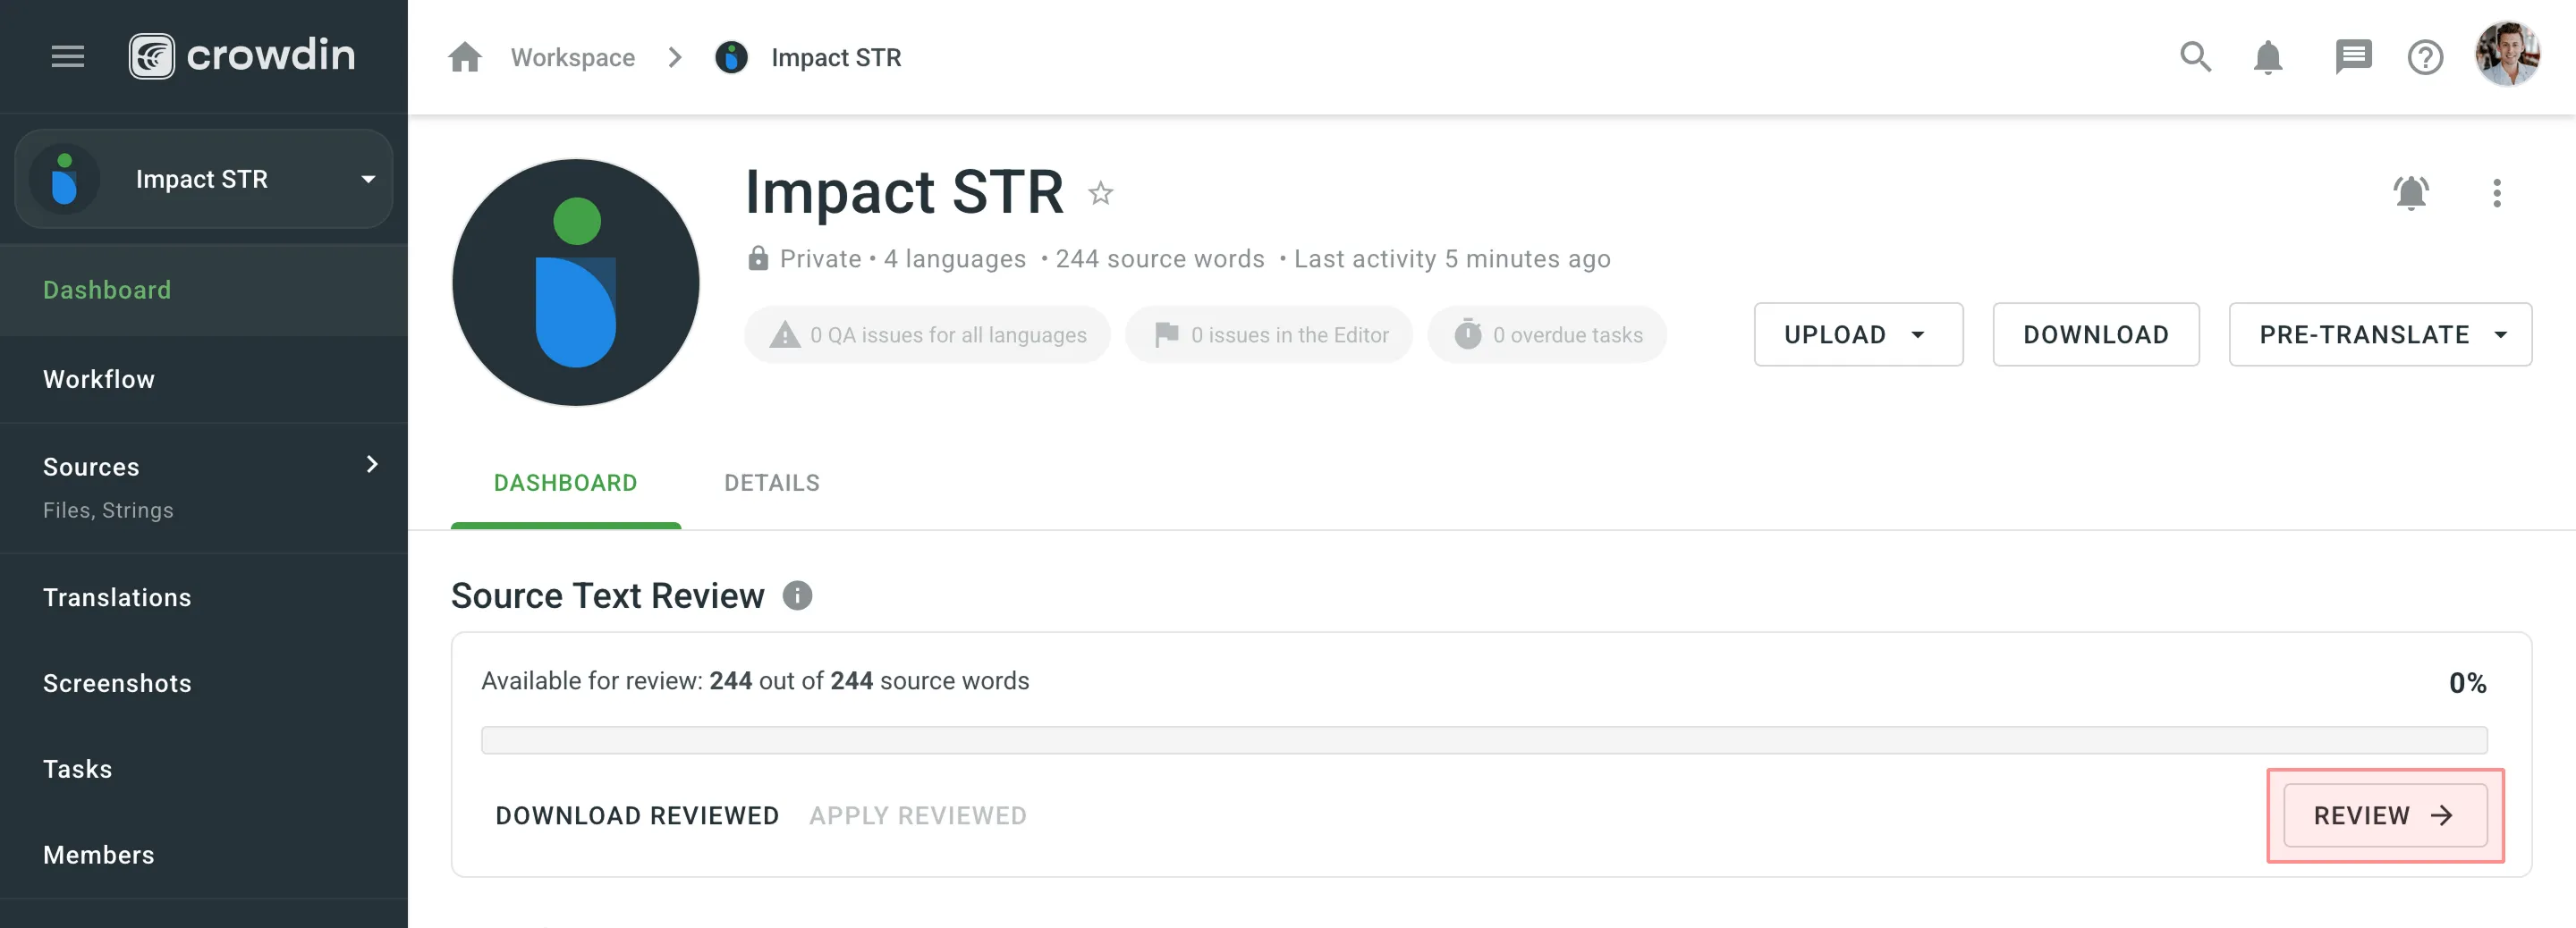 In Review mode, go through the source texts and make corrections where needed. If the source text is correct, click **Approve**. The string will be marked *Done* and will immediately appear on the next workflow step. If the source text requires edits, enter the corrected version and click **Save**. The string will get approved automatically and be marked *ToDo*, meaning the source file requires an update with the reviewed texts. 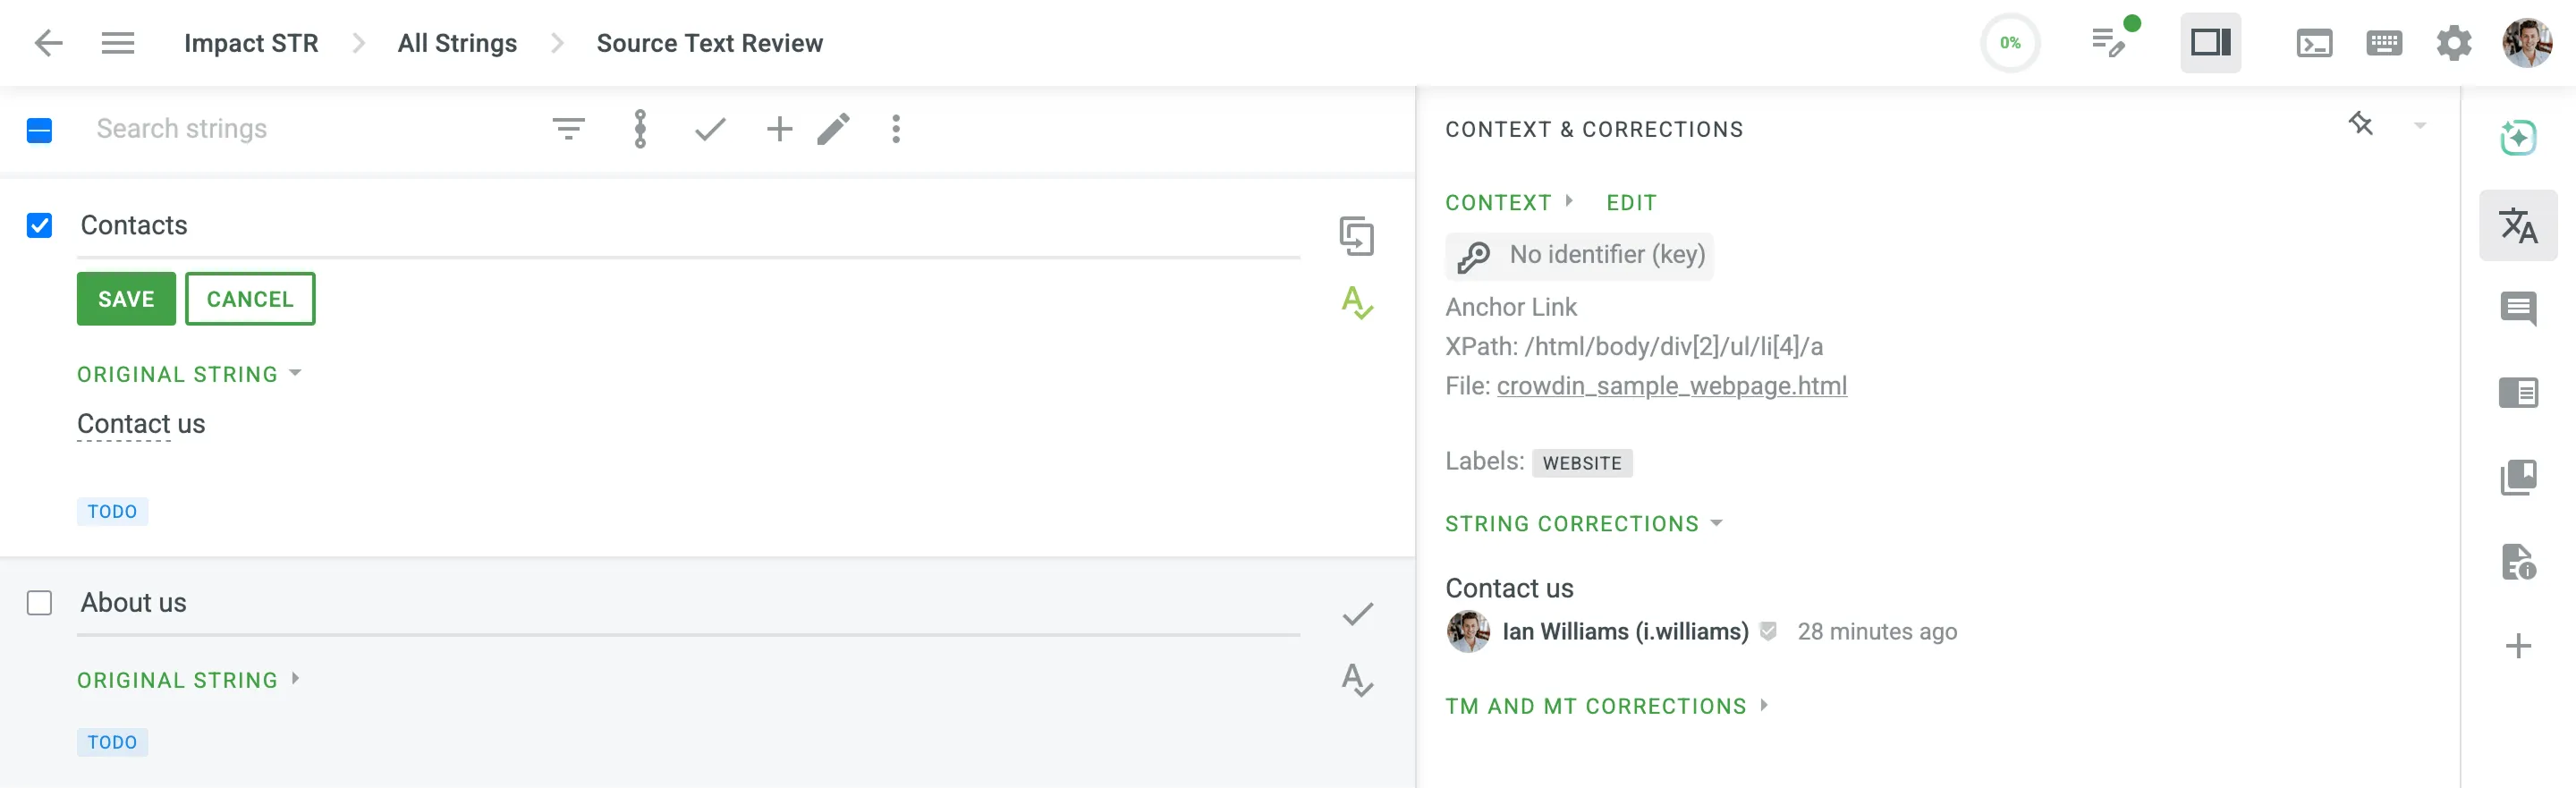 To apply all reviewed texts to the source files, go to the **Dashboard** page and click **Apply reviewed**. After the source file update, the corrected strings will be marked *Done* and be available on the next workflow step. When all strings are reviewed, the Source Text Review progress reaches 100%. Optionally, click **Download reviewed** on the **Dashboard** page to export the reviewed source file and update your local version if needed.
# String Management
> Manage source strings in your translation project
You can view all the project’s strings and manage strings settings via **Sources > Strings**. ## [Changing Strings Visibility](#changing-strings-visibility) [Section titled “Changing Strings Visibility”](#changing-strings-visibility) If some strings contain data that is not supposed to be translated (e.g., placeholders, other technical entities), you can hide them from translators. To do this: 1. Open your project and go to **Sources > Strings**. 2. Select the necessary strings by clicking the checkbox next to each one. 3. Click . 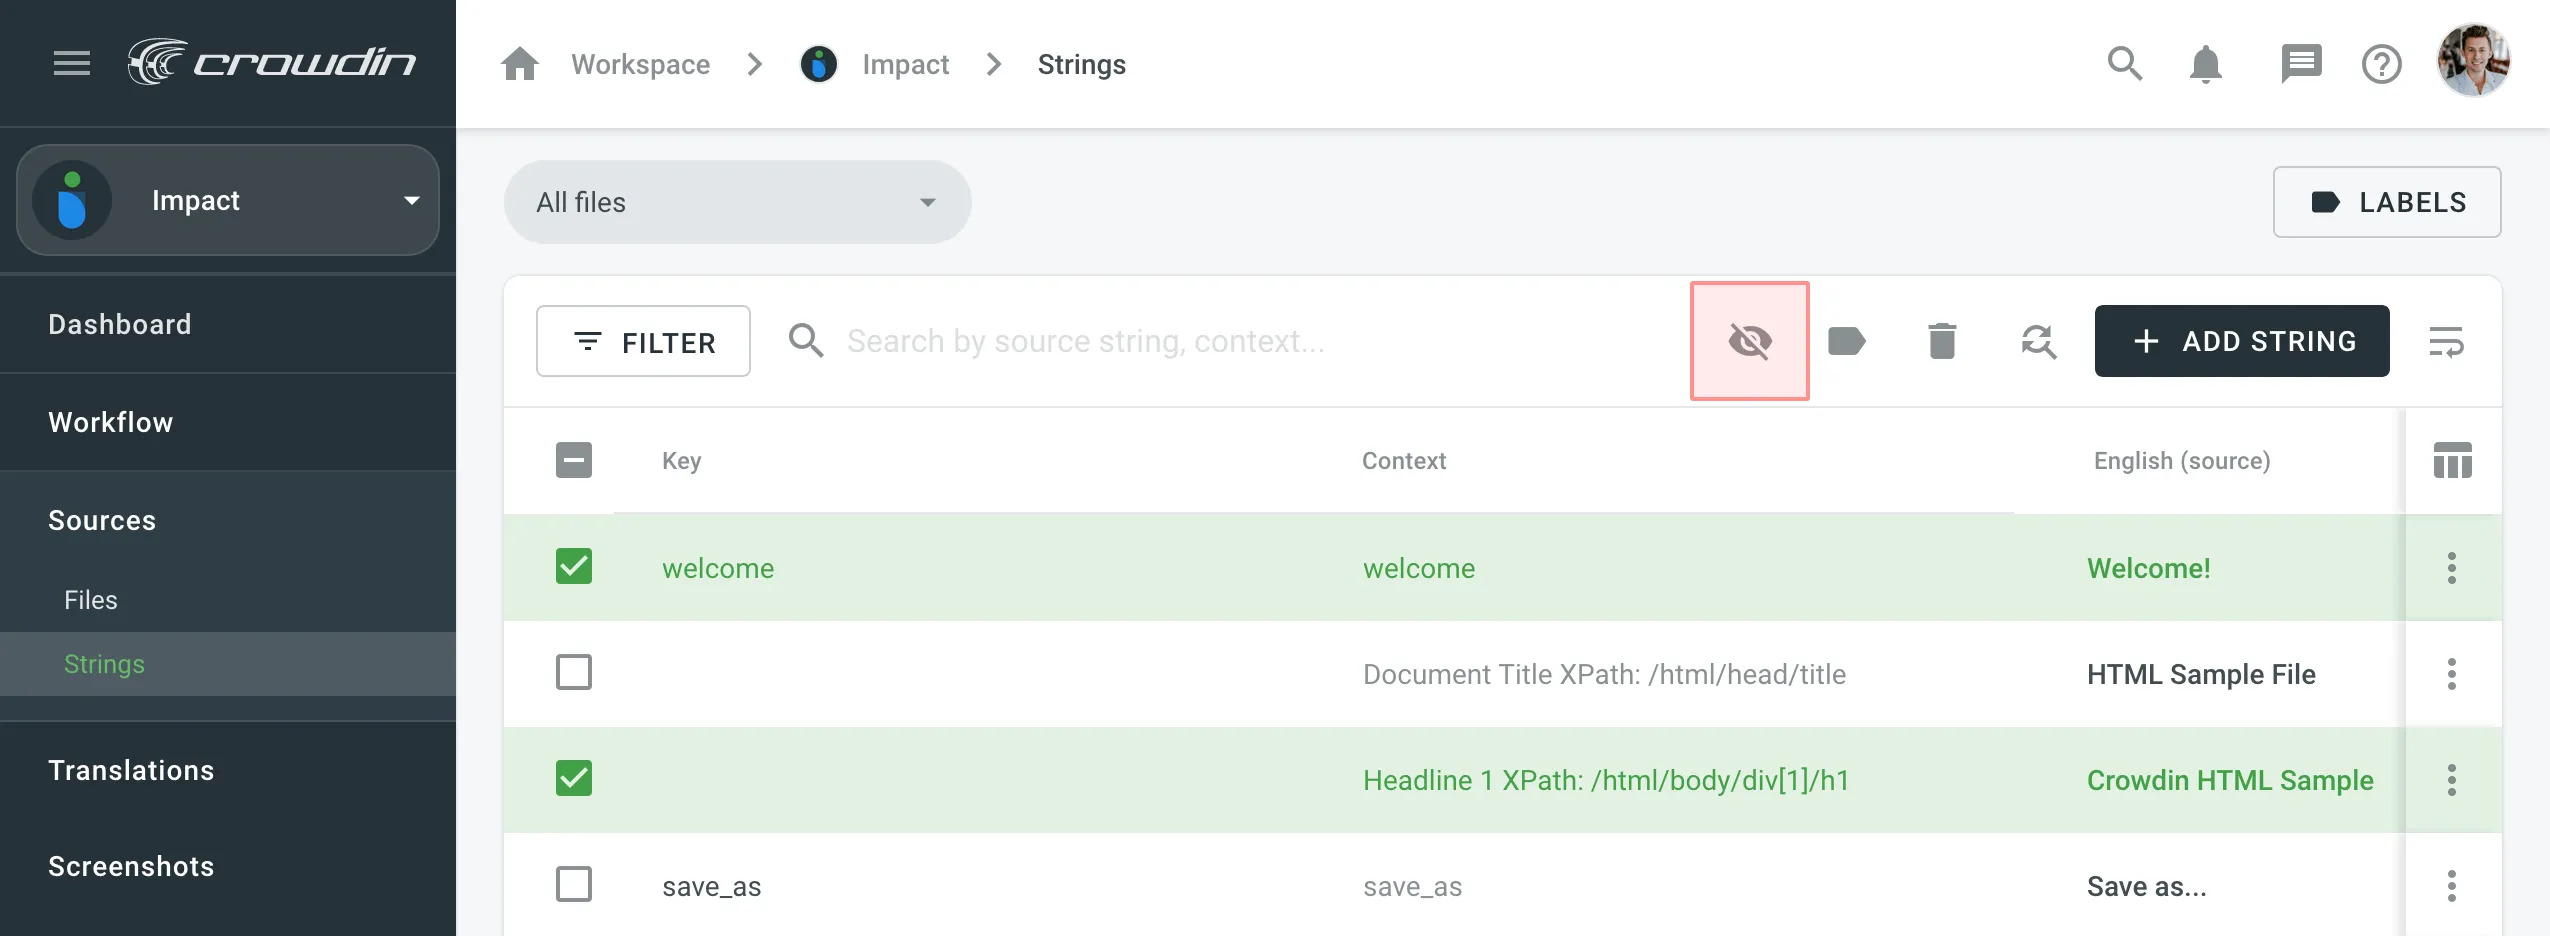 ## [Filtering Strings](#filtering-strings) [Section titled “Filtering Strings”](#filtering-strings) By default, all source strings of the project are displayed in **Sources > Strings**. If necessary, you can filter out strings using the available filter options (Issues: All, With unresolved issues, Without unresolved issues; Comments: All, With comments, Without comments; Screenshots: All, With screenshots, Without screenshots; Visibility: All, Visible only and Hidden only) and project labels. 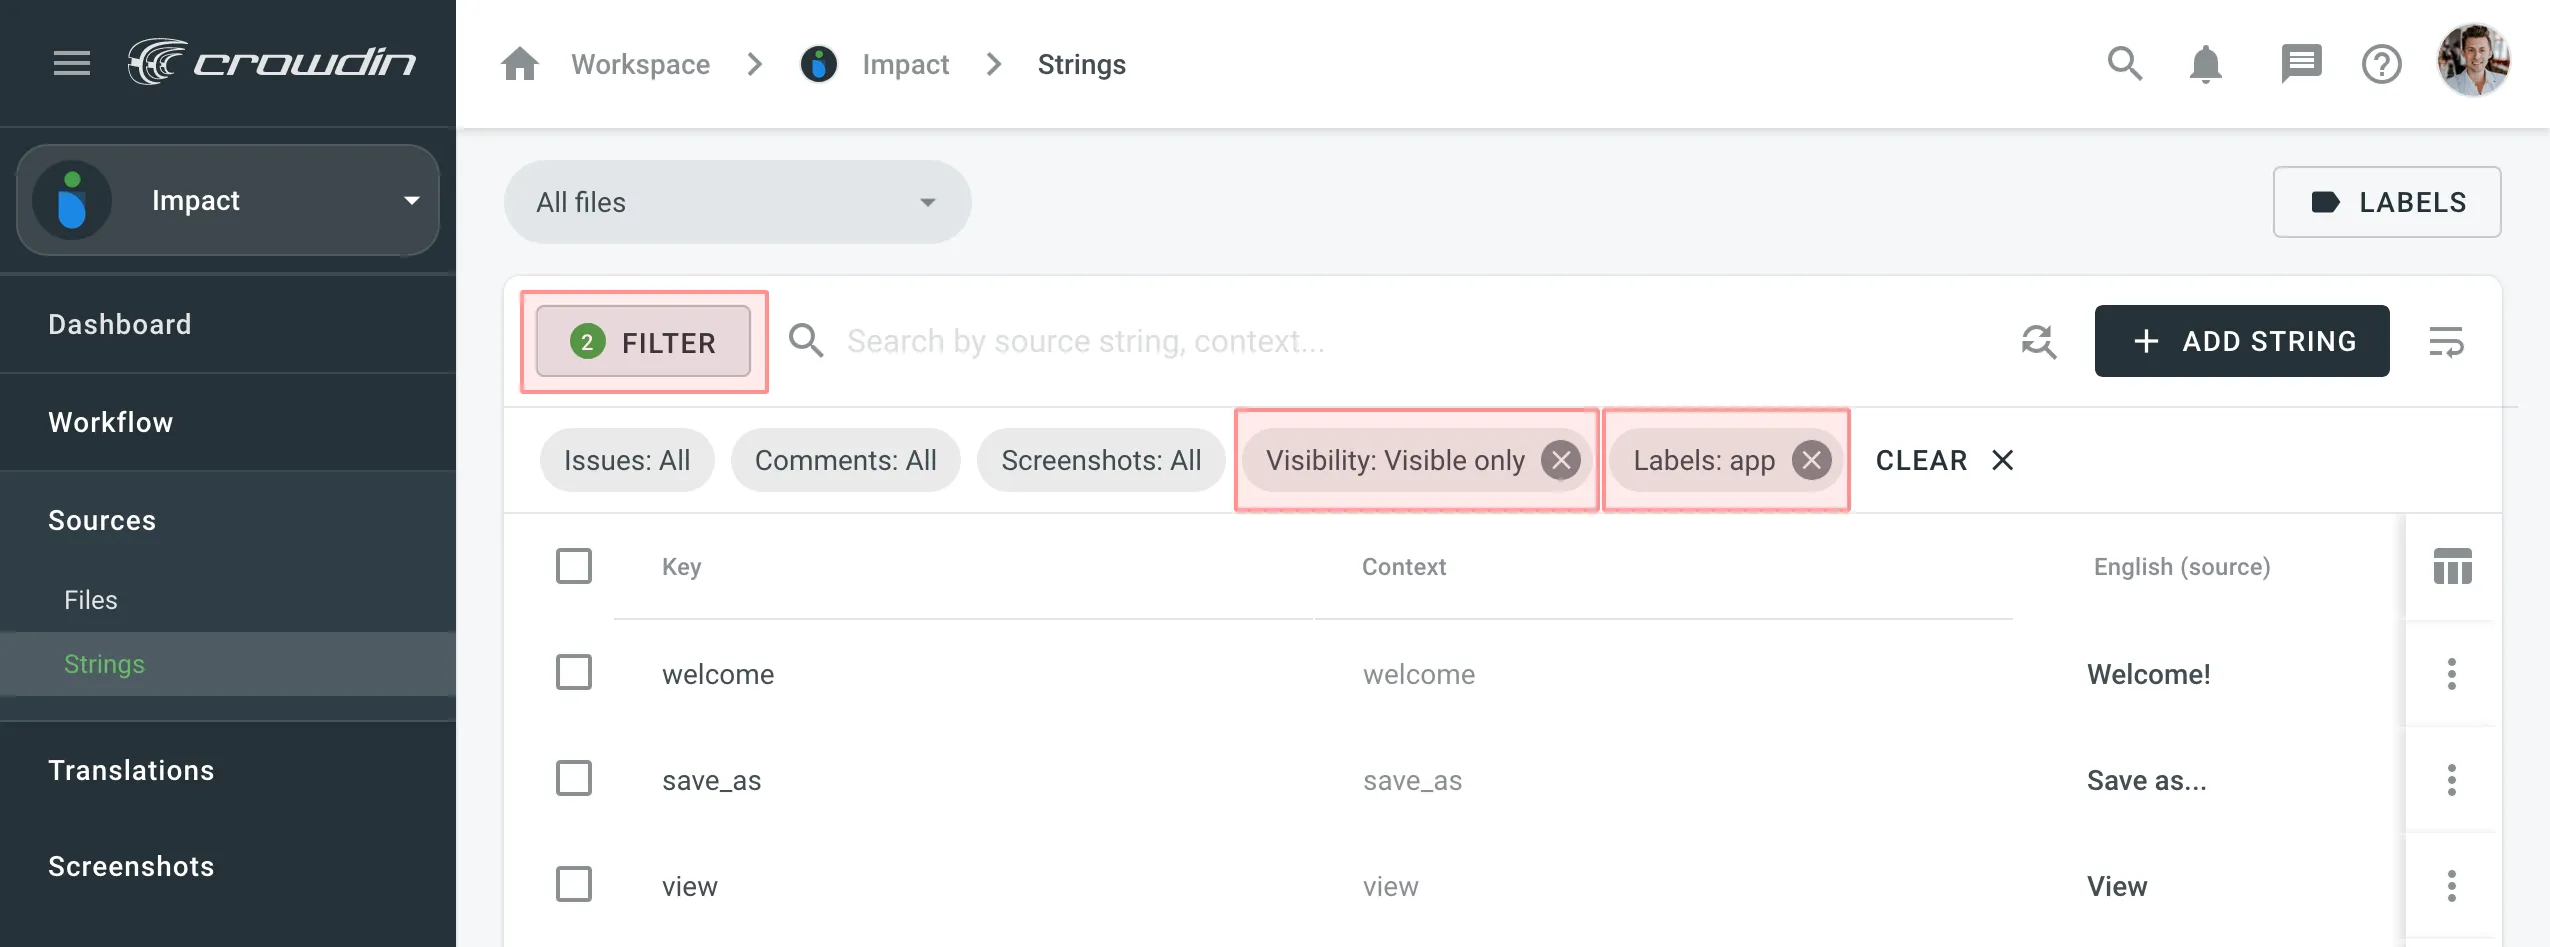 ## [Adding Strings](#adding-strings) [Section titled “Adding Strings”](#adding-strings) You can add strings to your projects directly in Crowdin Enterprise. To add a new string, follow these steps: * File-based project 1. Open your project and go to **Sources > Strings**. 2. Click **Add String**. 3. In the appeared dialog, enter the necessary details for the string: * *String* – specify the text that needs translation. * *(Optional)* *Plurals* – select this option to add plural forms and enter the text for each form based on the project’s source language requirements. * *Identifier* – specify a unique key for the string, often used for referencing the translated text in the application. * *(Optional)* *Context* – add additional information to help translators understand the intended meaning. * *(Optional)* [*Labels*](#labels) – specify labels to organize strings or provide extra context. * *(Optional)* *Maximum Translation Length* – set a character limit for the translation. * *(Optional)* File-specific identifiers – specify unique keys for each file format when adding the string to multiple files. This ensures that the string meets the different identifier requirements based on the file formats it will be used in. * *Files* – choose the source files where this string should be added. 4. Click **Add** to add the new string to your project. * String-based project 1. Open your project and go to the **Strings** tab. 2. Click **Add String**. 3. In the appeared dialog, enter the necessary details for the string: * *Branches* – choose the branches where this string should be added. * *String* – specify the text that needs translation. You can leave this field empty to create placeholder strings for future content or development purposes. * *(Optional)* *Plurals* – select this option to add plural forms and enter the text for each form based on the project’s source language requirements. * *Identifier* – specify a unique key for the string, often used for referencing the translated text in the application. * *(Optional)* *Context* – add additional information to help translators understand the intended meaning. * *(Optional)* [*Labels*](#labels) – specify labels to organize strings or provide extra context. * *(Optional)* *Maximum Translation Length* – set a character limit for the translation. * *(Optional)* File-specific identifiers – specify unique keys for each branch when adding the string to multiple branches. This ensures that the string meets the different identifier requirements based on the file formats it will be used in. 4. Click **Add** to add the new string to your project. Read more about [project types](/enterprise/creating-project/#project-types). Limitations The maximum identifier length is 512 characters. ## [String Editing](#string-editing) [Section titled “String Editing”](#string-editing) You can add context to the string, add or remove labels, set the max. length of the translation. Once the translation limits are exceeded, the system notifies the contributor that the translation should be shorter. 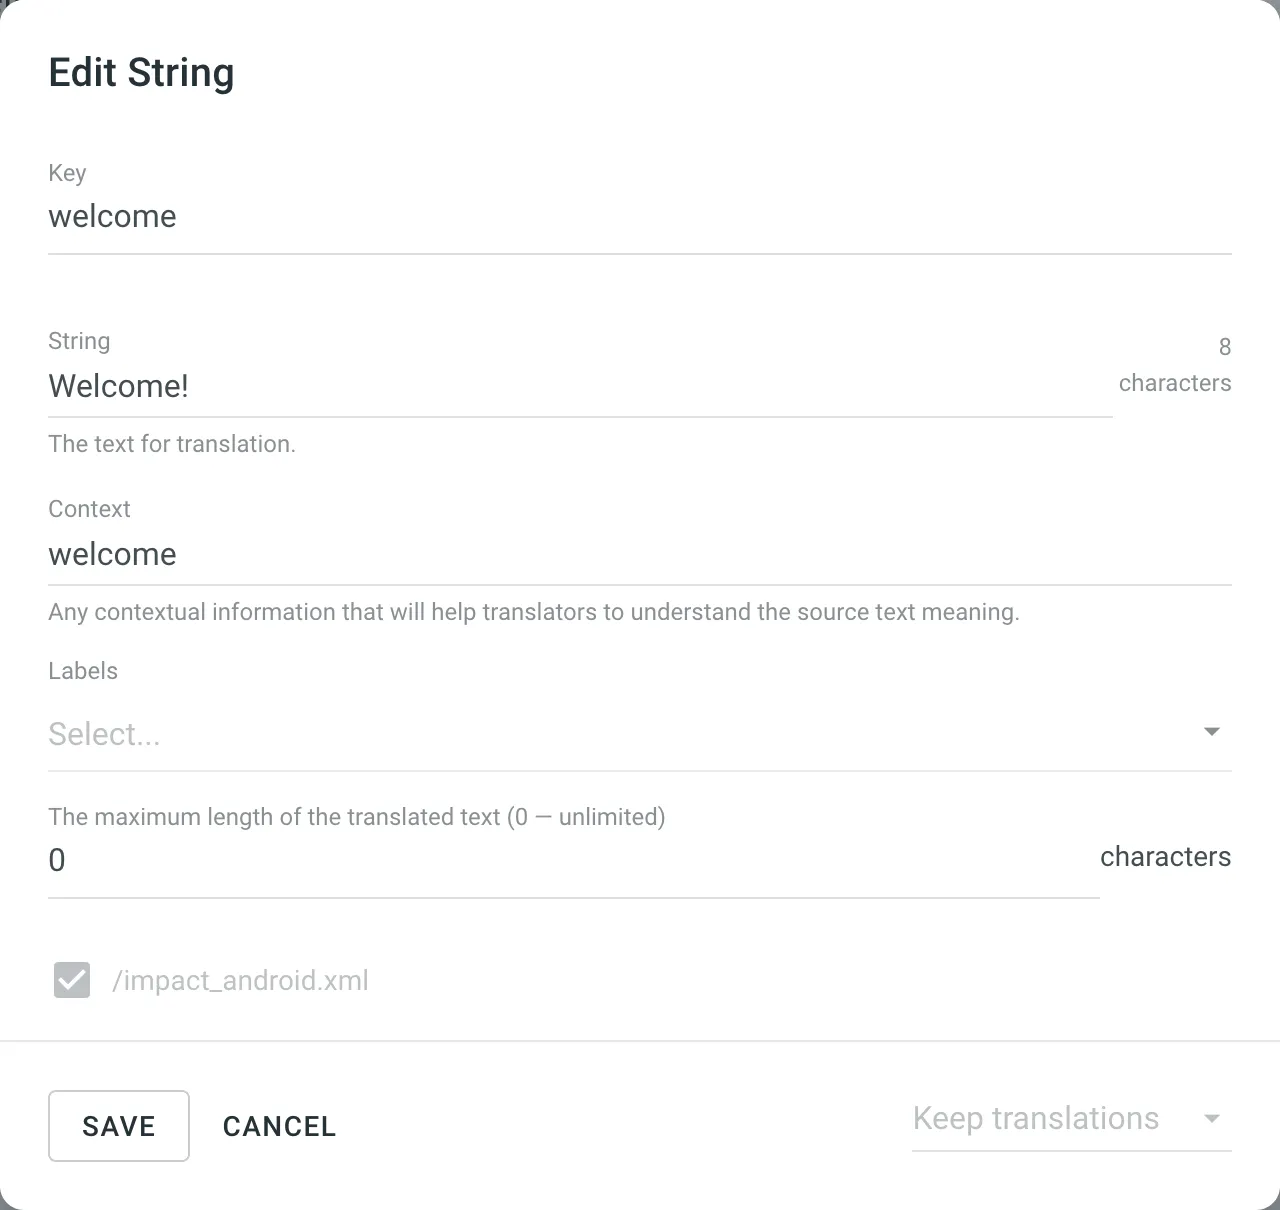 To edit some particular word or phrase that appears in multiple source strings, you can use the **Find and replace** feature in **Sources > Strings**. Caution When editing the identifier of a string contained in a group of strings (string array for Android XML, segments for XLIFF), the existing translations will be removed for all group strings but the edited one. ### [Formats That Support Online Editing](#formats-that-support-online-editing) [Section titled “Formats That Support Online Editing”](#formats-that-support-online-editing) Some file formats allow editing (adding, deleting, and modifying) of the source text and string identifiers directly in Crowdin Enterprise, so you can make the necessary corrections without having to update the source file via **Sources > Files**. The following file formats support editing the source text and string identifiers directly in Crowdin: * [Android XML](https://store.crowdin.com/android-xml) * [iOS Strings](https://store.crowdin.com/strings) * [Apple Strings Catalog](https://store.crowdin.com/string_catalog) * [JSON](https://store.crowdin.com/json) * [i18next JSON](https://store.crowdin.com/i18next-json) * [Chrome JSON](https://store.crowdin.com/chrome-json) * [XLIFF 1.2](https://store.crowdin.com/xliff) * [XLIFF 2.0](https://store.crowdin.com/xliff2.0) * [Angular XLF](https://store.crowdin.com/angular) * [GNU Gettext PO](https://store.crowdin.com/gnu-gettext) * [Unreal Engine Gettext PO](https://store.crowdin.com/gettext-unreal) * [YAML](https://store.crowdin.com/yaml) * [RESX](https://store.crowdin.com/resx) * [CSV](https://store.crowdin.com/csv) * [XLSX](https://store.crowdin.com/xlsx-excel) * [ARB](https://store.crowdin.com/arb) * [Java Properties](https://store.crowdin.com/java-properties) * [Properties Play](https://store.crowdin.com/properties-play) * [Properties XML](https://store.crowdin.com/properties-xml) ### [Labels](#labels) [Section titled “Labels”](#labels) Use labels in your project for an easy way to add context to the strings or organize them by certain topics. Labels are also useful while creating translation and proofreading tasks or searching for specific strings in the Editor with the help of [Advanced Filter](/enterprise/online-editor/#advanced-filter). [Managing Project Labels ](/enterprise/project-settings/labels/)Learn how to make your Crowdin project labels. There are a few possible ways you can add labels to the strings. ##### [Add labels to one string at a time via the *Edit String* dialog](#add-labels-to-one-string-at-a-time-via-the-edit-string-dialog) [Section titled “Add labels to one string at a time via the Edit String dialog”](#add-labels-to-one-string-at-a-time-via-the-edit-string-dialog) 1. Right-click on the string in the list and select **Edit**. 2. Select needed labels in the *Labels* field. 3. Click **Save**. 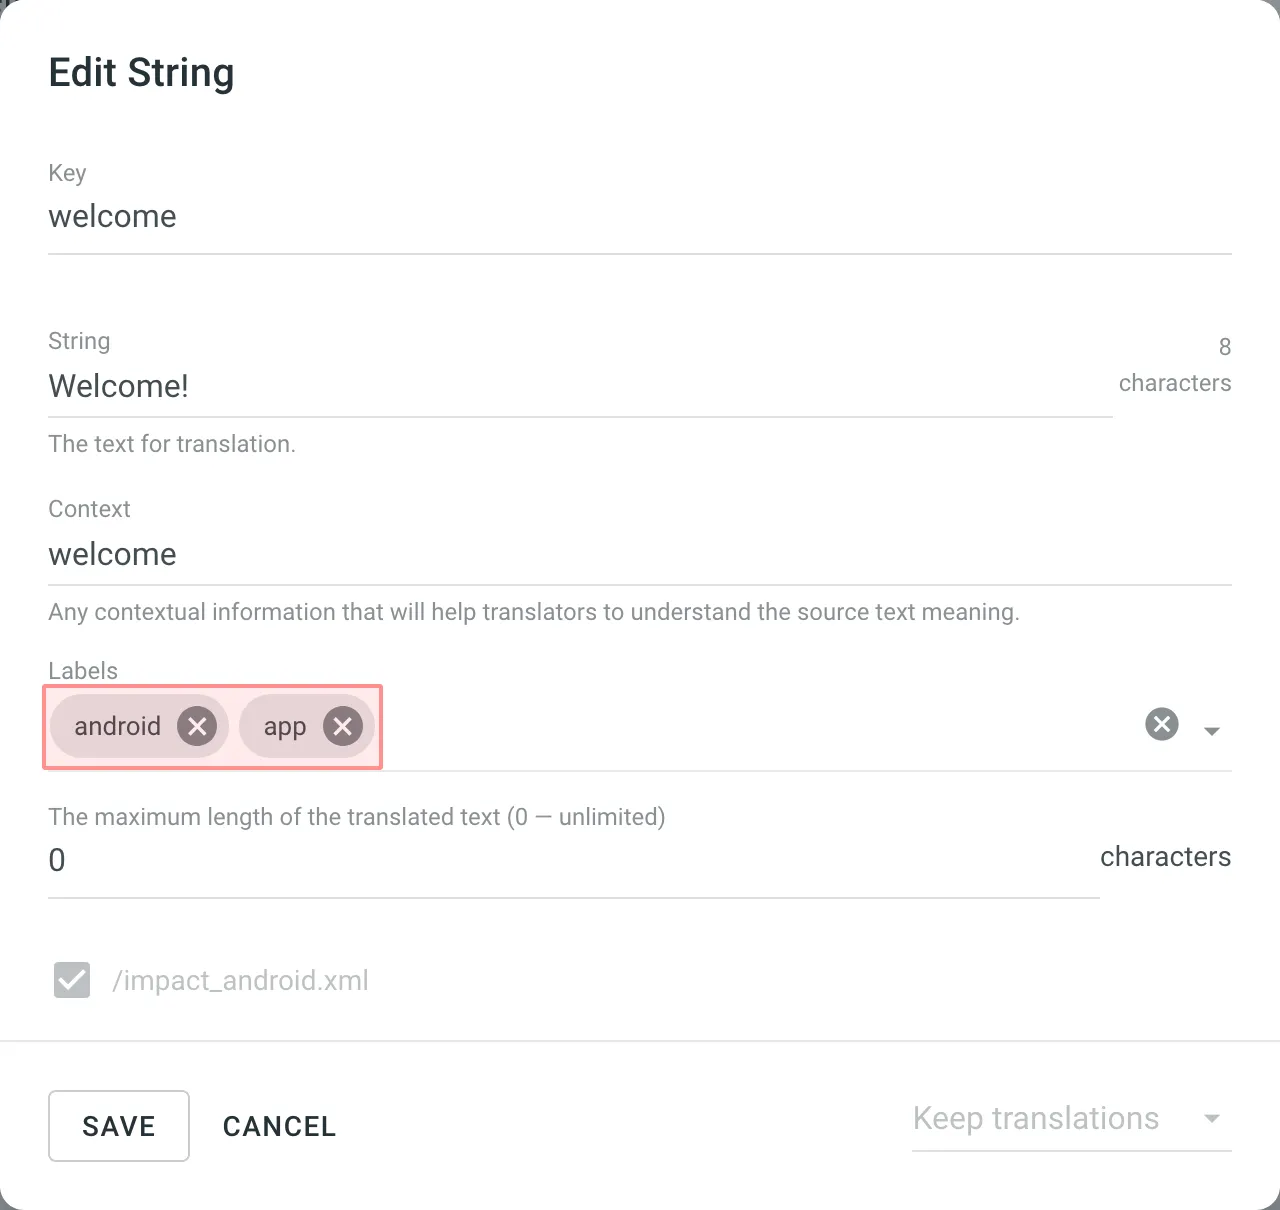 ##### [Add labels to multiple strings via the *Manage Strings Labels* dialog](#add-labels-to-multiple-strings-via-the-manage-strings-labels-dialog) [Section titled “Add labels to multiple strings via the Manage Strings Labels dialog”](#add-labels-to-multiple-strings-via-the-manage-strings-labels-dialog) 1. Select a few strings you want to add the same labels to. 2. Click . 3. Select needed labels from the list. 4. Click **Apply**. 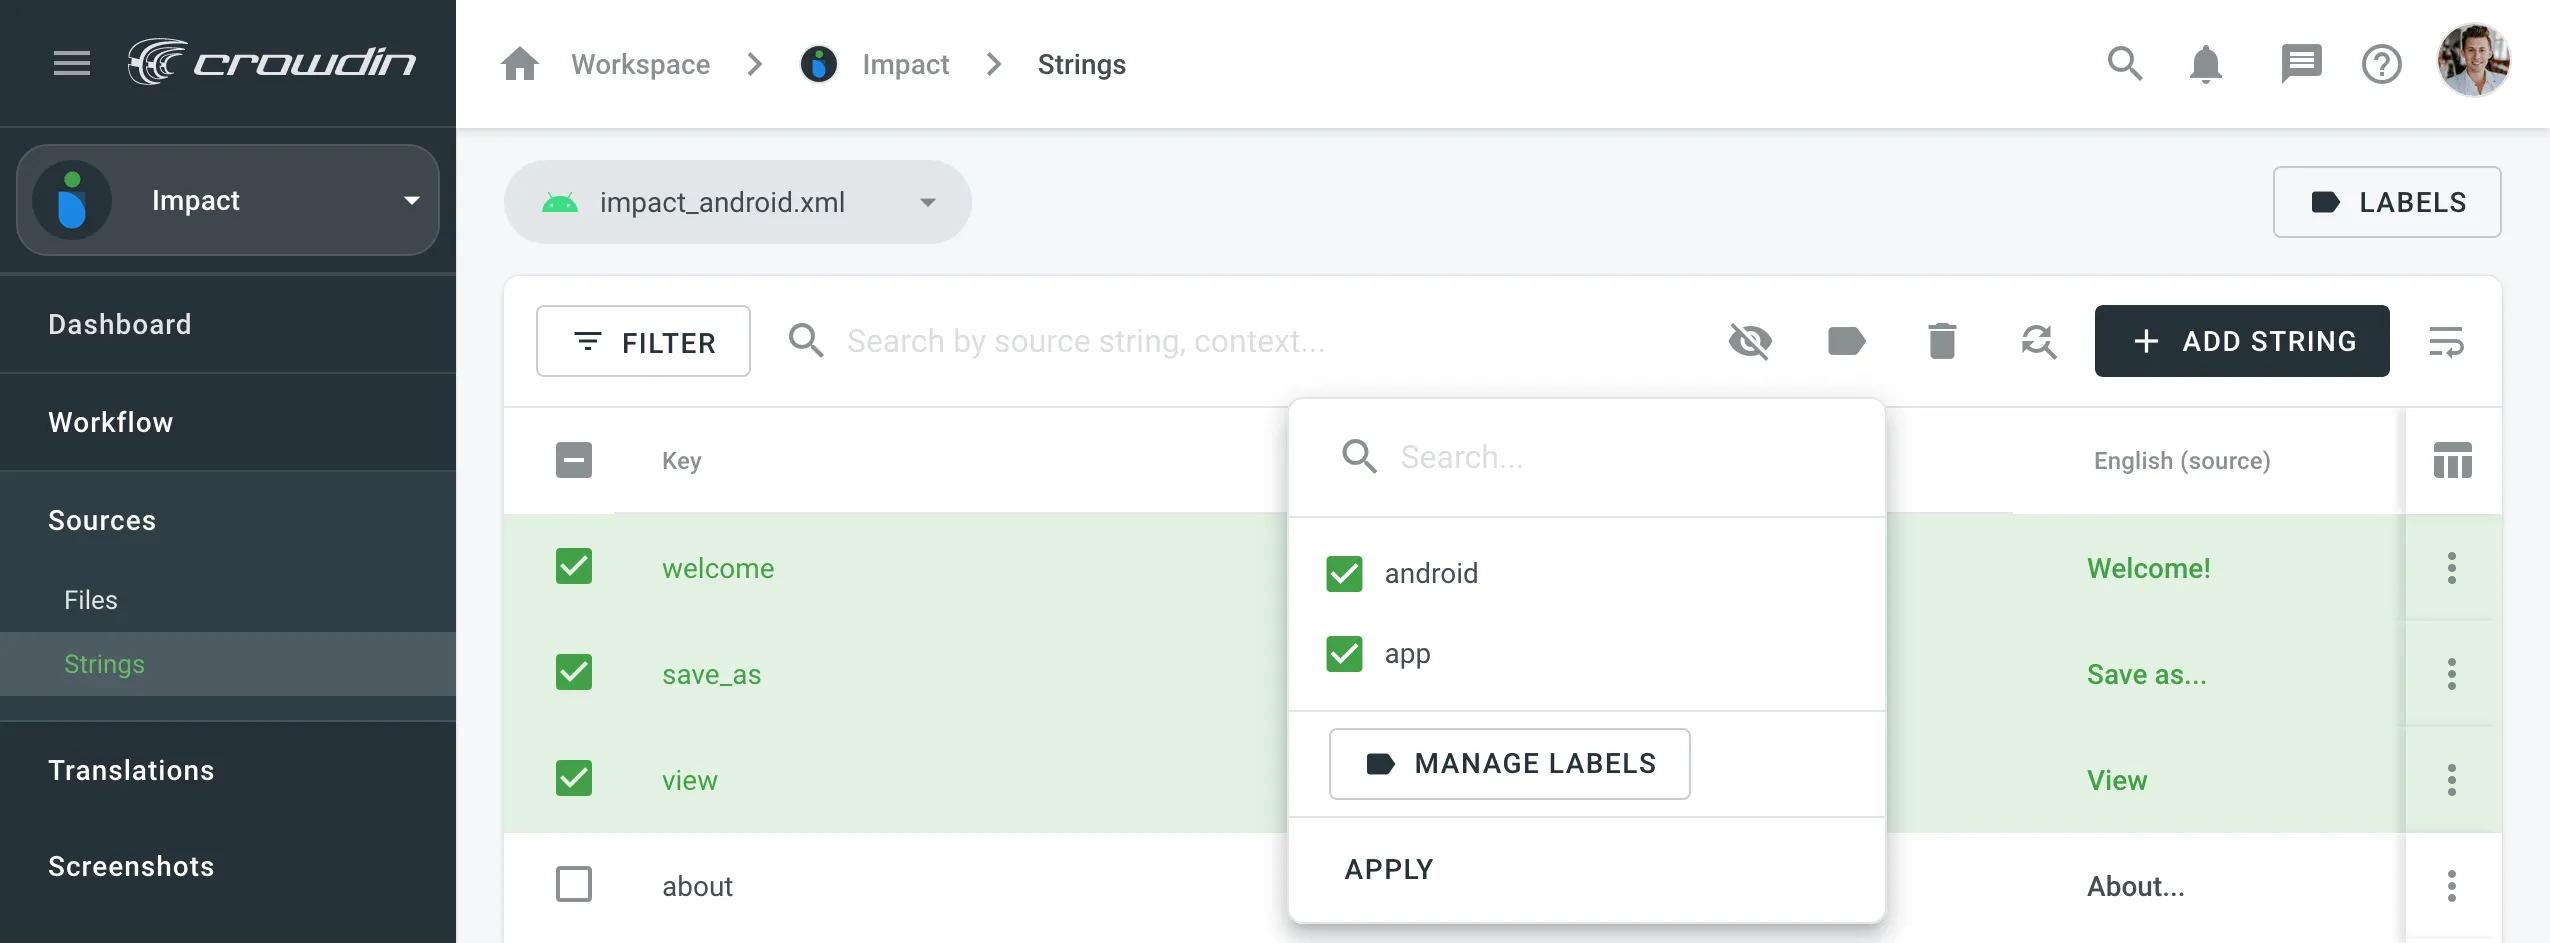 ##### [Add labels to the source strings in CSV and XLSX files using a dedicated column for labels](#add-labels-to-the-source-strings-in-csv-and-xlsx-files-using-a-dedicated-column-for-labels) [Section titled “Add labels to the source strings in CSV and XLSX files using a dedicated column for labels”](#add-labels-to-the-source-strings-in-csv-and-xlsx-files-using-a-dedicated-column-for-labels) Read more about [Configuring Columns for Import](/enterprise/csv-xlsx-configuration/#configuring-columns-for-import).
# Supported Formats
> Explore the list of localization formats supported by Crowdin
Crowdin supports a wide range of localization formats, including but not limited to files for mobile, software, documents, subtitles, and graphic assets. ## [Localization Formats and Documents](#localization-formats-and-documents) [Section titled “Localization Formats and Documents”](#localization-formats-and-documents) * Mobile application formats * Web and desktop software formats * Documentation and video subtitles  50 Supported Formats [View on Store ](https://store.crowdin.com/categories/file-formats) ## [Graphics and Assets](#graphics-and-assets) [Section titled “Graphics and Assets”](#graphics-and-assets) Localize images associated with your product to improve your product’s user experience. 1. Upload graphics to Crowdin. 2. Add all the necessary references for a translator to understand how these graphics should be handled. 3. Wait for translators to upload localized files. 4. Download the localized graphics and use them in production. 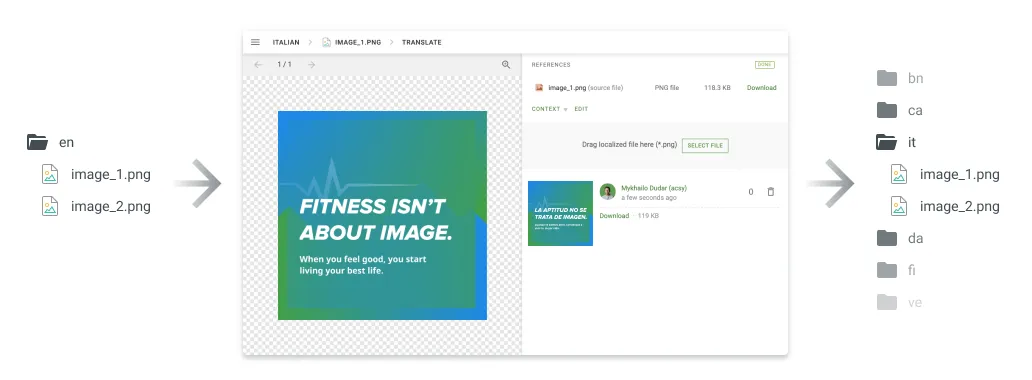 ## [Converted File Formats](#converted-file-formats) [Section titled “Converted File Formats”](#converted-file-formats) On import, some file formats are automatically converted into other formats to be further parsed and processed. You can see the list of the initial file formats and the file formats they’re being converted into in the table below. | Initial file format | Converted file format | | ------------------- | --------------------- | | DOC | DOCX | | PPT | PPTX | | RTF | DOCX | | PDF | DOCX | ## [Custom Services](#custom-services) [Section titled “Custom Services”](#custom-services) ## [Custom File Formats](#custom-file-formats) [Section titled “Custom File Formats”](#custom-file-formats) File formats that are not officially supported will be recognized as plain text files (if they contain text) or as graphic assets. Our team can add special code to support your original file formats and ensure that translators see only translatable text rather than the entire file content. This approach allows you to manage custom file formats more effectively. [Contact](https://crowdin.com/contacts) our support team to start working with custom file formats in your project. Alternatively, you can implement support for a custom format yourself by developing a [Crowdin app](/developer/crowdin-apps-about/) incorporating the [Custom File Format](/developer/crowdin-apps-module-custom-file-format/) module. ## [Custom File Export](#custom-file-export) [Section titled “Custom File Export”](#custom-file-export) By default, we export the translations in the same format as the source files. For example, if you upload an XML file to Crowdin, you’ll have the XML file exported. Our developers can create a special processor if you want to configure custom settings for your file export. For example, you upload a key-value file that doesn’t support [string editing](/enterprise/string-management/) by default and want to modify it directly in Crowdin. We can temporarily convert your file to CSV file format to allow you to add strings online. The exported file will remain in the original format. [Contact](https://crowdin.com/contacts) our support team, and we’ll gladly help you set custom export options based on your needs. ## [Custom Placeholders](#custom-placeholders) [Section titled “Custom Placeholders”](#custom-placeholders) Crowdin supports all the placeholders typical for the supported file formats. They are all automatically highlighted in the Editor, so translators know that they shouldn’t be translated. Even if the translator tries to save the translation with some modified or missing placeholder, enabled QA checks will notify the translator about the mistake. As various file formats allow the creation of custom placeholders, we can also add support for the custom ones you use in your project. To request the support of your custom placeholders, [contact](https://crowdin.com/contacts) our support team.
# Project Tasks
> Create and assign tasks for translating or proofreading content
Create and assign tasks for translating or proofreading content to specific project members or vendors. You can set due dates, split words among assignees, receive notifications about task changes and updates, and discuss tasks with other project members in the comments. ## [Creating New Task](#creating-new-task) [Section titled “Creating New Task”](#creating-new-task) To create a new task, follow these steps: * File-based project 1. Open your project and select **Tasks** on the left sidebar. 2. Click **New task**. 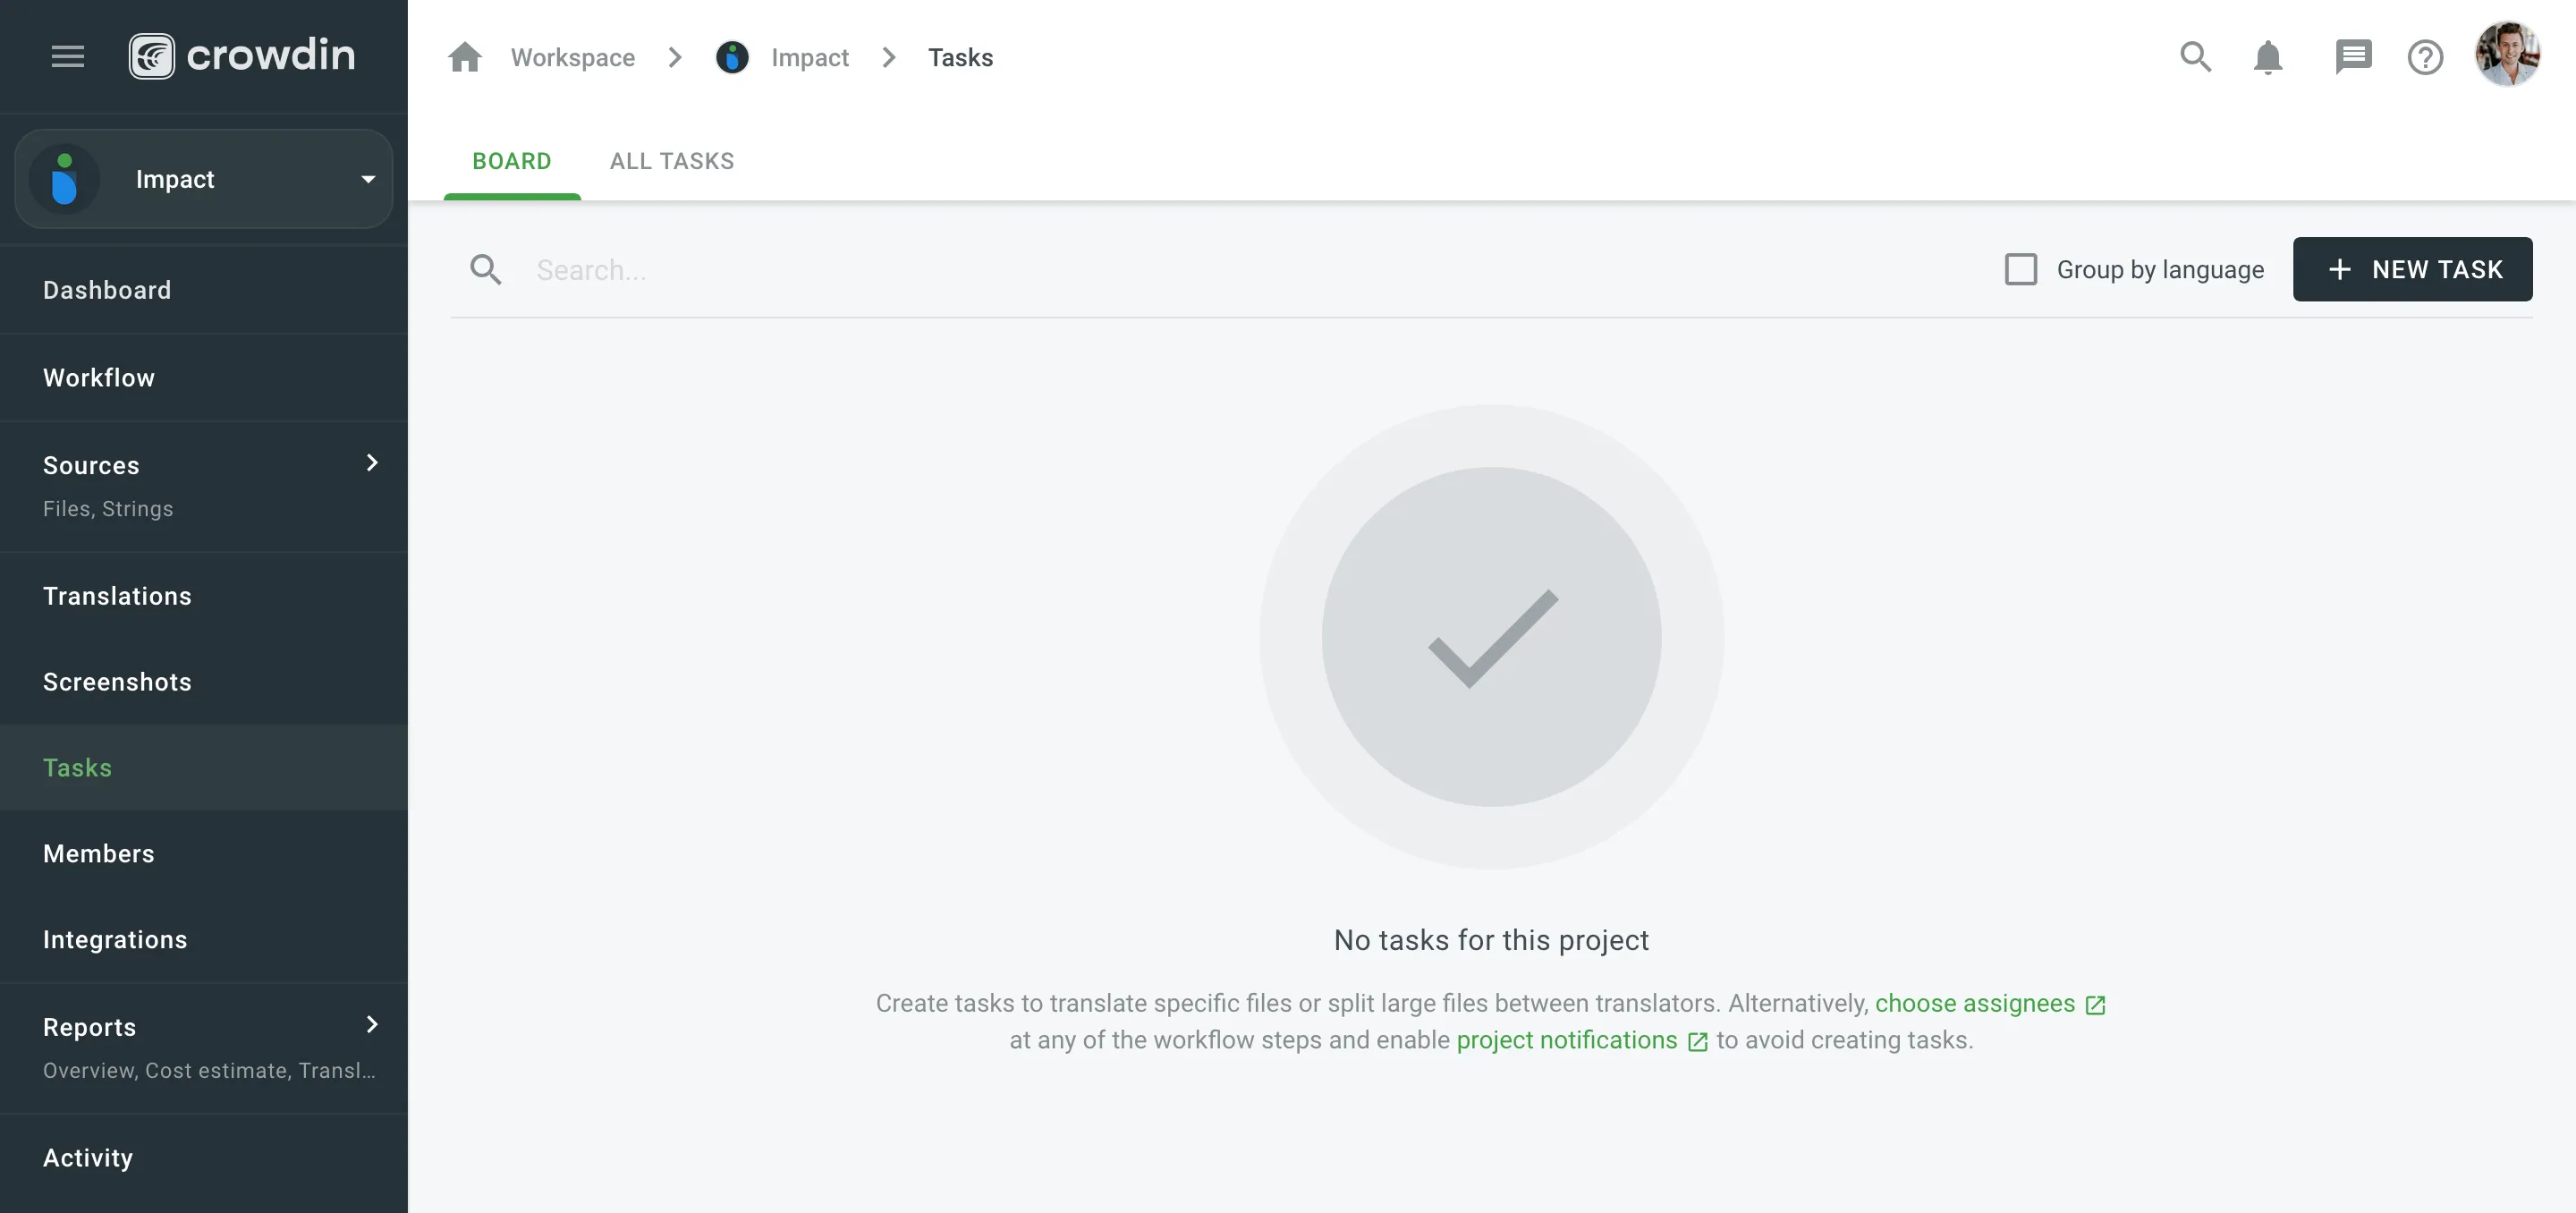 3. Set the task parameters: * *Type* – select between Translate by own translators, Proofread by own proofreads, Translate by vendor, and Proofread by vendor. * *Workflow step* – select the necessary step from the project workflow. * *String filters* – filter which strings should be included in the task: * *Strings* – select whether to include *All ToDo strings on the selected step*, or only those modified within a specific period. * *Filter by labels* (optional) – include only strings with specified labels. Additionally, choose how selected labels should be matched: * *All selected labels* – includes only strings that have all selected labels (AND logic). * *Any selected label* – includes strings that have at least one of the selected labels (OR logic). * *Exclude by labels* (optional) – exclude strings with specified labels. Additionally, choose how selected labels should be matched: * *All selected labels* – excludes only strings that have all selected labels (AND logic). * *Any selected label* – excludes strings that have at least one of the selected labels (OR logic). * *Skip strings already included in other tasks* – select or clear this option depending on your preferences. * *Due Date* (optional) – set a deadline. * *Files* – select files that should be translated or require proofreading. * *Languages* – select target languages (a separate task will be created for each selected language). The *Words to do* column shows the total number of words added to the task. 4. Click **Assign** to assign users to the task for each language separately. 5. Name the task and add a description (optional). 6. Click **Create**. 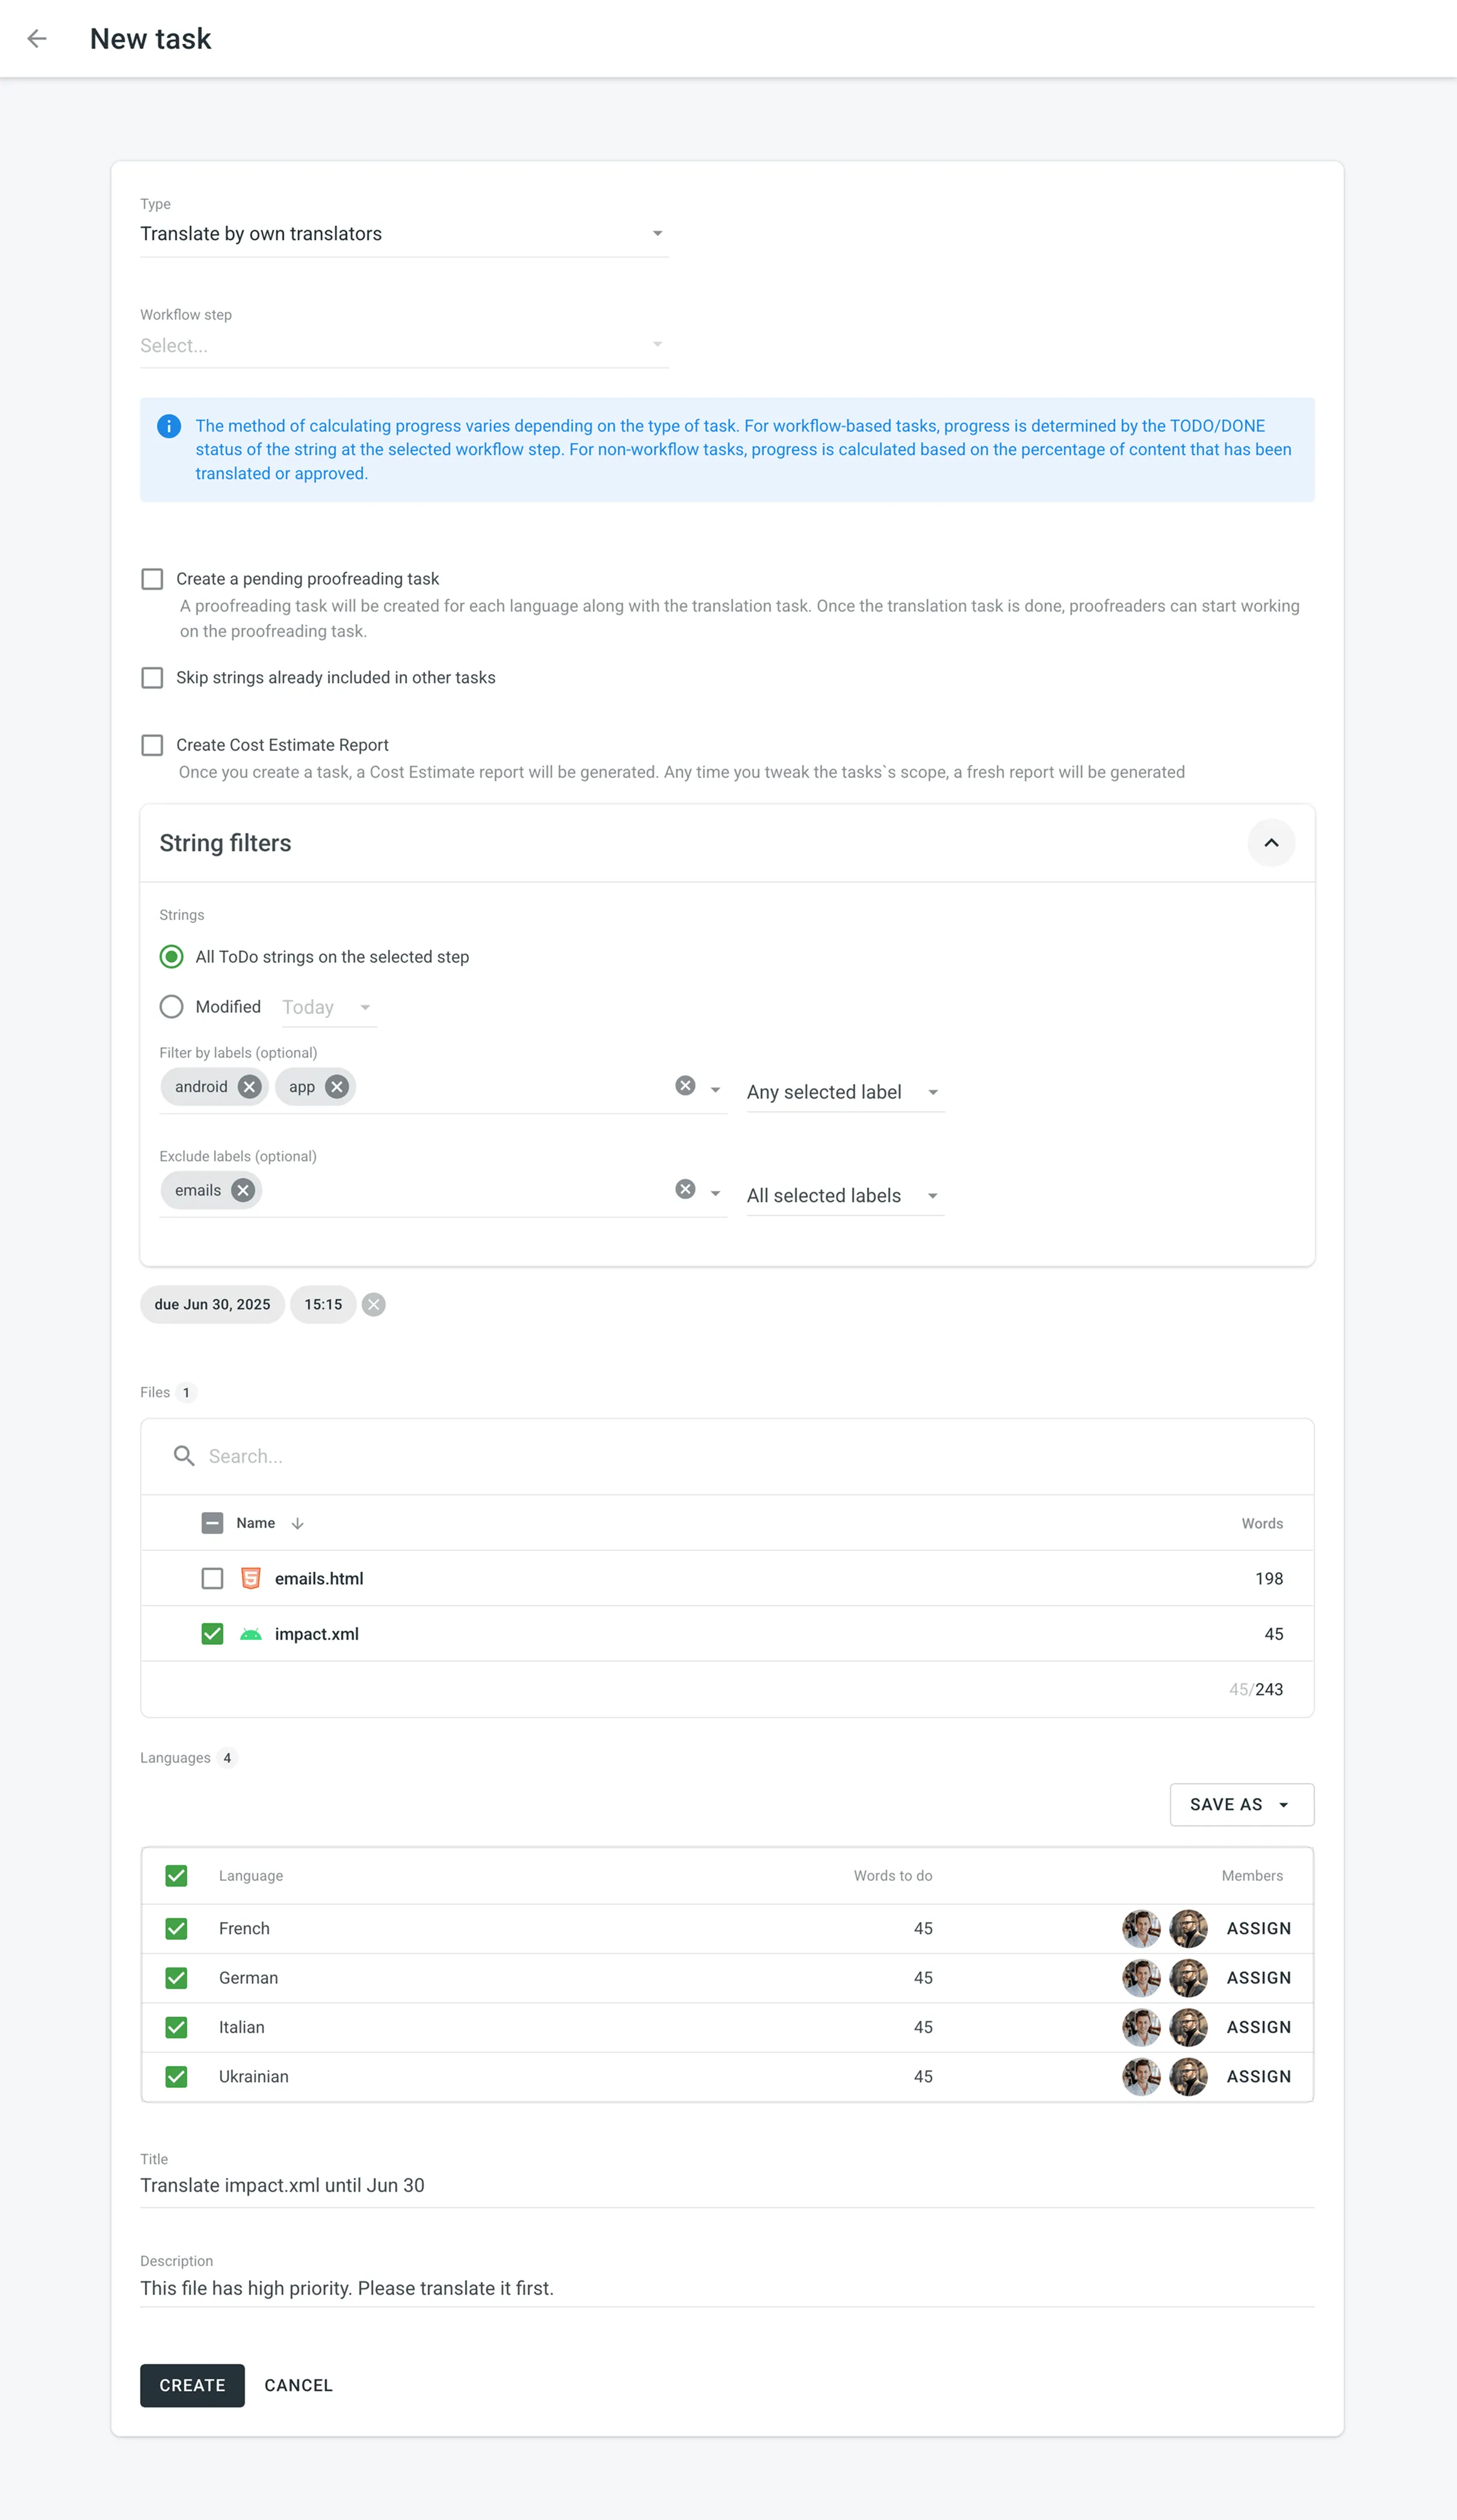 * String-based project 1. Open your project and select **Tasks** on the left sidebar. 2. Click **New task**. 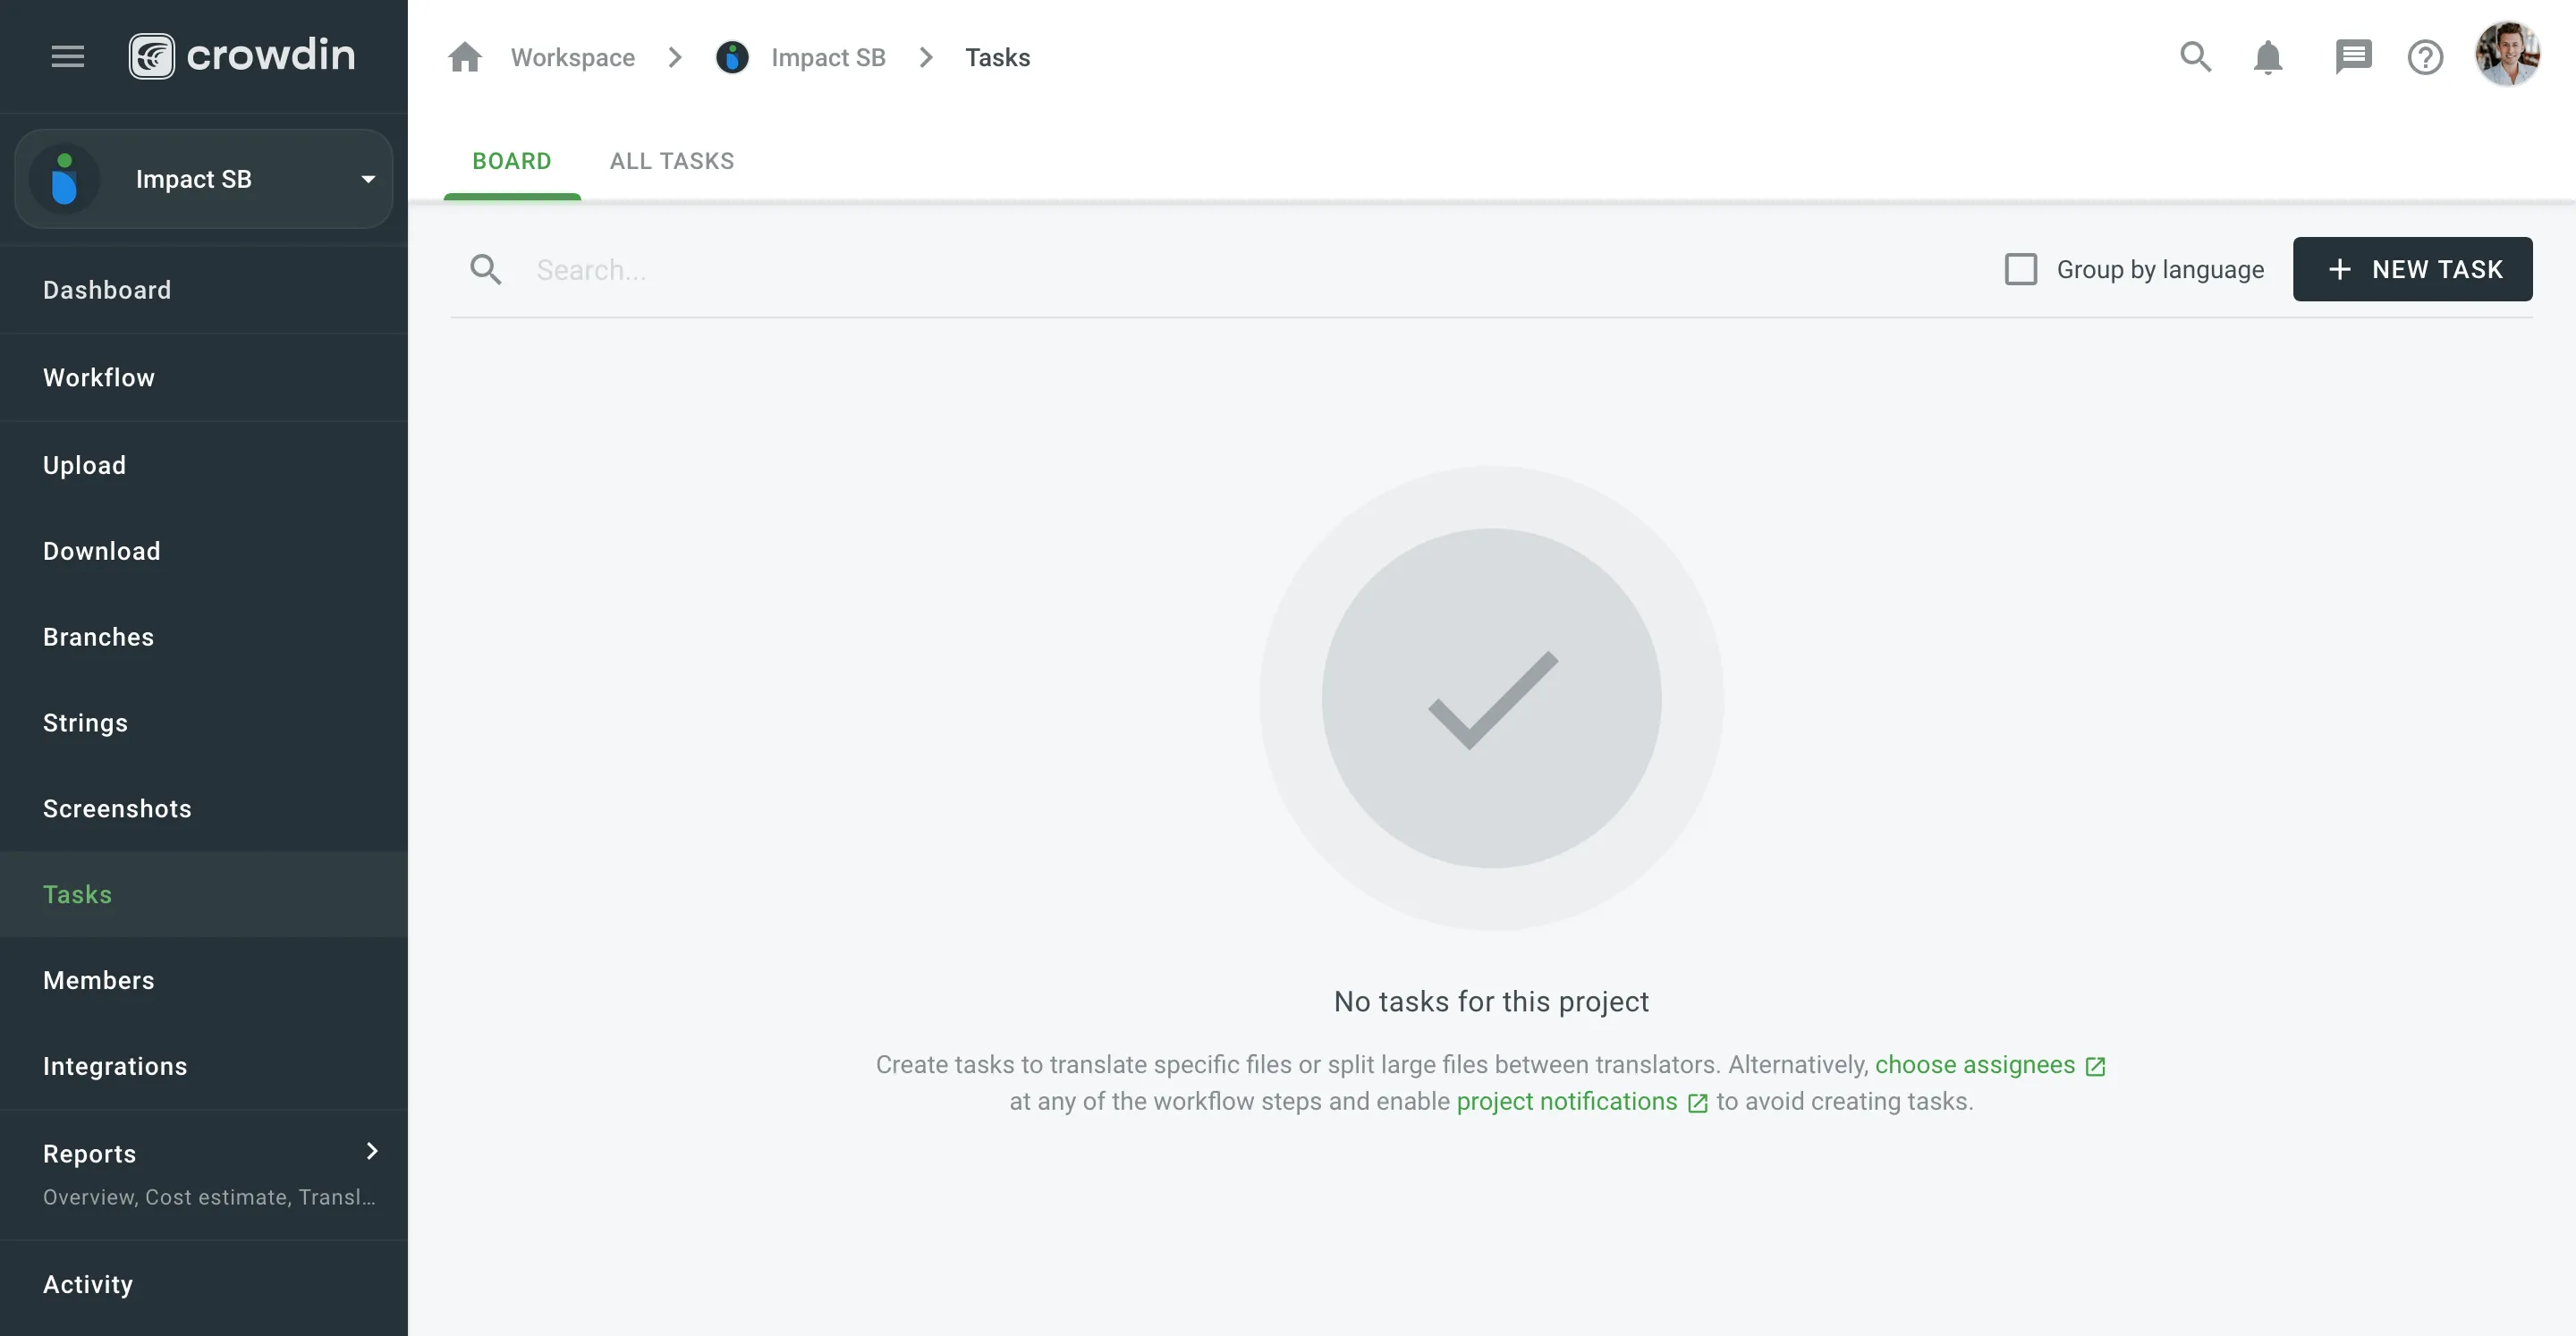 3. Set the task parameters: * *Type* – select between Translate by own translators, Proofread by own proofreads, Translate by vendor, and Proofread by vendor. * *Workflow step* – select the necessary step from the project workflow. * *String filters* – filter which strings should be included in the task: * *Strings* – select whether to include *All ToDo strings on the selected step*, or only those modified within a specific period. * *Filter by labels* (optional) – include only strings with specified labels. Additionally, choose how selected labels should be matched: * *All selected labels* – includes only strings that have all selected labels (AND logic). * *Any selected label* – includes strings that have at least one of the selected labels (OR logic). * *Exclude by labels* (optional) – exclude strings with specified labels. Additionally, choose how selected labels should be matched: * *All selected labels* – excludes only strings that have all selected labels (AND logic). * *Any selected label* – excludes strings that have at least one of the selected labels (OR logic). * *Skip strings already included in other tasks* – select or clear this option depending on your preferences. * *Due Date* (optional) – set a deadline. * *Branches* – select branches that should be translated or require proofreading. * *Languages* – select target languages (a separate task will be created for each selected language). The *Words to do* column shows the total number of words added to the task. 4. Click **Assign** to assign users to the task for each language separately. 5. Name the task and add a description (optional). 6. Click **Create**. 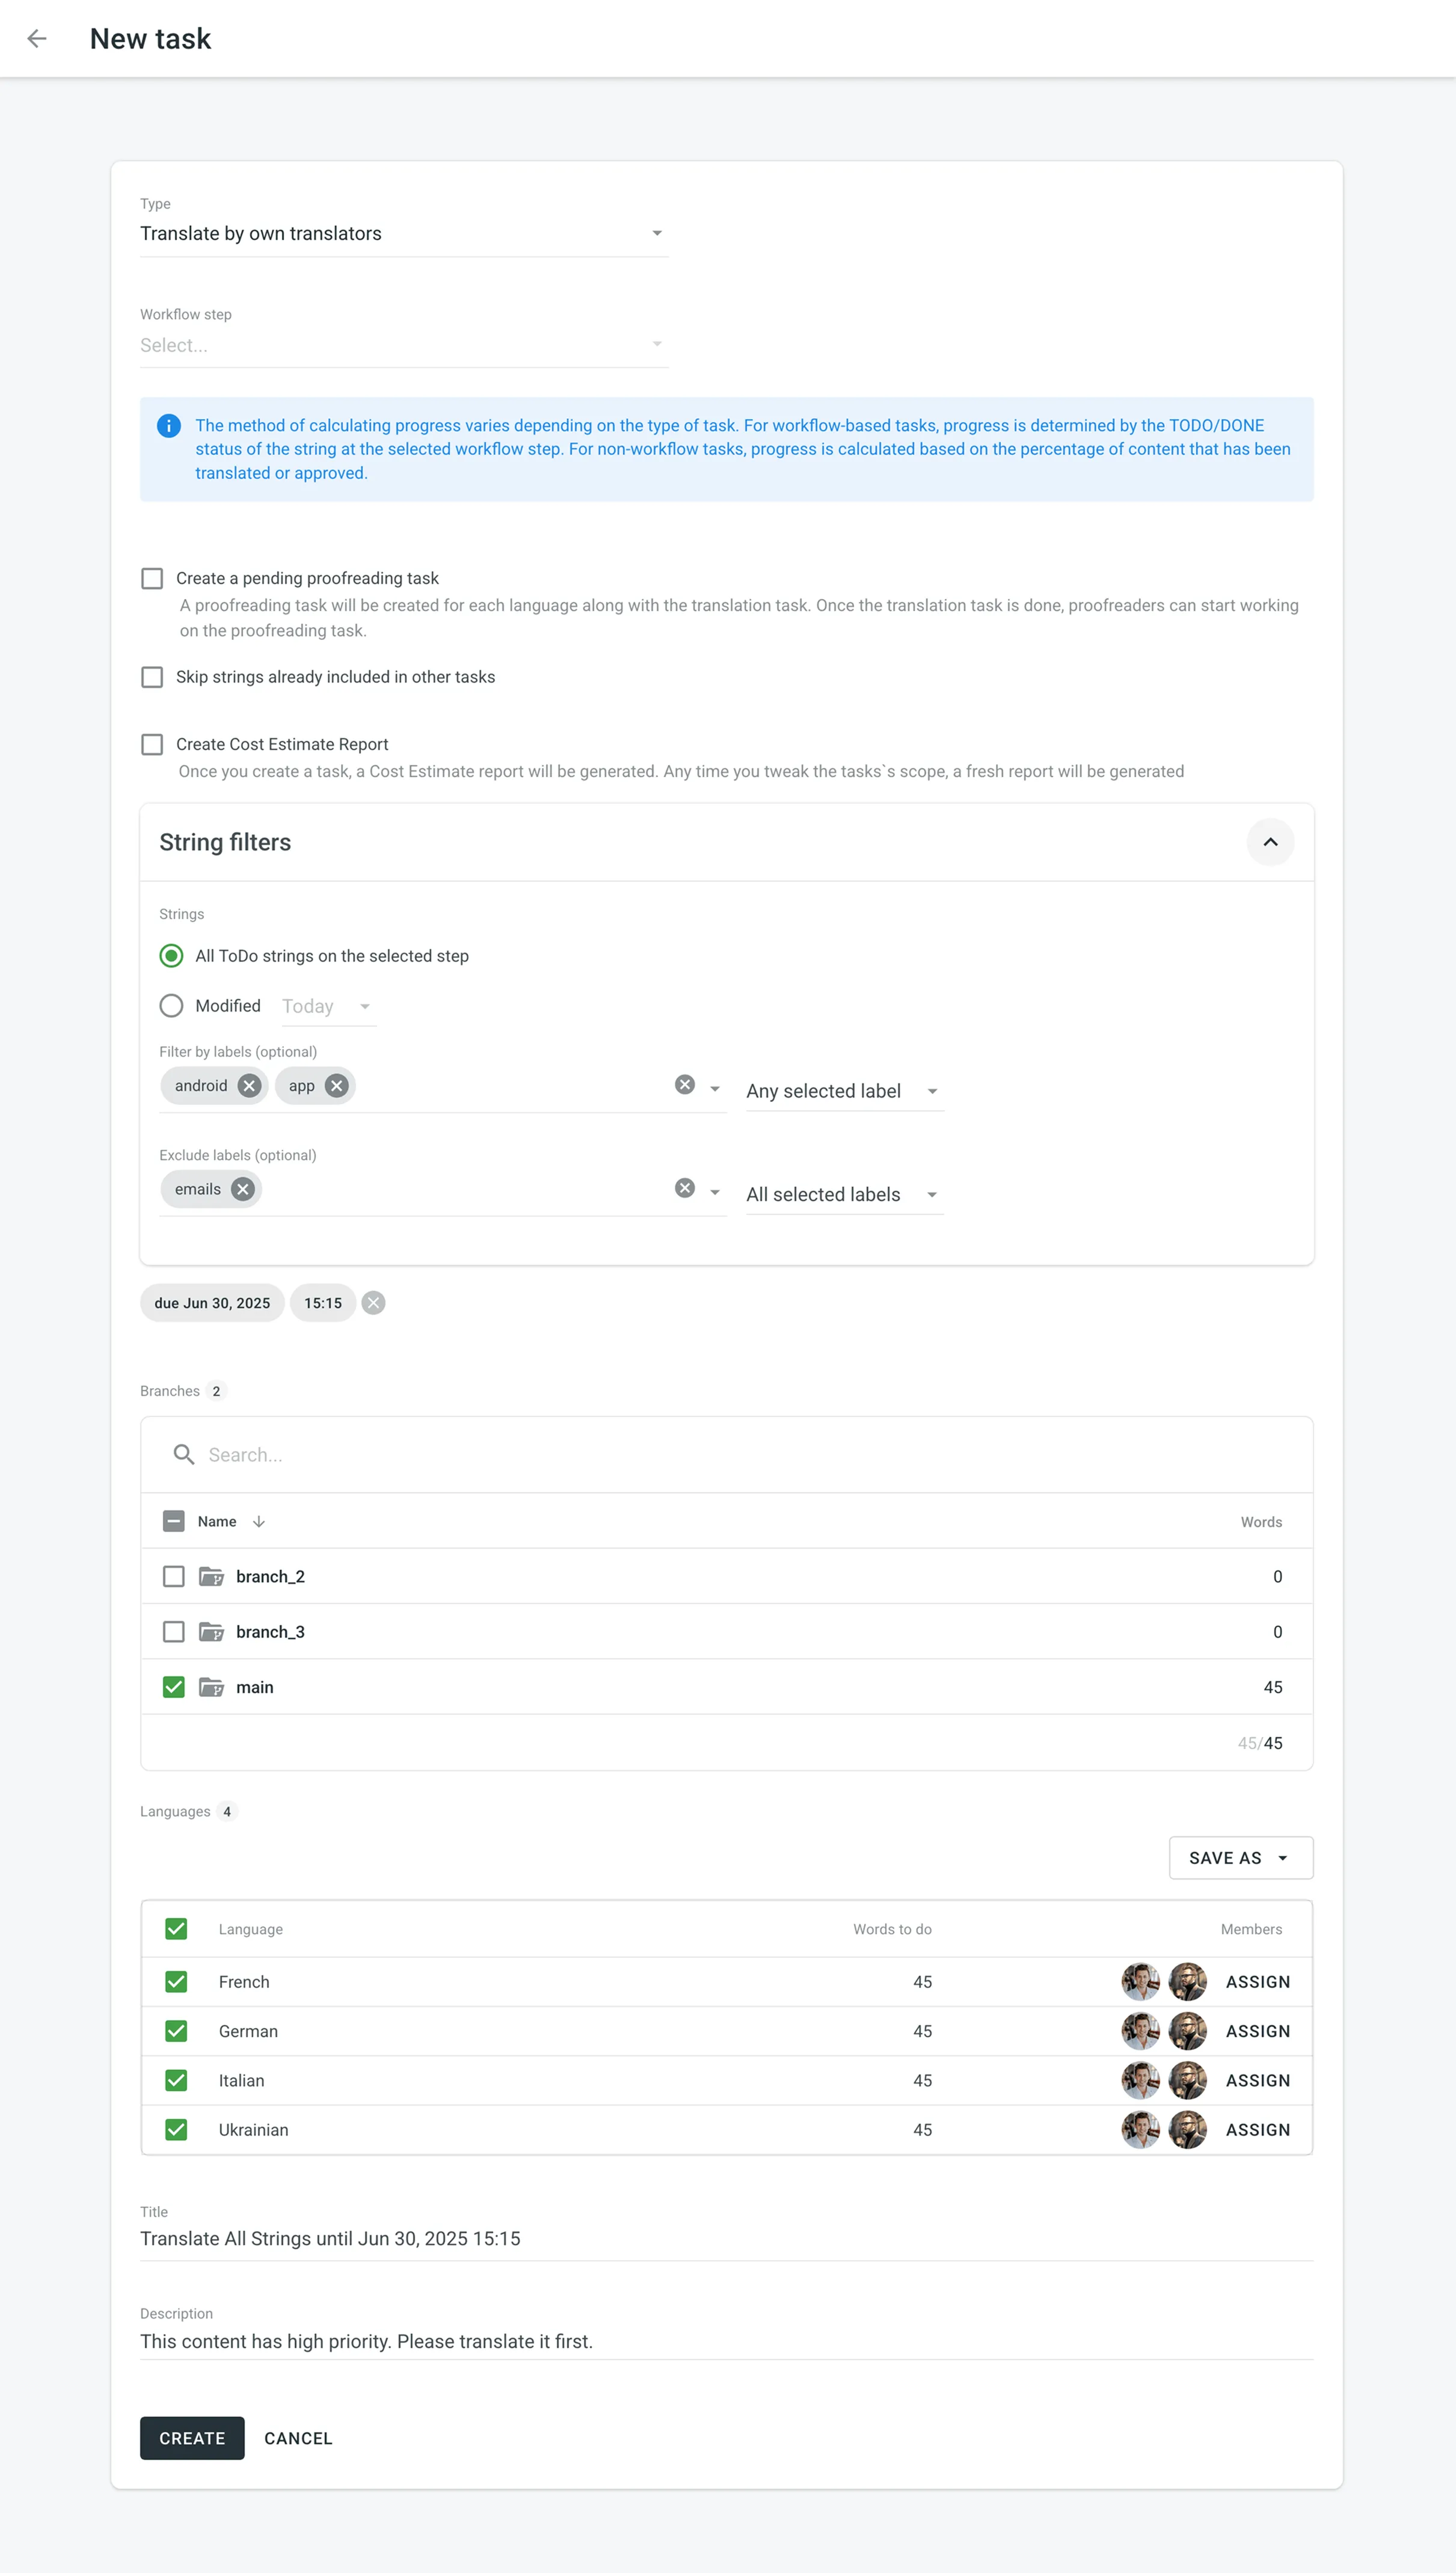 Read more about [project types](/enterprise/creating-project/#project-types). ### [Splitting Content](#splitting-content) [Section titled “Splitting Content”](#splitting-content) Splitting content between several members allows you to speed up the translation or proofreading process. While in string-based and file-based projects this option is called differently (i.e., **Split strings** and **Split files**), the basic principle of its behavior remains the same. To split content between several members select **Split files** (in file-based project) or **Split strings** (in file-based project) in the **Assign users** dialog. You can set the approximate amount of words for each assignee. 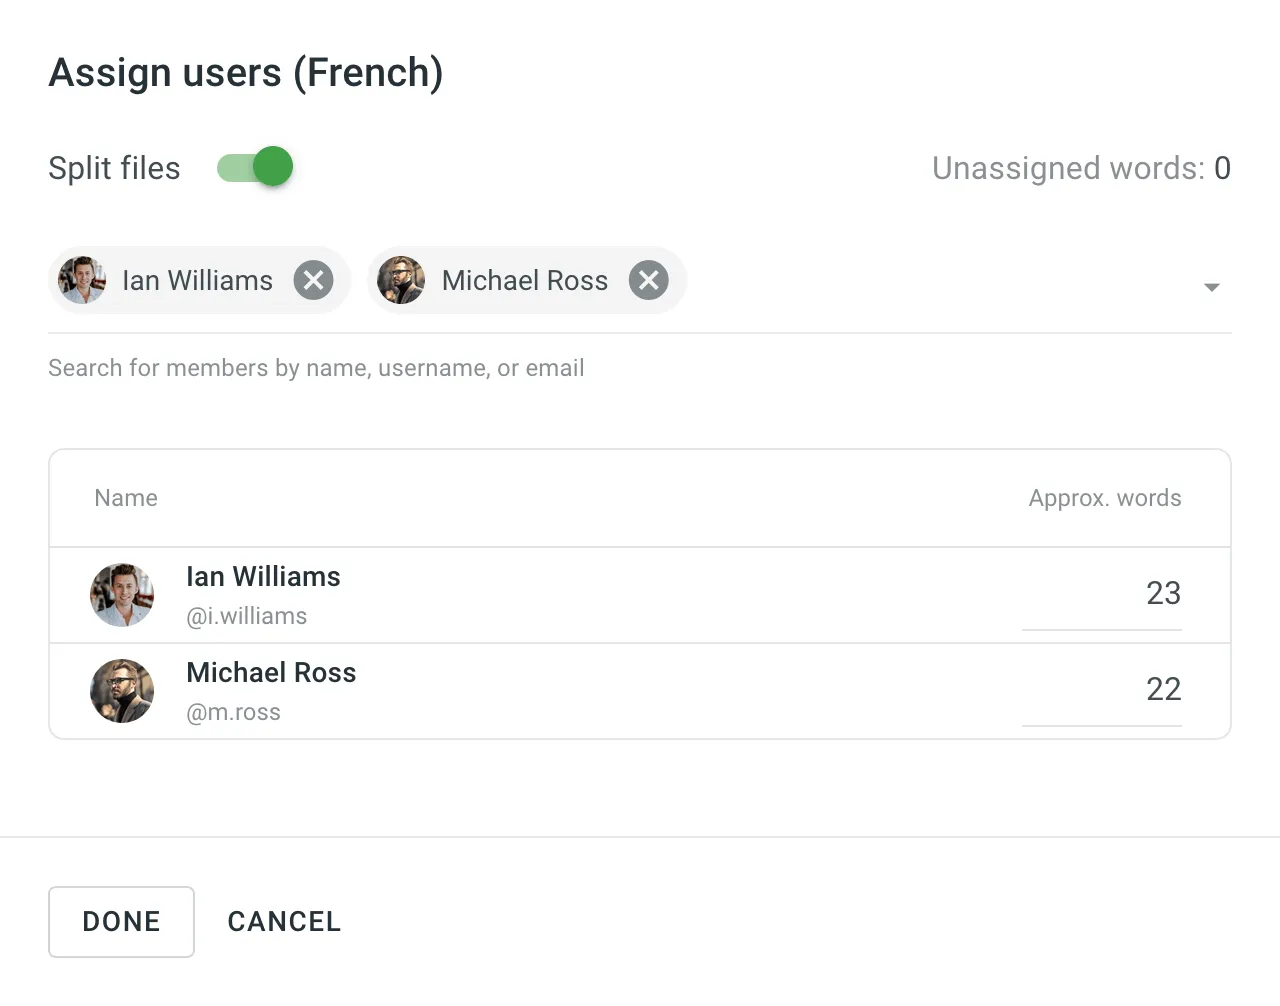 ### [Generating Cost Estimate Report for Tasks](#generating-cost-estimate-report-for-tasks) [Section titled “Generating Cost Estimate Report for Tasks”](#generating-cost-estimate-report-for-tasks) To automatically estimate the cost of translation or proofreading for a task, select the **Create Cost Estimate Report** option during task creation. Once selected, a required [**Rates Template**](/enterprise/project-reports/#rate-templates) drop-down will appear. Choose a saved template to calculate the cost estimate based on the selected strings or files. After the task is created, a Cost Estimate report will be generated automatically and become available in the [Archive](/enterprise/project-reports/#archive) section. The estimated cost will also be displayed on the task card in the Board section. You can open the task to view the **Estimated Cost** section, which includes the following details: * The calculated cost based on the selected rates template * A clickable report title (e.g., Report #123) that links to the full report in the Archive section * The report generation date If the task scope changes (e.g., files or strings are modified), a new Cost Estimate report will be generated automatically to reflect the updated estimate. ### [Task Templates](#task-templates) [Section titled “Task Templates”](#task-templates) Use task templates to save the configuration of the **Languages** section, including target languages and member assignments. Templates help you quickly apply these configurations when creating new tasks, saving time and ensuring consistency. #### [Saving Templates](#saving-templates) [Section titled “Saving Templates”](#saving-templates) To save the language and member assignment settings as a template, follow these steps: 1. In the **Languages** section, click **Save as**. 2. Select **New template** from the drop-down menu. 3. In the dialog that appears, enter a name for your template. 4. Click **Save**. Your template is now saved and available for future tasks. 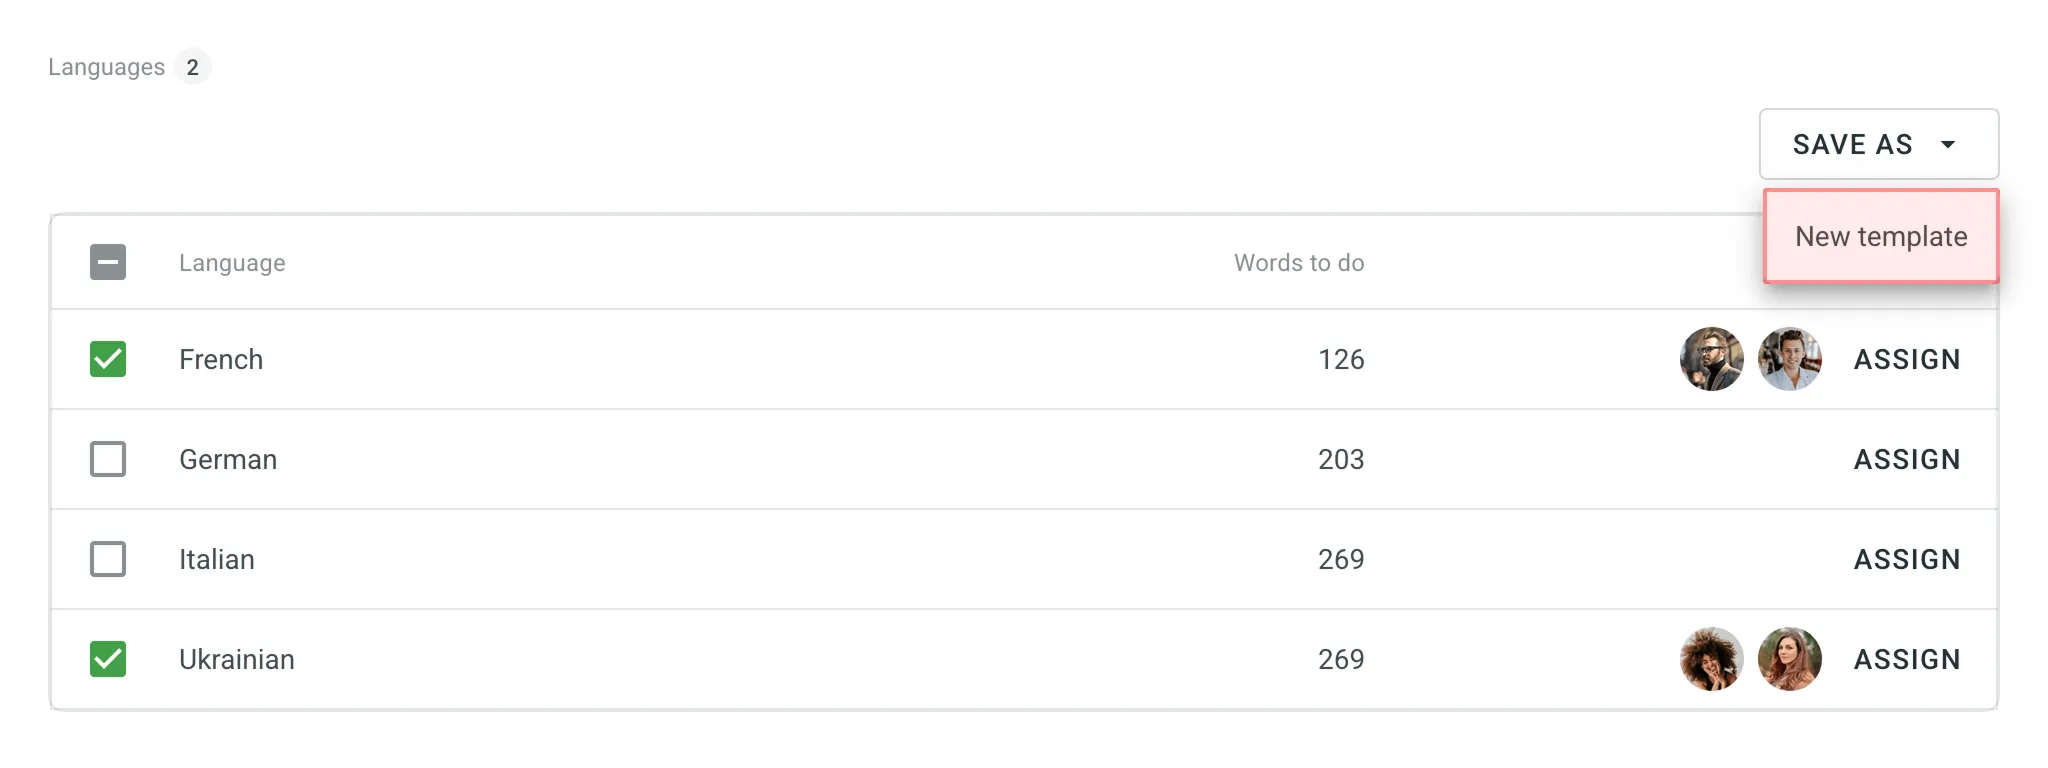 #### [Applying Templates](#applying-templates) [Section titled “Applying Templates”](#applying-templates) To apply a saved template to a new task, follow these steps: 1. In the **Languages** section, click on the template name to apply it immediately. 2. Alternatively, click next to the template name and select **Apply**. #### [Managing Templates](#managing-templates) [Section titled “Managing Templates”](#managing-templates) To rename or delete a saved template, follow these steps: 1. In the **Languages** section, click next to the template name. 2. Select one of the following options: * **Rename** – Enter a new name for your template. * **Delete** – Permanently remove the template. 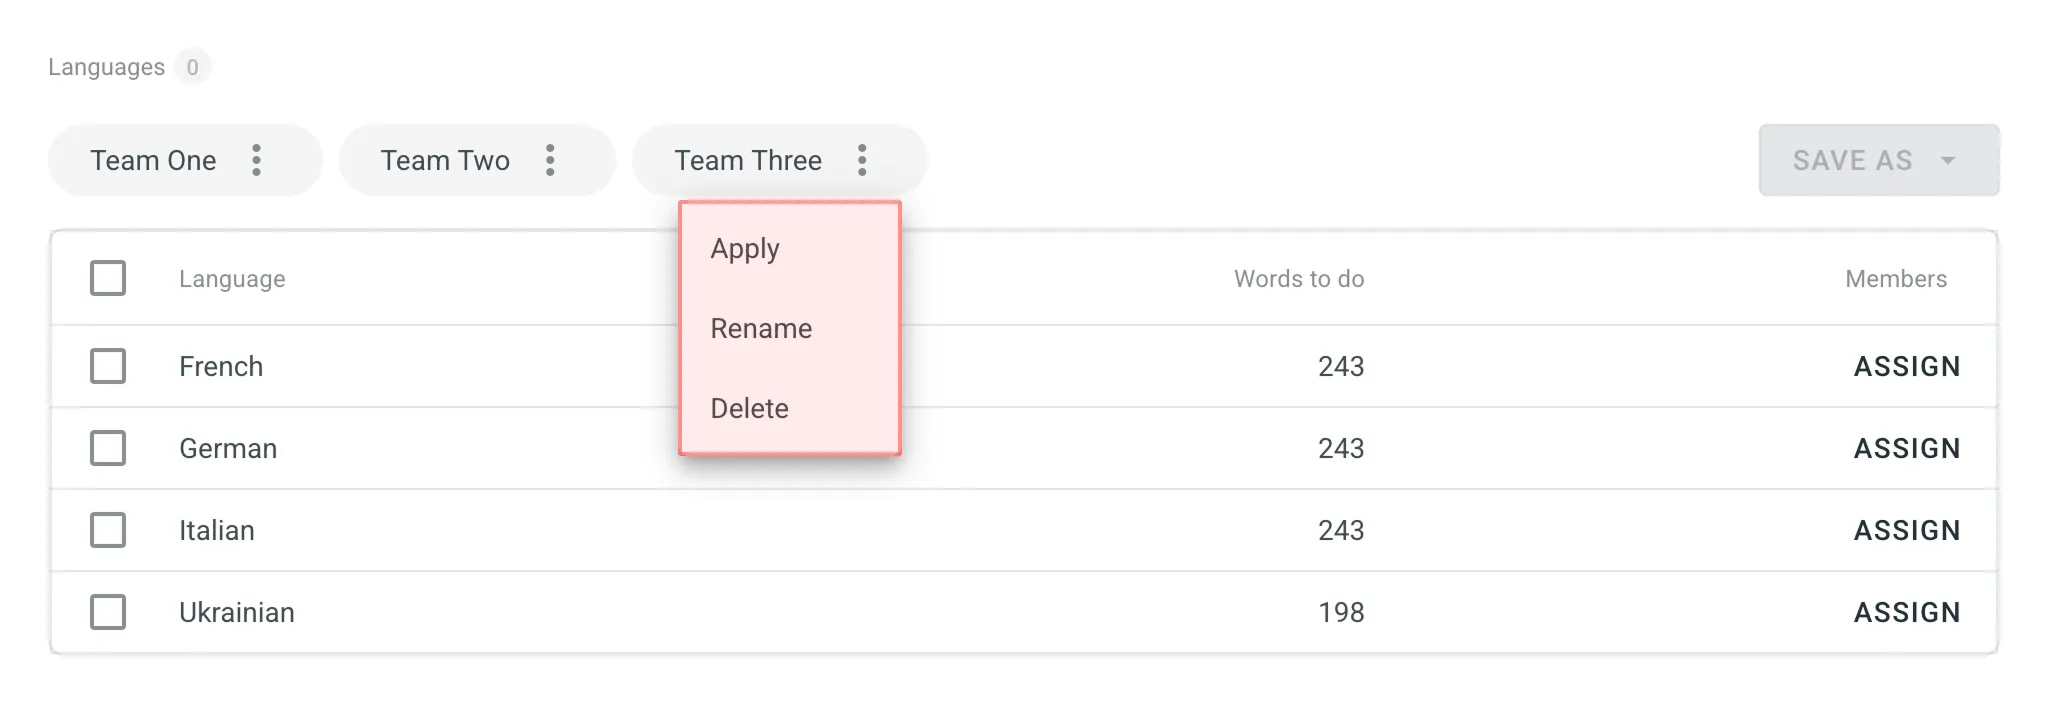 ## [Project Tasks](#project-tasks) [Section titled “Project Tasks”](#project-tasks) In the **Tasks** section, you can view all the project tasks in the following two sections: *Board*, *All Tasks*. ### [Board](#board) [Section titled “Board”](#board) In the *Board* section, tasks are organized into three columns: To Do, In Progress, and Done. This layout provides a clear view and visualization of the current status of all tasks. Within each column, tasks are further grouped by target languages. Each target language group can be collapsed to hide task cards or expanded to display them. This feature is particularly useful for decluttering the view and focusing on specific languages. Use the **Search** field to search for tasks by name or [filter tasks](#filtering-tasks) using various filter options. To view the task details, open it by clicking on the task name. 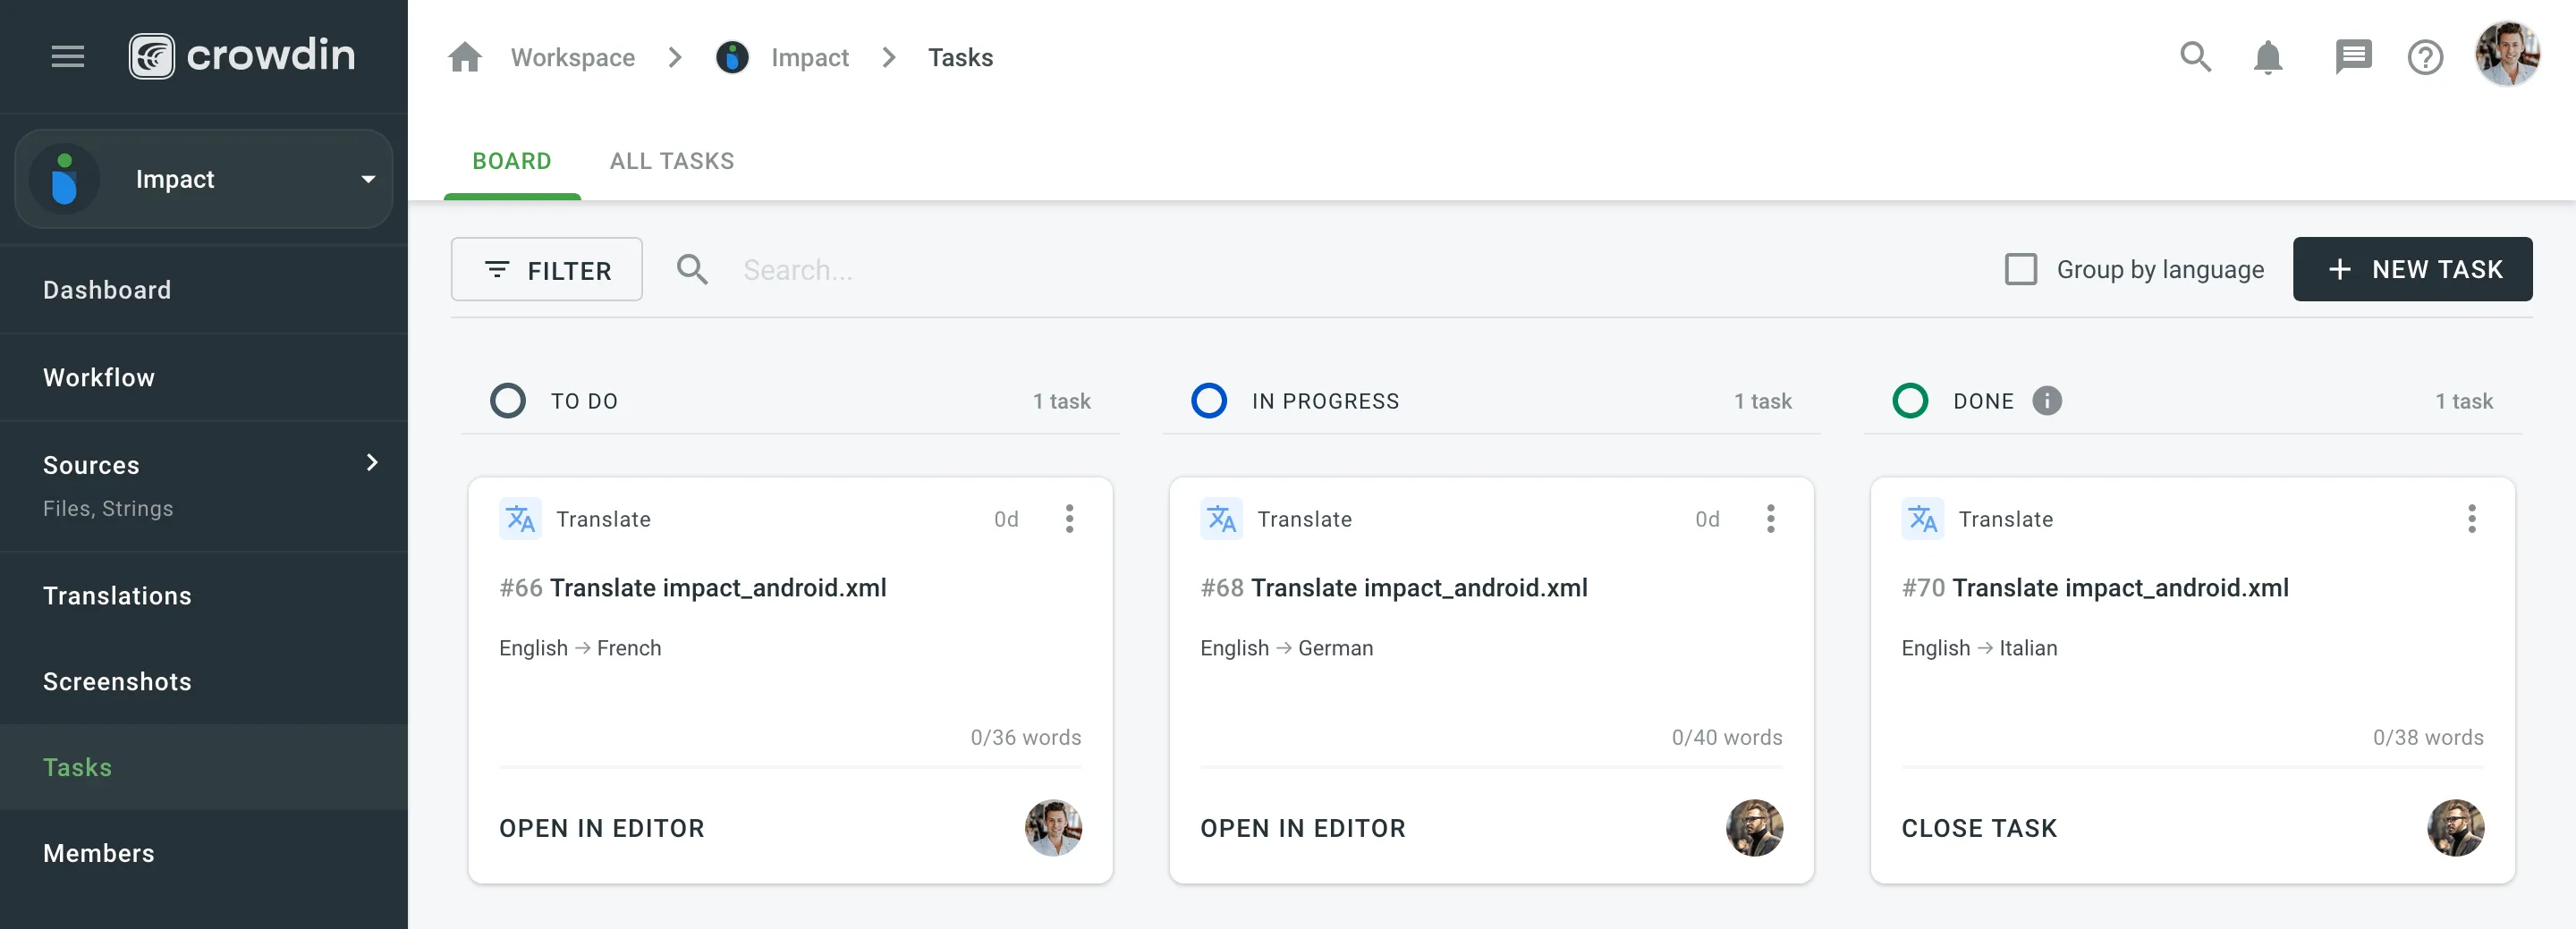 ### [All Tasks](#all-tasks) [Section titled “All Tasks”](#all-tasks) The All Tasks section provides a list view of all project tasks. It is particularly useful for efficiently managing large volumes of tasks. The All Tasks section also allows you to select multiple tasks and perform bulk actions. These include changing the assignee, updating the status, or deleting tasks in a single operation. Similar to the Board section, the All Tasks also allows you to use the **Search** field and [filter](#filtering-tasks). Additionally, you can sort the task list in ascending or descending order using the available sort options (ID, Date created, Resolve date, Due date). ### [Editing Task](#editing-task) [Section titled “Editing Task”](#editing-task) To change the task details, follow these steps: 1. Open your project and select **Tasks** on the left sidebar. 2. In the Board or All tasks section, click (or right-click) on the task you want to change and select **Edit**. 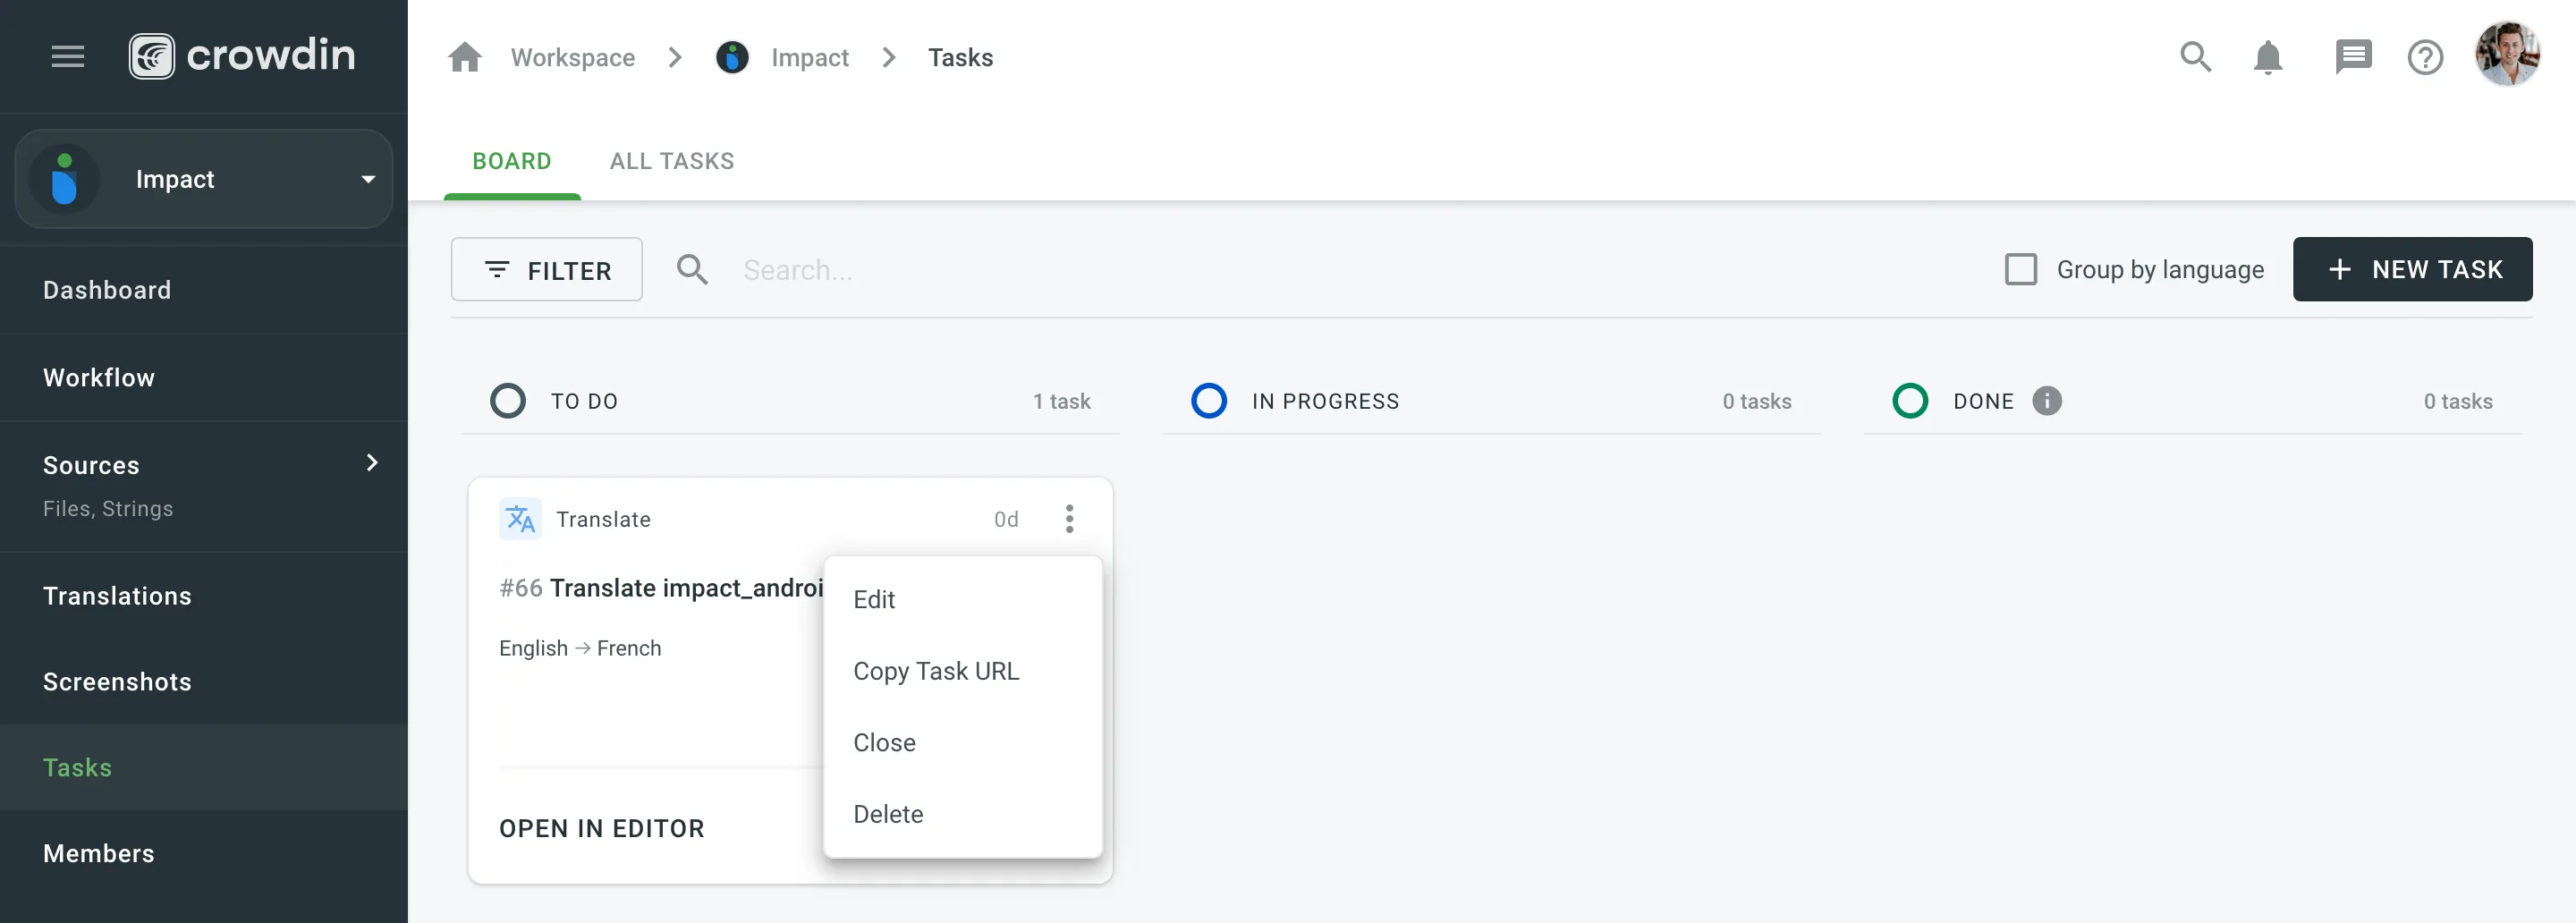 3. Make the necessary edits and click **Save**. ### [Filtering Tasks](#filtering-tasks) [Section titled “Filtering Tasks”](#filtering-tasks) By default, all project tasks are displayed in the **Tasks** section either in the Board or All Tasks sections. If necessary, you can filter tasks using the available filter options: * Language: All languages or particular language. * Assignee: All users or particular user. * Created by: All users or particular user. * Due date: All, Overdue now, Custom Range. * Type: All types, Translate by own translators, Proofread by own proofreaders, Translate by vendor, Proofread by vendor. * Workflow step: All, No workflow step, or particular workflow step. * File: All files or particular file or folder. * Status: All statuses, To Do, In Progress, Done, Closed. 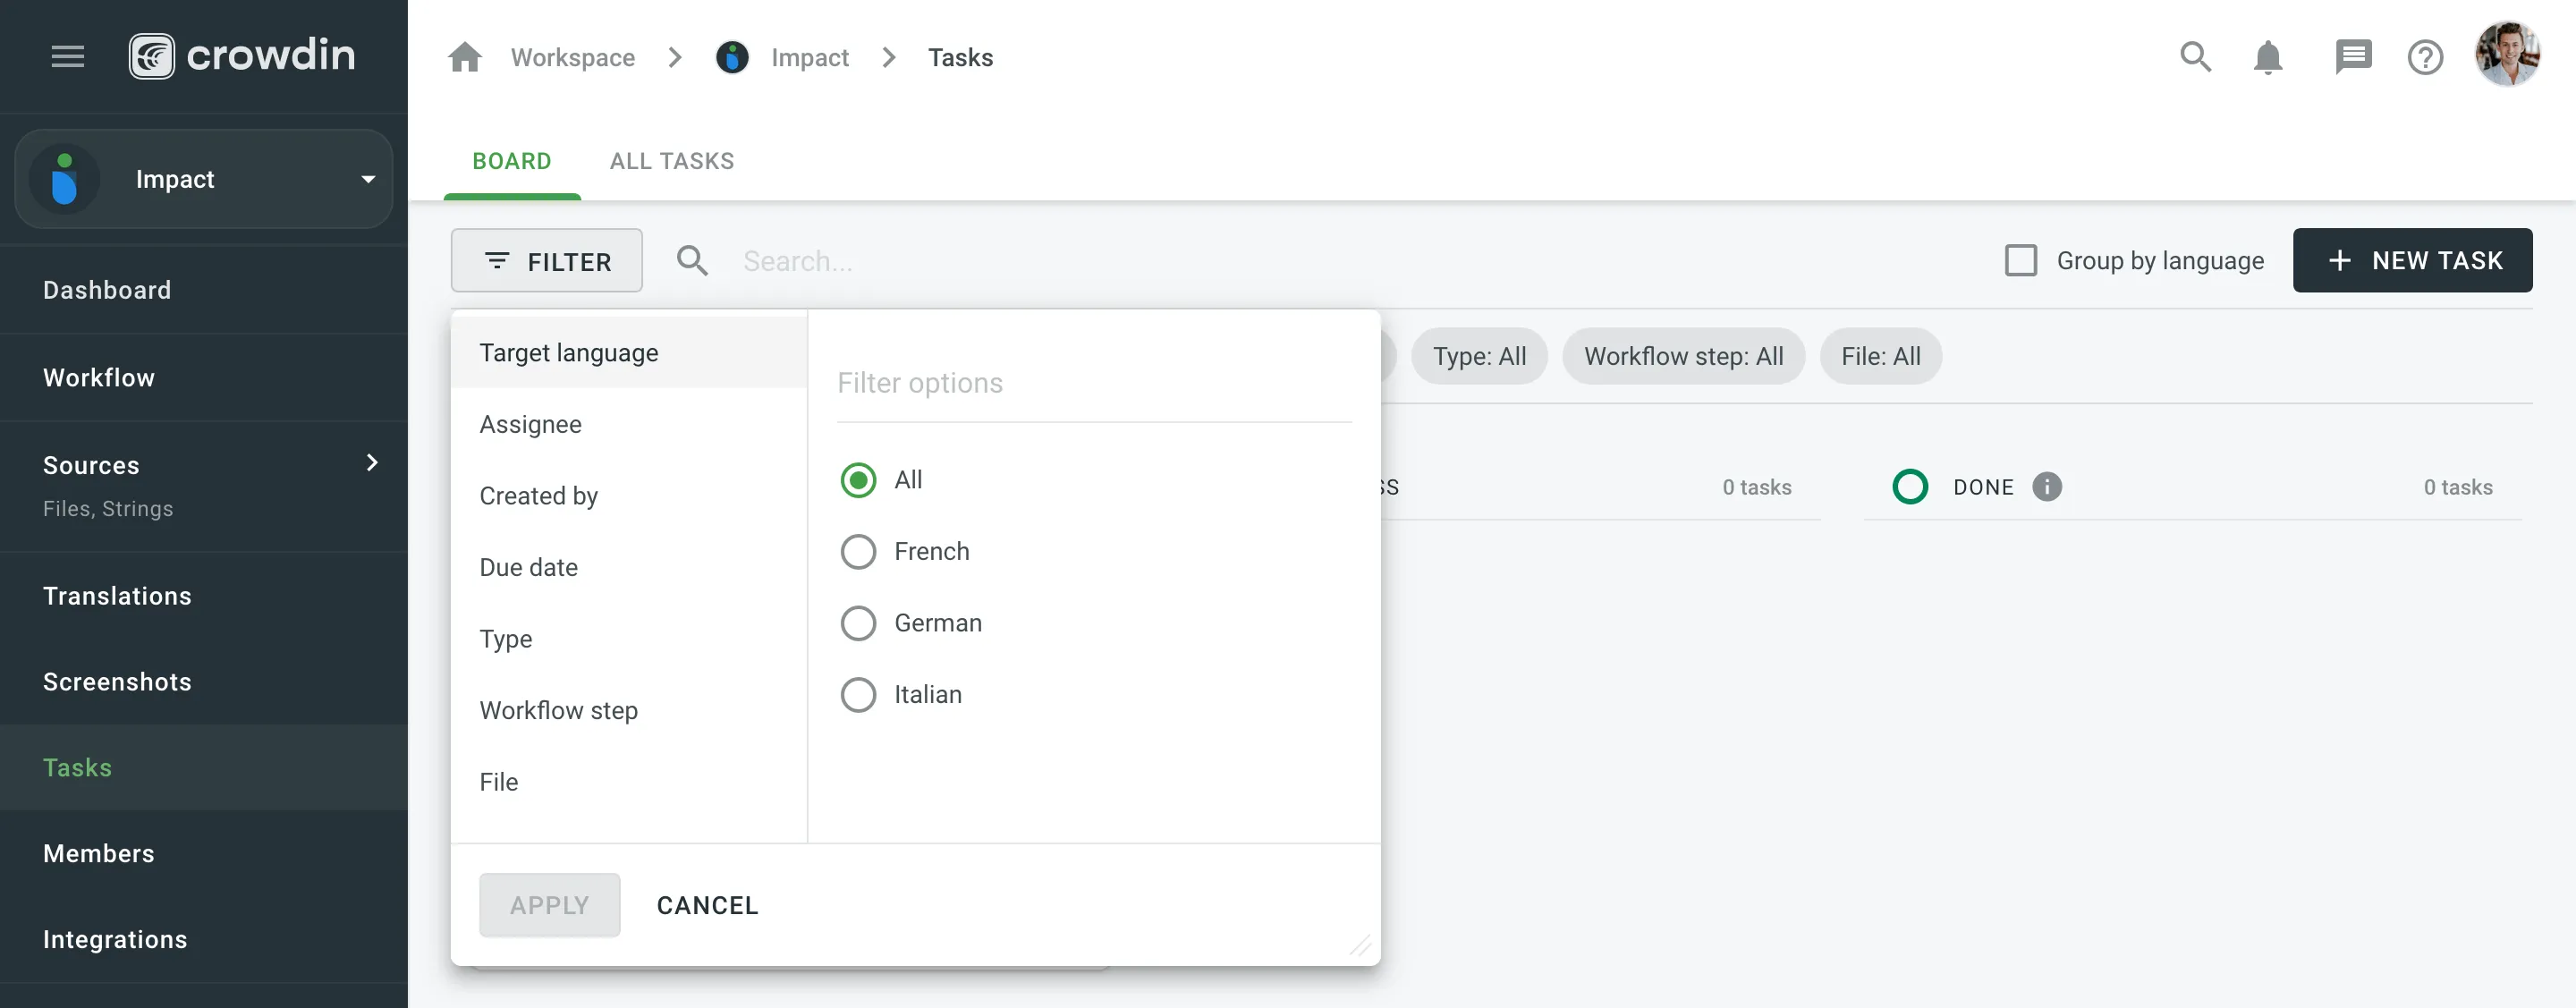 ### [Changing Task Status](#changing-task-status) [Section titled “Changing Task Status”](#changing-task-status) To change the task status in the Board section, select the task assigned to you and drag it to the column with the status you need. 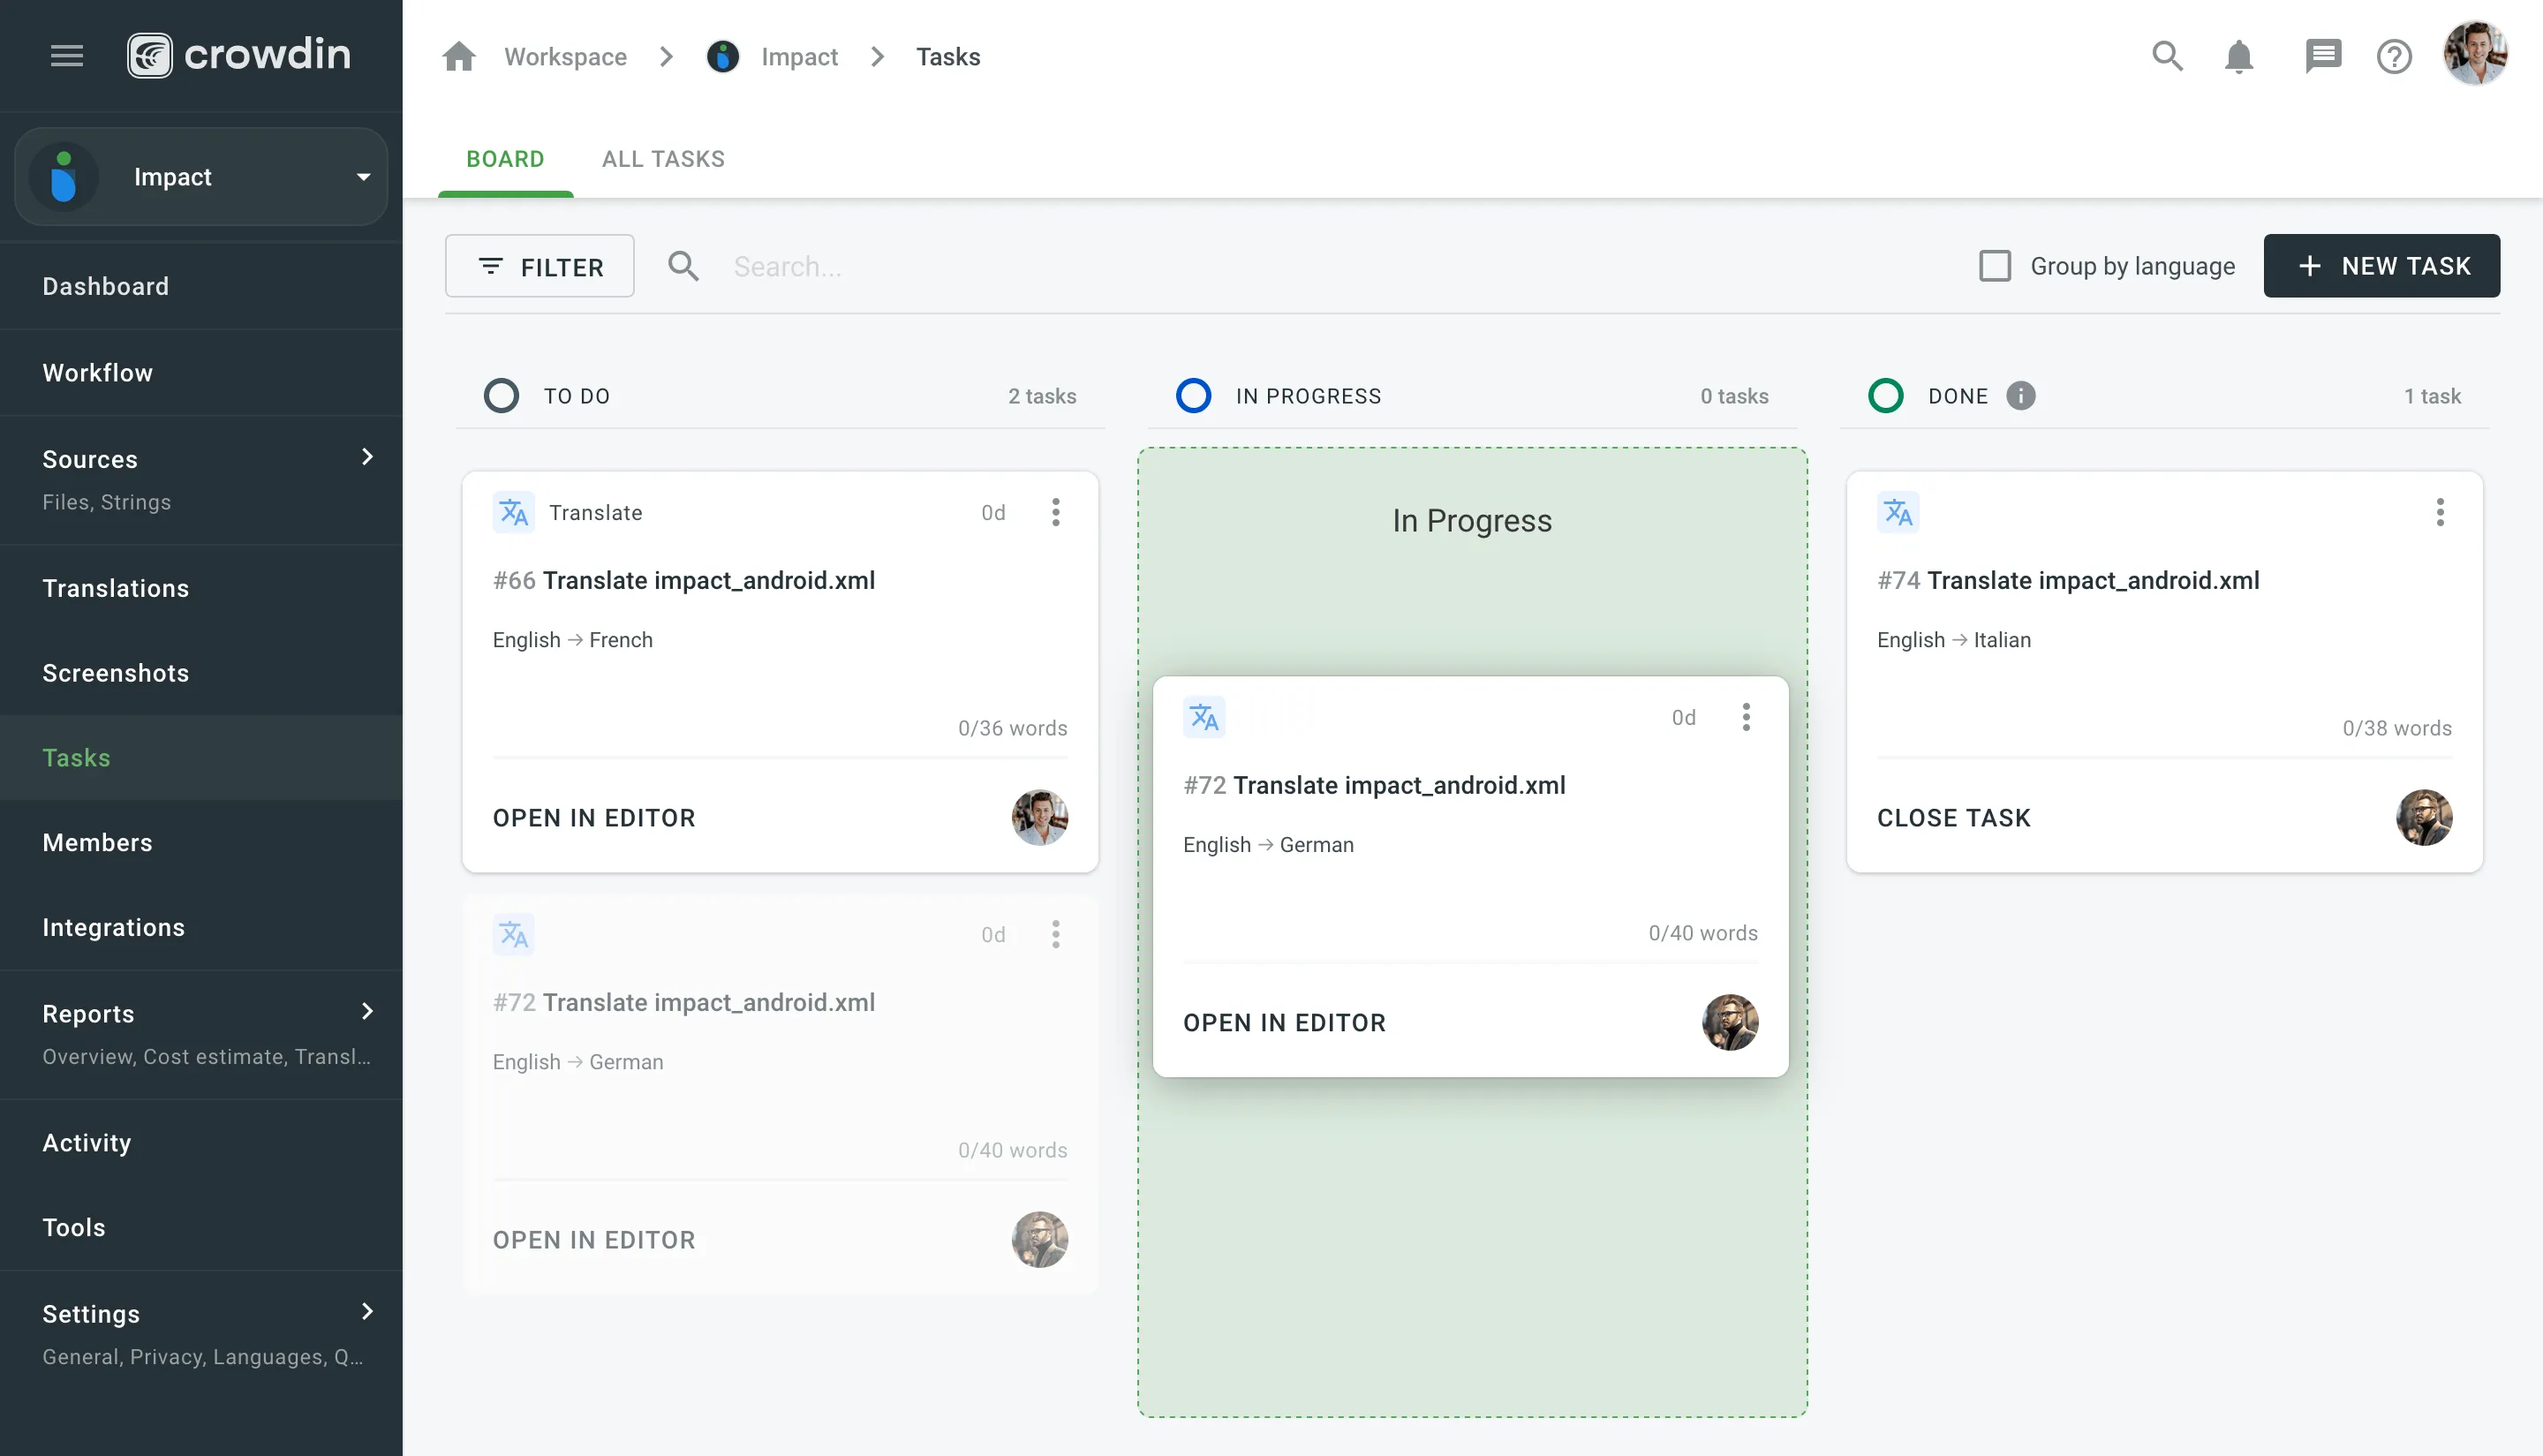 To change the task status in the All Tasks section, select the needed task, click **Change status**, and select the new status. Alternatively, in either of the two sections, you can change the task status directly in the task itself using the **Status** drop-down menu and selecting needed statuses. ### [Closing Task](#closing-task) [Section titled “Closing Task”](#closing-task) To close the task when it’s finished, move it to the **Done** column and click **Close Task**. 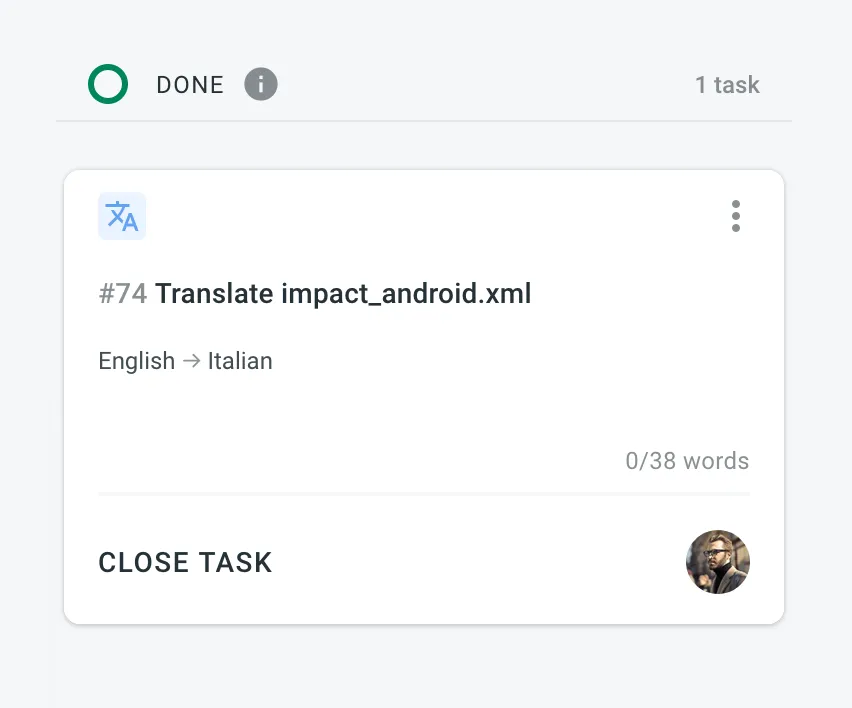 To view the list of closed tasks, open the All Tasks section and use the filter **Status: Closed**. ## [Sequential Tasks](#sequential-tasks) [Section titled “Sequential Tasks”](#sequential-tasks) Sequential tasks streamline the management of translation and proofreading processes in a structured, step-by-step manner. This feature is particularly useful for managing content that requires translation followed by proofreading, ensuring a smooth workflow. Once created, sequential tasks are represented on the Tasks Board, displaying both the translation task and its linked pending proofreading task. 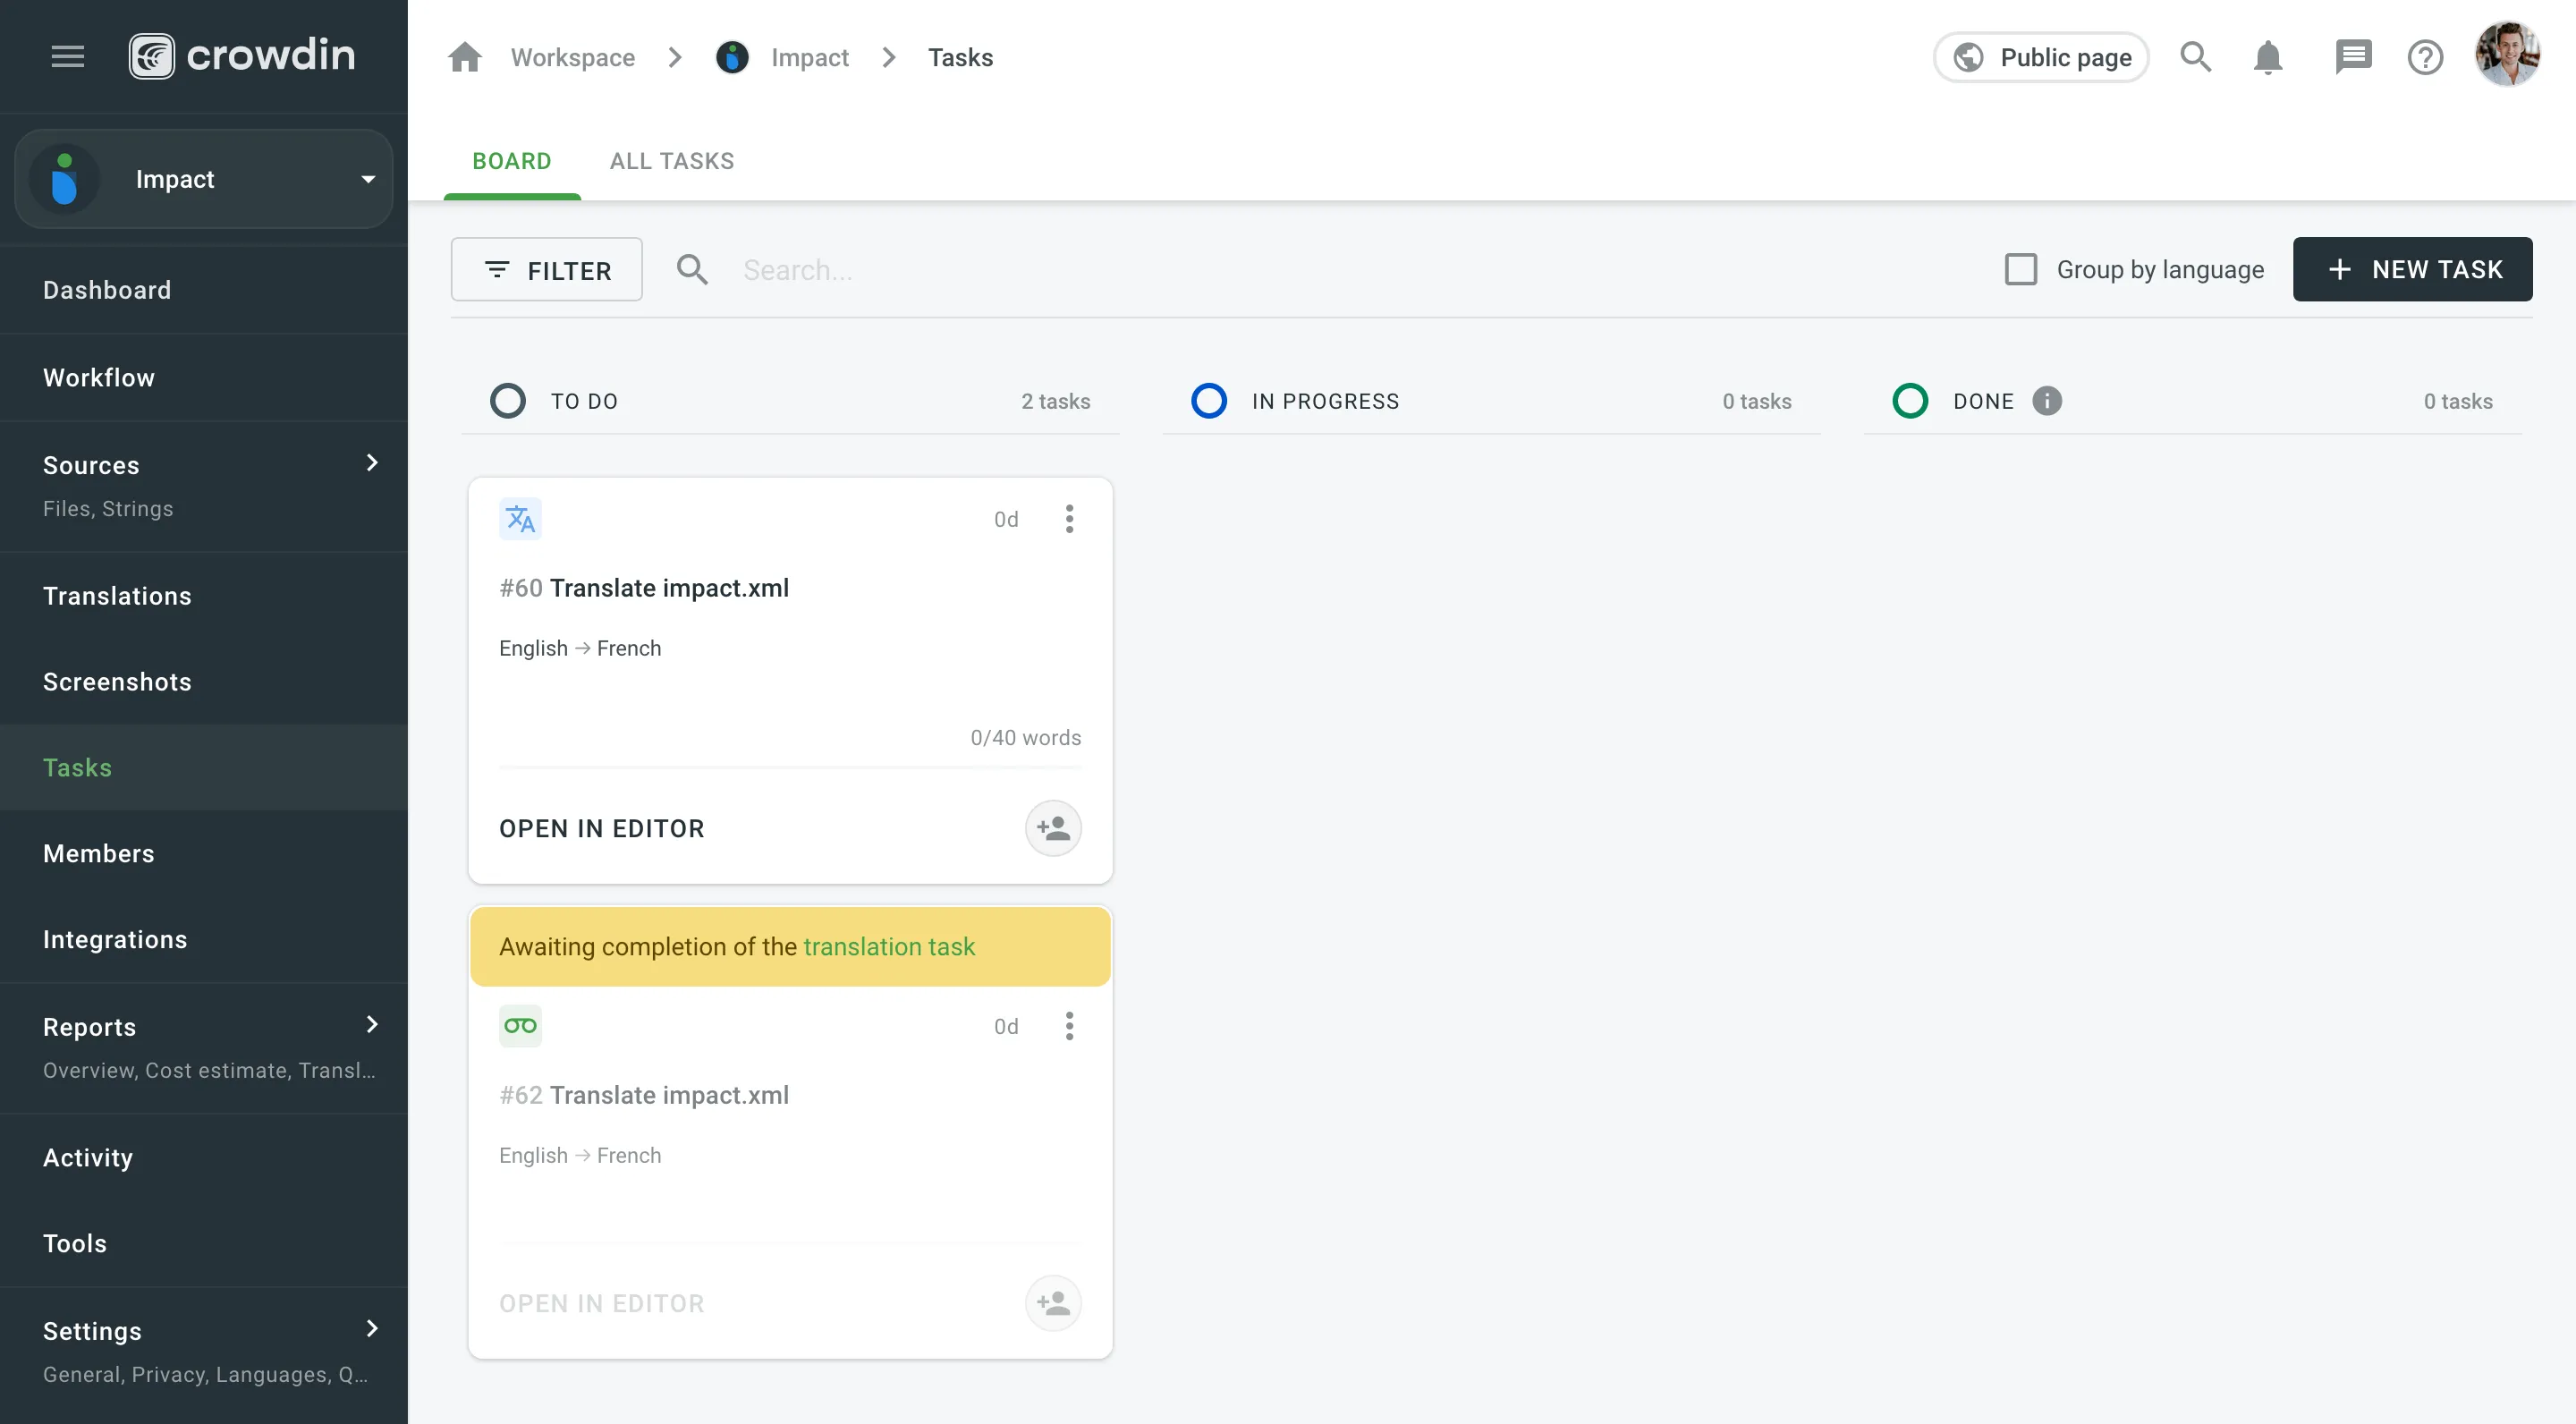 ### [Key Approaches](#key-approaches) [Section titled “Key Approaches”](#key-approaches) The concept of sequential tasks is based on two primary approaches: * **Creating a translation task with its associated pending proofreading task:** * Start by creating a translation task and specifying the target languages and work scope. * Select **Create a pending proofreading task** to generate the associated proofreading task. You can set separate due dates for the translation and proofreading tasks if needed. 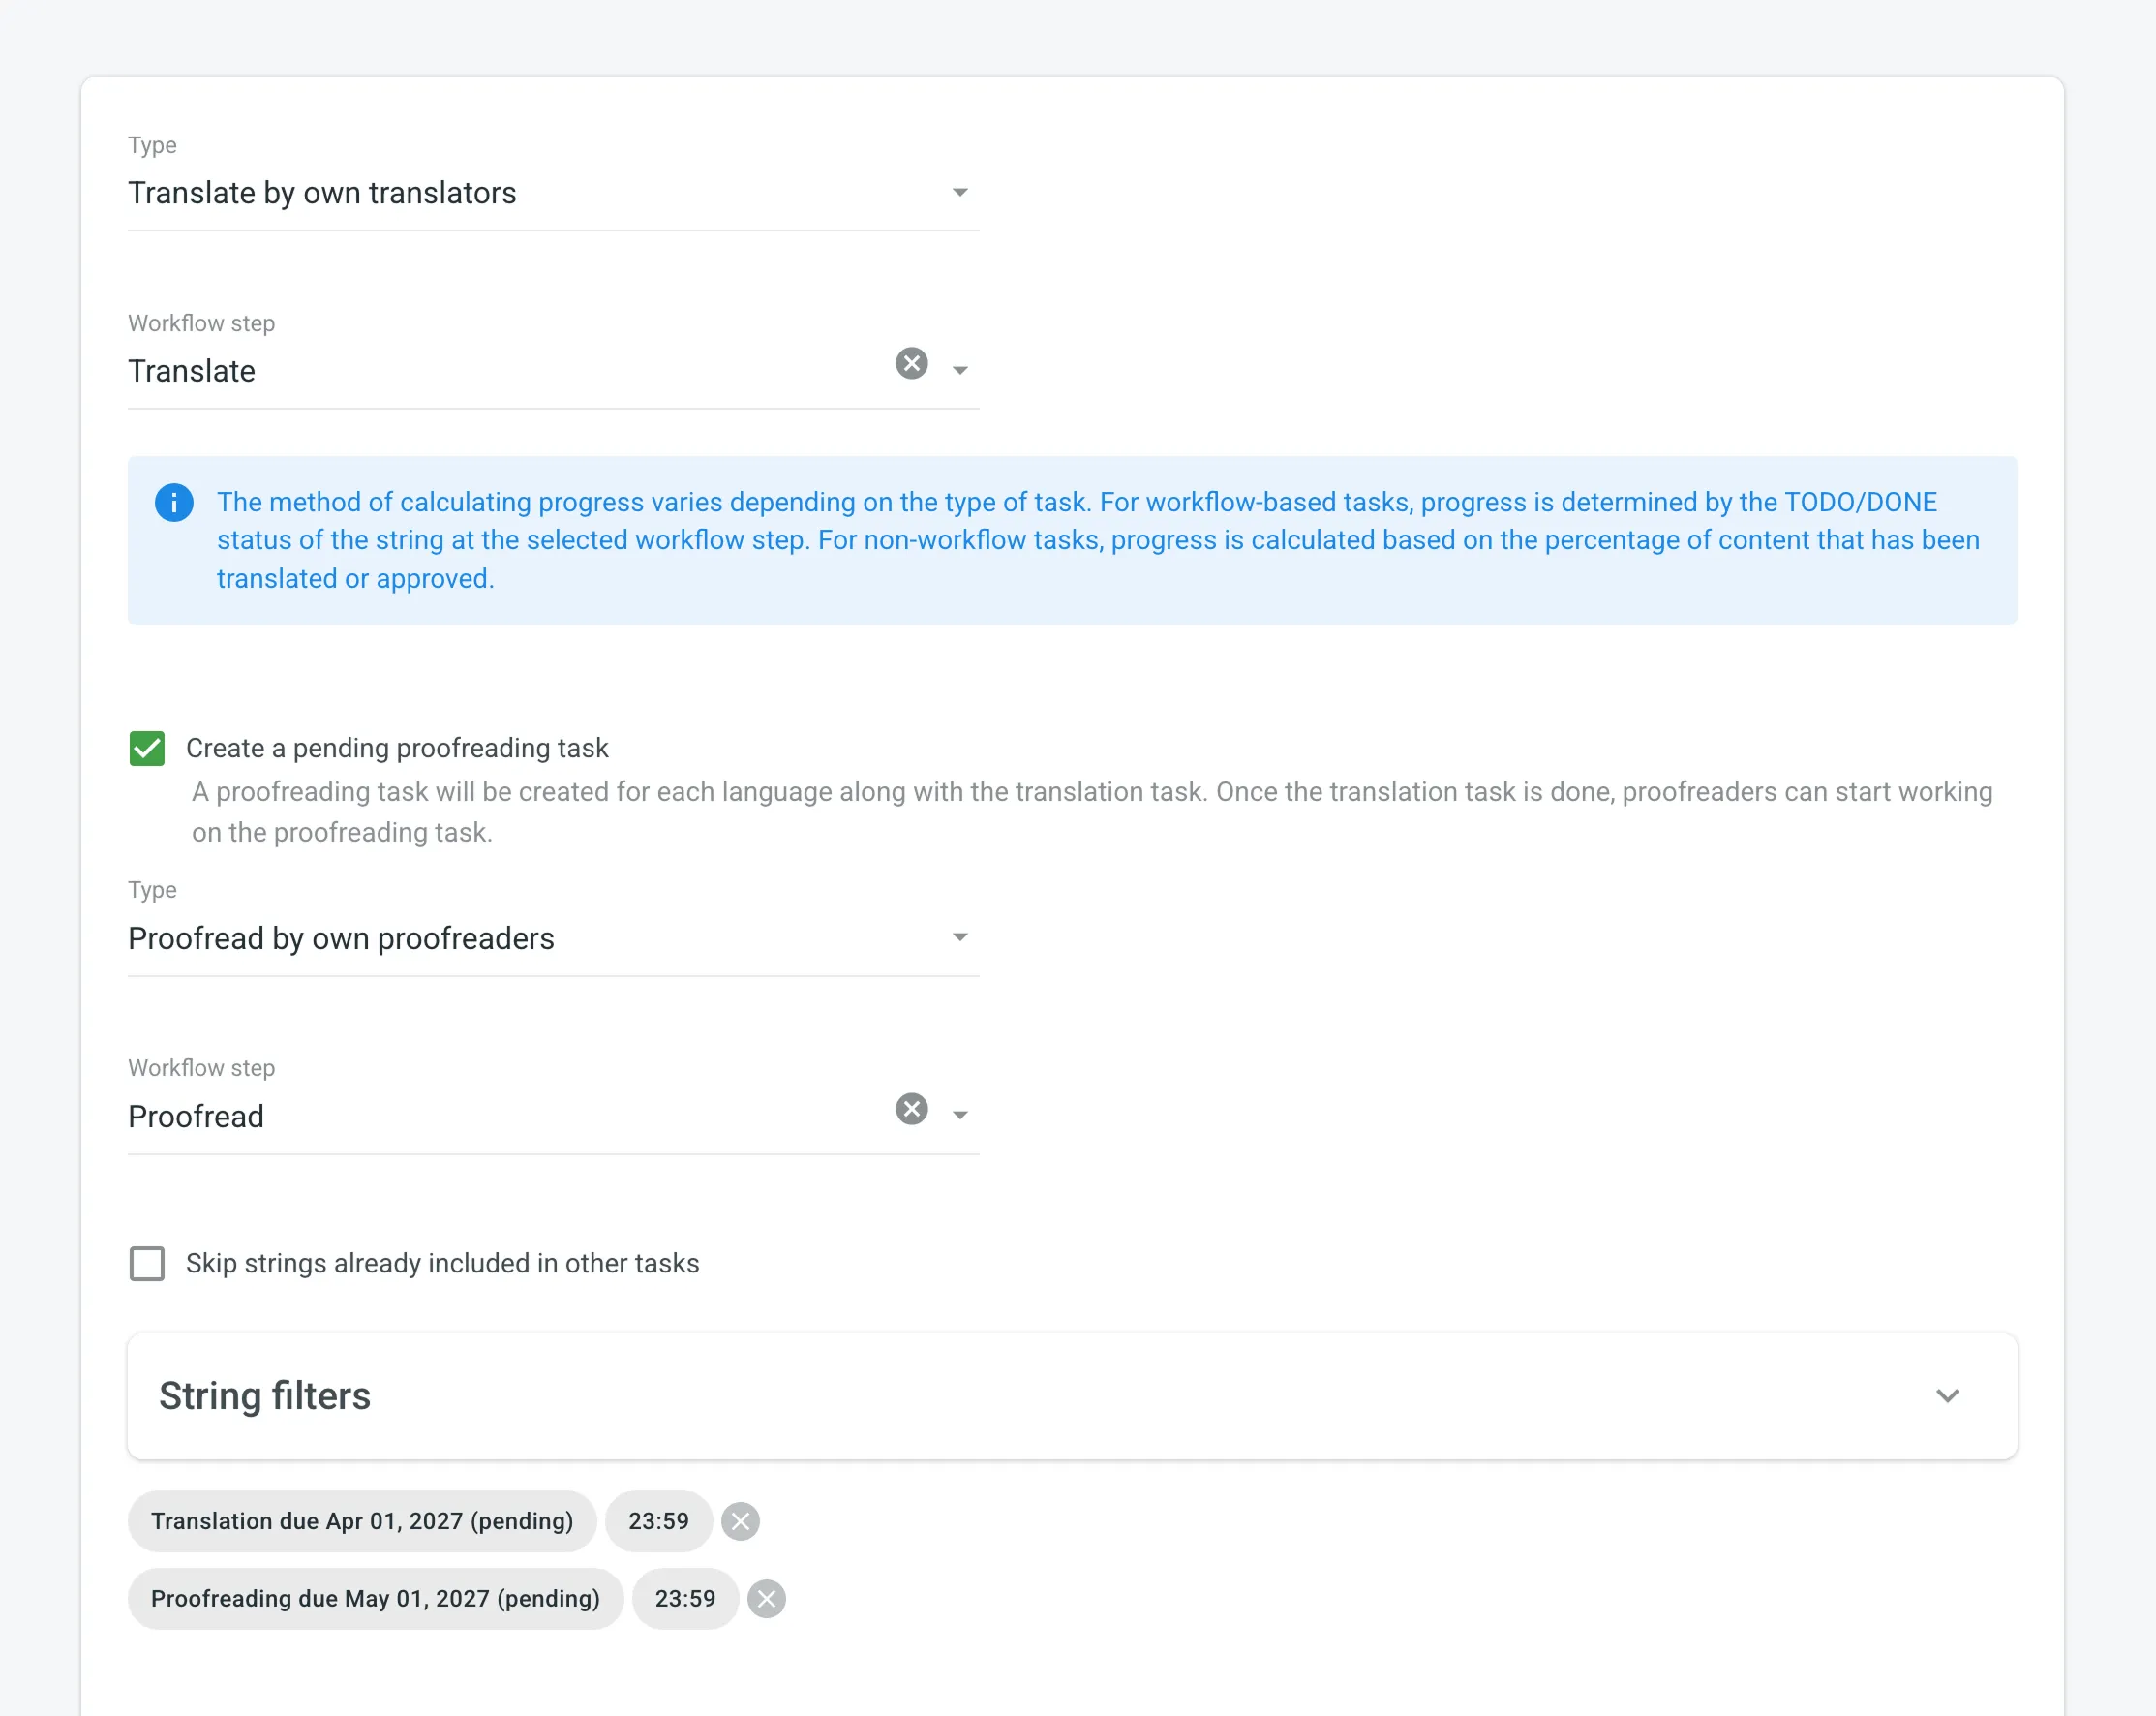 * While translators work on the translation task, the linked proofreading task remains pending. * When the translation task is completed, the status of the associated proofreading task changes from Pending to To Do. Proofreaders will then receive notifications that it’s ready for review. * **Creating a proofreading task and linking it to a translation task:** * Create a proofreading task and select the translation task you want to link it with from the **Preceding task** drop-down menu. You can link it to either a completed or an active translation task.  * The languages and work scope are automatically inherited from the linked translation task. * The proofreading task remains pending until the linked translation task is completed. * As with the first approach, proofreaders receive notifications when the proofreading task is ready for review. ### [Task Types Supported](#task-types-supported) [Section titled “Task Types Supported”](#task-types-supported) Sequential tasks are available for the following task types: * Translate by own translators * Proofread by own translators * Translate by vendor * Proofread by vendor ### [Sequential Task Management](#sequential-task-management) [Section titled “Sequential Task Management”](#sequential-task-management) * When editing a pending proofreading task, changes are limited to fields that do not affect the scope of the task. * Pending proofreading tasks can be deleted if necessary. In this case, linked translation tasks are preserved. * Deleting a translation task with an associated sequential proofreading task results in the deletion of both tasks simultaneously. ## [Task Cross-Review New](#task-cross-review) [Section titled “Task Cross-Review ”New](#task-cross-review) The **Task Cross-Review** feature helps ensure proper oversight in task workflows by requiring approval before contributors can start working. It’s especially beneficial for teams with internal approval processes, such as budget approvals, where tasks must be reviewed and approved by designated managers or the owner. By adding an extra layer of accountability, this feature ensures tasks don’t move forward without proper review. 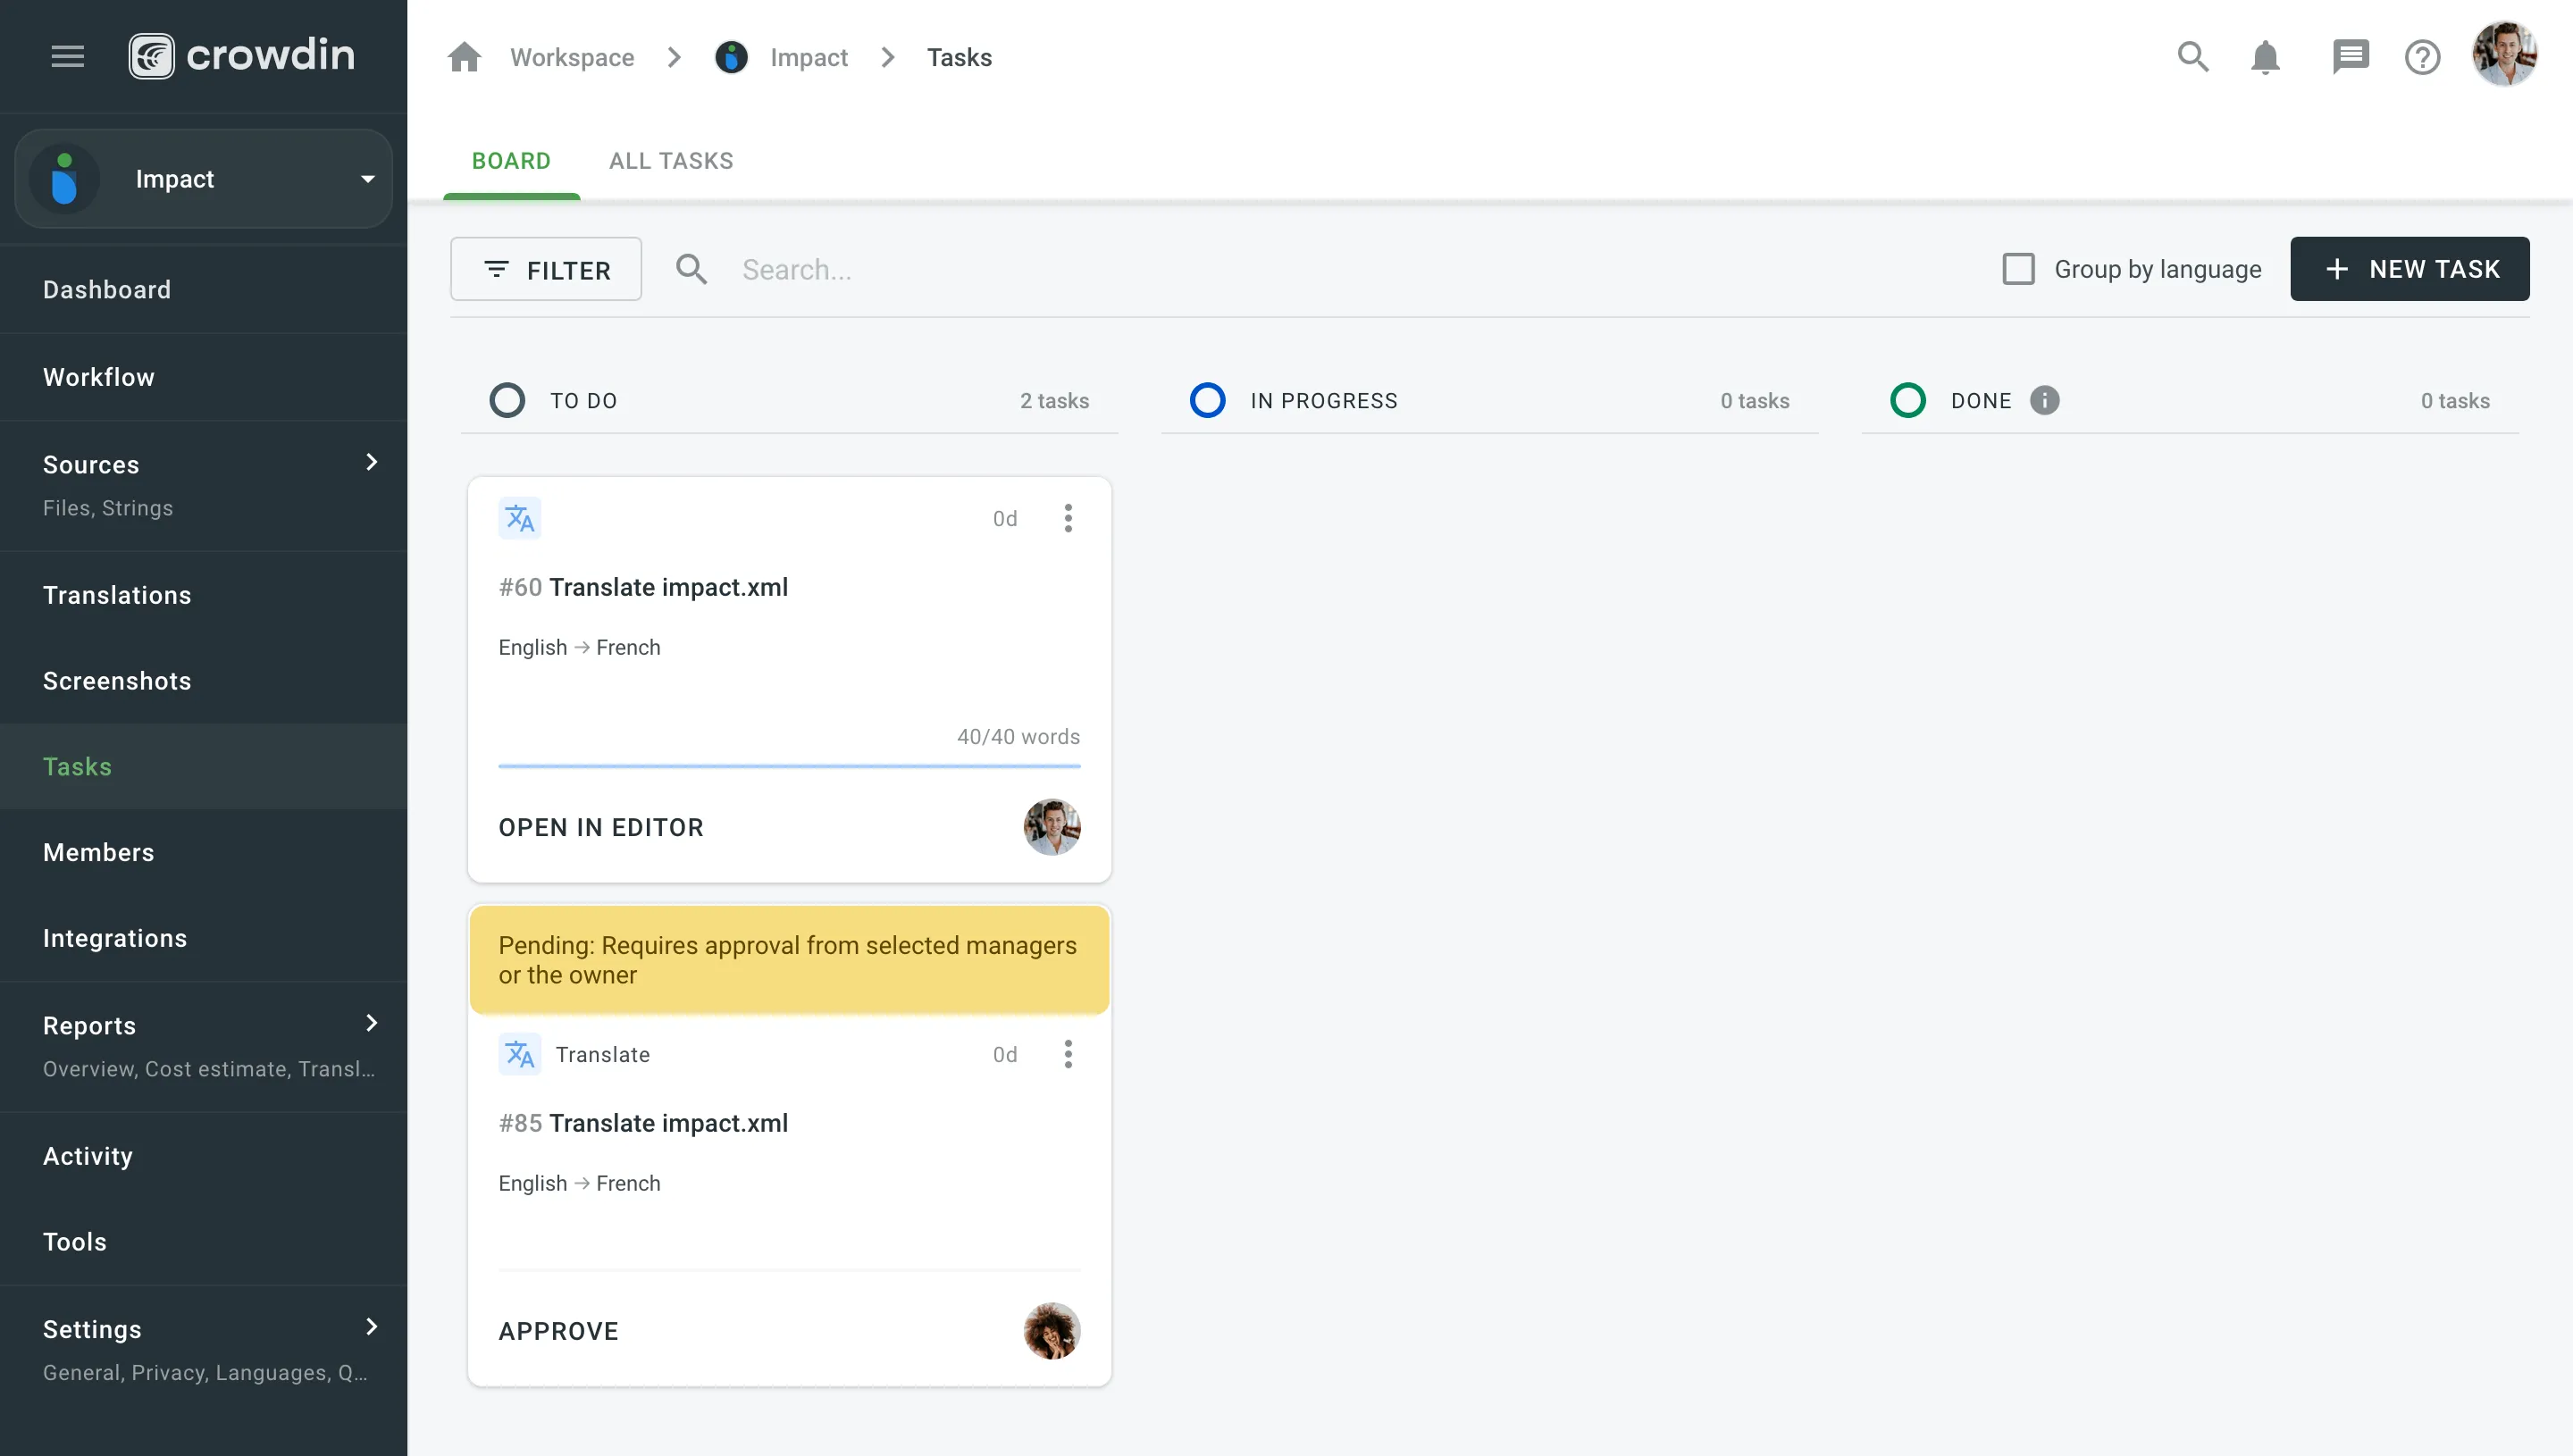 ### [How Task Cross-Review Works](#how-task-cross-review-works) [Section titled “How Task Cross-Review Works”](#how-task-cross-review-works) When **Task Cross-Review** is enabled: * During task creation, a notification informs the user that the task will require approval from eligible project members (selected managers or the owner) before assigned members can start working. * On the Board, tasks awaiting approval display an alert indicating they are pending review from selected managers or the owner, making them easy to identify. * In the task details view, an alert states, *“The task is currently pending review from selected managers or the owner,”* and the task is labeled with the status **For Approval**. Only selected managers or the owner can approve the task. The manager who created the task cannot approve it, but the owner can always approve their own tasks. Once approved, the task status changes to **To Do**, indicating that contributors can begin work. Read more about [configuring Task Cross-Review](/enterprise/project-settings/privacy/#configuring-task-cross-review). ## [See Also](#see-also) [Section titled “See Also”](#see-also) [Task-based access control ](/enterprise/project-settings/privacy/#translations)Allow project members to work with tasks they are assigned to, even if they do not have full access to the language in the project. [User Tasks ](/enterprise/user-tasks/)Learn how to view, filter, and manage tasks assigned to you.
# Teams
> Organize members of your organization into teams to simplify user management
Organize members of your organization into teams to simplify people management in projects, workflow steps, and tasks. Teams help you invite tens or even hundreds of members to the project in a few clicks. So inviting a team to the project becomes as easy as inviting a single person. ## [Use Cases](#use-cases) [Section titled “Use Cases”](#use-cases) * Create language-specific teams of members. You’ll be able to assign a whole team to the needed target language on the workflow steps of your projects. * Assign teams to translation or proofreading tasks. * Add a member to the team to automatically grant access to all projects the team participates in. ## [Creating Teams](#creating-teams) [Section titled “Creating Teams”](#creating-teams) To create a team, follow these steps: 1. Open your organization’s **Workspace** and select **Users** on the left sidebar. 2. Switch to the **Teams** tab. 3. Click **Create** in the lower-right corner. 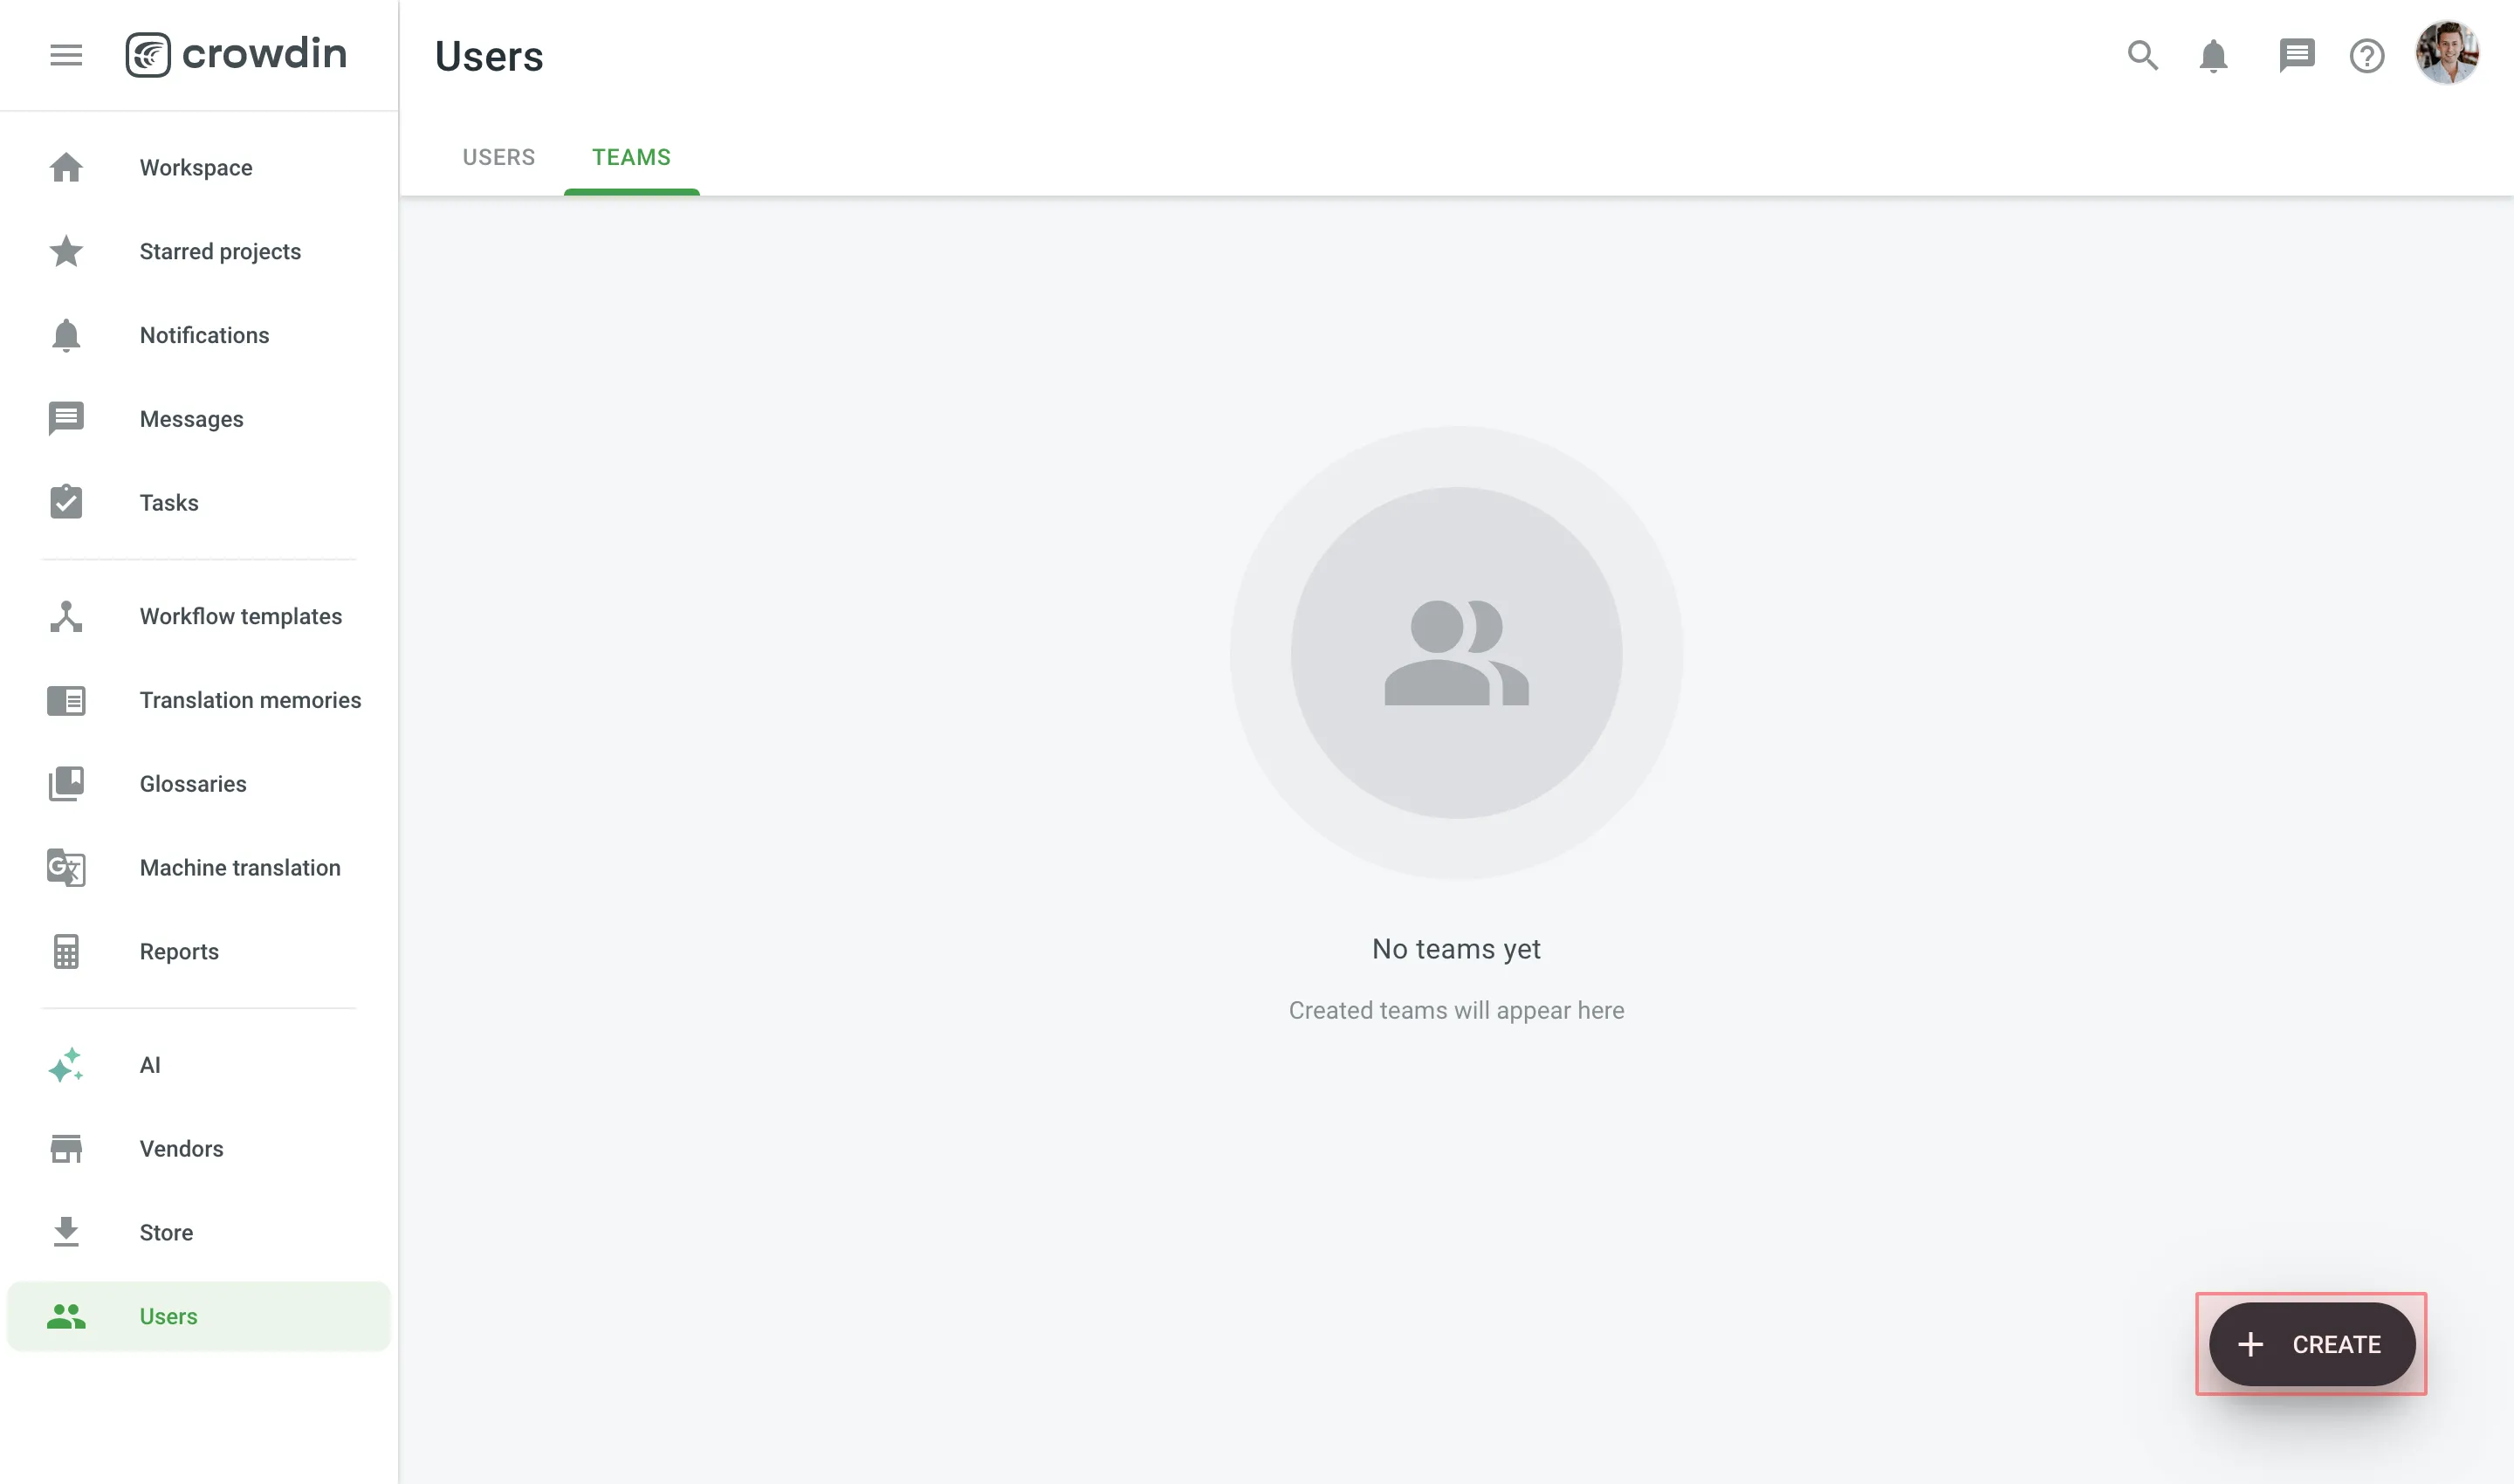 4. Name your team and select the needed members. 5. Click **Create**. 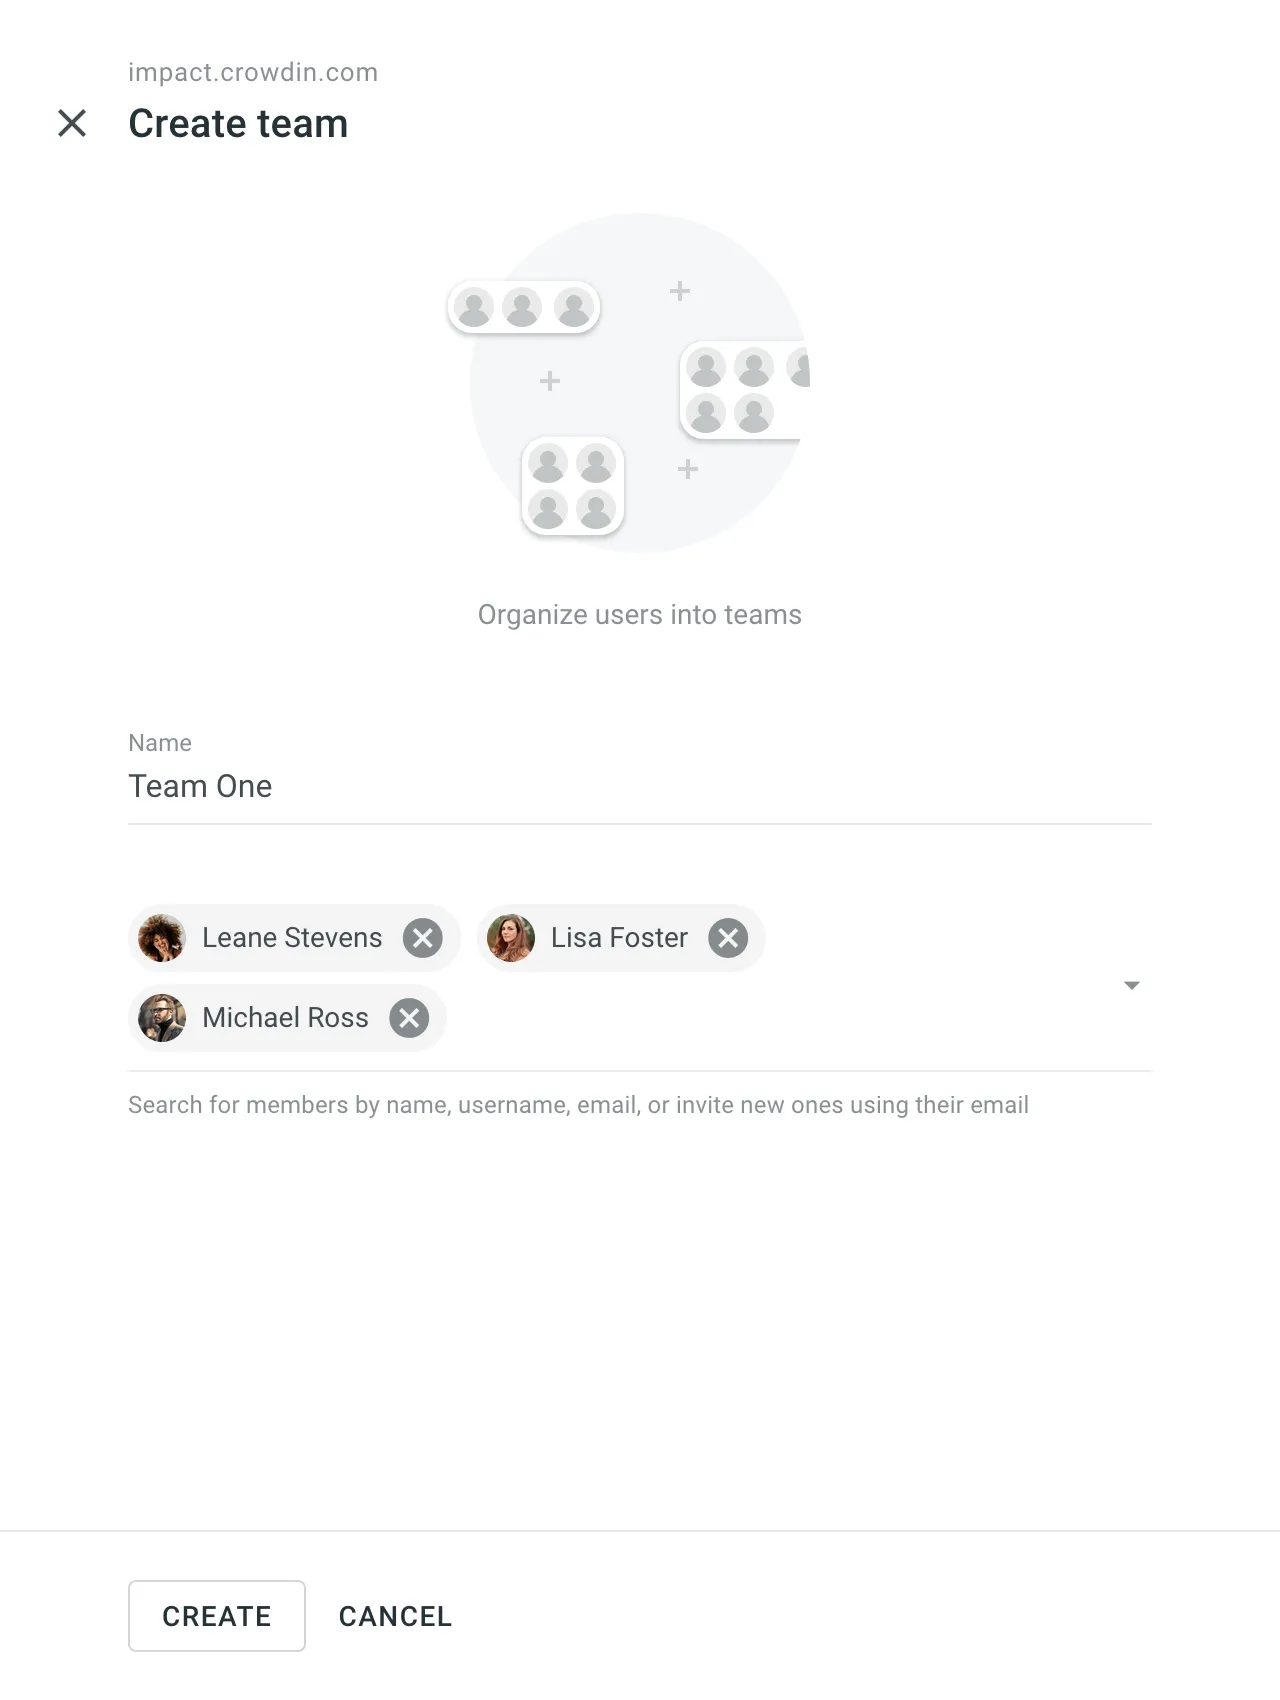 ## [Managing Teams](#managing-teams) [Section titled “Managing Teams”](#managing-teams) Managing organization teams in Crowdin Enterprise involves various operations such as managing permissions and team members, contacting teams, and deleting teams. Below you can find instructions for each operation. ### [Viewing and Searching Teams](#viewing-and-searching-teams) [Section titled “Viewing and Searching Teams”](#viewing-and-searching-teams) Once you open the **Users** page, you can switch to the **Teams** tab to view and search for teams. You can view the list of existing organization teams (one team per row). To search for a particular team, type the team name in the **Search** field. To change the sorting order, click on the **Name** column heading. 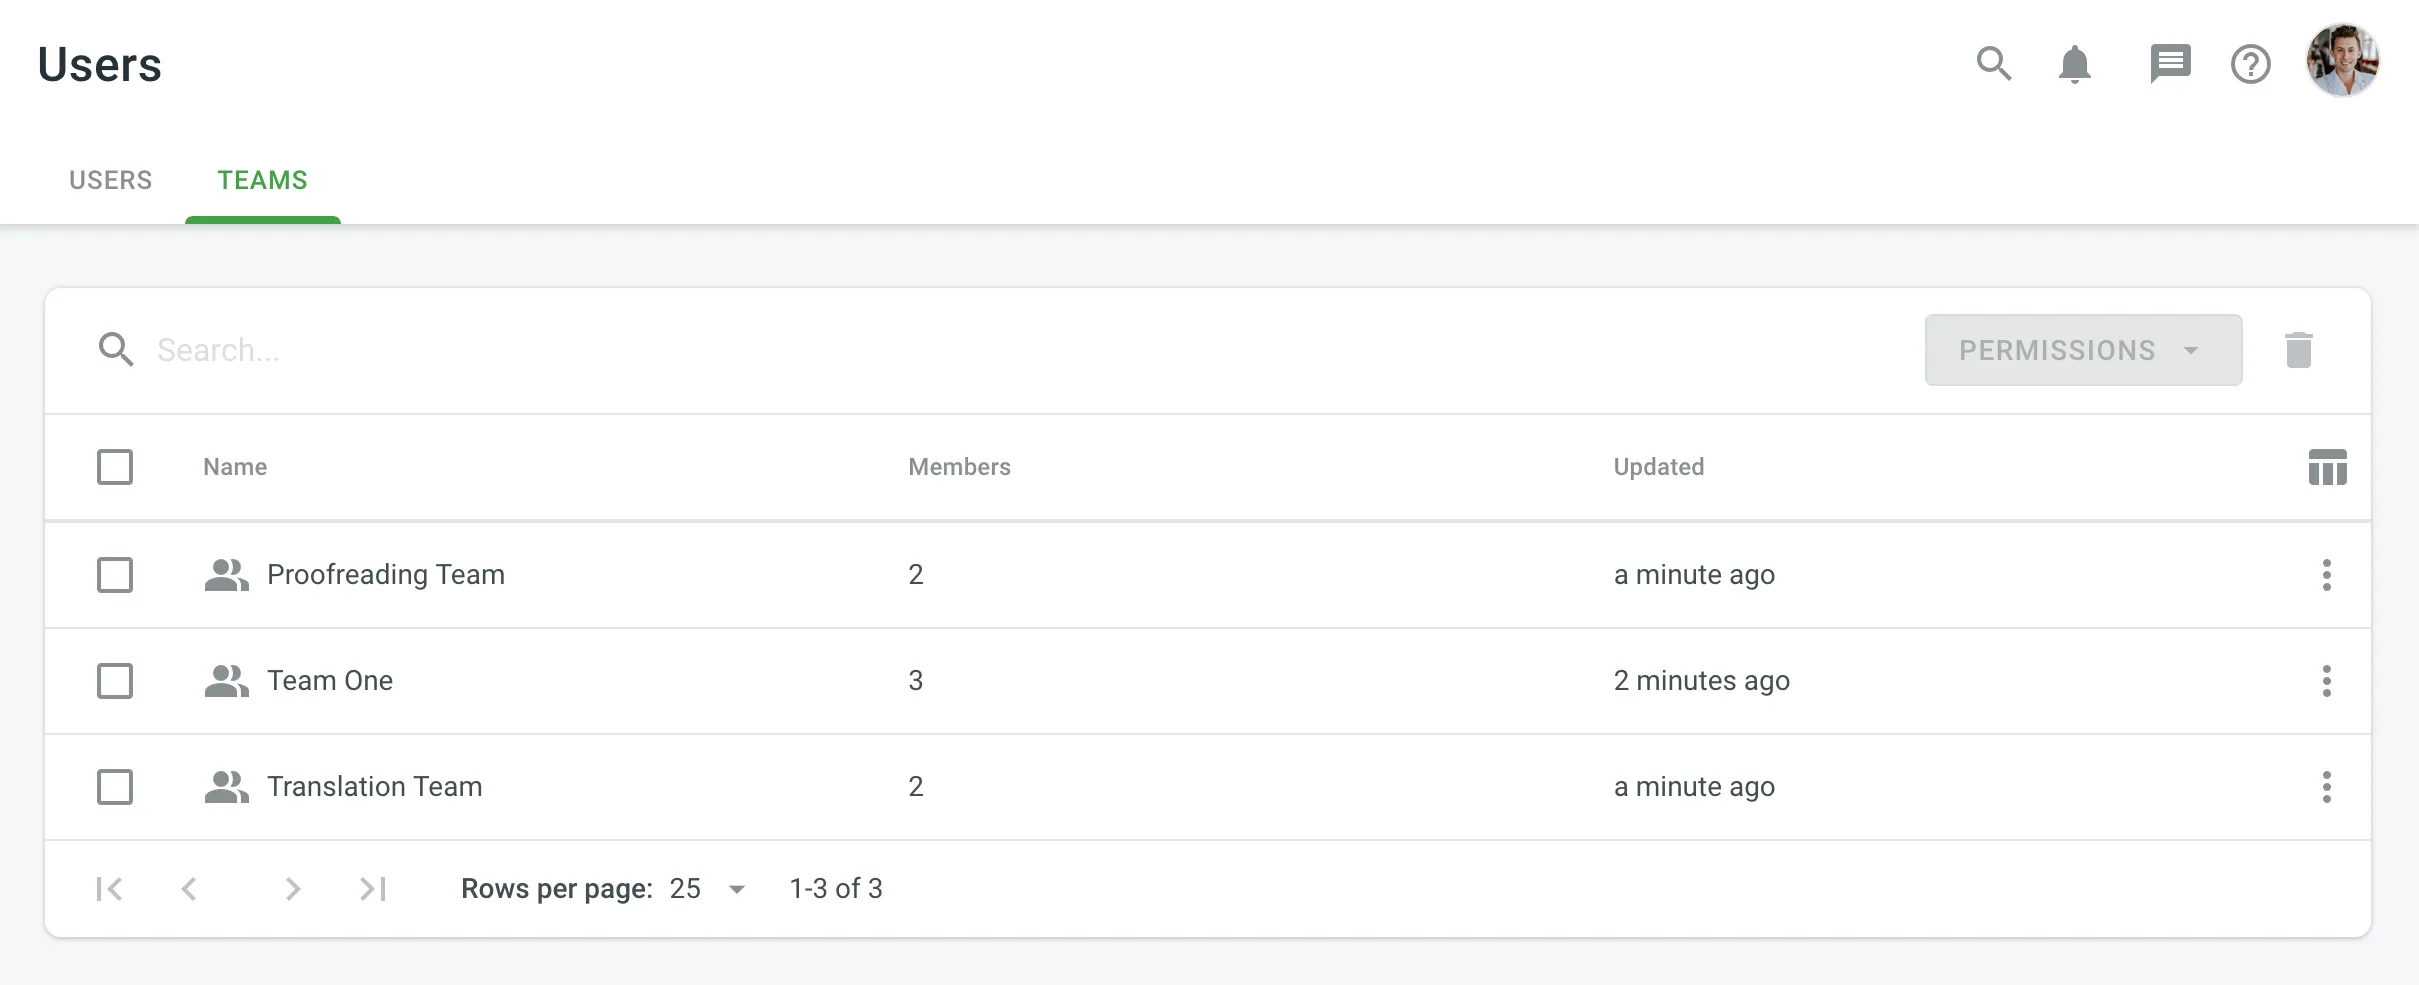 ### [Viewing Team Details](#viewing-team-details) [Section titled “Viewing Team Details”](#viewing-team-details) To view and manage team details, follow these steps: 1. Open your organization’s **Workspace** and select **Users** on the left sidebar. 2. Switch to the **Teams** tab. 3. Double-click on the team or right-click and select **Open** from the menu. 4. In the team details, you can perform various actions: * **Members**: view and manage team members. * **Projects and Roles**: view and manage team participation in organization projects and their roles in these projects. * **Groups**: (only for [Permission granularity](/enterprise/permissions-granularity-mode/#permissions) mode) view and manage the groups which are managed by a team. * Use the left panel to rename the team, view basic information, team members number, creation date, and add new members. 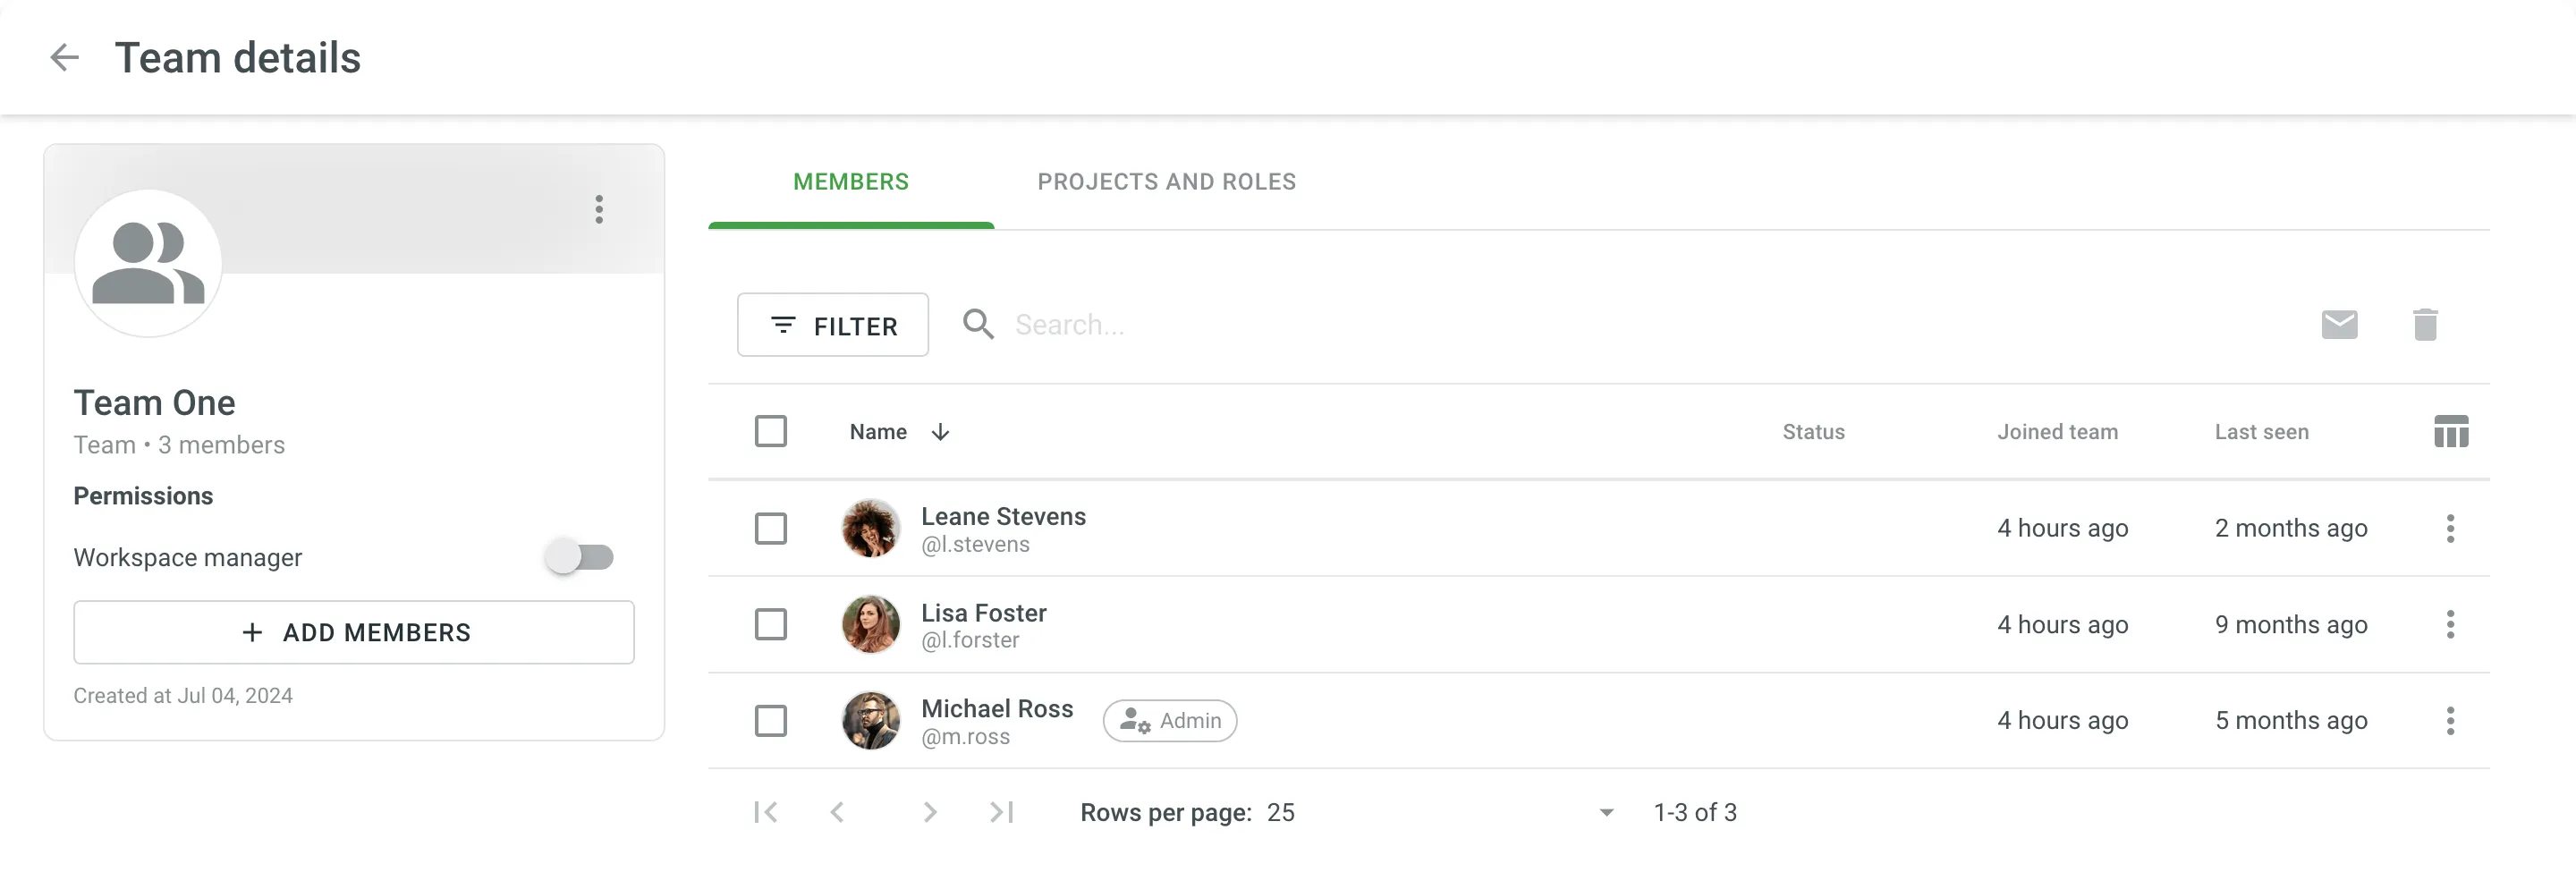 ### [Changing Permissions](#changing-permissions) [Section titled “Changing Permissions”](#changing-permissions) To change team permissions, follow these steps: 1. Open your organization’s **Workspace** and select **Users** on the left sidebar. 2. Switch to the **Teams** tab. 3. Select one or multiple teams for which you want to change the permissions. 4. Click **Permissions** in the upper-right corner or right-click on the team and change **Permissions** from the menu. 5. Select either **Add project permissions** or **Remove project permissions**. 6. In the appeared dialog, configure the permissions you want to add or remove and confirm the changes. ### [Editing Teams](#editing-teams) [Section titled “Editing Teams”](#editing-teams) To edit (e.g., rename a team, add new or remove current team members) a team, follow these steps: 1. Open your organization’s **Workspace** and select **Users** on the left sidebar. 2. Switch to the **Teams** tab. 3. Right-click on the needed team and select the option from the context menu. Once you edit a team (add a new member or remove one of the current ones), the changes will be applied automatically to all the projects this team participates in. ### [Deleting Teams](#deleting-teams) [Section titled “Deleting Teams”](#deleting-teams) To delete teams from the organization, follow these steps: 1. Open your organization’s **Workspace** and select **Users** on the left sidebar. 2. Switch to the **Teams** tab. 3. Select one or multiple teams that you want to delete. 4. Click or right-click on the selected teams and select **Delete** from the menu. 5. Confirm the deletion. Once you delete a team, all its members will also be deleted from all projects this team participated in. ## [Assigning Teams](#assigning-teams) [Section titled “Assigning Teams”](#assigning-teams) ### [Assigning Teams to Workflow Step](#assigning-teams-to-workflow-step) [Section titled “Assigning Teams to Workflow Step”](#assigning-teams-to-workflow-step) You can assign a team to the workflow step of your project in the workflow editor or the Workflow template editor. Read more about [Workflows](/enterprise/workflows/). ### [Inviting Teams to the Project](#inviting-teams-to-the-project) [Section titled “Inviting Teams to the Project”](#inviting-teams-to-the-project) You can invite a team to the project via the **Members** section and provide the necessary access level the same way as you do it for a single person. Read more about [inviting people to the project](/enterprise/inviting-people/#inviting-people-to-a-project). After you invited a team to the project, you can remove one or few people from the project members list. In this case, the deleted member will remain in the team and on next invitations to the projects will be listed among project participants. ### [Assigning Team to the Task](#assigning-team-to-the-task) [Section titled “Assigning Team to the Task”](#assigning-team-to-the-task) While creating a translation or proofreading task, you can assign it to the team. Optionally, you can use the *Split files* option to split translatable content between team members. Read more about [Creating a Task](/enterprise/tasks/#creating-new-task). ## [Team Permissions](#team-permissions) [Section titled “Team Permissions”](#team-permissions) When you invite an individual member to a project who also participates in a team, and later on, you invite this team to the project as well, the personal permissions of this member might be overridden by the team permissions. For example, if the member initially had permissions only for the translation step of French, and then the whole team was granted permissions for the translation and proofreading steps of French, German, and Italian, this particular member will also receive the higher permissions.
# Translation by API Vendor
> Order professional translations from vendors integrated via API
Translation by API Vendor is a workflow step used to order translations from vendors integrated with Crowdin Enterprise via API. It helps automate the translation process by enabling manual or scheduled order placement, with translations delivered directly to your project. [Workflow Overview ](/enterprise/workflows/) [Vendors ](/enterprise/vendors/) ## [Adding API Vendor to the Organization](#adding-api-vendor-to-the-organization) [Section titled “Adding API Vendor to the Organization”](#adding-api-vendor-to-the-organization) To use this workflow step, first add a supported API vendor (e.g., Gengo) to your organization. 1. Open your organization’s **Workspace** and select **Store** on the left sidebar. 2. Switch to the **Vendors** tab and click **Invite** for Gengo. 3. In the appeared dialog, keep **Vendor as organization** selected and click **Invite**. 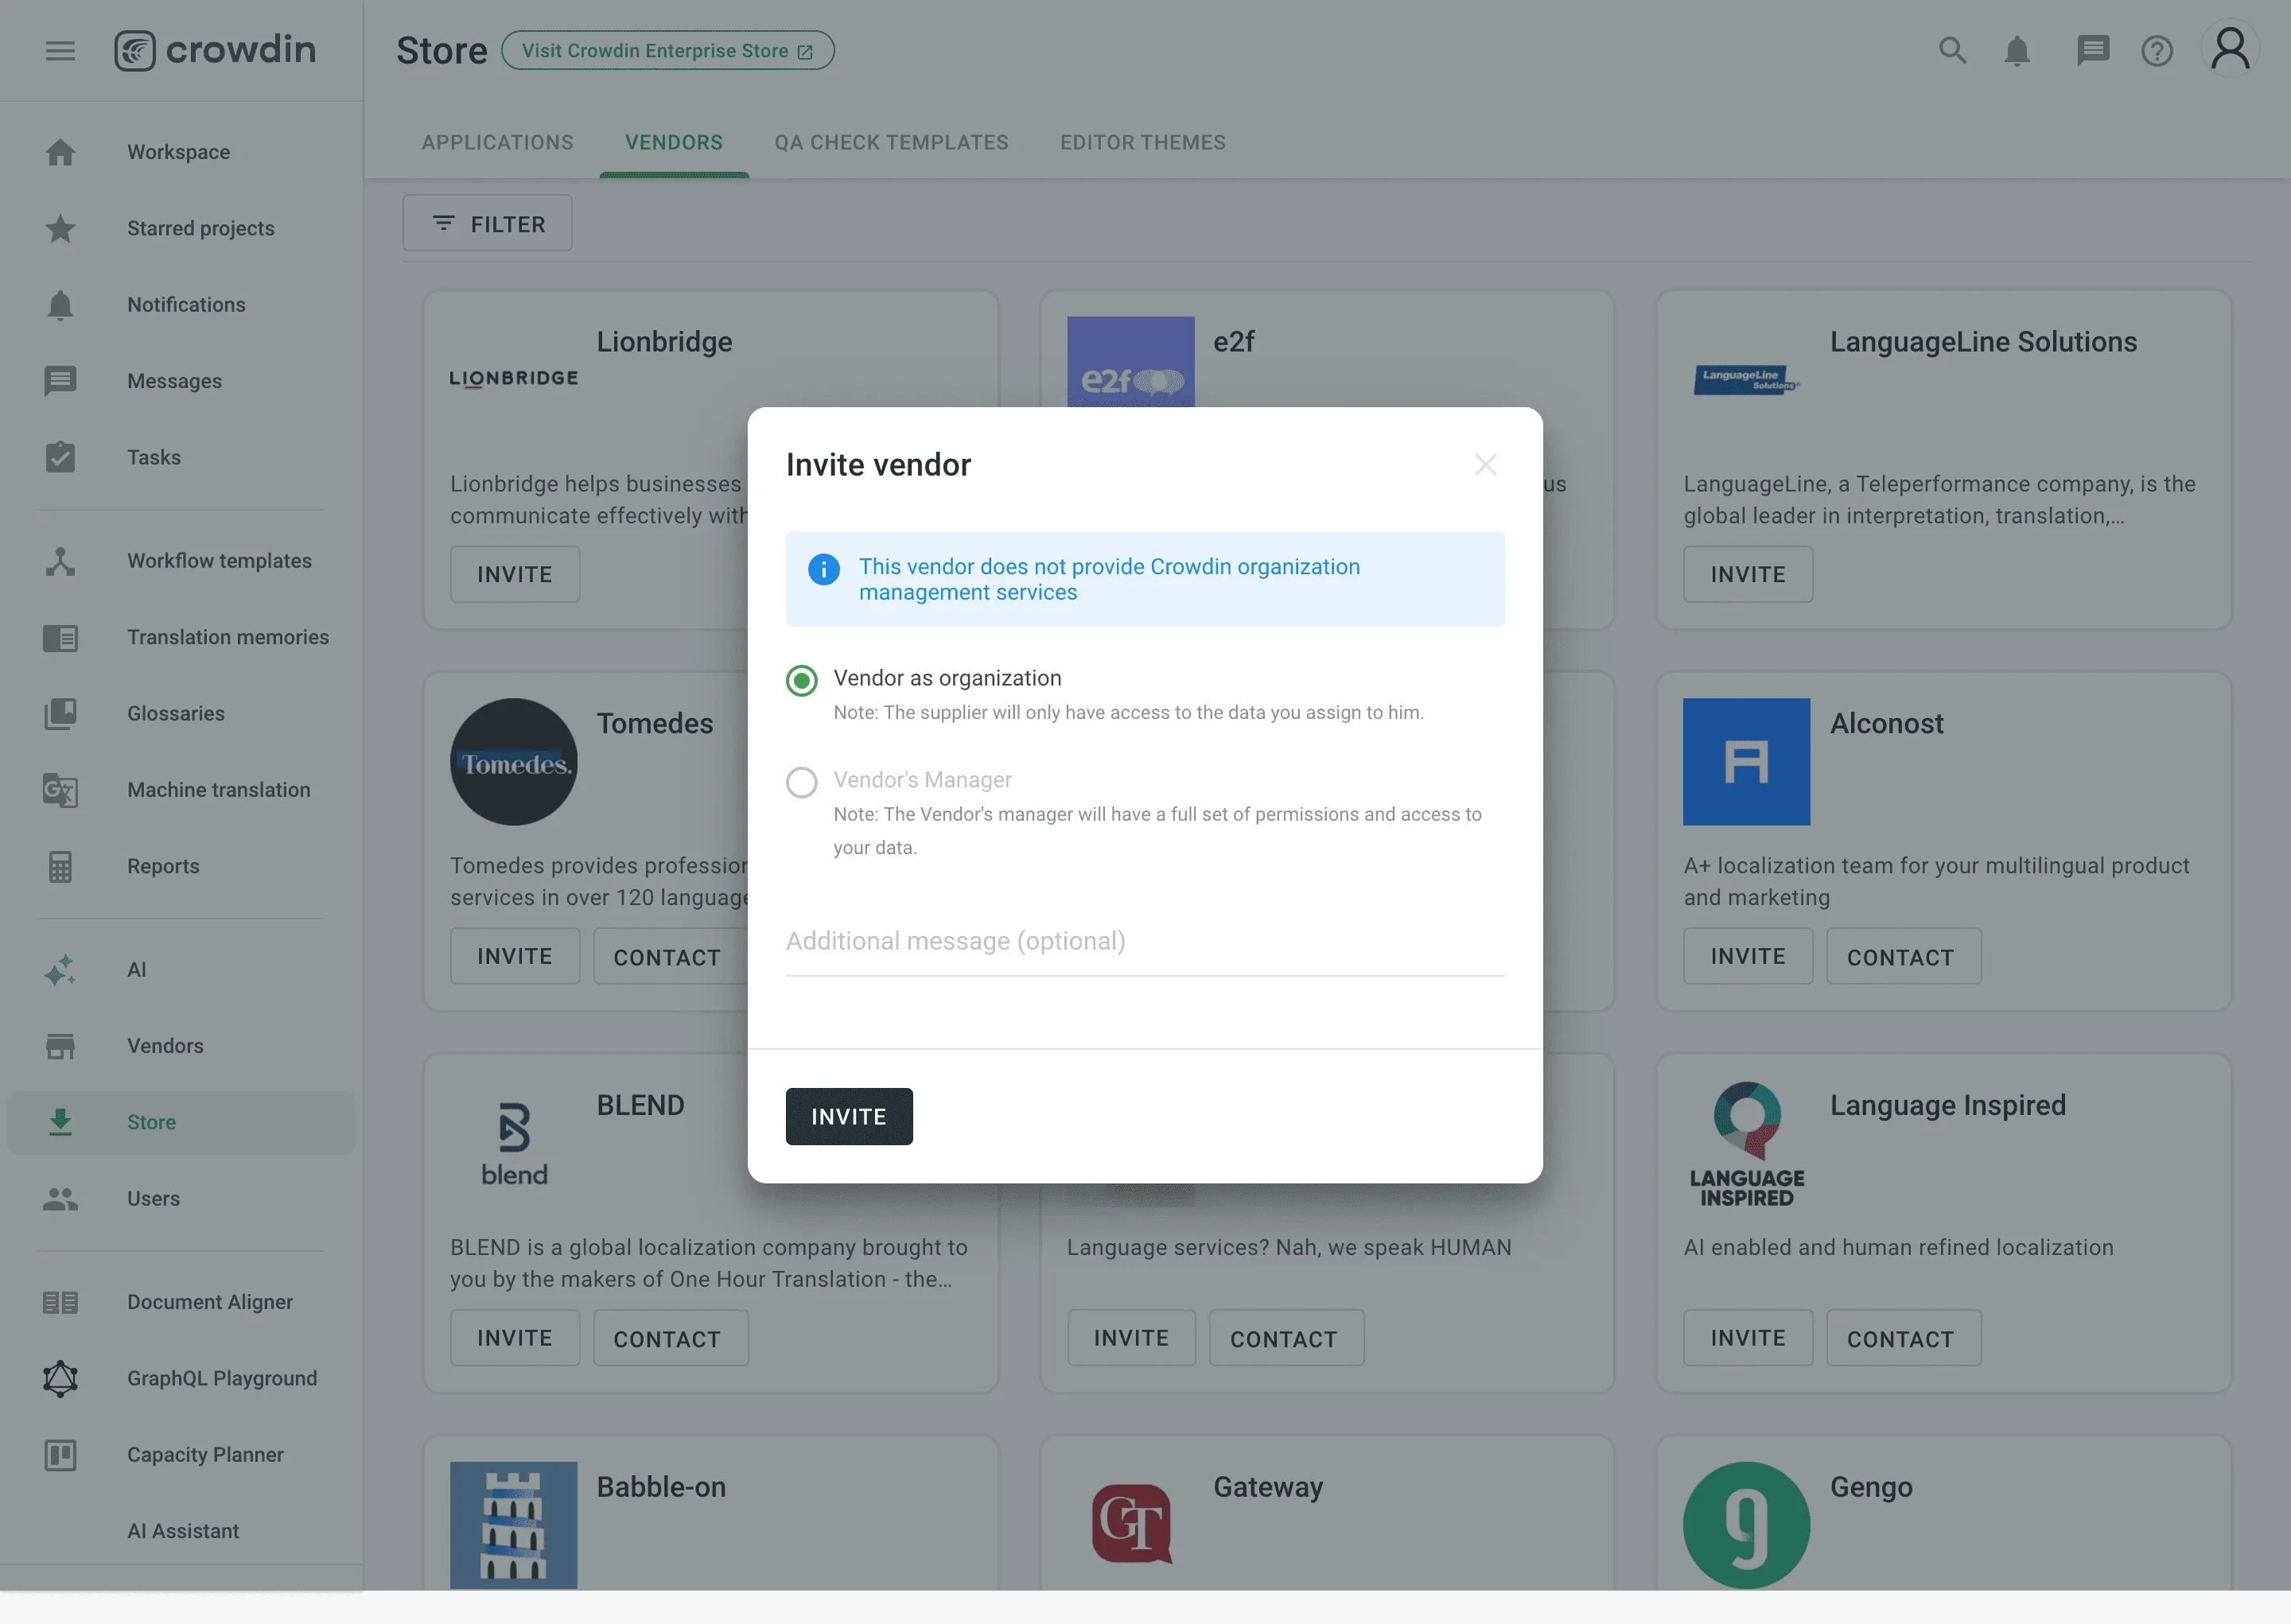 4. Go back to your **Workspace**, select **Vendors** on the left sidebar, and click **Gengo**. 5. Click **Set up account**. 6. In the appeared dialog, paste your Gengo API keys from your Gengo [Account settings > API settings](https://gengo.com/account/api_settings/) and click **Done**. ## [Adding Translation by API Vendor Step to Your Workflow](#adding-translation-by-api-vendor-step-to-your-workflow) [Section titled “Adding Translation by API Vendor Step to Your Workflow”](#adding-translation-by-api-vendor-step-to-your-workflow) You can add the *Translation by API Vendor* step in the workflow editor or the workflow template editor. In the step settings, select the vendor (e.g., Gengo) from the *Vendor* drop-down. If needed, adjust additional options like *Expertise*, *Tone*, and *Purpose* to match your requirements. 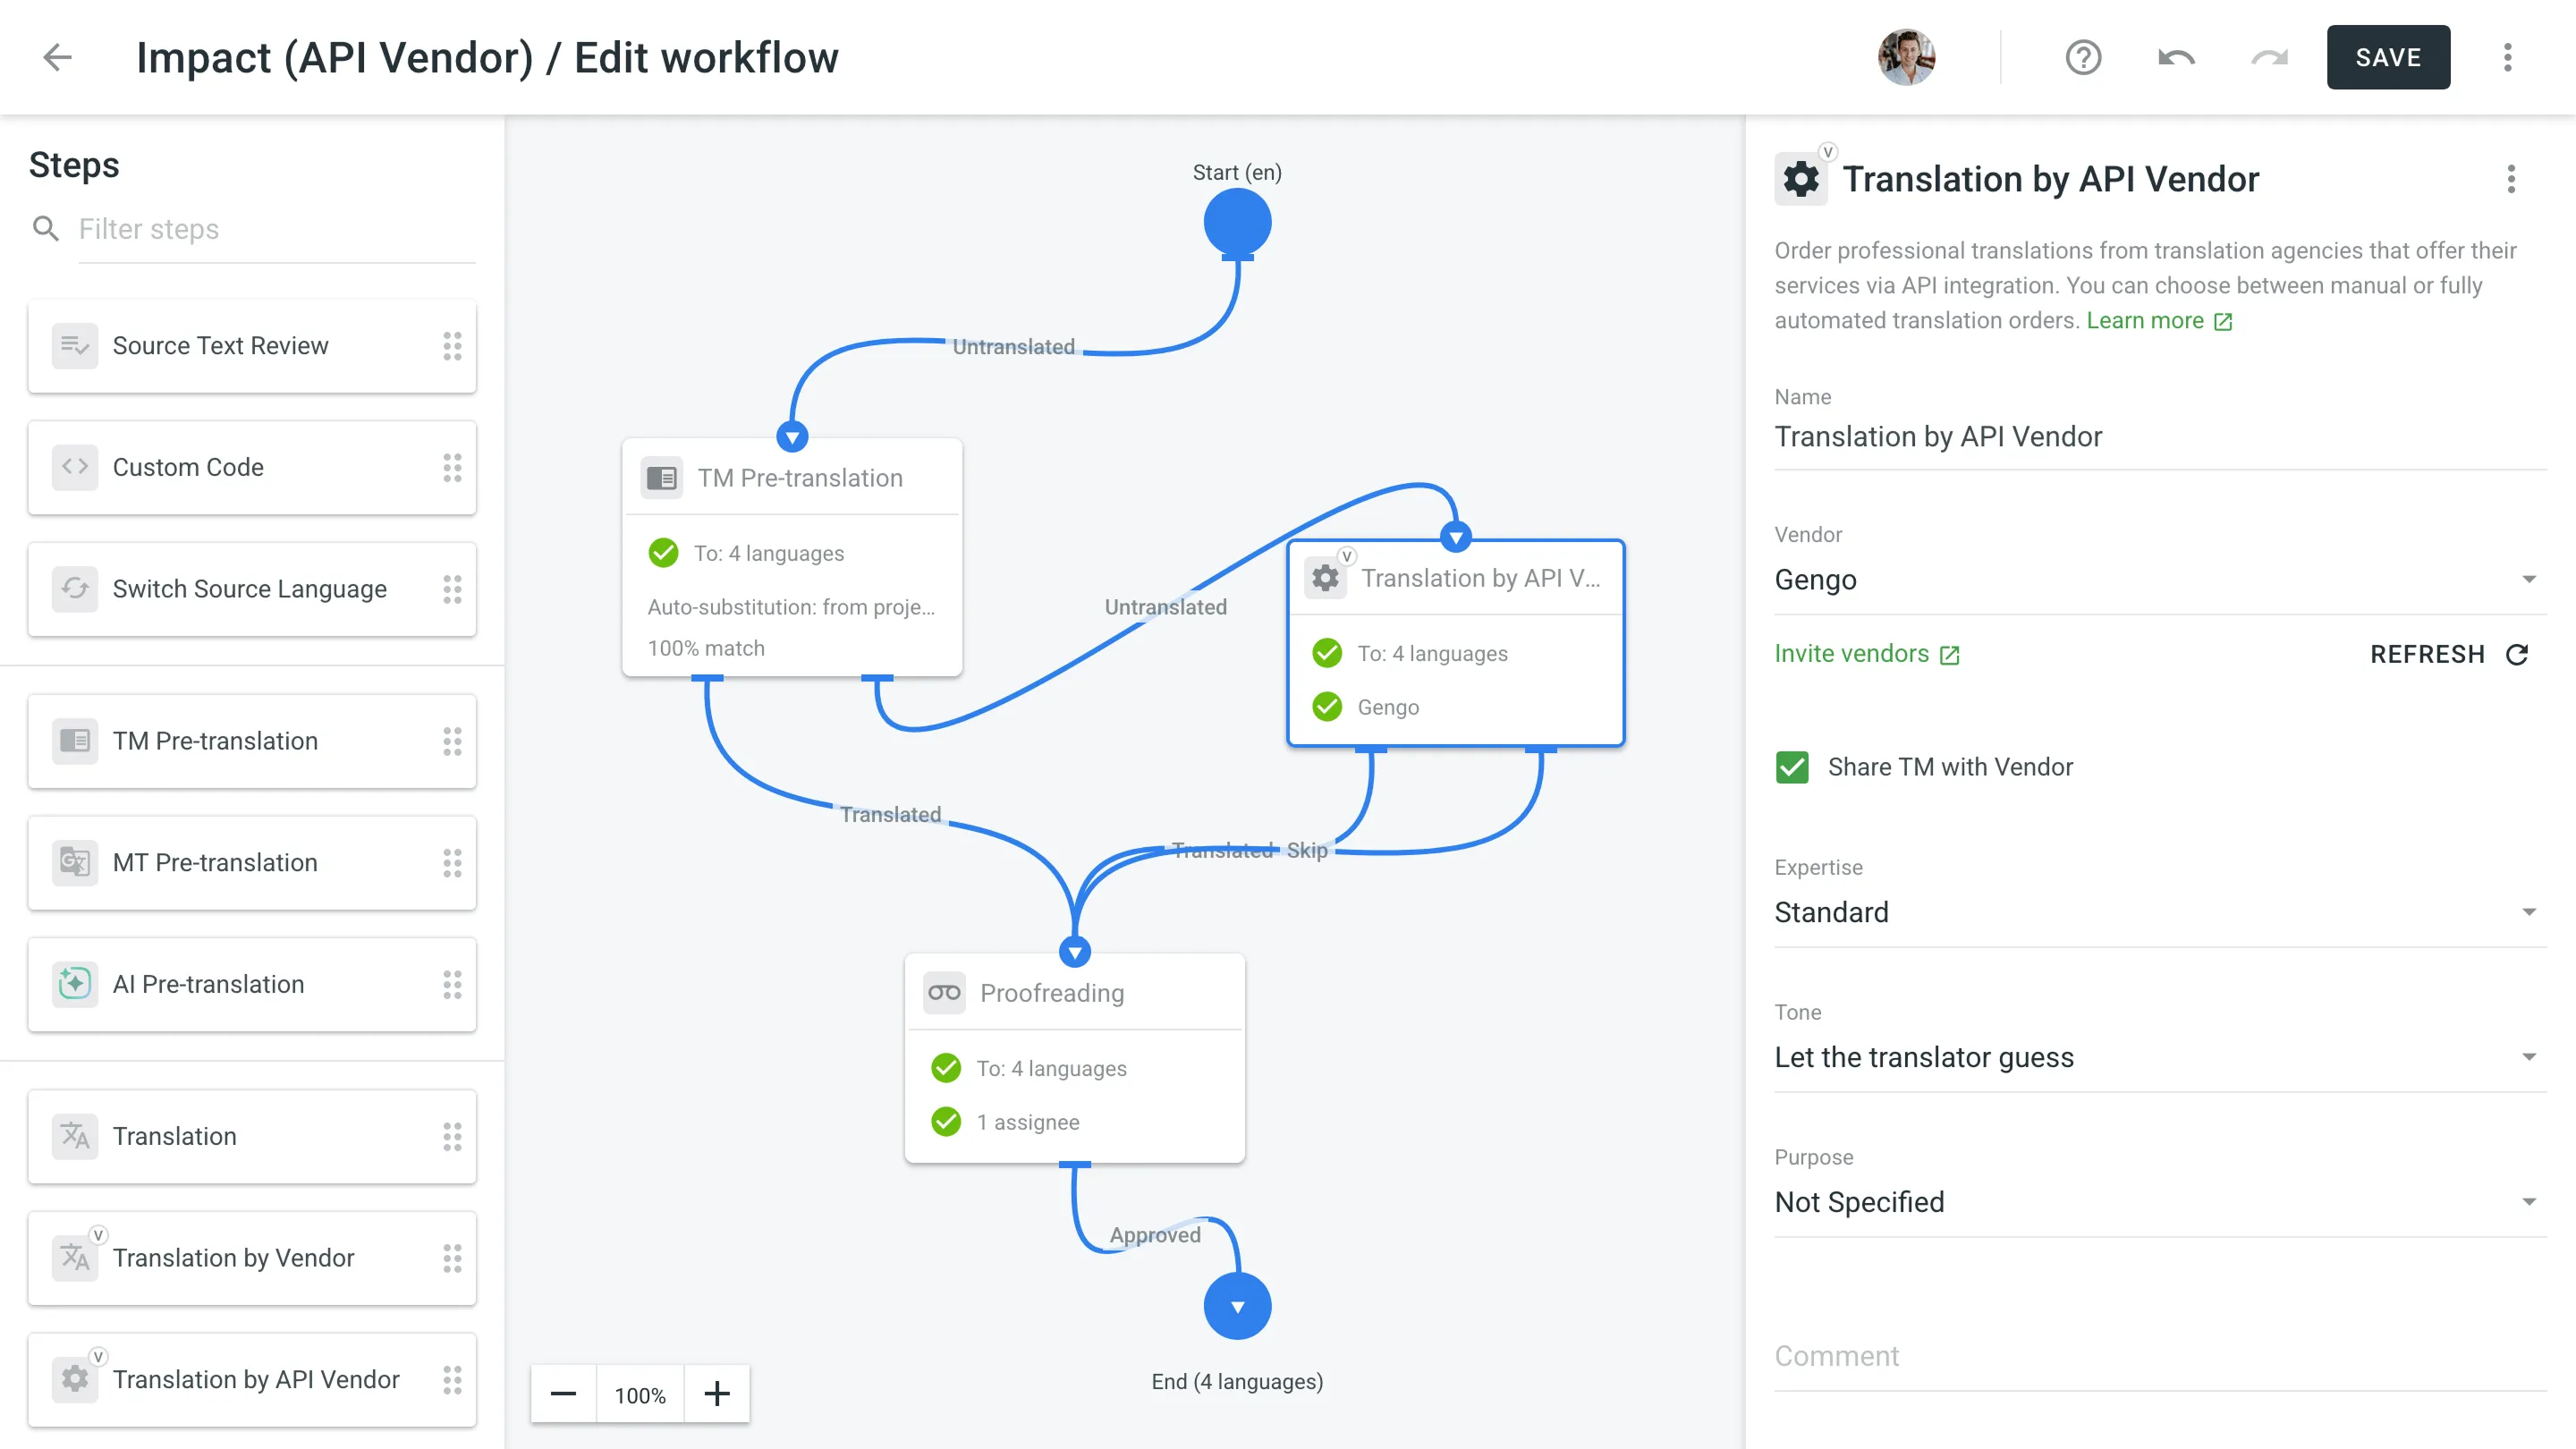 ## [Ordering Translations from API Vendor](#ordering-translations-from-api-vendor) [Section titled “Ordering Translations from API Vendor”](#ordering-translations-from-api-vendor) Once the step is added to your project workflow, the *API Vendor* tab becomes available in the **Workflow** section of the project. To order translations, follow these steps: 1. Open your project and go to **Workflow > API Vendor**. 2. Choose the target languages. 3. Click **Create order**. 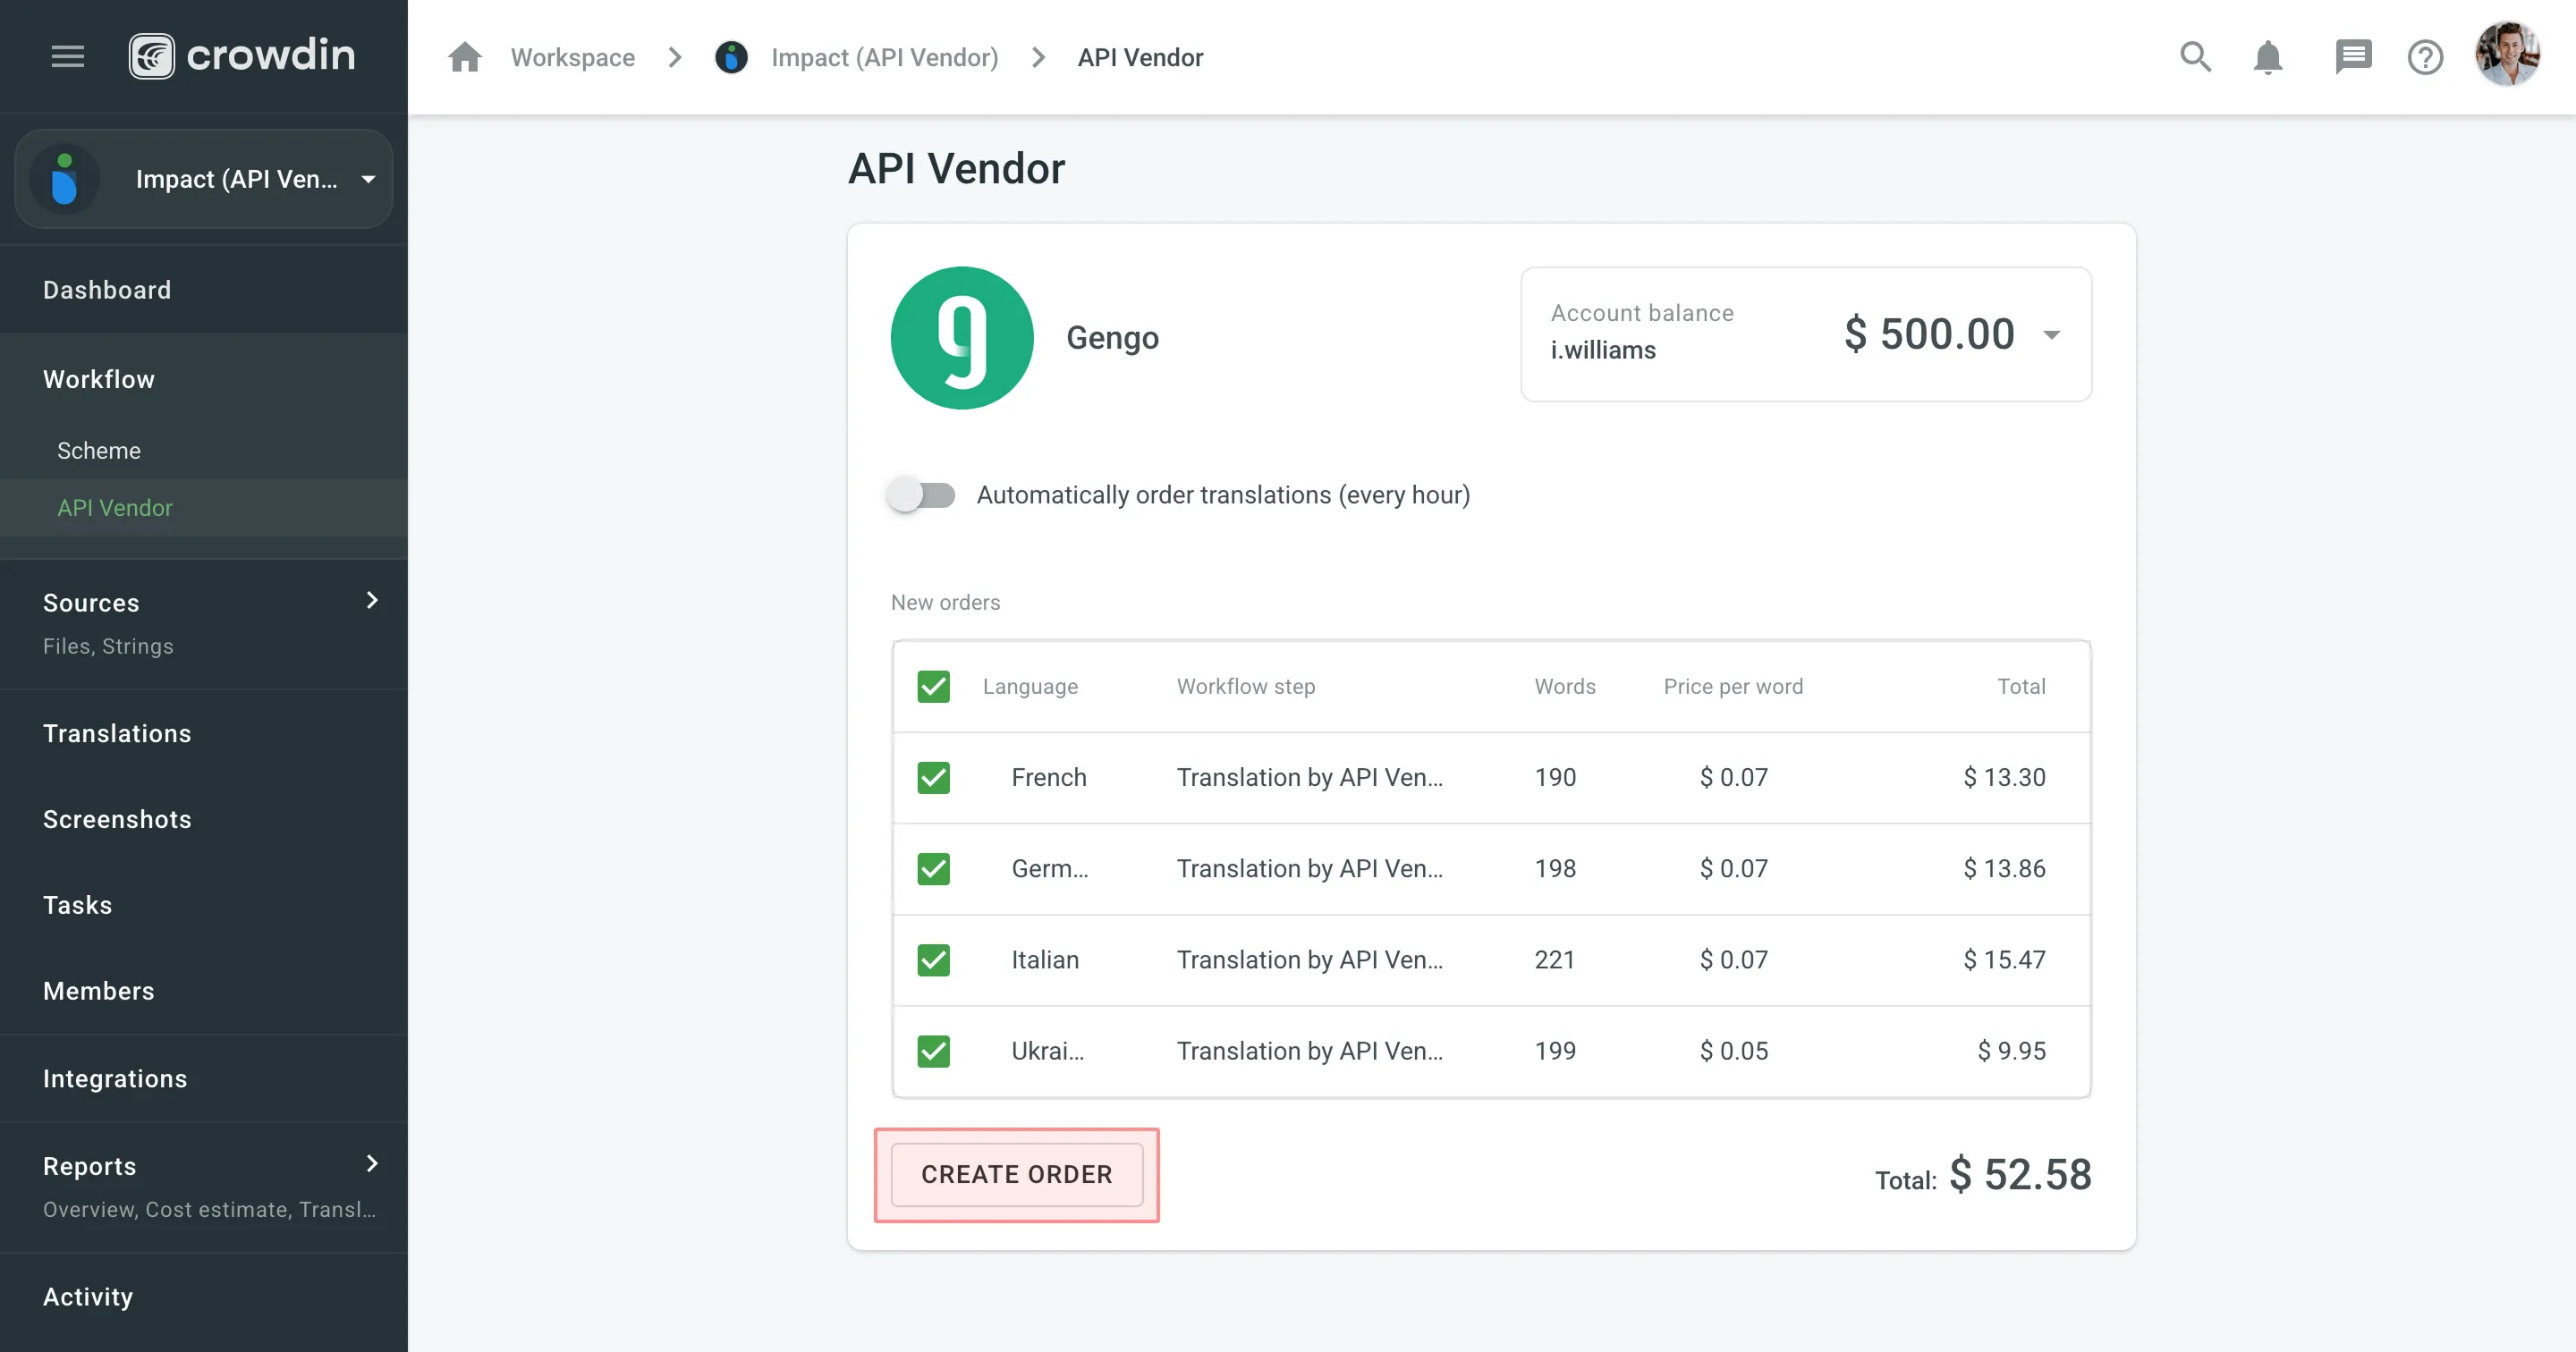 4. *(Optional)* Enable **Automatically order translations (every hour)** if you want translation orders to be sent periodically without manual action. As soon as the translations are completed by the vendor, they will be delivered back into the project automatically. ## [Orders History](#orders-history) [Section titled “Orders History”](#orders-history) To track past orders, scroll down to the **Orders history** section on the **Workflow > API Vendor** page. This section shows each order’s language, word count, status, and price. For more detailed order information, click the specific order entry.  You can also view orders across all your projects by going to **Workspace > Vendors** and selecting the needed vendor (e.g., Gengo). On the **Orders** tab, use the available filters (e.g., Project, Language, Status, Created) to narrow down the results and check relevant order details.
# Translation Consistency
> Hints regarding how the source words were previously translated
Translation consistency is a feature designed to provide translators with informative hints regarding how the source words were previously translated. These hints show previous translations for individual words and the number indicating how many times each translation was used in the project. As the feature’s name states, its main task is to improve the consistency of translations within the project. As a result, you get higher-quality translations that will be used in your applications, websites, etc. ## [Overview](#overview) [Section titled “Overview”](#overview) Translation consistency is handled by an experimental machine learning technology. As soon as you start translating your project, machine learning algorithms engage, and the system shows previous translations for the source words and how often they were used in the project. The previous translation lists are formed based on the translations with the highest priority (approved, most voted, or last added ones) within the project. ## [Using Translation Consistency in Editor](#using-translation-consistency-in-editor) [Section titled “Using Translation Consistency in Editor”](#using-translation-consistency-in-editor) Hover over the source words underlined with the light dashed line to see the previous translations formed by the translation consistency feature. You can also search previous translations for specific source words using the *Search TM* tab. 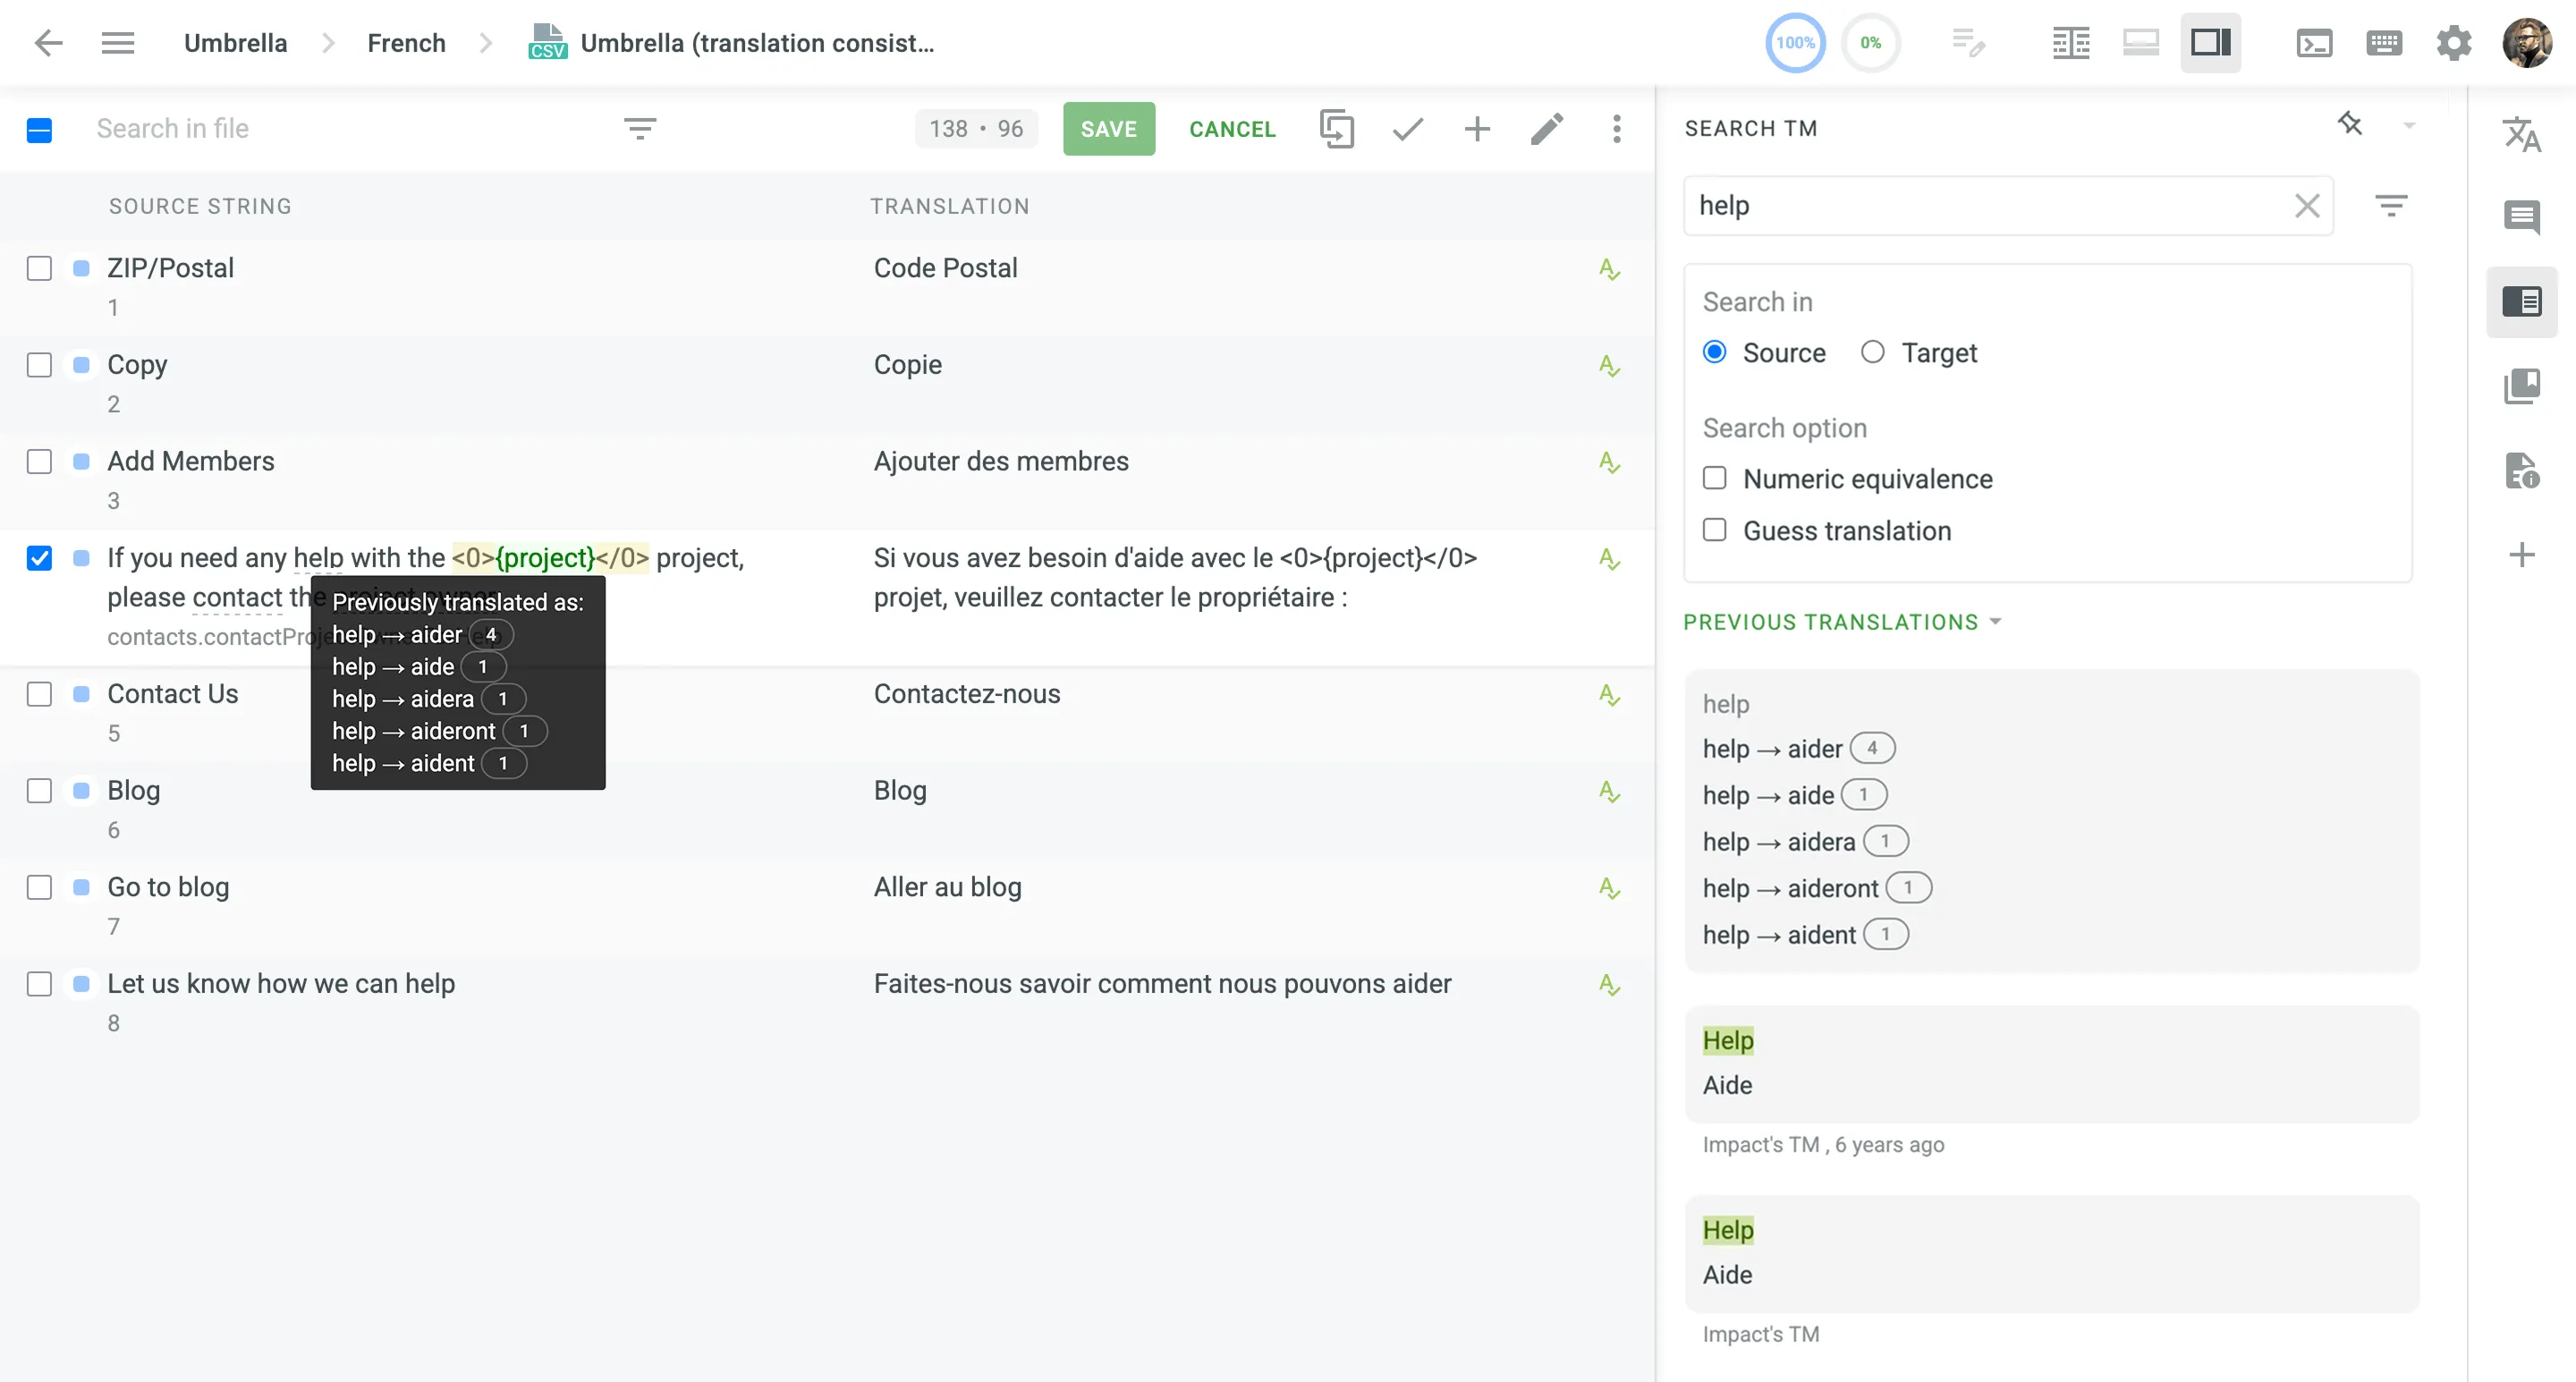 ## [Supported Languages](#supported-languages) [Section titled “Supported Languages”](#supported-languages) Currently, translation consistency is available for the following source and target languages: **Source languages** * English * English, United States * English, United Kingdom **Target Languages** * Czech * Danish * Dutch * Finnish * French * German * Italian * Norwegian * Norwegian Bokmal * Polish * Portuguese * Romanian * Russian * Spanish * Swedish * Ukrainian New languages are added regularly.
# Translation Memory
> Learn how to manage Translation Memories in Crowdin Enterprise
A Translation Memory (TM) is a database that stores translation units, which are segments of source text paired with their corresponding translations in different languages. It improves and speeds up the translation process by providing suggestions for identical or similar strings in your projects. A project TM is created automatically for each Crowdin Enterprise project. By default, each translation made within the project is automatically added to the project’s TM. This behavior can be customized in the [project settings](/enterprise/project-settings/translation-memories/) to save only approved translations. ## [Creating TM](#creating-tm) [Section titled “Creating TM”](#creating-tm) In addition to the project TMs that are automatically created with each project, you can create separate TMs and populate them with content by uploading your existing TMs in TMX, XLSX, or CSV formats. These TMs can then be assigned to the relevant projects as needed. To create a TM, follow these steps: 1. Open your organization’s **Workspace** and select **Translation memories** on the left sidebar. 2. At the bottom right, click **Create**.  3. In the appeared dialog, name your TM and select a default language that will be displayed first in the table of translation units. 4. *(Optional)* Click **Select files** to upload your existing TM. You can skip this step and upload a TM later. 5. Click **Create**.  [Assigning TM ](/enterprise/project-settings/translation-memories/#assigning-tm) [Prioritizing TM ](/enterprise/project-settings/translation-memories/#prioritizing-tm) [Changing Default TM ](/enterprise/project-settings/translation-memories/#changing-default-tm) ## [Managing Translation Units and Segments](#managing-translation-units-and-segments) [Section titled “Managing Translation Units and Segments”](#managing-translation-units-and-segments) You can create translation units from scratch, edit and delete existing translation units or segments of a particular TM or all available TMs. [Translation Memory Generator ](https://store.crowdin.com/tmg)Use this app to create a TM based on the translated Crowdin Enterprise project. ### [Creating Translation Units](#creating-translation-units) [Section titled “Creating Translation Units”](#creating-translation-units) To create a translation unit, follow these steps: 1. Open your organization’s **Workspace** and select **Translation memories** on the left sidebar. Alternatively, open your project and go to **Settings > Translation memories**. 2. Select the needed TM and click **View Records**. 3. Click **Add Translation Unit**. 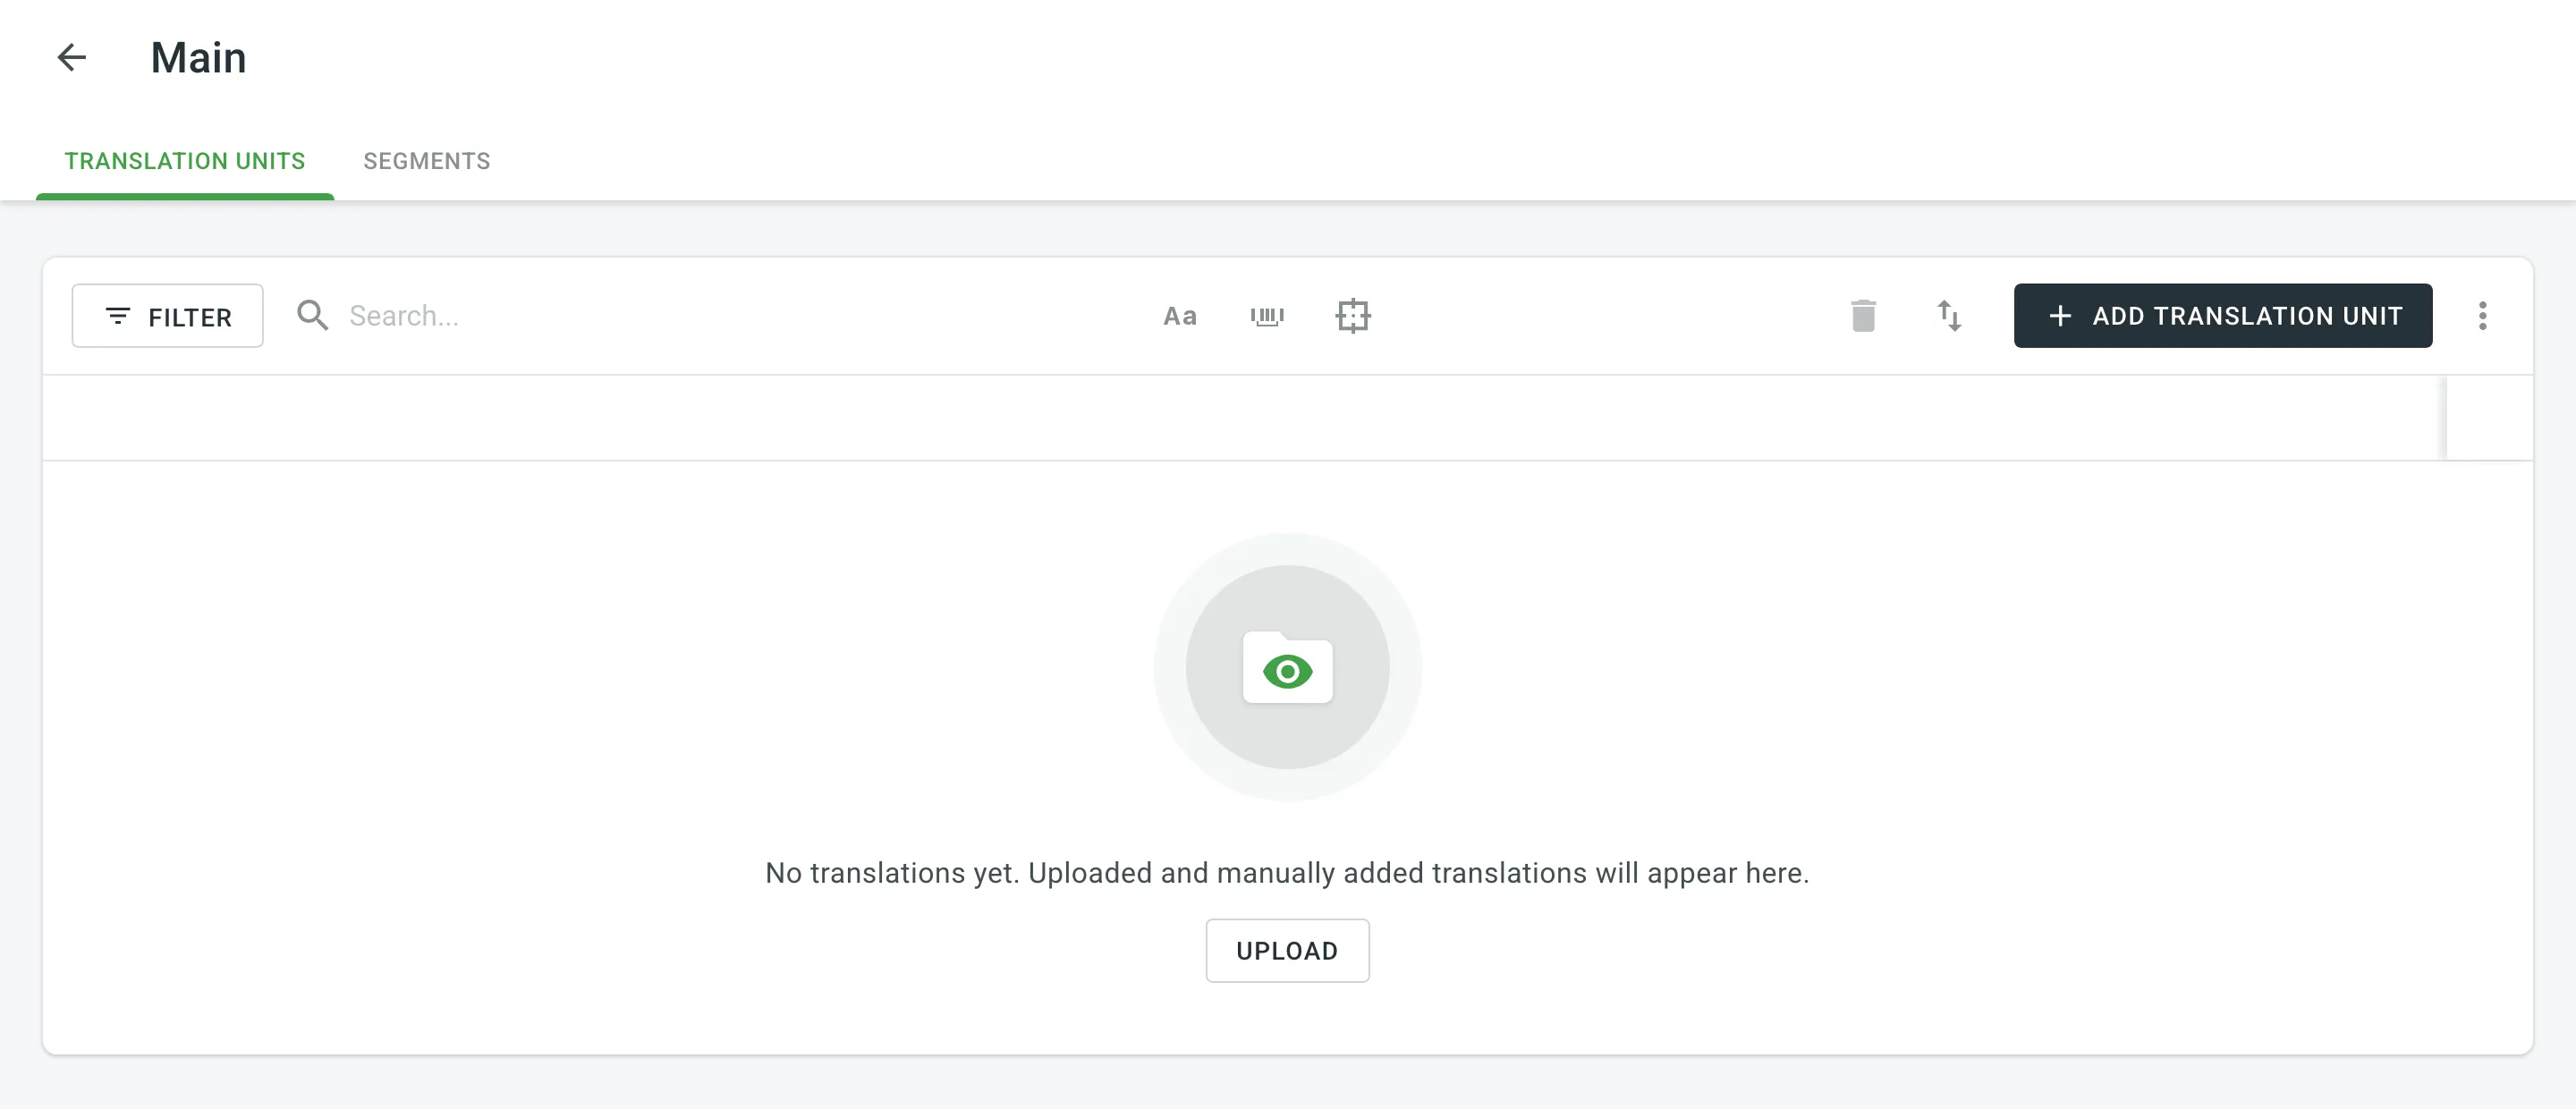 4. In the appeared dialog, select the language from the drop-down menu and type the translation of the segment. 5. Click **Add segment** to add more translations for the translation unit. 6. Click **Save**. 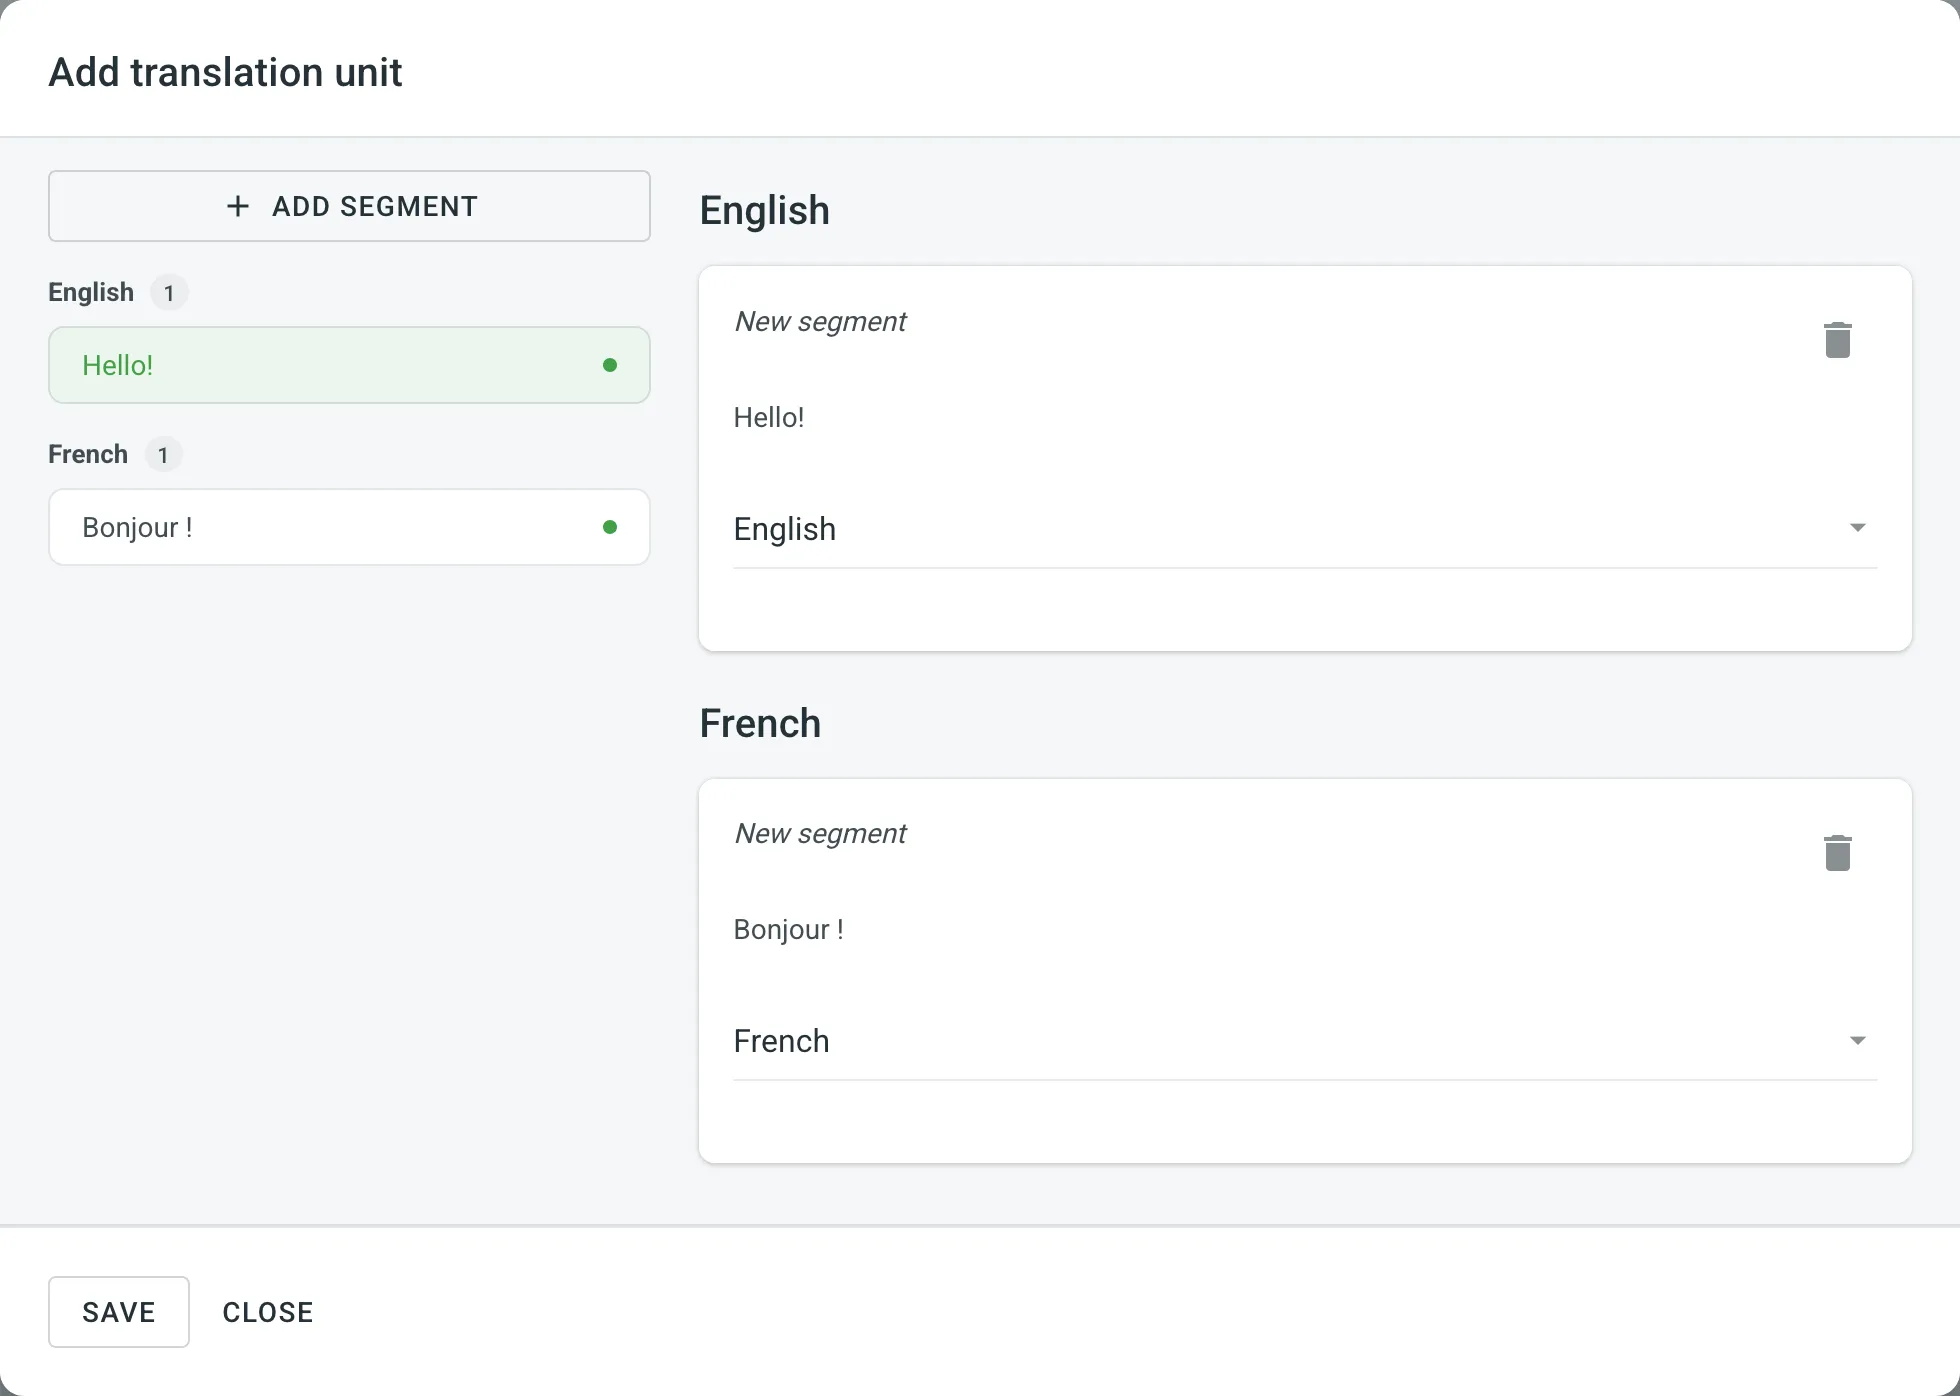 ### [Viewing and Filtering Translation Units and Segments](#viewing-and-filtering-translation-units-and-segments) [Section titled “Viewing and Filtering Translation Units and Segments”](#viewing-and-filtering-translation-units-and-segments) Once you open a translation memory, you can view and filter its translation units and segments using either the Translation Units or Segments pages. On the Translation Units page, you can view TM content grouped as translation units (one translation unit per row, each segment displayed in a separate language column). 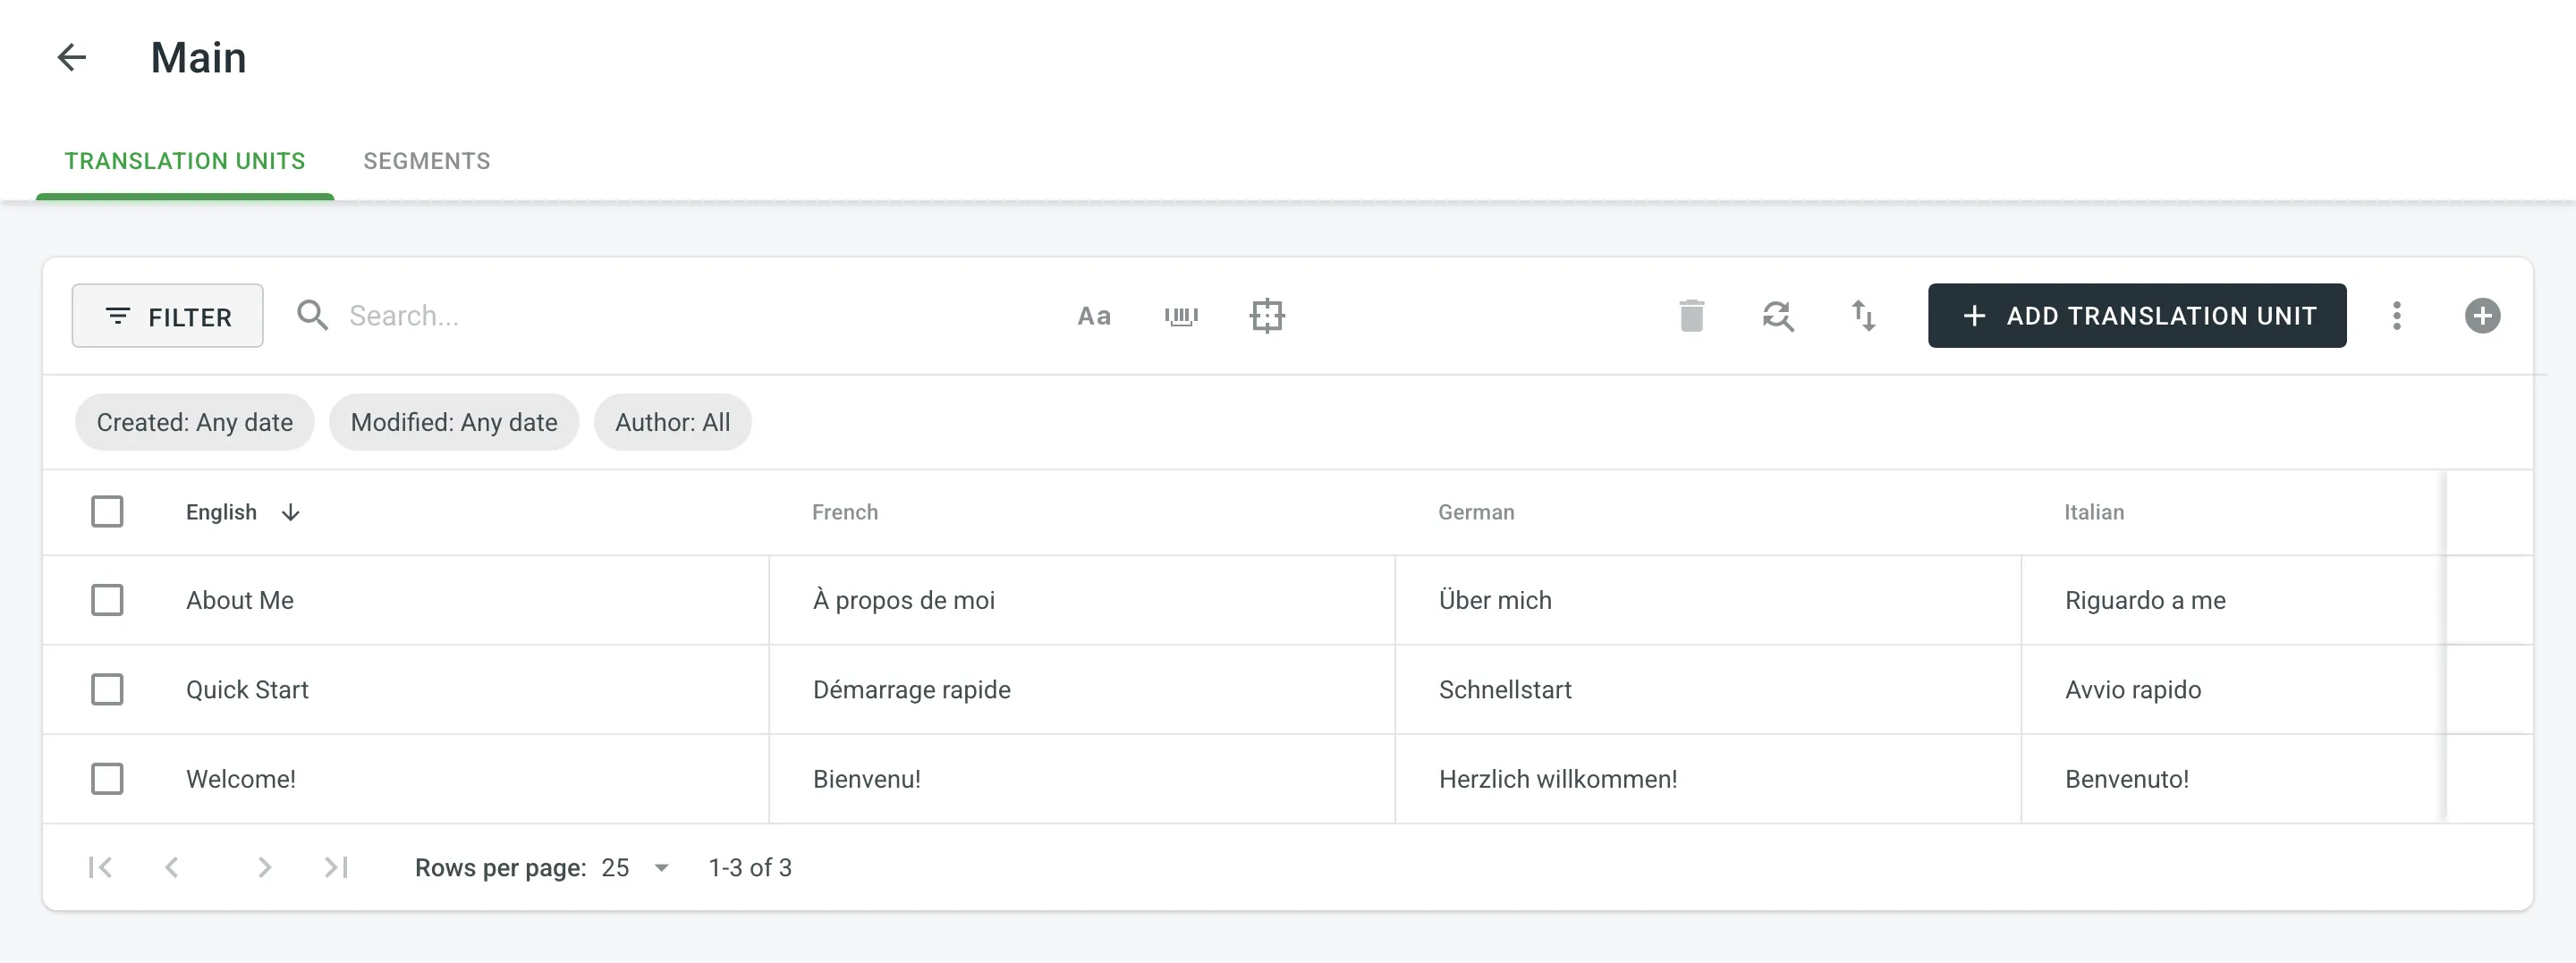 On the Segments page, you can view TM content as individual segments (one segment per row) with the following details: * Segment – contains either source or target language text. * Language – specifies the language of the segment. * Usage count – specifies the number of times a segment has been used. * Created – specifies the date of the segment creation. * Last modified – specifies the date of the last modification of the segment. * Author – specifies the user who created the segment. 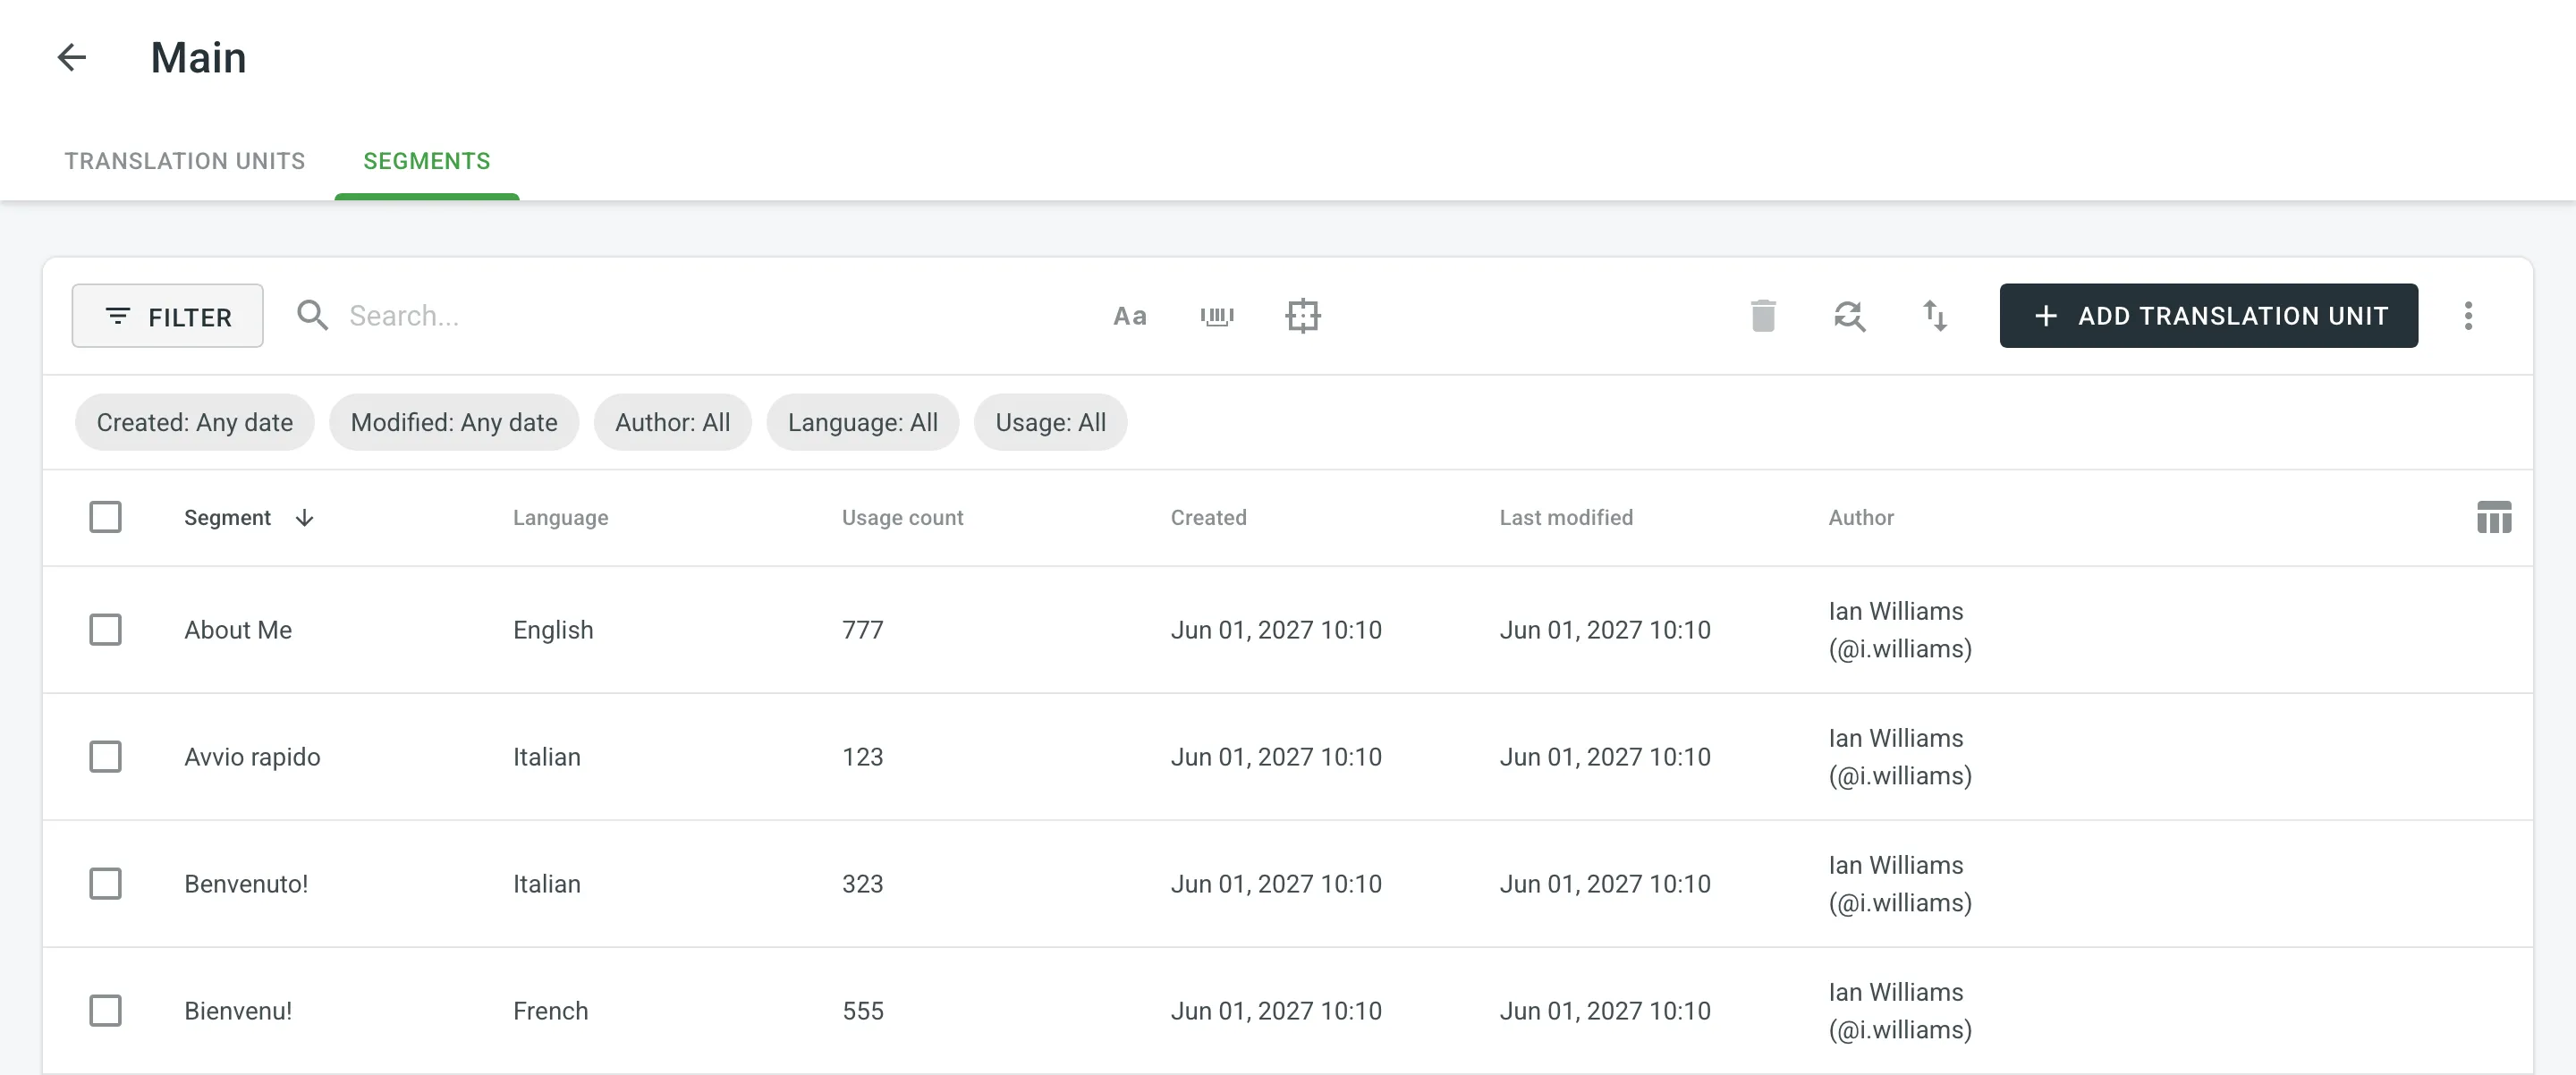 By default, all translation units and segments are displayed in the Translation Units and Segments pages. To filter the translation units or segments displayed, click and use the available filter options: * Created: All, Custom Range. * Modified: All, Custom Range. * Author: All, particular user. * Languages (Specific to the Segments page): All, particular language. * Usage (Specific to the Segments page): All, Used, Unused. To sort translation units or segments, click the column header you want to sort by: * Translation Units page – click a language column (e.g., English, French, etc.) to sort the translation units by that language’s text. * Segments page – click the Segment column to sort by segment text. Click once to sort in ascending order and click again to sort in descending order. ### [Editing Translation Units](#editing-translation-units) [Section titled “Editing Translation Units”](#editing-translation-units) You can edit both the source and translation parts of the existing translation unit. To edit a translation unit, follow these steps: 1. Open your organization’s **Workspace** and select **Translation memories** on the left sidebar. Alternatively, open your project and go to **Settings > Translation memories**. 2. Click on the needed TM. Alternatively, click **All Records** to view translation units of all available TMs in one list. 3. Hover over a translation unit and click to open it. 4. In the appeared dialog, edit or delete the segments of the needed languages. For each segment, you can see additional details like the language, creation date, update date, and, if available, the name of the contributor who originally submitted the translation. 5. Click **Save**. 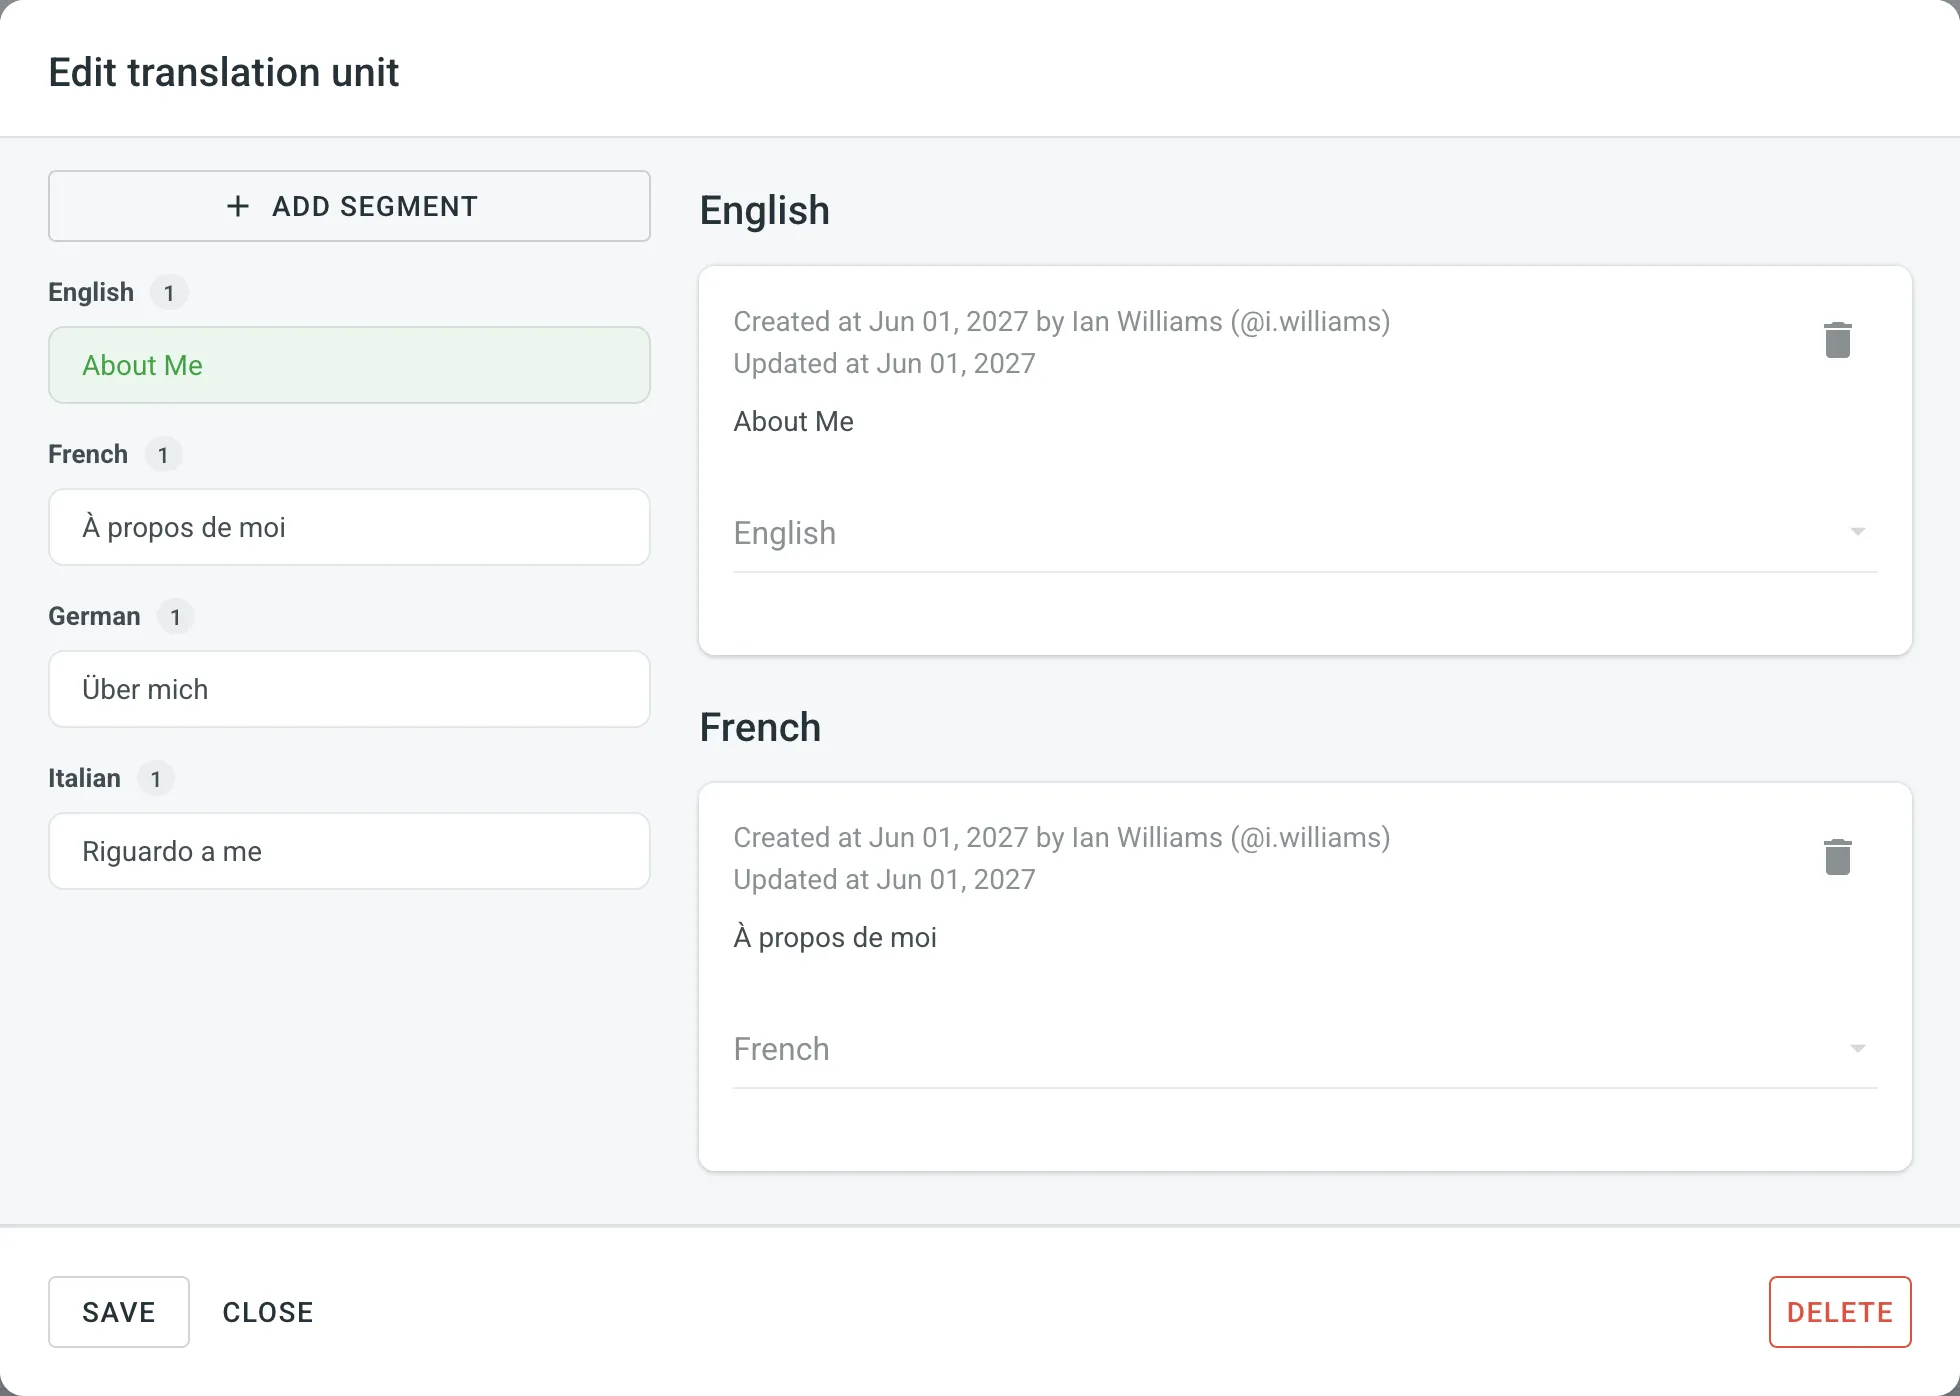 In addition to editing translation units via the **Translation memories** page, you can also do it in the Editor. Read more about [Editing TM Suggestions in the Editor](/enterprise/online-editor/#editing-tm-suggestions-in-the-editor). Another way to edit translation units in your TM is to download it (e.g., in TMX format), make the necessary changes locally on your device, and then reupload the modified TM back to Crowdin. Depending on what you modify in your TM, there could be different outcomes: * If you edit both the source and translation segments of a translation unit, then when you upload the TM to Crowdin, the locally modified translation unit will be treated as new upon re-upload, leaving the original translation unit unchanged. * If you only edit the translation segment of a translation unit, then when you upload the TM to Crowdin, the locally modified translation segment will be added as an alternative version segment to the existing translation unit, keeping the original translation intact but providing another option. If you want to have only the modified version of the translation units, follow these steps: 1. [Download](#downloading-tm-for-offline-management) the complete version of your TM to your device. 2. Make the necessary changes locally on your device. 3. Completely [clear the content of your TM](#deleting-translation-units-and-segments) in Crowdin. 4. [Upload](#downloading-and-uploading-tm) your locally modified TM to Crowdin. ### [Replacing in Segments](#replacing-in-segments) [Section titled “Replacing in Segments”](#replacing-in-segments) You can easily find and replace translations in segments within a selected TM using the *Find & Replace* feature. To replace current translations with the new ones, follow these steps: 1. Open your organization’s **Workspace** and select **Translation memories** on the left sidebar. Alternatively, open your project and go to **Settings > Translation memories**. 2. Click on the needed TM. 3. Click . 4. In the appeared dialog, select the language in which you want to search. *(Optional)* Use filters if necessary. 5. Enter the word, phrase, or sentence you want to substitute and the text to replace it with. *(Optional)* Use the *Match case* and *Exact match* options to refine the search results. 6. Click **Find** to preview the segments that will be replaced. 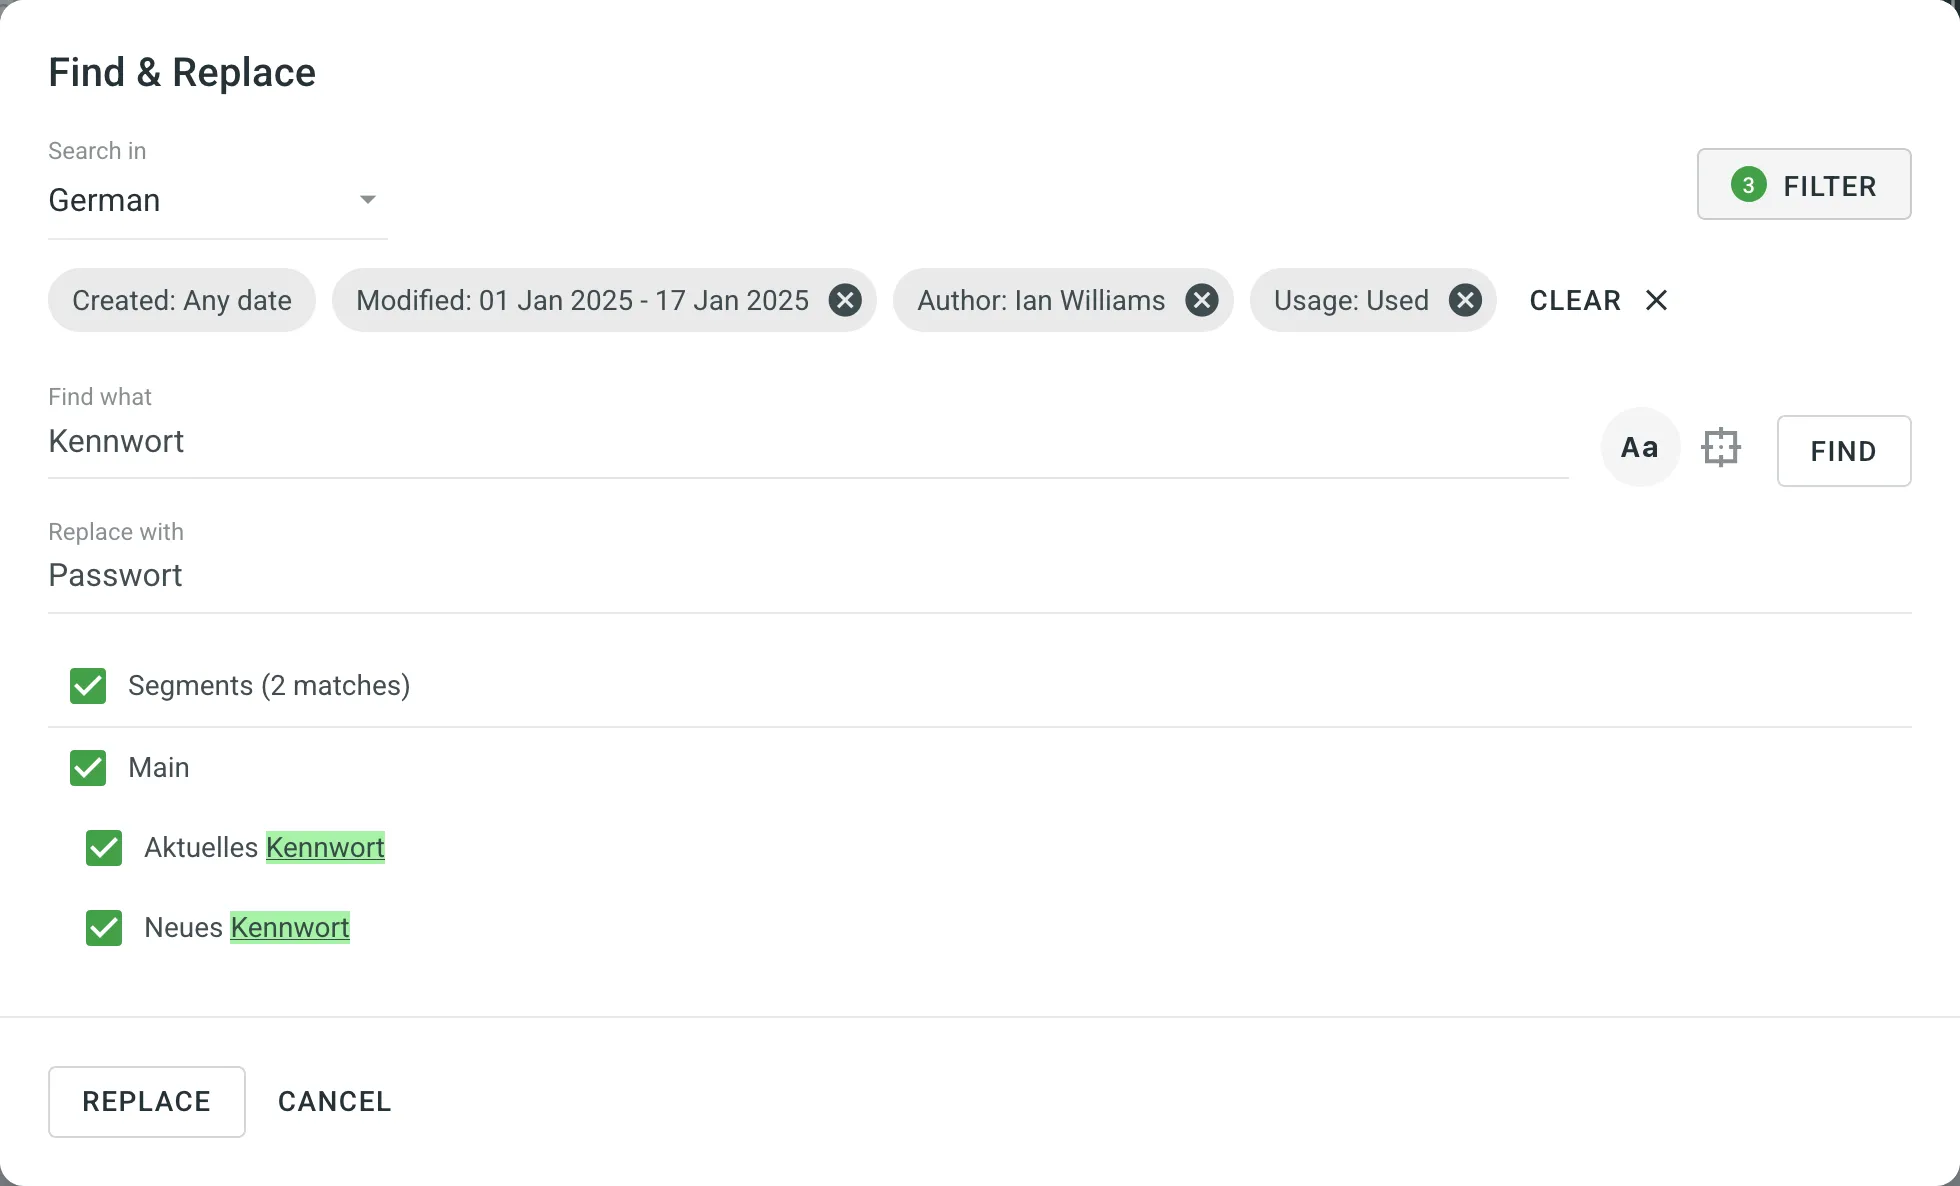 7. Select the segments you want to replace and click **Replace Selected** to finish. ### [Deleting Translation Units and Segments](#deleting-translation-units-and-segments) [Section titled “Deleting Translation Units and Segments”](#deleting-translation-units-and-segments) You can delete one, multiple, or all the translation units or segments at once. To delete all the translation units from TM, follow these steps: 1. On the Translation Units page, select the top checkbox above the translation unit list. 2. Confirm the selection of all translation units. 3. Click . 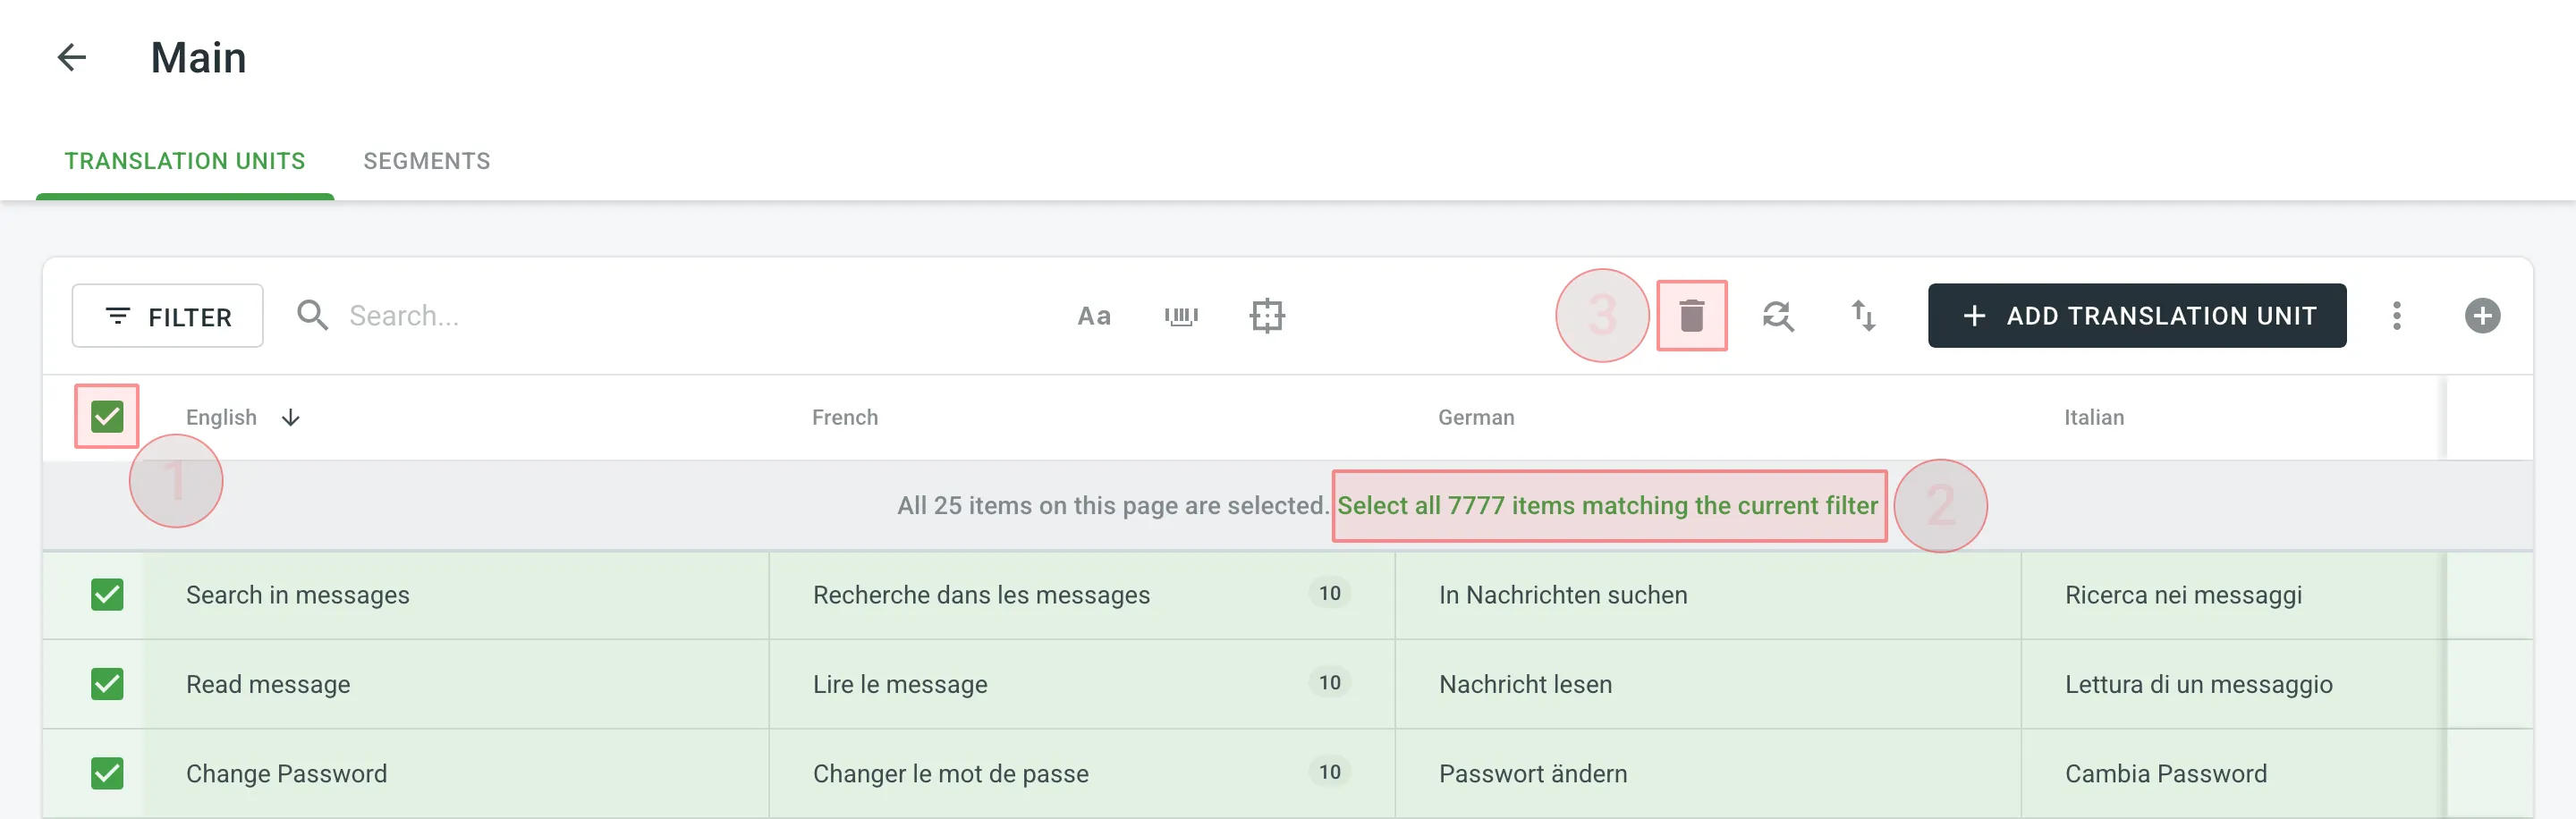 To delete all the segments from TM for only one particular language, follow these steps: 1. On the Segments page, click and select the needed language. 2. Select the top checkbox above the segment list. 3. Confirm the selection of all segments. 4. Click . 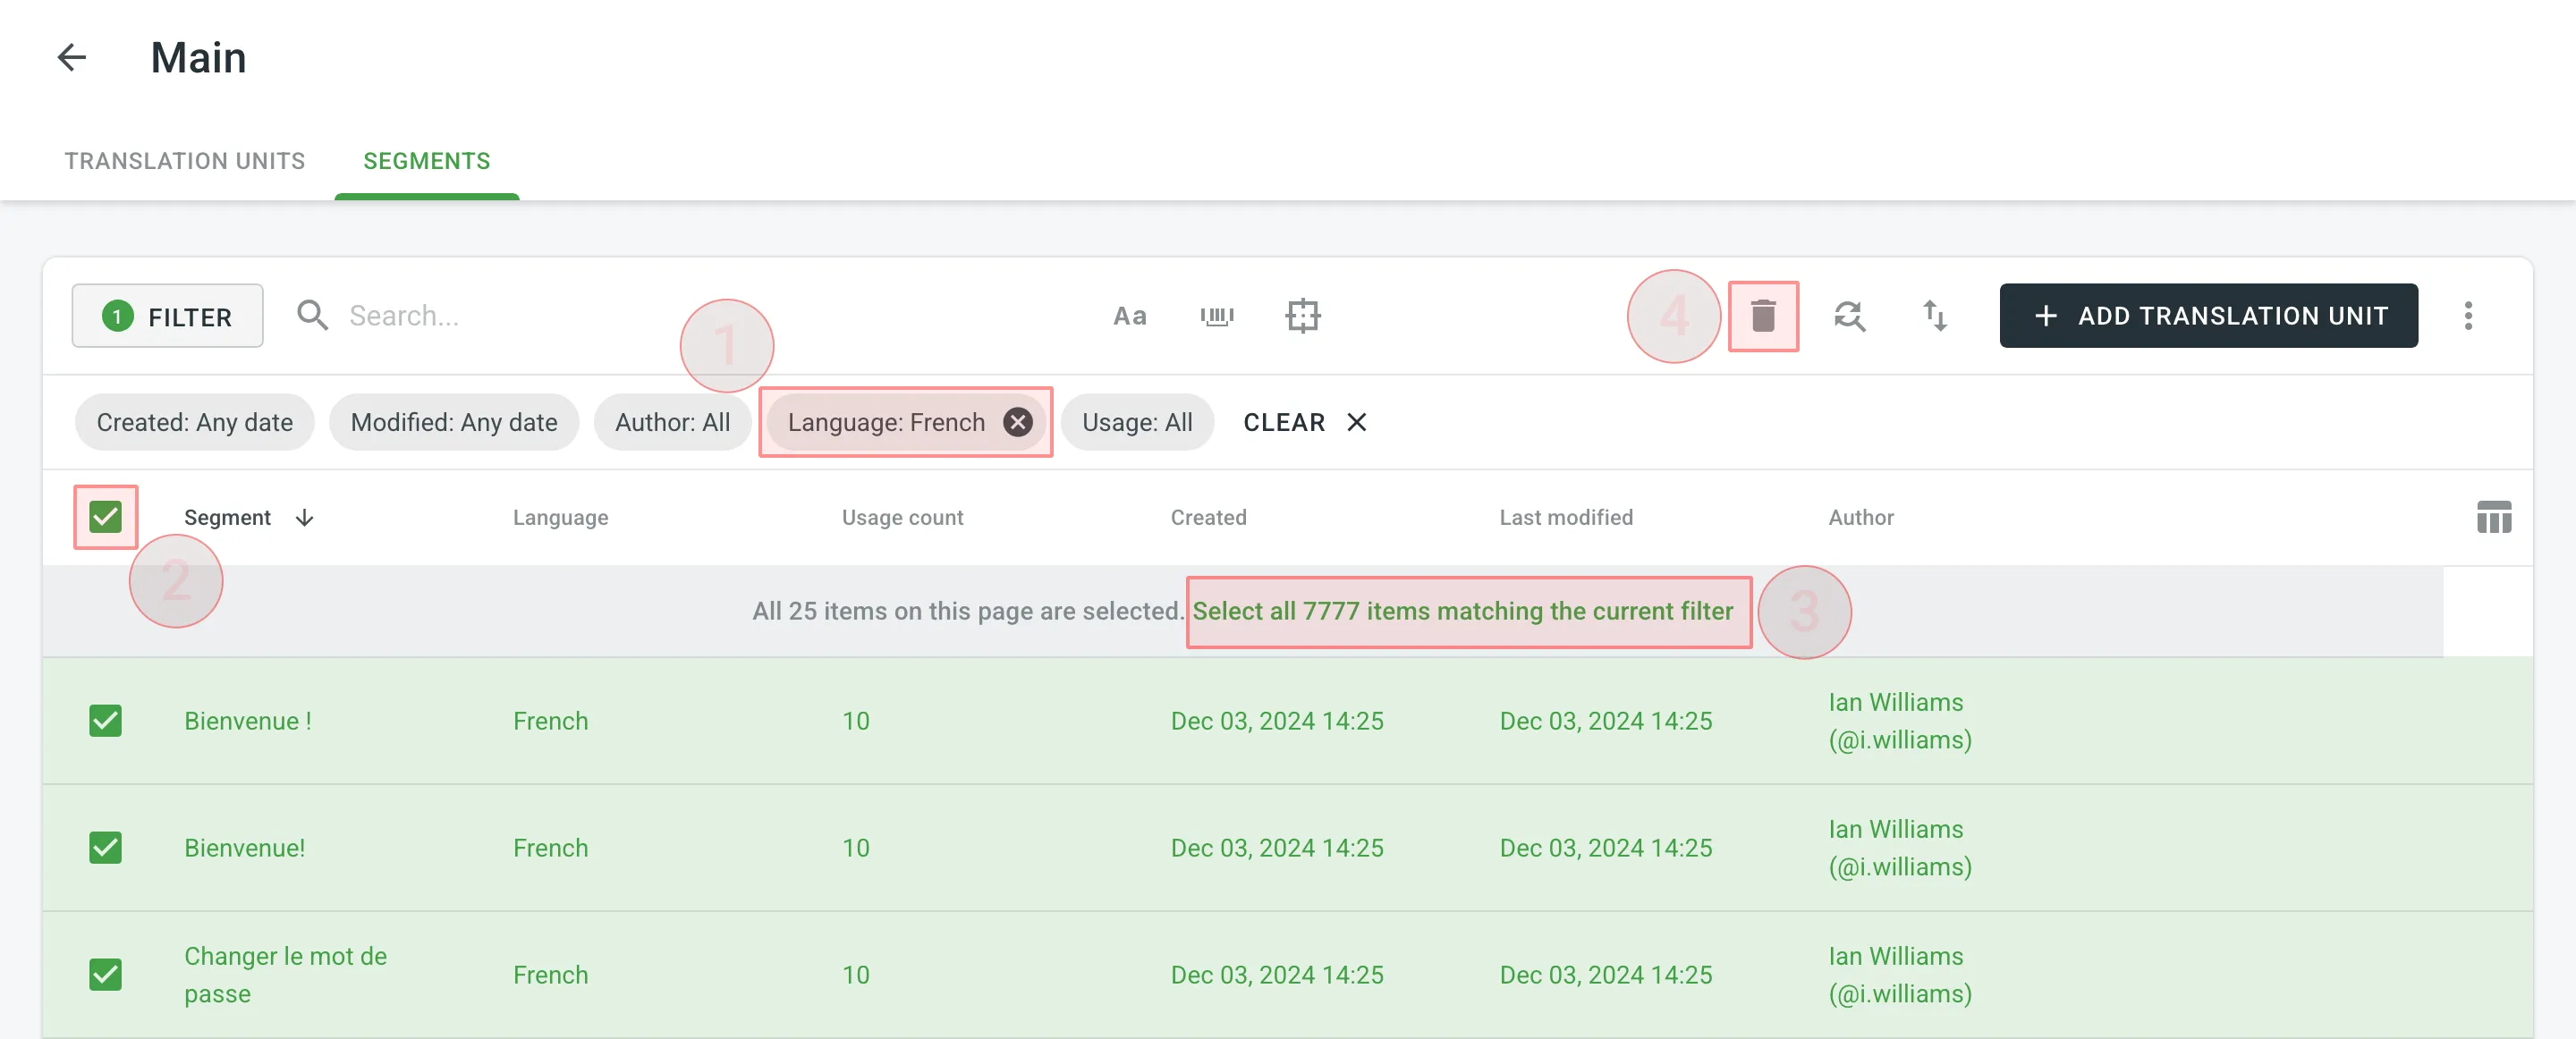 When dealing with the removal of translation units and translations, there could be three possible outcomes: * When deleting a translation unit from TM, the related translation won’t be deleted for a string in your Crowdin Enterprise project. * When you cancel the translation activity for a string on the **Activity** page, the translation for a string will be deleted, but the related translation unit will be preserved in TM. * When deleting a translation for a string in the Editor, both the translation and the related translation unit will be deleted. [TM Cleaner App ](https://store.crowdin.com/tm_cleaner_app)Use this app to clean your TM from duplicates and outdated translation units. ## [Downloading and Uploading TM](#downloading-and-uploading-tm) [Section titled “Downloading and Uploading TM”](#downloading-and-uploading-tm) To download or upload TMs, follow these steps: 1. Open your organization’s **Workspace** and select **Translation memories** on the left sidebar. Alternatively, open your project and go to **Settings > Translation memories**. 2. Click on the needed TM. 3. Click and select **Download** or **Upload**.  The owner, admins and managers can download and upload TM in the following file formats: TMX, XLSX, or CSV. Limitations The maximum file size is 2 GB for TMX and 200 MB for XLSX and CSV. If your file exceeds these limits, it is recommended to split it into several smaller files, and upload them one at a time. If you upload a TM in CSV or XLS/XLSX file formats, match columns with the corresponding languages in the configuration dialog. 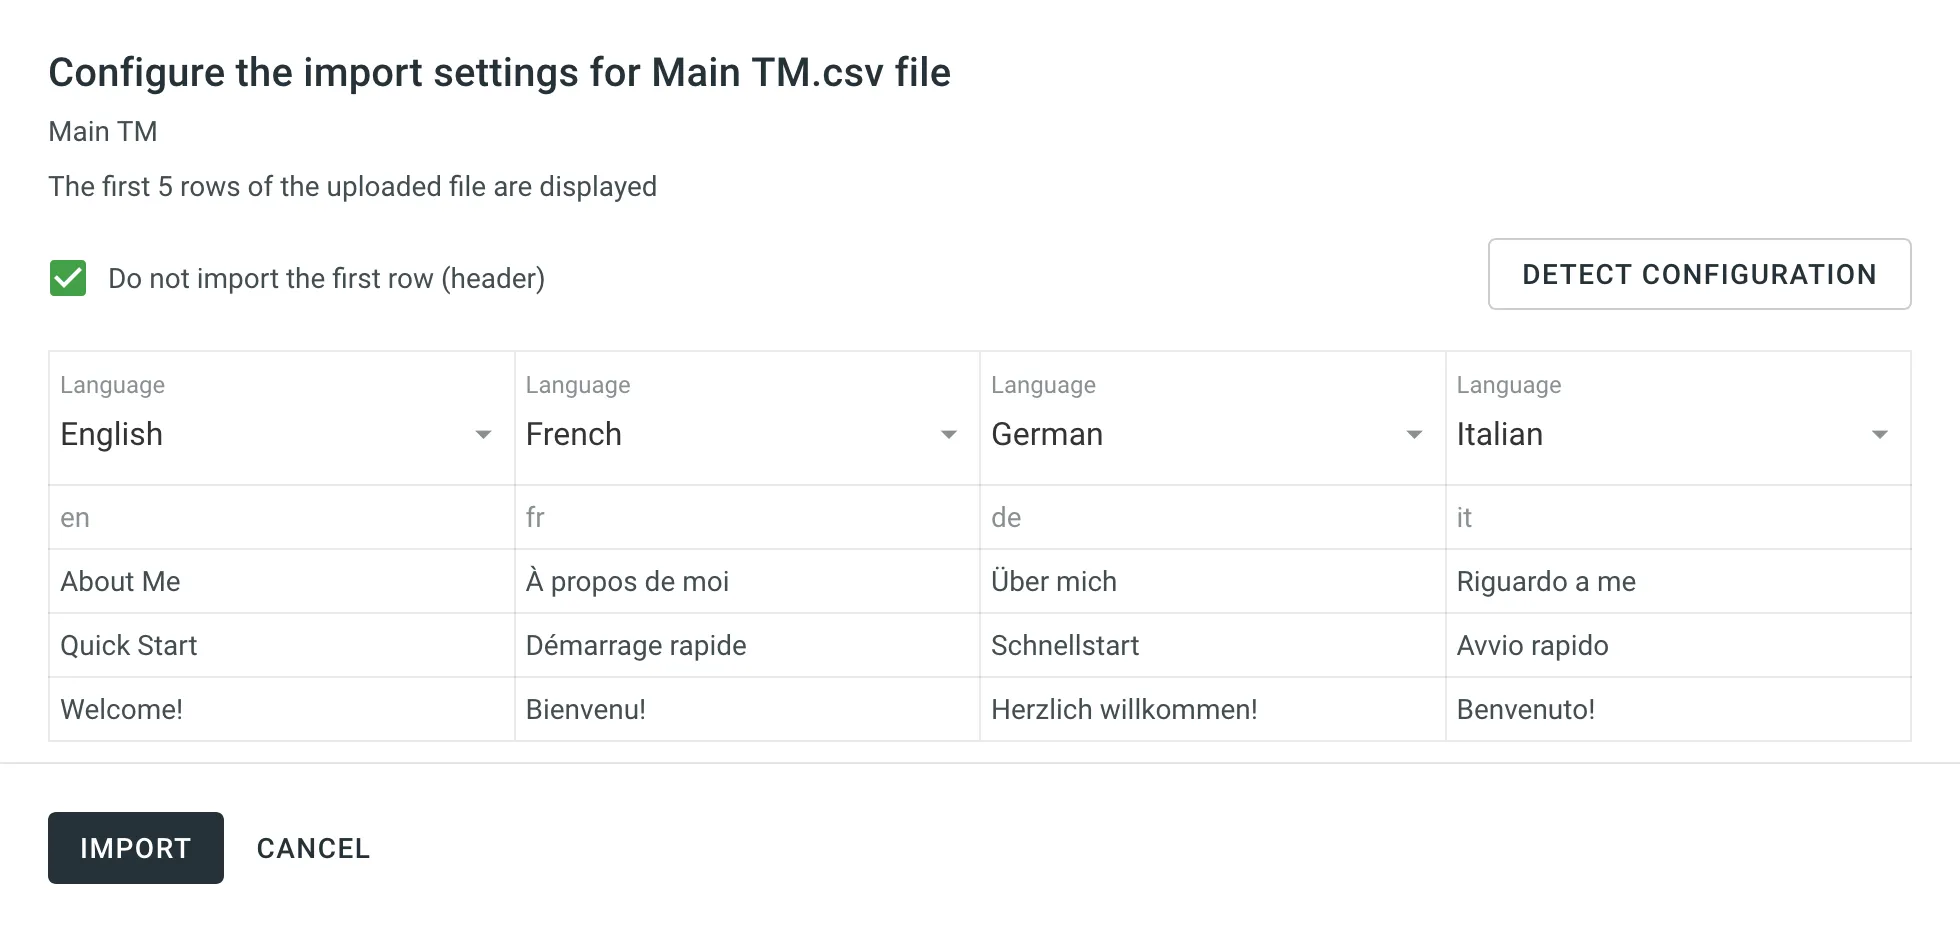 ### [Automatic Column Identification for TM in CSV and XLSX File Formats](#automatic-column-identification-for-tm-in-csv-and-xlsx-file-formats) [Section titled “Automatic Column Identification for TM in CSV and XLSX File Formats”](#automatic-column-identification-for-tm-in-csv-and-xlsx-file-formats) Once you upload your TM file in CSV or XLSX formats, the system automatically detects the file scheme based on the column names specified in the first row. The identification is performed in a case-insensitive manner. Columns that weren’t detected automatically will be left as **Not chosen** for manual configuration. Automatic column identification is especially helpful when you upload TM spreadsheets that contain many languages. To get the most out of the automatic column detection, we recommend that you name the language columns in your CSV or XLSX TM files using the values displayed below: * [Language name](/developer/language-codes/) (e.g., Ukrainian) * [Crowdin language code](/developer/language-codes/) (e.g., uk) * Locale (e.g., uk-UA) * Locale with underscore (e.g., uk\_UA) * Language code ISO 639-1 (e.g., uk) * Language code ISO 639-2/T (e.g., ukr) To redetect the TM file scheme, click **Detect Configuration**. ### [Downloading TM for Offline Management](#downloading-tm-for-offline-management) [Section titled “Downloading TM for Offline Management”](#downloading-tm-for-offline-management) When downloading a TM from Crowdin Enterprise in TMX format, you can get some additional metadata that might be useful for different usage scenarios with offline tools. Additional TM attributes provided by translation memory downloaded in TMX format: * `x-crowdin-metadata` – String identifier hash. * `creationid` – Translation author’s full name and username in Crowdin Enterprise. * `creationdate` – Translation creation date. * `changeid` – Full name and username of the person who updated a translation. * `changedate` – Translation update date. * `usagecount` – Translation suggestion’s number of usages in Crowdin Enterprise. * `lastusagedate` – The last date a translation suggestion was used in Crowdin Enterprise. Often translation vendors that work in Crowdin Enterprise export TMs from projects to manage them for their clients in various desktop applications (e.g., for cleaning TMs from irrelevant translations and further reimport back to Crowdin Enterprise). The TM attributes listed above allow better navigation and filtering of TM segments based on different criteria. Also, you might use cleaned and refreshed TMs to train MT engines only on product-specific data to ensure a higher quality of translations as a result. ## [Sharing TMs](#sharing-tms) [Section titled “Sharing TMs”](#sharing-tms) Using the shared TMs, you can pre-translate any of the projects in your organization. Also, TM suggestions from all TMs will appear in the Editor. To share TMs between all of the projects in your organization, follow these steps: 1. Open your organization’s **Workspace** and select **Translation memories** on the left sidebar. 2. Select **Share Translation Memories**. 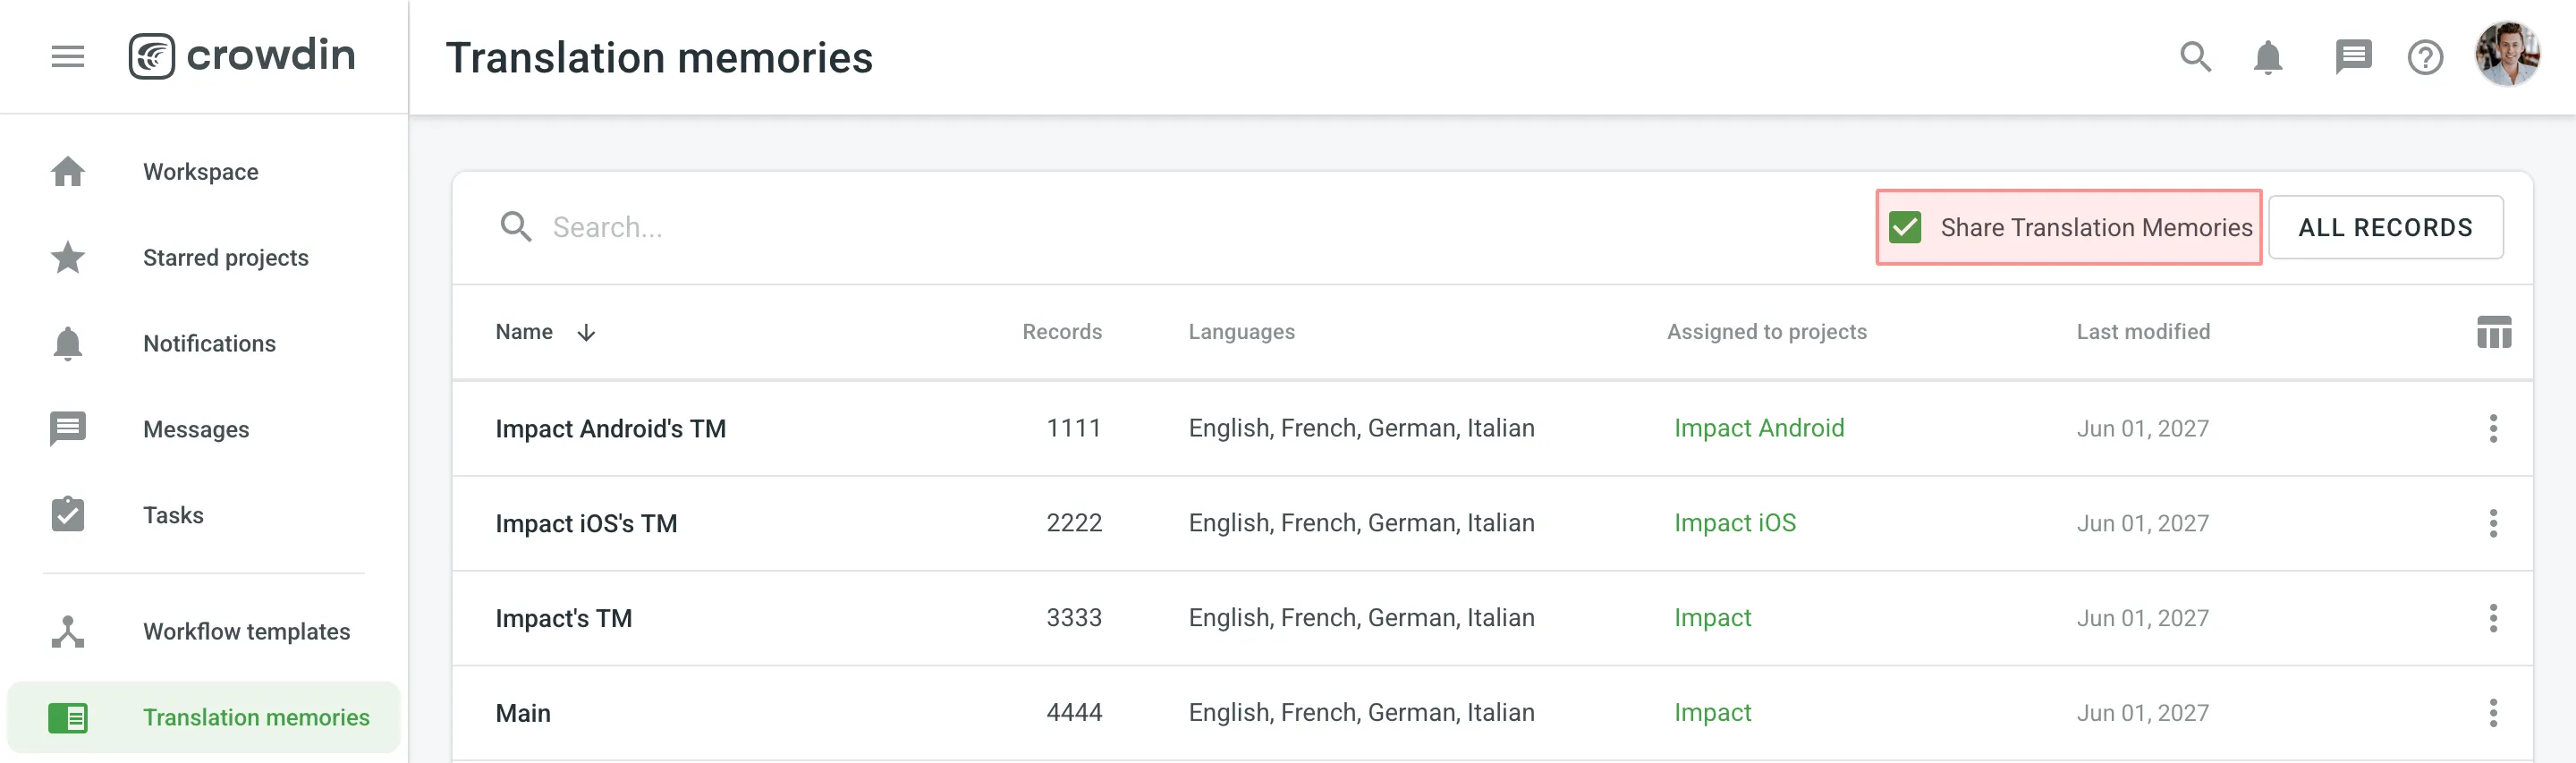 ## [Applying Translation Memory via Pre-translation](#applying-translation-memory-via-pre-translation) [Section titled “Applying Translation Memory via Pre-translation”](#applying-translation-memory-via-pre-translation) Pre-translation via TM allows you to leverage a configurable (40% to 100% match ratio) and Perfect matches. [TM Match Calculation ](#tm-match-calculation) [Pre-translation ](/enterprise/pre-translation/) ### [Prioritizing TM Suggestions during the Pre-translation via TM](#prioritizing-tm-suggestions-during-the-pre-translation-via-tm) [Section titled “Prioritizing TM Suggestions during the Pre-translation via TM”](#prioritizing-tm-suggestions-during-the-pre-translation-via-tm) During the pre-translation via TM, the system considers multiple parameters to select the most relevant TM suggestion. If the system finds only one suitable TM suggestion for a string, it will be applied during the pre-translation via TM. If the system finds two or more TM suggestions for one string, they will be sorted based on multiple parameters and applies the most suitable one. The following parameters are listed in the order the system uses them to decide which TM suggestion works better. If the decision can’t be made using the first parameter (i.e., two TM suggestions with 100% match), the system will use the next parameter until the decision is made. 1. Relevance – also known as TM match. Read more about [TM Match Calculation](#tm-match-calculation). 2. Auto-Substitution usage – verifying whether the TM suggestion was improved by the auto-substitution. Read more about [Auto-substitution](#tm-auto-substitution). 3. Assigned TM Priority – the priority of the TM a TM suggestion is stored in. Read more about [Prioritizing TM](/enterprise/project-settings/translation-memories/#prioritizing-tm). 4. Primary or dialect language – the primary or dialect language usage in TM suggestion’s source text (e.g., a TM suggestion from English will have a higher priority than English, Canada). 5. TM suggestion creation date – the date a TM suggestion was created (a TM suggestion with a more recent creation date will have a higher priority). To better understand how TM suggestions are prioritized during the pre-translation via TM, let’s go through a few hypothetical scenarios. Let’s imagine you have an untranslated string in your project with the following source text `Welcome!`. Once you run the pre-translation via TM, the system starts to search for TM suggestions in your TMs. * The system finds two TM suggestions with the source text `Welcome` and `Welcome!`. The translation from the `Welcome!` TM suggestion will be used since it has a higher TM match. * The system finds two TM suggestions: `Welcome!` and `Welcome!`. Both have the same source text, so the system checks whether the auto-substitution was used to improve these TM suggestions and picks the one that wasn’t improved by the auto-substitution. * The system finds two TM suggestions: `Welcome!` and `Welcome!`. Both have the same source text, and both weren’t improved by the auto-substitution. Then the system checks the priority of the TMs these TM suggestions are stored in and picks the one stored in the TM with higher priority. * The system finds two TM suggestions: `Welcome!` and `Welcome!`. Both have the same source text, both weren’t improved by the auto-substitution, and both are stored in the TMs with the same priority. Then the system checks the source languages of the TM suggestions and picks the one that uses the primary language. * The system finds two TM suggestions: `Welcome!` and `Welcome!`. Both have the same source text, both weren’t improved by the auto-substitution, both are stored in the TMs with the same priority, and both use primary source languages. Then the system checks the TM suggestion creation date and picks the one with the latest date. In rarer cases, there could be a situation when two or more TM suggestions are identical based on all the parameters listed above. In this case, the system picks the first one among identical. To improve accuracy, Crowdin minimizes the influence of HTML tags when determining TM matches. Instead of matching based on the original strings, the matching is conducted on strings where HTML tags are replaced with placeholders, similar to the behavior in the Editor. For example, a string `Hello world!` will match 100% with a string `Hello world!`. ## [TM Suggestions for Dialect Languages in the Editor](#tm-suggestions-for-dialect-languages-in-the-editor) [Section titled “TM Suggestions for Dialect Languages in the Editor”](#tm-suggestions-for-dialect-languages-in-the-editor) When the [**TM Suggestions for Dialects**](/enterprise/project-settings/translation-memories/) option is enabled, Crowdin will show TM suggestions from the primary language for dialect languages in the Editor. For instance, if you have Spanish and Spanish, Argentina as your target languages, and the option is enabled, the Editor will display TM suggestions from Spanish for Spanish, Argentina (indicated as “English -> Spanish” in the TM and MT Suggestions section). However, this behavior does not apply to the **Search TM** functionality. If you search for TM suggestions from the primary language in the Search TM tab while working with a dialect language, you will not find any results. ## [TM Match Calculation](#tm-match-calculation) [Section titled “TM Match Calculation”](#tm-match-calculation) Crowdin Enterprise calculates the TM match by comparing the source string to be translated and TM’s existing segments. There are three main types of TM matches: * Perfect Match - TM segment’s text and context completely match the source string * 100% Match - TM segment’s text matches the source string, but the context is different * Fuzzy Match (99% and less) - TM segment’s text is different to a certain extent compared to the source string If the calculations for Perfect and 100% TM match is relatively straightforward, the fuzzy matches’ calculation may not be so obvious. There are multiple different factors that affect the calculation of fuzzy matches, for example: * Word order * Punctuation * Formatting tags * Matches that are longer than the source string 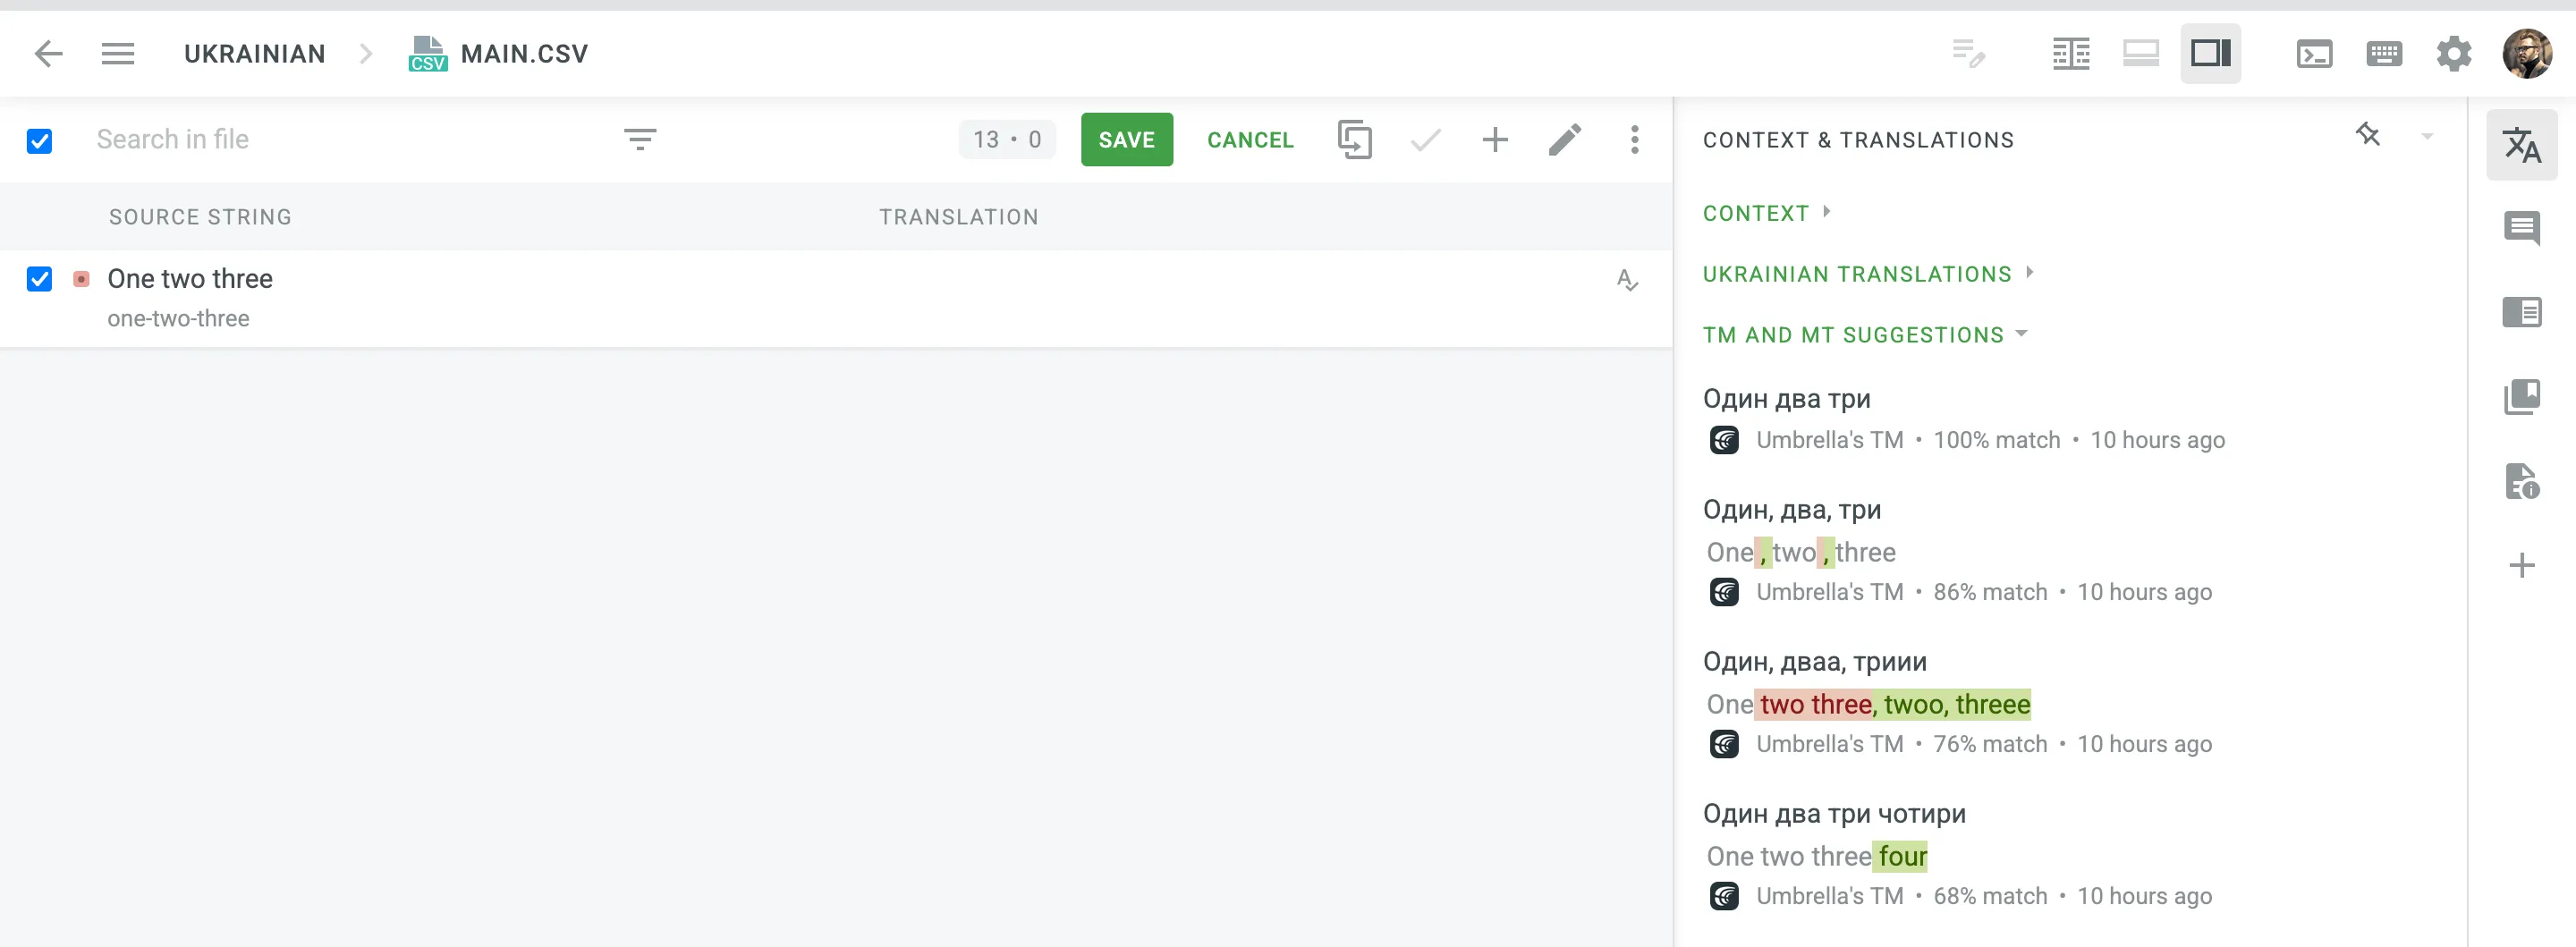 ## [TM Auto-Substitution](#tm-auto-substitution) [Section titled “TM Auto-Substitution”](#tm-auto-substitution) Auto-Substitution is aimed to increase the benefit of using the translation memory (TM) by suggesting translations with a higher similarity match. The feature substitutes the non-translatable elements (such as tags, HTML entities, placeholders, numbers, and more) in translations suggested by TM by the ones used in the source strings. To enable the Auto-substitution feature, open your project and go to **Settings > Translation Memories**. ### [Non-translatable Elements that can be Auto-substituted](#non-translatable-elements-that-can-be-auto-substituted) [Section titled “Non-translatable Elements that can be Auto-substituted”](#non-translatable-elements-that-can-be-auto-substituted) Auto-substitution feature can substitute the following non-translatable elements: | Non-translatable elements | Source string example | TM suggestion (German) | Improved TM suggestion | | ------------------------------------------------- | ------------------------------------------------- | -------------------------------------------------- | --------------------------------------------------- | | Tags | `Help` | `Hilfe` | `Hilfe` | | HTML entities | `Currency €` | `Währung ¥` | `Währung €` | | Line breaks | `Profile` | `Profil ` | `Profil` | | Escape sequences (\r\n, \r, \n, \t, unicode, hex) | `Translation \x42` | `Übersetzung \u4242` | `Übersetzung \x42` | | Non-escaped equivalents of \r\n, \r, \n, \t | `Translated by \n TM` | `Übersetzt vom Übersetzungsspeicher` | `Übersetzt vom \n Übersetzungsspeicher` | | Placeholders | `Example %s` | `Beispiel %1$s` | `Beispiel %s` | | Numbers | `Attempt 2` | `Versuch 5` | `Versuch 2` | | Letter case | `Log in` | `einloggen` | `Einloggen` | | Special characters | `Help?` | `Hilfe!` | `Hilfe?` | | URLs | `More Information: https://crowdin.com/features` | `Weitere Infos: https://crowdin.com/` | `Weitere Infos: https://crowdin.com/features` | | ICU syntax | `Get {discountPercent, number, percent} discount` | `Erhalte {discountValue, number, currency} Rabatt` | `Erhalte {discountPercent, number, percent} Rabatt` | ### [Auto-substitution for Pre-translation](#auto-substitution-for-pre-translation) [Section titled “Auto-substitution for Pre-translation”](#auto-substitution-for-pre-translation) Once you enable the TM auto-substitution, you can leverage improved TM suggestions during [pre-translation](/enterprise/pre-translation/). Be sure to set a minimum match ratio to 100%. This will result in including 100% TM matches along with the ones improved to 100% by TM auto-substitution. ### [Auto-substitution for TM Suggestions](#auto-substitution-for-tm-suggestions) [Section titled “Auto-substitution for TM Suggestions”](#auto-substitution-for-tm-suggestions) With the Auto-substitution feature, translators can see the improved TM suggestions in the Editor. The percentage below the improved suggestion shows the match percentage of the original TM suggestion and the improved one. 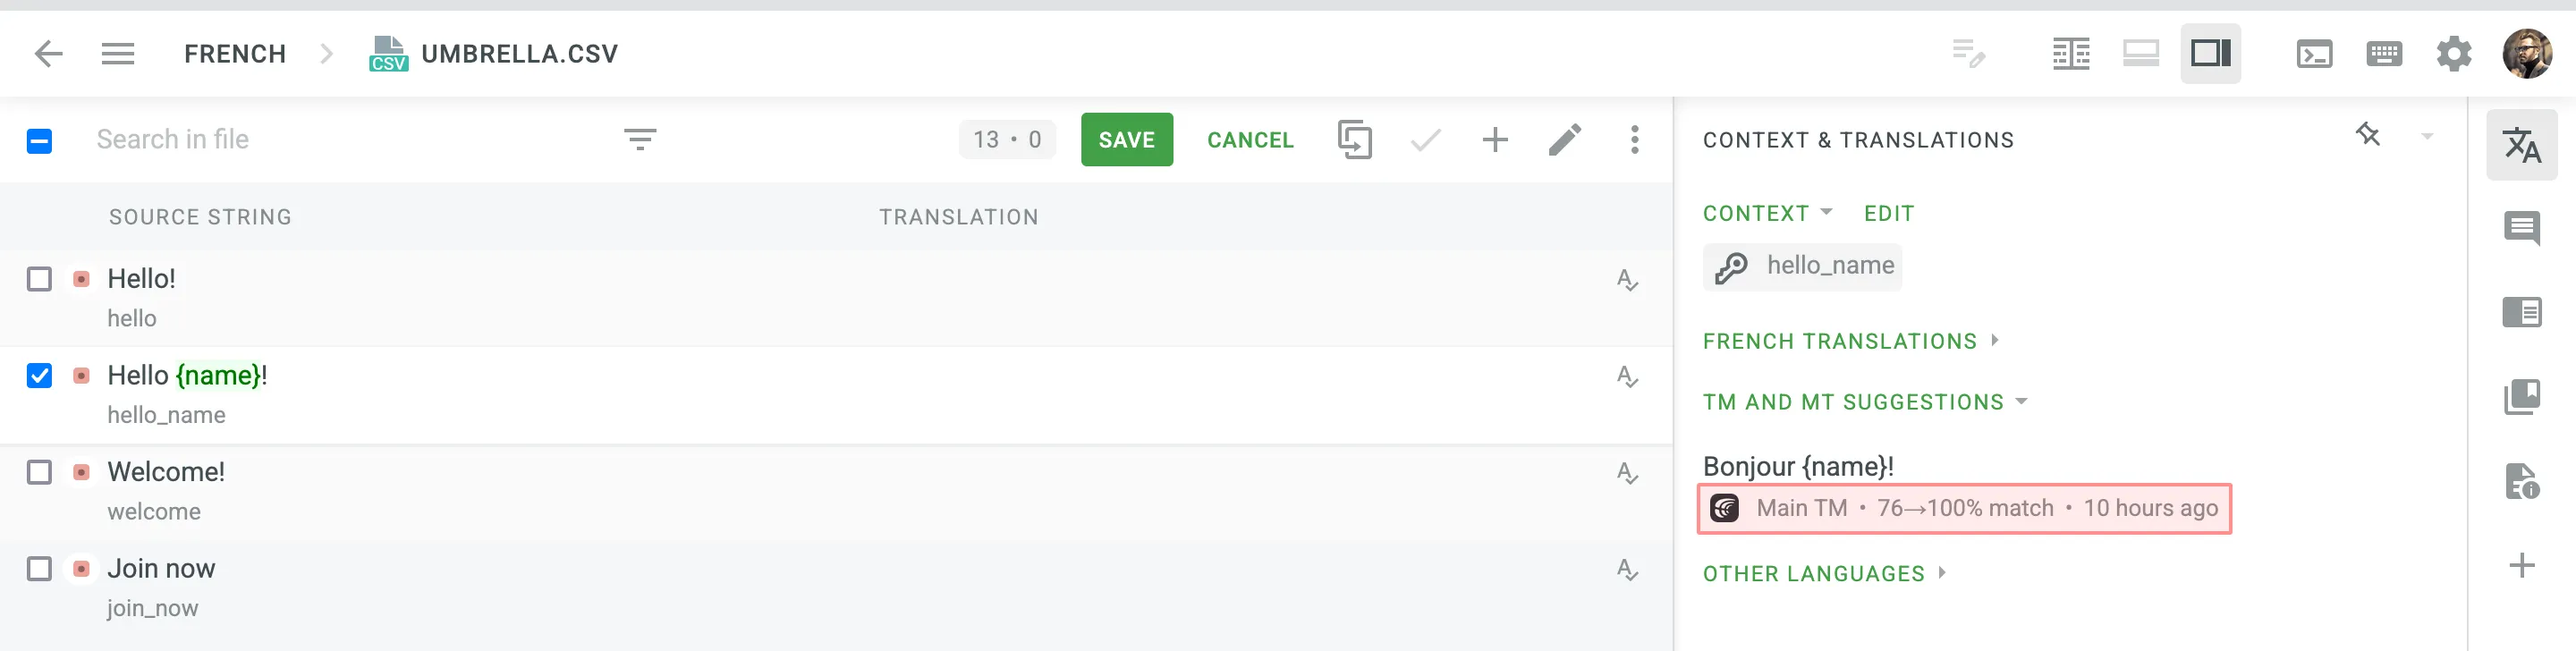 ### [Penalized TM Suggestions](#penalized-tm-suggestions) [Section titled “Penalized TM Suggestions”](#penalized-tm-suggestions) In some cases, you may want to apply penalties to TM suggestions to reduce their match percentage based on specific conditions. For example, you can set up a penalty for TM suggestions improved by the auto-substitution feature to prioritize exact matches over improved ones. The percentage below the improved and penalized suggestion shows the match percentage of the improved TM suggestion and the penalized one. Hover the cursor over the percentage to see more details. 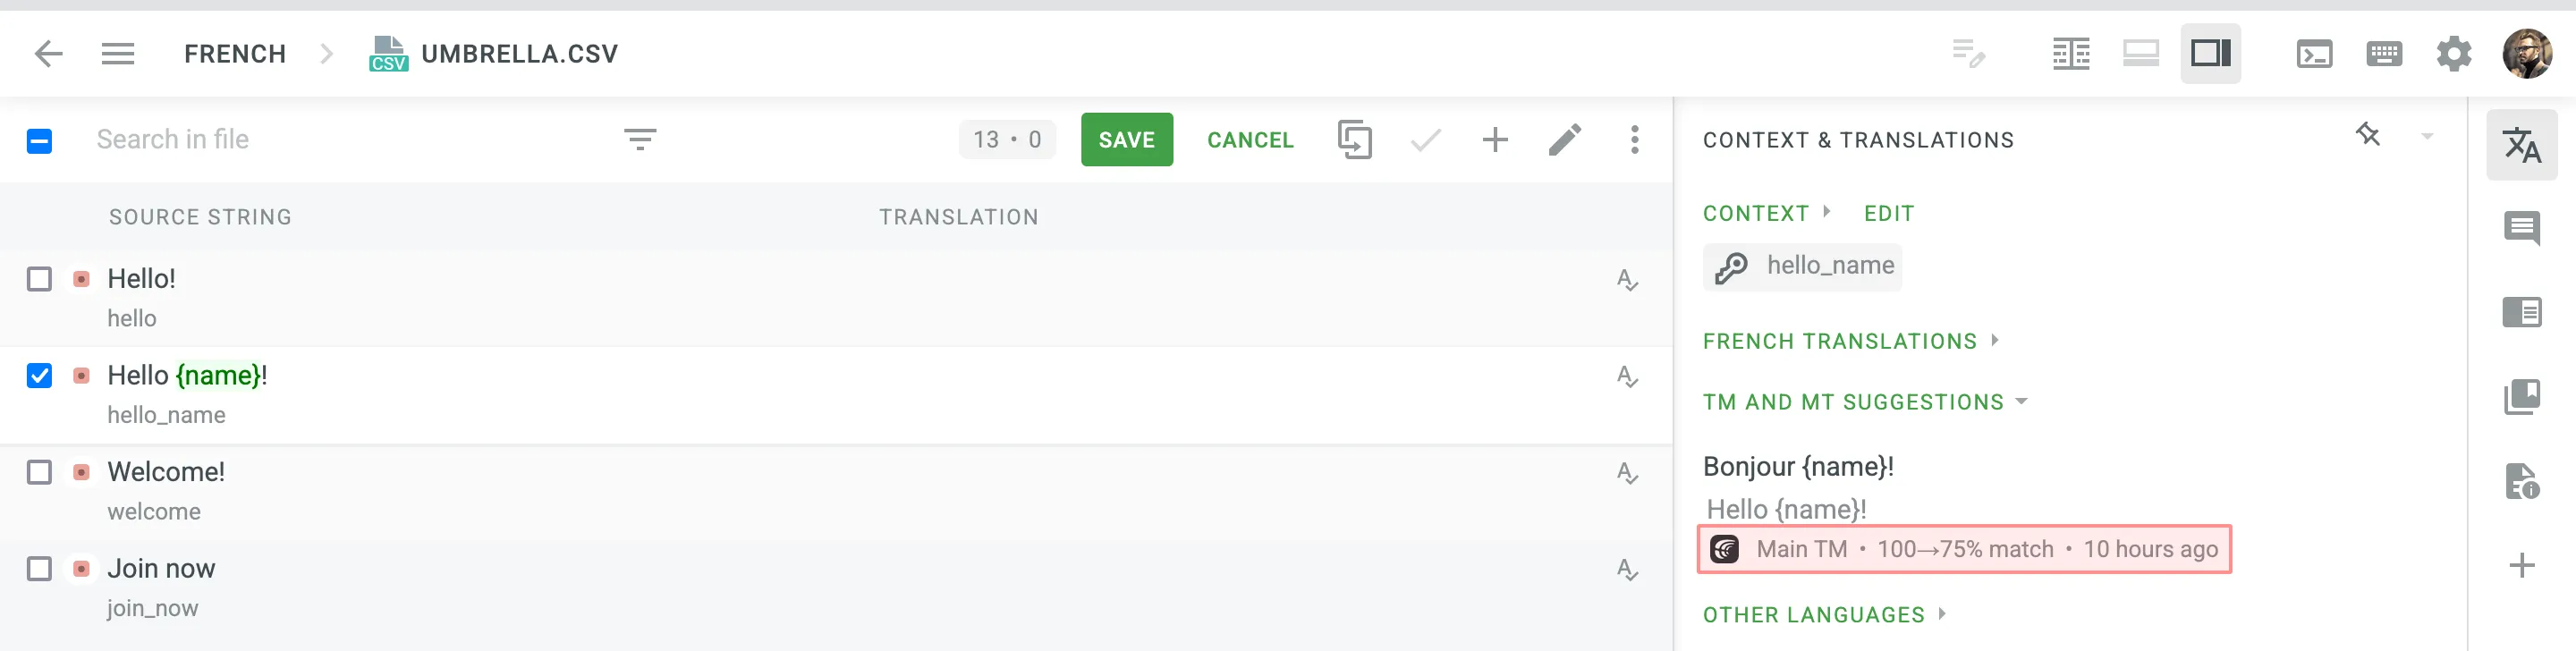 Read more about [TM Suggestion Penalties](/enterprise/project-settings/translation-memories/#penalties). ### [Cost Reports](#cost-reports) [Section titled “Cost Reports”](#cost-reports) Once the feature is enabled, it will affect how the [Costs Estimate](/enterprise/project-reports/#cost-estimate) and [Translation Cost](/enterprise/project-reports/#translation-cost) reports are calculated. **Costs Estimate** report would count TM suggestions that can potentially be improved by the auto-substitution feature based on the highest similarity match to which those strings can be improved. For example, a match that can be improved from a 75% match to a 100% match would be considered a 100% match. **Translation Cost** report would count TM suggestions improved by the auto-substitution feature as regular TM suggestions. For example, a match improved from a 75% match to a 100% match would be considered a 100% match.
# Translation and Proofreading by Vendor
> Configure translation and proofreading by vendor in your project workflow
Translation by Vendor and Proofreading by Vendor are the workflow steps designed to get translations and approvals from vendors you cooperate with. [Workflow Overview ](/enterprise/workflows/) [Vendors ](/enterprise/vendors/) ## [Adding Translation by Vendor and Proofreading by Vendor to Your Workflow](#adding-translation-by-vendor-and-proofreading-by-vendor-to-your-workflow) [Section titled “Adding Translation by Vendor and Proofreading by Vendor to Your Workflow”](#adding-translation-by-vendor-and-proofreading-by-vendor-to-your-workflow) You can add Translation by Vendor and Proofreading by Vendor to your project workflow in the workflow editor or the Workflow template editor. 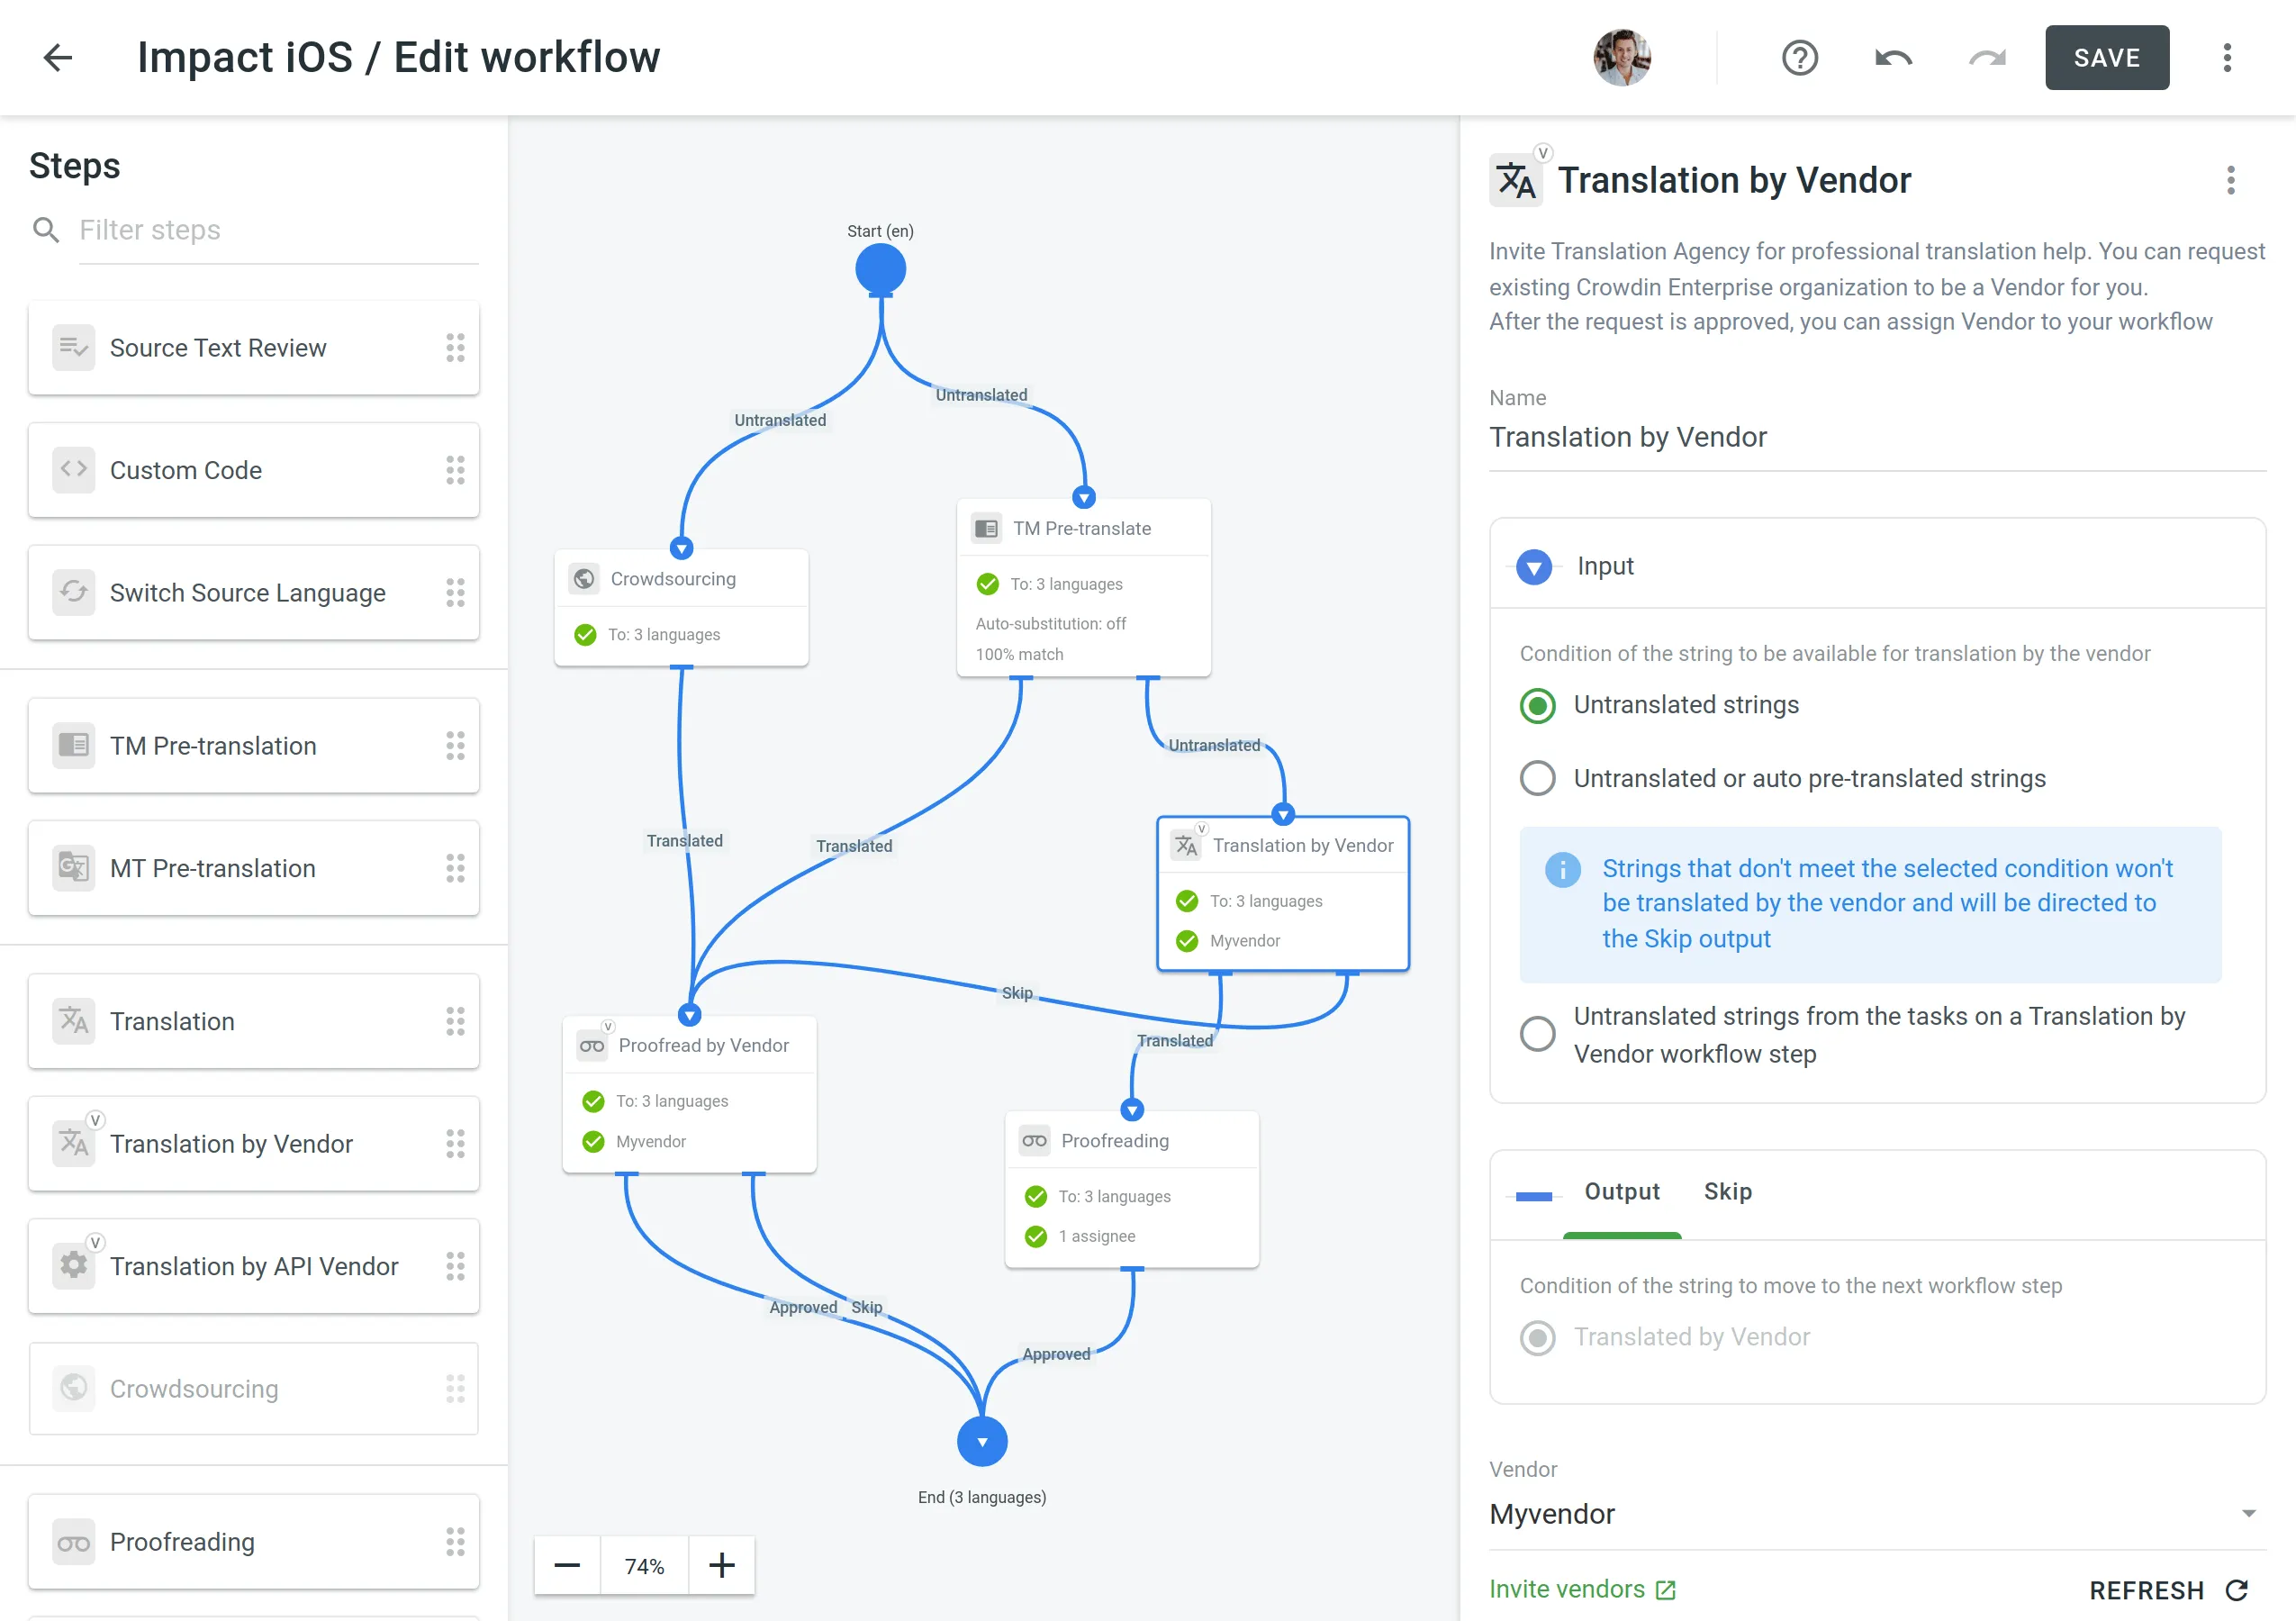 ## [Configuring Translation by Vendor and Proofreading by Vendor](#configuring-translation-by-vendor-and-proofreading-by-vendor) [Section titled “Configuring Translation by Vendor and Proofreading by Vendor”](#configuring-translation-by-vendor-and-proofreading-by-vendor) Once you added the Translation by Vendor workflow step to your project workflow, you can configure the following parameters: * Name – You can specify the needed name for the Translation by Vendor step. By default, it’s **Translation by Vendor**. * Input – Select the condition of the string to be available for translation by the vendor. You can choose between **Untranslated strings**, **Untranslated or auto pre-translated strings**, and **Untranslated strings from the tasks on a Translation by Vendor workflow step** options. * Vendor – Select the vendor you’d like to assign to the workflow step. Read more about [Inviting an Existing Organization to be Vendor](/enterprise/vendors/#inviting-an-existing-organization-to-be-a-vendor). * Comment (Optional) – Add a comment that will be visible to the assigned vendor. * Languages – Select the languages that require translations. You can also view the conditions of the string when it goes through the **Output** (string translated by vendor) and the **Skip** (string wasn’t translated by the vendor and skipped the workflow step). 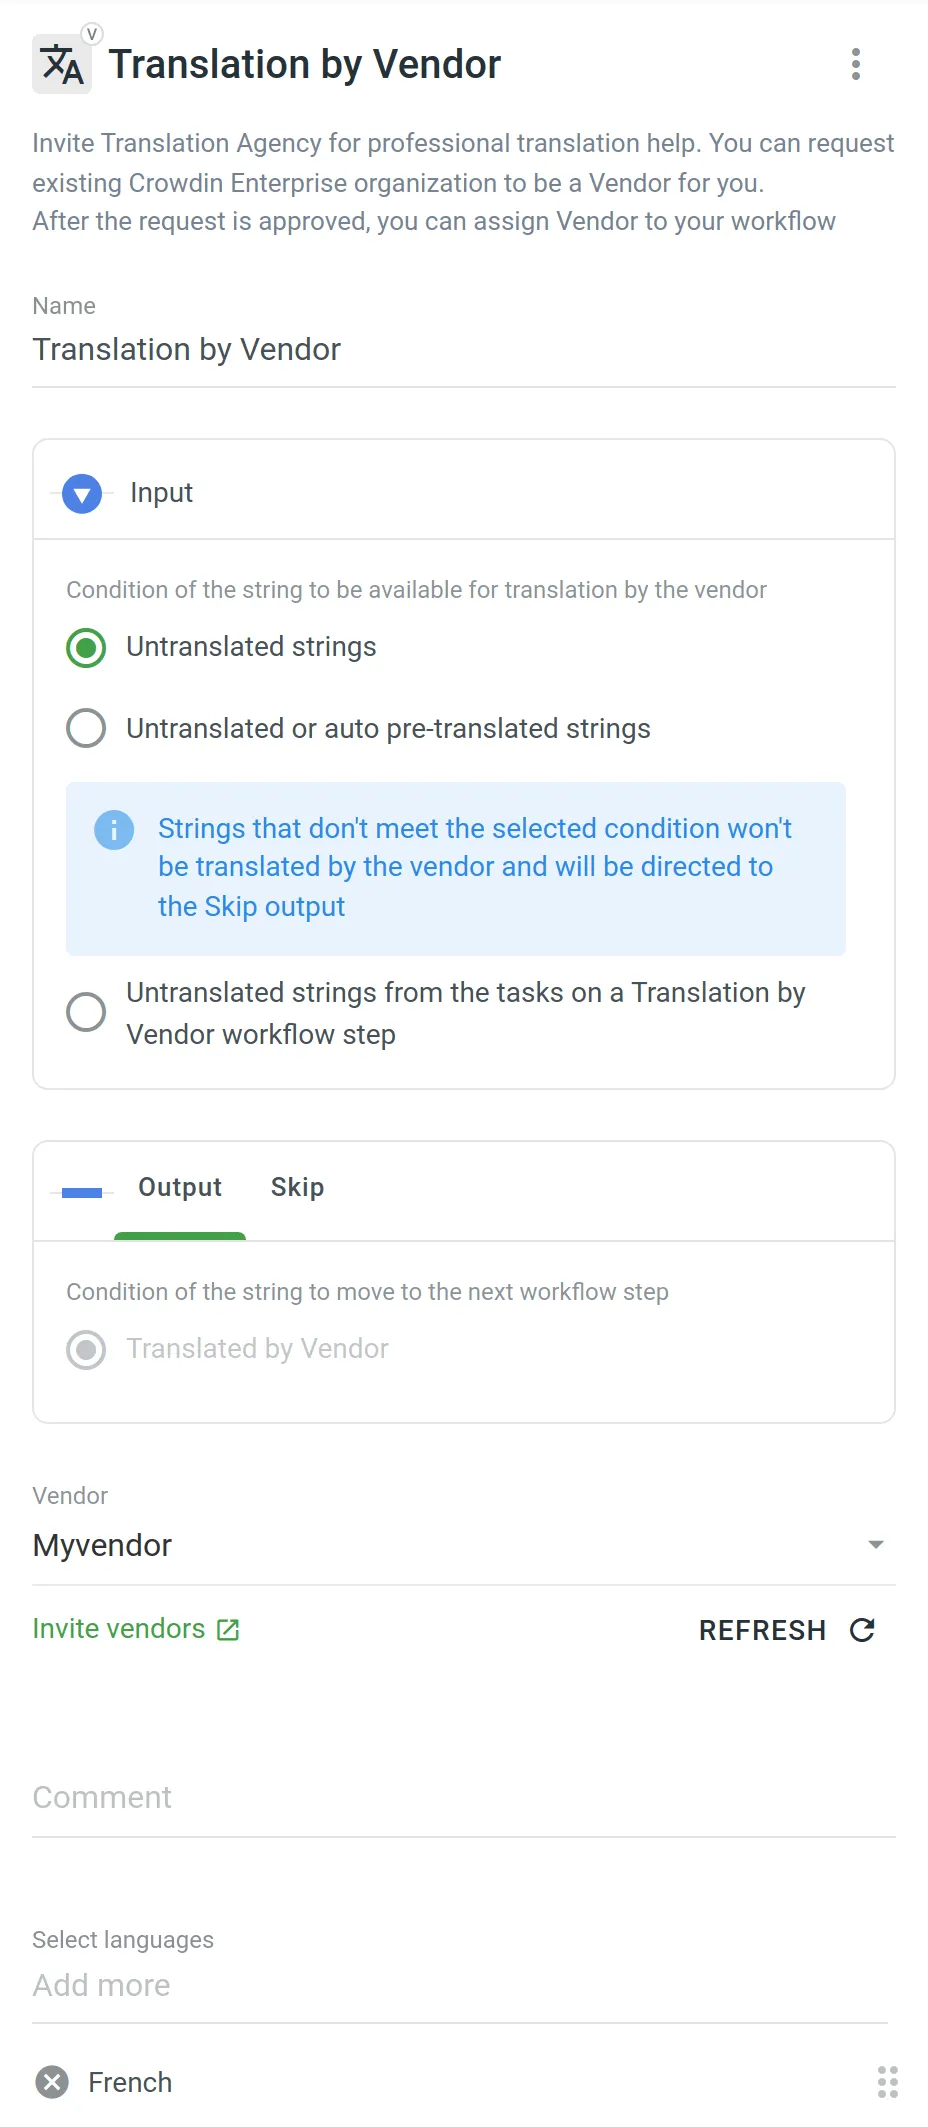 Similar settings also apply to the Proofreading by Vendor workflow step. The difference is that in the Input parameter you can select the condition of the string to be available for proofreading by the vendor. You can choose between **Translated strings**, **Translated strings without approval**, and **Not approved strings from the tasks on a Proofreading by Vendor workflow step** options. 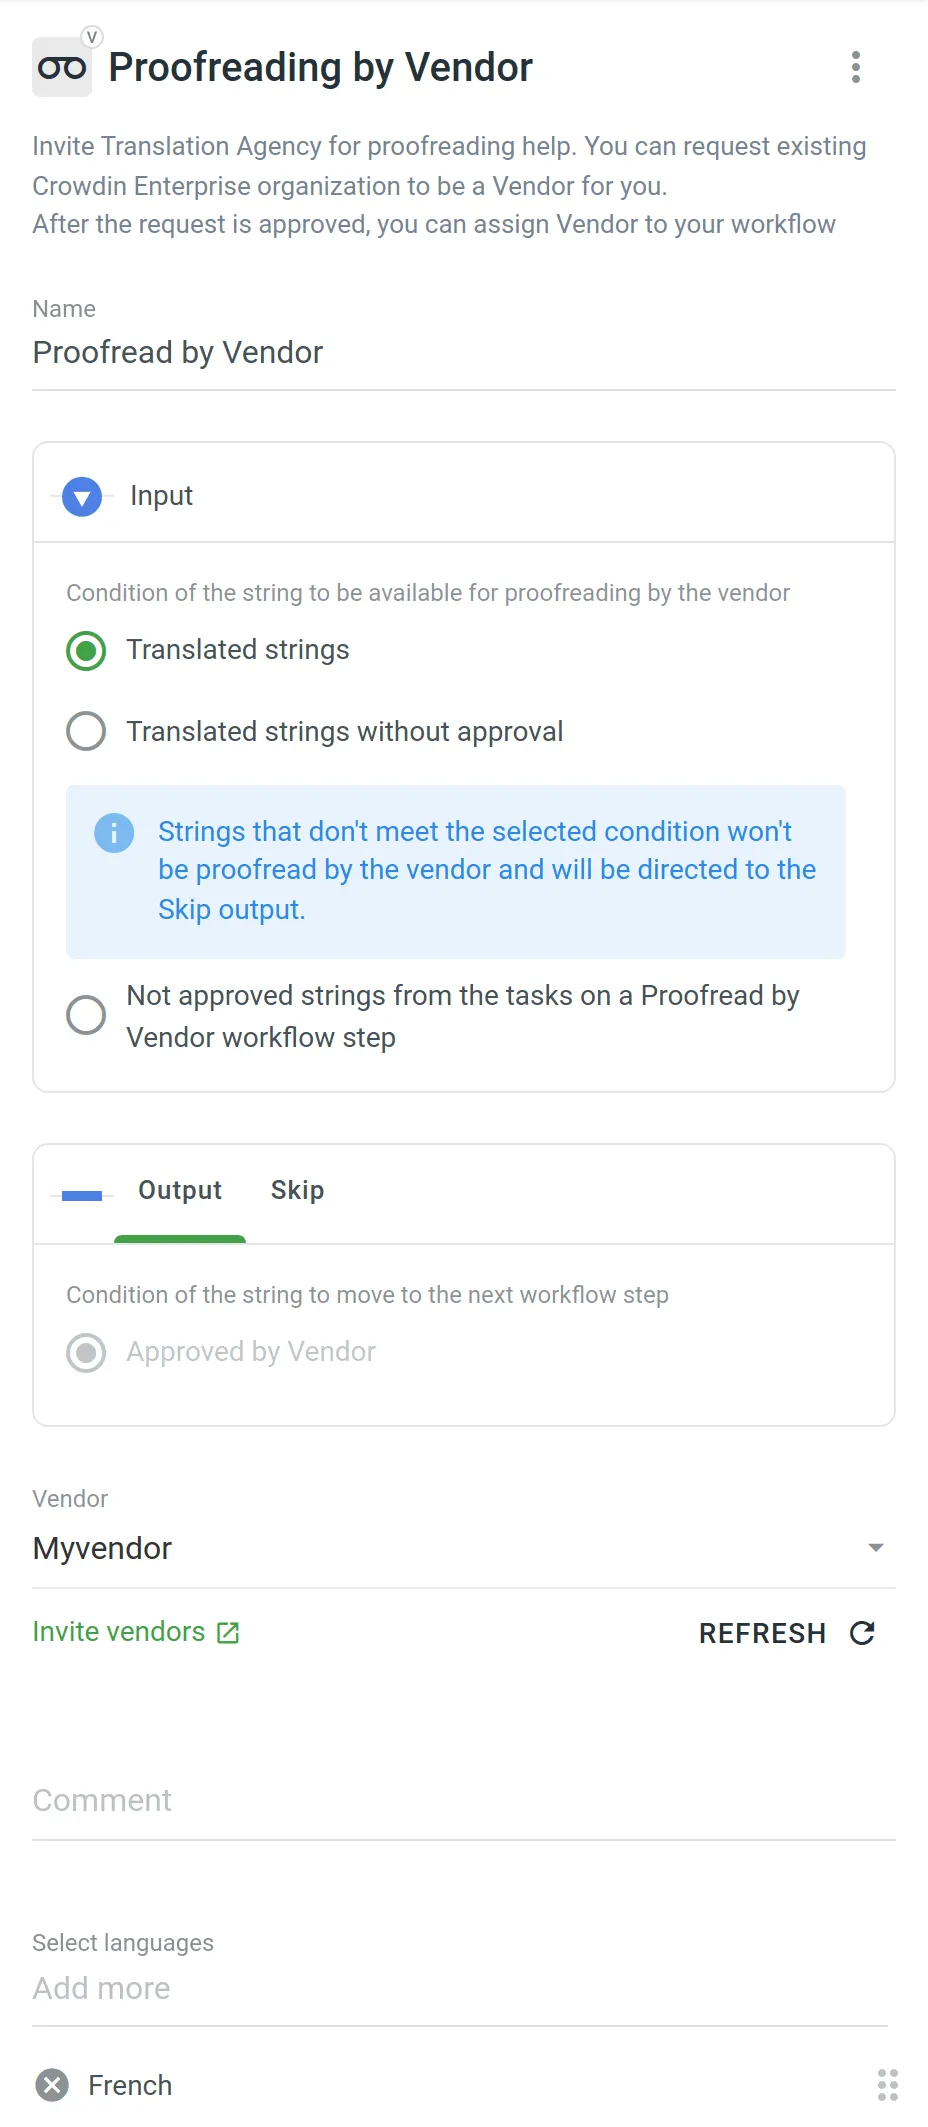 ### [Sending the Vendor Only the Content from the Tasks](#sending-the-vendor-only-the-content-from-the-tasks) [Section titled “Sending the Vendor Only the Content from the Tasks”](#sending-the-vendor-only-the-content-from-the-tasks) Both the Translation by Vendor and Proofreading by Vendor workflow steps let you control the content that will be sent to the vendor for translation and proofreading. This is especially useful when you have a defined budget for localization that should not be exceeded. First of all, you should configure the inputs of the Translation by Vendor and Proofreading by Vendor workflow steps by selecting the following options: * **Untranslated strings from the tasks on a Translation by Vendor workflow step** * **Not approved strings from the tasks on a Proofreading by Vendor workflow step** Then each time you’d like to send content to your vendor for translation and proofreading, you should create tasks selecting specific files on a specific workflow step. As a result, all the strings that meet the criteria configured on the Translation by Vendor and Proofreading by Vendor workflow steps will be included in the tasks and sent to the vendor. Read more about [Tasks](/enterprise/tasks/).
# Translation Strategies
> Approaches for translating and proofreading your content effectively
Once your organization is set up and your first project is created, choosing the right translation strategy is critical to ensuring effective and efficient localization. You need to decide who will translate and review the content added to your project, which can significantly impact the quality and turnaround time of your translations. Each project in Crowdin Enterprise has its own workflow, giving you the flexibility to combine different translation approaches according to your needs. Workflows allow you to optimize the translation process to different content types and localization requirements. Read more about [Workflows](/enterprise/workflows/). ## [Use Cases](#use-cases) [Section titled “Use Cases”](#use-cases) Use multiple translation methods in parallel or sequentially to find the winning combination for each project: * Assign in-house translators to the language pairs in which they specialize. Delegate translation into less common target languages to a translation agency. * Select a Translation Vendor from the Crowdin [Store](https://store.crowdin.com/). Assign them to both translation and proofreading workflow steps. * Pre-translate files using AI-powered tools or Machine Translation engines to assist your in-house translators. * Add the **TM Pre-translation** step to the project workflow to translate the same text used in different versions and parts of your product. * If you have an active community, choose **Crowdsourcing** as one of the workflow steps. Add **Proofreading** as the next step to review translations by professional linguists. ## [Assemble In-house Team of Translators](#assemble-in-house-team-of-translators) [Section titled “Assemble In-house Team of Translators”](#assemble-in-house-team-of-translators) You can invite translators and proofreaders you already work with to your organization or project. These could be: * In-house translators * Freelancers * Translators from the translation agencies you already work with When assembling your own team, invite each translator and proofreader individually and manage their permissions within your organization. You can assign specific workflow steps and target languages to ensure they only access the relevant resources. Read more about [Inviting People](/enterprise/inviting-people/) to an organization or project. ## [Send Request to a Translation Vendor](#send-request-to-a-translation-vendor) [Section titled “Send Request to a Translation Vendor”](#send-request-to-a-translation-vendor) Professional translation agencies can have separate organizations in Crowdin Enterprise. The collaboration between the organizations is based on client-vendor relations. You can choose a vendor from the Crowdin Store or invite the translation agency you already work with to be a vendor for you. For this, the agency should register a separate organization in Crowdin Enterprise. The good thing about cooperation with a Vendor organization is that there’s no need to invite each of the agency’s translators and proofreaders to your organization or project. You invite only the vendor organization, which receives a secured copy of the workflow steps it was assigned to as an incoming project. Once the incoming project is accepted, they will be able to assign their workflow and specific translators, which will not influence your project’s workflow in any way. All their translations will be marked as translations done by that vendor, not specific people. Professional translation services offer high-quality and efficient localization. These services are paid, so be sure to discuss rates and project costs with the vendor before starting the cooperation. Read more about [Inviting an Organization to be a Vendor](/enterprise/vendors/#inviting-an-existing-organization-to-be-a-vendor). ## [Pre-translate via AI, Machine Translation, or Translation Memory](#pre-translate-via-ai-machine-translation-or-translation-memory) [Section titled “Pre-translate via AI, Machine Translation, or Translation Memory”](#pre-translate-via-ai-machine-translation-or-translation-memory) AI-powered pre-translation tools, Machine Translation (MT) engines, and Translation Memory (TM) are all effective methods for pre-translating project files. Each method offers unique benefits for assisting human translators, speeding up localization, and reducing translation costs. After the pre-translation, human translators can review and refine these translations to ensure high-quality results. ### [AI-powered Pre-Translation](#ai-powered-pre-translation) [Section titled “AI-powered Pre-Translation”](#ai-powered-pre-translation) Crowdin Enterprise integrates with top AI providers such as OpenAI, Google Gemini, Microsoft Azure OpenAI, and more. AI-powered translations provide context-aware and high-quality translations that significantly enhance efficiency. You can expand your AI provider options by installing respective applications from the Crowdin [Store](https://store.crowdin.com/tags/ai). Read more about [Crowdin AI](/enterprise/crowdin-ai/). ### [Machine Translation (MT) Engines](#machine-translation-mt-engines) [Section titled “Machine Translation (MT) Engines”](#machine-translation-mt-engines) Crowdin Enterprise supports integration with the most popular MT engines, including Google Translate and AutoML Translation, Microsoft Translator, DeepL Pro, and Amazon Translate. Similarly to AI providers, you can add more MT engines of your choice from the Crowdin [Store](https://store.crowdin.com/tags/mt). Read more about the [Machine Translation engines](/enterprise/machine-translation/). ### [Translation Memory (TM)](#translation-memory-tm) [Section titled “Translation Memory (TM)”](#translation-memory-tm) Translation Memory stores source strings and their translations into various languages. TM is automatically created for each Crowdin Enterprise project, and you can also upload your existing TMs. TM pre-translation helps you speed up the translation process by leveraging previously translated content, which is especially useful for translating repeated or similar strings, thereby reducing translation costs. Read more about [Translation Memory](/enterprise/translation-memory/). ## [Engage Your Community](#engage-your-community) [Section titled “Engage Your Community”](#engage-your-community) Crowdsourcing is a localization practice that engages your product’s community to translate your content. Translations made by community members can be reviewed by professional linguists or go directly to production. Invite your community via social media or other communication channels you use. Read more about [Crowdsourcing](/enterprise/crowdsourcing/).
# Uploading Source Files
> Learn how to upload source files to your project for translation
Once you’ve [created a project](/enterprise/creating-project/), the next step would be preparing source files for upload. Crowdin Enterprise supports a wide range of [file formats](/enterprise/supported-formats/), including Android XML, iOS Strings, XML, JSON, etc. When you have your files prepared, you can add them to your Crowdin Enterprise project for translation. Crowdin Enterprise offers a few options for adding content to a project: * Manually via the web interface (UI). * Integrate your Crowdin Enterprise project with the tools you already use. Explore available integrations on the [Crowdin Store](https://store.crowdin.com/). * Use the [API](/developer/api/) or [Developer Tool](/developer/dev-tools/) of your choice. Usually, this task is accomplished by developers. You can [invite your colleague developer](/enterprise/inviting-people/) to assist you with this step. You can also use Crowdin sample files to test the translation workflows before starting your project with the actual source files. ## [Uploading Files](#uploading-files) [Section titled “Uploading Files”](#uploading-files) To upload files via the web interface, follow these steps: * File-based project 1. Open your project and go to **Sources > Files**. 2. Drag and drop files from your machine anywhere within the **Files** section — to the root of the project or directly into an existing folder. You can upload ZIP archives if you want to add a structured set of folders and files. 3. *(Optional)* Click **Upload Files** or **File** and select **Upload** to add files, **Use Samples** to test translation workflows, **Set Up Integration** to synchronize content automatically, or **Invite Developer** if content uploads will be handled by your developer teammate. You can also click **File** to access additional options, such as **Create String Vault** (adds an empty CSV file) or another **Set Up Integration** shortcut.  * String-based project 1. Open your project and select **Upload** on the left sidebar. 2. Select the target branch to which you’re uploading source files. By default, the `main` branch is selected. Create new branches if needed. 3. Drag and drop files from your machine, or click **Select Files**. You can also upload ZIP archives if you want a set of files to be added. 4. Crowdin Enterprise automatically tries to detect whether you’re uploading source content or translations. Verify the detection is correct and adjust the language settings if needed (e.g., English (source) should be selected for source files if the project’s source language is English). 5. *(Optional)* In the **Source files** section, to the right of the uploaded file list, configure [advanced source file import settings](#advanced-import-settings). 6. Click **Upload** to finish uploading the source content. 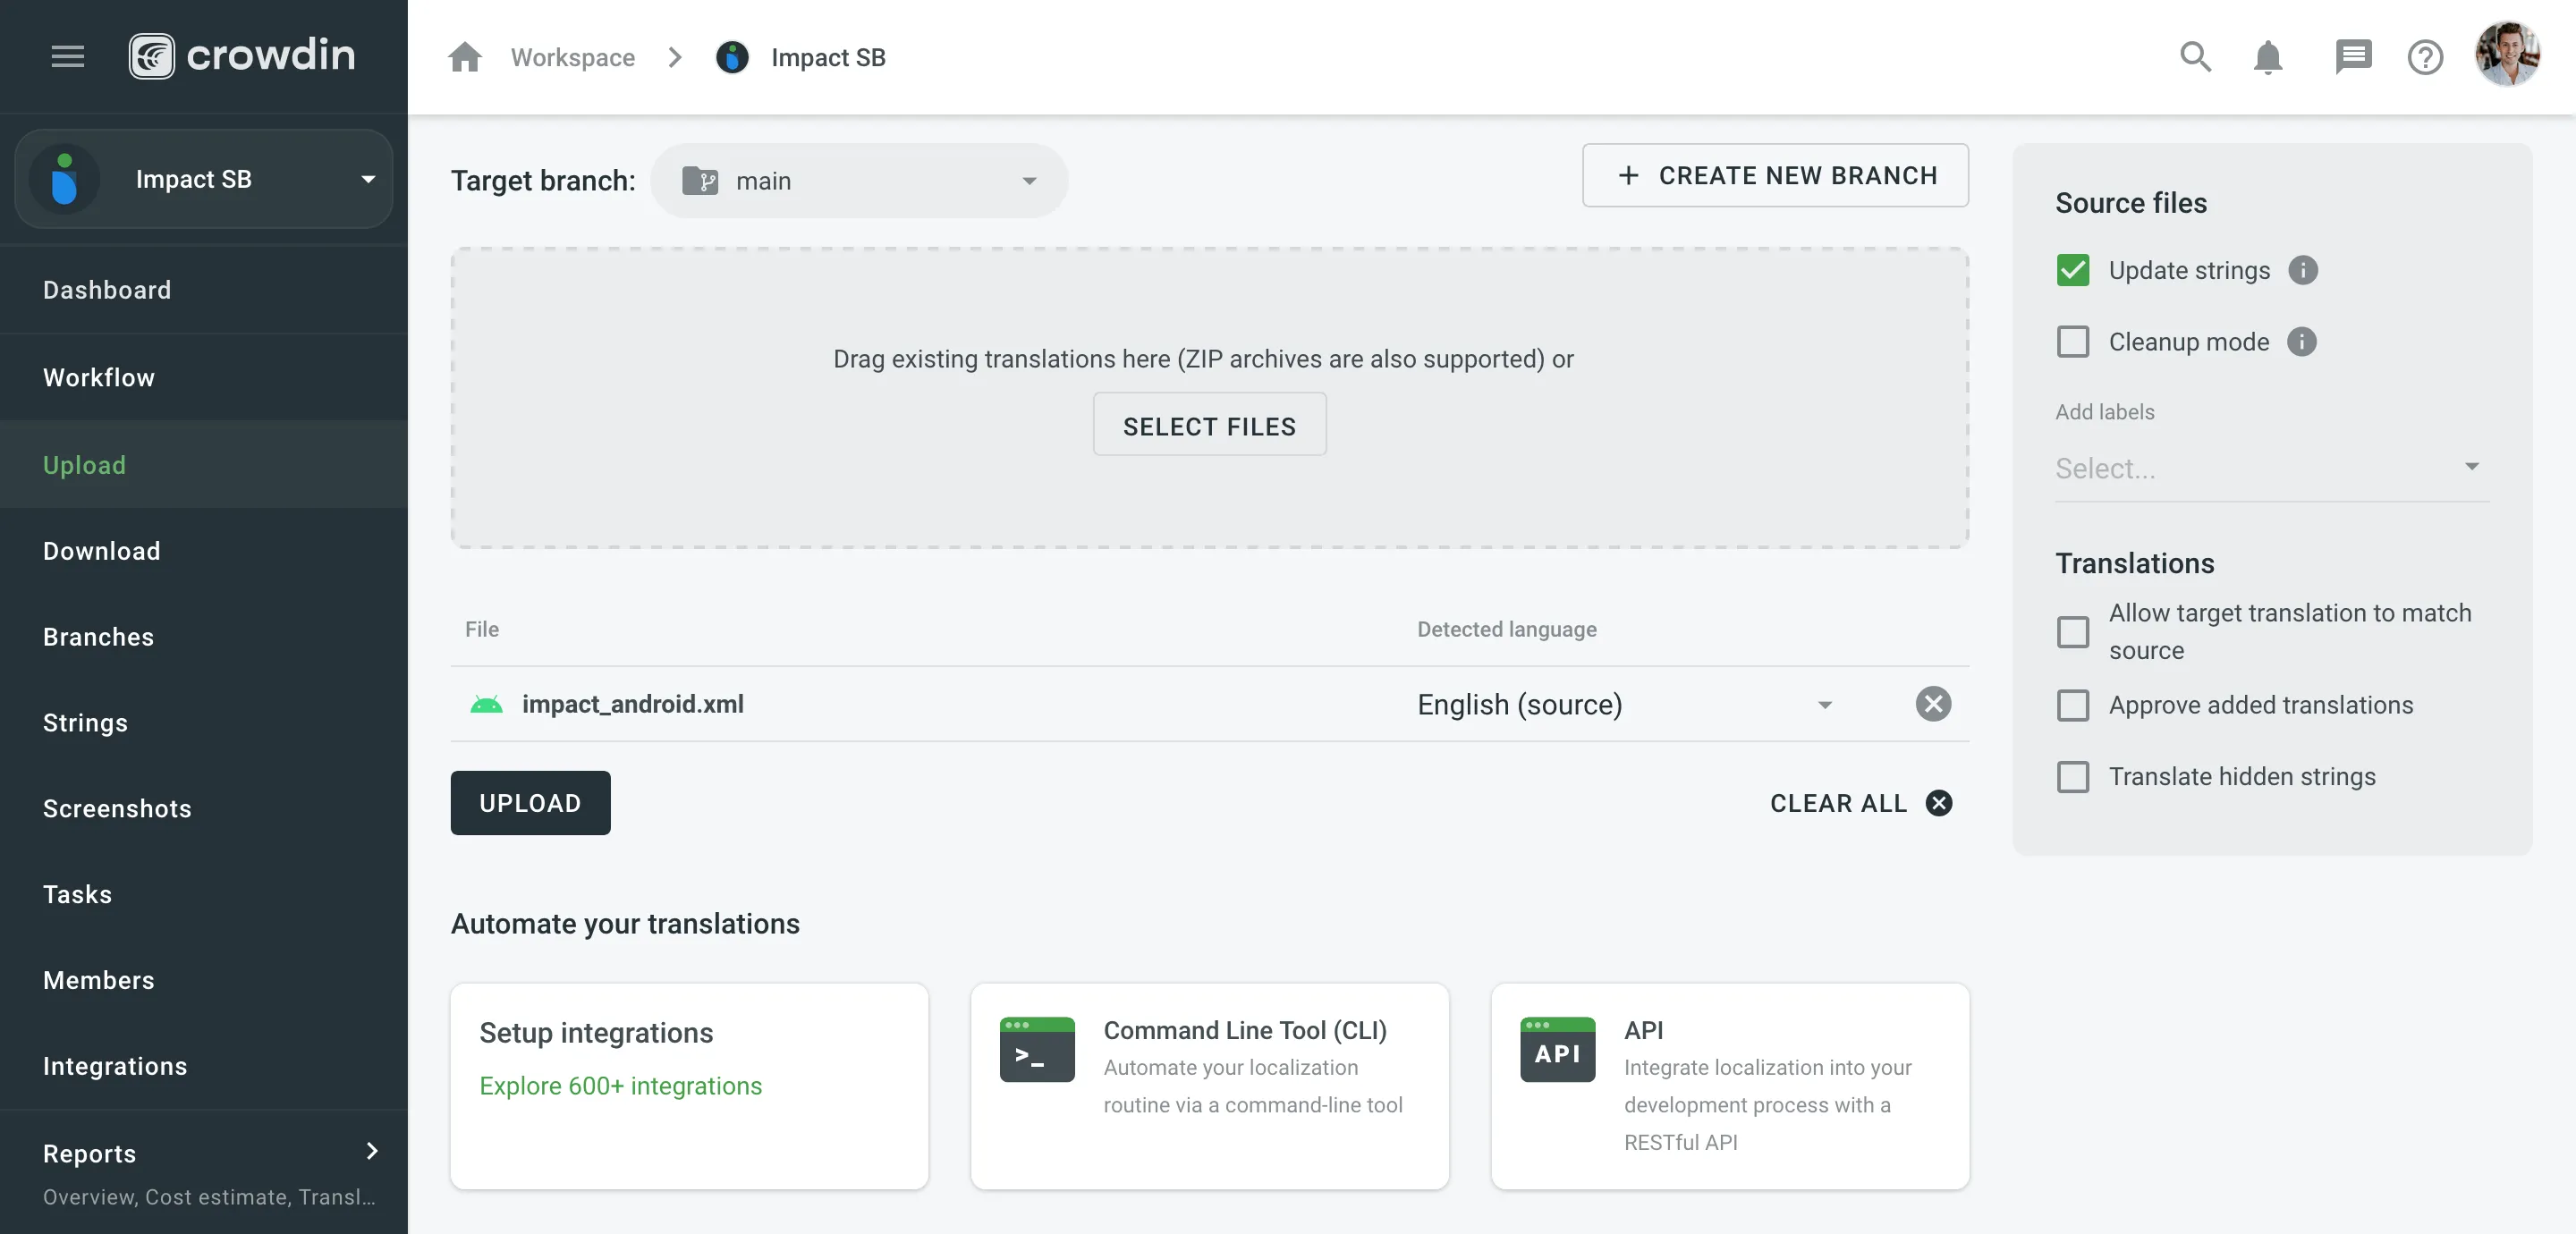 Read more about [project types](/enterprise/creating-project/#project-types). Limitations The maximum file size is 100 MB. If your file exceeds this limit, it is recommended to split it into several smaller files, and upload them one at a time. ### [XML, CSV, and XLSX Files](#xml-csv-and-xlsx-files) [Section titled “XML, CSV, and XLSX Files”](#xml-csv-and-xlsx-files) Some file formats, such as XML, CSV, XLSX, and others, might require additional configuration. * [CSV/XLSX File Configuration](/enterprise/csv-xlsx-configuration/) * [XML File Configuration](/enterprise/xml-configuration/) * [Parser Configuration](/enterprise/project-settings/parser-configuration/) Limitations The XLSX/XLS file size is limited to 2 000 000 cells. ### [HTML Files with Relative URLs](#html-files-with-relative-urls) [Section titled “HTML Files with Relative URLs”](#html-files-with-relative-urls) To display images and styles in the HTML file used outside of the website, where it belongs, add the `` tag to specify the base URL/target for all relative URLs in a document. ```html
Please note that we only specified a relative address for the image. Since we specified a base URL in the head section, the browser will look for the image at "https://www.w3schools.com/images/stickman.gif".
` | | `src` | translatable if contained in `img`, `iframe`, `embed`, `video`, `audio`, `source`\*, `track`\* tags \* – if nested in the parent tags `video`, `audio` | `` | | `href` | translatable if contained in `a` tag | `Site name` | | `data` | translatable if contained in `object` tag | `` | | `value` | translatable if contained in `input`, `button` tags | `` | | `placeholder` | translatable if contained in `input`, `textarea` tags | `` | | `alt` | translatable if contained in `img` tag | `` | | `label` | translatable if contained in `optgroup`, `track`\* tags \* – if nested in the parent tags `video`, `audio` | `
 ` | | `label` | translatable if contained in `optgroup`, `track`\* tags \* – if nested in the parent tags `video`, `audio` | `